canCrystalFlash (Very Hard)

Performing a Crystal Flash (CF). Initiating the Crystal Flash requires energy at 50 or lower, empty Reserve energy, 1 Power Bomb to initiate, and holding L+R+Shoot+Down with no other inputs. A Crystal Flash will refill 1500 energy at the cost of 10 Missiles, 10 Supers, and 10 Power Bombs. The Crystal Flash will also put Samus in a standing position even if she is in a Morph tunnel.
Strats ()
|
Requires: "h_canCrystalFlash" |
|
Requires: "h_canCrystalFlash" |
|
Requires: "h_canCrystalFlash" Clears obstacles: A |
|
Requires: "h_canCrystalFlash" |
|
Requires: "h_canCrystalFlash" |
|
Requires: "h_canCrystalFlash" Clears obstacles: A |
|
Requires: "h_canCrystalFlash" |
|
Requires: "h_canCrystalFlash" |
|
Requires: "h_canCrystalFlash" |
|
Requires: "h_canCrystalFlash" |
|
Requires: "h_canCrystalFlash" |
|
From: 4
Top Junction (Right of Spikes)
To: 4
Top Junction (Right of Spikes)
Requires: "h_canCrystalFlash" |
|
Requires: "h_canCrystalFlash" |
|
Requires: "h_canCrystalFlash" |
|
Requires: "h_canCrystalFlash" |
|
Requires: "h_canCrystalFlash" |
|
Requires: "h_canCrystalFlash" Clears obstacles: A |
|
Requires: "h_canCrystalFlash" |
|
From: 4
Bottom Right Door
To: 3
Top Right Door
Notable: true 
Become doorstuck in the bottom right door of Landing Site, using a Crystal Flash to continue X-Ray climbing past the slope above the door. Start by climbing until the slope pushed Samus down. Then auto-spinjump towards the door, and Morph to perform the Crystal Flash. Finally, continue X-Ray climbing to the top door. Climb up 3 screens. Entrance condition: {
"comeInWithDoorStuckSetup": {}
}
Requires: "canXRayClimb" "h_canCrystalFlash" |
|
Requires: "h_canCrystalFlash" |
|
Requires: "h_canCrystalFlash" |
|
From: 5
Alcatraz Door
To: 8
Central Junction
Notable: true 

Enter with direct G-Mode artificial morph, and perform a Crystal Flash to refill reserve energy. Do this all the way to the left, to prevent the Geemer from being destroyed by the lingering light orb. Wait for a global Geemer to make the long trip along the map, or shoot a Super 20 to 30 seconds after entering the room to knock it off the ceiling and save a lot of time. Either way, after the Geemer comes down into Alcatraz, shoot a Super to knock it off the ledge to make it bypass the light orb. Damage down until one Geemer hit away from running out of energy. If Samus has at least one Energy Tank, it will take longer to damage down, in which case an additional Super can be used to knock the Geemer onto the floating platform, to allow unlimited time for damaging down. A final Super can be used to knock the Geemer off the floating platform. Set reserves to manual, stand next to the bomb blocks, and wait for the Geemer to approach. Just before taking a hit, press pause. During the fade-out, hold forward to land quickly after knockback. At a precise moment just before the pause hits, jump and aim down; the aim-down can be buffered before jumping, e.g. by rolling from forward to down through a diagonal input. Set reserves to auto, then unpause while continuing to hold jump. If successful, the forced stand-up will occur close to the ceiling and while Samus still has upward momentum, allowing Samus to clip through. Entrance condition: {
"comeInWithGMode": {
"mode": "direct",
"morphed": true
}
}
Requires: "h_ZebesIsAwake"
"canBeVeryPatient"
{
"ammo": {
"type": "Super",
"count": 3
}
}
"h_canArtificialMorphCrystalFlash"
"canPauseAbuse"
{
"autoReserveTrigger": {}
}
{
"enemyDamage": {
"enemy": "Geemer (blue)",
"type": "contact",
"hits": 1
}
}
|
|
Requires: "h_canCrystalFlash" |
|
Requires: "h_canCrystalFlash" Clears obstacles: A |
|
Requires: "h_canCrystalFlash" |
|
Requires: "h_canCrystalFlash" |
|
Requires: "h_canCrystalFlash" |
|
Requires: "h_canCrystalFlash" |
|
Requires: "h_canCrystalFlash" |
|
Requires: "h_canCrystalFlash" |
|
Requires: "h_canCrystalFlash" |
|
From: 2
Middle Right Door
To: 1
Top Right Door
In Red Brinstar Firefleas, instead of simply grappling and moonwalking into the transition, perform a setup like in the Moat: Angle-up, jump, bonk the ceiling, then use Grapple just before landing and moonwalk back as it attaches. This will put Samus into a lower position after the transition. Samus will be stuck inside the wall. Perform a Crystal Flash, then morph and roll out. Entrance condition: {
"comeInWithGrappleTeleport": {
"blockPositions": [
[
5,
3
]
]
}
}
Requires: "canInsaneJump" "h_canCrystalFlash" |
|
Requires: "h_canCrystalFlash" |
|
From: 2
Middle Right Door
To: 9
Junction Below Items
Crystal Flash then damage down on the Pirates to Reserve trigger to exit G-Mode. To prevent freeing the Beetoms, the Power Bomb needs to be placed on the left platform just below the door. To prevent extra hits after the trigger, kill the Pirate when Samus is low on Energy, then finish damaging down using its invisible lasers. Entrance condition: {
"comeInWithGMode": {
"mode": "any",
"morphed": true
}
}
Requires: "h_canArtificialMorphCrystalFlash"
{
"autoReserveTrigger": {}
}
{
"or": [
{
"enemyKill": {
"enemies": [
[
"Green Space Pirate (standing)"
]
]
}
},
{
"enemyDamage": {
"enemy": "Green Space Pirate (standing)",
"type": "laser",
"hits": 3
}
}
]
}
Clears obstacles: A |
|
From: 4
Bottom Right Door
To: 1
Top Right Door
In Red Brinstar Firefleas, instead of simply grappling and moonwalking into the transition, perform a setup like in the Moat: Angle-up, jump, bonk the ceiling, then use Grapple just before landing and moonwalk back as it attaches. This will put Samus into a lower position after the transition. Samus will be stuck inside the wall. Perform a Crystal Flash, then morph and roll out. Entrance condition: {
"comeInWithGrappleTeleport": {
"blockPositions": [
[
5,
3
]
]
}
}
Requires: "canInsaneJump" "h_canCrystalFlash" |
|
Requires: "h_canCrystalFlash" |
|
Requires: "h_canCrystalFlash" |
|
Requires: "h_canCrystalFlash" |
|
Requires: "h_canCrystalFlash" |
|
Requires: "h_canCrystalFlash" |
|
Requires: "h_canCrystalFlash" |
|
Requires: "h_canCrystalFlash" |
|
Requires: "h_canCrystalFlash" |
|
Requires: "h_canCrystalFlash" |
|
Requires: "h_canCrystalFlash" |
|
From: 3
Junction (Left side Pit)
To: 3
Junction (Left side Pit)
Requires: "h_canCrystalFlash" |
|
Requires: "h_canCrystalFlash" |
|
Requires: "h_canCrystalFlash" |
|
Requires: "h_canCrystalFlash" |
|
Requires: "h_canCrystalFlash" |
|
Requires: "h_canCrystalFlash" |
|
Requires: "h_canCrystalFlash" |
|
Requires: "h_canCrystalFlash" |
|
From: 4
Lower Section - Top Right Door
To: 4
Lower Section - Top Right Door
Requires: "canPrepareForNextRoom"
{
"doorUnlockedAtNode": 4
}
"h_canCrystalFlash"
|
|
From: 5
Lower Section - Bottom Right Door
To: 4
Lower Section - Top Right Door
Notable: true 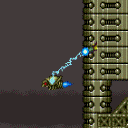
Grapple on the Ripper to get inside the wall under the door. Do a Crystal Flash to force a standup. X-Ray climb up to the door transition. Requires: "canUseEnemies" "canGrappleClip" "h_canCrystalFlash" "canXRayClimb" Bypasses door shell: true |
|
Requires: "h_canCrystalFlash" |
|
Requires: "h_canCrystalFlash" |
|
Requires: "h_canCrystalFlash" |
|
Requires: "h_canCrystalFlash" |
|
Requires: "h_canCrystalFlash" |
|
From: 1
Bottom Left Door
To: 1
Bottom Left Door
Requires: "h_canCrystalFlash" Clears obstacles: C |
|
Requires: "h_canCrystalFlash" Clears obstacles: A |
|
Requires: "h_canCrystalFlash" |
|
Requires: "h_canCrystalFlash" |
|
Requires: {
"obstaclesCleared": [
"C"
]
}
"h_canCrystalFlash"
|
|
Requires: "h_canCrystalFlash" Clears obstacles: B |
|
Requires: "h_canCrystalFlash" |
|
Requires: "h_canCrystalFlash" Clears obstacles: A |
|
Requires: "h_canCrystalFlash" Clears obstacles: A |
|
Requires: "h_canCrystalFlash" |
|
Requires: "h_canCrystalFlash" |
|
Requires: "h_canCrystalFlash" |
|
Requires: "h_canCrystalFlash" |
|
Requires: "h_canCrystalFlash" |
|
Requires: {
"or": [
{
"obstaclesCleared": [
"A"
]
},
{
"enemyDamage": {
"enemy": "Beetom",
"type": "contact",
"hits": 1
}
}
]
}
"h_canCrystalFlash"
|
|
Requires: "h_canCrystalFlash" |
|
From: 9
Right Etecoon Shaft - Top Left Door
To: 9
Right Etecoon Shaft - Top Left Door
Requires: "h_canCrystalFlash" |
|
From: 10
Right Etecoon Shaft - Bottom Left Door
To: 10
Right Etecoon Shaft - Bottom Left Door
Requires: "h_canCrystalFlash" |
|
From: 12
Above Power Bomb Blocks - Main Junction
To: 12
Above Power Bomb Blocks - Main Junction
Requires: "h_canCrystalFlash" |
|
From: 13
Below Power Bomb Blocks - Main Junction
To: 13
Below Power Bomb Blocks - Main Junction
Requires: "h_canCrystalFlash" Clears obstacles: A |
|
Requires: "h_canCrystalFlash" |
|
Requires: "h_canCrystalFlash" |
|
Requires: "h_canCrystalFlash" |
|
Requires: "h_canCrystalFlash" |
|
Requires: "h_canCrystalFlash" |
|
Requires: "h_canCrystalFlash" |
|
Requires: "h_canCrystalFlash" |
|
Requires: "h_canCrystalFlash" |
|
From: 5
Left Side - Bottom Middle Door (Blocked by Crumble Blocks)
To: 5
Left Side - Bottom Middle Door (Blocked by Crumble Blocks)
Requires: "h_canCrystalFlash" |
|
From: 9
Left Side - Bottom Door
To: 4
Left Side - Middle Doorway (Behind the Power Bomb Blocks)
Go into the morph tunnel below the Charge Beam location and Crystal Flash to force a standup and jump through. Samus is now unable to use X-Ray. Overload PLMs using the camera scroll blocks on the path upward, then go through the bomb blocks. Go up to the Sidehopper pit and go up through the crumble blocks and through to the next room. Entrance condition: {
"comeInWithGMode": {
"mode": "any",
"morphed": false
}
}
Requires: "h_canCrystalFlash" "canMidAirMorph" |
|
From: 9
Left Side - Bottom Door
To: 11
Middle Item
Go into the morph tunnel below the Charge Beam location and Crystal Flash to force a standup and jump through. Samus is now unable to use X-Ray. Without Morph, be careful not to overload PLMs using the camera scroll blocks on the path upward. Then partially floor clip into the left side of the bomb block, and jump to clip through and escape. To exit G-Mode, damage down until the reserves trigger, which can be done most quickly using the Sidehoppers. Entrance condition: {
"comeInWithGMode": {
"mode": "any",
"morphed": true
}
}
Requires: {
"or": [
"h_canArtificialMorphIBJ",
"Morph",
{
"and": [
"h_canArtificialMorphSpringBall",
{
"or": [
"HiJump",
{
"and": [
"h_canArtificialMorphSpringBallBombJump",
"h_additionalBomb",
"h_additionalBomb",
"h_additionalBomb"
]
}
]
}
]
}
]
}
"h_canArtificialMorphCrystalFlash"
{
"or": [
"Morph",
{
"and": [
"canTwoTileSqueeze",
"canPartialFloorClip",
"canCeilingClip"
]
}
]
}
"canBePatient"
|
|
From: 13
Central Junction
To: 7
Right Side - Bottom Middle Door (Behind the Super Block)
Notable: true 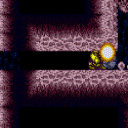
Crystal Flash in the morph tunnel to force a standup, making it possible to shoot the super block from the left while it's on-screen. Requires: "h_canBombThings"
"h_canCrystalFlash"
{
"ammo": {
"type": "Super",
"count": 1
}
}
Clears obstacles: F |
|
Requires: "h_canCrystalFlash" |
|
Requires: "h_canCrystalFlash" |
|
Requires: "h_canCrystalFlash" Clears obstacles: A |
|
Requires: "h_canCrystalFlash" |
|
Requires: "h_canCrystalFlash" Clears obstacles: A |
|
Requires: "h_canCrystalFlash" |
|
Requires: {
"obstaclesCleared": [
"A"
]
}
"h_canCrystalFlash"
|
|
Requires: "h_canCrystalFlash" Clears obstacles: A |
|
Requires: {
"obstaclesCleared": [
"A"
]
}
"h_canCrystalFlash"
|
|
From: 2
Bottom Right Door
To: 3
Item
Notable: true 
Perform the crystal flash all the way to the left, against the crumble blocks to prevent the elevator on the right from blocking you in. Simply jump after performing the crystal flash to jump through the floor. Requires: "h_canCrystalFlash" "canCeilingClip" |
|
Requires: "h_canCrystalFlash" |
|
Requires: "h_canCrystalFlash" |
|
Requires: "h_canCrystalFlash" |
|
Requires: "h_canCrystalFlash" |
|
Requires: "h_canCrystalFlash" |
|
Requires: "h_canCrystalFlash" |
|
Requires: {
"obstaclesCleared": [
"A"
]
}
"h_canCrystalFlash"
Clears obstacles: B |
|
Requires: "h_canCrystalFlash" |
|
Requires: "h_canCrystalFlash" |
|
From: 5
Top Right Door (Through Morph Tunnel)
To: 5
Top Right Door (Through Morph Tunnel)
Requires: "h_canCrystalFlash" |
|
Requires: "h_canCrystalFlash" |
|
Requires: "h_canCrystalFlash" |
|
Requires: "h_canCrystalFlash" |
|
From: 2
Middle Left Door (Behind Power Bomb Blocks)
To: 2
Middle Left Door (Behind Power Bomb Blocks)
Requires: "h_canCrystalFlash" Clears obstacles: A |
|
Requires: "h_canCrystalFlash" |
|
From: 8
Junction (Below Bottom Rippers)
To: 8
Junction (Below Bottom Rippers)
Requires: "h_canCrystalFlash" |
|
Requires: "h_canCrystalFlash" |
|
Requires: "h_canCrystalFlash" |
|
Requires: "h_canCrystalFlash" |
|
Requires: "h_canCrystalFlash" |
|
Requires: "h_canCrystalFlash" |
|
Requires: "h_canCrystalFlash" |
|
Requires: "h_canCrystalFlash" |
|
Requires: "h_canCrystalFlash" |
|
Requires: "h_canCrystalFlash" |
|
Requires: {
"or": [
"canPrepareForNextRoom",
{
"enemyDamage": {
"enemy": "Beetom",
"type": "contact",
"hits": 2
}
}
]
}
"h_canCrystalFlash"
|
|
Requires: "h_canCrystalFlash" |
|
Requires: "h_canCrystalFlash" |
|
From: 1
Left Vertical Door
To: 1
Left Vertical Door
Requires: {
"obstaclesCleared": [
"C"
]
}
"h_canCrystalFlash"
|
|
Requires: "h_canCrystalFlash" |
|
Requires: "h_canCrystalFlash" |
|
Requires: "h_canCrystalFlash" |
|
From: 3
Right Vertical Door
To: 3
Right Vertical Door
Requires: "h_canCrystalFlash" |
|
Requires: "h_canHeatedCrystalFlash" |
|
Requires: "h_canHeatedCrystalFlash" |
|
Requires: "h_canCrystalFlash" |
|
From: 4
Left Side - Bottom Door
To: 4
Left Side - Bottom Door
Requires: "h_canCrystalFlash" Clears obstacles: A |
|
Requires: "h_canCrystalFlash" |
|
Requires: "h_canCrystalFlash" Clears obstacles: A |
|
Requires: "h_canCrystalFlash" |
|
Requires: "h_canHeatedCrystalFlash" |
|
Requires: "h_canHeatedCrystalFlash" |
|
Requires: "h_canHeatedCrystalFlash" Clears obstacles: A |
|
Requires: "h_canHeatedCrystalFlash" |
|
Requires: "h_canHeatedCrystalFlash" |
|
From: 3
Bottom Left Junction
To: 3
Bottom Left Junction
Requires: "h_canHeatedCrystalFlash" |
|
From: 4
Bottom Junction (Cleared Runway)
To: 4
Bottom Junction (Cleared Runway)
Requires: "h_canHeatedCrystalFlash" |
|
Requires: "h_canHeatedCrystalFlash" |
|
Requires: "h_canHeatedCrystalFlash" |
|
Requires: "h_canHeatedCrystalFlash" |
|
Requires: "h_canHeatedCrystalFlash" |
|
Jump from below the respawning shot block into a Crystal Flash. Use Grappling Beam as the Crystal Flash finishes to be placed next to the door. Do not aim down as the Crystal Flash finishes. Requires: "h_heatProof" "h_canJumpIntoCrystalFlashClip" "Grapple" |
|
Requires: "h_canHeatedCrystalFlash" |
|
Requires: "h_canCrystalFlash" |
|
Requires: "h_canCrystalFlash" |
|
From: 1
Left Door
To: 1
Left Door
Notable: true Use SpeedBooster to construct a structure for Moondancing that has 1 chest height block and 1 head height block to the right of it and no other Speed blocks. Crystal Flash below the lower block, exactly pixel aligned with its right side, to standup and then begin Moondancing. After Samus sinks through the floor tiles, use Grapple to return to a standing position and count an additional 145 moonfalls. Then use Grapple to return to a crouch and wiggle right and Turn-Around Aim Cancel to escape to the right. Finally, use SpeedBooster if needed to break the remaining Speed blocks and reach the door. Requires: "h_canCrystalFlash" "canTrickyJump" "canTurnaroundAimCancel" "canTemporaryBlue" "canExtendedMoondance" "canSpeedball" Exit condition: {
"leaveWithStoredFallSpeed": {
"fallSpeedInTiles": 2
}
}
|
|
From: 1
Left Door
To: 1
Left Door
Notable: true Use SpeedBooster to construct a structure for Moondancing that has 1 chest height block and 1 head height block to the right of it and no other Speed blocks. Crystal Flash below the lower block, exactly pixel aligned with its right side, to standup and then begin Moondancing. After Samus sinks through the bottom tile, it is possible to use Grapple to return to a crouch and wiggle right and then Turn-Around Aim Cancel to escape to the right. Without Grapple, count to 174 Moonfalls and delicately Moonfall so as to remain crouched and then wiggle to the right. Finally, use SpeedBooster if needed to break the remaining Speed blocks and reach the door. Requires: "h_canCrystalFlash" "canTrickyJump" "canTurnaroundAimCancel" "canTemporaryBlue" "canMoondance" "canSpeedball" Exit condition: {
"leaveWithStoredFallSpeed": {
"fallSpeedInTiles": 1
}
}
|
|
From: 1
Left Door
To: 2
Right Door
Notable: true Use SpeedBooster to construct a structure for Moondancing that has 1 chest height block and 1 head height block to the right of it and no other Speed blocks. Crystal Flash below the lower block, exactly pixel aligned with its right side, to standup and then begin Moondancing. After Samus sinks through the floor tiles, use Grapple to return to a standing position and count an additional 145 moonfalls. Then use Grapple to return to a crouch and wiggle right and Turn-Around Aim Cancel to escape to the right. Finally, use SpeedBooster if needed to break the remaining Speed blocks and reach the door. Requires: "h_canCrystalFlash" "canTrickyJump" "canTurnaroundAimCancel" "canTemporaryBlue" "canExtendedMoondance" "canSpeedball" Exit condition: {
"leaveWithStoredFallSpeed": {
"fallSpeedInTiles": 2
}
}
|
|
From: 1
Left Door
To: 2
Right Door
Notable: true Use SpeedBooster to construct a structure for Moondancing that has 1 chest height block and 1 head height block to the right of it and no other Speed blocks. Crystal Flash below the lower block, exactly pixel aligned with its right side, to standup and then begin Moondancing. After Samus sinks through the bottom tile, it is possible to use Grapple to return to a crouch and wiggle right and then Turn-Around Aim Cancel to escape to the right. Without Grapple, count to 174 Moonfalls and delicately Moonfall so as to remain crouched and then wiggle to the right. Finally, use SpeedBooster if needed to break the remaining Speed blocks and reach the door. Requires: "h_canCrystalFlash" "canTrickyJump" "canTurnaroundAimCancel" "canTemporaryBlue" "canMoondance" "canSpeedball" Exit condition: {
"leaveWithStoredFallSpeed": {
"fallSpeedInTiles": 1
}
}
|
|
Requires: "h_canCrystalFlash" |
|
Requires: "h_canHeatedCrystalFlash" |
|
Requires: "h_canHeatedCrystalFlash" |
|
Requires: "h_canHeatedCrystalFlash" |
|
Requires: "h_canHeatedCrystalFlash" |
|
Requires: "h_canHeatedCrystalFlash" |
|
Requires: "h_canHeatedCrystalFlash" |
|
Requires: "h_canHeatedCrystalFlash" |
|
From: 5
Middle Junction (Ledge Right of Morph Tunnel)
To: 5
Middle Junction (Ledge Right of Morph Tunnel)
Requires: "h_canHeatedCrystalFlash" |
|
Requires: "h_canHeatedCrystalFlash" |
|
Requires: "h_canHeatedCrystalFlash" |
|
Use a Crystal Flash to clip through the ceiling, where there is one solid tile with 2 empty tiles above it. Use Grapple as the Crystal Flash is ending to be forced above the solid tile. Requires: "h_heatProof" "h_canJumpIntoCrystalFlashClip" "Grapple" |
|
Requires: "h_canHeatedCrystalFlash" |
|
Requires: "h_canHeatedLavaCrystalFlash" |
|
Requires: "h_canHeatedLavaCrystalFlash" |
|
Requires: "h_canHeatedCrystalFlash" |
|
Requires: "h_canHeatedCrystalFlash" |
|
Requires: "h_canCrystalFlash" |
|
Requires: "h_canHeatedCrystalFlash" |
|
Requires: "h_canHeatedCrystalFlash" |
|
Requires: "h_canHeatedCrystalFlash" |
|
Requires: "h_canHeatedCrystalFlash" |
|
Requires: "h_canCrystalFlash" |
|
Requires: {
"heatFrames": 10
}
"h_canHeatedCrystalFlash"
{
"heatFrames": 40
}
|
|
Requires: "h_canHeatedCrystalFlash" |
|
Requires: "h_canHeatedCrystalFlash" |
|
Requires: "h_canCrystalFlash" |
|
Requires: "h_canCrystalFlash" |
|
Requires: "h_canHeatedCrystalFlash" |
|
Requires: "h_canHeatedCrystalFlash" |
|
From: 1
Left Shaft - Top Left Door
To: 1
Left Shaft - Top Left Door
Requires: "h_canHeatedCrystalFlash" |
|
From: 2
Left Shaft - Bottom Right Door
To: 2
Left Shaft - Bottom Right Door
Requires: "h_canHeatedCrystalFlash" |
|
From: 3
Left Shaft - Middle Right Door
To: 3
Left Shaft - Middle Right Door
Requires: "h_canHeatedCrystalFlash" |
|
From: 4
Left Shaft - Top Right Door
To: 4
Left Shaft - Top Right Door
Requires: "h_canHeatedCrystalFlash" |
|
Requires: "h_canHeatedCrystalFlash" |
|
Requires: "h_canHeatedCrystalFlash" |
|
Requires: "h_canHeatedCrystalFlash" |
|
Requires: "h_canHeatedCrystalFlash" |
|
Requires: "h_canHeatedCrystalFlash" |
|
Requires: "h_canHeatedCrystalFlash" |
|
Requires: "h_canHeatedCrystalFlash" |
|
Requires: "h_canHeatedCrystalFlash" |
|
Requires: "h_canHeatedCrystalFlash" |
|
Requires: {
"resetRoom": {
"nodes": [
1
],
"mustStayPut": false
}
}
"h_canCrystalFlash"
|
|
Requires: {
"resetRoom": {
"nodes": [
2
],
"mustStayPut": false
}
}
"h_canHeatedCrystalFlash"
|
|
Requires: "h_canCrystalFlash" |
|
Requires: "h_canCrystalFlash" |
|
Requires: "h_canHeatedCrystalFlash" |
|
Requires: "h_canHeatedCrystalFlash" |
|
Requires: "h_canHeatedCrystalFlash" |
|
Requires: "h_canCrystalFlash" |
|
From: 1
Top of the Shaft Left Door
To: 1
Top of the Shaft Left Door
Requires: "h_canHeatedCrystalFlash" |
|
From: 2
Far Left Door
To: 2
Far Left Door
Notable: true 
Use SpeedBooster to construct a structure for Moondancing that has 1 chest height block and 1 head height block to the right of it and no other Speed blocks. Crystal Flash below the lower block, exactly pixel aligned with its right side, to standup and then begin Moondancing. After Samus sinks through the floor tiles, use Grapple to return to a standing position and count an additional 145 moonfalls. Then use Grapple to return to a crouch and wiggle right and Turn-Around Aim Cancel to escape to the right. Finally, use SpeedBooster if needed to break the remaining Speed blocks and reach the door. Requires: "h_heatProof" "SpeedBooster" "h_canCrystalFlash" "canTrickyJump" "canTurnaroundAimCancel" "canTemporaryBlue" "canExtendedMoondance" "canSpeedball" Exit condition: {
"leaveWithStoredFallSpeed": {
"fallSpeedInTiles": 2
}
}
|
|
From: 2
Far Left Door
To: 2
Far Left Door
Notable: true
Use SpeedBooster to construct a structure for Moondancing that has 1 chest height block and 1 head height block to the right of it and no other Speed blocks. Crystal Flash below the lower block, exactly pixel aligned with its right side, to standup and then begin Moondancing. After Samus sinks through the bottom tile, it is possible to use Grapple to return to a crouch and wiggle right and then Turn-Around Aim Cancel to escape to the right. Without Grapple, count to 174 Moonfalls and delicately Moonfall so as to remain crouched and then wiggle to the right. Finally, use SpeedBooster if needed to break the remaining Speed blocks and reach the door. Requires: "h_heatProof" "SpeedBooster" "h_canCrystalFlash" "canTrickyJump" "canTurnaroundAimCancel" "canTemporaryBlue" "canMoondance" "canSpeedball" Exit condition: {
"leaveWithStoredFallSpeed": {
"fallSpeedInTiles": 1
}
}
|
|
Requires: "h_canHeatedCrystalFlash" |
|
Requires: "h_canHeatedCrystalFlash" |
|
Requires: "h_canHeatedCrystalFlash" |
|
Requires: "h_canHeatedCrystalFlash" |
|
Requires: "h_canHeatedCrystalFlash" |
|
Requires: {
"heatFrames": 20
}
"h_canHeatedCrystalFlash"
{
"heatFrames": 20
}
|
|
Requires: "h_canCrystalFlash" |
|
Requires: "h_canCrystalFlash" |
|
Requires: "h_canCrystalFlash" |
|
Requires: "h_canHeatedCrystalFlash" |
|
Requires: "h_canHeatedCrystalFlash" |
|
Requires: "h_canCrystalFlash" |
|
Requires: "h_canCrystalFlash" Clears obstacles: A, B, C |
|
Kill some or all of the enemies before Crystal Flashing. Requires: {
"or": [
{
"obstaclesCleared": [
"D"
]
},
{
"enemyDamage": {
"enemy": "Sm. Dessgeega",
"type": "contact",
"hits": 1
}
},
{
"enemyKill": {
"enemies": [
[
"Sm. Dessgeega"
]
],
"explicitWeapons": [
"Missile",
"Super"
]
}
}
]
}
"h_canCrystalFlash"
|
|
Requires: "h_canCrystalFlash" |
|
From: 7
Junction Below Power Bomb Blocks
To: 7
Junction Below Power Bomb Blocks
Requires: "h_canCrystalFlash" Clears obstacles: C |
|
Requires: "h_canCrystalFlash" |
|
Requires: {
"heatFrames": 40
}
"h_canHeatedCrystalFlash"
|
|
Requires: "h_canHeatedCrystalFlash" |
|
Kill the Fune before Crystal Flashing. Requires: {
"ammo": {
"type": "Super",
"count": 1
}
}
{
"heatFrames": 20
}
"h_canHeatedCrystalFlash"
|
|
From: 4
Junction Below Morph Tunnel
To: 4
Junction Below Morph Tunnel
Requires: "h_canHeatedCrystalFlash" |
|
Requires: "h_canHeatedCrystalFlash" |
|
Requires: "h_canHeatedCrystalFlash" |
|
Requires: "h_canCrystalFlash" |
|
Requires: "h_canCrystalFlash" |
|
Requires: "h_canCrystalFlash" |
|
Requires: "h_canCrystalFlash" |
|
Requires: "h_canCrystalFlash" |
|
Requires: {
"obstaclesNotCleared": [
"A"
]
}
"h_canCrystalFlash"
|
|
Requires: "h_canCrystalFlash" |
|
Requires: "h_canCrystalFlash" |
|
Requires: "h_canCrystalFlash" |
|
Requires: "h_canCrystalFlash" |
|
Requires: "h_canCrystalFlash" |
|
Requires: "h_canCrystalFlash" |
|
From: 2
Right Vertical Door
To: 2
Right Vertical Door
Requires: "h_canCrystalFlash" Clears obstacles: A |
|
Requires: "h_canHeatedCrystalFlash" |
|
Requires: "h_canCrystalFlash" |
|
Requires: "h_canCrystalFlash" |
|
Requires: "h_canCrystalFlash" |
|
Requires: "h_canHeatedCrystalFlash" |
|
From: 1
Top Right Door
To: 3
Acid Chozo Statue (locked)
Grapple teleporting here will spawn Samus inside the wall behind the Acid Chozo statue. To escape, perform a Crystal Flash to stand up, then morph and roll out to the right. Samus will be visible but off-camera, making the movement tricky. While off camera, the Chozo hand will not function (i.e., will not trigger the acid lowering cutscene). Entrance condition: {
"comeInWithGrappleTeleport": {
"blockPositions": [
[
5,
3
]
]
}
}
Requires: {
"heatFrames": 220
}
"h_canCrystalFlash"
{
"heatFrames": 20
}
"canOffScreenMovement"
Clears obstacles: A |
|
Requires: "h_canHeatedCrystalFlash" |
|
From: 2
Bottom Right Door
To: 3
Acid Chozo Statue (locked)
Grapple teleporting here will spawn Samus inside the wall behind the Acid Chozo statue. To escape, perform a Crystal Flash to stand up, then morph and roll out to the right. Samus will be visible but off-camera, making the movement tricky. While off camera, the Chozo hand will not function (i.e., will not trigger the acid lowering cutscene). Entrance condition: {
"comeInWithGrappleTeleport": {
"blockPositions": [
[
5,
3
]
]
}
}
Requires: {
"heatFrames": 220
}
"h_canCrystalFlash"
{
"heatFrames": 20
}
"canOffScreenMovement"
Clears obstacles: A |
|
From: 3
Acid Chozo Statue (locked)
To: 3
Acid Chozo Statue (locked)
Requires: "h_canHeatedCrystalFlash" |
|
From: 4
Junction Above Acid Plug, Without Acid
To: 4
Junction Above Acid Plug, Without Acid
Requires: "h_canHeatedCrystalFlash" |
|
From: 5
Bottom Junction Right of Morph Tunnel
To: 4
Junction Above Acid Plug, Without Acid
Menu to Grappling Beam before the crystal flash ends and mash shoot while holding down. Requires: "h_heatProof" "h_canBombThings" "h_canJumpIntoCrystalFlashClip" "HiJump" "Grapple" |
|
From: 5
Bottom Junction Right of Morph Tunnel
To: 5
Bottom Junction Right of Morph Tunnel
Requires: "h_canHeatedCrystalFlash" |
|
Requires: "h_canHeatedCrystalFlash" |
|
Requires: "h_canHeatedCrystalFlash" |
|
From: 3
Junction Left of Green Gate
To: 3
Junction Left of Green Gate
Requires: "h_canHeatedCrystalFlash" |
|
Requires: "h_canCrystalFlash" |
|
Requires: "h_canHeatedCrystalFlash" |
|
From: 2
Right Door (locked)
To: 2
Right Door (locked)
If entering from the right door with Golden Torizo not yet defeated, come in already morphed, Crystal Flash immediately, then morph and roll under Golden Torizo. Requires: {
"or": [
"canPrepareForNextRoom",
"f_DefeatedGoldenTorizo"
]
}
"h_canHeatedCrystalFlash"
|
|
Requires: "h_canHeatedCrystalFlash" |
|
Requires: "h_canHeatedCrystalFlash" |
|
From: 5
Golden Torizo (locked)
To: 8
Golden Torizo (unlocked)
Notable: true 
Midway through the fight, use a Crystal Flash to refill Samus' energy. Crystal Flashing while standing in the safe spot at GT's feet is safe. Requires: "h_canNavigateHeatRooms"
{
"or": [
{
"ammo": {
"type": "Super",
"count": 30
}
},
{
"and": [
"Charge",
"Ice",
"Wave",
"Plasma"
]
}
]
}
{
"heatFrames": 800
}
"h_canHeatedCrystalFlash"
{
"heatFrames": 800
}
Clears obstacles: f_DefeatedGoldenTorizo |
|
Requires: {
"obstaclesNotCleared": [
"C"
]
}
{
"heatFrames": 10
}
"h_canHeatedCrystalFlash"
{
"heatFrames": 10
}
Clears obstacles: B |
|
Requires: "canPrepareForNextRoom"
{
"heatFrames": 40
}
"h_canHeatedCrystalFlash"
Clears obstacles: B |
|
Requires: "h_canHeatedCrystalFlash" Clears obstacles: A |
|
Requires: {
"obstaclesNotCleared": [
"C"
]
}
"h_canHeatedCrystalFlash"
Clears obstacles: B |
|
Requires: {
"obstaclesCleared": [
"A"
]
}
"h_canHeatedCrystalFlash"
|
|
Requires: "h_canHeatedCrystalFlash" |
|
Requires: "h_canHeatedCrystalFlash" |
|
Requires: "h_canHeatedCrystalFlash" |
|
Requires: "canPrepareForNextRoom"
{
"heatFrames": 40
}
"h_canHeatedCrystalFlash"
|
|
Requires: "h_canHeatedCrystalFlash" |
|
From: 1
Left Door
To: 2
Top Door
Notable: true 
Stand next to the Crumble Blocks and jump into a Crystal Flash Clip to briefly clip into the ceiling above those blocks. Hold down exiting the Crystal Flash to shrink Samus' hitbox and on the next frame press forward to move above the Crumble blocks. Holding down and mashing forward sometimes works, or X-Ray can be used at the end of the Crystal Flash to more easily time the inputs. Requires: "h_heatProof" "h_canJumpIntoCrystalFlashClip" "canTrickyJump" |
|
Requires: "h_canHeatedCrystalFlash" |
|
Requires: "h_canHeatedCrystalFlash" |
|
Be careful to avoid damage from the respawning Zebbos. They will not spawn if you are close enough to the door. Requires: "h_canHeatedCrystalFlash" |
|
From: 3
Left Farm Junction
To: 3
Left Farm Junction
Be careful to avoid damage from the respawning Zebbos. Requires: "h_canHeatedCrystalFlash" |
|
From: 4
Right Farm Junction
To: 4
Right Farm Junction
Be careful to avoid damage from the respawning Zebbos. Requires: "h_canHeatedCrystalFlash" |
|
From: 2
Bottom Left Door
To: 2
Bottom Left Door
Requires: "h_canCrystalFlash" Clears obstacles: A |
|
Requires: "h_canCrystalFlash" |
|
Requires: "h_canHeatedCrystalFlash" |
|
From: 2
Right Vertical Door
To: 2
Right Vertical Door
Requires: "h_canHeatedCrystalFlash" |
|
From: 2
Right Vertical Door
To: 5
Spring Ball Maze Junction (Past the Bomb Blocks)
Notable: true 
Perform the crystal flash all the way against the left wall of the accessible tunnel, then jump through the ceiling. Requires: {
"heatFrames": 300
}
"h_canCrystalFlash"
"canCeilingClip"
{
"heatFrames": 270
}
Clears obstacles: B |
|
From: 3
Bottom Horizontal Door
To: 3
Bottom Horizontal Door
Requires: "h_canHeatedCrystalFlash" |
|
Requires: "h_canHeatedCrystalFlash" Clears obstacles: B |
|
From: 5
Spring Ball Maze Junction (Past the Bomb Blocks)
To: 5
Spring Ball Maze Junction (Past the Bomb Blocks)
Requires: "h_canHeatedCrystalFlash" |
|
From: 6
Junction By Left Door (Right of Pit)
To: 6
Junction By Left Door (Right of Pit)
Requires: "h_canHeatedCrystalFlash" |
|
From: 7
Junction By Lower Alcoons (Left of Spike Pits)
To: 7
Junction By Lower Alcoons (Left of Spike Pits)
Requires: "h_canHeatedCrystalFlash" |
|
Requires: "h_canHeatedCrystalFlash" |
|
Requires: "h_canHeatedCrystalFlash" |
|
Requires: "h_canHeatedCrystalFlash" |
|
Requires: {
"heatFrames": 10
}
"h_canHeatedCrystalFlash"
{
"heatFrames": 10
}
|
|
Requires: {
"heatFrames": 10
}
"h_canHeatedCrystalFlash"
{
"heatFrames": 10
}
|
|
Requires: {
"heatFrames": 15
}
"h_canHeatedCrystalFlash"
Clears obstacles: A |
|
Requires: "h_canHeatedCrystalFlash" |
|
From: 4
Junction Below Bomb Blocks
To: 4
Junction Below Bomb Blocks
Requires: "h_canHeatedCrystalFlash" Clears obstacles: A |
|
From: 6
Bottom Right Corner Junction
To: 4
Junction Below Bomb Blocks
Menu to Grappling Beam before the crystal flash ends and mash shoot while holding down to be forced on top of the solid block. Requires: "h_heatProof"
"h_canJumpIntoCrystalFlashClip"
"Grapple"
{
"or": [
{
"obstaclesCleared": [
"D"
]
},
{
"obstaclesCleared": [
"F"
]
},
{
"enemyDamage": {
"enemy": "Multiviola",
"type": "contact",
"hits": 2
}
}
]
}
Clears obstacles: A, D |
|
From: 6
Bottom Right Corner Junction
To: 6
Bottom Right Corner Junction
Requires: {
"obstaclesCleared": [
"F"
]
}
"h_canHeatedCrystalFlash"
|
|
From: 8
Left Door Junction After Multiviola
To: 8
Left Door Junction After Multiviola
Requires: {
"obstaclesCleared": [
"C",
"E"
]
}
"h_canHeatedCrystalFlash"
|
|
Entrance condition: {
"comeInNormally": {}
}
Requires: "h_canHeatedCrystalFlash"
{
"resetRoom": {
"nodes": [
1
],
"mustStayPut": false
}
}
|
|
Entrance condition: {
"comeInNormally": {}
}
Requires: "h_canHeatedCrystalFlash"
{
"resetRoom": {
"nodes": [
2
],
"mustStayPut": false
}
}
|
|
Requires: "h_canHeatedCrystalFlash" |
|
From: 3
Farm Junction Free of Holtzes
To: 3
Farm Junction Free of Holtzes
Crystal Flash to the left of the pipe to avoid the Holtzes. Requires: "h_canHeatedCrystalFlash" |
|
Requires: "h_canHeatedCrystalFlash" Clears obstacles: A |
|
From: 2
Bottom Right Vertical Door
To: 2
Bottom Right Vertical Door
Requires: "h_canHeatedCrystalFlash" |
|
Perform the Crystal Flash to the left, away from the door, to prevent the Kihunter from coming down. Requires: {
"heatFrames": 20
}
"h_canHeatedCrystalFlash"
{
"heatFrames": 20
}
|
|
Requires: "h_canHeatedCrystalFlash" Clears obstacles: A |
|
From: 6
Inside Morph Tunnel (Right of Left Bomb Blocks)
To: 6
Inside Morph Tunnel (Right of Left Bomb Blocks)
Requires: "h_canHeatedCrystalFlash" |
|
Requires: "h_canCrystalFlash" |
|
Requires: "h_canHeatedCrystalFlash" |
|
Requires: "h_canHeatedCrystalFlash" |
|
Requires: "h_canHeatedCrystalFlash" |
|
From: 2
Bottom Left Door
To: 2
Bottom Left Door
Perform the Crystal Flash on the bottom part of the floating platform, to avoid taking damage. Afterward, reset the room if needed to manipulate the Pirates. Requires: {
"heatFrames": 60
}
"h_canHeatedCrystalFlash"
{
"heatFrames": 90
}
{
"resetRoom": {
"nodes": [
2
],
"mustStayPut": false
}
}
|
|
From: 2
Bottom Left Door
To: 2
Bottom Left Door
Refreeze the Namihe after laying the Power Bomb, to avoid taking damage. Requires: "Plasma" "Ice" "h_canHeatedCrystalFlash" |
|
Requires: "h_canHeatedCrystalFlash" |
|
From: 4
Junction Above Bomb Blocks
To: 4
Junction Above Bomb Blocks
Requires: "h_canHeatedCrystalFlash" |
|
From: 5
Junction Below Top Pirate
To: 5
Junction Below Top Pirate
Refreeze the Namihe after laying the Power Bomb, to avoid taking damage. Requires: "Plasma" "Ice" "h_canHeatedCrystalFlash" |
|
From: 5
Junction Below Top Pirate
To: 5
Junction Below Top Pirate
Perform the Crystal Flash on top of the Namihe. At the start of the Crystal Flash, Samus will take one Namihe contact hit (10 energy damage without suits). Requires: {
"heatFrames": 40
}
{
"enemyDamage": {
"enemy": "Namihe",
"type": "kago",
"hits": 1
}
}
"h_canHeatedCrystalFlash"
{
"heatFrames": 40
}
|
|
From: 6
Bottom Platform Junction With Pirates Killed
To: 6
Bottom Platform Junction With Pirates Killed
Requires: "h_canHeatedCrystalFlash" |
|
Requires: "h_canHeatedCrystalFlash" |
|
Requires: "h_canHeatedCrystalFlash" |
|
Requires: "h_canHeatedCrystalFlash" |
|
From: 4
Junction Above Bomb Block
To: 4
Junction Above Bomb Block
Requires: "h_canHeatedCrystalFlash" |
|
Requires: "h_canHeatedCrystalFlash" |
|
Requires: {
"heatFrames": 10
}
"h_canHeatedCrystalFlash"
|
|
Requires: "h_canHeatedCrystalFlash" |
|
From: 4
Junction Right of Power Bomb Blocks
To: 4
Junction Right of Power Bomb Blocks
Requires: {
"obstaclesCleared": [
"D"
]
}
"h_canHeatedCrystalFlash"
Clears obstacles: A, B |
|
From: 5
Junction Below Shot Block
To: 5
Junction Below Shot Block
Requires: "h_canHeatedCrystalFlash" Clears obstacles: A, B |
|
From: 6
Junction Left of Power Bomb Blocks
To: 6
Junction Left of Power Bomb Blocks
Requires: "h_canHeatedCrystalFlash"
{
"or": [
{
"obstaclesCleared": [
"B"
]
},
{
"obstaclesCleared": [
"C"
]
}
]
}
Clears obstacles: A, B |
|
From: 7
Junction Left of Morph Tunnel
To: 7
Junction Left of Morph Tunnel
Requires: "h_canHeatedCrystalFlash" |
|
From: 8
Junction Below Top Right Door
To: 8
Junction Below Top Right Door
Requires: "h_canHeatedCrystalFlash" |
|
Requires: "h_canCrystalFlash" |
|
If the leftmost Kihunter is still alive, lay the Power Bomb with it on screen, to kill it before the Crystal Flash refill begins. Requires: "h_canCrystalFlash" |
|
Requires: "h_canCrystalFlash" |
|
Requires: "h_canCrystalFlash" |
|
Requires: "h_canCrystalFlash" Clears obstacles: A |
|
Requires: "h_canCrystalFlash" Clears obstacles: A |
|
From: 1
Top Left Door
To: 1
Top Left Door
Notable: true 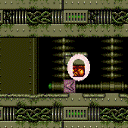
Use SpeedBooster to construct a structure for Moondancing that has 1 chest height block and 1 head height block to the right of it and no other Speed blocks. Crystal Flash below the lower block, exactly pixel aligned with its right side, to standup and then begin Moondancing. After Samus sinks through the floor tiles, use Grapple to return to a standing position and count an additional 145 moonfalls. Then use Grapple to return to a crouch and wiggle right and Turn-Around Aim Cancel to escape to the right. Finally, shortcharge to break the remaining Speed blocks and reach the door. Requires: "h_canCrystalFlash"
"canTrickyJump"
"canTurnaroundAimCancel"
"canTemporaryBlue"
"canExtendedMoondance"
"canSpeedball"
"Grapple"
{
"canShineCharge": {
"openEnd": 0,
"usedTiles": 16,
"steepDownTiles": 4
}
}
Exit condition: {
"leaveWithStoredFallSpeed": {
"fallSpeedInTiles": 2
}
}
|
|
From: 1
Top Left Door
To: 1
Top Left Door
Notable: true
Use SpeedBooster to construct a structure for Moondancing that has 1 chest height block and 1 head height block to the right of it and no other Speed blocks. Crystal Flash below the lower block, exactly pixel aligned with its right side, to standup and then begin Moondancing. After Samus sinks through the bottom tile, it is possible to use Grapple to return to a crouch and wiggle right and then Turn-Around Aim Cancel to escape to the right. Without Grapple, count to 174 Moonfalls and delicately Moonfall so as to remain crouched and then wiggle to the right. Finally, shortcharge to break the remaining Speed blocks and reach the door. Requires: "h_canCrystalFlash"
"canTrickyJump"
"canTurnaroundAimCancel"
"canTemporaryBlue"
"canSpeedball"
"canMoondance"
{
"canShineCharge": {
"openEnd": 0,
"usedTiles": 16,
"steepDownTiles": 4
}
}
Exit condition: {
"leaveWithStoredFallSpeed": {
"fallSpeedInTiles": 1
}
}
|
|
Requires: "h_canCrystalFlash" |
|
From: 1
Top Left Door
To: 5
Top Right Item (locked)
Notable: true
Use SpeedBooster to construct a structure for Moondancing that has 1 chest height block and 1 head height block to the right of it and no other Speed blocks. Crystal Flash below the lower block, exactly pixel aligned with its right side, to standup and then begin Moondancing. After Samus sinks through the bottom tile, it is possible to use Grapple to return to a crouch and wiggle right and then Turn-Around Aim Cancel to escape to the right. Without Grapple, count to 174 Moonfalls and delicately Moonfall so as to remain crouched and then wiggle to the right. The Camera will not follow Samus after clipping. Requires: "h_canCrystalFlash"
"canTrickyJump"
"canTurnaroundAimCancel"
"canTemporaryBlue"
"canMoondance"
"canSpeedball"
{
"canShineCharge": {
"openEnd": 0,
"usedTiles": 16,
"steepDownTiles": 4
}
}
Clears obstacles: B |
|
Requires: "h_canCrystalFlash" |
|
Requires: "h_canCrystalFlash" |
|
The shot blocks must be broken using Bombs or Power Bombs because Beams will instantly despawn. Use X-Ray or a Crystal Flash to stand up, followed by a Partial Floor clip to jump through the Crumble blocks. Requires: {
"obstaclesCleared": [
"B"
]
}
"h_canBombThings"
"canOffScreenMovement"
{
"or": [
{
"and": [
"canXRayStandUp",
"canPartialFloorClip",
"h_additionalBomb"
]
},
{
"and": [
{
"or": [
{
"and": [
"SpeedBooster",
"h_ShinesparksCostEnergy"
]
},
"f_DefeatedPhantoon"
]
},
"h_canCrystalFlash"
]
}
]
}
|
|
From: 5
Top Right Item (locked)
To: 1
Top Left Door
Menu to Grappling Beam before the crystal flash ends and mash shoot while holding down. Requires: "h_canJumpIntoCrystalFlashClip"
"Grapple"
{
"obstaclesNotCleared": [
"B"
]
}
|
|
From: 5
Top Right Item (locked)
To: 1
Top Left Door
Fall through the Crumble blocks in order to damage down using either the spikes or repeated Shinesparks. Touching the Chozo statue will lock the camera in a less useful position. Menu to Grappling Beam before the crystal flash ends and mash shoot while holding down. Requires: {
"obstaclesCleared": [
"B"
]
}
"h_ShinesparksCostEnergy"
"h_canJumpIntoCrystalFlashClip"
"Grapple"
"canOffScreenMovement"
{
"canShineCharge": {
"usedTiles": 25,
"openEnd": 1
}
}
|
|
Requires: "h_canCrystalFlash" |
|
Requires: "h_canCrystalFlash" |
|
Requires: "h_canCrystalFlash" |
|
Requires: "h_canCrystalFlash" |
|
Requires: "h_canCrystalFlash" |
|
Requires: "h_canCrystalFlash" |
|
Requires: "h_canCrystalFlash" |
|
Requires: "h_canCrystalFlash" |
|
From: 2
Item (Behind the Bomb Wall) (locked)
To: 1
Left Door
Notable: true .png)
.gif)
Crystal flash to force a standup then spin jump up then morph to bypass the dead robot. Use Coverns to damage down if necessary. Note that if the Covern spawns on Samus while crystal flashing, it will deal large amounts of damage. To avoid this, it is recommended to kill the Covern and leave its drop, then quickly get in the morph tunnel and CF. Requires: "h_canCrystalFlash" "canCeilingClip" |
|
Requires: "h_canCrystalFlash" |
|
Requires: "h_canCrystalFlash" |
|
Requires: "h_canCrystalFlash" Clears obstacles: A, B, C |
|
Requires: "h_canCrystalFlash" Clears obstacles: A, B, C |
|
Requires: "h_canCrystalFlash" Clears obstacles: A |
|
Requires: "h_canCrystalFlash" Clears obstacles: A, B |
|
Requires: "h_canCrystalFlash" |
|
Requires: "h_canCrystalFlash" |
|
Requires: "h_canCrystalFlash" |
|
Requires: "h_canCrystalFlash" |
|
Requires: "h_canCrystalFlash" |
|
Requires: "h_canCrystalFlash" |
|
Requires: "h_canCrystalFlash" |
|
Requires: "h_canCrystalFlash" |
|
Requires: "h_canCrystalFlash" |
|
Requires: "h_canCrystalFlash" |
|
From: 5
Platform Junction Near Top Left Door
To: 5
Platform Junction Near Top Left Door
Requires: "h_canCrystalFlash" |
|
From: 7
Spawn At Junction Near Top Right Door
To: 7
Spawn At Junction Near Top Right Door
Requires: "h_canCrystalFlash" |
|
Requires: "h_canCrystalFlash" |
|
Requires: "h_canCrystalFlash" |
|
Requires: "h_canCrystalFlash" |
|
Requires: "h_canCrystalFlash" |
|
Requires: "h_canCrystalFlash" |
|
Requires: "h_canCrystalFlash" |
|
Requires: "h_canCrystalFlash" |
|
Requires: "h_canCrystalFlash" |
|
Requires: "h_canCrystalFlash" |
|
Requires: "h_canCrystalFlash" |
|
Requires: "h_canCrystalFlash" |
|
Requires: "h_canCrystalFlash" |
|
From: 6
Left Morph Passage Doorway
To: 6
Left Morph Passage Doorway
Requires: "h_canCrystalFlash" |
|
From: 9
Spawn At Junction Below Top Door
To: 9
Spawn At Junction Below Top Door
Requires: "h_canCrystalFlash" |
|
Requires: "h_canCrystalFlash" |
|
Requires: "h_canHeatedCrystalFlash" |
|
Requires: "h_canCrystalFlash" Clears obstacles: A |
|
Requires: "h_canCrystalFlash" Clears obstacles: A |
|
Requires: "h_canCrystalFlash" |
|
Requires: "h_canCrystalFlash" |
|
Requires: "h_canCrystalFlash" |
|
Requires: "h_canCrystalFlash" |
|
From: 1
Bottom Left Door
To: 2
Right Door
Find the crumble blocks and crystal flash mid-air, just below them. They are on the far right of the ceiling of the bottom right pathway. Hold down as the CF ends to break the non-respawning crumble blocks. The vertical positioning can be setup using Gravity and Bombs. Requires: "h_canBombIntoCrystalFlashClip" "Gravity" |
|
From: 1
Bottom Left Door
To: 2
Right Door
Find the crumble blocks and crystal flash mid-air, just below them. They are on the far right of the ceiling of the bottom right pathway. Hold down as the CF ends to break the non-respawning crumble blocks. This is for the much harder version, without Gravity and Bombs. Requires: "h_canJumpIntoCrystalFlashClip"
"canSuitlessMaridia"
{
"or": [
"HiJump",
"canSpringBallJumpMidAir",
{
"and": [
"h_canCrouchJumpDownGrab",
"canCarefulJump"
]
},
"canUseFrozenEnemies"
]
}
|
|
From: 2
Right Door
To: 1
Bottom Left Door
Find the crumble blocks and crystal flash mid-air, just below them. They are on the far left of the ceiling of the middle left pathway. Hold down as the CF ends to break the non-respawning crumble blocks. The vertical positioning can be setup using Gravity and Bombs. Requires: "h_canBombIntoCrystalFlashClip" "Gravity" |
|
From: 2
Right Door
To: 1
Bottom Left Door
Find the crumble blocks and crystal flash mid-air, just below them. They are on the far left of the ceiling of the middle left pathway. Hold down as the CF ends to break the non-respawning crumble blocks. This is for the much harder version, without Gravity and Bombs. Requires: "h_canJumpIntoCrystalFlashClip"
"canSuitlessMaridia"
{
"or": [
{
"and": [
"h_canCrouchJumpDownGrab",
"canTrickyJump"
]
},
"HiJump",
"Gravity",
"canSpringBallJumpMidAir"
]
}
|
|
Requires: "h_canCrystalFlash" |
|
From: 5
Hidden Morph Tunnel Junction
To: 5
Hidden Morph Tunnel Junction
Requires: "h_canCrystalFlash" |
|
Requires: "h_canCrystalFlash" |
|
Requires: "h_canCrystalFlash" |
|
Requires: "h_canCrystalFlash" |
|
Requires: "h_canCrystalFlash" |
|
Requires: "h_canCrystalFlash" |
|
Requires: "h_canCrystalFlash" |
|
Requires: "h_canCrystalFlash" |
|
Requires: "h_canCrystalFlash" "canCrouchJump" |
|
Requires: "h_canCrystalFlash" |
|
Requires: {
"or": [
"f_DefeatedDraygon",
"h_canBreakOneDraygonTurret"
]
}
"h_canCrystalFlash"
|
|
Requires: {
"obstaclesCleared": [
"f_DefeatedDraygon"
]
}
"h_canCrystalFlash"
|
|
From: 1
Top Sand Entrance
To: 1
Top Sand Entrance
Requires: "h_canCrystalFlash" |
|
Requires: "h_canCrystalFlash" |
|
Requires: "h_canCrystalFlash" |
|
Requires: "h_canCrystalFlash" |
|
Requires: "h_canCrystalFlash" |
|
Requires: "h_canCrystalFlash" |
|
Requires: "h_canCrystalFlash" |
|
Requires: "h_canCrystalFlash" |
|
Requires: "h_canCrystalFlash" |
|
Requires: "h_canCrystalFlash" |
|
Requires: "h_canCrystalFlash" |
|
Requires: "h_canCrystalFlash" |
|
Requires: "h_canCrystalFlash" |
|
Requires: "h_canCrystalFlash" Clears obstacles: A |
|
Requires: "h_canCrystalFlash" |
|
Requires: "h_canCrystalFlash" |
|
Requires: "h_canCrystalFlash" |
|
Requires: "h_canCrystalFlash" |
|
Requires: "h_canCrystalFlash" |
|
Requires: "h_canCrystalFlash" |
|
Requires: "h_canCrystalFlash" |
|
Requires: "h_canCrystalFlash" |
|
Requires: "h_canCrystalFlash" |
|
Requires: "h_canCrystalFlash" |
|
Requires: "h_canCrystalFlash" |
|
Requires: "h_canCrystalFlash" |
|
From: 3
Junction Below Right Door
To: 2
Right Door
Clip below the crumble blocks on the left side. Hold down after clipping to break them. Requires: "h_canBombIntoCrystalFlashClip" "Gravity" |
|
From: 3
Junction Below Right Door
To: 2
Right Door
Place a PB up against the crumble blocks, then jump and midair morph into that same position at the end of the explosion while holding CF inputs. Immediately after the CF, hold down to break the crumble blocks. Requires: "h_canJumpIntoCrystalFlashClip" "canSuitlessMaridia" |
|
Requires: "h_canCrystalFlash" |
|
Requires: "h_canCrystalFlash" |
|
Requires: "h_canCrystalFlash" |
|
Requires: "h_canCrystalFlash" |
|
Requires: "h_canCrystalFlash" |
|
Requires: "h_canCrystalFlash" |
|
Requires: "h_canCrystalFlash" |
|
Requires: "h_canCrystalFlash" |
|
Requires: "h_canCrystalFlash" |
|
Requires: "h_canCrystalFlash" |
|
Requires: "h_canCrystalFlash" |
|
Requires: "h_canCrystalFlash" |
|
Requires: "h_canCrystalFlash" |
|
Notable: true 
Enter the room from the left door, morph, and wait at the left wall. After 6 hops, the bottom Hopper will do three big hops in a row. Roll under the Hopper while it does the third of those three big hops. Quickly unmorph and run to the right side of the room. If successful, both Hoppers will remain off-camera, so you can safely Crystal Flash. Reset the room through the top door before returning to the left. Requires: {
"resetRoom": {
"nodes": [
1
],
"mustStayPut": false
}
}
{
"resetRoom": {
"nodes": [
2
],
"mustStayPut": false
}
}
"canTrickyJump"
"h_canCrystalFlash"
|
|
Requires: "h_canCrystalFlash" |
|
Requires: "h_canCrystalFlash" |
|
Be sure to be at a safe distance from Rinkas before performing the Crystal Flash. Requires: {
"obstaclesCleared": [
"A"
]
}
"h_canCrystalFlash"
|
|
Requires: "h_canCrystalFlash" |
|
From: 2
Bottom Right Door (locked)
To: 1
Top Right Door
Enter with G-mode direct, using artificial morph to avoid the Metroids if they are still alive. Go to the top of the room and Crystal Flash, with the Metroids stuck below (if alive). The Crystal Flash will leave behind a light orb, which can be used to kill the Metroids. Use the Rinkas to damage down. For the final hit that will trigger auto-reserves, stand in the open doorway between 1 and 6 pixels from the transition. The auto reserve trigger will cancel G-mode and close the door on top of Samus. Climb up 1 screen, moving quickly to minimize Rinka damage. Perform a turnaround buffered spin-jump away from the door to trigger the transition, bypassing any lock on the door. Entrance condition: {
"comeInWithGMode": {
"mode": "direct",
"morphed": false
}
}
Requires: "h_canCrystalFlash"
{
"autoReserveTrigger": {}
}
"canXRayClimb"
{
"enemyDamage": {
"enemy": "Rinka",
"type": "contact",
"hits": 1
}
}
Bypasses door shell: true |
|
From: 2
Bottom Right Door (locked)
To: 2
Bottom Right Door (locked)
To avoid heavy Rinka damage, you must perform the Crystal Flash on a specific tile: on the third floor tile from the left wall. Lay the Power Bomb immediately after destroying both Rinkas. Requires: {
"obstaclesCleared": [
"A"
]
}
"h_canCrystalFlash"
{
"enemyDamage": {
"enemy": "Rinka",
"type": "contact",
"hits": 1
}
}
|
|
Be at a safe distance from Rinkas before performing the Crystal Flash. Requires: {
"obstaclesCleared": [
"A"
]
}
"h_canCrystalFlash"
|
|
To avoid heavy Rinka damage, perform the Crystal Flash while backed against the left door or inside the open door frame. Lay the Power Bomb immediately after destroying the Rinka with the closer spawn location. Requires: {
"or": [
{
"resetRoom": {
"nodes": [
1
],
"mustStayPut": false
}
},
"Ice",
{
"obstaclesCleared": [
"A"
]
}
]
}
"h_canCrystalFlash"
|
|
Requires: "h_canCrystalFlash" |
|
From: 3
Bottom Left Door
To: 1
Top Left Door
Enter with G-mode direct, and go to the top of the room to perform a Crystal Flash to refill on energy without destroying all the bottom Rinkas. Use the Rinkas to damage down. For the final hit that will trigger auto-reserves, stand in the open doorway between 1 and 6 pixels from the transition. The auto reserve trigger will cancel G-mode and close the door on top of Samus. Climb up 2 screens, moving quickly to minimize Rinka damage. Perform a turnaround buffered spin-jump away from the door to trigger the transition, bypassing any lock on the door. Entrance condition: {
"comeInWithGMode": {
"mode": "direct",
"morphed": false
}
}
Requires: "h_canCrystalFlash"
{
"autoReserveTrigger": {}
}
"canXRayClimb"
{
"enemyDamage": {
"enemy": "Rinka",
"type": "contact",
"hits": 2
}
}
Bypasses door shell: true |
|
From: 3
Bottom Left Door
To: 2
Middle Left Door
Enter with G-mode direct, and go to the top of the room to perform a Crystal Flash to refill on energy without destroying all the bottom Rinkas. Use a Rinka to damage down. For the final hit that will trigger auto-reserves, stand in the open doorway between 1 and 6 pixels from the transition. The auto reserve trigger will cancel G-mode and close the door on top of Samus. Climb up 1 screen, moving quickly to minimize Rinka damage. Perform a turnaround buffered spin-jump away from the door to trigger the transition, bypassing any lock on the door. Entrance condition: {
"comeInWithGMode": {
"mode": "direct",
"morphed": false
}
}
Requires: "h_canCrystalFlash"
{
"autoReserveTrigger": {}
}
"canXRayClimb"
{
"enemyDamage": {
"enemy": "Rinka",
"type": "contact",
"hits": 2
}
}
Bypasses door shell: true |
|
Requires: "h_canCrystalFlash" |
|
Requires: "h_canCrystalFlash" |
|
Requires: "h_canCrystalFlash" |
|
Requires: "h_canCrystalFlash" |
|
Requires: "h_canCrystalFlash" |
|
Requires: "h_canCrystalFlash" |
|
Clear the Pirates near the door. Jump into a Crystal Flash clip where the ceiling is a single tile thick. Switch to Grappling Beam before the Crystal Flash ends and mash shoot while holding down. Requires: "h_canJumpIntoCrystalFlashClip" "HiJump" "Grapple" |
|
Requires: "h_canCrystalFlash" |
|
Requires: "h_canCrystalFlash" |
|
Requires: "h_canCrystalFlash" |
|
Requires: "h_canCrystalFlash" |