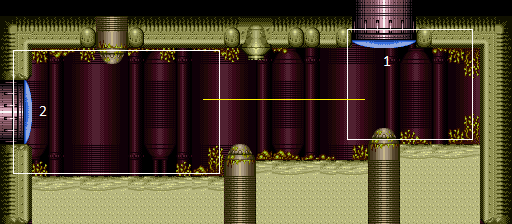
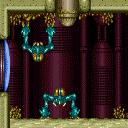
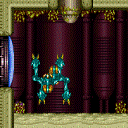
Blue Hopper Room
Room ID: 230
|
Exit condition: {
"leaveWithDoorFrameBelow": {
"height": 3
}
}
|
|
Exit condition: {
"leaveWithPlatformBelow": {
"height": 8.5,
"leftPosition": -1.5,
"rightPosition": 1.5
}
}
|
|
Requires: {
"enemyDamage": {
"enemy": "Blue Sidehopper",
"type": "contact",
"hits": 1
}
}
|
|
Notable: true 
Enter through the far left side of the door. Wait for the top hopper to move right to start running. Run under the right Hopper and jump over the left Hopper to avoid all damage. Jump when Samus reaches the leftmost lump in the ground to avoid the left hopper. It helps to keep the camera scrolled to the right. Entrance condition: {
"comeInNormally": {},
"comesThroughToilet": "no"
}
Requires: "canTrickyJump"
{
"or": [
"canPrepareForNextRoom",
{
"and": [
"canCameraManip",
"canMoonwalk",
"canInsaneJump"
]
}
]
}
|
|
Notable: true
Try to scroll the camera to the right to keep the left Hopper off-camera for longer. Wait for the top hopper to move right to start running. Run under the right Hopper and jump over the left Hopper to avoid all damage. Jump when Samus reaches the leftmost lump in the ground to avoid the left hopper. Entrance condition: {
"comeInNormally": {},
"comesThroughToilet": "any"
}
Requires: "canCameraManip" "canMoonwalk" "canInsaneJump" |
|
Wait for the top hopper to move right, then jump through the left hopper. The left hopper may be harder to dodge if the camera is scrolled to the left. Requires: "ScrewAttack"
"canCarefulJump"
{
"or": [
"canTrickyJump",
"SpaceJump",
{
"and": [
"canCameraManip",
"canPrepareForNextRoom"
]
},
{
"and": [
"canCameraManip",
"canMoonwalk"
]
}
]
}
|
|
Kill the top hopper quickly; the left hopper is more random. To be safe, plan to retreat right while attacking. It also helps to attempt to move the hopper off camera between attacks. Requires: "canDodgeWhileShooting"
"canTrickyJump"
"canCameraManip"
{
"enemyKill": {
"enemies": [
[
"Blue Sidehopper",
"Blue Sidehopper"
]
]
}
}
|
|
Wait for the left hopper to move right so it does not follow Samus as IFrames run out. A damage boost using the top hopper also moves through the room fast enough to be safe. Requires: {
"enemyDamage": {
"enemy": "Blue Sidehopper",
"type": "contact",
"hits": 1
}
}
{
"or": [
"canHorizontalDamageBoost",
"canTrickyJump",
"canHitbox",
{
  "enemyDamage": {
    "enemy": "Blue Sidehopper",
    "type": "contact",
    "hits": 1
  }
}
]
}
|
|
Requires: {
"enemyDamage": {
"enemy": "Blue Sidehopper",
"type": "contact",
"hits": 1
}
}
Exit condition: {
"leaveWithGModeSetup": {}
}
|
|
Requires: {
"or": [
"ScrewAttack",
"canTrickyJump",
{
"and": [
"canDodgeWhileShooting",
"canCameraManip",
{
"enemyKill": {
"enemies": [
[
"Blue Sidehopper",
"Blue Sidehopper"
]
]
}
}
]
}
]
}
Exit condition: {
"leaveWithGModeSetup": {}
}
|
|
From: 1
Top Right Door
To: 2
Left Door
Entrance condition: {
"comeInShinecharged": {
"framesRequired": 95
},
"comesThroughToilet": "no"
}
Requires: "canShinechargeMovementTricky"
{
  "enemyDamage": {
    "enemy": "Blue Sidehopper",
    "type": "contact",
    "hits": 1
  }
}
"canMidairShinespark"
{
"shinespark": {
"frames": 21
}
}
Exit condition: {
"leaveWithSpark": {}
}
|
|
From: 2
Left Door
To: 1
Top Right Door
Notable: true Spin jump into the room with Screw Attack, holding left through the transition to land near the door. Do a turn-around spin jump to the right, bonking the ceiling and overhang and then falling straight down. Then run and spin jump to the right through the Hoppers, to make it to the door without taking damage. Requires: "canPrepareForNextRoom" "ScrewAttack" "canTrickyJump" |
|
Entrance condition: {
"comeInWithSpark": {}
}
Requires: {
"shinespark": {
"frames": 32,
"excessFrames": 7
}
}
|
|
From: 2
Left Door
To: 1
Top Right Door
Notable: true 
Time Samus' movement carefully to roll underneath a Blue Hopper and also race it to the far door. Enter the room in ball mode and let the hoppers jump against the wall a couple of times. After the lower hopper has long enough time between jumps, roll under and run to the door. Requires: "Morph" "canPrepareForNextRoom" "canTrickyJump" |
|
From: 2
Left Door
To: 1
Top Right Door
Notable: true Use at least 4 tiles of runway to gain speed, running through the transition. Hold down during and after the transition in order to aim down and squeeze under the Hopper. Then immediately run to the right to make it to the door without taking damage. Entrance condition: {
"comeInRunning": {
"minTiles": 4,
"speedBooster": "any"
}
}
Requires: "canPrepareForNextRoom" "canTwoTileSqueeze" |
|
Enter the room in ball mode and let the hoppers jump against the wall a couple of times. Between hops, unmorph and shoot the lower hopper. Roll under the top hopper until it goes off camera to the left. Requires: "Morph"
"canPrepareForNextRoom"
{
"enemyKill": {
"enemies": [
[
"Blue Sidehopper"
]
]
}
}
"canCameraManip"
|
|
Requires: {
"enemyDamage": {
"enemy": "Blue Sidehopper",
"type": "contact",
"hits": 1
}
}
|
|
Jump far enough to land on the first floor pillar. Entrance condition: {
"comeInShinecharging": {
"length": 0,
"openEnd": 0
}
}
Requires: "canPrepareForNextRoom"
{
"or": [
"SpaceJump",
"canCarefulJump"
]
}
|
|
From: 2
Left Door
To: 1
Top Right Door
Entrance condition: {
"comeInShinecharged": {
"framesRequired": 160
}
}
Requires: "canShinechargeMovementTricky"
{
"enemyDamage": {
"enemy": "Blue Sidehopper",
"type": "contact",
"hits": 1
}
}
Exit condition: {
"leaveShinecharged": {
"framesRemaining": "auto"
}
}
|
|
Requires: "never" Exit condition: {
"leaveWithRunway": {
"length": 1,
"openEnd": 1
}
}
|
|
Notable: true 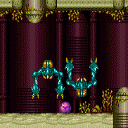
Enter the room from the left door, morph, and wait at the left wall. After 6 hops, the bottom Hopper will do three big hops in a row. Roll under the Hopper while it does the third of those three big hops. Quickly unmorph and run to the right side of the room. If successful, both Hoppers will remain off-camera, so you can safely Crystal Flash. Reset the room through the top door before returning to the left. Requires: {
"resetRoom": {
"nodes": [
1
],
"mustStayPut": false
}
}
{
"resetRoom": {
"nodes": [
2
],
"mustStayPut": false
}
}
"canTrickyJump"
"h_canCrystalFlash"
|
|
Requires: {
"enemyDamage": {
"enemy": "Blue Sidehopper",
"type": "contact",
"hits": 1
}
}
Exit condition: {
"leaveWithGModeSetup": {}
}
|
|
Requires: "canPrepareForNextRoom"
{
"or": [
{
"and": [
"ScrewAttack",
"SpaceJump"
]
},
{
"and": [
"Morph",
{
"or": [
"canTrickyJump",
{
"enemyKill": {
"enemies": [
[
"Blue Sidehopper"
]
]
}
}
]
}
]
}
]
}
Exit condition: {
"leaveWithGModeSetup": {}
}
|
|
Requires: {
"enemyDamage": {
"enemy": "Blue Sidehopper",
"type": "contact",
"hits": 1
}
}
|
{
"$schema": "../../../schema/m3-room.schema.json",
"id": 230,
"name": "Blue Hopper Room",
"area": "Tourian",
"subarea": "Main",
"playable": true,
"roomAddress": "0x7DC19",
"roomEnvironments": [
{
"heated": false
}
],
"nodes": [
{
"id": 1,
"name": "Top Right Door",
"nodeType": "door",
"nodeSubType": "blue",
"nodeAddress": "0x001aa08",
"doorEnvironments": [
{
"physics": "air"
}
]
},
{
"id": 2,
"name": "Left Door",
"nodeType": "door",
"nodeSubType": "blue",
"nodeAddress": "0x001aa14",
"doorEnvironments": [
{
"physics": "air"
}
],
"useImplicitDoorUnlocks": false
}
],
"enemies": [
{
"id": "e1",
"groupName": "Blue Hoppers",
"enemyName": "Blue Sidehopper",
"quantity": 2,
"homeNodes": [
1,
2
]
}
],
"reusableRoomwideNotable": [
{
"name": "Blue Hopper Dodge",
"note": [
"Enter through the far left side of the door.",
"Wait for the top hopper to move right to start running.",
"Run under the right Hopper and jump over the left Hopper to avoid all damage.",
"Jump when Samus reaches the leftmost lump in the ground to avoid the left hopper.",
"It helps to keep the camera scrolled to the right."
]
}
],
"links": [
{
"from": 1,
"to": [
{
"id": 1
},
{
"id": 2
}
]
},
{
"from": 2,
"to": [
{
"id": 1
},
{
"id": 2
}
]
}
],
"strats": [
{
"link": [
1,
1
],
"name": "Leave With Door Frame Below",
"requires": [],
"exitCondition": {
"leaveWithDoorFrameBelow": {
"height": 3
}
}
},
{
"link": [
1,
1
],
"name": "Leave With Platform Below",
"requires": [],
"exitCondition": {
"leaveWithPlatformBelow": {
"height": 8.5,
"leftPosition": -1.5,
"rightPosition": 1.5
}
},
"devNote": "Additional platforms could be added, but they don't yet appear to have applications."
},
{
"link": [
1,
1
],
"name": "G-Mode Regain Mobility",
"requires": [
{
"enemyDamage": {
"enemy": "Blue Sidehopper",
"type": "contact",
"hits": 1
}
}
],
"gModeRegainMobility": {}
},
{
"link": [
1,
2
],
"name": "Blue Hopper Dodge (Normal Entry)",
"notable": true,
"entranceCondition": {
"comeInNormally": {},
"comesThroughToilet": "no"
},
"requires": [
"canTrickyJump",
{
"or": [
"canPrepareForNextRoom",
{
"and": [
"canCameraManip",
"canMoonwalk",
"canInsaneJump"
]
}
]
}
],
"unlocksDoors": [
{
"types": [
"super"
],
"requires": []
},
{
"types": [
"missiles",
"powerbomb"
],
"requires": [
{
"enemyDamage": {
"enemy": "Blue Sidehopper",
"type": "contact",
"hits": 1
}
}
]
}
],
"reusableRoomwideNotable": "Blue Hopper Dodge",
"note": [
"Enter through the far left side of the door.",
"Wait for the top hopper to move right to start running.",
"Run under the right Hopper and jump over the left Hopper to avoid all damage.",
"Jump when Samus reaches the leftmost lump in the ground to avoid the left hopper.",
"It helps to keep the camera scrolled to the right."
]
},
{
"link": [
1,
2
],
"name": "Blue Hopper Dodge (Toilet Entry)",
"notable": true,
"entranceCondition": {
"comeInNormally": {},
"comesThroughToilet": "any"
},
"requires": [
"canCameraManip",
"canMoonwalk",
"canInsaneJump"
],
"unlocksDoors": [
{
"types": [
"super"
],
"requires": []
},
{
"types": [
"missiles",
"powerbomb"
],
"requires": [
{
"enemyDamage": {
"enemy": "Blue Sidehopper",
"type": "contact",
"hits": 1
}
}
]
}
],
"reusableRoomwideNotable": "Blue Hopper Dodge",
"note": [
"Try to scroll the camera to the right to keep the left Hopper off-camera for longer.",
"Wait for the top hopper to move right to start running.",
"Run under the right Hopper and jump over the left Hopper to avoid all damage.",
"Jump when Samus reaches the leftmost lump in the ground to avoid the left hopper."
]
},
{
"link": [
1,
2
],
"name": "Screw Attack",
"requires": [
"ScrewAttack",
"canCarefulJump",
{
"or": [
"canTrickyJump",
"SpaceJump",
{
"and": [
"canCameraManip",
"canPrepareForNextRoom"
]
},
{
"and": [
"canCameraManip",
"canMoonwalk"
]
}
]
}
],
"unlocksDoors": [
{
"types": [
"super"
],
"requires": []
},
{
"types": [
"missiles",
"powerbomb"
],
"requires": [
{
"enemyDamage": {
"enemy": "Blue Sidehopper",
"type": "contact",
"hits": 1
}
}
]
}
],
"note": [
"Wait for the top hopper to move right, then jump through the left hopper.",
"The left hopper may be harder to dodge if the camera is scrolled to the left."
]
},
{
"link": [
1,
2
],
"name": "Kill the enemies",
"requires": [
"canDodgeWhileShooting",
"canTrickyJump",
"canCameraManip",
{
"enemyKill": {
"enemies": [
[
"Blue Sidehopper",
"Blue Sidehopper"
]
]
}
}
],
"unlocksDoors": [
{
"types": [
"ammo"
],
"requires": []
}
],
"note": [
"Kill the top hopper quickly; the left hopper is more random.",
"To be safe, plan to retreat right while attacking.",
"It also helps to attempt to move the hopper off camera between attacks."
]
},
{
"link": [
1,
2
],
"name": "Take the Damage",
"requires": [
{
"enemyDamage": {
"enemy": "Blue Sidehopper",
"type": "contact",
"hits": 1
}
},
{
"or": [
"canHorizontalDamageBoost",
"canTrickyJump",
"canHitbox",
{
"enemyDamage": {
"enemy": "Blue Sidehopper",
"type": "contact",
"hits": 1
}
}
]
}
],
"unlocksDoors": [
{
"types": [
"super"
],
"requires": []
},
{
"types": [
"missiles",
"powerbomb"
],
"requires": [
{
"enemyDamage": {
"enemy": "Blue Sidehopper",
"type": "contact",
"hits": 1
}
}
]
}
],
"note": [
"Wait for the left hopper to move right so it does not follow Samus as IFrames run out.",
"A damage boost using the top hopper also moves through the room fast enough to be safe."
]
},
{
"link": [
1,
2
],
"name": "G-Mode Setup - Tank During Setup",
"notable": false,
"requires": [
{
"enemyDamage": {
"enemy": "Blue Sidehopper",
"type": "contact",
"hits": 1
}
}
],
"exitCondition": {
"leaveWithGModeSetup": {}
},
"unlocksDoors": [
{
"types": [
"super"
],
"requires": []
},
{
"types": [
"missiles",
"powerbomb"
],
"requires": [
{
"enemyDamage": {
"enemy": "Blue Sidehopper",
"type": "contact",
"hits": 1
}
}
]
}
]
},
{
"link": [
1,
2
],
"name": "G-Mode Setup - Prepared Dodge",
"notable": false,
"requires": [
{
  "or": [
    "ScrewAttack",
    "canTrickyJump",
    {
      "and": [
        "canDodgeWhileShooting",
        "canCameraManip",
        {
          "enemyKill": {
            "enemies": [
              [
                "Blue Sidehopper",
                "Blue Sidehopper"
              ]
            ]
          }
        }
      ]
    }
  ]
}
],
"exitCondition": {
"leaveWithGModeSetup": {}
},
"unlocksDoors": [
{
"types": [
"super"
],
"requires": []
},
{
"types": [
"missiles",
"powerbomb"
],
"requires": [
{
"enemyDamage": {
"enemy": "Blue Sidehopper",
"type": "contact",
"hits": 1
}
}
]
}
]
},
{
"link": [
1,
2
],
"name": "Come in Shinecharged, Leave With Spark (Tank the Damage)",
"entranceCondition": {
"comeInShinecharged": {
"framesRequired": 95
},
"comesThroughToilet": "no"
},
"requires": [
"canShinechargeMovementTricky",
{
"enemyDamage": {
"enemy": "Blue Sidehopper",
"type": "contact",
"hits": 1
}
},
"canMidairShinespark",
{
"shinespark": {
"frames": 21
}
}
],
"exitCondition": {
"leaveWithSpark": {}
},
"unlocksDoors": [
{
"types": [
"super"
],
"requires": []
},
{
"types": [
"missiles",
"powerbomb"
],
"requires": [
"never"
]
}
]
},
{
"link": [
2,
1
],
"name": "Blue Hopper Room Screw Attack Jumps",
"notable": true,
"requires": [
"canPrepareForNextRoom",
"ScrewAttack",
"canTrickyJump"
],
"note": [
"Spin jump into the room with Screw Attack, holding left through the transition to land near the door.",
"Do a turn-around spin jump to the right, bonking the ceiling and overhang and then falling straight down.",
"Then run and spin jump to the right through the Hoppers, to make it to the door without taking damage."
]
},
{
"link": [
2,
1
],
"name": "Shinespark",
"entranceCondition": {
"comeInWithSpark": {}
},
"requires": [
{
  "shinespark": {
    "frames": 32,
    "excessFrames": 7
  }
}
]
},
{
"link": [
2,
1
],
"name": "Blue Hopper Room Roll Under Hoppers",
"notable": true,
"requires": [
"Morph",
"canPrepareForNextRoom",
"canTrickyJump"
],
"note": [
"Time Samus' movement carefully to roll underneath a Blue Hopper and also race it to the far door.",
"Enter the room in ball mode and let the hoppers jump against the wall a couple of times.",
"After the lower hopper has long enough time between jumps, roll under and run to the door."
]
},
{
"link": [
2,
1
],
"name": "Blue Hopper Room Squeeze Under Hoppers",
"notable": true,
"entranceCondition": {
"comeInRunning": {
"minTiles": 4,
"speedBooster": "any"
}
},
"requires": [
"canPrepareForNextRoom",
"canTwoTileSqueeze"
],
"note": [
"Use at least 4 tiles of runway to gain speed, running through the transition.",
"Hold down during and after the transition in order to aim down and squeeze under the Hopper.",
"Then immediately run to the right to make it to the door without taking damage."
]
},
{
"link": [
2,
1
],
"name": "Kill Hopper",
"requires": [
"Morph",
"canPrepareForNextRoom",
{
"enemyKill": {
"enemies": [
[
"Blue Sidehopper"
]
]
}
},
"canCameraManip"
],
"unlocksDoors": [
{
"nodeId": 1,
"types": [
"ammo"
],
"requires": []
}
],
"note": [
"Enter the room in ball mode and let the hoppers jump against the wall a couple of times.",
"Between hops, unmorph and shoot the lower hopper.",
"Roll under the top hopper until it goes off camera to the left."
]
},
{
"link": [
2,
1
],
"name": "Take the Damage",
"requires": [
{
  "enemyDamage": {
    "enemy": "Blue Sidehopper",
    "type": "contact",
    "hits": 1
  }
}
]
},
{
"link": [
2,
1
],
"name": "Blue Speed Jump through Hoppers",
"entranceCondition": {
"comeInShinecharging": {
"length": 0,
"openEnd": 0
}
},
"requires": [
"canPrepareForNextRoom",
{
"or": [
"SpaceJump",
"canCarefulJump"
]
}
],
"note": "Jump far enough to land on the first floor pillar.",
"devNote": "This is not the level of precision that would call for canBlueSpaceJump."
},
{
"link": [
2,
1
],
"name": "Carry Shinecharge (Tank the Damage)",
"entranceCondition": {
"comeInShinecharged": {
"framesRequired": 160
}
},
"requires": [
"canShinechargeMovementTricky",
{
  "enemyDamage": {
    "enemy": "Blue Sidehopper",
    "type": "contact",
    "hits": 1
  }
}
],
"exitCondition": {
"leaveShinecharged": {
"framesRemaining": "auto"
}
},
"unlocksDoors": [
{
"types": [
"super"
],
"requires": []
},
{
"types": [
"missiles",
"powerbomb"
],
"requires": [
"never"
]
}
]
},
{
"link": [
2,
2
],
"name": "Leave with Runway",
"requires": [
"never"
],
"exitCondition": {
"leaveWithRunway": {
"length": 1,
"openEnd": 1
}
},
"devNote": "FIXME: Add requirements to be able to use this runway."
},
{
"link": [
2,
2
],
"name": "Tourian Blue Hopper Crystal Flash",
"notable": true,
"requires": [
{
"resetRoom": {
"nodes": [
1
],
"mustStayPut": false
}
},
{
"resetRoom": {
"nodes": [
2
],
"mustStayPut": false
}
},
"canTrickyJump",
"h_canCrystalFlash"
],
"note": [
"Enter the room from the left door, morph, and wait at the left wall.",
"After 6 hops, the bottom Hopper will do three big hops in a row.",
"Roll under the Hopper while it does the third of those three big hops.",
"Quickly unmorph and run to the right side of the room.",
"If successful, both Hoppers will remain off-camera, so you can safely Crystal Flash.",
"Reset the room through the top door before returning to the left."
]
},
{
"link": [
2,
2
],
"name": "G-Mode Setup - Tank During Setup",
"notable": false,
"requires": [
{
  "enemyDamage": {
    "enemy": "Blue Sidehopper",
    "type": "contact",
    "hits": 1
  }
}
],
"exitCondition": {
"leaveWithGModeSetup": {}
}
},
{
"link": [
2,
2
],
"name": "G-Mode Setup - Prepared Dodge",
"notable": false,
"requires": [
"canPrepareForNextRoom",
{
"or": [
{
"and": [
"ScrewAttack",
"SpaceJump"
]
},
{
"and": [
"Morph",
{
"or": [
"canTrickyJump",
{
"enemyKill": {
"enemies": [
[
"Blue Sidehopper"
]
]
}
}
]
}
]
}
]
}
],
"exitCondition": {
"leaveWithGModeSetup": {}
}
},
{
"link": [
2,
2
],
"name": "G-Mode Regain Mobility",
"requires": [
{
"enemyDamage": {
"enemy": "Blue Sidehopper",
"type": "contact",
"hits": 1
}
}
],
"gModeRegainMobility": {}
}
]
}