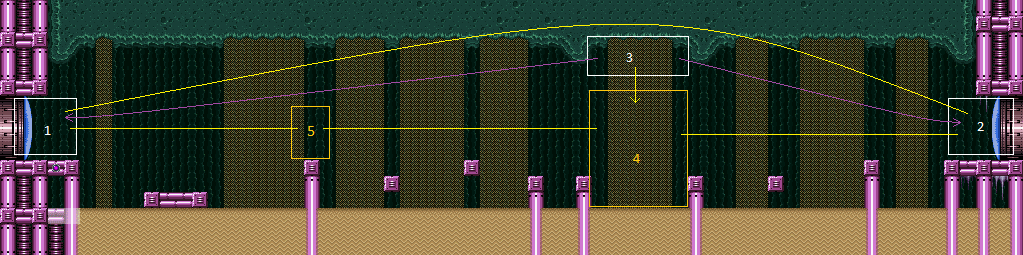
West Sand Hall
Room ID: 199
|
Exit condition: {
"leaveWithRunway": {
"length": 4,
"openEnd": 1
}
}
|
|
Requires: "h_canCrystalFlash" |
|
Entrance condition: {
"comeInWithSpark": {}
}
Requires: {
"shinespark": {
"frames": 99,
"excessFrames": 5
}
}
|
|
Entrance condition: {
"comeInWithSpark": {}
}
Requires: "Gravity"
{
"shinespark": {
"frames": 77,
"excessFrames": 4
}
}
|
|
Entrance condition: {
"comeInShinecharging": {
"length": 3,
"openEnd": 0
}
}
Requires: "Gravity"
"canHorizontalShinespark"
{
"shinespark": {
"frames": 76,
"excessFrames": 4
}
}
|
|
From: 1
Left Door
To: 2
Right Door
Gain an extra half-tile of runway by coming in very slowly to prevent falling off. Entrance condition: {
"comeInShinecharging": {
"length": 1,
"openEnd": 0
}
}
Requires: "canShinechargeMovementComplex"
"canSlowShortCharge"
"canMidairShinespark"
{
"canShineCharge": {
"usedTiles": 14,
"openEnd": 0
}
}
{
"shinespark": {
"frames": 88,
"excessFrames": 5
}
}
|
|
Entrance condition: {
"comeInWithGMode": {
"mode": "any",
"morphed": false
}
}
Requires: "h_canNavigateUnderwater"
{
"or": [
"canCarefulJump",
"h_canCrouchJumpDownGrab",
"HiJump",
"Gravity",
"canSpringBallJumpMidAir"
]
}
{
"or": [
"canCarefulJump",
{
"enemyDamage": {
"enemy": "Evir",
"type": "particle",
"hits": 1
}
}
]
}
|
|
Requires: "Gravity" |
|
Requires: "canSuitlessMaridia" "HiJump" "canTrickySpringBallJump" "canPlayInSand" |
|
From: 1
Left Door
To: 5
Left Pillar Junction
Notable: true 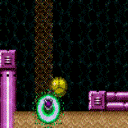
Time a bomb to hit Samus when she is morphed, 1 pixel into the sand, inside a sandfall, and moving horizontally. There is a setup using a Sand IBJ to rise up the sandfall from the floor and Sandfall Bounce with the correct timing. An alternate setup places the bomb before entering the sand and jumps into it with a very fast jump morph, using HiJump. Requires: "canSuitlessMaridia"
"canTrickyJump"
"canSandfallBounce"
"h_canUseMorphBombs"
{
"or": [
"canSandIBJ",
{
"and": [
"HiJump",
"can4HighMidAirMorph"
]
}
]
}
|
|
Gain momentum in the room to the left, then jump at the edge of the runway in order to land on the first pillar. Requires a runway of at least 2 tiles (with no open end) in the adjacent room. Entrance condition: {
"comeInRunning": {
"speedBooster": "any",
"minTiles": 1.4375
}
}
Requires: "HiJump" "canCrossRoomJumpIntoWater" "canTrickyJump" "canPlayInSand" |
|
Gain momentum in the room to the left, then jump in this room in order to land on the first pillar. Ensure that Speed Booster is disabled. With a short runway of 5 tiles in the adjacent room, it is required to jump as late as possible at the edge of the runway in this room. With any longer of a runway, the jump is much less precise. Entrance condition: {
"comeInRunning": {
"speedBooster": false,
"minTiles": 5
}
}
Requires: "canCrossRoomJumpIntoWater" "canPlayInSand" "canCarefulJump" |
|
Gain momentum in the room to the left, then jump in this room in order to land on the first pillar. Ensure that Speed Booster is disabled. With a short runway of 5 tiles (with no open end) in the adjacent room, it is required to jump as late as possible at the edge of the runway in this room. With any longer of a runway, the jump is much less precise. Entrance condition: {
"comeInRunning": {
"speedBooster": false,
"minTiles": 4.4375
}
}
Requires: "canCrossRoomJumpIntoWater" "canPlayInSand" "canTrickyJump" |
|
From: 1
Left Door
To: 5
Left Pillar Junction
Notable: true 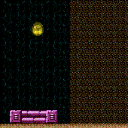

Enter with at least 1 tile of run speed from an air room, with Speedbooster unequipped. Jump from near the end of the runway (though a jump from 1-2 tiles away from the end can still work). Press pause while crossing the narrow first sandfall, then perform a lateral mid-air morph after exiting the sandfall. Equip both Spring Ball and Speed Booster, and perform a mid-air Spring Ball jump at somewhere close to the maximum height. Unequip Spring Ball while descending through the wide second sidefall. Entrance condition: {
"comeInRunning": {
"speedBooster": true,
"minTiles": 1
}
}
Requires: "canCrossRoomJumpIntoWater" "canPlayInSand" "canLateralMidAirMorph" "canTrickySpringBallJump" "canSpringFling" |
|
Requires a runway of 7 tiles (with no open end) in the adjacent room. Perform an air ball before hitting the ceiling in order to land on the first pillar. Entrance condition: {
"comeInJumping": {
"speedBooster": false,
"minTiles": 6.4375
}
}
Requires: "canLateralMidAirMorph" "canCrossRoomJumpIntoWater" "canPlayInSand" |
|
From: 1
Left Door
To: 5
Left Pillar Junction
Requires a runway of only approximately 0.5 tiles in the adjacent room. Perform an air ball before hitting the ceiling in order to land on the first pillar. Entrance condition: {
"comeInJumping": {
"speedBooster": "any",
"minTiles": 1
}
}
Requires: "canLateralMidAirMorph" "canCrossRoomJumpIntoWater" "HiJump" "canPlayInSand" |
|
Bomb boost through the doorway. Get the bomb boost while as close to the door transition as possible in order to get to the first pillar. Entrance condition: {
"comeInWithBombBoost": {}
}
Requires: "canCrossRoomJumpIntoWater" |
|
Entrance condition: {
"comeInWithSpark": {}
}
Requires: {
"shinespark": {
"frames": 99,
"excessFrames": 5
}
}
|
|
Entrance condition: {
"comeInWithSpark": {}
}
Requires: "Gravity"
{
"shinespark": {
"frames": 78,
"excessFrames": 4
}
}
|
|
Entrance condition: {
"comeInShinecharging": {
"length": 3,
"openEnd": 0
}
}
Requires: "Gravity"
"canHorizontalShinespark"
{
"shinespark": {
"frames": 76,
"excessFrames": 4
}
}
|
|
From: 2
Right Door
To: 1
Left Door
Gain an extra half-tile of runway by coming in very slowly to prevent falling off. Entrance condition: {
"comeInShinecharging": {
"length": 1,
"openEnd": 0
}
}
Requires: "canShinechargeMovementComplex"
"canSlowShortCharge"
"canMidairShinespark"
{
"canShineCharge": {
"usedTiles": 14,
"openEnd": 0
}
}
{
"shinespark": {
"frames": 90,
"excessFrames": 5
}
}
|
|
Entrance condition: {
"comeInWithGMode": {
"mode": "any",
"morphed": false
}
}
Requires: "h_canNavigateUnderwater" "canCarefulJump" |
|
Entrance condition: {
"comeInWithGrappleTeleport": {
"blockPositions": [
[
7,
2
]
]
}
}
|
|
Exit condition: {
"leaveWithRunway": {
"length": 4,
"openEnd": 1
}
}
|
|
Requires: "h_canCrystalFlash" |
|
From: 2
Right Door
To: 2
Right Door
Requires: "Gravity" Exit condition: {
"leaveWithGModeSetup": {}
}
|
|
From: 2
Right Door
To: 2
Right Door
The Evir won't shoot unless Samus is on the left tile of the platform. Getting to the transition tiles while standing before the projectile can be tricky. Either do two quick small spin jumps, one onto it and one back, breaking spin before landing both times, or start with Samus' toe barely on the last tile, move left then do a short spin jump to the right, also breaking spin before landing. Requires: "canSuitlessMaridia" "canTurnaroundSpinJump" "canTrickyJump" Exit condition: {
"leaveWithGModeSetup": {}
}
|
|
Requires: "Gravity" "SpaceJump" |
|
From: 2
Right Door
To: 4
Below Sand Entrance
Requires: "Gravity"
{
"or": [
"ScrewAttack",
"canCarefulJump",
{
"enemyDamage": {
"enemy": "Evir",
"type": "particle",
"hits": 1
}
}
]
}
|
|
From: 2
Right Door
To: 4
Below Sand Entrance
Requires: "canSuitlessMaridia"
"HiJump"
"canPlayInSand"
{
"or": [
"canCarefulJump",
{
"enemyDamage": {
"enemy": "Evir",
"type": "particle",
"hits": 1
}
}
]
}
|
|
From: 2
Right Door
To: 4
Below Sand Entrance
It is possible to cross this segment with nothing. Cancel spin before hitting the sand, then get a good jump off the sand in multiple places. Requires: "canSuitlessMaridia" "canTrickyJump" "canPlayInSand" |
|
Entrance condition: {
"comeInWithGMode": {
"mode": "any",
"morphed": false
},
"comesThroughToilet": "any"
}
Requires: "h_canNavigateUnderwater"
{
"or": [
"canCarefulJump",
"h_canCrouchJumpDownGrab",
"HiJump",
"Gravity",
"canSpringBallJumpMidAir"
]
}
{
"or": [
"canCarefulJump",
{
"enemyDamage": {
"enemy": "Evir",
"type": "particle",
"hits": 1
}
}
]
}
|
|
Entrance condition: {
"comeInWithGMode": {
"mode": "any",
"morphed": false
},
"comesThroughToilet": "any"
}
Requires: "h_canNavigateUnderwater" |
|
Requires: {
"enemyDamage": {
"enemy": "Evir",
"type": "particle",
"hits": 1
}
}
|
|
Enter on the right side of the transition and move left to avoid damage. Requires: "canPrepareForNextRoom"
"canPlayInSand"
"canTrickyJump"
{
"or": [
"Gravity",
"HiJump",
"canInsaneJump"
]
}
|
|
Requires: "Gravity" "SpaceJump" |
|
From: 4
Below Sand Entrance
To: 2
Right Door
Requires: "Gravity"
{
"or": [
"canPlayInSand",
"canUseFrozenEnemies",
"canCarefulJump"
]
}
{
"or": [
"canCarefulJump",
{
"enemyDamage": {
"enemy": "Evir",
"type": "particle",
"hits": 1
}
}
]
}
|
|
From: 4
Below Sand Entrance
To: 2
Right Door
Requires: "canSuitlessMaridia"
"canPlayInSand"
"HiJump"
{
"or": [
"canCarefulJump",
{
"enemyDamage": {
"enemy": "Evir",
"type": "particle",
"hits": 1
}
}
]
}
|
|
From: 4
Below Sand Entrance
To: 2
Right Door
Notable: true 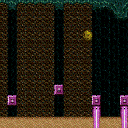
Perform multiple stationary lateral mid-air morphs, while avoiding the Evir projectiles, to cross the room. It is necessary to start the jumps from the far side of the platforms in order to gain more horizontal momentum before entering the sand falls. Falling into the sand will often result in a soft lock. Requires: "canSuitlessMaridia"
"canPlayInSand"
"h_canMaxHeightSpringBallJump"
"canStationaryLateralMidAirMorph"
{
"or": [
{
"enemyKill": {
"enemies": [
[
"Evir"
]
],
"explicitWeapons": [
"Super",
"Missile",
"PowerBombPeriphery",
"Plasma"
]
}
},
{
"enemyDamage": {
"enemy": "Evir",
"type": "particle",
"hits": 1
}
}
]
}
|
|
From: 4
Below Sand Entrance
To: 2
Right Door
Notable: true .png)
.gif)
From the sand fall, quickly get onto the left platform to prevent the right side Evir from lowering too far. Freeze the right Evir, then jump on the sand to the right while shooting ice over the first Evir to also freeze the second. Freezing the first Evir very high up would also work. As a backup, it may be possible to make them rise again by hitting them with a PB - place the PB in the air to avoid double hitting and killing them. Requires: "canSuitlessMaridia" "canPlayInSand" "canTrickyJump" "canTrickyUseFrozenEnemies" |
|
Requires: "Gravity" "SpaceJump" |
|
From: 4
Below Sand Entrance
To: 5
Left Pillar Junction
Requires: "Gravity"
{
"or": [
"canPlayInSand",
"canWalljump",
"h_canUseSpringBall",
"canCarefulJump"
]
}
{
"or": [
{
"and": [
"ScrewAttack",
"canCarefulJump"
]
},
"canTrickyJump",
{
"enemyDamage": {
"enemy": "Evir",
"type": "particle",
"hits": 1
}
}
]
}
|
|
From: 4
Below Sand Entrance
To: 5
Left Pillar Junction
Requires: "canSuitlessMaridia"
"HiJump"
"canPlayInSand"
{
"or": [
"canTrickyJump",
{
"enemyDamage": {
"enemy": "Evir",
"type": "particle",
"hits": 1
}
}
]
}
|
|
From: 4
Below Sand Entrance
To: 5
Left Pillar Junction
Notable: true
Perform multiple stationary lateral mid-air morphs, while avoiding the Evir projectiles, to cross the room. It is necessary to start the jumps from the far side of the platforms in order to gain more horizontal momentum before entering the sand falls. Falling into the sand will often result in a soft lock. Requires: "canSuitlessMaridia"
"canPlayInSand"
"h_canMaxHeightSpringBallJump"
{
"or": [
{
"enemyKill": {
"enemies": [
[
"Evir"
]
],
"explicitWeapons": [
"Super",
"Missile",
"PowerBombPeriphery",
"Plasma"
]
}
},
{
"enemyDamage": {
"enemy": "Evir",
"type": "particle",
"hits": 1
}
}
]
}
|
|
From: 4
Below Sand Entrance
To: 5
Left Pillar Junction
Notable: true .png)
.gif)
Freeze the Evir quickly before it descends and use it to get to the platforms. Getting a good jump while on the right side of the floating block can get Samus to the leftmost block. With a clean jump off of the sand, Samus can then get onto the final vertical pillar. Requires: "canSuitlessMaridia" "canPlayInSand" "canTrickyJump" "canTrickyUseFrozenEnemies" |
|
From: 4
Below Sand Entrance
To: 5
Left Pillar Junction
Notable: true .png)
.gif)
Use the projectile from a fully submerged Evir to boost Samus into the sandfall, providing just enough height to make the first and hardest jump. Time the projectile to hit Samus when at the maximum height from a jump. The hit must be on the right side of Samus and with no inputs held, but also hold forward during the damage knockback to move through the sandfall. Getting a good jump while on the right side of the next floating block can get Samus to the leftmost block. With a clean jump off of the sand, Samus can then get onto the final vertical pillar. Requires: "canSuitlessMaridia"
"canPlayInSand"
"canInsaneJump"
"canCrouchJump"
"canNeutralDamageBoost"
{
"enemyDamage": {
"enemy": "Evir",
"type": "particle",
"hits": 1
}
}
|
|
Requires: "h_canNavigateUnderwater"
{
"or": [
"Gravity",
"canPlayInSand",
"HiJump"
]
}
|
|
Fall into the sand and roll all the way to the left, through an invisible tile and under the door platform. Shoot upwards to break part of the platform, then perform a crouch jump and down grab or a tile-wide wall jump climb to escape. Requires: "canSuitlessMaridia"
"Morph"
{
"or": [
"canSunkenTileWideWallClimb",
"h_canCrouchJumpDownGrab"
]
}
|
|
Requires: "Gravity" "SpaceJump" |
|
From: 5
Left Pillar Junction
To: 4
Below Sand Entrance
Requires: "Gravity"
{
"or": [
"HiJump",
"canPreciseWalljump",
"canPlayInSand"
]
}
{
"or": [
"canTrickyJump",
{
"enemyDamage": {
"enemy": "Evir",
"type": "particle",
"hits": 1
}
}
]
}
|
|
From: 5
Left Pillar Junction
To: 4
Below Sand Entrance
Requires: "canSuitlessMaridia"
"HiJump"
"canPlayInSand"
{
"or": [
"canCarefulJump",
"canSpringBallJumpMidAir"
]
}
{
"or": [
"canTrickyJump",
{
"enemyDamage": {
"enemy": "Evir",
"type": "particle",
"hits": 1
}
}
]
}
|
|
From: 5
Left Pillar Junction
To: 4
Below Sand Entrance
Notable: true
Perform multiple stationary lateral mid-air morphs, while avoiding the Evir projectiles, to cross the room. It is necessary to start the jumps from the far side of the platforms in order to gain more horizontal momentum before entering the sand falls. Falling into the sand will often result in a soft lock. Requires: "canSuitlessMaridia" "canPlayInSand" "h_canMaxHeightSpringBallJump" "canStationaryLateralMidAirMorph" |
{
"$schema": "../../../schema/m3-room.schema.json",
"id": 199,
"name": "West Sand Hall",
"area": "Maridia",
"subarea": "Inner",
"subsubarea": "Green",
"playable": true,
"roomAddress": "0x7D461",
"roomEnvironments": [
{
"heated": false
}
],
"nodes": [
{
"id": 1,
"name": "Left Door",
"nodeType": "door",
"nodeSubType": "blue",
"nodeAddress": "0x001a63c",
"doorEnvironments": [
{
"physics": "water"
}
]
},
{
"id": 2,
"name": "Right Door",
"nodeType": "door",
"nodeSubType": "blue",
"nodeAddress": "0x001a648",
"doorEnvironments": [
{
"physics": "water"
}
]
},
{
"id": 3,
"name": "Top Sand Entrance",
"nodeType": "entrance",
"nodeSubType": "sandpit",
"nodeAddress": "0x001a654"
},
{
"id": 4,
"name": "Below Sand Entrance",
"nodeType": "junction",
"nodeSubType": "junction"
},
{
"id": 5,
"name": "Left Pillar Junction",
"nodeType": "junction",
"nodeSubType": "junction"
}
],
"enemies": [
{
"id": "e1",
"groupName": "West Sand Hall Right Evirs",
"enemyName": "Evir",
"quantity": 2,
"betweenNodes": [
2,
4
]
},
{
"id": "e2",
"groupName": "West Sand Hall Left Evir",
"enemyName": "Evir",
"quantity": 1,
"betweenNodes": [
1,
4
]
}
],
"reusableRoomwideNotable": [
{
"name": "West Sand Hall Suitless Bootless Spring Ball",
"note": [
"Perform multiple stationary lateral mid-air morphs, while avoiding the Evir projectiles, to cross the room.",
"It is necessary to start the jumps from the far side of the platforms in order to gain more horizontal momentum before entering the sand falls.",
"Falling into the sand will often result in a soft lock."
]
}
],
"links": [
{
"from": 1,
"to": [
{
"id": 1
},
{
"id": 2,
"devNote": "This link is only for sparking and G-Mode. All other strats should go 1 -> 5 -> 4 -> 2."
},
{
"id": 5
}
]
},
{
"from": 2,
"to": [
{
"id": 1,
"devNote": "This link is only for sparking and G-Mode. All other strats should go 2 -> 4 -> 5 -> 1."
},
{
"id": 2
},
{
"id": 4
}
]
},
{
"from": 3,
"to": [
{
"id": 1
},
{
"id": 2
},
{
"id": 4
}
]
},
{
"from": 4,
"to": [
{
"id": 1
},
{
"id": 2
},
{
"id": 5
}
]
},
{
"from": 5,
"to": [
{
"id": 1
},
{
"id": 4
}
]
}
],
"strats": [
{
"link": [
1,
1
],
"name": "Leave with Runway",
"requires": [],
"exitCondition": {
"leaveWithRunway": {
"length": 4,
"openEnd": 1
}
}
},
{
"link": [
1,
1
],
"name": "Crystal Flash",
"requires": [
"h_canCrystalFlash"
]
},
{
"link": [
1,
2
],
"name": "Suitless Shinespark",
"entranceCondition": {
"comeInWithSpark": {}
},
"requires": [
{
  "shinespark": {
    "frames": 99,
    "excessFrames": 5
  }
}
]
},
{
"link": [
1,
2
],
"name": "Shinespark Into Room",
"entranceCondition": {
"comeInWithSpark": {}
},
"requires": [
"Gravity",
{
"shinespark": {
"frames": 77,
"excessFrames": 4
}
}
]
},
{
"link": [
1,
2
],
"name": "Shinespark",
"entranceCondition": {
"comeInShinecharging": {
"length": 3,
"openEnd": 0
}
},
"requires": [
"Gravity",
"canHorizontalShinespark",
{
"shinespark": {
"frames": 76,
"excessFrames": 4
}
}
]
},
{
"link": [
1,
2
],
"name": "Suitless Shinespark, Careful Slow Shinecharge",
"entranceCondition": {
"comeInShinecharging": {
"length": 1,
"openEnd": 0
}
},
"requires": [
"canShinechargeMovementComplex",
"canSlowShortCharge",
"canMidairShinespark",
{
"canShineCharge": {
"usedTiles": 14,
"openEnd": 0
}
},
{
"shinespark": {
"frames": 88,
"excessFrames": 5
}
}
],
"note": "Gain an extra half-tile of runway by coming in very slowly to prevent falling off.",
"devNote": [
"If applicable, the heat frames in the adjacent room may be underrepresented, particularly on a longer runway,",
"but it shouldn't be too bad because with a longer runway, Samus can just come in fully shinecharged."
]
},
{
"link": [
1,
2
],
"name": "G-Mode",
"entranceCondition": {
"comeInWithGMode": {
"mode": "any",
"morphed": false
}
},
"requires": [
"h_canNavigateUnderwater",
{
"or": [
"canCarefulJump",
"h_canCrouchJumpDownGrab",
"HiJump",
"Gravity",
"canSpringBallJumpMidAir"
]
},
{
"or": [
"canCarefulJump",
{
"enemyDamage": {
"enemy": "Evir",
"type": "particle",
"hits": 1
}
}
]
}
]
},
{
"link": [
1,
5
],
"name": "Base",
"requires": [
"Gravity"
]
},
{
"link": [
1,
5
],
"name": "Suitless SpringBall Jump",
"requires": [
"canSuitlessMaridia",
"HiJump",
"canTrickySpringBallJump",
"canPlayInSand"
]
},
{
"link": [
1,
5
],
"name": "West Sand Hall Insane Bomb Jump",
"notable": true,
"requires": [
"canSuitlessMaridia",
"canTrickyJump",
"canSandfallBounce",
"h_canUseMorphBombs",
{
"or": [
"canSandIBJ",
{
"and": [
"HiJump",
"can4HighMidAirMorph"
]
}
]
}
],
"note": [
"Time a bomb to hit Samus when she is morphed, 1 pixel into the sand, inside a sandfall, and moving horizontally.",
"There is a setup using a Sand IBJ to rise up the sandfall from the floor and Sandfall Bounce with the correct timing.",
"An alternate setup places the bomb before entering the sand and jumps into it with a very fast jump morph, using HiJump."
]
},
{
"link": [
1,
5
],
"name": "HiJump with Momentum",
"entranceCondition": {
"comeInRunning": {
"speedBooster": "any",
"minTiles": 1.4375
}
},
"requires": [
"HiJump",
"canCrossRoomJumpIntoWater",
"canTrickyJump",
"canPlayInSand"
],
"note": [
"Gain momentum in the room to the left, then jump at the edge of the runway in order to land on the first pillar.",
"Requires a runway of at least 2 tiles (with no open end) in the adjacent room."
],
"devNote": "This is not technically a canCrossRoomJumpIntoWater, but it is used here because of the way the momentum changes as Samus enters the water."
},
{
"link": [
1,
5
],
"name": "Jump with Momentum",
"entranceCondition": {
"comeInRunning": {
"speedBooster": false,
"minTiles": 5
}
},
"requires": [
"canCrossRoomJumpIntoWater",
"canPlayInSand",
"canCarefulJump"
],
"note": [
"Gain momentum in the room to the left, then jump in this room in order to land on the first pillar. Ensure that Speed Booster is disabled.",
"With a short runway of 5 tiles in the adjacent room, it is required to jump as late as possible at the edge of the runway in this room.",
"With any longer of a runway, the jump is much less precise."
],
"devNote": "This is not technically a canCrossRoomJumpIntoWater, but it is used here because of the way the momentum changes as Samus enters the water."
},
{
"link": [
1,
5
],
"name": "Tricky Jump with Momentum",
"entranceCondition": {
"comeInRunning": {
"speedBooster": false,
"minTiles": 4.4375
}
},
"requires": [
"canCrossRoomJumpIntoWater",
"canPlayInSand",
"canTrickyJump"
],
"note": [
"Gain momentum in the room to the left, then jump in this room in order to land on the first pillar. Ensure that Speed Booster is disabled.",
"With a short runway of 5 tiles (with no open end) in the adjacent room, it is required to jump as late as possible at the edge of the runway in this room.",
"With any longer of a runway, the jump is much less precise."
],
"devNote": "This is not technically a canCrossRoomJumpIntoWater, but it is used here because of the way the momentum changes as Samus enters the water."
},
{
"link": [
1,
5
],
"name": "West Sand Hall Spring Fling with Momentum",
"notable": true,
"entranceCondition": {
"comeInRunning": {
"speedBooster": true,
"minTiles": 1
}
},
"requires": [
"canCrossRoomJumpIntoWater",
"canPlayInSand",
"canLateralMidAirMorph",
"canTrickySpringBallJump",
"canSpringFling"
],
"note": [
"Enter with at least 1 tile of run speed from an air room, with Speedbooster unequipped.",
"Jump from near the end of the runway (though a jump from 1-2 tiles away from the end can still work).",
"Press pause while crossing the narrow first sandfall, then perform a lateral mid-air morph after exiting the sandfall.",
"Equip both Spring Ball and Speed Booster, and perform a mid-air Spring Ball jump at somewhere close to the maximum height.",
"Unequip Spring Ball while descending through the wide second sidefall."
]
},
{
"link": [
1,
5
],
"name": "Cross Room Jump into Air Ball",
"entranceCondition": {
"comeInJumping": {
"speedBooster": false,
"minTiles": 6.4375
}
},
"requires": [
"canLateralMidAirMorph",
"canCrossRoomJumpIntoWater",
"canPlayInSand"
],
"note": [
"Requires a runway of 7 tiles (with no open end) in the adjacent room.",
"Perform an air ball before hitting the ceiling in order to land on the first pillar."
]
},
{
"link": [
1,
5
],
"name": "Cross Room Jump into Air Ball with HiJump",
"entranceCondition": {
"comeInJumping": {
"speedBooster": "any",
"minTiles": 1
}
},
"requires": [
"canLateralMidAirMorph",
"canCrossRoomJumpIntoWater",
"HiJump",
"canPlayInSand"
],
"note": [
"Requires a runway of only approximately 0.5 tiles in the adjacent room.",
"Perform an air ball before hitting the ceiling in order to land on the first pillar."
]
},
{
"link": [
1,
5
],
"name": "Cross Room Jump with Bomb Boost",
"entranceCondition": {
"comeInWithBombBoost": {}
},
"requires": [
"canCrossRoomJumpIntoWater"
],
"note": "Bomb boost through the doorway. Get the bomb boost while as close to the door transition as possible in order to get to the first pillar."
},
{
"link": [
2,
1
],
"name": "Suitless Shinespark",
"entranceCondition": {
"comeInWithSpark": {}
},
"requires": [
{
  "shinespark": {
    "frames": 99,
    "excessFrames": 5
  }
}
]
},
{
"link": [
2,
1
],
"name": "Shinespark Into Room",
"entranceCondition": {
"comeInWithSpark": {}
},
"requires": [
"Gravity",
{
"shinespark": {
"frames": 78,
"excessFrames": 4
}
}
]
},
{
"link": [
2,
1
],
"name": "Shinespark",
"entranceCondition": {
"comeInShinecharging": {
"length": 3,
"openEnd": 0
}
},
"requires": [
"Gravity",
"canHorizontalShinespark",
{
"shinespark": {
"frames": 76,
"excessFrames": 4
}
}
]
},
{
"link": [
2,
1
],
"name": "Suitless Shinespark, Careful Slow Shinecharge",
"entranceCondition": {
"comeInShinecharging": {
"length": 1,
"openEnd": 0
}
},
"requires": [
"canShinechargeMovementComplex",
"canSlowShortCharge",
"canMidairShinespark",
{
"canShineCharge": {
"usedTiles": 14,
"openEnd": 0
}
},
{
"shinespark": {
"frames": 90,
"excessFrames": 5
}
}
],
"note": "Gain an extra half-tile of runway by coming in very slowly to prevent falling off.",
"devNote": [
"If applicable, the heat frames in the adjacent room may be underrepresented, particularly on a longer runway,",
"but it shouldn't be too bad because with a longer runway, Samus can just come in fully shinecharged."
]
},
{
"link": [
2,
1
],
"name": "G-Mode",
"entranceCondition": {
"comeInWithGMode": {
"mode": "any",
"morphed": false
}
},
"requires": [
"h_canNavigateUnderwater",
"canCarefulJump"
]
},
{
"link": [
2,
1
],
"name": "Grapple Teleport",
"entranceCondition": {
"comeInWithGrappleTeleport": {
"blockPositions": [
[
7,
2
]
]
}
},
"requires": []
},
{
"link": [
2,
2
],
"name": "Leave with Runway",
"requires": [],
"exitCondition": {
"leaveWithRunway": {
"length": 4,
"openEnd": 1
}
}
},
{
"link": [
2,
2
],
"name": "Crystal Flash",
"requires": [
"h_canCrystalFlash"
]
},
{
"link": [
2,
2
],
"name": "G-Mode Setup - Get Hit By Evir Projectile",
"notable": false,
"requires": [
"Gravity"
],
"exitCondition": {
"leaveWithGModeSetup": {}
}
},
{
"link": [
2,
2
],
"name": "G-Mode Setup - Get Hit By Evir Projectile Suitless",
"notable": false,
"requires": [
"canSuitlessMaridia",
"canTurnaroundSpinJump",
"canTrickyJump"
],
"exitCondition": {
"leaveWithGModeSetup": {}
},
"note": [
"The Evir won't shoot unless Samus is on the left tile of the platform. Getting to the transition tiles while standing before the projectile can be tricky.",
"Either do two quick small spin jumps, one onto it and one back, breaking spin before landing both times,",
"or start with Samus' toe barely on the last tile, move left then do a short spin jump to the right, also breaking spin before landing."
]
},
{
"link": [
2,
4
],
"name": "Base",
"requires": [
"Gravity",
"SpaceJump"
]
},
{
"link": [
2,
4
],
"name": "Gravity Platforming (Right to Center)",
"requires": [
"Gravity",
{
"or": [
"ScrewAttack",
"canCarefulJump",
{
  "enemyDamage": {
    "enemy": "Evir",
    "type": "particle",
    "hits": 1
  }
}
]
}
]
},
{
"link": [
2,
4
],
"name": "Suitless HiJump (Right to Center)",
"requires": [
"canSuitlessMaridia",
"HiJump",
"canPlayInSand",
{
"or": [
"canCarefulJump",
{
"enemyDamage": {
"enemy": "Evir",
"type": "particle",
"hits": 1
}
}
]
}
]
},
{
"link": [
2,
4
],
"name": "Suitless Itemless (Right to Center)",
"requires": [
"canSuitlessMaridia",
"canTrickyJump",
"canPlayInSand"
],
"note": "It is possible to cross this segment with nothing. Cancel spin before hitting the sand, then get a good jump off the sand in multiple places."
},
{
"link": [
3,
1
],
"name": "G-Mode",
"entranceCondition": {
"comeInWithGMode": {
"mode": "any",
"morphed": false
},
"comesThroughToilet": "any"
},
"requires": [
"h_canNavigateUnderwater",
{
"or": [
"canCarefulJump",
"h_canCrouchJumpDownGrab",
"HiJump",
"Gravity",
"canSpringBallJumpMidAir"
]
},
{
"or": [
"canCarefulJump",
{
"enemyDamage": {
"enemy": "Evir",
"type": "particle",
"hits": 1
}
}
]
}
]
},
{
"link": [
3,
2
],
"name": "G-Mode",
"entranceCondition": {
"comeInWithGMode": {
"mode": "any",
"morphed": false
},
"comesThroughToilet": "any"
},
"requires": [
"h_canNavigateUnderwater"
]
},
{
"link": [
3,
4
],
"name": "Base",
"requires": [
{
"enemyDamage": {
"enemy": "Evir",
"type": "particle",
"hits": 1
}
}
]
},
{
"link": [
3,
4
],
"name": "Evir Dodge",
"requires": [
"canPrepareForNextRoom",
"canPlayInSand",
"canTrickyJump",
{
"or": [
"Gravity",
"HiJump",
"canInsaneJump"
]
}
],
"note": "Enter on the right side of the transition and move left to avoid damage.",
"devNote": [
"Entering from a non-sand room makes the suitless+hijumpless dodge only possible with a walljump.",
"Entering through the Toilet does not affect this dodge strat much."
]
},
{
"link": [
4,
2
],
"name": "Base",
"requires": [
"Gravity",
"SpaceJump"
]
},
{
"link": [
4,
2
],
"name": "Gravity Platforming (Center to Right)",
"requires": [
"Gravity",
{
"or": [
"canPlayInSand",
"canUseFrozenEnemies",
"canCarefulJump"
]
},
{
"or": [
"canCarefulJump",
{
"enemyDamage": {
"enemy": "Evir",
"type": "particle",
"hits": 1
}
}
]
}
]
},
{
"link": [
4,
2
],
"name": "Suitless Platforming (Center to Right)",
"requires": [
"canSuitlessMaridia",
"canPlayInSand",
"HiJump",
{
"or": [
"canCarefulJump",
{
"enemyDamage": {
"enemy": "Evir",
"type": "particle",
"hits": 1
}
}
]
}
]
},
{
"link": [
4,
2
],
"name": "West Sand Hall Suitless Bootless Spring Ball (Center to Right)",
"notable": true,
"requires": [
"canSuitlessMaridia",
"canPlayInSand",
"h_canMaxHeightSpringBallJump",
"canStationaryLateralMidAirMorph",
{
"or": [
{
"enemyKill": {
"enemies": [
[
"Evir"
]
],
"explicitWeapons": [
"Super",
"Missile",
"PowerBombPeriphery",
"Plasma"
]
}
},
{
"enemyDamage": {
"enemy": "Evir",
"type": "particle",
"hits": 1
}
}
]
}
],
"reusableRoomwideNotable": "West Sand Hall Suitless Bootless Spring Ball",
"note": [
"Perform multiple stationary lateral mid-air morphs, while avoiding the Evir projectiles, to cross the room.",
"It is necessary to start the jumps from the far side of the platforms in order to gain more horizontal momentum before entering the sand falls.",
"Falling into the sand will often result in a soft lock."
]
},
{
"link": [
4,
2
],
"name": "West Sand Hall Ice Only (Center to Right)",
"notable": true,
"requires": [
"canSuitlessMaridia",
"canPlayInSand",
"canTrickyJump",
"canTrickyUseFrozenEnemies"
],
"note": [
"From the sand fall, quickly get onto the left platform to prevent the right side Evir from lowering too far.",
"Freeze the right Evir, then jump on the sand to the right while shooting ice over the first Evir to also freeze the second.",
"Freezing the first Evir very high up would also work.",
"As a backup, it may be possible to make them rise again by hitting them with a PB - place the PB in the air to avoid double hitting and killing them."
]
},
{
"link": [
4,
5
],
"name": "Base",
"requires": [
"Gravity",
"SpaceJump"
]
},
{
"link": [
4,
5
],
"name": "Gravity Platforming (Center to Left)",
"requires": [
"Gravity",
{
"or": [
"canPlayInSand",
"canWalljump",
"h_canUseSpringBall",
"canCarefulJump"
]
},
{
"or": [
{
"and": [
"ScrewAttack",
"canCarefulJump"
]
},
"canTrickyJump",
{
"enemyDamage": {
"enemy": "Evir",
"type": "particle",
"hits": 1
}
}
]
}
]
},
{
"link": [
4,
5
],
"name": "Suitless Platforming (Center to Left)",
"requires": [
"canSuitlessMaridia",
"HiJump",
"canPlayInSand",
{
"or": [
"canTrickyJump",
{
"enemyDamage": {
"enemy": "Evir",
"type": "particle",
"hits": 1
}
}
]
}
]
},
{
"link": [
4,
5
],
"name": "West Sand Hall Suitless Bootless Spring Ball (Center to Left)",
"notable": true,
"requires": [
"canSuitlessMaridia",
"canPlayInSand",
"h_canMaxHeightSpringBallJump",
{
"or": [
{
"enemyKill": {
"enemies": [
[
"Evir"
]
],
"explicitWeapons": [
"Super",
"Missile",
"PowerBombPeriphery",
"Plasma"
]
}
},
{
"enemyDamage": {
"enemy": "Evir",
"type": "particle",
"hits": 1
}
}
]
}
],
"reusableRoomwideNotable": "West Sand Hall Suitless Bootless Spring Ball",
"note": [
"Perform multiple stationary lateral mid-air morphs, while avoiding the Evir projectiles, to cross the room.",
"It is necessary to start the jumps from the far side of the platforms in order to gain more horizontal momentum before entering the sand falls.",
"Falling into the sand will often result in a soft lock."
]
},
{
"link": [
4,
5
],
"name": "West Sand Hall Ice Beam Only (Center to Left)",
"notable": true,
"requires": [
"canSuitlessMaridia",
"canPlayInSand",
"canTrickyJump",
"canTrickyUseFrozenEnemies"
],
"note": [
"Freeze the Evir quickly before it descends and use it to get to the platforms.",
"Getting a good jump while on the right side of the floating block can get Samus to the leftmost block.",
"With a clean jump off of the sand, Samus can then get onto the final vertical pillar."
]
},
{
"link": [
4,
5
],
"name": "West Sand Hall Suitless Damage Boost (Center to Left)",
"notable": true,
"requires": [
"canSuitlessMaridia",
"canPlayInSand",
"canInsaneJump",
"canCrouchJump",
"canNeutralDamageBoost",
{
"enemyDamage": {
"enemy": "Evir",
"type": "particle",
"hits": 1
}
}
],
"note": [
"Use the projectile from a fully submerged Evir to boost Samus into the sandfall, providing just enough height to make the first and hardest jump.",
"Time the projectile to hit Samus when at the maximum height from a jump.",
"The hit must be on the right side of Samus and with no inputs held, but also hold forward during the damage knockback to move through the sandfall.",
"Getting a good jump while on the right side of the next floating block can get Samus to the leftmost block.",
"With a clean jump off of the sand, Samus can then get onto the final vertical pillar."
]
},
{
"link": [
5,
1
],
"name": "Base",
"requires": [
"h_canNavigateUnderwater",
{
"or": [
"Gravity",
"canPlayInSand",
"HiJump"
]
}
]
},
{
"link": [
5,
1
],
"name": "Hidden Tunnel",
"requires": [
"canSuitlessMaridia",
"Morph",
{
"or": [
"canSunkenTileWideWallClimb",
"h_canCrouchJumpDownGrab"
]
}
],
"note": [
"Fall into the sand and roll all the way to the left, through an invisible tile and under the door platform.",
"Shoot upwards to break part of the platform, then perform a crouch jump and down grab or a tile-wide wall jump climb to escape."
]
},
{
"link": [
5,
4
],
"name": "Base",
"requires": [
"Gravity",
"SpaceJump"
]
},
{
"link": [
5,
4
],
"name": "Gravity Platforming (Left to Center)",
"requires": [
"Gravity",
{
"or": [
"HiJump",
"canPreciseWalljump",
"canPlayInSand"
]
},
{
"or": [
"canTrickyJump",
{
"enemyDamage": {
"enemy": "Evir",
"type": "particle",
"hits": 1
}
}
]
}
]
},
{
"link": [
5,
4
],
"name": "Suitless Platforming (Left to Center)",
"requires": [
"canSuitlessMaridia",
"HiJump",
"canPlayInSand",
{
"or": [
"canCarefulJump",
"canSpringBallJumpMidAir"
]
},
{
"or": [
"canTrickyJump",
{
"enemyDamage": {
"enemy": "Evir",
"type": "particle",
"hits": 1
}
}
]
}
]
},
{
"link": [
5,
4
],
"name": "West Sand Hall Suitless Bootless Spring Ball (Left to Center)",
"notable": true,
"requires": [
"canSuitlessMaridia",
"canPlayInSand",
"h_canMaxHeightSpringBallJump",
"canStationaryLateralMidAirMorph"
],
"reusableRoomwideNotable": "West Sand Hall Suitless Bootless Spring Ball",
"note": [
"Perform multiple stationary lateral mid-air morphs, while avoiding the Evir projectiles, to cross the room.",
"It is necessary to start the jumps from the far side of the platforms in order to gain more horizontal momentum before entering the sand falls.",
"Falling into the sand will often result in a soft lock."
]
}
]
}