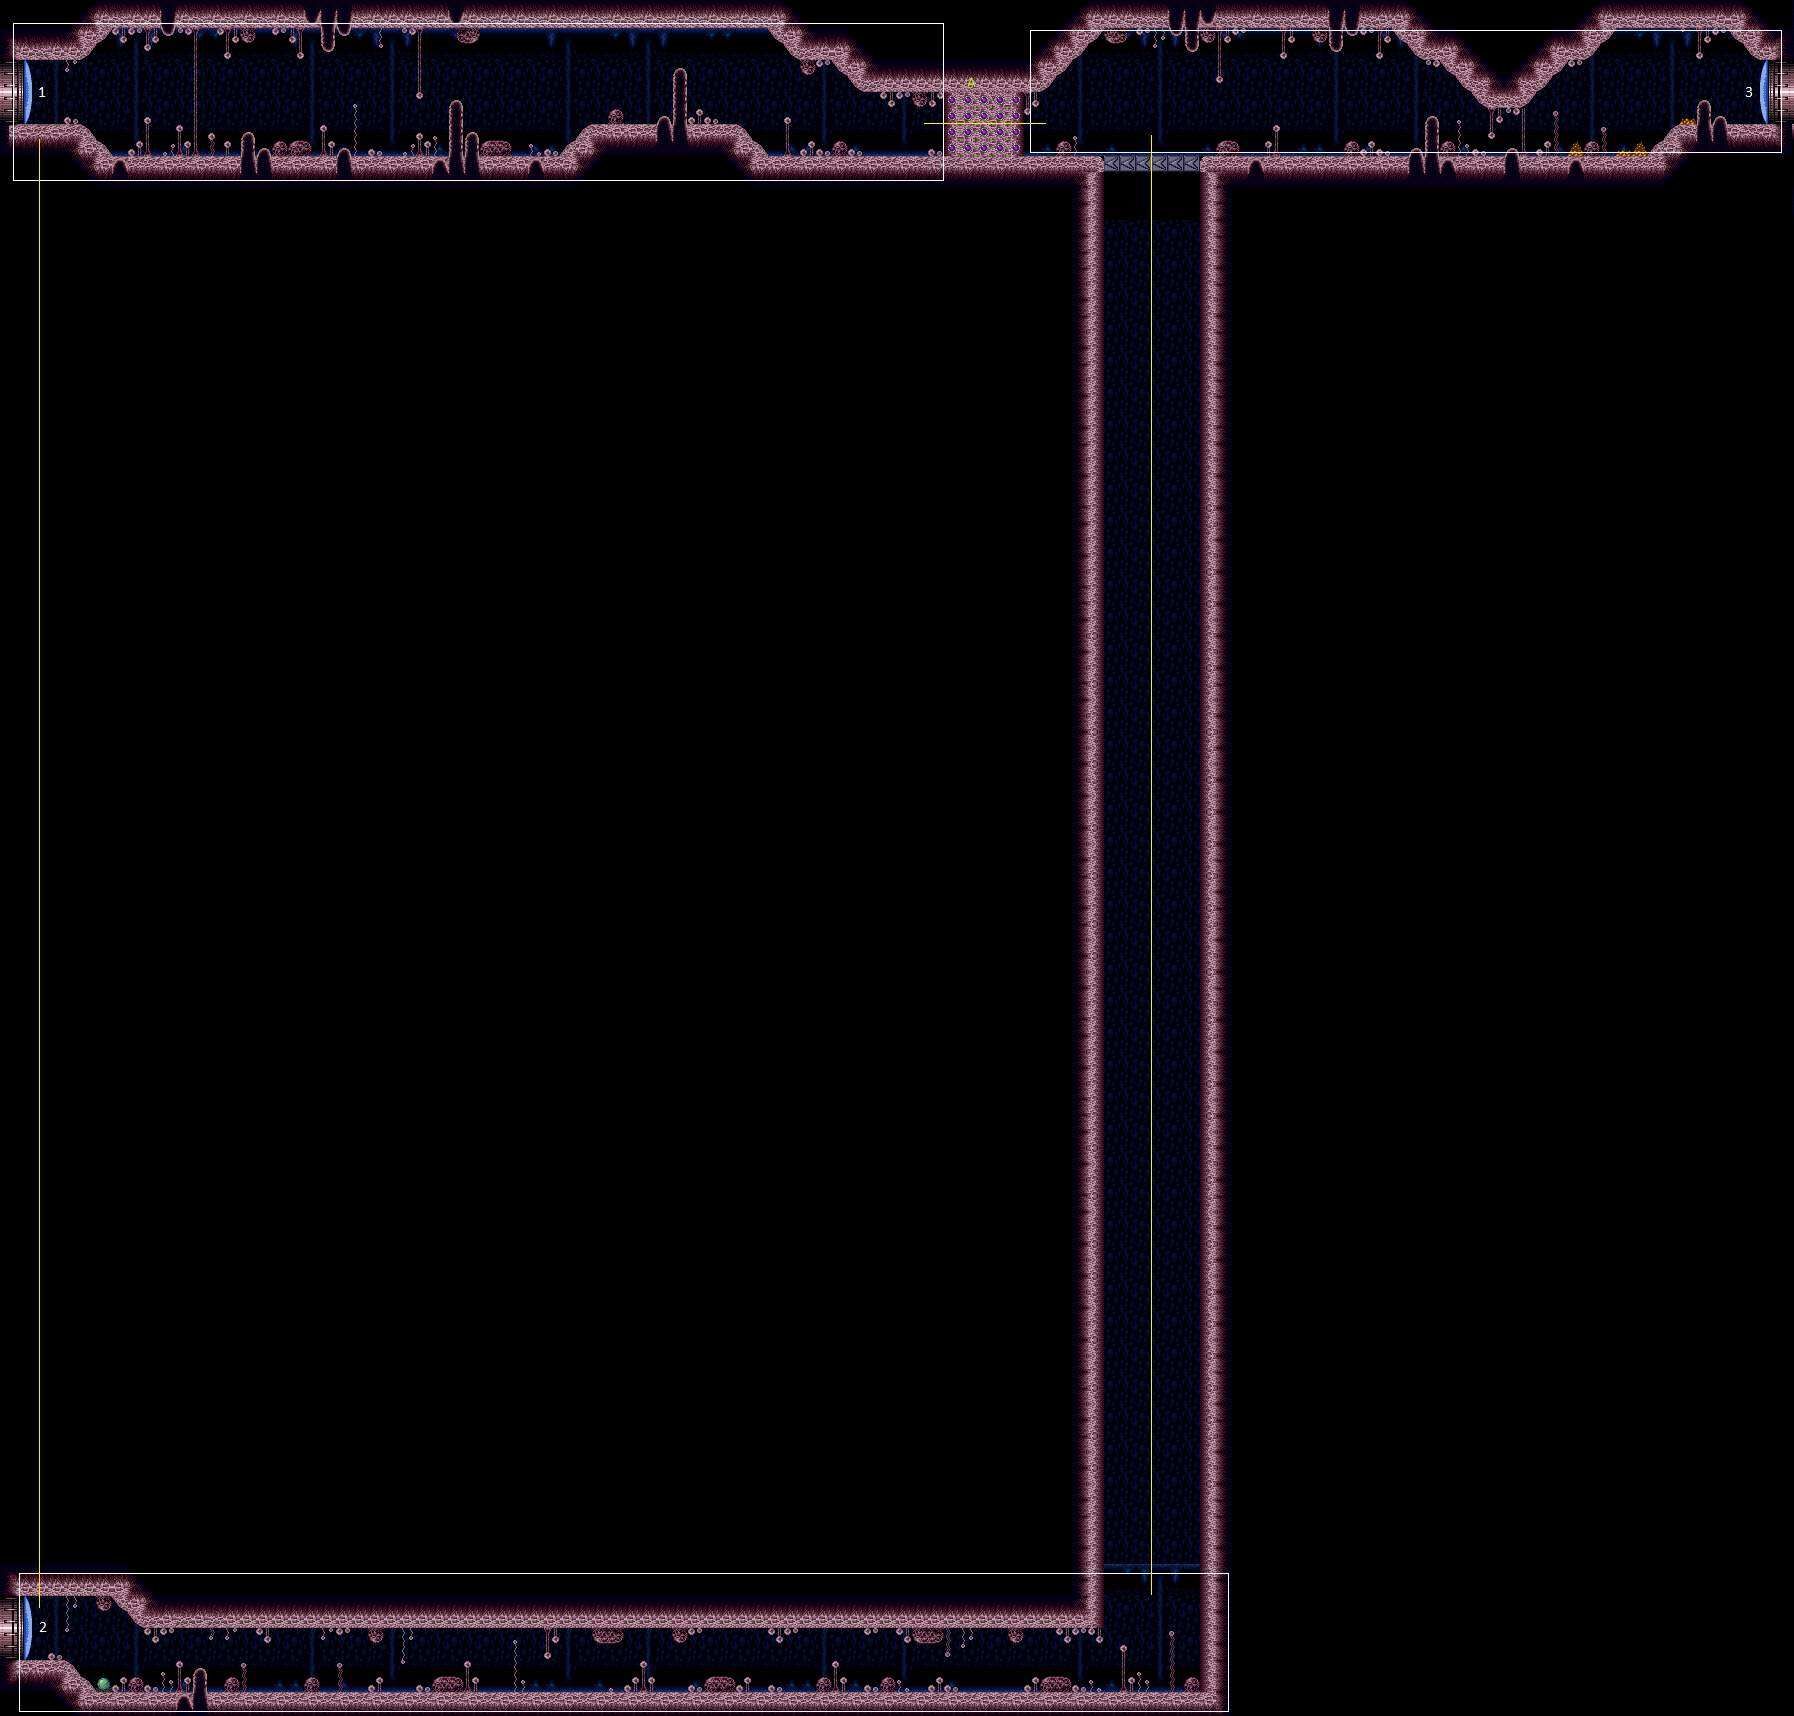
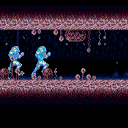
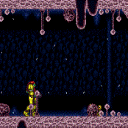
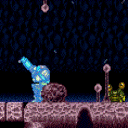
Dachora Room
Room ID: 58
|
Exit condition: {
"leaveWithRunway": {
"length": 45,
"openEnd": 1
}
}
|
|
Break exactly the bottom-right and top-right Bomb Blocks and Unmorph while on the top block hole, to begin the Moondance. Clear a path to the left in advance, as well as all enemies. Requires: {
"obstaclesNotCleared": [
"A"
]
}
"h_canUseMorphBombs"
"canMoondance"
Exit condition: {
"leaveWithStoredFallSpeed": {
"fallSpeedInTiles": 1
}
}
|
|
From: 1
Top Left Door
To: 1
Top Left Door
Notable: true 
Break exactly the bottom-right and top-right Bomb Blocks and Unmorph while on the top block hole, to begin the Moondance. Clear a path to the left in advance, as well as all enemies. Moonfall a total of 321 times, stopping just before Samus clips two tiles into the ground. Requires: {
"obstaclesNotCleared": [
"A"
]
}
"h_canUseMorphBombs"
"canExtendedMoondance"
Exit condition: {
"leaveWithStoredFallSpeed": {
"fallSpeedInTiles": 2
}
}
|
|
Requires: {
"resetRoom": {
"nodes": [
1
],
"mustStayPut": false
}
}
{
"refill": [
"Energy",
"Missile",
"Super"
]
}
|
|
Requires: "h_canCrystalFlash" Clears obstacles: A |
|
Exit condition: {
"leaveWithGModeSetup": {}
}
|
|
Requires: {
"enemyDamage": {
"enemy": "Zeela",
"type": "contact",
"hits": 1
}
}
|
|
Notable: true
Break exactly the lower-middle-right and top-right Bomb Blocks, leaving the upper-middle-right and bottommost Blocks intact. Clear all enemies before starting. Unmorph while on the top block to begin the Moondance. Exactly 145 moonfalls after clipping into the bottom block (321 total), wiggle out to the left. The next moonfall will clip Samus down two tiles. Re-enable Screw Attack and moonfall to break the right side blocks, then use Grapple again to become unstuck. Finally, moonfall through the Speed Blocks to clip down to the Dachora. Requires: {
"obstaclesNotCleared": [
"A"
]
}
"h_canUseMorphBombs"
"ScrewAttack"
"canExtendedMoondance"
"canDisableEquipment"
|
|
Entrance condition: {
"comeInWithStoredFallSpeed": {
"fallSpeedInTiles": 2
}
}
Requires: "Grapple" "ScrewAttack" |
|
Screw Attack through the bomb block wall, to instantly overload PLMs on the other side, and fall through the Speed Blocks. Entrance condition: {
"comeInWithGMode": {
"mode": "any",
"morphed": false
}
}
Requires: "ScrewAttack" Clears obstacles: A |
|
Requires: {
"or": [
"SpeedBooster",
"h_canDestroyBombWalls",
{
"obstaclesCleared": [
"A"
]
}
]
}
Clears obstacles: A |
|
Break exactly the lower-middle-right and top-right Bomb Blocks, leaving the upper-middle-right and bottommost Blocks intact. Clear all enemies before starting. Unmorph while on the top block to begin the Moondance. Wiggle out to the left and use SpeedBooster to run through to the right side door. Requires: {
"obstaclesNotCleared": [
"A"
]
}
"h_canUseMorphBombs"
"canMoondance"
"SpeedBooster"
Exit condition: {
"leaveWithStoredFallSpeed": {
"fallSpeedInTiles": 1
}
}
|
|
Notable: true
Break exactly the lower-middle-right and top-right Bomb Blocks, leaving the upper-middle-right and bottommost Blocks intact. Clear all enemies before starting. Unmorph while on the top block to begin the Moondance. Exactly 145 moonfalls after clipping into the bottom block (321 total), wiggle out to the left. The next moonfall will clip Samus down two tiles. Finally use Screw Attack or SpeedBooster to break the Bomb blocks and reach the right side door. Requires: {
"obstaclesNotCleared": [
"A"
]
}
"h_canUseMorphBombs"
{
"or": [
"SpeedBooster",
{
"and": [
"ScrewAttack",
"canDisableEquipment"
]
}
]
}
"canExtendedMoondance"
Exit condition: {
"leaveWithStoredFallSpeed": {
"fallSpeedInTiles": 2
}
}
|
|
Entrance condition: {
"comeInWithStoredFallSpeed": {
"fallSpeedInTiles": 1
}
}
Requires: "SpeedBooster" Exit condition: {
"leaveWithStoredFallSpeed": {
"fallSpeedInTiles": 1
}
}
|
|
From: 1
Top Left Door
To: 3
Right Door
Entrance condition: {
"comeInWithStoredFallSpeed": {
"fallSpeedInTiles": 2
}
}
Requires: {
"or": [
"SpeedBooster",
{
"and": [
"Grapple",
"ScrewAttack"
]
}
]
}
Exit condition: {
"leaveWithStoredFallSpeed": {
"fallSpeedInTiles": 2
}
}
|
|
Use a Power Bomb to destroy the bomb block wall. Entrance condition: {
"comeInWithGMode": {
"mode": "any",
"morphed": true
}
}
Requires: "h_canArtificialMorphPowerBomb"
{
"or": [
"h_canArtificialMorphBombThings",
"h_canArtificialMorphSpringBall",
{
"enemyDamage": {
"enemy": "Zeela",
"hits": 1,
"type": "contact"
}
}
]
}
Clears obstacles: A |
|
Entrance condition: {
"comeInWithGrappleTeleport": {
"blockPositions": [
[
108,
12
],
[
108,
13
]
]
}
}
Bypasses door shell: true |
|
Entrance condition: {
"comeInWithGrappleTeleport": {
"blockPositions": [
[
108,
12
]
]
}
}
Exit condition: {
"leaveWithGrappleTeleport": {
"blockPositions": [
[
108,
12
]
]
}
}
Bypasses door shell: true |
|
From: 1
Top Left Door
To: 3
Right Door
Entrance condition: {
"comeInWithGrappleTeleport": {
"blockPositions": [
[
108,
13
]
]
}
}
Exit condition: {
"leaveWithGrappleTeleport": {
"blockPositions": [
[
108,
13
]
]
}
}
Bypasses door shell: true |
|
6 screen X-Ray climb, and global Zeelas are still active even off camera. Entrance condition: {
"comeInWithDoorStuckSetup": {}
}
Requires: "canXRayClimb" "canBeVeryPatient" |
|
Enter with G-mode direct, back up to between 1 and 6 pixels from the door transition, and activate X-ray to get very deep stuck in the door. Climb up 6 screens, and perform a turnaround buffered spin-jump away from the door to trigger the transition, bypassing any lock on the door. Entrance condition: {
"comeInWithGMode": {
"mode": "direct",
"morphed": false
}
}
Requires: "canXRayClimb" "canBeVeryPatient" Bypasses door shell: true |
|
There are camera scroll blocks just below the speed blocks, so it is easy to overload PLMs by wall jumping or space jumping into them. Entrance condition: {
"comeInWithGMode": {
"mode": "any",
"morphed": false
}
}
Requires: {
"or": [
"canConsecutiveWalljump",
"SpaceJump"
]
}
|
|
There are camera scroll blocks just below the speed blocks, so it is easy to overload PLMs by bouncing into them. A single IBJ is slow enough at the top to overload them before Samus can hit the blocks. Entrance condition: {
"comeInWithGMode": {
"mode": "any",
"morphed": true
}
}
Requires: "h_canArtificialMorphIBJ" "canBePatient" |
|
Entrance condition: {
"comeInWithGrappleTeleport": {
"blockPositions": [
[
12,
12
],
[
12,
13
]
]
}
}
|
|
Exit condition: {
"leaveWithRunway": {
"length": 45,
"openEnd": 1
}
}
|
|
Requires: "h_canCrystalFlash" |
|
Diagonal spark left to save health. Requires: {
"canShineCharge": {
"usedTiles": 33,
"openEnd": 2
}
}
{
"shinespark": {
"frames": 110,
"excessFrames": 3
}
}
|
|
Diagonal spark left to save health. Requires: "canShinechargeMovement"
"HiJump"
"canMidairShinespark"
{
"canShineCharge": {
"usedTiles": 33,
"openEnd": 2
}
}
{
"shinespark": {
"frames": 85,
"excessFrames": 3
}
}
|
|
Requires: "HiJump"
"canFastWalljumpClimb"
"canShinechargeMovementComplex"
"canMidairShinespark"
{
"canShineCharge": {
"usedTiles": 33,
"openEnd": 2
}
}
{
"shinespark": {
"frames": 67,
"excessFrames": 3
}
}
|
|
From: 2
Bottom Left Door
To: 3
Right Door
Notable: true 
Quickly wall jump up the right wall and shinespark up to barely get above the speed blocks without any tanks. Requires: "canFastWalljumpClimb"
"canShinechargeMovementComplex"
"canMidairShinespark"
{
"canShineCharge": {
"usedTiles": 33,
"openEnd": 2
}
}
{
"shinespark": {
"frames": 73,
"excessFrames": 3
}
}
|
|
There are camera scroll blocks just below the speed blocks, so it is easy to overload PLMs by wall jumping or space jumping into them. Entrance condition: {
"comeInWithGMode": {
"mode": "any",
"morphed": false
}
}
Requires: {
"or": [
"canConsecutiveWalljump",
"SpaceJump"
]
}
|
|
There are camera scroll blocks just below the speed blocks, so it is easy to overload PLMs by bouncing into them. A single IBJ is slow enough at the top to overload them before Samus can hit the blocks. Entrance condition: {
"comeInWithGMode": {
"mode": "any",
"morphed": true
}
}
Requires: "h_canArtificialMorphIBJ" "canBePatient" |
|
Entrance condition: {
"comeInWithGrappleTeleport": {
"blockPositions": [
[
108,
12
],
[
108,
13
]
]
}
}
Bypasses door shell: true |
|
From: 2
Bottom Left Door
To: 3
Right Door
Entrance condition: {
"comeInWithGrappleTeleport": {
"blockPositions": [
[
108,
12
]
]
}
}
Exit condition: {
"leaveWithGrappleTeleport": {
"blockPositions": [
[
108,
12
]
]
}
}
Bypasses door shell: true |
|
From: 2
Bottom Left Door
To: 3
Right Door
Entrance condition: {
"comeInWithGrappleTeleport": {
"blockPositions": [
[
108,
13
]
]
}
}
Exit condition: {
"leaveWithGrappleTeleport": {
"blockPositions": [
[
108,
13
]
]
}
}
Bypasses door shell: true |
|
Requires: {
"or": [
"SpeedBooster",
"h_canDestroyBombWalls",
{
"obstaclesCleared": [
"A"
]
}
]
}
Clears obstacles: A |
|
Freeze one of the Metarees at a height where Samus can become stuck and then use it to Moondance. Stop after 175 Moonfalls, before Samus clips into the ground. Requires: "canMoondance"
"canTrickyUseFrozenEnemies"
{
"obstaclesCleared": [
"A"
]
}
Exit condition: {
"leaveWithStoredFallSpeed": {
"fallSpeedInTiles": 1
}
}
|
|
Entrance condition: {
"comeInWithStoredFallSpeed": {
"fallSpeedInTiles": 1
}
}
Requires: "SpeedBooster" Exit condition: {
"leaveWithStoredFallSpeed": {
"fallSpeedInTiles": 1
}
}
|
|
From: 3
Right Door
To: 1
Top Left Door
Entrance condition: {
"comeInWithStoredFallSpeed": {
"fallSpeedInTiles": 2
}
}
Requires: {
"or": [
"SpeedBooster",
{
"and": [
"Grapple",
"ScrewAttack"
]
}
]
}
Exit condition: {
"leaveWithStoredFallSpeed": {
"fallSpeedInTiles": 2
}
}
|
|
Use The camera scroll blocks above the speed blocks and by the bomb wall to overload PLMs. Entrance condition: {
"comeInWithGMode": {
"mode": "any",
"morphed": false
}
}
|
|
Entrance condition: {
"comeInWithGrappleTeleport": {
"blockPositions": [
[
5,
3
],
[
7,
2
]
]
}
}
|
|
Entrance condition: {
"comeInWithGrappleTeleport": {
"blockPositions": [
[
3,
12
],
[
3,
13
]
]
}
}
Bypasses door shell: true |
|
Entrance condition: {
"comeInWithGrappleTeleport": {
"blockPositions": [
[
3,
12
]
]
}
}
Exit condition: {
"leaveWithGrappleTeleport": {
"blockPositions": [
[
3,
12
]
]
}
}
Bypasses door shell: true |
|
From: 3
Right Door
To: 1
Top Left Door
Entrance condition: {
"comeInWithGrappleTeleport": {
"blockPositions": [
[
3,
13
]
]
}
}
Exit condition: {
"leaveWithGrappleTeleport": {
"blockPositions": [
[
3,
13
]
]
}
}
Bypasses door shell: true |
|
Exit the previous room with Samus in a standing pose (while grappled). After teleporting, press right to release Grapple while staying standing (not being forced into a crouch). Then X-ray climb to get up to the door transition, without needing to open the door. Entrance condition: {
"comeInWithGrappleTeleport": {
"blockPositions": [
[
2,
18
],
[
2,
19
],
[
2,
28
],
[
2,
29
],
[
2,
34
]
]
}
}
Requires: "canXRayClimb" Bypasses door shell: true |
|
Requires: "SpeedBooster" |
|
Entrance condition: {
"comeInWithStoredFallSpeed": {
"fallSpeedInTiles": 1
}
}
|
|
Entrance condition: {
"comeInWithStoredFallSpeed": {
"fallSpeedInTiles": 2
}
}
|
|
From: 3
Right Door
To: 2
Bottom Left Door
Notable: true 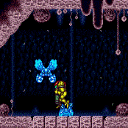
Use a Reo (Bee) and a Zeela to perform an 'Enemy Stuck Moonfall', clipping Samus through the Speed blocks. Break the Bomb blocks to bring enemies over to the Speed blocks. Have a Reo wait off camera while the Zeela walks onto the Speed blocks, then freeze the Bee just above Samus' head. Try to freeze both enemies near the same time and start the moonfall as quickly as possible. Requires: "canTrickyUseFrozenEnemies"
"canEnemyStuckMoonfall"
"canBePatient"
"canCameraManip"
{
"obstaclesCleared": [
"A"
]
}
|
|
Freeze one of the Metarees at a height where Samus can become stuck and then use it to Moondance. After exactly 175 Moonfalls, before Samus clips into the ground, walk over to the Speed Blocks to perform the clip. Requires: "canMoondance" "canTrickyUseFrozenEnemies" |
|
Use The camera scroll blocks above the speed blocks and by the bomb wall to overload PLMs. Entrance condition: {
"comeInWithGMode": {
"mode": "any",
"morphed": false
}
}
|
|
From: 3
Right Door
To: 2
Bottom Left Door
Notable: true 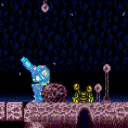
Using Speed Booster, run through and break the bomb wall to free the global Zeela. Break the speed blocks just before the Zeela gets to them in order for it to go down to the bottom half of the room. The speed blocks respawn very quickly, so this requires very precise timing. Normally, it takes the Zeela a minimum of 2 minutes to setup, but a super can make it fall down the shaft, saving 30 seconds. It may be easiest to knock the Zeela from the ceiling directly into the hole, saving another 30 seconds: Shoot a well-timed Super diagonally at the ground just before breaking the speed blocks. Requires: "canBePatient" "SpeedBooster" Exit condition: {
"leaveWithGModeSetup": {}
}
|
|
Exit condition: {
"leaveWithRunway": {
"length": 45,
"openEnd": 1
}
}
|
|
Freeze one of the Metarees at a height where Samus can become stuck and then use it to Moondance. Stop after exactly 175 Moonfalls, before Samus clips into the ground. Requires: "canMoondance" "canTrickyUseFrozenEnemies" Exit condition: {
"leaveWithStoredFallSpeed": {
"fallSpeedInTiles": 1
}
}
|
|
Requires: "h_canCrystalFlash" Clears obstacles: A |
|
Requires: {
"or": [
"SpeedBooster",
"h_canDestroyBombWalls",
{
"obstaclesCleared": [
"A"
]
}
]
}
Exit condition: {
"leaveWithGModeSetup": {}
}
|
{
"$schema": "../../../schema/m3-room.schema.json",
"id": 58,
"name": "Dachora Room",
"area": "Brinstar",
"subarea": "Pink",
"playable": true,
"roomAddress": "0x79CB3",
"roomEnvironments": [
{
"heated": false
}
],
"nodes": [
{
"id": 1,
"name": "Top Left Door",
"nodeType": "door",
"nodeSubType": "blue",
"nodeAddress": "0x0018da2",
"doorEnvironments": [
{
"physics": "air"
}
]
},
{
"id": 2,
"name": "Bottom Left Door",
"nodeType": "door",
"nodeSubType": "blue",
"nodeAddress": "0x0018dba",
"doorEnvironments": [
{
"physics": "air"
}
]
},
{
"id": 3,
"name": "Right Door",
"nodeType": "door",
"nodeSubType": "blue",
"nodeAddress": "0x0018dae",
"doorEnvironments": [
{
"physics": "air"
}
]
}
],
"enemies": [
{
"id": "e1",
"groupName": "Dachora Room Zeelas",
"enemyName": "Zeela",
"quantity": 2,
"homeNodes": [
1
]
},
{
"id": "e2",
"groupName": "Dachora Room Reo",
"enemyName": "Reo",
"quantity": 3,
"homeNodes": [
1
]
},
{
"id": "e3",
"groupName": "Dachora Room Metarees",
"enemyName": "Metaree",
"quantity": 3,
"homeNodes": [
3
]
}
],
"obstacles": [
{
"id": "A",
"name": "Bomb Blockade",
"obstacleType": "inanimate"
}
],
"reusableRoomwideNotable": [
{
"name": "Dachora Room Blockade Extended Moondance",
"note": [
"Break exactly the lower-middle-right and top-right Bomb Blocks, leaving the upper-middle-right and bottommost Blocks intact.",
"Clear all enemies before starting.",
"Unmorph while on the top block to begin the Moondance.",
"Exactly 145 moonfalls after clipping into the bottom block (321 total), wiggle out to the left.",
"The next moonfall will clip Samus down two tiles.",
"Finally use Screw Attack or SpeedBooster to break the Bomb blocks."
]
}
],
"links": [
{
"from": 1,
"to": [
{
"id": 1,
"devNote": "FIXME: Node 3 could be used to reset the room, with additional requirements."
},
{
"id": 2
},
{
"id": 3
}
]
},
{
"from": 2,
"to": [
{
"id": 1
},
{
"id": 2
},
{
"id": 3
}
]
},
{
"from": 3,
"to": [
{
"id": 1
},
{
"id": 2
},
{
"id": 3
}
]
}
],
"strats": [
{
"link": [
1,
1
],
"name": "Leave With Runway",
"requires": [],
"exitCondition": {
"leaveWithRunway": {
"length": 45,
"openEnd": 1
}
}
},
{
"link": [
1,
1
],
"name": "Blockade Leave with Moondance",
"requires": [
{
"obstaclesNotCleared": [
"A"
]
},
"h_canUseMorphBombs",
"canMoondance"
],
"exitCondition": {
"leaveWithStoredFallSpeed": {
"fallSpeedInTiles": 1
}
},
"note": [
"Break exactly the bottom-right and top-right Bomb Blocks and Unmorph while on the top block hole, to begin the Moondance.",
"Clear a path to the left in advance, as well as all enemies."
]
},
{
"link": [
1,
1
],
"name": "Blockade Leave with Extended Moondance",
"notable": true,
"requires": [
{
"obstaclesNotCleared": [
"A"
]
},
"h_canUseMorphBombs",
"canExtendedMoondance"
],
"exitCondition": {
"leaveWithStoredFallSpeed": {
"fallSpeedInTiles": 2
}
},
"reusableRoomwideNotable": "Dachora Room Blockade Extended Moondance",
"note": [
"Break exactly the bottom-right and top-right Bomb Blocks and Unmorph while on the top block hole, to begin the Moondance.",
"Clear a path to the left in advance, as well as all enemies.",
"Moonfall a total of 321 times, stopping just before Samus clips two tiles into the ground."
]
},
{
"link": [
1,
1
],
"name": "Zeela and Reo Farm",
"requires": [
{
"resetRoom": {
"nodes": [
1
],
"mustStayPut": false
}
},
{
"refill": [
"Energy",
"Missile",
"Super"
]
}
]
},
{
"link": [
1,
1
],
"name": "Crystal Flash",
"requires": [
"h_canCrystalFlash"
],
"clearsObstacles": [
"A"
]
},
{
"link": [
1,
1
],
"name": "G-Mode Setup - Get Hit By Zeela",
"notable": false,
"requires": [],
"exitCondition": {
"leaveWithGModeSetup": {}
}
},
{
"link": [
1,
1
],
"name": "G-Mode Regain Mobility",
"requires": [
{
  "enemyDamage": {
    "enemy": "Zeela",
    "type": "contact",
    "hits": 1
  }
}
],
"gModeRegainMobility": {}
},
{
"link": [
1,
2
],
"name": "Blockade Extended Moondance Clip",
"notable": true,
"requires": [
{
"obstaclesNotCleared": [
"A"
]
},
"h_canUseMorphBombs",
"ScrewAttack",
"canExtendedMoondance",
"canDisableEquipment"
],
"reusableRoomwideNotable": "Dachora Room Blockade Extended Moondance",
"note": [
"Break exactly the lower-middle-right and top-right Bomb Blocks, leaving the upper-middle-right and bottommost Blocks intact.",
"Clear all enemies before starting.",
"Unmorph while on the top block to begin the Moondance.",
"Exactly 145 moonfalls after clipping into the bottom block (321 total), wiggle out to the left.",
"The next moonfall will clip Samus down two tiles.",
"Re-enable Screw Attack and moonfall to break the right side blocks, then use Grapple again to become unstuck.",
"Finally, moonfall through the Speed Blocks to clip down to the Dachora."
]
},
{
"link": [
1,
2
],
"name": "Stored Moonfall Clip (more speed)",
"entranceCondition": {
"comeInWithStoredFallSpeed": {
"fallSpeedInTiles": 2
}
},
"requires": [
"Grapple",
"ScrewAttack"
]
},
{
"link": [
1,
2
],
"name": "G-Mode Screw and Overload PLMs",
"entranceCondition": {
"comeInWithGMode": {
"mode": "any",
"morphed": false
}
},
"requires": [
"ScrewAttack"
],
"clearsObstacles": [
"A"
],
"note": "Screw Attack through the bomb block wall, to instantly overload PLMs on the other side, and fall through the Speed Blocks."
},
{
"link": [
1,
3
],
"name": "Base",
"requires": [
{
  "or": [
    "SpeedBooster",
    "h_canDestroyBombWalls",
    {
      "obstaclesCleared": [
        "A"
      ]
    }
  ]
}
],
"clearsObstacles": [
"A"
]
},
{
"link": [
1,
3
],
"name": "Blockade Leave with Moondance",
"requires": [
{
"obstaclesNotCleared": [
"A"
]
},
"h_canUseMorphBombs",
"canMoondance",
"SpeedBooster"
],
"exitCondition": {
"leaveWithStoredFallSpeed": {
"fallSpeedInTiles": 1
}
},
"unlocksDoors": [
{
"types": [
"ammo"
],
"requires": []
}
],
"note": [
"Break exactly the lower-middle-right and top-right Bomb Blocks, leaving the upper-middle-right and bottommost Blocks intact.",
"Clear all enemies before starting.",
"Unmorph while on the top block to begin the Moondance.",
"Wiggle out to the left and use SpeedBooster to run through to the right side door."
]
},
{
"link": [
1,
3
],
"name": "Blockade Leave with Extended Moondance",
"notable": true,
"requires": [
{
"obstaclesNotCleared": [
"A"
]
},
"h_canUseMorphBombs",
{
"or": [
"SpeedBooster",
{
"and": [
"ScrewAttack",
"canDisableEquipment"
]
}
]
},
"canExtendedMoondance"
],
"exitCondition": {
"leaveWithStoredFallSpeed": {
"fallSpeedInTiles": 2
}
},
"unlocksDoors": [
{
"types": [
"ammo"
],
"requires": []
}
],
"reusableRoomwideNotable": "Dachora Room Blockade Extended Moondance",
"note": [
"Break exactly the lower-middle-right and top-right Bomb Blocks, leaving the upper-middle-right and bottommost Blocks intact.",
"Clear all enemies before starting.",
"Unmorph while on the top block to begin the Moondance.",
"Exactly 145 moonfalls after clipping into the bottom block (321 total), wiggle out to the left.",
"The next moonfall will clip Samus down two tiles.",
"Finally use Screw Attack or SpeedBooster to break the Bomb blocks and reach the right side door."
]
},
{
"link": [
1,
3
],
"name": "Transition with Stored Fall Speed",
"entranceCondition": {
"comeInWithStoredFallSpeed": {
"fallSpeedInTiles": 1
}
},
"requires": [
"SpeedBooster"
],
"exitCondition": {
"leaveWithStoredFallSpeed": {
"fallSpeedInTiles": 1
}
},
"unlocksDoors": [
{
"types": [
"missiles",
"super"
],
"requires": []
},
{
"types": [
"powerbomb"
],
"requires": [
"never"
]
}
]
},
{
"link": [
1,
3
],
"name": "Transition with Stored Fall Speed (more speed)",
"entranceCondition": {
"comeInWithStoredFallSpeed": {
"fallSpeedInTiles": 2
}
},
"requires": [
{
  "or": [
    "SpeedBooster",
    {
      "and": [
        "Grapple",
        "ScrewAttack"
      ]
    }
  ]
}
],
"exitCondition": {
"leaveWithStoredFallSpeed": {
"fallSpeedInTiles": 2
}
},
"unlocksDoors": [
{
"types": [
"missiles",
"super"
],
"requires": []
},
{
"types": [
"powerbomb"
],
"requires": [
"never"
]
}
]
},
{
"link": [
1,
3
],
"name": "G-Mode Morph Power Bomb",
"entranceCondition": {
"comeInWithGMode": {
"mode": "any",
"morphed": true
}
},
"requires": [
"h_canArtificialMorphPowerBomb",
{
"or": [
"h_canArtificialMorphBombThings",
"h_canArtificialMorphSpringBall",
{
"enemyDamage": {
"enemy": "Zeela",
"hits": 1,
"type": "contact"
}
}
]
}
],
"clearsObstacles": [
"A"
],
"note": "Use a Power Bomb to destroy the bomb block wall."
},
{
"link": [
1,
3
],
"name": "Grapple Teleport Door Lock Skip",
"entranceCondition": {
"comeInWithGrappleTeleport": {
"blockPositions": [
[
108,
12
],
[
108,
13
]
]
}
},
"requires": [],
"bypassesDoorShell": true
},
{
"link": [
1,
3
],
"name": "Carry Grapple Teleport (Top Position)",
"entranceCondition": {
"comeInWithGrappleTeleport": {
"blockPositions": [
[
108,
12
]
]
}
},
"requires": [],
"bypassesDoorShell": true,
"exitCondition": {
"leaveWithGrappleTeleport": {
"blockPositions": [
[
108,
12
]
]
}
}
},
{
"link": [
1,
3
],
"name": "Carry Grapple Teleport (Bottom Position)",
"entranceCondition": {
"comeInWithGrappleTeleport": {
"blockPositions": [
[
108,
13
]
]
}
},
"requires": [],
"bypassesDoorShell": true,
"exitCondition": {
"leaveWithGrappleTeleport": {
"blockPositions": [
[
108,
13
]
]
}
}
},
{
"link": [
2,
1
],
"name": "X-Ray Climb",
"entranceCondition": {
"comeInWithDoorStuckSetup": {}
},
"requires": [
"canXRayClimb",
"canBeVeryPatient"
],
"note": "6 screen X-Ray climb, and global Zeelas are still active even off camera."
},
{
"link": [
2,
1
],
"name": "Very Deep Stuck X-Ray Climb",
"entranceCondition": {
"comeInWithGMode": {
"mode": "direct",
"morphed": false
}
},
"requires": [
"canXRayClimb",
"canBeVeryPatient"
],
"bypassesDoorShell": true,
"note": [
"Enter with G-mode direct, back up to between 1 and 6 pixels from the door transition, and activate X-ray to get very deep stuck in the door.",
"Climb up 6 screens, and perform a turnaround buffered spin-jump away from the door to trigger the transition, bypassing any lock on the door."
]
},
{
"link": [
2,
1
],
"name": "G-Mode Overload PLMs",
"entranceCondition": {
"comeInWithGMode": {
"mode": "any",
"morphed": false
}
},
"requires": [
{
  "or": [
    "canConsecutiveWalljump",
    "SpaceJump"
  ]
}
],
"note": "There are camera scroll blocks just below the speed blocks, so it is easy to overload PLMs by wall jumping or space jumping into them."
},
{
"link": [
2,
1
],
"name": "G-Mode Morph Overload PLMs",
"entranceCondition": {
"comeInWithGMode": {
"mode": "any",
"morphed": true
}
},
"requires": [
"h_canArtificialMorphIBJ",
"canBePatient"
],
"note": [
"There are camera scroll blocks just below the speed blocks, so it is easy to overload PLMs by bouncing into them.",
"A single IBJ is slow enough at the top to overload them before Samus can hit the blocks."
]
},
{
"link": [
2,
1
],
"name": "Grapple Teleport",
"entranceCondition": {
"comeInWithGrappleTeleport": {
"blockPositions": [
[
12,
12
],
[
12,
13
]
]
}
},
"requires": []
},
{
"link": [
2,
2
],
"name": "Leave With Runway",
"requires": [],
"exitCondition": {
"leaveWithRunway": {
"length": 45,
"openEnd": 1
}
}
},
{
"link": [
2,
2
],
"name": "Crystal Flash",
"requires": [
"h_canCrystalFlash"
]
},
{
"link": [
2,
3
],
"name": "Spark from Floor",
"requires": [
{
"canShineCharge": {
"usedTiles": 33,
"openEnd": 2
}
},
{
"shinespark": {
"frames": 110,
"excessFrames": 3
}
}
],
"note": "Diagonal spark left to save health."
},
{
"link": [
2,
3
],
"name": "Spark from Speedy Jump",
"requires": [
"canShinechargeMovement",
"HiJump",
"canMidairShinespark",
{
"canShineCharge": {
"usedTiles": 33,
"openEnd": 2
}
},
{
"shinespark": {
"frames": 85,
"excessFrames": 3
}
}
],
"note": "Diagonal spark left to save health."
},
{
"link": [
2,
3
],
"name": "Spark from Fast Walljumps",
"requires": [
"HiJump",
"canFastWalljumpClimb",
"canShinechargeMovementComplex",
"canMidairShinespark",
{
"canShineCharge": {
"usedTiles": 33,
"openEnd": 2
}
},
{
"shinespark": {
"frames": 67,
"excessFrames": 3
}
}
]
},
{
"link": [
2,
3
],
"name": "Dachora Room Shinespark No Etanks No HiJump",
"notable": true,
"requires": [
"canFastWalljumpClimb",
"canShinechargeMovementComplex",
"canMidairShinespark",
{
"canShineCharge": {
"usedTiles": 33,
"openEnd": 2
}
},
{
"shinespark": {
"frames": 73,
"excessFrames": 3
}
}
],
"note": "Quickly wall jump up the right wall and shinespark up to barely get above the speed blocks without any tanks.",
"devNote": "At no etanks, the spark will always be cut short barely above the speed blocks."
},
{
"link": [
2,
3
],
"name": "G-Mode Overload PLMs",
"entranceCondition": {
"comeInWithGMode": {
"mode": "any",
"morphed": false
}
},
"requires": [
{
  "or": [
    "canConsecutiveWalljump",
    "SpaceJump"
  ]
}
],
"note": "There are camera scroll blocks just below the speed blocks, so it is easy to overload PLMs by wall jumping or space jumping into them."
},
{
"link": [
2,
3
],
"name": "G-Mode Morph Overload PLMs",
"entranceCondition": {
"comeInWithGMode": {
"mode": "any",
"morphed": true
}
},
"requires": [
"h_canArtificialMorphIBJ",
"canBePatient"
],
"note": [
"There are camera scroll blocks just below the speed blocks, so it is easy to overload PLMs by bouncing into them.",
"A single IBJ is slow enough at the top to overload them before Samus can hit the blocks."
]
},
{
"link": [
2,
3
],
"name": "Grapple Teleport Door Lock Skip",
"entranceCondition": {
"comeInWithGrappleTeleport": {
"blockPositions": [
[
108,
12
],
[
108,
13
]
]
}
},
"requires": [],
"bypassesDoorShell": true
},
{
"link": [
2,
3
],
"name": "Carry Grapple Teleport (Top Position)",
"entranceCondition": {
"comeInWithGrappleTeleport": {
"blockPositions": [
[
108,
12
]
]
}
},
"requires": [],
"bypassesDoorShell": true,
"exitCondition": {
"leaveWithGrappleTeleport": {
"blockPositions": [
[
108,
12
]
]
}
}
},
{
"link": [
2,
3
],
"name": "Carry Grapple Teleport (Bottom Position)",
"entranceCondition": {
"comeInWithGrappleTeleport": {
"blockPositions": [
[
108,
13
]
]
}
},
"requires": [],
"bypassesDoorShell": true,
"exitCondition": {
"leaveWithGrappleTeleport": {
"blockPositions": [
[
108,
13
]
]
}
}
},
{
"link": [
3,
1
],
"name": "Base",
"requires": [
{
  "or": [
    "SpeedBooster",
    "h_canDestroyBombWalls",
    {
      "obstaclesCleared": [
        "A"
      ]
    }
  ]
}
],
"clearsObstacles": [
"A"
]
},
{
"link": [
3,
1
],
"name": "Metaree Leave with Moondance",
"requires": [
"canMoondance",
"canTrickyUseFrozenEnemies",
{
"obstaclesCleared": [
"A"
]
}
],
"exitCondition": {
"leaveWithStoredFallSpeed": {
"fallSpeedInTiles": 1
}
},
"unlocksDoors": [
{
"types": [
"ammo"
],
"requires": []
}
],
"note": [
"Freeze one of the Metarees at a height where Samus can become stuck and then use it to Moondance.",
"Stop after 175 Moonfalls, before Samus clips into the ground."
]
},
{
"link": [
3,
1
],
"name": "Transition with Stored Fall Speed",
"entranceCondition": {
"comeInWithStoredFallSpeed": {
"fallSpeedInTiles": 1
}
},
"requires": [
"SpeedBooster"
],
"exitCondition": {
"leaveWithStoredFallSpeed": {
"fallSpeedInTiles": 1
}
},
"unlocksDoors": [
{
"types": [
"missiles",
"super"
],
"requires": []
},
{
"types": [
"powerbomb"
],
"requires": [
"never"
]
}
]
},
{
"link": [
3,
1
],
"name": "Transition with Stored Fall Speed (more speed)",
"entranceCondition": {
"comeInWithStoredFallSpeed": {
"fallSpeedInTiles": 2
}
},
"requires": [
{
  "or": [
    "SpeedBooster",
    {
      "and": [
        "Grapple",
        "ScrewAttack"
      ]
    }
  ]
}
],
"exitCondition": {
"leaveWithStoredFallSpeed": {
"fallSpeedInTiles": 2
}
},
"unlocksDoors": [
{
"types": [
"missiles",
"super"
],
"requires": []
},
{
"types": [
"powerbomb"
],
"requires": [
"never"
]
}
]
},
{
"link": [
3,
1
],
"name": "G-Mode Overload PLMs",
"entranceCondition": {
"comeInWithGMode": {
"mode": "any",
"morphed": false
}
},
"requires": [],
"note": "Use The camera scroll blocks above the speed blocks and by the bomb wall to overload PLMs."
},
{
"link": [
3,
1
],
"name": "Grapple Teleport",
"entranceCondition": {
"comeInWithGrappleTeleport": {
"blockPositions": [
[
5,
3
],
[
7,
2
]
]
}
},
"requires": []
},
{
"link": [
3,
1
],
"name": "Grapple Teleport Door Lock Skip",
"entranceCondition": {
"comeInWithGrappleTeleport": {
"blockPositions": [
[
3,
12
],
[
3,
13
]
]
}
},
"requires": [],
"bypassesDoorShell": true
},
{
"link": [
3,
1
],
"name": "Carry Grapple Teleport (Top Position)",
"entranceCondition": {
"comeInWithGrappleTeleport": {
"blockPositions": [
[
3,
12
]
]
}
},
"requires": [],
"bypassesDoorShell": true,
"exitCondition": {
"leaveWithGrappleTeleport": {
"blockPositions": [
[
3,
12
]
]
}
}
},
{
"link": [
3,
1
],
"name": "Carry Grapple Teleport (Bottom Position)",
"entranceCondition": {
"comeInWithGrappleTeleport": {
"blockPositions": [
[
3,
13
]
]
}
},
"requires": [],
"bypassesDoorShell": true,
"exitCondition": {
"leaveWithGrappleTeleport": {
"blockPositions": [
[
3,
13
]
]
}
}
},
{
"link": [
3,
1
],
"name": "Grapple Teleport X-Ray Climb",
"entranceCondition": {
"comeInWithGrappleTeleport": {
"blockPositions": [
[
2,
18
],
[
2,
19
],
[
2,
28
],
[
2,
29
],
[
2,
34
]
]
}
},
"requires": [
"canXRayClimb"
],
"bypassesDoorShell": true,
"note": [
"Exit the previous room with Samus in a standing pose (while grappled).",
"After teleporting, press right to release Grapple while staying standing (not being forced into a crouch).",
"Then X-ray climb to get up to the door transition, without needing to open the door."
]
},
{
"link": [
3,
2
],
"name": "Base",
"requires": [
"SpeedBooster"
]
},
{
"link": [
3,
2
],
"name": "Stored Moonfall Clip",
"entranceCondition": {
"comeInWithStoredFallSpeed": {
"fallSpeedInTiles": 1
}
},
"requires": []
},
{
"link": [
3,
2
],
"name": "Stored Moonfall Clip (more speed)",
"entranceCondition": {
"comeInWithStoredFallSpeed": {
"fallSpeedInTiles": 2
}
},
"requires": []
},
{
"link": [
3,
2
],
"name": "Dachora Room Reo Zeela Stuck Moonfall",
"notable": true,
"requires": [
"canTrickyUseFrozenEnemies",
"canEnemyStuckMoonfall",
"canBePatient",
"canCameraManip",
{
"obstaclesCleared": [
"A"
]
}
],
"note": [
"Use a Reo (Bee) and a Zeela to perform an 'Enemy Stuck Moonfall', clipping Samus through the Speed blocks.",
"Break the Bomb blocks to bring enemies over to the Speed blocks.",
"Have a Reo wait off camera while the Zeela walks onto the Speed blocks, then freeze the Bee just above Samus' head.",
"Try to freeze both enemies near the same time and start the moonfall as quickly as possible."
]
},
{
"link": [
3,
2
],
"name": "Metaree Moondance",
"requires": [
"canMoondance",
"canTrickyUseFrozenEnemies"
],
"note": [
"Freeze one of the Metarees at a height where Samus can become stuck and then use it to Moondance.",
"After exactly 175 Moonfalls, before Samus clips into the ground, walk over to the Speed Blocks to perform the clip."
]
},
{
"link": [
3,
2
],
"name": "G-Mode Overload PLMs",
"entranceCondition": {
"comeInWithGMode": {
"mode": "any",
"morphed": false
}
},
"requires": [],
"note": "Use The camera scroll blocks above the speed blocks and by the bomb wall to overload PLMs."
},
{
"link": [
3,
2
],
"name": "Dachora Room G-Mode Setup - Lure the Zeela Down Below",
"notable": true,
"requires": [
"canBePatient",
"SpeedBooster"
],
"exitCondition": {
"leaveWithGModeSetup": {}
},
"unlocksDoors": [
{
"types": [
"ammo"
],
"requires": []
}
],
"note": [
"Using Speed Booster, run through and break the bomb wall to free the global Zeela.",
"Break the speed blocks just before the Zeela gets to them in order for it to go down to the bottom half of the room.",
"The speed blocks respawn very quickly, so this requires very precise timing.",
"Normally, it takes the Zeela a minimum of 2 minutes to setup, but a super can make it fall down the shaft, saving 30 seconds.",
"It may be easiest to knock the Zeela from the ceiling directly into the hole, saving another 30 seconds:",
"Shoot a well-timed Super diagonally at the ground just before breaking the speed blocks."
]
},
{
"link": [
3,
3
],
"name": "Leave With Runway",
"requires": [],
"exitCondition": {
"leaveWithRunway": {
"length": 45,
"openEnd": 1
}
}
},
{
"link": [
3,
3
],
"name": "Metaree Leave with Moondance",
"requires": [
"canMoondance",
"canTrickyUseFrozenEnemies"
],
"exitCondition": {
"leaveWithStoredFallSpeed": {
"fallSpeedInTiles": 1
}
},
"note": [
"Freeze one of the Metarees at a height where Samus can become stuck and then use it to Moondance.",
"Stop after exactly 175 Moonfalls, before Samus clips into the ground."
]
},
{
"link": [
3,
3
],
"name": "Crystal Flash",
"requires": [
"h_canCrystalFlash"
],
"clearsObstacles": [
"A"
]
},
{
"link": [
3,
3
],
"name": "G-Mode Setup - Get Hit By Zeela or Reo",
"notable": false,
"requires": [
{
  "or": [
    "SpeedBooster",
    "h_canDestroyBombWalls",
    {
      "obstaclesCleared": [
        "A"
      ]
    }
  ]
}
],
"exitCondition": {
"leaveWithGModeSetup": {}
}
}
]
}