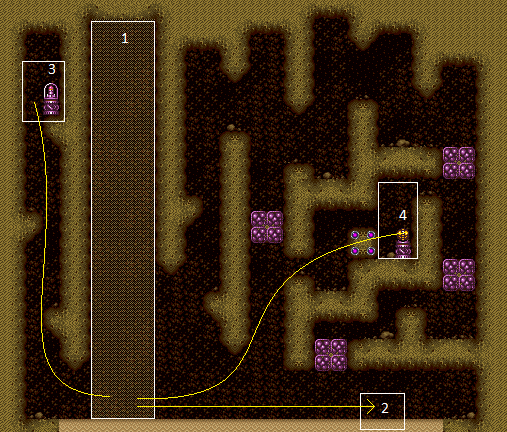
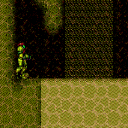
East Sand Hole
Room ID: 208
|
Requires: "h_canCrystalFlash" |
|
|
|
Entrance condition: {
"comeInWithGMode": {
"mode": "any",
"morphed": false
},
"comesThroughToilet": "any"
}
Exit condition: {
"leaveWithGMode": {
"morphed": false
}
}
|
|
Entrance condition: {
"comeInWithGMode": {
"mode": "any",
"morphed": true
},
"comesThroughToilet": "any"
}
Exit condition: {
"leaveWithGMode": {
"morphed": true
}
}
|
|
Requires: "Gravity" |
|
Requires: "canSuitlessMaridia"
"HiJump"
{
"or": [
"canPlayInSand",
{
"and": [
"canPrepareForNextRoom",
"h_canUseSpringBall"
]
}
]
}
{
"or": [
{
"and": [
{
"or": [
"canWalljump",
"canSpaceJumpWaterEscape"
]
},
{
"or": [
"h_canCrouchJumpDownGrab",
"canSunkenTileWideWallClimb"
]
}
]
},
"canSpringBallJumpMidAir",
{
"and": [
"h_canCrouchJumpDownGrab",
"canBombJumpWaterEscape",
"canIBJ"
]
}
]
}
|
|
From: 1
Top Sand Entrance
To: 3
Top Left Item
Notable: true 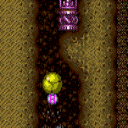

Reach the left side item using a single bomb explosion barely reach it. Use HiJump to reach the water line and then use a Bomb Jump Water Escape motion to Bomb jump out of the water. Do not Morph until fully out of the water to place the Bomb with the correct height. And do not place the Bomb at the max possible height, but a little lower where it will bounce Samus higher. Requires: "canSuitlessMaridia" "HiJump" "canPlayInSand" "h_canCrouchJumpDownGrab" "canBombJumpWaterEscape" |
|
It's possible to get out of the sand suitless and without HiJump after falling from the chute, by hugging the left side and moving quickly. Requires: "canSuitlessMaridia"
"canPlayInSand"
{
"or": [
{
"and": [
"h_canMaxHeightSpringBallJump",
{
"or": [
"canWalljump",
"can4HighMidAirMorph",
"canJumpIntoIBJ"
]
}
]
}
]
}
|
|
Jump out of the sand before Shinesparking. Entrance condition: {
"comeInShinecharged": {
"framesRequired": 105
},
"comesThroughToilet": "any"
}
Requires: "canPlayInSand"
"canSunkenTileWideWallClimb"
"canShinechargeMovementComplex"
{
"or": [
"canMidairShinespark",
"canCarefulJump"
]
}
{
"shinespark": {
"frames": 11
}
}
|
|
Requires: "Gravity"
{
"or": [
"canWallJumpInstantMorph",
{
"and": [
"SpaceJump",
"Morph",
{
"or": [
"canMidAirMorph",
"canCarefulJump",
{
"ammo": {
"type": "Super",
"count": 1
}
},
{
"enemyDamage": {
"enemy": "Boulder",
"type": "contact",
"hits": 1
}
}
]
}
]
}
]
}
|
|
Requires: "Gravity"
"Morph"
"canPlayInSand"
{
"or": [
{
"and": [
{
"or": [
"canWalljump",
"canGravityJump",
"HiJump",
"canSpringBallJumpMidAir"
]
},
{
"or": [
"canMidAirMorph",
"canCarefulJump",
{
"ammo": {
"type": "Super",
"count": 1
}
},
{
"enemyDamage": {
"enemy": "Boulder",
"type": "contact",
"hits": 1
}
}
]
}
]
},
{
"and": [
"h_canUseSpringBall",
"canJumpIntoIBJ"
]
},
"canSandIBJ"
]
}
|
|
Requires: "canSuitlessMaridia" "canPlayInSand" "HiJump" "canSpringBallJumpMidAir" |
|
Perform a double springball jump with the first jump being a bounce on the sand. Requires: "canSuitlessMaridia"
{
"or": [
"canPrepareForNextRoom",
"canPlayInSand"
]
}
"h_canDoubleSpringBallJumpWithHiJump"
|
|
From: 1
Top Sand Entrance
To: 4
Right Item
Notable: true 
Jump off the sand and use Underwater Walljumps to enter the maze leading to the Power Bomb location. Requires: "Morph" "canPlayInSand" "canUnderwaterWalljump" |
|
From: 1
Top Sand Entrance
To: 4
Right Item
Notable: true 
Walljump up and instant morph with exact timing and positioning so as to enter the Power Bomb location through the maze's exit. Requires: "canSuitlessMaridia" "canConsecutiveWalljump" "canPlayInSand" "HiJump" "canInsaneWalljump" "can3HighWallMidAirMorph" |
|
From: 1
Top Sand Entrance
To: 4
Right Item
Notable: true 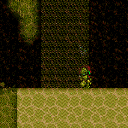
By using the sandfall physics, it is possible to springballjump to the Maridia Power Bomb location without Gravity or HiJump. This requires a very precise spinjump into the sandfall which also exits the sandfall, after being pushed down, with more height than a regular jump. It is very easy to fall into the sand and be unable to escape. Requires: "canSuitlessMaridia" "canSandfallBounce" "canTrickySpringBallJump" "canTrickyJump" |
|
Shinespark vertically from the sand to get onto the first ledge. Carefully jump onto the second ledge and return to lure the Boulder, or shoot it with a Super. Entrance condition: {
"comeInShinecharged": {
"framesRequired": 90
},
"comesThroughToilet": "any"
}
Requires: "Gravity"
"Morph"
"canPlayInSand"
"canShinechargeMovement"
{
"shinespark": {
"frames": 12
}
}
{
"or": [
"canCarefulJump",
{
"ammo": {
"type": "Super",
"count": 1
}
},
{
"enemyDamage": {
"enemy": "Boulder",
"type": "contact",
"hits": 1
}
}
]
}
|
|
From: 1
Top Sand Entrance
To: 4
Right Item
The shinespark must be performed near the upper ledge, and not inside the sandfall. Entrance condition: {
"comeInShinecharged": {
"framesRequired": 60
},
"comesThroughToilet": "any"
}
Requires: "Gravity"
"Morph"
"canMidairShinespark"
"canShinechargeMovement"
"canPrepareForNextRoom"
{
"shinespark": {
"frames": 18
}
}
|
|
From: 1
Top Sand Entrance
To: 4
Right Item
Shinespark vertically from the sand to get onto the first ledge. Carefully get to the second ledge and return to lure the Boulder, or shoot it with a Super. Entrance condition: {
"comeInShinecharged": {
"framesRequired": 140
},
"comesThroughToilet": "any"
}
Requires: "canSuitlessMaridia"
"Morph"
"canPlayInSand"
"canShinechargeMovementComplex"
{
"shinespark": {
"frames": 12
}
}
{
"or": [
"HiJump",
"canSpringBallJumpMidAir",
"canSunkenTileWideWallClimb"
]
}
{
"or": [
"canTrickyJump",
{
"ammo": {
"type": "Super",
"count": 1
}
},
{
"enemyDamage": {
"enemy": "Boulder",
"type": "contact",
"hits": 1
}
}
]
}
|
|
From: 1
Top Sand Entrance
To: 4
Right Item
The shinespark must be performed near the upper ledge, and not inside the sandfall. Entrance condition: {
"comeInShinecharged": {
"framesRequired": 70
},
"comesThroughToilet": "any"
}
Requires: "canSuitlessMaridia"
"Morph"
"canMidairShinespark"
"canShinechargeMovementComplex"
"canPrepareForNextRoom"
{
"shinespark": {
"frames": 18
}
}
|
|
IBJ or Spring Ball Bomb Jump through two sets of Crumble Blocks. Entrance condition: {
"comeInWithGMode": {
"mode": "any",
"morphed": true
},
"comesThroughToilet": "any"
}
Requires: "Gravity"
{
"or": [
"h_canArtificialMorphIBJ",
{
"and": [
"h_canArtificialMorphSpringBallBombJump",
"h_additionalBomb"
]
}
]
}
|
|
Exit condition: {
"leaveNormally": {}
}
|
|
|
|
Requires: "Morph" |
{
"$schema": "../../../schema/m3-room.schema.json",
"id": 208,
"name": "East Sand Hole",
"area": "Maridia",
"subarea": "Inner",
"subsubarea": "Pink",
"playable": true,
"roomAddress": "0x7D51E",
"roomEnvironments": [
{
"heated": false
}
],
"nodes": [
{
"id": 1,
"name": "Top Sand Entrance",
"nodeType": "entrance",
"nodeSubType": "sandpit",
"nodeAddress": "0x001a6c0",
"doorOrientation": "up"
},
{
"id": 2,
"name": "Bottom Right Sand Exit",
"nodeType": "exit",
"nodeSubType": "sandpit",
"nodeAddress": "0x001a6cc",
"doorOrientation": "down"
},
{
"id": 3,
"name": "Top Left Item",
"nodeType": "item",
"nodeSubType": "visible",
"nodeItem": "Missile",
"nodeAddress": "0x7C5EB",
"locks": [
{
"name": "Dummy Item Lock",
"lockType": "gameFlag",
"unlockStrats": [
{
"name": "Base (Collect Item)",
"notable": false,
"requires": []
}
]
}
]
},
{
"id": 4,
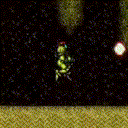
"name": "Right Item",
"nodeType": "item",
"nodeSubType": "visible",
"nodeItem": "PowerBomb",
"nodeAddress": "0x7C5F1",
"locks": [
{
"name": "Dummy Item Lock",
"lockType": "gameFlag",
"unlockStrats": [
{
"name": "Base (Collect Item)",
"notable": false,
"requires": []
}
]
}
]
}
],
"enemies": [],
"links": [
{
"from": 1,
"to": [
{
"id": 1
},
{
"id": 2
},
{
"id": 3
},
{
"id": 4
}
]
},
{
"from": 2,
"to": [
{
"id": 2
}
]
},
{
"from": 3,
"to": [
{
"id": 1
}
]
},
{
"from": 4,
"to": [
{
"id": 1
}
]
}
],
"strats": [
{
"link": [
1,
1
],
"name": "Crystal Flash",
"requires": [
"h_canCrystalFlash"
],
"flashSuitChecked": true
},
{
"link": [
1,
2
],
"name": "Base",
"requires": []
},
{
"link": [
1,
2
],
"name": "G-Mode",
"notable": false,
"entranceCondition": {
"comeInWithGMode": {
"mode": "any",
"morphed": false
},
"comesThroughToilet": "any"
},
"requires": [],
"exitCondition": {
"leaveWithGMode": {
"morphed": false
}
},
"flashSuitChecked": true
},
{
"link": [
1,
2
],
"name": "G-Mode Morph",
"notable": false,
"entranceCondition": {
"comeInWithGMode": {
"mode": "any",
"morphed": true
},
"comesThroughToilet": "any"
},
"requires": [],
"exitCondition": {
"leaveWithGMode": {
"morphed": true
}
},
"flashSuitChecked": true
},
{
"link": [
1,
3
],
"name": "Base",
"requires": [
"Gravity"
]
},
{
"link": [
1,
3
],
"name": "Suitless HiJump",
"requires": [
"canSuitlessMaridia",
"HiJump",
{
"or": [
"canPlayInSand",
{
"and": [
"canPrepareForNextRoom",
"h_canUseSpringBall"
]
}
]
},
{
"or": [
{
"and": [
{
"or": [
"canWalljump",
"canSpaceJumpWaterEscape"
]
},
{
"or": [
"h_canCrouchJumpDownGrab",
"canSunkenTileWideWallClimb"
]
}
]
},
"canSpringBallJumpMidAir",
{
"and": [
"h_canCrouchJumpDownGrab",
"canBombJumpWaterEscape",
"canIBJ"
]
}
]
}
]
},
{
"link": [
1,
3
],
"name": "East Sand Hole Suitless HiJump Perfect Bomb Boost",
"notable": true,
"requires": [
"canSuitlessMaridia",
"HiJump",
"canPlayInSand",
"h_canCrouchJumpDownGrab",
"canBombJumpWaterEscape"
],
"note": [
"Reach the left side item using a single bomb explosion barely reach it.",
"Use HiJump to reach the water line and then use a Bomb Jump Water Escape motion to Bomb jump out of the water.",
"Do not Morph until fully out of the water to place the Bomb with the correct height.",
"And do not place the Bomb at the max possible height, but a little lower where it will bounce Samus higher."
]
},
{
"link": [
1,
3
],
"name": "Suitless Bootless",
"requires": [
"canSuitlessMaridia",
"canPlayInSand",
{
"or": [
{
"and": [
"h_canMaxHeightSpringBallJump",
{
"or": [
"canWalljump",
"can4HighMidAirMorph",
"canJumpIntoIBJ"
]
}
]
}
]
}
],
"note": "It's possible to get out of the sand suitless and without HiJump after falling from the chute, by hugging the left side and moving quickly."
},
{
"link": [
1,
3
],
"name": "Shinespark",
"entranceCondition": {
"comeInShinecharged": {
"framesRequired": 105
},
"comesThroughToilet": "any"
},
"requires": [
"canPlayInSand",
"canSunkenTileWideWallClimb",
"canShinechargeMovementComplex",
{
"or": [
"canMidairShinespark",
"canCarefulJump"
]
},
{
"shinespark": {
"frames": 11
}
}
],
"flashSuitChecked": true,
"note": "Jump out of the sand before Shinesparking."
},
{
"link": [
1,
4
],
"name": "Base",
"requires": [
"Gravity",
{
"or": [
"canWallJumpInstantMorph",
{
"and": [
"SpaceJump",
"Morph",
{
"or": [
"canMidAirMorph",
"canCarefulJump",
{
"ammo": {
"type": "Super",
"count": 1
}
},
{
"enemyDamage": {
"enemy": "Boulder",
"type": "contact",
"hits": 1
}
}
]
}
]
}
]
}
]
},
{
"link": [
1,
4
],
"name": "Gravity on Sand",
"requires": [
"Gravity",
"Morph",
"canPlayInSand",
{
"or": [
{
"and": [
{
"or": [
"canWalljump",
"canGravityJump",
"HiJump",
"canSpringBallJumpMidAir"
]
},
{
"or": [
"canMidAirMorph",
"canCarefulJump",
{
"ammo": {
"type": "Super",
"count": 1
}
},
{
"enemyDamage": {
"enemy": "Boulder",
"type": "contact",
"hits": 1
}
}
]
}
]
},
{
"and": [
"h_canUseSpringBall",
"canJumpIntoIBJ"
]
},
"canSandIBJ"
]
}
]
},
{
"link": [
1,
4
],
"name": "Suitless",
"requires": [
"canSuitlessMaridia",
"canPlayInSand",
"HiJump",
"canSpringBallJumpMidAir"
]
},
{
"link": [
1,
4
],
"name": "Double Springball Jump",
"requires": [
"canSuitlessMaridia",
{
"or": [
"canPrepareForNextRoom",
"canPlayInSand"
]
},
"h_canDoubleSpringBallJumpWithHiJump"
],
"note": "Perform a double springball jump with the first jump being a bounce on the sand."
},
{
"link": [
1,
4
],
"name": "East Sand Hole Underwater Walljumps",
"notable": true,
"requires": [
"Morph",
"canPlayInSand",
"canUnderwaterWalljump"
],
"note": "Jump off the sand and use Underwater Walljumps to enter the maze leading to the Power Bomb location."
},
{
"link": [
1,
4
],
"name": "East Sand Hole Insane Walljump Morph",
"notable": true,
"requires": [
"canSuitlessMaridia",
"canConsecutiveWalljump",
"canPlayInSand",
"HiJump",
"canInsaneWalljump",
"can3HighWallMidAirMorph"
],
"note": "Walljump up and instant morph with exact timing and positioning so as to enter the Power Bomb location through the maze's exit."
},
{
"link": [
1,
4
],
"name": "East Sand Hole Sandfall Bounce to Power Bombs",
"notable": true,
"requires": [
"canSuitlessMaridia",
"canSandfallBounce",
"canTrickySpringBallJump",
"canTrickyJump"
],
"note": [
"By using the sandfall physics, it is possible to springballjump to the Maridia Power Bomb location without Gravity or HiJump.",
"This requires a very precise spinjump into the sandfall which also exits the sandfall, after being pushed down, with more height than a regular jump.",
"It is very easy to fall into the sand and be unable to escape."
]
},
{
"link": [
1,
4
],
"name": "Shinespark From the Sand",
"entranceCondition": {
"comeInShinecharged": {
"framesRequired": 90
},
"comesThroughToilet": "any"
},
"requires": [
"Gravity",
"Morph",
"canPlayInSand",
"canShinechargeMovement",
{
"shinespark": {
"frames": 12
}
},
{
"or": [
"canCarefulJump",
{
"ammo": {
"type": "Super",
"count": 1
}
},
{
"enemyDamage": {
"enemy": "Boulder",
"type": "contact",
"hits": 1
}
}
]
}
],
"flashSuitChecked": true,
"note": [
"Shinespark vertically from the sand to get onto the first ledge.",
"Carefully jump onto the second ledge and return to lure the Boulder, or shoot it with a Super."
]
},
{
"link": [
1,
4
],
"name": "Shinespark - Enter Spinning, Midair Diagonal Spark",
"entranceCondition": {
"comeInShinecharged": {
"framesRequired": 60
},
"comesThroughToilet": "any"
},
"requires": [
"Gravity",
"Morph",
"canMidairShinespark",
"canShinechargeMovement",
"canPrepareForNextRoom",
{
"shinespark": {
"frames": 18
}
}
],
"flashSuitChecked": true,
"note": "The shinespark must be performed near the upper ledge, and not inside the sandfall."
},
{
"link": [
1,
4
],
"name": "Suitless Shinespark - Sand Jump Into Spark",
"entranceCondition": {
"comeInShinecharged": {
"framesRequired": 140
},
"comesThroughToilet": "any"
},
"requires": [
"canSuitlessMaridia",
"Morph",
"canPlayInSand",
"canShinechargeMovementComplex",
{
"shinespark": {
"frames": 12
}
},
{
"or": [
"HiJump",
"canSpringBallJumpMidAir",
"canSunkenTileWideWallClimb"
]
},
{
"or": [
"canTrickyJump",
{
"ammo": {
"type": "Super",
"count": 1
}
},
{
"enemyDamage": {
"enemy": "Boulder",
"type": "contact",
"hits": 1
}
}
]
}
],
"flashSuitChecked": true,
"note": [
"Shinespark vertically from the sand to get onto the first ledge.",
"Carefully get to the second ledge and return to lure the Boulder, or shoot it with a Super."
]
},
{
"link": [
1,
4
],
"name": "Suitless Shinespark - Enter Spinning, Midair Diagonal Spark",
"entranceCondition": {
"comeInShinecharged": {
"framesRequired": 70
},
"comesThroughToilet": "any"
},
"requires": [
"canSuitlessMaridia",
"Morph",
"canMidairShinespark",
"canShinechargeMovementComplex",
"canPrepareForNextRoom",
{
"shinespark": {
"frames": 18
}
}
],
"flashSuitChecked": true,
"note": "The shinespark must be performed near the upper ledge, and not inside the sandfall."
},
{
"link": [
1,
4
],
"name": "G-Mode Morph Through Crumbles",
"entranceCondition": {
"comeInWithGMode": {
"mode": "any",
"morphed": true
},
"comesThroughToilet": "any"
},
"requires": [
"Gravity",
{
"or": [
"h_canArtificialMorphIBJ",
{
"and": [
"h_canArtificialMorphSpringBallBombJump",
"h_additionalBomb"
]
}
]
}
],
"flashSuitChecked": true,
"note": "IBJ or Spring Ball Bomb Jump through two sets of Crumble Blocks.",
"devNote": [
"Without this being Morph, there is no way to escape. PLMs are already overloaded from the sand.",
"FIXME Add a morphless double spring ball jump."
]
},
{
"link": [
2,
2
],
"name": "Leave Normally",
"exitCondition": {
"leaveNormally": {}
},
"requires": []
},
{
"link": [
3,
1
],
"name": "Base",
"requires": []
},
{
"link": [
4,
1
],
"name": "Base",
"requires": [
"Morph"
],
"devNote": [
"This does not require a mid-air morph, and Samus can roll from the ledge above to get into the morph tunnel."
]
},
{
"link": [
1,
1
],
"name": "Base (Come In Normally)",
"entranceCondition": {
"comeInNormally": {}
},
"requires": []
},
{
"link": [
2,
2
],
"name": "Base (Unlock Door)",
"requires": [],
"unlocksDoors": [
{
"types": [
"ammo"
],
"requires": []
}
]
},
{
"name": "Base (Collect Item)",
"notable": false,
"requires": [],
"link": [
3,
3
],
"collectsItems": [
3
]
},
{
"name": "Base (Collect Item)",
"notable": false,
"requires": [],
"link": [
4,
4
],
"collectsItems": [
4
]
}
]
}