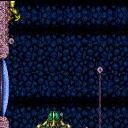
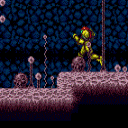
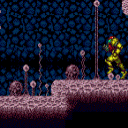
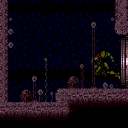
Pink Brinstar Hopper Room
Room ID: 61
|
Requires: {
"obstaclesCleared": [
"A"
]
}
Exit condition: {
"leaveWithRunway": {
"length": 1,
"openEnd": 1
}
}
|
|
This assumes you don't know you're entering this room, and take a Small Sidehopper hit quickly. The Small Sidehoppers may deliver more of the hits, but this is an assumed worst case scenario Requires: {
"enemyDamage": {
"enemy": "Sm. Sidehopper",
"type": "contact",
"hits": 1
}
}
{
"enemyDamage": {
"enemy": "Sidehopper",
"type": "contact",
"hits": 3
}
}
Clears obstacles: A |
|
This assumes you don't know you're entering this room, and take a Small Sidehopper hit quickly. Requires: {
"enemyDamage": {
"enemy": "Sm. Sidehopper",
"type": "contact",
"hits": 1
}
}
{
"enemyDamage": {
"enemy": "Sidehopper",
"type": "contact",
"hits": 1
}
}
{
"or": [
"Spazer",
"Wave"
]
}
Clears obstacles: A |
|
This assumes you don't know you're entering this room, and take a Small Sidehopper hit quickly. Requires: {
"enemyDamage": {
"enemy": "Sm. Sidehopper",
"type": "contact",
"hits": 1
}
}
{
"enemyKill": {
"enemies": [
[
"Sidehopper",
"Sm. Sidehopper",
"Sm. Sidehopper"
]
],
"explicitWeapons": [
"Missile",
"Super",
"PowerBomb",
"ScrewAttack",
"Plasma"
]
}
}
Clears obstacles: A |
|
Weaken the big hopper with a Power Beam shot and then use one Super to hit all three enemies when they stack together. Entrance condition: {
"comeInNormally": {}
}
Requires: {
"enemyDamage": {
"enemy": "Sm. Sidehopper",
"type": "contact",
"hits": 1
}
}
"canPrepareForNextRoom"
{
"ammo": {
"type": "Super",
"count": 1
}
}
Clears obstacles: A |
|
From: 1
Left Door
To: 1
Left Door
Requires: "canPrepareForNextRoom" "ScrewAttack" Clears obstacles: A |
|
From: 1
Left Door
To: 1
Left Door
Entrance condition: {
"comeInShinecharging": {
"length": 0,
"openEnd": 1
}
}
Requires: "canPrepareForNextRoom" Clears obstacles: A |
|
From: 1
Left Door
To: 1
Left Door
Entrance condition: {
"comeInWithSpark": {}
}
Requires: "canPrepareForNextRoom"
{
"shinespark": {
"frames": 24
}
}
Clears obstacles: A |
|
From: 1
Left Door
To: 1
Left Door
Notable: true 
Jump straight up and shoot with the correct timing. This strat involves shooting a Super diagonally from the correct height while flush against the left wall. Its acceleration will cause it to clip into the blue gate off-screen. Requires: {
"obstaclesCleared": [
"A"
]
}
{
"or": [
"canTrickyJump",
"h_canBackIntoCorner"
]
}
"HiJump"
"canOffScreenSuperShot"
Clears obstacles: B |
|
From: 1
Left Door
To: 1
Left Door
Notable: true
Use damage from the small sidehopper to align against the left wall. Jump straight up and shoot with the correct timing. This strat involves shooting a Super diagonally from the correct height while flush against the left wall. Its acceleration will cause it to clip into the blue gate off-screen. Requires: {
"enemyDamage": {
"enemy": "Sm. Sidehopper",
"type": "contact",
"hits": 1
}
}
{
"enemyDamage": {
"enemy": "Sidehopper",
"type": "contact",
"hits": 1
}
}
"canNeutralDamageBoost"
"HiJump"
"canOffScreenSuperShot"
Clears obstacles: B |
|
From: 1
Left Door
To: 1
Left Door
Notable: true
Use a stationary spinjump, or spinjump against the wall and turn around without moving; and shoot with the same correct timing. This strat involves shooting a Super diagonally from the correct height while flush against the left wall. Its acceleration will cause it to clip into the blue gate off-screen. Requires: {
"obstaclesCleared": [
"A"
]
}
{
"or": [
"canTrickyJump",
"h_canBackIntoCorner"
]
}
"canStationarySpinJump"
"SpaceJump"
"canOffScreenSuperShot"
Clears obstacles: B |
|
From: 1
Left Door
To: 1
Left Door
Notable: true
Build run speed and jump into the left wall, turning around without changing Samus' pixel position. This strat involves shooting a Super diagonally from the correct height while flush against the left wall. Its acceleration will cause it to clip into the blue gate off-screen. Requires: {
"obstaclesCleared": [
"A"
]
}
"canTrickyDashJump"
"canOffScreenSuperShot"
Clears obstacles: B |
|
From: 1
Left Door
To: 1
Left Door
Notable: true
A consistent setup is to align with the wall below the door frame facing right. Jump and turn around to land on the door frame. Then jump and turn around again to return to being aligned with the wall but at the right height for shooting the Super. This strat involves shooting a Super diagonally from the correct height while flush against the left wall. Its acceleration will cause it to clip into the blue gate off-screen. Requires: {
"obstaclesCleared": [
"A"
]
}
{
"doorUnlockedAtNode": 1
}
"canTrickyJump"
"canOffScreenSuperShot"
Clears obstacles: B |
|
From: 1
Left Door
To: 1
Left Door
Entrance condition: {
"comeInWithGMode": {
"mode": "indirect",
"morphed": false
}
}
Clears obstacles: B, C |
|
From: 1
Left Door
To: 1
Left Door
Kill the Sidehoppers with a Power Bomb upon entry. Entrance condition: {
"comeInWithGMode": {
"mode": "indirect",
"morphed": true
}
}
Requires: {
"enemyDamage": {
"enemy": "Sm. Sidehopper",
"type": "contact",
"hits": 1
}
}
"h_canArtificialMorphPowerBomb"
Clears obstacles: A, B, C |
|
Requires: {
"obstaclesCleared": [
"A"
]
}
"h_canCrystalFlash"
|
|
From: 1
Left Door
To: 1
Left Door
This is possible to do without taking a second hit: Enter the room in a jump, then shoot down to open the door and land in the doorsill. Entrance condition: {
"comeInJumping": {
"minTiles": 1,
"speedBooster": "any"
}
}
Exit condition: {
"leaveWithGModeSetup": {}
}
|
|
From: 1
Left Door
To: 1
Left Door
This is possible to do without taking a second hit: Enter the room in a jump, then shoot down to open the door and land in the doorsill. Requires: {
"obstaclesNotCleared": [
"A"
]
}
{
"enemyDamage": {
"enemy": "Sm. Sidehopper",
"type": "contact",
"hits": 1
}
}
Exit condition: {
"leaveWithGModeSetup": {}
}
|
|
Requires: {
"enemyDamage": {
"enemy": "Sidehopper",
"type": "contact",
"hits": 1
}
}
|
|
Requires: "h_canIBJ"
{
  "obstaclesCleared": [
    "A"
  ]
}
{
"or": [
"Wave",
{
"obstaclesCleared": [
"B"
]
}
]
}
|
|
From: 1
Left Door
To: 2
Right Door
Kill the Sidehoppers with Bombs or a Power Bomb, then IBJ up onto the Grapple block. Entrance condition: {
"comeInWithGMode": {
"mode": "indirect",
"morphed": true
}
}
Requires: "h_canArtificialMorphIBJ"
{
"enemyDamage": {
"enemy": "Sm. Sidehopper",
"type": "contact",
"hits": 1
}
}
{
"or": [
{
"enemyDamage": {
"enemy": "Sidehopper",
"type": "contact",
"hits": 3
}
},
"h_canArtificialMorphPowerBomb"
]
}
Clears obstacles: A, B |
|
Requires: {
"or": [
{
"obstaclesCleared": [
"A"
]
},
{
"enemyDamage": {
"enemy": "Sm. Sidehopper",
"type": "contact",
"hits": 1
}
}
]
}
{
"or": [
"SpaceJump",
"canWalljump",
{
"and": [
"Grapple",
{
"obstaclesNotCleared": [
"C"
]
}
]
},
{
"and": [
"HiJump",
"canSpringBallJumpMidAir"
]
}
]
}
|
|
Entrance condition: {
"comeInJumping": {
"minTiles": 1,
"speedBooster": "any"
}
}
Requires: "canPrepareForNextRoom"
{
"or": [
"SpaceJump",
"canWalljump",
{
"and": [
"Grapple",
{
"obstaclesNotCleared": [
"C"
]
}
]
},
{
"and": [
"HiJump",
"canSpringBallJumpMidAir"
]
}
]
}
|
|
From: 1
Left Door
To: 3
Top Junction
Run from the left side to the right, then jump just before or at the end of the runway to get up onto the Grapple block. Requires: "HiJump"
"canTrickyJump"
"SpeedBooster"
{
"obstaclesCleared": [
"A"
]
}
|
|
From: 1
Left Door
To: 3
Top Junction
Perform a very precise Spring Ball jump from the doorframe onto the Grapple block. A running spin jump or crouch jump can be used. Requires: {
"doorUnlockedAtNode": 1
}
"canTrickySpringBallJump"
"canTrickyJump"
{
"obstaclesCleared": [
"A"
]
}
{
"obstaclesNotCleared": [
"C"
]
}
|
|
Jump into the room and onto the Grapple block. Entrance condition: {
"comeInJumping": {
"speedBooster": true,
"minTiles": 34.4375
}
}
Requires: "canPrepareForNextRoom" "canTrickyJump" |
|
Jump into the room and onto the Grapple block. Entrance condition: {
"comeInJumping": {
"speedBooster": true,
"minTiles": 25
}
}
Requires: "canPrepareForNextRoom" "canTrickyDashJump" |
|
Jump into the room and onto the Grapple block. Entrance condition: {
"comeInJumping": {
"speedBooster": true,
"minTiles": 6.4375
}
}
Requires: "canPrepareForNextRoom" "HiJump" "canDisableEquipment" "canCarefulJump" |
|
Jump into the room and onto the Grapple block. Requires a runway of only 2 tiles in the adjacent room. Entrance condition: {
"comeInJumping": {
"speedBooster": true,
"minTiles": 1.4375
}
}
Requires: "canPrepareForNextRoom" "HiJump" "canTrickyDashJump" "canDisableEquipment" |
|
From: 1
Left Door
To: 3
Top Junction
Perform a Spring Ball jump from a speedy jump in the previous room. Entrance condition: {
"comeInJumping": {
"speedBooster": true,
"minTiles": 7
}
}
Requires: "canPrepareForNextRoom" "canTrickySpringBallJump" "canCarefulJump" |
|
From: 1
Left Door
To: 3
Top Junction
Perform a very precise Spring Ball jump through the transition and onto the Grapple block. A running spin jump or crouch jump can be used. Entrance condition: {
"comeInJumping": {
"speedBooster": false,
"minTiles": 0.4375
}
}
Requires: "canPrepareForNextRoom" "canTrickySpringBallJump" "canTrickyJump" |
|
Kill the Sidehoppers with Bombs or a Power Bomb, then IBJ up onto the Grapple block. Use Wave to get through. Entrance condition: {
"comeInWithGMode": {
"mode": "any",
"morphed": true
}
}
Requires: "h_canArtificialMorphIBJ"
{
"enemyDamage": {
"enemy": "Sm. Sidehopper",
"type": "contact",
"hits": 1
}
}
{
"or": [
{
"enemyDamage": {
"enemy": "Sidehopper",
"type": "contact",
"hits": 3
}
},
"h_canArtificialMorphPowerBomb"
]
}
Clears obstacles: A |
|
From: 1
Left Door
To: 3
Top Junction
Notable: true 
To minimize damage from the Hoppers, get stuck in the door relatively high and move quickly. Climb up somewhat less than 1 screen, until Samus' head appears between 1 and 3 tiles below the door. Then perform a turn-around spin jump to the right to get on top of the Grapple block. Entrance condition: {
"comeInWithDoorStuckSetup": {}
}
Requires: "canXRayClimb"
{
"enemyDamage": {
"enemy": "Sidehopper",
"type": "contact",
"hits": 2
}
}
|
|
Carefully freeze the hoppers without taking too much damage but also without accidently killing all of the enemies. Requires: {
"obstaclesNotCleared": [
"A"
]
}
"canTrickyUseFrozenEnemies"
{
"enemyDamage": {
"enemy": "Sm. Sidehopper",
"type": "contact",
"hits": 1
}
}
{
  "enemyDamage": {
    "enemy": "Sidehopper",
    "type": "contact",
    "hits": 1
  }
}
{
"or": [
{
"and": [
"Wave",
"Spazer"
]
},
"Plasma",
{
"enemyDamage": {
"enemy": "Sidehopper",
"type": "contact",
"hits": 1
}
}
]
}
|
|
Entrance condition: {
"comeInWithGrappleTeleport": {
"blockPositions": [
[
2,
29
]
]
}
}
Bypasses door shell: true |
|
Entrance condition: {
"comeInWithGrappleTeleport": {
"blockPositions": [
[
2,
29
]
]
}
}
Exit condition: {
"leaveWithGrappleTeleport": {
"blockPositions": [
[
2,
29
]
]
}
}
Bypasses door shell: true |
|
Exit condition: {
"leaveWithRunway": {
"length": 6,
"openEnd": 1
}
}
|
|
Requires: "h_canCrystalFlash" Clears obstacles: A |
|
Requires: "Charge"
"Plasma"
"canSpecialBeamAttack"
{
"ammo": {
"type": "PowerBomb",
"count": 1
}
}
Clears obstacles: A |
|
Requires: {
"or": [
"canWalljump",
"h_canFly",
{
"and": [
"HiJump",
"canSpringBallJumpMidAir"
]
}
]
}
Clears obstacles: B |
|
The elevator can be raised by hitting below the shot block with a Bomb. Requires: "h_canUseMorphBombs" Clears obstacles: B |
|
From: 2
Right Door
To: 3
Top Junction
Use a Power Bomb against the left wall or Wave to kill the enemies and ride the elevator. Requires: {
"or": [
"h_canUsePowerBombs",
"Wave"
]
}
Clears obstacles: A, B |
|
From: 2
Right Door
To: 3
Top Junction
Notable: true 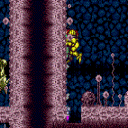
The elevator can be raised by clipping a shot into the floor, shot while falling with the right amount of vertical speed. This can be done with a Missile, Super, or charged Spazer or Plasma shot, a well positioned angle Spazer shot while crouched, or an or Ice SBA. Requires: {
"or": [
{
"ammo": {
"type": "Missile",
"count": 1
}
},
{
"ammo": {
"type": "Super",
"count": 1
}
},
"Spazer",
{
"and": [
"Charge",
"Plasma"
]
},
{
"and": [
"Charge",
"Ice",
"canSpecialBeamAttack",
{
"ammo": {
"type": "PowerBomb",
"count": 1
}
}
]
}
]
}
Clears obstacles: B |
|
Jump at the end of the runway in-room. Assumes there is a runway in the adjacent room of at least 7 tiles. Entrance condition: {
"comeInRunning": {
"speedBooster": true,
"minTiles": 7
}
}
Requires: "HiJump" |
|
Jump at the end of the runway in-room. Assumes there is a runway in the adjacent room of at least 29 tiles. Entrance condition: {
"comeInRunning": {
"speedBooster": true,
"minTiles": 29
}
}
|
|
Jump at the very end of the runway in-room. Requires a runway in the adjacent room of at least 6 tiles. Entrance condition: {
"comeInRunning": {
"speedBooster": true,
"minTiles": 6
}
}
Requires: "HiJump" "canTrickyJump" |
|
Jump at the very end of the runway in-room. Requires a runway in the adjacent room of at least 7 tiles. Entrance condition: {
"comeInRunning": {
"speedBooster": true,
"minTiles": 7
}
}
Requires: "canTrickySpringBallJump" "canTrickyDashJump" |
|
From: 2
Right Door
To: 3
Top Junction
Notable: true 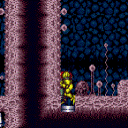
Start the elevator ride by using Screw Attack or Pseudo Screw in the hole. Kago the elevator to fall back in and hit the elevator again. This is much easier while the elevator is still rising, but can still be done with Morph afterwards. Unless HiJump is owned, this will need to be done once more to get high enough to get to the blue gate. Requires: "canKago"
{
"or": [
"ScrewAttack",
"canPseudoScrew"
]
}
{
"or": [
{
"and": [
"HiJump",
{
"or": [
"canCrouchJump",
"canDownGrab"
]
}
]
},
"canTrickyJump",
"Morph"
]
}
Clears obstacles: B |
|
From: 2
Right Door
To: 3
Top Junction
Entrance condition: {
"comeInShinecharging": {
"length": 5,
"openEnd": 1
}
}
Requires: {
"or": [
{
"shinespark": {
"frames": 22,
"excessFrames": 4
}
},
{
"and": [
"canMidairShinespark",
{
"shinespark": {
"frames": 15,
"excessFrames": 3
}
}
]
},
{
"and": [
"canMidairShinespark",
"HiJump",
{
"shinespark": {
"frames": 12,
"excessFrames": 4
}
}
]
}
]
}
Clears obstacles: B |
|
From: 2
Right Door
To: 3
Top Junction
Entrance condition: {
"comeInShinecharged": {
"framesRequired": 1
}
}
Requires: {
"shinespark": {
"frames": 22,
"excessFrames": 4
}
}
Clears obstacles: B |
|
Pink Hoppers Shinespark into the Wall to Ride the Elevator, Come in Shinecharging (Very Hard)
Pink Brinstar Hopper Room
From: 2
Right Door
To: 3
Top Junction
Notable: true 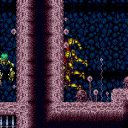
Shinesparking horizontally into the wall will trigger the elevator as Samus's echos hit it. Entrance condition: {
"comeInShinecharging": {
"length": 5,
"openEnd": 1
}
}
Requires: "canHorizontalShinespark"
{
"shinespark": {
"frames": 1,
"excessFrames": 1
}
}
Clears obstacles: B |
|
Pink Hoppers Shinespark into the Wall to Ride the Elevator, Come in Shinecharged (Very Hard)
Pink Brinstar Hopper Room
From: 2
Right Door
To: 3
Top Junction
Notable: true
Shinesparking horizontally into the wall will trigger the elevator as Samus's echos hit it. Entrance condition: {
"comeInShinecharged": {
"framesRequired": 45
}
}
Requires: "canHorizontalShinespark"
{
"shinespark": {
"frames": 1,
"excessFrames": 1
}
}
Clears obstacles: B |
|
Pink Hoppers Shinespark into the Wall to Ride the Elevator, Come in Shinesparking (Very Hard)
Pink Brinstar Hopper Room
From: 2
Right Door
To: 3
Top Junction
Notable: true
Shinesparking horizontally into the wall will trigger the elevator as Samus's echos hit it. Entrance condition: {
"comeInWithSpark": {}
}
Requires: "canHorizontalShinespark"
{
"shinespark": {
"frames": 15,
"excessFrames": 6
}
}
Clears obstacles: B |
|
From: 2
Right Door
To: 3
Top Junction
X-Ray climb until Samus is a little over halfway off screen; the position is not precise. Face right, then do a turnaround buffer spin jump into a Spring Ball jump to reach the ledge. The pause input can be pressed at the same time as the turnaround. It helps to do an airball to gain horizontal speed. The jump input after pausing should not be buffered, in order to allow a little time for the spring fling horizontal speed to take effect. Entrance condition: {
"comeInWithDoorStuckSetup": {}
}
Requires: "canXRayClimb" "canTrickyJump" "canLateralMidAirMorph" "canTrickySpringBallJump" "canSpringFling" |
|
From: 2
Right Door
To: 3
Top Junction
Get stuck 3 pixels inside the door, and X-ray climb to a precise height: after just one pixel of Samus' feet are visible while crouching facing left, perform exactly 7 more X-Ray stand-ups. Use X-ray to face left, then run and jump to barely make it onto the ledge. Entrance condition: {
"comeInWithDoorStuckSetup": {}
}
Requires: "HiJump" "canXRayClimb" "canOffScreenMovement" "canInsaneJump" |
|
From: 2
Right Door
To: 3
Top Junction
Enter with G-Mode and use X-Ray to get stuck 9 pixels inside the door. X-Ray climb to a relatively specific height: after just one pixel of Samus' feet are visible while crouching facing left, perform between 20 and 22 more X-Ray stand-ups (any of these work). Use X-ray to face left, then run and jump to barely make it onto the ledge. Entrance condition: {
"comeInWithGMode": {
"mode": "direct",
"morphed": false
}
}
Requires: "canXRayClimb" "canOffScreenMovement" "canInsaneJump" |
|
Entrance condition: {
"comeInWithGMode": {
"mode": "any",
"morphed": true
}
}
Requires: "h_canArtificialMorphIBJ" Clears obstacles: B |
|
From: 2
Right Door
To: 3
Top Junction
Using a power bomb against the left wall will kill the enemies and trigger the elevator. Entrance condition: {
"comeInWithGMode": {
"mode": "any",
"morphed": true
}
}
Requires: "h_canArtificialMorphPowerBomb" Clears obstacles: A, B |
|
Entrance condition: {
"comeInWithGrappleTeleport": {
"blockPositions": [
[
5,
3
],
[
7,
2
]
]
}
}
|
|
Requires: {
"obstaclesCleared": [
"A"
]
}
|
|
Jump far to the left in order to hit a small Sidehopper instead of a large one. Requires: {
"or": [
{
"enemyDamage": {
"enemy": "Sidehopper",
"type": "contact",
"hits": 1
}
},
{
"and": [
"canCarefulJump",
{
"enemyDamage": {
"enemy": "Sm. Sidehopper",
"type": "contact",
"hits": 1
}
}
]
}
]
}
|
|
It is possible to kill the Sidehoppers damageless by jumping into the bottom left corner then quickly spin jumping again. Requires: "ScrewAttack"
{
"or": [
"canCarefulJump",
{
"enemyDamage": {
"enemy": "Sm. Sidehopper",
"type": "contact",
"hits": 1
}
}
]
}
Clears obstacles: A |
|
Requires: {
"obstaclesCleared": [
"B"
]
}
{
"or": [
"canCarefulJump",
"canWalljump",
"SpaceJump",
"Grapple"
]
}
|
|
Requires: "Wave" Clears obstacles: B |
|
Clears obstacles: A |
|
From: 4
Frozen Hopper Junction
To: 3
Top Junction
Use a Frozen Hopper as a platform to jump up to the Grapple Block with an additional movement item. Letting it jump from the spike ledge or the door frame will make the jump easier, but it is difficult to avoid Hopper damage when setting this up. Requires: {
"obstaclesNotCleared": [
"A"
]
}
"canTrickyUseFrozenEnemies"
{
"or": [
"HiJump",
"canSpringBallJumpMidAir"
]
}
{
"or": [
{
"enemyDamage": {
"enemy": "Sm. Sidehopper",
"type": "contact",
"hits": 1
}
},
"canTrickyJump"
]
}
|
|
From: 4
Frozen Hopper Junction
To: 4
Frozen Hopper Junction
Notable: true
Freeze a small hopper to the side and kill the remaining Side Hoppers. Stand against the left wall (damage knockback will align Samus with the wall) and shoot up to freeze the hopper. Jump up to land on it, aligned with the wall. Alternatively, Jump and shoot down to freeze the hopper as a way to avoid damage. Fire a Super just above the door shell to hit the Gate. This strat involves shooting a Super diagonally from the correct height while flush against the left wall. Its acceleration will cause it to clip into the blue gate off-screen. Requires: {
"obstaclesNotCleared": [
"A"
]
}
"canTrickyUseFrozenEnemies"
"h_canBackIntoCorner"
"canOffScreenSuperShot"
{
"enemyDamage": {
"enemy": "Sm. Sidehopper",
"type": "contact",
"hits": 1
}
}
Clears obstacles: B |
|
From: 4
Frozen Hopper Junction
To: 4
Frozen Hopper Junction
Notable: true
This strat involves shooting a Super diagonally from the correct height while flush against the left wall. Its acceleration will cause it to clip into the blue gate off-screen. Jump straight up and shoot with the correct timing. Taking damage can be used to align against the wall. Requires: {
"obstaclesNotCleared": [
"A"
]
}
{
"or": [
"h_canBackIntoCorner",
{
"enemyDamage": {
"enemy": "Sm. Sidehopper",
"type": "contact",
"hits": 1
}
},
"canTrickyJump"
]
}
"HiJump"
"canOffScreenSuperShot"
Clears obstacles: B |
{
"$schema": "../../../schema/m3-room.schema.json",
"id": 61,
"name": "Pink Brinstar Hopper Room",
"area": "Brinstar",
"subarea": "Pink",
"playable": true,
"roomAddress": "0x7A130",
"roomEnvironments": [
{
"heated": false
}
],
"nodes": [
{
"id": 1,
"name": "Left Door",
"nodeType": "door",
"nodeSubType": "grey",
"nodeAddress": "0x0018fb2",
"doorEnvironments": [
{
"physics": "air"
}
],
"locks": [
{
"name": "Pink Brinstar Hoppers Left Grey Lock (to Big Pink)",
"lockType": "killEnemies",
"unlockStrats": [
{
"name": "Base",
"notable": false,
"requires": [
{
"obstaclesCleared": [
"A"
]
}
]
}
],
"yields": [
"f_ZebesAwake"
]
}
]
},
{
"id": 2,
"name": "Right Door",
"nodeType": "door",
"nodeSubType": "grey",
"nodeAddress": "0x0018fbe",
"doorEnvironments": [
{
"physics": "air"
}
],
"locks": [
{
"name": "Pink Brinstar Hoppers Right Grey Lock (to E-Tank)",
"lockType": "killEnemies",
"unlockStrats": [
{
"name": "Base",
"notable": false,
"requires": [
{
"obstaclesCleared": [
"A"
]
}
]
}
],
"yields": [
"f_ZebesAwake"
],
"devNote": "Hoppers must be killed, possibly by going to 1 and back."
}
]
},
{
"id": 3,
"name": "Top Junction",
"nodeType": "junction",
"nodeSubType": "junction",
"note": "Represents being on the Grapple block if going right or to the right of the gate, if going left."
},
{
"id": 4,
"name": "Frozen Hopper Junction",
"nodeType": "junction",
"nodeSubType": "junction",
"note": "Represents being with the Hoppers, one of them is frozen, and they are no longer a threat to Samus."
}
],
"obstacles": [
{
"id": "A",
"name": "Hoppers",
"obstacleType": "enemies"
},
{
"id": "B",
"name": "Blue Gate",
"obstacleType": "inanimate"
},
{
"id": "C",
"name": "In G-Mode - Can't Use Grapple, Open Door",
"obstacleType": "abstract"
}
],
"enemies": [
{
"id": "e1",
"groupName": "Pink Wave Gate Small Sidehoppers",
"enemyName": "Sm. Sidehopper",
"quantity": 2,
"homeNodes": [
1
]
},
{
"id": "e2",
"groupName": "Pink Wave Gate Sidehopper",
"enemyName": "Sidehopper",
"quantity": 1,
"homeNodes": [
1
]
}
],
"reusableRoomwideNotable": [
{
"name": "Pink Hoppers Shinespark into the Wall to Ride the Elevator",
"note": "Shinesparking horizontally into the wall will trigger the elevator as Samus's echos hit it."
},
{
"name": "Pink Hopper Reverse Gate Glitch",
"note": [
"This strat involves shooting a Super diagonally from the correct height while flush against the left wall.",
"Its acceleration will cause it to clip into the blue gate off-screen."
]
}
],
"links": [
{
"from": 1,
"to": [
{
"id": 1
},
{
"id": 2
},
{
"id": 3
},
{
"id": 4
}
]
},
{
"from": 2,
"to": [
{
"id": 1
},
{
"id": 2
},
{
"id": 3
}
]
},
{
"from": 3,
"to": [
{
"id": 1
},
{
"id": 2
},
{
"id": 3
}
]
},
{
"from": 4,
"to": [
{
"id": 1
},
{
"id": 3
},
{
"id": 4
}
]
}
],
"strats": [
{
"link": [
1,
1
],
"name": "Leave With Runway",
"requires": [
{
"obstaclesCleared": [
"A"
]
}
],
"exitCondition": {
"leaveWithRunway": {
"length": 1,
"openEnd": 1
}
}
},
{
"link": [
1,
1
],
"name": "Power Beam Kill",
"requires": [
{
"enemyDamage": {
"enemy": "Sm. Sidehopper",
"type": "contact",
"hits": 1
}
},
{
"enemyDamage": {
"enemy": "Sidehopper",
"type": "contact",
"hits": 3
}
}
],
"clearsObstacles": [
"A"
],
"note": [
"This assumes you don't know you're entering this room, and take a Small Sidehopper hit quickly.",
"The Small Sidehoppers may deliver more of the hits, but this is an assumed worst case scenario"
]
},
{
"link": [
1,
1
],
"name": "Intermediate Weapon Kill",
"requires": [
{
"enemyDamage": {
"enemy": "Sm. Sidehopper",
"type": "contact",
"hits": 1
}
},
{
"enemyDamage": {
"enemy": "Sidehopper",
"type": "contact",
"hits": 1
}
},
{
"or": [
"Spazer",
"Wave"
]
}
],
"clearsObstacles": [
"A"
],
"note": "This assumes you don't know you're entering this room, and take a Small Sidehopper hit quickly."
},
{
"link": [
1,
1
],
"name": "Fast Weapon Kill",
"requires": [
{
"enemyDamage": {
"enemy": "Sm. Sidehopper",
"type": "contact",
"hits": 1
}
},
{
"enemyKill": {
"enemies": [
[
"Sidehopper",
"Sm. Sidehopper",
"Sm. Sidehopper"
]
],
"explicitWeapons": [
"Missile",
"Super",
"PowerBomb",
"ScrewAttack",
"Plasma"
]
}
}
],
"clearsObstacles": [
"A"
],
"note": "This assumes you don't know you're entering this room, and take a Small Sidehopper hit quickly."
},
{
"link": [
1,
1
],
"name": "Stacked Super Kill",
"entranceCondition": {
"comeInNormally": {}
},
"requires": [
{
"enemyDamage": {
"enemy": "Sm. Sidehopper",
"type": "contact",
"hits": 1
}
},
"canPrepareForNextRoom",
{
"ammo": {
"type": "Super",
"count": 1
}
}
],
"clearsObstacles": [
"A"
],
"note": "Weaken the big hopper with a Power Beam shot and then use one Super to hit all three enemies when they stack together."
},
{
"link": [
1,
1
],
"name": "Kill on Entry (Screw Attack)",
"requires": [
"canPrepareForNextRoom",
"ScrewAttack"
],
"clearsObstacles": [
"A"
]
},
{
"link": [
1,
1
],
"name": "Kill on Entry (Come In With Blue Speed)",
"entranceCondition": {
"comeInShinecharging": {
"length": 0,
"openEnd": 1
}
},
"requires": [
"canPrepareForNextRoom"
],
"clearsObstacles": [
"A"
]
},
{
"link": [
1,
1
],
"name": "Kill on Entry (Come In With Spark)",
"entranceCondition": {
"comeInWithSpark": {}
},
"requires": [
"canPrepareForNextRoom",
{
"shinespark": {
"frames": 24
}
}
],
"clearsObstacles": [
"A"
]
},
{
"link": [
1,
1
],
"name": "Pink Hopper Reverse Gate Glitch (HiJump)",
"notable": true,
"requires": [
{
"obstaclesCleared": [
"A"
]
},
{
"or": [
"canTrickyJump",
"h_canBackIntoCorner"
]
},
"HiJump",
"canOffScreenSuperShot"
],
"clearsObstacles": [
"B"
],
"reusableRoomwideNotable": "Pink Hopper Reverse Gate Glitch",
"note": [
"Jump straight up and shoot with the correct timing.",
"This strat involves shooting a Super diagonally from the correct height while flush against the left wall.",
"Its acceleration will cause it to clip into the blue gate off-screen."
],
"devNote": [
"Springball jumps didn't look possible but was close.",
"IBJ didn't look possible."
]
},
{
"link": [
1,
1
],
"name": "Pink Hopper Reverse Gate Glitch (HiJump, Hoppers Alive)",
"notable": true,
"requires": [
{
"enemyDamage": {
"enemy": "Sm. Sidehopper",
"type": "contact",
"hits": 1
}
},
{
"enemyDamage": {
"enemy": "Sidehopper",
"type": "contact",
"hits": 1
}
},
"canNeutralDamageBoost",
"HiJump",
"canOffScreenSuperShot"
],
"clearsObstacles": [
"B"
],
"reusableRoomwideNotable": "Pink Hopper Reverse Gate Glitch",
"note": [
"Use damage from the small sidehopper to align against the left wall.",
"Jump straight up and shoot with the correct timing.",
"This strat involves shooting a Super diagonally from the correct height while flush against the left wall.",
"Its acceleration will cause it to clip into the blue gate off-screen."
]
},
{
"link": [
1,
1
],
"name": "Pink Hopper Reverse Gate Glitch (SpaceJump)",
"notable": true,
"requires": [
{
"obstaclesCleared": [
"A"
]
},
{
"or": [
"canTrickyJump",
"h_canBackIntoCorner"
]
},
"canStationarySpinJump",
"SpaceJump",
"canOffScreenSuperShot"
],
"clearsObstacles": [
"B"
],
"reusableRoomwideNotable": "Pink Hopper Reverse Gate Glitch",
"note": [
"Use a stationary spinjump, or spinjump against the wall and turn around without moving; and shoot with the same correct timing.",
"This strat involves shooting a Super diagonally from the correct height while flush against the left wall.",
"Its acceleration will cause it to clip into the blue gate off-screen."
]
},
{
"link": [
1,
1
],
"name": "Pink Hopper Reverse Gate Glitch (Speedy Jump)",
"notable": true,
"requires": [
{
"obstaclesCleared": [
"A"
]
},
"canTrickyDashJump",
"canOffScreenSuperShot"
],
"clearsObstacles": [
"B"
],
"reusableRoomwideNotable": "Pink Hopper Reverse Gate Glitch",
"note": [
"Build run speed and jump into the left wall, turning around without changing Samus' pixel position.",
"This strat involves shooting a Super diagonally from the correct height while flush against the left wall.",
"Its acceleration will cause it to clip into the blue gate off-screen."
],
"devNote": "The reverse gate glitch requires killing the enemies first, so it's required here."
},
{
"link": [
1,
1
],
"name": "Pink Hopper Reverse Gate Glitch (Door Frame Jump)",
"notable": true,
"requires": [
{
"obstaclesCleared": [
"A"
]
},
{
"doorUnlockedAtNode": 1
},
"canTrickyJump",
"canOffScreenSuperShot"
],
"clearsObstacles": [
"B"
],
"unlocksDoors": [
{
"types": [
"ammo"
],
"requires": []
}
],
"reusableRoomwideNotable": "Pink Hopper Reverse Gate Glitch",
"note": [
"A consistent setup is to align with the wall below the door frame facing right.",
"Jump and turn around to land on the door frame.",
"Then jump and turn around again to return to being aligned with the wall but at the right height for shooting the Super.",
"This strat involves shooting a Super diagonally from the correct height while flush against the left wall.",
"Its acceleration will cause it to clip into the blue gate off-screen."
],
"devNote": [
"The reverse gate glitch pretty much requires killing the enemies first, so it's required here.",
"FIXME: direct GMode would have a usable door frame."
]
},
{
"link": [
1,
1
],
"name": "G-Mode Indirect to Despawn Gate",
"entranceCondition": {
"comeInWithGMode": {
"mode": "indirect",
"morphed": false
}
},
"requires": [],
"clearsObstacles": [
"B",
"C"
]
},
{
"link": [
1,
1
],
"name": "G-Mode Morph Indirect to Despawn Gate Power Bomb Kill",
"entranceCondition": {
"comeInWithGMode": {
"mode": "indirect",
"morphed": true
}
},
"requires": [
{
"enemyDamage": {
"enemy": "Sm. Sidehopper",
"type": "contact",
"hits": 1
}
},
"h_canArtificialMorphPowerBomb"
],
"clearsObstacles": [
"A",
"B",
"C"
],
"note": "Kill the Sidehoppers with a Power Bomb upon entry."
},
{
"link": [
1,
1
],
"name": "Crystal Flash",
"requires": [
{
"obstaclesCleared": [
"A"
]
},
"h_canCrystalFlash"
]
},
{
"link": [
1,
1
],
"name": "G-Mode Setup - Get Hit By Hopper (Jump Entry)",
"notable": false,
"entranceCondition": {
"comeInJumping": {
"minTiles": 1,
"speedBooster": "any"
}
},
"requires": [],
"exitCondition": {
"leaveWithGModeSetup": {}
},
"unlocksDoors": [
{
"types": [
"ammo"
],
"requires": [
"never"
]
}
],
"note": [
"This is possible to do without taking a second hit:",
"Enter the room in a jump, then shoot down to open the door and land in the doorsill."
]
},
{
"link": [
1,
1
],
"name": "G-Mode Setup - Get Hit By Hopper",
"notable": false,
"requires": [
{
"obstaclesNotCleared": [
"A"
]
},
{
"enemyDamage": {
"enemy": "Sm. Sidehopper",
"type": "contact",
"hits": 1
}
}
],
"exitCondition": {
"leaveWithGModeSetup": {}
},
"unlocksDoors": [
{
"types": [
"missiles",
"super"
],
"requires": []
},
{
"types": [
"powerbomb"
],
"requires": [
"never"
]
}
],
"note": [
"This is possible to do without taking a second hit:",
"Enter the room in a jump, then shoot down to open the door and land in the doorsill."
],
"devNote": [
"Version for entering from the right, or if unable to enter jumping.",
"A Power Bomb would kill the hoppers."
]
},
{
"link": [
1,
1
],
"name": "G-Mode Regain Mobility",
"requires": [
{
"enemyDamage": {
"enemy": "Sidehopper",
"type": "contact",
"hits": 1
}
}
],
"gModeRegainMobility": {}
},
{
"link": [
1,
2
],
"name": "IBJ",
"requires": [
"h_canIBJ",
{
"obstaclesCleared": [
"A"
]
},
{
"or": [
"Wave",
{
"obstaclesCleared": [
"B"
]
}
]
}
],
"devNote": [
"IBJ requires the enemies to be killed",
"The reverse gate glitch may be executed earlier from node 1 -> 1."
]
},
{
"link": [
1,
2
],
"name": "G-Mode Morph Indirect to Despawn Gate with IBJ",
"entranceCondition": {
"comeInWithGMode": {
"mode": "indirect",
"morphed": true
}
},
"requires": [
"h_canArtificialMorphIBJ",
{
"enemyDamage": {
"enemy": "Sm. Sidehopper",
"type": "contact",
"hits": 1
}
},
{
"or": [
{
"enemyDamage": {
"enemy": "Sidehopper",
"type": "contact",
"hits": 3
}
},
"h_canArtificialMorphPowerBomb"
]
}
],
"clearsObstacles": [
"A",
"B"
],
"note": "Kill the Sidehoppers with Bombs or a Power Bomb, then IBJ up onto the Grapple block."
},
{
"link": [
1,
3
],
"name": "Base",
"requires": [
{
"or": [
{
"obstaclesCleared": [
"A"
]
},
{
"enemyDamage": {
"enemy": "Sm. Sidehopper",
"type": "contact",
"hits": 1
}
}
]
},
{
"or": [
"SpaceJump",
"canWalljump",
{
"and": [
"Grapple",
{
"obstaclesNotCleared": [
"C"
]
}
]
},
{
"and": [
"HiJump",
"canSpringBallJumpMidAir"
]
}
]
}
],
"devNote": "The reverse gate glitch may be executed earlier from node 1 -> 1."
},
{
"link": [
1,
3
],
"name": "Jump into Room",
"entranceCondition": {
"comeInJumping": {
"minTiles": 1,
"speedBooster": "any"
}
},
"requires": [
"canPrepareForNextRoom",
{
"or": [
"SpaceJump",
"canWalljump",
{
"and": [
"Grapple",
{
"obstaclesNotCleared": [
"C"
]
}
]
},
{
"and": [
"HiJump",
"canSpringBallJumpMidAir"
]
}
]
}
]
},
{
"link": [
1,
3
],
"name": "Speedy Jump Onto Grapple Block",
"requires": [
"HiJump",
"canTrickyJump",
"SpeedBooster",
{
"obstaclesCleared": [
"A"
]
}
],
"note": "Run from the left side to the right, then jump just before or at the end of the runway to get up onto the Grapple block."
},
{
"link": [
1,
3
],
"name": "Spring Ball from the Doorframe",
"requires": [
{
"doorUnlockedAtNode": 1
},
"canTrickySpringBallJump",
"canTrickyJump",
{
"obstaclesCleared": [
"A"
]
},
{
"obstaclesNotCleared": [
"C"
]
}
],
"note": [
"Perform a very precise Spring Ball jump from the doorframe onto the Grapple block.",
"A running spin jump or crouch jump can be used."
],
"devNote": "FIXME: Direct GMode would have a usable door frame."
},
{
"link": [
1,
3
],
"name": "Speedy Jump",
"entranceCondition": {
"comeInJumping": {
"speedBooster": true,
"minTiles": 34.4375
}
},
"requires": [
"canPrepareForNextRoom",
"canTrickyJump"
],
"note": "Jump into the room and onto the Grapple block."
},
{
"link": [
1,
3
],
"name": "Tricky Speedy Jump",
"entranceCondition": {
"comeInJumping": {
"speedBooster": true,
"minTiles": 25
}
},
"requires": [
"canPrepareForNextRoom",
"canTrickyDashJump"
],
"note": "Jump into the room and onto the Grapple block."
},
{
"link": [
1,
3
],
"name": "Speedy HiJump",
"entranceCondition": {
"comeInJumping": {
"speedBooster": true,
"minTiles": 6.4375
}
},
"requires": [
"canPrepareForNextRoom",
"HiJump",
"canDisableEquipment",
"canCarefulJump"
],
"note": "Jump into the room and onto the Grapple block."
},
{
"link": [
1,
3
],
"name": "Tricky Speedy HiJump",
"entranceCondition": {
"comeInJumping": {
"speedBooster": true,
"minTiles": 1.4375
}
},
"requires": [
"canPrepareForNextRoom",
"HiJump",
"canTrickyDashJump",
"canDisableEquipment"
],
"note": "Jump into the room and onto the Grapple block. Requires a runway of only 2 tiles in the adjacent room.",
"devNote": "It can be done with no open ends, but it's a fair bit tighter."
},
{
"link": [
1,
3
],
"name": "Cross-Room Spring Ball Jump",
"entranceCondition": {
"comeInJumping": {
"speedBooster": true,
"minTiles": 7
}
},
"requires": [
"canPrepareForNextRoom",
"canTrickySpringBallJump",
"canCarefulJump"
],
"note": "Perform a Spring Ball jump from a speedy jump in the previous room."
},
{
"link": [
1,
3
],
"name": "Tricky Cross-Room Spring Ball Jump",
"entranceCondition": {
"comeInJumping": {
"speedBooster": false,
"minTiles": 0.4375
}
},
"requires": [
"canPrepareForNextRoom",
"canTrickySpringBallJump",
"canTrickyJump"
],
"note": [
"Perform a very precise Spring Ball jump through the transition and onto the Grapple block.",
"A running spin jump or crouch jump can be used."
]
},
{
"link": [
1,
3
],
"name": "G-Mode Morph IBJ",
"entranceCondition": {
"comeInWithGMode": {
"mode": "any",
"morphed": true
}
},
"requires": [
"h_canArtificialMorphIBJ",
{
"enemyDamage": {
"enemy": "Sm. Sidehopper",
"type": "contact",
"hits": 1
}
},
{
"or": [
{
"enemyDamage": {
"enemy": "Sidehopper",
"type": "contact",
"hits": 3
}
},
"h_canArtificialMorphPowerBomb"
]
}
],
"clearsObstacles": [
"A"
],
"note": "Kill the Sidehoppers with Bombs or a Power Bomb, then IBJ up onto the Grapple block. Use Wave to get through."
},
{
"link": [
1,
3
],
"name": "Pink Brinstar Hopper X-Ray Climb",
"notable": true,
"entranceCondition": {
"comeInWithDoorStuckSetup": {}
},
"requires": [
"canXRayClimb",
{
"enemyDamage": {
"enemy": "Sidehopper",
"type": "contact",
"hits": 2
}
}
],
"note": [
"To minimize damage from the Hoppers, get stuck in the door relatively high and move quickly.",
"Climb up somewhat less than 1 screen, until Samus' head appears between 1 and 3 tiles below the door.",
"Then perform a turn-around spin jump to the right to get on top of the Grapple block."
],
"devNote": [
"It is possible to avoid all Hopper damage, but it is not clear if this can be done reliably.",
"Two hits from the big Sidehopper appears to be a worst-case scenario."
]
},
{
"link": [
1,
4
],
"name": "Hopper Freeze",
"requires": [
{
"obstaclesNotCleared": [
"A"
]
},
"canTrickyUseFrozenEnemies",
{
"enemyDamage": {
"enemy": "Sm. Sidehopper",
"type": "contact",
"hits": 1
}
},
{
"enemyDamage": {
"enemy": "Sidehopper",
"type": "contact",
"hits": 1
}
},
{
"or": [
{
"and": [
"Wave",
"Spazer"
]
},
"Plasma",
{
"enemyDamage": {
"enemy": "Sidehopper",
"type": "contact",
"hits": 1
}
}
]
}
],
"note": [
"Carefully freeze the hoppers without taking too much damage but also without accidently killing all of the enemies."
],
"devNote": [
"The Small Sidehoppers may deliver more of the hits, but this is an assumed worst case scenario"
]
},
{
"link": [
2,
1
],
"name": "Grapple Teleport",
"entranceCondition": {
"comeInWithGrappleTeleport": {
"blockPositions": [
[
2,
29
]
]
}
},
"requires": [],
"bypassesDoorShell": true
},
{
"link": [
2,
1
],
"name": "Carry Grapple Teleport",
"entranceCondition": {
"comeInWithGrappleTeleport": {
"blockPositions": [
[
2,
29
]
]
}
},
"requires": [],
"bypassesDoorShell": true,
"exitCondition": {
"leaveWithGrappleTeleport": {
"blockPositions": [
[
2,
29
]
]
}
}
},
{
"link": [
2,
2
],
"name": "Leave With Runway",
"requires": [],
"exitCondition": {
"leaveWithRunway": {
"length": 6,
"openEnd": 1
}
}
},
{
"link": [
2,
2
],
"name": "Crystal Flash",
"requires": [
"h_canCrystalFlash"
],
"clearsObstacles": [
"A"
]
},
{
"link": [
2,
2
],
"name": "Plasma SBA Sidehopper Kill",
"requires": [
"Charge",
"Plasma",
"canSpecialBeamAttack",
{
"ammo": {
"type": "PowerBomb",
"count": 1
}
}
],
"clearsObstacles": [
"A"
],
"devNote": "This also raises the elevator, but using this method to get up is a bit obscure and would use the notable from 2->3."
},
{
"link": [
2,
3
],
"name": "Base",
"requires": [
{
  "or": [
    "canWalljump",
    "h_canFly",
    {
      "and": [
        "HiJump",
        "canSpringBallJumpMidAir"
      ]
    }
  ]
}
],
"clearsObstacles": [
"B"
]
},
{
"link": [
2,
3
],
"name": "Ride the Elevator",
"requires": [
"h_canUseMorphBombs"
],
"clearsObstacles": [
"B"
],
"note": "The elevator can be raised by hitting below the shot block with a Bomb."
},
{
"link": [
2,
3
],
"name": "Elevator with Power Bombs or Wave",
"requires": [
{
  "or": [
    "h_canUsePowerBombs",
    "Wave"
  ]
}
],
"clearsObstacles": [
"A",
"B"
],
"note": "Use a Power Bomb against the left wall or Wave to kill the enemies and ride the elevator."
},
{
"link": [
2,
3
],
"name": "Pink Hoppers Shot Clip to Ride the Elevator",
"notable": true,
"requires": [
{
  "or": [
    {
      "ammo": {
        "type": "Missile",
        "count": 1
      }
    },
    {
      "ammo": {
        "type": "Super",
        "count": 1
      }
    },
    "Spazer",
    {
      "and": [
        "Charge",
        "Plasma"
      ]
    },
    {
      "and": [
        "Charge",
        "Ice",
        "canSpecialBeamAttack",
        {
          "ammo": {
            "type": "PowerBomb",
            "count": 1
          }
        }
      ]
    }
  ]
}
],
"clearsObstacles": [
"B"
],
"note": [
"The elevator can be raised by clipping a shot into the floor, shot while falling with the right amount of vertical speed.",
"This can be done with a Missile, Super, or charged Spazer or Plasma shot, a well positioned angle Spazer shot while crouched, or an or Ice SBA."
],
"devNote": [
"FIXME: Do we need leniency or another tech for this?",
"This is only notable as a way to avoid wall jumps."
]
},
{
"link": [
2,
3
],
"name": "Speedy HiJump",
"entranceCondition": {
"comeInRunning": {
"speedBooster": true,
"minTiles": 7
}
},
"requires": [
"HiJump"
],
"note": "Jump at the end of the runway in-room. Assumes there is a runway in the adjacent room of at least 7 tiles."
},
{
"link": [
2,
3
],
"name": "Speedy Jump",
"entranceCondition": {
"comeInRunning": {
"speedBooster": true,
"minTiles": 29
}
},
"requires": [],
"note": "Jump at the end of the runway in-room. Assumes there is a runway in the adjacent room of at least 29 tiles."
},
{
"link": [
2,
3
],
"name": "Tricky Speedy HiJump",
"entranceCondition": {
"comeInRunning": {
"speedBooster": true,
"minTiles": 6
}
},
"requires": [
"HiJump",
"canTrickyJump"
],
"note": "Jump at the very end of the runway in-room. Requires a runway in the adjacent room of at least 6 tiles."
},
{
"link": [
2,
3
],
"name": "Tricky Speedy Spring Ball",
"entranceCondition": {
"comeInRunning": {
"speedBooster": true,
"minTiles": 7
}
},
"requires": [
"canTrickySpringBallJump",
"canTrickyDashJump"
],
"note": "Jump at the very end of the runway in-room. Requires a runway in the adjacent room of at least 7 tiles."
},
{
"link": [
2,
3
],
"name": "Pink Hoppers Screw and Kago to Ride the Elevator",
"notable": true,
"requires": [
"canKago",
{
"or": [
"ScrewAttack",
"canPseudoScrew"
]
},
{
"or": [
{
"and": [
"HiJump",
{
"or": [
"canCrouchJump",
"canDownGrab"
]
}
]
},
"canTrickyJump",
"Morph"
]
}
],
"clearsObstacles": [
"B"
],
"note": [
"Start the elevator ride by using Screw Attack or Pseudo Screw in the hole.",
"Kago the elevator to fall back in and hit the elevator again. This is much easier while the elevator is still rising, but can still be done with Morph afterwards.",
"Unless HiJump is owned, this will need to be done once more to get high enough to get to the blue gate."
],
"devNote": [
"FIXME: Add Shinespark strats to get up to the gate, or to spark against the wall to raise the elevator.",
"This is only notable as a way to avoid wall jumps."
]
},
{
"link": [
2,
3
],
"name": "Shinespark, Come in Shinecharging",
"entranceCondition": {
"comeInShinecharging": {
"length": 5,
"openEnd": 1
}
},
"requires": [
{
  "or": [
    {
      "shinespark": {
        "frames": 22,
        "excessFrames": 4
      }
    },
    {
      "and": [
        "canMidairShinespark",
        {
          "shinespark": {
            "frames": 15,
            "excessFrames": 3
          }
        }
      ]
    },
    {
      "and": [
        "canMidairShinespark",
        "HiJump",
        {
          "shinespark": {
            "frames": 12,
            "excessFrames": 4
          }
        }
      ]
    }
  ]
}
],
"clearsObstacles": [
"B"
]
},
{
"link": [
2,
3
],
"name": "Shinespark, Come in Shinecharged",
"entranceCondition": {
"comeInShinecharged": {
"framesRequired": 1
}
},
"requires": [
{
  "shinespark": {
    "frames": 22,
    "excessFrames": 4
  }
}
],
"clearsObstacles": [
"B"
]
},
{
"link": [
2,
3
],
"name": "Pink Hoppers Shinespark into the Wall to Ride the Elevator, Come in Shinecharging",
"notable": true,
"entranceCondition": {
"comeInShinecharging": {
"length": 5,
"openEnd": 1
}
},
"requires": [
"canHorizontalShinespark",
{
"shinespark": {
"frames": 1,
"excessFrames": 1
}
}
],
"clearsObstacles": [
"B"
],
"reusableRoomwideNotable": "Pink Hoppers Shinespark into the Wall to Ride the Elevator",
"note": "Shinesparking horizontally into the wall will trigger the elevator as Samus's echos hit it."
},
{
"link": [
2,
3
],
"name": "Pink Hoppers Shinespark into the Wall to Ride the Elevator, Come in Shinecharged",
"notable": true,
"entranceCondition": {
"comeInShinecharged": {
"framesRequired": 45
}
},
"requires": [
"canHorizontalShinespark",
{
"shinespark": {
"frames": 1,
"excessFrames": 1
}
}
],
"clearsObstacles": [
"B"
],
"reusableRoomwideNotable": "Pink Hoppers Shinespark into the Wall to Ride the Elevator",
"note": "Shinesparking horizontally into the wall will trigger the elevator as Samus's echos hit it."
},
{
"link": [
2,
3
],
"name": "Pink Hoppers Shinespark into the Wall to Ride the Elevator, Come in Shinesparking",
"notable": true,
"entranceCondition": {
"comeInWithSpark": {}
},
"requires": [
"canHorizontalShinespark",
{
"shinespark": {
"frames": 15,
"excessFrames": 6
}
}
],
"clearsObstacles": [
"B"
],
"reusableRoomwideNotable": "Pink Hoppers Shinespark into the Wall to Ride the Elevator",
"note": "Shinesparking horizontally into the wall will trigger the elevator as Samus's echos hit it."
},
{
"link": [
2,
3
],
"name": "Pink Hoppers X-Ray Climb Spring Ball Jump",
"entranceCondition": {
"comeInWithDoorStuckSetup": {}
},
"requires": [
"canXRayClimb",
"canTrickyJump",
"canLateralMidAirMorph",
"canTrickySpringBallJump",
"canSpringFling"
],
"note": [
"X-Ray climb until Samus is a little over halfway off screen; the position is not precise.",
"Face right, then do a turnaround buffer spin jump into a Spring Ball jump to reach the ledge.",
"The pause input can be pressed at the same time as the turnaround.",
"It helps to do an airball to gain horizontal speed.",
"The jump input after pausing should not be buffered, in order to allow a little time for the spring fling horizontal speed to take effect."
]
},
{
"link": [
2,
3
],
"name": "Pink Hoppers X-Ray Climb HiJump Insane Jump",
"entranceCondition": {
"comeInWithDoorStuckSetup": {}
},
"requires": [
"HiJump",
"canXRayClimb",
"canOffScreenMovement",
"canInsaneJump"
],
"note": [
"Get stuck 3 pixels inside the door, and X-ray climb to a precise height:",
"after just one pixel of Samus' feet are visible while crouching facing left, perform exactly 7 more X-Ray stand-ups.",
"Use X-ray to face left, then run and jump to barely make it onto the ledge."
],
"devNote": [
"3 pixels stuck in the door is X position 478 (0x1DE)."
]
},
{
"link": [
2,
3
],
"name": "Pink Hoppers G-Mode Deep Stuck X-Ray Climb Insane Jump",
"entranceCondition": {
"comeInWithGMode": {
"mode": "direct",
"morphed": false
}
},
"requires": [
"canXRayClimb",
"canOffScreenMovement",
"canInsaneJump"
],
"note": [
"Enter with G-Mode and use X-Ray to get stuck 9 pixels inside the door.",
"X-Ray climb to a relatively specific height:",
"after just one pixel of Samus' feet are visible while crouching facing left, perform between 20 and 22 more X-Ray stand-ups (any of these work).",
"Use X-ray to face left, then run and jump to barely make it onto the ledge."
],
"devNote": [
"9 pixels stuck in the door is X position 484 (0x1E4).",
"The correct Y positions for the jump are 193 (0xC1), 188 (0xBC), and 187 (0xBB)",
"FIXME: Some of the X position to the left (482, 483) could also work; maybe investigate which vertical positions work for them?"
]
},
{
"link": [
2,
3
],
"name": "G-Mode Morph IBJ",
"entranceCondition": {
"comeInWithGMode": {
"mode": "any",
"morphed": true
}
},
"requires": [
"h_canArtificialMorphIBJ"
],
"clearsObstacles": [
"B"
]
},
{
"link": [
2,
3
],
"name": "G-Mode Morph Elevator with Power Bomb",
"entranceCondition": {
"comeInWithGMode": {
"mode": "any",
"morphed": true
}
},
"requires": [
"h_canArtificialMorphPowerBomb"
],
"clearsObstacles": [
"A",
"B"
],
"note": "Using a power bomb against the left wall will kill the enemies and trigger the elevator."
},
{
"link": [
2,
3
],
"name": "Grapple Teleport",
"entranceCondition": {
"comeInWithGrappleTeleport": {
"blockPositions": [
[
5,
3
],
[
7,
2
]
]
}
},
"requires": []
},
{
"link": [
3,
1
],
"name": "Dead Sidehoppers",
"requires": [
{
  "obstaclesCleared": [
    "A"
  ]
}
]
},
{
"link": [
3,
1
],
"name": "Tank a Hit",
"requires": [
{
  "or": [
    {
      "enemyDamage": {
        "enemy": "Sidehopper",
        "type": "contact",
        "hits": 1
      }
    },
    {
      "and": [
        "canCarefulJump",
        {
          "enemyDamage": {
            "enemy": "Sm. Sidehopper",
            "type": "contact",
            "hits": 1
          }
        }
      ]
    }
  ]
}
],
"note": "Jump far to the left in order to hit a small Sidehopper instead of a large one."
},
{
"link": [
3,
1
],
"name": "Screw Kill",
"requires": [
"ScrewAttack",
{
"or": [
"canCarefulJump",
{
"enemyDamage": {
"enemy": "Sm. Sidehopper",
"type": "contact",
"hits": 1
}
}
]
}
],
"clearsObstacles": [
"A"
],
"note": "It is possible to kill the Sidehoppers damageless by jumping into the bottom left corner then quickly spin jumping again."
},
{
"link": [
3,
2
],
"name": "Base",
"requires": [
{
"obstaclesCleared": [
"B"
]
},
{
"or": [
"canCarefulJump",
"canWalljump",
"SpaceJump",
"Grapple"
]
}
]
},
{
"link": [
3,
3
],
"name": "Open the Gate",
"requires": [
"Wave"
],
"clearsObstacles": [
"B"
]
},
{
"link": [
4,
1
],
"name": "Base",
"requires": [],
"clearsObstacles": [
"A"
]
},
{
"link": [
4,
3
],
"name": "Frozen Hopper Platform",
"requires": [
{
"obstaclesNotCleared": [
"A"
]
},
"canTrickyUseFrozenEnemies",
{
"or": [
"HiJump",
"canSpringBallJumpMidAir"
]
},
{
"or": [
{
"enemyDamage": {
"enemy": "Sm. Sidehopper",
"type": "contact",
"hits": 1
}
},
"canTrickyJump"
]
}
],
"note": [
"Use a Frozen Hopper as a platform to jump up to the Grapple Block with an additional movement item.",
"Letting it jump from the spike ledge or the door frame will make the jump easier, but it is difficult to avoid Hopper damage when setting this up."
],
"devNote": "FIXME: A big hopper doing a high jump from the door frame is enough to reach the grapple block without a movement item. This would need a full manip since it is hard to try to make happen."
},
{
"link": [
4,
4
],
"name": "Pink Hopper Reverse Gate Glitch (Ice)",
"notable": true,
"requires": [
{
"obstaclesNotCleared": [
"A"
]
},
"canTrickyUseFrozenEnemies",
"h_canBackIntoCorner",
"canOffScreenSuperShot",
{
"enemyDamage": {
"enemy": "Sm. Sidehopper",
"type": "contact",
"hits": 1
}
}
],
"clearsObstacles": [
"B"
],
"reusableRoomwideNotable": "Pink Hopper Reverse Gate Glitch",
"note": [
"Freeze a small hopper to the side and kill the remaining Side Hoppers.",
"Stand against the left wall (damage knockback will align Samus with the wall) and shoot up to freeze the hopper.",
"Jump up to land on it, aligned with the wall.",
"Alternatively, Jump and shoot down to freeze the hopper as a way to avoid damage.",
"Fire a Super just above the door shell to hit the Gate.",
"This strat involves shooting a Super diagonally from the correct height while flush against the left wall.",
"Its acceleration will cause it to clip into the blue gate off-screen."
]
},
{
"link": [
4,
4
],
"name": "Pink Hopper Reverse Gate Glitch (HiJump, Ice)",
"notable": true,
"requires": [
{
"obstaclesNotCleared": [
"A"
]
},
{
"or": [
"h_canBackIntoCorner",
{
"enemyDamage": {
"enemy": "Sm. Sidehopper",
"type": "contact",
"hits": 1
}
},
"canTrickyJump"
]
},
"HiJump",
"canOffScreenSuperShot"
],
"clearsObstacles": [
"B"
],
"reusableRoomwideNotable": "Pink Hopper Reverse Gate Glitch",
"note": [
"This strat involves shooting a Super diagonally from the correct height while flush against the left wall.",
"Its acceleration will cause it to clip into the blue gate off-screen.",
"Jump straight up and shoot with the correct timing.",
"Taking damage can be used to align against the wall."
]
}
]
}