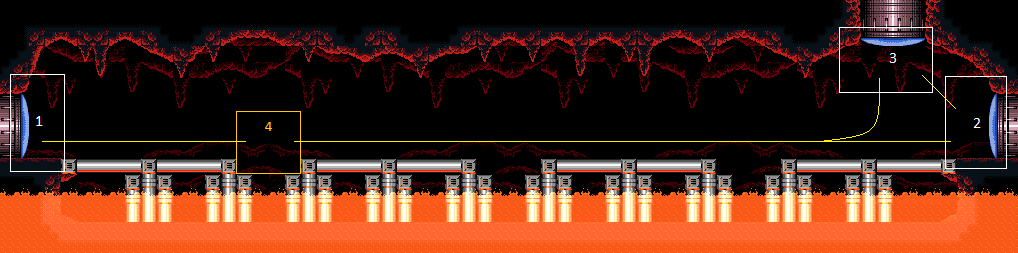
Acid Snakes Tunnel
Room ID: 119
|
Requires: {
"heatFrames": 70
}
|
|
Entrance condition: {
"comeInWithGrappleTeleport": {
"blockPositions": [
[
7,
2
]
]
}
}
|
|
Entrance condition: {
"comeInWithGrappleTeleport": {
"blockPositions": [
[
3,
12
],
[
3,
13
]
]
}
}
Bypasses door shell: true |
|
From: 2
Right Door
To: 1
Left Door
Entrance condition: {
"comeInWithGrappleTeleport": {
"blockPositions": [
[
3,
12
]
]
}
}
Exit condition: {
"leaveWithGrappleTeleport": {
"blockPositions": [
[
3,
12
]
]
}
}
Bypasses door shell: true |
|
From: 2
Right Door
To: 1
Left Door
Entrance condition: {
"comeInWithGrappleTeleport": {
"blockPositions": [
[
3,
13
]
]
}
}
Exit condition: {
"leaveWithGrappleTeleport": {
"blockPositions": [
[
3,
13
]
]
}
}
Bypasses door shell: true |
|
Exit condition: {
"leaveWithRunway": {
"length": 14,
"openEnd": 1
}
}
|
|
Requires: "h_canHeatedCrystalFlash" |
|
Requires: {
"heatFrames": 80
}
|
|
Requires: {
"or": [
{
"canShineCharge": {
"usedTiles": 13,
"openEnd": 1
}
},
{
"and": [
{
"doorUnlockedAtNode": 2
},
{
"canShineCharge": {
"usedTiles": 14,
"openEnd": 1
}
},
{
"heatFrames": 20
}
]
}
]
}
{
"heatFrames": 240
}
Exit condition: {
"leaveShinecharged": {
"framesRemaining": 90
}
}
|
|
Entrance condition: {
"comeInShinecharged": {
"framesRequired": 40
}
}
Requires: {
"shinespark": {
"frames": 8
}
}
{
"heatFrames": 50
}
Exit condition: {
"leaveWithSpark": {}
}
|
|
Break spin to trigger the transition early, or use a wall jump. Entrance condition: {
"comeInShinecharged": {
"framesRequired": 65
}
}
Requires: "canShinechargeMovementComplex"
{
"heatFrames": 65
}
Exit condition: {
"leaveShinecharged": {
"framesRemaining": "auto"
}
}
|
|
Entrance condition: {
"comeInShinecharged": {
"framesRequired": 50
}
}
Requires: "HiJump"
"canShinechargeMovementComplex"
{
"heatFrames": 50
}
Exit condition: {
"leaveShinecharged": {
"framesRemaining": "auto"
}
}
|
|
From: 2
Right Door
To: 3
Top Door
Entrance condition: {
"comeInShinecharging": {
"length": 13,
"openEnd": 1
}
}
Requires: {
"heatFrames": 80
}
Exit condition: {
"leaveShinecharged": {
"framesRemaining": 90
}
}
|
|
Requires: {
"heatFrames": 65
}
Exit condition: {
"leaveWithDoorFrameBelow": {
"height": 2
}
}
|
|
From: 2
Right Door
To: 3
Top Door
Requires: {
"heatFrames": 80
}
Exit condition: {
"leaveWithPlatformBelow": {
"height": 9,
"leftPosition": -2,
"rightPosition": 2
}
}
|
|
From: 2
Right Door
To: 3
Top Door
Requires: "h_canBackIntoCorner"
{
"heatFrames": 100
}
Exit condition: {
"leaveWithPlatformBelow": {
"height": 9,
"leftPosition": -2,
"rightPosition": 6
}
}
|
|
Requires: {
"heatFrames": 210
}
|
|
Requires: {
"heatFrames": 55
}
|
|
Entrance condition: {
"comeInShinecharged": {
"framesRequired": 50
},
"comesThroughToilet": "any"
}
Requires: "canShinechargeMovementComplex"
{
"heatFrames": 50
}
Exit condition: {
"leaveShinecharged": {
"framesRemaining": "auto"
}
}
|
|
From: 3
Top Door
To: 2
Right Door
Entrance condition: {
"comeInShinecharged": {
"framesRequired": 30
},
"comesThroughToilet": "any"
}
Requires: "canShinechargeMovementComplex"
{
"shinespark": {
"frames": 10,
"excessFrames": 0
}
}
{
"heatFrames": 50
}
Exit condition: {
"leaveWithSpark": {}
}
|
|
Requires: {
"heatFrames": 70
}
Exit condition: {
"leaveWithDoorFrameBelow": {
"height": 2
}
}
|
|
Requires: {
"heatFrames": 70
}
Exit condition: {
"leaveWithPlatformBelow": {
"height": 9,
"leftPosition": -2.5,
"rightPosition": 2.5
}
}
|
|
Requires: {
"heatFrames": 120
}
Exit condition: {
"leaveWithPlatformBelow": {
"height": 9,
"leftPosition": -7.5,
"rightPosition": 6
}
}
|
|
Freeze the stack of Gammets together a few times to try and raise them as high as possible. Run with them to the door and freeze the top two such that Samus can stand on the lower and take damage from the higher Gammet when it unfreezes. Requires: "h_heatProof" "canUpwardGModeSetup" "canTrickyUseFrozenEnemies" "Morph" Exit condition: {
"leaveWithGModeSetup": {}
}
|
|
Requires: {
"heatFrames": 210
}
|
|
Requires: {
"heatFrames": 80
}
|
|
Requires: {
"heatFrames": 10
}
Exit condition: {
"leaveWithRunway": {
"length": 14,
"openEnd": 1
}
}
|
|
Requires: {
"heatFrames": 210
}
|
|
Requires: {
"heatFrames": 155
}
Exit condition: {
"leaveWithRunway": {
"length": 14,
"openEnd": 1
}
}
|
|
Requires: {
"heatFrames": 210
}
|
|
Requires: {
"heatFrames": 210
}
|
|
Requires: {
"heatFrames": 220
}
Exit condition: {
"leaveWithDoorFrameBelow": {
"height": 2
}
}
|
|
Requires: {
"heatFrames": 220
}
Exit condition: {
"leaveWithPlatformBelow": {
"height": 9,
"leftPosition": -7.5,
"rightPosition": 2
}
}
|
|
From: 4
Gamet Farm Junction
To: 3
Top Door
Bring a Gamet from the farm and freeze it at a precise distance below the door in order to crouch-jump up and clip through the door shell. The pixel window is larger and higher with Morph and an X-Ray stand-up, in which case a standing jump is used. Requires: {
"heatFrames": 560
}
"canTrickyUseFrozenEnemies"
"h_canNonTrivialCeilingClip"
Bypasses door shell: true |
|
Requires: {
"or": [
"canPauseAbuse",
{
"heatFrames": 60
}
]
}
{
"refill": [
"Energy",
"Missile",
"Super",
"PowerBomb"
]
}
|
{
"$schema": "../../../schema/m3-room.schema.json",
"id": 119,
"name": "Acid Snakes Tunnel",
"area": "Norfair",
"subarea": "Upper",
"subsubarea": "East",
"playable": true,
"roomAddress": "0x7AFCE",
"roomEnvironments": [
{
"heated": true
}
],
"nodes": [
{
"id": 1,
"name": "Left Door",
"nodeType": "door",
"nodeSubType": "blue",
"nodeAddress": "0x001974a",
"doorEnvironments": [
{
"physics": "air"
}
]
},
{
"id": 2,
"name": "Right Door",
"nodeType": "door",
"nodeSubType": "blue",
"nodeAddress": "0x0019756",
"doorEnvironments": [
{
"physics": "air"
}
]
},
{
"id": 3,
"name": "Top Door",
"nodeType": "door",
"nodeSubType": "blue",
"nodeAddress": "0x0019762",
"doorEnvironments": [
{
"physics": "air"
}
]
},
{
"id": 4,
"name": "Gamet Farm Junction",
"nodeType": "junction",
"nodeSubType": "junction"
}
],
"enemies": [
{
"id": "e1",
"groupName": "Acid Snakes Tunnel Gamets",
"enemyName": "Gamet",
"quantity": 5,
"homeNodes": [
4
],
"farmCycles": [
{
"name": "Crouch 3 tiles over Gamets",
"cycleFrames": 165,
"requires": [
{
"heatFrames": 165
}
]
},
{
"name": "Lava Gamets down shots",
"cycleFrames": 120,
"requires": [
{
"heatFrames": 120
},
{
"lavaFrames": 120
}
],
"note": "Works fine with lava immunity"
}
]
},
{
"id": "e2",
"groupName": "Acid Snakes Tunnel Dragons",
"enemyName": "Dragon",
"quantity": 2,
"homeNodes": [
4,
2
],
"dropRequires": [
"h_heatProof"
],
"note": "Drops can be reached from land"
}
],
"links": [
{
"from": 1,
"to": [
{
"id": 1
},
{
"id": 4
}
]
},
{
"from": 2,
"to": [
{
"id": 1
},
{
"id": 2
},
{
"id": 3
},
{
"id": 4
}
]
},
{
"from": 3,
"to": [
{
"id": 2
},
{
"id": 3
},
{
"id": 4
}
]
},
{
"from": 4,
"to": [
{
"id": 1
},
{
"id": 2
},
{
"id": 3
},
{
"id": 4
}
]
}
],
"strats": [
{
"link": [
1,
4
],
"name": "Base",
"requires": [
{
  "heatFrames": 70
}
]
},
{
"link": [
2,
1
],
"name": "Grapple Teleport",
"entranceCondition": {
"comeInWithGrappleTeleport": {
"blockPositions": [
[
7,
2
]
]
}
},
"requires": []
},
{
"link": [
2,
1
],
"name": "Grapple Teleport Door Lock Skip",
"entranceCondition": {
"comeInWithGrappleTeleport": {
"blockPositions": [
[
3,
12
],
[
3,
13
]
]
}
},
"requires": [],
"bypassesDoorShell": true
},
{
"link": [
2,
1
],
"name": "Carry Grapple Teleport (Top Position)",
"entranceCondition": {
"comeInWithGrappleTeleport": {
"blockPositions": [
[
3,
12
]
]
}
},
"requires": [],
"bypassesDoorShell": true,
"exitCondition": {
"leaveWithGrappleTeleport": {
"blockPositions": [
[
3,
12
]
]
}
}
},
{
"link": [
2,
1
],
"name": "Carry Grapple Teleport (Bottom Position)",
"entranceCondition": {
"comeInWithGrappleTeleport": {
"blockPositions": [
[
3,
13
]
]
}
},
"requires": [],
"bypassesDoorShell": true,
"exitCondition": {
"leaveWithGrappleTeleport": {
"blockPositions": [
[
3,
13
]
]
}
}
},
{
"link": [
2,
2
],
"name": "Leave with Runway",
"requires": [],
"exitCondition": {
"leaveWithRunway": {
"length": 14,
"openEnd": 1
}
}
},
{
"link": [
2,
2
],
"name": "Crystal Flash",
"requires": [
"h_canHeatedCrystalFlash"
]
},
{
"link": [
2,
3
],
"name": "Base",
"requires": [
{
  "heatFrames": 80
}
]
},
{
"link": [
2,
3
],
"name": "In-Room Shortcharge",
"requires": [
{
"or": [
{
"canShineCharge": {
"usedTiles": 13,
"openEnd": 1
}
},
{
"and": [
{
"doorUnlockedAtNode": 2
},
{
"canShineCharge": {
"usedTiles": 14,
"openEnd": 1
}
},
{
"heatFrames": 20
}
]
}
]
},
{
"heatFrames": 240
}
],
"exitCondition": {
"leaveShinecharged": {
"framesRemaining": 90
}
},
"unlocksDoors": [
{
"nodeId": 2,
"types": [
"missiles"
],
"requires": [
{
"heatFrames": 50
}
]
},
{
"nodeId": 2,
"types": [
"super"
],
"requires": []
},
{
"nodeId": 2,
"types": [
"powerbomb"
],
"requires": [
{
"heatFrames": 110
}
]
},
{
"types": [
"missiles"
],
"requires": [
{
"heatFrames": 50
}
]
},
{
"types": [
"super"
],
"requires": []
},
{
"types": [
"powerbomb"
],
"requires": [
{
"heatFrames": 110
}
]
}
],
"devNote": "FIXME: One Power Bomb would open both doors."
},
{
"link": [
2,
3
],
"name": "Come In Shinecharged, Leave Sparking",
"entranceCondition": {
"comeInShinecharged": {
"framesRequired": 40
}
},
"requires": [
{
"shinespark": {
"frames": 8
}
},
{
"heatFrames": 50
}
],
"exitCondition": {
"leaveWithSpark": {}
},
"unlocksDoors": [
{
"types": [
"super"
],
"requires": []
},
{
"types": [
"missiles",
"powerbomb"
],
"requires": [
"never"
]
}
],
"devNote": "FIXME: Missiles could unlock the door with more shinespark frames available."
},
{
"link": [
2,
3
],
"name": "Carry Shinecharge",
"entranceCondition": {
"comeInShinecharged": {
"framesRequired": 65
}
},
"requires": [
"canShinechargeMovementComplex",
{
"heatFrames": 65
}
],
"exitCondition": {
"leaveShinecharged": {
"framesRemaining": "auto"
}
},
"unlocksDoors": [
{
"types": [
"super"
],
"requires": []
},
{
"types": [
"missiles",
"powerbomb"
],
"requires": [
"never"
]
}
],
"note": "Break spin to trigger the transition early, or use a wall jump."
},
{
"link": [
2,
3
],
"name": "Carry Shinecharge (HiJump)",
"entranceCondition": {
"comeInShinecharged": {
"framesRequired": 50
}
},
"requires": [
"HiJump",
"canShinechargeMovementComplex",
{
"heatFrames": 50
}
],
"exitCondition": {
"leaveShinecharged": {
"framesRemaining": "auto"
}
},
"unlocksDoors": [
{
"types": [
"super"
],
"requires": []
},
{
"types": [
"missiles",
"powerbomb"
],
"requires": [
"never"
]
}
]
},
{
"link": [
2,
3
],
"name": "Come In Shinecharging, Leave Shinecharged",
"entranceCondition": {
"comeInShinecharging": {
"length": 13,
"openEnd": 1
}
},
"requires": [
{
  "heatFrames": 80
}
],
"exitCondition": {
"leaveShinecharged": {
"framesRemaining": 90
}
},
"unlocksDoors": [
{
"types": [
"super"
],
"requires": []
},
{
"types": [
"missiles",
"powerbomb"
],
"requires": [
"never"
]
}
],
"devNote": "FIXME: Missiles could unlock the door but would end with fewer shinespark frames available."
},
{
"link": [
2,
3
],
"name": "Leave With Door Frame Below",
"requires": [
{
  "heatFrames": 65
}
],
"exitCondition": {
"leaveWithDoorFrameBelow": {
"height": 2
}
},
"unlocksDoors": [
{
"types": [
"missiles"
],
"requires": [
{
"heatFrames": 50
}
]
},
{
"types": [
"super"
],
"requires": []
},
{
"types": [
"powerbomb"
],
"requires": [
{
"heatFrames": 110
}
]
}
]
},
{
"link": [
2,
3
],
"name": "Leave With Platform Below (Small Runway)",
"requires": [
{
  "heatFrames": 80
}
],
"exitCondition": {
"leaveWithPlatformBelow": {
"height": 9,
"leftPosition": -2,
"rightPosition": 2
}
},
"unlocksDoors": [
{
"types": [
"ammo"
],
"requires": []
}
]
},
{
"link": [
2,
3
],
"name": "Leave With Platform Below (Full Runway)",
"requires": [
"h_canBackIntoCorner",
{
"heatFrames": 100
}
],
"exitCondition": {
"leaveWithPlatformBelow": {
"height": 9,
"leftPosition": -2,
"rightPosition": 6
}
},
"unlocksDoors": [
{
"types": [
"missiles"
],
"requires": [
{
"heatFrames": 50
}
]
},
{
"types": [
"super"
],
"requires": []
},
{
"types": [
"powerbomb"
],
"requires": [
{
"heatFrames": 110
}
]
}
],
"devNote": [
"This includes time to moonwalk back against the right door, without shooting it open.",
"An additional tile could be used by opening the right door but there is not yet any known application."
]
},
{
"link": [
2,
4
],
"name": "Base",
"requires": [
{
  "heatFrames": 210
}
]
},
{
"link": [
3,
2
],
"name": "Base",
"requires": [
{
  "heatFrames": 55
}
]
},
{
"link": [
3,
2
],
"name": "Carry Shinecharge",
"entranceCondition": {
"comeInShinecharged": {
"framesRequired": 50
},
"comesThroughToilet": "any"
},
"requires": [
"canShinechargeMovementComplex",
{
"heatFrames": 50
}
],
"exitCondition": {
"leaveShinecharged": {
"framesRemaining": "auto"
}
},
"unlocksDoors": [
{
"types": [
"super"
],
"requires": []
},
{
"types": [
"missiles",
"powerbomb"
],
"requires": [
"never"
]
}
]
},
{
"link": [
3,
2
],
"name": "Come in Shinecharged, Leave With Spark",
"entranceCondition": {
"comeInShinecharged": {
"framesRequired": 30
},
"comesThroughToilet": "any"
},
"requires": [
"canShinechargeMovementComplex",
{
"shinespark": {
"frames": 10,
"excessFrames": 0
}
},
{
"heatFrames": 50
}
],
"exitCondition": {
"leaveWithSpark": {}
},
"unlocksDoors": [
{
"types": [
"super"
],
"requires": []
},
{
"types": [
"missiles",
"powerbomb"
],
"requires": [
"never"
]
}
]
},
{
"link": [
3,
3
],
"name": "Leave With Door Frame Below",
"requires": [
{
  "heatFrames": 70
}
],
"exitCondition": {
"leaveWithDoorFrameBelow": {
"height": 2
}
}
},
{
"link": [
3,
3
],
"name": "Leave With Platform Below (Small Runway)",
"requires": [
{
  "heatFrames": 70
}
],
"exitCondition": {
"leaveWithPlatformBelow": {
"height": 9,
"leftPosition": -2.5,
"rightPosition": 2.5
}
}
},
{
"link": [
3,
3
],
"name": "Leave With Platform Below (Full Runway)",
"requires": [
{
  "heatFrames": 120
}
],
"exitCondition": {
"leaveWithPlatformBelow": {
"height": 9,
"leftPosition": -7.5,
"rightPosition": 6
}
},
"devNote": "An additional tile could be used by opening the right door but there is not yet any known application."
},
{
"link": [
3,
3
],
"name": "G-Mode Setup - Frozen Gammets",
"notable": false,
"requires": [
"h_heatProof",
"canUpwardGModeSetup",
"canTrickyUseFrozenEnemies",
"Morph"
],
"exitCondition": {
"leaveWithGModeSetup": {}
},
"note": [
"Freeze the stack of Gammets together a few times to try and raise them as high as possible.",
"Run with them to the door and freeze the top two such that Samus can stand on the lower and take damage from the higher Gammet when it unfreezes."
],
"devNote": [
"Landing on the Gammet with an aim down, or spin, wasn't working. So require Morph.",
"Would be notable but its a GMode strat."
]
},
{
"link": [
3,
4
],
"name": "Base",
"requires": [
{
  "heatFrames": 210
}
]
},
{
"link": [
4,
1
],
"name": "Base",
"requires": [
{
  "heatFrames": 80
}
]
},
{
"link": [
4,
1
],
"name": "Leave with Runway",
"requires": [
{
  "heatFrames": 10
}
],
"exitCondition": {
"leaveWithRunway": {
"length": 14,
"openEnd": 1
}
},
"unlocksDoors": [
{
"types": [
"ammo"
],
"requires": []
}
]
},
{
"link": [
4,
2
],
"name": "Base",
"requires": [
{
  "heatFrames": 210
}
],
"unlocksDoors": [
{
"types": [
"missiles"
],
"requires": []
}
]
},
{
"link": [
4,
2
],
"name": "Leave with Runway",
"requires": [
{
  "heatFrames": 155
}
],
"exitCondition": {
"leaveWithRunway": {
"length": 14,
"openEnd": 1
}
},
"unlocksDoors": [
{
"types": [
"missiles"
],
"requires": [
{
"heatFrames": 40
}
]
},
{
"types": [
"super"
],
"requires": []
},
{
"types": [
"powerbomb"
],
"requires": [
{
"heatFrames": 110
}
]
}
]
},
{
"link": [
4,
3
],
"name": "Base",
"requires": [
{
  "heatFrames": 210
}
]
},
{
"link": [
4,
3
],
"name": "Base",
"requires": [
{
  "heatFrames": 210
}
]
},
{
"link": [
4,
3
],
"name": "Leave With Door Frame Below",
"requires": [
{
  "heatFrames": 220
}
],
"exitCondition": {
"leaveWithDoorFrameBelow": {
"height": 2
}
},
"unlocksDoors": [
{
"types": [
"missiles"
],
"requires": [
{
"heatFrames": 50
}
]
},
{
"types": [
"super"
],
"requires": []
},
{
"types": [
"powerbomb"
],
"requires": [
{
"heatFrames": 110
}
]
}
]
},
{
"link": [
4,
3
],
"name": "Leave With Platform Below",
"requires": [
{
  "heatFrames": 220
}
],
"exitCondition": {
"leaveWithPlatformBelow": {
"height": 9,
"leftPosition": -7.5,
"rightPosition": 2
}
},
"unlocksDoors": [
{
"types": [
"missiles"
],
"requires": [
{
"heatFrames": 50
}
]
},
{
"types": [
"super"
],
"requires": []
},
{
"types": [
"powerbomb"
],
"requires": [
{
"heatFrames": 110
}
]
}
]
},
{
"link": [
4,
3
],
"name": "Gamet Ice Clip Door Lock Skip",
"requires": [
{
"heatFrames": 560
},
"canTrickyUseFrozenEnemies",
"h_canNonTrivialCeilingClip"
],
"bypassesDoorShell": true,
"note": [
"Bring a Gamet from the farm and freeze it at a precise distance below the door in order to crouch-jump up and clip through the door shell.",
"The pixel window is larger and higher with Morph and an X-Ray stand-up, in which case a standing jump is used."
]
},
{
"link": [
4,
4
],
"name": "Gamet Farm",
"requires": [
{
"or": [
"canPauseAbuse",
{
"heatFrames": 60
}
]
},
{
"refill": [
"Energy",
"Missile",
"Super",
"PowerBomb"
]
}
]
}
]
}