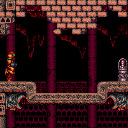
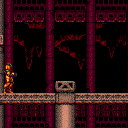
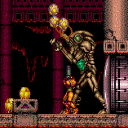
Golden Torizo's Room
Room ID: 150
|
Exit condition: {
"leaveWithRunway": {
"length": 4,
"openEnd": 1
}
}
|
|
Requires: "h_canHeatedCrystalFlash" |
|
Notable: true 
Jump on the crumble blocks before they break to reach the item, at the risk on falling through. Requires: "h_canNavigateHeatRooms"
"canCrumbleJump"
{
"heatFrames": 80
}
|
|
Notable: true 
Uses a single bomb blast to just barely get propelled over the crumble pit. Requires: "h_canNavigateHeatRooms"
"h_canBombHorizontally"
{
"heatFrames": 160
}
|
|
Requires: "h_canNavigateHeatRooms"
"h_canUseSpringBall"
{
"heatFrames": 140
}
|
|
Requires: "h_canNavigateHeatRooms"
"SpaceJump"
{
"heatFrames": 70
}
|
|
Entrance condition: {
"comeInWithSpark": {
"position": "bottom"
}
}
Requires: "h_canNavigateHeatRooms"
{
"shinespark": {
"frames": 18,
"excessFrames": 5
}
}
{
"heatFrames": 100
}
|
|
Entrance condition: {
"comeInWithSpark": {
"position": "top"
}
}
Requires: "h_canNavigateHeatRooms"
{
"shinespark": {
"frames": 19,
"excessFrames": 8
}
}
{
"heatFrames": 120
}
|
|
Using momentum from the previous room, run and jump over the crumble blocks to reach the item. Entrance condition: {
"comeInRunning": {
"minTiles": 1,
"speedBooster": "any"
}
}
Requires: "canInsaneJump"
{
"heatFrames": 60
}
|
|
Using momentum from the previous room, run and jump over the crumble blocks to reach the item. Entrance condition: {
"comeInRunning": {
"minTiles": 4,
"speedBooster": "any"
}
}
Requires: "canTrickyJump"
{
  "heatFrames": 50
}
|
|
From: 1
Left Door
To: 6
Golden Torizo Arena Junction (Fight Not Started)
Requires: "h_canNavigateHeatRooms"
{
"heatFrames": 200
}
|
|
Entrance condition: {
"comeInWithGrappleTeleport": {
"blockPositions": [
[
5,
3
],
[
7,
2
]
]
}
}
Requires: {
"heatFrames": 50
}
|
|
From: 2
Right Door (locked)
To: 1
Left Door
Entrance condition: {
"comeInWithGrappleTeleport": {
"blockPositions": [
[
3,
12
]
]
}
}
Bypasses door shell: true |
|
Entrance condition: {
"comeInWithGrappleTeleport": {
"blockPositions": [
[
3,
12
]
]
}
}
Exit condition: {
"leaveWithGrappleTeleport": {
"blockPositions": [
[
3,
12
]
]
}
}
Bypasses door shell: true |
|
From: 2
Right Door (locked)
To: 1
Left Door
Exit the previous room with Samus in a standing pose (while grappled). After teleporting, press right to release Grapple while staying standing (not being forced into a crouch). Then X-ray climb to get up to the door transition, without needing to open the door. Samus will not be visible during the climb. If Golden Torizo is alive, the fight will be triggered but does not create any risk of damage. Entrance condition: {
"comeInWithGrappleTeleport": {
"blockPositions": [
[
2,
28
],
[
2,
29
]
]
}
}
Requires: "canXRayClimb"
{
"heatFrames": 1600
}
Bypasses door shell: true |
|
From: 2
Right Door (locked)
To: 2
Right Door (locked)
Requires: "f_DefeatedGoldenTorizo" Exit condition: {
"leaveWithRunway": {
"length": 29,
"openEnd": 0
}
}
|
|
From: 2
Right Door (locked)
To: 2
Right Door (locked)
Wait to run under Golden Torizo as it jumps. Entrance condition: {
"comeInNormally": {}
}
Requires: {
"heatFrames": 415
}
Exit condition: {
"leaveWithRunway": {
"length": 29,
"openEnd": 0
}
}
|
|
From: 2
Right Door (locked)
To: 2
Right Door (locked)
If entering from the right door with Golden Torizo not yet defeated, come in already morphed, Crystal Flash immediately, then morph and roll under Golden Torizo. Requires: {
"or": [
"canPrepareForNextRoom",
"f_DefeatedGoldenTorizo"
]
}
"h_canHeatedCrystalFlash"
|
|
Requires: "h_canNavigateHeatRooms"
{
"heatFrames": 50
}
Clears obstacles: A |
|
From: 3
Top Left Item
To: 1
Left Door
Notable: true
It takes a short hop to avoid hitting the ceiling to do this with only one crumble jump. Requires: "h_canNavigateHeatRooms"
"canCrumbleJump"
{
"heatFrames": 100
}
|
|
Notable: true
Use a single bomb blast to just barely get propelled over the crumble pit. Requires: "h_canNavigateHeatRooms"
"h_canBombHorizontally"
{
"heatFrames": 190
}
|
|
Requires: "h_canNavigateHeatRooms"
"h_canUseSpringBall"
{
"heatFrames": 140
}
|
|
Requires: "h_canNavigateHeatRooms"
"SpaceJump"
{
"heatFrames": 90
}
|
|
Requires: "h_canHeatedCrystalFlash" |
|
From: 3
Top Left Item
To: 6
Golden Torizo Arena Junction (Fight Not Started)
Requires: "h_canNavigateHeatRooms"
{
"heatFrames": 200
}
|
|
Requires: "h_canHeatedCrystalFlash" |
|
Requires: "h_canNavigateHeatRooms"
{
"heatFrames": 100
}
Clears obstacles: A |
|
From: 4
Hidden Right Item
To: 6
Golden Torizo Arena Junction (Fight Not Started)
Requires: "h_canNavigateHeatRooms"
{
"obstaclesNotCleared": [
"A"
]
}
{
"heatFrames": 100
}
|
|
Requires: "h_canNavigateHeatRooms"
{
"heatFrames": 50
}
|
|
Requires: "h_canNavigateHeatRooms"
"h_canUsePowerBombs"
{
"heatFrames": 350
}
{
"or": [
"canPreciseWalljump",
"SpaceJump",
{
"and": [
"HiJump",
{
"or": [
"SpeedBooster",
"canWalljump",
"canSpringBallJumpMidAir"
]
}
]
}
]
}
|
|
Requires: "h_canNavigateHeatRooms"
"SpaceJump"
"ScrewAttack"
{
"heatFrames": 200
}
|
|
From: 5
Golden Torizo (locked)
To: 4
Hidden Right Item
Build run speed for a jump straight into the destructible blocks. Requires: "h_canNavigateHeatRooms"
"HiJump"
"SpeedBooster"
"ScrewAttack"
{
"heatFrames": 150
}
|
|
From: 5
Golden Torizo (locked)
To: 4
Hidden Right Item
This is kind of tricky because Screw off a walljump can only break bomb blocks if you change directions before bonking. Requires: "h_canNavigateHeatRooms"
"ScrewAttack"
"canPreciseWalljump"
"canMidairWiggle"
{
"heatFrames": 200
}
|
|
From: 5
Golden Torizo (locked)
To: 4
Hidden Right Item
Notable: true 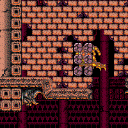
One vertical spark is needed to open up the area directly above. Then, a second horizontal spark is performed where those blocks were cleared. Try to aim for the seam between tiles to break more blocks. And the left side of the opening may be slightly easier. Requires: "h_canNavigateHeatRooms"
"f_DefeatedGoldenTorizo"
"canShinechargeMovementComplex"
"canPreciseWalljump"
"canConsecutiveWalljump"
{
"canShineCharge": {
"usedTiles": 28,
"openEnd": 0
}
}
{
"heatFrames": 900
}
{
"shinespark": {
"frames": 11
}
}
|
|
From: 5
Golden Torizo (locked)
To: 4
Hidden Right Item
Notable: true
One vertical spark is needed to open up the area directly above. A running jump is used to jump high enough into the revealed hole for a horizontal spark. Requires: "h_canNavigateHeatRooms"
"f_DefeatedGoldenTorizo"
"canShinechargeMovementComplex"
"HiJump"
{
"canShineCharge": {
"usedTiles": 28,
"openEnd": 0
}
}
{
"heatFrames": 900
}
{
"shinespark": {
"frames": 11
}
}
|
|
Expects two IBJs; one to break a block, then another one to get back up. Requires: "h_canNavigateHeatRooms"
"f_DefeatedGoldenTorizo"
"h_canIBJ"
{
"heatFrames": 3000
}
|
|
From: 5
Golden Torizo (locked)
To: 4
Hidden Right Item
Walljump up to reach the left ledge below the bomb blocks then perform an instant morph to place a bomb. Walljump up a second time and again instant morph off that left ledge to enter the 1 tile hole created by the bomb. Requires: "h_canNavigateHeatRooms"
"h_canUseMorphBombs"
"can3HighWallMidAirMorph"
"canConsecutiveWalljump"
{
"heatFrames": 1100
}
|
|
From: 5
Golden Torizo (locked)
To: 4
Hidden Right Item
Uses a Springwall to put a bomb on the left corner bomb block, then a second one to get in there. Then clears the rest of the bomb blocks normally. It winds up costing less heat frames than IBJ, if you fall. Requires: "h_canNavigateHeatRooms"
"h_canUseMorphBombs"
"canSpringwall"
"canTrickySpringBallJump"
{
"heatFrames": 900
}
|
|
From: 6
Golden Torizo Arena Junction (Fight Not Started)
To: 2
Right Door (locked)
Requires: "h_canNavigateHeatRooms"
{
"heatFrames": 50
}
|
|
From: 6
Golden Torizo Arena Junction (Fight Not Started)
To: 4
Hidden Right Item
Avoid touching the ground below GT. Try not to touch GT without ScrewAttack active. Requires: "h_canNavigateHeatRooms"
"SpaceJump"
{
"or": [
"ScrewAttack",
{
"and": [
"h_canUsePowerBombs",
{
"heatFrames": 100
}
]
}
]
}
{
"heatFrames": 200
}
|
|
From: 6
Golden Torizo Arena Junction (Fight Not Started)
To: 4
Hidden Right Item
Jump a before reaching the rightmost floor pillar. Requires: "h_canNavigateHeatRooms"
"HiJump"
"SpeedBooster"
"canCarefulJump"
"ScrewAttack"
{
"heatFrames": 200
}
|
|
From: 6
Golden Torizo Arena Junction (Fight Not Started)
To: 4
Hidden Right Item
Jump over the space below GT that is between the door and first foreground pillar and walljump up. Break the bomb blocks with a power bomb to make space. Then use Screw Attack to pass through the inactive GT. Requires: "h_canNavigateHeatRooms"
"ScrewAttack"
"canCarefulJump"
"canPreciseWalljump"
"h_canUsePowerBombs"
{
"or": [
"HiJump",
"canTrickyJump"
]
}
{
"heatFrames": 350
}
|
|
From: 6
Golden Torizo Arena Junction (Fight Not Started)
To: 4
Hidden Right Item
Springball jump into GT to bounce to the upper level. Requires: "h_canNavigateHeatRooms"
{
"not": "f_DefeatedGoldenTorizo"
}
{
"or": [
"canRiskPermanentLossOfAccess",
"HiJump",
{
"and": [
"canTrickyJump",
"canSpringwall"
]
}
]
}
"canSpringBallJumpMidAir"
"canNeutralDamageBoost"
{
"enemyDamage": {
"enemy": "Golden Torizo",
"type": "contact",
"hits": 1
}
}
{
"ammo": {
"type": "PowerBomb",
"count": 1
}
}
{
"heatFrames": 300
}
|
|
From: 6
Golden Torizo Arena Junction (Fight Not Started)
To: 5
Golden Torizo (locked)
Clears obstacles: A |
|
Requires: "f_DefeatedGoldenTorizo" |
|
|
|
From: 5
Golden Torizo (locked)
To: 8
Golden Torizo (unlocked)
Notable: true 
Farm supers to use throughout the fight. Requires: "h_heatProof" "Super" Clears obstacles: f_DefeatedGoldenTorizo |
|
From: 5
Golden Torizo (locked)
To: 8
Golden Torizo (unlocked)
Notable: true
Stand in the safe spot and fire Charge shots into GT. Requires: "h_heatProof" "Charge" "canBeVeryPatient" Clears obstacles: f_DefeatedGoldenTorizo |
|
From: 5
Golden Torizo (locked)
To: 8
Golden Torizo (unlocked)
Notable: true
This strat is assuming no farming. It requires 30 supers, but can be done with 29. This requires a very steady fire rate so that for every Super Missile caught by GT, the next 4 Supers do damage. Requires: "h_canNavigateHeatRooms"
{
"heatFrames": 1200
}
{
"ammo": {
"type": "Super",
"count": 30
}
}
Clears obstacles: f_DefeatedGoldenTorizo |
|
From: 5
Golden Torizo (locked)
To: 8
Golden Torizo (unlocked)
Notable: true
This strat requires some farming. It assumes starting with 15 supers for one session of farming. A safe farming method is to face left while standing in the safe spot. Then fire straight up to shoot the orbs as they appear. Jump up while GT's beak is not open to collect the drops. Plasma allows all of the orbs to be broken at once. Grapple allows for more drops to be collected by shooting diagonally, and collecting the items using Grapple. Keep the number of current Missiles below 31 so that GT will be guaranteed to use the attack which creates drops. Firing Supers requires a very steady fire rate so that for every Super Missile caught by GT, the next 4 Supers do damage. Requires: "h_canNavigateHeatRooms"
"canTrickyJump"
{
"ammo": {
"type": "Super",
"count": 15
}
}
{
"or": [
{
"and": [
"Plasma",
{
"heatFrames": 2700
}
]
},
{
"and": [
"canPreciseGrapple",
{
"heatFrames": 2700
}
]
},
{
"heatFrames": 3200
}
]
}
Clears obstacles: f_DefeatedGoldenTorizo |
|
From: 5
Golden Torizo (locked)
To: 8
Golden Torizo (unlocked)
Notable: true
This strat requires much farming. It assumes a capacity of and starting with only 5 supers for five sessions of farming. A safe farming method is to face left while standing in the safe spot. Then fire straight up to shoot the orbs as they appear. Jump up while GT's beak is not open to collect the drops. Plasma allows all of the orbs to be broken at once. Grapple allows for more drops to be collected by shooting diagonally, and collecting the items using Grapple. Keep the number of current Missiles below 31 so that GT will be guaranteed to use the attack which creates drops. Firing Supers requires a very steady fire rate so that for every Super Missile caught by GT, the next 4 Supers do damage. Requires: "h_canNavigateHeatRooms"
"canTrickyJump"
"canBePatient"
{
"ammo": {
"type": "Super",
"count": 5
}
}
{
"or": [
{
"and": [
"Plasma",
{
"heatFrames": 3100
}
]
},
{
"and": [
"canPreciseGrapple",
{
"heatFrames": 3200
}
]
},
{
"heatFrames": 4500
}
]
}
Clears obstacles: f_DefeatedGoldenTorizo |
|
From: 5
Golden Torizo (locked)
To: 8
Golden Torizo (unlocked)
Notable: true 
Midway through the fight, use a Crystal Flash to refill Samus' energy. Crystal Flashing while standing in the safe spot at GT's feet is safe. Requires: "h_canNavigateHeatRooms"
{
"or": [
{
"ammo": {
"type": "Super",
"count": 30
}
},
{
"and": [
"Charge",
"Ice",
"Wave",
"Plasma"
]
}
]
}
{
"heatFrames": 800
}
"h_canHeatedCrystalFlash"
{
"heatFrames": 800
}
Clears obstacles: f_DefeatedGoldenTorizo |
|
From: 5
Golden Torizo (locked)
To: 8
Golden Torizo (unlocked)
Notable: true
Stand in the safe spot and fire Charge shots into GT. Requires: "h_canNavigateHeatRooms"
"Charge"
"Ice"
"Wave"
"Plasma"
{
"heatFrames": 1250
}
Clears obstacles: f_DefeatedGoldenTorizo |
|
From: 5
Golden Torizo (locked)
To: 8
Golden Torizo (unlocked)
Notable: true
Stand in the safe spot and fire Charge shots into GT. Requires: "h_canNavigateHeatRooms"
"Charge"
"Wave"
"Plasma"
{
"heatFrames": 1400
}
Clears obstacles: f_DefeatedGoldenTorizo |
|
From: 5
Golden Torizo (locked)
To: 8
Golden Torizo (unlocked)
Notable: true
Stand in the safe spot and fire Charge shots into GT. Requires: "h_canNavigateHeatRooms"
"Charge"
"Plasma"
{
"heatFrames": 2000
}
Clears obstacles: f_DefeatedGoldenTorizo |
|
From: 5
Golden Torizo (locked)
To: 8
Golden Torizo (unlocked)
Notable: true
Stand in the safe spot and fire Charge shots into GT. Requires: "h_canNavigateHeatRooms"
"Charge"
"Ice"
"Wave"
"Spazer"
{
"heatFrames": 4000
}
Clears obstacles: f_DefeatedGoldenTorizo |
|
From: 5
Golden Torizo (locked)
To: 8
Golden Torizo (unlocked)
Notable: true
Stand in the safe spot and fire Charge shots into GT. Requires: "h_canNavigateHeatRooms"
"Charge"
{
"heatFrames": 6500
}
{
"or": [
{
"and": [
"Ice",
"Wave"
]
},
{
"and": [
"Ice",
"Spazer"
]
},
{
"and": [
"Wave",
"Spazer"
]
}
]
}
Clears obstacles: f_DefeatedGoldenTorizo |
|
Requires: "h_canNavigateHeatRooms"
{
"heatFrames": 1200
}
{
"ammo": {
"type": "Super",
"count": 30
}
}
{
"enemyDamage": {
"enemy": "Golden Torizo",
"type": "super",
"hits": 4
}
}
{
"or": [
"canDodgeWhileShooting",
{
"ammo": {
"type": "Super",
"count": 5
}
},
{
"and": [
{
"enemyDamage": {
"enemy": "Golden Torizo",
"type": "super",
"hits": 2
}
},
{
"heatFrames": 200
}
]
}
]
}
Clears obstacles: f_DefeatedGoldenTorizo |
|
From: 5
Golden Torizo (locked)
To: 8
Golden Torizo (unlocked)
Notable: true 
Killing Golden Torizo only with missiles using enemy state manipulation to get missiles to connect. This can be done by rolling under GT, triggering the sit attack, and then shooting missiles during the stand up animation. By pushing GT to the door and rolling into the door during a jump back, the sit can reliably be manipulated. But this setup is subpixel dependant and harder to setup again if GT moves unexpectidly. Use of the safe spot is expected. Keep missiles below 31 to control the fight. This fight takes multiple minutes. (A cheeky Missile can hit GT the moment it becomes active) Requires: "h_heatProof"
"Morph"
{
"resourceCapacity": [
{
"type": "Missile",
"count": 15
}
]
}
{
"or": [
{
"resourceCapacity": [
{
"type": "RegularEnergy",
"count": 199
}
]
},
{
"resourceCapacity": [
{
"type": "ReserveEnergy",
"count": 100
}
]
}
]
}
"canBeVeryPatient"
Clears obstacles: f_DefeatedGoldenTorizo |
|
From: 5
Golden Torizo (locked)
To: 8
Golden Torizo (unlocked)
This is an estimate of the net damage taken, including farmed energy. Requires: "h_canNavigateHeatRooms"
{
"heatFrames": 1800
}
"Charge"
"Ice"
"Wave"
"Plasma"
{
"enemyDamage": {
"enemy": "Golden Torizo",
"type": "contact",
"hits": 1
}
}
{
"or": [
{
"enemyDamage": {
"enemy": "Golden Torizo",
"type": "contact",
"hits": 3
}
},
{
"and": [
"canDodgeWhileShooting",
{
"or": [
"ScrewAttack",
"Morph"
]
}
]
}
]
}
Clears obstacles: f_DefeatedGoldenTorizo |
|
From: 5
Golden Torizo (locked)
To: 8
Golden Torizo (unlocked)
This is an estimate of the net damage taken, including farmed energy. Requires: "h_canNavigateHeatRooms"
{
"heatFrames": 2150
}
"Charge"
"Wave"
"Plasma"
{
"enemyDamage": {
"enemy": "Golden Torizo",
"type": "contact",
"hits": 2
}
}
{
"or": [
{
"enemyDamage": {
"enemy": "Golden Torizo",
"type": "contact",
"hits": 3
}
},
{
"and": [
"canDodgeWhileShooting",
{
"or": [
"ScrewAttack",
"Morph"
]
}
]
}
]
}
Clears obstacles: f_DefeatedGoldenTorizo |
|
From: 5
Golden Torizo (locked)
To: 8
Golden Torizo (unlocked)
This is an estimate of the net damage taken, including farmed energy. Requires: "h_canNavigateHeatRooms"
{
"heatFrames": 3600
}
"Charge"
"Plasma"
{
"enemyDamage": {
"enemy": "Golden Torizo",
"type": "contact",
"hits": 2
}
}
{
"or": [
{
"enemyDamage": {
"enemy": "Golden Torizo",
"type": "contact",
"hits": 6
}
},
{
"and": [
"canDodgeWhileShooting",
{
"or": [
"ScrewAttack",
"Morph"
]
}
]
}
]
}
Clears obstacles: f_DefeatedGoldenTorizo |
|
From: 5
Golden Torizo (locked)
To: 8
Golden Torizo (unlocked)
This is an estimate of the net damage taken, including farmed energy. Requires: "h_heatProof"
"Charge"
"Ice"
"Wave"
"Spazer"
{
"enemyDamage": {
"enemy": "Golden Torizo",
"type": "contact",
"hits": 4
}
}
{
"or": [
{
"and": [
"canDodgeWhileShooting",
{
"or": [
"Morph",
"ScrewAttack",
{
"enemyDamage": {
"enemy": "Golden Torizo",
"type": "contact",
"hits": 6
}
}
]
}
]
},
{
"enemyDamage": {
"enemy": "Golden Torizo",
"type": "contact",
"hits": 13
}
}
]
}
Clears obstacles: f_DefeatedGoldenTorizo |
|
|
|
From: 2
Right Door (locked)
To: 2
Right Door (locked)
Requires: {
"obstaclesCleared": [
"f_DefeatedGoldenTorizo"
]
}
Exit condition: {
"leaveWithRunway": {
"length": 29,
"openEnd": 0
}
}
|
|
From: 5
Golden Torizo (locked)
To: 4
Hidden Right Item
Notable: true
One vertical spark is needed to open up the area directly above. Then, a second horizontal spark is performed where those blocks were cleared. Try to aim for the seam between tiles to break more blocks. And the left side of the opening may be slightly easier. Requires: "h_canNavigateHeatRooms"
{
"obstaclesCleared": [
"f_DefeatedGoldenTorizo"
]
}
"canShinechargeMovementComplex"
"canPreciseWalljump"
"canConsecutiveWalljump"
{
"canShineCharge": {
"usedTiles": 28,
"openEnd": 0
}
}
{
"heatFrames": 900
}
{
"shinespark": {
"frames": 11
}
}
|
|
From: 5
Golden Torizo (locked)
To: 4
Hidden Right Item
Notable: true
One vertical spark is needed to open up the area directly above. A running jump is used to jump high enough into the revealed hole for a horizontal spark. Requires: "h_canNavigateHeatRooms"
{
"obstaclesCleared": [
"f_DefeatedGoldenTorizo"
]
}
"canShinechargeMovementComplex"
"HiJump"
{
"canShineCharge": {
"usedTiles": 28,
"openEnd": 0
}
}
{
"heatFrames": 900
}
{
"shinespark": {
"frames": 11
}
}
|
|
Expects two IBJs; one to break a block, then another one to get back up. Requires: "h_canNavigateHeatRooms"
{
"obstaclesCleared": [
"f_DefeatedGoldenTorizo"
]
}
"h_canIBJ"
{
"heatFrames": 3000
}
|
|
Requires: {
"obstaclesCleared": [
"f_DefeatedGoldenTorizo"
]
}
|
{
"$schema": "../../../schema/m3-room.schema.json",
"id": 150,
"name": "Golden Torizo's Room",
"area": "Norfair",
"subarea": "Lower",
"subsubarea": "West",
"playable": true,
"roomAddress": "0x7B283",
"roomEnvironments": [
{
"heated": true
}
],
"nodes": [
{
"id": 1,
"name": "Left Door",
"nodeType": "door",
"nodeSubType": "blue",
"nodeAddress": "0x0019876",
"doorEnvironments": [
{
"physics": "air"
}
]
},
{
"id": 2,
"name": "Right Door (locked)",
"nodeType": "junction",
"nodeSubType": "grey",
"nodeAddress": "0x0019882",
"doorEnvironments": [
{
"physics": "air"
}
]
},
{
"id": 3,
"name": "Top Left Item",
"nodeType": "item",
"nodeSubType": "visible",
"nodeItem": "Missile",
"nodeAddress": "0x78E6E"
},
{
"id": 4,
"name": "Hidden Right Item",
"nodeType": "item",
"nodeSubType": "hidden",
"nodeItem": "Super",
"nodeAddress": "0x78E74"
},
{
"id": 5,
"name": "Golden Torizo (locked)",
"nodeType": "junction",
"nodeSubType": "boss"
},
{
"id": 6,
"name": "Golden Torizo Arena Junction (Fight Not Started)",
"nodeType": "junction",
"nodeSubType": "junction",
"viewableNodes": [
{
"id": 4,
"strats": [
{
"name": "Base",
"notable": false,
"requires": [
"h_canNavigateHeatRooms",
{
"or": [
"Wave",
"h_canUsePowerBombs"
]
},
{
"or": [
{
"and": [
"f_DefeatedGoldenTorizo",
"canWalljump"
]
},
"HiJump",
"SpaceJump",
{
"and": [
"h_canIBJ",
{
"heatFrames": 300
}
]
}
]
},
{
"heatFrames": 180
}
]
}
]
}
]
},
{
"id": 7,
"name": "Right Door (unlocked)",
"nodeType": "door",
"nodeSubType": "grey",
"nodeAddress": "0x0019882",
"doorEnvironments": [
{
"physics": "air"
}
]
},
{
"id": 8,
"name": "Golden Torizo (unlocked)",
"nodeType": "event",
"nodeSubType": "boss",
"yields": [
"f_DefeatedGoldenTorizo"
]
}
],
"obstacles": [
{
"id": "A",
"name": "Gold Torizo Trigger",
"obstacleType": "abstract"
},
{
"id": "f_DefeatedGoldenTorizo",
"name": "f_DefeatedGoldenTorizo"
}
],
"enemies": [
{
"id": "e1",
"groupName": "Golden Torizo",
"enemyName": "Golden Torizo",
"quantity": 1,
"homeNodes": [
5
],
"stopSpawn": [
"f_DefeatedGoldenTorizo"
]
}
],
"reusableRoomwideNotable": [
{
"name": "Golden Torizo Supers Double Shinespark",
"note": [
"One vertical spark is needed to open up the breakable blocks on the right ceiling.",
"Then, a second horizontal spark is performed where those blocks were cleared to reveal the item."
]
},
{
"name": "Golden Torizo Safe Spot",
"note": [
"The ability to get into the safe spot in the Golden Torizo fight, where Samus can attack while being safe from GT's standard attacks.",
"To get into the safe spot near the door: Stand on the left side of the floor pillar for GT to jump back. Then stand to the right of the nearby background pillar.",
"Shoot Golden Torizo by facing right and firing up. Farm drops by turning around to face left and firing up with no wide beams equipped."
]
},
{
"name": "Golden Torizo Crumble Jump",
"note": "Jump on the crumble blocks to reach the Missile item location at the risk of falling through.",
"devNote": "It is possible to directly jump over the crumble blocks but the input timings and strat expectations resemble a crumble jump while just being harder."
},
{
"name": "Golden Torizo Horizontal Bomb Jump",
"note": "Use a bomb explosion to jump horizontally over the GT crumble blocks."
}
],
"links": [
{
"from": 1,
"to": [
{
"id": 1
},
{
"id": 3
},
{
"id": 6
}
]
},
{
"from": 2,
"to": [
{
"id": 1
},
{
"id": 2
},
{
"id": 5
}
]
},
{
"from": 3,
"to": [
{
"id": 1
},
{
"id": 3
},
{
"id": 6
}
]
},
{
"from": 4,
"to": [
{
"id": 4
},
{
"id": 5
},
{
"id": 6
}
]
},
{
"from": 5,
"to": [
{
"id": 2
},
{
"id": 4
}
]
},
{
"from": 6,
"to": [
{
"id": 2,
"devNote": "This link indicates passing below GT before the fight has time to begin."
},
{
"id": 4,
"devNote": [
"These links can collect the Super Item Location without starting the GT encounter.",
"There are more precise strats, but it is more reasonable to active GT before attempting them."
]
},
{
"id": 5
}
]
}
],
"strats": [
{
"link": [
1,
1
],
"name": "Leave With Runway",
"requires": [],
"exitCondition": {
"leaveWithRunway": {
"length": 4,
"openEnd": 1
}
}
},
{
"link": [
1,
1
],
"name": "Crystal Flash",
"requires": [
"h_canHeatedCrystalFlash"
]
},
{
"link": [
1,
3
],
"name": "GT Crumble Jump to Left Item",
"notable": true,
"requires": [
"h_canNavigateHeatRooms",
"canCrumbleJump",
{
"heatFrames": 80
}
],
"reusableRoomwideNotable": "Golden Torizo Crumble Jump",
"note": "Jump on the crumble blocks before they break to reach the item, at the risk on falling through."
},
{
"link": [
1,
3
],
"name": "GT Bomb Boost to Left Item",
"notable": true,
"requires": [
"h_canNavigateHeatRooms",
"h_canBombHorizontally",
{
"heatFrames": 160
}
],
"reusableRoomwideNotable": "Golden Torizo Horizontal Bomb Jump",
"note": "Uses a single bomb blast to just barely get propelled over the crumble pit."
},
{
"link": [
1,
3
],
"name": "Spring Ball",
"requires": [
"h_canNavigateHeatRooms",
"h_canUseSpringBall",
{
"heatFrames": 140
}
]
},
{
"link": [
1,
3
],
"name": "Space Jump",
"requires": [
"h_canNavigateHeatRooms",
"SpaceJump",
{
"heatFrames": 70
}
]
},
{
"link": [
1,
3
],
"name": "Shinespark (Bottom)",
"entranceCondition": {
"comeInWithSpark": {
"position": "bottom"
}
},
"requires": [
"h_canNavigateHeatRooms",
{
"shinespark": {
"frames": 18,
"excessFrames": 5
}
},
{
"heatFrames": 100
}
],
"devNote": [
"Sparking in from the bottom position requires fewer heat frames, as you bonk the side of the item pedestal.",
"FIXME: The heat frames for the crash animation occur after the item collection, which could matter if the item is an ETank.",
"Likewise, one shinespark frame of damage occurs after the item collection (assuming not stopping early)."
]
},
{
"link": [
1,
3
],
"name": "Shinespark (Top)",
"entranceCondition": {
"comeInWithSpark": {
"position": "top"
}
},
"requires": [
"h_canNavigateHeatRooms",
{
"shinespark": {
"frames": 19,
"excessFrames": 8
}
},
{
"heatFrames": 120
}
],
"devNote": [
"Sparking in from the top position requires more heat frames, because you end up on top of the item pedestal and need to move off of it.",
"FIXME: The heat frames for the crash animation (and for moving off the pedestal) occur after the item collection, which could matter if the item is an ETank.",
"Likewise, 3 shinespark frames of damage occur after the item collection (assuming not stopping early)."
]
},
{
"link": [
1,
3
],
"name": "Running Jump (Short Runway)",
"notable": false,
"entranceCondition": {
"comeInRunning": {
"minTiles": 1,
"speedBooster": "any"
}
},
"requires": [
"canInsaneJump",
{
"heatFrames": 60
}
],
"note": "Using momentum from the previous room, run and jump over the crumble blocks to reach the item."
},
{
"link": [
1,
3
],
"name": "Running Jump (Longer Runway)",
"notable": false,
"entranceCondition": {
"comeInRunning": {
"minTiles": 4,
"speedBooster": "any"
}
},
"requires": [
"canTrickyJump",
{
"heatFrames": 50
}
],
"note": "Using momentum from the previous room, run and jump over the crumble blocks to reach the item."
},
{
"link": [
1,
6
],
"name": "Base",
"requires": [
"h_canNavigateHeatRooms",
{
"heatFrames": 200
}
]
},
{
"link": [
2,
1
],
"name": "Grapple Teleport",
"entranceCondition": {
"comeInWithGrappleTeleport": {
"blockPositions": [
[
5,
3
],
[
7,
2
]
]
}
},
"requires": [
{
"heatFrames": 50
}
]
},
{
"link": [
2,
1
],
"name": "Grapple Teleport Door Lock Skip",
"entranceCondition": {
"comeInWithGrappleTeleport": {
"blockPositions": [
[
3,
12
]
]
}
},
"requires": [],
"bypassesDoorShell": true
},
{
"link": [
2,
1
],
"name": "Carry Grapple Teleport ",
"entranceCondition": {
"comeInWithGrappleTeleport": {
"blockPositions": [
[
3,
12
]
]
}
},
"requires": [],
"bypassesDoorShell": true,
"exitCondition": {
"leaveWithGrappleTeleport": {
"blockPositions": [
[
3,
12
]
]
}
}
},
{
"link": [
2,
1
],
"name": "Grapple Teleport X-Ray Climb",
"entranceCondition": {
"comeInWithGrappleTeleport": {
"blockPositions": [
[
2,
28
],
[
2,
29
]
]
}
},
"requires": [
"canXRayClimb",
{
"heatFrames": 1600
}
],
"bypassesDoorShell": true,
"note": [
"Exit the previous room with Samus in a standing pose (while grappled).",
"After teleporting, press right to release Grapple while staying standing (not being forced into a crouch).",
"Then X-ray climb to get up to the door transition, without needing to open the door.",
"Samus will not be visible during the climb.",
"If Golden Torizo is alive, the fight will be triggered but does not create any risk of damage."
]
},
{
"link": [
2,
2
],
"name": "Leave With Runway (GT Dead)",
"requires": [
"f_DefeatedGoldenTorizo"
],
"exitCondition": {
"leaveWithRunway": {
"length": 29,
"openEnd": 0
}
}
},
{
"link": [
2,
2
],
"name": "Leave With Runway (GT Alive)",
"entranceCondition": {
"comeInNormally": {}
},
"requires": [
{
  "heatFrames": 415
}
],
"exitCondition": {
"leaveWithRunway": {
"length": 29,
"openEnd": 0
}
},
"unlocksDoors": [
{
"types": [
"ammo"
],
"requires": []
}
],
"note": "Wait to run under Golden Torizo as it jumps."
},
{
"link": [
2,
2
],
"name": "Crystal Flash",
"requires": [
{
"or": [
"canPrepareForNextRoom",
"f_DefeatedGoldenTorizo"
]
},
"h_canHeatedCrystalFlash"
],
"note": [
"If entering from the right door with Golden Torizo not yet defeated, come in already morphed, Crystal Flash immediately, then morph and roll under Golden Torizo."
]
},
{
"link": [
2,
5
],
"name": "Base",
"requires": [
"h_canNavigateHeatRooms",
{
"heatFrames": 50
}
],
"clearsObstacles": [
"A"
]
},
{
"link": [
3,
1
],
"name": "GT Crumble Jump from Left Item",
"notable": true,
"requires": [
"h_canNavigateHeatRooms",
"canCrumbleJump",
{
"heatFrames": 100
}
],
"reusableRoomwideNotable": "Golden Torizo Crumble Jump",
"note": "It takes a short hop to avoid hitting the ceiling to do this with only one crumble jump."
},
{
"link": [
3,
1
],
"name": "GT Bomb Boost from Left Item",
"notable": true,
"requires": [
"h_canNavigateHeatRooms",
"h_canBombHorizontally",
{
"heatFrames": 190
}
],
"reusableRoomwideNotable": "Golden Torizo Horizontal Bomb Jump",
"note": "Use a single bomb blast to just barely get propelled over the crumble pit."
},
{
"link": [
3,
1
],
"name": "Spring Ball",
"requires": [
"h_canNavigateHeatRooms",
"h_canUseSpringBall",
{
"heatFrames": 140
}
]
},
{
"link": [
3,
1
],
"name": "Space Jump",
"requires": [
"h_canNavigateHeatRooms",
"SpaceJump",
{
"heatFrames": 90
}
]
},
{
"link": [
3,
3
],
"name": "Crystal Flash",
"requires": [
"h_canHeatedCrystalFlash"
]
},
{
"link": [
3,
6
],
"name": "Base",
"requires": [
"h_canNavigateHeatRooms",
{
"heatFrames": 200
}
]
},
{
"link": [
4,
4
],
"name": "Crystal Flash",
"requires": [
"h_canHeatedCrystalFlash"
]
},
{
"link": [
4,
5
],
"name": "Base",
"requires": [
"h_canNavigateHeatRooms",
{
"heatFrames": 100
}
],
"clearsObstacles": [
"A"
]
},
{
"link": [
4,
6
],
"name": "Base",
"requires": [
"h_canNavigateHeatRooms",
{
"obstaclesNotCleared": [
"A"
]
},
{
"heatFrames": 100
}
]
},
{
"link": [
5,
2
],
"name": "Base",
"requires": [
"h_canNavigateHeatRooms",
{
"heatFrames": 50
}
]
},
{
"link": [
5,
4
],
"name": "Power Bombs",
"requires": [
"h_canNavigateHeatRooms",
"h_canUsePowerBombs",
{
"heatFrames": 350
},
{
"or": [
"canPreciseWalljump",
"SpaceJump",
{
"and": [
"HiJump",
{
"or": [
"SpeedBooster",
"canWalljump",
"canSpringBallJumpMidAir"
]
}
]
}
]
}
]
},
{
"link": [
5,
4
],
"name": "Space Screw",
"requires": [
"h_canNavigateHeatRooms",
"SpaceJump",
"ScrewAttack",
{
"heatFrames": 200
}
]
},
{
"link": [
5,
4
],
"name": "Speed HiJump Screw",
"requires": [
"h_canNavigateHeatRooms",
"HiJump",
"SpeedBooster",
"ScrewAttack",
{
"heatFrames": 150
}
],
"note": "Build run speed for a jump straight into the destructible blocks."
},
{
"link": [
5,
4
],
"name": "GT Supers Screw Walljump",
"requires": [
"h_canNavigateHeatRooms",
"ScrewAttack",
"canPreciseWalljump",
"canMidairWiggle",
{
"heatFrames": 200
}
],
"note": "This is kind of tricky because Screw off a walljump can only break bomb blocks if you change directions before bonking."
},
{
"link": [
5,
4
],
"name": "GT Supers Walljump Into Double Shinespark",
"notable": true,
"requires": [
"h_canNavigateHeatRooms",
"f_DefeatedGoldenTorizo",
"canShinechargeMovementComplex",
"canPreciseWalljump",
"canConsecutiveWalljump",
{
"canShineCharge": {
"usedTiles": 28,
"openEnd": 0
}
},
{
"heatFrames": 900
},
{
"shinespark": {
"frames": 11
}
}
],
"reusableRoomwideNotable": "Golden Torizo Supers Double Shinespark",
"note": [
"One vertical spark is needed to open up the area directly above.",
"Then, a second horizontal spark is performed where those blocks were cleared.",
"Try to aim for the seam between tiles to break more blocks. And the left side of the opening may be slightly easier."
]
},
{
"link": [
5,
4
],
"name": "GT Supers Double Shinespark With HiJump",
"notable": true,
"requires": [
"h_canNavigateHeatRooms",
"f_DefeatedGoldenTorizo",
"canShinechargeMovementComplex",
"HiJump",
{
"canShineCharge": {
"usedTiles": 28,
"openEnd": 0
}
},
{
"heatFrames": 900
},
{
"shinespark": {
"frames": 11
}
}
],
"reusableRoomwideNotable": "Golden Torizo Supers Double Shinespark",
"note": [
"One vertical spark is needed to open up the area directly above.",
"A running jump is used to jump high enough into the revealed hole for a horizontal spark."
]
},
{
"link": [
5,
4
],
"name": "GT Supers IBJ",
"requires": [
"h_canNavigateHeatRooms",
"f_DefeatedGoldenTorizo",
"h_canIBJ",
{
"heatFrames": 3000
}
],
"note": "Expects two IBJs; one to break a block, then another one to get back up.",
"devNote": "Needs strats for variations of IBJs, mainly for heatframe count."
},
{
"link": [
5,
4
],
"name": "Instant Morph Bomb Placement.",
"requires": [
"h_canNavigateHeatRooms",
"h_canUseMorphBombs",
"can3HighWallMidAirMorph",
"canConsecutiveWalljump",
{
"heatFrames": 1100
}
],
"note": [
"Walljump up to reach the left ledge below the bomb blocks then perform an instant morph to place a bomb.",
"Walljump up a second time and again instant morph off that left ledge to enter the 1 tile hole created by the bomb."
]
},
{
"link": [
5,
4
],
"name": "Springwall with Bombs",
"requires": [
"h_canNavigateHeatRooms",
"h_canUseMorphBombs",
"canSpringwall",
"canTrickySpringBallJump",
{
"heatFrames": 900
}
],
"note": [
"Uses a Springwall to put a bomb on the left corner bomb block, then a second one to get in there.",
"Then clears the rest of the bomb blocks normally.",
"It winds up costing less heat frames than IBJ, if you fall."
]
},
{
"link": [
6,
2
],
"name": "Base",
"requires": [
"h_canNavigateHeatRooms",
{
"heatFrames": 50
}
]
},
{
"link": [
6,
4
],
"name": "SpaceJump",
"requires": [
"h_canNavigateHeatRooms",
"SpaceJump",
{
"or": [
"ScrewAttack",
{
"and": [
"h_canUsePowerBombs",
{
"heatFrames": 100
}
]
}
]
},
{
"heatFrames": 200
}
],
"note": "Avoid touching the ground below GT. Try not to touch GT without ScrewAttack active."
},
{
"link": [
6,
4
],
"name": "HiJump and Speed",
"requires": [
"h_canNavigateHeatRooms",
"HiJump",
"SpeedBooster",
"canCarefulJump",
"ScrewAttack",
{
"heatFrames": 200
}
],
"note": "Jump a before reaching the rightmost floor pillar."
},
{
"link": [
6,
4
],
"name": "Walljump",
"requires": [
"h_canNavigateHeatRooms",
"ScrewAttack",
"canCarefulJump",
"canPreciseWalljump",
"h_canUsePowerBombs",
{
"or": [
"HiJump",
"canTrickyJump"
]
},
{
"heatFrames": 350
}
],
"note": [
"Jump over the space below GT that is between the door and first foreground pillar and walljump up.",
"Break the bomb blocks with a power bomb to make space. Then use Screw Attack to pass through the inactive GT."
]
},
{
"link": [
6,
4
],
"name": "Springball Jump",
"requires": [
"h_canNavigateHeatRooms",
{
"not": "f_DefeatedGoldenTorizo"
},
{
"or": [
"canRiskPermanentLossOfAccess",
"HiJump",
{
"and": [
"canTrickyJump",
"canSpringwall"
]
}
]
},
"canSpringBallJumpMidAir",
"canNeutralDamageBoost",
{
"enemyDamage": {
"enemy": "Golden Torizo",
"type": "contact",
"hits": 1
}
},
{
"ammo": {
"type": "PowerBomb",
"count": 1
}
},
{
"heatFrames": 300
}
],
"note": "Springball jump into GT to bounce to the upper level.",
"devNote": "Strats can follow 6->5->4 if GT is defeated."
},
{
"link": [
6,
5
],
"name": "Base",
"requires": [],
"clearsObstacles": [
"A"
]
},
{
"name": "Base",
"notable": false,
"requires": [
"f_DefeatedGoldenTorizo"
],
"link": [
2,
7
]
},
{
"link": [
7,
2
],
"name": "Base",
"notable": false,
"requires": []
},
{
"name": "Safe Spot Heatproof Supers",
"notable": true,
"requires": [
"h_heatProof",
"Super"
],
"reusableRoomwideNotable": "Golden Torizo Safe Spot",
"note": "Farm supers to use throughout the fight.",
"devNote": "Supers are farmable here, so no ammo requirement.",
"link": [
5,
8
],
"clearsObstacles": [
"f_DefeatedGoldenTorizo"
]
},
{
"name": "Safe Spot Heatproof Charge",
"notable": true,
"requires": [
"h_heatProof",
"Charge",
"canBeVeryPatient"
],
"reusableRoomwideNotable": "Golden Torizo Safe Spot",
"note": "Stand in the safe spot and fire Charge shots into GT.",
"link": [
5,
8
],
"clearsObstacles": [
"f_DefeatedGoldenTorizo"
]
},
{
"name": "Safe Spot Supers",
"notable": true,
"requires": [
"h_canNavigateHeatRooms",
{
"heatFrames": 1200
},
{
"ammo": {
"type": "Super",
"count": 30
}
}
],
"reusableRoomwideNotable": "Golden Torizo Safe Spot",
"note": [
"This strat is assuming no farming. It requires 30 supers, but can be done with 29.",
"This requires a very steady fire rate so that for every Super Missile caught by GT, the next 4 Supers do damage."
],
"devNote": [
"No farming expected because that would change the heat frames.",
"Supers count hard-coded because of GT's inherent 'dodging' ability.",
"We could use an enemyKill if this were integrated into the enemy definition.",
"It actually takes 29 supers but giving 1 extra in leniency since it's easy to miss."
],
"link": [
5,
8
],
"clearsObstacles": [
"f_DefeatedGoldenTorizo"
]
},
{
"name": "Safe Spot Supers (Farming)",
"notable": true,
"requires": [
"h_canNavigateHeatRooms",
"canTrickyJump",
{
"ammo": {
"type": "Super",
"count": 15
}
},
{
"or": [
{
"and": [
"Plasma",
{
"heatFrames": 2700
}
]
},
{
"and": [
"canPreciseGrapple",
{
"heatFrames": 2700
}
]
},
{
"heatFrames": 3200
}
]
}
],
"reusableRoomwideNotable": "Golden Torizo Safe Spot",
"note": [
"This strat requires some farming. It assumes starting with 15 supers for one session of farming.",
"A safe farming method is to face left while standing in the safe spot. Then fire straight up to shoot the orbs as they appear.",
"Jump up while GT's beak is not open to collect the drops.",
"Plasma allows all of the orbs to be broken at once.",
"Grapple allows for more drops to be collected by shooting diagonally, and collecting the items using Grapple.",
"Keep the number of current Missiles below 31 so that GT will be guaranteed to use the attack which creates drops.",
"Firing Supers requires a very steady fire rate so that for every Super Missile caught by GT, the next 4 Supers do damage."
],
"devNote": "Listed Heat frames have been reduced by accounting for health drops.",
"link": [
5,
8
],
"clearsObstacles": [
"f_DefeatedGoldenTorizo"
]
},
{
"name": "Safe Spot Supers (Farming, Few Supers)",
"notable": true,
"requires": [
"h_canNavigateHeatRooms",
"canTrickyJump",
"canBePatient",
{
"ammo": {
"type": "Super",
"count": 5
}
},
{
"or": [
{
"and": [
"Plasma",
{
"heatFrames": 3100
}
]
},
{
"and": [
"canPreciseGrapple",
{
"heatFrames": 3200
}
]
},
{
"heatFrames": 4500
}
]
}
],
"reusableRoomwideNotable": "Golden Torizo Safe Spot",
"note": [
"This strat requires much farming. It assumes a capacity of and starting with only 5 supers for five sessions of farming.",
"A safe farming method is to face left while standing in the safe spot. Then fire straight up to shoot the orbs as they appear.",
"Jump up while GT's beak is not open to collect the drops.",
"Plasma allows all of the orbs to be broken at once.",
"Grapple allows for more drops to be collected by shooting diagonally, and collecting the items using Grapple.",
"Keep the number of current Missiles below 31 so that GT will be guaranteed to use the attack which creates drops.",
"Firing Supers requires a very steady fire rate so that for every Super Missile caught by GT, the next 4 Supers do damage."
],
"devNote": "Listed Heat frames have been reduced by accounting for health drops.",
"link": [
5,
8
],
"clearsObstacles": [
"f_DefeatedGoldenTorizo"
]
},
{
"name": "Golden Torizo Crystal Flash",
"notable": true,
"requires": [
"h_canNavigateHeatRooms",
{
"or": [
{
"ammo": {
"type": "Super",
"count": 30
}
},
{
"and": [
"Charge",
"Ice",
"Wave",
"Plasma"
]
}
]
},
{
"heatFrames": 800
},
"h_canHeatedCrystalFlash",
{
"heatFrames": 800
}
],
"note": [
"Midway through the fight, use a Crystal Flash to refill Samus' energy.",
"Crystal Flashing while standing in the safe spot at GT's feet is safe."
],
"devNote": [
"FIXME: Other resource combinations can work; fewer supers + farm, weaker beam + more health, 2nd crystal flash.",
"FIXME: Add heavy pause abuse strats for GT."
],
"link": [
5,
8
],
"clearsObstacles": [
"f_DefeatedGoldenTorizo"
]
},
{
"name": "Safe Spot Full Combo",
"notable": true,
"requires": [
"h_canNavigateHeatRooms",
"Charge",
"Ice",
"Wave",
"Plasma",
{
"heatFrames": 1250
}
],
"reusableRoomwideNotable": "Golden Torizo Safe Spot",
"note": "Stand in the safe spot and fire Charge shots into GT.",
"link": [
5,
8
],
"clearsObstacles": [
"f_DefeatedGoldenTorizo"
]
},
{
"name": "Safe Spot Almost Full Combo",
"notable": true,
"requires": [
"h_canNavigateHeatRooms",
"Charge",
"Wave",
"Plasma",
{
"heatFrames": 1400
}
],
"reusableRoomwideNotable": "Golden Torizo Safe Spot",
"note": "Stand in the safe spot and fire Charge shots into GT.",
"link": [
5,
8
],
"clearsObstacles": [
"f_DefeatedGoldenTorizo"
]
},
{
"name": "Safe Spot Charge Plasma",
"notable": true,
"requires": [
"h_canNavigateHeatRooms",
"Charge",
"Plasma",
{
"heatFrames": 2000
}
],
"reusableRoomwideNotable": "Golden Torizo Safe Spot",
"note": "Stand in the safe spot and fire Charge shots into GT.",
"link": [
5,
8
],
"clearsObstacles": [
"f_DefeatedGoldenTorizo"
]
},
{
"name": "Safe Spot Full Spazer",
"notable": true,
"requires": [
"h_canNavigateHeatRooms",
"Charge",
"Ice",
"Wave",
"Spazer",
{
"heatFrames": 4000
}
],
"reusableRoomwideNotable": "Golden Torizo Safe Spot",
"note": "Stand in the safe spot and fire Charge shots into GT.",
"link": [
5,
8
],
"clearsObstacles": [
"f_DefeatedGoldenTorizo"
]
},
{
"name": "Safe Spot Two Beam Charge",
"notable": true,
"requires": [
"h_canNavigateHeatRooms",
"Charge",
{
"heatFrames": 6500
},
{
"or": [
{
"and": [
"Ice",
"Wave"
]
},
{
"and": [
"Ice",
"Spazer"
]
},
{
"and": [
"Wave",
"Spazer"
]
}
]
}
],
"reusableRoomwideNotable": "Golden Torizo Safe Spot",
"note": "Stand in the safe spot and fire Charge shots into GT.",
"link": [
5,
8
],
"clearsObstacles": [
"f_DefeatedGoldenTorizo"
]
},
{
"name": "Supers",
"notable": false,
"requires": [
"h_canNavigateHeatRooms",
{
"heatFrames": 1200
},
{
"ammo": {
"type": "Super",
"count": 30
}
},
{
"enemyDamage": {
"enemy": "Golden Torizo",
"type": "super",
"hits": 4
}
},
{
"or": [
"canDodgeWhileShooting",
{
"ammo": {
"type": "Super",
"count": 5
}
},
{
"and": [
{
"enemyDamage": {
"enemy": "Golden Torizo",
"type": "super",
"hits": 2
}
},
{
"heatFrames": 200
}
]
}
]
}
],
"devNote": [
"No farming expected because that would change the heat frames.",
"Supers count hard-coded because of GT's inherent 'dodging' ability.",
"We could use an enemyKill if this were integrated into the enemy definition.",
"It actually takes 29 supers but giving 1 extra in leniency since it's easy to miss"
],
"link": [
5,
8
],
"clearsObstacles": [
"f_DefeatedGoldenTorizo"
]
},
{
"name": "Golden Torizo Missiles Only",
"notable": true,
"requires": [
"h_heatProof",
"Morph",
{
"resourceCapacity": [
{
"type": "Missile",
"count": 15
}
]
},
{
"or": [
{
"resourceCapacity": [
{
"type": "RegularEnergy",
"count": 199
}
]
},
{
"resourceCapacity": [
{
"type": "ReserveEnergy",
"count": 100
}
]
}
]
},
"canBeVeryPatient"
],
"note": [
"Killing Golden Torizo only with missiles using enemy state manipulation to get missiles to connect.",
"This can be done by rolling under GT, triggering the sit attack, and then shooting missiles during the stand up animation.",
"By pushing GT to the door and rolling into the door during a jump back, the sit can reliably be manipulated.",
"But this setup is subpixel dependant and harder to setup again if GT moves unexpectidly.",
"Use of the safe spot is expected. Keep missiles below 31 to control the fight. This fight takes multiple minutes.",
"(A cheeky Missile can hit GT the moment it becomes active)"
],
"devNote": "It is easy to make mistakes with this strat, so some capacity is given for leniency. You can farm up resources readily enough.",
"link": [
5,
8
],
"clearsObstacles": [
"f_DefeatedGoldenTorizo"
]
},
{
"name": "Full Combo",
"notable": false,
"requires": [
"h_canNavigateHeatRooms",
{
"heatFrames": 1800
},
"Charge",
"Ice",
"Wave",
"Plasma",
{
"enemyDamage": {
"enemy": "Golden Torizo",
"type": "contact",
"hits": 1
}
},
{
"or": [
{
"enemyDamage": {
"enemy": "Golden Torizo",
"type": "contact",
"hits": 3
}
},
{
"and": [
"canDodgeWhileShooting",
{
"or": [
"ScrewAttack",
"Morph"
]
}
]
}
]
}
],
"note": "This is an estimate of the net damage taken, including farmed energy.",
"link": [
5,
8
],
"clearsObstacles": [
"f_DefeatedGoldenTorizo"
]
},
{
"name": "Almost Full Combo",
"notable": false,
"requires": [
"h_canNavigateHeatRooms",
{
"heatFrames": 2150
},
"Charge",
"Wave",
"Plasma",
{
"enemyDamage": {
"enemy": "Golden Torizo",
"type": "contact",
"hits": 2
}
},
{
"or": [
{
"enemyDamage": {
"enemy": "Golden Torizo",
"type": "contact",
"hits": 3
}
},
{
"and": [
"canDodgeWhileShooting",
{
"or": [
"ScrewAttack",
"Morph"
]
}
]
}
]
}
],
"note": "This is an estimate of the net damage taken, including farmed energy.",
"link": [
5,
8
],
"clearsObstacles": [
"f_DefeatedGoldenTorizo"
]
},
{
"name": "Charge Plasma",
"notable": false,
"requires": [
"h_canNavigateHeatRooms",
{
"heatFrames": 3600
},
"Charge",
"Plasma",
{
"enemyDamage": {
"enemy": "Golden Torizo",
"type": "contact",
"hits": 2
}
},
{
"or": [
{
"enemyDamage": {
"enemy": "Golden Torizo",
"type": "contact",
"hits": 6
}
},
{
"and": [
"canDodgeWhileShooting",
{
"or": [
"ScrewAttack",
"Morph"
]
}
]
}
]
}
],
"note": "This is an estimate of the net damage taken, including farmed energy.",
"link": [
5,
8
],
"clearsObstacles": [
"f_DefeatedGoldenTorizo"
]
},
{
"name": "Full Spazer",
"notable": false,
"requires": [
"h_heatProof",
"Charge",
"Ice",
"Wave",
"Spazer",
{
"enemyDamage": {
"enemy": "Golden Torizo",
"type": "contact",
"hits": 4
}
},
{
"or": [
{
"and": [
"canDodgeWhileShooting",
{
"or": [
"Morph",
"ScrewAttack",
{
"enemyDamage": {
"enemy": "Golden Torizo",
"type": "contact",
"hits": 6
}
}
]
}
]
},
{
"enemyDamage": {
"enemy": "Golden Torizo",
"type": "contact",
"hits": 13
}
}
]
}
],
"note": "This is an estimate of the net damage taken, including farmed energy.",
"link": [
5,
8
],
"clearsObstacles": [
"f_DefeatedGoldenTorizo"
]
},
{
"link": [
8,
5
],
"name": "Base",
"notable": false,
"requires": []
},
{
"link": [
2,
2
],
"name": "Leave With Runway (GT Dead)",
"requires": [
{
  "obstaclesCleared": [
    "f_DefeatedGoldenTorizo"
  ]
}
],
"exitCondition": {
"leaveWithRunway": {
"length": 29,
"openEnd": 0
}
}
},
{
"link": [
5,
4
],
"name": "GT Supers Walljump Into Double Shinespark",
"notable": true,
"requires": [
"h_canNavigateHeatRooms",
{
  "obstaclesCleared": [
    "f_DefeatedGoldenTorizo"
  ]
},
"canShinechargeMovementComplex",
"canPreciseWalljump",
"canConsecutiveWalljump",
{
"canShineCharge": {
"usedTiles": 28,
"openEnd": 0
}
},
{
"heatFrames": 900
},
{
"shinespark": {
"frames": 11
}
}
],
"reusableRoomwideNotable": "Golden Torizo Supers Double Shinespark",
"note": [
"One vertical spark is needed to open up the area directly above.",
"Then, a second horizontal spark is performed where those blocks were cleared.",
"Try to aim for the seam between tiles to break more blocks. And the left side of the opening may be slightly easier."
]
},
{
"link": [
5,
4
],
"name": "GT Supers Double Shinespark With HiJump",
"notable": true,
"requires": [
"h_canNavigateHeatRooms",
{
"obstaclesCleared": [
"f_DefeatedGoldenTorizo"
]
},
"canShinechargeMovementComplex",
"HiJump",
{
"canShineCharge": {
"usedTiles": 28,
"openEnd": 0
}
},
{
"heatFrames": 900
},
{
"shinespark": {
"frames": 11
}
}
],
"reusableRoomwideNotable": "Golden Torizo Supers Double Shinespark",
"note": [
"One vertical spark is needed to open up the area directly above.",
"A running jump is used to jump high enough into the revealed hole for a horizontal spark."
]
},
{
"link": [
5,
4
],
"name": "GT Supers IBJ",
"requires": [
"h_canNavigateHeatRooms",
{
"obstaclesCleared": [
"f_DefeatedGoldenTorizo"
]
},
"h_canIBJ",
{
"heatFrames": 3000
}
],
"note": "Expects two IBJs; one to break a block, then another one to get back up.",
"devNote": "Needs strats for variations of IBJs, mainly for heatframe count."
},
{
"name": "Base",
"notable": false,
"requires": [
{
"obstaclesCleared": [
"f_DefeatedGoldenTorizo"
]
}
],
"link": [
2,
7
]
}
]
}