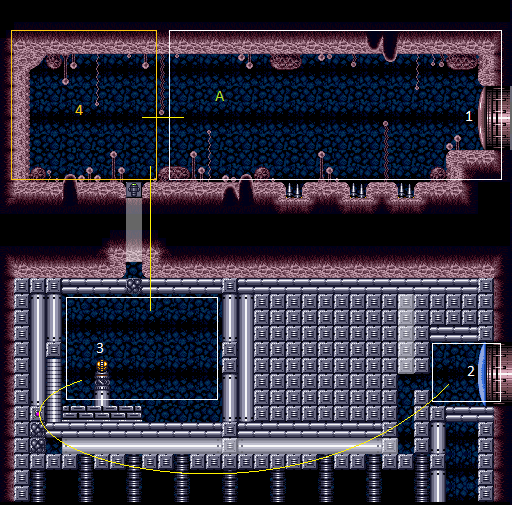
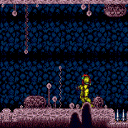
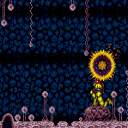
Pink Brinstar Power Bomb Room
Room ID: 60
|
Requires: {
"obstaclesCleared": [
"A"
]
}
Exit condition: {
"leaveWithRunway": {
"length": 3,
"openEnd": 1
}
}
|
|
From: 1
Top Right Door
To: 1
Top Right Door
Requires: {
"obstaclesCleared": [
"A"
]
}
{
"obstaclesNotCleared": [
"B"
]
}
{
"canShineCharge": {
"usedTiles": 16,
"openEnd": 0
}
}
Exit condition: {
"leaveShinecharged": {
"framesRemaining": 60
}
}
|
|
From: 1
Top Right Door
To: 1
Top Right Door
Stand to the right of the center spike Run to the left, and continue running left while getting knocked back right by the spike. The spike i-frames allow shortcharging while running through the left two spike blocks. After gaining a shinecharge, turn back right, run, and jump through the door. Requires: {
"obstaclesCleared": [
"A"
]
}
{
"obstaclesNotCleared": [
"B"
]
}
{
"canShineCharge": {
"usedTiles": 23,
"openEnd": 0
}
}
{
"spikeHits": 1
}
"canIframeSpikeJump"
"canShinechargeMovementComplex"
Exit condition: {
"leaveShinecharged": {
"framesRemaining": 62
}
}
|
|
From: 1
Top Right Door
To: 1
Top Right Door
Requires: {
"obstaclesCleared": [
"A"
]
}
"SpeedBooster"
"h_canXMode"
"h_XModeSpikeHit"
"h_XModeSpikeHit"
"canShinechargeMovement"
Exit condition: {
"leaveShinecharged": {
"framesRemaining": 100
}
}
|
|
Requires: {
"obstaclesCleared": [
"A"
]
}
"h_canCrystalFlash"
|
|
From: 1
Top Right Door
To: 1
Top Right Door
It's fastest to kill the first hopper safely from inside the doorway, then lure the second one over. Exit condition: {
"leaveWithGModeSetup": {}
}
|
|
From: 1
Top Right Door
To: 1
Top Right Door
Requires: {
"enemyDamage": {
"enemy": "Sidehopper",
"type": "contact",
"hits": 1
}
}
|
|
From: 1
Top Right Door
To: 4
Top Left Junction
2 hits are expected to be taken. The first can be either from a Sidehopper or from a spike. Second hit will be from a Sidehopper. It is possible to avoid the first hit by opening the door and standing in the doorway while killing the first hopper. Requires: {
"enemyDamage": {
"enemy": "Sidehopper",
"type": "contact",
"hits": 1
}
}
{
"or": [
{
"enemyDamage": {
"enemy": "Sidehopper",
"type": "contact",
"hits": 1
}
},
{
"spikeHits": 1
},
{
"and": [
{
"doorUnlockedAtNode": 1
},
"canDodgeWhileShooting"
]
}
]
}
|
|
From: 1
Top Right Door
To: 4
Top Left Junction
Requires: {
"enemyDamage": {
"enemy": "Sidehopper",
"type": "contact",
"hits": 6
}
}
Clears obstacles: A |
|
From: 1
Top Right Door
To: 4
Top Left Junction
Morph reduces damage because the ceiling Sidehopper can't reach a Morphed Samus. Requires: {
"enemyDamage": {
"enemy": "Sidehopper",
"type": "contact",
"hits": 3
}
}
"Morph"
"canDodgeWhileShooting"
Clears obstacles: A |
|
From: 1
Top Right Door
To: 4
Top Left Junction
Pseudo Screw can help with the Sidehopper kills. Requires: {
"enemyDamage": {
"enemy": "Sidehopper",
"type": "contact",
"hits": 2
}
}
{
"or": [
"Spazer",
"canPseudoScrew",
"Wave"
]
}
Clears obstacles: A |
|
From: 1
Top Right Door
To: 4
Top Left Junction
Morph reduces damage because the ceiling Sidehopper can't reach a morphed Samus. Requires: {
"enemyDamage": {
"enemy": "Sidehopper",
"type": "contact",
"hits": 1
}
}
"Morph"
"canDodgeWhileShooting"
{
"or": [
"Spazer",
"Wave"
]
}
Clears obstacles: A |
|
From: 1
Top Right Door
To: 4
Top Left Junction
Requires: {
"enemyDamage": {
"enemy": "Sidehopper",
"type": "contact",
"hits": 1
}
}
{
"enemyKill": {
"enemies": [
[
"Sidehopper"
],
[
"Sidehopper"
]
],
"explicitWeapons": [
"Missile"
]
}
}
Clears obstacles: A |
|
From: 1
Top Right Door
To: 4
Top Left Junction
All beam weapons that can take out a Sidehopper in 5 hits or less can reliably take out the Sidehoppers damage-free. Requires: {
"enemyKill": {
"enemies": [
[
"Sidehopper"
],
[
"Sidehopper"
]
],
"explicitWeapons": [
"Super",
"PowerBomb",
"ScrewAttack",
"Plasma",
"Wave+Spazer"
]
}
}
Clears obstacles: A |
|
From: 1
Top Right Door
To: 4
Top Left Junction
Open the door and kill the first hopper from inside the doorway. It won't be able to hit Samus for many jumps. It is possible to quickly get back to the right and crouch against the the ledge while aiming upward to safely kill the Sidehopper. Alternatively, morph can help with the second hopper, as it won't be able to hit Samus. Requires: {
"doorUnlockedAtNode": 1
}
"canDodgeWhileShooting"
{
"or": [
"Morph",
"Spazer",
"Wave",
"Plasma",
{
"enemyKill": {
"enemies": [
[
"Sidehopper"
]
],
"explicitWeapons": [
"Missile"
]
}
},
{
"enemyDamage": {
"enemy": "Sidehopper",
"type": "contact",
"hits": 2
}
},
"canTrickyJump"
]
}
Clears obstacles: A |
|
From: 1
Top Right Door
To: 4
Top Left Junction
Use 1-3 Power Bombs to kill the Sidehoppers. Entrance condition: {
"comeInWithGMode": {
"mode": "any",
"morphed": true
}
}
Requires: "h_canArtificialMorphPowerBomb"
{
"or": [
{
"and": [
"h_canArtificialMorphPowerBomb",
{
"or": [
"h_canArtificialMorphBombHorizontally",
"h_canArtificialMorphSpringBall"
]
}
]
},
{
"enemyDamage": {
"enemy": "Sidehopper",
"hits": 1,
"type": "contact"
}
}
]
}
Clears obstacles: A |
|
Climb up 1 screen. Entrance condition: {
"comeInWithDoorStuckSetup": {}
}
Requires: "canXRayClimb" |
|
From: 2
Bottom Right Door
To: 1
Top Right Door
Enter with G-mode direct, back up to between 1 and 6 pixels from the door transition, and activate X-ray to get very deep stuck in the door. Climb up 1 screen, and perform a turnaround buffered spin-jump away from the door to trigger the transition, bypassing any lock on the door. Entrance condition: {
"comeInWithGMode": {
"mode": "direct",
"morphed": false
}
}
Requires: "canXRayClimb" Bypasses door shell: true |
|
From: 2
Bottom Right Door
To: 1
Top Right Door
Entrance condition: {
"comeInWithGrappleTeleport": {
"blockPositions": [
[
5,
3
],
[
7,
2
]
]
}
}
Requires: {
"enemyDamage": {
"enemy": "Sidehopper",
"type": "contact",
"hits": 1
}
}
|
|
From: 2
Bottom Right Door
To: 1
Top Right Door
Enter the room in a pose that allows Samus to stand. After teleporting, retract Grapple by pressing up. Then hold right to release Grapple while standing. Samus should get pushed up onto the floor. Run to the right and reach the door, taking just one hit from a Hopper. Entrance condition: {
"comeInWithGrappleTeleport": {
"blockPositions": [
[
3,
12
],
[
3,
13
]
]
}
}
Requires: "canOffScreenMovement"
{
"enemyDamage": {
"enemy": "Sidehopper",
"type": "contact",
"hits": 1
}
}
|
|
From: 2
Bottom Right Door
To: 2
Bottom Right Door
Exit condition: {
"leaveWithRunway": {
"length": 4,
"openEnd": 0
}
}
|
|
From: 2
Bottom Right Door
To: 3
Item
Notable: true 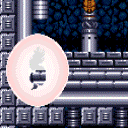
Perform the crystal flash all the way to the left, against the crumble blocks to prevent the elevator on the right from blocking you in. Simply jump after performing the crystal flash to jump through the floor. Requires: "h_canCrystalFlash" "canCeilingClip" |
|
From: 2
Bottom Right Door
To: 3
Item
Place Bombs against the side of the crumble block until PLMs are overloaded, then go through. Entrance condition: {
"comeInWithGMode": {
"mode": "any",
"morphed": true
}
}
Requires: "h_canArtificialMorphBombs" |
|
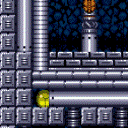
From: 2
Bottom Right Door
To: 3
Item
Place two Power Bombs, precisely on the third tile in the morph tunnel to overload PLMs (watch the right side of the screen). Entrance condition: {
"comeInWithGMode": {
"mode": "direct",
"morphed": true
}
}
Requires: {
"itemNotCollectedAtNode": 3
}
"h_canArtificialMorphPowerBomb"
"h_canArtificialMorphPowerBomb"
{
"or": [
"h_canArtificialMorphSpringBall",
{
"ammo": {
"type": "PowerBomb",
"count": 4
}
},
{
"and": [
"Morph",
{
"or": [
"can4HighMidAirMorph",
{
"ammo": {
"type": "PowerBomb",
"count": 2
}
}
]
}
]
}
]
}
|
|
Requires: "h_canBombThings" |
|
Notable: true 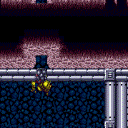
Perform a quick-drop through the Crumble block, and grab the item. During the item message box, buffer the inputs to turn around to the right and jump. Perform a wall jump by briefly releasing and repressing jump (while continuing to hold right) after hitting the respawning crumble block, to clip up through it. Requires: "canQuickCrumbleEscape"
"HiJump"
"canPreciseWalljump"
{
"obstaclesCleared": [
"A",
"B"
]
}
|
|
From: 3
Item
To: 4
Top Left Junction
Notable: true 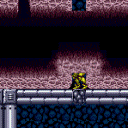
Perform a quick-drop through the Crumble block, and grab the item. During the item message box, buffer the inputs to turn around to the right and jump. Break spin just before you would hit the respawning crumble block, in order to clip up through it. Then perform a crumble jump to make it out. Requires: "canQuickCrumbleEscape"
"HiJump"
"canCrumbleJump"
{
"obstaclesCleared": [
"A",
"B"
]
}
|
|
From: 3
Item
To: 4
Top Left Junction
Notable: true 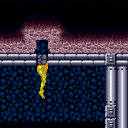
Gain a shinecharge by running right-to-left, either using the short runway (with unbroken Super block) or an extended runway by taking a spike hit. Then spin jump, hit the ceiling, aim down, break the Super block, and turn around to quick drop through the crumble block. During the item message box, buffer the inputs to turn around to the right and jump. Once under the crumble block (the left part of it), press up while still holding jump, to immediately activate the spark and make it up in time. Requires: {
"or": [
{
"canShineCharge": {
"usedTiles": 16,
"openEnd": 0
}
},
{
"and": [
{
"canShineCharge": {
"usedTiles": 23,
"openEnd": 0
}
},
{
"spikeHits": 1
},
"canIframeSpikeJump"
]
}
]
}
"canShinechargeMovementComplex"
"canQuickCrumbleEscape"
{
"or": [
{
"shinespark": {
"frames": 19,
"excessFrames": 7
}
},
{
"and": [
{
"shinespark": {
"frames": 19,
"excessFrames": 15
}
},
"canCrumbleJump"
]
}
]
}
{
"obstaclesCleared": [
"A",
"B"
]
}
|
|
Requires: {
"obstaclesCleared": [
"A"
]
}
|
|
Requires: {
"ammo": {
"type": "Super",
"count": 1
}
}
Clears obstacles: B |
{
"$schema": "../../../schema/m3-room.schema.json",
"id": 60,
"name": "Pink Brinstar Power Bomb Room",
"area": "Brinstar",
"subarea": "Pink",
"playable": true,
"roomAddress": "0x79E11",
"roomEnvironments": [
{
"heated": false
}
],
"nodes": [
{
"id": 1,
"name": "Top Right Door",
"nodeType": "door",
"nodeSubType": "grey",
"nodeAddress": "0x0018e62",
"doorEnvironments": [
{
"physics": "air"
}
],
"locks": [
{
"name": "Mission Impossible Grey Lock (to Big Pink Upper)",
"lockType": "killEnemies",
"unlockStrats": [
{
"name": "Base",
"notable": false,
"requires": [
{
  "obstaclesCleared": [
    "A"
  ]
}
],
"devNote": "Obstacle must be destroyed by going to 4 and back."
}
],
"yields": [
"f_ZebesAwake"
]
}
]
},
{
"id": 2,
"name": "Bottom Right Door",
"nodeType": "door",
"nodeSubType": "blue",
"nodeAddress": "0x0018e6e",
"doorEnvironments": [
{
"physics": "air"
}
]
},
{
"id": 3,
"name": "Item",
"nodeType": "item",
"nodeSubType": "visible",
"nodeItem": "PowerBomb",
"nodeAddress": "0x7865C"
},
{
"id": 4,
"name": "Top Left Junction",
"nodeType": "junction",
"nodeSubType": "junction",
"note": "The top left section of the room, where the Super block is"
}
],
"obstacles": [
{
"id": "A",
"name": "Sidehoppers",
"obstacleType": "enemies"
},
{
"id": "B",
"name": "Mission Impossible - Return through the Crumble Block",
"obstacleType": "abstract"
}
],
"enemies": [
{
"id": "e1",
"groupName": "Mission Impossible Sidehoppers",
"enemyName": "Sidehopper",
"quantity": 2,
"homeNodes": [
1,
4
]
}
],
"links": [
{
"from": 1,
"to": [
{
"id": 1
},
{
"id": 4
}
]
},
{
"from": 2,
"to": [
{
"id": 1
},
{
"id": 2
},
{
"id": 3
}
]
},
{
"from": 3,
"to": [
{
"id": 2
},
{
"id": 4
}
]
},
{
"from": 4,
"to": [
{
"id": 1
},
{
"id": 3
}
]
}
],
"strats": [
{
"link": [
1,
1
],
"name": "Leave With Runway",
"requires": [
{
"obstaclesCleared": [
"A"
]
}
],
"exitCondition": {
"leaveWithRunway": {
"length": 3,
"openEnd": 1
}
}
},
{
"link": [
1,
1
],
"name": "Leave Shinecharged (Unbroken Super Block)",
"requires": [
{
"obstaclesCleared": [
"A"
]
},
{
"obstaclesNotCleared": [
"B"
]
},
{
"canShineCharge": {
"usedTiles": 16,
"openEnd": 0
}
}
],
"exitCondition": {
"leaveShinecharged": {
"framesRemaining": 60
}
},
"devNote": "Spikes cannot be used as openEnds."
},
{
"link": [
1,
1
],
"name": "Leave Shinecharged (Spike I-frames, Unbroken Super Block)",
"requires": [
{
"obstaclesCleared": [
"A"
]
},
{
"obstaclesNotCleared": [
"B"
]
},
{
"canShineCharge": {
"usedTiles": 23,
"openEnd": 0
}
},
{
"spikeHits": 1
},
"canIframeSpikeJump",
"canShinechargeMovementComplex"
],
"exitCondition": {
"leaveShinecharged": {
"framesRemaining": 62
}
},
"note": [
"Stand to the right of the center spike",
"Run to the left, and continue running left while getting knocked back right by the spike.",
"The spike i-frames allow shortcharging while running through the left two spike blocks.",
"After gaining a shinecharge, turn back right, run, and jump through the door."
],
"devNote": "Spikes cannot be used as openEnds."
},
{
"link": [
1,
1
],
"name": "Leave Shinecharged (X-Mode)",
"requires": [
{
"obstaclesCleared": [
"A"
]
},
"SpeedBooster",
"h_canXMode",
"h_XModeSpikeHit",
"h_XModeSpikeHit",
"canShinechargeMovement"
],
"exitCondition": {
"leaveShinecharged": {
"framesRemaining": 100
}
},
"devNote": "Two spike hits are expected per attempt (with any additional leniency hits being multiplied by this amount)."
},
{
"link": [
1,
1
],
"name": "Crystal Flash",
"requires": [
{
"obstaclesCleared": [
"A"
]
},
"h_canCrystalFlash"
]
},
{
"link": [
1,
1
],
"name": "G-Mode Setup - Get Hit By Sidehopper",
"notable": false,
"requires": [],
"exitCondition": {
"leaveWithGModeSetup": {}
},
"note": [
"It's fastest to kill the first hopper safely from inside the doorway, then lure the second one over."
]
},
{
"link": [
1,
1
],
"name": "G-Mode Regain Mobility",
"requires": [
{
  "enemyDamage": {
    "enemy": "Sidehopper",
    "type": "contact",
    "hits": 1
  }
}
],
"gModeRegainMobility": {}
},
{
"link": [
1,
4
],
"name": "Tank the Damage while Running Through",
"requires": [
{
"enemyDamage": {
"enemy": "Sidehopper",
"type": "contact",
"hits": 1
}
},
{
"or": [
{
"enemyDamage": {
"enemy": "Sidehopper",
"type": "contact",
"hits": 1
}
},
{
"spikeHits": 1
},
{
"and": [
{
"doorUnlockedAtNode": 1
},
"canDodgeWhileShooting"
]
}
]
}
],
"note": [
"2 hits are expected to be taken.",
"The first can be either from a Sidehopper or from a spike.",
"Second hit will be from a Sidehopper.",
"It is possible to avoid the first hit by opening the door and standing in the doorway while killing the first hopper."
]
},
{
"link": [
1,
4
],
"name": "Power Beam Sidehopper Kill",
"requires": [
{
  "enemyDamage": {
    "enemy": "Sidehopper",
    "type": "contact",
    "hits": 6
  }
}
],
"clearsObstacles": [
"A"
],
"devNote": "FIXME: Coming in with blue or sparking may be another way to kill the Hoppers."
},
{
"link": [
1,
4
],
"name": "Morph Power Beam Sidehopper Kill",
"requires": [
{
"enemyDamage": {
"enemy": "Sidehopper",
"type": "contact",
"hits": 3
}
},
"Morph",
"canDodgeWhileShooting"
],
"clearsObstacles": [
"A"
],
"note": "Morph reduces damage because the ceiling Sidehopper can't reach a Morphed Samus."
},
{
"link": [
1,
4
],
"name": "Intermediate Weapon Sidehopper Kill",
"requires": [
{
"enemyDamage": {
"enemy": "Sidehopper",
"type": "contact",
"hits": 2
}
},
{
"or": [
"Spazer",
"canPseudoScrew",
"Wave"
]
}
],
"clearsObstacles": [
"A"
],
"note": "Pseudo Screw can help with the Sidehopper kills."
},
{
"link": [
1,
4
],
"name": "Morph Intermediate Weapon Sidehopper Kill",
"requires": [
{
"enemyDamage": {
"enemy": "Sidehopper",
"type": "contact",
"hits": 1
}
},
"Morph",
"canDodgeWhileShooting",
{
"or": [
"Spazer",
"Wave"
]
}
],
"clearsObstacles": [
"A"
],
"note": "Morph reduces damage because the ceiling Sidehopper can't reach a morphed Samus."
},
{
"link": [
1,
4
],
"name": "Good Weapon Sidehopper Kill",
"requires": [
{
"enemyDamage": {
"enemy": "Sidehopper",
"type": "contact",
"hits": 1
}
},
{
"enemyKill": {
"enemies": [
[
"Sidehopper"
],
[
"Sidehopper"
]
],
"explicitWeapons": [
"Missile"
]
}
}
],
"clearsObstacles": [
"A"
]
},
{
"link": [
1,
4
],
"name": "Safe Weapon Sidehopper Kill",
"requires": [
{
  "enemyKill": {
    "enemies": [
      [
        "Sidehopper"
      ],
      [
        "Sidehopper"
      ]
    ],
    "explicitWeapons": [
      "Super",
      "PowerBomb",
      "ScrewAttack",
      "Plasma",
      "Wave+Spazer"
    ]
  }
}
],
"clearsObstacles": [
"A"
],
"note": "All beam weapons that can take out a Sidehopper in 5 hits or less can reliably take out the Sidehoppers damage-free."
},
{
"link": [
1,
4
],
"name": "Doorway Sidehopper Kill",
"requires": [
{
"doorUnlockedAtNode": 1
},
"canDodgeWhileShooting",
{
"or": [
"Morph",
"Spazer",
"Wave",
"Plasma",
{
"enemyKill": {
"enemies": [
[
"Sidehopper"
]
],
"explicitWeapons": [
"Missile"
]
}
},
{
"enemyDamage": {
"enemy": "Sidehopper",
"type": "contact",
"hits": 2
}
},
"canTrickyJump"
]
}
],
"clearsObstacles": [
"A"
],
"note": [
"Open the door and kill the first hopper from inside the doorway. It won't be able to hit Samus for many jumps.",
"It is possible to quickly get back to the right and crouch against the the ledge while aiming upward to safely kill the Sidehopper.",
"Alternatively, morph can help with the second hopper, as it won't be able to hit Samus."
]
},
{
"link": [
1,
4
],
"name": "G-Mode Morph Power Bomb Kill",
"entranceCondition": {
"comeInWithGMode": {
"mode": "any",
"morphed": true
}
},
"requires": [
"h_canArtificialMorphPowerBomb",
{
"or": [
{
"and": [
"h_canArtificialMorphPowerBomb",
{
"or": [
"h_canArtificialMorphBombHorizontally",
"h_canArtificialMorphSpringBall"
]
}
]
},
{
"enemyDamage": {
"enemy": "Sidehopper",
"hits": 1,
"type": "contact"
}
}
]
}
],
"clearsObstacles": [
"A"
],
"note": "Use 1-3 Power Bombs to kill the Sidehoppers."
},
{
"link": [
2,
1
],
"name": "X-Ray Climb",
"entranceCondition": {
"comeInWithDoorStuckSetup": {}
},
"requires": [
"canXRayClimb"
],
"note": "Climb up 1 screen."
},
{
"link": [
2,
1
],
"name": "Very Deep Stuck X-Ray Climb",
"entranceCondition": {
"comeInWithGMode": {
"mode": "direct",
"morphed": false
}
},
"requires": [
"canXRayClimb"
],
"bypassesDoorShell": true,
"note": [
"Enter with G-mode direct, back up to between 1 and 6 pixels from the door transition, and activate X-ray to get very deep stuck in the door.",
"Climb up 1 screen, and perform a turnaround buffered spin-jump away from the door to trigger the transition, bypassing any lock on the door."
]
},
{
"link": [
2,
1
],
"name": "Grapple Teleport",
"entranceCondition": {
"comeInWithGrappleTeleport": {
"blockPositions": [
[
5,
3
],
[
7,
2
]
]
}
},
"requires": [
{
  "enemyDamage": {
    "enemy": "Sidehopper",
    "type": "contact",
    "hits": 1
  }
}
]
},
{
"link": [
2,
1
],
"name": "Pink Prinstar Power Bomb Grapple Teleport Inside Wall",
"entranceCondition": {
"comeInWithGrappleTeleport": {
"blockPositions": [
[
3,
12
],
[
3,
13
]
]
}
},
"requires": [
"canOffScreenMovement",
{
"enemyDamage": {
"enemy": "Sidehopper",
"type": "contact",
"hits": 1
}
}
],
"note": [
"Enter the room in a pose that allows Samus to stand.",
"After teleporting, retract Grapple by pressing up.",
"Then hold right to release Grapple while standing.",
"Samus should get pushed up onto the floor.",
"Run to the right and reach the door, taking just one hit from a Hopper."
]
},
{
"link": [
2,
2
],
"name": "Leave With Runway",
"requires": [],
"exitCondition": {
"leaveWithRunway": {
"length": 4,
"openEnd": 0
}
}
},
{
"link": [
2,
3
],
"name": "Pink Brinstar Power Bombs Crystal Flash Clip",
"notable": true,
"requires": [
"h_canCrystalFlash",
"canCeilingClip"
],
"note": [
"Perform the crystal flash all the way to the left, against the crumble blocks to prevent the elevator on the right from blocking you in.",
"Simply jump after performing the crystal flash to jump through the floor."
]
},
{
"link": [
2,
3
],
"name": "G-Mode Morph Overload PLMs with Bombs",
"entranceCondition": {
"comeInWithGMode": {
"mode": "any",
"morphed": true
}
},
"requires": [
"h_canArtificialMorphBombs"
],
"note": "Place Bombs against the side of the crumble block until PLMs are overloaded, then go through."
},
{
"link": [
2,
3
],
"name": "G-Mode Morph Direct Overload PLMs with Power Bombs",
"entranceCondition": {
"comeInWithGMode": {
"mode": "direct",
"morphed": true
}
},
"requires": [
{
"itemNotCollectedAtNode": 3
},
"h_canArtificialMorphPowerBomb",
"h_canArtificialMorphPowerBomb",
{
"or": [
"h_canArtificialMorphSpringBall",
{
"ammo": {
"type": "PowerBomb",
"count": 4
}
},
{
"and": [
"Morph",
{
"or": [
"can4HighMidAirMorph",
{
"ammo": {
"type": "PowerBomb",
"count": 2
}
}
]
}
]
}
]
}
],
"note": "Place two Power Bombs, precisely on the third tile in the morph tunnel to overload PLMs (watch the right side of the screen).",
"devNote": [
"Because of the gates, it costs 2 Power Bombs to get into the tunnel and 2 to get out the other side.",
"There is no canRiskPermanentLossOfAccess, because there is no reason to go here except to get the item and leave."
]
},
{
"link": [
3,
2
],
"name": "Base",
"requires": [
"h_canBombThings"
]
},
{
"link": [
3,
4
],
"name": "Mission Impossible",
"notable": true,
"requires": [
"canQuickCrumbleEscape",
"HiJump",
"canPreciseWalljump",
{
"obstaclesCleared": [
"A",
"B"
]
}
],
"failures": [
{
"name": "Crumble Failure",
"note": "Failure leaves you at 3 with a solid crumble block above."
}
],
"note": [
"Perform a quick-drop through the Crumble block, and grab the item.",
"During the item message box, buffer the inputs to turn around to the right and jump.",
"Perform a wall jump by briefly releasing and repressing jump (while continuing to hold right) after hitting the respawning crumble block, to clip up through it."
],
"devNote": "This expects that the Sidehoppers are dead. To avoid redundant requirements, they must be killed coming in."
},
{
"link": [
3,
4
],
"name": "Mission Impossible Walljumpless",
"notable": true,
"requires": [
"canQuickCrumbleEscape",
"HiJump",
"canCrumbleJump",
{
"obstaclesCleared": [
"A",
"B"
]
}
],
"failures": [
{
"name": "Crumble Failure",
"note": "Failure leaves you at 3 with a solid crumble block above."
}
],
"note": [
"Perform a quick-drop through the Crumble block, and grab the item.",
"During the item message box, buffer the inputs to turn around to the right and jump.",
"Break spin just before you would hit the respawning crumble block, in order to clip up through it.",
"Then perform a crumble jump to make it out."
],
"devNote": "This expects that the Sidehoppers are dead. To avoid redundant requirements, they must be killed coming in."
},
{
"link": [
3,
4
],
"name": "Mission Impossible Shinespark",
"notable": true,
"requires": [
{
"or": [
{
"canShineCharge": {
"usedTiles": 16,
"openEnd": 0
}
},
{
"and": [
{
"canShineCharge": {
"usedTiles": 23,
"openEnd": 0
}
},
{
"spikeHits": 1
},
"canIframeSpikeJump"
]
}
]
},
"canShinechargeMovementComplex",
"canQuickCrumbleEscape",
{
"or": [
{
"shinespark": {
"frames": 19,
"excessFrames": 7
}
},
{
"and": [
{
"shinespark": {
"frames": 19,
"excessFrames": 15
}
},
"canCrumbleJump"
]
}
]
},
{
"obstaclesCleared": [
"A",
"B"
]
}
],
"failures": [
{
"name": "Crumble Failure",
"note": "Failure leaves you at 3 with a solid crumble block above."
}
],
"note": [
"Gain a shinecharge by running right-to-left, either using the short runway (with unbroken Super block) or an extended runway by taking a spike hit.",
"Then spin jump, hit the ceiling, aim down, break the Super block, and turn around to quick drop through the crumble block.",
"During the item message box, buffer the inputs to turn around to the right and jump.",
"Once under the crumble block (the left part of it), press up while still holding jump, to immediately activate the spark and make it up in time."
],
"devNote": "This expects that the Sidehoppers are dead. To avoid redundant requirements, they must be killed coming in."
},
{
"link": [
4,
1
],
"name": "Base",
"requires": [
{
  "obstaclesCleared": [
    "A"
  ]
}
],
"devNote": "This link is only useful after Mission Impossible, which already requires the hoppers to be killed."
},
{
"link": [
4,
3
],
"name": "Base",
"requires": [
{
  "ammo": {
    "type": "Super",
    "count": 1
  }
}
],
"clearsObstacles": [
"B"
]
}
]
}