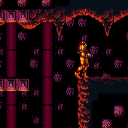
Lower Norfair Spring Ball Maze Room
Room ID: 146
|
Exit condition: {
"leaveWithRunway": {
"length": 6,
"openEnd": 1
}
}
|
|
Requires: "h_canHeatedCrystalFlash" |
|
From: 1
Left Door
To: 6
Junction By Left Door (Right of Pit)
Requires: "h_canNavigateHeatRooms"
{
"heatFrames": 60
}
|
|
From: 1
Left Door
To: 6
Junction By Left Door (Right of Pit)
Entrance condition: {
"comeInRunning": {
"minTiles": 3,
"speedBooster": "any"
}
}
Requires: "h_canNavigateHeatRooms"
{
"heatFrames": 45
}
|
|
From: 1
Left Door
To: 7
Junction By Lower Alcoons (Left of Spike Pits)
Requires: "h_canNavigateHeatRooms"
{
"heatFrames": 160
}
|
|
From: 1
Left Door
To: 7
Junction By Lower Alcoons (Left of Spike Pits)
Requires: "h_canNavigateHeatRooms"
{
"or": [
"canDownBack",
"canCarefulJump"
]
}
{
"heatFrames": 120
}
|
|
From: 2
Right Vertical Door
To: 2
Right Vertical Door
Exit condition: {
"leaveNormally": {}
}
|
|
From: 2
Right Vertical Door
To: 2
Right Vertical Door
Entrance condition: {
"comeInWithSpark": {},
"comesThroughToilet": "any"
}
Requires: {
"shinespark": {
"frames": 5,
"excessFrames": 5
}
}
{
"heatFrames": 120
}
|
|
From: 2
Right Vertical Door
To: 2
Right Vertical Door
Requires: "h_canHeatedCrystalFlash" |
|
From: 2
Right Vertical Door
To: 5
Spring Ball Maze Junction (Past the Bomb Blocks)
Notable: true 
Perform the crystal flash all the way against the left wall of the accessible tunnel, then jump through the ceiling. Requires: {
"heatFrames": 300
}
"h_canCrystalFlash"
"canCeilingClip"
{
"heatFrames": 270
}
Clears obstacles: B |
|
From: 3
Bottom Horizontal Door
To: 1
Left Door
Entrance condition: {
"comeInWithGrappleTeleport": {
"blockPositions": [
[
5,
3
],
[
7,
2
]
]
}
}
Requires: {
"heatFrames": 50
}
|
|
From: 3
Bottom Horizontal Door
To: 1
Left Door
Entrance condition: {
"comeInWithGrappleTeleport": {
"blockPositions": [
[
3,
12
],
[
3,
13
]
]
}
}
Bypasses door shell: true |
|
From: 3
Bottom Horizontal Door
To: 1
Left Door
Entrance condition: {
"comeInWithGrappleTeleport": {
"blockPositions": [
[
3,
12
]
]
}
}
Exit condition: {
"leaveWithGrappleTeleport": {
"blockPositions": [
[
3,
12
]
]
}
}
Bypasses door shell: true |
|
From: 3
Bottom Horizontal Door
To: 1
Left Door
Entrance condition: {
"comeInWithGrappleTeleport": {
"blockPositions": [
[
3,
13
]
]
}
}
Exit condition: {
"leaveWithGrappleTeleport": {
"blockPositions": [
[
3,
13
]
]
}
}
Bypasses door shell: true |
|
From: 3
Bottom Horizontal Door
To: 3
Bottom Horizontal Door
Exit condition: {
"leaveWithRunway": {
"length": 8,
"openEnd": 1,
"gentleUpTiles": 4
}
}
|
|
From: 3
Bottom Horizontal Door
To: 3
Bottom Horizontal Door
Requires: "h_canHeatedCrystalFlash" |
|
From: 3
Bottom Horizontal Door
To: 3
Bottom Horizontal Door
Clears obstacles: C |
|
From: 3
Bottom Horizontal Door
To: 3
Bottom Horizontal Door
Clear the Alcoon then bounce into the spike patch. Requires: "SpeedBooster"
"h_canXMode"
"h_XModeSpikeHit"
"h_XModeSpikeHit"
{
"or": [
{
"and": [
{
"enemyKill": {
"enemies": [
[
"Alcoon"
]
],
"explicitWeapons": [
"Plasma",
"Wave+Spazer",
"ScrewAttack",
"Missile",
"Super"
]
}
},
{
"heatFrames": 420
}
]
},
{
"and": [
{
"enemyKill": {
"enemies": [
[
"Alcoon"
]
],
"explicitWeapons": [
"Spazer",
"Wave",
"PseudoScrew",
"PowerBomb"
]
}
},
{
"heatFrames": 530
}
]
},
{
"and": [
{
"enemyKill": {
"enemies": [
[
"Alcoon"
]
],
"explicitWeapons": [
"PowerBeam"
]
}
},
{
"heatFrames": 620
}
]
}
]
}
Exit condition: {
"leaveShinecharged": {
"framesRemaining": 90
}
}
|
|
From: 3
Bottom Horizontal Door
To: 7
Junction By Lower Alcoons (Left of Spike Pits)
Requires: "h_canNavigateHeatRooms"
"ScrewAttack"
{
"or": [
"canCarefulJump",
{
"heatFrames": 40
}
]
}
{
"heatFrames": 100
}
|
|
From: 3
Bottom Horizontal Door
To: 7
Junction By Lower Alcoons (Left of Spike Pits)
Kill the Alcoon without stopping. Requires: "h_canNavigateHeatRooms"
"canDodgeWhileShooting"
{
"or": [
{
"enemyKill": {
"enemies": [
[
"Alcoon"
]
],
"explicitWeapons": [
"Missile",
"Super",
"Wave+Plasma"
]
}
},
{
"and": [
"canPrepareForNextRoom",
"Charge",
"Wave",
"Spazer"
]
},
{
"and": [
"canPseudoScrew",
{
"heatFrames": 30
}
]
}
]
}
{
"or": [
"canCarefulJump",
{
"heatFrames": 10
}
]
}
{
"heatFrames": 100
}
|
|
From: 3
Bottom Horizontal Door
To: 7
Junction By Lower Alcoons (Left of Spike Pits)
Use blue speed to kill the Alcoons without stopping. Entrance condition: {
"comeInShinecharging": {
"length": 7,
"openEnd": 1,
"gentleDownTiles": 4
}
}
Requires: "h_canNavigateHeatRooms"
{
"heatFrames": 60
}
|
|
From: 3
Bottom Horizontal Door
To: 7
Junction By Lower Alcoons (Left of Spike Pits)
Requires: "h_canNavigateHeatRooms"
{
"enemyKill": {
"enemies": [
[
"Alcoon",
"Alcoon"
]
],
"explicitWeapons": [
"Missile",
"Super",
"Plasma",
"Wave+Spazer"
]
}
}
{
"heatFrames": 200
}
|
|
From: 3
Bottom Horizontal Door
To: 7
Junction By Lower Alcoons (Left of Spike Pits)
Requires: "h_canNavigateHeatRooms"
"canCarefulJump"
{
"heatFrames": 199
}
|
|
From: 3
Bottom Horizontal Door
To: 7
Junction By Lower Alcoons (Left of Spike Pits)
Requires: "h_canNavigateHeatRooms"
{
"enemyDamage": {
"enemy": "Alcoon",
"type": "contact",
"hits": 1
}
}
{
"heatFrames": 180
}
|
|
From: 3
Bottom Horizontal Door
To: 7
Junction By Lower Alcoons (Left of Spike Pits)
Requires: "h_heatProof" "canDodgeWhileShooting" |
|
From: 3
Bottom Horizontal Door
To: 7
Junction By Lower Alcoons (Left of Spike Pits)
Get out of the wall if necessary; then do a blind jump over the Alcoon. Entrance condition: {
"comeInWithGrappleTeleport": {
"blockPositions": [
[
2,
18
],
[
2,
19
],
[
2,
28
],
[
2,
29
]
]
}
}
Requires: "canOffScreenMovement"
{
"heatFrames": 80
}
|
|
Requires: {
"canShineCharge": {
"usedTiles": 27,
"gentleUpTiles": 2,
"openEnd": 0
}
}
{
"obstaclesCleared": [
"A"
]
}
{
"heatFrames": 260
}
"canShinechargeMovement"
Exit condition: {
"leaveShinecharged": {
"framesRemaining": 90
}
}
|
|
From: 4
Item
To: 3
Bottom Horizontal Door
Open the door to be able to spark out. Shinecharge near the missile location, then fall back down and spark out the right door. The door must have been opened prior in order to be able to spark out of it. Requires: {
"canShineCharge": {
"usedTiles": 27,
"gentleUpTiles": 2,
"openEnd": 1
}
}
{
"obstaclesCleared": [
"A",
"C"
]
}
{
"heatFrames": 390
}
"canShinechargeMovement"
{
"shinespark": {
"frames": 35
}
}
Exit condition: {
"leaveWithSpark": {
"position": "bottom"
}
}
|
|
Leave Shinecharged Through Top of Door - Open Door First (Very Hard)
Lower Norfair Spring Ball Maze Room
From: 4
Item
To: 3
Bottom Horizontal Door
Open the door to be able to spark out. Shinecharge near the missile location, then fall back down and run to the right before sparking out the right door. The Alcoons must have been cleared prior in order to be able to spark out. Requires: {
"canShineCharge": {
"usedTiles": 27,
"gentleUpTiles": 2,
"openEnd": 1
}
}
{
"obstaclesCleared": [
"A",
"C"
]
}
{
"heatFrames": 390
}
"canShinechargeMovementComplex"
{
"shinespark": {
"frames": 30
}
}
Exit condition: {
"leaveWithSpark": {}
}
|
|
Spring Ball Maze - Hero Shot Shinespark through the Right Door (Very Hard)
Lower Norfair Spring Ball Maze Room
From: 4
Item
To: 3
Bottom Horizontal Door
Shinecharge near the missile location, then fall down and shoot a beam shot through the lower half of the large stalactite. Shinespark to the right before the shot goes off screen, and have it open the door before Samus gets there. Requires: {
"canShineCharge": {
"usedTiles": 27,
"gentleUpTiles": 2,
"openEnd": 1
}
}
{
"obstaclesCleared": [
"A"
]
}
{
"heatFrames": 370
}
"canShinechargeMovementComplex"
"canHeroShot"
{
"shinespark": {
"frames": 31
}
}
{
"doorUnlockedAtNode": 3
}
Exit condition: {
"leaveWithSpark": {
"position": "bottom"
}
}
|
|
Requires: "h_canHeatedCrystalFlash" Clears obstacles: B |
|
From: 4
Item
To: 5
Spring Ball Maze Junction (Past the Bomb Blocks)
Requires: "h_canNavigateHeatRooms"
{
"obstaclesCleared": [
"B"
]
}
{
"heatFrames": 199
}
|
|
From: 4
Item
To: 5
Spring Ball Maze Junction (Past the Bomb Blocks)
Requires: "h_canNavigateHeatRooms"
"h_canUseMorphBombs"
{
"heatFrames": 360
}
Clears obstacles: B |
|
From: 4
Item
To: 5
Spring Ball Maze Junction (Past the Bomb Blocks)
Requires: "h_canNavigateHeatRooms"
"h_canUsePowerBombs"
{
"heatFrames": 300
}
Clears obstacles: B |
|
From: 4
Item
To: 6
Junction By Left Door (Right of Pit)
Requires: "h_canNavigateHeatRooms"
{
"obstaclesCleared": [
"A"
]
}
{
"heatFrames": 150
}
|
|
From: 4
Item
To: 6
Junction By Left Door (Right of Pit)
Jump over the Alcoon's fireball and kill it and run through. Requires: "h_canNavigateHeatRooms"
{
"enemyKill": {
"enemies": [
[
"Alcoon"
]
],
"explicitWeapons": [
"Missile",
"Super",
"Plasma",
"ScrewAttack",
"PseudoScrew"
]
}
}
{
"heatFrames": 190
}
Clears obstacles: A |
|
From: 4
Item
To: 6
Junction By Left Door (Right of Pit)
Requires: "h_canNavigateHeatRooms"
{
"enemyDamage": {
"enemy": "Alcoon",
"type": "fireball",
"hits": 1
}
}
{
"heatFrames": 170
}
|
|
From: 4
Item
To: 6
Junction By Left Door (Right of Pit)
Requires: "h_canNavigateHeatRooms"
{
"or": [
{
"and": [
"canDodgeWhileShooting",
{
"heatFrames": 200
}
]
},
{
"and": [
"Morph",
{
"heatFrames": 200
}
]
},
{
"and": [
{
"enemyDamage": {
"enemy": "Alcoon",
"type": "fireball",
"hits": 1
}
},
{
"heatFrames": 160
}
]
}
]
}
Clears obstacles: A |
|
From: 5
Spring Ball Maze Junction (Past the Bomb Blocks)
To: 2
Right Vertical Door
Requires: "h_canNavigateHeatRooms"
"Morph"
{
"or": [
"h_canUseSpringBall",
{
"heatFrames": 30
}
]
}
{
"heatFrames": 520
}
|
|
From: 5
Spring Ball Maze Junction (Past the Bomb Blocks)
To: 4
Item
Requires: "h_canNavigateHeatRooms"
"Morph"
{
"heatFrames": 130
}
|
|
From: 5
Spring Ball Maze Junction (Past the Bomb Blocks)
To: 5
Spring Ball Maze Junction (Past the Bomb Blocks)
Requires: "h_canHeatedCrystalFlash" |
|
From: 6
Junction By Left Door (Right of Pit)
To: 1
Left Door
Requires: "h_canNavigateHeatRooms"
{
"heatFrames": 60
}
|
|
From: 6
Junction By Left Door (Right of Pit)
To: 4
Item
Requires: "h_canNavigateHeatRooms"
{
"obstaclesCleared": [
"A"
]
}
{
"heatFrames": 120
}
|
|
From: 6
Junction By Left Door (Right of Pit)
To: 4
Item
Run under the Alcoon as it spawns Requires: "h_canNavigateHeatRooms"
"canDodgeWhileShooting"
{
"heatFrames": 120
}
|
|
From: 6
Junction By Left Door (Right of Pit)
To: 4
Item
Kill the Alcoon in one hit as it spawns. Requires: "h_canNavigateHeatRooms"
"canDodgeWhileShooting"
{
"enemyKill": {
"enemies": [
[
"Alcoon"
]
],
"explicitWeapons": [
"Missile",
"Super",
"Charge+Plasma"
]
}
}
{
"heatFrames": 120
}
Clears obstacles: A |
|
From: 6
Junction By Left Door (Right of Pit)
To: 4
Item
Let the Alcoon spawn and then defeat it. Requires: "h_canNavigateHeatRooms"
{
"enemyKill": {
"enemies": [
[
"Alcoon"
]
],
"explicitWeapons": [
"Missile",
"Super",
"Wave",
"Ice+Spazer",
"Plasma",
"ScrewAttack",
"PseudoScrew",
"PowerBomb"
]
}
}
{
"heatFrames": 180
}
Clears obstacles: A |
|
From: 6
Junction By Left Door (Right of Pit)
To: 4
Item
Requires: "h_canNavigateHeatRooms"
{
"or": [
{
"and": [
"canDodgeWhileShooting",
{
"heatFrames": 200
}
]
},
{
"and": [
"Morph",
{
"heatFrames": 200
}
]
},
{
"and": [
{
"enemyDamage": {
"enemy": "Alcoon",
"type": "fireball",
"hits": 1
}
},
{
"heatFrames": 160
}
]
}
]
}
Clears obstacles: A |
|
From: 6
Junction By Left Door (Right of Pit)
To: 5
Spring Ball Maze Junction (Past the Bomb Blocks)
Notable: true 
Jump and Morph with a speedball to enter the morph tunnel and then use SpringBall to break the bomb blocks. Requires: "h_canNavigateHeatRooms"
"h_canUseSpringBall"
"canSpeedball"
"canLateralMidAirMorph"
{
"canShineCharge": {
"usedTiles": 26,
"gentleDownTiles": 2,
"openEnd": 1
}
}
{
"heatFrames": 160
}
Clears obstacles: B |
|
From: 6
Junction By Left Door (Right of Pit)
To: 6
Junction By Left Door (Right of Pit)
Requires: "h_canHeatedCrystalFlash" |
|
From: 6
Junction By Left Door (Right of Pit)
To: 7
Junction By Lower Alcoons (Left of Spike Pits)
Requires: "h_canNavigateHeatRooms"
{
"heatFrames": 160
}
|
|
From: 6
Junction By Left Door (Right of Pit)
To: 7
Junction By Lower Alcoons (Left of Spike Pits)
Requires: "h_canNavigateHeatRooms"
{
"or": [
"canDownBack",
"canCarefulJump"
]
}
{
"heatFrames": 120
}
|
|
From: 7
Junction By Lower Alcoons (Left of Spike Pits)
To: 1
Left Door
Requires: "h_canNavigateHeatRooms"
{
"or": [
"canWalljump",
"HiJump",
"canSpringBallJumpMidAir",
"SpaceJump"
]
}
{
"heatFrames": 180
}
|
|
From: 7
Junction By Lower Alcoons (Left of Spike Pits)
To: 1
Left Door
Requires: "h_canNavigateHeatRooms"
"h_canSpringBallBombJump"
{
"heatFrames": 240
}
|
|
From: 7
Junction By Lower Alcoons (Left of Spike Pits)
To: 1
Left Door
Requires: "h_canNavigateHeatRooms"
"h_canIBJ"
{
"or": [
{
"and": [
"canBombHorizontally",
{
"heatFrames": 840
}
]
},
{
"and": [
"h_canJumpIntoIBJ",
"canDoubleBombJump",
{
"heatFrames": 290
}
]
},
{
"and": [
"h_canJumpIntoIBJ",
{
"heatFrames": 480
}
]
}
]
}
|
|
From: 7
Junction By Lower Alcoons (Left of Spike Pits)
To: 1
Left Door
Requires: "h_canNavigateHeatRooms"
"h_canIBJ"
{
"or": [
{
"enemyKill": {
"enemies": [
[
"Alcoon"
]
],
"explicitWeapons": [
"Missile",
"Super",
"Plasma",
"Wave+Spazer",
"PseudoScrew",
"ScrewAttack"
]
}
},
{
"heatFrames": 270
}
]
}
{
  "heatFrames": 50
}
{
"or": [
{
"and": [
"canDoubleBombJump",
{
"heatFrames": 500
}
]
},
{
"heatFrames": 860
}
]
}
|
|
From: 7
Junction By Lower Alcoons (Left of Spike Pits)
To: 1
Left Door
Jump from the bottom of the slope with about 6 tiles of run speed. Requires: "canTrickyDashJump"
"h_canNavigateHeatRooms"
{
"heatFrames": 200
}
|
|
From: 7
Junction By Lower Alcoons (Left of Spike Pits)
To: 1
Left Door
Requires: "h_canNavigateHeatRooms"
"canUseFrozenEnemies"
{
"heatFrames": 330
}
|
|
From: 7
Junction By Lower Alcoons (Left of Spike Pits)
To: 3
Bottom Horizontal Door
Kill the Alcoon without stopping. Requires: "h_canNavigateHeatRooms"
"canDodgeWhileShooting"
{
"or": [
{
"enemyKill": {
"enemies": [
[
"Alcoon"
]
],
"explicitWeapons": [
"Missile",
"Super",
"Wave+Plasma",
"PseudoScrew",
"ScrewAttack",
"Charge+Wave+Spazer",
"Shinespark"
]
}
},
{
"and": [
"Plasma",
"canHitbox"
]
}
]
}
{
"heatFrames": 120
}
|
|
From: 7
Junction By Lower Alcoons (Left of Spike Pits)
To: 3
Bottom Horizontal Door
Requires: "h_canNavigateHeatRooms"
{
"enemyKill": {
"enemies": [
[
"Alcoon",
"Alcoon"
]
],
"explicitWeapons": [
"Missile",
"Super",
"Plasma",
"Wave+Spazer"
]
}
}
{
"heatFrames": 240
}
|
|
From: 7
Junction By Lower Alcoons (Left of Spike Pits)
To: 3
Bottom Horizontal Door
Requires: "h_canNavigateHeatRooms"
"canCarefulJump"
{
"heatFrames": 240
}
|
|
From: 7
Junction By Lower Alcoons (Left of Spike Pits)
To: 3
Bottom Horizontal Door
Requires: "h_canNavigateHeatRooms"
{
"enemyDamage": {
"enemy": "Alcoon",
"type": "contact",
"hits": 1
}
}
{
"heatFrames": 180
}
|
|
From: 7
Junction By Lower Alcoons (Left of Spike Pits)
To: 3
Bottom Horizontal Door
Requires: "h_heatProof" "canDodgeWhileShooting" |
|
From: 7
Junction By Lower Alcoons (Left of Spike Pits)
To: 6
Junction By Left Door (Right of Pit)
Requires: "h_canNavigateHeatRooms"
{
"or": [
"canWalljump",
"HiJump",
"canSpringBallJumpMidAir",
"SpaceJump"
]
}
{
"heatFrames": 160
}
|
|
From: 7
Junction By Lower Alcoons (Left of Spike Pits)
To: 6
Junction By Left Door (Right of Pit)
Requires: "h_canNavigateHeatRooms"
"h_canSpringBallBombJump"
{
"heatFrames": 220
}
|
|
From: 7
Junction By Lower Alcoons (Left of Spike Pits)
To: 6
Junction By Left Door (Right of Pit)
Requires: "h_canNavigateHeatRooms"
"h_canIBJ"
{
"or": [
{
"and": [
"canBombHorizontally",
{
"heatFrames": 820
}
]
},
{
"and": [
"h_canJumpIntoIBJ",
"canDoubleBombJump",
{
"heatFrames": 270
}
]
},
{
"and": [
"h_canJumpIntoIBJ",
{
"heatFrames": 460
}
]
}
]
}
|
|
From: 7
Junction By Lower Alcoons (Left of Spike Pits)
To: 6
Junction By Left Door (Right of Pit)
Requires: "h_canNavigateHeatRooms"
"h_canIBJ"
{
"or": [
{
"enemyKill": {
"enemies": [
[
"Alcoon"
]
],
"explicitWeapons": [
"Missile",
"Super",
"Plasma",
"Wave+Spazer",
"PseudoScrew",
"ScrewAttack"
]
}
},
{
"heatFrames": 270
}
]
}
{
"heatFrames": 50
}
{
"or": [
{
"and": [
"canDoubleBombJump",
{
"heatFrames": 480
}
]
},
{
"heatFrames": 840
}
]
}
|
|
From: 7
Junction By Lower Alcoons (Left of Spike Pits)
To: 6
Junction By Left Door (Right of Pit)
Jump from the bottom of the slope with about 6 tiles of run speed. Requires: "canTrickyDashJump"
"h_canNavigateHeatRooms"
{
"heatFrames": 180
}
|
|
From: 7
Junction By Lower Alcoons (Left of Spike Pits)
To: 6
Junction By Left Door (Right of Pit)
Requires: "h_canNavigateHeatRooms"
"canUseFrozenEnemies"
{
"heatFrames": 310
}
|
|
From: 7
Junction By Lower Alcoons (Left of Spike Pits)
To: 7
Junction By Lower Alcoons (Left of Spike Pits)
Requires: "h_heatProof"
{
"or": [
"canDodgeWhileShooting",
"ScrewAttack",
"Wave",
"Ice",
"Spazer",
"Plasma"
]
}
{
"refill": [
"PowerBomb"
]
}
|
|
From: 7
Junction By Lower Alcoons (Left of Spike Pits)
To: 7
Junction By Lower Alcoons (Left of Spike Pits)
Requires: "h_canHeatedCrystalFlash" |
|
From: 7
Junction By Lower Alcoons (Left of Spike Pits)
To: 7
Junction By Lower Alcoons (Left of Spike Pits)
Jump over the Alcoon and shoot open the door, then return. Requires: "canCarefulJump"
{
"heatFrames": 200
}
Clears obstacles: C |
{
"$schema": "../../../schema/m3-room.schema.json",
"id": 146,
"name": "Lower Norfair Spring Ball Maze Room",
"area": "Norfair",
"subarea": "Lower",
"subsubarea": "East",
"playable": true,
"roomAddress": "0x7B510",
"roomEnvironments": [
{
"heated": true
}
],
"nodes": [
{
"id": 1,
"name": "Left Door",
"nodeType": "door",
"nodeSubType": "blue",
"nodeAddress": "0x00199ae",
"doorEnvironments": [
{
"physics": "air"
}
]
},
{
"id": 2,
"name": "Right Vertical Door",
"nodeType": "door",
"nodeSubType": "blue",
"nodeAddress": "0x00199c6",
"doorEnvironments": [
{
"physics": "air"
}
]
},
{
"id": 3,
"name": "Bottom Horizontal Door",
"nodeType": "door",
"nodeSubType": "blue",
"nodeAddress": "0x00199ba",
"doorEnvironments": [
{
"physics": "air"
}
]
},
{
"id": 4,
"name": "Item",
"nodeType": "item",
"nodeSubType": "visible",
"nodeItem": "Missile",
"nodeAddress": "0x78FCA"
},
{
"id": 5,
"name": "Spring Ball Maze Junction (Past the Bomb Blocks)",
"nodeType": "junction",
"nodeSubType": "junction",
"note": "This junction is just after the bomb blocks inside the Morph maze."
},
{
"id": 6,
"name": "Junction By Left Door (Right of Pit)",
"nodeType": "junction",
"nodeSubType": "junction"
},
{
"id": 7,
"name": "Junction By Lower Alcoons (Left of Spike Pits)",
"nodeType": "junction",
"nodeSubType": "junction"
}
],
"enemies": [
{
"id": "e1",
"groupName": "Lower Norfair Spring Ball Maze Room Spike Pit Alcoons",
"enemyName": "Alcoon",
"quantity": 2,
"betweenNodes": [
3,
7
],
"dropRequires": [
"h_heatProof"
]
},
{
"id": "e2",
"groupName": "Lower Norfair Spring Ball Maze Room Bottom Left Alcoon",
"enemyName": "Alcoon",
"quantity": 1,
"homeNodes": [
7
],
"dropRequires": [
"h_heatProof"
]
},
{
"id": "e3",
"groupName": "Lower Norfair Spring Ball Maze Room Top Alcoon",
"enemyName": "Alcoon",
"quantity": 1,
"betweenNodes": [
4,
6
],
"dropRequires": [
"h_heatProof"
]
}
],
"obstacles": [
{
"id": "A",
"name": "Hotarubi Runway Alcoon",
"obstacleType": "enemies"
},
{
"id": "B",
"name": "Hotarubi Bomb Blocks",
"obstacleType": "inanimate"
},
{
"id": "C",
"name": "Bottom Right Door Opened",
"obstacleType": "inanimate"
}
],
"links": [
{
"from": 1,
"to": [
{
"id": 1
},
{
"id": 6
},
{
"id": 7
}
]
},
{
"from": 2,
"to": [
{
"id": 2
},
{
"id": 5
}
]
},
{
"from": 3,
"to": [
{
"id": 1
},
{
"id": 3
},
{
"id": 7
}
]
},
{
"from": 4,
"to": [
{
"id": 1
},
{
"id": 3
},
{
"id": 4
},
{
"id": 5
},
{
"id": 6
}
]
},
{
"from": 5,
"to": [
{
"id": 2
},
{
"id": 4
},
{
"id": 5
}
]
},
{
"from": 6,
"to": [
{
"id": 1
},
{
"id": 4
},
{
"id": 5,
"devNote": "This one-way link represents only the Maze Air Speedball. Anything else should go 6-> 4-> 5."
},
{
"id": 6
},
{
"id": 7
}
]
},
{
"from": 7,
"to": [
{
"id": 1
},
{
"id": 3
},
{
"id": 6
},
{
"id": 7
}
]
}
],
"strats": [
{
"link": [
1,
1
],
"name": "Leave With Runway",
"requires": [],
"exitCondition": {
"leaveWithRunway": {
"length": 6,
"openEnd": 1
}
}
},
{
"link": [
1,
1
],
"name": "Crystal Flash",
"requires": [
"h_canHeatedCrystalFlash"
]
},
{
"link": [
1,
6
],
"name": "Base",
"requires": [
"h_canNavigateHeatRooms",
{
"heatFrames": 60
}
]
},
{
"link": [
1,
6
],
"name": "Running Entry",
"entranceCondition": {
"comeInRunning": {
"minTiles": 3,
"speedBooster": "any"
}
},
"requires": [
"h_canNavigateHeatRooms",
{
"heatFrames": 45
}
]
},
{
"link": [
1,
7
],
"name": "Base",
"requires": [
"h_canNavigateHeatRooms",
{
"heatFrames": 160
}
]
},
{
"link": [
1,
7
],
"name": "Weave",
"requires": [
"h_canNavigateHeatRooms",
{
"or": [
"canDownBack",
"canCarefulJump"
]
},
{
"heatFrames": 120
}
]
},
{
"link": [
2,
2
],
"name": "Leave Normally",
"exitCondition": {
"leaveNormally": {}
},
"requires": []
},
{
"link": [
2,
2
],
"name": "Shinespark",
"entranceCondition": {
"comeInWithSpark": {},
"comesThroughToilet": "any"
},
"requires": [
{
"shinespark": {
"frames": 5,
"excessFrames": 5
}
},
{
"heatFrames": 120
}
],
"devNote": "This strat is not useful in-room, but can satisfy a strat in the room before with an exit shinespark."
},
{
"link": [
2,
2
],
"name": "Crystal Flash",
"requires": [
"h_canHeatedCrystalFlash"
]
},
{
"link": [
2,
5
],
"name": "Reverse Spring Ball Maze Crystal Flash Clip",
"notable": true,
"requires": [
{
"heatFrames": 300
},
"h_canCrystalFlash",
"canCeilingClip",
{
"heatFrames": 270
}
],
"clearsObstacles": [
"B"
],
"note": "Perform the crystal flash all the way against the left wall of the accessible tunnel, then jump through the ceiling.",
"devNote": "Does not include heatFrames while refilling health."
},
{
"link": [
3,
1
],
"name": "Grapple Teleport",
"entranceCondition": {
"comeInWithGrappleTeleport": {
"blockPositions": [
[
5,
3
],
[
7,
2
]
]
}
},
"requires": [
{
"heatFrames": 50
}
]
},
{
"link": [
3,
1
],
"name": "Grapple Teleport Door Lock Skip",
"entranceCondition": {
"comeInWithGrappleTeleport": {
"blockPositions": [
[
3,
12
],
[
3,
13
]
]
}
},
"requires": [],
"bypassesDoorShell": true
},
{
"link": [
3,
1
],
"name": "Carry Grapple Teleport (Top Position)",
"entranceCondition": {
"comeInWithGrappleTeleport": {
"blockPositions": [
[
3,
12
]
]
}
},
"requires": [],
"bypassesDoorShell": true,
"exitCondition": {
"leaveWithGrappleTeleport": {
"blockPositions": [
[
3,
12
]
]
}
}
},
{
"link": [
3,
1
],
"name": "Carry Grapple Teleport (Bottom Position)",
"entranceCondition": {
"comeInWithGrappleTeleport": {
"blockPositions": [
[
3,
13
]
]
}
},
"requires": [],
"bypassesDoorShell": true,
"exitCondition": {
"leaveWithGrappleTeleport": {
"blockPositions": [
[
3,
13
]
]
}
}
},
{
"link": [
3,
3
],
"name": "Leave With Runway",
"requires": [],
"exitCondition": {
"leaveWithRunway": {
"length": 8,
"openEnd": 1,
"gentleUpTiles": 4
}
}
},
{
"link": [
3,
3
],
"name": "Crystal Flash",
"requires": [
"h_canHeatedCrystalFlash"
]
},
{
"link": [
3,
3
],
"name": "Open Door",
"requires": [],
"clearsObstacles": [
"C"
]
},
{
"link": [
3,
3
],
"name": "X-Mode",
"requires": [
"SpeedBooster",
"h_canXMode",
"h_XModeSpikeHit",
"h_XModeSpikeHit",
{
"or": [
{
"and": [
{
"enemyKill": {
"enemies": [
[
"Alcoon"
]
],
"explicitWeapons": [
"Plasma",
"Wave+Spazer",
"ScrewAttack",
"Missile",
"Super"
]
}
},
{
"heatFrames": 420
}
]
},
{
"and": [
{
"enemyKill": {
"enemies": [
[
"Alcoon"
]
],
"explicitWeapons": [
"Spazer",
"Wave",
"PseudoScrew",
"PowerBomb"
]
}
},
{
"heatFrames": 530
}
]
},
{
"and": [
{
"enemyKill": {
"enemies": [
[
"Alcoon"
]
],
"explicitWeapons": [
"PowerBeam"
]
}
},
{
"heatFrames": 620
}
]
}
]
}
],
"exitCondition": {
"leaveShinecharged": {
"framesRemaining": 90
}
},
"note": "Clear the Alcoon then bounce into the spike patch.",
"devNote": "Two spike hits are expected per attempt (with any additional leniency hits being multiplied by this amount)."
},
{
"link": [
3,
7
],
"name": "Base",
"requires": [
"h_canNavigateHeatRooms",
"ScrewAttack",
{
"or": [
"canCarefulJump",
{
"heatFrames": 40
}
]
},
{
"heatFrames": 100
}
]
},
{
"link": [
3,
7
],
"name": "Kill While Running",
"requires": [
"h_canNavigateHeatRooms",
"canDodgeWhileShooting",
{
"or": [
{
"enemyKill": {
"enemies": [
[
"Alcoon"
]
],
"explicitWeapons": [
"Missile",
"Super",
"Wave+Plasma"
]
}
},
{
"and": [
"canPrepareForNextRoom",
"Charge",
"Wave",
"Spazer"
]
},
{
"and": [
"canPseudoScrew",
{
"heatFrames": 30
}
]
}
]
},
{
"or": [
"canCarefulJump",
{
"heatFrames": 10
}
]
},
{
"heatFrames": 100
}
],
"note": "Kill the Alcoon without stopping."
},
{
"link": [
3,
7
],
"name": "Blue Speed",
"entranceCondition": {
"comeInShinecharging": {
"length": 7,
"openEnd": 1,
"gentleDownTiles": 4
}
},
"requires": [
"h_canNavigateHeatRooms",
{
"heatFrames": 60
}
],
"note": "Use blue speed to kill the Alcoons without stopping."
},
{
"link": [
3,
7
],
"name": "Stop To Kill",
"requires": [
"h_canNavigateHeatRooms",
{
"enemyKill": {
"enemies": [
[
"Alcoon",
"Alcoon"
]
],
"explicitWeapons": [
"Missile",
"Super",
"Plasma",
"Wave+Spazer"
]
}
},
{
"heatFrames": 200
}
]
},
{
"link": [
3,
7
],
"name": "Jump Over",
"requires": [
"h_canNavigateHeatRooms",
"canCarefulJump",
{
"heatFrames": 199
}
]
},
{
"link": [
3,
7
],
"name": "Tank the Damage",
"requires": [
"h_canNavigateHeatRooms",
{
"enemyDamage": {
"enemy": "Alcoon",
"type": "contact",
"hits": 1
}
},
{
"heatFrames": 180
}
]
},
{
"link": [
3,
7
],
"name": "Slow Kill",
"requires": [
"h_heatProof",
"canDodgeWhileShooting"
]
},
{
"link": [
3,
7
],
"name": "Grapple Teleport",
"entranceCondition": {
"comeInWithGrappleTeleport": {
"blockPositions": [
[
2,
18
],
[
2,
19
],
[
2,
28
],
[
2,
29
]
]
}
},
"requires": [
"canOffScreenMovement",
{
"heatFrames": 80
}
],
"note": "Get out of the wall if necessary; then do a blind jump over the Alcoon."
},
{
"link": [
4,
1
],
"name": "Leave Shinecharged",
"requires": [
{
"canShineCharge": {
"usedTiles": 27,
"gentleUpTiles": 2,
"openEnd": 0
}
},
{
"obstaclesCleared": [
"A"
]
},
{
"heatFrames": 260
},
"canShinechargeMovement"
],
"exitCondition": {
"leaveShinecharged": {
"framesRemaining": 90
}
},
"unlocksDoors": [
{
"types": [
"missiles"
],
"requires": [
{
"heatFrames": 240
}
]
},
{
"types": [
"super"
],
"requires": []
},
{
"types": [
"powerbomb"
],
"requires": [
{
"heatFrames": 240
}
]
}
],
"devNote": "Most of the time 1 can be unlocked on the way to 4."
},
{
"link": [
4,
3
],
"name": "Leave Shinesparking - Open Door First",
"requires": [
{
"canShineCharge": {
"usedTiles": 27,
"gentleUpTiles": 2,
"openEnd": 1
}
},
{
"obstaclesCleared": [
"A",
"C"
]
},
{
"heatFrames": 390
},
"canShinechargeMovement",
{
"shinespark": {
"frames": 35
}
}
],
"exitCondition": {
"leaveWithSpark": {
"position": "bottom"
}
},
"unlocksDoors": [
{
"types": [
"missiles"
],
"requires": [
{
"heatFrames": 50
}
]
},
{
"types": [
"super"
],
"requires": []
},
{
"types": [
"powerbomb"
],
"requires": [
{
"heatFrames": 30
}
]
}
],
"note": [
"Open the door to be able to spark out.",
"Shinecharge near the missile location, then fall back down and spark out the right door.",
"The door must have been opened prior in order to be able to spark out of it."
]
},
{
"link": [
4,
3
],
"name": "Leave Shinecharged Through Top of Door - Open Door First",
"requires": [
{
"canShineCharge": {
"usedTiles": 27,
"gentleUpTiles": 2,
"openEnd": 1
}
},
{
"obstaclesCleared": [
"A",
"C"
]
},
{
"heatFrames": 390
},
"canShinechargeMovementComplex",
{
"shinespark": {
"frames": 30
}
}
],
"exitCondition": {
"leaveWithSpark": {}
},
"unlocksDoors": [
{
"types": [
"missiles"
],
"requires": [
{
"heatFrames": 50
}
]
},
{
"types": [
"super"
],
"requires": []
},
{
"types": [
"powerbomb"
],
"requires": [
{
"heatFrames": 30
}
]
}
],
"note": [
"Open the door to be able to spark out.",
"Shinecharge near the missile location, then fall back down and run to the right before sparking out the right door.",
"The Alcoons must have been cleared prior in order to be able to spark out."
]
},
{
"link": [
4,
3
],
"name": "Spring Ball Maze - Hero Shot Shinespark through the Right Door",
"requires": [
{
"canShineCharge": {
"usedTiles": 27,
"gentleUpTiles": 2,
"openEnd": 1
}
},
{
"obstaclesCleared": [
"A"
]
},
{
"heatFrames": 370
},
"canShinechargeMovementComplex",
"canHeroShot",
{
"shinespark": {
"frames": 31
}
},
{
"doorUnlockedAtNode": 3
}
],
"exitCondition": {
"leaveWithSpark": {
"position": "bottom"
}
},
"unlocksDoors": [
{
"types": [
"super"
],
"requires": []
},
{
"types": [
"missiles",
"powerbomb"
],
"requires": [
"never"
]
}
],
"note": [
"Shinecharge near the missile location, then fall down and shoot a beam shot through the lower half of the large stalactite.",
"Shinespark to the right before the shot goes off screen, and have it open the door before Samus gets there."
]
},
{
"link": [
4,
4
],
"name": "Crystal Flash",
"requires": [
"h_canHeatedCrystalFlash"
],
"clearsObstacles": [
"B"
]
},
{
"link": [
4,
5
],
"name": "Blocks Broken",
"requires": [
"h_canNavigateHeatRooms",
{
"obstaclesCleared": [
"B"
]
},
{
"heatFrames": 199
}
]
},
{
"link": [
4,
5
],
"name": "Bombs",
"requires": [
"h_canNavigateHeatRooms",
"h_canUseMorphBombs",
{
"heatFrames": 360
}
],
"clearsObstacles": [
"B"
]
},
{
"link": [
4,
5
],
"name": "Power Bombs",
"requires": [
"h_canNavigateHeatRooms",
"h_canUsePowerBombs",
{
"heatFrames": 300
}
],
"clearsObstacles": [
"B"
]
},
{
"link": [
4,
6
],
"name": "Base",
"requires": [
"h_canNavigateHeatRooms",
{
"obstaclesCleared": [
"A"
]
},
{
"heatFrames": 150
}
]
},
{
"link": [
4,
6
],
"name": "Quick Kill",
"requires": [
"h_canNavigateHeatRooms",
{
"enemyKill": {
"enemies": [
[
"Alcoon"
]
],
"explicitWeapons": [
"Missile",
"Super",
"Plasma",
"ScrewAttack",
"PseudoScrew"
]
}
},
{
"heatFrames": 190
}
],
"clearsObstacles": [
"A"
],
"note": "Jump over the Alcoon's fireball and kill it and run through.",
"devNote": "Beams that take more than two shots are generally not quick enough to justify."
},
{
"link": [
4,
6
],
"name": "Tank Fireball and Run Through",
"requires": [
"h_canNavigateHeatRooms",
{
"enemyDamage": {
"enemy": "Alcoon",
"type": "fireball",
"hits": 1
}
},
{
"heatFrames": 170
}
]
},
{
"link": [
4,
6
],
"name": "Slow Kill",
"requires": [
"h_canNavigateHeatRooms",
{
"or": [
{
"and": [
"canDodgeWhileShooting",
{
"heatFrames": 200
}
]
},
{
"and": [
"Morph",
{
"heatFrames": 200
}
]
},
{
"and": [
{
"enemyDamage": {
"enemy": "Alcoon",
"type": "fireball",
"hits": 1
}
},
{
"heatFrames": 160
}
]
}
]
}
],
"clearsObstacles": [
"A"
]
},
{
"link": [
5,
2
],
"name": "Base",
"requires": [
"h_canNavigateHeatRooms",
"Morph",
{
"or": [
"h_canUseSpringBall",
{
"heatFrames": 30
}
]
},
{
"heatFrames": 520
}
],
"unlocksDoors": [
{
"types": [
"powerbomb"
],
"requires": []
}
]
},
{
"link": [
5,
4
],
"name": "Base",
"requires": [
"h_canNavigateHeatRooms",
"Morph",
{
"heatFrames": 130
}
]
},
{
"link": [
5,
5
],
"name": "Crystal Flash",
"requires": [
"h_canHeatedCrystalFlash"
]
},
{
"link": [
6,
1
],
"name": "Base",
"requires": [
"h_canNavigateHeatRooms",
{
"heatFrames": 60
}
],
"unlocksDoors": [
{
"types": [
"missiles"
],
"requires": [
{
"heatFrames": 20
}
]
}
]
},
{
"link": [
6,
4
],
"name": "Base",
"requires": [
"h_canNavigateHeatRooms",
{
"obstaclesCleared": [
"A"
]
},
{
"heatFrames": 120
}
]
},
{
"link": [
6,
4
],
"name": "Avoid",
"requires": [
"h_canNavigateHeatRooms",
"canDodgeWhileShooting",
{
"heatFrames": 120
}
],
"note": "Run under the Alcoon as it spawns",
"devNote": "canDodgeWhileShooting represents the knowledge of how this Alcoon spawns and that you can run under it."
},
{
"link": [
6,
4
],
"name": "Kill Without Stopping",
"requires": [
"h_canNavigateHeatRooms",
"canDodgeWhileShooting",
{
"enemyKill": {
"enemies": [
[
"Alcoon"
]
],
"explicitWeapons": [
"Missile",
"Super",
"Charge+Plasma"
]
}
},
{
"heatFrames": 120
}
],
"clearsObstacles": [
"A"
],
"note": "Kill the Alcoon in one hit as it spawns."
},
{
"link": [
6,
4
],
"name": "Stop and Kill",
"requires": [
"h_canNavigateHeatRooms",
{
"enemyKill": {
"enemies": [
[
"Alcoon"
]
],
"explicitWeapons": [
"Missile",
"Super",
"Wave",
"Ice+Spazer",
"Plasma",
"ScrewAttack",
"PseudoScrew",
"PowerBomb"
]
}
},
{
"heatFrames": 180
}
],
"clearsObstacles": [
"A"
],
"note": "Let the Alcoon spawn and then defeat it."
},
{
"link": [
6,
4
],
"name": "Slow Kill",
"requires": [
"h_canNavigateHeatRooms",
{
"or": [
{
"and": [
"canDodgeWhileShooting",
{
"heatFrames": 200
}
]
},
{
"and": [
"Morph",
{
"heatFrames": 200
}
]
},
{
"and": [
{
"enemyDamage": {
"enemy": "Alcoon",
"type": "fireball",
"hits": 1
}
},
{
"heatFrames": 160
}
]
}
]
}
],
"clearsObstacles": [
"A"
]
},
{
"link": [
6,
5
],
"name": "LN Spring Ball Maze Air Speedball",
"notable": true,
"requires": [
"h_canNavigateHeatRooms",
"h_canUseSpringBall",
"canSpeedball",
"canLateralMidAirMorph",
{
"canShineCharge": {
"usedTiles": 26,
"gentleDownTiles": 2,
"openEnd": 1
}
},
{
"heatFrames": 160
}
],
"clearsObstacles": [
"B"
],
"note": "Jump and Morph with a speedball to enter the morph tunnel and then use SpringBall to break the bomb blocks."
},
{
"link": [
6,
6
],
"name": "Crystal Flash",
"requires": [
"h_canHeatedCrystalFlash"
]
},
{
"link": [
6,
7
],
"name": "Base",
"requires": [
"h_canNavigateHeatRooms",
{
"heatFrames": 160
}
]
},
{
"link": [
6,
7
],
"name": "Weave",
"requires": [
"h_canNavigateHeatRooms",
{
"or": [
"canDownBack",
"canCarefulJump"
]
},
{
"heatFrames": 120
}
]
},
{
"link": [
7,
1
],
"name": "Base",
"requires": [
"h_canNavigateHeatRooms",
{
"or": [
"canWalljump",
"HiJump",
"canSpringBallJumpMidAir",
"SpaceJump"
]
},
{
"heatFrames": 180
}
],
"unlocksDoors": [
{
"types": [
"powerbomb"
],
"requires": [
{
"heatFrames": 60
}
]
}
]
},
{
"link": [
7,
1
],
"name": "SpringBall Bomb Jump",
"requires": [
"h_canNavigateHeatRooms",
"h_canSpringBallBombJump",
{
"heatFrames": 240
}
],
"unlocksDoors": [
{
"types": [
"powerbomb"
],
"requires": [
{
"heatFrames": 60
}
]
}
]
},
{
"link": [
7,
1
],
"name": "Avoid Spawning Alcoon and IBJ",
"requires": [
"h_canNavigateHeatRooms",
"h_canIBJ",
{
"or": [
{
"and": [
"canBombHorizontally",
{
"heatFrames": 840
}
]
},
{
"and": [
"h_canJumpIntoIBJ",
"canDoubleBombJump",
{
"heatFrames": 290
}
]
},
{
"and": [
"h_canJumpIntoIBJ",
{
"heatFrames": 480
}
]
}
]
}
],
"unlocksDoors": [
{
"types": [
"powerbomb"
],
"requires": [
{
"heatFrames": 60
}
]
}
]
},
{
"link": [
7,
1
],
"name": "Kill Alcoon and IBJ",
"requires": [
"h_canNavigateHeatRooms",
"h_canIBJ",
{
"or": [
{
"enemyKill": {
"enemies": [
[
"Alcoon"
]
],
"explicitWeapons": [
"Missile",
"Super",
"Plasma",
"Wave+Spazer",
"PseudoScrew",
"ScrewAttack"
]
}
},
{
"heatFrames": 270
}
]
},
{
"heatFrames": 50
},
{
"or": [
{
"and": [
"canDoubleBombJump",
{
"heatFrames": 500
}
]
},
{
"heatFrames": 860
}
]
}
],
"unlocksDoors": [
{
"types": [
"powerbomb"
],
"requires": [
{
"heatFrames": 60
}
]
}
]
},
{
"link": [
7,
1
],
"name": "Tricky Dash Jump",
"requires": [
"canTrickyDashJump",
"h_canNavigateHeatRooms",
{
"heatFrames": 200
}
],
"unlocksDoors": [
{
"types": [
"powerbomb"
],
"requires": [
{
"heatFrames": 60
}
]
}
],
"note": "Jump from the bottom of the slope with about 6 tiles of run speed."
},
{
"link": [
7,
1
],
"name": "Frozen Alcoon",
"requires": [
"h_canNavigateHeatRooms",
"canUseFrozenEnemies",
{
"heatFrames": 330
}
],
"unlocksDoors": [
{
"types": [
"powerbomb"
],
"requires": [
{
"heatFrames": 60
}
]
}
]
},
{
"link": [
7,
3
],
"name": "Kill While Running",
"requires": [
"h_canNavigateHeatRooms",
"canDodgeWhileShooting",
{
"or": [
{
"enemyKill": {
"enemies": [
[
"Alcoon"
]
],
"explicitWeapons": [
"Missile",
"Super",
"Wave+Plasma",
"PseudoScrew",
"ScrewAttack",
"Charge+Wave+Spazer",
"Shinespark"
]
}
},
{
"and": [
"Plasma",
"canHitbox"
]
}
]
},
{
"heatFrames": 120
}
],
"note": "Kill the Alcoon without stopping."
},
{
"link": [
7,
3
],
"name": "Stop To Kill",
"requires": [
"h_canNavigateHeatRooms",
{
"enemyKill": {
"enemies": [
[
"Alcoon",
"Alcoon"
]
],
"explicitWeapons": [
"Missile",
"Super",
"Plasma",
"Wave+Spazer"
]
}
},
{
"heatFrames": 240
}
],
"unlocksDoors": [
{
"types": [
"missiles"
],
"requires": [
{
"heatFrames": 30
}
]
}
]
},
{
"link": [
7,
3
],
"name": "Jump Over",
"requires": [
"h_canNavigateHeatRooms",
"canCarefulJump",
{
"heatFrames": 240
}
]
},
{
"link": [
7,
3
],
"name": "Tank the Damage",
"requires": [
"h_canNavigateHeatRooms",
{
"enemyDamage": {
"enemy": "Alcoon",
"type": "contact",
"hits": 1
}
},
{
"heatFrames": 180
}
],
"unlocksDoors": [
{
"types": [
"missiles"
],
"requires": [
{
"heatFrames": 30
}
]
}
]
},
{
"link": [
7,
3
],
"name": "Slow Kill",
"requires": [
"h_heatProof",
"canDodgeWhileShooting"
]
},
{
"link": [
7,
6
],
"name": "Base",
"requires": [
"h_canNavigateHeatRooms",
{
"or": [
"canWalljump",
"HiJump",
"canSpringBallJumpMidAir",
"SpaceJump"
]
},
{
"heatFrames": 160
}
]
},
{
"link": [
7,
6
],
"name": "SpringBall Bomb Jump",
"requires": [
"h_canNavigateHeatRooms",
"h_canSpringBallBombJump",
{
"heatFrames": 220
}
]
},
{
"link": [
7,
6
],
"name": "Avoid Spawning Alcoon and IBJ",
"requires": [
"h_canNavigateHeatRooms",
"h_canIBJ",
{
"or": [
{
"and": [
"canBombHorizontally",
{
"heatFrames": 820
}
]
},
{
"and": [
"h_canJumpIntoIBJ",
"canDoubleBombJump",
{
"heatFrames": 270
}
]
},
{
"and": [
"h_canJumpIntoIBJ",
{
"heatFrames": 460
}
]
}
]
}
]
},
{
"link": [
7,
6
],
"name": "Kill Alcoon and IBJ",
"requires": [
"h_canNavigateHeatRooms",
"h_canIBJ",
{
"or": [
{
"enemyKill": {
"enemies": [
[
"Alcoon"
]
],
"explicitWeapons": [
"Missile",
"Super",
"Plasma",
"Wave+Spazer",
"PseudoScrew",
"ScrewAttack"
]
}
},
{
"heatFrames": 270
}
]
},
{
"heatFrames": 50
},
{
"or": [
{
"and": [
"canDoubleBombJump",
{
"heatFrames": 480
}
]
},
{
"heatFrames": 840
}
]
}
]
},
{
"link": [
7,
6
],
"name": "Tricky Dash Jump",
"requires": [
"canTrickyDashJump",
"h_canNavigateHeatRooms",
{
"heatFrames": 180
}
],
"note": "Jump from the bottom of the slope with about 6 tiles of run speed."
},
{
"link": [
7,
6
],
"name": "Frozen Alcoon",
"requires": [
"h_canNavigateHeatRooms",
"canUseFrozenEnemies",
{
"heatFrames": 310
}
]
},
{
"link": [
7,
7
],
"name": "Alcoon Farm",
"requires": [
"h_heatProof",
{
"or": [
"canDodgeWhileShooting",
"ScrewAttack",
"Wave",
"Ice",
"Spazer",
"Plasma"
]
},
{
"refill": [
"PowerBomb"
]
}
]
},
{
"link": [
7,
7
],
"name": "Crystal Flash",
"requires": [
"h_canHeatedCrystalFlash"
]
},
{
"link": [
7,
7
],
"name": "Open Right Door",
"requires": [
"canCarefulJump",
{
"heatFrames": 200
}
],
"clearsObstacles": [
"C"
],
"note": "Jump over the Alcoon and shoot open the door, then return."
}
]
}