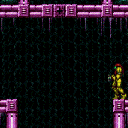
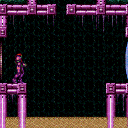
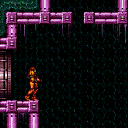
Pants Room
Room ID: 220
|
Exit condition: {
"leaveWithRunway": {
"length": 3,
"openEnd": 1
}
}
|
|
Requires: "h_canCrystalFlash" |
|
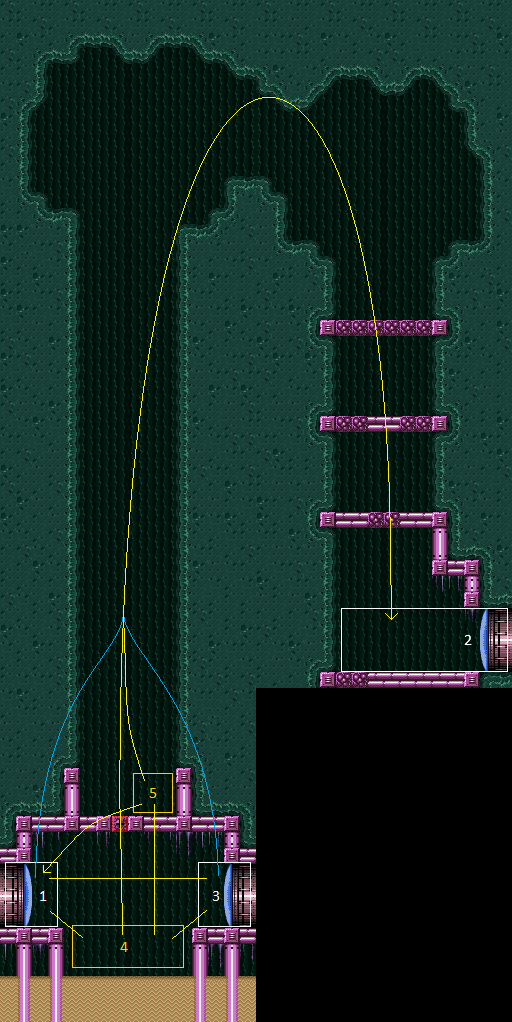
From: 1
West Leg Left Door
To: 2
East Leg Right Door
This climb is from the left side of the left room, the room with the breakable grapple block. Climb up 3 screens. Entrance condition: {
"comeInWithDoorStuckSetup": {}
}
Requires: "canXRayClimb" "canBePatient" |
|
From: 1
West Leg Left Door
To: 2
East Leg Right Door
Notable: true 
Preselect Grapple and be ready to use it when entering the room. Release up or angle up before release grapple so the shinespark does not activate instantly. Use the windup frames for a shinespark to extend the duration timer. Entrance condition: {
"comeInShinecharged": {
"framesRequired": 150
}
}
Requires: "h_canNavigateUnderwater"
"canShinechargeMovement"
"Grapple"
{
"shinespark": {
"frames": 65
}
}
{
"enemyDamage": {
"enemy": "Menu",
"type": "contact",
"hits": 1
}
}
|
|
Jump from door platform to door platform while avoiding the sand. Requires: "h_canNavigateUnderwater" |
|
|
|
Exit condition: {
"leaveWithRunway": {
"length": 8,
"openEnd": 1
}
}
|
|
Requires: "h_canCrystalFlash" |
|
From: 2
East Leg Right Door
To: 2
East Leg Right Door
Exit condition: {
"leaveWithGModeSetup": {}
}
|
|
Requires: {
"enemyDamage": {
"enemy": "Puyo",
"type": "contact",
"hits": 1
}
}
|
|
Jump from door platform to door platform while avoiding the sand. Requires: "h_canNavigateUnderwater" |
|
From: 3
West Leg Right Door
To: 2
East Leg Right Door
This climb is right side of the left room - the room with the breakable grapple block. Climb up 3 screens. Entrance condition: {
"comeInWithDoorStuckSetup": {}
}
Requires: "canXRayClimb" "canBePatient" |
|
From: 3
West Leg Right Door
To: 2
East Leg Right Door
Notable: true
Preselect Grapple and be ready to use it when entering the room. Release up or angle up before release grapple so the shinespark does not activate instantly. Use the windup frames for a shinespark to extend the duration timer. Entrance condition: {
"comeInShinecharged": {
"framesRequired": 150
}
}
Requires: "h_canNavigateUnderwater"
"canShinechargeMovement"
"Grapple"
{
"shinespark": {
"frames": 65
}
}
{
"enemyDamage": {
"enemy": "Menu",
"type": "contact",
"hits": 1
}
}
|
|
Exit condition: {
"leaveWithRunway": {
"length": 3,
"openEnd": 1
}
}
|
|
|
|
Requires: "h_canNavigateUnderwater"
{
"or": [
"canPlayInSand",
{
"and": [
"HiJump",
"h_canUseSpringBall"
]
},
{
"and": [
"Gravity",
{
"or": [
"HiJump",
"h_canUseSpringBall",
"SpaceJump"
]
}
]
}
]
}
|
|
From: 4
West Leg Sand
To: 2
East Leg Right Door
Notable: true 
Use the grapple block to initiate a Grapple Jump to climb up to the higher level and above the water line. Aiming the Grapple Jump to line up with the one tile hole is difficult and Samus is moving at high speeds. Escaping the water is also difficult as Samus must be standing at the water line when jumping for the next part of the grapple jump. It may be easier to jump out of the water by turning HiJump off. A Grapple Jump can be a spin jump by running briefly before jumping and that can be used to begin Walljumping or Space Jumping. Requires: "canSuitlessMaridia"
"canTrickyGrappleJump"
"canMidairWiggle"
{
"or": [
{
"enemyDamage": {
"enemy": "Menu",
"type": "contact",
"hits": 1
}
},
"SpaceJump",
{
"and": [
"canConsecutiveWalljump",
{
"or": [
"ScrewAttack",
"canStaggeredWalljump"
]
}
]
}
]
}
|
|
Requires: "h_canNavigateUnderwater"
{
"or": [
"canPlayInSand",
{
"and": [
"HiJump",
"h_canUseSpringBall"
]
},
{
"and": [
"Gravity",
{
"or": [
"HiJump",
"h_canUseSpringBall",
"SpaceJump"
]
}
]
}
]
}
|
|
Requires: "Gravity" "Grapple" "SpaceJump" |
|
From: 4
West Leg Sand
To: 5
Junction Above Grapple Block
Break the grapple block, then jump on the sand to get through the hole. Break spin before touching the sand, and then spinjump to get a good jump off of the sand. Breaking spin after jumping from the sand will remove horizontal momentum, or a stationary spinjump can help. Requires: "Gravity" "Grapple" "HiJump" "canCarefulJump" "canPlayInSand" |
|
From: 4
West Leg Sand
To: 5
Junction Above Grapple Block
Break spin before touching the sand, and then spinjump to get a good jump off of the sand. Requires: "Gravity" "Grapple" "canTrickySpringBallJump" "canPlayInSand" |
|
Wait for a good jump out of the sand to begin the IBJ with. A stationary spinjump can help. Requires: "Gravity" "Grapple" "canSandIBJ" |
|
Springball can keep Samus out of the sand. Place the first bomb right after Samus begins falling back towards the sand. Requires: "Gravity" "Grapple" "h_canUseSpringBall" "h_canJumpIntoIBJ" |
|
From: 4
West Leg Sand
To: 5
Junction Above Grapple Block
Notable: true 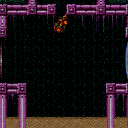
Gets above the grapple block by doing a well-positioned and well-timed Gravity jump following a good jump off the sand. It is also possible to do this off of a wall jump on the side immediately followed by a gravity jump. Break spin before touching the sand, and then spinjump to get a good jump off of the sand. Breaking spin after jumping from the sand will remove horizontal momentum, or a stationary spinjump can help. Requires: "Grapple"
"canGravityJump"
"canPlayInSand"
"canCarefulJump"
{
"or": [
"canStationarySpinJump",
"canTrickyJump"
]
}
|
|
From: 4
West Leg Sand
To: 5
Junction Above Grapple Block
Requires a mid-air SpringBall jump off the sand. Break spin before touching the sand, and then spinjump to get a good jump off of the sand. A stationary spinjump or a turnaround spin jump can help but morphing will remove all horizontal momentum. Requires: "Grapple" "canSuitlessMaridia" "HiJump" "canSpringBallJumpMidAir" "canPlayInSand" "canTrickyJump" |
|
From: 4
West Leg Sand
To: 5
Junction Above Grapple Block
Notable: true 
Use a flatley turnaround jump to get Samus inside the gap during a spinjump. Samus must jump from the left side platform. Requires: "Grapple" "canSuitlessMaridia" "HiJump" "canFlatleyJump" "canSunkenTileWideWallClimb" |
|
From: 4
West Leg Sand
To: 5
Junction Above Grapple Block
Notable: true
Use the grapple block to initiate a Grapple Jump to climb up to the higher level. Aiming the Grapple Jump to line up with the one tile hole is difficult and Samus is moving at high speeds. Requires: "canSuitlessMaridia" "canTrickyGrappleJump" "canMidairWiggle" |
|
Using movement tricks to reduce fall speed even slightly can avoid touching the sand. A Flatley style turnaround over the grapple block hole reduces fall speed some, but also needs a down back or a tiny jump. Requires: "canSuitlessMaridia"
{
"or": [
{
"and": [
"canFlatleyJump",
{
"or": [
"canTrickyJump",
"canDownBack"
]
}
]
},
"canWalljump",
"h_canResetFallSpeed"
]
}
|
|
The swarm of Menus will attack Samus at the top of the room. Tank them or kill them with Screw or Pseudo Screw. Requires: "Gravity"
"SpaceJump"
{
"or": [
"ScrewAttack",
"canPseudoScrew",
{
"enemyDamage": {
"enemy": "Menu",
"type": "contact",
"hits": 1
}
}
]
}
|
|
The swarm of Menus will attack Samus at the top of the room. Tank them, carefully dodge them, or kill them with Screw or Pseudo Screw. Requires: "Gravity"
"canConsecutiveWalljump"
{
"or": [
"ScrewAttack",
"canStaggeredWalljump",
"canWalljumpWithCharge",
{
"enemyDamage": {
"enemy": "Menu",
"type": "contact",
"hits": 1
}
}
]
}
|
|
Watch for the water level to start falling to time the jump to escape at its lowest point. Then use SpaceJump to splash on top of the water. Time another jump with the water level or walljump to fully escape the water. Requires: "canSuitlessMaridia"
{
"or": [
{
"and": [
"canSpaceJumpWaterBounce",
"canWalljump"
]
},
"canSpaceJumpWaterEscape"
]
}
"HiJump"
{
"or": [
{
"enemyDamage": {
"enemy": "Menu",
"type": "contact",
"hits": 1
}
},
"ScrewAttack",
"canStaggeredWalljump",
"canPseudoScrew"
]
}
|
|
From: 5
Junction Above Grapple Block
To: 2
East Leg Right Door
Notable: true Wait the water tide to reach its peak, then crouch jump into a spring ball jump into an IBJ. Perform the spring ball jump near max height. Place the first bomb between about 4 and 6 frames after the spring ball jump; ideally it should be just above the water line. Press pause between about 5 and 10 frames after placing the bomb, to disable Spring Ball (a 'spring fling', to reset fall speed). Place the second bomb soon after regaining control, while the game is fading back in. When close to the top, perform a spring ball jump to reach the ledge; release jump as soon as Samus is high enough to clear the ledge, in order to avoid taking a Menu hit. Requires: "HiJump" "h_canMaxHeightSpringBallJump" "canSpringFling" "canBombJumpWaterEscape" "canDoubleBombJump" "h_canJumpIntoIBJ" |
|
|
{
"$schema": "../../../schema/m3-room.schema.json",
"id": 220,
"name": "Pants Room",
"area": "Maridia",
"subarea": "Inner",
"subsubarea": "Green",
"playable": true,
"roomAddress": "0x7D646",
"roomEnvironments": [
{
"heated": false
}
],
"nodes": [
{
"id": 1,
"name": "West Leg Left Door",
"nodeType": "door",
"nodeSubType": "blue",
"nodeAddress": "0x001a780",
"doorEnvironments": [
{
"physics": "water"
}
]
},
{
"id": 2,
"name": "East Leg Right Door",
"nodeType": "door",
"nodeSubType": "blue",
"nodeAddress": "0x001a798",
"doorEnvironments": [
{
"physics": "air"
}
],
"twinDoorAddresses": [
{
"roomAddress": "0x7D69A",
"doorAddress": "0x001a7bc"
}
]
},
{
"id": 3,
"name": "West Leg Right Door",
"nodeType": "door",
"nodeSubType": "blue",
"nodeAddress": "0x001a78c",
"doorEnvironments": [
{
"physics": "water"
}
],
"note": "The center door that is accessible from the grapple block side"
},
{
"id": 4,
"name": "West Leg Sand",
"nodeType": "junction",
"nodeSubType": "junction"
},
{
"id": 5,
"name": "Junction Above Grapple Block",
"nodeType": "junction",
"nodeSubType": "junction"
}
],
"enemies": [
{
"id": "e1",
"groupName": "Pants Room Menus",
"enemyName": "Menu",
"quantity": 6,
"betweenNodes": [
2,
5
]
},
{
"id": "e2",
"groupName": "Pants Room Top Right Puyo",
"enemyName": "Puyo",
"quantity": 1,
"betweenNodes": [
2,
5
]
},
{
"id": "e3",
"groupName": "Pants Room Bottom Right Puyo",
"enemyName": "Puyo",
"quantity": 1,
"homeNodes": [
2
]
}
],
"reusableRoomwideNotable": [
{
"name": "Pants Room Grapple Jump",
"note": [
"Use the grapple block to initiate a Grapple Jump to climb up to the higher level and above the water line.",
"Aiming the Grapple Jump to line up with the one tile hole is difficult and Samus is moving at high speeds.",
"Escaping the water without Gravity is also difficult as Samus must be standing at the water line when jumping for the next part of the grapple jump.",
"A Grapple Jump can be a spin jump by running briefly before jumping and that can be used to begin Walljumping or Space Jumping."
]
},
{
"name": "Pants Room Shinespark",
"note": [
"Preselect Grapple and be ready to use it when entering the room. Release up or angle up before release grapple so the shinespark does not activate instantly.",
"Use the windup frames for a shinespark to extend the duration timer."
]
}
],
"links": [
{
"from": 1,
"to": [
{
"id": 1
},
{
"id": 2,
"note": "This link is only for the X-Ray climb, which skips the junction altogether."
},
{
"id": 3
},
{
"id": 4
}
]
},
{
"from": 2,
"to": [
{
"id": 2
}
]
},
{
"from": 3,
"to": [
{
"id": 1
},
{
"id": 2,
"note": "This link is only for the X-Ray climb, which skips the junction altogether."
},
{
"id": 3
},
{
"id": 4
}
]
},
{
"from": 4,
"to": [
{
"id": 1
},
{
"id": 2,
"note": "This link is for strats that go directly to the top of the room. Other strats should go 5 -> 7 -> 2."
},
{
"id": 3
},
{
"id": 5
}
]
},
{
"from": 5,
"to": [
{
"id": 1,
"devNote": "This link assumes the grapple block has been broken from below."
},
{
"id": 2
},
{
"id": 4,
"devNote": "This link assumes the grapple block has been broken from below."
}
]
}
],
"strats": [
{
"link": [
1,
1
],
"name": "Leave with Runway",
"requires": [],
"exitCondition": {
"leaveWithRunway": {
"length": 3,
"openEnd": 1
}
}
},
{
"link": [
1,
1
],
"name": "Crystal Flash",
"requires": [
"h_canCrystalFlash"
]
},
{
"link": [
1,
2
],
"name": "Pants Room Left-Side X-Ray Climb",
"entranceCondition": {
"comeInWithDoorStuckSetup": {}
},
"requires": [
"canXRayClimb",
"canBePatient"
],
"note": [
"This climb is from the left side of the left room, the room with the breakable grapple block.",
"Climb up 3 screens."
]
},
{
"link": [
1,
2
],
"name": "Pants Room Shinespark (From the Left)",
"notable": true,
"entranceCondition": {
"comeInShinecharged": {
"framesRequired": 150
}
},
"requires": [
"h_canNavigateUnderwater",
"canShinechargeMovement",
"Grapple",
{
"shinespark": {
"frames": 65
}
},
{
"enemyDamage": {
"enemy": "Menu",
"type": "contact",
"hits": 1
}
}
],
"reusableRoomwideNotable": "Pants Room Shinespark",
"note": [
"Preselect Grapple and be ready to use it when entering the room. Release up or angle up before release grapple so the shinespark does not activate instantly.",
"Use the windup frames for a shinespark to extend the duration timer."
]
},
{
"link": [
1,
3
],
"name": "Base",
"requires": [
"h_canNavigateUnderwater"
],
"note": "Jump from door platform to door platform while avoiding the sand."
},
{
"link": [
1,
4
],
"name": "Base",
"requires": []
},
{
"link": [
2,
2
],
"name": "Leave with Runway",
"requires": [],
"exitCondition": {
"leaveWithRunway": {
"length": 8,
"openEnd": 1
}
}
},
{
"link": [
2,
2
],
"name": "Crystal Flash",
"requires": [
"h_canCrystalFlash"
]
},
{
"link": [
2,
2
],
"name": "G-Mode Setup - Get Hit By Puyo",
"notable": false,
"requires": [],
"exitCondition": {
"leaveWithGModeSetup": {}
}
},
{
"link": [
2,
2
],
"name": "G-Mode Regain Mobility",
"requires": [
{
  "enemyDamage": {
    "enemy": "Puyo",
    "type": "contact",
    "hits": 1
  }
}
],
"gModeRegainMobility": {},
"devNote": [
"This is not possible in vanilla, because there is no way to enter through this door.",
"FIXME: There is a strat from here to 5 with IBJ (Spring Ball + HiJump or ceiling bomb jump)."
]
},
{
"link": [
3,
1
],
"name": "Base",
"requires": [
"h_canNavigateUnderwater"
],
"note": "Jump from door platform to door platform while avoiding the sand."
},
{
"link": [
3,
2
],
"name": "Pants Room Right-Side X-Ray Climb",
"entranceCondition": {
"comeInWithDoorStuckSetup": {}
},
"requires": [
"canXRayClimb",
"canBePatient"
],
"note": [
"This climb is right side of the left room - the room with the breakable grapple block.",
"Climb up 3 screens."
]
},
{
"link": [
3,
2
],
"name": "Pants Room Shinespark (From the Right)",
"notable": true,
"entranceCondition": {
"comeInShinecharged": {
"framesRequired": 150
}
},
"requires": [
"h_canNavigateUnderwater",
"canShinechargeMovement",
"Grapple",
{
"shinespark": {
"frames": 65
}
},
{
"enemyDamage": {
"enemy": "Menu",
"type": "contact",
"hits": 1
}
}
],
"reusableRoomwideNotable": "Pants Room Shinespark",
"note": [
"Preselect Grapple and be ready to use it when entering the room. Release up or angle up before release grapple so the shinespark does not activate instantly.",
"Use the windup frames for a shinespark to extend the duration timer."
]
},
{
"link": [
3,
3
],
"name": "Leave with Runway",
"requires": [],
"exitCondition": {
"leaveWithRunway": {
"length": 3,
"openEnd": 1
}
}
},
{
"link": [
3,
4
],
"name": "Base",
"requires": []
},
{
"link": [
4,
1
],
"name": "Base",
"requires": [
"h_canNavigateUnderwater",
{
"or": [
"canPlayInSand",
{
"and": [
"HiJump",
"h_canUseSpringBall"
]
},
{
"and": [
"Gravity",
{
"or": [
"HiJump",
"h_canUseSpringBall",
"SpaceJump"
]
}
]
}
]
}
],
"devNote": "It is easy enough to get out of the sand without tech, because the strats only require briefly entering it, but it is there as turning around at the wrong time will make Samus sink."
},
{
"link": [
4,
2
],
"name": "Pants Room Grapple Jump (To The Top)",
"notable": true,
"requires": [
"canSuitlessMaridia",
"canTrickyGrappleJump",
"canMidairWiggle",
{
"or": [
{
"enemyDamage": {
"enemy": "Menu",
"type": "contact",
"hits": 1
}
},
"SpaceJump",
{
"and": [
"canConsecutiveWalljump",
{
"or": [
"ScrewAttack",
"canStaggeredWalljump"
]
}
]
}
]
}
],
"reusableRoomwideNotable": "Pants Room Grapple Jump",
"note": [
"Use the grapple block to initiate a Grapple Jump to climb up to the higher level and above the water line.",
"Aiming the Grapple Jump to line up with the one tile hole is difficult and Samus is moving at high speeds.",
"Escaping the water is also difficult as Samus must be standing at the water line when jumping for the next part of the grapple jump.",
"It may be easier to jump out of the water by turning HiJump off.",
"A Grapple Jump can be a spin jump by running briefly before jumping and that can be used to begin Walljumping or Space Jumping."
]
},
{
"link": [
4,
3
],
"name": "Base",
"requires": [
"h_canNavigateUnderwater",
{
"or": [
"canPlayInSand",
{
"and": [
"HiJump",
"h_canUseSpringBall"
]
},
{
"and": [
"Gravity",
{
"or": [
"HiJump",
"h_canUseSpringBall",
"SpaceJump"
]
}
]
}
]
}
],
"devNote": "It is easy enough to get out of the sand without tech, because the strats only require briefly entering it, but it is there as turning around at the wrong time will make Samus sink."
},
{
"link": [
4,
5
],
"name": "Base",
"requires": [
"Gravity",
"Grapple",
"SpaceJump"
]
},
{
"link": [
4,
5
],
"name": "Pants Room Gravity with HiJump",
"requires": [
"Gravity",
"Grapple",
"HiJump",
"canCarefulJump",
"canPlayInSand"
],
"note": [
"Break the grapple block, then jump on the sand to get through the hole.",
"Break spin before touching the sand, and then spinjump to get a good jump off of the sand.",
"Breaking spin after jumping from the sand will remove horizontal momentum, or a stationary spinjump can help."
]
},
{
"link": [
4,
5
],
"name": "Pants Room Gravity MidAir SpringBall Jump",
"requires": [
"Gravity",
"Grapple",
"canTrickySpringBallJump",
"canPlayInSand"
],
"note": "Break spin before touching the sand, and then spinjump to get a good jump off of the sand."
},
{
"link": [
4,
5
],
"name": "Pants Room IBJ",
"requires": [
"Gravity",
"Grapple",
"canSandIBJ"
],
"note": "Wait for a good jump out of the sand to begin the IBJ with. A stationary spinjump can help."
},
{
"link": [
4,
5
],
"name": "SpringBall IBJ",
"requires": [
"Gravity",
"Grapple",
"h_canUseSpringBall",
"h_canJumpIntoIBJ"
],
"note": "Springball can keep Samus out of the sand. Place the first bomb right after Samus begins falling back towards the sand."
},
{
"link": [
4,
5
],
"name": "Pants Room Gravity Jump",
"notable": true,
"requires": [
"Grapple",
"canGravityJump",
"canPlayInSand",
"canCarefulJump",
{
"or": [
"canStationarySpinJump",
"canTrickyJump"
]
}
],
"note": [
"Gets above the grapple block by doing a well-positioned and well-timed Gravity jump following a good jump off the sand.",
"It is also possible to do this off of a wall jump on the side immediately followed by a gravity jump.",
"Break spin before touching the sand, and then spinjump to get a good jump off of the sand.",
"Breaking spin after jumping from the sand will remove horizontal momentum, or a stationary spinjump can help."
]
},
{
"link": [
4,
5
],
"name": "Suitless MidAir SpringBall Jump with HiJump",
"requires": [
"Grapple",
"canSuitlessMaridia",
"HiJump",
"canSpringBallJumpMidAir",
"canPlayInSand",
"canTrickyJump"
],
"note": [
"Requires a mid-air SpringBall jump off the sand.",
"Break spin before touching the sand, and then spinjump to get a good jump off of the sand.",
"A stationary spinjump or a turnaround spin jump can help but morphing will remove all horizontal momentum."
]
},
{
"link": [
4,
5
],
"name": "Pants Room Suitless Flatley Turnaround Climb",
"notable": true,
"requires": [
"Grapple",
"canSuitlessMaridia",
"HiJump",
"canFlatleyJump",
"canSunkenTileWideWallClimb"
],
"note": [
"Use a flatley turnaround jump to get Samus inside the gap during a spinjump.",
"Samus must jump from the left side platform."
]
},
{
"link": [
4,
5
],
"name": "Pants Room Grapple Jump (Above Grapple Block)",
"notable": true,
"requires": [
"canSuitlessMaridia",
"canTrickyGrappleJump",
"canMidairWiggle"
],
"reusableRoomwideNotable": "Pants Room Grapple Jump",
"note": [
"Use the grapple block to initiate a Grapple Jump to climb up to the higher level.",
"Aiming the Grapple Jump to line up with the one tile hole is difficult and Samus is moving at high speeds."
]
},
{
"link": [
5,
1
],
"name": "Avoid Sand",
"requires": [
"canSuitlessMaridia",
{
"or": [
{
"and": [
"canFlatleyJump",
{
"or": [
"canTrickyJump",
"canDownBack"
]
}
]
},
"canWalljump",
"h_canResetFallSpeed"
]
}
],
"note": [
"Using movement tricks to reduce fall speed even slightly can avoid touching the sand.",
"A Flatley style turnaround over the grapple block hole reduces fall speed some, but also needs a down back or a tiny jump."
],
"devNote": "The or following canFlatleyJump has no logical relevance but indicates there are two distinct ways of using the flatley jump."
},
{
"link": [
5,
2
],
"name": "Space Jump",
"requires": [
"Gravity",
"SpaceJump",
{
"or": [
"ScrewAttack",
"canPseudoScrew",
{
"enemyDamage": {
"enemy": "Menu",
"type": "contact",
"hits": 1
}
}
]
}
],
"note": "The swarm of Menus will attack Samus at the top of the room. Tank them or kill them with Screw or Pseudo Screw."
},
{
"link": [
5,
2
],
"name": "Wall Jump",
"requires": [
"Gravity",
"canConsecutiveWalljump",
{
"or": [
"ScrewAttack",
"canStaggeredWalljump",
"canWalljumpWithCharge",
{
"enemyDamage": {
"enemy": "Menu",
"type": "contact",
"hits": 1
}
}
]
}
],
"note": "The swarm of Menus will attack Samus at the top of the room. Tank them, carefully dodge them, or kill them with Screw or Pseudo Screw.",
"devNote": "The Menus prevent a reliable IBJ."
},
{
"link": [
5,
2
],
"name": "Suitless",
"requires": [
"canSuitlessMaridia",
{
"or": [
{
"and": [
"canSpaceJumpWaterBounce",
"canWalljump"
]
},
"canSpaceJumpWaterEscape"
]
},
"HiJump",
{
"or": [
{
"enemyDamage": {
"enemy": "Menu",
"type": "contact",
"hits": 1
}
},
"ScrewAttack",
"canStaggeredWalljump",
"canPseudoScrew"
]
}
],
"note": [
"Watch for the water level to start falling to time the jump to escape at its lowest point.",
"Then use SpaceJump to splash on top of the water.",
"Time another jump with the water level or walljump to fully escape the water."
]
},
{
"link": [
5,
2
],
"name": "Pants Room Bomb Jump Water Escape",
"notable": true,
"requires": [
"HiJump",
"h_canMaxHeightSpringBallJump",
"canSpringFling",
"canBombJumpWaterEscape",
"canDoubleBombJump",
"h_canJumpIntoIBJ"
],
"note": [
"Wait the water tide to reach its peak, then crouch jump into a spring ball jump into an IBJ.",
"Perform the spring ball jump near max height.",
"Place the first bomb between about 4 and 6 frames after the spring ball jump; ideally it should be just above the water line.",
"Press pause between about 5 and 10 frames after placing the bomb, to disable Spring Ball (a 'spring fling', to reset fall speed).",
"Place the second bomb soon after regaining control, while the game is fading back in.",
"When close to the top, perform a spring ball jump to reach the ledge;",
"release jump as soon as Samus is high enough to clear the ledge, in order to avoid taking a Menu hit."
],
"devNote": [
"This trick can technically be done without a 'spring fling' but is extremely precise."
]
},
{
"link": [
5,
4
],
"name": "Base",
"requires": []
}
]
}