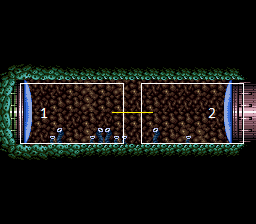
West Sand Hall Tunnel
Room ID: 202
|
Exit condition: {
"leaveWithRunway": {
"length": 13,
"openEnd": 0
}
}
|
|
Requires: {
"doorUnlockedAtNode": 2
}
Exit condition: {
"leaveWithRunway": {
"length": 14,
"openEnd": 0
}
}
|
|
From: 1
Left Door
To: 1
Left Door
Get the shinecharge while killing the crab, then move towards and shinespark out the left door. Entrance condition: {
"comeInRunning": {
"speedBooster": true,
"minTiles": 2.4375
}
}
Requires: "canStutterWaterShineCharge"
"canShinechargeMovementComplex"
{
"canShineCharge": {
"usedTiles": 33,
"openEnd": 2
}
}
{
"or": [
{
"shinespark": {
"frames": 9
}
},
{
"and": [
"canShinechargeMovementTricky",
{
"shinespark": {
"frames": 2
}
}
]
}
]
}
{
"or": [
"Wave",
"Spazer",
"Plasma",
{
"ammo": {
"type": "Missile",
"count": 2
}
},
{
"ammo": {
"type": "Super",
"count": 1
}
}
]
}
Exit condition: {
"leaveWithSpark": {}
}
|
|
Requires: "h_canCrystalFlash" |
|
Exit condition: {
"leaveWithGModeSetup": {}
}
|
|
Requires: {
"enemyDamage": {
"enemy": "Sciser",
"type": "contact",
"hits": 1
}
}
|
|
|
|
Entrance condition: {
"comeInShinecharging": {
"length": 13,
"openEnd": 0
}
}
Requires: "Gravity" Exit condition: {
"leaveShinecharged": {
"framesRemaining": 179
}
}
|
|
Get the shinecharge while killing the crab, then exit the right door. Entrance condition: {
"comeInRunning": {
"speedBooster": true,
"minTiles": 2
}
}
Requires: "canStutterWaterShineCharge"
{
"canShineCharge": {
"usedTiles": 33,
"openEnd": 2
}
}
{
"or": [
"Wave",
"Spazer",
"Plasma",
{
"ammo": {
"type": "Missile",
"count": 2
}
},
{
"ammo": {
"type": "Super",
"count": 1
}
}
]
}
Exit condition: {
"leaveShinecharged": {
"framesRemaining": 179
}
}
|
|
From: 1
Left Door
To: 2
Right Door
Entrance condition: {
"comeInShinecharged": {
"framesRequired": 25
}
}
Requires: {
"shinespark": {
"frames": 23
}
}
Exit condition: {
"leaveWithSpark": {}
}
|
|
Entrance condition: {
"comeInWithGrappleTeleport": {
"blockPositions": [
[
12,
12
],
[
12,
13
]
]
}
}
Bypasses door shell: true |
|
From: 1
Left Door
To: 2
Right Door
Entrance condition: {
"comeInWithGrappleTeleport": {
"blockPositions": [
[
12,
12
]
]
}
}
Exit condition: {
"leaveWithGrappleTeleport": {
"blockPositions": [
[
12,
12
]
]
}
}
Bypasses door shell: true |
|
From: 1
Left Door
To: 2
Right Door
Entrance condition: {
"comeInWithGrappleTeleport": {
"blockPositions": [
[
12,
13
]
]
}
}
Exit condition: {
"leaveWithGrappleTeleport": {
"blockPositions": [
[
12,
13
]
]
}
}
Bypasses door shell: true |
|
Entrance condition: {
"comeInWithStoredFallSpeed": {
"fallSpeedInTiles": 1
}
}
Requires: {
"or": [
"Gravity",
"Wave",
"Spazer",
"Plasma",
{
"ammo": {
"type": "Missile",
"count": 2
}
},
{
"ammo": {
"type": "Super",
"count": 1
}
}
]
}
Exit condition: {
"leaveWithStoredFallSpeed": {
"fallSpeedInTiles": 1
}
}
|
|
From: 1
Left Door
To: 2
Right Door
Entrance condition: {
"comeInWithStoredFallSpeed": {
"fallSpeedInTiles": 2
}
}
Requires: {
"or": [
"Gravity",
"Wave",
"Spazer",
"Plasma",
{
"ammo": {
"type": "Missile",
"count": 2
}
},
{
"ammo": {
"type": "Super",
"count": 1
}
}
]
}
Exit condition: {
"leaveWithStoredFallSpeed": {
"fallSpeedInTiles": 2
}
}
|
|
|
|
Entrance condition: {
"comeInShinecharging": {
"length": 13,
"openEnd": 0
}
}
Requires: "Gravity" Exit condition: {
"leaveShinecharged": {
"framesRemaining": 179
}
}
|
|
Entrance condition: {
"comeInRunning": {
"speedBooster": true,
"minTiles": 2
}
}
Requires: "canStutterWaterShineCharge"
{
"canShineCharge": {
"usedTiles": 33,
"openEnd": 2
}
}
Exit condition: {
"leaveShinecharged": {
"framesRemaining": 179
}
}
|
|
From: 2
Right Door
To: 1
Left Door
Entrance condition: {
"comeInShinecharged": {
"framesRequired": 25
}
}
Requires: {
"shinespark": {
"frames": 23
}
}
Exit condition: {
"leaveWithSpark": {}
}
|
|
Entrance condition: {
"comeInWithStoredFallSpeed": {
"fallSpeedInTiles": 1
}
}
Exit condition: {
"leaveWithStoredFallSpeed": {
"fallSpeedInTiles": 1
}
}
|
|
From: 2
Right Door
To: 1
Left Door
Entrance condition: {
"comeInWithStoredFallSpeed": {
"fallSpeedInTiles": 2
}
}
Exit condition: {
"leaveWithStoredFallSpeed": {
"fallSpeedInTiles": 2
}
}
|
|
Entrance condition: {
"comeInWithGrappleTeleport": {
"blockPositions": [
[
3,
12
],
[
3,
13
]
]
}
}
Bypasses door shell: true |
|
From: 2
Right Door
To: 1
Left Door
Entrance condition: {
"comeInWithGrappleTeleport": {
"blockPositions": [
[
3,
12
]
]
}
}
Exit condition: {
"leaveWithGrappleTeleport": {
"blockPositions": [
[
3,
12
]
]
}
}
Bypasses door shell: true |
|
From: 2
Right Door
To: 1
Left Door
Entrance condition: {
"comeInWithGrappleTeleport": {
"blockPositions": [
[
3,
13
]
]
}
}
Exit condition: {
"leaveWithGrappleTeleport": {
"blockPositions": [
[
3,
13
]
]
}
}
Bypasses door shell: true |
|
Exit condition: {
"leaveWithRunway": {
"length": 13,
"openEnd": 0
}
}
|
|
Requires: {
"doorUnlockedAtNode": 1
}
Exit condition: {
"leaveWithRunway": {
"length": 14,
"openEnd": 0
}
}
|
|
From: 2
Right Door
To: 2
Right Door
Get the shinecharge, carefully jump over the crab and move towards then shinespark out the right door. Entrance condition: {
"comeInRunning": {
"speedBooster": true,
"minTiles": 2.4375
}
}
Requires: "canStutterWaterShineCharge"
"canShinechargeMovementComplex"
"canCarefulJump"
{
"canShineCharge": {
"usedTiles": 33,
"openEnd": 2
}
}
{
"or": [
{
"shinespark": {
"frames": 9
}
},
{
"and": [
"canShinechargeMovementTricky",
{
"shinespark": {
"frames": 2
}
}
]
}
]
}
Exit condition: {
"leaveWithSpark": {}
}
|
|
From: 2
Right Door
To: 2
Right Door
Exit condition: {
"leaveWithGModeSetup": {}
}
|
|
Requires: {
"enemyDamage": {
"enemy": "Sciser",
"type": "contact",
"hits": 1
}
}
|
{
"$schema": "../../../schema/m3-room.schema.json",
"id": 202,
"name": "West Sand Hall Tunnel",
"area": "Maridia",
"subarea": "Inner",
"subsubarea": "Green",
"playable": true,
"roomAddress": "0x7D252",
"roomEnvironments": [
{
"heated": false
}
],
"nodes": [
{
"id": 1,
"name": "Left Door",
"nodeType": "door",
"nodeSubType": "blue",
"nodeAddress": "0x001a528",
"doorEnvironments": [
{
"physics": "water"
}
]
},
{
"id": 2,
"name": "Right Door",
"nodeType": "door",
"nodeSubType": "blue",
"nodeAddress": "0x001a534",
"doorEnvironments": [
{
"physics": "water"
}
]
}
],
"enemies": [
{
"id": "e1",
"groupName": "West Sand Hall Tunnel Sciser",
"enemyName": "Sciser",
"quantity": 1,
"homeNodes": [
1,
2
]
}
],
"links": [
{
"from": 1,
"to": [
{
"id": 1
},
{
"id": 2
}
]
},
{
"from": 2,
"to": [
{
"id": 1
},
{
"id": 2
}
]
}
],
"strats": [
{
"link": [
1,
1
],
"name": "Leave with Runway",
"requires": [],
"exitCondition": {
"leaveWithRunway": {
"length": 13,
"openEnd": 0
}
}
},
{
"link": [
1,
1
],
"name": "Leave with Runway Both Doors Open",
"requires": [
{
  "doorUnlockedAtNode": 2
}
],
"exitCondition": {
"leaveWithRunway": {
"length": 14,
"openEnd": 0
}
},
"unlocksDoors": [
{
"nodeId": 2,
"types": [
"ammo"
],
"requires": []
}
]
},
{
"link": [
1,
1
],
"name": "Suitless Water Shinecharge, Shinespark Return",
"entranceCondition": {
"comeInRunning": {
"speedBooster": true,
"minTiles": 2.4375
}
},
"requires": [
"canStutterWaterShineCharge",
"canShinechargeMovementComplex",
{
"canShineCharge": {
"usedTiles": 33,
"openEnd": 2
}
},
{
"or": [
{
"shinespark": {
"frames": 9
}
},
{
"and": [
"canShinechargeMovementTricky",
{
"shinespark": {
"frames": 2
}
}
]
}
]
},
{
"or": [
"Wave",
"Spazer",
"Plasma",
{
"ammo": {
"type": "Missile",
"count": 2
}
},
{
"ammo": {
"type": "Super",
"count": 1
}
}
]
}
],
"exitCondition": {
"leaveWithSpark": {}
},
"unlocksDoors": [
{
"types": [
"super"
],
"requires": []
},
{
"types": [
"missiles",
"powerbomb"
],
"requires": [
"never"
]
}
],
"note": "Get the shinecharge while killing the crab, then move towards and shinespark out the left door."
},
{
"link": [
1,
1
],
"name": "Crystal Flash",
"requires": [
"h_canCrystalFlash"
]
},
{
"link": [
1,
1
],
"name": "G-Mode Setup - Get Hit By Sciser",
"notable": false,
"requires": [],
"exitCondition": {
"leaveWithGModeSetup": {}
}
},
{
"link": [
1,
1
],
"name": "G-Mode Regain Mobility",
"requires": [
{
  "enemyDamage": {
    "enemy": "Sciser",
    "type": "contact",
    "hits": 1
  }
}
],
"gModeRegainMobility": {}
},
{
"link": [
1,
2
],
"name": "Base",
"requires": []
},
{
"link": [
1,
2
],
"name": "Leave Shinecharged",
"entranceCondition": {
"comeInShinecharging": {
"length": 13,
"openEnd": 0
}
},
"requires": [
"Gravity"
],
"exitCondition": {
"leaveShinecharged": {
"framesRemaining": 179
}
},
"unlocksDoors": [
{
"types": [
"super"
],
"requires": []
},
{
"types": [
"missiles",
"powerbomb"
],
"requires": [
"never"
]
}
],
"devNote": "FIXME: Do we need a way to deal with the crab? It seems avoidable unless: a short runway, the next room is a drop off, and you need almost all of the frames."
},
{
"link": [
1,
2
],
"name": "Suitless Water Shinecharge",
"entranceCondition": {
"comeInRunning": {
"speedBooster": true,
"minTiles": 2
}
},
"requires": [
"canStutterWaterShineCharge",
{
"canShineCharge": {
"usedTiles": 33,
"openEnd": 2
}
},
{
"or": [
"Wave",
"Spazer",
"Plasma",
{
"ammo": {
"type": "Missile",
"count": 2
}
},
{
"ammo": {
"type": "Super",
"count": 1
}
}
]
}
],
"exitCondition": {
"leaveShinecharged": {
"framesRemaining": 179
}
},
"unlocksDoors": [
{
"types": [
"missiles",
"super"
],
"requires": []
},
{
"types": [
"powerbomb"
],
"requires": [
"never"
]
}
],
"note": "Get the shinecharge while killing the crab, then exit the right door."
},
{
"link": [
1,
2
],
"name": "Come In Shinecharged, Leave Sparking",
"entranceCondition": {
"comeInShinecharged": {
"framesRequired": 25
}
},
"requires": [
{
  "shinespark": {
    "frames": 23
  }
}
],
"exitCondition": {
"leaveWithSpark": {}
},
"unlocksDoors": [
{
"types": [
"super"
],
"requires": []
},
{
"types": [
"missiles",
"powerbomb"
],
"requires": [
"never"
]
}
]
},
{
"link": [
1,
2
],
"name": "Grapple Teleport",
"entranceCondition": {
"comeInWithGrappleTeleport": {
"blockPositions": [
[
12,
12
],
[
12,
13
]
]
}
},
"requires": [],
"bypassesDoorShell": true
},
{
"link": [
1,
2
],
"name": "Carry Grapple Teleport (Top Position)",
"entranceCondition": {
"comeInWithGrappleTeleport": {
"blockPositions": [
[
12,
12
]
]
}
},
"requires": [],
"bypassesDoorShell": true,
"exitCondition": {
"leaveWithGrappleTeleport": {
"blockPositions": [
[
12,
12
]
]
}
}
},
{
"link": [
1,
2
],
"name": "Carry Grapple Teleport (Bottom Position)",
"entranceCondition": {
"comeInWithGrappleTeleport": {
"blockPositions": [
[
12,
13
]
]
}
},
"requires": [],
"bypassesDoorShell": true,
"exitCondition": {
"leaveWithGrappleTeleport": {
"blockPositions": [
[
12,
13
]
]
}
}
},
{
"link": [
1,
2
],
"name": "Transition with Stored Fall Speed",
"entranceCondition": {
"comeInWithStoredFallSpeed": {
"fallSpeedInTiles": 1
}
},
"requires": [
{
  "or": [
    "Gravity",
    "Wave",
    "Spazer",
    "Plasma",
    {
      "ammo": {
        "type": "Missile",
        "count": 2
      }
    },
    {
      "ammo": {
        "type": "Super",
        "count": 1
      }
    }
  ]
}
],
"exitCondition": {
"leaveWithStoredFallSpeed": {
"fallSpeedInTiles": 1
}
},
"unlocksDoors": [
{
"types": [
"missiles",
"super"
],
"requires": []
},
{
"types": [
"powerbomb"
],
"requires": [
"never"
]
}
]
},
{
"link": [
1,
2
],
"name": "Transition with Stored Fall Speed (more speed)",
"entranceCondition": {
"comeInWithStoredFallSpeed": {
"fallSpeedInTiles": 2
}
},
"requires": [
{
  "or": [
    "Gravity",
    "Wave",
    "Spazer",
    "Plasma",
    {
      "ammo": {
        "type": "Missile",
        "count": 2
      }
    },
    {
      "ammo": {
        "type": "Super",
        "count": 1
      }
    }
  ]
}
],
"exitCondition": {
"leaveWithStoredFallSpeed": {
"fallSpeedInTiles": 2
}
},
"unlocksDoors": [
{
"types": [
"missiles",
"super"
],
"requires": []
},
{
"types": [
"powerbomb"
],
"requires": [
"never"
]
}
]
},
{
"link": [
2,
1
],
"name": "Base",
"requires": []
},
{
"link": [
2,
1
],
"name": "Leave Shinecharged",
"entranceCondition": {
"comeInShinecharging": {
"length": 13,
"openEnd": 0
}
},
"requires": [
"Gravity"
],
"exitCondition": {
"leaveShinecharged": {
"framesRemaining": 179
}
},
"unlocksDoors": [
{
"types": [
"super"
],
"requires": []
},
{
"types": [
"missiles",
"powerbomb"
],
"requires": [
"never"
]
}
]
},
{
"link": [
2,
1
],
"name": "Suitless Water Shinecharge",
"entranceCondition": {
"comeInRunning": {
"speedBooster": true,
"minTiles": 2
}
},
"requires": [
"canStutterWaterShineCharge",
{
"canShineCharge": {
"usedTiles": 33,
"openEnd": 2
}
}
],
"exitCondition": {
"leaveShinecharged": {
"framesRemaining": 179
}
},
"unlocksDoors": [
{
"types": [
"missiles",
"super"
],
"requires": []
},
{
"types": [
"powerbomb"
],
"requires": [
"never"
]
}
],
"devNote": "FIXME: This is a prime example for 3-room shinecharges, once the schema can model it."
},
{
"link": [
2,
1
],
"name": "Come In Shinecharged, Leave Sparking",
"entranceCondition": {
"comeInShinecharged": {
"framesRequired": 25
}
},
"requires": [
{
  "shinespark": {
    "frames": 23
  }
}
],
"exitCondition": {
"leaveWithSpark": {}
},
"unlocksDoors": [
{
"types": [
"super"
],
"requires": []
},
{
"types": [
"missiles",
"powerbomb"
],
"requires": [
"never"
]
}
]
},
{
"link": [
2,
1
],
"name": "Transition with Stored Fall Speed",
"entranceCondition": {
"comeInWithStoredFallSpeed": {
"fallSpeedInTiles": 1
}
},
"requires": [],
"exitCondition": {
"leaveWithStoredFallSpeed": {
"fallSpeedInTiles": 1
}
},
"unlocksDoors": [
{
"types": [
"missiles",
"super"
],
"requires": []
},
{
"types": [
"powerbomb"
],
"requires": [
"never"
]
}
]
},
{
"link": [
2,
1
],
"name": "Transition with Stored Fall Speed (more speed)",
"entranceCondition": {
"comeInWithStoredFallSpeed": {
"fallSpeedInTiles": 2
}
},
"requires": [],
"exitCondition": {
"leaveWithStoredFallSpeed": {
"fallSpeedInTiles": 2
}
},
"unlocksDoors": [
{
"types": [
"missiles",
"super"
],
"requires": []
},
{
"types": [
"powerbomb"
],
"requires": [
"never"
]
}
]
},
{
"link": [
2,
1
],
"name": "Grapple Teleport",
"entranceCondition": {
"comeInWithGrappleTeleport": {
"blockPositions": [
[
3,
12
],
[
3,
13
]
]
}
},
"requires": [],
"bypassesDoorShell": true
},
{
"link": [
2,
1
],
"name": "Carry Grapple Teleport (Top Position)",
"entranceCondition": {
"comeInWithGrappleTeleport": {
"blockPositions": [
[
3,
12
]
]
}
},
"requires": [],
"bypassesDoorShell": true,
"exitCondition": {
"leaveWithGrappleTeleport": {
"blockPositions": [
[
3,
12
]
]
}
}
},
{
"link": [
2,
1
],
"name": "Carry Grapple Teleport (Bottom Position)",
"entranceCondition": {
"comeInWithGrappleTeleport": {
"blockPositions": [
[
3,
13
]
]
}
},
"requires": [],
"bypassesDoorShell": true,
"exitCondition": {
"leaveWithGrappleTeleport": {
"blockPositions": [
[
3,
13
]
]
}
}
},
{
"link": [
2,
2
],
"name": "Leave with Runway",
"requires": [],
"exitCondition": {
"leaveWithRunway": {
"length": 13,
"openEnd": 0
}
}
},
{
"link": [
2,
2
],
"name": "Leave with Runway Both Doors Open",
"requires": [
{
  "doorUnlockedAtNode": 1
}
],
"exitCondition": {
"leaveWithRunway": {
"length": 14,
"openEnd": 0
}
},
"unlocksDoors": [
{
"nodeId": 1,
"types": [
"ammo"
],
"requires": []
}
]
},
{
"link": [
2,
2
],
"name": "Suitless Water Shinecharge, Shinespark Return",
"entranceCondition": {
"comeInRunning": {
"speedBooster": true,
"minTiles": 2.4375
}
},
"requires": [
"canStutterWaterShineCharge",
"canShinechargeMovementComplex",
"canCarefulJump",
{
"canShineCharge": {
"usedTiles": 33,
"openEnd": 2
}
},
{
"or": [
{
"shinespark": {
"frames": 9
}
},
{
"and": [
"canShinechargeMovementTricky",
{
"shinespark": {
"frames": 2
}
}
]
}
]
}
],
"exitCondition": {
"leaveWithSpark": {}
},
"unlocksDoors": [
{
"types": [
"super"
],
"requires": []
},
{
"types": [
"missiles",
"powerbomb"
],
"requires": [
"never"
]
}
],
"note": "Get the shinecharge, carefully jump over the crab and move towards then shinespark out the right door."
},
{
"link": [
2,
2
],
"name": "G-Mode Setup - Get Hit By Sciser",
"notable": false,
"requires": [],
"exitCondition": {
"leaveWithGModeSetup": {}
}
},
{
"link": [
2,
2
],
"name": "G-Mode Regain Mobility",
"requires": [
{
  "enemyDamage": {
    "enemy": "Sciser",
    "type": "contact",
    "hits": 1
  }
}
],
"gModeRegainMobility": {}
}
]
}