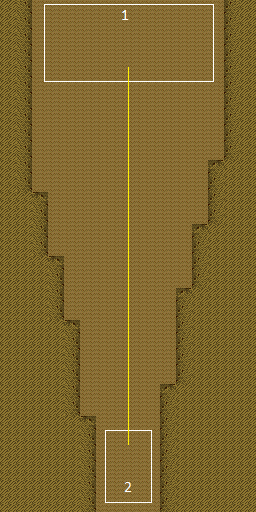
West Aqueduct Quicksand Room
Room ID: 206
|
From: 1
Top Sand Entrance
To: 1
Top Sand Entrance
Requires: "h_canCrystalFlash" |
|
From: 1
Top Sand Entrance
To: 1
Top Sand Entrance
Requires: {
"enemyDamage": {
"enemy": "Bull",
"type": "contact",
"hits": 1
}
}
|
|
|
|
Entrance condition: {
"comeInWithGMode": {
"mode": "any",
"morphed": false
},
"comesThroughToilet": "any"
}
Exit condition: {
"leaveWithGMode": {
"morphed": false
}
}
|
|
From: 1
Top Sand Entrance
To: 2
Bottom Sand Exit
Entrance condition: {
"comeInWithGMode": {
"mode": "any",
"morphed": true
},
"comesThroughToilet": "any"
}
Exit condition: {
"leaveWithGMode": {
"morphed": true
}
}
|
|
Exit condition: {
"leaveNormally": {}
}
|
{
"$schema": "../../../schema/m3-room.schema.json",
"id": 206,
"name": "West Aqueduct Quicksand Room",
"area": "Maridia",
"subarea": "Inner",
"subsubarea": "Pink",
"playable": true,
"roomAddress": "0x7D54D",
"roomEnvironments": [
{
"heated": false
}
],
"nodes": [
{
"id": 1,
"name": "Top Sand Entrance",
"nodeType": "entrance",
"nodeSubType": "sandpit",
"nodeAddress": "0x001a6d8"
},
{
"id": 2,
"name": "Bottom Sand Exit",
"nodeType": "exit",
"nodeSubType": "sandpit",
"nodeAddress": "0x001a6e4"
}
],
"enemies": [
{
"id": "e1",
"groupName": "West Aqueduct Quicksand Bulls",
"enemyName": "Bull",
"quantity": 7,
"homeNodes": [
1,
2
]
}
],
"links": [
{
"from": 1,
"to": [
{
"id": 1
},
{
"id": 2
}
]
},
{
"from": 2,
"to": [
{
"id": 2
}
]
}
],
"strats": [
{
"link": [
1,
1
],
"name": "Crystal Flash",
"requires": [
"h_canCrystalFlash"
],
"devNote": "A 10 Power Bomb Crystal Flash strat may also be possible here, but it seems tricky to ensure that health-bomb won't interfere."
},
{
"link": [
1,
1
],
"name": "G-Mode Regain Mobility",
"requires": [
{
  "enemyDamage": {
    "enemy": "Bull",
    "type": "contact",
    "hits": 1
  }
}
],
"gModeRegainMobility": {}
},
{
"link": [
1,
2
],
"name": "Base",
"requires": []
},
{
"link": [
1,
2
],
"name": "G-Mode",
"notable": false,
"entranceCondition": {
"comeInWithGMode": {
"mode": "any",
"morphed": false
},
"comesThroughToilet": "any"
},
"requires": [],
"exitCondition": {
"leaveWithGMode": {
"morphed": false
}
}
},
{
"link": [
1,
2
],
"name": "G-Mode Morph",
"notable": false,
"entranceCondition": {
"comeInWithGMode": {
"mode": "any",
"morphed": true
},
"comesThroughToilet": "any"
},
"requires": [],
"exitCondition": {
"leaveWithGMode": {
"morphed": true
}
}
},
{
"link": [
2,
2
],
"name": "Leave Normally",
"exitCondition": {
"leaveNormally": {}
},
"requires": []
}
]
}