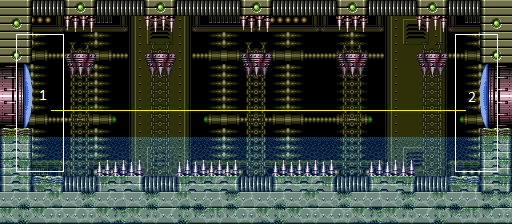
Spiky Death Room
Room ID: 165
|
Exit condition: {
"leaveWithRunway": {
"length": 1,
"openEnd": 1
}
}
|
|
Jumping from the door and bouncing on the platform enemy works pretty well. Requires: "f_DefeatedPhantoon"
"h_canXMode"
"h_XModeSpikeHit"
"h_XModeSpikeHit"
"Gravity"
{
"canShineCharge": {
"usedTiles": 33,
"openEnd": 2
}
}
"canShinechargeMovement"
Exit condition: {
"leaveShinecharged": {
"framesRemaining": 80
}
}
|
|
Requires: "h_canCrystalFlash" |
|
Land on the first spike platform, and use it to run and jump far enough through the room to trigger the fourth spike platform to fall. Fire a shot mid-air and activate the shinespark wind-up. Wait until the shot is at a specific position before sparking. Sparking too late will cause the shot to despawn before reaching the door. Sparking too early will cause Samus to bonk the door as it will not yet be open. A beam shot, Missile, or Super can be used. Entrance condition: {
"comeInShinecharged": {
"framesRequired": 85
}
}
Requires: "Gravity"
"canShinechargeMovementTricky"
"canHeroShot"
"canMidairShinespark"
{
"shinespark": {
"frames": 31
}
}
Exit condition: {
"leaveWithSpark": {}
}
|
|
Land on the floor, then jump and fire a shot mid-air and activate the shinespark wind-up. Wait until the shot is at a specific position before sparking. Sparking too late will cause the shot to despawn before reaching the door. Sparking too early will cause Samus to bonk the door as it will not yet be open. A beam shot, Missile, or Super can be used. Entrance condition: {
"comeInShinecharged": {
"framesRequired": 70
}
}
Requires: {
"not": "f_DefeatedPhantoon"
}
"canRiskPermanentLossOfAccess"
"canShinechargeMovementTricky"
"canHeroShot"
"canMidairShinespark"
{
"shinespark": {
"frames": 37
}
}
Exit condition: {
"leaveWithSpark": {}
}
|
|
Entrance condition: {
"comeInShinecharging": {
"length": 0,
"openEnd": 1
}
}
Requires: {
"not": "f_DefeatedPhantoon"
}
"canRiskPermanentLossOfAccess"
"canShinechargeMovementComplex"
"canMidairShinespark"
{
"shinespark": {
"frames": 20
}
}
Exit condition: {
"leaveWithSpark": {}
}
|
|
From: 1
Left Door
To: 2
Right Door
Entrance condition: {
"comeInShinecharging": {
"length": 0,
"openEnd": 1
}
}
Requires: {
"not": "f_DefeatedPhantoon"
}
"canRiskPermanentLossOfAccess"
"canShinechargeMovementTricky"
"canMidairShinespark"
{
"shinespark": {
"frames": 8
}
}
Exit condition: {
"leaveWithSpark": {}
}
|
|
Requires: {
"not": "f_DefeatedPhantoon"
}
"canRiskPermanentLossOfAccess"
|
|
Requires: "canSuitlessMaridia"
{
"spikeHits": 2
}
|
|
Requires: "canSuitlessMaridia" "canCarefulJump" |
|
Requires: {
"or": [
"Morph",
"Gravity",
"canSpaceJumpWaterBounce"
]
}
|
|
Requires: {
"not": "f_DefeatedPhantoon"
}
"canRiskPermanentLossOfAccess"
|
|
Requires: "canSuitlessMaridia"
{
"spikeHits": 2
}
|
|
Requires: "canSuitlessMaridia" "canCarefulJump" |
|
Requires: {
"or": [
"Morph",
"Gravity",
"canSpaceJumpWaterBounce"
]
}
|
|
Wait for the first spike platform to fall, jump onto it, and use it to run and jump far enough through the room to trigger the fourth spike platform to fall. Fire a shot mid-air and activate the shinespark wind-up. Wait until the shot is at a specific position before sparking. Sparking too late will cause the shot to despawn before reaching the door. Sparking too early will cause Samus to bonk the door as it will not yet be open. A beam shot, Missile, or Super can be used. Entrance condition: {
"comeInShinecharged": {
"framesRequired": 115
}
}
Requires: "Gravity"
"canShinechargeMovementTricky"
"canHeroShot"
"canMidairShinespark"
{
"shinespark": {
"frames": 31
}
}
Exit condition: {
"leaveWithSpark": {
"position": "top"
}
}
|
|
Land on the floor, then jump and fire a shot mid-air and activate the shinespark wind-up. Wait until the shot is at a specific position before sparking. Sparking too late will cause the shot to despawn before reaching the door. Sparking too early will cause Samus to bonk the door as it will not yet be open. A beam shot, Missile, or Super can be used. Entrance condition: {
"comeInShinecharged": {
"framesRequired": 70
}
}
Requires: {
"not": "f_DefeatedPhantoon"
}
"canRiskPermanentLossOfAccess"
"canShinechargeMovementTricky"
"canHeroShot"
"canMidairShinespark"
{
"shinespark": {
"frames": 37
}
}
Exit condition: {
"leaveWithSpark": {}
}
|
|
Entrance condition: {
"comeInShinecharging": {
"length": 0,
"openEnd": 1
}
}
Requires: {
"not": "f_DefeatedPhantoon"
}
"canRiskPermanentLossOfAccess"
"canShinechargeMovementComplex"
"canMidairShinespark"
{
"shinespark": {
"frames": 20
}
}
Exit condition: {
"leaveWithSpark": {}
}
|
|
From: 2
Right Door
To: 1
Left Door
Entrance condition: {
"comeInShinecharging": {
"length": 0,
"openEnd": 1
}
}
Requires: {
"not": "f_DefeatedPhantoon"
}
"canRiskPermanentLossOfAccess"
"canShinechargeMovementTricky"
"canMidairShinespark"
{
"shinespark": {
"frames": 8
}
}
Exit condition: {
"leaveWithSpark": {}
}
|
|
Entrance condition: {
"comeInWithGrappleTeleport": {
"blockPositions": [
[
3,
13
]
]
}
}
Bypasses door shell: true |
|
Entrance condition: {
"comeInWithGrappleTeleport": {
"blockPositions": [
[
3,
13
]
]
}
}
Exit condition: {
"leaveWithGrappleTeleport": {
"blockPositions": [
[
3,
13
]
]
}
}
Bypasses door shell: true |
|
Exit condition: {
"leaveWithRunway": {
"length": 1,
"openEnd": 1
}
}
|
|
Jumping from the door and bouncing on the platform enemy works pretty well. Requires: "f_DefeatedPhantoon"
"h_canXMode"
"h_XModeSpikeHit"
"h_XModeSpikeHit"
"Gravity"
{
"canShineCharge": {
"usedTiles": 33,
"openEnd": 2
}
}
"canShinechargeMovement"
Exit condition: {
"leaveShinecharged": {
"framesRemaining": 80
}
}
|
|
Requires: "h_canCrystalFlash" |
{
"$schema": "../../../schema/m3-room.schema.json",
"id": 165,
"name": "Spiky Death Room",
"area": "Wrecked Ship",
"subarea": "Main",
"playable": true,
"roomAddress": "0x7CB8B",
"roomEnvironments": [
{
"heated": false
}
],
"nodes": [
{
"id": 1,
"name": "Left Door",
"nodeType": "door",
"nodeSubType": "blue",
"nodeAddress": "0x001a24c",
"doorEnvironments": [
{
"physics": "air"
}
]
},
{
"id": 2,
"name": "Right Door",
"nodeType": "door",
"nodeSubType": "blue",
"nodeAddress": "0x001a258",
"doorEnvironments": [
{
"physics": "air"
}
]
}
],
"enemies": [],
"links": [
{
"from": 1,
"to": [
{
"id": 1
},
{
"id": 2
}
]
},
{
"from": 2,
"to": [
{
"id": 1
},
{
"id": 2
}
]
}
],
"strats": [
{
"link": [
1,
1
],
"name": "Leave with Runway",
"requires": [],
"exitCondition": {
"leaveWithRunway": {
"length": 1,
"openEnd": 1
}
}
},
{
"link": [
1,
1
],
"name": "Leave Shinecharged, X-Mode",
"requires": [
"f_DefeatedPhantoon",
"h_canXMode",
"h_XModeSpikeHit",
"h_XModeSpikeHit",
"Gravity",
{
"canShineCharge": {
"usedTiles": 33,
"openEnd": 2
}
},
"canShinechargeMovement"
],
"exitCondition": {
"leaveShinecharged": {
"framesRemaining": 80
}
},
"note": "Jumping from the door and bouncing on the platform enemy works pretty well.",
"devNote": "Two spike hits are expected per attempt (with any additional leniency hits being multiplied by this amount)."
},
{
"link": [
1,
1
],
"name": "Crystal Flash",
"requires": [
"h_canCrystalFlash"
]
},
{
"link": [
1,
2
],
"name": "Hero Shot Shinespark",
"entranceCondition": {
"comeInShinecharged": {
"framesRequired": 85
}
},
"requires": [
"Gravity",
"canShinechargeMovementTricky",
"canHeroShot",
"canMidairShinespark",
{
"shinespark": {
"frames": 31
}
}
],
"exitCondition": {
"leaveWithSpark": {}
},
"unlocksDoors": [
{
"types": [
"super"
],
"requires": []
},
{
"types": [
"missiles",
"powerbomb"
],
"requires": [
"never"
]
}
],
"note": [
"Land on the first spike platform, and use it to run and jump far enough through the room to trigger the fourth spike platform to fall.",
"Fire a shot mid-air and activate the shinespark wind-up.",
"Wait until the shot is at a specific position before sparking.",
"Sparking too late will cause the shot to despawn before reaching the door.",
"Sparking too early will cause Samus to bonk the door as it will not yet be open.",
"A beam shot, Missile, or Super can be used."
]
},
{
"link": [
1,
2
],
"name": "Hero Shot Shinespark (Power Off)",
"entranceCondition": {
"comeInShinecharged": {
"framesRequired": 70
}
},
"requires": [
{
"not": "f_DefeatedPhantoon"
},
"canRiskPermanentLossOfAccess",
"canShinechargeMovementTricky",
"canHeroShot",
"canMidairShinespark",
{
"shinespark": {
"frames": 37
}
}
],
"exitCondition": {
"leaveWithSpark": {}
},
"unlocksDoors": [
{
"types": [
"super"
],
"requires": []
},
{
"types": [
"missiles",
"powerbomb"
],
"requires": [
"never"
]
}
],
"note": [
"Land on the floor, then jump and fire a shot mid-air and activate the shinespark wind-up.",
"Wait until the shot is at a specific position before sparking.",
"Sparking too late will cause the shot to despawn before reaching the door.",
"Sparking too early will cause Samus to bonk the door as it will not yet be open.",
"A beam shot, Missile, or Super can be used."
]
},
{
"link": [
1,
2
],
"name": "Leave With Shinespark (Power Off)",
"entranceCondition": {
"comeInShinecharging": {
"length": 0,
"openEnd": 1
}
},
"requires": [
{
"not": "f_DefeatedPhantoon"
},
"canRiskPermanentLossOfAccess",
"canShinechargeMovementComplex",
"canMidairShinespark",
{
"shinespark": {
"frames": 20
}
}
],
"exitCondition": {
"leaveWithSpark": {}
},
"unlocksDoors": [
{
"types": [
"super"
],
"requires": []
},
{
"types": [
"missiles",
"powerbomb"
],
"requires": [
"never"
]
}
]
},
{
"link": [
1,
2
],
"name": "Leave With Shinespark (Power Off, Fast Movement)",
"entranceCondition": {
"comeInShinecharging": {
"length": 0,
"openEnd": 1
}
},
"requires": [
{
"not": "f_DefeatedPhantoon"
},
"canRiskPermanentLossOfAccess",
"canShinechargeMovementTricky",
"canMidairShinespark",
{
"shinespark": {
"frames": 8
}
}
],
"exitCondition": {
"leaveWithSpark": {}
},
"unlocksDoors": [
{
"types": [
"super"
],
"requires": []
},
{
"types": [
"missiles",
"powerbomb"
],
"requires": [
"never"
]
}
]
},
{
"link": [
1,
2
],
"name": "Unpowered",
"requires": [
{
"not": "f_DefeatedPhantoon"
},
"canRiskPermanentLossOfAccess"
]
},
{
"link": [
1,
2
],
"name": "Base",
"requires": [
"canSuitlessMaridia",
{
"spikeHits": 2
}
]
},
{
"link": [
1,
2
],
"name": "Naked Spiky Death Room (Left to Right)",
"requires": [
"canSuitlessMaridia",
"canCarefulJump"
]
},
{
"link": [
1,
2
],
"name": "Passage With Assist",
"requires": [
{
  "or": [
    "Morph",
    "Gravity",
    "canSpaceJumpWaterBounce"
  ]
}
],
"devNote": "The room is considerably more forgiving with Morph, Gravity, or Space Jump so this is there as an alternate strat."
},
{
"link": [
2,
1
],
"name": "Unpowered",
"requires": [
{
"not": "f_DefeatedPhantoon"
},
"canRiskPermanentLossOfAccess"
]
},
{
"link": [
2,
1
],
"name": "Base",
"requires": [
"canSuitlessMaridia",
{
"spikeHits": 2
}
]
},
{
"link": [
2,
1
],
"name": "Naked Spiky Death Room (Right to Left)",
"requires": [
"canSuitlessMaridia",
"canCarefulJump"
]
},
{
"link": [
2,
1
],
"name": "Passage With Assist",
"requires": [
{
  "or": [
    "Morph",
    "Gravity",
    "canSpaceJumpWaterBounce"
  ]
}
],
"devNote": "The room is considerably more forgiving with Morph, Gravity, or Space Jump so this is there as an alternate strat."
},
{
"link": [
2,
1
],
"name": "Hero Shot Shinespark",
"entranceCondition": {
"comeInShinecharged": {
"framesRequired": 115
}
},
"requires": [
"Gravity",
"canShinechargeMovementTricky",
"canHeroShot",
"canMidairShinespark",
{
"shinespark": {
"frames": 31
}
}
],
"exitCondition": {
"leaveWithSpark": {
"position": "top"
}
},
"unlocksDoors": [
{
"types": [
"super"
],
"requires": []
},
{
"types": [
"missiles",
"powerbomb"
],
"requires": [
"never"
]
}
],
"note": [
"Wait for the first spike platform to fall, jump onto it, and use it to run and jump far enough through the room to trigger the fourth spike platform to fall.",
"Fire a shot mid-air and activate the shinespark wind-up.",
"Wait until the shot is at a specific position before sparking.",
"Sparking too late will cause the shot to despawn before reaching the door.",
"Sparking too early will cause Samus to bonk the door as it will not yet be open.",
"A beam shot, Missile, or Super can be used."
]
},
{
"link": [
2,
1
],
"name": "Hero Shot Shinespark (Power Off)",
"entranceCondition": {
"comeInShinecharged": {
"framesRequired": 70
}
},
"requires": [
{
"not": "f_DefeatedPhantoon"
},
"canRiskPermanentLossOfAccess",
"canShinechargeMovementTricky",
"canHeroShot",
"canMidairShinespark",
{
"shinespark": {
"frames": 37
}
}
],
"exitCondition": {
"leaveWithSpark": {}
},
"unlocksDoors": [
{
"types": [
"super"
],
"requires": []
},
{
"types": [
"missiles",
"powerbomb"
],
"requires": [
"never"
]
}
],
"note": [
"Land on the floor, then jump and fire a shot mid-air and activate the shinespark wind-up.",
"Wait until the shot is at a specific position before sparking.",
"Sparking too late will cause the shot to despawn before reaching the door.",
"Sparking too early will cause Samus to bonk the door as it will not yet be open.",
"A beam shot, Missile, or Super can be used."
]
},
{
"link": [
2,
1
],
"name": "Leave With Shinespark (Power Off)",
"entranceCondition": {
"comeInShinecharging": {
"length": 0,
"openEnd": 1
}
},
"requires": [
{
"not": "f_DefeatedPhantoon"
},
"canRiskPermanentLossOfAccess",
"canShinechargeMovementComplex",
"canMidairShinespark",
{
"shinespark": {
"frames": 20
}
}
],
"exitCondition": {
"leaveWithSpark": {}
},
"unlocksDoors": [
{
"types": [
"super"
],
"requires": []
},
{
"types": [
"missiles",
"powerbomb"
],
"requires": [
"never"
]
}
]
},
{
"link": [
2,
1
],
"name": "Leave With Shinespark (Power Off, Fast Movement)",
"entranceCondition": {
"comeInShinecharging": {
"length": 0,
"openEnd": 1
}
},
"requires": [
{
"not": "f_DefeatedPhantoon"
},
"canRiskPermanentLossOfAccess",
"canShinechargeMovementTricky",
"canMidairShinespark",
{
"shinespark": {
"frames": 8
}
}
],
"exitCondition": {
"leaveWithSpark": {}
},
"unlocksDoors": [
{
"types": [
"super"
],
"requires": []
},
{
"types": [
"missiles",
"powerbomb"
],
"requires": [
"never"
]
}
]
},
{
"link": [
2,
1
],
"name": "Grapple Teleport Door Lock Skip",
"entranceCondition": {
"comeInWithGrappleTeleport": {
"blockPositions": [
[
3,
13
]
]
}
},
"requires": [],
"bypassesDoorShell": true
},
{
"link": [
2,
1
],
"name": "Carry Grapple Teleport",
"entranceCondition": {
"comeInWithGrappleTeleport": {
"blockPositions": [
[
3,
13
]
]
}
},
"requires": [],
"bypassesDoorShell": true,
"exitCondition": {
"leaveWithGrappleTeleport": {
"blockPositions": [
[
3,
13
]
]
}
}
},
{
"link": [
2,
2
],
"name": "Leave with Runway",
"requires": [],
"exitCondition": {
"leaveWithRunway": {
"length": 1,
"openEnd": 1
}
}
},
{
"link": [
2,
2
],
"name": "Leave Shinecharged, X-Mode",
"requires": [
"f_DefeatedPhantoon",
"h_canXMode",
"h_XModeSpikeHit",
"h_XModeSpikeHit",
"Gravity",
{
"canShineCharge": {
"usedTiles": 33,
"openEnd": 2
}
},
"canShinechargeMovement"
],
"exitCondition": {
"leaveShinecharged": {
"framesRemaining": 80
}
},
"note": "Jumping from the door and bouncing on the platform enemy works pretty well.",
"devNote": "Two spike hits are expected per attempt (with any additional leniency hits being multiplied by this amount)."
},
{
"link": [
2,
2
],
"name": "Crystal Flash",
"requires": [
"h_canCrystalFlash"
]
}
]
}