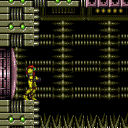
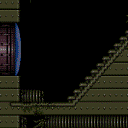
Bowling Alley
Room ID: 161
|
Requires: "f_DefeatedPhantoon" Exit condition: {
"leaveWithRunway": {
"length": 45,
"openEnd": 1
}
}
|
|
Exit condition: {
"leaveWithRunway": {
"length": 28,
"openEnd": 0
}
}
|
|
From: 1
Top Left Door
To: 1
Top Left Door
Requires: {
"or": [
{
"canShineCharge": {
"usedTiles": 28,
"openEnd": 0
}
},
{
"and": [
{
"canShineCharge": {
"usedTiles": 29,
"openEnd": 0
}
},
{
"doorUnlockedAtNode": 1
}
]
}
]
}
Exit condition: {
"leaveWithRunway": {
"length": 45,
"openEnd": 1
}
}
|
|
Entrance condition: {
"comeInShinecharging": {
"length": 29,
"openEnd": 0
}
}
Exit condition: {
"leaveWithRunway": {
"length": 45,
"openEnd": 1
}
}
|
|
From: 1
Top Left Door
To: 1
Top Left Door
Entrance condition: {
"comeInWithSpark": {}
}
Requires: {
"shinespark": {
"frames": 71,
"excessFrames": 21
}
}
Exit condition: {
"leaveWithRunway": {
"length": 45,
"openEnd": 1
}
}
|
|
Requires: "h_canCrystalFlash" |
|
From: 1
Top Left Door
To: 1
Top Left Door
Notable: true 
Use SpeedBooster to construct a structure for Moondancing that has 1 chest height block and 1 head height block to the right of it and no other Speed blocks. Crystal Flash below the lower block, exactly pixel aligned with its right side, to standup and then begin Moondancing. After Samus sinks through the bottom tile, it is possible to use Grapple to return to a crouch and wiggle right and then Turn-Around Aim Cancel to escape to the right. Without Grapple, count to 174 Moonfalls and delicately Moonfall so as to remain crouched and then wiggle to the right. Finally, shortcharge to break the remaining Speed blocks and reach the door. Requires: "h_canCrystalFlash"
"canTrickyJump"
"canTurnaroundAimCancel"
"canTemporaryBlue"
"canSpeedball"
"canMoondance"
{
"canShineCharge": {
"openEnd": 0,
"usedTiles": 16,
"steepDownTiles": 4
}
}
Exit condition: {
"leaveWithStoredFallSpeed": {
"fallSpeedInTiles": 1
}
}
|
|
From: 1
Top Left Door
To: 1
Top Left Door
Notable: true
Use SpeedBooster to construct a structure for Moondancing that has 1 chest height block and 1 head height block to the right of it and no other Speed blocks. Crystal Flash below the lower block, exactly pixel aligned with its right side, to standup and then begin Moondancing. After Samus sinks through the floor tiles, use Grapple to return to a standing position and count an additional 145 moonfalls. Then use Grapple to return to a crouch and wiggle right and Turn-Around Aim Cancel to escape to the right. Finally, shortcharge to break the remaining Speed blocks and reach the door. Requires: "h_canCrystalFlash"
"canTrickyJump"
"canTurnaroundAimCancel"
"canTemporaryBlue"
"canExtendedMoondance"
"canSpeedball"
"Grapple"
{
"canShineCharge": {
"openEnd": 0,
"usedTiles": 16,
"steepDownTiles": 4
}
}
Exit condition: {
"leaveWithStoredFallSpeed": {
"fallSpeedInTiles": 2
}
}
|
|
From: 1
Top Left Door
To: 5
Top Right Item (locked)
Notable: true
Use SpeedBooster to construct a structure for Moondancing that has 1 chest height block and 1 head height block to the right of it and no other Speed blocks. Crystal Flash below the lower block, exactly pixel aligned with its right side, to standup and then begin Moondancing. After Samus sinks through the bottom tile, it is possible to use Grapple to return to a crouch and wiggle right and then Turn-Around Aim Cancel to escape to the right. Without Grapple, count to 174 Moonfalls and delicately Moonfall so as to remain crouched and then wiggle to the right. The Camera will not follow Samus after clipping. Requires: "h_canCrystalFlash"
"canTrickyJump"
"canTurnaroundAimCancel"
"canTemporaryBlue"
"canMoondance"
"canSpeedball"
{
"canShineCharge": {
"openEnd": 0,
"usedTiles": 16,
"steepDownTiles": 4
}
}
Clears obstacles: B |
|
The camera will not follow Samus after clipping. Entrance condition: {
"comeInWithStoredFallSpeed": {
"fallSpeedInTiles": 1
}
}
Requires: "SpeedBooster" "canMoonfall" Clears obstacles: B |
|
Exit condition: {
"leaveWithRunway": {
"length": 3,
"openEnd": 1
}
}
|
|
From: 2
Middle Left Door
To: 2
Middle Left Door
Requires: "h_canXMode"
"h_XModeSpikeHit"
"h_XModeSpikeHit"
"h_XModeSpikeHit"
"canIframeSpikeJump"
{
"canShineCharge": {
"usedTiles": 33,
"openEnd": 2
}
}
"canShinechargeMovement"
Exit condition: {
"leaveShinecharged": {
"framesRemaining": 100
}
}
|
|
From: 2
Middle Left Door
To: 2
Middle Left Door
Requires: {
"not": "f_DefeatedPhantoon"
}
"canRiskPermanentLossOfAccess"
{
"canShineCharge": {
"usedTiles": 33,
"openEnd": 2
}
}
"canShinechargeMovement"
Exit condition: {
"leaveShinecharged": {
"framesRemaining": 140
}
}
|
|
Requires: "h_canCrystalFlash" |
|
Requires: "Grapple" |
|
Requires: "SpaceJump" |
|
From: 2
Middle Left Door
To: 6
Bowling Chozo Statue (locked)
Start with Springball disabled. Jump over the spikes and midair morph. SpringFling on the way down, SpringBall bounce through the spikes, then SpringFling again to reach the statue taking only one spike hit. Entrance condition: {
"comeInRunning": {
"minTiles": 12,
"speedBooster": true
}
}
Requires: "canTrickyJump"
"canSpringFling"
"canLateralMidAirMorph"
"canIframeSpikeJump"
{
"spikeHits": 1
}
|
|
From: 2
Middle Left Door
To: 6
Bowling Chozo Statue (locked)
This is doable even without any momentum from a previous room, but pretty tight. Requires: "canTrickyJump"
"canIframeSpikeJump"
{
"spikeHits": 2
}
|
|
From: 2
Middle Left Door
To: 6
Bowling Chozo Statue (locked)
A bit easier than 2-hit bowling Requires: "canCarefulJump"
"canIframeSpikeJump"
"SpeedBooster"
{
"spikeHits": 2
}
|
|
Requires: "canIframeSpikeJump"
{
"spikeHits": 3
}
|
|
From: 2
Middle Left Door
To: 6
Bowling Chozo Statue (locked)
Requires: {
"spikeHits": 6
}
|
|
Entrance condition: {
"comeInWithSpark": {}
}
Requires: {
"shinespark": {
"frames": 91,
"excessFrames": 8
}
}
|
|
Move in X-Mode until the Chozo Statue becomes visible and then jump before releasing XRay. Requires: "h_canXMode" "h_XModeSpikeHit" |
|
From: 2
Middle Left Door
To: 6
Bowling Chozo Statue (locked)
Notable: true 
This is a very long ceiling bomb jump. Requires: "h_canCeilingBombJump" "canLongCeilingBombJump" "canBeVeryPatient" |
|
Notable: true 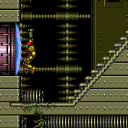
Climb up about half a screen. If Phantoon is dead, the last part of the climb should be done carefully to avoid triggering collision with the spikes: Do not press forward or turn-around except while X-Ray is active. For each X-ray stand-up, release the turn-around input quickly to make sure that it is not still held after X-Ray deactivates. Once Samus is high enough, unequip X-Ray, jump up (from either standing or crouch) to clip past the spikes, and land, taking a single spike hit. Then use the i-frames from the spike hit to run and jump to the left to make it to the door. Samus is high enough after the top of her arm cannon first becomes visible at the bottom of the screen; or up to 3 additional climbs can be performed after that point. In case of an accidental spike collision, it is possible to recover: Unless Samus climbed higher than needed, she will still be stuck in the wall, will take a single spike hit, and be able to continue climbing. With Grapple it is possible to swing on the Grapple blocks, avoiding all spike damage. Spike damage can also be avoided with Space Jump, by doing a stationary turn-around spin jump, which is very precise. Entrance condition: {
"comeInWithDoorStuckSetup": {}
}
Requires: "canXRayClimb"
{
"or": [
{
"and": [
{
"spikeHits": 3
},
{
"resourceCapacity": [
{
"type": "RegularEnergy",
"count": 199
}
]
}
]
},
{
"and": [
{
"not": "f_DefeatedPhantoon"
},
"canRiskPermanentLossOfAccess"
]
},
{
"and": [
"canOffScreenMovement",
{
"or": [
{
"spikeHits": 1
},
"Grapple",
{
"and": [
"SpaceJump",
"canInsaneJump",
"canBeVeryPatient"
]
}
]
}
]
}
]
}
|
|
Exit condition: {
"leaveWithRunway": {
"length": 1,
"openEnd": 1
}
}
|
|
Requires: "h_canCrystalFlash" |
|
If using PBs, place it far enough right to reach the shot blocks. Requires: "h_canBombThings" |
|
Plasma or Charged Spazer can reach the shot blocks through the tunnel while crouched. Requires: "ScrewAttack" "Morph" "Plasma" |
|
From: 3
Bottom Left Door
To: 4
Bottom Chozo Item (locked)
Notable: true 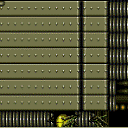

Break the shot blocks with Power Beam by first rolling into the morph tunnel to unlock camera scroll for this room. The blocks can now be cleared from the left side by shooting and quickly scrolling the camera to the right a small amount. A shot from crouch will reach the bottom block by following the shot as a ball, or wave beam works from the stairs. Screw Attack is still needed to clear the bomb blocks. Requires: "ScrewAttack" "Morph" "canCameraManip" |
|
The bomb block respawns. It must be broken on the way back too. Requires: "h_canBombThings"
{
"obstaclesNotCleared": [
"B"
]
}
|
|
From: 4
Bottom Chozo Item (locked)
To: 3
Bottom Left Door
Use Temporary Blue to bounce into the Morph Tunnel with temp blue then continue to the bomb block using SpringBall. Just left of center of the pit is a good place to bounce for entering the tunnel. Requires either a tight shortcharge or clearing the power bomb blocks to open up more runway. Requires: {
"obstaclesNotCleared": [
"B"
]
}
"h_canUseSpringBall"
"canTemporaryBlue"
"canCarefulJump"
{
"or": [
{
"and": [
"f_DefeatedPhantoon",
{
"canShineCharge": {
"usedTiles": 16,
"openEnd": 0
}
}
]
},
{
"and": [
{
"obstaclesCleared": [
"A"
]
},
{
"canShineCharge": {
"usedTiles": 33,
"openEnd": 2
}
},
{
"or": [
"f_DefeatedPhantoon",
"canMockball"
]
}
]
}
]
}
|
|
The shot blocks must be broken using Bombs or Power Bombs because Beams will instantly despawn. Use X-Ray or a Crystal Flash to stand up, followed by a Partial Floor clip to jump through the Crumble blocks. Requires: {
"obstaclesCleared": [
"B"
]
}
"h_canBombThings"
"canOffScreenMovement"
{
"or": [
{
"and": [
"canXRayStandUp",
"canPartialFloorClip",
"h_additionalBomb"
]
},
{
"and": [
{
"or": [
{
"and": [
"SpeedBooster",
"h_ShinesparksCostEnergy"
]
},
"f_DefeatedPhantoon"
]
},
"h_canCrystalFlash"
]
}
]
}
|
|
From: 4
Bottom Chozo Item (locked)
To: 5
Top Right Item (locked)
Requires: {
"canShineCharge": {
"usedTiles": 33,
"openEnd": 2
}
}
{
"shinespark": {
"frames": 40
}
}
{
"obstaclesCleared": [
"A"
]
}
|
|
From: 4
Bottom Chozo Item (locked)
To: 5
Top Right Item (locked)
Requires: {
"canShineCharge": {
"usedTiles": 33,
"openEnd": 2
}
}
{
"shinespark": {
"frames": 40
}
}
"h_canUsePowerBombs"
Clears obstacles: A |
|
From: 5
Top Right Item (locked)
To: 1
Top Left Door
Menu to Grappling Beam before the crystal flash ends and mash shoot while holding down. Requires: "h_canJumpIntoCrystalFlashClip"
"Grapple"
{
"obstaclesNotCleared": [
"B"
]
}
|
|
From: 5
Top Right Item (locked)
To: 1
Top Left Door
Fall through the Crumble blocks in order to damage down using either the spikes or repeated Shinesparks. Touching the Chozo statue will lock the camera in a less useful position. Menu to Grappling Beam before the crystal flash ends and mash shoot while holding down. Requires: {
"obstaclesCleared": [
"B"
]
}
"h_ShinesparksCostEnergy"
"h_canJumpIntoCrystalFlashClip"
"Grapple"
"canOffScreenMovement"
{
"canShineCharge": {
"usedTiles": 25,
"openEnd": 1
}
}
|
|
Requires: {
"obstaclesCleared": [
"A"
]
}
{
"or": [
{
"obstaclesNotCleared": [
"B"
]
},
"canOffScreenMovement"
]
}
|
|
From: 5
Top Right Item (locked)
To: 4
Bottom Chozo Item (locked)
Requires: "h_canUsePowerBombs"
{
"or": [
{
"obstaclesNotCleared": [
"B"
]
},
"canOffScreenMovement"
]
}
Clears obstacles: A |
|
Requires: "f_DefeatedPhantoon" "Morph" |
|
The item doesn't spawn until Phantoon is defeated. Requires: {
"or": [
"f_DefeatedPhantoon",
"h_AllItemsSpawned"
]
}
|
|
|
|
The item doesn't spawn until Phantoon is defeated. Requires: {
"or": [
"f_DefeatedPhantoon",
"h_AllItemsSpawned"
]
}
|
|
|
|
From: 6
Bowling Chozo Statue (locked)
To: 9
Bowling Chozo Statue (unlocked)
|
|
From: 9
Bowling Chozo Statue (unlocked)
To: 6
Bowling Chozo Statue (locked)
|
{
"$schema": "../../../schema/m3-room.schema.json",
"id": 161,
"name": "Bowling Alley",
"area": "Wrecked Ship",
"subarea": "Main",
"playable": true,
"roomAddress": "0x7C98E",
"roomEnvironments": [
{
"heated": false
}
],
"nodes": [
{
"id": 1,
"name": "Top Left Door",
"nodeType": "door",
"nodeSubType": "blue",
"nodeAddress": "0x001a18c",
"doorEnvironments": [
{
"physics": "air"
}
]
},
{
"id": 2,
"name": "Middle Left Door",
"nodeType": "door",
"nodeSubType": "blue",
"nodeAddress": "0x001a198",
"doorEnvironments": [
{
"physics": "air"
}
],
"locks": [
{
"name": "Bowling Alley Top Left Grey Lock (to West Ocean Lower)",
"lockType": "permanent",
"lock": [
"f_DefeatedPhantoon"
],
"unlockStrats": [
{
"name": "Base",
"notable": false,
"requires": [
"never"
]
}
]
}
]
},
{
"id": 3,
"name": "Bottom Left Door",
"nodeType": "door",
"nodeSubType": "blue",
"nodeAddress": "0x001a1a4",
"doorEnvironments": [
{
"physics": "air"
}
]
},
{
"id": 4,
"name": "Bottom Chozo Item (locked)",
"nodeType": "junction",
"nodeSubType": "visible",
"nodeItem": "Missile",
"nodeAddress": "0x7C2EF"
},
{
"id": 5,
"name": "Top Right Item (locked)",
"nodeType": "junction",
"nodeSubType": "chozo",
"nodeItem": "ReserveTank",
"nodeAddress": "0x7C2E9"
},
{
"id": 6,
"name": "Bowling Chozo Statue (locked)",
"nodeType": "junction",
"nodeSubType": "junction"
},
{
"id": 7,
"name": "Bottom Chozo Item (unlocked)",
"nodeType": "item",
"nodeSubType": "visible",
"nodeItem": "Missile",
"nodeAddress": "0x7C2EF"
},
{
"id": 8,
"name": "Top Right Item (unlocked)",
"nodeType": "item",
"nodeSubType": "chozo",
"nodeItem": "ReserveTank",
"nodeAddress": "0x7C2E9"
},
{
"id": 9,
"name": "Bowling Chozo Statue (unlocked)",
"nodeType": "junction",
"nodeSubType": "junction",
"yields": [
"f_UsedBowlingStatue"
]
}
],
"obstacles": [
{
"id": "A",
"name": "Destructible Chozo Statue",
"obstacleType": "inanimate"
},
{
"id": "B",
"name": "Traversing the Room Backwards",
"obstacleType": "abstract",
"note": "Clipping to the reserve location means the camera does not follow Samus and the crumble blocks are not broken."
}
],
"enemies": [
{
"id": "e1",
"groupName": "Bowling Alley Workrobots",
"enemyName": "Workrobot",
"quantity": 2,
"betweenNodes": [
3,
4
],
"spawn": [
"f_DefeatedPhantoon"
]
}
],
"reusableRoomwideNotable": [
{
"name": "Bowling Alley Speed Block Moondance",
"note": [
"Use SpeedBooster to construct a structure for Moondancing that has 2 top blocks intact, 2 middle blocks removed, and the bottom left block intact but the bottom right block removed.",
"Crystal Flash inside the middle hole to standup and then begin Moondancing.",
"After Samus sinks through the bottom tile, it is possible to wiggle right and then Turn-Around Aim Cancel to escape to the right."
]
}
],
"links": [
{
"from": 1,
"to": [
{
"id": 1
},
{
"id": 5
}
]
},
{
"from": 2,
"to": [
{
"id": 2
},
{
"id": 6
}
]
},
{
"from": 3,
"to": [
{
"id": 2
},
{
"id": 3
},
{
"id": 4
}
]
},
{
"from": 4,
"to": [
{
"id": 3
},
{
"id": 5
}
]
},
{
"from": 5,
"to": [
{
"id": 1
},
{
"id": 4
}
]
},
{
"from": 6,
"to": [
{
"id": 3
}
]
}
],
"strats": [
{
"link": [
1,
1
],
"name": "Leave with Runway, Conveyor On",
"requires": [
"f_DefeatedPhantoon"
],
"exitCondition": {
"leaveWithRunway": {
"length": 45,
"openEnd": 1
}
}
},
{
"link": [
1,
1
],
"name": "Leave with Runway",
"requires": [],
"exitCondition": {
"leaveWithRunway": {
"length": 28,
"openEnd": 0
}
}
},
{
"link": [
1,
1
],
"name": "Leave with Runway, Break Speed Blocks",
"requires": [
{
  "or": [
    {
      "canShineCharge": {
        "usedTiles": 28,
        "openEnd": 0
      }
    },
    {
      "and": [
        {
          "canShineCharge": {
            "usedTiles": 29,
            "openEnd": 0
          }
        },
        {
          "doorUnlockedAtNode": 1
        }
      ]
    }
  ]
}
],
"exitCondition": {
"leaveWithRunway": {
"length": 45,
"openEnd": 1
}
}
},
{
"link": [
1,
1
],
"name": "Leave with Runway, Enter with Speed",
"entranceCondition": {
"comeInShinecharging": {
"length": 29,
"openEnd": 0
}
},
"requires": [],
"exitCondition": {
"leaveWithRunway": {
"length": 45,
"openEnd": 1
}
},
"unlocksDoors": [
{
"types": [
"ammo"
],
"requires": []
}
]
},
{
"link": [
1,
1
],
"name": "Leave with Runway (Enter with Shinespark to Break the Blocks)",
"entranceCondition": {
"comeInWithSpark": {}
},
"requires": [
{
  "shinespark": {
    "frames": 71,
    "excessFrames": 21
  }
}
],
"exitCondition": {
"leaveWithRunway": {
"length": 45,
"openEnd": 1
}
},
"unlocksDoors": [
{
"types": [
"ammo"
],
"requires": []
}
]
},
{
"link": [
1,
1
],
"name": "Crystal Flash",
"requires": [
"h_canCrystalFlash"
]
},
{
"link": [
1,
1
],
"name": "Bowling Alley Speed Block Moondance (Leave with Stored Fall Speed)",
"notable": true,
"requires": [
"h_canCrystalFlash",
"canTrickyJump",
"canTurnaroundAimCancel",
"canTemporaryBlue",
"canSpeedball",
"canMoondance",
{
"canShineCharge": {
"openEnd": 0,
"usedTiles": 16,
"steepDownTiles": 4
}
}
],
"exitCondition": {
"leaveWithStoredFallSpeed": {
"fallSpeedInTiles": 1
}
},
"reusableRoomwideNotable": "Bowling Alley Speed Block Moondance",
"note": [
"Use SpeedBooster to construct a structure for Moondancing that has 1 chest height block and 1 head height block to the right of it and no other Speed blocks.",
"Crystal Flash below the lower block, exactly pixel aligned with its right side, to standup and then begin Moondancing.",
"After Samus sinks through the bottom tile, it is possible to use Grapple to return to a crouch and wiggle right and then Turn-Around Aim Cancel to escape to the right.",
"Without Grapple, count to 174 Moonfalls and delicately Moonfall so as to remain crouched and then wiggle to the right.",
"Finally, shortcharge to break the remaining Speed blocks and reach the door."
]
},
{
"link": [
1,
1
],
"name": "Bowling Alley Speed Block Moondance (Leave with More Stored Fall Speed)",
"notable": true,
"requires": [
"h_canCrystalFlash",
"canTrickyJump",
"canTurnaroundAimCancel",
"canTemporaryBlue",
"canExtendedMoondance",
"canSpeedball",
"Grapple",
{
"canShineCharge": {
"openEnd": 0,
"usedTiles": 16,
"steepDownTiles": 4
}
}
],
"exitCondition": {
"leaveWithStoredFallSpeed": {
"fallSpeedInTiles": 2
}
},
"reusableRoomwideNotable": "Bowling Alley Speed Block Moondance",
"note": [
"Use SpeedBooster to construct a structure for Moondancing that has 1 chest height block and 1 head height block to the right of it and no other Speed blocks.",
"Crystal Flash below the lower block, exactly pixel aligned with its right side, to standup and then begin Moondancing.",
"After Samus sinks through the floor tiles, use Grapple to return to a standing position and count an additional 145 moonfalls.",
"Then use Grapple to return to a crouch and wiggle right and Turn-Around Aim Cancel to escape to the right.",
"Finally, shortcharge to break the remaining Speed blocks and reach the door."
]
},
{
"link": [
1,
5
],
"name": "Bowling Alley Speed Block Moondance (Moonfall Clip)",
"notable": true,
"requires": [
"h_canCrystalFlash",
"canTrickyJump",
"canTurnaroundAimCancel",
"canTemporaryBlue",
"canMoondance",
"canSpeedball",
{
"canShineCharge": {
"openEnd": 0,
"usedTiles": 16,
"steepDownTiles": 4
}
}
],
"clearsObstacles": [
"B"
],
"reusableRoomwideNotable": "Bowling Alley Speed Block Moondance",
"note": [
"Use SpeedBooster to construct a structure for Moondancing that has 1 chest height block and 1 head height block to the right of it and no other Speed blocks.",
"Crystal Flash below the lower block, exactly pixel aligned with its right side, to standup and then begin Moondancing.",
"After Samus sinks through the bottom tile, it is possible to use Grapple to return to a crouch and wiggle right and then Turn-Around Aim Cancel to escape to the right.",
"Without Grapple, count to 174 Moonfalls and delicately Moonfall so as to remain crouched and then wiggle to the right.",
"The Camera will not follow Samus after clipping."
]
},
{
"link": [
1,
5
],
"name": "Stored Moonfall Clip",
"entranceCondition": {
"comeInWithStoredFallSpeed": {
"fallSpeedInTiles": 1
}
},
"requires": [
"SpeedBooster",
"canMoonfall"
],
"clearsObstacles": [
"B"
],
"note": "The camera will not follow Samus after clipping."
},
{
"link": [
2,
2
],
"name": "Leave with Runway",
"requires": [],
"exitCondition": {
"leaveWithRunway": {
"length": 3,
"openEnd": 1
}
}
},
{
"link": [
2,
2
],
"name": "Leave Shinecharged (X-Mode or Phantoon Alive)",
"requires": [
"h_canXMode",
"h_XModeSpikeHit",
"h_XModeSpikeHit",
"h_XModeSpikeHit",
"canIframeSpikeJump",
{
"canShineCharge": {
"usedTiles": 33,
"openEnd": 2
}
},
"canShinechargeMovement"
],
"exitCondition": {
"leaveShinecharged": {
"framesRemaining": 100
}
},
"devNote": "Three spike hits are expected per attempt (with any additional leniency hits being multiplied by this amount)."
},
{
"link": [
2,
2
],
"name": "Leave Shinecharged (Phantoon Alive)",
"requires": [
{
"not": "f_DefeatedPhantoon"
},
"canRiskPermanentLossOfAccess",
{
"canShineCharge": {
"usedTiles": 33,
"openEnd": 2
}
},
"canShinechargeMovement"
],
"exitCondition": {
"leaveShinecharged": {
"framesRemaining": 140
}
}
},
{
"link": [
2,
2
],
"name": "Crystal Flash",
"requires": [
"h_canCrystalFlash"
]
},
{
"link": [
2,
6
],
"name": "Grapple",
"requires": [
"Grapple"
]
},
{
"link": [
2,
6
],
"name": "Space Jump",
"requires": [
"SpaceJump"
]
},
{
"link": [
2,
6
],
"name": "SpringFling Bowling",
"entranceCondition": {
"comeInRunning": {
"minTiles": 12,
"speedBooster": true
}
},
"requires": [
"canTrickyJump",
"canSpringFling",
"canLateralMidAirMorph",
"canIframeSpikeJump",
{
"spikeHits": 1
}
],
"note": [
"Start with Springball disabled. Jump over the spikes and midair morph.",
"SpringFling on the way down, SpringBall bounce through the spikes, then SpringFling again to reach the statue taking only one spike hit."
]
},
{
"link": [
2,
6
],
"name": "2-hit Bowling",
"requires": [
"canTrickyJump",
"canIframeSpikeJump",
{
"spikeHits": 2
}
],
"note": "This is doable even without any momentum from a previous room, but pretty tight."
},
{
"link": [
2,
6
],
"name": "2-hit Speed Bowling",
"requires": [
"canCarefulJump",
"canIframeSpikeJump",
"SpeedBooster",
{
"spikeHits": 2
}
],
"note": "A bit easier than 2-hit bowling"
},
{
"link": [
2,
6
],
"name": "3-hit Bowling",
"requires": [
"canIframeSpikeJump",
{
"spikeHits": 3
}
]
},
{
"link": [
2,
6
],
"name": "Bowling Spike Run",
"requires": [
{
  "spikeHits": 6
}
]
},
{
"link": [
2,
6
],
"name": "Shinespark",
"entranceCondition": {
"comeInWithSpark": {}
},
"requires": [
{
  "shinespark": {
    "frames": 91,
    "excessFrames": 8
  }
}
]
},
{
"link": [
2,
6
],
"name": "X-Mode",
"requires": [
"h_canXMode",
"h_XModeSpikeHit"
],
"note": "Move in X-Mode until the Chozo Statue becomes visible and then jump before releasing XRay."
},
{
"link": [
2,
6
],
"name": "Bowling Alley Ceiling Bomb Jump",
"notable": true,
"requires": [
"h_canCeilingBombJump",
"canLongCeilingBombJump",
"canBeVeryPatient"
],
"note": "This is a very long ceiling bomb jump."
},
{
"link": [
3,
2
],
"name": "Bowling Alley X-Ray Climb",
"notable": true,
"entranceCondition": {
"comeInWithDoorStuckSetup": {}
},
"requires": [
"canXRayClimb",
{
"or": [
{
"and": [
{
"spikeHits": 3
},
{
"resourceCapacity": [
{
"type": "RegularEnergy",
"count": 199
}
]
}
]
},
{
"and": [
{
"not": "f_DefeatedPhantoon"
},
"canRiskPermanentLossOfAccess"
]
},
{
"and": [
"canOffScreenMovement",
{
"or": [
{
"spikeHits": 1
},
"Grapple",
{
"and": [
"SpaceJump",
"canInsaneJump",
"canBeVeryPatient"
]
}
]
}
]
}
]
}
],
"note": [
"Climb up about half a screen.",
"If Phantoon is dead, the last part of the climb should be done carefully to avoid triggering collision with the spikes:",
"Do not press forward or turn-around except while X-Ray is active.",
"For each X-ray stand-up, release the turn-around input quickly to make sure that it is not still held after X-Ray deactivates.",
"Once Samus is high enough, unequip X-Ray, jump up (from either standing or crouch) to clip past the spikes, and land, taking a single spike hit.",
"Then use the i-frames from the spike hit to run and jump to the left to make it to the door.",
"Samus is high enough after the top of her arm cannon first becomes visible at the bottom of the screen; or up to 3 additional climbs can be performed after that point.",
"In case of an accidental spike collision, it is possible to recover:",
"Unless Samus climbed higher than needed, she will still be stuck in the wall, will take a single spike hit, and be able to continue climbing.",
"With Grapple it is possible to swing on the Grapple blocks, avoiding all spike damage.",
"Spike damage can also be avoided with Space Jump, by doing a stationary turn-around spin jump, which is very precise."
],
"devNote": [
"FIXME: The canBeVeryPatient is for difficulty placement, as the damageless Space Jump version would likely require many attempts.",
"The resourceCapacity requirement is to ensure that reserve energy management will not be needed for the lower-difficulty version of the strat;",
"this could be refined since suits can affect spike damage, but we don't yet have a good way to represent that cleanly, given that randomizers are likely to modify suit damage protection."
]
},
{
"link": [
3,
3
],
"name": "Leave with Runway",
"requires": [],
"exitCondition": {
"leaveWithRunway": {
"length": 1,
"openEnd": 1
}
}
},
{
"link": [
3,
3
],
"name": "Crystal Flash",
"requires": [
"h_canCrystalFlash"
]
},
{
"link": [
3,
4
],
"name": "Bomb the blocks",
"requires": [
"h_canBombThings"
],
"note": "If using PBs, place it far enough right to reach the shot blocks."
},
{
"link": [
3,
4
],
"name": "Long Beam and Screw",
"requires": [
"ScrewAttack",
"Morph",
"Plasma"
],
"note": "Plasma or Charged Spazer can reach the shot blocks through the tunnel while crouched.",
"devNote": [
"Plasma is somewhat known as a way to reach the blocks.",
"Charge+Spazer is not, and to shoot around the Bowling Chozo you would add Wave to make things more complicated.",
"If we're requiring strat knowledge here, camera unlock is more generally applicable.",
"A very precise wave shot from the stairs can also work but is much harder and less obvious than the camera unlock strat."
]
},
{
"link": [
3,
4
],
"name": "Bowling Alley Missile Chozo Camera Unlock",
"notable": true,
"requires": [
"ScrewAttack",
"Morph",
"canCameraManip"
],
"note": [
"Break the shot blocks with Power Beam by first rolling into the morph tunnel to unlock camera scroll for this room.",
"The blocks can now be cleared from the left side by shooting and quickly scrolling the camera to the right a small amount.",
"A shot from crouch will reach the bottom block by following the shot as a ball, or wave beam works from the stairs.",
"Screw Attack is still needed to clear the bomb blocks."
]
},
{
"link": [
4,
3
],
"name": "Base",
"requires": [
"h_canBombThings",
{
"obstaclesNotCleared": [
"B"
]
}
],
"note": "The bomb block respawns. It must be broken on the way back too."
},
{
"link": [
4,
3
],
"name": "Temporary Blue Bounce and SpringBall",
"requires": [
{
"obstaclesNotCleared": [
"B"
]
},
"h_canUseSpringBall",
"canTemporaryBlue",
"canCarefulJump",
{
"or": [
{
"and": [
"f_DefeatedPhantoon",
{
"canShineCharge": {
"usedTiles": 16,
"openEnd": 0
}
}
]
},
{
"and": [
{
"obstaclesCleared": [
"A"
]
},
{
"canShineCharge": {
"usedTiles": 33,
"openEnd": 2
}
},
{
"or": [
"f_DefeatedPhantoon",
"canMockball"
]
}
]
}
]
}
],
"note": [
"Use Temporary Blue to bounce into the Morph Tunnel with temp blue then continue to the bomb block using SpringBall.",
"Just left of center of the pit is a good place to bounce for entering the tunnel.",
"Requires either a tight shortcharge or clearing the power bomb blocks to open up more runway."
],
"devNote": "Killing phantoon only removes requirements for the strat."
},
{
"link": [
4,
3
],
"name": "Blind Traversal",
"requires": [
{
"obstaclesCleared": [
"B"
]
},
"h_canBombThings",
"canOffScreenMovement",
{
"or": [
{
"and": [
"canXRayStandUp",
"canPartialFloorClip",
"h_additionalBomb"
]
},
{
"and": [
{
"or": [
{
"and": [
"SpeedBooster",
"h_ShinesparksCostEnergy"
]
},
"f_DefeatedPhantoon"
]
},
"h_canCrystalFlash"
]
}
]
}
],
"note": [
"The shot blocks must be broken using Bombs or Power Bombs because Beams will instantly despawn.",
"Use X-Ray or a Crystal Flash to stand up, followed by a Partial Floor clip to jump through the Crumble blocks."
]
},
{
"link": [
4,
5
],
"name": "Chozo Statue Already Broken",
"requires": [
{
"canShineCharge": {
"usedTiles": 33,
"openEnd": 2
}
},
{
"shinespark": {
"frames": 40
}
},
{
"obstaclesCleared": [
"A"
]
}
]
},
{
"link": [
4,
5
],
"name": "Power Bomb the Chozo Statue",
"requires": [
{
"canShineCharge": {
"usedTiles": 33,
"openEnd": 2
}
},
{
"shinespark": {
"frames": 40
}
},
"h_canUsePowerBombs"
],
"clearsObstacles": [
"A"
]
},
{
"link": [
5,
1
],
"name": "Crystal Flash Grapple Clip",
"requires": [
"h_canJumpIntoCrystalFlashClip",
"Grapple",
{
"obstaclesNotCleared": [
"B"
]
}
],
"note": "Menu to Grappling Beam before the crystal flash ends and mash shoot while holding down."
},
{
"link": [
5,
1
],
"name": "Damage Down then Crystal Flash Grapple Clip",
"requires": [
{
"obstaclesCleared": [
"B"
]
},
"h_ShinesparksCostEnergy",
"h_canJumpIntoCrystalFlashClip",
"Grapple",
"canOffScreenMovement",
{
"canShineCharge": {
"usedTiles": 25,
"openEnd": 1
}
}
],
"note": [
"Fall through the Crumble blocks in order to damage down using either the spikes or repeated Shinesparks.",
"Touching the Chozo statue will lock the camera in a less useful position.",
"Menu to Grappling Beam before the crystal flash ends and mash shoot while holding down."
],
"devNote": [
"FIXME: If power is on, spikes or worker robots can damage Samus.",
" but multiples of 60 may not put Samus into Crystal Flash range, and visiting the robots will lock the camera making the jump-into-CF much harder."
]
},
{
"link": [
5,
4
],
"name": "Base",
"requires": [
{
"obstaclesCleared": [
"A"
]
},
{
"or": [
{
"obstaclesNotCleared": [
"B"
]
},
"canOffScreenMovement"
]
}
]
},
{
"link": [
5,
4
],
"name": "Power Bomb the Chozo Statue",
"requires": [
"h_canUsePowerBombs",
{
"or": [
{
"obstaclesNotCleared": [
"B"
]
},
"canOffScreenMovement"
]
}
],
"clearsObstacles": [
"A"
]
},
{
"link": [
6,
3
],
"name": "Bowling!",
"requires": [
"f_DefeatedPhantoon",
"Morph"
]
},
{
"name": "Base",
"notable": false,
"requires": [
{
  "or": [
    "f_DefeatedPhantoon",
    "h_AllItemsSpawned"
  ]
}
],
"note": "The item doesn't spawn until Phantoon is defeated.",
"link": [
4,
7
]
},
{
"link": [
7,
4
],
"name": "Base",
"notable": false,
"requires": []
},
{
"name": "Base",
"notable": false,
"requires": [
{
  "or": [
    "f_DefeatedPhantoon",
    "h_AllItemsSpawned"
  ]
}
],
"note": "The item doesn't spawn until Phantoon is defeated.",
"link": [
5,
8
]
},
{
"link": [
8,
5
],
"name": "Base",
"notable": false,
"requires": []
},
{
"name": "Base",
"notable": false,
"requires": [],
"link": [
6,
9
]
},
{
"link": [
9,
6
],
"name": "Base",
"notable": false,
"requires": []
}
]
}