Landing Site
Room ID: 8
|
Exit condition: {
"leaveWithRunway": {
"length": 3,
"openEnd": 1
}
}
|
|
Requires: {
"doorUnlockedAtNode": 1
}
Clears obstacles: C |
|
Requires: "h_canCrystalFlash" Clears obstacles: A |
|
Shinespark through the top of the door to reach the breakable blocks. Entrance condition: {
"comeInWithSpark": {}
}
Requires: "canMidairShinespark"
{
"shinespark": {
"frames": 154,
"excessFrames": 107
}
}
Clears obstacles: A |
|
Overload the scroll PLMs which are one tile to the left of the bomb blocks leading to Gauntlet. Then pass through the bomb blocks (which will have become air). If needed, continue on through the next set of bomb blocks (which will also be air) to reach the bottom right door. Entrance condition: {
"comeInWithGMode": {
"mode": "any",
"morphed": false
}
}
|
|
Requires: {
"or": [
"h_canDestroyBombWalls",
{
"obstaclesCleared": [
"A"
]
}
]
}
Clears obstacles: A |
|
Overload the scroll PLMs which are one tile to the left of the bomb blocks leading to Gauntlet. Then pass through the bomb blocks (which will have become air). Entrance condition: {
"comeInWithGMode": {
"mode": "any",
"morphed": true
}
}
Requires: "h_canArtificialMorphBombs" |
|
Exit condition: {
"leaveWithRunway": {
"length": 45,
"openEnd": 1
}
}
|
|
From: 2
Bottom Left Door
To: 4
Bottom Right Door
Entrance condition: {
"comeInWithStoredFallSpeed": {
"fallSpeedInTiles": 1
}
}
Requires: "SpeedBooster" Exit condition: {
"leaveWithStoredFallSpeed": {
"fallSpeedInTiles": 1
}
}
|
|
From: 2
Bottom Left Door
To: 4
Bottom Right Door
Break the Bomb blocks using Screw Attack in a Moonfall or SpeedBooster. Entrance condition: {
"comeInWithStoredFallSpeed": {
"fallSpeedInTiles": 2
}
}
Requires: {
"or": [
"SpeedBooster",
{
"and": [
"ScrewAttack",
"Grapple"
]
}
]
}
Exit condition: {
"leaveWithStoredFallSpeed": {
"fallSpeedInTiles": 2
}
}
|
|
|
|
Entrance condition: {
"comeInWithGMode": {
"mode": "any",
"morphed": true
}
}
|
|
Entrance condition: {
"comeInShinecharging": {
"length": 30,
"openEnd": 1,
"steepUpTiles": 9
}
}
Requires: "canHorizontalShinespark"
{
"shinespark": {
"frames": 125,
"excessFrames": 33
}
}
Clears obstacles: A |
|
Requires: {
"obstaclesCleared": [
"C"
]
}
{
"shinespark": {
"frames": 125
}
}
{
"or": [
{
"canShineCharge": {
"usedTiles": 30,
"openEnd": 1,
"steepUpTiles": 9
}
},
{
"and": [
{
"canShineCharge": {
"usedTiles": 31,
"openEnd": 1,
"steepUpTiles": 9
}
},
{
"doorUnlockedAtNode": 3
}
]
}
]
}
Exit condition: {
"leaveWithSpark": {
"position": "top"
}
}
|
|
A Power Bomb can be placed on the ledge above the Gauntlet Bomb blocks to destroy them. Requires: "SpeedBooster"
{
"or": [
"canCarefulJump",
"ScrewAttack",
"canLateralMidAirMorph"
]
}
{
"or": [
{
"obstaclesCleared": [
"A"
]
},
"h_canUsePowerBombs",
"ScrewAttack"
]
}
Clears obstacles: A |
|
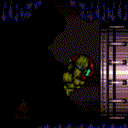
Notable: true .png)
.gif)
This strat is fairly precise. All jumps should be as small as possible. Using at least one-tap short charge, jump off the ledge and descend as much as possible while keeping space jump active. Once approaching the wall, be sure to jump again to continue through all of the bomb blocks. If HiJump is available, it is much easier to use the blue space jump strat from the ground. Requires: "canBlueSpaceJump"
"canTrickyDashJump"
{
"canShineCharge": {
"usedTiles": 22,
"openEnd": 2
}
}
Clears obstacles: A |
|
From: 3
Top Right Door
To: 1
Top Left Door
Notable: true 
Use the runway near the Power Bomb room door to jump towards the Gauntlet Entrance room Bomb blocks and break them using the temporary blue effect from SpeedBooster. Using the full runway, a one tap shortcharge where the tap is at the top of the lowest slope, jump and then Morph once Samus begins descending to bounce through all of the Bomb blocks. A controlled release of the jump button works in place of the shortcharge, where the bottom of the thick dark line in the background at the top of the room works as a visual cue. Requires: "canCarefulJump"
"Morph"
"canLateralMidAirMorph"
{
"canShineCharge": {
"usedTiles": 30,
"openEnd": 2
}
}
Clears obstacles: A |
|
Entrance condition: {
"comeInWithGrappleTeleport": {
"blockPositions": [
[
2,
34
]
]
}
}
Bypasses door shell: true |
|
Entrance condition: {
"comeInWithGrappleTeleport": {
"blockPositions": [
[
2,
34
]
]
}
}
Exit condition: {
"leaveWithGrappleTeleport": {
"blockPositions": [
[
2,
34
]
]
}
}
Bypasses door shell: true |
|
Exit condition: {
"leaveWithRunway": {
"length": 31,
"openEnd": 1,
"steepDownTiles": 9
}
}
|
|
Open the Gauntlet Entrance door by shooting a charged Wave shot through the right wall to wrap around to hit the door. Near the top right door, move the right wall a bit off camera. Jump and shoot a charge shot diagonally into the floor just before landing while moving rightwards. Listen for the door opening to ensure it worked. Requires: "canCameraManip"
"canWrapAroundShot"
{
  "doorUnlockedAtNode": 1
}
Clears obstacles: C |
|
Requires: "h_canCrystalFlash" |
|
|
|
Entrance condition: {
"comeInWithGMode": {
"mode": "any",
"morphed": true
}
}
|
|
Requires: "canHorizontalShinespark"
{
"canShineCharge": {
"usedTiles": 19,
"steepUpTiles": 2,
"steepDownTiles": 1,
"openEnd": 2
}
}
{
"shinespark": {
"frames": 125,
"excessFrames": 33
}
}
Clears obstacles: A |
|
Requires: {
"obstaclesCleared": [
"C"
]
}
{
"shinespark": {
"frames": 125
}
}
{
"canShineCharge": {
"usedTiles": 19,
"steepUpTiles": 2,
"steepDownTiles": 1,
"openEnd": 2
}
}
Exit condition: {
"leaveWithSpark": {
"position": "top"
}
}
|
|
Store the spark on the right side of the ledge. Run left and do a big jump towards the gauntlet door and then midair spark at the right time. The lines in the background make for a good way to measure height. Requires: "canMidairShinespark"
"canShinechargeMovementComplex"
{
"canShineCharge": {
"usedTiles": 19,
"steepUpTiles": 2,
"steepDownTiles": 1,
"openEnd": 2
}
}
{
"or": [
{
"shinespark": {
"frames": 95,
"excessFrames": 33
}
},
{
"and": [
"canShinechargeMovementTricky",
{
"shinespark": {
"frames": 87,
"excessFrames": 33
}
}
]
}
]
}
Clears obstacles: A |
|
From: 4
Bottom Right Door
To: 1
Top Left Door
Store the spark on the right side of the ledge. Run left and do a big jump towards the gauntlet door and then midair spark at the right time. The lines in the background make for a good way to measure height. Requires: {
"obstaclesCleared": [
"C"
]
}
"canMidairShinespark"
"canShinechargeMovementComplex"
{
"canShineCharge": {
"usedTiles": 19,
"steepUpTiles": 2,
"steepDownTiles": 1,
"openEnd": 2
}
}
{
"or": [
{
"shinespark": {
"frames": 96
}
},
{
"and": [
"canShinechargeMovementTricky",
{
"shinespark": {
"frames": 88
}
}
]
}
]
}
Exit condition: {
"leaveWithSpark": {
"position": "top"
}
}
|
|
From: 4
Bottom Right Door
To: 1
Top Left Door
Use the lines in the background to determine the height of the breakable blocks. Requires: "canBlueSpaceJump"
{
"canShineCharge": {
"usedTiles": 19,
"steepUpTiles": 2,
"steepDownTiles": 1,
"openEnd": 2
}
}
Clears obstacles: A |
|
From: 4
Bottom Right Door
To: 1
Top Left Door
Notable: true .png)
.gif)
Starting near the right runway, run through the bomb block passage, then jump right after exiting. Using HiJump and space jump, Samus is able to elevate enough to break through the bomb blocks blocking the Gauntlet entrance. Requires: "canBlueSpaceJump"
"HiJump"
{
"canShineCharge": {
"usedTiles": 33,
"openEnd": 2
}
}
Clears obstacles: A |
|
From the right door, run and jump while on the dirt mound directly right of the ship. Then SpringBall Jump to reach the Bomb blocks leading to Gauntlet. Requires: "canTrickySpringBallJump"
"canLateralMidAirMorph"
"HiJump"
{
"canShineCharge": {
"usedTiles": 33,
"openEnd": 2
}
}
|
|
Entrance condition: {
"comeInWithGrappleTeleport": {
"blockPositions": [
[
2,
34
]
]
}
}
Bypasses door shell: true |
|
Entrance condition: {
"comeInWithGrappleTeleport": {
"blockPositions": [
[
2,
34
]
]
}
}
Exit condition: {
"leaveWithGrappleTeleport": {
"blockPositions": [
[
2,
34
]
]
}
}
Bypasses door shell: true |
|
From: 4
Bottom Right Door
To: 2
Bottom Left Door
Entrance condition: {
"comeInWithStoredFallSpeed": {
"fallSpeedInTiles": 1
}
}
Requires: {
"canShineCharge": {
"usedTiles": 25,
"steepDownTiles": 3,
"openEnd": 0
}
}
Exit condition: {
"leaveWithStoredFallSpeed": {
"fallSpeedInTiles": 1
}
}
|
|
From: 4
Bottom Right Door
To: 2
Bottom Left Door
Break the Bomb blocks using Screw Attack in a Moonfall or SpeedBooster. Entrance condition: {
"comeInWithStoredFallSpeed": {
"fallSpeedInTiles": 2
}
}
Requires: {
"or": [
{
"canShineCharge": {
"usedTiles": 25,
"steepDownTiles": 3,
"openEnd": 0
}
},
{
"and": [
"ScrewAttack",
"Grapple"
]
}
]
}
Exit condition: {
"leaveWithStoredFallSpeed": {
"fallSpeedInTiles": 2
}
}
|
|
Requires: "h_canFly" |
|
Requires: {
"canShineCharge": {
"usedTiles": 19,
"steepUpTiles": 2,
"steepDownTiles": 1,
"openEnd": 2
}
}
{
"shinespark": {
"frames": 45,
"excessFrames": 13
}
}
|
|
Requires: "canTrickyDashJump" "HiJump" "canTrickySpringBallJump" |
|
Climb up 3 screens. Entrance condition: {
"comeInWithGMode": {
"mode": "direct",
"morphed": false
}
}
Requires: "canXRayClimb" "canBePatient" |
|
From: 4
Bottom Right Door
To: 3
Top Right Door
Climb up 3 screens. Entrance condition: {
"comeInShinecharged": {
"framesRequired": 1
}
}
Requires: {
"shinespark": {
"frames": 1,
"excessFrames": 1
}
}
"canShinesparkDeepStuck"
"canXRayClimb"
"canBePatient"
|
|
From: 4
Bottom Right Door
To: 3
Top Right Door
Notable: true 
Become doorstuck in the bottom right door of Landing Site, using a Crystal Flash to continue X-Ray climbing past the slope above the door. Start by climbing until the slope pushed Samus down. Then auto-spinjump towards the door, and Morph to perform the Crystal Flash. Finally, continue X-Ray climbing to the top door. Climb up 3 screens. Entrance condition: {
"comeInWithDoorStuckSetup": {}
}
Requires: "canXRayClimb" "h_canCrystalFlash" |
|
Enter with G-mode direct, back up to between 1 and 6 pixels from the door transition, and activate X-ray to get very deep stuck in the door. Climb up 3 screens, and perform a turnaround buffered spin-jump away from the door to trigger the transition, bypassing any lock on the door. Entrance condition: {
"comeInWithGMode": {
"mode": "direct",
"morphed": false
}
}
Requires: "canXRayClimb" "canBeVeryPatient" Bypasses door shell: true |
|
Exit condition: {
"leaveWithRunway": {
"length": 45,
"openEnd": 1
}
}
|
|
|
|
Entrance condition: {
"comeInWithGMode": {
"mode": "any",
"morphed": true
}
}
Requires: "h_canArtificialMorphMovement" |
|
|
|
Requires: {
"or": [
{
"and": [
{
"canShineCharge": {
"usedTiles": 33,
"openEnd": 2
}
},
{
"shinespark": {
"frames": 78,
"excessFrames": 13
}
}
]
},
{
"and": [
"canShinechargeMovement",
{
"canShineCharge": {
"usedTiles": 33,
"openEnd": 2
}
},
{
"shinespark": {
"frames": 65,
"excessFrames": 13
}
}
]
}
]
}
|
|
Requires: {
"or": [
"canWalljump",
"h_canFly",
"HiJump",
"canSpringBallJumpMidAir"
]
}
|
|
Requires: {
"or": [
"SpeedBooster",
"h_canDestroyBombWalls",
{
"obstaclesCleared": [
"B"
]
}
]
}
Clears obstacles: B |
|
Requires: {
"refill": [
"Energy",
"Missile",
"Super",
"PowerBomb"
]
}
|
|
|
|
Requires: {
"or": [
"h_canFly",
"SpeedBooster",
{
"and": [
"HiJump",
"canSpringBallJumpMidAir"
]
}
]
}
|
|
Requires: "canDelayedWalljump"
{
"or": [
"HiJump",
"canConsecutiveWalljump"
]
}
|
|
|
|
Requires: {
"or": [
"canWalljump",
"h_canFly"
]
}
{
  "or": [
    "h_canDestroyBombWalls",
    {
      "obstaclesCleared": [
        "A"
      ]
    }
  ]
}
Clears obstacles: A |
|
Requires: "HiJump"
{
"or": [
{
"obstaclesCleared": [
"A"
]
},
"h_canBombThings",
{
"and": [
"ScrewAttack",
{
"or": [
"canTwoTileSqueeze",
"SpeedBooster",
{
"and": [
"canXRayStandUp",
"Morph"
]
}
]
}
]
}
]
}
Clears obstacles: A |
|
From: 7
Junction (Left Ledge Below Bomb Blocks)
To: 1
Top Left Door
Requires: "canSpringBallJumpMidAir"
{
"or": [
"h_canBombThings",
{
"obstaclesCleared": [
"A"
]
}
]
}
Clears obstacles: A |
|
Shinespark diagonally from the small hill left of the ship to break part way into the hidden bomb wall, then use Bombs or another means to continue to the left. Requires: {
"canShineCharge": {
"usedTiles": 33,
"openEnd": 2
}
}
{
"shinespark": {
"frames": 40
}
}
{
"or": [
"h_canDestroyBombWalls",
{
"obstaclesCleared": [
"A"
]
}
]
}
Clears obstacles: A |
|
|
|
From: 8
G-Mode Morph Junction (Ship)
To: 1
Top Left Door
Using IBJ to reach the Gauntlet entrance bomb blocks, place a Power Bomb and it will hit but not break the blocks. Then IBJ up to to the left, unmorph and use X-Ray to cancel G-mode, the blocks will be broken, allowing Samus to pass through. Requires: "h_canArtificialMorphIBJ" "h_canArtificialMorphPowerBomb" |
|
From: 8
G-Mode Morph Junction (Ship)
To: 1
Top Left Door
IBJ up to to the top left of the room. Use X-Ray to cancel G-mode, then fall with Screw Attack to break the bomb blocks. Requires: "h_canArtificialMorphIBJ" "ScrewAttack" |
|
Requires: "h_canArtificialMorphIBJ" |
|
From: 8
G-Mode Morph Junction (Ship)
To: 4
Bottom Right Door
Place a Power Bomb then quickly exit G-Mode before it explodes to break the bomb blocks. Requires: "h_canArtificialMorphPowerBomb" Clears obstacles: B |
|
Requires: "h_canArtificialMorphIBJ" |
{
"$schema": "../../../schema/m3-room.schema.json",
"id": 8,
"name": "Landing Site",
"area": "Crateria",
"subarea": "Central",
"playable": true,
"roomAddress": "0x791F8",
"roomEnvironments": [
{
"heated": false
}
],
"nodes": [
{
"id": 1,
"name": "Top Left Door",
"nodeType": "door",
"nodeSubType": "blue",
"nodeAddress": "0x001892e",
"doorEnvironments": [
{
"physics": "air"
}
],
"locks": [
{
"name": "Landing Site Top Left Escape Lock (to Gauntlet)",
"lockType": "escapeFunnel",
"lock": [
"f_ZebesSetAblaze"
],
"unlockStrats": [
{
"name": "Base",
"notable": false,
"requires": [
"never"
]
}
]
}
]
},
{
"id": 2,
"name": "Bottom Left Door",
"nodeType": "door",
"nodeSubType": "blue",
"nodeAddress": "0x0018916",
"doorEnvironments": [
{
"physics": "air"
}
]
},
{
"id": 3,
"name": "Top Right Door",
"nodeType": "door",
"nodeSubType": "yellow",
"nodeAddress": "0x001893a",
"doorEnvironments": [
{
"physics": "air"
}
],
"locks": [
{
"name": "Landing Site Top Right Yellow Lock (to Power Bombs)",
"lockType": "coloredDoor",
"unlockStrats": [
{
"name": "Base",
"notable": false,
"requires": [
"h_canOpenYellowDoors"
]
}
]
},
{
"name": "Landing Site Top Right Escape Lock (to Power Bombs)",
"lockType": "escapeFunnel",
"lock": [
"f_ZebesSetAblaze"
],
"unlockStrats": [
{
"name": "Base",
"notable": false,
"requires": [
"never"
]
}
]
}
]
},
{
"id": 4,
"name": "Bottom Right Door",
"nodeType": "door",
"nodeSubType": "green",
"nodeAddress": "0x0018922",
"doorEnvironments": [
{
"physics": "air"
}
],
"locks": [
{
"name": "Landing Site Bottom Right Green Lock (to Crateria Tube)",
"lockType": "coloredDoor",
"unlockStrats": [
{
"name": "Base",
"notable": false,
"requires": [
"h_canOpenGreenDoors"
]
}
]
},
{
"name": "Landing Site Bottom Right Escape Lock (to Crateria Tube)",
"lockType": "escapeFunnel",
"lock": [
"f_ZebesSetAblaze"
],
"unlockStrats": [
{
"name": "Base",
"notable": false,
"requires": [
"never"
]
}
]
}
]
},
{
"id": 5,
"name": "Ship",
"nodeType": "utility",
"nodeSubType": "ship",
"devNote": "FIXME If there's a proper memory address to the ship/elevator it was in hiding",
"utility": [
"save",
"missile",
"super",
"powerbomb",
"energy",
"reserve"
]
},
{
"id": 6,
"name": "Escape Zebes",
"nodeType": "door",
"nodeSubType": "elevator",
"devNote": "Not a normal elevator so no nodeaddresses to or from here",
"locks": [
{
"name": "Victory Lock",
"lockType": "gameFlag",
"unlockStrats": [
{
"name": "Base",
"notable": false,
"requires": [
"f_ZebesSetAblaze"
]
}
]
}
],
"yields": [
"f_BeatSuperMetroid"
]
},
{
"id": 7,
"name": "Junction (Left Ledge Below Bomb Blocks)",
"nodeType": "junction",
"nodeSubType": "junction",
"note": "Represents the ledge on the way to gauntlet, but on the right side of the bomb blocks."
},
{
"id": 8,
"name": "G-Mode Morph Junction (Ship)",
"nodeType": "junction",
"nodeSubType": "g-mode",
"note": "Represents being at the Ship with G-Mode Morph (artificial morph)"
}
],
"enemies": [],
"obstacles": [
{
"id": "A",
"obstacleType": "inanimate",
"name": "Gauntlet Bomb Blocks"
},
{
"id": "B",
"obstacleType": "inanimate",
"name": "Bottom Bomb Blocks"
},
{
"id": "C",
"obstacleType": "inanimate",
"name": "Gauntlet Entrance Open Door"
}
],
"links": [
{
"from": 1,
"to": [
{
"id": 1
},
{
"id": 4,
"devNote": "This link is only for sparking and G-mode. All other strats should go 1 -> 7 -> 5 -> 4."
},
{
"id": 7
},
{
"id": 8
}
]
},
{
"from": 2,
"to": [
{
"id": 2
},
{
"id": 4
},
{
"id": 5
},
{
"id": 8
}
]
},
{
"from": 3,
"to": [
{
"id": 1
},
{
"id": 3
},
{
"id": 4
},
{
"id": 8
}
]
},
{
"from": 4,
"to": [
{
"id": 1,
"devNote": "This link is only for sparking, blue space jump, and G-mode. All other strats should go 4 -> 5 -> 7 -> 1."
},
{
"id": 2
},
{
"id": 3
},
{
"id": 4
},
{
"id": 5
},
{
"id": 8
}
]
},
{
"from": 5,
"to": [
{
"id": 2
},
{
"id": 3,
"devNote": "This link is only for sparking and G-Mode. All other strats should go 5 -> 4 -> 3."
},
{
"id": 4
},
{
"id": 5
},
{
"id": 6
},
{
"id": 7
}
]
},
{
"from": 6,
"to": [
{
"id": 5
}
]
},
{
"from": 7,
"to": [
{
"id": 1
},
{
"id": 5
}
]
},
{
"from": 8,
"to": [
{
"id": 1
},
{
"id": 3
},
{
"id": 4
}
]
}
],
"strats": [
{
"link": [
1,
1
],
"name": "Leave with Runway",
"requires": [],
"exitCondition": {
"leaveWithRunway": {
"length": 3,
"openEnd": 1
}
}
},
{
"link": [
1,
1
],
"name": "Open Door",
"requires": [
{
"doorUnlockedAtNode": 1
}
],
"clearsObstacles": [
"C"
]
},
{
"link": [
1,
1
],
"name": "Crystal Flash",
"requires": [
"h_canCrystalFlash"
],
"clearsObstacles": [
"A"
]
},
{
"link": [
1,
4
],
"name": "Shinespark",
"entranceCondition": {
"comeInWithSpark": {}
},
"requires": [
"canMidairShinespark",
{
"shinespark": {
"frames": 154,
"excessFrames": 107
}
}
],
"clearsObstacles": [
"A"
],
"note": "Shinespark through the top of the door to reach the breakable blocks.",
"devNote": "The shinespark may end early dropping Samus into 7, or 5. But speed alone is enough to reach any of 4, 5, and 7."
},
{
"link": [
1,
4
],
"name": "G-Mode through Bomb Blocks",
"entranceCondition": {
"comeInWithGMode": {
"mode": "any",
"morphed": false
}
},
"requires": [],
"note": [
"Overload the scroll PLMs which are one tile to the left of the bomb blocks leading to Gauntlet.",
"Then pass through the bomb blocks (which will have become air).",
"If needed, continue on through the next set of bomb blocks (which will also be air) to reach the bottom right door."
],
"devNote": [
"FIXME: add something to indicate we can refill at the Ship on the way (e.g. if we add a logical requirement type for this).",
"This only affects the logic in the case where we can't walljump or get over the top in some other way."
]
},
{
"link": [
1,
7
],
"name": "Base",
"requires": [
{
"or": [
"h_canDestroyBombWalls",
{
"obstaclesCleared": [
"A"
]
}
]
}
],
"clearsObstacles": [
"A"
]
},
{
"link": [
1,
8
],
"name": "G-Mode Morph",
"entranceCondition": {
"comeInWithGMode": {
"mode": "any",
"morphed": true
}
},
"requires": [
"h_canArtificialMorphBombs"
],
"note": [
"Overload the scroll PLMs which are one tile to the left of the bomb blocks leading to Gauntlet.",
"Then pass through the bomb blocks (which will have become air)."
],
"devNote": [
"Other items (SpringBall or Power Bombs) could be used to get through but these cases are not relevant, as Bombs are needed to do anything useful with G-Mode Morph after this point."
]
},
{
"link": [
2,
2
],
"name": "Leave with Runway",
"requires": [],
"exitCondition": {
"leaveWithRunway": {
"length": 45,
"openEnd": 1
}
}
},
{
"link": [
2,
4
],
"name": "Transition with Stored Fall Speed",
"entranceCondition": {
"comeInWithStoredFallSpeed": {
"fallSpeedInTiles": 1
}
},
"requires": [
"SpeedBooster"
],
"exitCondition": {
"leaveWithStoredFallSpeed": {
"fallSpeedInTiles": 1
}
},
"unlocksDoors": [
{
"types": [
"missiles",
"super"
],
"requires": []
},
{
"types": [
"powerbomb"
],
"requires": [
"never"
]
}
]
},
{
"link": [
2,
4
],
"name": "Transition with Stored Fall Speed (more speed)",
"entranceCondition": {
"comeInWithStoredFallSpeed": {
"fallSpeedInTiles": 2
}
},
"requires": [
{
  "or": [
    "SpeedBooster",
    {
      "and": [
        "ScrewAttack",
        "Grapple"
      ]
    }
  ]
}
],
"exitCondition": {
"leaveWithStoredFallSpeed": {
"fallSpeedInTiles": 2
}
},
"unlocksDoors": [
{
"types": [
"missiles",
"super"
],
"requires": []
},
{
"types": [
"powerbomb"
],
"requires": [
"never"
]
}
],
"note": "Break the Bomb blocks using Screw Attack in a Moonfall or SpeedBooster."
},
{
"link": [
2,
5
],
"name": "Base",
"requires": []
},
{
"link": [
2,
8
],
"name": "G-Mode Morph",
"entranceCondition": {
"comeInWithGMode": {
"mode": "any",
"morphed": true
}
},
"requires": []
},
{
"link": [
3,
1
],
"name": "Shinespark",
"entranceCondition": {
"comeInShinecharging": {
"length": 30,
"openEnd": 1,
"steepUpTiles": 9
}
},
"requires": [
"canHorizontalShinespark",
{
"shinespark": {
"frames": 125,
"excessFrames": 33
}
}
],
"clearsObstacles": [
"A"
]
},
{
"link": [
3,
1
],
"name": "Shinespark through Door",
"requires": [
{
"obstaclesCleared": [
"C"
]
},
{
"shinespark": {
"frames": 125
}
},
{
"or": [
{
"canShineCharge": {
"usedTiles": 30,
"openEnd": 1,
"steepUpTiles": 9
}
},
{
"and": [
{
"canShineCharge": {
"usedTiles": 31,
"openEnd": 1,
"steepUpTiles": 9
}
},
{
"doorUnlockedAtNode": 3
}
]
}
]
}
],
"exitCondition": {
"leaveWithSpark": {
"position": "top"
}
},
"unlocksDoors": [
{
"types": [
"ammo"
],
"requires": []
}
],
"devNote": [
"The Gauntlet Entrance door must be open, so the connecting room at 3 cannot be used.",
"Unlocking the door is free since the obstacle C cleared means that any lock was already taken care of."
]
},
{
"link": [
3,
1
],
"name": "Direct Jump to Gauntlet Entrance",
"requires": [
"SpeedBooster",
{
"or": [
"canCarefulJump",
"ScrewAttack",
"canLateralMidAirMorph"
]
},
{
"or": [
{
"obstaclesCleared": [
"A"
]
},
"h_canUsePowerBombs",
"ScrewAttack"
]
}
],
"clearsObstacles": [
"A"
],
"note": "A Power Bomb can be placed on the ledge above the Gauntlet Bomb blocks to destroy them.",
"devNote": "Bombs to break the blocks would require another movement option, so would use a different strat."
},
{
"link": [
3,
1
],
"name": "Landing Site Blue Space Jump (Top)",
"notable": true,
"requires": [
"canBlueSpaceJump",
"canTrickyDashJump",
{
"canShineCharge": {
"usedTiles": 22,
"openEnd": 2
}
}
],
"clearsObstacles": [
"A"
],
"note": [
"This strat is fairly precise. All jumps should be as small as possible.",
"Using at least one-tap short charge, jump off the ledge and descend as much as possible while keeping space jump active.",
"Once approaching the wall, be sure to jump again to continue through all of the bomb blocks.",
"If HiJump is available, it is much easier to use the blue space jump strat from the ground."
],
"devNote": "Although there is a larger runway available, minimizing the speed is important."
},
{
"link": [
3,
1
],
"name": "Landing Site Big Jump Blue Suit Bounce",
"notable": true,
"requires": [
"canCarefulJump",
"Morph",
"canLateralMidAirMorph",
{
"canShineCharge": {
"usedTiles": 30,
"openEnd": 2
}
}
],
"clearsObstacles": [
"A"
],
"note": [
"Use the runway near the Power Bomb room door to jump towards the Gauntlet Entrance room Bomb blocks and break them using the temporary blue effect from SpeedBooster.",
"Using the full runway, a one tap shortcharge where the tap is at the top of the lowest slope, jump and then Morph once Samus begins descending to bounce through all of the Bomb blocks.",
"A controlled release of the jump button works in place of the shortcharge, where the bottom of the thick dark line in the background at the top of the room works as a visual cue."
]
},
{
"link": [
3,
1
],
"name": "Grapple Teleport",
"entranceCondition": {
"comeInWithGrappleTeleport": {
"blockPositions": [
[
2,
34
]
]
}
},
"requires": [],
"bypassesDoorShell": true
},
{
"link": [
3,
1
],
"name": "Carry Grapple Teleport",
"entranceCondition": {
"comeInWithGrappleTeleport": {
"blockPositions": [
[
2,
34
]
]
}
},
"requires": [],
"bypassesDoorShell": true,
"exitCondition": {
"leaveWithGrappleTeleport": {
"blockPositions": [
[
2,
34
]
]
}
}
},
{
"link": [
3,
3
],
"name": "Leave with Runway",
"requires": [],
"exitCondition": {
"leaveWithRunway": {
"length": 31,
"openEnd": 1,
"steepDownTiles": 9
}
}
},
{
"link": [
3,
3
],
"name": "Gauntlet Wraparound Shot",
"requires": [
"canCameraManip",
"canWrapAroundShot",
{
"doorUnlockedAtNode": 1
}
],
"unlocksDoors": [
{
"nodeId": 1,
"types": [
"ammo"
],
"requires": [
"never"
]
}
],
"clearsObstacles": [
"C"
],
"note": [
"Open the Gauntlet Entrance door by shooting a charged Wave shot through the right wall to wrap around to hit the door.",
"Near the top right door, move the right wall a bit off camera. Jump and shoot a charge shot diagonally into the floor just before landing while moving rightwards.",
"Listen for the door opening to ensure it worked."
]
},
{
"link": [
3,
3
],
"name": "Crystal Flash",
"requires": [
"h_canCrystalFlash"
]
},
{
"link": [
3,
4
],
"name": "Base",
"requires": []
},
{
"link": [
3,
8
],
"name": "G-Mode Morph",
"entranceCondition": {
"comeInWithGMode": {
"mode": "any",
"morphed": true
}
},
"requires": []
},
{
"link": [
4,
1
],
"name": "Shinespark",
"requires": [
"canHorizontalShinespark",
{
"canShineCharge": {
"usedTiles": 19,
"steepUpTiles": 2,
"steepDownTiles": 1,
"openEnd": 2
}
},
{
"shinespark": {
"frames": 125,
"excessFrames": 33
}
}
],
"clearsObstacles": [
"A"
]
},
{
"link": [
4,
1
],
"name": "Shinespark through Door",
"requires": [
{
"obstaclesCleared": [
"C"
]
},
{
"shinespark": {
"frames": 125
}
},
{
"canShineCharge": {
"usedTiles": 19,
"steepUpTiles": 2,
"steepDownTiles": 1,
"openEnd": 2
}
}
],
"exitCondition": {
"leaveWithSpark": {
"position": "top"
}
},
"unlocksDoors": [
{
"types": [
"ammo"
],
"requires": []
}
],
"devNote": [
"Unlocking the door is free since the obstacle C cleared means that any lock was already taken care of."
]
},
{
"link": [
4,
1
],
"name": "Big Jump Midair Shinespark",
"requires": [
"canMidairShinespark",
"canShinechargeMovementComplex",
{
"canShineCharge": {
"usedTiles": 19,
"steepUpTiles": 2,
"steepDownTiles": 1,
"openEnd": 2
}
},
{
"or": [
{
"shinespark": {
"frames": 95,
"excessFrames": 33
}
},
{
"and": [
"canShinechargeMovementTricky",
{
"shinespark": {
"frames": 87,
"excessFrames": 33
}
}
]
}
]
}
],
"clearsObstacles": [
"A"
],
"note": [
"Store the spark on the right side of the ledge. Run left and do a big jump towards the gauntlet door and then midair spark at the right time.",
"The lines in the background make for a good way to measure height."
]
},
{
"link": [
4,
1
],
"name": "Big Jump Midair Shinespark Through Door",
"requires": [
{
"obstaclesCleared": [
"C"
]
},
"canMidairShinespark",
"canShinechargeMovementComplex",
{
"canShineCharge": {
"usedTiles": 19,
"steepUpTiles": 2,
"steepDownTiles": 1,
"openEnd": 2
}
},
{
"or": [
{
"shinespark": {
"frames": 96
}
},
{
"and": [
"canShinechargeMovementTricky",
{
"shinespark": {
"frames": 88
}
}
]
}
]
}
],
"exitCondition": {
"leaveWithSpark": {
"position": "top"
}
},
"unlocksDoors": [
{
"types": [
"ammo"
],
"requires": []
}
],
"note": [
"Store the spark on the right side of the ledge. Run left and do a big jump towards the gauntlet door and then midair spark at the right time.",
"The lines in the background make for a good way to measure height."
],
"devNote": [
"Unlocking the door is free since the obstacle C cleared means that any lock was already taken care of."
]
},
{
"link": [
4,
1
],
"name": "Landing Site Blue Space Jump (Mid)",
"requires": [
"canBlueSpaceJump",
{
"canShineCharge": {
"usedTiles": 19,
"steepUpTiles": 2,
"steepDownTiles": 1,
"openEnd": 2
}
}
],
"clearsObstacles": [
"A"
],
"note": "Use the lines in the background to determine the height of the breakable blocks."
},
{
"link": [
4,
1
],
"name": "Landing Site Blue Space Jump (Bottom)",
"notable": true,
"requires": [
"canBlueSpaceJump",
"HiJump",
{
"canShineCharge": {
"usedTiles": 33,
"openEnd": 2
}
}
],
"clearsObstacles": [
"A"
],
"note": [
"Starting near the right runway, run through the bomb block passage, then jump right after exiting.",
"Using HiJump and space jump, Samus is able to elevate enough to break through the bomb blocks blocking the Gauntlet entrance."
]
},
{
"link": [
4,
1
],
"name": "Blue Springball Jump",
"requires": [
"canTrickySpringBallJump",
"canLateralMidAirMorph",
"HiJump",
{
"canShineCharge": {
"usedTiles": 33,
"openEnd": 2
}
}
],
"note": [
"From the right door, run and jump while on the dirt mound directly right of the ship.",
"Then SpringBall Jump to reach the Bomb blocks leading to Gauntlet."
]
},
{
"link": [
4,
1
],
"name": "Grapple Teleport",
"entranceCondition": {
"comeInWithGrappleTeleport": {
"blockPositions": [
[
2,
34
]
]
}
},
"requires": [],
"bypassesDoorShell": true
},
{
"link": [
4,
1
],
"name": "Carry Grapple Teleport",
"entranceCondition": {
"comeInWithGrappleTeleport": {
"blockPositions": [
[
2,
34
]
]
}
},
"requires": [],
"bypassesDoorShell": true,
"exitCondition": {
"leaveWithGrappleTeleport": {
"blockPositions": [
[
2,
34
]
]
}
}
},
{
"link": [
4,
2
],
"name": "Transition with Stored Fall Speed",
"entranceCondition": {
"comeInWithStoredFallSpeed": {
"fallSpeedInTiles": 1
}
},
"requires": [
{
  "canShineCharge": {
    "usedTiles": 25,
    "steepDownTiles": 3,
    "openEnd": 0
  }
}
],
"exitCondition": {
"leaveWithStoredFallSpeed": {
"fallSpeedInTiles": 1
}
},
"unlocksDoors": [
{
"types": [
"missiles",
"super"
],
"requires": []
},
{
"types": [
"powerbomb"
],
"requires": [
"never"
]
}
]
},
{
"link": [
4,
2
],
"name": "Transition with Stored Fall Speed (more speed)",
"entranceCondition": {
"comeInWithStoredFallSpeed": {
"fallSpeedInTiles": 2
}
},
"requires": [
{
  "or": [
    {
      "canShineCharge": {
        "usedTiles": 25,
        "steepDownTiles": 3,
        "openEnd": 0
      }
    },
    {
      "and": [
        "ScrewAttack",
        "Grapple"
      ]
    }
  ]
}
],
"exitCondition": {
"leaveWithStoredFallSpeed": {
"fallSpeedInTiles": 2
}
},
"unlocksDoors": [
{
"types": [
"missiles",
"super"
],
"requires": []
},
{
"types": [
"powerbomb"
],
"requires": [
"never"
]
}
],
"note": "Break the Bomb blocks using Screw Attack in a Moonfall or SpeedBooster."
},
{
"link": [
4,
3
],
"name": "Base",
"requires": [
"h_canFly"
]
},
{
"link": [
4,
3
],
"name": "Shinespark",
"requires": [
{
"canShineCharge": {
"usedTiles": 19,
"steepUpTiles": 2,
"steepDownTiles": 1,
"openEnd": 2
}
},
{
"shinespark": {
"frames": 45,
"excessFrames": 13
}
}
]
},
{
"link": [
4,
3
],
"name": "SpeedyJump Into SpringballJump",
"requires": [
"canTrickyDashJump",
"HiJump",
"canTrickySpringBallJump"
]
},
{
"link": [
4,
3
],
"name": "G-Mode Deep Stuck X-Ray Climb",
"entranceCondition": {
"comeInWithGMode": {
"mode": "direct",
"morphed": false
}
},
"requires": [
"canXRayClimb",
"canBePatient"
],
"note": "Climb up 3 screens."
},
{
"link": [
4,
3
],
"name": "Shinespark Deep Stuck X-Ray Climb",
"entranceCondition": {
"comeInShinecharged": {
"framesRequired": 1
}
},
"requires": [
{
"shinespark": {
"frames": 1,
"excessFrames": 1
}
},
"canShinesparkDeepStuck",
"canXRayClimb",
"canBePatient"
],
"note": "Climb up 3 screens."
},
{
"link": [
4,
3
],
"name": "Landing Site Crystal Flash X-Ray Climb",
"notable": true,
"entranceCondition": {
"comeInWithDoorStuckSetup": {}
},
"requires": [
"canXRayClimb",
"h_canCrystalFlash"
],
"note": [
"Become doorstuck in the bottom right door of Landing Site, using a Crystal Flash to continue X-Ray climbing past the slope above the door.",
"Start by climbing until the slope pushed Samus down.",
"Then auto-spinjump towards the door, and Morph to perform the Crystal Flash.",
"Finally, continue X-Ray climbing to the top door.",
"Climb up 3 screens."
],
"devNote": "FIXME: Requires a way to take damage."
},
{
"link": [
4,
3
],
"name": "Very Deep Stuck X-Ray Climb",
"entranceCondition": {
"comeInWithGMode": {
"mode": "direct",
"morphed": false
}
},
"requires": [
"canXRayClimb",
"canBeVeryPatient"
],
"bypassesDoorShell": true,
"note": [
"Enter with G-mode direct, back up to between 1 and 6 pixels from the door transition, and activate X-ray to get very deep stuck in the door.",
"Climb up 3 screens, and perform a turnaround buffered spin-jump away from the door to trigger the transition, bypassing any lock on the door."
]
},
{
"link": [
4,
4
],
"name": "Leave with Runway",
"requires": [],
"exitCondition": {
"leaveWithRunway": {
"length": 45,
"openEnd": 1
}
},
"devNote": [
"With SpeedBooster, climb the platforms to the ship, then run through the blocks.",
"Without, the runway is not as long, but it's much longer than it takes to get max run speed."
]
},
{
"link": [
4,
5
],
"name": "Base",
"requires": []
},
{
"link": [
4,
8
],
"name": "G-Mode Morph",
"entranceCondition": {
"comeInWithGMode": {
"mode": "any",
"morphed": true
}
},
"requires": [
"h_canArtificialMorphMovement"
]
},
{
"link": [
5,
2
],
"name": "Base",
"requires": []
},
{
"link": [
5,
3
],
"name": "Shinespark",
"requires": [
{
  "or": [
    {
      "and": [
        {
          "canShineCharge": {
            "usedTiles": 33,
            "openEnd": 2
          }
        },
        {
          "shinespark": {
            "frames": 78,
            "excessFrames": 13
          }
        }
      ]
    },
    {
      "and": [
        "canShinechargeMovement",
        {
          "canShineCharge": {
            "usedTiles": 33,
            "openEnd": 2
          }
        },
        {
          "shinespark": {
            "frames": 65,
            "excessFrames": 13
          }
        }
      ]
    }
  ]
}
]
},
{
"link": [
5,
4
],
"name": "Over the Top",
"requires": [
{
  "or": [
    "canWalljump",
    "h_canFly",
    "HiJump",
    "canSpringBallJumpMidAir"
  ]
}
]
},
{
"link": [
5,
4
],
"name": "Through the Blocks",
"requires": [
{
  "or": [
    "SpeedBooster",
    "h_canDestroyBombWalls",
    {
      "obstaclesCleared": [
        "B"
      ]
    }
  ]
}
],
"clearsObstacles": [
"B"
]
},
{
"link": [
5,
5
],
"name": "Refill",
"requires": [
{
  "refill": [
    "Energy",
    "Missile",
    "Super",
    "PowerBomb"
  ]
}
]
},
{
"link": [
5,
6
],
"name": "Base",
"requires": []
},
{
"link": [
5,
7
],
"name": "Base",
"requires": [
{
  "or": [
    "h_canFly",
    "SpeedBooster",
    {
      "and": [
        "HiJump",
        "canSpringBallJumpMidAir"
      ]
    }
  ]
}
]
},
{
"link": [
5,
7
],
"name": "Gauntlet Walljumps",
"requires": [
"canDelayedWalljump",
{
"or": [
"HiJump",
"canConsecutiveWalljump"
]
}
]
},
{
"link": [
6,
5
],
"name": "Base",
"requires": []
},
{
"link": [
7,
1
],
"name": "Base",
"requires": [
{
"or": [
"canWalljump",
"h_canFly"
]
},
{
"or": [
"h_canDestroyBombWalls",
{
"obstaclesCleared": [
"A"
]
}
]
}
],
"clearsObstacles": [
"A"
]
},
{
"link": [
7,
1
],
"name": "HiJump",
"requires": [
"HiJump",
{
"or": [
{
"obstaclesCleared": [
"A"
]
},
"h_canBombThings",
{
"and": [
"ScrewAttack",
{
"or": [
"canTwoTileSqueeze",
"SpeedBooster",
{
"and": [
"canXRayStandUp",
"Morph"
]
}
]
}
]
}
]
}
],
"clearsObstacles": [
"A"
],
"devNote": "HiJump alone can only reach the lower bomb block."
},
{
"link": [
7,
1
],
"name": "Spring Ball",
"requires": [
"canSpringBallJumpMidAir",
{
"or": [
"h_canBombThings",
{
"obstaclesCleared": [
"A"
]
}
]
}
],
"clearsObstacles": [
"A"
]
},
{
"link": [
7,
1
],
"name": "Shinespark",
"requires": [
{
"canShineCharge": {
"usedTiles": 33,
"openEnd": 2
}
},
{
"shinespark": {
"frames": 40
}
},
{
"or": [
"h_canDestroyBombWalls",
{
"obstaclesCleared": [
"A"
]
}
]
}
],
"clearsObstacles": [
"A"
],
"note": "Shinespark diagonally from the small hill left of the ship to break part way into the hidden bomb wall, then use Bombs or another means to continue to the left."
},
{
"link": [
7,
5
],
"name": "Base",
"requires": []
},
{
"link": [
8,
1
],
"name": "G-Mode Morph Power Bomb",
"requires": [
"h_canArtificialMorphIBJ",
"h_canArtificialMorphPowerBomb"
],
"note": [
"Using IBJ to reach the Gauntlet entrance bomb blocks, place a Power Bomb and it will hit but not break the blocks.",
"Then IBJ up to to the left, unmorph and use X-Ray to cancel G-mode, the blocks will be broken, allowing Samus to pass through."
]
},
{
"link": [
8,
1
],
"name": "G-Mode Morph Screw Attack",
"requires": [
"h_canArtificialMorphIBJ",
"ScrewAttack"
],
"note": "IBJ up to to the top left of the room. Use X-Ray to cancel G-mode, then fall with Screw Attack to break the bomb blocks."
},
{
"link": [
8,
3
],
"name": "G-Mode Morph IBJ",
"requires": [
"h_canArtificialMorphIBJ"
]
},
{
"link": [
8,
4
],
"name": "G-Mode Morph Power Bomb",
"requires": [
"h_canArtificialMorphPowerBomb"
],
"clearsObstacles": [
"B"
],
"note": "Place a Power Bomb then quickly exit G-Mode before it explodes to break the bomb blocks."
},
{
"link": [
8,
4
],
"name": "G-Mode Morph IBJ",
"requires": [
"h_canArtificialMorphIBJ"
],
"devNote": "Over the wall."
}
]
}