West Ocean
Room ID: 32
|
From: 1
Lower Section - Bottom Left Door
To: 1
Lower Section - Bottom Left Door
Exit condition: {
"leaveWithRunway": {
"length": 24,
"openEnd": 1,
"steepUpTiles": 6,
"steepDownTiles": 1
}
}
|
|
From: 1
Lower Section - Bottom Left Door
To: 5
Lower Section - Bottom Right Door
Entrance condition: {
"comeInWithSpark": {}
}
Requires: {
"shinespark": {
"frames": 146,
"excessFrames": 35
}
}
|
|
From: 1
Lower Section - Bottom Left Door
To: 5
Lower Section - Bottom Right Door
Entrance condition: {
"comeInShinecharging": {
"length": 23,
"openEnd": 1,
"steepUpTiles": 1,
"steepDownTiles": 6
}
}
Requires: "canHorizontalShinespark"
{
"or": [
{
"shinespark": {
"frames": 131,
"excessFrames": 35
}
},
{
"and": [
"canShinechargeMovement",
"canMidairShinespark",
{
"shinespark": {
"frames": 106,
"excessFrames": 35
}
}
]
}
]
}
|
|
|
|
From: 1
Lower Section - Bottom Left Door
To: 15
G-Mode Morph Junction (By Left Door)
Entrance condition: {
"comeInWithGMode": {
"mode": "any",
"morphed": true
}
}
|
|
From: 1
Lower Section - Bottom Left Door
To: 17
G-Mode Morph Junction Direct (By Left Door)
Entrance condition: {
"comeInWithGMode": {
"mode": "direct",
"morphed": true
}
}
|
|
From: 2
Upper Right Section - Top Right Door
To: 2
Upper Right Section - Top Right Door
Exit condition: {
"leaveWithRunway": {
"length": 7,
"openEnd": 1,
"steepUpTiles": 1
}
}
|
|
From: 2
Upper Right Section - Top Right Door
To: 2
Upper Right Section - Top Right Door
Requires: "HiJump" "canTrickyDashJump" "canWalljump" "canShinechargeMovementComplex" Exit condition: {
"leaveShinecharged": {
"framesRemaining": 55
}
}
|
|
From: 2
Upper Right Section - Top Right Door
To: 2
Upper Right Section - Top Right Door
Requires: "HiJump" "SpaceJump" "canShinechargeMovementComplex" Exit condition: {
"leaveShinecharged": {
"framesRemaining": 30
}
}
|
|
From: 2
Upper Right Section - Top Right Door
To: 2
Upper Right Section - Top Right Door
Requires: "HiJump" "canTrickyDashJump" "canShinechargeMovementComplex" Exit condition: {
"leaveShinecharged": {
"framesRemaining": 20
}
}
|
|
From: 2
Upper Right Section - Top Right Door
To: 2
Upper Right Section - Top Right Door
Requires: "canTrickyDashJump"
"canWalljump"
"canShinechargeMovementComplex"
{
"shinespark": {
"frames": 20
}
}
Exit condition: {
"leaveWithSpark": {}
}
|
|
|
|
From: 3
Upper Right Section - Bottom Right Door
To: 2
Upper Right Section - Top Right Door
Enter with G-mode direct, back up to between 1 and 6 pixels from the door transition, and activate X-ray to get very deep stuck in the door. Climb up 1 screen, and perform a turnaround buffered spin-jump away from the door to trigger the transition, bypassing any lock on the door. Entrance condition: {
"comeInWithGMode": {
"mode": "direct",
"morphed": false
}
}
Requires: "canXRayClimb" Bypasses door shell: true |
|
From: 3
Upper Right Section - Bottom Right Door
To: 3
Upper Right Section - Bottom Right Door
Exit condition: {
"leaveWithRunway": {
"length": 33,
"openEnd": 1,
"steepUpTiles": 4
}
}
|
|
From: 3
Upper Right Section - Bottom Right Door
To: 5
Lower Section - Bottom Right Door
Moonfall onto the Homing Geemer walkway twice to clip all the way down into the ocean below. The Moonfall must be performed at the very edge of the slope so that Samus fully falls to the lower area. The first Moonfall will clip into the slope above the walkway, and the second Moonfall will clip all the way through. Pose changing can send Samus inside of the walkway, where the right door connects to the WS main entrance door, and the left door connects to the Moat door. Entrance condition: {
"comeInWithStoredFallSpeed": {
"fallSpeedInTiles": 2
}
}
|
|
From: 3
Upper Right Section - Bottom Right Door
To: 8
Bridge Right Door (Same Connection as Lower Section - Bottom Right Door)
Notable: true 
Moonfall onto the Homing Geemer walkway twice to clip down into the bridge below. The Moonfall must be performed at the very edge of the slope so that Samus fully falls to the lower area. The first Moonfall will clip into the slope above the walkway, and the second Moonfall will clip all the way through. Pose changing will allow Samus to remain inside of the bridge, where the right door connects to the WS main entrance door, and the left door connects to the Moat door. Entrance condition: {
"comeInWithStoredFallSpeed": {
"fallSpeedInTiles": 2
}
}
Requires: "canSkipDoorLock" |
|
|
|
From: 4
Lower Section - Top Right Door
To: 4
Lower Section - Top Right Door
Exit condition: {
"leaveWithRunway": {
"length": 1,
"openEnd": 1
}
}
|
|
From: 4
Lower Section - Top Right Door
To: 4
Lower Section - Top Right Door
Requires: "canPrepareForNextRoom"
{
"doorUnlockedAtNode": 4
}
"h_canCrystalFlash"
|
|
From: 4
Lower Section - Top Right Door
To: 5
Lower Section - Bottom Right Door
|
|
From: 4
Lower Section - Top Right Door
To: 5
Lower Section - Bottom Right Door
While falling out the door, swing out to the left a couple tiles before moving back right, in order to make the camera scroll. Run, jump, fire a shot mid-air, and activate a well-timed mid-air shinespark to make it through the door. Entrance condition: {
"comeInShinecharged": {
"framesRequired": 170
}
}
Requires: "canShinechargeMovementComplex"
"canHeroShot"
{
"shinespark": {
"frames": 22
}
}
Exit condition: {
"leaveWithSpark": {}
}
|
|
From: 4
Lower Section - Top Right Door
To: 8
Bridge Right Door (Same Connection as Lower Section - Bottom Right Door)
Notable: true
Climb up 1 screen. Entrance condition: {
"comeInWithGMode": {
"mode": "direct",
"morphed": false
}
}
Requires: "canSkipDoorLock"
{
"or": [
"canArtificialMorph",
"canWalljump",
"SpaceJump",
{
"and": [
"h_canIBJ",
{
"or": [
"Gravity",
"h_canJumpIntoIBJ",
"h_canBombHorizontally"
]
}
]
},
{
"and": [
"HiJump",
"canSpringBallJumpMidAir"
]
},
"canPreciseGrapple"
]
}
"canXRayClimb"
|
|
From: 4
Lower Section - Top Right Door
To: 8
Bridge Right Door (Same Connection as Lower Section - Bottom Right Door)
Notable: true
Climb up 1 screen. Entrance condition: {
"comeInShinecharged": {
"framesRequired": 1
}
}
Requires: "canSkipDoorLock"
{
"shinespark": {
"frames": 1,
"excessFrames": 1
}
}
"canShinesparkDeepStuck"
"canXRayClimb"
|
|
From: 4
Lower Section - Top Right Door
To: 8
Bridge Right Door (Same Connection as Lower Section - Bottom Right Door)
Notable: true
Enter with G-mode direct, back up to between 1 and 6 pixels from the door transition, and activate X-ray to get very deep stuck in the door. Climb up 1 screen, and perform a turnaround buffered spin-jump away from the door to trigger the transition, bypassing any lock on the door. Entrance condition: {
"comeInWithGMode": {
"mode": "direct",
"morphed": false
}
}
Requires: {
"or": [
"canArtificialMorph",
"canWalljump",
"SpaceJump",
{
"and": [
"h_canIBJ",
{
"or": [
"Gravity",
"h_canJumpIntoIBJ",
"h_canBombHorizontally"
]
}
]
},
{
"and": [
"HiJump",
"canSpringBallJumpMidAir"
]
},
"canPreciseGrapple"
]
}
"canXRayClimb"
Bypasses door shell: true |
|
From: 4
Lower Section - Top Right Door
To: 12
Top Junction
Climb up 2 screens. Entrance condition: {
"comeInWithGMode": {
"mode": "direct",
"morphed": false
}
}
Requires: {
"or": [
"canArtificialMorph",
"canWalljump",
"SpaceJump",
{
"and": [
"h_canIBJ",
{
"or": [
"Gravity",
"h_canJumpIntoIBJ",
"h_canBombHorizontally"
]
}
]
},
{
"and": [
"HiJump",
"canSpringBallJumpMidAir"
]
},
"canPreciseGrapple"
]
}
"canXRayClimb"
|
|
From: 4
Lower Section - Top Right Door
To: 12
Top Junction
Climb up 2 screens. Entrance condition: {
"comeInShinecharged": {
"framesRequired": 1
}
}
Requires: {
"shinespark": {
"frames": 1,
"excessFrames": 1
}
}
"canShinesparkDeepStuck"
"canXRayClimb"
|
|
From: 4
Lower Section - Top Right Door
To: 15
G-Mode Morph Junction (By Left Door)
Entrance condition: {
"comeInWithGMode": {
"mode": "any",
"morphed": true
}
}
Requires: {
"or": [
"Morph",
{
"and": [
"Gravity",
"h_canArtificialMorphIBJ"
]
},
{
"and": [
"h_canArtificialMorphSpringBall",
{
"or": [
"Gravity",
"HiJump",
"canCarefulJump"
]
}
]
},
"h_canArtificialMorphHBJ",
"h_canArtificialMorphDiagonalBombJump"
]
}
|
|
From: 4
Lower Section - Top Right Door
To: 17
G-Mode Morph Junction Direct (By Left Door)
Entrance condition: {
"comeInWithGMode": {
"mode": "direct",
"morphed": true
}
}
Requires: {
"or": [
"Morph",
{
"and": [
"Gravity",
"h_canArtificialMorphIBJ"
]
},
{
"and": [
"h_canArtificialMorphSpringBall",
{
"or": [
"Gravity",
"HiJump",
"canCarefulJump"
]
}
]
},
"h_canArtificialMorphHBJ",
"h_canArtificialMorphDiagonalBombJump"
]
}
|
|
From: 5
Lower Section - Bottom Right Door
To: 2
Upper Right Section - Top Right Door
Enter with G-mode direct, back up to between 1 and 6 pixels from the door transition, and activate X-ray to get very deep stuck in the door. Climb up 4 screens, and perform a turnaround buffered spin-jump away from the door to trigger the transition, bypassing any lock on the door. Entrance condition: {
"comeInWithGMode": {
"mode": "direct",
"morphed": false
}
}
Requires: "canXRayClimb" "canBePatient" Bypasses door shell: true |
|
From: 5
Lower Section - Bottom Right Door
To: 3
Upper Right Section - Bottom Right Door
Climb up 3 screens. Entrance condition: {
"comeInWithGMode": {
"mode": "direct",
"morphed": false
}
}
Requires: "canXRayClimb" "canBePatient" |
|
From: 5
Lower Section - Bottom Right Door
To: 3
Upper Right Section - Bottom Right Door
Climb up 3 screens. Entrance condition: {
"comeInShinecharged": {
"framesRequired": 1
}
}
Requires: {
"shinespark": {
"frames": 1,
"excessFrames": 1
}
}
"canShinesparkDeepStuck"
"canXRayClimb"
"canBePatient"
|
|
From: 5
Lower Section - Bottom Right Door
To: 3
Upper Right Section - Bottom Right Door
Enter with G-mode direct, back up to between 1 and 6 pixels from the door transition, and activate X-ray to get very deep stuck in the door. Climb up 3 screens, and perform a turnaround buffered spin-jump away from the door to trigger the transition, bypassing any lock on the door. Entrance condition: {
"comeInWithGMode": {
"mode": "direct",
"morphed": false
}
}
Requires: "canXRayClimb" "canBePatient" Bypasses door shell: true |
|
From: 5
Lower Section - Bottom Right Door
To: 4
Lower Section - Top Right Door
Requires: "canWalljump" |
|
From: 5
Lower Section - Bottom Right Door
To: 4
Lower Section - Top Right Door
Requires: "SpaceJump" |
|
From: 5
Lower Section - Bottom Right Door
To: 4
Lower Section - Top Right Door
Requires: "Gravity" "h_canIBJ" |
|
From: 5
Lower Section - Bottom Right Door
To: 4
Lower Section - Top Right Door
Jump into an IBJ while avoiding the Ripper, or start an IBJ from the platform to the left and boost horizontally at the top. Requires: {
"or": [
"h_canJumpIntoIBJ",
{
"and": [
"h_canIBJ",
"canBombHorizontally",
"canResetFallSpeed"
]
}
]
}
|
|
From: 5
Lower Section - Bottom Right Door
To: 4
Lower Section - Top Right Door
Requires: "HiJump" "SpeedBooster" |
|
From: 5
Lower Section - Bottom Right Door
To: 4
Lower Section - Top Right Door
Requires: "Gravity"
{
"canShineCharge": {
"usedTiles": 33,
"openEnd": 2
}
}
{
"shinespark": {
"frames": 50,
"excessFrames": 10
}
}
|
|
From: 5
Lower Section - Bottom Right Door
To: 4
Lower Section - Top Right Door
Jump to the submerged platform, then jump again. Requires: "Gravity"
"canShinechargeMovement"
"canMidairShinespark"
{
"canShineCharge": {
"usedTiles": 33,
"openEnd": 2
}
}
{
"shinespark": {
"frames": 35,
"excessFrames": 10
}
}
|
|
From: 5
Lower Section - Bottom Right Door
To: 4
Lower Section - Top Right Door
Attach to the ripper when it is all the way left. Build momentum and launch Heavensward. Requires: "canTrickyJump" "canPreciseGrapple" |
|
From: 5
Lower Section - Bottom Right Door
To: 4
Lower Section - Top Right Door
Requires: "HiJump" "canSpringBallJumpMidAir" |
|
From: 5
Lower Section - Bottom Right Door
To: 4
Lower Section - Top Right Door
Notable: true 
Grapple on the Ripper to get inside the wall under the door. Do a Crystal Flash to force a standup. X-Ray climb up to the door transition. Requires: "canUseEnemies" "canGrappleClip" "h_canCrystalFlash" "canXRayClimb" Bypasses door shell: true |
|
From: 5
Lower Section - Bottom Right Door
To: 5
Lower Section - Bottom Right Door
Exit condition: {
"leaveWithRunway": {
"length": 9,
"openEnd": 1,
"steepUpTiles": 2
}
}
|
|
|
|
From: 5
Lower Section - Bottom Right Door
To: 15
G-Mode Morph Junction (By Left Door)
Entrance condition: {
"comeInWithGMode": {
"mode": "any",
"morphed": true
}
}
Requires: {
"or": [
"Morph",
{
"and": [
"Gravity",
"h_canArtificialMorphIBJ"
]
},
{
"and": [
"h_canArtificialMorphSpringBall",
{
"or": [
"Gravity",
"HiJump",
"canCarefulJump"
]
}
]
},
"h_canArtificialMorphHBJ",
"h_canArtificialMorphDiagonalBombJump"
]
}
|
|
From: 5
Lower Section - Bottom Right Door
To: 17
G-Mode Morph Junction Direct (By Left Door)
Entrance condition: {
"comeInWithGMode": {
"mode": "direct",
"morphed": true
}
}
Requires: {
"or": [
"Morph",
{
"and": [
"Gravity",
"h_canArtificialMorphIBJ"
]
},
{
"and": [
"h_canArtificialMorphSpringBall",
{
"or": [
"Gravity",
"HiJump",
"canCarefulJump"
]
}
]
},
"h_canArtificialMorphHBJ",
"h_canArtificialMorphDiagonalBombJump"
]
}
|
|
West Ocean - G-Mode Setup Lure Zeb from Below (to Top Right Section - Top Right Door) (Extreme)
West Ocean
From: 6
Middle Right Door (By Zeb Farm)
To: 2
Upper Right Section - Top Right Door
Notable: true 
Start from the Middle Right Door next to the Zeb farm. While standing on the right of the Zeb farm, freeze the Zeb while it is still moving up and facing to the right. Quickly go through the morph tunnel with a Bomb, Power Bomb, or Spring Ball, and get onto the small floating platform just above the Zeb farm. After the Zeb is visible, freeze it and jump on top of it. Use the Zeb as a platform to climb high enough to get it to be aligned with the door. Use the background to see how high the Zeb is - Get the Zeb 2-3 tiles higher than the thinner bright line in the background. Note that if the Zeb is unfrozen and off screen horizontally it will despawn, but if it's off screen vertically it will not. Chase the Zeb towards the doorway, refreezing it as needed. Requires: "canTrickyUseFrozenEnemies"
{
"or": [
"h_canBombThings",
"h_canUseSpringBall",
"h_canUsePowerBombs"
]
}
"canCameraManip"
Exit condition: {
"leaveWithGModeSetup": {}
}
|
|
West Ocean - G-Mode Setup Lure Zeb from Below (to Top Right Section - Bottom Right Door) (Extreme)
West Ocean
From: 6
Middle Right Door (By Zeb Farm)
To: 3
Upper Right Section - Bottom Right Door
Notable: true
Start from the Middle Right Door next to the Zeb farm. While standing on the right of the Zeb farm, freeze the Zeb while it is still moving up and facing to the right. Quickly go through the morph tunnel with a Bomb, Power Bomb, or Spring Ball, and get onto the small floating platform just above the Zeb farm. After the Zeb is visible, fall off the platform to make the Zeb move horizontally at the right height to hit Samus in the doorway to the right. Note that if the Zeb is unfrozen and off screen horizontally it will despawn, but if it's off screen vertically it will not. Requires: "canTrickyUseFrozenEnemies"
{
"or": [
"h_canBombThings",
"h_canUseSpringBall",
"h_canUsePowerBombs"
]
}
"canCameraManip"
Exit condition: {
"leaveWithGModeSetup": {}
}
|
|
From: 6
Middle Right Door (By Zeb Farm)
To: 6
Middle Right Door (By Zeb Farm)
Exit condition: {
"leaveWithRunway": {
"length": 3,
"openEnd": 1
}
}
|
|
From: 6
Middle Right Door (By Zeb Farm)
To: 6
Middle Right Door (By Zeb Farm)
Freeze the Zeb from the right while jumping in order to freeze it at the correct height, noting that it will raise 1 more pixel when it thaws. While standing to the left of it, refreeze it again. Keep a half-tile gap between the Zeb and the runway in order to extend the runway as much as possible. Requires: "h_canFrozenEnemyRunway" Exit condition: {
"leaveWithRunway": {
"length": 5,
"openEnd": 0
}
}
|
|
From: 6
Middle Right Door (By Zeb Farm)
To: 6
Middle Right Door (By Zeb Farm)
Requires: {
"refill": [
"Energy",
"Missile",
"Super"
]
}
|
|
From: 6
Middle Right Door (By Zeb Farm)
To: 6
Middle Right Door (By Zeb Farm)
Exit condition: {
"leaveWithGModeSetup": {}
}
|
|
The shot blocks can be destroyed without using bombs Requires: {
"or": [
"h_canBombThings",
"h_canUseSpringBall"
]
}
|
|
Unmorph and shoot the shot block, then x-ray standup, partial floor clip, and down grab to escape. Requires: "Morph" "canXRayStandUp" "canPartialFloorClip" "canDownGrab" |
|
From: 6
Middle Right Door (By Zeb Farm)
To: 12
Top Junction
Notable: true 
Get a Zeb to move left into the morph passage, and reach the end of the tunnel before it. Freeze the bug at the correct height, such that it will move and be able to hit Samus while in the morph tunnel. While in the first two-tile tall region, shoot and refreeze the bug. Then go to the second two-tile region and shoot the block. Return and lure the bug such that it hits Samus and boosts her up and onto the ledge to escape. Be careful not to despawn the enemy by moving it off camera, except while it is frozen. This strat is a one-shot try and failure is a softlock. Requires: "Morph"
"canNeutralDamageBoost"
"canTrickyUseFrozenEnemies"
"canCameraManip"
{
"enemyDamage": {
"enemy": "Zeb",
"hits": 1,
"type": "contact"
}
}
|
|
From: 6
Middle Right Door (By Zeb Farm)
To: 12
Top Junction
Notable: true 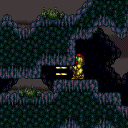

Get a Zeb to move left into the morph passage, and reach the end of the tunnel before it. Shoot the block with Wave or while crouching with Spazer before luring the bug. Quickly lure the bug then use a mockball on the 4 tile floor before the tunnel. This strat is a one-shot try and failure is a softlock. Requires: {
"or": [
"Wave",
"Spazer"
]
}
"canNeutralDamageBoost"
"canMockball"
{
"enemyDamage": {
"enemy": "Zeb",
"hits": 1,
"type": "contact"
}
}
|
|
From: 6
Middle Right Door (By Zeb Farm)
To: 12
Top Junction
Notable: true 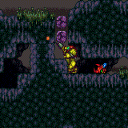
Get a Zeb to move left into the morph passage, and reach the end of the tunnel before it. Must be quick enough to shoot the shot block first. Requires a mockball on the 4 tile floor before the tunnel. This strat is a one-shot try and failure is a softlock. Requires: "canNeutralDamageBoost"
"canMockball"
{
"enemyDamage": {
"enemy": "Zeb",
"hits": 1,
"type": "contact"
}
}
|
|
From: 6
Middle Right Door (By Zeb Farm)
To: 12
Top Junction
Notable: true 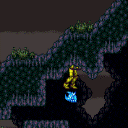
Freeze a bug three tiles to the right of the morph tunnel entrance, directly under the tile where ceiling is higher. Jump onto the bug, crouch, and jump up. The bug must be at a very precise pixel height unless using XRay and Morph. Note that although the ceiling here is 3 tiles thick, only the bottom tile is solid; the other two are slopes pushing Samus up, allowing the trick to be done. Requires: "h_canNonTrivialCeilingClip" "canTrickyUseFrozenEnemies" |
|
From: 6
Middle Right Door (By Zeb Farm)
To: 12
Top Junction
Unmorph and cancel g-mode, shoot the shot block, then x-ray standup, partial floor clip, and down grab to the ledge. Wiggle to escape. Entrance condition: {
"comeInWithGMode": {
"mode": "any",
"morphed": true
}
}
Requires: "canXRayStandUp"
"canPartialFloorClip"
"canDownGrab"
{
"or": [
"h_canArtificialMorphSpringBall",
{
"and": [
"h_canArtificialMorphBombs",
{
"or": [
"canTrickyJump",
{
"enemyDamage": {
"enemy": "Zeb",
"hits": 1,
"type": "contact"
}
}
]
}
]
},
{
"and": [
"h_canArtificialMorphBombHorizontally",
{
"or": [
{
"and": [
"canTrickyJump",
"h_canArtificialMorphPowerBomb"
]
},
{
"and": [
"canNeutralDamageBoost",
{
"enemyDamage": {
"enemy": "Zeb",
"hits": 3,
"type": "contact"
}
}
]
}
]
}
]
}
]
}
|
|
From: 6
Middle Right Door (By Zeb Farm)
To: 12
Top Junction
Climb up 1 screen. Entrance condition: {
"comeInWithGMode": {
"mode": "direct",
"morphed": false
}
}
Requires: "canXRayClimb" |
|
From: 6
Middle Right Door (By Zeb Farm)
To: 12
Top Junction
Climb up 1 screen. Entrance condition: {
"comeInShinecharged": {
"framesRequired": 1
}
}
Requires: {
"shinespark": {
"frames": 1,
"excessFrames": 1
}
}
"canShinesparkDeepStuck"
"canXRayClimb"
|
|
From: 7
Bridge Left Door (Same Connection as Lower Section - Bottom Left Door)
To: 7
Bridge Left Door (Same Connection as Lower Section - Bottom Left Door)
Exit condition: {
"leaveWithRunway": {
"length": 13,
"openEnd": 0
}
}
|
|
From: 7
Bridge Left Door (Same Connection as Lower Section - Bottom Left Door)
To: 7
Bridge Left Door (Same Connection as Lower Section - Bottom Left Door)
Requires: {
"doorUnlockedAtNode": 8
}
Exit condition: {
"leaveWithRunway": {
"length": 14,
"openEnd": 0
}
}
|
|
From: 8
Bridge Right Door (Same Connection as Lower Section - Bottom Right Door)
To: 7
Bridge Left Door (Same Connection as Lower Section - Bottom Left Door)
|
|
From: 8
Bridge Right Door (Same Connection as Lower Section - Bottom Right Door)
To: 8
Bridge Right Door (Same Connection as Lower Section - Bottom Right Door)
Exit condition: {
"leaveWithRunway": {
"length": 13,
"openEnd": 0
}
}
|
|
From: 8
Bridge Right Door (Same Connection as Lower Section - Bottom Right Door)
To: 8
Bridge Right Door (Same Connection as Lower Section - Bottom Right Door)
Requires: {
"doorUnlockedAtNode": 7
}
Exit condition: {
"leaveWithRunway": {
"length": 14,
"openEnd": 0
}
}
|
|
|
|
Requires: {
"obstaclesCleared": [
"B"
]
}
|
|
From: 10
Left Morph Maze Item
To: 14
Morph Maze Junction (Below Super Block)
Requires: "Morph"
{
"or": [
{
"obstaclesNotCleared": [
"B"
]
},
"canRiskPermanentLossOfAccess"
]
}
|
|
Requires: "h_canBombThings" |
|
Crouch and shoot the shot blocks from afar. There is enough time to get past them without Gravity before they respawn. If the shot blocks do not break, roll all the way to the left to reset the camera, then go back. Requires: "Morph" "canCameraManip" |
|
|
|
|
|
Requires: {
"or": [
"h_canBombThings",
"h_canUseSpringBall"
]
}
|
|
From: 12
Top Junction
To: 6
Middle Right Door (By Zeb Farm)
Notable: true 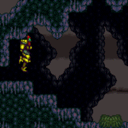
Preopen the door and shotblock, then go back and charge a shinespark. Springball through the short morphball tunnel to just have enough time to shinespark out the door. Requires: "canShinechargeMovementComplex"
"h_canUseSpringBall"
{
"canShineCharge": {
"usedTiles": 33,
"openEnd": 2
}
}
{
"shinespark": {
"frames": 25
}
}
Exit condition: {
"leaveWithSpark": {}
}
|
|
From: 12
Top Junction
To: 8
Bridge Right Door (Same Connection as Lower Section - Bottom Right Door)
Notable: true
Watch the middle Tripper move until it reaches the rightmost platform and then move it off camera. Move to the Zeb Spawner and freeze the bug as it is rising and facing right. Travel through the Morph tunnel and wait above the Zeb. Once it rises to the correct height, let it start moving right. Freeze the Zeb and the Tripper above the Bridge and perform the Enemy Stuck Moonfall. Move off after building enough fall speed and wiggle back and forth to clip through the Bridge and land inside. Requires: "canSkipDoorLock"
"canEnemyStuckMoonfall"
"canTrickyUseFrozenEnemies"
{
"or": [
"h_canUseSpringBall",
{
"and": [
"h_canBombThings",
"h_additionalBomb"
]
}
]
}
|
|
Requires: "h_canFly" |
|
From: 12
Top Junction
To: 9
Top Hidden Item (Above Trippers)
Requires: "canUseEnemies" "HiJump" |
|
From: 12
Top Junction
To: 9
Top Hidden Item (Above Trippers)
Jump on the left platforms to get the middle Tripper on screen, luring it to the right. Get on the middle Tripper and use it to jump to the item. This requires a somewhat precise shot and jump, particularly if the top Tripper is in the way. The jump and shot can be easier and done at the apex of a single jump starting with a crouch. Freezing the Trippers can make this much easier. Requires: "canUseEnemies"
{
"or": [
"canCarefulJump",
"canUseFrozenEnemies",
"canPreciseWalljump"
]
}
|
|
Requires: {
"canShineCharge": {
"usedTiles": 33,
"openEnd": 2
}
}
{
"shinespark": {
"frames": 36
}
}
|
|
Requires: "canUseEnemies" "canBeVeryPatient" |
|
Requires: "h_canCrystalFlash" |
|
The super block respawns. Requires: {
"ammo": {
"type": "Super",
"count": 1
}
}
Clears obstacles: A |
|
From: 12
Top Junction
To: 14
Morph Maze Junction (Below Super Block)
Notable: true 
Watch the lowest Tripper move until it reaches the left side wall and then move it off camera. Move to the Zeb Spawner and freeze the bug as it is rising and facing left. Travel through the Morph tunnel and wait above the Zeb. Once it rises to about halfway up the floating platform, let it start moving left. Freeze the Zeb and the Tripper above the Super Block and perform the Enemy Stuck Moonfall. Move off after building enough fall speed and aim down to clip through the Super block. Requires: "canEnemyStuckMoonfall"
"canTrickyUseFrozenEnemies"
{
"or": [
"h_canUseSpringBall",
{
"and": [
"h_canBombThings",
"h_additionalBomb"
]
}
]
}
|
|
|
|
From: 13
Bottom Junction
To: 1
Lower Section - Bottom Left Door
Jump to the runway connected to the left side door before sparking. Requires: "Gravity"
"canShinechargeMovementComplex"
{
"canShineCharge": {
"usedTiles": 33,
"openEnd": 2
}
}
{
"shinespark": {
"frames": 38
}
}
Exit condition: {
"leaveWithSpark": {}
}
|
|
From: 13
Bottom Junction
To: 4
Lower Section - Top Right Door
Notable: true 
Use walljumps to climb from the ocean floor up to the gravity suit room door. Requires: "canShinechargeMovementComplex"
"canFastWalljumpClimb"
"HiJump"
"Gravity"
{
"canShineCharge": {
"usedTiles": 33,
"openEnd": 2
}
}
Exit condition: {
"leaveShinecharged": {
"framesRemaining": 18
}
}
|
|
From: 13
Bottom Junction
To: 4
Lower Section - Top Right Door
Notable: true 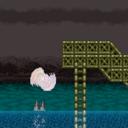

Spacejump out of the water then use walljumps up to the gravity suit room door. Requires: "canShinechargeMovementComplex"
"canFastWalljumpClimb"
"HiJump"
"Gravity"
"SpaceJump"
{
"canShineCharge": {
"usedTiles": 33,
"openEnd": 2
}
}
Exit condition: {
"leaveShinecharged": {
"framesRemaining": 35
}
}
|
|
Requires: {
"or": [
"SpaceJump",
"Grapple"
]
}
|
|
From: 13
Bottom Junction
To: 5
Lower Section - Bottom Right Door
It may be best to have shorter, later jumps to prevent bonking the ceiling or hitting the Ripper. Requires: {
"or": [
"canCarefulJump",
"canConsecutiveWalljump"
]
}
|
|
Requires: "Gravity"
{
"or": [
"canWalljump",
"HiJump",
"h_canIBJ"
]
}
|
|
From: 13
Bottom Junction
To: 5
Lower Section - Bottom Right Door
Requires: "Gravity"
{
"canShineCharge": {
"usedTiles": 33,
"openEnd": 2
}
}
{
"shinespark": {
"frames": 17,
"excessFrames": 5
}
}
|
|
From: 13
Bottom Junction
To: 5
Lower Section - Bottom Right Door
Requires: "Gravity"
"canShinechargeMovementComplex"
{
"or": [
"HiJump",
"SpaceJump"
]
}
{
"canShineCharge": {
"usedTiles": 33,
"openEnd": 2
}
}
Exit condition: {
"leaveShinecharged": {
"framesRemaining": 40
}
}
|
|
From: 13
Bottom Junction
To: 5
Lower Section - Bottom Right Door
Requires: "Gravity"
"canShinechargeMovementComplex"
"canPreciseWalljump"
{
"canShineCharge": {
"usedTiles": 33,
"openEnd": 2
}
}
{
"shinespark": {
"frames": 15
}
}
Exit condition: {
"leaveWithSpark": {}
}
|
|
From: 13
Bottom Junction
To: 5
Lower Section - Bottom Right Door
Requires: "canHorizontalShinespark"
{
"or": [
{
"canShineCharge": {
"usedTiles": 23,
"openEnd": 1,
"steepUpTiles": 6,
"steepDownTiles": 1
}
},
{
"and": [
{
"canShineCharge": {
"usedTiles": 24,
"openEnd": 1,
"steepUpTiles": 6,
"steepDownTiles": 1
}
},
{
"doorUnlockedAtNode": 1
}
]
}
]
}
{
"or": [
{
"shinespark": {
"frames": 131
}
},
{
"and": [
"canShinechargeMovement",
"canMidairShinespark",
{
"shinespark": {
"frames": 106
}
}
]
}
]
}
|
|
From: 13
Bottom Junction
To: 5
Lower Section - Bottom Right Door
Open the right door before sparking to spark out of it. Requires: {
"or": [
"canCarefulJump",
"Grapple",
"Wave",
"SpaceJump"
]
}
{
"or": [
{
"canShineCharge": {
"usedTiles": 23,
"openEnd": 1,
"steepUpTiles": 6,
"steepDownTiles": 1
}
},
{
"and": [
{
"canShineCharge": {
"usedTiles": 24,
"openEnd": 1,
"steepUpTiles": 6,
"steepDownTiles": 1
}
},
{
"doorUnlockedAtNode": 1
}
]
}
]
}
{
"or": [
{
"shinespark": {
"frames": 131
}
},
{
"and": [
"canShinechargeMovement",
"canMidairShinespark",
{
"shinespark": {
"frames": 106
}
}
]
}
]
}
Exit condition: {
"leaveWithSpark": {}
}
|
|
Requires: "Morph" |
|
Requires: "h_canCrystalFlash" |
|
From: 14
Morph Maze Junction (Below Super Block)
To: 10
Left Morph Maze Item
Requires: "Morph" |
|
The super block respawns. Requires: {
"ammo": {
"type": "Super",
"count": 1
}
}
|
|
From: 14
Morph Maze Junction (Below Super Block)
To: 12
Top Junction
It's possible to go down, grab the item, and return before the Super block respawns, if going quick enough. Requires: {
"obstaclesCleared": [
"A"
]
}
"canCarefulJump"
|
|
Requires: "Morph" |
|
From: 15
G-Mode Morph Junction (By Left Door)
To: 16
G-Mode Morph Overloaded PLMs Junction (By Left Door)
Requires: "Grapple" "Morph" |
|
From: 15
G-Mode Morph Junction (By Left Door)
To: 16
G-Mode Morph Overloaded PLMs Junction (By Left Door)
The crumble block is the leftmost flat ceiling tile. Requires: "h_canUseMorphBombs"
"SpaceJump"
{
"or": [
"h_canCeilingBombJump",
"canBeVeryPatient"
]
}
|
|
From: 15
G-Mode Morph Junction (By Left Door)
To: 16
G-Mode Morph Overloaded PLMs Junction (By Left Door)
Start the IBJ on the second downward tile from the door. The crumble block is the leftmost flat ceiling tile. Requires: "h_canArtificialMorphIBJ" "h_canArtificialMorphCeilingBombJump" |
|
From: 16
G-Mode Morph Overloaded PLMs Junction (By Left Door)
To: 14
Morph Maze Junction (Below Super Block)
Requires: {
"or": [
{
"and": [
"SpaceJump",
"Morph"
]
},
"h_canArtificialMorphIBJ",
{
"and": [
"canTrickyDashJump",
"canSpringBallJumpMidAir",
"HiJump"
]
}
]
}
|
|
From: 17
G-Mode Morph Junction Direct (By Left Door)
To: 10
Left Morph Maze Item
Notable: true 
To overload the PLMs, place a PB precisely to the right of the bottom of the second overhang above the door to the Moat. This is at the max jump height without HiJump. Placing the PB higher or lower will not overload the PLMs without many PBs. Requires: {
"itemNotCollectedAtNode": 10
}
"h_canUsePowerBombs"
{
"or": [
"h_canFly",
{
"and": [
"canTrickyDashJump",
"canTrickySpringBallJump",
"HiJump"
]
}
]
}
Clears obstacles: B |
|
From: 17
G-Mode Morph Junction Direct (By Left Door)
To: 16
G-Mode Morph Overloaded PLMs Junction (By Left Door)
To overload the PLMs, place a PB precisely to the right of the bottom of the second overhang above the door to the Moat. This is at the max jump height without HiJump. Placing the PB higher or lower will not overload the PLMs without many PBs. Requires: {
"itemNotCollectedAtNode": 10
}
"canRiskPermanentLossOfAccess"
{
"or": [
"h_canArtificialMorphIBJ",
"Morph",
{
"and": [
"h_canArtificialMorphSpringBall",
{
"or": [
"HiJump",
"h_canArtificialMorphBombThings"
]
}
]
}
]
}
"h_canArtificialMorphPowerBomb"
|
{
"$schema": "../../../schema/m3-room.schema.json",
"id": 32,
"name": "West Ocean",
"area": "Crateria",
"subarea": "East",
"playable": true,
"roomAddress": "0x793FE",
"roomEnvironments": [
{
"heated": false
}
],
"note": "The section between Bowling Alley Path and Bowling Alley is excluded from West Ocean and considered as its own room instead (Homing Geemer Room)",
"nodes": [
{
"id": 1,
"name": "Lower Section - Bottom Left Door",
"nodeType": "door",
"nodeSubType": "blue",
"nodeAddress": "0x00189ca",
"doorEnvironments": [
{
"physics": "air"
}
]
},
{
"id": 2,
"name": "Upper Right Section - Top Right Door",
"nodeType": "door",
"nodeSubType": "blue",
"nodeAddress": "0x00189ee",
"doorEnvironments": [
{
"physics": "air"
}
]
},
{
"id": 3,
"name": "Upper Right Section - Bottom Right Door",
"nodeType": "door",
"nodeSubType": "blue",
"nodeAddress": "0x00189fa",
"doorEnvironments": [
{
"physics": "air"
}
]
},
{
"id": 4,
"name": "Lower Section - Top Right Door",
"nodeType": "door",
"nodeSubType": "grey",
"nodeAddress": "0x0018a06",
"doorEnvironments": [
{
"physics": "air"
}
],
"locks": [
{
"name": "West Ocean Ship Exit Grey Lock (to Gravity Suit Room)",
"lockType": "permanent",
"unlockStrats": [
{
"name": "Base",
"notable": false,
"requires": [
"never"
]
}
]
}
]
},
{
"id": 5,
"name": "Lower Section - Bottom Right Door",
"nodeType": "door",
"nodeSubType": "green",
"nodeAddress": "0x00189d6",
"doorEnvironments": [
{
"physics": "air"
}
],
"locks": [
{
"name": "West Ocean Green Lock (to Wrecked Ship Entrance)",
"lockType": "coloredDoor",
"unlockStrats": [
{
"name": "Base",
"notable": false,
"requires": [
"h_canOpenGreenDoors"
]
}
]
}
]
},
{
"id": 6,
"name": "Middle Right Door (By Zeb Farm)",
"nodeType": "door",
"nodeSubType": "blue",
"nodeAddress": "0x00189e2",
"doorEnvironments": [
{
"physics": "air"
}
]
},
{
"id": 7,
"name": "Bridge Left Door (Same Connection as Lower Section - Bottom Left Door)",
"nodeType": "door",
"nodeSubType": "blue",
"nodeAddress": "0x00189ca",
"doorEnvironments": [
{
"physics": "air"
}
],
"note": [
"This door can only be accessed with the use of glitchy techniques.",
"Graphically it aligns with the Left Door of Homing Geemer Room, but surprisingly it leads to the same location as the Lower Section - Bottom Left Door of West Ocean."
]
},
{
"id": 8,
"name": "Bridge Right Door (Same Connection as Lower Section - Bottom Right Door)",
"nodeType": "door",
"nodeSubType": "blue",
"nodeAddress": "0x00189d6",
"doorEnvironments": [
{
"physics": "air"
}
],
"note": [
"This door can only be accessed with the use of glitchy techniques.",
"Graphically it aligns with the Right Door of Homing Geemer Room, but surprisingly it leads to the same location as the Lower Section - Bottom Right Door of West Ocean."
]
},
{
"id": 9,
"name": "Top Hidden Item (Above Trippers)",
"nodeType": "item",
"nodeSubType": "hidden",
"nodeItem": "Missile",
"nodeAddress": "0x781EE"
},
{
"id": 10,
"name": "Left Morph Maze Item",
"nodeType": "item",
"nodeSubType": "visible",
"nodeItem": "Missile",
"nodeAddress": "0x781F4"
},
{
"id": 11,
"name": "Bottom Left Underwater Item",
"nodeType": "item",
"nodeSubType": "visible",
"nodeItem": "Missile",
"nodeAddress": "0x781E8"
},
{
"id": 12,
"name": "Top Junction",
"nodeType": "junction",
"nodeSubType": "junction"
},
{
"id": 13,
"name": "Bottom Junction",
"nodeType": "junction",
"nodeSubType": "junction"
},
{
"id": 14,
"name": "Morph Maze Junction (Below Super Block)",
"nodeType": "junction",
"nodeSubType": "junction"
},
{
"id": 15,
"name": "G-Mode Morph Junction (By Left Door)",
"nodeType": "junction",
"nodeSubType": "g-mode",
"note": "Represents being at the Moat door with G-Mode and morph or artificial morph"
},
{
"id": 16,
"name": "G-Mode Morph Overloaded PLMs Junction (By Left Door)",
"nodeType": "junction",
"nodeSubType": "g-mode",
"note": "Represents being at the Moat door with G-Mode, PLMs overloaded, and morph or artificial morph"
},
{
"id": 17,
"name": "G-Mode Morph Junction Direct (By Left Door)",
"nodeType": "junction",
"nodeSubType": "g-mode",
"note": "Represents being at the Moat door with G-Mode and morph or artificial morph, in direct G-Mode"
}
],
"obstacles": [
{
"id": "A",
"name": "Shoot Respawning Super Block",
"obstacleType": "abstract"
},
{
"id": "B",
"name": "G-Mode Overload PLMs by PBing Item - Return or Risk Loss of Access",
"obstacleType": "abstract"
}
],
"enemies": [
{
"id": "e1",
"groupName": "West Ocean Zeb",
"enemyName": "Zeb",
"quantity": 1,
"homeNodes": [
6
],
"farmCycles": [
{
"name": "Crouch over spawn point",
"cycleFrames": 120,
"requires": []
}
]
},
{
"id": "e2",
"groupName": "West Ocean Trippers",
"enemyName": "Tripper",
"quantity": 3,
"homeNodes": [
12
]
},
{
"id": "e3",
"groupName": "West Ocean Ripper 2",
"enemyName": "Ripper 2 (green)",
"quantity": 1,
"homeNodes": [
13
]
},
{
"id": "e4",
"groupName": "West Ocean Skulteras",
"enemyName": "Skultera",
"quantity": 2,
"homeNodes": [
13
]
}
],
"reusableRoomwideNotable": [
{
"name": "West Ocean - G-Mode Setup Lure Zeb from Below",
"note": [
"Start from the Middle Right Door next to the Zeb farm.",
"While standing on the right of the Zeb farm, freeze the Zeb while it is still moving up and facing to the right.",
"Quickly go through the morph tunnel with a Bomb, Power Bomb, or Spring Ball, and get above the Zeb.",
"Using Ice, lure the Zeb to the same height as one of the doors to the right, then chase and use it for the setup.",
"Note that if the Zeb is unfrozen and off screen horizontally it will despawn, but if it's off screen vertically it will not."
]
},
{
"name": "West Ocean - Get Inside the Bridge",
"note": [
"Enter the bridge using a deep-stuck X-ray climb from below or high fall speed from above.",
"The doors do not connect to the same locations as Homing Geemer Room.",
"They connect to the same locations as the bottom-left and bottom-right doors of the room.",
"This can be used to bypass a lock on those doors or to exit with a longer runway."
]
}
],
"links": [
{
"from": 1,
"to": [
{
"id": 1
},
{
"id": 5
},
{
"id": 13
},
{
"id": 15
},
{
"id": 17
}
]
},
{
"from": 2,
"to": [
{
"id": 2
},
{
"id": 3
},
{
"id": 12
}
]
},
{
"from": 3,
"to": [
{
"id": 2
},
{
"id": 3
},
{
"id": 5
},
{
"id": 8
},
{
"id": 12
}
]
},
{
"from": 4,
"to": [
{
"id": 4
},
{
"id": 5
},
{
"id": 8
},
{
"id": 12,
"devNote": [
"It's possible to stop half-way by shooting open the door that appears to lead to Bowling Alley",
"This has limited usefulness, because this door actually leads to the same transition as the bottom right door (to the Wrecked Ship Entrance).",
"Likewise the door on the left, which appears to lead to Bowling Alley Path, actually leads to the same transition as the bottom left door (to the Moat).",
"There is a potential application by using this runway to the right, as it is longer than the one in front of the bottom right door.",
"FIXME: add nodes to represent the doors that appear to lead left and right to Bowling Alley Path and Bowling Alley, and add a similar strat leading there."
]
},
{
"id": 15
},
{
"id": 17
}
]
},
{
"from": 5,
"to": [
{
"id": 2
},
{
"id": 3
},
{
"id": 4
},
{
"id": 5
},
{
"id": 13
},
{
"id": 15
},
{
"id": 17
}
]
},
{
"from": 6,
"to": [
{
"id": 2
},
{
"id": 3
},
{
"id": 6
},
{
"id": 12
}
]
},
{
"from": 7,
"to": [
{
"id": 7
},
{
"id": 8
}
]
},
{
"from": 8,
"to": [
{
"id": 7
},
{
"id": 8
}
]
},
{
"from": 9,
"to": [
{
"id": 12
}
]
},
{
"from": 10,
"to": [
{
"id": 13
},
{
"id": 14
}
]
},
{
"from": 11,
"to": [
{
"id": 13
}
]
},
{
"from": 12,
"to": [
{
"id": 2
},
{
"id": 3
},
{
"id": 6
},
{
"id": 8
},
{
"id": 9
},
{
"id": 12
},
{
"id": 13
},
{
"id": 14
}
]
},
{
"from": 13,
"to": [
{
"id": 1
},
{
"id": 4
},
{
"id": 5
},
{
"id": 11
},
{
"id": 13
}
]
},
{
"from": 14,
"to": [
{
"id": 10
},
{
"id": 12
},
{
"id": 13
}
]
},
{
"from": 15,
"to": [
{
"id": 16
}
]
},
{
"from": 16,
"to": [
{
"id": 14
}
]
},
{
"from": 17,
"to": [
{
"id": 10
},
{
"id": 16
}
]
}
],
"strats": [
{
"link": [
1,
1
],
"name": "Leave with Runway",
"requires": [],
"exitCondition": {
"leaveWithRunway": {
"length": 24,
"openEnd": 1,
"steepUpTiles": 6,
"steepDownTiles": 1
}
}
},
{
"link": [
1,
5
],
"name": "Shinespark Into Room",
"entranceCondition": {
"comeInWithSpark": {}
},
"requires": [
{
  "shinespark": {
    "frames": 146,
    "excessFrames": 35
  }
}
]
},
{
"link": [
1,
5
],
"name": "Shinespark",
"entranceCondition": {
"comeInShinecharging": {
"length": 23,
"openEnd": 1,
"steepUpTiles": 1,
"steepDownTiles": 6
}
},
"requires": [
"canHorizontalShinespark",
{
"or": [
{
"shinespark": {
"frames": 131,
"excessFrames": 35
}
},
{
"and": [
"canShinechargeMovement",
"canMidairShinespark",
{
"shinespark": {
"frames": 106,
"excessFrames": 35
}
}
]
}
]
}
]
},
{
"link": [
1,
13
],
"name": "Base",
"requires": []
},
{
"link": [
1,
15
],
"name": "G-mode Morph",
"entranceCondition": {
"comeInWithGMode": {
"mode": "any",
"morphed": true
}
},
"requires": []
},
{
"link": [
1,
17
],
"name": "G-mode Morph",
"entranceCondition": {
"comeInWithGMode": {
"mode": "direct",
"morphed": true
}
},
"requires": []
},
{
"link": [
2,
2
],
"name": "Leave with Runway",
"requires": [],
"exitCondition": {
"leaveWithRunway": {
"length": 7,
"openEnd": 1,
"steepUpTiles": 1
}
}
},
{
"link": [
2,
2
],
"name": "Leave Shinecharged (HiJump Wall Jump)",
"requires": [
"HiJump",
"canTrickyDashJump",
"canWalljump",
"canShinechargeMovementComplex"
],
"exitCondition": {
"leaveShinecharged": {
"framesRemaining": 55
}
}
},
{
"link": [
2,
2
],
"name": "Leave Shinecharged (HiJump Space Jump)",
"requires": [
"HiJump",
"SpaceJump",
"canShinechargeMovementComplex"
],
"exitCondition": {
"leaveShinecharged": {
"framesRemaining": 30
}
}
},
{
"link": [
2,
2
],
"name": "Leave Shinecharged (HiJump)",
"requires": [
"HiJump",
"canTrickyDashJump",
"canShinechargeMovementComplex"
],
"exitCondition": {
"leaveShinecharged": {
"framesRemaining": 20
}
}
},
{
"link": [
2,
2
],
"name": "Leave With Spark",
"requires": [
"canTrickyDashJump",
"canWalljump",
"canShinechargeMovementComplex",
{
"shinespark": {
"frames": 20
}
}
],
"exitCondition": {
"leaveWithSpark": {}
}
},
{
"link": [
2,
12
],
"name": "Base",
"requires": []
},
{
"link": [
3,
2
],
"name": "Very Deep Stuck X-Ray Climb",
"entranceCondition": {
"comeInWithGMode": {
"mode": "direct",
"morphed": false
}
},
"requires": [
"canXRayClimb"
],
"bypassesDoorShell": true,
"note": [
"Enter with G-mode direct, back up to between 1 and 6 pixels from the door transition, and activate X-ray to get very deep stuck in the door.",
"Climb up 1 screen, and perform a turnaround buffered spin-jump away from the door to trigger the transition, bypassing any lock on the door."
]
},
{
"link": [
3,
3
],
"name": "Leave with Runway",
"requires": [],
"exitCondition": {
"leaveWithRunway": {
"length": 33,
"openEnd": 1,
"steepUpTiles": 4
}
}
},
{
"link": [
3,
5
],
"name": "Stored Moonfall Clip Through the Bridge",
"entranceCondition": {
"comeInWithStoredFallSpeed": {
"fallSpeedInTiles": 2
}
},
"requires": [],
"note": [
"Moonfall onto the Homing Geemer walkway twice to clip all the way down into the ocean below.",
"The Moonfall must be performed at the very edge of the slope so that Samus fully falls to the lower area.",
"The first Moonfall will clip into the slope above the walkway, and the second Moonfall will clip all the way through.",
"Pose changing can send Samus inside of the walkway, where the right door connects to the WS main entrance door, and the left door connects to the Moat door."
]
},
{
"link": [
3,
8
],
"name": "Stored Moonfall Clip Into the Bridge",
"notable": true,
"entranceCondition": {
"comeInWithStoredFallSpeed": {
"fallSpeedInTiles": 2
}
},
"requires": [
"canSkipDoorLock"
],
"reusableRoomwideNotable": "West Ocean - Get Inside the Bridge",
"note": [
"Moonfall onto the Homing Geemer walkway twice to clip down into the bridge below.",
"The Moonfall must be performed at the very edge of the slope so that Samus fully falls to the lower area.",
"The first Moonfall will clip into the slope above the walkway, and the second Moonfall will clip all the way through.",
"Pose changing will allow Samus to remain inside of the bridge, where the right door connects to the WS main entrance door, and the left door connects to the Moat door."
]
},
{
"link": [
3,
12
],
"name": "Base",
"requires": []
},
{
"link": [
4,
4
],
"name": "Leave with Runway",
"requires": [],
"exitCondition": {
"leaveWithRunway": {
"length": 1,
"openEnd": 1
}
}
},
{
"link": [
4,
4
],
"name": "Crystal Flash",
"requires": [
"canPrepareForNextRoom",
{
"doorUnlockedAtNode": 4
},
"h_canCrystalFlash"
],
"devNote": "This is to represent the ability to Crystal Flash after coming in jumping, shooting open the door, and landing in the door frame."
},
{
"link": [
4,
5
],
"name": "Base",
"requires": []
},
{
"link": [
4,
5
],
"name": "Hero Shot Spark",
"entranceCondition": {
"comeInShinecharged": {
"framesRequired": 170
}
},
"requires": [
"canShinechargeMovementComplex",
"canHeroShot",
{
"shinespark": {
"frames": 22
}
}
],
"exitCondition": {
"leaveWithSpark": {}
},
"unlocksDoors": [
{
"types": [
"super"
],
"requires": []
},
{
"types": [
"missiles",
"powerbomb"
],
"requires": [
"never"
]
}
],
"note": [
"While falling out the door, swing out to the left a couple tiles before moving back right, in order to make the camera scroll.",
"Run, jump, fire a shot mid-air, and activate a well-timed mid-air shinespark to make it through the door."
]
},
{
"link": [
4,
8
],
"name": "West Ocean - G-Mode Deep Stuck X-Ray Climb into the Bridge",
"notable": true,
"entranceCondition": {
"comeInWithGMode": {
"mode": "direct",
"morphed": false
}
},
"requires": [
"canSkipDoorLock",
{
"or": [
"canArtificialMorph",
"canWalljump",
"SpaceJump",
{
"and": [
"h_canIBJ",
{
"or": [
"Gravity",
"h_canJumpIntoIBJ",
"h_canBombHorizontally"
]
}
]
},
{
"and": [
"HiJump",
"canSpringBallJumpMidAir"
]
},
"canPreciseGrapple"
]
},
"canXRayClimb"
],
"reusableRoomwideNotable": "West Ocean - Get Inside the Bridge",
"note": "Climb up 1 screen."
},
{
"link": [
4,
8
],
"name": "West Ocean - Shinespark Deep Stuck X-Ray Climb into the Bridge",
"notable": true,
"entranceCondition": {
"comeInShinecharged": {
"framesRequired": 1
}
},
"requires": [
"canSkipDoorLock",
{
"shinespark": {
"frames": 1,
"excessFrames": 1
}
},
"canShinesparkDeepStuck",
"canXRayClimb"
],
"reusableRoomwideNotable": "West Ocean - Get Inside the Bridge",
"note": "Climb up 1 screen."
},
{
"link": [
4,
8
],
"name": "West Ocean - Very Deep Stuck X-Ray Climb into the Bridge",
"notable": true,
"entranceCondition": {
"comeInWithGMode": {
"mode": "direct",
"morphed": false
}
},
"requires": [
{
"or": [
"canArtificialMorph",
"canWalljump",
"SpaceJump",
{
"and": [
"h_canIBJ",
{
"or": [
"Gravity",
"h_canJumpIntoIBJ",
"h_canBombHorizontally"
]
}
]
},
{
"and": [
"HiJump",
"canSpringBallJumpMidAir"
]
},
"canPreciseGrapple"
]
},
"canXRayClimb"
],
"bypassesDoorShell": true,
"reusableRoomwideNotable": "West Ocean - Get Inside the Bridge",
"note": [
"Enter with G-mode direct, back up to between 1 and 6 pixels from the door transition, and activate X-ray to get very deep stuck in the door.",
"Climb up 1 screen, and perform a turnaround buffered spin-jump away from the door to trigger the transition, bypassing any lock on the door."
]
},
{
"link": [
4,
12
],
"name": "G-Mode Deep Stuck X-Ray Climb",
"entranceCondition": {
"comeInWithGMode": {
"mode": "direct",
"morphed": false
}
},
"requires": [
{
"or": [
"canArtificialMorph",
"canWalljump",
"SpaceJump",
{
"and": [
"h_canIBJ",
{
"or": [
"Gravity",
"h_canJumpIntoIBJ",
"h_canBombHorizontally"
]
}
]
},
{
"and": [
"HiJump",
"canSpringBallJumpMidAir"
]
},
"canPreciseGrapple"
]
},
"canXRayClimb"
],
"note": "Climb up 2 screens."
},
{
"link": [
4,
12
],
"name": "Shinespark Deep Stuck X-Ray Climb",
"entranceCondition": {
"comeInShinecharged": {
"framesRequired": 1
}
},
"requires": [
{
"shinespark": {
"frames": 1,
"excessFrames": 1
}
},
"canShinesparkDeepStuck",
"canXRayClimb"
],
"note": "Climb up 2 screens."
},
{
"link": [
4,
15
],
"name": "G-mode Morph",
"entranceCondition": {
"comeInWithGMode": {
"mode": "any",
"morphed": true
}
},
"requires": [
{
  "or": [
    "Morph",
    {
      "and": [
        "Gravity",
        "h_canArtificialMorphIBJ"
      ]
    },
    {
      "and": [
        "h_canArtificialMorphSpringBall",
        {
          "or": [
            "Gravity",
            "HiJump",
            "canCarefulJump"
          ]
        }
      ]
    },
    "h_canArtificialMorphHBJ",
    "h_canArtificialMorphDiagonalBombJump"
  ]
}
]
},
{
"link": [
4,
17
],
"name": "G-mode Morph",
"entranceCondition": {
"comeInWithGMode": {
"mode": "direct",
"morphed": true
}
},
"requires": [
{
  "or": [
    "Morph",
    {
      "and": [
        "Gravity",
        "h_canArtificialMorphIBJ"
      ]
    },
    {
      "and": [
        "h_canArtificialMorphSpringBall",
        {
          "or": [
            "Gravity",
            "HiJump",
            "canCarefulJump"
          ]
        }
      ]
    },
    "h_canArtificialMorphHBJ",
    "h_canArtificialMorphDiagonalBombJump"
  ]
}
]
},
{
"link": [
5,
2
],
"name": "Very Deep Stuck X-Ray Climb",
"entranceCondition": {
"comeInWithGMode": {
"mode": "direct",
"morphed": false
}
},
"requires": [
"canXRayClimb",
"canBePatient"
],
"bypassesDoorShell": true,
"note": [
"Enter with G-mode direct, back up to between 1 and 6 pixels from the door transition, and activate X-ray to get very deep stuck in the door.",
"Climb up 4 screens, and perform a turnaround buffered spin-jump away from the door to trigger the transition, bypassing any lock on the door."
]
},
{
"link": [
5,
3
],
"name": "G-Mode Deep Stuck X-Ray Climb",
"entranceCondition": {
"comeInWithGMode": {
"mode": "direct",
"morphed": false
}
},
"requires": [
"canXRayClimb",
"canBePatient"
],
"note": "Climb up 3 screens."
},
{
"link": [
5,
3
],
"name": "Shinespark Deep Stuck X-Ray Climb",
"entranceCondition": {
"comeInShinecharged": {
"framesRequired": 1
}
},
"requires": [
{
"shinespark": {
"frames": 1,
"excessFrames": 1
}
},
"canShinesparkDeepStuck",
"canXRayClimb",
"canBePatient"
],
"note": "Climb up 3 screens."
},
{
"link": [
5,
3
],
"name": "Very Deep Stuck X-Ray Climb",
"entranceCondition": {
"comeInWithGMode": {
"mode": "direct",
"morphed": false
}
},
"requires": [
"canXRayClimb",
"canBePatient"
],
"bypassesDoorShell": true,
"note": [
"Enter with G-mode direct, back up to between 1 and 6 pixels from the door transition, and activate X-ray to get very deep stuck in the door.",
"Climb up 3 screens, and perform a turnaround buffered spin-jump away from the door to trigger the transition, bypassing any lock on the door."
]
},
{
"link": [
5,
4
],
"name": "Wall Jump",
"requires": [
"canWalljump"
]
},
{
"link": [
5,
4
],
"name": "Space Jump",
"requires": [
"SpaceJump"
]
},
{
"link": [
5,
4
],
"name": "IBJ from the Water",
"requires": [
"Gravity",
"h_canIBJ"
]
},
{
"link": [
5,
4
],
"name": "IBJ from the Platforms",
"requires": [
{
  "or": [
    "h_canJumpIntoIBJ",
    {
      "and": [
        "h_canIBJ",
        "canBombHorizontally",
        "canResetFallSpeed"
      ]
    }
  ]
}
],
"note": "Jump into an IBJ while avoiding the Ripper, or start an IBJ from the platform to the left and boost horizontally at the top."
},
{
"link": [
5,
4
],
"name": "SpeedyJump",
"requires": [
"HiJump",
"SpeedBooster"
]
},
{
"link": [
5,
4
],
"name": "Shinespark",
"requires": [
"Gravity",
{
"canShineCharge": {
"usedTiles": 33,
"openEnd": 2
}
},
{
"shinespark": {
"frames": 50,
"excessFrames": 10
}
}
]
},
{
"link": [
5,
4
],
"name": "Health Conscious Shinespark",
"requires": [
"Gravity",
"canShinechargeMovement",
"canMidairShinespark",
{
"canShineCharge": {
"usedTiles": 33,
"openEnd": 2
}
},
{
"shinespark": {
"frames": 35,
"excessFrames": 10
}
}
],
"note": "Jump to the submerged platform, then jump again."
},
{
"link": [
5,
4
],
"name": "West Ocean Grapple Fling",
"requires": [
"canTrickyJump",
"canPreciseGrapple"
],
"note": "Attach to the ripper when it is all the way left. Build momentum and launch Heavensward."
},
{
"link": [
5,
4
],
"name": "HiJump Springball Jump",
"requires": [
"HiJump",
"canSpringBallJumpMidAir"
]
},
{
"link": [
5,
4
],
"name": "West Ocean Grapple Clip Door Lock Skip",
"notable": true,
"requires": [
"canUseEnemies",
"canGrappleClip",
"h_canCrystalFlash",
"canXRayClimb"
],
"bypassesDoorShell": true,
"note": [
"Grapple on the Ripper to get inside the wall under the door.",
"Do a Crystal Flash to force a standup.",
"X-Ray climb up to the door transition."
],
"devNote": "TODO: There may be Bob strats to skip the Crystal Flash requirement."
},
{
"link": [
5,
5
],
"name": "Leave with Runway",
"requires": [],
"exitCondition": {
"leaveWithRunway": {
"length": 9,
"openEnd": 1,
"steepUpTiles": 2
}
}
},
{
"link": [
5,
13
],
"name": "Base",
"requires": []
},
{
"link": [
5,
15
],
"name": "G-mode Morph",
"entranceCondition": {
"comeInWithGMode": {
"mode": "any",
"morphed": true
}
},
"requires": [
{
  "or": [
    "Morph",
    {
      "and": [
        "Gravity",
        "h_canArtificialMorphIBJ"
      ]
    },
    {
      "and": [
        "h_canArtificialMorphSpringBall",
        {
          "or": [
            "Gravity",
            "HiJump",
            "canCarefulJump"
          ]
        }
      ]
    },
    "h_canArtificialMorphHBJ",
    "h_canArtificialMorphDiagonalBombJump"
  ]
}
]
},
{
"link": [
5,
17
],
"name": "G-mode Morph",
"entranceCondition": {
"comeInWithGMode": {
"mode": "direct",
"morphed": true
}
},
"requires": [
{
  "or": [
    "Morph",
    {
      "and": [
        "Gravity",
        "h_canArtificialMorphIBJ"
      ]
    },
    {
      "and": [
        "h_canArtificialMorphSpringBall",
        {
          "or": [
            "Gravity",
            "HiJump",
            "canCarefulJump"
          ]
        }
      ]
    },
    "h_canArtificialMorphHBJ",
    "h_canArtificialMorphDiagonalBombJump"
  ]
}
]
},
{
"link": [
6,
2
],
"name": "West Ocean - G-Mode Setup Lure Zeb from Below (to Top Right Section - Top Right Door)",
"notable": true,
"requires": [
"canTrickyUseFrozenEnemies",
{
"or": [
"h_canBombThings",
"h_canUseSpringBall",
"h_canUsePowerBombs"
]
},
"canCameraManip"
],
"exitCondition": {
"leaveWithGModeSetup": {}
},
"unlocksDoors": [
{
"types": [
"ammo"
],
"requires": []
}
],
"reusableRoomwideNotable": "West Ocean - G-Mode Setup Lure Zeb from Below",
"note": [
"Start from the Middle Right Door next to the Zeb farm.",
"While standing on the right of the Zeb farm, freeze the Zeb while it is still moving up and facing to the right.",
"Quickly go through the morph tunnel with a Bomb, Power Bomb, or Spring Ball, and get onto the small floating platform just above the Zeb farm.",
"After the Zeb is visible, freeze it and jump on top of it. Use the Zeb as a platform to climb high enough to get it to be aligned with the door.",
"Use the background to see how high the Zeb is - Get the Zeb 2-3 tiles higher than the thinner bright line in the background.",
"Note that if the Zeb is unfrozen and off screen horizontally it will despawn, but if it's off screen vertically it will not.",
"Chase the Zeb towards the doorway, refreezing it as needed."
]
},
{
"link": [
6,
3
],
"name": "West Ocean - G-Mode Setup Lure Zeb from Below (to Top Right Section - Bottom Right Door)",
"notable": true,
"requires": [
"canTrickyUseFrozenEnemies",
{
"or": [
"h_canBombThings",
"h_canUseSpringBall",
"h_canUsePowerBombs"
]
},
"canCameraManip"
],
"exitCondition": {
"leaveWithGModeSetup": {}
},
"unlocksDoors": [
{
"types": [
"ammo"
],
"requires": []
}
],
"reusableRoomwideNotable": "West Ocean - G-Mode Setup Lure Zeb from Below",
"note": [
"Start from the Middle Right Door next to the Zeb farm.",
"While standing on the right of the Zeb farm, freeze the Zeb while it is still moving up and facing to the right.",
"Quickly go through the morph tunnel with a Bomb, Power Bomb, or Spring Ball, and get onto the small floating platform just above the Zeb farm.",
"After the Zeb is visible, fall off the platform to make the Zeb move horizontally at the right height to hit Samus in the doorway to the right.",
"Note that if the Zeb is unfrozen and off screen horizontally it will despawn, but if it's off screen vertically it will not."
]
},
{
"link": [
6,
6
],
"name": "Leave with Runway",
"requires": [],
"exitCondition": {
"leaveWithRunway": {
"length": 3,
"openEnd": 1
}
}
},
{
"link": [
6,
6
],
"name": "Leave With Runway - Frozen Zeb",
"requires": [
"h_canFrozenEnemyRunway"
],
"exitCondition": {
"leaveWithRunway": {
"length": 5,
"openEnd": 0
}
},
"note": [
"Freeze the Zeb from the right while jumping in order to freeze it at the correct height, noting that it will raise 1 more pixel when it thaws.",
"While standing to the left of it, refreeze it again. Keep a half-tile gap between the Zeb and the runway in order to extend the runway as much as possible."
],
"devNote": "The Zeb can be used to extend the runway at 2 and 3, but that requires a blind and precise positioning (and is not very useful at 3)."
},
{
"link": [
6,
6
],
"name": "Zeb Farm",
"requires": [
{
  "refill": [
    "Energy",
    "Missile",
    "Super"
  ]
}
]
},
{
"link": [
6,
6
],
"name": "G-Mode Setup - Get Hit by Zeb",
"notable": false,
"requires": [],
"exitCondition": {
"leaveWithGModeSetup": {}
}
},
{
"link": [
6,
12
],
"name": "Base",
"requires": [
{
  "or": [
    "h_canBombThings",
    "h_canUseSpringBall"
  ]
}
],
"note": "The shot blocks can be destroyed without using bombs"
},
{
"link": [
6,
12
],
"name": "X-Ray Standup",
"requires": [
"Morph",
"canXRayStandUp",
"canPartialFloorClip",
"canDownGrab"
],
"note": "Unmorph and shoot the shot block, then x-ray standup, partial floor clip, and down grab to escape."
},
{
"link": [
6,
12
],
"name": "West Ocean Bug Boost with Ice",
"notable": true,
"requires": [
"Morph",
"canNeutralDamageBoost",
"canTrickyUseFrozenEnemies",
"canCameraManip",
{
"enemyDamage": {
"enemy": "Zeb",
"hits": 1,
"type": "contact"
}
}
],
"note": [
"Get a Zeb to move left into the morph passage, and reach the end of the tunnel before it.",
"Freeze the bug at the correct height, such that it will move and be able to hit Samus while in the morph tunnel.",
"While in the first two-tile tall region, shoot and refreeze the bug. Then go to the second two-tile region and shoot the block.",
"Return and lure the bug such that it hits Samus and boosts her up and onto the ledge to escape.",
"Be careful not to despawn the enemy by moving it off camera, except while it is frozen. This strat is a one-shot try and failure is a softlock."
],
"devNote": "Could use a failure definition?"
},
{
"link": [
6,
12
],
"name": "West Ocean Bug Boost with Wave or Spazer",
"notable": true,
"requires": [
{
"or": [
"Wave",
"Spazer"
]
},
"canNeutralDamageBoost",
"canMockball",
{
"enemyDamage": {
"enemy": "Zeb",
"hits": 1,
"type": "contact"
}
}
],
"note": [
"Get a Zeb to move left into the morph passage, and reach the end of the tunnel before it.",
"Shoot the block with Wave or while crouching with Spazer before luring the bug.",
"Quickly lure the bug then use a mockball on the 4 tile floor before the tunnel.",
"This strat is a one-shot try and failure is a softlock."
],
"devNote": "Could use a failure definition?"
},
{
"link": [
6,
12
],
"name": "West Ocean Bug Boost",
"notable": true,
"requires": [
"canNeutralDamageBoost",
"canMockball",
{
"enemyDamage": {
"enemy": "Zeb",
"hits": 1,
"type": "contact"
}
}
],
"note": [
"Get a Zeb to move left into the morph passage, and reach the end of the tunnel before it.",
"Must be quick enough to shoot the shot block first. Requires a mockball on the 4 tile floor before the tunnel.",
"This strat is a one-shot try and failure is a softlock."
],
"devNote": "Could use a failure definition?"
},
{
"link": [
6,
12
],
"name": "West Ocean Bug Ice Clip",
"notable": true,
"requires": [
"h_canNonTrivialCeilingClip",
"canTrickyUseFrozenEnemies"
],
"note": [
"Freeze a bug three tiles to the right of the morph tunnel entrance, directly under the tile where ceiling is higher.",
"Jump onto the bug, crouch, and jump up.",
"The bug must be at a very precise pixel height unless using XRay and Morph.",
"Note that although the ceiling here is 3 tiles thick, only the bottom tile is solid; the other two are slopes pushing Samus up, allowing the trick to be done."
]
},
{
"link": [
6,
12
],
"name": "G-mode Morph X-Ray Standup",
"entranceCondition": {
"comeInWithGMode": {
"mode": "any",
"morphed": true
}
},
"requires": [
"canXRayStandUp",
"canPartialFloorClip",
"canDownGrab",
{
"or": [
"h_canArtificialMorphSpringBall",
{
"and": [
"h_canArtificialMorphBombs",
{
"or": [
"canTrickyJump",
{
"enemyDamage": {
"enemy": "Zeb",
"hits": 1,
"type": "contact"
}
}
]
}
]
},
{
"and": [
"h_canArtificialMorphBombHorizontally",
{
"or": [
{
"and": [
"canTrickyJump",
"h_canArtificialMorphPowerBomb"
]
},
{
"and": [
"canNeutralDamageBoost",
{
"enemyDamage": {
"enemy": "Zeb",
"hits": 3,
"type": "contact"
}
}
]
}
]
}
]
}
]
}
],
"note": "Unmorph and cancel g-mode, shoot the shot block, then x-ray standup, partial floor clip, and down grab to the ledge. Wiggle to escape."
},
{
"link": [
6,
12
],
"name": "G-Mode Deep Stuck X-Ray Climb",
"entranceCondition": {
"comeInWithGMode": {
"mode": "direct",
"morphed": false
}
},
"requires": [
"canXRayClimb"
],
"note": "Climb up 1 screen."
},
{
"link": [
6,
12
],
"name": "Shinespark Deep Stuck X-Ray Climb",
"entranceCondition": {
"comeInShinecharged": {
"framesRequired": 1
}
},
"requires": [
{
"shinespark": {
"frames": 1,
"excessFrames": 1
}
},
"canShinesparkDeepStuck",
"canXRayClimb"
],
"note": "Climb up 1 screen."
},
{
"link": [
7,
7
],
"name": "Leave With Runway",
"requires": [],
"exitCondition": {
"leaveWithRunway": {
"length": 13,
"openEnd": 0
}
}
},
{
"link": [
7,
7
],
"name": "Leave With Runway, Both Doors Open",
"requires": [
{
  "doorUnlockedAtNode": 8
}
],
"exitCondition": {
"leaveWithRunway": {
"length": 14,
"openEnd": 0
}
},
"unlocksDoors": [
{
"nodeId": 8,
"types": [
"ammo"
],
"requires": []
}
]
},
{
"link": [
8,
7
],
"name": "Base",
"requires": []
},
{
"link": [
8,
8
],
"name": "Leave With Runway",
"requires": [],
"exitCondition": {
"leaveWithRunway": {
"length": 13,
"openEnd": 0
}
}
},
{
"link": [
8,
8
],
"name": "Leave With Runway, Both Doors Open",
"requires": [
{
  "doorUnlockedAtNode": 7
}
],
"exitCondition": {
"leaveWithRunway": {
"length": 14,
"openEnd": 0
}
},
"unlocksDoors": [
{
"nodeId": 7,
"types": [
"ammo"
],
"requires": []
}
]
},
{
"link": [
9,
12
],
"name": "Base",
"requires": []
},
{
"link": [
10,
13
],
"name": "Base",
"requires": [
{
  "obstaclesCleared": [
    "B"
  ]
}
],
"devNote": "This is to return below if using g-mode strats, to avoid canRiskPermanentLossOfAccess."
},
{
"link": [
10,
14
],
"name": "Base",
"requires": [
"Morph",
{
"or": [
{
"obstaclesNotCleared": [
"B"
]
},
"canRiskPermanentLossOfAccess"
]
}
]
},
{
"link": [
11,
13
],
"name": "Base",
"requires": [
"h_canBombThings"
]
},
{
"link": [
11,
13
],
"name": "Camera Maniuplation",
"requires": [
"Morph",
"canCameraManip"
],
"note": [
"Crouch and shoot the shot blocks from afar. There is enough time to get past them without Gravity before they respawn.",
"If the shot blocks do not break, roll all the way to the left to reset the camera, then go back."
]
},
{
"link": [
12,
2
],
"name": "Base",
"requires": []
},
{
"link": [
12,
3
],
"name": "Base",
"requires": []
},
{
"link": [
12,
6
],
"name": "Base",
"requires": [
{
  "or": [
    "h_canBombThings",
    "h_canUseSpringBall"
  ]
}
]
},
{
"link": [
12,
6
],
"name": "West Ocean Shinespark, Morph Tunnel Rush",
"notable": true,
"requires": [
"canShinechargeMovementComplex",
"h_canUseSpringBall",
{
"canShineCharge": {
"usedTiles": 33,
"openEnd": 2
}
},
{
"shinespark": {
"frames": 25
}
}
],
"exitCondition": {
"leaveWithSpark": {}
},
"unlocksDoors": [
{
"types": [
"ammo"
],
"requires": []
}
],
"note": [
"Preopen the door and shotblock, then go back and charge a shinespark.",
"Springball through the short morphball tunnel to just have enough time to shinespark out the door."
]
},
{
"link": [
12,
8
],
"name": "West Ocean - Enemy Stuck Moonfall into the Bridge",
"notable": true,
"requires": [
"canSkipDoorLock",
"canEnemyStuckMoonfall",
"canTrickyUseFrozenEnemies",
{
"or": [
"h_canUseSpringBall",
{
"and": [
"h_canBombThings",
"h_additionalBomb"
]
}
]
}
],
"reusableRoomwideNotable": "West Ocean - Get Inside the Bridge",
"note": [
"Watch the middle Tripper move until it reaches the rightmost platform and then move it off camera.",
"Move to the Zeb Spawner and freeze the bug as it is rising and facing right.",
"Travel through the Morph tunnel and wait above the Zeb.",
"Once it rises to the correct height, let it start moving right.",
"Freeze the Zeb and the Tripper above the Bridge and perform the Enemy Stuck Moonfall.",
"Move off after building enough fall speed and wiggle back and forth to clip through the Bridge and land inside."
],
"devNote": "FIXME: A [6, 8] version of this strat is possible with slightly different requirements but is more difficult."
},
{
"link": [
12,
9
],
"name": "Base",
"requires": [
"h_canFly"
]
},
{
"link": [
12,
9
],
"name": "Climb the Trippers with HiJump",
"requires": [
"canUseEnemies",
"HiJump"
]
},
{
"link": [
12,
9
],
"name": "Climb the Trippers Bootless",
"requires": [
"canUseEnemies",
{
"or": [
"canCarefulJump",
"canUseFrozenEnemies",
"canPreciseWalljump"
]
}
],
"note": [
"Jump on the left platforms to get the middle Tripper on screen, luring it to the right.",
"Get on the middle Tripper and use it to jump to the item. This requires a somewhat precise shot and jump, particularly if the top Tripper is in the way.",
"The jump and shot can be easier and done at the apex of a single jump starting with a crouch. Freezing the Trippers can make this much easier."
]
},
{
"link": [
12,
9
],
"name": "Shinespark",
"requires": [
{
"canShineCharge": {
"usedTiles": 33,
"openEnd": 2
}
},
{
"shinespark": {
"frames": 36
}
}
]
},
{
"link": [
12,
9
],
"name": "Slow Tripper Ride",
"requires": [
"canUseEnemies",
"canBeVeryPatient"
]
},
{
"link": [
12,
12
],
"name": "Crystal Flash",
"requires": [
"h_canCrystalFlash"
]
},
{
"link": [
12,
14
],
"name": "Base",
"requires": [
{
  "ammo": {
    "type": "Super",
    "count": 1
  }
}
],
"clearsObstacles": [
"A"
],
"note": "The super block respawns.",
"devNote": [
"This obstacle is to represent shooting the super block and is only used in quickly returning after grabbing the item.",
"It is necessary because there is a g-mode strat to get to 14."
]
},
{
"link": [
12,
14
],
"name": "West Ocean - Enemy Stuck Moonfall Super Block Clip",
"notable": true,
"requires": [
"canEnemyStuckMoonfall",
"canTrickyUseFrozenEnemies",
{
"or": [
"h_canUseSpringBall",
{
"and": [
"h_canBombThings",
"h_additionalBomb"
]
}
]
}
],
"note": [
"Watch the lowest Tripper move until it reaches the left side wall and then move it off camera.",
"Move to the Zeb Spawner and freeze the bug as it is rising and facing left.",
"Travel through the Morph tunnel and wait above the Zeb.",
"Once it rises to about halfway up the floating platform, let it start moving left.",
"Freeze the Zeb and the Tripper above the Super Block and perform the Enemy Stuck Moonfall.",
"Move off after building enough fall speed and aim down to clip through the Super block."
],
"devNote": "FIXME: A [6, 14] version of this strat is possible with slightly different requirements but is more difficult."
},
{
"link": [
13,
1
],
"name": "Base",
"requires": []
},
{
"link": [
13,
1
],
"name": "Ocean Floor Shinecharge, Spark Left",
"requires": [
"Gravity",
"canShinechargeMovementComplex",
{
"canShineCharge": {
"usedTiles": 33,
"openEnd": 2
}
},
{
"shinespark": {
"frames": 38
}
}
],
"exitCondition": {
"leaveWithSpark": {}
},
"unlocksDoors": [
{
"types": [
"ammo"
],
"requires": []
}
],
"note": "Jump to the runway connected to the left side door before sparking."
},
{
"link": [
13,
4
],
"name": "West Ocean Floor Shinecharge, Fast Wallclimb to Gravity Door",
"notable": true,
"requires": [
"canShinechargeMovementComplex",
"canFastWalljumpClimb",
"HiJump",
"Gravity",
{
"canShineCharge": {
"usedTiles": 33,
"openEnd": 2
}
}
],
"exitCondition": {
"leaveShinecharged": {
"framesRemaining": 18
}
},
"unlocksDoors": [
{
"types": [
"ammo"
],
"requires": []
}
],
"note": "Use walljumps to climb from the ocean floor up to the gravity suit room door."
},
{
"link": [
13,
4
],
"name": "West Ocean Floor Shinecharge, Fast Spacejump Wallclimb to Gravity Door",
"notable": true,
"requires": [
"canShinechargeMovementComplex",
"canFastWalljumpClimb",
"HiJump",
"Gravity",
"SpaceJump",
{
"canShineCharge": {
"usedTiles": 33,
"openEnd": 2
}
}
],
"exitCondition": {
"leaveShinecharged": {
"framesRemaining": 35
}
},
"unlocksDoors": [
{
"types": [
"ammo"
],
"requires": []
}
],
"note": "Spacejump out of the water then use walljumps up to the gravity suit room door."
},
{
"link": [
13,
5
],
"name": "Base",
"requires": [
{
  "or": [
    "SpaceJump",
    "Grapple"
  ]
}
]
},
{
"link": [
13,
5
],
"name": "West Ocean Platforming",
"requires": [
{
  "or": [
    "canCarefulJump",
    "canConsecutiveWalljump"
  ]
}
],
"note": "It may be best to have shorter, later jumps to prevent bonking the ceiling or hitting the Ripper."
},
{
"link": [
13,
5
],
"name": "Gravity Suit",
"requires": [
"Gravity",
{
"or": [
"canWalljump",
"HiJump",
"h_canIBJ"
]
}
],
"devNote": "A speedy jump would be obsoleted by another strat for being tricky."
},
{
"link": [
13,
5
],
"name": "Gravity Suit and Shinespark",
"requires": [
"Gravity",
{
"canShineCharge": {
"usedTiles": 33,
"openEnd": 2
}
},
{
"shinespark": {
"frames": 17,
"excessFrames": 5
}
}
]
},
{
"link": [
13,
5
],
"name": "Ocean Floor Jump Assist Shinecharge Right",
"requires": [
"Gravity",
"canShinechargeMovementComplex",
{
"or": [
"HiJump",
"SpaceJump"
]
},
{
"canShineCharge": {
"usedTiles": 33,
"openEnd": 2
}
}
],
"exitCondition": {
"leaveShinecharged": {
"framesRemaining": 40
}
},
"unlocksDoors": [
{
"types": [
"ammo"
],
"requires": []
}
]
},
{
"link": [
13,
5
],
"name": "Ocean Floor Precise Walljump Shinespark Right",
"requires": [
"Gravity",
"canShinechargeMovementComplex",
"canPreciseWalljump",
{
"canShineCharge": {
"usedTiles": 33,
"openEnd": 2
}
},
{
"shinespark": {
"frames": 15
}
}
],
"exitCondition": {
"leaveWithSpark": {}
},
"unlocksDoors": [
{
"types": [
"ammo"
],
"requires": []
}
]
},
{
"link": [
13,
5
],
"name": "Over Ocean Spark, In-Room",
"requires": [
"canHorizontalShinespark",
{
"or": [
{
"canShineCharge": {
"usedTiles": 23,
"openEnd": 1,
"steepUpTiles": 6,
"steepDownTiles": 1
}
},
{
"and": [
{
"canShineCharge": {
"usedTiles": 24,
"openEnd": 1,
"steepUpTiles": 6,
"steepDownTiles": 1
}
},
{
"doorUnlockedAtNode": 1
}
]
}
]
},
{
"or": [
{
"shinespark": {
"frames": 131
}
},
{
"and": [
"canShinechargeMovement",
"canMidairShinespark",
{
"shinespark": {
"frames": 106
}
}
]
}
]
}
],
"unlocksDoors": [
{
"nodeId": 1,
"types": [
"ammo"
],
"requires": []
}
]
},
{
"link": [
13,
5
],
"name": "Over Ocean Spark, Through the Door",
"requires": [
{
"or": [
"canCarefulJump",
"Grapple",
"Wave",
"SpaceJump"
]
},
{
"or": [
{
"canShineCharge": {
"usedTiles": 23,
"openEnd": 1,
"steepUpTiles": 6,
"steepDownTiles": 1
}
},
{
"and": [
{
"canShineCharge": {
"usedTiles": 24,
"openEnd": 1,
"steepUpTiles": 6,
"steepDownTiles": 1
}
},
{
"doorUnlockedAtNode": 1
}
]
}
]
},
{
"or": [
{
"shinespark": {
"frames": 131
}
},
{
"and": [
"canShinechargeMovement",
"canMidairShinespark",
{
"shinespark": {
"frames": 106
}
}
]
}
]
}
],
"exitCondition": {
"leaveWithSpark": {}
},
"unlocksDoors": [
{
"nodeId": 1,
"types": [
"ammo"
],
"requires": []
},
{
"nodeId": 5,
"types": [
"ammo"
],
"requires": []
}
],
"note": "Open the right door before sparking to spark out of it.",
"devNote": [
"The right door could be an obstacle, but with this shinecharge, a careful jump is probably fair to include.",
"This room is already pretty complex, so adding an obstacle is fairly significant."
]
},
{
"link": [
13,
11
],
"name": "Base",
"requires": [
"Morph"
]
},
{
"link": [
13,
13
],
"name": "Crystal Flash",
"requires": [
"h_canCrystalFlash"
]
},
{
"link": [
14,
10
],
"name": "Base",
"requires": [
"Morph"
]
},
{
"link": [
14,
12
],
"name": "Base",
"requires": [
{
  "ammo": {
    "type": "Super",
    "count": 1
  }
}
],
"note": "The super block respawns."
},
{
"link": [
14,
12
],
"name": "Beat West Ocean Super Block Respawn",
"requires": [
{
"obstaclesCleared": [
"A"
]
},
"canCarefulJump"
],
"note": "It's possible to go down, grab the item, and return before the Super block respawns, if going quick enough."
},
{
"link": [
14,
13
],
"name": "Base",
"requires": [
"Morph"
]
},
{
"link": [
15,
16
],
"name": "G-mode Overload PLMs with Grapple",
"requires": [
"Grapple",
"Morph"
]
},
{
"link": [
15,
16
],
"name": "G-mode Overload PLMs by Bombing Crumble Block with Space Jump",
"requires": [
"h_canUseMorphBombs",
"SpaceJump",
{
"or": [
"h_canCeilingBombJump",
"canBeVeryPatient"
]
}
],
"note": "The crumble block is the leftmost flat ceiling tile."
},
{
"link": [
15,
16
],
"name": "G-mode Overload PLMs by Bombing Crumble Block",
"requires": [
"h_canArtificialMorphIBJ",
"h_canArtificialMorphCeilingBombJump"
],
"note": "Start the IBJ on the second downward tile from the door. The crumble block is the leftmost flat ceiling tile.",
"devNote": "Without canCeilingBombJump, this would take more than 10 minutes."
},
{
"link": [
16,
14
],
"name": "Base",
"requires": [
{
  "or": [
    {
      "and": [
        "SpaceJump",
        "Morph"
      ]
    },
    "h_canArtificialMorphIBJ",
    {
      "and": [
        "canTrickyDashJump",
        "canSpringBallJumpMidAir",
        "HiJump"
      ]
    }
  ]
}
]
},
{
"link": [
17,
10
],
"name": "West Ocean G-mode Overload PLMs by PBing Missile Item",
"notable": true,
"requires": [
{
"itemNotCollectedAtNode": 10
},
"h_canUsePowerBombs",
{
"or": [
"h_canFly",
{
"and": [
"canTrickyDashJump",
"canTrickySpringBallJump",
"HiJump"
]
}
]
}
],
"clearsObstacles": [
"B"
],
"note": [
"To overload the PLMs, place a PB precisely to the right of the bottom of the second overhang above the door to the Moat.",
"This is at the max jump height without HiJump. Placing the PB higher or lower will not overload the PLMs without many PBs."
],
"devNote": "This link is used to get the item and return, so there is no canRiskPermanentLossOfAccess."
},
{
"link": [
17,
16
],
"name": "West Ocean G-mode Overload PLMs by PBing Missile Item Softlock Risk",
"requires": [
{
"itemNotCollectedAtNode": 10
},
"canRiskPermanentLossOfAccess",
{
"or": [
"h_canArtificialMorphIBJ",
"Morph",
{
"and": [
"h_canArtificialMorphSpringBall",
{
"or": [
"HiJump",
"h_canArtificialMorphBombThings"
]
}
]
}
]
},
"h_canArtificialMorphPowerBomb"
],
"note": [
"To overload the PLMs, place a PB precisely to the right of the bottom of the second overhang above the door to the Moat.",
"This is at the max jump height without HiJump. Placing the PB higher or lower will not overload the PLMs without many PBs."
]
}
]
}