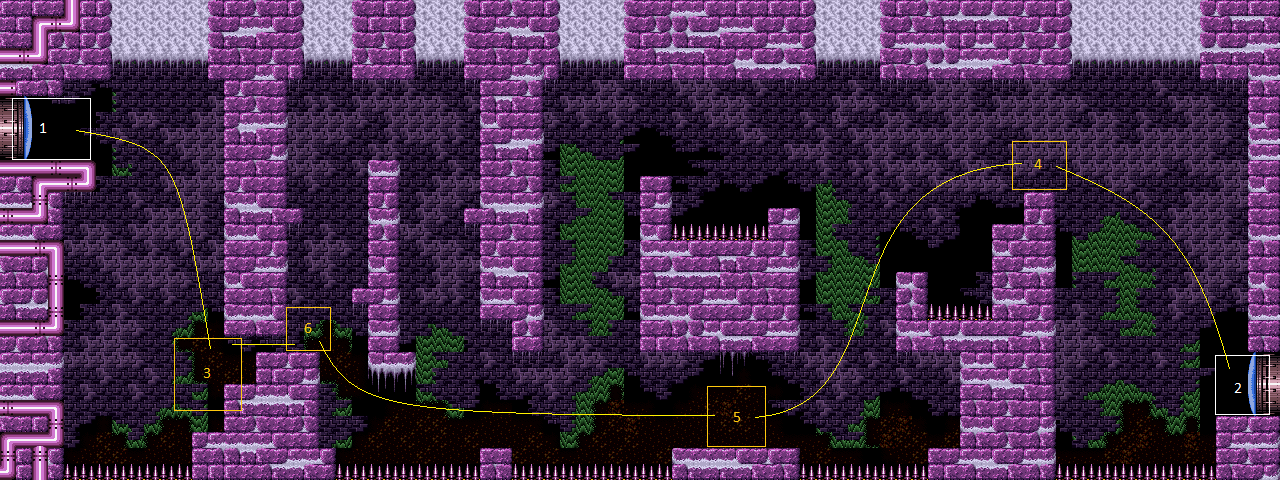
East Cactus Alley Room
Room ID: 196
|
Exit condition: {
"leaveWithRunway": {
"length": 5,
"openEnd": 1
}
}
|
|
Requires: {
"or": [
{
"and": [
"Gravity",
{
"or": [
"SpaceJump",
{
"and": [
"canPreciseWalljump",
"canConsecutiveWalljump"
]
},
{
"and": [
"HiJump",
"canWalljump"
]
}
]
}
]
},
{
"and": [
"canSpaceJumpWaterBounce",
"canWalljump"
]
}
]
}
{
"resetRoom": {
"nodes": [
1
],
"mustStayPut": false
}
}
{
"refill": [
"Super"
]
}
|
|
Requires: "h_canXMode"
"h_XModeSpikeHit"
"h_XModeSpikeHit"
{
"or": [
"h_XModeSpikeHit",
"canStationarySpinJump"
]
}
"Gravity"
"HiJump"
"SpaceJump"
"canShinechargeMovementComplex"
"canMidairShinespark"
{
"canShineCharge": {
"usedTiles": 33,
"openEnd": 2
}
}
{
"shinespark": {
"frames": 10
}
}
Exit condition: {
"leaveWithSpark": {}
}
|
|
Requires: "h_canCrystalFlash" |
|
Doesn't require anything, but getting out does. |
|
From: 1
Left Door
To: 4
Top Right Ledge Junction
Hug the right wall after killing the first Cacatac in order to avoid its invisible, stationary projectiles. After getting to the small island platform, diagonal IBJ up while avoiding the top Cacatac. Alternatively HBJ to the next platform and Spring Ball from the right edge of this platform into an IBJ above the spikes. Entrance condition: {
"comeInWithGMode": {
"mode": "any",
"morphed": true
}
}
Requires: "Gravity"
{
"or": [
"h_canArtificialMorphDiagonalBombJump",
{
"and": [
"h_canArtificialMorphHBJ",
"h_canArtificialMorphJumpIntoIBJ"
]
}
]
}
|
|
From: 1
Left Door
To: 6
East Cactus Alley Junction (Right of Morph Tunnel)
Hug the right wall after killing the first Cacatac in order to avoid its invisible, stationary projectiles. Entrance condition: {
"comeInWithGMode": {
"mode": "any",
"morphed": true
}
}
Requires: "h_canNavigateUnderwater"
{
"or": [
"h_canArtificialMorphSpringBall",
"h_canArtificialMorphBombHorizontally"
]
}
{
"or": [
{
"and": [
"h_canArtificialMorphBombs",
{
"or": [
"Gravity",
"h_canArtificialMorphSpringBall"
]
}
]
},
"h_canArtificialMorphPowerBomb",
{
"enemyDamage": {
"enemy": "Cacatac",
"hits": 1,
"type": "contact"
}
}
]
}
{
"or": [
"h_canArtificialMorphSpringBall",
{
"and": [
"Gravity",
"h_canArtificialMorphBombThings"
]
}
]
}
|
|
From: 2
Right Door
To: 1
Left Door
Notable: true 
This requires multiple HBJ to get over spike pits. The first one, by the right door, must be started at the top of an IBJ. Entrance condition: {
"comeInWithGMode": {
"mode": "any",
"morphed": true
}
}
Requires: "Gravity" "h_canArtificialMorphIBJ" "h_canArtificialMorphHBJ" |
|
Entrance condition: {
"comeInWithGrappleTeleport": {
"blockPositions": [
[
5,
3
],
[
7,
2
]
]
}
}
|
|
Entrance condition: {
"comeInWithGrappleTeleport": {
"blockPositions": [
[
3,
12
],
[
3,
13
]
]
}
}
Bypasses door shell: true |
|
From: 2
Right Door
To: 1
Left Door
Entrance condition: {
"comeInWithGrappleTeleport": {
"blockPositions": [
[
3,
12
]
]
}
}
Exit condition: {
"leaveWithGrappleTeleport": {
"blockPositions": [
[
3,
12
]
]
}
}
Bypasses door shell: true |
|
From: 2
Right Door
To: 1
Left Door
Entrance condition: {
"comeInWithGrappleTeleport": {
"blockPositions": [
[
3,
13
]
]
}
}
Exit condition: {
"leaveWithGrappleTeleport": {
"blockPositions": [
[
3,
13
]
]
}
}
Bypasses door shell: true |
|
Exit the previous room with Samus in a standing pose (while grappled). After teleporting, press right to release Grapple while staying standing (not being forced into a crouch). Then X-ray climb to get up to the door transition, without needing to open the door. Entrance condition: {
"comeInWithGrappleTeleport": {
"blockPositions": [
[
2,
18
],
[
2,
19
],
[
2,
28
],
[
2,
29
]
]
}
}
Requires: "canXRayClimb" Bypasses door shell: true |
|
Exit condition: {
"leaveWithRunway": {
"length": 3,
"openEnd": 1
}
}
|
|
Requires: {
"or": [
{
"and": [
"Gravity",
{
"or": [
"SpaceJump",
"canWalljump"
]
}
]
},
{
"and": [
"HiJump",
"canSpaceJumpWaterBounce",
"canWalljump"
]
}
]
}
{
"resetRoom": {
"nodes": [
2
],
"mustStayPut": false
}
}
{
"refill": [
"Energy",
"Super"
]
}
|
|
Requires: "h_canXMode"
"h_XModeSpikeHit"
"h_XModeSpikeHit"
{
"or": [
"h_XModeSpikeHit",
"canStationarySpinJump"
]
}
"Gravity"
"canShinechargeMovementComplex"
{
"canShineCharge": {
"usedTiles": 33,
"openEnd": 2
}
}
Exit condition: {
"leaveShinecharged": {
"framesRemaining": 100
}
}
|
|
Requires: "h_canCrystalFlash" |
|
Requires: "Gravity"
{
"or": [
"SpaceJump",
"canWalljump",
"h_IBJFromSpikes",
{
"and": [
"h_canIBJ",
"h_canHBJ"
]
},
"h_canDiagonalBombJump"
]
}
|
|
From: 2
Right Door
To: 4
Top Right Ledge Junction
There is just enough distance for a MidAir SpringBall jump to reach without HiJump. Requires: "Gravity"
"canSpringBallJumpMidAir"
{
"or": [
"HiJump",
{
"and": [
"h_canMaxHeightSpringBallJump",
"canSpringFling"
]
}
]
}
|
|
From: 2
Right Door
To: 4
Top Right Ledge Junction
Use SpaceJump to break out of the water. Afterward, it's easiest to use a wall jump to gain height but this is not required. Requires: "canSuitlessMaridia"
"HiJump"
{
"or": [
"canSpaceJumpWaterEscape",
{
"and": [
"canSpaceJumpWaterBounce",
"canWalljump"
]
}
]
}
|
|
From: 2
Right Door
To: 4
Top Right Ledge Junction
SpringBall jump just as Samus exits the water to reach the distant ledge. To get enough horizontal distance, either use a Stationary Lateral Mid-Air Morph with a crouch jump for extra height, or spin jump out before morphing. Or SpringBall jump part of the way over and land on a Bomb explosion to cross the rest of the distance. Requires: "canSuitlessMaridia"
"HiJump"
"h_canMaxHeightSpringBallJump"
"canTrickyJump"
{
"or": [
"canStationaryLateralMidAirMorph",
{
"and": [
"canJumpIntoIBJ",
"h_canBombHorizontally"
]
}
]
}
|
|
Entrance condition: {
"comeInShinecharged": {
"framesRequired": 10
}
}
Requires: "Gravity"
{
"shinespark": {
"frames": 21,
"excessFrames": 5
}
}
|
|
From: 2
Right Door
To: 4
Top Right Ledge Junction
Entrance condition: {
"comeInShinecharged": {
"framesRequired": 10
}
}
Requires: {
"shinespark": {
"frames": 22,
"excessFrames": 5
}
}
|
|
From: 2
Right Door
To: 4
Top Right Ledge Junction
Requires: "Gravity"
"h_canXMode"
"h_XModeSpikeHit"
"h_XModeSpikeHit"
{
"or": [
"h_XModeSpikeHit",
"canStationarySpinJump"
]
}
{
"canShineCharge": {
"usedTiles": 33,
"openEnd": 2
}
}
{
"shinespark": {
"frames": 25,
"excessFrames": 5
}
}
|
|
From: 2
Right Door
To: 4
Top Right Ledge Junction
Requires a runway of at least 1 tile in the adjacent room, although it is easier with more. Entrance condition: {
"comeInJumping": {
"speedBooster": false,
"minTiles": 1
}
}
Requires: {
"or": [
"canWalljump",
"canTrickySpringBallJump",
"SpaceJump"
]
}
"canCrossRoomJumpIntoWater"
|
|
From: 2
Right Door
To: 4
Top Right Ledge Junction
Notable: true 
Requires a runway of at least 1 tiles in the adjacent room, although it is easier with more. Start the IBJ as far left as possible. The furthest right is just right of the waterfall. Turning around, carefully, is one way to lose forward momentum and begin the IBJ. At the top of the IBJ bomb to the left and unmorph to reset fall speed. Entrance condition: {
"comeInJumping": {
"speedBooster": false,
"minTiles": 1
}
}
Requires: "h_canJumpIntoIBJ" "h_canBombHorizontally" "h_canResetFallSpeed" "canCrossRoomJumpIntoWater" "canTrickyJump" |
|
From: 2
Right Door
To: 4
Top Right Ledge Junction
Requires a runway of at least 1 tile in the adjacent room, although it is easier with more. Entrance condition: {
"comeInJumping": {
"speedBooster": "any",
"minTiles": 1
}
}
Requires: "HiJump"
{
"or": [
"canWalljump",
"canTrickyJump",
"SpeedBooster"
]
}
"canCrossRoomJumpIntoWater"
|
|
From: 2
Right Door
To: 4
Top Right Ledge Junction
This assumes a runway of at least 2 tiles in the adjacent room, although it is easier with more. Entrance condition: {
"comeInJumping": {
"speedBooster": "any",
"minTiles": 2
}
}
Requires: "HiJump" "canCrossRoomJumpIntoWater" |
|
From: 2
Right Door
To: 4
Top Right Ledge Junction
Notable: true 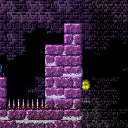
Use the bomb boost as Samus is going through the doorway, then spring ball after breaking the water, then ibj or use an unmorph bomb boost. Entrance condition: {
"comeInWithBombBoost": {}
}
Requires: "h_canSpringBallBombJump"
"canCrossRoomJumpIntoWater"
{
"or": [
"h_canJumpIntoIBJ",
"canUnmorphBombBoost"
]
}
|
|
From: 2
Right Door
To: 4
Top Right Ledge Junction
Requires a runway of 7 tiles with no open end in the adjacent room, to hit a peak of the speed vs height graph. Entrance condition: {
"comeInJumping": {
"speedBooster": true,
"minTiles": 6.4375
}
}
Requires: "canCrossRoomJumpIntoWater" "canTrickyDashJump" |
|
From: 2
Right Door
To: 4
Top Right Ledge Junction
Requires a runway of at least 17 tiles in the adjacent room. Entrance condition: {
"comeInJumping": {
"speedBooster": true,
"minTiles": 17
}
}
Requires: "canCrossRoomJumpIntoWater" "canTrickyJump" |
|
From: 2
Right Door
To: 4
Top Right Ledge Junction
Assumes a runway of at least 18 tiles in the adjacent room. Entrance condition: {
"comeInJumping": {
"speedBooster": true,
"minTiles": 18
}
}
Requires: "canCrossRoomJumpIntoWater" |
|
From: 2
Right Door
To: 4
Top Right Ledge Junction
X-ray climb until Samus is above the water surface. To avoid falling out, be careful not to turn left except while holding X-ray. From a standing position facing left, hold left and immediately jump, then use Space Jump to reach the ledge. Alternatively, from a standing position facing right, do a turn-around spin jump, waiting to jump until part way through the turn-around animation (otherwise Samus will bonk inside the wall) It is also possible to climb lower, with Samus' feet still in the water; in this case, the turn-around animation is slower, providing a larger window to jump, though in this case either a wall jump or a Space Jump water escape may be needed. Entrance condition: {
"comeInWithDoorStuckSetup": {}
}
Requires: "canXRayClimb" "SpaceJump" |
|
Requires: "Gravity" "SpaceJump" |
|
From: 3
Junction Left of Morph Tunnel
To: 1
Left Door
Requires: "Gravity"
{
"or": [
{
"and": [
"canPreciseWalljump",
"canConsecutiveWalljump"
]
},
{
"and": [
"HiJump",
"canWalljump"
]
}
]
}
|
|
From: 3
Junction Left of Morph Tunnel
To: 1
Left Door
Requires: "Gravity"
{
"or": [
"canSpringwall",
{
"and": [
"HiJump",
"canSpringBallJumpMidAir"
]
}
]
}
|
|
Jump from the raised alcove. A down grab can help. Requires: "Gravity" "HiJump" "SpeedBooster" "canCarefulJump" |
|
Requires: "Gravity"
"h_canIBJ"
{
"or": [
"h_canBombHorizontally",
"h_IBJFromSpikes"
]
}
|
|
From: 3
Junction Left of Morph Tunnel
To: 1
Left Door
Requires: "canSuitlessMaridia"
"HiJump"
"canPreciseWalljump"
{
"or": [
"canConsecutiveWalljump",
"canDelayedWalljump"
]
}
|
|
From: 3
Junction Left of Morph Tunnel
To: 1
Left Door
Requires: "canSuitlessMaridia"
{
"or": [
{
"and": [
"canSpaceJumpWaterBounce",
"canWalljump"
]
},
{
"and": [
"canSpaceJumpWaterEscape",
"HiJump"
]
}
]
}
|
|
From: 3
Junction Left of Morph Tunnel
To: 1
Left Door
Start the jump from the raised alcove. Requires: "canSuitlessMaridia" "HiJump" "canSpringBallJumpMidAir" |
|
From: 3
Junction Left of Morph Tunnel
To: 6
East Cactus Alley Junction (Right of Morph Tunnel)
Requires: "h_canNavigateUnderwater"
{
"or": [
"h_canUseSpringBall",
{
"and": [
"Gravity",
"h_canBombThings"
]
}
]
}
|
|
From: 3
Junction Left of Morph Tunnel
To: 6
East Cactus Alley Junction (Right of Morph Tunnel)
This can be done by turning off Gravity and HiJump to do a mid-air morph through the morph tunnel. Requires: "canSuitlessMaridia" "Morph" "canDisableEquipment" |
|
|
|
|
|
Requires: "Gravity"
{
"or": [
"SpaceJump",
"canWalljump",
"canSpringBallJumpMidAir",
"h_canDiagonalBombJump",
"h_IBJFromSpikes"
]
}
|
|
From: 5
Bottom Middle Junction
To: 4
Top Right Ledge Junction
Notable: true 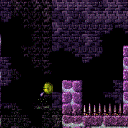
When the Cacatac on the ground fires a spike, perform a springball Jump to break the waterline and then hit the spike for extra height. Requires: "HiJump"
"canSuitlessMaridia"
"canCarefulJump"
"canTrickySpringBallJump"
"canLateralMidAirMorph"
"canNeutralDamageBoost"
{
"enemyDamage": {
"enemy": "Cacatac",
"hits": 2,
"type": "spike"
}
}
|
|
From: 5
Bottom Middle Junction
To: 4
Top Right Ledge Junction
Requires: "canUnderwaterWalljump" "canSpaceJumpWaterBounce" |
|
Cacatac Alley HiJumpless Double SpringBall Jump and Bomb-Grapple-Jump (Beyond)
East Cactus Alley Room
From: 5
Bottom Middle Junction
To: 4
Top Right Ledge Junction
Notable: true 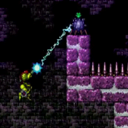
1) Crouch jump and then SpringBall jump. 2) Bomb-Grapple-Jump using the distant Cacatac who is above the water. 3) SpringBall jump again just as Samus exits the water. Requires: "canBombGrappleJump" "canDoubleSpringBallJumpMidAir" "h_canMaxHeightSpringBallJump" |
|
From: 5
Bottom Middle Junction
To: 6
East Cactus Alley Junction (Right of Morph Tunnel)
Requires: "Gravity"
{
"or": [
"SpaceJump",
"h_canHBJ",
"h_canResetFallSpeed",
{
"enemyDamage": {
"enemy": "Cacatac",
"hits": 1,
"type": "spike"
}
}
]
}
{
"or": [
"SpaceJump",
"canWalljump",
"HiJump",
"h_canIBJ",
"h_canHBJ",
"h_canSpringBallBombJump",
{
"spikeHits": 1
}
]
}
|
|
From: 5
Bottom Middle Junction
To: 6
East Cactus Alley Junction (Right of Morph Tunnel)
Jump into the ceiling Cacatac and damage boost onto the platform between spike pits. Use IFrames to cross the second set of spikes. Requires: "Gravity"
"canHorizontalDamageBoost"
"canIframeSpikeJump"
{
"enemyDamage": {
"enemy": "Cacatac",
"hits": 1,
"type": "contact"
}
}
|
|
From: 5
Bottom Middle Junction
To: 6
East Cactus Alley Junction (Right of Morph Tunnel)
Requires: "canSuitlessMaridia"
"HiJump"
{
"spikeHits": 1
}
{
"or": [
"canWalljump",
"canSpaceJumpWaterEscape",
"canSpringBallJumpMidAir",
{
"and": [
"h_canJumpIntoIBJ",
"h_canUseSpringBall"
]
},
{
"and": [
"h_canIBJ",
"canBombJumpWaterEscape"
]
},
{
"spikeHits": 1
}
]
}
|
|
From: 5
Bottom Middle Junction
To: 6
East Cactus Alley Junction (Right of Morph Tunnel)
This can be done by turning off Gravity and HiJump to jump over both spike pits. Requires: "canSuitlessMaridia"
"canDisableEquipment"
"canCarefulJump"
{
"or": [
"Gravity",
"HiJump",
"canSpringBallJumpMidAir"
]
}
|
|
From: 5
Bottom Middle Junction
To: 6
East Cactus Alley Junction (Right of Morph Tunnel)
This can be done by turning off Gravity and HiJump to jump over both spike pits. Requires: "canSuitlessMaridia"
"canSpringBallJumpMidAir"
{
"spikeHits": 1
}
{
"or": [
"canTrickySpringBallJump",
{
"and": [
"canWalljump",
"canSpaceJumpWaterBounce"
]
},
{
"and": [
"h_canJumpIntoIBJ",
"h_canUseSpringBall"
]
},
{
"and": [
"h_canIBJ",
"canBombJumpWaterEscape"
]
},
{
"spikeHits": 1
}
]
}
|
|
From: 6
East Cactus Alley Junction (Right of Morph Tunnel)
To: 3
Junction Left of Morph Tunnel
Requires: "Morph" |
|
From: 6
East Cactus Alley Junction (Right of Morph Tunnel)
To: 5
Bottom Middle Junction
Requires: "canSuitlessMaridia"
{
"or": [
{
"spikeHits": 1
},
"canSpringBallJumpMidAir",
{
"and": [
"HiJump",
{
"or": [
"canWalljump",
"h_canCrouchJumpDownGrab",
"canSpaceJumpWaterEscape"
]
}
]
},
{
"and": [
"h_canIBJ",
"canBombJumpWaterEscape"
]
}
]
}
{
"or": [
{
"spikeHits": 1
},
"HiJump"
]
}
|
|
From: 6
East Cactus Alley Junction (Right of Morph Tunnel)
To: 5
Bottom Middle Junction
Requires: "Gravity"
{
"or": [
"SpaceJump",
"h_canHBJ",
{
"spikeHits": 1
}
]
}
|
|
From: 6
East Cactus Alley Junction (Right of Morph Tunnel)
To: 5
Bottom Middle Junction
This can be done by turning off Gravity and HiJump to jump over both spike pits. Requires: "canSuitlessMaridia" "canDisableEquipment" "canCarefulJump" |
{
"$schema": "../../../schema/m3-room.schema.json",
"id": 196,
"name": "East Cactus Alley Room",
"area": "Maridia",
"subarea": "Inner",
"subsubarea": "Pink",
"playable": true,
"roomAddress": "0x7DA2B",
"roomEnvironments": [
{
"heated": false
}
],
"nodes": [
{
"id": 1,
"name": "Left Door",
"nodeType": "door",
"nodeSubType": "blue",
"nodeAddress": "0x001a954",
"doorEnvironments": [
{
"physics": "air"
}
]
},
{
"id": 2,
"name": "Right Door",
"nodeType": "door",
"nodeSubType": "blue",
"nodeAddress": "0x001a960",
"doorEnvironments": [
{
"physics": "water"
}
]
},
{
"id": 3,
"name": "Junction Left of Morph Tunnel",
"nodeType": "junction",
"nodeSubType": "junction"
},
{
"id": 4,
"name": " Top Right Ledge Junction",
"nodeType": "junction",
"nodeSubType": "junction"
},
{
"id": 5,
"name": "Bottom Middle Junction",
"nodeType": "junction",
"nodeSubType": "junction"
},
{
"id": 6,
"name": "East Cactus Alley Junction (Right of Morph Tunnel)",
"nodeType": "junction",
"nodeSubType": "junction"
}
],
"enemies": [
{
"id": "e1",
"groupName": "East Cactus Alley Left Cacatac",
"enemyName": "Cacatac",
"quantity": 1,
"homeNodes": [
3
]
},
{
"id": "e2",
"groupName": "East Cactus Alley Bottom Cacatacs",
"enemyName": "Cacatac",
"quantity": 2,
"homeNodes": [
5
]
},
{
"id": "e3",
"groupName": "East Cactus Alley Top Right Cacatacs",
"enemyName": "Cacatac",
"quantity": 2,
"homeNodes": [
4
]
},
{
"id": "e4",
"groupName": "East Cactus Alley Top Left Cacatac",
"enemyName": "Cacatac",
"quantity": 1,
"betweenNodes": [
5,
6
]
}
],
"links": [
{
"from": 1,
"to": [
{
"id": 1
},
{
"id": 3
},
{
"id": 4
},
{
"id": 6
}
]
},
{
"from": 2,
"to": [
{
"id": 1
},
{
"id": 2
},
{
"id": 4
}
]
},
{
"from": 3,
"to": [
{
"id": 1
},
{
"id": 6
}
]
},
{
"from": 4,
"to": [
{
"id": 2
},
{
"id": 5
}
]
},
{
"from": 5,
"to": [
{
"id": 4
},
{
"id": 6
}
]
},
{
"from": 6,
"to": [
{
"id": 3
},
{
"id": 5
}
]
}
],
"strats": [
{
"link": [
1,
1
],
"name": "Leave with Runway",
"requires": [],
"exitCondition": {
"leaveWithRunway": {
"length": 5,
"openEnd": 1
}
}
},
{
"link": [
1,
1
],
"name": "Cacatac Farm",
"requires": [
{
"or": [
{
"and": [
"Gravity",
{
"or": [
"SpaceJump",
{
"and": [
"canPreciseWalljump",
"canConsecutiveWalljump"
]
},
{
"and": [
"HiJump",
"canWalljump"
]
}
]
}
]
},
{
"and": [
"canSpaceJumpWaterBounce",
"canWalljump"
]
}
]
},
{
"resetRoom": {
"nodes": [
1
],
"mustStayPut": false
}
},
{
"refill": [
"Super"
]
}
]
},
{
"link": [
1,
1
],
"name": "X-Mode, Leave Shinecharged",
"requires": [
"h_canXMode",
"h_XModeSpikeHit",
"h_XModeSpikeHit",
{
"or": [
"h_XModeSpikeHit",
"canStationarySpinJump"
]
},
"Gravity",
"HiJump",
"SpaceJump",
"canShinechargeMovementComplex",
"canMidairShinespark",
{
"canShineCharge": {
"usedTiles": 33,
"openEnd": 2
}
},
{
"shinespark": {
"frames": 10
}
}
],
"exitCondition": {
"leaveWithSpark": {}
},
"devNote": "Two spike hits are expected per attempt (with any additional leniency hits being multiplied by this amount)."
},
{
"link": [
1,
1
],
"name": "Crystal Flash",
"requires": [
"h_canCrystalFlash"
]
},
{
"link": [
1,
3
],
"name": "Base",
"requires": [],
"note": "Doesn't require anything, but getting out does."
},
{
"link": [
1,
4
],
"name": "G-Mode Morph Diagonal IBJ",
"entranceCondition": {
"comeInWithGMode": {
"mode": "any",
"morphed": true
}
},
"requires": [
"Gravity",
{
"or": [
"h_canArtificialMorphDiagonalBombJump",
{
"and": [
"h_canArtificialMorphHBJ",
"h_canArtificialMorphJumpIntoIBJ"
]
}
]
}
],
"note": [
"Hug the right wall after killing the first Cacatac in order to avoid its invisible, stationary projectiles.",
"After getting to the small island platform, diagonal IBJ up while avoiding the top Cacatac.",
"Alternatively HBJ to the next platform and Spring Ball from the right edge of this platform into an IBJ above the spikes."
]
},
{
"link": [
1,
6
],
"name": "G-Mode Morph",
"entranceCondition": {
"comeInWithGMode": {
"mode": "any",
"morphed": true
}
},
"requires": [
"h_canNavigateUnderwater",
{
"or": [
"h_canArtificialMorphSpringBall",
"h_canArtificialMorphBombHorizontally"
]
},
{
"or": [
{
"and": [
"h_canArtificialMorphBombs",
{
"or": [
"Gravity",
"h_canArtificialMorphSpringBall"
]
}
]
},
"h_canArtificialMorphPowerBomb",
{
"enemyDamage": {
"enemy": "Cacatac",
"hits": 1,
"type": "contact"
}
}
]
},
{
"or": [
"h_canArtificialMorphSpringBall",
{
"and": [
"Gravity",
"h_canArtificialMorphBombThings"
]
}
]
}
],
"note": "Hug the right wall after killing the first Cacatac in order to avoid its invisible, stationary projectiles."
},
{
"link": [
2,
1
],
"name": "East Cac Alley G-Mode Morph, IBJ, HBJ",
"notable": true,
"entranceCondition": {
"comeInWithGMode": {
"mode": "any",
"morphed": true
}
},
"requires": [
"Gravity",
"h_canArtificialMorphIBJ",
"h_canArtificialMorphHBJ"
],
"note": "This requires multiple HBJ to get over spike pits. The first one, by the right door, must be started at the top of an IBJ."
},
{
"link": [
2,
1
],
"name": "Grapple Teleport",
"entranceCondition": {
"comeInWithGrappleTeleport": {
"blockPositions": [
[
5,
3
],
[
7,
2
]
]
}
},
"requires": []
},
{
"link": [
2,
1
],
"name": "Grapple Teleport Door Lock Skip",
"entranceCondition": {
"comeInWithGrappleTeleport": {
"blockPositions": [
[
3,
12
],
[
3,
13
]
]
}
},
"requires": [],
"bypassesDoorShell": true
},
{
"link": [
2,
1
],
"name": "Carry Grapple Teleport (Top Position)",
"entranceCondition": {
"comeInWithGrappleTeleport": {
"blockPositions": [
[
3,
12
]
]
}
},
"requires": [],
"bypassesDoorShell": true,
"exitCondition": {
"leaveWithGrappleTeleport": {
"blockPositions": [
[
3,
12
]
]
}
}
},
{
"link": [
2,
1
],
"name": "Carry Grapple Teleport (Bottom Position)",
"entranceCondition": {
"comeInWithGrappleTeleport": {
"blockPositions": [
[
3,
13
]
]
}
},
"requires": [],
"bypassesDoorShell": true,
"exitCondition": {
"leaveWithGrappleTeleport": {
"blockPositions": [
[
3,
13
]
]
}
}
},
{
"link": [
2,
1
],
"name": "Grapple Teleport X-Ray Climb",
"entranceCondition": {
"comeInWithGrappleTeleport": {
"blockPositions": [
[
2,
18
],
[
2,
19
],
[
2,
28
],
[
2,
29
]
]
}
},
"requires": [
"canXRayClimb"
],
"bypassesDoorShell": true,
"note": [
"Exit the previous room with Samus in a standing pose (while grappled).",
"After teleporting, press right to release Grapple while staying standing (not being forced into a crouch).",
"Then X-ray climb to get up to the door transition, without needing to open the door."
]
},
{
"link": [
2,
2
],
"name": "Leave with Runway",
"requires": [],
"exitCondition": {
"leaveWithRunway": {
"length": 3,
"openEnd": 1
}
}
},
{
"link": [
2,
2
],
"name": "Cacatac Farm",
"requires": [
{
"or": [
{
"and": [
"Gravity",
{
"or": [
"SpaceJump",
"canWalljump"
]
}
]
},
{
"and": [
"HiJump",
"canSpaceJumpWaterBounce",
"canWalljump"
]
}
]
},
{
"resetRoom": {
"nodes": [
2
],
"mustStayPut": false
}
},
{
"refill": [
"Energy",
"Super"
]
}
]
},
{
"link": [
2,
2
],
"name": "X-Mode, Leave Shinecharged",
"requires": [
"h_canXMode",
"h_XModeSpikeHit",
"h_XModeSpikeHit",
{
"or": [
"h_XModeSpikeHit",
"canStationarySpinJump"
]
},
"Gravity",
"canShinechargeMovementComplex",
{
"canShineCharge": {
"usedTiles": 33,
"openEnd": 2
}
}
],
"exitCondition": {
"leaveShinecharged": {
"framesRemaining": 100
}
},
"devNote": "Two spike hits are expected per attempt (with any additional leniency hits being multiplied by this amount)."
},
{
"link": [
2,
2
],
"name": "Crystal Flash",
"requires": [
"h_canCrystalFlash"
]
},
{
"link": [
2,
4
],
"name": "Base",
"requires": [
"Gravity",
{
"or": [
"SpaceJump",
"canWalljump",
"h_IBJFromSpikes",
{
"and": [
"h_canIBJ",
"h_canHBJ"
]
},
"h_canDiagonalBombJump"
]
}
]
},
{
"link": [
2,
4
],
"name": "Gravity and SpringBall",
"requires": [
"Gravity",
"canSpringBallJumpMidAir",
{
"or": [
"HiJump",
{
"and": [
"h_canMaxHeightSpringBallJump",
"canSpringFling"
]
}
]
}
],
"note": "There is just enough distance for a MidAir SpringBall jump to reach without HiJump."
},
{
"link": [
2,
4
],
"name": "Suitless HiJump Space Jump Break Free",
"requires": [
"canSuitlessMaridia",
"HiJump",
{
"or": [
"canSpaceJumpWaterEscape",
{
"and": [
"canSpaceJumpWaterBounce",
"canWalljump"
]
}
]
}
],
"note": [
"Use SpaceJump to break out of the water.",
"Afterward, it's easiest to use a wall jump to gain height but this is not required."
]
},
{
"link": [
2,
4
],
"name": "Suitless HiJump SpringBall Jump",
"requires": [
"canSuitlessMaridia",
"HiJump",
"h_canMaxHeightSpringBallJump",
"canTrickyJump",
{
"or": [
"canStationaryLateralMidAirMorph",
{
"and": [
"canJumpIntoIBJ",
"h_canBombHorizontally"
]
}
]
}
],
"note": [
"SpringBall jump just as Samus exits the water to reach the distant ledge.",
"To get enough horizontal distance, either use a Stationary Lateral Mid-Air Morph with a crouch jump for extra height, or spin jump out before morphing.",
"Or SpringBall jump part of the way over and land on a Bomb explosion to cross the rest of the distance."
],
"devNote": "canStationaryLateralMidAirMorph is not strictly required but better describes the difficulty."
},
{
"link": [
2,
4
],
"name": "Shinespark",
"entranceCondition": {
"comeInShinecharged": {
"framesRequired": 10
}
},
"requires": [
"Gravity",
{
"shinespark": {
"frames": 21,
"excessFrames": 5
}
}
]
},
{
"link": [
2,
4
],
"name": "Suitless Shinespark",
"entranceCondition": {
"comeInShinecharged": {
"framesRequired": 10
}
},
"requires": [
{
  "shinespark": {
    "frames": 22,
    "excessFrames": 5
  }
}
]
},
{
"link": [
2,
4
],
"name": "X-Mode Shinespark",
"requires": [
"Gravity",
"h_canXMode",
"h_XModeSpikeHit",
"h_XModeSpikeHit",
{
"or": [
"h_XModeSpikeHit",
"canStationarySpinJump"
]
},
{
"canShineCharge": {
"usedTiles": 33,
"openEnd": 2
}
},
{
"shinespark": {
"frames": 25,
"excessFrames": 5
}
}
],
"devNote": "Two spike hits are expected per attempt (with any additional leniency hits being multiplied by this amount)."
},
{
"link": [
2,
4
],
"name": "Cross Room Jump with Assist",
"entranceCondition": {
"comeInJumping": {
"speedBooster": false,
"minTiles": 1
}
},
"requires": [
{
"or": [
"canWalljump",
"canTrickySpringBallJump",
"SpaceJump"
]
},
"canCrossRoomJumpIntoWater"
],
"note": "Requires a runway of at least 1 tile in the adjacent room, although it is easier with more."
},
{
"link": [
2,
4
],
"name": "East Cac Alley Cross Room Jump with IBJ",
"notable": true,
"entranceCondition": {
"comeInJumping": {
"speedBooster": false,
"minTiles": 1
}
},
"requires": [
"h_canJumpIntoIBJ",
"h_canBombHorizontally",
"h_canResetFallSpeed",
"canCrossRoomJumpIntoWater",
"canTrickyJump"
],
"note": [
"Requires a runway of at least 1 tiles in the adjacent room, although it is easier with more.",
"Start the IBJ as far left as possible. The furthest right is just right of the waterfall.",
"Turning around, carefully, is one way to lose forward momentum and begin the IBJ.",
"At the top of the IBJ bomb to the left and unmorph to reset fall speed."
]
},
{
"link": [
2,
4
],
"name": "Cross Room Jump with HiJump",
"entranceCondition": {
"comeInJumping": {
"speedBooster": "any",
"minTiles": 1
}
},
"requires": [
"HiJump",
{
"or": [
"canWalljump",
"canTrickyJump",
"SpeedBooster"
]
},
"canCrossRoomJumpIntoWater"
],
"note": "Requires a runway of at least 1 tile in the adjacent room, although it is easier with more."
},
{
"link": [
2,
4
],
"name": "Cross Room Jump with HiJump (Lenient)",
"entranceCondition": {
"comeInJumping": {
"speedBooster": "any",
"minTiles": 2
}
},
"requires": [
"HiJump",
"canCrossRoomJumpIntoWater"
],
"note": "This assumes a runway of at least 2 tiles in the adjacent room, although it is easier with more."
},
{
"link": [
2,
4
],
"name": "East Cac Alley Cross Room Jump with Spring Ball, Bomb Boost",
"notable": true,
"entranceCondition": {
"comeInWithBombBoost": {}
},
"requires": [
"h_canSpringBallBombJump",
"canCrossRoomJumpIntoWater",
{
"or": [
"h_canJumpIntoIBJ",
"canUnmorphBombBoost"
]
}
],
"note": "Use the bomb boost as Samus is going through the doorway, then spring ball after breaking the water, then ibj or use an unmorph bomb boost.",
"devNote": "This strat requires a minimum of 2 bombs or Power Bombs."
},
{
"link": [
2,
4
],
"name": "Cross Room Tricky Dash Jump",
"entranceCondition": {
"comeInJumping": {
"speedBooster": true,
"minTiles": 6.4375
}
},
"requires": [
"canCrossRoomJumpIntoWater",
"canTrickyDashJump"
],
"note": [
"Requires a runway of 7 tiles with no open end in the adjacent room, to hit a peak of the speed vs height graph."
]
},
{
"link": [
2,
4
],
"name": "Cross Room Jump with SpeedBooster",
"entranceCondition": {
"comeInJumping": {
"speedBooster": true,
"minTiles": 17
}
},
"requires": [
"canCrossRoomJumpIntoWater",
"canTrickyJump"
],
"note": [
"Requires a runway of at least 17 tiles in the adjacent room."
]
},
{
"link": [
2,
4
],
"name": "Cross Room Jump with SpeedBooster (Lenient)",
"entranceCondition": {
"comeInJumping": {
"speedBooster": true,
"minTiles": 18
}
},
"requires": [
"canCrossRoomJumpIntoWater"
],
"note": [
"Assumes a runway of at least 18 tiles in the adjacent room."
]
},
{
"link": [
2,
4
],
"name": "X-Ray Climb Space Jump",
"entranceCondition": {
"comeInWithDoorStuckSetup": {}
},
"requires": [
"canXRayClimb",
"SpaceJump"
],
"note": [
"X-ray climb until Samus is above the water surface.",
"To avoid falling out, be careful not to turn left except while holding X-ray.",
"From a standing position facing left, hold left and immediately jump, then use Space Jump to reach the ledge.",
"Alternatively, from a standing position facing right, do a turn-around spin jump, waiting to jump until part way through the turn-around animation (otherwise Samus will bonk inside the wall)",
"It is also possible to climb lower, with Samus' feet still in the water; in this case, the turn-around animation is slower, providing a larger window to jump, though in this case either a wall jump or a Space Jump water escape may be needed."
]
},
{
"link": [
3,
1
],
"name": "Base",
"requires": [
"Gravity",
"SpaceJump"
]
},
{
"link": [
3,
1
],
"name": "Gravity and Walljump",
"requires": [
"Gravity",
{
"or": [
{
"and": [
"canPreciseWalljump",
"canConsecutiveWalljump"
]
},
{
"and": [
"HiJump",
"canWalljump"
]
}
]
}
]
},
{
"link": [
3,
1
],
"name": "Gravity and Springball",
"requires": [
"Gravity",
{
"or": [
"canSpringwall",
{
"and": [
"HiJump",
"canSpringBallJumpMidAir"
]
}
]
}
]
},
{
"link": [
3,
1
],
"name": "Speedy Jump",
"requires": [
"Gravity",
"HiJump",
"SpeedBooster",
"canCarefulJump"
],
"note": "Jump from the raised alcove. A down grab can help."
},
{
"link": [
3,
1
],
"name": "IBJ",
"requires": [
"Gravity",
"h_canIBJ",
{
"or": [
"h_canBombHorizontally",
"h_IBJFromSpikes"
]
}
]
},
{
"link": [
3,
1
],
"name": "HiJump Walljump",
"requires": [
"canSuitlessMaridia",
"HiJump",
"canPreciseWalljump",
{
"or": [
"canConsecutiveWalljump",
"canDelayedWalljump"
]
}
]
},
{
"link": [
3,
1
],
"name": "Suitless Spacejump",
"requires": [
"canSuitlessMaridia",
{
"or": [
{
"and": [
"canSpaceJumpWaterBounce",
"canWalljump"
]
},
{
"and": [
"canSpaceJumpWaterEscape",
"HiJump"
]
}
]
}
]
},
{
"link": [
3,
1
],
"name": "Suitless Springball",
"requires": [
"canSuitlessMaridia",
"HiJump",
"canSpringBallJumpMidAir"
],
"note": "Start the jump from the raised alcove."
},
{
"link": [
3,
6
],
"name": "Base",
"requires": [
"h_canNavigateUnderwater",
{
"or": [
"h_canUseSpringBall",
{
"and": [
"Gravity",
"h_canBombThings"
]
}
]
}
]
},
{
"link": [
3,
6
],
"name": "Suitless Bootless",
"requires": [
"canSuitlessMaridia",
"Morph",
"canDisableEquipment"
],
"note": "This can be done by turning off Gravity and HiJump to do a mid-air morph through the morph tunnel."
},
{
"link": [
4,
2
],
"name": "Base",
"requires": []
},
{
"link": [
4,
5
],
"name": "Base",
"requires": []
},
{
"link": [
5,
4
],
"name": "Base",
"requires": [
"Gravity",
{
"or": [
"SpaceJump",
"canWalljump",
"canSpringBallJumpMidAir",
"h_canDiagonalBombJump",
"h_IBJFromSpikes"
]
}
]
},
{
"link": [
5,
4
],
"name": "Cacatac Alley Springball Spike Boost",
"notable": true,
"requires": [
"HiJump",
"canSuitlessMaridia",
"canCarefulJump",
"canTrickySpringBallJump",
"canLateralMidAirMorph",
"canNeutralDamageBoost",
{
"enemyDamage": {
"enemy": "Cacatac",
"hits": 2,
"type": "spike"
}
}
],
"note": "When the Cacatac on the ground fires a spike, perform a springball Jump to break the waterline and then hit the spike for extra height."
},
{
"link": [
5,
4
],
"name": "Underwater Walljump",
"requires": [
"canUnderwaterWalljump",
"canSpaceJumpWaterBounce"
]
},
{
"link": [
5,
4
],
"name": "Cacatac Alley HiJumpless Double SpringBall Jump and Bomb-Grapple-Jump",
"notable": true,
"requires": [
"canBombGrappleJump",
"canDoubleSpringBallJumpMidAir",
"h_canMaxHeightSpringBallJump"
],
"note": [
"1) Crouch jump and then SpringBall jump.",
"2) Bomb-Grapple-Jump using the distant Cacatac who is above the water.",
"3) SpringBall jump again just as Samus exits the water."
]
},
{
"link": [
5,
6
],
"name": "Base",
"requires": [
"Gravity",
{
"or": [
"SpaceJump",
"h_canHBJ",
"h_canResetFallSpeed",
{
"enemyDamage": {
"enemy": "Cacatac",
"hits": 1,
"type": "spike"
}
}
]
},
{
"or": [
"SpaceJump",
"canWalljump",
"HiJump",
"h_canIBJ",
"h_canHBJ",
"h_canSpringBallBombJump",
{
"spikeHits": 1
}
]
}
]
},
{
"link": [
5,
6
],
"name": "Cacatac Boost",
"requires": [
"Gravity",
"canHorizontalDamageBoost",
"canIframeSpikeJump",
{
"enemyDamage": {
"enemy": "Cacatac",
"hits": 1,
"type": "contact"
}
}
],
"note": [
"Jump into the ceiling Cacatac and damage boost onto the platform between spike pits.",
"Use IFrames to cross the second set of spikes."
]
},
{
"link": [
5,
6
],
"name": "Suitless HiJump",
"requires": [
"canSuitlessMaridia",
"HiJump",
{
"spikeHits": 1
},
{
"or": [
"canWalljump",
"canSpaceJumpWaterEscape",
"canSpringBallJumpMidAir",
{
"and": [
"h_canJumpIntoIBJ",
"h_canUseSpringBall"
]
},
{
"and": [
"h_canIBJ",
"canBombJumpWaterEscape"
]
},
{
"spikeHits": 1
}
]
}
],
"devNote": [
"The first spike pit on the right is considered unavoidable, as if the player has Gravity and HiJump, the jump is quite tricky.",
"In that scenario, the player will hit the spikes or need the strat with canDisableEquipment."
]
},
{
"link": [
5,
6
],
"name": "Suitless Bootless Jump",
"requires": [
"canSuitlessMaridia",
"canDisableEquipment",
"canCarefulJump",
{
"or": [
"Gravity",
"HiJump",
"canSpringBallJumpMidAir"
]
}
],
"note": "This can be done by turning off Gravity and HiJump to jump over both spike pits."
},
{
"link": [
5,
6
],
"name": "Suitless Springball",
"requires": [
"canSuitlessMaridia",
"canSpringBallJumpMidAir",
{
"spikeHits": 1
},
{
"or": [
"canTrickySpringBallJump",
{
"and": [
"canWalljump",
"canSpaceJumpWaterBounce"
]
},
{
"and": [
"h_canJumpIntoIBJ",
"h_canUseSpringBall"
]
},
{
"and": [
"h_canIBJ",
"canBombJumpWaterEscape"
]
},
{
"spikeHits": 1
}
]
}
],
"note": "This can be done by turning off Gravity and HiJump to jump over both spike pits.",
"devNote": [
"This strat is only used if the player doesn't have canCarefulJump, because otherwise the Suitless Bootless strat will be used,",
"because canSpringBallJumpMidAir requires canDisableEquipment."
]
},
{
"link": [
6,
3
],
"name": "Base",
"requires": [
"Morph"
]
},
{
"link": [
6,
5
],
"name": "Suitless",
"requires": [
"canSuitlessMaridia",
{
"or": [
{
"spikeHits": 1
},
"canSpringBallJumpMidAir",
{
"and": [
"HiJump",
{
"or": [
"canWalljump",
"h_canCrouchJumpDownGrab",
"canSpaceJumpWaterEscape"
]
}
]
},
{
"and": [
"h_canIBJ",
"canBombJumpWaterEscape"
]
}
]
},
{
"or": [
{
"spikeHits": 1
},
"HiJump"
]
}
]
},
{
"link": [
6,
5
],
"name": "Gravity",
"requires": [
"Gravity",
{
"or": [
"SpaceJump",
"h_canHBJ",
{
"spikeHits": 1
}
]
}
]
},
{
"link": [
6,
5
],
"name": "Suitless Bootless",
"requires": [
"canSuitlessMaridia",
"canDisableEquipment",
"canCarefulJump"
],
"note": "This can be done by turning off Gravity and HiJump to jump over both spike pits."
}
]
}