Aqueduct
Room ID: 183
|
Exit condition: {
"leaveWithRunway": {
"length": 6,
"openEnd": 1
}
}
|
|
Requires: "h_canCrystalFlash" Clears obstacles: A |
|
Requires: {
"or": [
{
"obstaclesCleared": [
"A"
]
},
"h_canUsePowerBombs"
]
}
Exit condition: {
"leaveWithGModeSetup": {}
}
|
|
From: 1
Middle Left Door
To: 1
Middle Left Door
Place a Power Bomb then exit G-Mode. Entrance condition: {
"comeInWithGMode": {
"mode": "any",
"morphed": true
}
}
Requires: "h_canArtificialMorphPowerBomb" Clears obstacles: A |
|
Requires: {
"or": [
{
"obstaclesCleared": [
"A"
]
},
"h_canUsePowerBombs"
]
}
Clears obstacles: A |
|
Moonfall twice into the wall adjacent the Power Bomb blocks and then wiggle out to the right. Then moonfall again to clip through the Power Bomb Blocks Without Gravity, break spin to avoid clipping down too far. Entrance condition: {
"comeInWithStoredFallSpeed": {
"fallSpeedInTiles": 2
}
}
Requires: "canMoonfall" |
|
From: 1
Middle Left Door
To: 9
Junction Below Top Door
Notable: true .png)
.gif)
Climb up 1 screen. Aim to end this XRay climb when Samus is visually near but not above the top of the left side door. Fall out of the wall by turning to the right, from a crouch if possible. This XRay climb has a window of 4 crouches, but with a way to break bomb blocks it can be ended earlier. Entrance condition: {
"comeInWithDoorStuckSetup": {}
}
Requires: "canXRayClimb" |
|
From: 1
Middle Left Door
To: 9
Junction Below Top Door
Bomb the Power Bomb blocks below to overload PLMs, then go up through the crumble blocks to escape. Entrance condition: {
"comeInWithGMode": {
"mode": "any",
"morphed": true
}
}
Requires: "h_canArtificialMorphBombs"
"h_canNavigateUnderwater"
{
"or": [
{
"and": [
"Gravity",
"h_canArtificialMorphIBJ"
]
},
{
"and": [
"HiJump",
"canSpringBallJumpMidAir"
]
},
{
"and": [
"HiJump",
"canConsecutiveWalljump",
"canPreciseWalljump"
]
}
]
}
|
|
From: 1
Middle Left Door
To: 10
G-Mode Morph Junction (By Bottom Left Door)
Bomb the Power Bomb blocks below to overload PLMs, then IBJ up through the crumble blocks to escape. Entrance condition: {
"comeInWithGMode": {
"mode": "any",
"morphed": true
}
}
Requires: "Gravity" "h_canArtificialMorphIBJ" |
|
From: 1
Middle Left Door
To: 11
G-Mode Overloaded PLMs Junction (By Bottom Left Door)
Bomb the PB blocks below to overload PLMs, then go up through the crumble blocks to escape. Entrance condition: {
"comeInWithGMode": {
"mode": "any",
"morphed": true
}
}
Requires: "h_canArtificialMorphBombs"
"h_canNavigateUnderwater"
{
"or": [
{
"and": [
"Gravity",
"h_canArtificialMorphIBJ"
]
},
{
"and": [
"HiJump",
"canSpringBallJumpMidAir"
]
},
{
"and": [
"HiJump",
"canConsecutiveWalljump",
"canPreciseWalljump"
]
}
]
}
|
|
Requires: "Gravity"
{
"or": [
"canWalljump",
"h_canFly",
"SpeedBooster",
"canSpringBallJumpMidAir",
"canUseEnemies"
]
}
{
  "or": [
    {
      "obstaclesCleared": [
        "A"
      ]
    },
    "h_canUsePowerBombs"
  ]
}
Clears obstacles: A |
|
Notable: true 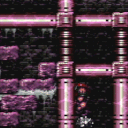

Jump on the Snail when it is at a precise location, and then crouch jump through the ceiling and jump again, without moving between jumps. The Snail's positioning is very precise, but it is more lenient with Morph and an X-Ray Turn Around. X-Ray can also be useful for helping position the Snail. Requires: "h_canNonTrivialCeilingClip" "Gravity" |
|
Climb up 1 screen. Entrance condition: {
"comeInWithDoorStuckSetup": {}
}
Requires: "canXRayClimb" |
|
Enter with G-mode direct, back up to between 1 and 6 pixels from the door transition, and activate X-ray to get very deep stuck in the door. Climb up 1 screen, and perform a turnaround buffered spin-jump away from the door to trigger the transition, bypassing any lock on the door. Entrance condition: {
"comeInWithGMode": {
"mode": "direct",
"morphed": false
}
}
Requires: "canXRayClimb" Bypasses door shell: true |
|
Requires: "canSuitlessMaridia"
"HiJump"
"canSpringBallJumpMidAir"
{
  "or": [
    {
      "obstaclesCleared": [
        "A"
      ]
    },
    "h_canUsePowerBombs"
  ]
}
Clears obstacles: A |
|
Requires: "canSuitlessMaridia"
"HiJump"
"canConsecutiveWalljump"
{
"or": [
{
"obstaclesCleared": [
"A"
]
},
"h_canUsePowerBombs"
]
}
Clears obstacles: A |
|
Requires: "canUseEnemies"
{
"or": [
"Gravity",
{
"and": [
"canSuitlessMaridia",
"HiJump"
]
}
]
}
{
"or": [
{
"obstaclesCleared": [
"A"
]
},
"h_canUsePowerBombs"
]
}
Clears obstacles: A |
|
From: 2
Bottom Left Door
To: 1
Middle Left Door
Notable: true 
Stop the snail when it is on the lower part of the overhang (hug the snail to gain extra jump height). Climb it by waiting until it is just about to become active to jump. Requires: "h_canNavigateUnderwater"
"canSnailClimb"
{
"or": [
{
"obstaclesCleared": [
"A"
]
},
"h_canUsePowerBombs"
]
}
Clears obstacles: A |
|
Entrance condition: {
"comeInShinecharged": {
"framesRequired": 130
}
}
Requires: "canSuitlessMaridia"
"h_canUsePowerBombs"
"canShinechargeMovement"
{
"shinespark": {
"frames": 25,
"excessFrames": 11
}
}
Clears obstacles: A |
|
Entrance condition: {
"comeInRunning": {
"speedBooster": true,
"minTiles": 2.4375
}
}
Requires: "canSuitlessMaridia"
"h_canUsePowerBombs"
"canStutterWaterShineCharge"
"canShinechargeMovement"
{
"canShineCharge": {
"usedTiles": 33,
"openEnd": 2
}
}
{
"shinespark": {
"frames": 25,
"excessFrames": 11
}
}
Clears obstacles: A |
|
Requires: "Gravity"
{
"or": [
"SpaceJump",
"canWalljump",
"HiJump"
]
}
{
"canShineCharge": {
"usedTiles": 33,
"openEnd": 2
}
}
{
"or": [
{
"obstaclesCleared": [
"A"
]
},
"h_canUsePowerBombs"
]
}
Exit condition: {
"leaveShinecharged": {
"framesRemaining": 50
}
}
|
|
From: 2
Bottom Left Door
To: 1
Middle Left Door
Requires: "Gravity"
"HiJump"
"canFastWalljumpClimb"
{
"canShineCharge": {
"usedTiles": 33,
"openEnd": 2
}
}
{
"or": [
{
"obstaclesCleared": [
"A"
]
},
"h_canUsePowerBombs"
]
}
Exit condition: {
"leaveShinecharged": {
"framesRemaining": 70
}
}
|
|
Exit condition: {
"leaveWithRunway": {
"length": 45,
"openEnd": 1
}
}
|
|
From: 2
Bottom Left Door
To: 2
Bottom Left Door
Entrance condition: {
"comeInRunning": {
"speedBooster": true,
"minTiles": 2
}
}
Requires: "canSuitlessMaridia"
"canShinechargeMovementComplex"
"canStutterWaterShineCharge"
{
"canShineCharge": {
"usedTiles": 33,
"openEnd": 2
}
}
{
"or": [
{
"shinespark": {
"frames": 12
}
},
{
"and": [
"canShinechargeMovementTricky",
{
"shinespark": {
"frames": 3
}
}
]
}
]
}
Exit condition: {
"leaveWithSpark": {}
}
|
|
Requires: "h_canCrystalFlash" Clears obstacles: A |
|
Exit condition: {
"leaveWithGModeSetup": {}
}
|
|
Requires: {
"enemyDamage": {
"enemy": "Yard",
"type": "contact",
"hits": 1
}
}
|
|
Requires: "Gravity"
{
"or": [
"SpaceJump",
"canPlayInSand",
{
"canShineCharge": {
"usedTiles": 32,
"openEnd": 1
}
},
"h_canUseSpringBall"
]
}
|
|
Requires: "canSuitlessMaridia"
{
"or": [
{
"and": [
"HiJump",
"h_canUseSpringBall"
]
},
"canPlayInSand"
]
}
|
|
Entrance condition: {
"comeInRunning": {
"speedBooster": true,
"minTiles": 0.4375
}
}
Requires: "canSuitlessMaridia"
"canShinechargeMovementComplex"
"canWaterShineCharge"
"canHorizontalShinespark"
{
"canShineCharge": {
"usedTiles": 33,
"openEnd": 2
}
}
{
"shinespark": {
"frames": 139,
"excessFrames": 66
}
}
|
|
Requires: "h_canNavigateUnderwater" |
|
Requires: "Gravity"
{
"or": [
"canWalljump",
"h_canFly",
"SpeedBooster",
"Grapple",
{
"and": [
"HiJump",
"canSpringBallJumpMidAir"
]
},
{
"and": [
"HiJump",
"canUseEnemies"
]
}
]
}
|
|
Requires: "canSuitlessMaridia" "canGrappleJump" |
|
Requires: "canSnailClimb"
"h_canUseSpringBall"
{
"or": [
"Gravity",
{
"and": [
"canSuitlessMaridia",
"HiJump"
]
}
]
}
|
|
From: 2
Bottom Left Door
To: 5
Right Door
Notable: true
Stop the snail when it is on the lower part of the overhang (hug the snail to gain extra jump height). Climb it by waiting until it is just about to become active to jump. Requires: "h_canNavigateUnderwater" "canSnailClimb" |
|
Entrance condition: {
"comeInRunning": {
"speedBooster": true,
"minTiles": 0.4375
}
}
Requires: "canWaterShineCharge"
{
"canShineCharge": {
"usedTiles": 33,
"openEnd": 2
}
}
{
"shinespark": {
"frames": 37,
"excessFrames": 3
}
}
|
|
Requires: "Gravity"
{
"canShineCharge": {
"usedTiles": 33,
"openEnd": 2
}
}
{
"shinespark": {
"frames": 40,
"excessFrames": 7
}
}
|
|
Entrance condition: {
"comeInRunning": {
"speedBooster": true,
"minTiles": 0.4375
}
}
Requires: "canWaterShineCharge"
{
"canShineCharge": {
"usedTiles": 33,
"openEnd": 2
}
}
{
"shinespark": {
"frames": 40,
"excessFrames": 7
}
}
|
|
From: 2
Bottom Left Door
To: 7
Top Right Left Item
Notable: true 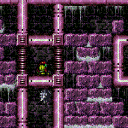
PLMs can be overloaded in direct G-Mode with a single Power Bomb if both items are still there and 2 PBs if only one item is. There is a row of tiles that works, just above and to the left of the right door. The row is one tile higher than the horizontal pipe that is part of the door frame, spanning from the left to one tile away from the right wall. Entrance condition: {
"comeInWithGMode": {
"mode": "direct",
"morphed": false
}
}
Requires: {
"or": [
{
"itemNotCollectedAtNode": 7
},
{
"itemNotCollectedAtNode": 8
}
]
}
"h_canUsePowerBombs"
"h_canUsePowerBombs"
"h_canNavigateUnderwater"
"canSnailClimb"
{
"or": [
"Gravity",
"h_canMaxHeightSpringBallJump",
{
"and": [
"HiJump",
{
"or": [
"canCrouchJump",
"canDownGrab"
]
}
]
}
]
}
|
|
From: 2
Bottom Left Door
To: 7
Top Right Left Item
Notable: true
PLMs can be overloaded in direct G-Mode with a single Power Bomb if both items are still there and 2 PBs if only one item is. There is a row of tiles that works, just above and to the left of the right door. The row is one tile higher than the horizontal pipe that is part of the door frame, spanning from the left to one tile away from the right wall. Entrance condition: {
"comeInWithGMode": {
"mode": "direct",
"morphed": true
}
}
Requires: {
"or": [
{
"itemNotCollectedAtNode": 7
},
{
"itemNotCollectedAtNode": 8
}
]
}
"h_canArtificialMorphSpringBall"
"h_canArtificialMorphPowerBomb"
"h_canArtificialMorphPowerBomb"
"h_canNavigateUnderwater"
"canSnailClimb"
{
"or": [
"Gravity",
{
"and": [
"HiJump",
{
"or": [
"canCrouchJump",
"canDownGrab"
]
}
]
}
]
}
|
|
Requires: "Gravity"
{
"or": [
"SpaceJump",
"Grapple",
"canConsecutiveWalljump"
]
}
|
|
Requires: "canSuitlessMaridia" "canGrappleJump" |
|
Watch out for snails coming from above, or aggressive snails from below, who will either block or attack Samus. Requires: "canSnailClimb"
"h_canUseSpringBall"
{
"or": [
"Gravity",
{
"and": [
"canSuitlessMaridia",
"HiJump"
]
}
]
}
|
|
From: 2
Bottom Left Door
To: 9
Junction Below Top Door
Notable: true
Stop the snail when it is on the lower part of the overhang (hug the snail to gain extra jump height). Climb it by waiting until it is just about to become active to jump. Watch out for snails coming from above, or aggressive snails from below, who will either block or attack Samus. Requires: "h_canNavigateUnderwater" "canSnailClimb" |
|
Requires: "Gravity"
{
"canShineCharge": {
"usedTiles": 33,
"openEnd": 2
}
}
{
"shinespark": {
"frames": 37,
"excessFrames": 3
}
}
|
|
Entrance condition: {
"comeInRunning": {
"speedBooster": true,
"minTiles": 2.4375
}
}
Requires: "canWaterShineCharge"
"canShinechargeMovement"
{
"canShineCharge": {
"usedTiles": 33,
"openEnd": 2
}
}
{
"shinespark": {
"frames": 37,
"excessFrames": 3
}
}
|
|
From: 2
Bottom Left Door
To: 9
Junction Below Top Door
Start running next to the transition (But at least 1 pixel away) so that Samus has very low run speed. Entrance condition: {
"comeInRunning": {
"speedBooster": true,
"minTiles": 0.4375
}
}
Requires: "canWaterShineCharge"
"canShinechargeMovementComplex"
{
"canShineCharge": {
"usedTiles": 33,
"openEnd": 2
}
}
{
"shinespark": {
"frames": 34,
"excessFrames": 3
}
}
|
|
From: 2
Bottom Left Door
To: 10
G-Mode Morph Junction (By Bottom Left Door)
Entrance condition: {
"comeInWithGMode": {
"mode": "any",
"morphed": true
}
}
|
|
From: 2
Bottom Left Door
To: 11
G-Mode Overloaded PLMs Junction (By Bottom Left Door)
Overload PLMs using the Grapple Blocks. Entrance condition: {
"comeInWithGMode": {
"mode": "any",
"morphed": false
}
}
Requires: "Grapple" "h_canNavigateUnderwater" |
|
Requires: "Gravity"
{
"or": [
"SpaceJump",
"canPlayInSand",
"h_canUseSpringBall"
]
}
|
|
Requires: "canSuitlessMaridia"
"HiJump"
{
"or": [
"h_canUseSpringBall",
"canPlayInSand"
]
}
|
|
Exit condition: {
"leaveNormally": {}
}
|
|
Requires: "h_canNavigateUnderwater" |
|
Requires: "Gravity"
{
"canShineCharge": {
"usedTiles": 33,
"openEnd": 1
}
}
Exit condition: {
"leaveShinecharged": {
"framesRemaining": 129
}
}
|
|
Exit condition: {
"leaveNormally": {}
}
|
|
Requires: "Gravity"
{
"canShineCharge": {
"usedTiles": 33,
"openEnd": 1
}
}
Exit condition: {
"leaveShinecharged": {
"framesRemaining": 129
}
}
|
|
Hold Grapple through the transition and then immediately release it to teleport below the Bomb blocks. Entrance condition: {
"comeInWithGrappleTeleport": {
"blockPositions": [
[
5,
3
],
[
7,
2
]
]
}
}
|
|
Exit the previous room with Samus in a standing pose (while grappled) with a horizontal position of 21 (as far right as possible). After teleporting, press right to release Grapple while staying standing (not being forced into a crouch). Then X-ray climb to get to the door transition above, without needing to open the door. At the beginning of the climb, avoid pressing left without X-Ray being held, to prevent triggering the transition of the bottom door. Entrance condition: {
"comeInWithGrappleTeleport": {
"blockPositions": [
[
2,
34
]
]
}
}
Requires: "canXRayClimb" Bypasses door shell: true |
|
|
|
Entrance condition: {
"comeInWithGrappleTeleport": {
"blockPositions": [
[
2,
34
]
]
}
}
Bypasses door shell: true |
|
Entrance condition: {
"comeInWithGrappleTeleport": {
"blockPositions": [
[
2,
34
]
]
}
}
Exit condition: {
"leaveWithGrappleTeleport": {
"blockPositions": [
[
2,
34
]
]
}
}
Bypasses door shell: true |
|
Exit condition: {
"leaveWithRunway": {
"length": 1,
"openEnd": 1
}
}
|
|
Requires: "Gravity"
{
"or": [
{
"canShineCharge": {
"usedTiles": 20,
"openEnd": 2
}
},
{
"and": [
"canEnemyExtendRunway",
{
"canShineCharge": {
"usedTiles": 21,
"openEnd": 2
}
}
]
}
]
}
Exit condition: {
"leaveShinecharged": {
"framesRemaining": 60
}
}
|
|
Requires: "h_canCrystalFlash" |
|
Exit condition: {
"leaveWithGModeSetup": {}
}
|
|
Requires: {
"enemyDamage": {
"enemy": "Yard",
"type": "contact",
"hits": 1
}
}
|
|
Notable: true
Jump on the Snail when it is at a precise location, and then crouch jump through the ceiling and jump again, without moving between jumps. The Snail's positioning is very precise, but it is more lenient with Morph and an X-Ray Turn Around. X-Ray can also be useful for helping position the Snail. Requires: "h_canNonTrivialCeilingClip" "Gravity" |
|
Requires: "Gravity"
{
"or": [
{
"canShineCharge": {
"usedTiles": 20,
"openEnd": 2
}
},
{
"and": [
"canEnemyExtendRunway",
{
"canShineCharge": {
"usedTiles": 21,
"openEnd": 2
}
}
]
}
]
}
{
"shinespark": {
"frames": 25
}
}
|
|
From: 5
Right Door
To: 7
Top Right Left Item
Notable: true
PLMs can be overloaded in direct G-Mode with a single Power Bomb if both items are still there and 2 PBs if only one item is. There is a row of tiles that works, just above and to the left of the right door. The row is one tile higher than the horizontal pipe that is part of the door frame, spanning from the left to one tile away from the right wall. Entrance condition: {
"comeInWithGMode": {
"mode": "direct",
"morphed": false
}
}
Requires: {
"or": [
{
"itemNotCollectedAtNode": 7
},
{
"itemNotCollectedAtNode": 8
}
]
}
"h_canUsePowerBombs"
"h_canUsePowerBombs"
"h_canNavigateUnderwater"
"canSnailClimb"
{
"or": [
"Gravity",
"h_canMaxHeightSpringBallJump",
{
"and": [
"HiJump",
{
"or": [
"canCrouchJump",
"canDownGrab"
]
}
]
}
]
}
|
|
From: 5
Right Door
To: 7
Top Right Left Item
Notable: true
PLMs can be overloaded in direct G-Mode with a single Power Bomb if both items are still there and 2 PBs if only one item is. There is a row of tiles that works, just above and to the left of the right door. The row is one tile higher than the horizontal pipe that is part of the door frame, spanning from the left to one tile away from the right wall. Entrance condition: {
"comeInWithGMode": {
"mode": "direct",
"morphed": true
}
}
Requires: {
"or": [
{
"itemNotCollectedAtNode": 7
},
{
"itemNotCollectedAtNode": 8
}
]
}
"h_canArtificialMorphSpringBall"
"h_canArtificialMorphPowerBomb"
"h_canArtificialMorphPowerBomb"
"h_canNavigateUnderwater"
"canSnailClimb"
{
"or": [
"Gravity",
{
"and": [
"HiJump",
{
"or": [
"canCrouchJump",
"canDownGrab"
]
}
]
}
]
}
|
|
Climb up 1 screen. Entrance condition: {
"comeInWithDoorStuckSetup": {}
}
Requires: "canXRayClimb" |
|
From: 5
Right Door
To: 9
Junction Below Top Door
Entrance condition: {
"comeInWithGrappleTeleport": {
"blockPositions": [
[
5,
3
]
]
}
}
|
|
Press down immediately after teleporting, in order to get above the bomb blocks. Entrance condition: {
"comeInWithGrappleTeleport": {
"blockPositions": [
[
7,
2
]
]
}
}
|
|
From: 5
Right Door
To: 10
G-Mode Morph Junction (By Bottom Left Door)
Entrance condition: {
"comeInWithGMode": {
"mode": "any",
"morphed": true
}
}
Requires: {
"or": [
"h_canArtificialMorphSpringBall",
"Morph",
{
"and": [
"Gravity",
"h_canArtificialMorphIBJ"
]
}
]
}
|
|
From: 5
Right Door
To: 11
G-Mode Overloaded PLMs Junction (By Bottom Left Door)
Entrance condition: {
"comeInWithGMode": {
"mode": "any",
"morphed": true
}
}
Requires: "h_canArtificialMorphBombs"
{
"or": [
"h_canArtificialMorphSpringBall",
"Morph",
{
"and": [
"Gravity",
"h_canArtificialMorphIBJ"
]
}
]
}
|
|
From: 5
Right Door
To: 11
G-Mode Overloaded PLMs Junction (By Bottom Left Door)
Overload PLMs using the Grapple Blocks. Entrance condition: {
"comeInWithGMode": {
"mode": "any",
"morphed": false
}
}
Requires: "Grapple" "h_canNavigateUnderwater" |
|
Entrance condition: {
"comeInWithGMode": {
"mode": "any",
"morphed": true
},
"comesThroughToilet": "any"
}
Requires: {
"or": [
"h_canArtificialMorphPowerBomb",
{
"and": [
"h_canArtificialMorphBombs",
{
"or": [
"Gravity",
"h_canArtificialMorphSpringBall"
]
}
]
}
]
}
|
|
Entrance condition: {
"comeInShinecharged": {
"framesRequired": 35
},
"comesThroughToilet": "any"
}
Requires: "Gravity"
"canHorizontalShinespark"
{
"shinespark": {
"frames": 78,
"excessFrames": 16
}
}
|
|
Entrance condition: {
"comeInShinecharged": {
"framesRequired": 55
},
"comesThroughToilet": "any"
}
Requires: "canSuitlessMaridia"
"canHorizontalShinespark"
{
"shinespark": {
"frames": 99,
"excessFrames": 29
}
}
|
|
The two snails together can setup G-Mode on either side of the door. Requires: "canUpwardGModeSetup" "h_canNavigateUnderwater" "canTwoTileSqueeze" Exit condition: {
"leaveWithGModeSetup": {}
}
|
|
Requires: {
"enemyDamage": {
"enemy": "Yard",
"type": "contact",
"hits": 1
}
}
|
|
From: 6
Top Door
To: 7
Top Right Left Item
Notable: true
PLMs can be overloaded in direct G-Mode with a single Power Bomb if both items are still there and 2 PBs if only one item is. There is a row of tiles that works, just above and to the left of the right door. The row is one tile higher than the horizontal pipe that is part of the door frame, spanning from the left to one tile away from the right wall. Entrance condition: {
"comeInWithGMode": {
"mode": "direct",
"morphed": false
},
"comesThroughToilet": "no"
}
Requires: {
"or": [
{
"itemNotCollectedAtNode": 7
},
{
"itemNotCollectedAtNode": 8
}
]
}
"h_canUsePowerBombs"
"h_canUsePowerBombs"
"h_canNavigateUnderwater"
"canSnailClimb"
{
"or": [
"Gravity",
"h_canMaxHeightSpringBallJump",
{
"and": [
"HiJump",
{
"or": [
"canCrouchJump",
"canDownGrab"
]
}
]
}
]
}
|
|
From: 6
Top Door
To: 7
Top Right Left Item
Notable: true
PLMs can be overloaded in direct G-Mode with a single Power Bomb if both items are still there and 2 PBs if only one item is. There is a row of tiles that works, just above and to the left of the right door. The row is one tile higher than the horizontal pipe that is part of the door frame, spanning from the left to one tile away from the right wall. Entrance condition: {
"comeInWithGMode": {
"mode": "direct",
"morphed": true
},
"comesThroughToilet": "no"
}
Requires: {
"or": [
{
"itemNotCollectedAtNode": 7
},
{
"itemNotCollectedAtNode": 8
}
]
}
"h_canArtificialMorphSpringBall"
"h_canArtificialMorphPowerBomb"
"h_canArtificialMorphPowerBomb"
"h_canNavigateUnderwater"
"canSnailClimb"
{
"or": [
"Gravity",
{
"and": [
"HiJump",
{
"or": [
"canCrouchJump",
"canDownGrab"
]
}
]
}
]
}
|
|
|
|
Entrance condition: {
"comeInWithGMode": {
"mode": "any",
"morphed": true
},
"comesThroughToilet": "any"
}
|
|
From: 6
Top Door
To: 11
G-Mode Overloaded PLMs Junction (By Bottom Left Door)
Overload PLMs using the Grapple Blocks. Entrance condition: {
"comeInWithGMode": {
"mode": "any",
"morphed": false
},
"comesThroughToilet": "any"
}
Requires: "Grapple" "h_canNavigateUnderwater" |
|
|
|
|
|
|
|
Requires: "Gravity" "h_canDestroyBombWalls" |
|
Requires: "canSuitlessMaridia" "h_canBombThings" |
|
From: 9
Junction Below Top Door
To: 1
Middle Left Door
Notable: true 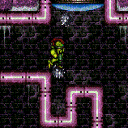
Use two snails to perform an 'Enemy Stuck Moonfall' to bypass the bomb blocks above the middle left door of Aqueduct. Position one snail on the above door shell, and the second above the corner of pipe below Samus will clip through the lower snail, taking damage, then continue through a segment of pipe where the crumble blocks can be reached. Facing both snails during the moonfall while positioning Samus for the clip can be precise Depending on the exact heights of the snails, it may be necessary to pose change while clipping. Requires: "h_canNavigateUnderwater"
"canEnemyStuckMoonfall"
"canBePatient"
{
  "enemyDamage": {
    "enemy": "Yard",
    "type": "contact",
    "hits": 1
  }
}
|
|
From: 9
Junction Below Top Door
To: 1
Middle Left Door
Requires: "h_canDestroyBombWalls" Exit condition: {
"leaveWithGModeSetup": {}
}
|
|
|
|
Requires: "Grapple" |
|
Requires: "canSuitlessMaridia" "canFlatleyJump" "HiJump" |
|
Requires: "Gravity"
"canLateralMidAirMorph"
"canCarefulJump"
{
"or": [
"canTrickyJump",
"canSpringBallBounce"
]
}
|
|
From: 9
Junction Below Top Door
To: 5
Right Door
Requires: "canSuitlessMaridia" "canStationaryLateralMidAirMorph" "canTrickySpringBallJump" "canResetFallSpeed" |
|
Requires: "canSuitlessMaridia" "h_canSpringFling" "canTrickySpringBallJump" |
|
Requires: {
"or": [
"Gravity",
"HiJump",
"canSpringBallJumpMidAir"
]
}
|
|
Involves waiting around for a snail to come along, in order to reach the door by jumping while standing on it. Requires: "canUseEnemies" |
|
Crouch on rightmost pixel of the ledge to the left of the door, jump then move over quickly without spin jumping. Requires: "canCrouchJump" "canTrickyJump" |
|
Requires: "h_canCrystalFlash" |
|
From: 10
G-Mode Morph Junction (By Bottom Left Door)
To: 1
Middle Left Door
Requires: "Gravity" "h_canArtificialMorphIBJ" |
|
From: 10
G-Mode Morph Junction (By Bottom Left Door)
To: 2
Bottom Left Door
Place a Power Bomb, then exit G-Mode to break the blocks. Requires: "h_canArtificialMorphPowerBomb" Clears obstacles: A |
|
From: 10
G-Mode Morph Junction (By Bottom Left Door)
To: 7
Top Right Left Item
Requires: "Gravity" "h_canArtificialMorphIBJ" |
|
From: 10
G-Mode Morph Junction (By Bottom Left Door)
To: 11
G-Mode Overloaded PLMs Junction (By Bottom Left Door)
Requires: "Gravity" "h_canArtificialMorphIBJ" |
|
From: 10
G-Mode Morph Junction (By Bottom Left Door)
To: 11
G-Mode Overloaded PLMs Junction (By Bottom Left Door)
Bomb the Speed blocks by the right door. Requires: "h_canUseMorphBombs"
{
"or": [
"canSnailClimb",
"Gravity",
"HiJump"
]
}
|
|
From: 10
G-Mode Morph Junction (By Bottom Left Door)
To: 11
G-Mode Overloaded PLMs Junction (By Bottom Left Door)
Requires: "h_canArtificialMorphBombs" "HiJump" "h_canArtificialMorphSpringBall" "canSnailClimb" |
|
From: 10
G-Mode Morph Junction (By Bottom Left Door)
To: 11
G-Mode Overloaded PLMs Junction (By Bottom Left Door)
It is barely possible to start a snail climb with just Spring Ball. Get a snail positioned such that it is on the bottom of an overhang above, and sticking out a bit to be usable as a platform. Use Spring Ball to jump and press against the snail for the maximum possible duration, in order to gain enough height to get onto it. Requires: "h_canArtificialMorphBombs" "h_canArtificialMorphSpringBall" "canSnailClimb" "canTrickyJump" |
|
From: 11
G-Mode Overloaded PLMs Junction (By Bottom Left Door)
To: 1
Middle Left Door
After PLMs are overloaded, climb to the top left door and fall through the Bomb Blocks. Requires: {
"or": [
"canSnailClimb",
{
"and": [
"Gravity",
{
"or": [
"SpaceJump",
"canConsecutiveWalljump"
]
}
]
}
]
}
|
|
From: 11
G-Mode Overloaded PLMs Junction (By Bottom Left Door)
To: 7
Top Right Left Item
After PLMs are overloaded, use a snail to help climb to the top right items. Requires: "canSnailClimb"
{
"or": [
"Gravity",
"h_canMaxHeightSpringBallJump",
{
"and": [
"HiJump",
{
"or": [
"canCrouchJump",
"canDownGrab"
]
}
]
}
]
}
|
{
"$schema": "../../../schema/m3-room.schema.json",
"id": 183,
"name": "Aqueduct",
"area": "Maridia",
"subarea": "Inner",
"subsubarea": "Pink",
"playable": true,
"roomAddress": "0x7D5A7",
"roomEnvironments": [
{
"heated": false
}
],
"nodes": [
{
"id": 1,
"name": "Middle Left Door",
"nodeType": "door",
"nodeSubType": "blue",
"nodeAddress": "0x001a708",
"doorEnvironments": [
{
"physics": "water"
}
]
},
{
"id": 2,
"name": "Bottom Left Door",
"nodeType": "door",
"nodeSubType": "red",
"nodeAddress": "0x001a744",
"doorEnvironments": [
{
"physics": "water"
}
],
"locks": [
{
"name": "Aqueduct Save Red Lock (to Save)",
"lockType": "coloredDoor",
"unlockStrats": [
{
"name": "Base",
"notable": false,
"requires": [
"h_canOpenRedDoors"
]
}
]
}
]
},
{
"id": 3,
"name": "Left Sand Pit",
"nodeType": "exit",
"nodeSubType": "sandpit",
"nodeAddress": "0x001a714"
},
{
"id": 4,
"name": "Right Sand Pit",
"nodeType": "exit",
"nodeSubType": "sandpit",
"nodeAddress": "0x001a720"
},
{
"id": 5,
"name": "Right Door",
"nodeType": "door",
"nodeSubType": "blue",
"nodeAddress": "0x001a738",
"doorEnvironments": [
{
"physics": "water"
}
]
},
{
"id": 6,
"name": "Top Door",
"nodeType": "door",
"nodeSubType": "blue",
"nodeAddress": "0x001a72c",
"doorEnvironments": [
{
"physics": "water"
}
],
"spawnAt": 9
},
{
"id": 7,
"name": "Top Right Left Item",
"nodeType": "item",
"nodeSubType": "visible",
"nodeItem": "Missile",
"nodeAddress": "0x7C603"
},
{
"id": 8,
"name": "Top Right Right Item",
"nodeType": "item",
"nodeSubType": "visible",
"nodeItem": "Super",
"nodeAddress": "0x7C609"
},
{
"id": 9,
"name": "Junction Below Top Door",
"nodeType": "junction",
"nodeSubType": "junction"
},
{
"id": 10,
"name": "G-Mode Morph Junction (By Bottom Left Door)",
"nodeType": "junction",
"nodeSubType": "g-mode",
"note": "Represents being at the bottom left door with G-Mode and morph or artificial morph."
},
{
"id": 11,
"name": "G-Mode Overloaded PLMs Junction (By Bottom Left Door)",
"nodeType": "junction",
"nodeSubType": "g-mode",
"note": "Represents being at the bottom left door with G-Mode and PLMs overloaded."
}
],
"obstacles": [
{
"id": "A",
"name": "Power Bomb Blocks",
"obstacleType": "inanimate"
}
],
"enemies": [
{
"id": "e1",
"groupName": "Aqueduct Free-Roaming Yards",
"enemyName": "Yard",
"quantity": 3,
"homeNodes": [
2,
5,
9
],
"note": "They move around the external walls even when offscreen, and can be brought to any of their home nodes."
},
{
"id": "e2",
"groupName": "Aqueduct Middle Yard",
"enemyName": "Yard",
"quantity": 1,
"homeNodes": [
2
],
"note": "It circles around on one of the grapple panels."
},
{
"id": "e3",
"groupName": "Aqueduct Bottom Yard",
"enemyName": "Yard",
"quantity": 1,
"homeNodes": [
4
]
}
],
"reusableRoomwideNotable": [
{
"name": "Aqueduct Bootless Suitless Snail Climb",
"note": "Snail Climb without movement items by better coordinating the movements of both the snail and Samus."
},
{
"name": "Aqueduct Snail Clip",
"note": [
"Jump on the Snail when it is at a precise location, and then crouch jump through the ceiling and jump again, without moving between jumps.",
"The Snail's positioning is very precise, but it is more lenient with Morph and an X-Ray Turn Around. X-Ray can also be useful for helping position the Snail.",
"This clip can be used to get to the middle left door and the items in the top right of the room."
]
},
{
"name": "Aqueduct G-Mode Overload PLMs - PB the Items",
"note": [
"PLMs can be overloaded in direct G-Mode with a single Power Bomb if both items are still there and 2 PBs if only one item is.",
"There is a row of tiles that works, just above and to the left of the right door.",
"The row is one tile higher than the horizontal pipe that is part of the door frame, spanning from the left to one tile away from the right wall."
]
}
],
"links": [
{
"from": 1,
"to": [
{
"id": 1
},
{
"id": 2
},
{
"id": 7
},
{
"id": 9
},
{
"id": 10
},
{
"id": 11
}
]
},
{
"from": 2,
"to": [
{
"id": 1
},
{
"id": 2
},
{
"id": 3
},
{
"id": 4
},
{
"id": 5
},
{
"id": 7
},
{
"id": 9
},
{
"id": 10
},
{
"id": 11
}
]
},
{
"from": 3,
"to": [
{
"id": 2
},
{
"id": 3
},
{
"id": 4
}
]
},
{
"from": 4,
"to": [
{
"id": 2
},
{
"id": 3
},
{
"id": 4
}
]
},
{
"from": 5,
"to": [
{
"id": 1
},
{
"id": 2
},
{
"id": 5
},
{
"id": 7
},
{
"id": 8
},
{
"id": 9
},
{
"id": 10
},
{
"id": 11
}
]
},
{
"from": 6,
"to": [
{
"id": 1
},
{
"id": 5
},
{
"id": 6
},
{
"id": 7
},
{
"id": 9
},
{
"id": 10
},
{
"id": 11
}
]
},
{
"from": 7,
"to": [
{
"id": 8
}
]
},
{
"from": 8,
"to": [
{
"id": 5
},
{
"id": 7
}
]
},
{
"from": 9,
"to": [
{
"id": 1
},
{
"id": 2
},
{
"id": 5,
"devNote": "This link is only for strats that can't go from 9 -> 2 -> 5."
},
{
"id": 6
},
{
"id": 9
}
]
},
{
"from": 10,
"to": [
{
"id": 1
},
{
"id": 2
},
{
"id": 7
},
{
"id": 11
}
]
},
{
"from": 11,
"to": [
{
"id": 1
},
{
"id": 7
}
]
}
],
"strats": [
{
"link": [
1,
1
],
"name": "Leave with Runway",
"requires": [],
"exitCondition": {
"leaveWithRunway": {
"length": 6,
"openEnd": 1
}
}
},
{
"link": [
1,
1
],
"name": "Crystal Flash",
"requires": [
"h_canCrystalFlash"
],
"clearsObstacles": [
"A"
]
},
{
"link": [
1,
1
],
"name": "G-Mode Setup - Get Hit By Yard",
"notable": false,
"requires": [
{
"or": [
{
"obstaclesCleared": [
"A"
]
},
"h_canUsePowerBombs"
]
}
],
"exitCondition": {
"leaveWithGModeSetup": {}
}
},
{
"link": [
1,
1
],
"name": "G-Mode Morph Break the Power Bomb Blocks",
"entranceCondition": {
"comeInWithGMode": {
"mode": "any",
"morphed": true
}
},
"requires": [
"h_canArtificialMorphPowerBomb"
],
"clearsObstacles": [
"A"
],
"note": "Place a Power Bomb then exit G-Mode."
},
{
"link": [
1,
2
],
"name": "Base",
"requires": [
{
"or": [
{
"obstaclesCleared": [
"A"
]
},
"h_canUsePowerBombs"
]
}
],
"clearsObstacles": [
"A"
]
},
{
"link": [
1,
2
],
"name": "Stored Moonfall Clip",
"entranceCondition": {
"comeInWithStoredFallSpeed": {
"fallSpeedInTiles": 2
}
},
"requires": [
"canMoonfall"
],
"note": [
"Moonfall twice into the wall adjacent the Power Bomb blocks and then wiggle out to the right.",
"Then moonfall again to clip through the Power Bomb Blocks",
"Without Gravity, break spin to avoid clipping down too far."
]
},
{
"link": [
1,
9
],
"name": "Aqueduct Left-Side X-Ray Climb (Upper)",
"notable": true,
"entranceCondition": {
"comeInWithDoorStuckSetup": {}
},
"requires": [
"canXRayClimb"
],
"note": [
"Climb up 1 screen.",
"Aim to end this XRay climb when Samus is visually near but not above the top of the left side door.",
"Fall out of the wall by turning to the right, from a crouch if possible.",
"This XRay climb has a window of 4 crouches, but with a way to break bomb blocks it can be ended earlier."
]
},
{
"link": [
1,
9
],
"name": "G-Mode Morph Overload PLMs - Bomb the PB Blocks",
"entranceCondition": {
"comeInWithGMode": {
"mode": "any",
"morphed": true
}
},
"requires": [
"h_canArtificialMorphBombs",
"h_canNavigateUnderwater",
{
"or": [
{
"and": [
"Gravity",
"h_canArtificialMorphIBJ"
]
},
{
"and": [
"HiJump",
"canSpringBallJumpMidAir"
]
},
{
"and": [
"HiJump",
"canConsecutiveWalljump",
"canPreciseWalljump"
]
}
]
}
],
"note": "Bomb the Power Bomb blocks below to overload PLMs, then go up through the crumble blocks to escape."
},
{
"link": [
1,
10
],
"name": "G-Mode Morph Overload PLMs - Bomb the Power Bomb Blocks",
"entranceCondition": {
"comeInWithGMode": {
"mode": "any",
"morphed": true
}
},
"requires": [
"Gravity",
"h_canArtificialMorphIBJ"
],
"note": "Bomb the Power Bomb blocks below to overload PLMs, then IBJ up through the crumble blocks to escape."
},
{
"link": [
1,
11
],
"name": "G-Mode Morph Overload PLMs - Bomb the PB Blocks",
"entranceCondition": {
"comeInWithGMode": {
"mode": "any",
"morphed": true
}
},
"requires": [
"h_canArtificialMorphBombs",
"h_canNavigateUnderwater",
{
"or": [
{
"and": [
"Gravity",
"h_canArtificialMorphIBJ"
]
},
{
"and": [
"HiJump",
"canSpringBallJumpMidAir"
]
},
{
"and": [
"HiJump",
"canConsecutiveWalljump",
"canPreciseWalljump"
]
}
]
}
],
"note": "Bomb the PB blocks below to overload PLMs, then go up through the crumble blocks to escape."
},
{
"link": [
2,
1
],
"name": "Base",
"requires": [
"Gravity",
{
"or": [
"canWalljump",
"h_canFly",
"SpeedBooster",
"canSpringBallJumpMidAir",
"canUseEnemies"
]
},
{
"or": [
{
"obstaclesCleared": [
"A"
]
},
"h_canUsePowerBombs"
]
}
],
"clearsObstacles": [
"A"
]
},
{
"link": [
2,
1
],
"name": "Snail Clip to the Left Middle Door",
"notable": true,
"requires": [
"h_canNonTrivialCeilingClip",
"Gravity"
],
"reusableRoomwideNotable": "Aqueduct Snail Clip",
"note": [
"Jump on the Snail when it is at a precise location, and then crouch jump through the ceiling and jump again, without moving between jumps.",
"The Snail's positioning is very precise, but it is more lenient with Morph and an X-Ray Turn Around. X-Ray can also be useful for helping position the Snail."
]
},
{
"link": [
2,
1
],
"name": "X-Ray Climb",
"entranceCondition": {
"comeInWithDoorStuckSetup": {}
},
"requires": [
"canXRayClimb"
],
"note": "Climb up 1 screen."
},
{
"link": [
2,
1
],
"name": "Very Deep Stuck X-Ray Climb",
"entranceCondition": {
"comeInWithGMode": {
"mode": "direct",
"morphed": false
}
},
"requires": [
"canXRayClimb"
],
"bypassesDoorShell": true,
"note": [
"Enter with G-mode direct, back up to between 1 and 6 pixels from the door transition, and activate X-ray to get very deep stuck in the door.",
"Climb up 1 screen, and perform a turnaround buffered spin-jump away from the door to trigger the transition, bypassing any lock on the door."
]
},
{
"link": [
2,
1
],
"name": "Suitless Jump Assist",
"requires": [
"canSuitlessMaridia",
"HiJump",
"canSpringBallJumpMidAir",
{
"or": [
{
"obstaclesCleared": [
"A"
]
},
"h_canUsePowerBombs"
]
}
],
"clearsObstacles": [
"A"
]
},
{
"link": [
2,
1
],
"name": "Suitless Sunken Dual Wall Climb",
"requires": [
"canSuitlessMaridia",
"HiJump",
"canConsecutiveWalljump",
{
"or": [
{
"obstaclesCleared": [
"A"
]
},
"h_canUsePowerBombs"
]
}
],
"clearsObstacles": [
"A"
]
},
{
"link": [
2,
1
],
"name": "Snail Jump",
"requires": [
"canUseEnemies",
{
"or": [
"Gravity",
{
"and": [
"canSuitlessMaridia",
"HiJump"
]
}
]
},
{
"or": [
{
"obstaclesCleared": [
"A"
]
},
"h_canUsePowerBombs"
]
}
],
"clearsObstacles": [
"A"
],
"devNote": "HJBless SpringBall jumps require less obvious snail positioning."
},
{
"link": [
2,
1
],
"name": "Aqueduct Bootless Suitless Snail Climb (Crab Shaft Door)",
"notable": true,
"requires": [
"h_canNavigateUnderwater",
"canSnailClimb",
{
"or": [
{
"obstaclesCleared": [
"A"
]
},
"h_canUsePowerBombs"
]
}
],
"clearsObstacles": [
"A"
],
"reusableRoomwideNotable": "Aqueduct Bootless Suitless Snail Climb",
"note": [
"Stop the snail when it is on the lower part of the overhang (hug the snail to gain extra jump height).",
"Climb it by waiting until it is just about to become active to jump."
]
},
{
"link": [
2,
1
],
"name": "Suitless Shinespark",
"entranceCondition": {
"comeInShinecharged": {
"framesRequired": 130
}
},
"requires": [
"canSuitlessMaridia",
"h_canUsePowerBombs",
"canShinechargeMovement",
{
"shinespark": {
"frames": 25,
"excessFrames": 11
}
}
],
"clearsObstacles": [
"A"
]
},
{
"link": [
2,
1
],
"name": "Stutter Water ShineCharge",
"entranceCondition": {
"comeInRunning": {
"speedBooster": true,
"minTiles": 2.4375
}
},
"requires": [
"canSuitlessMaridia",
"h_canUsePowerBombs",
"canStutterWaterShineCharge",
"canShinechargeMovement",
{
"canShineCharge": {
"usedTiles": 33,
"openEnd": 2
}
},
{
"shinespark": {
"frames": 25,
"excessFrames": 11
}
}
],
"clearsObstacles": [
"A"
]
},
{
"link": [
2,
1
],
"name": "Leave Shinecharged",
"requires": [
"Gravity",
{
"or": [
"SpaceJump",
"canWalljump",
"HiJump"
]
},
{
"canShineCharge": {
"usedTiles": 33,
"openEnd": 2
}
},
{
"or": [
{
"obstaclesCleared": [
"A"
]
},
"h_canUsePowerBombs"
]
}
],
"exitCondition": {
"leaveShinecharged": {
"framesRemaining": 50
}
},
"unlocksDoors": [
{
"types": [
"ammo"
],
"requires": []
}
]
},
{
"link": [
2,
1
],
"name": "Leave Shinecharged with a Fast WallJump Climb",
"requires": [
"Gravity",
"HiJump",
"canFastWalljumpClimb",
{
"canShineCharge": {
"usedTiles": 33,
"openEnd": 2
}
},
{
"or": [
{
"obstaclesCleared": [
"A"
]
},
"h_canUsePowerBombs"
]
}
],
"exitCondition": {
"leaveShinecharged": {
"framesRemaining": 70
}
},
"unlocksDoors": [
{
"types": [
"ammo"
],
"requires": []
}
]
},
{
"link": [
2,
2
],
"name": "Leave with Runway",
"requires": [],
"exitCondition": {
"leaveWithRunway": {
"length": 45,
"openEnd": 1
}
}
},
{
"link": [
2,
2
],
"name": "Suitless Stutter Shinecharge, Shinespark Return",
"entranceCondition": {
"comeInRunning": {
"speedBooster": true,
"minTiles": 2
}
},
"requires": [
"canSuitlessMaridia",
"canShinechargeMovementComplex",
"canStutterWaterShineCharge",
{
"canShineCharge": {
"usedTiles": 33,
"openEnd": 2
}
},
{
"or": [
{
"shinespark": {
"frames": 12
}
},
{
"and": [
"canShinechargeMovementTricky",
{
"shinespark": {
"frames": 3
}
}
]
}
]
}
],
"exitCondition": {
"leaveWithSpark": {}
},
"unlocksDoors": [
{
"types": [
"super"
],
"requires": []
},
{
"types": [
"missiles",
"powerbomb"
],
"requires": [
"never"
]
}
]
},
{
"link": [
2,
2
],
"name": "Crystal Flash",
"requires": [
"h_canCrystalFlash"
],
"clearsObstacles": [
"A"
]
},
{
"link": [
2,
2
],
"name": "G-Mode Setup - Get Hit By Yard",
"notable": false,
"requires": [],
"exitCondition": {
"leaveWithGModeSetup": {}
}
},
{
"link": [
2,
2
],
"name": "G-Mode Regain Mobility",
"requires": [
{
  "enemyDamage": {
    "enemy": "Yard",
    "type": "contact",
    "hits": 1
  }
}
],
"gModeRegainMobility": {}
},
{
"link": [
2,
3
],
"name": "Gravity",
"requires": [
"Gravity",
{
"or": [
"SpaceJump",
"canPlayInSand",
{
"canShineCharge": {
"usedTiles": 32,
"openEnd": 1
}
},
"h_canUseSpringBall"
]
}
]
},
{
"link": [
2,
3
],
"name": "Suitless",
"requires": [
"canSuitlessMaridia",
{
"or": [
{
"and": [
"HiJump",
"h_canUseSpringBall"
]
},
"canPlayInSand"
]
}
]
},
{
"link": [
2,
3
],
"name": "Suitless Shinespark",
"entranceCondition": {
"comeInRunning": {
"speedBooster": true,
"minTiles": 0.4375
}
},
"requires": [
"canSuitlessMaridia",
"canShinechargeMovementComplex",
"canWaterShineCharge",
"canHorizontalShinespark",
{
"canShineCharge": {
"usedTiles": 33,
"openEnd": 2
}
},
{
"shinespark": {
"frames": 139,
"excessFrames": 66
}
}
],
"devNote": "This is obscure enough that it's assumed you can canShinechargeMovementComplex"
},
{
"link": [
2,
4
],
"name": "Base",
"requires": [
"h_canNavigateUnderwater"
]
},
{
"link": [
2,
5
],
"name": "Base",
"requires": [
"Gravity",
{
"or": [
"canWalljump",
"h_canFly",
"SpeedBooster",
"Grapple",
{
"and": [
"HiJump",
"canSpringBallJumpMidAir"
]
},
{
"and": [
"HiJump",
"canUseEnemies"
]
}
]
}
],
"devNote": "A very precise CrouchJumpDownGrab, or springball jumping to the snail is closer to canSnailClimb."
},
{
"link": [
2,
5
],
"name": "Grapple Jump",
"requires": [
"canSuitlessMaridia",
"canGrappleJump"
]
},
{
"link": [
2,
5
],
"name": "Snail Climb",
"requires": [
"canSnailClimb",
"h_canUseSpringBall",
{
"or": [
"Gravity",
{
"and": [
"canSuitlessMaridia",
"HiJump"
]
}
]
}
]
},
{
"link": [
2,
5
],
"name": "Aqueduct Bootless Suitless Snail Climb (Right Door)",
"notable": true,
"requires": [
"h_canNavigateUnderwater",
"canSnailClimb"
],
"reusableRoomwideNotable": "Aqueduct Bootless Suitless Snail Climb",
"note": [
"Stop the snail when it is on the lower part of the overhang (hug the snail to gain extra jump height).",
"Climb it by waiting until it is just about to become active to jump."
]
},
{
"link": [
2,
5
],
"name": "Suitless Shinespark",
"entranceCondition": {
"comeInRunning": {
"speedBooster": true,
"minTiles": 0.4375
}
},
"requires": [
"canWaterShineCharge",
{
"canShineCharge": {
"usedTiles": 33,
"openEnd": 2
}
},
{
"shinespark": {
"frames": 37,
"excessFrames": 3
}
}
]
},
{
"link": [
2,
7
],
"name": "Shinespark",
"requires": [
"Gravity",
{
"canShineCharge": {
"usedTiles": 33,
"openEnd": 2
}
},
{
"shinespark": {
"frames": 40,
"excessFrames": 7
}
}
]
},
{
"link": [
2,
7
],
"name": "Suitless Shinespark",
"entranceCondition": {
"comeInRunning": {
"speedBooster": true,
"minTiles": 0.4375
}
},
"requires": [
"canWaterShineCharge",
{
"canShineCharge": {
"usedTiles": 33,
"openEnd": 2
}
},
{
"shinespark": {
"frames": 40,
"excessFrames": 7
}
}
]
},
{
"link": [
2,
7
],
"name": "G-Mode Overload PLMs - PB the Items (To the Items)",
"notable": true,
"entranceCondition": {
"comeInWithGMode": {
"mode": "direct",
"morphed": false
}
},
"requires": [
{
"or": [
{
"itemNotCollectedAtNode": 7
},
{
"itemNotCollectedAtNode": 8
}
]
},
"h_canUsePowerBombs",
"h_canUsePowerBombs",
"h_canNavigateUnderwater",
"canSnailClimb",
{
"or": [
"Gravity",
"h_canMaxHeightSpringBallJump",
{
"and": [
"HiJump",
{
"or": [
"canCrouchJump",
"canDownGrab"
]
}
]
}
]
}
],
"reusableRoomwideNotable": "Aqueduct G-Mode Overload PLMs - PB the Items",
"note": [
"PLMs can be overloaded in direct G-Mode with a single Power Bomb if both items are still there and 2 PBs if only one item is.",
"There is a row of tiles that works, just above and to the left of the right door.",
"The row is one tile higher than the horizontal pipe that is part of the door frame, spanning from the left to one tile away from the right wall."
],
"devNote": "This does not include canRiskPermanentLossOfAccess, as it is only worth doing this strat if the items are there."
},
{
"link": [
2,
7
],
"name": "G-Mode Morph Overload PLMs - PB the Items (To the Items)",
"notable": true,
"entranceCondition": {
"comeInWithGMode": {
"mode": "direct",
"morphed": true
}
},
"requires": [
{
"or": [
{
"itemNotCollectedAtNode": 7
},
{
"itemNotCollectedAtNode": 8
}
]
},
"h_canArtificialMorphSpringBall",
"h_canArtificialMorphPowerBomb",
"h_canArtificialMorphPowerBomb",
"h_canNavigateUnderwater",
"canSnailClimb",
{
"or": [
"Gravity",
{
"and": [
"HiJump",
{
"or": [
"canCrouchJump",
"canDownGrab"
]
}
]
}
]
}
],
"reusableRoomwideNotable": "Aqueduct G-Mode Overload PLMs - PB the Items",
"note": [
"PLMs can be overloaded in direct G-Mode with a single Power Bomb if both items are still there and 2 PBs if only one item is.",
"There is a row of tiles that works, just above and to the left of the right door.",
"The row is one tile higher than the horizontal pipe that is part of the door frame, spanning from the left to one tile away from the right wall."
],
"devNote": "This does not include canRiskPermanentLossOfAccess, as it is only worth doing this strat if the items are there."
},
{
"link": [
2,
9
],
"name": "Base",
"requires": [
"Gravity",
{
"or": [
"SpaceJump",
"Grapple",
"canConsecutiveWalljump"
]
}
]
},
{
"link": [
2,
9
],
"name": "Grapple Jump",
"requires": [
"canSuitlessMaridia",
"canGrappleJump"
]
},
{
"link": [
2,
9
],
"name": "Snail Climb",
"requires": [
"canSnailClimb",
"h_canUseSpringBall",
{
"or": [
"Gravity",
{
"and": [
"canSuitlessMaridia",
"HiJump"
]
}
]
}
],
"note": "Watch out for snails coming from above, or aggressive snails from below, who will either block or attack Samus."
},
{
"link": [
2,
9
],
"name": "Aqueduct Bootless Suitless Snail Climb (Top Door)",
"notable": true,
"requires": [
"h_canNavigateUnderwater",
"canSnailClimb"
],
"reusableRoomwideNotable": "Aqueduct Bootless Suitless Snail Climb",
"note": [
"Stop the snail when it is on the lower part of the overhang (hug the snail to gain extra jump height).",
"Climb it by waiting until it is just about to become active to jump.",
"Watch out for snails coming from above, or aggressive snails from below, who will either block or attack Samus."
]
},
{
"link": [
2,
9
],
"name": "Shinespark",
"requires": [
"Gravity",
{
"canShineCharge": {
"usedTiles": 33,
"openEnd": 2
}
},
{
"shinespark": {
"frames": 37,
"excessFrames": 3
}
}
]
},
{
"link": [
2,
9
],
"name": "Suitless Shinespark",
"entranceCondition": {
"comeInRunning": {
"speedBooster": true,
"minTiles": 2.4375
}
},
"requires": [
"canWaterShineCharge",
"canShinechargeMovement",
{
"canShineCharge": {
"usedTiles": 33,
"openEnd": 2
}
},
{
"shinespark": {
"frames": 37,
"excessFrames": 3
}
}
]
},
{
"link": [
2,
9
],
"name": "Suitless Shinespark, Low Run Speed",
"entranceCondition": {
"comeInRunning": {
"speedBooster": true,
"minTiles": 0.4375
}
},
"requires": [
"canWaterShineCharge",
"canShinechargeMovementComplex",
{
"canShineCharge": {
"usedTiles": 33,
"openEnd": 2
}
},
{
"shinespark": {
"frames": 34,
"excessFrames": 3
}
}
],
"note": "Start running next to the transition (But at least 1 pixel away) so that Samus has very low run speed.",
"devNote": "Starting with low run speed is less obvious than trying to shortcharge."
},
{
"link": [
2,
10
],
"name": "G-Mode Morph",
"entranceCondition": {
"comeInWithGMode": {
"mode": "any",
"morphed": true
}
},
"requires": []
},
{
"link": [
2,
11
],
"name": "G-Mode Overload PLMs with Grapple",
"entranceCondition": {
"comeInWithGMode": {
"mode": "any",
"morphed": false
}
},
"requires": [
"Grapple",
"h_canNavigateUnderwater"
],
"note": "Overload PLMs using the Grapple Blocks."
},
{
"link": [
3,
2
],
"name": "Gravity",
"requires": [
"Gravity",
{
"or": [
"SpaceJump",
"canPlayInSand",
"h_canUseSpringBall"
]
}
]
},
{
"link": [
3,
2
],
"name": "Suitless",
"requires": [
"canSuitlessMaridia",
"HiJump",
{
"or": [
"h_canUseSpringBall",
"canPlayInSand"
]
}
]
},
{
"link": [
3,
3
],
"name": "Leave Normally",
"exitCondition": {
"leaveNormally": {}
},
"requires": []
},
{
"link": [
3,
4
],
"name": "Base",
"requires": [
"h_canNavigateUnderwater"
]
},
{
"link": [
4,
3
],
"name": "Leave Shinecharged",
"requires": [
"Gravity",
{
"canShineCharge": {
"usedTiles": 33,
"openEnd": 1
}
}
],
"exitCondition": {
"leaveShinecharged": {
"framesRemaining": 129
}
}
},
{
"link": [
4,
4
],
"name": "Leave Normally",
"exitCondition": {
"leaveNormally": {}
},
"requires": []
},
{
"link": [
4,
4
],
"name": "Leave Shinecharged",
"requires": [
"Gravity",
{
"canShineCharge": {
"usedTiles": 33,
"openEnd": 1
}
}
],
"exitCondition": {
"leaveShinecharged": {
"framesRemaining": 129
}
}
},
{
"link": [
5,
1
],
"name": "Grapple Teleport Below Bomb Blocks",
"entranceCondition": {
"comeInWithGrappleTeleport": {
"blockPositions": [
[
5,
3
],
[
7,
2
]
]
}
},
"requires": [],
"note": [
"Hold Grapple through the transition and then immediately release it to teleport below the Bomb blocks."
]
},
{
"link": [
5,
1
],
"name": "Grapple Teleport X-Ray Climb",
"entranceCondition": {
"comeInWithGrappleTeleport": {
"blockPositions": [
[
2,
34
]
]
}
},
"requires": [
"canXRayClimb"
],
"bypassesDoorShell": true,
"note": [
"Exit the previous room with Samus in a standing pose (while grappled) with a horizontal position of 21 (as far right as possible).",
"After teleporting, press right to release Grapple while staying standing (not being forced into a crouch).",
"Then X-ray climb to get to the door transition above, without needing to open the door.",
"At the beginning of the climb, avoid pressing left without X-Ray being held, to prevent triggering the transition of the bottom door."
]
},
{
"link": [
5,
2
],
"name": "Base",
"requires": []
},
{
"link": [
5,
2
],
"name": "Grapple Teleport",
"entranceCondition": {
"comeInWithGrappleTeleport": {
"blockPositions": [
[
2,
34
]
]
}
},
"requires": [],
"bypassesDoorShell": true
},
{
"link": [
5,
2
],
"name": "Carry Grapple Teleport",
"entranceCondition": {
"comeInWithGrappleTeleport": {
"blockPositions": [
[
2,
34
]
]
}
},
"requires": [],
"bypassesDoorShell": true,
"exitCondition": {
"leaveWithGrappleTeleport": {
"blockPositions": [
[
2,
34
]
]
}
}
},
{
"link": [
5,
5
],
"name": "Leave with Runway",
"requires": [],
"exitCondition": {
"leaveWithRunway": {
"length": 1,
"openEnd": 1
}
}
},
{
"link": [
5,
5
],
"name": "Leave Shinecharged",
"requires": [
"Gravity",
{
"or": [
{
"canShineCharge": {
"usedTiles": 20,
"openEnd": 2
}
},
{
"and": [
"canEnemyExtendRunway",
{
"canShineCharge": {
"usedTiles": 21,
"openEnd": 2
}
}
]
}
]
}
],
"exitCondition": {
"leaveShinecharged": {
"framesRemaining": 60
}
},
"devNote": "It is possible, although not overly useful, to extend the runway here using a snail."
},
{
"link": [
5,
5
],
"name": "Crystal Flash",
"requires": [
"h_canCrystalFlash"
]
},
{
"link": [
5,
5
],
"name": "G-Mode Setup - Get Hit By Yard",
"notable": false,
"requires": [],
"exitCondition": {
"leaveWithGModeSetup": {}
},
"devNote": [
"Requires no items or tech if you step on a Snail - canUseEnemies is necessary for G-Mode Setup."
]
},
{
"link": [
5,
5
],
"name": "G-Mode Regain Mobility",
"requires": [
{
"enemyDamage": {
"enemy": "Yard",
"type": "contact",
"hits": 1
}
}
],
"gModeRegainMobility": {}
},
{
"link": [
5,
7
],
"name": "Snail Clip to the Items",
"notable": true,
"requires": [
"h_canNonTrivialCeilingClip",
"Gravity"
],
"reusableRoomwideNotable": "Aqueduct Snail Clip",
"note": [
"Jump on the Snail when it is at a precise location, and then crouch jump through the ceiling and jump again, without moving between jumps.",
"The Snail's positioning is very precise, but it is more lenient with Morph and an X-Ray Turn Around. X-Ray can also be useful for helping position the Snail."
]
},
{
"link": [
5,
7
],
"name": "Shinespark",
"requires": [
"Gravity",
{
"or": [
{
"canShineCharge": {
"usedTiles": 20,
"openEnd": 2
}
},
{
"and": [
"canEnemyExtendRunway",
{
"canShineCharge": {
"usedTiles": 21,
"openEnd": 2
}
}
]
}
]
},
{
"shinespark": {
"frames": 25
}
}
],
"devNote": [
"It is possible, although not overly useful, to extend the runway here using a snail.",
"FIXME: It is possible to use a snail here and in Shaktool's room to extend the runway at the door.",
"This can be useful when short charging, but can not be used to leave running, as running on the snail does not work."
]
},
{
"link": [
5,
7
],
"name": "G-Mode Overload PLMs - PB the Items (To the Items)",
"notable": true,
"entranceCondition": {
"comeInWithGMode": {
"mode": "direct",
"morphed": false
}
},
"requires": [
{
"or": [
{
"itemNotCollectedAtNode": 7
},
{
"itemNotCollectedAtNode": 8
}
]
},
"h_canUsePowerBombs",
"h_canUsePowerBombs",
"h_canNavigateUnderwater",
"canSnailClimb",
{
"or": [
"Gravity",
"h_canMaxHeightSpringBallJump",
{
"and": [
"HiJump",
{
"or": [
"canCrouchJump",
"canDownGrab"
]
}
]
}
]
}
],
"reusableRoomwideNotable": "Aqueduct G-Mode Overload PLMs - PB the Items",
"note": [
"PLMs can be overloaded in direct G-Mode with a single Power Bomb if both items are still there and 2 PBs if only one item is.",
"There is a row of tiles that works, just above and to the left of the right door.",
"The row is one tile higher than the horizontal pipe that is part of the door frame, spanning from the left to one tile away from the right wall."
],
"devNote": "This does not include canRiskPermanentLossOfAccess, as it is only worth doing this strat if the items are there."
},
{
"link": [
5,
7
],
"name": "G-Mode Morph Overload PLMs - PB the Items (To the Items)",
"notable": true,
"entranceCondition": {
"comeInWithGMode": {
"mode": "direct",
"morphed": true
}
},
"requires": [
{
"or": [
{
"itemNotCollectedAtNode": 7
},
{
"itemNotCollectedAtNode": 8
}
]
},
"h_canArtificialMorphSpringBall",
"h_canArtificialMorphPowerBomb",
"h_canArtificialMorphPowerBomb",
"h_canNavigateUnderwater",
"canSnailClimb",
{
"or": [
"Gravity",
{
"and": [
"HiJump",
{
"or": [
"canCrouchJump",
"canDownGrab"
]
}
]
}
]
}
],
"reusableRoomwideNotable": "Aqueduct G-Mode Overload PLMs - PB the Items",
"note": [
"PLMs can be overloaded in direct G-Mode with a single Power Bomb if both items are still there and 2 PBs if only one item is.",
"There is a row of tiles that works, just above and to the left of the right door.",
"The row is one tile higher than the horizontal pipe that is part of the door frame, spanning from the left to one tile away from the right wall."
],
"devNote": "This does not include canRiskPermanentLossOfAccess, as it is only worth doing this strat if the items are there."
},
{
"link": [
5,
8
],
"name": "Aqueduct Right-Side X-Ray Climb",
"entranceCondition": {
"comeInWithDoorStuckSetup": {}
},
"requires": [
"canXRayClimb"
],
"note": "Climb up 1 screen."
},
{
"link": [
5,
9
],
"name": "Grapple Teleport (from Red Brinstar Firefleas)",
"entranceCondition": {
"comeInWithGrappleTeleport": {
"blockPositions": [
[
5,
3
]
]
}
},
"requires": []
},
{
"link": [
5,
9
],
"name": "Grapple Teleport (from Moat)",
"entranceCondition": {
"comeInWithGrappleTeleport": {
"blockPositions": [
[
7,
2
]
]
}
},
"requires": [],
"note": "Press down immediately after teleporting, in order to get above the bomb blocks."
},
{
"link": [
5,
10
],
"name": "G-Mode Morph",
"entranceCondition": {
"comeInWithGMode": {
"mode": "any",
"morphed": true
}
},
"requires": [
{
  "or": [
    "h_canArtificialMorphSpringBall",
    "Morph",
    {
      "and": [
        "Gravity",
        "h_canArtificialMorphIBJ"
      ]
    }
  ]
}
]
},
{
"link": [
5,
11
],
"name": "G-Mode Morph Overload PLMs - Bomb the Speed Blocks",
"entranceCondition": {
"comeInWithGMode": {
"mode": "any",
"morphed": true
}
},
"requires": [
"h_canArtificialMorphBombs",
{
"or": [
"h_canArtificialMorphSpringBall",
"Morph",
{
"and": [
"Gravity",
"h_canArtificialMorphIBJ"
]
}
]
}
]
},
{
"link": [
5,
11
],
"name": "G-Mode Overload PLMs with Grapple",
"entranceCondition": {
"comeInWithGMode": {
"mode": "any",
"morphed": false
}
},
"requires": [
"Grapple",
"h_canNavigateUnderwater"
],
"note": "Overload PLMs using the Grapple Blocks."
},
{
"link": [
6,
1
],
"name": "G-Mode Morph",
"entranceCondition": {
"comeInWithGMode": {
"mode": "any",
"morphed": true
},
"comesThroughToilet": "any"
},
"requires": [
{
  "or": [
    "h_canArtificialMorphPowerBomb",
    {
      "and": [
        "h_canArtificialMorphBombs",
        {
          "or": [
            "Gravity",
            "h_canArtificialMorphSpringBall"
          ]
        }
      ]
    }
  ]
}
],
"devNote": "FIXME: This is doable with just Bombs and entering on the left side."
},
{
"link": [
6,
5
],
"name": "Shinespark",
"entranceCondition": {
"comeInShinecharged": {
"framesRequired": 35
},
"comesThroughToilet": "any"
},
"requires": [
"Gravity",
"canHorizontalShinespark",
{
"shinespark": {
"frames": 78,
"excessFrames": 16
}
}
]
},
{
"link": [
6,
5
],
"name": "Suitless Shinespark",
"entranceCondition": {
"comeInShinecharged": {
"framesRequired": 55
},
"comesThroughToilet": "any"
},
"requires": [
"canSuitlessMaridia",
"canHorizontalShinespark",
{
"shinespark": {
"frames": 99,
"excessFrames": 29
}
}
]
},
{
"link": [
6,
6
],
"name": "G-Mode Setup - Snail Platform",
"notable": false,
"requires": [
"canUpwardGModeSetup",
"h_canNavigateUnderwater",
"canTwoTileSqueeze"
],
"exitCondition": {
"leaveWithGModeSetup": {}
},
"note": [
"The two snails together can setup G-Mode on either side of the door."
]
},
{
"link": [
6,
6
],
"name": "G-Mode Regain Mobility",
"requires": [
{
  "enemyDamage": {
    "enemy": "Yard",
    "type": "contact",
    "hits": 1
  }
}
],
"gModeRegainMobility": {},
"devNote": "Requires entry on either side of the doorway, but not the center."
},
{
"link": [
6,
7
],
"name": "G-Mode Overload PLMs - PB the Items (To the Items)",
"notable": true,
"entranceCondition": {
"comeInWithGMode": {
"mode": "direct",
"morphed": false
},
"comesThroughToilet": "no"
},
"requires": [
{
"or": [
{
"itemNotCollectedAtNode": 7
},
{
"itemNotCollectedAtNode": 8
}
]
},
"h_canUsePowerBombs",
"h_canUsePowerBombs",
"h_canNavigateUnderwater",
"canSnailClimb",
{
"or": [
"Gravity",
"h_canMaxHeightSpringBallJump",
{
"and": [
"HiJump",
{
"or": [
"canCrouchJump",
"canDownGrab"
]
}
]
}
]
}
],
"reusableRoomwideNotable": "Aqueduct G-Mode Overload PLMs - PB the Items",
"note": [
"PLMs can be overloaded in direct G-Mode with a single Power Bomb if both items are still there and 2 PBs if only one item is.",
"There is a row of tiles that works, just above and to the left of the right door.",
"The row is one tile higher than the horizontal pipe that is part of the door frame, spanning from the left to one tile away from the right wall."
],
"devNote": "This does not include canRiskPermanentLossOfAccess, as it is only worth doing this strat if the items are there."
},
{
"link": [
6,
7
],
"name": "G-Mode Morph Overload PLMs - PB the Items (To the Items)",
"notable": true,
"entranceCondition": {
"comeInWithGMode": {
"mode": "direct",
"morphed": true
},
"comesThroughToilet": "no"
},
"requires": [
{
"or": [
{
"itemNotCollectedAtNode": 7
},
{
"itemNotCollectedAtNode": 8
}
]
},
"h_canArtificialMorphSpringBall",
"h_canArtificialMorphPowerBomb",
"h_canArtificialMorphPowerBomb",
"h_canNavigateUnderwater",
"canSnailClimb",
{
"or": [
"Gravity",
{
"and": [
"HiJump",
{
"or": [
"canCrouchJump",
"canDownGrab"
]
}
]
}
]
}
],
"reusableRoomwideNotable": "Aqueduct G-Mode Overload PLMs - PB the Items",
"note": [
"PLMs can be overloaded in direct G-Mode with a single Power Bomb if both items are still there and 2 PBs if only one item is.",
"There is a row of tiles that works, just above and to the left of the right door.",
"The row is one tile higher than the horizontal pipe that is part of the door frame, spanning from the left to one tile away from the right wall."
],
"devNote": "This does not include canRiskPermanentLossOfAccess, as it is only worth doing this strat if the items are there."
},
{
"link": [
6,
9
],
"name": "Base",
"requires": []
},
{
"link": [
6,
10
],
"name": "G-Mode Morph",
"entranceCondition": {
"comeInWithGMode": {
"mode": "any",
"morphed": true
},
"comesThroughToilet": "any"
},
"requires": []
},
{
"link": [
6,
11
],
"name": "G-Mode Overload PLMs with Grapple",
"entranceCondition": {
"comeInWithGMode": {
"mode": "any",
"morphed": false
},
"comesThroughToilet": "any"
},
"requires": [
"Grapple",
"h_canNavigateUnderwater"
],
"note": "Overload PLMs using the Grapple Blocks."
},
{
"link": [
7,
8
],
"name": "Base",
"requires": []
},
{
"link": [
8,
5
],
"name": "Base",
"requires": []
},
{
"link": [
8,
7
],
"name": "Base",
"requires": []
},
{
"link": [
9,
1
],
"name": "Base",
"requires": [
"Gravity",
"h_canDestroyBombWalls"
]
},
{
"link": [
9,
1
],
"name": "Suitless",
"requires": [
"canSuitlessMaridia",
"h_canBombThings"
]
},
{
"link": [
9,
1
],
"name": "Aqueduct Snail Stuck Moonfall",
"notable": true,
"requires": [
"h_canNavigateUnderwater",
"canEnemyStuckMoonfall",
"canBePatient",
{
"enemyDamage": {
"enemy": "Yard",
"type": "contact",
"hits": 1
}
}
],
"note": [
"Use two snails to perform an 'Enemy Stuck Moonfall' to bypass the bomb blocks above the middle left door of Aqueduct.",
"Position one snail on the above door shell, and the second above the corner of pipe below",
"Samus will clip through the lower snail, taking damage, then continue through a segment of pipe where the crumble blocks can be reached.",
"Facing both snails during the moonfall while positioning Samus for the clip can be precise",
"Depending on the exact heights of the snails, it may be necessary to pose change while clipping."
]
},
{
"link": [
9,
1
],
"name": "G-Mode Setup - Get Hit By Yard, from Above",
"notable": false,
"requires": [
"h_canDestroyBombWalls"
],
"exitCondition": {
"leaveWithGModeSetup": {}
},
"unlocksDoors": [
{
"types": [
"ammo"
],
"requires": []
}
]
},
{
"link": [
9,
2
],
"name": "Base",
"requires": []
},
{
"link": [
9,
5
],
"name": "Grapple",
"requires": [
"Grapple"
]
},
{
"link": [
9,
5
],
"name": "Flatley Jump",
"requires": [
"canSuitlessMaridia",
"canFlatleyJump",
"HiJump"
]
},
{
"link": [
9,
5
],
"name": "Air Ball",
"requires": [
"Gravity",
"canLateralMidAirMorph",
"canCarefulJump",
{
"or": [
"canTrickyJump",
"canSpringBallBounce"
]
}
]
},
{
"link": [
9,
5
],
"name": "Stationary Lateral Midair Spring Ball",
"requires": [
"canSuitlessMaridia",
"canStationaryLateralMidAirMorph",
"canTrickySpringBallJump",
"canResetFallSpeed"
]
},
{
"link": [
9,
5
],
"name": "Spring Fling",
"requires": [
"canSuitlessMaridia",
"h_canSpringFling",
"canTrickySpringBallJump"
]
},
{
"link": [
9,
6
],
"name": "Base",
"requires": [
{
  "or": [
    "Gravity",
    "HiJump",
    "canSpringBallJumpMidAir"
  ]
}
]
},
{
"link": [
9,
6
],
"name": "Aqueduct Top Door Snailstep",
"requires": [
"canUseEnemies"
],
"note": "Involves waiting around for a snail to come along, in order to reach the door by jumping while standing on it."
},
{
"link": [
9,
6
],
"name": "Aqueduct Top Door Crouch Jump",
"requires": [
"canCrouchJump",
"canTrickyJump"
],
"note": "Crouch on rightmost pixel of the ledge to the left of the door, jump then move over quickly without spin jumping."
},
{
"link": [
9,
9
],
"name": "Crystal Flash",
"requires": [
"h_canCrystalFlash"
]
},
{
"link": [
10,
1
],
"name": "Overload PLMs - Bomb the Speed Blocks, To the Middle Left Door",
"requires": [
"Gravity",
"h_canArtificialMorphIBJ"
]
},
{
"link": [
10,
2
],
"name": "Break the Power Bomb Blocks",
"requires": [
"h_canArtificialMorphPowerBomb"
],
"clearsObstacles": [
"A"
],
"note": "Place a Power Bomb, then exit G-Mode to break the blocks."
},
{
"link": [
10,
7
],
"name": "Overload PLMs - Bomb the Speed Blocks, To the Top Right Items",
"requires": [
"Gravity",
"h_canArtificialMorphIBJ"
]
},
{
"link": [
10,
11
],
"name": "Overload PLMs - Bomb the Speed Blocks",
"requires": [
"Gravity",
"h_canArtificialMorphIBJ"
]
},
{
"link": [
10,
11
],
"name": "Overload PLMs - Bomb the Speed Blocks",
"requires": [
"h_canUseMorphBombs",
{
"or": [
"canSnailClimb",
"Gravity",
"HiJump"
]
}
],
"note": "Bomb the Speed blocks by the right door."
},
{
"link": [
10,
11
],
"name": "Overload PLMs - Morphed Suitless Snail Climb",
"requires": [
"h_canArtificialMorphBombs",
"HiJump",
"h_canArtificialMorphSpringBall",
"canSnailClimb"
]
},
{
"link": [
10,
11
],
"name": "Overload PLMs - Morphed Suitless Snail Climb, No Jump Assist",
"requires": [
"h_canArtificialMorphBombs",
"h_canArtificialMorphSpringBall",
"canSnailClimb",
"canTrickyJump"
],
"note": [
"It is barely possible to start a snail climb with just Spring Ball.",
"Get a snail positioned such that it is on the bottom of an overhang above, and sticking out a bit to be usable as a platform.",
"Use Spring Ball to jump and press against the snail for the maximum possible duration, in order to gain enough height to get onto it."
]
},
{
"link": [
11,
1
],
"name": "G-Mode Overloaded PLMs Through the Bomb Blocks",
"requires": [
{
  "or": [
    "canSnailClimb",
    {
      "and": [
        "Gravity",
        {
          "or": [
            "SpaceJump",
            "canConsecutiveWalljump"
          ]
        }
      ]
    }
  ]
}
],
"note": "After PLMs are overloaded, climb to the top left door and fall through the Bomb Blocks."
},
{
"link": [
11,
7
],
"name": "G-Mode Overloaded PLMs Through the Speed Blocks",
"requires": [
"canSnailClimb",
{
"or": [
"Gravity",
"h_canMaxHeightSpringBallJump",
{
"and": [
"HiJump",
{
"or": [
"canCrouchJump",
"canDownGrab"
]
}
]
}
]
}
],
"note": "After PLMs are overloaded, use a snail to help climb to the top right items."
}
]
}