Wrecked Ship Main Shaft
Room ID: 155

|
From: 1
Top Door
To: 1
Top Door
Freeze an Atomic at a precise distance below the door in order to crouch-jump up and clip through the door shell. The pixel window is larger and higher with Morph and an X-Ray stand-up, in which case a standing jump is used. If Phantoon is not defeated, freeze a Covern as high as possible, then jump and down-grab onto it and Samus will stand up. Requires: "canTrickyUseFrozenEnemies" "h_canNonTrivialCeilingClip" Bypasses door shell: true |
|
Exit condition: {
"leaveWithDoorFrameBelow": {
"height": 3
}
}
|
|
Exit condition: {
"leaveWithPlatformBelow": {
"height": 6,
"leftPosition": -4.5,
"rightPosition": 4.5
}
}
|
|
Bring two atomics to the top of the room. Stand on one frozen Atomic to bring a second Atomic to the correct height to use as a crouch platform. Requires: "canUpwardGModeSetup"
"canTwoTileSqueeze"
"canTrickyUseFrozenEnemies"
"f_DefeatedPhantoon"
{
"enemyDamage": {
"enemy": "Atomic",
"type": "contact",
"hits": 1
}
}
Exit condition: {
"leaveWithGModeSetup": {}
}
|
|
Requires: {
"enemyDamage": {
"enemy": "Covern",
"type": "contact",
"hits": 1
}
}
{
"not": "f_DefeatedPhantoon"
}
"canRiskPermanentLossOfAccess"
|
|
|
|
Exit condition: {
"leaveWithRunway": {
"length": 6,
"openEnd": 1
}
}
|
|
From: 2
Top Left Door
To: 2
Top Left Door
Position and freeze an Atomic to extend the runway. Maintain a half-tile gap between the runway to extend it as far as possible. Requires: "f_DefeatedPhantoon" "h_canFrozenEnemyRunway" Exit condition: {
"leaveWithRunway": {
"length": 8,
"openEnd": 0
}
}
|
|
From: 2
Top Left Door
To: 2
Top Left Door
Exit condition: {
"leaveWithGModeSetup": {}
}
|
|
Requires: {
"enemyDamage": {
"enemy": "Covern",
"type": "contact",
"hits": 1
}
}
{
"not": "f_DefeatedPhantoon"
}
"canRiskPermanentLossOfAccess"
|
|
|
|
From: 2
Top Left Door
To: 4
Top Right Door
Entrance condition: {
"comeInShinecharging": {
"length": 5,
"openEnd": 1
}
}
Requires: "canShinechargeMovementComplex" Exit condition: {
"leaveShinecharged": {
"framesRemaining": 115
}
}
|
|
Entrance condition: {
"comeInShinecharged": {
"framesRequired": 70
}
}
Requires: "canShinechargeMovementComplex" Exit condition: {
"leaveShinecharged": {
"framesRemaining": "auto"
}
}
|
|
From: 2
Top Left Door
To: 4
Top Right Door
Entrance condition: {
"comeInShinecharged": {
"framesRequired": 10
}
}
Requires: {
"shinespark": {
"frames": 21
}
}
Exit condition: {
"leaveWithSpark": {}
}
|
|
From: 2
Top Left Door
To: 5
Middle Right Door
Entrance condition: {
"comeInShinecharging": {
"length": 5,
"openEnd": 1
}
}
Requires: "canShinechargeMovementComplex" Exit condition: {
"leaveShinecharged": {
"framesRemaining": 5
}
}
|
|
From: 2
Top Left Door
To: 6
Bottom Right Door
Use the camera scroll blocks just left of the bomb blocks, in order to overload PLMs and go through them. Entrance condition: {
"comeInWithGMode": {
"mode": "any",
"morphed": true
}
}
|
|
Use the camera scroll blocks just right of the bomb blocks, in order to overload PLMs and go through them. Cancel g-mode, morph and move back towards the bomb blocks in order to fix the camera. Entrance condition: {
"comeInWithGMode": {
"mode": "any",
"morphed": false
}
}
Requires: "Morph" |
|
From: 2
Top Left Door
To: 8
Item
Use the camera scroll blocks just right of the bomb blocks, in order to overload PLMs and go through them. Exit g-mode and travel to the item and back while off screen. Entrance condition: {
"comeInWithGMode": {
"mode": "any",
"morphed": true
}
}
Requires: "canOffScreenMovement" |
|
Requires: {
"obstaclesNotCleared": [
"B"
]
}
Exit condition: {
"leaveWithRunway": {
"length": 14,
"openEnd": 0
}
}
|
|
From: 3
Bottom Left Door
To: 3
Bottom Left Door
Exit condition: {
"leaveWithRunway": {
"length": 2,
"openEnd": 1
}
}
|
|
Requires: "f_DefeatedPhantoon"
{
"or": [
"ScrewAttack",
"Wave",
"Spazer",
"Plasma"
]
}
{
"resetRoom": {
"nodes": [
3
],
"mustStayPut": false
}
}
{
"refill": [
"Energy",
"Missile"
]
}
|
|
Requires: "h_canCrystalFlash" Clears obstacles: A, B, C |
|
From: 3
Bottom Left Door
To: 3
Bottom Left Door
Exit condition: {
"leaveWithGModeSetup": {}
}
|
|
From: 3
Bottom Left Door
To: 3
Bottom Left Door
Requires: {
"enemyDamage": {
"enemy": "Covern",
"type": "contact",
"hits": 1
}
}
{
"not": "f_DefeatedPhantoon"
}
"canRiskPermanentLossOfAccess"
|
|
Requires: {
"or": [
"canWalljump",
"HiJump",
"h_canFly",
"SpeedBooster",
"h_canCrouchJumpDownGrab",
"canSpringBallJumpMidAir",
"h_canSpringBallBombJump",
"canUseFrozenEnemies"
]
}
|
|
From: 3
Bottom Left Door
To: 6
Bottom Right Door
Requires: "Morph"
{
"obstaclesCleared": [
"A"
]
}
|
|
Requires: "h_canUseMorphBombs" Clears obstacles: A |
|
Requires: "h_canUsePowerBombs" Clears obstacles: A, B |
|
Entrance condition: {
"comeInSpeedballing": {
"runway": {
"length": 13,
"openEnd": 0
}
}
}
Clears obstacles: A |
|
From: 3
Bottom Left Door
To: 6
Bottom Right Door
Entrance condition: {
"comeInShinecharging": {
"length": 12,
"openEnd": 0
}
}
Requires: "canTemporaryBlue" "canSpringBallBounce" Clears obstacles: A |
|
From: 3
Bottom Left Door
To: 6
Bottom Right Door
Use the camera scroll blocks just left of the bomb blocks, in order to overload PLMs and go through them. Entrance condition: {
"comeInWithGMode": {
"mode": "any",
"morphed": true
}
}
|
|
From this direction, the shot blocks are fully breakable with Power Beam Requires: "Morph" Clears obstacles: B |
|
Moonfall twice, on the right or left side of the shot blocks. This will put Samus inside of shotblocks, which can be cleared by shooting. If on the left side, perform two more moonfalls. The camera will be misaligned after the door transition. Entrance condition: {
"comeInWithStoredFallSpeed": {
"fallSpeedInTiles": 2
}
}
Requires: "canMoonfall" "canOffScreenMovement" |
|
From: 3
Bottom Left Door
To: 7
Bottom Door
Lure two Atomics down to the bottom of the room, and freeze them to be able to moonfall between them and aim down. After gaining enough speed, press forward to fall down and clip past the door shell below. Falling with too much speed can cause Samus to go out of bounds. Requires: "f_DefeatedPhantoon"
"Morph"
{
"obstaclesCleared": [
"B"
]
}
"canEnemyStuckMoonfall"
"canTrickyUseFrozenEnemies"
Bypasses door shell: true |
|
Requires: "Morph"
{
"obstaclesCleared": [
"C"
]
}
|
|
Requires: "h_canUseMorphBombs" Clears obstacles: C |
|
It is possible to use a single Power Bomb to break the bomb blocks going left to the item, right to the door, and shot blocks going down. Place the power bomb against the right wall at the top of the stairs between the three obstacles. Requires: "h_canUsePowerBombs" Clears obstacles: A, B, C |
|
Use the camera scroll blocks just right of the bomb blocks, in order to overload PLMs and go through them. Cancel g-mode, morph and move back towards the bomb blocks in order to fix the camera. Entrance condition: {
"comeInWithGMode": {
"mode": "any",
"morphed": false
}
}
Requires: "Morph" |
|
From: 3
Bottom Left Door
To: 8
Item
Use the camera scroll blocks just right of the bomb blocks, in order to overload PLMs and go through them. Exit g-mode and travel to the item and back while off screen. Entrance condition: {
"comeInWithGMode": {
"mode": "any",
"morphed": true
}
}
Requires: {
"or": [
"h_canArtificialMorphIBJ",
"h_canArtificialMorphSpringBallBombJump",
{
"and": [
"h_canArtificialMorphSpringBall",
"HiJump"
]
}
]
}
"canOffScreenMovement"
|
|
Wrecked Ship Main Shaft Spooky Missiles Temporary Blue with Frozen Enemy Runway (Insane)
Wrecked Ship Main Shaft
From: 3
Bottom Left Door
To: 8
Item
Notable: true 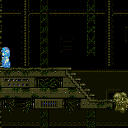
Use a frozen Atomic or Covern to extend the runway in front of the Spooky Missiles bomb block, then use temporary blue into a morph ball bounce to break it. Position the enemy horizontally centered in the hole to extend the runway all the way to the wall. Positioning a Covern is tricky. One way to set this up is with Space Jump. Perform Space Jumps half way between the desired Covern position and the ceiling until the Covern spawns in the correct position. Requires: "h_canFrozenEnemyRunway"
{
"or": [
"f_DefeatedPhantoon",
{
"and": [
"SpaceJump",
"h_canTrickyFrozenEnemyRunway"
]
}
]
}
"canSlowShortCharge"
{
"canShineCharge": {
"usedTiles": 14,
"openEnd": 0,
"steepUpTiles": 3
}
}
"canTemporaryBlue"
"Morph"
|
|
|
|
|
|
From: 4
Top Right Door
To: 2
Top Left Door
Entrance condition: {
"comeInShinecharging": {
"length": 12,
"openEnd": 0,
"steepDownTiles": 7
}
}
Requires: "canShinechargeMovementComplex" Exit condition: {
"leaveShinecharged": {
"framesRemaining": 80
}
}
|
|
From: 4
Top Right Door
To: 2
Top Left Door
Entrance condition: {
"comeInShinecharging": {
"length": 5,
"openEnd": 1,
"steepDownTiles": 3
}
}
Requires: "canShinechargeMovementComplex" Exit condition: {
"leaveShinecharged": {
"framesRemaining": 115
}
}
|
|
Entrance condition: {
"comeInShinecharged": {
"framesRequired": 70
}
}
Requires: "canShinechargeMovementComplex" Exit condition: {
"leaveShinecharged": {
"framesRemaining": "auto"
}
}
|
|
From: 4
Top Right Door
To: 2
Top Left Door
Entrance condition: {
"comeInShinecharged": {
"framesRequired": 10
}
}
Requires: {
"shinespark": {
"frames": 21
}
}
Exit condition: {
"leaveWithSpark": {}
}
|
|
Exit condition: {
"leaveWithRunway": {
"length": 13,
"openEnd": 1,
"steepUpTiles": 7
}
}
|
|
From: 4
Top Right Door
To: 4
Top Right Door
Lure an Atomic or get a Covern to spawn to slightly extend the runway. Positioning a Covern is a bit tricky. Consecutive wall jump or Space Jump in place above the gap but not quite at the ceiling, or perform full height jumps to sometimes get the Covern to spawn in position. A crouch shot may help freeze the Coven when it is in position. Requires: "h_canFrozenEnemyRunway"
{
"or": [
"f_DefeatedPhantoon",
"h_canTrickyFrozenEnemyRunway"
]
}
Exit condition: {
"leaveWithRunway": {
"length": 14,
"openEnd": 0,
"steepUpTiles": 7
}
}
|
|
Requires: "f_DefeatedPhantoon"
{
"or": [
"ScrewAttack",
"Wave",
"Spazer",
"Plasma"
]
}
{
"resetRoom": {
"nodes": [
1,
2,
4,
5
],
"mustStayPut": false
}
}
{
"refill": [
"Energy",
"Missile"
]
}
|
|
Requires: "h_canCrystalFlash" Clears obstacles: A, B, C |
|
From: 4
Top Right Door
To: 4
Top Right Door
Exit condition: {
"leaveWithGModeSetup": {}
}
|
|
Requires: {
"enemyDamage": {
"enemy": "Covern",
"type": "contact",
"hits": 1
}
}
{
"not": "f_DefeatedPhantoon"
}
"canRiskPermanentLossOfAccess"
|
|
|
|
From: 4
Top Right Door
To: 5
Middle Right Door
Entrance condition: {
"comeInShinecharging": {
"length": 12,
"openEnd": 0,
"steepDownTiles": 7
}
}
Requires: "canShinechargeMovementComplex" Exit condition: {
"leaveShinecharged": {
"framesRemaining": 75
}
}
|
|
From: 4
Top Right Door
To: 5
Middle Right Door
Entrance condition: {
"comeInShinecharged": {
"framesRequired": 150
}
}
Requires: "canShinechargeMovementComplex" Exit condition: {
"leaveShinecharged": {
"framesRemaining": "auto"
}
}
|
|
From: 4
Top Right Door
To: 6
Bottom Right Door
Use the camera scroll blocks just left of the bomb blocks, in order to overload PLMs and go through them. Entrance condition: {
"comeInWithGMode": {
"mode": "any",
"morphed": true
}
}
|
|
Use the camera scroll blocks just right of the bomb blocks, in order to overload PLMs and go through them. Cancel g-mode, morph and move back towards the bomb blocks in order to fix the camera. Entrance condition: {
"comeInWithGMode": {
"mode": "any",
"morphed": false
}
}
Requires: "Morph" |
|
From: 4
Top Right Door
To: 8
Item
Use the camera scroll blocks just right of the bomb blocks, in order to overload PLMs and go through them. Exit g-mode and travel to the item and back while off screen. Entrance condition: {
"comeInWithGMode": {
"mode": "any",
"morphed": true
}
}
Requires: "canOffScreenMovement" |
|
From: 5
Middle Right Door
To: 2
Top Left Door
Entrance condition: {
"comeInShinecharged": {
"framesRequired": 155
}
}
Requires: {
"shinespark": {
"frames": 17
}
}
Exit condition: {
"leaveWithSpark": {}
}
|
|
|
|
|
|
From: 5
Middle Right Door
To: 4
Top Right Door
Entrance condition: {
"comeInShinecharged": {
"framesRequired": 155
}
}
Requires: {
"shinespark": {
"frames": 2
}
}
Exit condition: {
"leaveWithSpark": {}
}
|
|
From: 5
Middle Right Door
To: 4
Top Right Door
Enter with G-mode direct, back up to between 1 and 6 pixels from the door transition, and activate X-ray to get very deep stuck in the door. Climb up 1 screen, and perform a turnaround buffered spin-jump away from the door to trigger the transition, bypassing any lock on the door. If Phantoon is not defeated then you have to move quickly to prevent the Coverns from hitting you. Entrance condition: {
"comeInWithGMode": {
"mode": "direct",
"morphed": false
}
}
Requires: "canXRayClimb" Bypasses door shell: true |
|
Exit condition: {
"leaveWithRunway": {
"length": 12,
"openEnd": 1,
"steepUpTiles": 6
}
}
|
|
From: 5
Middle Right Door
To: 5
Middle Right Door
Lure an Atomic or get a Covern to spawn to extend the runway. Position the enemy horizontally centered in the hole to extend the runway all the way to the wall. Positioning a Covern is tricky. One way to set this up is with Space Jump. Align Samus left against the tile in the ceiling to align the Covern horizontally, then perform short Space Jumps half way between the desired Covern position and the ceiling until the Covern spawns in the correct position. Requires: "h_canFrozenEnemyRunway"
{
"or": [
"f_DefeatedPhantoon",
{
"and": [
"SpaceJump",
"h_canTrickyFrozenEnemyRunway"
]
}
]
}
Exit condition: {
"leaveWithRunway": {
"length": 14,
"openEnd": 0,
"steepUpTiles": 6
}
}
|
|
From: 5
Middle Right Door
To: 5
Middle Right Door
Exit condition: {
"leaveWithGModeSetup": {}
}
|
|
From: 5
Middle Right Door
To: 5
Middle Right Door
Requires: {
"enemyDamage": {
"enemy": "Covern",
"type": "contact",
"hits": 1
}
}
{
"not": "f_DefeatedPhantoon"
}
"canRiskPermanentLossOfAccess"
|
|
From: 5
Middle Right Door
To: 6
Bottom Right Door
Use the camera scroll blocks just left of the bomb blocks, in order to overload PLMs and go through them. Entrance condition: {
"comeInWithGMode": {
"mode": "any",
"morphed": true
}
}
|
|
Shinecharging up the stairs gives a longer effective runway than shinecharging down them. A frozen Atomic (or Covern) can be used for more runway. Requires: "canTemporaryBlue"
"canLateralMidAirMorph"
{
"or": [
{
"canShineCharge": {
"usedTiles": 11,
"openEnd": 2,
"steepUpTiles": 3
}
},
{
"and": [
"f_DefeatedPhantoon",
"h_canFrozenEnemyRunway",
{
"canShineCharge": {
"usedTiles": 13,
"openEnd": 1,
"steepUpTiles": 3
}
}
]
}
]
}
Clears obstacles: C |
|
From: 5
Middle Right Door
To: 8
Item
Shinecharging up the stairs gives a longer effective runway than shinecharging down them. Bounce down the stairs to make movement simpler. A frozen Atomic (or Covern) can be used for more runway. Requires: "canChainTemporaryBlue"
"canXRayTurnaround"
{
"or": [
{
"and": [
"can4HighMidAirMorph",
{
"doorUnlockedAtNode": 5
},
{
"canShineCharge": {
"usedTiles": 11,
"openEnd": 2,
"steepUpTiles": 7
}
}
]
},
{
"and": [
"f_DefeatedPhantoon",
"h_canFrozenEnemyRunway",
"can4HighMidAirMorph",
{
"doorUnlockedAtNode": 5
},
{
"canShineCharge": {
"usedTiles": 13,
"openEnd": 1,
"steepUpTiles": 7
}
}
]
},
{
"canShineCharge": {
"usedTiles": 10,
"openEnd": 2,
"steepUpTiles": 7
}
},
{
"and": [
"f_DefeatedPhantoon",
"h_canFrozenEnemyRunway",
{
"canShineCharge": {
"usedTiles": 12,
"openEnd": 1,
"steepUpTiles": 7
}
}
]
}
]
}
Clears obstacles: C |
|
Entrance condition: {
"comeInShinecharging": {
"length": 11,
"openEnd": 1,
"steepDownTiles": 7
}
}
Requires: "canTemporaryBlue" "canLateralMidAirMorph" Clears obstacles: C |
|
Use the camera scroll blocks just right of the bomb blocks, in order to overload PLMs and go through them. Cancel g-mode, morph and move back towards the bomb blocks in order to fix the camera. Entrance condition: {
"comeInWithGMode": {
"mode": "any",
"morphed": false
}
}
Requires: "Morph" |
|
From: 5
Middle Right Door
To: 8
Item
Use the camera scroll blocks just right of the bomb blocks, in order to overload PLMs and go through them. Exit g-mode and travel to the item and back while off screen. Entrance condition: {
"comeInWithGMode": {
"mode": "any",
"morphed": true
}
}
Requires: "canOffScreenMovement" |
|
Requires: "Morph"
{
"or": [
"h_canBombThings",
{
"obstaclesCleared": [
"A"
]
}
]
}
Clears obstacles: A |
|
Entrance condition: {
"comeInSpeedballing": {
"runway": {
"length": 3,
"openEnd": 0
}
}
}
Clears obstacles: A |
|
From: 6
Bottom Right Door
To: 3
Bottom Left Door
Entrance condition: {
"comeInShinecharging": {
"length": 2,
"openEnd": 0
}
}
Requires: "canTemporaryBlue" "canSpringBallBounce" Clears obstacles: A |
|
Exit condition: {
"leaveWithRunway": {
"length": 4,
"openEnd": 0
}
}
|
|
Requires: "h_canCrystalFlash" Clears obstacles: A |
|
From: 6
Bottom Right Door
To: 6
Bottom Right Door
Requires: {
"or": [
"h_canBombThings",
{
"obstaclesCleared": [
"A"
]
},
{
"and": [
{
"not": "f_DefeatedPhantoon"
},
"canRiskPermanentLossOfAccess"
]
}
]
}
Exit condition: {
"leaveWithGModeSetup": {}
}
|
|
From: 6
Bottom Right Door
To: 6
Bottom Right Door
Requires: {
"enemyDamage": {
"enemy": "Covern",
"type": "contact",
"hits": 1
}
}
{
"not": "f_DefeatedPhantoon"
}
"canRiskPermanentLossOfAccess"
|
|
If Spring Ball is unavailable, then either crouch jump and morph from the stairs, or run and jump into morph from the right of the stairs. If you have HiJump, it must be disabled. Requires: "Morph"
{
"obstaclesCleared": [
"B"
]
}
{
"or": [
{
"and": [
"canCarefulJump",
"canDisableEquipment"
]
},
"h_canUseSpringBall"
]
}
|
|
Requires: "h_canUseMorphBombs" Clears obstacles: B |
|
If Spring Ball is unavailable, then either crouch jump and morph from the stairs, or run and jump into morph from the right of the stairs. If you have HiJump, it must be disabled. Requires: "Morph"
{
"or": [
"Wave",
"Spazer"
]
}
{
"or": [
{
"and": [
"canCarefulJump",
"canDisableEquipment"
]
},
"h_canUseSpringBall"
]
}
Clears obstacles: B |
|
Use a Power Bomb to bounce into the morph tunnel. This will break the shot blocks and the Bomb Blocks going to the door to the right. Requires: "h_canUsePowerBombs" Clears obstacles: A, B |
|
From: 7
Bottom Door
To: 3
Bottom Left Door
Use the Covern to partial ceiling clip so your beam can reach the shot block of the ceiling at the end of the Morph tunnel to the left. It is possible to mid-air morph to get into the morph tunnel with nothing, from the Covern, the ground, or the stairs below. Requires: "Morph"
"canUseFrozenEnemies"
"canCeilingClip"
{
"not": "f_DefeatedPhantoon"
}
"canRiskPermanentLossOfAccess"
Clears obstacles: B |
|
From: 7
Bottom Door
To: 3
Bottom Left Door
In R-Mode, kill the Coverns until there is Energy in Samus's Reserves. Get into the Morph tunnel and go to the far left. Wait for Coverns to damage Samus down until Reserves trigger, forcing a stand up and enabling her to shoot the shot blocks and escape. Entrance condition: {
"comeInWithRMode": {},
"comesThroughToilet": "any"
}
Requires: "Morph"
{
"not": "f_DefeatedPhantoon"
}
"canRiskPermanentLossOfAccess"
{
"or": [
"canBePatient",
"Plasma"
]
}
Clears obstacles: B |
|
From: 7
Bottom Door
To: 7
Bottom Door
To shoot the Atomics with Ice or Plasma, crouch near the edge of the glass and shoot forward; angled shots downwards also work but from a tile further back. Requires: {
"not": "f_DefeatedPhantoon"
}
"canRiskPermanentLossOfAccess"
{
"or": [
"Ice",
"Wave",
"Spazer",
"Plasma",
{
"and": [
"h_canUseMorphBombs",
"ScrewAttack"
]
}
]
}
{
"resetRoom": {
"nodes": [
7
],
"mustStayPut": false
}
}
{
"refill": [
"Energy",
"Missile",
"Super"
]
}
|
|
Exit condition: {
"leaveNormally": {}
}
|
|
Enter on the left side of the doorway to reduce the amount of energy used. Entrance condition: {
"comeInWithSpark": {},
"comesThroughToilet": "no"
}
Requires: {
"shinespark": {
"frames": 2,
"excessFrames": 2
}
}
|
|
Entrance condition: {
"comeInWithSpark": {},
"comesThroughToilet": "yes"
}
Requires: {
"shinespark": {
"frames": 9,
"excessFrames": 9
}
}
|
|
Requires: "h_canCrystalFlash" Clears obstacles: A, B |
|
Line up with the far right or left side of doorframe in the room below, to be able to not fall back through after entry, as the door remains open. Be careful not to fall into the door while being hit by the Covern. Requires: {
"enemyDamage": {
"enemy": "Covern",
"type": "contact",
"hits": 1
}
}
{
"not": "f_DefeatedPhantoon"
}
"canRiskPermanentLossOfAccess"
|
|
Requires: "Morph"
{
"obstaclesCleared": [
"C"
]
}
|
|
Requires: "h_canBombThings" Clears obstacles: C |
|
From: 8
Item
To: 3
Bottom Left Door
Run towards the conveyor to more easily build the ShineCharge, and for an easier bounce into the morph tunnel. Neutral bounce into the Morph tunnel, and SpringBall bounce to continue all the way through. Requires: "f_DefeatedPhantoon"
"canXRayTurnaround"
"canSpringBallBounce"
{
"or": [
"HiJump",
"canChainTemporaryBlue"
]
}
{
"canShineCharge": {
"usedTiles": 20,
"openEnd": 1,
"steepDownTiles": 4
}
}
Clears obstacles: C |
|
From: 8
Item
To: 3
Bottom Left Door
Neutral bounce into the Morph tunnel, and SpringBall bounce to continue all the way through. Requires: "Morph"
"canChainTemporaryBlue"
"canXRayTurnaround"
"canSpringBallBounce"
{
"canShineCharge": {
"usedTiles": 16,
"openEnd": 1,
"steepDownTiles": 4
}
}
Clears obstacles: C |
|
From: 8
Item
To: 3
Bottom Left Door
Requires: {
"not": "f_DefeatedPhantoon"
}
"canRiskPermanentLossOfAccess"
"canTemporaryBlue"
"can4HighMidAirMorph"
"canSpringBallBounce"
{
"canShineCharge": {
"usedTiles": 16,
"openEnd": 0,
"steepUpTiles": 4
}
}
Clears obstacles: C |
|
Requires: {
"not": "f_DefeatedPhantoon"
}
"canRiskPermanentLossOfAccess"
"canSpeedball"
{
"canShineCharge": {
"usedTiles": 14,
"openEnd": 0,
"steepUpTiles": 3
}
}
Clears obstacles: C |
{
"$schema": "../../../schema/m3-room.schema.json",
"id": 155,
"name": "Wrecked Ship Main Shaft",
"area": "Wrecked Ship",
"subarea": "Main",
"playable": true,
"roomAddress": "0x7CAF6",
"roomEnvironments": [
{
"heated": false
}
],
"nodes": [
{
"id": 1,
"name": "Top Door",
"nodeType": "door",
"nodeSubType": "blue",
"nodeAddress": "0x001a228",
"doorEnvironments": [
{
"physics": "air"
}
]
},
{
"id": 2,
"name": "Top Left Door",
"nodeType": "door",
"nodeSubType": "blue",
"nodeAddress": "0x001a1f8",
"doorEnvironments": [
{
"physics": "air"
}
]
},
{
"id": 3,
"name": "Bottom Left Door",
"nodeType": "door",
"nodeSubType": "grey",
"nodeAddress": "0x001a210",
"doorEnvironments": [
{
"physics": "air"
}
],
"locks": [
{
"name": "Wrecked Ship Main Shaft Bottom Left Grey Lock (to West Supers)",
"lockType": "gameFlag",
"unlockStrats": [
{
"name": "Base",
"notable": false,
"requires": [
"f_DefeatedPhantoon"
]
}
]
}
]
},
{
"id": 4,
"name": "Top Right Door",
"nodeType": "door",
"nodeSubType": "blue",
"nodeAddress": "0x001a240",
"doorEnvironments": [
{
"physics": "air"
}
]
},
{
"id": 5,
"name": "Middle Right Door",
"nodeType": "door",
"nodeSubType": "grey",
"nodeAddress": "0x001a204",
"doorEnvironments": [
{
"physics": "air"
}
],
"locks": [
{
"name": "Wrecked Ship Main Shaft Middle Right Grey Lock (to Sponge Bath)",
"lockType": "gameFlag",
"unlockStrats": [
{
"name": "Base",
"notable": false,
"requires": [
"f_DefeatedPhantoon"
]
}
]
}
]
},
{
"id": 6,
"name": "Bottom Right Door",
"nodeType": "door",
"nodeSubType": "blue",
"nodeAddress": "0x001a234",
"doorEnvironments": [
{
"physics": "air"
}
]
},
{
"id": 7,
"name": "Bottom Door",
"nodeType": "door",
"nodeSubType": "green",
"nodeAddress": "0x001a21c",
"doorEnvironments": [
{
"physics": "air"
}
],
"locks": [
{
"name": "Wrecked Ship Main Shaft Green Lock (to Basement)",
"lockType": "coloredDoor",
"unlockStrats": [
{
"name": "Base",
"notable": false,
"requires": [
"h_canOpenGreenDoors"
]
}
]
}
]
},
{
"id": 8,
"name": "Item",
"nodeType": "item",
"nodeSubType": "visible",
"nodeItem": "Missile",
"nodeAddress": "0x7C265"
}
],
"obstacles": [
{
"id": "A",
"name": "Right Bomb Blocks",
"obstacleType": "inanimate",
"note": "The bomb blocks that separate the bottom right door from the main shaft"
},
{
"id": "B",
"name": "Shot Blocks",
"obstacleType": "inanimate",
"note": "The shot blocks that separate the bottom door from the main shaft"
},
{
"id": "C",
"name": "Left Bomb Blocks",
"obstacleType": "inanimate",
"note": "The bomb blocks that separate the main shaft from the item on the left"
}
],
"enemies": [
{
"id": "e1",
"groupName": "Wrecked Ship Main Shaft Covern",
"enemyName": "Covern",
"quantity": 1,
"homeNodes": [
1,
3,
4,
7
],
"stopSpawn": [
"f_DefeatedPhantoon"
]
},
{
"id": "e2",
"groupName": "Wrecked Ship Main Shaft Trapped Atomics",
"enemyName": "Trapped Atomic",
"quantity": 2,
"homeNodes": [
7
],
"stopSpawn": [
"f_DefeatedPhantoon"
]
},
{
"id": "e3",
"groupName": "Wrecked Ship Main Shaft Top Atomics",
"enemyName": "Atomic",
"quantity": 2,
"homeNodes": [
4
],
"spawn": [
"f_DefeatedPhantoon"
]
},
{
"id": "e4",
"groupName": "Wrecked Ship Main Shaft Bottom Atomics",
"enemyName": "Atomic",
"quantity": 2,
"homeNodes": [
3
],
"spawn": [
"f_DefeatedPhantoon"
]
}
],
"links": [
{
"from": 1,
"to": [
{
"id": 1
},
{
"id": 4
}
]
},
{
"from": 2,
"to": [
{
"id": 2
},
{
"id": 4
},
{
"id": 5
},
{
"id": 6
},
{
"id": 8
}
]
},
{
"from": 3,
"to": [
{
"id": 3
},
{
"id": 5
},
{
"id": 6
},
{
"id": 7
},
{
"id": 8
}
]
},
{
"from": 4,
"to": [
{
"id": 1
},
{
"id": 2
},
{
"id": 4
},
{
"id": 5
},
{
"id": 6
},
{
"id": 8
}
]
},
{
"from": 5,
"to": [
{
"id": 2
},
{
"id": 3
},
{
"id": 4
},
{
"id": 5
},
{
"id": 6
},
{
"id": 8
}
]
},
{
"from": 6,
"to": [
{
"id": 3
},
{
"id": 6
}
]
},
{
"from": 7,
"to": [
{
"id": 3
},
{
"id": 7
}
]
},
{
"from": 8,
"to": [
{
"id": 3
}
]
}
],
"strats": [
{
"link": [
1,
1
],
"name": "Covern or Atomic Ice Clip Door Lock Skip",
"requires": [
"canTrickyUseFrozenEnemies",
"h_canNonTrivialCeilingClip"
],
"bypassesDoorShell": true,
"note": [
"Freeze an Atomic at a precise distance below the door in order to crouch-jump up and clip through the door shell.",
"The pixel window is larger and higher with Morph and an X-Ray stand-up, in which case a standing jump is used.",
"If Phantoon is not defeated, freeze a Covern as high as possible, then jump and down-grab onto it and Samus will stand up."
]
},
{
"link": [
1,
1
],
"name": "Leave With Door Frame Below",
"requires": [],
"exitCondition": {
"leaveWithDoorFrameBelow": {
"height": 3
}
}
},
{
"link": [
1,
1
],
"name": "Leave With Platform Below",
"requires": [],
"exitCondition": {
"leaveWithPlatformBelow": {
"height": 6,
"leftPosition": -4.5,
"rightPosition": 4.5
}
}
},
{
"link": [
1,
1
],
"name": "G-Mode Setup - Frozen Atomic",
"notable": false,
"requires": [
"canUpwardGModeSetup",
"canTwoTileSqueeze",
"canTrickyUseFrozenEnemies",
"f_DefeatedPhantoon",
{
"enemyDamage": {
"enemy": "Atomic",
"type": "contact",
"hits": 1
}
}
],
"exitCondition": {
"leaveWithGModeSetup": {}
},
"note": [
"Bring two atomics to the top of the room.",
"Stand on one frozen Atomic to bring a second Atomic to the correct height to use as a crouch platform."
]
},
{
"link": [
1,
1
],
"name": "G-Mode Regain Mobility",
"requires": [
{
"enemyDamage": {
"enemy": "Covern",
"type": "contact",
"hits": 1
}
},
{
"not": "f_DefeatedPhantoon"
},
"canRiskPermanentLossOfAccess"
],
"gModeRegainMobility": {}
},
{
"link": [
1,
4
],
"name": "Base",
"requires": []
},
{
"link": [
2,
2
],
"name": "Leave with Runway",
"requires": [],
"exitCondition": {
"leaveWithRunway": {
"length": 6,
"openEnd": 1
}
}
},
{
"link": [
2,
2
],
"name": "Leave With Runway - Frozen Atomic",
"requires": [
"f_DefeatedPhantoon",
"h_canFrozenEnemyRunway"
],
"exitCondition": {
"leaveWithRunway": {
"length": 8,
"openEnd": 0
}
},
"note": "Position and freeze an Atomic to extend the runway. Maintain a half-tile gap between the runway to extend it as far as possible.",
"devNote": "It could be possible to freeze a Covern in its place, but it seems very difficult to position."
},
{
"link": [
2,
2
],
"name": "G-Mode Setup - Get Hit By Covern or Atomic",
"notable": false,
"requires": [],
"exitCondition": {
"leaveWithGModeSetup": {}
}
},
{
"link": [
2,
2
],
"name": "G-Mode Regain Mobility",
"requires": [
{
"enemyDamage": {
"enemy": "Covern",
"type": "contact",
"hits": 1
}
},
{
"not": "f_DefeatedPhantoon"
},
"canRiskPermanentLossOfAccess"
],
"gModeRegainMobility": {}
},
{
"link": [
2,
4
],
"name": "Base",
"requires": []
},
{
"link": [
2,
4
],
"name": "Come in Shinecharging, Leave Shinecharged",
"entranceCondition": {
"comeInShinecharging": {
"length": 5,
"openEnd": 1
}
},
"requires": [
"canShinechargeMovementComplex"
],
"exitCondition": {
"leaveShinecharged": {
"framesRemaining": 115
}
},
"unlocksDoors": [
{
"types": [
"super"
],
"requires": []
},
{
"types": [
"missiles",
"powerbomb"
],
"requires": [
"never"
]
}
]
},
{
"link": [
2,
4
],
"name": "Carry Shinecharge",
"entranceCondition": {
"comeInShinecharged": {
"framesRequired": 70
}
},
"requires": [
"canShinechargeMovementComplex"
],
"exitCondition": {
"leaveShinecharged": {
"framesRemaining": "auto"
}
},
"unlocksDoors": [
{
"types": [
"super"
],
"requires": []
},
{
"types": [
"missiles",
"powerbomb"
],
"requires": [
"never"
]
}
]
},
{
"link": [
2,
4
],
"name": "Come In Shinecharged, Leave With Spark",
"entranceCondition": {
"comeInShinecharged": {
"framesRequired": 10
}
},
"requires": [
{
  "shinespark": {
    "frames": 21
  }
}
],
"exitCondition": {
"leaveWithSpark": {}
},
"unlocksDoors": [
{
"types": [
"super"
],
"requires": []
},
{
"types": [
"missiles",
"powerbomb"
],
"requires": [
"never"
]
}
]
},
{
"link": [
2,
5
],
"name": "Come in Shinecharging, Leave Shinecharged",
"entranceCondition": {
"comeInShinecharging": {
"length": 5,
"openEnd": 1
}
},
"requires": [
"canShinechargeMovementComplex"
],
"exitCondition": {
"leaveShinecharged": {
"framesRemaining": 5
}
},
"unlocksDoors": [
{
"types": [
"super"
],
"requires": []
},
{
"types": [
"missiles",
"powerbomb"
],
"requires": [
"never"
]
}
]
},
{
"link": [
2,
6
],
"name": "G-mode Morph Overload PLMs",
"entranceCondition": {
"comeInWithGMode": {
"mode": "any",
"morphed": true
}
},
"requires": [],
"note": "Use the camera scroll blocks just left of the bomb blocks, in order to overload PLMs and go through them."
},
{
"link": [
2,
8
],
"name": "G-mode Overload PLMs",
"entranceCondition": {
"comeInWithGMode": {
"mode": "any",
"morphed": false
}
},
"requires": [
"Morph"
],
"note": [
"Use the camera scroll blocks just right of the bomb blocks, in order to overload PLMs and go through them.",
"Cancel g-mode, morph and move back towards the bomb blocks in order to fix the camera."
]
},
{
"link": [
2,
8
],
"name": "G-mode Morph to Missiles While Blind",
"entranceCondition": {
"comeInWithGMode": {
"mode": "any",
"morphed": true
}
},
"requires": [
"canOffScreenMovement"
],
"note": [
"Use the camera scroll blocks just right of the bomb blocks, in order to overload PLMs and go through them.",
"Exit g-mode and travel to the item and back while off screen."
]
},
{
"link": [
3,
3
],
"name": "Leave with Runway",
"requires": [
{
  "obstaclesNotCleared": [
    "B"
  ]
}
],
"exitCondition": {
"leaveWithRunway": {
"length": 14,
"openEnd": 0
}
},
"devNote": "FIXME: It may be possible to extend this runway with a frozen Atomic or Covern."
},
{
"link": [
3,
3
],
"name": "Leave with Runway, Broken Blocks",
"requires": [],
"exitCondition": {
"leaveWithRunway": {
"length": 2,
"openEnd": 1
}
},
"devNote": "It is technically possible to reset at 7 and keep the top layer of obstacle B intact by clipping through the blocks"
},
{
"link": [
3,
3
],
"name": "Atomic Farm",
"requires": [
"f_DefeatedPhantoon",
{
"or": [
"ScrewAttack",
"Wave",
"Spazer",
"Plasma"
]
},
{
"resetRoom": {
"nodes": [
3
],
"mustStayPut": false
}
},
{
"refill": [
"Energy",
"Missile"
]
}
]
},
{
"link": [
3,
3
],
"name": "Crystal Flash",
"requires": [
"h_canCrystalFlash"
],
"clearsObstacles": [
"A",
"B",
"C"
]
},
{
"link": [
3,
3
],
"name": "G-Mode Setup - Get Hit By Covern or Atomic",
"notable": false,
"requires": [],
"exitCondition": {
"leaveWithGModeSetup": {}
}
},
{
"link": [
3,
3
],
"name": "G-Mode Regain Mobility",
"requires": [
{
"enemyDamage": {
"enemy": "Covern",
"type": "contact",
"hits": 1
}
},
{
"not": "f_DefeatedPhantoon"
},
"canRiskPermanentLossOfAccess"
],
"gModeRegainMobility": {}
},
{
"link": [
3,
5
],
"name": "Base",
"requires": [
{
  "or": [
    "canWalljump",
    "HiJump",
    "h_canFly",
    "SpeedBooster",
    "h_canCrouchJumpDownGrab",
    "canSpringBallJumpMidAir",
    "h_canSpringBallBombJump",
    "canUseFrozenEnemies"
  ]
}
]
},
{
"link": [
3,
6
],
"name": "Blocks Already Broken",
"requires": [
"Morph",
{
"obstaclesCleared": [
"A"
]
}
]
},
{
"link": [
3,
6
],
"name": "Bombs",
"requires": [
"h_canUseMorphBombs"
],
"clearsObstacles": [
"A"
]
},
{
"link": [
3,
6
],
"name": "Power Bombs",
"requires": [
"h_canUsePowerBombs"
],
"clearsObstacles": [
"A",
"B"
]
},
{
"link": [
3,
6
],
"name": "Speedball",
"entranceCondition": {
"comeInSpeedballing": {
"runway": {
"length": 13,
"openEnd": 0
}
}
},
"requires": [],
"clearsObstacles": [
"A"
]
},
{
"link": [
3,
6
],
"name": "Temporary Blue Bounce",
"entranceCondition": {
"comeInShinecharging": {
"length": 12,
"openEnd": 0
}
},
"requires": [
"canTemporaryBlue",
"canSpringBallBounce"
],
"clearsObstacles": [
"A"
],
"devNote": "There is 1 unusable tile in this runway."
},
{
"link": [
3,
6
],
"name": "G-mode Morph Overload PLMs",
"entranceCondition": {
"comeInWithGMode": {
"mode": "any",
"morphed": true
}
},
"requires": [],
"note": "Use the camera scroll blocks just left of the bomb blocks, in order to overload PLMs and go through them."
},
{
"link": [
3,
7
],
"name": "Base",
"requires": [
"Morph"
],
"clearsObstacles": [
"B"
],
"note": "From this direction, the shot blocks are fully breakable with Power Beam"
},
{
"link": [
3,
7
],
"name": "Stored Moonfall Clip",
"entranceCondition": {
"comeInWithStoredFallSpeed": {
"fallSpeedInTiles": 2
}
},
"requires": [
"canMoonfall",
"canOffScreenMovement"
],
"note": [
"Moonfall twice, on the right or left side of the shot blocks.",
"This will put Samus inside of shotblocks, which can be cleared by shooting.",
"If on the left side, perform two more moonfalls.",
"The camera will be misaligned after the door transition."
]
},
{
"link": [
3,
7
],
"name": "Atomic Ice Moonfall Door Lock Skip",
"requires": [
"f_DefeatedPhantoon",
"Morph",
{
"obstaclesCleared": [
"B"
]
},
"canEnemyStuckMoonfall",
"canTrickyUseFrozenEnemies"
],
"bypassesDoorShell": true,
"note": [
"Lure two Atomics down to the bottom of the room, and freeze them to be able to moonfall between them and aim down.",
"After gaining enough speed, press forward to fall down and clip past the door shell below.",
"Falling with too much speed can cause Samus to go out of bounds."
]
},
{
"link": [
3,
8
],
"name": "Blocks Already Broken",
"requires": [
"Morph",
{
"obstaclesCleared": [
"C"
]
}
]
},
{
"link": [
3,
8
],
"name": "Bombs",
"requires": [
"h_canUseMorphBombs"
],
"clearsObstacles": [
"C"
]
},
{
"link": [
3,
8
],
"name": "Power Bombs",
"requires": [
"h_canUsePowerBombs"
],
"clearsObstacles": [
"A",
"B",
"C"
],
"note": [
"It is possible to use a single Power Bomb to break the bomb blocks going left to the item, right to the door, and shot blocks going down.",
"Place the power bomb against the right wall at the top of the stairs between the three obstacles."
]
},
{
"link": [
3,
8
],
"name": "G-mode Overload PLMs",
"entranceCondition": {
"comeInWithGMode": {
"mode": "any",
"morphed": false
}
},
"requires": [
"Morph"
],
"note": [
"Use the camera scroll blocks just right of the bomb blocks, in order to overload PLMs and go through them.",
"Cancel g-mode, morph and move back towards the bomb blocks in order to fix the camera."
]
},
{
"link": [
3,
8
],
"name": "G-mode Morph to Item While Blind",
"entranceCondition": {
"comeInWithGMode": {
"mode": "any",
"morphed": true
}
},
"requires": [
{
"or": [
"h_canArtificialMorphIBJ",
"h_canArtificialMorphSpringBallBombJump",
{
"and": [
"h_canArtificialMorphSpringBall",
"HiJump"
]
}
]
},
"canOffScreenMovement"
],
"note": [
"Use the camera scroll blocks just right of the bomb blocks, in order to overload PLMs and go through them.",
"Exit g-mode and travel to the item and back while off screen."
]
},
{
"link": [
3,
8
],
"name": "Wrecked Ship Main Shaft Spooky Missiles Temporary Blue with Frozen Enemy Runway",
"notable": true,
"requires": [
"h_canFrozenEnemyRunway",
{
"or": [
"f_DefeatedPhantoon",
{
"and": [
"SpaceJump",
"h_canTrickyFrozenEnemyRunway"
]
}
]
},
"canSlowShortCharge",
{
"canShineCharge": {
"usedTiles": 14,
"openEnd": 0,
"steepUpTiles": 3
}
},
"canTemporaryBlue",
"Morph"
],
"note": [
"Use a frozen Atomic or Covern to extend the runway in front of the Spooky Missiles bomb block, then use temporary blue into a morph ball bounce to break it.",
"Position the enemy horizontally centered in the hole to extend the runway all the way to the wall.",
"Positioning a Covern is tricky. One way to set this up is with Space Jump.",
"Perform Space Jumps half way between the desired Covern position and the ceiling until the Covern spawns in the correct position."
],
"devNote": "FIXME: There may be other ways to set up the Covern positioning without Space Jump."
},
{
"link": [
4,
1
],
"name": "Base",
"requires": []
},
{
"link": [
4,
2
],
"name": "Base",
"requires": []
},
{
"link": [
4,
2
],
"name": "Come in Shinecharging, Leave Shinecharged (Full Runway)",
"entranceCondition": {
"comeInShinecharging": {
"length": 12,
"openEnd": 0,
"steepDownTiles": 7
}
},
"requires": [
"canShinechargeMovementComplex"
],
"exitCondition": {
"leaveShinecharged": {
"framesRemaining": 80
}
},
"unlocksDoors": [
{
"types": [
"super"
],
"requires": []
},
{
"types": [
"missiles",
"powerbomb"
],
"requires": [
"never"
]
}
]
},
{
"link": [
4,
2
],
"name": "Come in Shinecharging, Leave Shinecharged (Short Runway)",
"entranceCondition": {
"comeInShinecharging": {
"length": 5,
"openEnd": 1,
"steepDownTiles": 3
}
},
"requires": [
"canShinechargeMovementComplex"
],
"exitCondition": {
"leaveShinecharged": {
"framesRemaining": 115
}
},
"unlocksDoors": [
{
"types": [
"super"
],
"requires": []
},
{
"types": [
"missiles",
"powerbomb"
],
"requires": [
"never"
]
}
]
},
{
"link": [
4,
2
],
"name": "Carry Shinecharge",
"entranceCondition": {
"comeInShinecharged": {
"framesRequired": 70
}
},
"requires": [
"canShinechargeMovementComplex"
],
"exitCondition": {
"leaveShinecharged": {
"framesRemaining": "auto"
}
},
"unlocksDoors": [
{
"types": [
"super"
],
"requires": []
},
{
"types": [
"missiles",
"powerbomb"
],
"requires": [
"never"
]
}
]
},
{
"link": [
4,
2
],
"name": "Come In Shinecharged, Leave With Spark",
"entranceCondition": {
"comeInShinecharged": {
"framesRequired": 10
}
},
"requires": [
{
  "shinespark": {
    "frames": 21
  }
}
],
"exitCondition": {
"leaveWithSpark": {}
},
"unlocksDoors": [
{
"types": [
"super"
],
"requires": []
},
{
"types": [
"missiles",
"powerbomb"
],
"requires": [
"never"
]
}
]
},
{
"link": [
4,
4
],
"name": "Leave with Runway",
"requires": [],
"exitCondition": {
"leaveWithRunway": {
"length": 13,
"openEnd": 1,
"steepUpTiles": 7
}
}
},
{
"link": [
4,
4
],
"name": "Leave With Runway - Frozen Atomic or Covern",
"requires": [
"h_canFrozenEnemyRunway",
{
"or": [
"f_DefeatedPhantoon",
"h_canTrickyFrozenEnemyRunway"
]
}
],
"exitCondition": {
"leaveWithRunway": {
"length": 14,
"openEnd": 0,
"steepUpTiles": 7
}
},
"note": [
"Lure an Atomic or get a Covern to spawn to slightly extend the runway.",
"Positioning a Covern is a bit tricky. Consecutive wall jump or Space Jump in place above the gap but not quite at the ceiling,",
"or perform full height jumps to sometimes get the Covern to spawn in position. A crouch shot may help freeze the Coven when it is in position."
]
},
{
"link": [
4,
4
],
"name": "Atomic Farm",
"requires": [
"f_DefeatedPhantoon",
{
"or": [
"ScrewAttack",
"Wave",
"Spazer",
"Plasma"
]
},
{
"resetRoom": {
"nodes": [
1,
2,
4,
5
],
"mustStayPut": false
}
},
{
"refill": [
"Energy",
"Missile"
]
}
]
},
{
"link": [
4,
4
],
"name": "Crystal Flash",
"requires": [
"h_canCrystalFlash"
],
"clearsObstacles": [
"A",
"B",
"C"
]
},
{
"link": [
4,
4
],
"name": "G-Mode Setup - Get Hit By Covern or Atomic",
"notable": false,
"requires": [],
"exitCondition": {
"leaveWithGModeSetup": {}
}
},
{
"link": [
4,
4
],
"name": "G-Mode Regain Mobility",
"requires": [
{
"enemyDamage": {
"enemy": "Covern",
"type": "contact",
"hits": 1
}
},
{
"not": "f_DefeatedPhantoon"
},
"canRiskPermanentLossOfAccess"
],
"gModeRegainMobility": {}
},
{
"link": [
4,
5
],
"name": "Base",
"requires": []
},
{
"link": [
4,
5
],
"name": "Come in Shinecharging, Leave Shinecharged",
"entranceCondition": {
"comeInShinecharging": {
"length": 12,
"openEnd": 0,
"steepDownTiles": 7
}
},
"requires": [
"canShinechargeMovementComplex"
],
"exitCondition": {
"leaveShinecharged": {
"framesRemaining": 75
}
},
"unlocksDoors": [
{
"types": [
"super"
],
"requires": []
},
{
"types": [
"missiles",
"powerbomb"
],
"requires": [
"never"
]
}
]
},
{
"link": [
4,
5
],
"name": "Carry Shinecharge",
"entranceCondition": {
"comeInShinecharged": {
"framesRequired": 150
}
},
"requires": [
"canShinechargeMovementComplex"
],
"exitCondition": {
"leaveShinecharged": {
"framesRemaining": "auto"
}
},
"unlocksDoors": [
{
"types": [
"super"
],
"requires": []
},
{
"types": [
"missiles",
"powerbomb"
],
"requires": [
"never"
]
}
]
},
{
"link": [
4,
6
],
"name": "G-mode Morph Overload PLMs",
"entranceCondition": {
"comeInWithGMode": {
"mode": "any",
"morphed": true
}
},
"requires": [],
"note": "Use the camera scroll blocks just left of the bomb blocks, in order to overload PLMs and go through them."
},
{
"link": [
4,
8
],
"name": "G-mode Overload PLMs",
"entranceCondition": {
"comeInWithGMode": {
"mode": "any",
"morphed": false
}
},
"requires": [
"Morph"
],
"note": [
"Use the camera scroll blocks just right of the bomb blocks, in order to overload PLMs and go through them.",
"Cancel g-mode, morph and move back towards the bomb blocks in order to fix the camera."
]
},
{
"link": [
4,
8
],
"name": "G-mode Morph to Item While Blind",
"entranceCondition": {
"comeInWithGMode": {
"mode": "any",
"morphed": true
}
},
"requires": [
"canOffScreenMovement"
],
"note": [
"Use the camera scroll blocks just right of the bomb blocks, in order to overload PLMs and go through them.",
"Exit g-mode and travel to the item and back while off screen."
]
},
{
"link": [
5,
2
],
"name": "Come In Shinecharged, Leave With Spark",
"entranceCondition": {
"comeInShinecharged": {
"framesRequired": 155
}
},
"requires": [
{
  "shinespark": {
    "frames": 17
  }
}
],
"exitCondition": {
"leaveWithSpark": {}
},
"unlocksDoors": [
{
"types": [
"super"
],
"requires": []
},
{
"types": [
"missiles",
"powerbomb"
],
"requires": [
"never"
]
}
]
},
{
"link": [
5,
3
],
"name": "Base",
"requires": []
},
{
"link": [
5,
4
],
"name": "Base",
"requires": []
},
{
"link": [
5,
4
],
"name": "Come In Shinecharged, Leave With Spark",
"entranceCondition": {
"comeInShinecharged": {
"framesRequired": 155
}
},
"requires": [
{
  "shinespark": {
    "frames": 2
  }
}
],
"exitCondition": {
"leaveWithSpark": {}
},
"unlocksDoors": [
{
"types": [
"super"
],
"requires": []
},
{
"types": [
"missiles",
"powerbomb"
],
"requires": [
"never"
]
}
]
},
{
"link": [
5,
4
],
"name": "Very Deep Stuck X-Ray Climb",
"entranceCondition": {
"comeInWithGMode": {
"mode": "direct",
"morphed": false
}
},
"requires": [
"canXRayClimb"
],
"bypassesDoorShell": true,
"note": [
"Enter with G-mode direct, back up to between 1 and 6 pixels from the door transition, and activate X-ray to get very deep stuck in the door.",
"Climb up 1 screen, and perform a turnaround buffered spin-jump away from the door to trigger the transition, bypassing any lock on the door.",
"If Phantoon is not defeated then you have to move quickly to prevent the Coverns from hitting you."
]
},
{
"link": [
5,
5
],
"name": "Leave with Runway",
"requires": [],
"exitCondition": {
"leaveWithRunway": {
"length": 12,
"openEnd": 1,
"steepUpTiles": 6
}
}
},
{
"link": [
5,
5
],
"name": "Leave With Runway - Frozen Atomic or Covern",
"requires": [
"h_canFrozenEnemyRunway",
{
"or": [
"f_DefeatedPhantoon",
{
"and": [
"SpaceJump",
"h_canTrickyFrozenEnemyRunway"
]
}
]
}
],
"exitCondition": {
"leaveWithRunway": {
"length": 14,
"openEnd": 0,
"steepUpTiles": 6
}
},
"note": [
"Lure an Atomic or get a Covern to spawn to extend the runway.",
"Position the enemy horizontally centered in the hole to extend the runway all the way to the wall.",
"Positioning a Covern is tricky. One way to set this up is with Space Jump.",
"Align Samus left against the tile in the ceiling to align the Covern horizontally, then perform short Space Jumps half way between",
"the desired Covern position and the ceiling until the Covern spawns in the correct position."
],
"devNote": "FIXME: There may be other ways to set up the Covern positioning without Space Jump."
},
{
"link": [
5,
5
],
"name": "G-Mode Setup - Get Hit By Covern or Atomic",
"notable": false,
"requires": [],
"exitCondition": {
"leaveWithGModeSetup": {}
}
},
{
"link": [
5,
5
],
"name": "G-Mode Regain Mobility",
"requires": [
{
"enemyDamage": {
"enemy": "Covern",
"type": "contact",
"hits": 1
}
},
{
"not": "f_DefeatedPhantoon"
},
"canRiskPermanentLossOfAccess"
],
"gModeRegainMobility": {}
},
{
"link": [
5,
6
],
"name": "G-mode Morph Overload PLMs",
"entranceCondition": {
"comeInWithGMode": {
"mode": "any",
"morphed": true
}
},
"requires": [],
"note": "Use the camera scroll blocks just left of the bomb blocks, in order to overload PLMs and go through them."
},
{
"link": [
5,
8
],
"name": "Temporary Blue (In-Room)",
"requires": [
"canTemporaryBlue",
"canLateralMidAirMorph",
{
"or": [
{
"canShineCharge": {
"usedTiles": 11,
"openEnd": 2,
"steepUpTiles": 3
}
},
{
"and": [
"f_DefeatedPhantoon",
"h_canFrozenEnemyRunway",
{
"canShineCharge": {
"usedTiles": 13,
"openEnd": 1,
"steepUpTiles": 3
}
}
]
}
]
}
],
"clearsObstacles": [
"C"
],
"note": [
"Shinecharging up the stairs gives a longer effective runway than shinecharging down them.",
"A frozen Atomic (or Covern) can be used for more runway."
],
"devNote": "There is 1/2 a unusable tile in this runway."
},
{
"link": [
5,
8
],
"name": "Temporary Blue Chain (In-Room)",
"requires": [
"canChainTemporaryBlue",
"canXRayTurnaround",
{
"or": [
{
"and": [
"can4HighMidAirMorph",
{
"doorUnlockedAtNode": 5
},
{
"canShineCharge": {
"usedTiles": 11,
"openEnd": 2,
"steepUpTiles": 7
}
}
]
},
{
"and": [
"f_DefeatedPhantoon",
"h_canFrozenEnemyRunway",
"can4HighMidAirMorph",
{
"doorUnlockedAtNode": 5
},
{
"canShineCharge": {
"usedTiles": 13,
"openEnd": 1,
"steepUpTiles": 7
}
}
]
},
{
"canShineCharge": {
"usedTiles": 10,
"openEnd": 2,
"steepUpTiles": 7
}
},
{
"and": [
"f_DefeatedPhantoon",
"h_canFrozenEnemyRunway",
{
"canShineCharge": {
"usedTiles": 12,
"openEnd": 1,
"steepUpTiles": 7
}
}
]
}
]
}
],
"clearsObstacles": [
"C"
],
"note": [
"Shinecharging up the stairs gives a longer effective runway than shinecharging down them.",
"Bounce down the stairs to make movement simpler.",
"A frozen Atomic (or Covern) can be used for more runway."
],
"devNote": "There is 1/2 a unusable tile in this runway."
},
{
"link": [
5,
8
],
"name": "Temporary Blue",
"entranceCondition": {
"comeInShinecharging": {
"length": 11,
"openEnd": 1,
"steepDownTiles": 7
}
},
"requires": [
"canTemporaryBlue",
"canLateralMidAirMorph"
],
"clearsObstacles": [
"C"
],
"devNote": "There is 1 unusable tile in this runway."
},
{
"link": [
5,
8
],
"name": "G-mode Overload PLMs",
"entranceCondition": {
"comeInWithGMode": {
"mode": "any",
"morphed": false
}
},
"requires": [
"Morph"
],
"note": [
"Use the camera scroll blocks just right of the bomb blocks, in order to overload PLMs and go through them.",
"Cancel g-mode, morph and move back towards the bomb blocks in order to fix the camera."
]
},
{
"link": [
5,
8
],
"name": "G-mode Morph to Item While Blind",
"entranceCondition": {
"comeInWithGMode": {
"mode": "any",
"morphed": true
}
},
"requires": [
"canOffScreenMovement"
],
"note": [
"Use the camera scroll blocks just right of the bomb blocks, in order to overload PLMs and go through them.",
"Exit g-mode and travel to the item and back while off screen."
]
},
{
"link": [
6,
3
],
"name": "Base",
"requires": [
"Morph",
{
"or": [
"h_canBombThings",
{
"obstaclesCleared": [
"A"
]
}
]
}
],
"clearsObstacles": [
"A"
]
},
{
"link": [
6,
3
],
"name": "Speedball",
"entranceCondition": {
"comeInSpeedballing": {
"runway": {
"length": 3,
"openEnd": 0
}
}
},
"requires": [],
"clearsObstacles": [
"A"
]
},
{
"link": [
6,
3
],
"name": "Temporary Blue Bounce",
"entranceCondition": {
"comeInShinecharging": {
"length": 2,
"openEnd": 0
}
},
"requires": [
"canTemporaryBlue",
"canSpringBallBounce"
],
"clearsObstacles": [
"A"
],
"devNote": "There is 1 unusable tile in this runway."
},
{
"link": [
6,
6
],
"name": "Leave with Runway",
"requires": [],
"exitCondition": {
"leaveWithRunway": {
"length": 4,
"openEnd": 0
}
}
},
{
"link": [
6,
6
],
"name": "Crystal Flash",
"requires": [
"h_canCrystalFlash"
],
"clearsObstacles": [
"A"
]
},
{
"link": [
6,
6
],
"name": "G-Mode Setup - Get Hit By Covern or Atomic",
"notable": false,
"requires": [
{
  "or": [
    "h_canBombThings",
    {
      "obstaclesCleared": [
        "A"
      ]
    },
    {
      "and": [
        {
          "not": "f_DefeatedPhantoon"
        },
        "canRiskPermanentLossOfAccess"
      ]
    }
  ]
}
],
"exitCondition": {
"leaveWithGModeSetup": {}
}
},
{
"link": [
6,
6
],
"name": "G-Mode Regain Mobility",
"requires": [
{
"enemyDamage": {
"enemy": "Covern",
"type": "contact",
"hits": 1
}
},
{
"not": "f_DefeatedPhantoon"
},
"canRiskPermanentLossOfAccess"
],
"gModeRegainMobility": {}
},
{
"link": [
7,
3
],
"name": "Blocks Already Broken",
"requires": [
"Morph",
{
"obstaclesCleared": [
"B"
]
},
{
"or": [
{
"and": [
"canCarefulJump",
"canDisableEquipment"
]
},
"h_canUseSpringBall"
]
}
],
"note": [
"If Spring Ball is unavailable, then either crouch jump and morph from the stairs, or run and jump into morph from the right of the stairs.",
"If you have HiJump, it must be disabled."
]
},
{
"link": [
7,
3
],
"name": "Bombs",
"requires": [
"h_canUseMorphBombs"
],
"clearsObstacles": [
"B"
]
},
{
"link": [
7,
3
],
"name": "Shoot the Blocks",
"requires": [
"Morph",
{
"or": [
"Wave",
"Spazer"
]
},
{
"or": [
{
"and": [
"canCarefulJump",
"canDisableEquipment"
]
},
"h_canUseSpringBall"
]
}
],
"clearsObstacles": [
"B"
],
"note": [
"If Spring Ball is unavailable, then either crouch jump and morph from the stairs, or run and jump into morph from the right of the stairs.",
"If you have HiJump, it must be disabled."
]
},
{
"link": [
7,
3
],
"name": "Power Bomb",
"requires": [
"h_canUsePowerBombs"
],
"clearsObstacles": [
"A",
"B"
],
"note": [
"Use a Power Bomb to bounce into the morph tunnel.",
"This will break the shot blocks and the Bomb Blocks going to the door to the right."
]
},
{
"link": [
7,
3
],
"name": "Wrecked Ship Main Shaft Partial Covern Ice Clip",
"notable": false,
"requires": [
"Morph",
"canUseFrozenEnemies",
"canCeilingClip",
{
"not": "f_DefeatedPhantoon"
},
"canRiskPermanentLossOfAccess"
],
"clearsObstacles": [
"B"
],
"note": [
"Use the Covern to partial ceiling clip so your beam can reach the shot block of the ceiling at the end of the Morph tunnel to the left.",
"It is possible to mid-air morph to get into the morph tunnel with nothing, from the Covern, the ground, or the stairs below."
]
},
{
"link": [
7,
3
],
"name": "R-Mode Standup to Shoot the Shot Blocks",
"entranceCondition": {
"comeInWithRMode": {},
"comesThroughToilet": "any"
},
"requires": [
"Morph",
{
"not": "f_DefeatedPhantoon"
},
"canRiskPermanentLossOfAccess",
{
"or": [
"canBePatient",
"Plasma"
]
}
],
"clearsObstacles": [
"B"
],
"note": [
"In R-Mode, kill the Coverns until there is Energy in Samus's Reserves. Get into the Morph tunnel and go to the far left.",
"Wait for Coverns to damage Samus down until Reserves trigger, forcing a stand up and enabling her to shoot the shot blocks and escape."
]
},
{
"link": [
7,
7
],
"name": "Coverns and Atomics Farm (Power Off)",
"requires": [
{
"not": "f_DefeatedPhantoon"
},
"canRiskPermanentLossOfAccess",
{
"or": [
"Ice",
"Wave",
"Spazer",
"Plasma",
{
"and": [
"h_canUseMorphBombs",
"ScrewAttack"
]
}
]
},
{
"resetRoom": {
"nodes": [
7
],
"mustStayPut": false
}
},
{
"refill": [
"Energy",
"Missile",
"Super"
]
}
],
"note": [
"To shoot the Atomics with Ice or Plasma, crouch near the edge of the glass and shoot forward;",
"angled shots downwards also work but from a tile further back."
],
"devNote": [
"Killing the Coverns with any of these options can be done on a single cycle.",
"Screw Attack can kill the Coverns quickly, but can't kill the Atomics. Bombs can kill the Atimics easily, but not the Coverns.",
"FIXME: Should this require another tech? canRiskPermanentLossOfAccess is a pretty high-level requirement."
]
},
{
"link": [
7,
7
],
"name": "Leave Normally",
"exitCondition": {
"leaveNormally": {}
},
"requires": []
},
{
"link": [
7,
7
],
"name": "Shinespark",
"entranceCondition": {
"comeInWithSpark": {},
"comesThroughToilet": "no"
},
"requires": [
{
  "shinespark": {
    "frames": 2,
    "excessFrames": 2
  }
}
],
"note": "Enter on the left side of the doorway to reduce the amount of energy used.",
"devNote": "This strat is not useful in-room, but can satisfy a strat in the room before with an exit shinespark."
},
{
"link": [
7,
7
],
"name": "Shinespark (through Toilet)",
"entranceCondition": {
"comeInWithSpark": {},
"comesThroughToilet": "yes"
},
"requires": [
{
  "shinespark": {
    "frames": 9,
    "excessFrames": 9
  }
}
],
"devNote": "This strat is not useful in-room, but can satisfy a strat in the room before with an exit shinespark."
},
{
"link": [
7,
7
],
"name": "Crystal Flash",
"requires": [
"h_canCrystalFlash"
],
"clearsObstacles": [
"A",
"B"
]
},
{
"link": [
7,
7
],
"name": "G-Mode Regain Mobility",
"requires": [
{
"enemyDamage": {
"enemy": "Covern",
"type": "contact",
"hits": 1
}
},
{
"not": "f_DefeatedPhantoon"
},
"canRiskPermanentLossOfAccess"
],
"gModeRegainMobility": {},
"note": [
"Line up with the far right or left side of doorframe in the room below, to be able to not fall back through after entry, as the door remains open.",
"Be careful not to fall into the door while being hit by the Covern."
]
},
{
"link": [
8,
3
],
"name": "Blocks Already Broken",
"requires": [
"Morph",
{
"obstaclesCleared": [
"C"
]
}
]
},
{
"link": [
8,
3
],
"name": "Base",
"requires": [
"h_canBombThings"
],
"clearsObstacles": [
"C"
]
},
{
"link": [
8,
3
],
"name": "Temporary Blue Bounce (Phantoon Dead)",
"requires": [
"f_DefeatedPhantoon",
"canXRayTurnaround",
"canSpringBallBounce",
{
"or": [
"HiJump",
"canChainTemporaryBlue"
]
},
{
"canShineCharge": {
"usedTiles": 20,
"openEnd": 1,
"steepDownTiles": 4
}
}
],
"clearsObstacles": [
"C"
],
"note": [
"Run towards the conveyor to more easily build the ShineCharge, and for an easier bounce into the morph tunnel.",
"Neutral bounce into the Morph tunnel, and SpringBall bounce to continue all the way through."
],
"devNote": "16 tiles plus conveyor pushback."
},
{
"link": [
8,
3
],
"name": "Chain Temporary Blue Bounce (Phantoon Alive)",
"requires": [
"Morph",
"canChainTemporaryBlue",
"canXRayTurnaround",
"canSpringBallBounce",
{
"canShineCharge": {
"usedTiles": 16,
"openEnd": 1,
"steepDownTiles": 4
}
}
],
"clearsObstacles": [
"C"
],
"note": "Neutral bounce into the Morph tunnel, and SpringBall bounce to continue all the way through.",
"devNote": "Defeating Phantoon makes this strat easier."
},
{
"link": [
8,
3
],
"name": "Temporary Blue Bounce (Phantoon Alive)",
"requires": [
{
"not": "f_DefeatedPhantoon"
},
"canRiskPermanentLossOfAccess",
"canTemporaryBlue",
"can4HighMidAirMorph",
"canSpringBallBounce",
{
"canShineCharge": {
"usedTiles": 16,
"openEnd": 0,
"steepUpTiles": 4
}
}
],
"clearsObstacles": [
"C"
]
},
{
"link": [
8,
3
],
"name": "SpeedBall Out (Phantoon Alive)",
"requires": [
{
"not": "f_DefeatedPhantoon"
},
"canRiskPermanentLossOfAccess",
"canSpeedball",
{
"canShineCharge": {
"usedTiles": 14,
"openEnd": 0,
"steepUpTiles": 3
}
}
],
"clearsObstacles": [
"C"
]
}
]
}