Crab Hole
Room ID: 201

|
Exit condition: {
"leaveWithRunway": {
"length": 3,
"openEnd": 1
}
}
|
|
From: 1
Top Left Doorway
To: 1
Top Left Doorway
Requires: "h_canFrozenEnemyRunway" Exit condition: {
"leaveWithRunway": {
"length": 4,
"openEnd": 1
}
}
|
|
Requires: "h_canNavigateUnderwater"
{
"resetRoom": {
"nodes": [
1,
4
],
"mustStayPut": false
}
}
{
"refill": [
"Energy",
"PowerBomb"
]
}
|
|
Requires: "h_canCrystalFlash" |
|
From: 1
Top Left Doorway
To: 1
Top Left Doorway
Exit condition: {
"leaveWithGModeSetup": {}
}
|
|
Requires: {
"enemyDamage": {
"enemy": "Sciser",
"type": "contact",
"hits": 1
}
}
|
|
Requires: "Morph" |
|
Roll over the two crabs before the first gets to Samus. This is easier with Gravity Suit turned off. It is possible but difficult to roll from the doorway onto the platform with Gravity turned off. This requires backing up slightly after entering the room then quickly rolling before the crabs. It is a bit tighter in direct G-Mode. Entrance condition: {
"comeInWithGMode": {
"mode": "any",
"morphed": true
}
}
Requires: {
"or": [
"h_canArtificialMorphPowerBomb",
"h_canArtificialMorphSpringBall",
{
"and": [
"Gravity",
"h_canArtificialMorphBombs"
]
},
"canTrickyJump",
{
  "enemyDamage": {
    "enemy": "Sciser",
    "type": "contact",
    "hits": 1
  }
}
]
}
|
|
|
|
Entrance condition: {
"comeInWithSpark": {}
}
Requires: {
"or": [
{
"shinespark": {
"frames": 24
}
},
{
"and": [
"Gravity",
{
"shinespark": {
"frames": 21
}
}
]
}
]
}
Exit condition: {
"leaveWithSpark": {}
}
|
|
From: 1
Top Left Doorway
To: 4
Top Right Doorway
Entrance condition: {
"comeInShinecharging": {
"length": 2,
"openEnd": 0
}
}
Requires: "Gravity" "canShinechargeMovement" Exit condition: {
"leaveShinecharged": {
"framesRemaining": 80
}
}
|
|
From: 1
Top Left Doorway
To: 4
Top Right Doorway
Entrance condition: {
"comeInWithGMode": {
"mode": "any",
"morphed": false
}
}
Exit condition: {
"leaveWithGMode": {
"morphed": false
}
}
|
|
From: 1
Top Left Doorway
To: 4
Top Right Doorway
To save a bomb, it is possible but difficult to roll from the doorway onto the platform with Gravity turned off. This requires backing up slightly after entering the room then quickly rolling before the crabs. It is a bit tighter in direct G-Mode. Entrance condition: {
"comeInWithGMode": {
"mode": "any",
"morphed": true
}
}
Requires: {
"or": [
"Morph",
"h_canArtificialMorphSpringBall",
{
"and": [
"Gravity",
"h_canArtificialMorphIBJ"
]
},
{
"and": [
"Gravity",
"h_canArtificialMorphBombHorizontally",
{
"or": [
"h_canArtificialMorphBombThings",
"canTrickyJump",
{
"enemyDamage": {
"enemy": "Sciser",
"type": "contact",
"hits": 1
}
}
]
}
]
}
]
}
Exit condition: {
"leaveWithGMode": {
"morphed": true
}
}
|
|
Entrance condition: {
"comeInWithGrappleTeleport": {
"blockPositions": [
[
12,
12
],
[
12,
13
]
]
}
}
Bypasses door shell: true |
|
From: 1
Top Left Doorway
To: 4
Top Right Doorway
Entrance condition: {
"comeInWithGrappleTeleport": {
"blockPositions": [
[
12,
12
]
]
}
}
Exit condition: {
"leaveWithGrappleTeleport": {
"blockPositions": [
[
12,
12
]
]
}
}
Bypasses door shell: true |
|
From: 1
Top Left Doorway
To: 4
Top Right Doorway
Entrance condition: {
"comeInWithGrappleTeleport": {
"blockPositions": [
[
12,
13
]
]
}
}
Exit condition: {
"leaveWithGrappleTeleport": {
"blockPositions": [
[
12,
13
]
]
}
}
Bypasses door shell: true |
|
Requires: "Morph"
"Gravity"
{
"or": [
"h_canFly",
{
"and": [
"HiJump",
"canWalljump"
]
},
{
"and": [
"HiJump",
"canSpringBallJumpMidAir"
]
}
]
}
|
|
Requires: "Morph" "canGravityJump" |
|
Jump the first frame after running to gain just enough spinjump height. Requires: "canMidAirMorph" "Gravity" "canWalljump" "canTrickyDashJump" |
|
Freeze a crab on the edge of the hole in the ceiling. Then get on top of it with Gravity and a wall jump, jump assist, or second frozen crab on the ground, or a suitless Spring Ball jump with HiJump. Requires: "canMidAirMorph"
"canUseFrozenEnemies"
{
"or": [
{
"and": [
"Gravity",
{
"or": [
"HiJump",
"canWalljump",
"canSpringBallJumpMidAir",
"canTrickyUseFrozenEnemies"
]
}
]
},
{
"and": [
"HiJump",
"canSpringBallJumpMidAir",
"canSuitlessMaridia"
]
}
]
}
|
|
Climb up 1 screen. Entrance condition: {
"comeInWithDoorStuckSetup": {}
}
Requires: "canXRayClimb" |
|
Stand on a frozen crab, then freeze a second one on the edge of the hole above. Use a crouch jump and/or down grab to get onto the crab above. Requires: "canMidAirMorph"
"canSuitlessMaridia"
"canTrickyUseFrozenEnemies"
"HiJump"
{
"or": [
"canCrouchJump",
"canDownGrab"
]
}
|
|
Use a Super to knock off a crab and freeze it mid-air. Freeze a second crab on the edge of the hole above. Requires: "canSuitlessMaridia"
"canTrickyJump"
{
"ammo": {
"type": "Super",
"count": 1
}
}
"canTrickyUseFrozenEnemies"
"canSpringBallJumpMidAir"
|
|
From: 2
Bottom Left Door
To: 1
Top Left Doorway
Notable: true 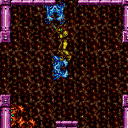
Use a super to knock off a crab and freeze it mid-air. Then get on that crab, possibly using a door ledge Freeze a second crab on the edge of the hole above. Requires: "canMidAirMorph"
"canSuitlessMaridia"
{
"ammo": {
"type": "Super",
"count": 1
}
}
"canTrickyUseFrozenEnemies"
|
|
From: 2
Bottom Left Door
To: 1
Top Left Doorway
Notable: true 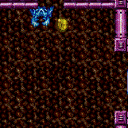
Freeze one crab on the lip of the overhead opening and another on the edge of a doors platform then springballjump up. Use a Stationary Lateral Mid-Air Morph to gain enough jump height without bonking the ceiling. It is possible with a crouch jump to not need the second crab. Requires: "canSuitlessMaridia" "canTrickyJump" "canTrickySpringBallJump" "canTrickyUseFrozenEnemies" "canStationaryLateralMidAirMorph" |
|
From: 2
Bottom Left Door
To: 1
Top Left Doorway
Notable: true 
Requires a runway of at least 4 tiles (with no open end) in the adjacent room. Use a Cross Room Jump into Water followed by a delayed Momentum Conserving Turnaround to reach the Morph tunnel above. Climbing the Left side of the center hole will run into an unavoidable Scisor that can be passed through by Morphing. Crossing to the right from the left door requires slightly more runway and takes a more precise turnaround. Samus must also stay near a side of the center hole to reach the Morph tunnels. Entrance condition: {
"comeInJumping": {
"speedBooster": false,
"minTiles": 3.4375
}
}
Requires: "canMidAirMorph"
"canCrossRoomJumpIntoWater"
"canMomentumConservingTurnaround"
"canKago"
{
"enemyDamage": {
"enemy": "Sciser",
"type": "contact",
"hits": 1
}
}
|
|
From: 2
Bottom Left Door
To: 1
Top Left Doorway
Notable: true
Only requires a runway of 6 tiles (with no open end) in the adjacent room. Perform an air ball while against the ceiling to make it up and through the morph tunnel. Use a Cross Room Jump into Water followed by a delayed Momentum Conserving Turnaround to reach the Morph tunnel above. Crossing to the right from the left door requires a more precise turnaround or morph timing which slides along the ceiling. Samus must also stay near a side of the center hole to reach the Morph tunnels. Entrance condition: {
"comeInJumping": {
"speedBooster": false,
"minTiles": 5.4375
}
}
Requires: "canCrossRoomJumpIntoWater" "canLateralMidAirMorph" "canMomentumConservingTurnaround" |
|
Requires: "canSuitlessMaridia" "h_canDoubleSpringBallJumpWithHiJump" |
|
Exit condition: {
"leaveWithRunway": {
"length": 2,
"openEnd": 1
}
}
|
|
From: 2
Bottom Left Door
To: 2
Bottom Left Door
Requires: "h_canFrozenEnemyRunway" Exit condition: {
"leaveWithRunway": {
"length": 3,
"openEnd": 1
}
}
|
|
Requires: "h_canNavigateUnderwater"
{
"resetRoom": {
"nodes": [
2,
3
],
"mustStayPut": false
}
}
{
"refill": [
"Energy",
"PowerBomb"
]
}
|
|
Requires: "h_canCrystalFlash" |
|
From: 2
Bottom Left Door
To: 2
Bottom Left Door
Exit condition: {
"leaveWithGModeSetup": {}
}
|
|
Requires: {
"enemyDamage": {
"enemy": "Sciser",
"type": "contact",
"hits": 1
}
}
|
|
|
|
From: 2
Bottom Left Door
To: 3
Bottom Right Door
Entrance condition: {
"comeInShinecharged": {
"framesRequired": 25
}
}
Requires: {
"shinespark": {
"frames": 23
}
}
Exit condition: {
"leaveWithSpark": {}
}
|
|
Entrance condition: {
"comeInWithGrappleTeleport": {
"blockPositions": [
[
12,
12
],
[
12,
13
]
]
}
}
Bypasses door shell: true |
|
From: 2
Bottom Left Door
To: 4
Top Right Doorway
Entrance condition: {
"comeInWithGrappleTeleport": {
"blockPositions": [
[
12,
12
]
]
}
}
Exit condition: {
"leaveWithGrappleTeleport": {
"blockPositions": [
[
12,
12
]
]
}
}
Bypasses door shell: true |
|
From: 2
Bottom Left Door
To: 4
Top Right Doorway
Entrance condition: {
"comeInWithGrappleTeleport": {
"blockPositions": [
[
12,
13
]
]
}
}
Exit condition: {
"leaveWithGrappleTeleport": {
"blockPositions": [
[
12,
13
]
]
}
}
Bypasses door shell: true |
|
From: 2
Bottom Left Door
To: 5
G-Mode Morph Junction (Top Half)
Entrance condition: {
"comeInWithGMode": {
"mode": "any",
"morphed": false
}
}
Requires: "Morph"
"h_canNavigateUnderwater"
{
"or": [
"canGravityJump",
{
"and": [
"Gravity",
"HiJump",
{
"or": [
"canSpringBallJumpMidAir",
"canWalljump"
]
}
]
},
{
"and": [
"canTrickyUseFrozenEnemies",
"HiJump",
"h_canCrouchJumpDownGrab"
]
},
{
"and": [
{
"ammo": {
"type": "Super",
"count": 1
}
},
"canTrickyUseFrozenEnemies",
"canOffScreenMovement"
]
},
{
"and": [
"canTrickyJump",
"canSpringBallJumpMidAir",
"canTrickyUseFrozenEnemies",
"canOffScreenMovement"
]
}
]
}
|
|
From: 2
Bottom Left Door
To: 5
G-Mode Morph Junction (Top Half)
One method to kill the crabs is to wait on the central platform until a crab comes near, then move with it laying bombs in its path. Another is to wait in the doorway and place three bombs to hit it while bouncing over it. The top of the IBJ will be off camera. Starting the IBJ as far to either side as possible and holding forward once off camera will make it easier to get through the morph tunnel. Entrance condition: {
"comeInWithGMode": {
"mode": "any",
"morphed": true
}
}
Requires: "Gravity" "h_canArtificialMorphIBJ" |
|
From: 2
Bottom Left Door
To: 5
G-Mode Morph Junction (Top Half)
The shaft will be clear of crabs on room entry. Quickly gravity jump before the bottom crab enters the shaft and exit the left morph tunnel to be safe. This is a bit tighter when entering in G-Mode Immobile. Entrance condition: {
"comeInWithGMode": {
"mode": "any",
"morphed": true
}
}
Requires: "canGravityJump" "h_canArtificialMorphSpringBall" |
|
Entrance condition: {
"comeInWithGrappleTeleport": {
"blockPositions": [
[
7,
2
]
]
}
}
|
|
From: 3
Bottom Right Door
To: 1
Top Left Doorway
Entrance condition: {
"comeInWithGrappleTeleport": {
"blockPositions": [
[
3,
12
],
[
3,
13
]
]
}
}
Bypasses door shell: true |
|
From: 3
Bottom Right Door
To: 1
Top Left Doorway
Entrance condition: {
"comeInWithGrappleTeleport": {
"blockPositions": [
[
3,
12
]
]
}
}
Exit condition: {
"leaveWithGrappleTeleport": {
"blockPositions": [
[
3,
12
]
]
}
}
Bypasses door shell: true |
|
From: 3
Bottom Right Door
To: 1
Top Left Doorway
Entrance condition: {
"comeInWithGrappleTeleport": {
"blockPositions": [
[
3,
13
]
]
}
}
Exit condition: {
"leaveWithGrappleTeleport": {
"blockPositions": [
[
3,
13
]
]
}
}
Bypasses door shell: true |
|
|
|
From: 3
Bottom Right Door
To: 2
Bottom Left Door
Entrance condition: {
"comeInShinecharged": {
"framesRequired": 25
}
}
Requires: {
"shinespark": {
"frames": 23
}
}
Exit condition: {
"leaveWithSpark": {}
}
|
|
Entrance condition: {
"comeInWithGrappleTeleport": {
"blockPositions": [
[
2,
18
],
[
2,
19
],
[
2,
28
],
[
2,
29
]
]
}
}
Bypasses door shell: true |
|
From: 3
Bottom Right Door
To: 2
Bottom Left Door
Entrance condition: {
"comeInWithGrappleTeleport": {
"blockPositions": [
[
2,
18
]
]
}
}
Exit condition: {
"leaveWithGrappleTeleport": {
"blockPositions": [
[
2,
18
]
]
}
}
Bypasses door shell: true |
|
From: 3
Bottom Right Door
To: 2
Bottom Left Door
Entrance condition: {
"comeInWithGrappleTeleport": {
"blockPositions": [
[
2,
19
]
]
}
}
Exit condition: {
"leaveWithGrappleTeleport": {
"blockPositions": [
[
2,
19
]
]
}
}
Bypasses door shell: true |
|
From: 3
Bottom Right Door
To: 2
Bottom Left Door
Entrance condition: {
"comeInWithGrappleTeleport": {
"blockPositions": [
[
2,
28
]
]
}
}
Exit condition: {
"leaveWithGrappleTeleport": {
"blockPositions": [
[
2,
28
]
]
}
}
Bypasses door shell: true |
|
From: 3
Bottom Right Door
To: 2
Bottom Left Door
Entrance condition: {
"comeInWithGrappleTeleport": {
"blockPositions": [
[
2,
29
]
]
}
}
Exit condition: {
"leaveWithGrappleTeleport": {
"blockPositions": [
[
2,
29
]
]
}
}
Bypasses door shell: true |
|
Exit condition: {
"leaveWithRunway": {
"length": 2,
"openEnd": 1
}
}
|
|
From: 3
Bottom Right Door
To: 3
Bottom Right Door
Requires: "h_canFrozenEnemyRunway" Exit condition: {
"leaveWithRunway": {
"length": 3,
"openEnd": 1
}
}
|
|
From: 3
Bottom Right Door
To: 3
Bottom Right Door
Exit condition: {
"leaveWithGModeSetup": {}
}
|
|
Requires: {
"enemyDamage": {
"enemy": "Sciser",
"type": "contact",
"hits": 1
}
}
|
|
From: 3
Bottom Right Door
To: 4
Top Right Doorway
Climb up 1 screen. Entrance condition: {
"comeInWithDoorStuckSetup": {}
}
Requires: "canXRayClimb" |
|
Notable: true
Requires a runway of at least 4 tiles (with no open end) in the adjacent room. Use a Cross Room Jump into Water followed by a delayed Momentum Conserving Turnaround to reach the Morph tunnel above. Climbing the Left side of the center hole will run into an unavoidable Scisor. Samus must also stay near a side of the center hole to reach the Morph tunnels. Entrance condition: {
"comeInJumping": {
"speedBooster": false,
"minTiles": 3.4375
}
}
Requires: "Morph" "canCrossRoomJumpIntoWater" "canMomentumConservingTurnaround" |
|
From: 3
Bottom Right Door
To: 5
G-Mode Morph Junction (Top Half)
Entrance condition: {
"comeInWithGMode": {
"mode": "any",
"morphed": false
}
}
Requires: "Morph"
"h_canNavigateUnderwater"
{
"or": [
"canGravityJump",
{
"and": [
"Gravity",
"HiJump",
{
"or": [
"canSpringBallJumpMidAir",
"canWalljump"
]
}
]
},
{
"and": [
"canTrickyUseFrozenEnemies",
"HiJump",
"h_canCrouchJumpDownGrab"
]
},
{
"and": [
{
"ammo": {
"type": "Super",
"count": 1
}
},
"canTrickyUseFrozenEnemies",
"canOffScreenMovement"
]
},
{
"and": [
"canTrickyJump",
"canSpringBallJumpMidAir",
"canTrickyUseFrozenEnemies",
"canOffScreenMovement"
]
}
]
}
|
|
From: 3
Bottom Right Door
To: 5
G-Mode Morph Junction (Top Half)
One method to kill the crabs is to wait on the central platform until a crab comes near, then move with it laying bombs in its path. Another is to wait in the doorway and place three bombs to hit it while bouncing over it. The top of the IBJ will be off camera. Starting the IBJ as far to either side as possible and holding forward once off camera will make it easier to get through the morph tunnel. Entrance condition: {
"comeInWithGMode": {
"mode": "any",
"morphed": true
}
}
Requires: "Gravity" "h_canArtificialMorphIBJ" |
|
From: 3
Bottom Right Door
To: 5
G-Mode Morph Junction (Top Half)
The shaft will be clear of crabs on room entry. Quickly gravity jump before the bottom crab enters the shaft and exit the left morph tunnel to be safe. The same strategy works when entering in G-Mode Immobile. Move to the center platform and gravity jump shortly after getting hit. Entrance condition: {
"comeInWithGMode": {
"mode": "any",
"morphed": true
}
}
Requires: "canGravityJump" "h_canArtificialMorphSpringBall" |
|
|
|
Entrance condition: {
"comeInWithSpark": {}
}
Requires: {
"or": [
{
"shinespark": {
"frames": 24
}
},
{
"and": [
"Gravity",
{
"shinespark": {
"frames": 21
}
}
]
}
]
}
Exit condition: {
"leaveWithSpark": {}
}
|
|
From: 4
Top Right Doorway
To: 1
Top Left Doorway
Entrance condition: {
"comeInShinecharging": {
"length": 2,
"openEnd": 0
}
}
Requires: "Gravity" "canShinechargeMovement" Exit condition: {
"leaveShinecharged": {
"framesRemaining": 80
}
}
|
|
From: 4
Top Right Doorway
To: 1
Top Left Doorway
Entrance condition: {
"comeInWithGMode": {
"mode": "any",
"morphed": false
}
}
Exit condition: {
"leaveWithGMode": {
"morphed": false
}
}
|
|
From: 4
Top Right Doorway
To: 1
Top Left Doorway
To save a bomb, it is possible to roll from the doorway onto the platform with Gravity turned off. Entrance condition: {
"comeInWithGMode": {
"mode": "any",
"morphed": true
}
}
Requires: {
"or": [
"Morph",
"h_canArtificialMorphSpringBall",
{
"and": [
"Gravity",
"h_canArtificialMorphIBJ"
]
},
{
"and": [
"Gravity",
"h_canArtificialMorphBombHorizontally"
]
}
]
}
Exit condition: {
"leaveWithGMode": {
"morphed": true
}
}
|
|
From: 4
Top Right Doorway
To: 1
Top Left Doorway
Entrance condition: {
"comeInWithGrappleTeleport": {
"blockPositions": [
[
3,
12
],
[
3,
13
]
]
}
}
Bypasses door shell: true |
|
From: 4
Top Right Doorway
To: 1
Top Left Doorway
Entrance condition: {
"comeInWithGrappleTeleport": {
"blockPositions": [
[
3,
12
]
]
}
}
Exit condition: {
"leaveWithGrappleTeleport": {
"blockPositions": [
[
3,
12
]
]
}
}
Bypasses door shell: true |
|
From: 4
Top Right Doorway
To: 1
Top Left Doorway
Entrance condition: {
"comeInWithGrappleTeleport": {
"blockPositions": [
[
3,
13
]
]
}
}
Exit condition: {
"leaveWithGrappleTeleport": {
"blockPositions": [
[
3,
13
]
]
}
}
Bypasses door shell: true |
|
Entrance condition: {
"comeInWithGMode": {
"mode": "any",
"morphed": true
}
}
|
|
Entrance condition: {
"comeInWithGrappleTeleport": {
"blockPositions": [
[
2,
18
],
[
2,
19
],
[
2,
28
],
[
2,
29
]
]
}
}
Bypasses door shell: true |
|
From: 4
Top Right Doorway
To: 2
Bottom Left Door
Entrance condition: {
"comeInWithGrappleTeleport": {
"blockPositions": [
[
2,
18
]
]
}
}
Exit condition: {
"leaveWithGrappleTeleport": {
"blockPositions": [
[
2,
18
]
]
}
}
Bypasses door shell: true |
|
From: 4
Top Right Doorway
To: 2
Bottom Left Door
Entrance condition: {
"comeInWithGrappleTeleport": {
"blockPositions": [
[
2,
19
]
]
}
}
Exit condition: {
"leaveWithGrappleTeleport": {
"blockPositions": [
[
2,
19
]
]
}
}
Bypasses door shell: true |
|
From: 4
Top Right Doorway
To: 2
Bottom Left Door
Entrance condition: {
"comeInWithGrappleTeleport": {
"blockPositions": [
[
2,
28
]
]
}
}
Exit condition: {
"leaveWithGrappleTeleport": {
"blockPositions": [
[
2,
28
]
]
}
}
Bypasses door shell: true |
|
From: 4
Top Right Doorway
To: 2
Bottom Left Door
Entrance condition: {
"comeInWithGrappleTeleport": {
"blockPositions": [
[
2,
29
]
]
}
}
Exit condition: {
"leaveWithGrappleTeleport": {
"blockPositions": [
[
2,
29
]
]
}
}
Bypasses door shell: true |
|
Exit condition: {
"leaveWithRunway": {
"length": 3,
"openEnd": 1
}
}
|
|
From: 4
Top Right Doorway
To: 4
Top Right Doorway
Requires: "h_canFrozenEnemyRunway" Exit condition: {
"leaveWithRunway": {
"length": 4,
"openEnd": 1
}
}
|
|
From: 4
Top Right Doorway
To: 4
Top Right Doorway
Exit condition: {
"leaveWithGModeSetup": {}
}
|
|
Requires: {
"enemyDamage": {
"enemy": "Sciser",
"type": "contact",
"hits": 1
}
}
|
|
|
|
From: 5
G-Mode Morph Junction (Top Half)
To: 1
Top Left Doorway
Exit condition: {
"leaveWithGMode": {
"morphed": true
}
}
|
|
From: 5
G-Mode Morph Junction (Top Half)
To: 4
Top Right Doorway
Exit condition: {
"leaveWithGMode": {
"morphed": true
}
}
|
{
"$schema": "../../../schema/m3-room.schema.json",
"id": 201,
"name": "Crab Hole",
"area": "Maridia",
"subarea": "Outer",
"playable": true,
"roomAddress": "0x7D21C",
"roomEnvironments": [
{
"heated": false
}
],
"nodes": [
{
"id": 1,
"name": "Top Left Doorway",
"nodeType": "door",
"nodeSubType": "doorway",
"nodeAddress": "0x001a4f8",
"doorEnvironments": [
{
"physics": "water"
}
]
},
{
"id": 2,
"name": "Bottom Left Door",
"nodeType": "door",
"nodeSubType": "blue",
"nodeAddress": "0x001a510",
"doorEnvironments": [
{
"physics": "water"
}
]
},
{
"id": 3,
"name": "Bottom Right Door",
"nodeType": "door",
"nodeSubType": "red",
"nodeAddress": "0x001a51c",
"doorEnvironments": [
{
"physics": "water"
}
],
"locks": [
{
"name": "Crab Hole Red Lock (to Map)",
"lockType": "coloredDoor",
"unlockStrats": [
{
"name": "Base",
"notable": false,
"requires": [
"h_canOpenRedDoors"
]
}
]
}
]
},
{
"id": 4,
"name": "Top Right Doorway",
"nodeType": "door",
"nodeSubType": "doorway",
"nodeAddress": "0x001a504",
"doorEnvironments": [
{
"physics": "water"
}
]
},
{
"id": 5,
"name": "G-Mode Morph Junction (Top Half)",
"nodeType": "junction",
"nodeSubType": "g-mode",
"note": "Represents being at the top half of the room in G-Mode, with morph or artificial morph, and movement items."
}
],
"enemies": [
{
"id": "e1",
"groupName": "Crab Hole Scisers",
"enemyName": "Sciser",
"quantity": 4,
"homeNodes": [
1,
2,
3,
4
],
"note": "They move while offscreen and can easily be reached from anywhere in the room."
}
],
"reusableRoomwideNotable": [
{
"name": "Crab Hole Cross Room Jump Morph",
"note": [
"Use a Cross Room Jump into Water followed by a delayed Momentum Conserving Turnaround to reach the Morph tunnel above.",
"Climbing the Left side of the center hole will run into an unavoidable Scisor.",
"Crossing to the right from the left door requires slightly more runway and takes a more precise turnaround or morph timing which slides along the ceiling.",
"Samus must also stay near a side of the center hole to reach the Morph tunnels."
]
}
],
"links": [
{
"from": 1,
"to": [
{
"id": 1
},
{
"id": 2
},
{
"id": 4
}
]
},
{
"from": 2,
"to": [
{
"id": 1
},
{
"id": 2
},
{
"id": 3
},
{
"id": 4
},
{
"id": 5
}
]
},
{
"from": 3,
"to": [
{
"id": 1
},
{
"id": 2
},
{
"id": 3
},
{
"id": 4,
"devNote": "This link is only for the X-Ray climb and cross room jump. All other strats should go 3 -> 2 -> 1 -> 4."
},
{
"id": 5
}
]
},
{
"from": 4,
"to": [
{
"id": 1
},
{
"id": 2
},
{
"id": 4
}
]
},
{
"from": 5,
"to": [
{
"id": 1
},
{
"id": 4
}
]
}
],
"strats": [
{
"link": [
1,
1
],
"name": "Leave with Runway",
"requires": [],
"exitCondition": {
"leaveWithRunway": {
"length": 3,
"openEnd": 1
}
}
},
{
"link": [
1,
1
],
"name": "Leave With Runway - Frozen Sciser",
"requires": [
"h_canFrozenEnemyRunway"
],
"exitCondition": {
"leaveWithRunway": {
"length": 4,
"openEnd": 1
}
}
},
{
"link": [
1,
1
],
"name": "Sciser Farm",
"requires": [
"h_canNavigateUnderwater",
{
"resetRoom": {
"nodes": [
1,
4
],
"mustStayPut": false
}
},
{
"refill": [
"Energy",
"PowerBomb"
]
}
]
},
{
"link": [
1,
1
],
"name": "Crystal Flash",
"requires": [
"h_canCrystalFlash"
]
},
{
"link": [
1,
1
],
"name": "G-Mode Setup - Get Hit By Sciser",
"notable": false,
"requires": [],
"exitCondition": {
"leaveWithGModeSetup": {}
}
},
{
"link": [
1,
1
],
"name": "G-Mode Regain Mobility",
"requires": [
{
"enemyDamage": {
"enemy": "Sciser",
"type": "contact",
"hits": 1
}
}
],
"gModeRegainMobility": {}
},
{
"link": [
1,
2
],
"name": "Base",
"requires": [
"Morph"
]
},
{
"link": [
1,
2
],
"name": "G-Mode Morph",
"entranceCondition": {
"comeInWithGMode": {
"mode": "any",
"morphed": true
}
},
"requires": [
{
  "or": [
    "h_canArtificialMorphPowerBomb",
    "h_canArtificialMorphSpringBall",
    {
      "and": [
        "Gravity",
        "h_canArtificialMorphBombs"
      ]
    },
    "canTrickyJump",
    {
      "enemyDamage": {
        "enemy": "Sciser",
        "type": "contact",
        "hits": 1
      }
    }
  ]
}
],
"note": [
"Roll over the two crabs before the first gets to Samus. This is easier with Gravity Suit turned off.",
"It is possible but difficult to roll from the doorway onto the platform with Gravity turned off.",
"This requires backing up slightly after entering the room then quickly rolling before the crabs. It is a bit tighter in direct G-Mode."
]
},
{
"link": [
1,
4
],
"name": "Base",
"requires": []
},
{
"link": [
1,
4
],
"name": "Shinespark Through Room",
"entranceCondition": {
"comeInWithSpark": {}
},
"requires": [
{
  "or": [
    {
      "shinespark": {
        "frames": 24
      }
    },
    {
      "and": [
        "Gravity",
        {
          "shinespark": {
            "frames": 21
          }
        }
      ]
    }
  ]
}
],
"exitCondition": {
"leaveWithSpark": {}
}
},
{
"link": [
1,
4
],
"name": "Come In Shinecharging, Leave Shinecharged",
"entranceCondition": {
"comeInShinecharging": {
"length": 2,
"openEnd": 0
}
},
"requires": [
"Gravity",
"canShinechargeMovement"
],
"exitCondition": {
"leaveShinecharged": {
"framesRemaining": 80
}
}
},
{
"link": [
1,
4
],
"name": "Carry G-Mode Through Tube (Left to Right)",
"notable": false,
"entranceCondition": {
"comeInWithGMode": {
"mode": "any",
"morphed": false
}
},
"requires": [],
"exitCondition": {
"leaveWithGMode": {
"morphed": false
}
}
},
{
"link": [
1,
4
],
"name": "Carry G-Mode Morph Through Tube (Left to Right)",
"notable": false,
"entranceCondition": {
"comeInWithGMode": {
"mode": "any",
"morphed": true
}
},
"requires": [
{
  "or": [
    "Morph",
    "h_canArtificialMorphSpringBall",
    {
      "and": [
        "Gravity",
        "h_canArtificialMorphIBJ"
      ]
    },
    {
      "and": [
        "Gravity",
        "h_canArtificialMorphBombHorizontally",
        {
          "or": [
            "h_canArtificialMorphBombThings",
            "canTrickyJump",
            {
              "enemyDamage": {
                "enemy": "Sciser",
                "type": "contact",
                "hits": 1
              }
            }
          ]
        }
      ]
    }
  ]
}
],
"exitCondition": {
"leaveWithGMode": {
"morphed": true
}
},
"note": [
"To save a bomb, it is possible but difficult to roll from the doorway onto the platform with Gravity turned off.",
"This requires backing up slightly after entering the room then quickly rolling before the crabs. It is a bit tighter in direct G-Mode."
]
},
{
"link": [
1,
4
],
"name": "Grapple Teleport",
"entranceCondition": {
"comeInWithGrappleTeleport": {
"blockPositions": [
[
12,
12
],
[
12,
13
]
]
}
},
"requires": [],
"bypassesDoorShell": true
},
{
"link": [
1,
4
],
"name": "Carry Grapple Teleport (Top Position)",
"entranceCondition": {
"comeInWithGrappleTeleport": {
"blockPositions": [
[
12,
12
]
]
}
},
"requires": [],
"bypassesDoorShell": true,
"exitCondition": {
"leaveWithGrappleTeleport": {
"blockPositions": [
[
12,
12
]
]
}
}
},
{
"link": [
1,
4
],
"name": "Carry Grapple Teleport (Bottom Position)",
"entranceCondition": {
"comeInWithGrappleTeleport": {
"blockPositions": [
[
12,
13
]
]
}
},
"requires": [],
"bypassesDoorShell": true,
"exitCondition": {
"leaveWithGrappleTeleport": {
"blockPositions": [
[
12,
13
]
]
}
}
},
{
"link": [
2,
1
],
"name": "Base",
"requires": [
"Morph",
"Gravity",
{
"or": [
"h_canFly",
{
"and": [
"HiJump",
"canWalljump"
]
},
{
"and": [
"HiJump",
"canSpringBallJumpMidAir"
]
}
]
}
]
},
{
"link": [
2,
1
],
"name": "Gravity Jump",
"requires": [
"Morph",
"canGravityJump"
]
},
{
"link": [
2,
1
],
"name": "Suited TrickyDashJump",
"requires": [
"canMidAirMorph",
"Gravity",
"canWalljump",
"canTrickyDashJump"
],
"note": "Jump the first frame after running to gain just enough spinjump height."
},
{
"link": [
2,
1
],
"name": "Frozen Crab",
"requires": [
"canMidAirMorph",
"canUseFrozenEnemies",
{
"or": [
{
"and": [
"Gravity",
{
"or": [
"HiJump",
"canWalljump",
"canSpringBallJumpMidAir",
"canTrickyUseFrozenEnemies"
]
}
]
},
{
"and": [
"HiJump",
"canSpringBallJumpMidAir",
"canSuitlessMaridia"
]
}
]
}
],
"note": [
"Freeze a crab on the edge of the hole in the ceiling.",
"Then get on top of it with Gravity and a wall jump, jump assist, or second frozen crab on the ground,",
"or a suitless Spring Ball jump with HiJump."
]
},
{
"link": [
2,
1
],
"name": "Crab Hole Left-Side X-Ray Climb",
"entranceCondition": {
"comeInWithDoorStuckSetup": {}
},
"requires": [
"canXRayClimb"
],
"note": "Climb up 1 screen."
},
{
"link": [
2,
1
],
"name": "Suitless HiJump",
"requires": [
"canMidAirMorph",
"canSuitlessMaridia",
"canTrickyUseFrozenEnemies",
"HiJump",
{
"or": [
"canCrouchJump",
"canDownGrab"
]
}
],
"note": [
"Stand on a frozen crab, then freeze a second one on the edge of the hole above.",
"Use a crouch jump and/or down grab to get onto the crab above."
]
},
{
"link": [
2,
1
],
"name": "Suitless Springball",
"requires": [
"canSuitlessMaridia",
"canTrickyJump",
{
"ammo": {
"type": "Super",
"count": 1
}
},
"canTrickyUseFrozenEnemies",
"canSpringBallJumpMidAir"
],
"note": "Use a Super to knock off a crab and freeze it mid-air. Freeze a second crab on the edge of the hole above."
},
{
"link": [
2,
1
],
"name": "Crab Hole Suitless Crab Climb No Jump Assist",
"notable": true,
"requires": [
"canMidAirMorph",
"canSuitlessMaridia",
{
"ammo": {
"type": "Super",
"count": 1
}
},
"canTrickyUseFrozenEnemies"
],
"note": [
"Use a super to knock off a crab and freeze it mid-air. Then get on that crab, possibly using a door ledge",
"Freeze a second crab on the edge of the hole above."
]
},
{
"link": [
2,
1
],
"name": "Crab Hole Suitless Crab Climb Superless with Springball",
"notable": true,
"requires": [
"canSuitlessMaridia",
"canTrickyJump",
"canTrickySpringBallJump",
"canTrickyUseFrozenEnemies",
"canStationaryLateralMidAirMorph"
],
"note": [
"Freeze one crab on the lip of the overhead opening and another on the edge of a doors platform then springballjump up.",
"Use a Stationary Lateral Mid-Air Morph to gain enough jump height without bonking the ceiling.",
"It is possible with a crouch jump to not need the second crab."
],
"devNote": "It is possible without canStationaryLateralMidAirMorph, but very precise."
},
{
"link": [
2,
1
],
"name": "Crab Hole Cross Room Jump with Kago",
"notable": true,
"entranceCondition": {
"comeInJumping": {
"speedBooster": false,
"minTiles": 3.4375
}
},
"requires": [
"canMidAirMorph",
"canCrossRoomJumpIntoWater",
"canMomentumConservingTurnaround",
"canKago",
{
  "enemyDamage": {
    "enemy": "Sciser",
    "type": "contact",
    "hits": 1
  }
}
],
"reusableRoomwideNotable": "Crab Hole Cross Room Jump Morph",
"note": [
"Requires a runway of at least 4 tiles (with no open end) in the adjacent room.",
"Use a Cross Room Jump into Water followed by a delayed Momentum Conserving Turnaround to reach the Morph tunnel above.",
"Climbing the Left side of the center hole will run into an unavoidable Scisor that can be passed through by Morphing.",
"Crossing to the right from the left door requires slightly more runway and takes a more precise turnaround.",
"Samus must also stay near a side of the center hole to reach the Morph tunnels."
]
},
{
"link": [
2,
1
],
"name": "Crab Hole Cross Room Jump with Air Ball",
"notable": true,
"entranceCondition": {
"comeInJumping": {
"speedBooster": false,
"minTiles": 5.4375
}
},
"requires": [
"canCrossRoomJumpIntoWater",
"canLateralMidAirMorph",
"canMomentumConservingTurnaround"
],
"reusableRoomwideNotable": "Crab Hole Cross Room Jump Morph",
"note": [
"Only requires a runway of 6 tiles (with no open end) in the adjacent room.",
"Perform an air ball while against the ceiling to make it up and through the morph tunnel.",
"Use a Cross Room Jump into Water followed by a delayed Momentum Conserving Turnaround to reach the Morph tunnel above.",
"Crossing to the right from the left door requires a more precise turnaround or morph timing which slides along the ceiling.",
"Samus must also stay near a side of the center hole to reach the Morph tunnels."
]
},
{
"link": [
2,
1
],
"name": "Double Springball Jump",
"requires": [
"canSuitlessMaridia",
"h_canDoubleSpringBallJumpWithHiJump"
]
},
{
"link": [
2,
2
],
"name": "Leave with Runway",
"requires": [],
"exitCondition": {
"leaveWithRunway": {
"length": 2,
"openEnd": 1
}
}
},
{
"link": [
2,
2
],
"name": "Leave With Runway - Frozen Sciser",
"requires": [
"h_canFrozenEnemyRunway"
],
"exitCondition": {
"leaveWithRunway": {
"length": 3,
"openEnd": 1
}
}
},
{
"link": [
2,
2
],
"name": "Sciser Farm",
"requires": [
"h_canNavigateUnderwater",
{
"resetRoom": {
"nodes": [
2,
3
],
"mustStayPut": false
}
},
{
"refill": [
"Energy",
"PowerBomb"
]
}
]
},
{
"link": [
2,
2
],
"name": "Crystal Flash",
"requires": [
"h_canCrystalFlash"
]
},
{
"link": [
2,
2
],
"name": "G-Mode Setup - Get Hit By Sciser",
"notable": false,
"requires": [],
"exitCondition": {
"leaveWithGModeSetup": {}
}
},
{
"link": [
2,
2
],
"name": "G-Mode Regain Mobility",
"requires": [
{
"enemyDamage": {
"enemy": "Sciser",
"type": "contact",
"hits": 1
}
}
],
"gModeRegainMobility": {}
},
{
"link": [
2,
3
],
"name": "Base",
"requires": []
},
{
"link": [
2,
3
],
"name": "Come In Shinecharged, Leave Sparking",
"entranceCondition": {
"comeInShinecharged": {
"framesRequired": 25
}
},
"requires": [
{
  "shinespark": {
    "frames": 23
  }
}
],
"exitCondition": {
"leaveWithSpark": {}
},
"unlocksDoors": [
{
"types": [
"super"
],
"requires": []
},
{
"types": [
"missiles",
"powerbomb"
],
"requires": [
"never"
]
}
]
},
{
"link": [
2,
4
],
"name": "Grapple Teleport",
"entranceCondition": {
"comeInWithGrappleTeleport": {
"blockPositions": [
[
12,
12
],
[
12,
13
]
]
}
},
"requires": [],
"bypassesDoorShell": true
},
{
"link": [
2,
4
],
"name": "Carry Grapple Teleport (Top Position)",
"entranceCondition": {
"comeInWithGrappleTeleport": {
"blockPositions": [
[
12,
12
]
]
}
},
"requires": [],
"bypassesDoorShell": true,
"exitCondition": {
"leaveWithGrappleTeleport": {
"blockPositions": [
[
12,
12
]
]
}
}
},
{
"link": [
2,
4
],
"name": "Carry Grapple Teleport (Bottom Position)",
"entranceCondition": {
"comeInWithGrappleTeleport": {
"blockPositions": [
[
12,
13
]
]
}
},
"requires": [],
"bypassesDoorShell": true,
"exitCondition": {
"leaveWithGrappleTeleport": {
"blockPositions": [
[
12,
13
]
]
}
}
},
{
"link": [
2,
5
],
"name": "G-Mode (Bottom to Top)",
"notable": false,
"entranceCondition": {
"comeInWithGMode": {
"mode": "any",
"morphed": false
}
},
"requires": [
"Morph",
"h_canNavigateUnderwater",
{
"or": [
"canGravityJump",
{
"and": [
"Gravity",
"HiJump",
{
"or": [
"canSpringBallJumpMidAir",
"canWalljump"
]
}
]
},
{
"and": [
"canTrickyUseFrozenEnemies",
"HiJump",
"h_canCrouchJumpDownGrab"
]
},
{
"and": [
{
"ammo": {
"type": "Super",
"count": 1
}
},
"canTrickyUseFrozenEnemies",
"canOffScreenMovement"
]
},
{
"and": [
"canTrickyJump",
"canSpringBallJumpMidAir",
"canTrickyUseFrozenEnemies",
"canOffScreenMovement"
]
}
]
}
]
},
{
"link": [
2,
5
],
"name": "G-Mode Morph IBJ (Bottom to Top)",
"notable": false,
"entranceCondition": {
"comeInWithGMode": {
"mode": "any",
"morphed": true
}
},
"requires": [
"Gravity",
"h_canArtificialMorphIBJ"
],
"note": [
"One method to kill the crabs is to wait on the central platform until a crab comes near, then move with it laying bombs in its path.",
"Another is to wait in the doorway and place three bombs to hit it while bouncing over it.",
"The top of the IBJ will be off camera. Starting the IBJ as far to either side as possible and holding forward once off camera will make it easier to get through the morph tunnel."
]
},
{
"link": [
2,
5
],
"name": "G-Mode Morph Gravity Jump (Bottom to Top)",
"notable": false,
"entranceCondition": {
"comeInWithGMode": {
"mode": "any",
"morphed": true
}
},
"requires": [
"canGravityJump",
"h_canArtificialMorphSpringBall"
],
"note": [
"The shaft will be clear of crabs on room entry. Quickly gravity jump before the bottom crab enters the shaft and exit the left morph tunnel to be safe.",
"This is a bit tighter when entering in G-Mode Immobile."
]
},
{
"link": [
3,
1
],
"name": "Grapple Teleport",
"entranceCondition": {
"comeInWithGrappleTeleport": {
"blockPositions": [
[
7,
2
]
]
}
},
"requires": []
},
{
"link": [
3,
1
],
"name": "Grapple Teleport Door Lock Skip",
"entranceCondition": {
"comeInWithGrappleTeleport": {
"blockPositions": [
[
3,
12
],
[
3,
13
]
]
}
},
"requires": [],
"bypassesDoorShell": true
},
{
"link": [
3,
1
],
"name": "Carry Grapple Teleport (Top Position)",
"entranceCondition": {
"comeInWithGrappleTeleport": {
"blockPositions": [
[
3,
12
]
]
}
},
"requires": [],
"bypassesDoorShell": true,
"exitCondition": {
"leaveWithGrappleTeleport": {
"blockPositions": [
[
3,
12
]
]
}
}
},
{
"link": [
3,
1
],
"name": "Carry Grapple Teleport (Bottom Position)",
"entranceCondition": {
"comeInWithGrappleTeleport": {
"blockPositions": [
[
3,
13
]
]
}
},
"requires": [],
"bypassesDoorShell": true,
"exitCondition": {
"leaveWithGrappleTeleport": {
"blockPositions": [
[
3,
13
]
]
}
}
},
{
"link": [
3,
2
],
"name": "Base",
"requires": []
},
{
"link": [
3,
2
],
"name": "Come In Shinecharged, Leave Sparking",
"entranceCondition": {
"comeInShinecharged": {
"framesRequired": 25
}
},
"requires": [
{
  "shinespark": {
    "frames": 23
  }
}
],
"exitCondition": {
"leaveWithSpark": {}
},
"unlocksDoors": [
{
"types": [
"super"
],
"requires": []
},
{
"types": [
"missiles",
"powerbomb"
],
"requires": [
"never"
]
}
]
},
{
"link": [
3,
2
],
"name": "Grapple Teleport",
"entranceCondition": {
"comeInWithGrappleTeleport": {
"blockPositions": [
[
2,
18
],
[
2,
19
],
[
2,
28
],
[
2,
29
]
]
}
},
"requires": [],
"bypassesDoorShell": true
},
{
"link": [
3,
2
],
"name": "Carry Grapple Teleport (Top Position)",
"entranceCondition": {
"comeInWithGrappleTeleport": {
"blockPositions": [
[
2,
18
]
]
}
},
"requires": [],
"bypassesDoorShell": true,
"exitCondition": {
"leaveWithGrappleTeleport": {
"blockPositions": [
[
2,
18
]
]
}
}
},
{
"link": [
3,
2
],
"name": "Carry Grapple Teleport (Upper Middle Position)",
"entranceCondition": {
"comeInWithGrappleTeleport": {
"blockPositions": [
[
2,
19
]
]
}
},
"requires": [],
"bypassesDoorShell": true,
"exitCondition": {
"leaveWithGrappleTeleport": {
"blockPositions": [
[
2,
19
]
]
}
}
},
{
"link": [
3,
2
],
"name": "Carry Grapple Teleport (Lower Middle Position)",
"entranceCondition": {
"comeInWithGrappleTeleport": {
"blockPositions": [
[
2,
28
]
]
}
},
"requires": [],
"bypassesDoorShell": true,
"exitCondition": {
"leaveWithGrappleTeleport": {
"blockPositions": [
[
2,
28
]
]
}
}
},
{
"link": [
3,
2
],
"name": "Carry Grapple Teleport (Bottom Position)",
"entranceCondition": {
"comeInWithGrappleTeleport": {
"blockPositions": [
[
2,
29
]
]
}
},
"requires": [],
"bypassesDoorShell": true,
"exitCondition": {
"leaveWithGrappleTeleport": {
"blockPositions": [
[
2,
29
]
]
}
}
},
{
"link": [
3,
3
],
"name": "Leave with Runway",
"requires": [],
"exitCondition": {
"leaveWithRunway": {
"length": 2,
"openEnd": 1
}
}
},
{
"link": [
3,
3
],
"name": "Leave With Runway - Frozen Sciser",
"requires": [
"h_canFrozenEnemyRunway"
],
"exitCondition": {
"leaveWithRunway": {
"length": 3,
"openEnd": 1
}
}
},
{
"link": [
3,
3
],
"name": "G-Mode Setup - Get Hit By Sciser",
"notable": false,
"requires": [],
"exitCondition": {
"leaveWithGModeSetup": {}
}
},
{
"link": [
3,
3
],
"name": "G-Mode Regain Mobility",
"requires": [
{
  "enemyDamage": {
    "enemy": "Sciser",
    "type": "contact",
    "hits": 1
  }
}
],
"gModeRegainMobility": {}
},
{
"link": [
3,
4
],
"name": "Crab Hole Right-Side X-Ray Climb",
"entranceCondition": {
"comeInWithDoorStuckSetup": {}
},
"requires": [
"canXRayClimb"
],
"note": "Climb up 1 screen."
},
{
"link": [
3,
4
],
"name": "Crab Hole Cross Room Jump",
"notable": true,
"entranceCondition": {
"comeInJumping": {
"speedBooster": false,
"minTiles": 3.4375
}
},
"requires": [
"Morph",
"canCrossRoomJumpIntoWater",
"canMomentumConservingTurnaround"
],
"reusableRoomwideNotable": "Crab Hole Cross Room Jump Morph",
"note": [
"Requires a runway of at least 4 tiles (with no open end) in the adjacent room.",
"Use a Cross Room Jump into Water followed by a delayed Momentum Conserving Turnaround to reach the Morph tunnel above.",
"Climbing the Left side of the center hole will run into an unavoidable Scisor.",
"Samus must also stay near a side of the center hole to reach the Morph tunnels."
]
},
{
"link": [
3,
5
],
"name": "G-Mode (Bottom to Top)",
"notable": false,
"entranceCondition": {
"comeInWithGMode": {
"mode": "any",
"morphed": false
}
},
"requires": [
"Morph",
"h_canNavigateUnderwater",
{
"or": [
"canGravityJump",
{
"and": [
"Gravity",
"HiJump",
{
"or": [
"canSpringBallJumpMidAir",
"canWalljump"
]
}
]
},
{
"and": [
"canTrickyUseFrozenEnemies",
"HiJump",
"h_canCrouchJumpDownGrab"
]
},
{
"and": [
{
"ammo": {
"type": "Super",
"count": 1
}
},
"canTrickyUseFrozenEnemies",
"canOffScreenMovement"
]
},
{
"and": [
"canTrickyJump",
"canSpringBallJumpMidAir",
"canTrickyUseFrozenEnemies",
"canOffScreenMovement"
]
}
]
}
]
},
{
"link": [
3,
5
],
"name": "G-Mode Morph IBJ (Bottom to Top)",
"notable": false,
"entranceCondition": {
"comeInWithGMode": {
"mode": "any",
"morphed": true
}
},
"requires": [
"Gravity",
"h_canArtificialMorphIBJ"
],
"note": [
"One method to kill the crabs is to wait on the central platform until a crab comes near, then move with it laying bombs in its path.",
"Another is to wait in the doorway and place three bombs to hit it while bouncing over it.",
"The top of the IBJ will be off camera. Starting the IBJ as far to either side as possible and holding forward once off camera will make it easier to get through the morph tunnel."
]
},
{
"link": [
3,
5
],
"name": "G-Mode Morph Gravity Jump (Bottom to Top)",
"notable": false,
"entranceCondition": {
"comeInWithGMode": {
"mode": "any",
"morphed": true
}
},
"requires": [
"canGravityJump",
"h_canArtificialMorphSpringBall"
],
"note": [
"The shaft will be clear of crabs on room entry. Quickly gravity jump before the bottom crab enters the shaft and exit the left morph tunnel to be safe.",
"The same strategy works when entering in G-Mode Immobile. Move to the center platform and gravity jump shortly after getting hit."
]
},
{
"link": [
4,
1
],
"name": "Base",
"requires": []
},
{
"link": [
4,
1
],
"name": "Shinespark Through Room",
"entranceCondition": {
"comeInWithSpark": {}
},
"requires": [
{
  "or": [
    {
      "shinespark": {
        "frames": 24
      }
    },
    {
      "and": [
        "Gravity",
        {
          "shinespark": {
            "frames": 21
          }
        }
      ]
    }
  ]
}
],
"exitCondition": {
"leaveWithSpark": {}
}
},
{
"link": [
4,
1
],
"name": "Come In Shinecharging, Leave Shinecharged",
"entranceCondition": {
"comeInShinecharging": {
"length": 2,
"openEnd": 0
}
},
"requires": [
"Gravity",
"canShinechargeMovement"
],
"exitCondition": {
"leaveShinecharged": {
"framesRemaining": 80
}
}
},
{
"link": [
4,
1
],
"name": "Carry G-Mode Through Tube (Right to Left)",
"notable": false,
"entranceCondition": {
"comeInWithGMode": {
"mode": "any",
"morphed": false
}
},
"requires": [],
"exitCondition": {
"leaveWithGMode": {
"morphed": false
}
}
},
{
"link": [
4,
1
],
"name": "Carry G-Mode Morph Through Tube (Right to Left)",
"notable": false,
"entranceCondition": {
"comeInWithGMode": {
"mode": "any",
"morphed": true
}
},
"requires": [
{
  "or": [
    "Morph",
    "h_canArtificialMorphSpringBall",
    {
      "and": [
        "Gravity",
        "h_canArtificialMorphIBJ"
      ]
    },
    {
      "and": [
        "Gravity",
        "h_canArtificialMorphBombHorizontally"
      ]
    }
  ]
}
],
"exitCondition": {
"leaveWithGMode": {
"morphed": true
}
},
"note": "To save a bomb, it is possible to roll from the doorway onto the platform with Gravity turned off."
},
{
"link": [
4,
1
],
"name": "Grapple Teleport Door Lock Skip",
"entranceCondition": {
"comeInWithGrappleTeleport": {
"blockPositions": [
[
3,
12
],
[
3,
13
]
]
}
},
"requires": [],
"bypassesDoorShell": true
},
{
"link": [
4,
1
],
"name": "Carry Grapple Teleport (Top Position)",
"entranceCondition": {
"comeInWithGrappleTeleport": {
"blockPositions": [
[
3,
12
]
]
}
},
"requires": [],
"bypassesDoorShell": true,
"exitCondition": {
"leaveWithGrappleTeleport": {
"blockPositions": [
[
3,
12
]
]
}
}
},
{
"link": [
4,
1
],
"name": "Carry Grapple Teleport (Bottom Position)",
"entranceCondition": {
"comeInWithGrappleTeleport": {
"blockPositions": [
[
3,
13
]
]
}
},
"requires": [],
"bypassesDoorShell": true,
"exitCondition": {
"leaveWithGrappleTeleport": {
"blockPositions": [
[
3,
13
]
]
}
}
},
{
"link": [
4,
2
],
"name": "G-Mode Morph",
"entranceCondition": {
"comeInWithGMode": {
"mode": "any",
"morphed": true
}
},
"requires": []
},
{
"link": [
4,
2
],
"name": "Grapple Teleport",
"entranceCondition": {
"comeInWithGrappleTeleport": {
"blockPositions": [
[
2,
18
],
[
2,
19
],
[
2,
28
],
[
2,
29
]
]
}
},
"requires": [],
"bypassesDoorShell": true
},
{
"link": [
4,
2
],
"name": "Carry Grapple Teleport (Top Position)",
"entranceCondition": {
"comeInWithGrappleTeleport": {
"blockPositions": [
[
2,
18
]
]
}
},
"requires": [],
"bypassesDoorShell": true,
"exitCondition": {
"leaveWithGrappleTeleport": {
"blockPositions": [
[
2,
18
]
]
}
}
},
{
"link": [
4,
2
],
"name": "Carry Grapple Teleport (Upper Middle Position)",
"entranceCondition": {
"comeInWithGrappleTeleport": {
"blockPositions": [
[
2,
19
]
]
}
},
"requires": [],
"bypassesDoorShell": true,
"exitCondition": {
"leaveWithGrappleTeleport": {
"blockPositions": [
[
2,
19
]
]
}
}
},
{
"link": [
4,
2
],
"name": "Carry Grapple Teleport (Lower Middle Position)",
"entranceCondition": {
"comeInWithGrappleTeleport": {
"blockPositions": [
[
2,
28
]
]
}
},
"requires": [],
"bypassesDoorShell": true,
"exitCondition": {
"leaveWithGrappleTeleport": {
"blockPositions": [
[
2,
28
]
]
}
}
},
{
"link": [
4,
2
],
"name": "Carry Grapple Teleport (Bottom Position)",
"entranceCondition": {
"comeInWithGrappleTeleport": {
"blockPositions": [
[
2,
29
]
]
}
},
"requires": [],
"bypassesDoorShell": true,
"exitCondition": {
"leaveWithGrappleTeleport": {
"blockPositions": [
[
2,
29
]
]
}
}
},
{
"link": [
4,
4
],
"name": "Leave with Runway",
"requires": [],
"exitCondition": {
"leaveWithRunway": {
"length": 3,
"openEnd": 1
}
}
},
{
"link": [
4,
4
],
"name": "Leave With Runway - Frozen Sciser",
"requires": [
"h_canFrozenEnemyRunway"
],
"exitCondition": {
"leaveWithRunway": {
"length": 4,
"openEnd": 1
}
}
},
{
"link": [
4,
4
],
"name": "G-Mode Setup - Get Hit By Sciser",
"notable": false,
"requires": [],
"exitCondition": {
"leaveWithGModeSetup": {}
}
},
{
"link": [
4,
4
],
"name": "G-Mode Regain Mobility",
"requires": [
{
  "enemyDamage": {
    "enemy": "Sciser",
    "type": "contact",
    "hits": 1
  }
}
],
"gModeRegainMobility": {}
},
{
"link": [
5,
1
],
"name": "Exit G-Mode",
"requires": []
},
{
"link": [
5,
1
],
"name": "Carry G-Mode Morph Left",
"requires": [],
"exitCondition": {
"leaveWithGMode": {
"morphed": true
}
}
},
{
"link": [
5,
4
],
"name": "Carry G-Mode Morph Right",
"requires": [],
"exitCondition": {
"leaveWithGMode": {
"morphed": true
}
}
}
]
}