Bug Sand Hole
Room ID: 211

|
Exit condition: {
"leaveWithRunway": {
"length": 1,
"openEnd": 1
}
}
|
|
Freeze the Yapping Maw on room entry, and continue to periodically refreeze it throughout. Jump and freeze the Zoa at the correct height, noting that it will rise one more pixel after it thaws. Maintain a half-tile runway between the frozen Zoa and the runway in order to extend it as much as possible. Requires: "h_canFrozenEnemyRunway" Exit condition: {
"leaveWithRunway": {
"length": 3,
"openEnd": 0
}
}
|
|
Requires: "h_canCrystalFlash" |
|
Exit condition: {
"leaveWithGModeSetup": {}
}
|
|
Requires: {
"enemyDamage": {
"enemy": "Zoa",
"type": "contact",
"hits": 1
}
}
|
|
Entrance condition: {
"comeInWithGMode": {
"mode": "any",
"morphed": false
}
}
Exit condition: {
"leaveWithGMode": {
"morphed": false
}
}
|
|
Entrance condition: {
"comeInWithGMode": {
"mode": "any",
"morphed": true
}
}
Exit condition: {
"leaveWithGMode": {
"morphed": true
}
}
|
|
Requires: "SpaceJump" |
|
Entrance condition: {
"comeInJumping": {
"speedBooster": "any",
"minTiles": 0.4375
}
}
Requires: "SpaceJump" "canPrepareForNextRoom" |
|
From: 1
Left Door
To: 3
Right Door
Notable: true 
From the doorframe, wait for the Zoa to rise out of the water, then use it to damage boost into the open opposite door. Requires: "canSuitlessMaridia"
"canTrickyJump"
"canHorizontalDamageBoost"
{
  "enemyDamage": {
    "enemy": "Zoa",
    "type": "contact",
    "hits": 1
  }
}
|
|
From: 1
Left Door
To: 3
Right Door
Notable: true 
Build up run speed and jump into the transition to cross this room without touching the water. Shoot open the opposite door upon entering and morph before touching the ceiling to bounce into the open door. Entrance condition: {
"comeInJumping": {
"speedBooster": "any",
"minTiles": 6
}
}
Requires: "Morph" "canTrickyJump" "canLateralMidAirMorph" |
|
From: 1
Left Door
To: 3
Right Door
Notable: true
Build up run speed and jump into the transition to cross this room without touching the water. Shoot open the opposite door upon entering and morph before touching the ceiling to bounce into the open door. Entrance condition: {
"comeInJumping": {
"speedBooster": true,
"minTiles": 5
}
}
Requires: "Morph" "canTrickyJump" "canLateralMidAirMorph" |
|
Enter with a high shinespark through the door then shoot the opposite door and fall into it. Entrance condition: {
"comeInWithSpark": {
"position": "top"
}
}
Requires: "canMidairShinespark"
"canPrepareForNextRoom"
{
"shinespark": {
"frames": 20
}
}
|
|
Entrance condition: {
"comeInWithGrappleTeleport": {
"blockPositions": [
[
12,
12
],
[
12,
13
]
]
}
}
Bypasses door shell: true |
|
Entrance condition: {
"comeInWithGrappleTeleport": {
"blockPositions": [
[
12,
12
]
]
}
}
Exit condition: {
"leaveWithGrappleTeleport": {
"blockPositions": [
[
12,
12
]
]
}
}
Bypasses door shell: true |
|
Entrance condition: {
"comeInWithGrappleTeleport": {
"blockPositions": [
[
12,
13
]
]
}
}
Exit condition: {
"leaveWithGrappleTeleport": {
"blockPositions": [
[
12,
13
]
]
}
}
Bypasses door shell: true |
|
|
|
Exit condition: {
"leaveNormally": {}
}
|
|
Requires: "SpaceJump" |
|
Entrance condition: {
"comeInJumping": {
"speedBooster": "any",
"minTiles": 0.4375
}
}
Requires: "SpaceJump" "canPrepareForNextRoom" |
|
From: 3
Right Door
To: 1
Left Door
Notable: true
From the doorframe, wait for the Zoa to rise out of the water, then use it to damage boost into the open opposite door. Requires: "canTrickyJump"
"canHorizontalDamageBoost"
{
  "enemyDamage": {
    "enemy": "Zoa",
    "type": "contact",
    "hits": 1
  }
}
|
|
From: 3
Right Door
To: 1
Left Door
Notable: true
Build up run speed and jump into the transition to cross this room without touching the water. Shoot open the opposite door upon entering and morph before touching the ceiling to bounce into the open door. Entrance condition: {
"comeInJumping": {
"speedBooster": "any",
"minTiles": 6
}
}
Requires: "Morph" "canTrickyJump" "canLateralMidAirMorph" |
|
From: 3
Right Door
To: 1
Left Door
Notable: true
Build up run speed and jump into the transition to cross this room without touching the water. Shoot open the opposite door upon entering and morph before touching the ceiling to bounce into the open door. Entrance condition: {
"comeInJumping": {
"speedBooster": true,
"minTiles": 5
}
}
Requires: "Morph" "canTrickyJump" "canLateralMidAirMorph" |
|
Enter with a high shinespark through the door then shoot the opposite door and fall into it. Entrance condition: {
"comeInWithSpark": {
"position": "top"
}
}
Requires: "canMidairShinespark"
"canPrepareForNextRoom"
{
"shinespark": {
"frames": 20
}
}
|
|
Entrance condition: {
"comeInWithGrappleTeleport": {
"blockPositions": [
[
3,
13
]
]
}
}
Bypasses door shell: true |
|
Entrance condition: {
"comeInWithGrappleTeleport": {
"blockPositions": [
[
3,
13
]
]
}
}
Exit condition: {
"leaveWithGrappleTeleport": {
"blockPositions": [
[
3,
13
]
]
}
}
Bypasses door shell: true |
|
Entrance condition: {
"comeInWithGMode": {
"mode": "any",
"morphed": false
}
}
Exit condition: {
"leaveWithGMode": {
"morphed": false
}
}
|
|
Entrance condition: {
"comeInWithGMode": {
"mode": "any",
"morphed": true
}
}
Exit condition: {
"leaveWithGMode": {
"morphed": true
}
}
|
|
Exit condition: {
"leaveWithRunway": {
"length": 1,
"openEnd": 1
}
}
|
|
Freeze the Yapping Maw on room entry, and continue to periodically refreeze it throughout. Jump and freeze the Zoa at the correct height, noting that it will rise one more pixel after it thaws. Maintain a half-tile runway between the frozen Zoa and the runway in order to extend it as much as possible. Requires: "h_canFrozenEnemyRunway" Exit condition: {
"leaveWithRunway": {
"length": 3,
"openEnd": 0
}
}
|
|
Requires: "h_canCrystalFlash" |
|
Exit condition: {
"leaveWithGModeSetup": {}
}
|
|
Requires: {
"enemyDamage": {
"enemy": "Zoa",
"type": "contact",
"hits": 1
}
}
|
|
|
|
Requires: {
"or": [
"Gravity",
{
"and": [
"canSuitlessMaridia",
"HiJump"
]
}
]
}
{
"doorUnlockedAtNode": 1
}
Unlocks doors: {"nodeId":1,"types":["missiles"],"requires":["canDodgeWhileShooting"]}
{"nodeId":1,"types":["super"],"requires":[]}
{"nodeId":1,"types":["powerbomb"],"requires":["canTrickyJump"]}
|
|
Escape by wall jumping when the water is low or using a crouch jump and down grab when it's high. Requires: "canSuitlessMaridia"
"canCarefulJump"
{
"or": [
"canWalljump",
"h_canCrouchJumpDownGrab",
"canTrickySpringBallJump"
]
}
{
"doorUnlockedAtNode": 1
}
Unlocks doors: {"nodeId":1,"types":["missiles"],"requires":["canDodgeWhileShooting"]}
{"nodeId":1,"types":["super"],"requires":[]}
{"nodeId":1,"types":["powerbomb"],"requires":["canTrickyJump"]}
|
|
Escape by wall jumping when the water is low or using a crouch jump and down grab when it's high. Requires: "canSuitlessMaridia"
{
"ammo": {
"type": "Super",
"count": 1
}
}
{
"or": [
"canWalljump",
"h_canCrouchJumpDownGrab",
"canTrickySpringBallJump"
]
}
{
"doorUnlockedAtNode": 1
}
Unlocks doors: {"nodeId":1,"types":["ammo"],"requires":[]}
|
|
Keep freezing the Yapping Maw while using a frozen bug to escape. Requires: "canSuitlessMaridia"
"canUseFrozenEnemies"
{
"doorUnlockedAtNode": 1
}
Unlocks doors: {"nodeId":1,"types":["ammo"],"requires":[]}
|
|
|
|
Requires: "Gravity" |
|
From: 4
Junction Below Left Door
To: 5
Junction Below Right Door
Kill the Zoa while avoiding the Yapping Maw, then cross the sand. Spring ball can be used to help cross the sand. Requires: "canSuitlessMaridia"
"HiJump"
{
"or": [
"canPlayInSand",
"h_canUseSpringBall",
"SpaceJump"
]
}
|
|
From: 4
Junction Below Left Door
To: 5
Junction Below Right Door
Freeze the Zoa as it spawns and jump on it then jump across the room. Freeze any Yapping Maws that attack and use them or a frozen Zoa as a platform to leave. Requires: "canSuitlessMaridia" "canUseFrozenEnemies" "canCarefulJump" |
|
From: 4
Junction Below Left Door
To: 5
Junction Below Right Door
Requires: "canSuitlessMaridia"
"canPlayInSand"
{
"ammo": {
"type": "Super",
"count": 1
}
}
|
|
From: 4
Junction Below Left Door
To: 5
Junction Below Right Door
Notable: true 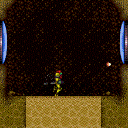
Avoid the Yapping Maw after entering by not standing in one place for too long. Kill the Zoa and quickly jump across the sand. Hitting the Zoas will drop Samus deep into the sand below. Requires: "canSuitlessMaridia" "canTrickyJump" "canPlayInSand" |
|
|
|
Requires: {
"or": [
"Gravity",
{
"and": [
"canSuitlessMaridia",
"HiJump"
]
}
]
}
{
"doorUnlockedAtNode": 3
}
Unlocks doors: {"nodeId":3,"types":["missiles"],"requires":["canDodgeWhileShooting"]}
{"nodeId":3,"types":["super"],"requires":[]}
{"nodeId":3,"types":["powerbomb"],"requires":["canTrickyJump"]}
|
|
Escape by wall jumping when the water is low or using a crouch jump and down grab when it's high. Requires: "canSuitlessMaridia"
"canCarefulJump"
{
"or": [
"canWalljump",
"h_canCrouchJumpDownGrab",
"canTrickySpringBallJump"
]
}
{
"doorUnlockedAtNode": 3
}
Unlocks doors: {"nodeId":3,"types":["missiles"],"requires":["canDodgeWhileShooting"]}
{"nodeId":3,"types":["super"],"requires":[]}
{"nodeId":3,"types":["powerbomb"],"requires":["canTrickyJump"]}
|
|
From: 5
Junction Below Right Door
To: 3
Right Door
Escape by wall jumping when the water is low or using a crouch jump and down grab when it's high. Requires: "canSuitlessMaridia"
{
"ammo": {
"type": "Super",
"count": 1
}
}
{
"or": [
"canWalljump",
"h_canCrouchJumpDownGrab",
"canTrickySpringBallJump"
]
}
{
"doorUnlockedAtNode": 3
}
Unlocks doors: {"nodeId":3,"types":["ammo"],"requires":[]}
|
|
Keep freezing the Yapping Maw while using a frozen bug to escape. Requires: "canSuitlessMaridia"
"canUseFrozenEnemies"
{
"doorUnlockedAtNode": 3
}
Unlocks doors: {"nodeId":3,"types":["ammo"],"requires":[]}
|
|
Requires: "Gravity" |
|
From: 5
Junction Below Right Door
To: 4
Junction Below Left Door
Kill the Zoa while avoiding the Yapping Maw, then cross the sand. Spring ball can be used to help cross the sand. Requires: "canSuitlessMaridia"
"HiJump"
{
"or": [
"canPlayInSand",
"h_canUseSpringBall",
"SpaceJump"
]
}
|
|
From: 5
Junction Below Right Door
To: 4
Junction Below Left Door
Freeze the Zoa as it spawns and jump on it then jump across the room. Freeze any Yapping Maws that attack and use them or a frozen Zoa as a platform to leave. Requires: "canSuitlessMaridia" "canUseFrozenEnemies" "canCarefulJump" |
|
From: 5
Junction Below Right Door
To: 4
Junction Below Left Door
Requires: "canSuitlessMaridia"
"canPlayInSand"
{
"ammo": {
"type": "Super",
"count": 1
}
}
|
|
From: 5
Junction Below Right Door
To: 4
Junction Below Left Door
Notable: true
Avoid the Yapping Maw after entering by not standing in one place for too long. Kill the Zoa and quickly jump across the sand. Hitting the Zoas will drop Samus deep into the sand below. Requires: "canSuitlessMaridia" "canTrickyJump" "canPlayInSand" |
{
"$schema": "../../../schema/m3-room.schema.json",
"id": 211,
"name": "Bug Sand Hole",
"area": "Maridia",
"subarea": "Inner",
"subsubarea": "Yellow",
"playable": true,
"roomAddress": "0x7D433",
"roomEnvironments": [
{
"heated": false
}
],
"nodes": [
{
"id": 1,
"name": "Left Door",
"nodeType": "door",
"nodeSubType": "blue",
"nodeAddress": "0x001a630",
"doorOrientation": "left",
"doorEnvironments": [
{
"physics": "air"
}
],
"spawnAt": 4
},
{
"id": 2,
"name": "Bottom Sand Exit",
"nodeType": "exit",
"nodeSubType": "sandpit",
"nodeAddress": "0x001a624",
"doorOrientation": "down"
},
{
"id": 3,
"name": "Right Door",
"nodeType": "door",
"nodeSubType": "blue",
"nodeAddress": "0x001a618",
"doorOrientation": "right",
"doorEnvironments": [
{
"physics": "air"
}
],
"spawnAt": 5
},
{
"id": 4,
"name": "Junction Below Left Door",
"nodeType": "junction",
"nodeSubType": "junction"
},
{
"id": 5,
"name": "Junction Below Right Door",
"nodeType": "junction",
"nodeSubType": "junction"
}
],
"enemies": [
{
"id": "e1",
"groupName": "Bug Sand Hole Zoa",
"enemyName": "Zoa",
"quantity": 1,
"homeNodes": [
1,
3
],
"farmCycles": [
{
"name": "Forget it",
"cycleFrames": 120,
"requires": [
"never"
],
"devNote": "Leaving this logically unfarmable until further notice because it sucks"
}
]
},
{
"id": "e2",
"groupName": "Bug Sand Hole Yapping Maws",
"enemyName": "Yapping Maw",
"quantity": 2,
"homeNodes": [
4,
5
]
}
],
"reusableRoomwideNotable": [
{
"name": "Bug Sand Hole Sand Jumps",
"note": [
"Cross the Bug Sand Hole with nothing while avoiding the enemies.",
"Juke the Yapping Maw after entering and kill the Zoa to clear a path over the sand."
]
},
{
"name": "Bug Sand Hole Damage Boost",
"note": "Wait inside the door frame of the Bug Sand Hole room while a Zoa rises out of the sand. Then use it to cross the room."
},
{
"name": "Bug Sand Hole Speedy Jump Morph",
"note": [
"With a fast enough jump into the Bug Sand Hole it is possible to cross over the water and land in the opposite door by morphing before reaching the ceiling."
]
}
],
"links": [
{
"from": 1,
"to": [
{
"id": 1
},
{
"id": 2
},
{
"id": 3
},
{
"id": 4
}
]
},
{
"from": 2,
"to": [
{
"id": 2
}
]
},
{
"from": 3,
"to": [
{
"id": 1
},
{
"id": 2
},
{
"id": 3
},
{
"id": 5
}
]
},
{
"from": 4,
"to": [
{
"id": 1
},
{
"id": 2
},
{
"id": 5
}
]
},
{
"from": 5,
"to": [
{
"id": 2
},
{
"id": 3
},
{
"id": 4
}
]
}
],
"strats": [
{
"link": [
1,
1
],
"name": "Leave with Runway",
"requires": [],
"exitCondition": {
"leaveWithRunway": {
"length": 1,
"openEnd": 1
}
}
},
{
"link": [
1,
1
],
"name": "Leave With Runway - Frozen Zoa",
"requires": [
"h_canFrozenEnemyRunway"
],
"exitCondition": {
"leaveWithRunway": {
"length": 3,
"openEnd": 0
}
},
"note": [
"Freeze the Yapping Maw on room entry, and continue to periodically refreeze it throughout.",
"Jump and freeze the Zoa at the correct height, noting that it will rise one more pixel after it thaws.",
"Maintain a half-tile runway between the frozen Zoa and the runway in order to extend it as much as possible."
]
},
{
"link": [
1,
1
],
"name": "Crystal Flash",
"requires": [
"h_canCrystalFlash"
],
"flashSuitChecked": true
},
{
"link": [
1,
1
],
"name": "G-Mode Setup - Get Hit By Zoa",
"notable": false,
"requires": [],
"exitCondition": {
"leaveWithGModeSetup": {}
},
"flashSuitChecked": true
},
{
"link": [
1,
1
],
"name": "G-Mode Regain Mobility",
"requires": [
{
"enemyDamage": {
"enemy": "Zoa",
"type": "contact",
"hits": 1
}
}
],
"gModeRegainMobility": {},
"flashSuitChecked": true
},
{
"link": [
1,
2
],
"name": "G-Mode",
"notable": false,
"entranceCondition": {
"comeInWithGMode": {
"mode": "any",
"morphed": false
}
},
"requires": [],
"exitCondition": {
"leaveWithGMode": {
"morphed": false
}
},
"flashSuitChecked": true
},
{
"link": [
1,
2
],
"name": "G-Mode Morph",
"notable": false,
"entranceCondition": {
"comeInWithGMode": {
"mode": "any",
"morphed": true
}
},
"requires": [],
"exitCondition": {
"leaveWithGMode": {
"morphed": true
}
},
"flashSuitChecked": true
},
{
"link": [
1,
3
],
"name": "Space Jump",
"requires": [
"SpaceJump"
]
},
{
"link": [
1,
3
],
"name": "Space Jump Through the Door",
"entranceCondition": {
"comeInJumping": {
"speedBooster": "any",
"minTiles": 0.4375
}
},
"requires": [
"SpaceJump",
"canPrepareForNextRoom"
],
"devNote": "This is only useful if canCarefulJump or h_canCrouchJumpDownGrab is disabled or if door 3 is locked."
},
{
"link": [
1,
3
],
"name": "Naked Bug Sand Hole Damage Boost (L to R)",
"notable": true,
"requires": [
"canSuitlessMaridia",
"canTrickyJump",
"canHorizontalDamageBoost",
{
"enemyDamage": {
"enemy": "Zoa",
"type": "contact",
"hits": 1
}
}
],
"reusableRoomwideNotable": "Bug Sand Hole Damage Boost",
"note": "From the doorframe, wait for the Zoa to rise out of the water, then use it to damage boost into the open opposite door."
},
{
"link": [
1,
3
],
"name": "Bug Sand Hole Speedy Jump Morph (L to R)",
"notable": true,
"entranceCondition": {
"comeInJumping": {
"speedBooster": "any",
"minTiles": 6
}
},
"requires": [
"Morph",
"canTrickyJump",
"canLateralMidAirMorph"
],
"reusableRoomwideNotable": "Bug Sand Hole Speedy Jump Morph",
"note": [
"Build up run speed and jump into the transition to cross this room without touching the water.",
"Shoot open the opposite door upon entering and morph before touching the ceiling to bounce into the open door."
]
},
{
"link": [
1,
3
],
"name": "Bug Sand Hole Speedy Jump Morph with Speed Booster (L to R)",
"notable": true,
"entranceCondition": {
"comeInJumping": {
"speedBooster": true,
"minTiles": 5
}
},
"requires": [
"Morph",
"canTrickyJump",
"canLateralMidAirMorph"
],
"reusableRoomwideNotable": "Bug Sand Hole Speedy Jump Morph",
"note": [
"Build up run speed and jump into the transition to cross this room without touching the water.",
"Shoot open the opposite door upon entering and morph before touching the ceiling to bounce into the open door."
]
},
{
"link": [
1,
3
],
"name": "Shinespark",
"entranceCondition": {
"comeInWithSpark": {
"position": "top"
}
},
"requires": [
"canMidairShinespark",
"canPrepareForNextRoom",
{
"shinespark": {
"frames": 20
}
}
],
"note": "Enter with a high shinespark through the door then shoot the opposite door and fall into it."
},
{
"link": [
1,
3
],
"name": "Grapple Teleport",
"entranceCondition": {
"comeInWithGrappleTeleport": {
"blockPositions": [
[
12,
12
],
[
12,
13
]
]
}
},
"requires": [],
"bypassesDoorShell": true
},
{
"link": [
1,
3
],
"name": "Carry Grapple Teleport (Top Position)",
"entranceCondition": {
"comeInWithGrappleTeleport": {
"blockPositions": [
[
12,
12
]
]
}
},
"requires": [],
"bypassesDoorShell": true,
"exitCondition": {
"leaveWithGrappleTeleport": {
"blockPositions": [
[
12,
12
]
]
}
}
},
{
"link": [
1,
3
],
"name": "Carry Grapple Teleport (Bottom Position)",
"entranceCondition": {
"comeInWithGrappleTeleport": {
"blockPositions": [
[
12,
13
]
]
}
},
"requires": [],
"bypassesDoorShell": true,
"exitCondition": {
"leaveWithGrappleTeleport": {
"blockPositions": [
[
12,
13
]
]
}
}
},
{
"link": [
1,
4
],
"name": "Base",
"requires": []
},
{
"link": [
2,
2
],
"name": "Leave Normally",
"exitCondition": {
"leaveNormally": {}
},
"requires": []
},
{
"link": [
3,
1
],
"name": "Space Jump",
"requires": [
"SpaceJump"
]
},
{
"link": [
3,
1
],
"name": "Space Jump Through the Door",
"entranceCondition": {
"comeInJumping": {
"speedBooster": "any",
"minTiles": 0.4375
}
},
"requires": [
"SpaceJump",
"canPrepareForNextRoom"
],
"devNote": "This is only useful if canCarefulJump or h_canCrouchJumpDownGrab is disabled or if door 3 is locked."
},
{
"link": [
3,
1
],
"name": "Naked Bug Sand Hole Damage Boost (R to L)",
"notable": true,
"requires": [
"canTrickyJump",
"canHorizontalDamageBoost",
{
"enemyDamage": {
"enemy": "Zoa",
"type": "contact",
"hits": 1
}
}
],
"reusableRoomwideNotable": "Bug Sand Hole Damage Boost",
"note": "From the doorframe, wait for the Zoa to rise out of the water, then use it to damage boost into the open opposite door."
},
{
"link": [
3,
1
],
"name": "Bug Sand Hole Speedy Jump Morph (R to L)",
"notable": true,
"entranceCondition": {
"comeInJumping": {
"speedBooster": "any",
"minTiles": 6
}
},
"requires": [
"Morph",
"canTrickyJump",
"canLateralMidAirMorph"
],
"reusableRoomwideNotable": "Bug Sand Hole Speedy Jump Morph",
"note": [
"Build up run speed and jump into the transition to cross this room without touching the water.",
"Shoot open the opposite door upon entering and morph before touching the ceiling to bounce into the open door."
]
},
{
"link": [
3,
1
],
"name": "Bug Sand Hole Speedy Jump Morph with Speed Booster (R to L)",
"notable": true,
"entranceCondition": {
"comeInJumping": {
"speedBooster": true,
"minTiles": 5
}
},
"requires": [
"Morph",
"canTrickyJump",
"canLateralMidAirMorph"
],
"reusableRoomwideNotable": "Bug Sand Hole Speedy Jump Morph",
"note": [
"Build up run speed and jump into the transition to cross this room without touching the water.",
"Shoot open the opposite door upon entering and morph before touching the ceiling to bounce into the open door."
]
},
{
"link": [
3,
1
],
"name": "Shinespark",
"entranceCondition": {
"comeInWithSpark": {
"position": "top"
}
},
"requires": [
"canMidairShinespark",
"canPrepareForNextRoom",
{
"shinespark": {
"frames": 20
}
}
],
"note": "Enter with a high shinespark through the door then shoot the opposite door and fall into it."
},
{
"link": [
3,
1
],
"name": "Grapple Teleport Door Lock Skip",
"entranceCondition": {
"comeInWithGrappleTeleport": {
"blockPositions": [
[
3,
13
]
]
}
},
"requires": [],
"bypassesDoorShell": true
},
{
"link": [
3,
1
],
"name": "Carry Grapple Teleport",
"entranceCondition": {
"comeInWithGrappleTeleport": {
"blockPositions": [
[
3,
13
]
]
}
},
"requires": [],
"bypassesDoorShell": true,
"exitCondition": {
"leaveWithGrappleTeleport": {
"blockPositions": [
[
3,
13
]
]
}
}
},
{
"link": [
3,
2
],
"name": "G-Mode",
"notable": false,
"entranceCondition": {
"comeInWithGMode": {
"mode": "any",
"morphed": false
}
},
"requires": [],
"exitCondition": {
"leaveWithGMode": {
"morphed": false
}
},
"flashSuitChecked": true
},
{
"link": [
3,
2
],
"name": "G-Mode Morph",
"notable": false,
"entranceCondition": {
"comeInWithGMode": {
"mode": "any",
"morphed": true
}
},
"requires": [],
"exitCondition": {
"leaveWithGMode": {
"morphed": true
}
},
"flashSuitChecked": true
},
{
"link": [
3,
3
],
"name": "Leave with Runway",
"requires": [],
"exitCondition": {
"leaveWithRunway": {
"length": 1,
"openEnd": 1
}
}
},
{
"link": [
3,
3
],
"name": "Leave With Runway - Frozen Zoa",
"requires": [
"h_canFrozenEnemyRunway"
],
"exitCondition": {
"leaveWithRunway": {
"length": 3,
"openEnd": 0
}
},
"note": [
"Freeze the Yapping Maw on room entry, and continue to periodically refreeze it throughout.",
"Jump and freeze the Zoa at the correct height, noting that it will rise one more pixel after it thaws.",
"Maintain a half-tile runway between the frozen Zoa and the runway in order to extend it as much as possible."
]
},
{
"link": [
3,
3
],
"name": "Crystal Flash",
"requires": [
"h_canCrystalFlash"
],
"flashSuitChecked": true
},
{
"link": [
3,
3
],
"name": "G-Mode Setup - Get Hit By Zoa",
"notable": false,
"requires": [],
"exitCondition": {
"leaveWithGModeSetup": {}
},
"flashSuitChecked": true
},
{
"link": [
3,
3
],
"name": "G-Mode Regain Mobility",
"requires": [
{
"enemyDamage": {
"enemy": "Zoa",
"type": "contact",
"hits": 1
}
}
],
"gModeRegainMobility": {},
"flashSuitChecked": true
},
{
"link": [
3,
5
],
"name": "Base",
"requires": []
},
{
"link": [
4,
1
],
"name": "Base",
"requires": [
{
"or": [
"Gravity",
{
"and": [
"canSuitlessMaridia",
"HiJump"
]
}
]
},
{
"doorUnlockedAtNode": 1
}
],
"unlocksDoors": [
{
"nodeId": 1,
"types": [
"missiles"
],
"requires": [
"canDodgeWhileShooting"
]
},
{
"nodeId": 1,
"types": [
"super"
],
"requires": []
},
{
"nodeId": 1,
"types": [
"powerbomb"
],
"requires": [
"canTrickyJump"
]
}
]
},
{
"link": [
4,
1
],
"name": "Dodge Yapping Maw",
"requires": [
"canSuitlessMaridia",
"canCarefulJump",
{
"or": [
"canWalljump",
"h_canCrouchJumpDownGrab",
"canTrickySpringBallJump"
]
},
{
"doorUnlockedAtNode": 1
}
],
"unlocksDoors": [
{
"nodeId": 1,
"types": [
"missiles"
],
"requires": [
"canDodgeWhileShooting"
]
},
{
"nodeId": 1,
"types": [
"super"
],
"requires": []
},
{
"nodeId": 1,
"types": [
"powerbomb"
],
"requires": [
"canTrickyJump"
]
}
],
"note": "Escape by wall jumping when the water is low or using a crouch jump and down grab when it's high."
},
{
"link": [
4,
1
],
"name": "Kill Yapping Maw With Super",
"requires": [
"canSuitlessMaridia",
{
"ammo": {
"type": "Super",
"count": 1
}
},
{
"or": [
"canWalljump",
"h_canCrouchJumpDownGrab",
"canTrickySpringBallJump"
]
},
{
"doorUnlockedAtNode": 1
}
],
"unlocksDoors": [
{
"nodeId": 1,
"types": [
"ammo"
],
"requires": []
}
],
"note": "Escape by wall jumping when the water is low or using a crouch jump and down grab when it's high."
},
{
"link": [
4,
1
],
"name": "Freeze Yapping Maw",
"requires": [
"canSuitlessMaridia",
"canUseFrozenEnemies",
{
"doorUnlockedAtNode": 1
}
],
"unlocksDoors": [
{
"nodeId": 1,
"types": [
"ammo"
],
"requires": []
}
],
"note": "Keep freezing the Yapping Maw while using a frozen bug to escape."
},
{
"link": [
4,
2
],
"name": "Base",
"requires": []
},
{
"link": [
4,
5
],
"name": "Base",
"requires": [
"Gravity"
]
},
{
"link": [
4,
5
],
"name": "Suitless HiJump",
"requires": [
"canSuitlessMaridia",
"HiJump",
{
"or": [
"canPlayInSand",
"h_canUseSpringBall",
"SpaceJump"
]
}
],
"note": "Kill the Zoa while avoiding the Yapping Maw, then cross the sand. Spring ball can be used to help cross the sand."
},
{
"link": [
4,
5
],
"name": "Suitless Frozen Bridge",
"requires": [
"canSuitlessMaridia",
"canUseFrozenEnemies",
"canCarefulJump"
],
"note": [
"Freeze the Zoa as it spawns and jump on it then jump across the room.",
"Freeze any Yapping Maws that attack and use them or a frozen Zoa as a platform to leave."
]
},
{
"link": [
4,
5
],
"name": "Suitless Kill Yapping Maw with Super",
"requires": [
"canSuitlessMaridia",
"canPlayInSand",
{
"ammo": {
"type": "Super",
"count": 1
}
}
],
"devNote": "One Super to cross the room, a second is likely used before getting up to the door."
},
{
"link": [
4,
5
],
"name": "Naked Bug Sand Hole Sand Jumps (L to R)",
"notable": true,
"requires": [
"canSuitlessMaridia",
"canTrickyJump",
"canPlayInSand"
],
"reusableRoomwideNotable": "Bug Sand Hole Sand Jumps",
"note": [
"Avoid the Yapping Maw after entering by not standing in one place for too long.",
"Kill the Zoa and quickly jump across the sand.",
"Hitting the Zoas will drop Samus deep into the sand below."
]
},
{
"link": [
5,
2
],
"name": "Base",
"requires": []
},
{
"link": [
5,
3
],
"name": "Base",
"requires": [
{
"or": [
"Gravity",
{
"and": [
"canSuitlessMaridia",
"HiJump"
]
}
]
},
{
"doorUnlockedAtNode": 3
}
],
"unlocksDoors": [
{
"nodeId": 3,
"types": [
"missiles"
],
"requires": [
"canDodgeWhileShooting"
]
},
{
"nodeId": 3,
"types": [
"super"
],
"requires": []
},
{
"nodeId": 3,
"types": [
"powerbomb"
],
"requires": [
"canTrickyJump"
]
}
]
},
{
"link": [
5,
3
],
"name": "Dodge Yapping Maw",
"requires": [
"canSuitlessMaridia",
"canCarefulJump",
{
"or": [
"canWalljump",
"h_canCrouchJumpDownGrab",
"canTrickySpringBallJump"
]
},
{
"doorUnlockedAtNode": 3
}
],
"unlocksDoors": [
{
"nodeId": 3,
"types": [
"missiles"
],
"requires": [
"canDodgeWhileShooting"
]
},
{
"nodeId": 3,
"types": [
"super"
],
"requires": []
},
{
"nodeId": 3,
"types": [
"powerbomb"
],
"requires": [
"canTrickyJump"
]
}
],
"note": "Escape by wall jumping when the water is low or using a crouch jump and down grab when it's high."
},
{
"link": [
5,
3
],
"name": "Kill Yapping Maw With Super",
"requires": [
"canSuitlessMaridia",
{
"ammo": {
"type": "Super",
"count": 1
}
},
{
"or": [
"canWalljump",
"h_canCrouchJumpDownGrab",
"canTrickySpringBallJump"
]
},
{
"doorUnlockedAtNode": 3
}
],
"unlocksDoors": [
{
"nodeId": 3,
"types": [
"ammo"
],
"requires": []
}
],
"note": "Escape by wall jumping when the water is low or using a crouch jump and down grab when it's high."
},
{
"link": [
5,
3
],
"name": "Freeze Yapping Maw",
"requires": [
"canSuitlessMaridia",
"canUseFrozenEnemies",
{
"doorUnlockedAtNode": 3
}
],
"unlocksDoors": [
{
"nodeId": 3,
"types": [
"ammo"
],
"requires": []
}
],
"note": "Keep freezing the Yapping Maw while using a frozen bug to escape."
},
{
"link": [
5,
4
],
"name": "Base",
"requires": [
"Gravity"
]
},
{
"link": [
5,
4
],
"name": "Suitless HiJump",
"requires": [
"canSuitlessMaridia",
"HiJump",
{
"or": [
"canPlayInSand",
"h_canUseSpringBall",
"SpaceJump"
]
}
],
"note": "Kill the Zoa while avoiding the Yapping Maw, then cross the sand. Spring ball can be used to help cross the sand."
},
{
"link": [
5,
4
],
"name": "Suitless Frozen Bridge",
"requires": [
"canSuitlessMaridia",
"canUseFrozenEnemies",
"canCarefulJump"
],
"note": [
"Freeze the Zoa as it spawns and jump on it then jump across the room.",
"Freeze any Yapping Maws that attack and use them or a frozen Zoa as a platform to leave."
]
},
{
"link": [
5,
4
],
"name": "Suitless Kill Yapping Maw with Super",
"requires": [
"canSuitlessMaridia",
"canPlayInSand",
{
"ammo": {
"type": "Super",
"count": 1
}
}
],
"devNote": "One Super to cross the room, a second is likely used before getting up to the door."
},
{
"link": [
5,
4
],
"name": "Naked Bug Sand Hole Sand Jumps (R to L)",
"notable": true,
"requires": [
"canSuitlessMaridia",
"canTrickyJump",
"canPlayInSand"
],
"reusableRoomwideNotable": "Bug Sand Hole Sand Jumps",
"note": [
"Avoid the Yapping Maw after entering by not standing in one place for too long.",
"Kill the Zoa and quickly jump across the sand.",
"Hitting the Zoas will drop Samus deep into the sand below."
]
},
{
"link": [
1,
1
],
"name": "Base (Unlock Door)",
"requires": [],
"unlocksDoors": [
{
"types": [
"ammo"
],
"requires": []
}
]
},
{
"link": [
1,
4
],
"name": "Base (Come In Normally)",
"entranceCondition": {
"comeInNormally": {}
},
"requires": []
},
{
"link": [
2,
2
],
"name": "Base (Unlock Door)",
"requires": [],
"unlocksDoors": [
{
"types": [
"ammo"
],
"requires": []
}
]
},
{
"link": [
3,
3
],
"name": "Base (Unlock Door)",
"requires": [],
"unlocksDoors": [
{
"types": [
"ammo"
],
"requires": []
}
]
},
{
"link": [
3,
5
],
"name": "Base (Come In Normally)",
"entranceCondition": {
"comeInNormally": {}
},
"requires": []
}
]
}