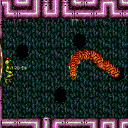
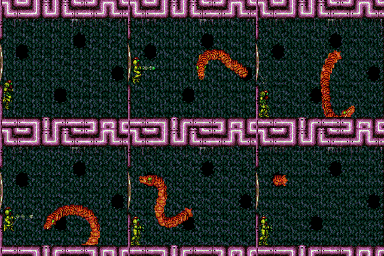
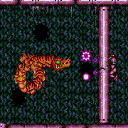
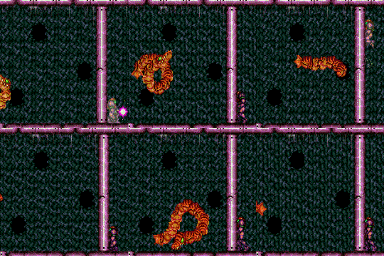
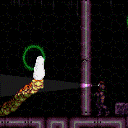
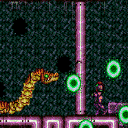
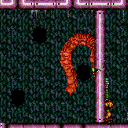
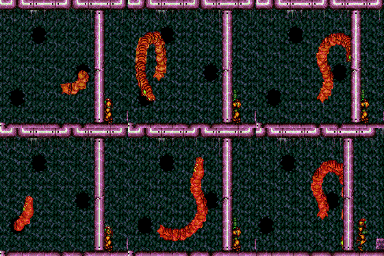
Botwoon's Room
Room ID: 185
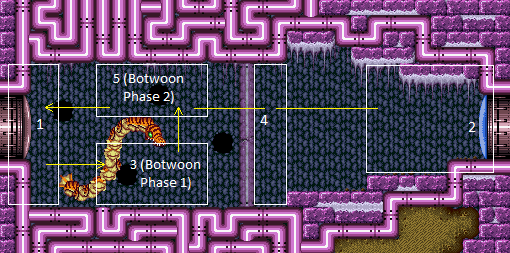
|
Exit condition: {
"leaveWithRunway": {
"length": 1,
"openEnd": 1
}
}
|
|
Requires: "canShinechargeMovement"
"Gravity"
"f_DefeatedBotwoon"
{
"canShineCharge": {
"usedTiles": 16,
"openEnd": 0
}
}
Exit condition: {
"leaveShinecharged": {
"framesRemaining": 125
}
}
|
|
Requires: "h_canCrystalFlash" |
|
|
|
Entrance condition: {
"comeInWithGrappleTeleport": {
"blockPositions": [
[
5,
3
],
[
7,
2
]
]
}
}
|
|
Entrance condition: {
"comeInWithGrappleTeleport": {
"blockPositions": [
[
3,
13
]
]
}
}
Bypasses door shell: true |
|
Entrance condition: {
"comeInWithGrappleTeleport": {
"blockPositions": [
[
3,
13
]
]
}
}
Exit condition: {
"leaveWithGrappleTeleport": {
"blockPositions": [
[
3,
13
]
]
}
}
Bypasses door shell: true |
|
Exit condition: {
"leaveWithRunway": {
"length": 3,
"openEnd": 1
}
}
|
|
Requires: "canShinechargeMovement"
"Gravity"
"f_DefeatedBotwoon"
{
"canShineCharge": {
"usedTiles": 16,
"openEnd": 0
}
}
Exit condition: {
"leaveShinecharged": {
"framesRemaining": 55
}
}
|
|
Requires: "h_canCrystalFlash" |
|
|
|
Requires: "f_DefeatedBotwoon" |
|
Requires: "Gravity"
{
"enemyKill": {
"enemies": [
[
"Botwoon 1"
]
]
}
}
|
|
From: 3
Botwoon Phase 1
To: 5
Botwoon Phase 2 (locked)
Notable: true Fight Botwoon without Gravity suit. The left corner can be used to avoid most attacks and may be worth using even in the opening of the fight for safety. Requires: "canSuitlessMaridia"
{
"enemyKill": {
"enemies": [
[
"Botwoon 1"
]
]
}
}
|
|
|
|
Requires: "f_DefeatedBotwoon" |
|
|
|
Requires: "f_DefeatedBotwoon" |
|
From: 4
Back-Side Botwoon (locked)
To: 6
Back-Side Botwoon (unlocked)
Notable: true With Gravity, dodging the acid is pretty trivial. Even without knowing about the distance trick expected in the suitless version. Requires: "Gravity"
"Charge"
"Wave"
{
"or": [
"canDodgeWhileShooting",
{
"enemyDamage": {
"enemy": "Botwoon 1",
"type": "acid",
"hits": 2
}
}
]
}
Clears obstacles: f_DefeatedBotwoon |
|
From: 4
Back-Side Botwoon (locked)
To: 6
Back-Side Botwoon (unlocked)
Notable: true Even when suitless, it's possible to stand far enough that the acid attack doesn't spawn. Botwoon still gets hit. So there's a safe way to take no damage. Requires: "canSuitlessMaridia"
"Charge"
"Wave"
"canDodgeWhileShooting"
{
"or": [
"Morph",
{
"enemyDamage": {
"enemy": "Botwoon 1",
"type": "acid",
"hits": 2
}
}
]
}
Clears obstacles: f_DefeatedBotwoon |
|
From: 4
Back-Side Botwoon (locked)
To: 6
Back-Side Botwoon (unlocked)
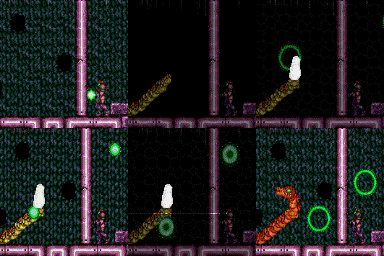
Notable: true Stand on the appropriate pixel for shooting diagonally through the wall and use the microwave trick to defeat Botwoon. Using angle up, it is where Samus' front foot is on the seam in the floor. There is not proper spacing for landing an angle down shot and xraying. Waiting for Botwoon to peak their head through the wall works too but is less safe. Requires: "h_canNavigateUnderwater" "Charge" "Plasma" "canXRayWaitForIFrames" Clears obstacles: f_DefeatedBotwoon |
|
From: 4
Back-Side Botwoon (locked)
To: 6
Back-Side Botwoon (unlocked)
Notable: true A charge beam shot will pass right through the dividing wall if fired from the correct 2pixel window. Using angle down the spot is where Samus' front toe touches the wall. Using angle up, it is where Samus' front foot is on the seam in the floor. Requires: "h_canNavigateUnderwater"
{
"enemyKill": {
"enemies": [
[
"Reverse Botwoon 1"
],
[
"Reverse Botwoon 2"
]
],
"explicitWeapons": [
"Charge+Plasma",
"Charge+Ice+Spazer"
]
}
}
Clears obstacles: f_DefeatedBotwoon |
|
From: 4
Back-Side Botwoon (locked)
To: 6
Back-Side Botwoon (unlocked)
Notable: true Wait for Botwoon to spawn then use a Plasma Special Beam Attack. Use XRay to slow time and watch for a particle to overlap Botwoons head, then proceed to Microwave. Requires: "h_canNavigateUnderwater"
"canSpecialBeamAttack"
"Plasma"
"canXRayWaitForIFrames"
{
"ammo": {
"type": "PowerBomb",
"count": 2
}
}
Clears obstacles: f_DefeatedBotwoon |
|
From: 4
Back-Side Botwoon (locked)
To: 6
Back-Side Botwoon (unlocked)
Notable: true Requires: "h_canNavigateUnderwater"
{
"enemyKill": {
"enemies": [
[
"Reverse Botwoon 1"
],
[
"Reverse Botwoon 2"
]
],
"explicitWeapons": [
"Plasma Shield"
]
}
}
Clears obstacles: f_DefeatedBotwoon |
|
From: 4
Back-Side Botwoon (locked)
To: 6
Back-Side Botwoon (unlocked)
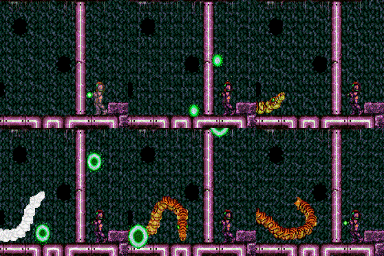
Notable: true Wait for the one pattern (bottom->right) where Botwoon's head passes through the dividing barrier briefly and fire a Super Missile. This takes a long time, averaging one super per minute. Requires: "h_canNavigateUnderwater"
"canBeExtremelyPatient"
{
"enemyKill": {
"enemies": [
[
"Reverse Botwoon 1"
],
[
"Reverse Botwoon 2"
]
],
"explicitWeapons": [
"Super"
]
}
}
Clears obstacles: f_DefeatedBotwoon |
|
|
|
Requires: {
"enemyKill": {
"enemies": [
[
"Botwoon 2"
]
]
}
}
Clears obstacles: f_DefeatedBotwoon |
|
|
|
Requires: "canShinechargeMovement"
"Gravity"
{
"obstaclesCleared": [
"f_DefeatedBotwoon"
]
}
{
"canShineCharge": {
"usedTiles": 16,
"openEnd": 0
}
}
Exit condition: {
"leaveShinecharged": {
"framesRemaining": 125
}
}
|
|
Requires: "canShinechargeMovement"
"Gravity"
{
"obstaclesCleared": [
"f_DefeatedBotwoon"
]
}
{
"canShineCharge": {
"usedTiles": 16,
"openEnd": 0
}
}
Exit condition: {
"leaveShinecharged": {
"framesRemaining": 55
}
}
|
|
Requires: {
"obstaclesCleared": [
"f_DefeatedBotwoon"
]
}
|
|
Requires: {
"obstaclesCleared": [
"f_DefeatedBotwoon"
]
}
|
|
Requires: {
"obstaclesCleared": [
"f_DefeatedBotwoon"
]
}
|
{
"$schema": "../../../schema/m3-room.schema.json",
"id": 185,
"name": "Botwoon's Room",
"area": "Maridia",
"subarea": "Inner",
"subsubarea": "Pink",
"playable": true,
"roomAddress": "0x7D95E",
"roomEnvironments": [
{
"heated": false
}
],
"nodes": [
{
"id": 1,
"name": "Left Door",
"nodeType": "door",
"nodeSubType": "grey",
"nodeAddress": "0x001a90c",
"doorEnvironments": [
{
"physics": "water"
}
],
"locks": [
{
"name": "Botwoon Grey Lock (to Botwoon Hallway)",
"lockType": "gameFlag",
"unlockStrats": [
{
"name": "Base",
"notable": false,
"requires": [
"f_DefeatedBotwoon"
]
}
]
}
]
},
{
"id": 2,
"name": "Right Door",
"nodeSubType": "blue",
"nodeType": "door",
"nodeAddress": "0x001a918",
"doorEnvironments": [
{
"physics": "water"
}
]
},
{
"id": 3,
"name": "Botwoon Phase 1",
"nodeType": "event",
"nodeSubType": "boss"
},
{
"id": 4,
"name": "Back-Side Botwoon (locked)",
"nodeType": "junction",
"nodeSubType": "boss",
"note": "This represents fighting Botwoon from behind the wall."
},
{
"id": 5,
"name": "Botwoon Phase 2 (locked)",
"nodeType": "junction",
"nodeSubType": "boss"
},
{
"id": 6,
"name": "Back-Side Botwoon (unlocked)",
"nodeType": "event",
"nodeSubType": "boss",
"yields": [
"f_DefeatedBotwoon"
],
"note": "This represents fighting Botwoon from behind the wall."
},
{
"id": 7,
"name": "Botwoon Phase 2 (unlocked)",
"nodeType": "event",
"nodeSubType": "boss",
"yields": [
"f_DefeatedBotwoon"
]
}
],
"enemies": [
{
"id": "e1",
"groupName": "Botwoon 1",
"enemyName": "Botwoon 1",
"quantity": 1,
"homeNodes": [
3
],
"stopSpawn": [
"f_DefeatedBotwoon"
]
},
{
"id": "e2",
"groupName": "Botwoon 2",
"enemyName": "Botwoon 2",
"quantity": 1,
"homeNodes": [
5
],
"stopSpawn": [
"f_DefeatedBotwoon"
]
},
{
"id": "e3",
"groupName": "Reverse Botwoon 1",
"enemyName": "Reverse Botwoon 1",
"quantity": 1,
"homeNodes": [
4
],
"stopSpawn": [
"f_DefeatedBotwoon"
]
},
{
"id": "e4",
"groupName": "Reverse Botwoon 2",
"enemyName": "Reverse Botwoon 2",
"quantity": 1,
"homeNodes": [
4
],
"stopSpawn": [
"f_DefeatedBotwoon"
]
}
],
"reusableRoomwideNotable": [
{
"name": "Back-Side Botwoon Fight with Charge and Wave",
"note": "Use Charge and Wave to kill Botwoon from the right, through the wall."
},
{
"name": "Back-Side Botwoon Magic Pixel Beam Fight",
"note": [
"Stand on a particular two pixels to the right of the dividing wall and fight Botwoon using charge beam shots.",
"Using angle down the spot is where Samus' front toe touches the wall.",
"Using angle up, it is where Samus' front foot is on the seam in the floor."
]
}
],
"links": [
{
"from": 1,
"to": [
{
"id": 1
},
{
"id": 3
}
]
},
{
"from": 2,
"to": [
{
"id": 1
},
{
"id": 2
},
{
"id": 4
}
]
},
{
"from": 3,
"to": [
{
"id": 5
}
]
},
{
"from": 4,
"to": [
{
"id": 2
},
{
"id": 5
}
]
},
{
"from": 5,
"to": [
{
"id": 1
},
{
"id": 4
}
]
}
],
"strats": [
{
"link": [
1,
1
],
"name": "Leave with Runway",
"requires": [],
"exitCondition": {
"leaveWithRunway": {
"length": 1,
"openEnd": 1
}
}
},
{
"link": [
1,
1
],
"name": "Leave Charged",
"requires": [
"canShinechargeMovement",
"Gravity",
"f_DefeatedBotwoon",
{
"canShineCharge": {
"usedTiles": 16,
"openEnd": 0
}
}
],
"exitCondition": {
"leaveShinecharged": {
"framesRemaining": 125
}
},
"devNote": "FIXME: Removing Gravity for a water stutter shinecharge may be helpful here."
},
{
"link": [
1,
1
],
"name": "Crystal Flash",
"requires": [
"h_canCrystalFlash"
]
},
{
"link": [
1,
3
],
"name": "Base",
"requires": []
},
{
"link": [
2,
1
],
"name": "Grapple Teleport",
"entranceCondition": {
"comeInWithGrappleTeleport": {
"blockPositions": [
[
5,
3
],
[
7,
2
]
]
}
},
"requires": []
},
{
"link": [
2,
1
],
"name": "Grapple Teleport Door Lock Skip",
"entranceCondition": {
"comeInWithGrappleTeleport": {
"blockPositions": [
[
3,
13
]
]
}
},
"requires": [],
"bypassesDoorShell": true
},
{
"link": [
2,
1
],
"name": "Carry Grapple Teleport",
"entranceCondition": {
"comeInWithGrappleTeleport": {
"blockPositions": [
[
3,
13
]
]
}
},
"requires": [],
"bypassesDoorShell": true,
"exitCondition": {
"leaveWithGrappleTeleport": {
"blockPositions": [
[
3,
13
]
]
}
}
},
{
"link": [
2,
2
],
"name": "Leave with Runway",
"requires": [],
"exitCondition": {
"leaveWithRunway": {
"length": 3,
"openEnd": 1
}
}
},
{
"link": [
2,
2
],
"name": "Leave Charged",
"requires": [
"canShinechargeMovement",
"Gravity",
"f_DefeatedBotwoon",
{
"canShineCharge": {
"usedTiles": 16,
"openEnd": 0
}
}
],
"exitCondition": {
"leaveShinecharged": {
"framesRemaining": 55
}
},
"devNote": "FIXME: Removing Gravity for a water stutter shinecharge may be helpful here."
},
{
"link": [
2,
2
],
"name": "Crystal Flash",
"requires": [
"h_canCrystalFlash"
]
},
{
"link": [
2,
4
],
"name": "Base",
"requires": []
},
{
"link": [
3,
5
],
"name": "Already Killed",
"requires": [
"f_DefeatedBotwoon"
]
},
{
"link": [
3,
5
],
"name": "Gravity",
"requires": [
"Gravity",
{
"enemyKill": {
"enemies": [
[
"Botwoon 1"
]
]
}
}
]
},
{
"link": [
3,
5
],
"name": "Suitless Botwoon Kill",
"notable": true,
"requires": [
"canSuitlessMaridia",
{
"enemyKill": {
"enemies": [
[
"Botwoon 1"
]
]
}
}
],
"note": [
"Fight Botwoon without Gravity suit.",
"The left corner can be used to avoid most attacks and may be worth using even in the opening of the fight for safety."
]
},
{
"link": [
4,
2
],
"name": "Base",
"requires": []
},
{
"link": [
4,
5
],
"name": "Base",
"requires": [
"f_DefeatedBotwoon"
]
},
{
"link": [
5,
1
],
"name": "Base",
"requires": []
},
{
"link": [
5,
4
],
"name": "Base",
"requires": [
"f_DefeatedBotwoon"
]
},
{
"name": "Back-Side Botwoon Fight - Gravity, Charge, Wave",
"notable": true,
"requires": [
"Gravity",
"Charge",
"Wave",
{
"or": [
"canDodgeWhileShooting",
{
"enemyDamage": {
"enemy": "Botwoon 1",
"type": "acid",
"hits": 2
}
}
]
}
],
"reusableRoomwideNotable": "Back-Side Botwoon Fight with Charge and Wave",
"note": [
"With Gravity, dodging the acid is pretty trivial.",
"Even without knowing about the distance trick expected in the suitless version."
],
"link": [
4,
6
],
"clearsObstacles": [
"f_DefeatedBotwoon"
]
},
{
"name": "Back-Side Botwoon Fight - Suitless, Charge, Wave",
"notable": true,
"requires": [
"canSuitlessMaridia",
"Charge",
"Wave",
"canDodgeWhileShooting",
{
"or": [
"Morph",
{
"enemyDamage": {
"enemy": "Botwoon 1",
"type": "acid",
"hits": 2
}
}
]
}
],
"reusableRoomwideNotable": "Back-Side Botwoon Fight with Charge and Wave",
"note": [
"Even when suitless, it's possible to stand far enough that the acid attack doesn't spawn.",
"Botwoon still gets hit. So there's a safe way to take no damage."
],
"link": [
4,
6
],
"clearsObstacles": [
"f_DefeatedBotwoon"
]
},
{
"name": "Back-Side Botwoon Microwave",
"notable": true,
"requires": [
"h_canNavigateUnderwater",
"Charge",
"Plasma",
"canXRayWaitForIFrames"
],
"reusableRoomwideNotable": "Back-Side Botwoon Magic Pixel Beam Fight",
"note": [
"Stand on the appropriate pixel for shooting diagonally through the wall and use the microwave trick to defeat Botwoon.",
"Using angle up, it is where Samus' front foot is on the seam in the floor.",
"There is not proper spacing for landing an angle down shot and xraying.",
"Waiting for Botwoon to peak their head through the wall works too but is less safe."
],
"link": [
4,
6
],
"clearsObstacles": [
"f_DefeatedBotwoon"
]
},
{
"name": "Back-Side Botwoon Magic Pixel",
"notable": true,
"requires": [
"h_canNavigateUnderwater",
{
"enemyKill": {
"enemies": [
[
"Reverse Botwoon 1"
],
[
"Reverse Botwoon 2"
]
],
"explicitWeapons": [
"Charge+Plasma",
"Charge+Ice+Spazer"
]
}
}
],
"reusableRoomwideNotable": "Back-Side Botwoon Magic Pixel Beam Fight",
"note": [
"A charge beam shot will pass right through the dividing wall if fired from the correct 2pixel window.",
"Using angle down the spot is where Samus' front toe touches the wall.",
"Using angle up, it is where Samus' front foot is on the seam in the floor."
],
"link": [
4,
6
],
"clearsObstacles": [
"f_DefeatedBotwoon"
]
},
{
"name": "Back-Side Botwoon Plasma Shield Microwave",
"notable": true,
"requires": [
"h_canNavigateUnderwater",
"canSpecialBeamAttack",
"Plasma",
"canXRayWaitForIFrames",
{
"ammo": {
"type": "PowerBomb",
"count": 2
}
}
],
"note": [
"Wait for Botwoon to spawn then use a Plasma Special Beam Attack.",
"Use XRay to slow time and watch for a particle to overlap Botwoons head, then proceed to Microwave."
],
"devNote": "Killing in 1 SBA takes some luck.",
"link": [
4,
6
],
"clearsObstacles": [
"f_DefeatedBotwoon"
]
},
{
"name": "Back-Side Botwoon Plasma Shield Fight",
"notable": true,
"requires": [
"h_canNavigateUnderwater",
{
"enemyKill": {
"enemies": [
[
"Reverse Botwoon 1"
],
[
"Reverse Botwoon 2"
]
],
"explicitWeapons": [
"Plasma Shield"
]
}
}
],
"note": "Stand near the dividing wall and unleash the Plasma Special Beam Attack!",
"link": [
4,
6
],
"clearsObstacles": [
"f_DefeatedBotwoon"
]
},
{
"name": "Back-Side Botwoon Super Only Fight",
"notable": true,
"requires": [
"h_canNavigateUnderwater",
"canBeExtremelyPatient",
{
"enemyKill": {
"enemies": [
[
"Reverse Botwoon 1"
],
[
"Reverse Botwoon 2"
]
],
"explicitWeapons": [
"Super"
]
}
}
],
"note": [
"Wait for the one pattern (bottom->right) where Botwoon's head passes through the dividing barrier briefly and fire a Super Missile.",
"This takes a long time, averaging one super per minute."
],
"link": [
4,
6
],
"clearsObstacles": [
"f_DefeatedBotwoon"
]
},
{
"link": [
6,
4
],
"name": "Base",
"notable": false,
"requires": []
},
{
"name": "Base",
"notable": false,
"requires": [
{
  "enemyKill": {
    "enemies": [
      [
        "Botwoon 2"
      ]
    ]
  }
}
],
"link": [
5,
7
],
"clearsObstacles": [
"f_DefeatedBotwoon"
]
},
{
"link": [
7,
5
],
"name": "Base",
"notable": false,
"requires": []
},
{
"link": [
1,
1
],
"name": "Leave Charged",
"requires": [
"canShinechargeMovement",
"Gravity",
{
  "obstaclesCleared": [
    "f_DefeatedBotwoon"
  ]
},
{
"canShineCharge": {
"usedTiles": 16,
"openEnd": 0
}
}
],
"exitCondition": {
"leaveShinecharged": {
"framesRemaining": 125
}
},
"devNote": "FIXME: Removing Gravity for a water stutter shinecharge may be helpful here."
},
{
"link": [
2,
2
],
"name": "Leave Charged",
"requires": [
"canShinechargeMovement",
"Gravity",
{
  "obstaclesCleared": [
    "f_DefeatedBotwoon"
  ]
},
{
"canShineCharge": {
"usedTiles": 16,
"openEnd": 0
}
}
],
"exitCondition": {
"leaveShinecharged": {
"framesRemaining": 55
}
},
"devNote": "FIXME: Removing Gravity for a water stutter shinecharge may be helpful here."
},
{
"link": [
3,
5
],
"name": "Already Killed",
"requires": [
{
  "obstaclesCleared": [
    "f_DefeatedBotwoon"
  ]
}
]
},
{
"link": [
4,
5
],
"name": "Base",
"requires": [
{
"obstaclesCleared": [
"f_DefeatedBotwoon"
]
}
]
},
{
"link": [
5,
4
],
"name": "Base",
"requires": [
{
"obstaclesCleared": [
"f_DefeatedBotwoon"
]
}
]
}
],
"obstacles": [
{
"id": "f_DefeatedBotwoon",
"name": "f_DefeatedBotwoon"
}
]
}
