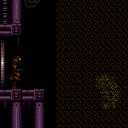
East Sand Hall
Room ID: 210
|
Exit condition: {
"leaveWithRunway": {
"length": 4,
"openEnd": 1
}
}
|
|
Requires: "h_canCrystalFlash" |
|
From: 1
Left Door
To: 1
Left Door
The easiest way to lure an Evir projectile and get through the door before it is to stand facing and against the door cap, open the door then turn right and run back to the left. Requires: "h_canNavigateUnderwater" Exit condition: {
"leaveWithGModeSetup": {}
}
|
|
Spark through the top of the door to avoid bonking. Entrance condition: {
"comeInWithSpark": {}
}
Requires: "canMidairShinespark"
{
"shinespark": {
"frames": 75,
"excessFrames": 7
}
}
|
|
Spark through the top of the door to avoid bonking. Entrance condition: {
"comeInWithSpark": {}
}
Requires: "Gravity"
"canMidairShinespark"
{
"shinespark": {
"frames": 61,
"excessFrames": 6
}
}
|
|
Shinespark midair to avoid bonking. Jump outward before sparking save Energy. Entrance condition: {
"comeInShinecharging": {
"length": 3,
"openEnd": 0
}
}
Requires: "Gravity"
"canMidairShinespark"
"canShinechargeMovement"
{
"shinespark": {
"frames": 51,
"excessFrames": 4
}
}
|
|
From: 1
Left Door
To: 2
Right Door
Gain an extra half-tile of runway by coming in very slowly to prevent falling off. Entrance condition: {
"comeInShinecharging": {
"length": 1,
"openEnd": 0
}
}
Requires: "canShinechargeMovementComplex"
"canSlowShortCharge"
"canMidairShinespark"
{
"canShineCharge": {
"usedTiles": 14,
"openEnd": 0
}
}
{
"shinespark": {
"frames": 69,
"excessFrames": 7
}
}
|
|
From: 1
Left Door
To: 2
Right Door
Notable: true 
Stand at an effective distance of between about 20 and 21 tiles from the door. Run through the door, and jump any time after the transition, holding jump through the entire room to make it to the other side. Samus will go over the Evirs, so there is no need for blue speed. Entrance condition: {
"comeInRunning": {
"minTiles": 19.3625,
"maxTiles": 21.25,
"speedBooster": true
}
}
Requires: "canPlayInSand" "canCrossRoomJumpIntoWater" "canTrickyDashJump" |
|
From: 1
Left Door
To: 2
Right Door
Notable: true 
Enter with enough run speed to jump (after the transition) across the full room using one SpringBall Jump. When exiting the first Sandfall, Samus will be rising still. That is the time to Springball jump. Entrance condition: {
"comeInRunning": {
"minTiles": 10,
"speedBooster": true
}
}
Requires: "canPlayInSand" "canCrossRoomJumpIntoWater" "canLateralMidAirMorph" "canTrickySpringBallJump" "canTrickyJump" |
|
The sand does not impede Samus in G-Mode. It is possible to jump to the tall pillar with nothing, requiring a subpixel precise jump. Running before jumping doesn't help. Stand one pixel from the right edge and spinjump to the right. Entrance condition: {
"comeInWithGMode": {
"mode": "any",
"morphed": false
}
}
Requires: "h_canNavigateUnderwater"
{
"or": [
"Gravity",
"HiJump",
"canSpringBallJumpMidAir",
"canInsaneJump"
]
}
|
|
Requires: "Gravity" "SpaceJump" |
|
Wait a little bit for the Evirs to descend some before jumping. Requires: "Gravity"
{
"or": [
"canCarefulJump",
{
  "enemyDamage": {
    "enemy": "Evir",
    "type": "particle",
    "hits": 1
  }
}
]
}
|
|
Requires: "Gravity"
{
"or": [
"Ice",
"ScrewAttack",
{
"enemyKill": {
"enemies": [
[
"Evir"
],
[
"Evir"
]
],
"explicitWeapons": [
"Plasma",
"Super",
"PowerBombPeriphery"
]
}
}
]
}
|
|
From: 1
Left Door
To: 4
Junction Below Sand Entrance
By entering the room with run speed, it is possible to jump over the pair of Evirs. Entrance condition: {
"comeInRunning": {
"speedBooster": "any",
"minTiles": 3.4375
}
}
Requires: "canSuitlessMaridia" "HiJump" "canCarefulJump" |
|
From: 1
Left Door
To: 4
Junction Below Sand Entrance
Requires: "canSuitlessMaridia"
"HiJump"
"canPlayInSand"
{
"enemyDamage": {
"enemy": "Evir",
"type": "particle",
"hits": 1
}
}
|
|
Requires: "canSuitlessMaridia"
"HiJump"
"canPlayInSand"
{
"or": [
"Ice",
{
"enemyKill": {
"enemies": [
[
"Evir"
],
[
"Evir"
]
],
"explicitWeapons": [
"Plasma",
"Super",
"PowerBombPeriphery"
]
}
}
]
}
|
|
Gain momentum in the room to the left, then jump at the edge of the runway in this room in order to jump off of the sand and land on the first pillar. Requires a runway of 7 tiles (with no open end) in the adjacent room, and killing the second Evir with a quick super or two plasma hits (note that the particle despawns as the Evir dies). Entrance condition: {
"comeInJumping": {
"speedBooster": false,
"minTiles": 6.4375
}
}
Requires: "canCrossRoomJumpIntoWater"
"canPlayInSand"
"canTrickyJump"
{
"enemyKill": {
"enemies": [
[
"Evir"
]
],
"explicitWeapons": [
"Plasma",
"Super"
]
}
}
|
|
From: 1
Left Door
To: 4
Junction Below Sand Entrance
Notable: true 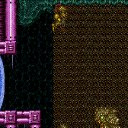
Requires a runway of 7 tiles (with no open end) in the adjacent room. Requires two precise inputs of jumping through the doorway and aiming down before hitting the ceiling. Damage boost off of the right Evir in order to land on the first pillar. With Ice, instead freeze the Evir to land on it and avoid the damage. When entering the room with a bad jump, it is possible to perform a midair wiggle to get back to the door platform. Entrance condition: {
"comeInJumping": {
"speedBooster": false,
"minTiles": 6.4375
}
}
Requires: "canCrossRoomJumpIntoWater"
"canPlayInSand"
"canInsaneJump"
{
"or": [
"canTrickyUseFrozenEnemies",
{
"and": [
"canNeutralDamageBoost",
{
"enemyDamage": {
"enemy": "Evir",
"type": "contact",
"hits": 1
}
}
]
}
]
}
|
|
From: 1
Left Door
To: 4
Junction Below Sand Entrance
Requires a runway of 7 tiles (with no open end) in the adjacent room. Jump into an air ball on room entry in order to get to the first pillar. Aim down after the transition to avoid hitting the overhang near the door. Entrance condition: {
"comeInJumping": {
"speedBooster": false,
"minTiles": 6.4375
}
}
Requires: "canCrossRoomJumpIntoWater"
"canPlayInSand"
"canLateralMidAirMorph"
{
"or": [
"canTrickyJump",
{
"and": [
"canCarefulJump",
{
"enemyDamage": {
"enemy": "Evir",
"type": "contact",
"hits": 1
}
}
]
}
]
}
|
|
From: 1
Left Door
To: 4
Junction Below Sand Entrance
Bomb boost through the doorway as close to the door transition as possible in order to get as far as possible. Entrance condition: {
"comeInWithBombBoost": {}
}
Requires: "canCrossRoomJumpIntoWater" "canTrickyJump" |
|
From: 2
Right Door
To: 1
Left Door
Notable: true
Stand at an effective distance of about 20 tiles from the door. Run through the door, and jump any time after the transition, holding jump through the entire room to make it to the other side. Samus will go over the Evirs, so there is no need for blue speed. Entrance condition: {
"comeInRunning": {
"minTiles": 19.3625,
"maxTiles": 20.3,
"speedBooster": true
}
}
Requires: "canPlayInSand" "canCrossRoomJumpIntoWater" "canTrickyDashJump" |
|
From: 2
Right Door
To: 1
Left Door
Notable: true
Enter with enough run speed to jump (after the transition) across the full room using one SpringBall Jump. When exiting the first Sandfall, Samus will be rising still. That is the time to Springball jump. Alternatively, an immediate pause can be used to SpringBall jump during the first narrow gap between Sandfalls. Sometimes Samus will land above the sand on the far left end of the room, where it will be necessary to unmorph and jump out. Entrance condition: {
"comeInRunning": {
"minTiles": 10,
"speedBooster": true
}
}
Requires: "canPlayInSand" "canCrossRoomJumpIntoWater" "canLateralMidAirMorph" "canTrickySpringBallJump" "canTrickyJump" |
|
Spark through the top of the door to avoid bonking. Entrance condition: {
"comeInWithSpark": {}
}
Requires: "canMidairShinespark"
{
"shinespark": {
"frames": 75,
"excessFrames": 7
}
}
|
|
Spark through the top of the door to avoid bonking. Entrance condition: {
"comeInWithSpark": {}
}
Requires: "Gravity"
"canMidairShinespark"
{
"shinespark": {
"frames": 61,
"excessFrames": 6
}
}
|
|
Shinespark midair to avoid bonking. Jump outward before sparking save Energy. Entrance condition: {
"comeInShinecharging": {
"length": 3,
"openEnd": 0
}
}
Requires: "Gravity"
"canMidairShinespark"
"canShinechargeMovement"
{
"shinespark": {
"frames": 51,
"excessFrames": 4
}
}
|
|
From: 2
Right Door
To: 1
Left Door
Gain an extra half-tile of runway by coming in very slowly to prevent falling off. Entrance condition: {
"comeInShinecharging": {
"length": 1,
"openEnd": 0
}
}
Requires: "canShinechargeMovementComplex"
"canSlowShortCharge"
"canMidairShinespark"
{
"canShineCharge": {
"usedTiles": 14,
"openEnd": 0
}
}
{
"shinespark": {
"frames": 69,
"excessFrames": 7
}
}
|
|
The sand does not impede Samus in G-Mode. Entrance condition: {
"comeInWithGMode": {
"mode": "any",
"morphed": false
}
}
Requires: "h_canNavigateUnderwater"
{
"or": [
"Gravity",
"HiJump",
"canSpringBallJumpMidAir"
]
}
|
|
Exit condition: {
"leaveWithRunway": {
"length": 4,
"openEnd": 1
}
}
|
|
Requires: "h_canCrystalFlash" |
|
From: 2
Right Door
To: 2
Right Door
The Evir won't shoot unless Samus enters the sand falls. Getting to the transition tiles while standing before the projectile can be tricky. With no movement items besides Gravity, walk off the platform while facing right, turn around spin jump to barely enter the sand fall before landing back on the platform and quickly getting to the door. Requires: "Gravity" "canTrickyJump" Exit condition: {
"leaveWithGModeSetup": {}
}
|
|
From: 2
Right Door
To: 2
Right Door
Notable: true 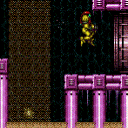
The Evir won't shoot unless Samus enters the sand falls. Getting to the transition tiles while standing before the projectile while suitless is very precise. From the sand, turnaround spinjump towards the right. Turn towards the sandfall about when you're level with the platform. Turn right and shoot as soon as you enter the sandfall. And try to land right next to the transition. Requires: "canSuitlessMaridia" "canPlayInSand" "canMidairWiggle" "HiJump" "canInsaneJump" Exit condition: {
"leaveWithGModeSetup": {}
}
|
|
Requires: "Gravity" |
|
Requires: "canSuitlessMaridia" "HiJump" "canPlayInSand" |
|
Gain momentum in the room to the right, then jump immediately on entry in order to land on the first pillar. Jumping too late will likely put Samus into the pit. Requires a small runway of only one tile or less in the adjacent room. Jumping before the door transition will set Samus straight into an Evir projectile, knocking her into the sand. Entrance condition: {
"comeInRunning": {
"speedBooster": false,
"minTiles": 0.4375
}
}
Requires: "canCrossRoomJumpIntoWater" "canPlayInSand" "canTrickyJump" "canTrickyUseFrozenEnemies" |
|
From: 2
Right Door
To: 4
Junction Below Sand Entrance
Bomb boost through the doorway. Get the bomb boost while as close to the door transition as possible in order to get to the first pillar. Entrance condition: {
"comeInWithBombBoost": {}
}
Requires: "canCrossRoomJumpIntoWater" |
|
Freeze the Evir soon after entering the room. Use a Spring Ball jump to reach the first pillar, then continue across using the Evir as a platform. Requires: "canTrickyUseFrozenEnemies" "canTrickySpringBallJump" |
|
The sand does not impede Samus in G-Mode. Entrance condition: {
"comeInWithGMode": {
"mode": "any",
"morphed": false
},
"comesThroughToilet": "any"
}
Requires: "h_canNavigateUnderwater"
{
"or": [
"Gravity",
"HiJump",
"canSpringBallJumpMidAir"
]
}
|
|
The sand does not impede Samus in G-Mode. It is possible to jump to the tall pillar with nothing, requiring a subpixel precise jump. Running before jumping doesn't help. Stand one pixel from the right edge and spinjump to the right. Entrance condition: {
"comeInWithGMode": {
"mode": "any",
"morphed": false
},
"comesThroughToilet": "any"
}
Requires: "h_canNavigateUnderwater"
{
"or": [
"Gravity",
"HiJump",
"canSpringBallJumpMidAir",
"canTrickyJump"
]
}
|
|
Requires: {
"enemyDamage": {
"enemy": "Evir",
"type": "particle",
"hits": 1
}
}
|
|
To safely avoid the Evir shot, enter in a spin jump from either the far left or far right side of the transition. Requires: "canPrepareForNextRoom"
"canPlayInSand"
"canTrickyJump"
{
"or": [
"Gravity",
"HiJump",
"canInsaneJump"
]
}
|
|
Requires: "Gravity" "SpaceJump" |
|
From: 4
Junction Below Sand Entrance
To: 1
Left Door
Requires: "Gravity"
{
"or": [
"canPlayInSand",
"canWalljump",
"h_canUseSpringBall"
]
}
{
"or": [
"canTrickyJump",
{
"enemyDamage": {
"enemy": "Evir",
"type": "particle",
"hits": 1
}
},
"Ice",
"ScrewAttack",
{
"enemyKill": {
"enemies": [
[
"Evir"
],
[
"Evir"
]
],
"explicitWeapons": [
"Super",
"Plasma",
"PowerBombPeriphery"
]
}
}
]
}
|
|
Requires: "canSuitlessMaridia"
"HiJump"
"canPlayInSand"
{
"or": [
"canTrickyJump",
{
"enemyDamage": {
"enemy": "Evir",
"type": "particle",
"hits": 1
}
},
"Ice",
{
"enemyKill": {
"enemies": [
[
"Evir"
],
[
"Evir"
]
],
"explicitWeapons": [
"Super",
"Plasma",
"PowerBombPeriphery"
]
}
}
]
}
|
|
From: 4
Junction Below Sand Entrance
To: 1
Left Door
Notable: true .png)
.gif)
If entering from the sandfall above, come in at the far left of the transition, with either a spin-jump or i-frames, to avoid the Evir shot; land on the right side of the pillar to the left, being careful to not bring left Evir on camera. If coming from the right side of the room, then moonwalk on the center pillar to scroll the camera as far right as possible, to avoid getting hit by an Evir shot; alternatively, jump slightly to the left and freeze the Evir, then return back to the center pillar before jumping across the sand. Freeze the right Evir and jump onto it. Quickly move left and fire an angle-down shot to freeze the left Evir before it descends too far. Jump onto the left Evir, back up to the right side of it to maximize space to build momentum, and jump to the left onto the sand and then onto the ledge. If Samus does not quite get enough height to make it onto the ledge, then break spin, turn around to the right, land on the sand again, and do a turnaround spin-jump to the left. If the Evirs descend too far, it is possible to use a Power Bomb to bring them back up again, but caution is needed to avoid killing the first Evir, and it is difficult to avoid getting shot. Requires: "canSuitlessMaridia"
"canTrickyJump"
"canTrickyUseFrozenEnemies"
"canPlayInSand"
{
"or": [
"canCameraManip",
{
"and": [
{
"ammo": {
"type": "PowerBomb",
"count": 1
}
},
{
"enemyDamage": {
"enemy": "Evir",
"type": "particle",
"hits": 2
}
}
]
}
]
}
|
|
Requires: "Gravity" "SpaceJump" |
|
Requires: "Gravity"
{
"or": [
"Ice",
"ScrewAttack",
{
"enemyKill": {
"enemies": [
[
"Evir"
]
],
"explicitWeapons": [
"Plasma",
"Super",
"PowerBombPeriphery"
]
}
},
{
"enemyDamage": {
"enemy": "Evir",
"type": "particle",
"hits": 1
}
}
]
}
{
"and": [
"canPlayInSand",
{
"or": [
"canWalljump",
"HiJump",
"canUseFrozenEnemies",
"canGravityJump",
{
"and": [
"canTrickyJump",
"can4HighMidAirMorph",
"canTrickySpringBallJump"
]
}
]
}
]
}
|
|
Requires: "Gravity"
"canTrickyJump"
"canHorizontalDamageBoost"
{
"enemyDamage": {
"enemy": "Evir",
"type": "particle",
"hits": 1
}
}
|
|
From: 4
Junction Below Sand Entrance
To: 2
Right Door
Let the Evir descend slightly from its spawn point to be at the correct height. A power bomb can be used to bring it back up if it falls too far. Requires: "canSuitlessMaridia" "HiJump" "canTrickyJump" "canTrickyUseFrozenEnemies" "canPlayInSand" |
|
From: 4
Junction Below Sand Entrance
To: 2
Right Door
Notable: true 
On the left side of the raised platform, jump for max height. Lateral Midair Morph for horizontal momentum, and perform the springball jump the moment before touching the sandfall. Pause again to disable springball as soon as possible. Requires: "canSuitlessMaridia"
"HiJump"
"canTrickySpringBallJump"
"canStationaryLateralMidAirMorph"
"canSpringFling"
"canPlayInSand"
{
"or": [
{
"enemyDamage": {
"enemy": "Evir",
"type": "particle",
"hits": 1
}
},
{
"enemyKill": {
"enemies": [
[
"Evir"
]
],
"explicitWeapons": [
"Plasma",
"Super",
"PowerBomb"
]
}
}
]
}
|
|
From: 4
Junction Below Sand Entrance
To: 2
Right Door
Notable: true .png)
.gif)
From the sand fall, quickly get onto the left platform to prevent the right side Evir from lowering too far. Jump on the sand to the right while freezing the Evir as high as possible. Refreeze the Evir so it is a slightly higher platform than the right pillar. Perform a spring ball jump with a stationary lateral mid-air morph from the left side of the current platform to get onto the Evir. Use a running jump off of the Evir. As a backup, it may be possible to make the Evir rise again by hitting it with a PB - place the PB in the air to avoid double hitting and killing it. Requires: "canSuitlessMaridia" "canTrickyUseFrozenEnemies" "canPlayInSand" "h_canMaxHeightSpringBallJump" "canStationaryLateralMidAirMorph" |
{
"$schema": "../../../schema/m3-room.schema.json",
"id": 210,
"name": "East Sand Hall",
"area": "Maridia",
"subarea": "Inner",
"subsubarea": "Green",
"playable": true,
"roomAddress": "0x7D4C2",
"roomEnvironments": [
{
"heated": false
}
],
"nodes": [
{
"id": 1,
"name": "Left Door",
"nodeType": "door",
"nodeSubType": "blue",
"nodeAddress": "0x001a684",
"doorEnvironments": [
{
"physics": "water"
}
]
},
{
"id": 2,
"name": "Right Door",
"nodeType": "door",
"nodeSubType": "blue",
"nodeAddress": "0x001a690",
"doorEnvironments": [
{
"physics": "water"
}
]
},
{
"id": 3,
"name": "Top Sand Entrance",
"nodeType": "entrance",
"nodeSubType": "sandpit",
"nodeAddress": "0x001a69c"
},
{
"id": 4,
"name": "Junction Below Sand Entrance",
"nodeType": "junction",
"nodeSubType": "junction"
}
],
"enemies": [
{
"id": "e1",
"groupName": "East Sand Hall Left Evirs",
"enemyName": "Evir",
"quantity": 2,
"betweenNodes": [
1,
4
]
},
{
"id": "e2",
"groupName": "East Sand Hall Right Evir",
"enemyName": "Evir",
"quantity": 1,
"betweenNodes": [
2,
4
]
}
],
"reusableRoomwideNotable": [
{
"name": "East Sand Hall Cross-Room Speed Jump",
"note": [
"Stand at an effective distance of approximately 20 tiles from the door.",
"Run through the door, and jump any time after the transition, holding jump through the entire room to make it to the other side.",
"Samus will go over the Evirs, so there is no need for blue speed."
]
},
{
"name": "East Sand Hall Cross-Room SpringBall Jump",
"note": [
"Enter with enough run speed to jump (after the transition) across the full room using one SpringBall Jump.",
"When exiting the first Sandfall, Samus will be rising still. That is the time to Springball jump."
]
}
],
"links": [
{
"from": 1,
"to": [
{
"id": 1
},
{
"id": 2,
"devNote": "This link is only for sparking and G-Mode. All other strats should go 1 -> 4 -> 2."
},
{
"id": 4
}
]
},
{
"from": 2,
"to": [
{
"id": 1,
"devNote": "This link is only for sparking and G-Mode. All other strats should go 2 -> 4 -> 1."
},
{
"id": 2
},
{
"id": 4
}
]
},
{
"from": 3,
"to": [
{
"id": 1
},
{
"id": 2
},
{
"id": 4
}
]
},
{
"from": 4,
"to": [
{
"id": 1
},
{
"id": 2
}
]
}
],
"strats": [
{
"link": [
1,
1
],
"name": "Leave with Runway",
"requires": [],
"exitCondition": {
"leaveWithRunway": {
"length": 4,
"openEnd": 1
}
}
},
{
"link": [
1,
1
],
"name": "Crystal Flash",
"requires": [
"h_canCrystalFlash"
]
},
{
"link": [
1,
1
],
"name": "G-Mode Setup - Get Hit By Evir Projectile",
"notable": false,
"requires": [
"h_canNavigateUnderwater"
],
"exitCondition": {
"leaveWithGModeSetup": {}
},
"note": [
"The easiest way to lure an Evir projectile and get through the door before it is to stand facing and against the door cap, open the door then turn right and run back to the left."
]
},
{
"link": [
1,
2
],
"name": "Suitless Shinespark",
"entranceCondition": {
"comeInWithSpark": {}
},
"requires": [
"canMidairShinespark",
{
"shinespark": {
"frames": 75,
"excessFrames": 7
}
}
],
"note": "Spark through the top of the door to avoid bonking."
},
{
"link": [
1,
2
],
"name": "Shinespark Into Room",
"entranceCondition": {
"comeInWithSpark": {}
},
"requires": [
"Gravity",
"canMidairShinespark",
{
"shinespark": {
"frames": 61,
"excessFrames": 6
}
}
],
"note": "Spark through the top of the door to avoid bonking."
},
{
"link": [
1,
2
],
"name": "Shinespark",
"entranceCondition": {
"comeInShinecharging": {
"length": 3,
"openEnd": 0
}
},
"requires": [
"Gravity",
"canMidairShinespark",
"canShinechargeMovement",
{
"shinespark": {
"frames": 51,
"excessFrames": 4
}
}
],
"note": "Shinespark midair to avoid bonking. Jump outward before sparking save Energy."
},
{
"link": [
1,
2
],
"name": "Suitless Shinespark, Careful Slow Shinecharge",
"entranceCondition": {
"comeInShinecharging": {
"length": 1,
"openEnd": 0
}
},
"requires": [
"canShinechargeMovementComplex",
"canSlowShortCharge",
"canMidairShinespark",
{
"canShineCharge": {
"usedTiles": 14,
"openEnd": 0
}
},
{
"shinespark": {
"frames": 69,
"excessFrames": 7
}
}
],
"note": "Gain an extra half-tile of runway by coming in very slowly to prevent falling off.",
"devNote": [
"If applicable, the heat frames in the adjacent room may be underrepresented, particularly on a longer runway,",
"but it shouldn't be too bad because with a longer runway, Samus can just come in fully shinecharged."
]
},
{
"link": [
1,
2
],
"name": "East Sand Hall Cross-Room Speed Jump (Left to Right)",
"notable": true,
"entranceCondition": {
"comeInRunning": {
"minTiles": 19.3625,
"maxTiles": 21.25,
"speedBooster": true
}
},
"requires": [
"canPlayInSand",
"canCrossRoomJumpIntoWater",
"canTrickyDashJump"
],
"reusableRoomwideNotable": "East Sand Hall Cross-Room Speed Jump",
"note": [
"Stand at an effective distance of between about 20 and 21 tiles from the door.",
"Run through the door, and jump any time after the transition, holding jump through the entire room to make it to the other side.",
"Samus will go over the Evirs, so there is no need for blue speed."
]
},
{
"link": [
1,
2
],
"name": "East Sand Hall Cross-Room SpringBall Jump (Left to Right)",
"notable": true,
"reusableRoomwideNotable": "East Sand Hall Cross-Room SpringBall Jump",
"entranceCondition": {
"comeInRunning": {
"minTiles": 10,
"speedBooster": true
}
},
"requires": [
"canPlayInSand",
"canCrossRoomJumpIntoWater",
"canLateralMidAirMorph",
"canTrickySpringBallJump",
"canTrickyJump"
],
"note": [
"Enter with enough run speed to jump (after the transition) across the full room using one SpringBall Jump.",
"When exiting the first Sandfall, Samus will be rising still. That is the time to Springball jump."
]
},
{
"link": [
1,
2
],
"name": "G-Mode",
"entranceCondition": {
"comeInWithGMode": {
"mode": "any",
"morphed": false
}
},
"requires": [
"h_canNavigateUnderwater",
{
"or": [
"Gravity",
"HiJump",
"canSpringBallJumpMidAir",
"canInsaneJump"
]
}
],
"note": [
"The sand does not impede Samus in G-Mode.",
"It is possible to jump to the tall pillar with nothing, requiring a subpixel precise jump.",
"Running before jumping doesn't help. Stand one pixel from the right edge and spinjump to the right."
]
},
{
"link": [
1,
4
],
"name": "Base",
"requires": [
"Gravity",
"SpaceJump"
]
},
{
"link": [
1,
4
],
"name": "Evir Avoid with Gravity",
"requires": [
"Gravity",
{
"or": [
"canCarefulJump",
{
"enemyDamage": {
"enemy": "Evir",
"type": "particle",
"hits": 1
}
}
]
}
],
"note": "Wait a little bit for the Evirs to descend some before jumping.",
"devNote": "Running in with speed to kill or jump over the Evirs is still a careful jump."
},
{
"link": [
1,
4
],
"name": "Evir Fight Gravity",
"requires": [
"Gravity",
{
"or": [
"Ice",
"ScrewAttack",
{
"enemyKill": {
"enemies": [
[
"Evir"
],
[
"Evir"
]
],
"explicitWeapons": [
"Plasma",
"Super",
"PowerBombPeriphery"
]
}
}
]
}
],
"devNote": "Other weapons take too long to kill the enemy."
},
{
"link": [
1,
4
],
"name": "Suitless HiJump Evir Avoid",
"entranceCondition": {
"comeInRunning": {
"speedBooster": "any",
"minTiles": 3.4375
}
},
"requires": [
"canSuitlessMaridia",
"HiJump",
"canCarefulJump"
],
"note": "By entering the room with run speed, it is possible to jump over the pair of Evirs."
},
{
"link": [
1,
4
],
"name": "Suitless HiJump, Evir Projectile Hit",
"requires": [
"canSuitlessMaridia",
"HiJump",
"canPlayInSand",
{
"enemyDamage": {
"enemy": "Evir",
"type": "particle",
"hits": 1
}
}
]
},
{
"link": [
1,
4
],
"name": "Evir Fight Suitless",
"requires": [
"canSuitlessMaridia",
"HiJump",
"canPlayInSand",
{
"or": [
"Ice",
{
"enemyKill": {
"enemies": [
[
"Evir"
],
[
"Evir"
]
],
"explicitWeapons": [
"Plasma",
"Super",
"PowerBombPeriphery"
]
}
}
]
}
],
"devNote": "Other weapons take too long to kill the enemy."
},
{
"link": [
1,
4
],
"name": "Jump with Momentum",
"entranceCondition": {
"comeInJumping": {
"speedBooster": false,
"minTiles": 6.4375
}
},
"requires": [
"canCrossRoomJumpIntoWater",
"canPlayInSand",
"canTrickyJump",
{
"enemyKill": {
"enemies": [
[
"Evir"
]
],
"explicitWeapons": [
"Plasma",
"Super"
]
}
}
],
"note": [
"Gain momentum in the room to the left, then jump at the edge of the runway in this room in order to jump off of the sand and land on the first pillar.",
"Requires a runway of 7 tiles (with no open end) in the adjacent room, and killing the second Evir with a quick super or two plasma hits (note that the particle despawns as the Evir dies)."
],
"devNote": "This is not technically a canCrossRoomJumpIntoWater, but it is used here because of the way the momentum changes as Samus enters the water."
},
{
"link": [
1,
4
],
"name": "East Sand Hall Cross Room Jump with Ice or Damage Boost",
"notable": true,
"entranceCondition": {
"comeInJumping": {
"speedBooster": false,
"minTiles": 6.4375
}
},
"requires": [
"canCrossRoomJumpIntoWater",
"canPlayInSand",
"canInsaneJump",
{
"or": [
"canTrickyUseFrozenEnemies",
{
"and": [
"canNeutralDamageBoost",
{
"enemyDamage": {
"enemy": "Evir",
"type": "contact",
"hits": 1
}
}
]
}
]
}
],
"note": [
"Requires a runway of 7 tiles (with no open end) in the adjacent room. Requires two precise inputs of jumping through the doorway and aiming down before hitting the ceiling.",
"Damage boost off of the right Evir in order to land on the first pillar. With Ice, instead freeze the Evir to land on it and avoid the damage.",
"When entering the room with a bad jump, it is possible to perform a midair wiggle to get back to the door platform."
]
},
{
"link": [
1,
4
],
"name": "Cross Room Jump with Air Ball",
"entranceCondition": {
"comeInJumping": {
"speedBooster": false,
"minTiles": 6.4375
}
},
"requires": [
"canCrossRoomJumpIntoWater",
"canPlayInSand",
"canLateralMidAirMorph",
{
"or": [
"canTrickyJump",
{
"and": [
"canCarefulJump",
{
"enemyDamage": {
"enemy": "Evir",
"type": "contact",
"hits": 1
}
}
]
}
]
}
],
"note": [
"Requires a runway of 7 tiles (with no open end) in the adjacent room.",
"Jump into an air ball on room entry in order to get to the first pillar.",
"Aim down after the transition to avoid hitting the overhang near the door."
],
"devNote": "It is assumed that getting to the second pillar is free relative to getting to the right door."
},
{
"link": [
1,
4
],
"name": "Cross Room Jump with Bomb Boost",
"entranceCondition": {
"comeInWithBombBoost": {}
},
"requires": [
"canCrossRoomJumpIntoWater",
"canTrickyJump"
],
"note": [
"Bomb boost through the doorway as close to the door transition as possible in order to get as far as possible."
],
"devNote": "It is assumed that getting to the second pillar is free relative to getting to the right door."
},
{
"link": [
2,
1
],
"name": "East Sand Hall Cross-Room Speed Jump (Right to Left)",
"notable": true,
"entranceCondition": {
"comeInRunning": {
"minTiles": 19.3625,
"maxTiles": 20.3,
"speedBooster": true
}
},
"requires": [
"canPlayInSand",
"canCrossRoomJumpIntoWater",
"canTrickyDashJump"
],
"reusableRoomwideNotable": "East Sand Hall Cross-Room Speed Jump",
"note": [
"Stand at an effective distance of about 20 tiles from the door.",
"Run through the door, and jump any time after the transition, holding jump through the entire room to make it to the other side.",
"Samus will go over the Evirs, so there is no need for blue speed."
],
"devNote": [
"A little higher run speed can also work but may require releasing jump near the peak to avoid getting caught on the overhang."
]
},
{
"link": [
2,
1
],
"name": "East Sand Hall Cross-Room SpringBall Jump (Right to Left)",
"notable": true,
"entranceCondition": {
"comeInRunning": {
"minTiles": 10,
"speedBooster": true
}
},
"requires": [
"canPlayInSand",
"canCrossRoomJumpIntoWater",
"canLateralMidAirMorph",
"canTrickySpringBallJump",
"canTrickyJump"
],
"reusableRoomwideNotable": "East Sand Hall Cross-Room SpringBall Jump",
"note": [
"Enter with enough run speed to jump (after the transition) across the full room using one SpringBall Jump.",
"When exiting the first Sandfall, Samus will be rising still. That is the time to Springball jump.",
"Alternatively, an immediate pause can be used to SpringBall jump during the first narrow gap between Sandfalls.",
"Sometimes Samus will land above the sand on the far left end of the room, where it will be necessary to unmorph and jump out."
]
},
{
"link": [
2,
1
],
"name": "Suitless Shinespark",
"entranceCondition": {
"comeInWithSpark": {}
},
"requires": [
"canMidairShinespark",
{
"shinespark": {
"frames": 75,
"excessFrames": 7
}
}
],
"note": "Spark through the top of the door to avoid bonking."
},
{
"link": [
2,
1
],
"name": "Shinespark Into Room",
"entranceCondition": {
"comeInWithSpark": {}
},
"requires": [
"Gravity",
"canMidairShinespark",
{
"shinespark": {
"frames": 61,
"excessFrames": 6
}
}
],
"note": "Spark through the top of the door to avoid bonking."
},
{
"link": [
2,
1
],
"name": "Shinespark",
"entranceCondition": {
"comeInShinecharging": {
"length": 3,
"openEnd": 0
}
},
"requires": [
"Gravity",
"canMidairShinespark",
"canShinechargeMovement",
{
"shinespark": {
"frames": 51,
"excessFrames": 4
}
}
],
"note": "Shinespark midair to avoid bonking. Jump outward before sparking save Energy."
},
{
"link": [
2,
1
],
"name": "Suitless Shinespark, Careful Slow Shinecharge",
"entranceCondition": {
"comeInShinecharging": {
"length": 1,
"openEnd": 0
}
},
"requires": [
"canShinechargeMovementComplex",
"canSlowShortCharge",
"canMidairShinespark",
{
"canShineCharge": {
"usedTiles": 14,
"openEnd": 0
}
},
{
"shinespark": {
"frames": 69,
"excessFrames": 7
}
}
],
"note": "Gain an extra half-tile of runway by coming in very slowly to prevent falling off.",
"devNote": [
"If applicable, the heat frames in the adjacent room may be underrepresented, particularly on a longer runway,",
"but it shouldn't be too bad because with a longer runway, Samus can just come in fully shinecharged."
]
},
{
"link": [
2,
1
],
"name": "G-Mode",
"entranceCondition": {
"comeInWithGMode": {
"mode": "any",
"morphed": false
}
},
"requires": [
"h_canNavigateUnderwater",
{
"or": [
"Gravity",
"HiJump",
"canSpringBallJumpMidAir"
]
}
],
"note": "The sand does not impede Samus in G-Mode.",
"devNote": "Only the last jump needs any items."
},
{
"link": [
2,
2
],
"name": "Leave with Runway",
"requires": [],
"exitCondition": {
"leaveWithRunway": {
"length": 4,
"openEnd": 1
}
}
},
{
"link": [
2,
2
],
"name": "Crystal Flash",
"requires": [
"h_canCrystalFlash"
]
},
{
"link": [
2,
2
],
"name": "G-Mode Setup - Get Hit By Evir Projectile",
"notable": false,
"requires": [
"Gravity",
"canTrickyJump"
],
"exitCondition": {
"leaveWithGModeSetup": {}
},
"note": [
"The Evir won't shoot unless Samus enters the sand falls. Getting to the transition tiles while standing before the projectile can be tricky.",
"With no movement items besides Gravity, walk off the platform while facing right, turn around spin jump to barely enter the sand fall before landing back on the platform and quickly getting to the door."
]
},
{
"link": [
2,
2
],
"name": "East Sand Hall Right Door G-Mode Setup Suitless HiJump",
"notable": true,
"requires": [
"canSuitlessMaridia",
"canPlayInSand",
"canMidairWiggle",
"HiJump",
"canInsaneJump"
],
"exitCondition": {
"leaveWithGModeSetup": {}
},
"note": [
"The Evir won't shoot unless Samus enters the sand falls. Getting to the transition tiles while standing before the projectile while suitless is very precise.",
"From the sand, turnaround spinjump towards the right. Turn towards the sandfall about when you're level with the platform. Turn right and shoot as soon as you enter the sandfall. And try to land right next to the transition."
]
},
{
"link": [
2,
4
],
"name": "Base",
"requires": [
"Gravity"
]
},
{
"link": [
2,
4
],
"name": "Suitless In Sand",
"requires": [
"canSuitlessMaridia",
"HiJump",
"canPlayInSand"
]
},
{
"link": [
2,
4
],
"name": "Jump with Momentum",
"entranceCondition": {
"comeInRunning": {
"speedBooster": false,
"minTiles": 0.4375
}
},
"requires": [
"canCrossRoomJumpIntoWater",
"canPlayInSand",
"canTrickyJump",
"canTrickyUseFrozenEnemies"
],
"note": [
"Gain momentum in the room to the right, then jump immediately on entry in order to land on the first pillar. Jumping too late will likely put Samus into the pit.",
"Requires a small runway of only one tile or less in the adjacent room. Jumping before the door transition will set Samus straight into an Evir projectile, knocking her into the sand."
],
"devNote": [
"This is not technically a canCrossRoomJumpIntoWater, but it is used here because of the way the momentum changes as Samus enters the water.",
"It is assumed that getting to the third pillar is free relative to getting to the left door.",
"The only current strat that would put this into logic is using a frozen Evir, so canTrickyUseFrozenEnemies is added for clarity."
]
},
{
"link": [
2,
4
],
"name": "Cross Room Jump with Bomb Boost",
"entranceCondition": {
"comeInWithBombBoost": {}
},
"requires": [
"canCrossRoomJumpIntoWater"
],
"note": "Bomb boost through the doorway. Get the bomb boost while as close to the door transition as possible in order to get to the first pillar.",
"devNote": "It is assumed that getting to the third pillar is free relative to getting to the left door."
},
{
"link": [
2,
4
],
"name": "Spring Ball Jump",
"requires": [
"canTrickyUseFrozenEnemies",
"canTrickySpringBallJump"
],
"note": [
"Freeze the Evir soon after entering the room.",
"Use a Spring Ball jump to reach the first pillar, then continue across using the Evir as a platform."
]
},
{
"link": [
3,
1
],
"name": "G-Mode",
"entranceCondition": {
"comeInWithGMode": {
"mode": "any",
"morphed": false
},
"comesThroughToilet": "any"
},
"requires": [
"h_canNavigateUnderwater",
{
"or": [
"Gravity",
"HiJump",
"canSpringBallJumpMidAir"
]
}
],
"note": "The sand does not impede Samus in G-Mode.",
"devNote": "Only the last jump needs any items."
},
{
"link": [
3,
2
],
"name": "G-Mode",
"entranceCondition": {
"comeInWithGMode": {
"mode": "any",
"morphed": false
},
"comesThroughToilet": "any"
},
"requires": [
"h_canNavigateUnderwater",
{
"or": [
"Gravity",
"HiJump",
"canSpringBallJumpMidAir",
"canTrickyJump"
]
}
],
"note": [
"The sand does not impede Samus in G-Mode.",
"It is possible to jump to the tall pillar with nothing, requiring a subpixel precise jump.",
"Running before jumping doesn't help. Stand one pixel from the right edge and spinjump to the right."
]
},
{
"link": [
3,
4
],
"name": "Base",
"requires": [
{
"enemyDamage": {
"enemy": "Evir",
"type": "particle",
"hits": 1
}
}
]
},
{
"link": [
3,
4
],
"name": "Evir Dodge",
"requires": [
"canPrepareForNextRoom",
"canPlayInSand",
"canTrickyJump",
{
"or": [
"Gravity",
"HiJump",
"canInsaneJump"
]
}
],
"note": [
"To safely avoid the Evir shot, enter in a spin jump from either the far left or far right side of the transition."
],
"devNote": [
"Entering from a non-sand room, or passing throught the toilet does not change the ability to dodge the evirs much."
]
},
{
"link": [
4,
1
],
"name": "Base",
"requires": [
"Gravity",
"SpaceJump"
]
},
{
"link": [
4,
1
],
"name": "Fight Evirs with Gravity",
"requires": [
"Gravity",
{
"or": [
"canPlayInSand",
"canWalljump",
"h_canUseSpringBall"
]
},
{
"or": [
"canTrickyJump",
{
"enemyDamage": {
"enemy": "Evir",
"type": "particle",
"hits": 1
}
},
"Ice",
"ScrewAttack",
{
"enemyKill": {
"enemies": [
[
"Evir"
],
[
"Evir"
]
],
"explicitWeapons": [
"Super",
"Plasma",
"PowerBombPeriphery"
]
}
}
]
}
],
"devNote": "Other weapons take too long to kill the enemy."
},
{
"link": [
4,
1
],
"name": "Fight Evirs Suitless",
"requires": [
"canSuitlessMaridia",
"HiJump",
"canPlayInSand",
{
"or": [
"canTrickyJump",
{
"enemyDamage": {
"enemy": "Evir",
"type": "particle",
"hits": 1
}
},
"Ice",
{
"enemyKill": {
"enemies": [
[
"Evir"
],
[
"Evir"
]
],
"explicitWeapons": [
"Super",
"Plasma",
"PowerBombPeriphery"
]
}
}
]
}
],
"devNote": "Other weapons take too long to kill the enemy."
},
{
"link": [
4,
1
],
"name": "East Sand Hall Suitless Bootless Evir Freeze (Center to Left)",
"notable": true,
"requires": [
"canSuitlessMaridia",
"canTrickyJump",
"canTrickyUseFrozenEnemies",
"canPlayInSand",
{
"or": [
"canCameraManip",
{
"and": [
{
"ammo": {
"type": "PowerBomb",
"count": 1
}
},
{
"enemyDamage": {
"enemy": "Evir",
"type": "particle",
"hits": 2
}
}
]
}
]
}
],
"note": [
"If entering from the sandfall above, come in at the far left of the transition, with either a spin-jump or i-frames, to avoid the Evir shot;",
"land on the right side of the pillar to the left, being careful to not bring left Evir on camera.",
"If coming from the right side of the room, then moonwalk on the center pillar to scroll the camera as far right as possible, to avoid getting hit by an Evir shot;",
"alternatively, jump slightly to the left and freeze the Evir, then return back to the center pillar before jumping across the sand.",
"Freeze the right Evir and jump onto it.",
"Quickly move left and fire an angle-down shot to freeze the left Evir before it descends too far.",
"Jump onto the left Evir, back up to the right side of it to maximize space to build momentum, and jump to the left onto the sand and then onto the ledge.",
"If Samus does not quite get enough height to make it onto the ledge, then break spin, turn around to the right, land on the sand again, and do a turnaround spin-jump to the left.",
"If the Evirs descend too far, it is possible to use a Power Bomb to bring them back up again, but caution is needed to avoid killing the first Evir, and it is difficult to avoid getting shot."
],
"devNote": [
"This strat is still possible after falling through the sandpit after being centered by the toilet by landing towards the right, then crossing back left."
]
},
{
"link": [
4,
2
],
"name": "Base",
"requires": [
"Gravity",
"SpaceJump"
]
},
{
"link": [
4,
2
],
"name": "Gravity in Sand",
"requires": [
"Gravity",
{
"or": [
"Ice",
"ScrewAttack",
{
"enemyKill": {
"enemies": [
[
"Evir"
]
],
"explicitWeapons": [
"Plasma",
"Super",
"PowerBombPeriphery"
]
}
},
{
"enemyDamage": {
"enemy": "Evir",
"type": "particle",
"hits": 1
}
}
]
},
{
"and": [
"canPlayInSand",
{
"or": [
"canWalljump",
"HiJump",
"canUseFrozenEnemies",
"canGravityJump",
{
"and": [
"canTrickyJump",
"can4HighMidAirMorph",
"canTrickySpringBallJump"
]
}
]
}
]
}
]
},
{
"link": [
4,
2
],
"name": "Evir Damage Boost",
"requires": [
"Gravity",
"canTrickyJump",
"canHorizontalDamageBoost",
{
"enemyDamage": {
"enemy": "Evir",
"type": "particle",
"hits": 1
}
}
]
},
{
"link": [
4,
2
],
"name": "Suitless Evir Freeze",
"requires": [
"canSuitlessMaridia",
"HiJump",
"canTrickyJump",
"canTrickyUseFrozenEnemies",
"canPlayInSand"
],
"note": [
"Let the Evir descend slightly from its spawn point to be at the correct height.",
"A power bomb can be used to bring it back up if it falls too far."
]
},
{
"link": [
4,
2
],
"name": "East Sand Hall Spring Ball HiJump",
"notable": true,
"requires": [
"canSuitlessMaridia",
"HiJump",
"canTrickySpringBallJump",
"canStationaryLateralMidAirMorph",
"canSpringFling",
"canPlayInSand",
{
"or": [
{
"enemyDamage": {
"enemy": "Evir",
"type": "particle",
"hits": 1
}
},
{
"enemyKill": {
"enemies": [
[
"Evir"
]
],
"explicitWeapons": [
"Plasma",
"Super",
"PowerBomb"
]
}
}
]
}
],
"note": [
"On the left side of the raised platform, jump for max height.",
"Lateral Midair Morph for horizontal momentum, and perform the springball jump the moment before touching the sandfall.",
"Pause again to disable springball as soon as possible."
]
},
{
"link": [
4,
2
],
"name": "East Sand Hall Suitless Bootless Evir Freeze (Center to Right)",
"notable": true,
"requires": [
"canSuitlessMaridia",
"canTrickyUseFrozenEnemies",
"canPlayInSand",
"h_canMaxHeightSpringBallJump",
"canStationaryLateralMidAirMorph"
],
"note": [
"From the sand fall, quickly get onto the left platform to prevent the right side Evir from lowering too far.",
"Jump on the sand to the right while freezing the Evir as high as possible. Refreeze the Evir so it is a slightly higher platform than the right pillar.",
"Perform a spring ball jump with a stationary lateral mid-air morph from the left side of the current platform to get onto the Evir. Use a running jump off of the Evir.",
"As a backup, it may be possible to make the Evir rise again by hitting it with a PB - place the PB in the air to avoid double hitting and killing it."
]
}
]
}