Bubble Mountain
Room ID: 97
|
Exit condition: {
"leaveWithRunway": {
"length": 4,
"openEnd": 1
}
}
|
|
From: 1
Left Side - Top Door
To: 1
Left Side - Top Door
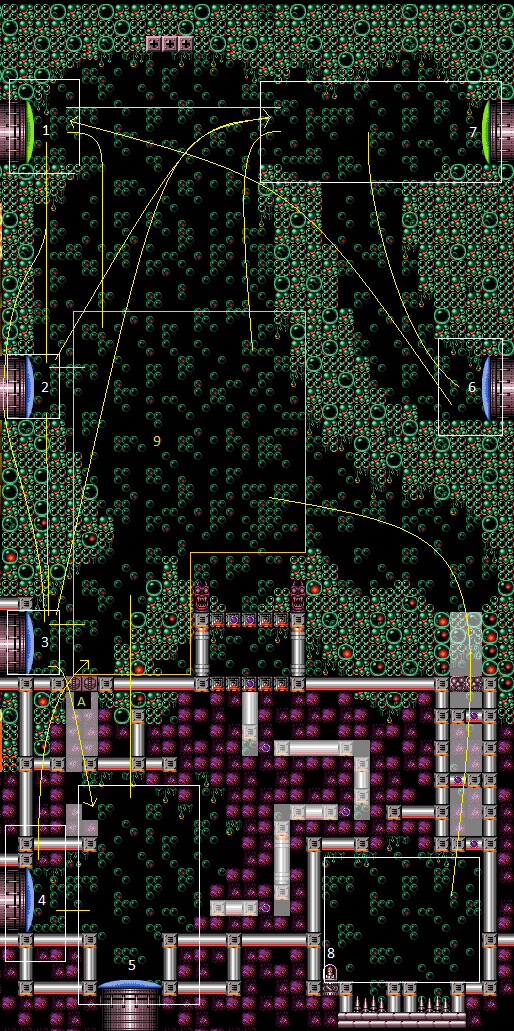
Place a Power Bomb on the bottom stair attached to the door in order to prevent killing the Sova, or free a Sova from the Morph maze with Bombs. If coming from below, be sure to lure the Sova to the bottom before placing a Power Bomb near the blocks in order to prevent killing it. Use the frozen Sova to climb to the top left door. Stand on a low frozen Waver to lower the camera enough to get the Sova to move again. Requires: "h_canFrozenEnemyRunway"
{
"or": [
{
"obstaclesCleared": [
"A"
]
},
"h_canBombThings"
]
}
{
"or": [
"canTrickyJump",
"SpaceJump"
]
}
Exit condition: {
"leaveWithRunway": {
"length": 5,
"openEnd": 1
}
}
|
|
Requires: "h_canCrystalFlash" |
|
From: 1
Left Side - Top Door
To: 2
Left Side - Top Middle Door
Entrance condition: {
"comeInShinecharging": {
"length": 3,
"openEnd": 1
}
}
Requires: "canShinechargeMovementComplex"
{
"or": [
{
"enemyKill": {
"enemies": [
[
"Waver"
],
[
"Waver"
]
],
"explicitWeapons": [
"Wave",
"Spazer",
"Plasma",
"Missile",
"Super",
"Grapple"
]
}
},
{
"enemyDamage": {
"enemy": "Waver",
"type": "contact",
"hits": 1
}
}
]
}
Exit condition: {
"leaveShinecharged": {
"framesRemaining": 70
}
}
|
|
From: 1
Left Side - Top Door
To: 3
Left Side - Bottom Middle Door
Slide off the edge to kill the Waver with blue. Entrance condition: {
"comeInShinecharging": {
"length": 3,
"openEnd": 1
}
}
Requires: "canShinechargeMovementTricky" Exit condition: {
"leaveShinecharged": {
"framesRemaining": 24
}
}
|
|
Kill King Cac by scrolling the camera before Grappling across. Requires: "Grapple" |
|
King Cac can be killed by scrolling the camera before jumping across. Requires: "canWalljump"
"canCarefulJump"
{
"or": [
"canCameraManip",
"canStaggeredWalljump",
{
"and": [
"canNeutralDamageBoost",
{
"enemyDamage": {
"enemy": "Cacatac",
"type": "contact",
"hits": 1
}
}
]
}
]
}
|
|
Entrance condition: {
"comeInRunning": {
"minTiles": 2,
"speedBooster": "any"
}
}
Requires: {
"or": [
"canTrickyJump",
{
"and": [
"SpeedBooster",
"canCarefulJump"
]
}
]
}
{
"or": [
"ScrewAttack",
{
"and": [
"canNeutralDamageBoost",
{
"enemyDamage": {
"enemy": "Cacatac",
"hits": 1,
"type": "contact"
}
}
]
}
]
}
|
|
From: 1
Left Side - Top Door
To: 7
Top Right Door
Kill King Cac by scrolling the camera, before attempting the jump. Requires: {
"doorUnlockedAtNode": 1
}
{
"or": [
"canTrickyJump",
{
"and": [
"SpeedBooster",
"canCarefulJump"
]
}
]
}
"canCameraManip"
|
|
Requires: "canLateralMidAirMorph"
"canTrickyJump"
{
"or": [
"canCameraManip",
{
"enemyDamage": {
"enemy": "Cacatac",
"hits": 1,
"type": "contact"
}
}
]
}
|
|
From: 1
Left Side - Top Door
To: 7
Top Right Door
Notable: true 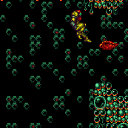

Damage Boost off a Waver to cross the gap. Requires: "canHorizontalDamageBoost"
{
"enemyDamage": {
"enemy": "Waver",
"hits": 1,
"type": "contact"
}
}
|
|
Entrance condition: {
"comeInWithSpark": {}
}
Requires: {
"shinespark": {
"frames": 42,
"excessFrames": 22
}
}
|
|
Jump over the Waver, fire a shot mid-air, and activate the shinespark wind-up. Wait until the shot is at a specific position before sparking. Sparking too late will cause the shot to despawn before reaching the door. Sparking too early will cause Samus to bonk the door as it will not yet be open. A beam shot, Missile, or Super can be used. Entrance condition: {
"comeInShinecharged": {
"framesRequired": 50
}
}
Requires: "canHeroShot"
"canShinechargeMovementComplex"
{
"shinespark": {
"frames": 35,
"excessFrames": 0
}
}
Exit condition: {
"leaveWithSpark": {}
}
|
|
|
|
Climb up 1 screen. Entrance condition: {
"comeInWithDoorStuckSetup": {}
}
Requires: "canXRayClimb" |
|
From: 2
Left Side - Top Middle Door
To: 1
Left Side - Top Door
Enter with G-mode direct, back up to between 1 and 6 pixels from the door transition, and activate X-ray to get very deep stuck in the door. Climb up 1 screen, and perform a turnaround buffered spin-jump away from the door to trigger the transition, bypassing any lock on the door. Entrance condition: {
"comeInWithGMode": {
"mode": "direct",
"morphed": false
}
}
Requires: "canXRayClimb" Bypasses door shell: true |
|
From: 2
Left Side - Top Middle Door
To: 1
Left Side - Top Door
Entrance condition: {
"comeInRunning": {
"minTiles": 35,
"speedBooster": true
}
}
Requires: "canTrickyJump" |
|
From: 2
Left Side - Top Middle Door
To: 1
Left Side - Top Door
Entrance condition: {
"comeInRunning": {
"minTiles": 8,
"speedBooster": true
}
}
Requires: "canCarefulJump"
"HiJump"
{
"or": [
"ScrewAttack",
{
"enemyDamage": {
"enemy": "Waver",
"type": "contact",
"hits": 1
}
}
]
}
|
|
From: 2
Left Side - Top Middle Door
To: 1
Left Side - Top Door
Entrance condition: {
"comeInRunning": {
"minTiles": 7,
"speedBooster": true
}
}
Requires: "canTrickyJump"
"HiJump"
{
"or": [
"ScrewAttack",
{
"enemyDamage": {
"enemy": "Waver",
"type": "contact",
"hits": 1
}
}
]
}
|
|
From: 2
Left Side - Top Middle Door
To: 1
Left Side - Top Door
Entrance condition: {
"comeInRunning": {
"minTiles": 15,
"speedBooster": true
}
}
Requires: "canTrickyJump"
"canTrickySpringBallJump"
"canNeutralDamageBoost"
{
"enemyDamage": {
"enemy": "Waver",
"type": "contact",
"hits": 1
}
}
|
|
From: 2
Left Side - Top Middle Door
To: 1
Left Side - Top Door
Entrance condition: {
"comeInShinecharging": {
"length": 2,
"openEnd": 1
}
}
Requires: {
"shinespark": {
"frames": 27,
"excessFrames": 2
}
}
|
|
From: 2
Left Side - Top Middle Door
To: 1
Left Side - Top Door
Entrance condition: {
"comeInShinecharged": {
"framesRequired": 50
}
}
Requires: {
"shinespark": {
"frames": 27,
"excessFrames": 2
}
}
|
|
From: 2
Left Side - Top Middle Door
To: 1
Left Side - Top Door
Entrance condition: {
"comeInShinecharged": {
"framesRequired": 22
}
}
Requires: "canShinechargeMovement"
"canMidairShinespark"
{
"shinespark": {
"frames": 19
}
}
|
|
From: 2
Left Side - Top Middle Door
To: 1
Left Side - Top Door
Entrance condition: {
"comeInShinecharged": {
"framesRequired": 125
}
}
Requires: "HiJump"
"canPreciseWalljump"
"canShinechargeMovementTricky"
{
"shinespark": {
"frames": 18,
"excessFrames": 0
}
}
Exit condition: {
"leaveWithSpark": {}
}
|
|
From: 2
Left Side - Top Middle Door
To: 1
Left Side - Top Door
Entrance condition: {
"comeInShinecharged": {
"framesRequired": 105
}
}
Requires: "HiJump"
"SpaceJump"
"canShinechargeMovementComplex"
{
"shinespark": {
"frames": 20,
"excessFrames": 0
}
}
Exit condition: {
"leaveWithSpark": {}
}
|
|
From: 2
Left Side - Top Middle Door
To: 1
Left Side - Top Door
Entrance condition: {
"comeInShinecharging": {
"length": 2,
"openEnd": 0
}
}
Requires: "HiJump" "canPreciseWalljump" "canShinechargeMovementTricky" Exit condition: {
"leaveShinecharged": {
"framesRemaining": 20
}
}
|
|
From: 2
Left Side - Top Middle Door
To: 1
Left Side - Top Door
Entrance condition: {
"comeInShinecharging": {
"length": 2,
"openEnd": 0
}
}
Requires: "HiJump" "SpaceJump" "canShinechargeMovementComplex" Exit condition: {
"leaveShinecharged": {
"framesRemaining": 35
}
}
|
|
From: 2
Left Side - Top Middle Door
To: 2
Left Side - Top Middle Door
Exit condition: {
"leaveWithRunway": {
"length": 3,
"openEnd": 1
}
}
|
|
From: 2
Left Side - Top Middle Door
To: 2
Left Side - Top Middle Door
Place a Power Bomb on the bottom stair attached to the door in order to prevent killing the Sova, or free a Sova from the Morph maze with Bombs. If coming from below, be sure to lure the Sova to the bottom before placing a Power Bomb near the blocks in order to prevent killing it. Requires: "h_canFrozenEnemyRunway"
{
"or": [
{
"obstaclesCleared": [
"A"
]
},
"h_canBombThings"
]
}
Exit condition: {
"leaveWithRunway": {
"length": 4,
"openEnd": 1
}
}
|
|
From: 2
Left Side - Top Middle Door
To: 3
Left Side - Bottom Middle Door
Entrance condition: {
"comeInShinecharged": {
"framesRequired": 115
}
}
Requires: "canShinechargeMovement" Exit condition: {
"leaveShinecharged": {
"framesRemaining": "auto"
}
}
|
|
From: 2
Left Side - Top Middle Door
To: 3
Left Side - Bottom Middle Door
Entrance condition: {
"comeInShinecharged": {
"framesRequired": 105
}
}
Requires: "canShinechargeMovement"
{
"shinespark": {
"frames": 7,
"excessFrames": 0
}
}
Exit condition: {
"leaveWithSpark": {}
}
|
|
From: 2
Left Side - Top Middle Door
To: 3
Left Side - Bottom Middle Door
Entrance condition: {
"comeInShinecharging": {
"length": 2,
"openEnd": 1
}
}
Requires: "canShinechargeMovement" Exit condition: {
"leaveShinecharged": {
"framesRemaining": 75
}
}
|
|
Entrance condition: {
"comeInRunning": {
"minTiles": 35,
"speedBooster": true
}
}
Requires: "canTrickyJump" |
|
Entrance condition: {
"comeInRunning": {
"minTiles": 7,
"speedBooster": true
}
}
Requires: "canCarefulJump"
"HiJump"
{
"or": [
"ScrewAttack",
{
"enemyDamage": {
"enemy": "Cacatac",
"type": "contact",
"hits": 1
}
}
]
}
|
|
From: 2
Left Side - Top Middle Door
To: 7
Top Right Door
Entrance condition: {
"comeInRunning": {
"minTiles": 15,
"speedBooster": true
}
}
Requires: "canTrickyJump"
"canTrickySpringBallJump"
"canNeutralDamageBoost"
{
"enemyDamage": {
"enemy": "Cacatac",
"type": "contact",
"hits": 1
}
}
|
|
From: 2
Left Side - Top Middle Door
To: 7
Top Right Door
Entrance condition: {
"comeInRunning": {
"minTiles": 2.4375,
"speedBooster": false
}
}
Requires: "canPreciseWalljump" "canTrickyJump" |
|
From: 2
Left Side - Top Middle Door
To: 7
Top Right Door
Entrance condition: {
"comeInRunning": {
"minTiles": 4,
"speedBooster": false
}
}
Requires: "canWalljump" "canCarefulJump" |
|
From: 2
Left Side - Top Middle Door
To: 7
Top Right Door
Entrance condition: {
"comeInRunning": {
"minTiles": 5,
"speedBooster": "any"
}
}
Requires: "canWalljump" "canCarefulJump" |
|
From: 2
Left Side - Top Middle Door
To: 7
Top Right Door
Entrance condition: {
"comeInShinecharging": {
"length": 2,
"openEnd": 1
}
}
Requires: {
"shinespark": {
"frames": 22,
"excessFrames": 2
}
}
|
|
From: 2
Left Side - Top Middle Door
To: 7
Top Right Door
Entrance condition: {
"comeInShinecharged": {
"framesRequired": 5
}
}
Requires: {
"shinespark": {
"frames": 22,
"excessFrames": 2
}
}
|
|
From: 2
Left Side - Top Middle Door
To: 7
Top Right Door
Entrance condition: {
"comeInShinecharging": {
"length": 2,
"openEnd": 0
}
}
Requires: "HiJump"
"SpaceJump"
"canHeroShot"
"canShinechargeMovementComplex"
{
"shinespark": {
"frames": 31,
"excessFrames": 0
}
}
Exit condition: {
"leaveWithSpark": {}
}
|
|
From: 2
Left Side - Top Middle Door
To: 7
Top Right Door
Entrance condition: {
"comeInShinecharged": {
"framesRequired": 125
}
}
Requires: "HiJump"
"canWalljump"
"canShinechargeMovementTricky"
{
"shinespark": {
"frames": 27,
"excessFrames": 0
}
}
Exit condition: {
"leaveWithSpark": {}
}
|
|
|
|
From: 3
Left Side - Bottom Middle Door
To: 1
Left Side - Top Door
Climb up 2 screens. Entrance condition: {
"comeInWithDoorStuckSetup": {}
}
Requires: "canXRayClimb" |
|
From: 3
Left Side - Bottom Middle Door
To: 1
Left Side - Top Door
Enter with G-mode direct, back up to between 1 and 6 pixels from the door transition, and activate X-ray to get very deep stuck in the door. Climb up 2 screens, and perform a turnaround buffered spin-jump away from the door to trigger the transition, bypassing any lock on the door. Entrance condition: {
"comeInWithGMode": {
"mode": "direct",
"morphed": false
}
}
Requires: "canXRayClimb" Bypasses door shell: true |
|
From: 3
Left Side - Bottom Middle Door
To: 1
Left Side - Top Door
Entrance condition: {
"comeInShinecharging": {
"length": 5,
"openEnd": 0
}
}
Requires: "canShinechargeMovementComplex"
{
"shinespark": {
"frames": 20,
"excessFrames": 2
}
}
|
|
From: 3
Left Side - Bottom Middle Door
To: 1
Left Side - Top Door
Entrance condition: {
"comeInShinecharging": {
"length": 5,
"openEnd": 0
}
}
Requires: "canShinechargeMovement"
{
"shinespark": {
"frames": 39
}
}
|
|
From: 3
Left Side - Bottom Middle Door
To: 1
Left Side - Top Door
Entrance condition: {
"comeInShinecharged": {
"framesRequired": 35
}
}
Requires: "canShinechargeMovement"
{
"shinespark": {
"frames": 39
}
}
|
|
From: 3
Left Side - Bottom Middle Door
To: 2
Left Side - Top Middle Door
Entrance condition: {
"comeInShinecharging": {
"length": 5,
"openEnd": 0
}
}
Requires: "canShinechargeMovementComplex" Exit condition: {
"leaveShinecharged": {
"framesRemaining": 45
}
}
|
|
From: 3
Left Side - Bottom Middle Door
To: 2
Left Side - Top Middle Door
Entrance condition: {
"comeInShinecharging": {
"length": 5,
"openEnd": 0
}
}
Requires: "HiJump"
{
"enemyDamage": {
"enemy": "Waver",
"type": "contact",
"hits": 1
}
}
"canShinechargeMovementComplex"
Exit condition: {
"leaveShinecharged": {
"framesRemaining": 70
}
}
|
|
From: 3
Left Side - Bottom Middle Door
To: 2
Left Side - Top Middle Door
Entrance condition: {
"comeInShinecharged": {
"framesRequired": 125
}
}
Requires: "canShinechargeMovementComplex"
{
"shinespark": {
"frames": 5
}
}
Exit condition: {
"leaveWithSpark": {}
}
|
|
From: 3
Left Side - Bottom Middle Door
To: 2
Left Side - Top Middle Door
Entrance condition: {
"comeInShinecharged": {
"framesRequired": 90
}
}
Requires: "HiJump"
"canShinechargeMovementComplex"
{
"enemyDamage": {
"enemy": "Waver",
"type": "contact",
"hits": 1
}
}
{
"shinespark": {
"frames": 7,
"excessFrames": 0
}
}
Exit condition: {
"leaveWithSpark": {}
}
|
|
From: 3
Left Side - Bottom Middle Door
To: 3
Left Side - Bottom Middle Door
Exit condition: {
"leaveWithRunway": {
"length": 3,
"openEnd": 1
}
}
|
|
From: 3
Left Side - Bottom Middle Door
To: 3
Left Side - Bottom Middle Door
Requires: {
"obstaclesNotCleared": [
"A"
]
}
Exit condition: {
"leaveWithRunway": {
"length": 6,
"openEnd": 0
}
}
|
|
From: 3
Left Side - Bottom Middle Door
To: 3
Left Side - Bottom Middle Door
Be sure to lure the Sova to the bottom before placing a Power Bomb near the blocks in order to prevent killing it. Requires: "h_canFrozenEnemyRunway" Exit condition: {
"leaveWithRunway": {
"length": 4,
"openEnd": 1
}
}
|
|
From: 3
Left Side - Bottom Middle Door
To: 5
Bottom Door
Entrance condition: {
"comeInWithStoredFallSpeed": {
"fallSpeedInTiles": 1
}
}
Requires: "canMoonfall" |
|
From: 3
Left Side - Bottom Middle Door
To: 7
Top Right Door
Diagonal spark from the Save Room Door steps. Entrance condition: {
"comeInShinecharging": {
"length": 5,
"openEnd": 0
}
}
Requires: "canShinechargeMovementComplex"
{
"shinespark": {
"frames": 26
}
}
|
|
From: 3
Left Side - Bottom Middle Door
To: 7
Top Right Door
Diagonal spark from the Save Room Door steps. Entrance condition: {
"comeInShinecharged": {
"framesRequired": 100
}
}
Requires: "canShinechargeMovementComplex"
{
"shinespark": {
"frames": 26
}
}
|
|
|
|
Climb up 3 screens. Entrance condition: {
"comeInWithDoorStuckSetup": {}
}
Requires: "canXRayClimb" "canBePatient" |
|
From: 4
Left Side - Bottom Door
To: 1
Left Side - Top Door
Enter with G-mode direct, back up to between 1 and 6 pixels from the door transition, and activate X-ray to get very deep stuck in the door. Climb up 3 screens, and perform a turnaround buffered spin-jump away from the door to trigger the transition, bypassing any lock on the door. Entrance condition: {
"comeInWithGMode": {
"mode": "direct",
"morphed": false
}
}
Requires: "canXRayClimb" "canBePatient" Bypasses door shell: true |
|
From: 4
Left Side - Bottom Door
To: 2
Left Side - Top Middle Door
Enter with G-mode direct, back up to between 1 and 6 pixels from the door transition, and activate X-ray to get very deep stuck in the door. Climb up 2 screens, and perform a turnaround buffered spin-jump away from the door to trigger the transition, bypassing any lock on the door. Entrance condition: {
"comeInWithGMode": {
"mode": "direct",
"morphed": false
}
}
Requires: "canXRayClimb" Bypasses door shell: true |
|
From: 4
Left Side - Bottom Door
To: 3
Left Side - Bottom Middle Door
Climb up 1 screen. Entrance condition: {
"comeInWithDoorStuckSetup": {}
}
Requires: "canXRayClimb" |
|
From: 4
Left Side - Bottom Door
To: 3
Left Side - Bottom Middle Door
Enter with G-mode direct, back up to between 1 and 6 pixels from the door transition, and activate X-ray to get very deep stuck in the door. Climb up 1 screen, and perform a turnaround buffered spin-jump away from the door to trigger the transition, bypassing any lock on the door. Entrance condition: {
"comeInWithGMode": {
"mode": "direct",
"morphed": false
}
}
Requires: "canXRayClimb" Bypasses door shell: true |
|
From: 4
Left Side - Bottom Door
To: 4
Left Side - Bottom Door
Exit condition: {
"leaveWithRunway": {
"length": 5,
"openEnd": 1
}
}
|
|
From: 4
Left Side - Bottom Door
To: 4
Left Side - Bottom Door
Requires: "h_canFrozenEnemyRunway"
{
"or": [
{
"resetRoom": {
"nodes": [
4,
5
],
"mustStayPut": false
}
},
{
"and": [
"h_canBombThings",
{
"ammo": {
"type": "Super",
"count": 1
}
}
]
}
]
}
Exit condition: {
"leaveWithRunway": {
"length": 6,
"openEnd": 1
}
}
|
|
From: 4
Left Side - Bottom Door
To: 4
Left Side - Bottom Door
Requires: "h_canCrystalFlash" Clears obstacles: A |
|
|
|
Entrance condition: {
"comeInShinecharged": {
"framesRequired": 70
}
}
Requires: "canShinechargeMovement" Exit condition: {
"leaveShinecharged": {
"framesRemaining": "auto"
}
}
|
|
From: 4
Left Side - Bottom Door
To: 5
Bottom Door
Entrance condition: {
"comeInShinecharging": {
"length": 4,
"openEnd": 1
}
}
Requires: "canShinechargeMovement" Exit condition: {
"leaveShinecharged": {
"framesRemaining": 130
}
}
|
|
From: 4
Left Side - Bottom Door
To: 5
Bottom Door
Entrance condition: {
"comeInWithStoredFallSpeed": {
"fallSpeedInTiles": 1
}
}
Requires: "canMoonfall" Bypasses door shell: true |
|
|
|
Entrance condition: {
"comeInShinecharged": {
"framesRequired": 70
},
"comesThroughToilet": "any"
}
Requires: "canShinechargeMovementComplex" Exit condition: {
"leaveShinecharged": {
"framesRemaining": "auto"
}
}
|
|
From: 5
Bottom Door
To: 4
Left Side - Bottom Door
Entrance condition: {
"comeInShinecharged": {
"framesRequired": 40
},
"comesThroughToilet": "any"
}
Requires: "canShinechargeMovement"
{
"shinespark": {
"frames": 9
}
}
Exit condition: {
"leaveWithSpark": {}
}
|
|
Exit condition: {
"leaveNormally": {}
}
|
|
Entrance condition: {
"comeInWithSpark": {},
"comesThroughToilet": "any"
}
Requires: {
"shinespark": {
"frames": 12,
"excessFrames": 12
}
}
|
|
Requires: {
"or": [
"h_canUsePowerBombs",
{
"obstaclesCleared": [
"A"
]
}
]
}
Clears obstacles: A |
|
Requires: "h_canUseMorphBombs" |
|
Freeze the wall crawler at a precise location in order to jump through the Power Bomb Blocks. The pixel window is larger and higher with Morph and an X-Ray Stand Up. Requires: "h_canNonTrivialCeilingClip" "canTrickyUseFrozenEnemies" |
|
From: 6
Middle Right Door
To: 1
Left Side - Top Door
Entrance condition: {
"comeInShinecharged": {
"framesRequired": 115
}
}
Requires: "canMidairShinespark"
"canShinechargeMovementComplex"
{
"shinespark": {
"frames": 30,
"excessFrames": 6
}
}
|
|
From: 6
Middle Right Door
To: 1
Left Side - Top Door
Entrance condition: {
"comeInShinecharging": {
"length": 4,
"openEnd": 0
}
}
Requires: "canMidairShinespark"
"canShinechargeMovementComplex"
{
"shinespark": {
"frames": 30,
"excessFrames": 6
}
}
|
|
From: 6
Middle Right Door
To: 1
Left Side - Top Door
Exit the previous room with Samus in a standing pose (while grappled) with a horizontal position of 21 (as far right as possible). After teleporting, press right to release Grapple while staying standing (not being forced into a crouch). Then X-ray climb to get up to the door transition above, without needing to open the door. At the beginning of the climb, avoid pressing left without X-Ray being held, to prevent triggering the transition of the lower door. Entrance condition: {
"comeInWithGrappleTeleport": {
"blockPositions": [
[
2,
28
],
[
2,
29
],
[
2,
34
]
]
}
}
Requires: "canXRayClimb" Bypasses door shell: true |
|
From: 6
Middle Right Door
To: 2
Left Side - Top Middle Door
Entrance condition: {
"comeInWithGrappleTeleport": {
"blockPositions": [
[
2,
28
],
[
2,
29
]
]
}
}
Bypasses door shell: true |
|
From: 6
Middle Right Door
To: 2
Left Side - Top Middle Door
Entrance condition: {
"comeInWithGrappleTeleport": {
"blockPositions": [
[
2,
28
]
]
}
}
Exit condition: {
"leaveWithGrappleTeleport": {
"blockPositions": [
[
2,
28
]
]
}
}
Bypasses door shell: true |
|
From: 6
Middle Right Door
To: 2
Left Side - Top Middle Door
Entrance condition: {
"comeInWithGrappleTeleport": {
"blockPositions": [
[
2,
29
]
]
}
}
Exit condition: {
"leaveWithGrappleTeleport": {
"blockPositions": [
[
2,
29
]
]
}
}
Bypasses door shell: true |
|
From: 6
Middle Right Door
To: 2
Left Side - Top Middle Door
Exit the previous room with Samus in a standing pose (while grappled) with a horizontal position of 21 (as far right as possible). After teleporting, press right to release Grapple while staying standing (not being forced into a crouch). Then X-ray climb to get up to the door transition above, without needing to open the door. At the beginning of the climb, avoid pressing left without X-Ray being held, to prevent triggering the transition of the lower door. Entrance condition: {
"comeInWithGrappleTeleport": {
"blockPositions": [
[
2,
34
]
]
}
}
Requires: "canXRayClimb" Bypasses door shell: true |
|
From: 6
Middle Right Door
To: 3
Left Side - Bottom Middle Door
Entrance condition: {
"comeInWithGrappleTeleport": {
"blockPositions": [
[
2,
34
]
]
}
}
Bypasses door shell: true |
|
From: 6
Middle Right Door
To: 3
Left Side - Bottom Middle Door
Entrance condition: {
"comeInWithGrappleTeleport": {
"blockPositions": [
[
2,
34
]
]
}
}
Exit condition: {
"leaveWithGrappleTeleport": {
"blockPositions": [
[
2,
34
]
]
}
}
Bypasses door shell: true |
|
Exit condition: {
"leaveWithRunway": {
"length": 5,
"openEnd": 0
}
}
|
|
|
|
From: 6
Middle Right Door
To: 7
Top Right Door
Enter with G-mode direct, back up to between 1 and 6 pixels from the door transition, and activate X-ray to get very deep stuck in the door. Climb up 1 screen, and perform a turnaround buffered spin-jump away from the door to trigger the transition, bypassing any lock on the door. Entrance condition: {
"comeInWithGMode": {
"mode": "direct",
"morphed": false
}
}
Requires: "canXRayClimb" Bypasses door shell: true |
|
From: 6
Middle Right Door
To: 7
Top Right Door
Entrance condition: {
"comeInShinecharged": {
"framesRequired": 120
}
}
Requires: "canMidairShinespark"
"canShinechargeMovementComplex"
{
"shinespark": {
"frames": 15
}
}
Exit condition: {
"leaveWithSpark": {}
}
|
|
From: 6
Middle Right Door
To: 7
Top Right Door
Entrance condition: {
"comeInShinecharged": {
"framesRequired": 80
}
}
Requires: "HiJump"
"canMidairShinespark"
"canShinechargeMovementComplex"
{
"shinespark": {
"frames": 11
}
}
Exit condition: {
"leaveWithSpark": {}
}
|
|
From: 6
Middle Right Door
To: 7
Top Right Door
Entrance condition: {
"comeInShinecharging": {
"length": 4,
"openEnd": 0
}
}
Requires: "canShinechargeMovementTricky"
{
"shinespark": {
"frames": 5,
"excessFrames": 0
}
}
Exit condition: {
"leaveWithSpark": {}
}
|
|
From: 6
Middle Right Door
To: 7
Top Right Door
Entrance condition: {
"comeInShinecharging": {
"length": 4,
"openEnd": 0
}
}
Requires: "canShinechargeMovementComplex" "HiJump" "canWalljump" Exit condition: {
"leaveShinecharged": {
"framesRemaining": 45
}
}
|
|
Requires: "Grapple" |
|
Use the full runway of the top-right door to jump to the ledge below the Cacatac and mockball on it. Either full jump from the left side of this platform, or do a small hop followed by a big jump to cross the gap. Disabling Springball once past the Grapple Blocks makes this much easier. Requires: "canCarefulJump"
"canSpringBallBounce"
"canMockball"
{
"or": [
{
"doorUnlockedAtNode": 7
},
"canTrickyJump"
]
}
|
|
Entrance condition: {
"comeInWithSpark": {}
}
Requires: {
"shinespark": {
"frames": 41,
"excessFrames": 2
}
}
|
|
From: 7
Top Right Door
To: 1
Left Side - Top Door
Dealing with spikes is up to luck. It is possible to shoot the Cacatac while jumping towards it. Entrance condition: {
"comeInShinecharged": {
"framesRequired": 100
}
}
Requires: "canShinechargeMovementComplex"
"canMidairShinespark"
"canCarefulJump"
{
"shinespark": {
"frames": 30,
"excessFrames": 6
}
}
|
|
From: 7
Top Right Door
To: 1
Left Side - Top Door
Dealing with spikes is up to luck. It is possible to shoot the Cacatac while jumping towards it. Entrance condition: {
"comeInShinecharging": {
"length": 2.5,
"openEnd": 1
}
}
Requires: "canShinechargeMovementComplex"
"canMidairShinespark"
"canCarefulJump"
{
"shinespark": {
"frames": 30,
"excessFrames": 6
}
}
|
|
From: 7
Top Right Door
To: 1
Left Side - Top Door
Kill the Cacatac and quickly jump over to its platform. Shoot towards the top-left door to open it, then follow the shot by jumping over the pit before initiating the shinespark. Entrance condition: {
"comeInShinecharging": {
"length": 2.5,
"openEnd": 1
}
}
Requires: "canShinechargeMovementComplex"
"canMidairShinespark"
"canTrickyJump"
"canHeroShot"
{
"shinespark": {
"frames": 25
}
}
{
"or": [
{
"and": [
"Wave",
"Spazer"
]
},
"Plasma",
{
"ammo": {
"type": "Missile",
"count": 2
}
},
{
"ammo": {
"type": "Super",
"count": 2
}
}
]
}
|
|
From: 7
Top Right Door
To: 1
Left Side - Top Door
Notable: true
Damage Boost off a Waver to cross the gap. Requires: "canHorizontalDamageBoost"
{
"enemyDamage": {
"enemy": "Waver",
"hits": 1,
"type": "contact"
}
}
|
|
Run and jump, fire a shot mid-air, and activate the shinespark wind-up. Wait until the shot is at a specific position before sparking. Sparking too late will cause the shot to despawn before reaching the door. Sparking too early will cause Samus to bonk the door as it will not yet be open. A beam shot, Missile, or Super can be used. Entrance condition: {
"comeInShinecharged": {
"framesRequired": 45
}
}
Requires: "canHeroShot"
"canShinechargeMovementTricky"
{
"shinespark": {
"frames": 36,
"excessFrames": 0
}
}
Exit condition: {
"leaveWithSpark": {}
}
|
|
From: 7
Top Right Door
To: 1
Left Side - Top Door
Exit the previous room with Samus in a standing pose (while grappled) with a horizontal position of 21 (as far right as possible). After teleporting, press right to release Grapple while staying standing (not being forced into a crouch). Then X-ray climb to get up to the door transition above, without needing to open the door. At the beginning of the climb, avoid pressing left without X-Ray being held, to prevent triggering the transition of the lower door. Entrance condition: {
"comeInWithGrappleTeleport": {
"blockPositions": [
[
2,
28
],
[
2,
29
],
[
2,
34
]
]
}
}
Requires: "canXRayClimb" Bypasses door shell: true |
|
Entrance condition: {
"comeInWithGrappleTeleport": {
"blockPositions": [
[
2,
28
],
[
2,
29
]
]
}
}
Bypasses door shell: true |
|
From: 7
Top Right Door
To: 2
Left Side - Top Middle Door
Entrance condition: {
"comeInWithGrappleTeleport": {
"blockPositions": [
[
2,
28
]
]
}
}
Exit condition: {
"leaveWithGrappleTeleport": {
"blockPositions": [
[
2,
28
]
]
}
}
Bypasses door shell: true |
|
From: 7
Top Right Door
To: 2
Left Side - Top Middle Door
Entrance condition: {
"comeInWithGrappleTeleport": {
"blockPositions": [
[
2,
29
]
]
}
}
Exit condition: {
"leaveWithGrappleTeleport": {
"blockPositions": [
[
2,
29
]
]
}
}
Bypasses door shell: true |
|
From: 7
Top Right Door
To: 2
Left Side - Top Middle Door
Exit the previous room with Samus in a standing pose (while grappled) with a horizontal position of 21 (as far right as possible). After teleporting, press right to release Grapple while staying standing (not being forced into a crouch). Then X-ray climb to get up to the door transition above, without needing to open the door. At the beginning of the climb, avoid pressing left without X-Ray being held, to prevent triggering the transition of the lower door. Entrance condition: {
"comeInWithGrappleTeleport": {
"blockPositions": [
[
2,
34
]
]
}
}
Requires: "canXRayClimb" Bypasses door shell: true |
|
From: 7
Top Right Door
To: 3
Left Side - Bottom Middle Door
Entrance condition: {
"comeInWithGrappleTeleport": {
"blockPositions": [
[
2,
34
]
]
}
}
Bypasses door shell: true |
|
From: 7
Top Right Door
To: 3
Left Side - Bottom Middle Door
Entrance condition: {
"comeInWithGrappleTeleport": {
"blockPositions": [
[
2,
34
]
]
}
}
Exit condition: {
"leaveWithGrappleTeleport": {
"blockPositions": [
[
2,
34
]
]
}
}
Bypasses door shell: true |
|
|
|
Entrance condition: {
"comeInShinecharged": {
"framesRequired": 120
}
}
Requires: "canShinechargeMovementComplex" Exit condition: {
"leaveShinecharged": {
"framesRemaining": "auto"
}
}
|
|
From: 7
Top Right Door
To: 6
Middle Right Door
Entrance condition: {
"comeInShinecharged": {
"framesRequired": 105
}
}
Requires: {
"shinespark": {
"frames": 5
}
}
Exit condition: {
"leaveWithSpark": {}
}
|
|
From: 7
Top Right Door
To: 6
Middle Right Door
Entrance condition: {
"comeInShinecharging": {
"length": 2.5,
"openEnd": 1
}
}
Exit condition: {
"leaveShinecharged": {
"framesRemaining": 55
}
}
|
|
Exit condition: {
"leaveWithRunway": {
"length": 3.5,
"openEnd": 1
}
}
|
|
From: 7
Top Right Door
To: 7
Top Right Door
Place a Power Bomb on the bottom stair attached to the door in order to prevent killing the Sova, or free a Sova from the Morph maze with Bombs. If coming from below, be sure to lure the Sova to the bottom before placing a Power Bomb near the blocks in order to prevent killing it. Use Space Jump to follow the Sova to the top right door. Freeze it just at the bottom of the small stairs, as Samus can run over the half-tile gap that remains. Requires: "h_canFrozenEnemyRunway"
"SpaceJump"
"canBePatient"
{
"or": [
{
"obstaclesCleared": [
"A"
]
},
"h_canBombThings"
]
}
Exit condition: {
"leaveWithRunway": {
"length": 5,
"openEnd": 1
}
}
|
|
Requires: {
"resetRoom": {
"nodes": [
6,
7
],
"mustStayPut": false
}
}
{
"refill": [
"Energy",
"Missile",
"Super"
]
}
|
|
Requires: "h_canCrystalFlash" |
|
|
|
Requires: {
"or": [
"canWalljump",
"HiJump",
"h_canFly",
"canUseFrozenEnemies",
"canSpringBallJumpMidAir"
]
}
|
|
Requires: "canXMode"
"canBounceBall"
"canLateralMidAirMorph"
"canShinechargeMovement"
{
"canShineCharge": {
"usedTiles": 33,
"openEnd": 2
}
}
"h_XModeSpikeHitLeniency"
"h_XModeSpikeHitLeniency"
{
"shinespark": {
"frames": 6
}
}
|
|
Requires: "h_canFly" |
|
Requires: "HiJump" "canSpringBallJumpMidAir" |
|
Requires: "canSpringwall" |
|
From: 9
Main Junction
To: 1
Left Side - Top Door
This is the same size of ledge as writg, so it should be equally possible. Requires: "HiJump" "canPreciseWalljump" |
|
From: 9
Main Junction
To: 1
Left Side - Top Door
This is the same size of ledge as writg, so it should be equally possible. Requires: "canInsaneWalljump" |
|
Requires: "canUseFrozenEnemies"
{
"or": [
"canTrickyUseFrozenEnemies",
"canWalljump",
"HiJump",
"canSpringBallJumpMidAir",
"h_canCrouchJumpDownGrab"
]
}
|
|
Jump from the Save room door runway and use Grapple to grab onto the Grapple Blocks. Requires: "HiJump" "SpeedBooster" "canPreciseGrapple" |
|
From: 9
Main Junction
To: 1
Left Side - Top Door
Notable: true 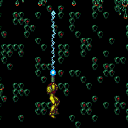
Perform a very tight Spring Ball jump from the Save room door runway, starting from either a crouch or spin jump, then use Grapple to barely reach the ceiling blocks. Requires: "canTrickySpringBallJump" "canPreciseGrapple" |
|
|
|
|
|
Requires: {
"or": [
"h_canUsePowerBombs",
{
"obstaclesCleared": [
"A"
]
}
]
}
Clears obstacles: A |
|
Requires: "h_canUseMorphBombs" |
|
Requires: "h_canFly" |
|
Requires: "HiJump" "canWalljump" |
|
Requires: "canUseFrozenEnemies"
{
"or": [
"canTrickyUseFrozenEnemies",
"canWalljump",
"HiJump"
]
}
|
|
Run and Jump into a Springball Jump from the Save Room runway. Requires: "HiJump" "canTrickySpringBallJump" |
|
From: 9
Main Junction
To: 7
Top Right Door
Notable: true 
A tricky, delayed walljump makes it possible to climb to top right in-room, with nothing. Requires: "canDelayedWalljump" "canConsecutiveWalljump" |
|
|
|
Requires: "h_canCrystalFlash" Clears obstacles: A |
{
"$schema": "../../../schema/m3-room.schema.json",
"id": 97,
"name": "Bubble Mountain",
"area": "Norfair",
"subarea": "Upper",
"subsubarea": "East",
"playable": true,
"roomAddress": "0x7ACB3",
"roomEnvironments": [
{
"heated": false
}
],
"nodes": [
{
"id": 1,
"name": "Left Side - Top Door",
"nodeType": "door",
"nodeSubType": "green",
"nodeAddress": "0x0019552",
"doorEnvironments": [
{
"physics": "air"
}
],
"locks": [
{
"name": "Bubble Mountain Top Left Green Lock (to Bubble Missiles)",
"lockType": "coloredDoor",
"unlockStrats": [
{
"name": "Base",
"notable": false,
"requires": [
"h_canOpenGreenDoors"
]
}
]
}
]
},
{
"id": 2,
"name": "Left Side - Top Middle Door",
"nodeType": "door",
"nodeSubType": "blue",
"nodeAddress": "0x001959a",
"doorEnvironments": [
{
"physics": "air"
}
]
},
{
"id": 3,
"name": "Left Side - Bottom Middle Door",
"nodeType": "door",
"nodeSubType": "blue",
"nodeAddress": "0x001955e",
"doorEnvironments": [
{
"physics": "air"
}
]
},
{
"id": 4,
"name": "Left Side - Bottom Door",
"nodeType": "door",
"nodeSubType": "blue",
"nodeAddress": "0x001956a",
"doorEnvironments": [
{
"physics": "air"
}
]
},
{
"id": 5,
"name": "Bottom Door",
"nodeType": "door",
"nodeSubType": "blue",
"nodeAddress": "0x0019576",
"doorEnvironments": [
{
"physics": "air"
}
]
},
{
"id": 6,
"name": "Middle Right Door",
"nodeType": "door",
"nodeSubType": "blue",
"nodeAddress": "0x0019582",
"doorEnvironments": [
{
"physics": "air"
}
]
},
{
"id": 7,
"name": "Top Right Door",
"nodeType": "door",
"nodeSubType": "green",
"nodeAddress": "0x001958e",
"doorEnvironments": [
{
"physics": "air"
}
],
"locks": [
{
"name": "Bubble Mountain Top Right Green Lock (to Bat Cave)",
"lockType": "coloredDoor",
"unlockStrats": [
{
"name": "Base",
"notable": false,
"requires": [
"h_canOpenGreenDoors"
]
}
]
}
]
},
{
"id": 8,
"name": "Bottom Right Item",
"nodeType": "item",
"nodeSubType": "visible",
"nodeItem": "Missile",
"nodeAddress": "0x78C66"
},
{
"id": 9,
"name": "Main Junction",
"nodeType": "junction",
"nodeSubType": "junction"
}
],
"obstacles": [
{
"id": "A",
"name": "Power Bomb Blocks",
"obstacleType": "inanimate",
"note": "The Power Bomb blocks above the bottom doors"
}
],
"enemies": [
{
"id": "e1",
"groupName": "Bubble Mountain Bottom Sova",
"enemyName": "Sova",
"quantity": 1,
"homeNodes": [
5
]
},
{
"id": "e2",
"groupName": "Bubble Mountain Morph Maze Sovas",
"enemyName": "Sova",
"quantity": 2,
"betweenNodes": [
5,
9
]
},
{
"id": "e3",
"groupName": "Bubble Mountain Wavers",
"enemyName": "Waver",
"quantity": 3,
"homeNodes": [
9
]
},
{
"id": "e4",
"groupName": "King Cacatac",
"enemyName": "Cacatac",
"quantity": 1,
"homeNodes": [
7
]
},
{
"id": "e5",
"groupName": "Bubble Mountain Ripper 2",
"enemyName": "Ripper 2 (red)",
"quantity": 1,
"homeNodes": [
8
]
}
],
"reusableRoomwideNotable": [
{
"name": "Bubble Mountain Damage Boost",
"note": "Crossing between the topmost doors of Bubble Mountain by damage boosting using a Waver."
}
],
"links": [
{
"from": 1,
"to": [
{
"id": 1
},
{
"id": 2
},
{
"id": 3
},
{
"id": 7,
"note": "This link only includes ways of crossing to 7 that can't be done from node 9"
},
{
"id": 9
}
]
},
{
"from": 2,
"to": [
{
"id": 1
},
{
"id": 2
},
{
"id": 3
},
{
"id": 7
},
{
"id": 9
}
]
},
{
"from": 3,
"to": [
{
"id": 1
},
{
"id": 2
},
{
"id": 3
},
{
"id": 5
},
{
"id": 7
},
{
"id": 9
}
]
},
{
"from": 4,
"to": [
{
"id": 1
},
{
"id": 2
},
{
"id": 3
},
{
"id": 4
},
{
"id": 5
},
{
"id": 9,
"note": "This link is only for the X-Ray climb, which skips the junction altogether."
}
]
},
{
"from": 5,
"to": [
{
"id": 4
},
{
"id": 5
},
{
"id": 9
}
]
},
{
"from": 6,
"to": [
{
"id": 1
},
{
"id": 2
},
{
"id": 3
},
{
"id": 6
},
{
"id": 7
}
]
},
{
"from": 7,
"to": [
{
"id": 1,
"note": "This link only includes ways of crossing to 1 that can't be done from node 9"
},
{
"id": 2
},
{
"id": 3
},
{
"id": 6
},
{
"id": 7
},
{
"id": 9
}
]
},
{
"from": 8,
"to": [
{
"id": 9
}
]
},
{
"from": 9,
"to": [
{
"id": 1
},
{
"id": 2
},
{
"id": 3
},
{
"id": 5
},
{
"id": 7
},
{
"id": 8
},
{
"id": 9
}
]
}
],
"strats": [
{
"link": [
1,
1
],
"name": "Leave with Runway",
"requires": [],
"exitCondition": {
"leaveWithRunway": {
"length": 4,
"openEnd": 1
}
}
},
{
"link": [
1,
1
],
"name": "Leave With Runway - Frozen Sova",
"requires": [
"h_canFrozenEnemyRunway",
{
"or": [
{
"obstaclesCleared": [
"A"
]
},
"h_canBombThings"
]
},
{
"or": [
"canTrickyJump",
"SpaceJump"
]
}
],
"exitCondition": {
"leaveWithRunway": {
"length": 5,
"openEnd": 1
}
},
"note": [
"Place a Power Bomb on the bottom stair attached to the door in order to prevent killing the Sova, or free a Sova from the Morph maze with Bombs.",
"If coming from below, be sure to lure the Sova to the bottom before placing a Power Bomb near the blocks in order to prevent killing it.",
"Use the frozen Sova to climb to the top left door. Stand on a low frozen Waver to lower the camera enough to get the Sova to move again."
]
},
{
"link": [
1,
1
],
"name": "Crystal Flash",
"requires": [
"h_canCrystalFlash"
]
},
{
"link": [
1,
2
],
"name": "Leave Shinecharged",
"entranceCondition": {
"comeInShinecharging": {
"length": 3,
"openEnd": 1
}
},
"requires": [
"canShinechargeMovementComplex",
{
"or": [
{
"enemyKill": {
"enemies": [
[
"Waver"
],
[
"Waver"
]
],
"explicitWeapons": [
"Wave",
"Spazer",
"Plasma",
"Missile",
"Super",
"Grapple"
]
}
},
{
"enemyDamage": {
"enemy": "Waver",
"type": "contact",
"hits": 1
}
}
]
}
],
"exitCondition": {
"leaveShinecharged": {
"framesRemaining": 70
}
},
"unlocksDoors": [
{
"types": [
"super"
],
"requires": []
},
{
"types": [
"missiles",
"powerbomb"
],
"requires": [
"never"
]
}
]
},
{
"link": [
1,
3
],
"name": "Come in Shinecharging, Leave Shinecharged",
"entranceCondition": {
"comeInShinecharging": {
"length": 3,
"openEnd": 1
}
},
"requires": [
"canShinechargeMovementTricky"
],
"exitCondition": {
"leaveShinecharged": {
"framesRemaining": 24
}
},
"unlocksDoors": [
{
"types": [
"super"
],
"requires": []
},
{
"types": [
"missiles",
"powerbomb"
],
"requires": [
"never"
]
}
],
"note": "Slide off the edge to kill the Waver with blue."
},
{
"link": [
1,
7
],
"name": "Base",
"requires": [
"Grapple"
],
"note": "Kill King Cac by scrolling the camera before Grappling across."
},
{
"link": [
1,
7
],
"name": "Walljump",
"requires": [
"canWalljump",
"canCarefulJump",
{
"or": [
"canCameraManip",
"canStaggeredWalljump",
{
"and": [
"canNeutralDamageBoost",
{
"enemyDamage": {
"enemy": "Cacatac",
"type": "contact",
"hits": 1
}
}
]
}
]
}
],
"note": "King Cac can be killed by scrolling the camera before jumping across."
},
{
"link": [
1,
7
],
"name": "Running Jump",
"entranceCondition": {
"comeInRunning": {
"minTiles": 2,
"speedBooster": "any"
}
},
"requires": [
{
"or": [
"canTrickyJump",
{
"and": [
"SpeedBooster",
"canCarefulJump"
]
}
]
},
{
"or": [
"ScrewAttack",
{
"and": [
"canNeutralDamageBoost",
{
"enemyDamage": {
"enemy": "Cacatac",
"hits": 1,
"type": "contact"
}
}
]
}
]
}
]
},
{
"link": [
1,
7
],
"name": "Open Door Full Runway Jump",
"requires": [
{
"doorUnlockedAtNode": 1
},
{
"or": [
"canTrickyJump",
{
"and": [
"SpeedBooster",
"canCarefulJump"
]
}
]
},
"canCameraManip"
],
"note": "Kill King Cac by scrolling the camera, before attempting the jump."
},
{
"link": [
1,
7
],
"name": "Airball",
"requires": [
"canLateralMidAirMorph",
"canTrickyJump",
{
"or": [
"canCameraManip",
{
"enemyDamage": {
"enemy": "Cacatac",
"hits": 1,
"type": "contact"
}
}
]
}
]
},
{
"link": [
1,
7
],
"name": "Bubble Mountain Damage Boost (Left to Right)",
"notable": true,
"requires": [
"canHorizontalDamageBoost",
{
"enemyDamage": {
"enemy": "Waver",
"hits": 1,
"type": "contact"
}
}
],
"reusableRoomwideNotable": "Bubble Mountain Damage Boost",
"note": "Damage Boost off a Waver to cross the gap."
},
{
"link": [
1,
7
],
"name": "Shinespark",
"entranceCondition": {
"comeInWithSpark": {}
},
"requires": [
{
  "shinespark": {
    "frames": 42,
    "excessFrames": 22
  }
}
]
},
{
"link": [
1,
7
],
"name": "Hero Shot Shinespark",
"entranceCondition": {
"comeInShinecharged": {
"framesRequired": 50
}
},
"requires": [
"canHeroShot",
"canShinechargeMovementComplex",
{
"shinespark": {
"frames": 35,
"excessFrames": 0
}
}
],
"exitCondition": {
"leaveWithSpark": {}
},
"unlocksDoors": [
{
"types": [
"super"
],
"requires": []
},
{
"types": [
"missiles",
"powerbomb"
],
"requires": [
"never"
]
}
],
"note": [
"Jump over the Waver, fire a shot mid-air, and activate the shinespark wind-up.",
"Wait until the shot is at a specific position before sparking.",
"Sparking too late will cause the shot to despawn before reaching the door.",
"Sparking too early will cause Samus to bonk the door as it will not yet be open.",
"A beam shot, Missile, or Super can be used."
]
},
{
"link": [
1,
9
],
"name": "Base",
"requires": []
},
{
"link": [
2,
1
],
"name": "X-Ray Climb",
"entranceCondition": {
"comeInWithDoorStuckSetup": {}
},
"requires": [
"canXRayClimb"
],
"note": "Climb up 1 screen."
},
{
"link": [
2,
1
],
"name": "Very Deep Stuck X-Ray Climb",
"entranceCondition": {
"comeInWithGMode": {
"mode": "direct",
"morphed": false
}
},
"requires": [
"canXRayClimb"
],
"bypassesDoorShell": true,
"note": [
"Enter with G-mode direct, back up to between 1 and 6 pixels from the door transition, and activate X-ray to get very deep stuck in the door.",
"Climb up 1 screen, and perform a turnaround buffered spin-jump away from the door to trigger the transition, bypassing any lock on the door."
]
},
{
"link": [
2,
1
],
"name": "Speedy Jump",
"entranceCondition": {
"comeInRunning": {
"minTiles": 35,
"speedBooster": true
}
},
"requires": [
"canTrickyJump"
]
},
{
"link": [
2,
1
],
"name": "Speedy HiJump",
"entranceCondition": {
"comeInRunning": {
"minTiles": 8,
"speedBooster": true
}
},
"requires": [
"canCarefulJump",
"HiJump",
{
"or": [
"ScrewAttack",
{
"enemyDamage": {
"enemy": "Waver",
"type": "contact",
"hits": 1
}
}
]
}
]
},
{
"link": [
2,
1
],
"name": "Tricky Speedy HiJump",
"entranceCondition": {
"comeInRunning": {
"minTiles": 7,
"speedBooster": true
}
},
"requires": [
"canTrickyJump",
"HiJump",
{
"or": [
"ScrewAttack",
{
"enemyDamage": {
"enemy": "Waver",
"type": "contact",
"hits": 1
}
}
]
}
]
},
{
"link": [
2,
1
],
"name": "Speedy Spring Ball Jump",
"entranceCondition": {
"comeInRunning": {
"minTiles": 15,
"speedBooster": true
}
},
"requires": [
"canTrickyJump",
"canTrickySpringBallJump",
"canNeutralDamageBoost",
{
"enemyDamage": {
"enemy": "Waver",
"type": "contact",
"hits": 1
}
}
]
},
{
"link": [
2,
1
],
"name": "Enter Running and Shinespark",
"entranceCondition": {
"comeInShinecharging": {
"length": 2,
"openEnd": 1
}
},
"requires": [
{
  "shinespark": {
    "frames": 27,
    "excessFrames": 2
  }
}
]
},
{
"link": [
2,
1
],
"name": "Enter with Shinecharge and Shinespark",
"entranceCondition": {
"comeInShinecharged": {
"framesRequired": 50
}
},
"requires": [
{
  "shinespark": {
    "frames": 27,
    "excessFrames": 2
  }
}
]
},
{
"link": [
2,
1
],
"name": "Enter with Shinecharge and Midair Shinespark",
"entranceCondition": {
"comeInShinecharged": {
"framesRequired": 22
}
},
"requires": [
"canShinechargeMovement",
"canMidairShinespark",
{
"shinespark": {
"frames": 19
}
}
]
},
{
"link": [
2,
1
],
"name": "Come in Shinecharged, Leave With Spark (HiJump Wall Jump)",
"entranceCondition": {
"comeInShinecharged": {
"framesRequired": 125
}
},
"requires": [
"HiJump",
"canPreciseWalljump",
"canShinechargeMovementTricky",
{
"shinespark": {
"frames": 18,
"excessFrames": 0
}
}
],
"exitCondition": {
"leaveWithSpark": {}
},
"unlocksDoors": [
{
"types": [
"super"
],
"requires": []
},
{
"types": [
"missiles",
"powerbomb"
],
"requires": [
"never"
]
}
]
},
{
"link": [
2,
1
],
"name": "Come in Shinecharged, Leave With Spark (HiJump Space Jump)",
"entranceCondition": {
"comeInShinecharged": {
"framesRequired": 105
}
},
"requires": [
"HiJump",
"SpaceJump",
"canShinechargeMovementComplex",
{
"shinespark": {
"frames": 20,
"excessFrames": 0
}
}
],
"exitCondition": {
"leaveWithSpark": {}
},
"unlocksDoors": [
{
"types": [
"super"
],
"requires": []
},
{
"types": [
"missiles",
"powerbomb"
],
"requires": [
"never"
]
}
]
},
{
"link": [
2,
1
],
"name": "Come in Shinecharging, Leave Shinecharged (HiJump Wall Jump)",
"entranceCondition": {
"comeInShinecharging": {
"length": 2,
"openEnd": 0
}
},
"requires": [
"HiJump",
"canPreciseWalljump",
"canShinechargeMovementTricky"
],
"exitCondition": {
"leaveShinecharged": {
"framesRemaining": 20
}
},
"unlocksDoors": [
{
"types": [
"super"
],
"requires": []
},
{
"types": [
"missiles",
"powerbomb"
],
"requires": [
"never"
]
}
]
},
{
"link": [
2,
1
],
"name": "Come in Shinecharging, Leave Shinecharged (HiJump Space Jump)",
"entranceCondition": {
"comeInShinecharging": {
"length": 2,
"openEnd": 0
}
},
"requires": [
"HiJump",
"SpaceJump",
"canShinechargeMovementComplex"
],
"exitCondition": {
"leaveShinecharged": {
"framesRemaining": 35
}
},
"unlocksDoors": [
{
"types": [
"super"
],
"requires": []
},
{
"types": [
"missiles",
"powerbomb"
],
"requires": [
"never"
]
}
]
},
{
"link": [
2,
2
],
"name": "Leave with Runway",
"requires": [],
"exitCondition": {
"leaveWithRunway": {
"length": 3,
"openEnd": 1
}
}
},
{
"link": [
2,
2
],
"name": "Leave With Runway - Frozen Sova",
"requires": [
"h_canFrozenEnemyRunway",
{
"or": [
{
"obstaclesCleared": [
"A"
]
},
"h_canBombThings"
]
}
],
"exitCondition": {
"leaveWithRunway": {
"length": 4,
"openEnd": 1
}
},
"note": [
"Place a Power Bomb on the bottom stair attached to the door in order to prevent killing the Sova, or free a Sova from the Morph maze with Bombs.",
"If coming from below, be sure to lure the Sova to the bottom before placing a Power Bomb near the blocks in order to prevent killing it."
]
},
{
"link": [
2,
3
],
"name": "Carry Shinecharge",
"entranceCondition": {
"comeInShinecharged": {
"framesRequired": 115
}
},
"requires": [
"canShinechargeMovement"
],
"exitCondition": {
"leaveShinecharged": {
"framesRemaining": "auto"
}
},
"unlocksDoors": [
{
"types": [
"super"
],
"requires": []
},
{
"types": [
"missiles",
"powerbomb"
],
"requires": [
"never"
]
}
]
},
{
"link": [
2,
3
],
"name": "Come In Shinecharged, Leave With Spark",
"entranceCondition": {
"comeInShinecharged": {
"framesRequired": 105
}
},
"requires": [
"canShinechargeMovement",
{
"shinespark": {
"frames": 7,
"excessFrames": 0
}
}
],
"exitCondition": {
"leaveWithSpark": {}
},
"unlocksDoors": [
{
"types": [
"super"
],
"requires": []
},
{
"types": [
"missiles",
"powerbomb"
],
"requires": [
"never"
]
}
]
},
{
"link": [
2,
3
],
"name": "Come in Shinecharging, Leave Shinecharged",
"entranceCondition": {
"comeInShinecharging": {
"length": 2,
"openEnd": 1
}
},
"requires": [
"canShinechargeMovement"
],
"exitCondition": {
"leaveShinecharged": {
"framesRemaining": 75
}
},
"unlocksDoors": [
{
"types": [
"super"
],
"requires": []
},
{
"types": [
"missiles",
"powerbomb"
],
"requires": [
"never"
]
}
]
},
{
"link": [
2,
7
],
"name": "Speedy Jump",
"entranceCondition": {
"comeInRunning": {
"minTiles": 35,
"speedBooster": true
}
},
"requires": [
"canTrickyJump"
]
},
{
"link": [
2,
7
],
"name": "Speedy HiJump",
"entranceCondition": {
"comeInRunning": {
"minTiles": 7,
"speedBooster": true
}
},
"requires": [
"canCarefulJump",
"HiJump",
{
"or": [
"ScrewAttack",
{
"enemyDamage": {
"enemy": "Cacatac",
"type": "contact",
"hits": 1
}
}
]
}
]
},
{
"link": [
2,
7
],
"name": "Speedy Spring Ball Jump",
"entranceCondition": {
"comeInRunning": {
"minTiles": 15,
"speedBooster": true
}
},
"requires": [
"canTrickyJump",
"canTrickySpringBallJump",
"canNeutralDamageBoost",
{
"enemyDamage": {
"enemy": "Cacatac",
"type": "contact",
"hits": 1
}
}
]
},
{
"link": [
2,
7
],
"name": "Running Jump into Right Side Precise Walljump Climb",
"entranceCondition": {
"comeInRunning": {
"minTiles": 2.4375,
"speedBooster": false
}
},
"requires": [
"canPreciseWalljump",
"canTrickyJump"
]
},
{
"link": [
2,
7
],
"name": "Running Jump into Right Side Walljump Climb",
"entranceCondition": {
"comeInRunning": {
"minTiles": 4,
"speedBooster": false
}
},
"requires": [
"canWalljump",
"canCarefulJump"
]
},
{
"link": [
2,
7
],
"name": "Speedy Running Jump into Right Side Walljump Climb",
"entranceCondition": {
"comeInRunning": {
"minTiles": 5,
"speedBooster": "any"
}
},
"requires": [
"canWalljump",
"canCarefulJump"
]
},
{
"link": [
2,
7
],
"name": "Enter Running and Shinespark",
"entranceCondition": {
"comeInShinecharging": {
"length": 2,
"openEnd": 1
}
},
"requires": [
{
  "shinespark": {
    "frames": 22,
    "excessFrames": 2
  }
}
]
},
{
"link": [
2,
7
],
"name": "Enter with Shinecharge and Shinespark",
"entranceCondition": {
"comeInShinecharged": {
"framesRequired": 5
}
},
"requires": [
{
  "shinespark": {
    "frames": 22,
    "excessFrames": 2
  }
}
]
},
{
"link": [
2,
7
],
"name": "Come in Shinecharging, Leave With Spark (HiJump Space Jump)",
"entranceCondition": {
"comeInShinecharging": {
"length": 2,
"openEnd": 0
}
},
"requires": [
"HiJump",
"SpaceJump",
"canHeroShot",
"canShinechargeMovementComplex",
{
"shinespark": {
"frames": 31,
"excessFrames": 0
}
}
],
"exitCondition": {
"leaveWithSpark": {}
},
"unlocksDoors": [
{
"types": [
"super"
],
"requires": []
},
{
"types": [
"missiles",
"powerbomb"
],
"requires": [
"never"
]
}
]
},
{
"link": [
2,
7
],
"name": "Come in Shinecharged, Leave With Spark (HiJump Wall Jump)",
"entranceCondition": {
"comeInShinecharged": {
"framesRequired": 125
}
},
"requires": [
"HiJump",
"canWalljump",
"canShinechargeMovementTricky",
{
"shinespark": {
"frames": 27,
"excessFrames": 0
}
}
],
"exitCondition": {
"leaveWithSpark": {}
},
"unlocksDoors": [
{
"types": [
"super"
],
"requires": []
},
{
"types": [
"missiles",
"powerbomb"
],
"requires": [
"never"
]
}
]
},
{
"link": [
2,
9
],
"name": "Base",
"requires": []
},
{
"link": [
3,
1
],
"name": "X-Ray Climb",
"entranceCondition": {
"comeInWithDoorStuckSetup": {}
},
"requires": [
"canXRayClimb"
],
"note": "Climb up 2 screens."
},
{
"link": [
3,
1
],
"name": "Very Deep Stuck X-Ray Climb",
"entranceCondition": {
"comeInWithGMode": {
"mode": "direct",
"morphed": false
}
},
"requires": [
"canXRayClimb"
],
"bypassesDoorShell": true,
"note": [
"Enter with G-mode direct, back up to between 1 and 6 pixels from the door transition, and activate X-ray to get very deep stuck in the door.",
"Climb up 2 screens, and perform a turnaround buffered spin-jump away from the door to trigger the transition, bypassing any lock on the door."
]
},
{
"link": [
3,
1
],
"name": "Enter Running, Climb Bubble Stairs, and Shinespark",
"entranceCondition": {
"comeInShinecharging": {
"length": 5,
"openEnd": 0
}
},
"requires": [
"canShinechargeMovementComplex",
{
"shinespark": {
"frames": 20,
"excessFrames": 2
}
}
]
},
{
"link": [
3,
1
],
"name": "Enter Running and Shinespark",
"entranceCondition": {
"comeInShinecharging": {
"length": 5,
"openEnd": 0
}
},
"requires": [
"canShinechargeMovement",
{
"shinespark": {
"frames": 39
}
}
]
},
{
"link": [
3,
1
],
"name": "Enter Shinecharged and Shinespark",
"entranceCondition": {
"comeInShinecharged": {
"framesRequired": 35
}
},
"requires": [
"canShinechargeMovement",
{
"shinespark": {
"frames": 39
}
}
]
},
{
"link": [
3,
2
],
"name": "Enter Running and Leave Shinecharged",
"entranceCondition": {
"comeInShinecharging": {
"length": 5,
"openEnd": 0
}
},
"requires": [
"canShinechargeMovementComplex"
],
"exitCondition": {
"leaveShinecharged": {
"framesRemaining": 45
}
},
"unlocksDoors": [
{
"types": [
"super"
],
"requires": []
},
{
"types": [
"missiles",
"powerbomb"
],
"requires": [
"never"
]
}
]
},
{
"link": [
3,
2
],
"name": "Enter Running and Leave Shinecharged (HiJump)",
"entranceCondition": {
"comeInShinecharging": {
"length": 5,
"openEnd": 0
}
},
"requires": [
"HiJump",
{
"enemyDamage": {
"enemy": "Waver",
"type": "contact",
"hits": 1
}
},
"canShinechargeMovementComplex"
],
"exitCondition": {
"leaveShinecharged": {
"framesRemaining": 70
}
},
"unlocksDoors": [
{
"types": [
"super"
],
"requires": []
},
{
"types": [
"missiles",
"powerbomb"
],
"requires": [
"never"
]
}
]
},
{
"link": [
3,
2
],
"name": "Enter Shinecharged and Leave Shinesparking",
"entranceCondition": {
"comeInShinecharged": {
"framesRequired": 125
}
},
"requires": [
"canShinechargeMovementComplex",
{
"shinespark": {
"frames": 5
}
}
],
"exitCondition": {
"leaveWithSpark": {}
},
"unlocksDoors": [
{
"types": [
"super"
],
"requires": []
},
{
"types": [
"missiles",
"powerbomb"
],
"requires": [
"never"
]
}
]
},
{
"link": [
3,
2
],
"name": "Enter Shinecharged and Leave Shinesparking (HiJump)",
"entranceCondition": {
"comeInShinecharged": {
"framesRequired": 90
}
},
"requires": [
"HiJump",
"canShinechargeMovementComplex",
{
"enemyDamage": {
"enemy": "Waver",
"type": "contact",
"hits": 1
}
},
{
"shinespark": {
"frames": 7,
"excessFrames": 0
}
}
],
"exitCondition": {
"leaveWithSpark": {}
},
"unlocksDoors": [
{
"types": [
"super"
],
"requires": []
},
{
"types": [
"missiles",
"powerbomb"
],
"requires": [
"never"
]
}
]
},
{
"link": [
3,
3
],
"name": "Leave with Runway",
"requires": [],
"exitCondition": {
"leaveWithRunway": {
"length": 3,
"openEnd": 1
}
}
},
{
"link": [
3,
3
],
"name": "Leave with Runway (Floor Not Broken)",
"requires": [
{
  "obstaclesNotCleared": [
    "A"
  ]
}
],
"exitCondition": {
"leaveWithRunway": {
"length": 6,
"openEnd": 0
}
}
},
{
"link": [
3,
3
],
"name": "Leave With Runway - Frozen Sova",
"requires": [
"h_canFrozenEnemyRunway"
],
"exitCondition": {
"leaveWithRunway": {
"length": 4,
"openEnd": 1
}
},
"note": "Be sure to lure the Sova to the bottom before placing a Power Bomb near the blocks in order to prevent killing it.",
"devNote": "This is only useful if the blocks are broken, but if they are not broken the longer runway can be used."
},
{
"link": [
3,
5
],
"name": "Stored Moonfall Clip",
"entranceCondition": {
"comeInWithStoredFallSpeed": {
"fallSpeedInTiles": 1
}
},
"requires": [
"canMoonfall"
]
},
{
"link": [
3,
7
],
"name": "Enter Running and Shinespark",
"entranceCondition": {
"comeInShinecharging": {
"length": 5,
"openEnd": 0
}
},
"requires": [
"canShinechargeMovementComplex",
{
"shinespark": {
"frames": 26
}
}
],
"note": "Diagonal spark from the Save Room Door steps."
},
{
"link": [
3,
7
],
"name": "Enter Shinecharged and Shinespark",
"entranceCondition": {
"comeInShinecharged": {
"framesRequired": 100
}
},
"requires": [
"canShinechargeMovementComplex",
{
"shinespark": {
"frames": 26
}
}
],
"note": "Diagonal spark from the Save Room Door steps."
},
{
"link": [
3,
9
],
"name": "Base",
"requires": []
},
{
"link": [
4,
1
],
"name": "X-Ray Climb",
"entranceCondition": {
"comeInWithDoorStuckSetup": {}
},
"requires": [
"canXRayClimb",
"canBePatient"
],
"note": "Climb up 3 screens."
},
{
"link": [
4,
1
],
"name": "Very Deep Stuck X-Ray Climb",
"entranceCondition": {
"comeInWithGMode": {
"mode": "direct",
"morphed": false
}
},
"requires": [
"canXRayClimb",
"canBePatient"
],
"bypassesDoorShell": true,
"note": [
"Enter with G-mode direct, back up to between 1 and 6 pixels from the door transition, and activate X-ray to get very deep stuck in the door.",
"Climb up 3 screens, and perform a turnaround buffered spin-jump away from the door to trigger the transition, bypassing any lock on the door."
]
},
{
"link": [
4,
2
],
"name": "Very Deep Stuck X-Ray Climb",
"entranceCondition": {
"comeInWithGMode": {
"mode": "direct",
"morphed": false
}
},
"requires": [
"canXRayClimb"
],
"bypassesDoorShell": true,
"note": [
"Enter with G-mode direct, back up to between 1 and 6 pixels from the door transition, and activate X-ray to get very deep stuck in the door.",
"Climb up 2 screens, and perform a turnaround buffered spin-jump away from the door to trigger the transition, bypassing any lock on the door."
]
},
{
"link": [
4,
3
],
"name": "X-Ray Climb",
"entranceCondition": {
"comeInWithDoorStuckSetup": {}
},
"requires": [
"canXRayClimb"
],
"note": "Climb up 1 screen."
},
{
"link": [
4,
3
],
"name": "Very Deep Stuck X-Ray Climb",
"entranceCondition": {
"comeInWithGMode": {
"mode": "direct",
"morphed": false
}
},
"requires": [
"canXRayClimb"
],
"bypassesDoorShell": true,
"note": [
"Enter with G-mode direct, back up to between 1 and 6 pixels from the door transition, and activate X-ray to get very deep stuck in the door.",
"Climb up 1 screen, and perform a turnaround buffered spin-jump away from the door to trigger the transition, bypassing any lock on the door."
]
},
{
"link": [
4,
4
],
"name": "Leave with Runway",
"requires": [],
"exitCondition": {
"leaveWithRunway": {
"length": 5,
"openEnd": 1
}
}
},
{
"link": [
4,
4
],
"name": "Leave With Runway - Frozen Sova",
"requires": [
"h_canFrozenEnemyRunway",
{
"or": [
{
"resetRoom": {
"nodes": [
4,
5
],
"mustStayPut": false
}
},
{
"and": [
"h_canBombThings",
{
"ammo": {
"type": "Super",
"count": 1
}
}
]
}
]
}
],
"exitCondition": {
"leaveWithRunway": {
"length": 6,
"openEnd": 1
}
},
"devNote": [
"Starting from the top of the room will require careful manipulation of the Sovas.",
"If going through the Power Bomb blocks, place the Power Bomb on the lowest stair on the ledge above,",
"go down and lure the Sova up and use a super to knock it off once it is just above the right side of where the Power Bomb blocks were.",
"If using Bombs, lure the Sova that is just below the Power Bomb blocks, then use a super to prevent it from going into the Morph tunnel."
]
},
{
"link": [
4,
4
],
"name": "Crystal Flash",
"requires": [
"h_canCrystalFlash"
],
"clearsObstacles": [
"A"
]
},
{
"link": [
4,
5
],
"name": "Base",
"requires": []
},
{
"link": [
4,
5
],
"name": "Carry Shinecharge",
"entranceCondition": {
"comeInShinecharged": {
"framesRequired": 70
}
},
"requires": [
"canShinechargeMovement"
],
"exitCondition": {
"leaveShinecharged": {
"framesRemaining": "auto"
}
},
"unlocksDoors": [
{
"types": [
"super"
],
"requires": []
},
{
"types": [
"missiles",
"powerbomb"
],
"requires": [
"never"
]
}
]
},
{
"link": [
4,
5
],
"name": "Come in Shinecharging, Leave Shinecharged",
"entranceCondition": {
"comeInShinecharging": {
"length": 4,
"openEnd": 1
}
},
"requires": [
"canShinechargeMovement"
],
"exitCondition": {
"leaveShinecharged": {
"framesRemaining": 130
}
},
"unlocksDoors": [
{
"types": [
"super"
],
"requires": []
},
{
"types": [
"missiles",
"powerbomb"
],
"requires": [
"never"
]
}
]
},
{
"link": [
4,
5
],
"name": "Stored Moonfall Door Shell Bypass",
"entranceCondition": {
"comeInWithStoredFallSpeed": {
"fallSpeedInTiles": 1
}
},
"requires": [
"canMoonfall"
],
"bypassesDoorShell": true
},
{
"link": [
5,
4
],
"name": "Base",
"requires": []
},
{
"link": [
5,
4
],
"name": "Carry Shinecharge",
"entranceCondition": {
"comeInShinecharged": {
"framesRequired": 70
},
"comesThroughToilet": "any"
},
"requires": [
"canShinechargeMovementComplex"
],
"exitCondition": {
"leaveShinecharged": {
"framesRemaining": "auto"
}
},
"unlocksDoors": [
{
"types": [
"super"
],
"requires": []
},
{
"types": [
"missiles",
"powerbomb"
],
"requires": [
"never"
]
}
]
},
{
"link": [
5,
4
],
"name": "Come in Shinecharged, Leave Shinesparking",
"entranceCondition": {
"comeInShinecharged": {
"framesRequired": 40
},
"comesThroughToilet": "any"
},
"requires": [
"canShinechargeMovement",
{
"shinespark": {
"frames": 9
}
}
],
"exitCondition": {
"leaveWithSpark": {}
},
"unlocksDoors": [
{
"types": [
"super"
],
"requires": []
},
{
"types": [
"missiles",
"powerbomb"
],
"requires": [
"never"
]
}
]
},
{
"link": [
5,
5
],
"name": "Leave Normally",
"exitCondition": {
"leaveNormally": {}
},
"requires": []
},
{
"link": [
5,
5
],
"name": "Shinespark",
"entranceCondition": {
"comeInWithSpark": {},
"comesThroughToilet": "any"
},
"requires": [
{
  "shinespark": {
    "frames": 12,
    "excessFrames": 12
  }
}
],
"devNote": "This strat is not useful in-room, but can satisfy a strat in the room before with an exit shinespark."
},
{
"link": [
5,
9
],
"name": "Power Bomb Blocks",
"requires": [
{
  "or": [
    "h_canUsePowerBombs",
    {
      "obstaclesCleared": [
        "A"
      ]
    }
  ]
}
],
"clearsObstacles": [
"A"
],
"devNote": "It is possible to go through the Morph Maze with a single Power Bomb, placed low enough to not break A, but this isn't very useful."
},
{
"link": [
5,
9
],
"name": "Morph Maze",
"requires": [
"h_canUseMorphBombs"
]
},
{
"link": [
5,
9
],
"name": "Bubble Mountain Ice Clip",
"requires": [
"h_canNonTrivialCeilingClip",
"canTrickyUseFrozenEnemies"
],
"note": [
"Freeze the wall crawler at a precise location in order to jump through the Power Bomb Blocks.",
"The pixel window is larger and higher with Morph and an X-Ray Stand Up."
]
},
{
"link": [
6,
1
],
"name": "Come in Shinecharged",
"entranceCondition": {
"comeInShinecharged": {
"framesRequired": 115
}
},
"requires": [
"canMidairShinespark",
"canShinechargeMovementComplex",
{
"shinespark": {
"frames": 30,
"excessFrames": 6
}
}
]
},
{
"link": [
6,
1
],
"name": "Run in and Shinespark",
"entranceCondition": {
"comeInShinecharging": {
"length": 4,
"openEnd": 0
}
},
"requires": [
"canMidairShinespark",
"canShinechargeMovementComplex",
{
"shinespark": {
"frames": 30,
"excessFrames": 6
}
}
]
},
{
"link": [
6,
1
],
"name": "Grapple Teleport X-Ray Climb",
"entranceCondition": {
"comeInWithGrappleTeleport": {
"blockPositions": [
[
2,
28
],
[
2,
29
],
[
2,
34
]
]
}
},
"requires": [
"canXRayClimb"
],
"bypassesDoorShell": true,
"note": [
"Exit the previous room with Samus in a standing pose (while grappled) with a horizontal position of 21 (as far right as possible).",
"After teleporting, press right to release Grapple while staying standing (not being forced into a crouch).",
"Then X-ray climb to get up to the door transition above, without needing to open the door.",
"At the beginning of the climb, avoid pressing left without X-Ray being held, to prevent triggering the transition of the lower door."
]
},
{
"link": [
6,
2
],
"name": "Grapple Teleport",
"entranceCondition": {
"comeInWithGrappleTeleport": {
"blockPositions": [
[
2,
28
],
[
2,
29
]
]
}
},
"requires": [],
"bypassesDoorShell": true
},
{
"link": [
6,
2
],
"name": "Carry Grapple Teleport (Middle Position)",
"entranceCondition": {
"comeInWithGrappleTeleport": {
"blockPositions": [
[
2,
28
]
]
}
},
"requires": [],
"bypassesDoorShell": true,
"exitCondition": {
"leaveWithGrappleTeleport": {
"blockPositions": [
[
2,
28
]
]
}
}
},
{
"link": [
6,
2
],
"name": "Carry Grapple Teleport (Bottom Position)",
"entranceCondition": {
"comeInWithGrappleTeleport": {
"blockPositions": [
[
2,
29
]
]
}
},
"requires": [],
"bypassesDoorShell": true,
"exitCondition": {
"leaveWithGrappleTeleport": {
"blockPositions": [
[
2,
29
]
]
}
}
},
{
"link": [
6,
2
],
"name": "Grapple Teleport X-Ray Climb",
"entranceCondition": {
"comeInWithGrappleTeleport": {
"blockPositions": [
[
2,
34
]
]
}
},
"requires": [
"canXRayClimb"
],
"bypassesDoorShell": true,
"note": [
"Exit the previous room with Samus in a standing pose (while grappled) with a horizontal position of 21 (as far right as possible).",
"After teleporting, press right to release Grapple while staying standing (not being forced into a crouch).",
"Then X-ray climb to get up to the door transition above, without needing to open the door.",
"At the beginning of the climb, avoid pressing left without X-Ray being held, to prevent triggering the transition of the lower door."
]
},
{
"link": [
6,
3
],
"name": "Grapple Teleport",
"entranceCondition": {
"comeInWithGrappleTeleport": {
"blockPositions": [
[
2,
34
]
]
}
},
"requires": [],
"bypassesDoorShell": true
},
{
"link": [
6,
3
],
"name": "Carry Grapple Teleport",
"entranceCondition": {
"comeInWithGrappleTeleport": {
"blockPositions": [
[
2,
34
]
]
}
},
"requires": [],
"bypassesDoorShell": true,
"exitCondition": {
"leaveWithGrappleTeleport": {
"blockPositions": [
[
2,
34
]
]
}
}
},
{
"link": [
6,
6
],
"name": "Leave with Runway",
"requires": [],
"exitCondition": {
"leaveWithRunway": {
"length": 5,
"openEnd": 0
}
}
},
{
"link": [
6,
7
],
"name": "Base",
"requires": []
},
{
"link": [
6,
7
],
"name": "Very Deep Stuck X-Ray Climb",
"entranceCondition": {
"comeInWithGMode": {
"mode": "direct",
"morphed": false
}
},
"requires": [
"canXRayClimb"
],
"bypassesDoorShell": true,
"note": [
"Enter with G-mode direct, back up to between 1 and 6 pixels from the door transition, and activate X-ray to get very deep stuck in the door.",
"Climb up 1 screen, and perform a turnaround buffered spin-jump away from the door to trigger the transition, bypassing any lock on the door."
]
},
{
"link": [
6,
7
],
"name": "Come in Shinecharged and Leave Shinesparking",
"entranceCondition": {
"comeInShinecharged": {
"framesRequired": 120
}
},
"requires": [
"canMidairShinespark",
"canShinechargeMovementComplex",
{
"shinespark": {
"frames": 15
}
}
],
"exitCondition": {
"leaveWithSpark": {}
},
"unlocksDoors": [
{
"types": [
"super"
],
"requires": []
},
{
"types": [
"missiles",
"powerbomb"
],
"requires": [
"never"
]
}
]
},
{
"link": [
6,
7
],
"name": "Come in Shinecharged and Leave Shinesparking (HiJump)",
"entranceCondition": {
"comeInShinecharged": {
"framesRequired": 80
}
},
"requires": [
"HiJump",
"canMidairShinespark",
"canShinechargeMovementComplex",
{
"shinespark": {
"frames": 11
}
}
],
"exitCondition": {
"leaveWithSpark": {}
},
"unlocksDoors": [
{
"types": [
"super"
],
"requires": []
},
{
"types": [
"missiles",
"powerbomb"
],
"requires": [
"never"
]
}
]
},
{
"link": [
6,
7
],
"name": "Run in and Leave Shinesparking",
"entranceCondition": {
"comeInShinecharging": {
"length": 4,
"openEnd": 0
}
},
"requires": [
"canShinechargeMovementTricky",
{
"shinespark": {
"frames": 5,
"excessFrames": 0
}
}
],
"exitCondition": {
"leaveWithSpark": {}
},
"unlocksDoors": [
{
"types": [
"super"
],
"requires": []
},
{
"types": [
"missiles",
"powerbomb"
],
"requires": [
"never"
]
}
]
},
{
"link": [
6,
7
],
"name": "Run in and Leave Shinecharged (HiJump Wall Jump)",
"entranceCondition": {
"comeInShinecharging": {
"length": 4,
"openEnd": 0
}
},
"requires": [
"canShinechargeMovementComplex",
"HiJump",
"canWalljump"
],
"exitCondition": {
"leaveShinecharged": {
"framesRemaining": 45
}
},
"unlocksDoors": [
{
"types": [
"super"
],
"requires": []
},
{
"types": [
"missiles",
"powerbomb"
],
"requires": [
"never"
]
}
]
},
{
"link": [
7,
1
],
"name": "Base",
"requires": [
"Grapple"
]
},
{
"link": [
7,
1
],
"name": "Springball Bounce",
"requires": [
"canCarefulJump",
"canSpringBallBounce",
"canMockball",
{
"or": [
{
"doorUnlockedAtNode": 7
},
"canTrickyJump"
]
}
],
"note": [
"Use the full runway of the top-right door to jump to the ledge below the Cacatac and mockball on it.",
"Either full jump from the left side of this platform, or do a small hop followed by a big jump to cross the gap.",
"Disabling Springball once past the Grapple Blocks makes this much easier."
]
},
{
"link": [
7,
1
],
"name": "Shinespark",
"entranceCondition": {
"comeInWithSpark": {}
},
"requires": [
{
  "shinespark": {
    "frames": 41,
    "excessFrames": 2
  }
}
],
"devNote": "Ending the spark earlier takes a hit from the Waver"
},
{
"link": [
7,
1
],
"name": "Enter Shinecharged and Shinespark from Cacatac Platform",
"entranceCondition": {
"comeInShinecharged": {
"framesRequired": 100
}
},
"requires": [
"canShinechargeMovementComplex",
"canMidairShinespark",
"canCarefulJump",
{
"shinespark": {
"frames": 30,
"excessFrames": 6
}
}
],
"note": [
"Dealing with spikes is up to luck.",
"It is possible to shoot the Cacatac while jumping towards it."
]
},
{
"link": [
7,
1
],
"name": "Run in and Shinespark from Cacatac Platform",
"entranceCondition": {
"comeInShinecharging": {
"length": 2.5,
"openEnd": 1
}
},
"requires": [
"canShinechargeMovementComplex",
"canMidairShinespark",
"canCarefulJump",
{
"shinespark": {
"frames": 30,
"excessFrames": 6
}
}
],
"note": [
"Dealing with spikes is up to luck.",
"It is possible to shoot the Cacatac while jumping towards it."
]
},
{
"link": [
7,
1
],
"name": "Shinespark from Cacatac Platform Through Door",
"entranceCondition": {
"comeInShinecharging": {
"length": 2.5,
"openEnd": 1
}
},
"requires": [
"canShinechargeMovementComplex",
"canMidairShinespark",
"canTrickyJump",
"canHeroShot",
{
"shinespark": {
"frames": 25
}
},
{
"or": [
{
"and": [
"Wave",
"Spazer"
]
},
"Plasma",
{
"ammo": {
"type": "Missile",
"count": 2
}
},
{
"ammo": {
"type": "Super",
"count": 2
}
}
]
}
],
"note": [
"Kill the Cacatac and quickly jump over to its platform.",
"Shoot towards the top-left door to open it, then follow the shot by jumping over the pit before initiating the shinespark."
]
},
{
"link": [
7,
1
],
"name": "Bubble Mountain Damage Boost (Right to Left)",
"notable": true,
"requires": [
"canHorizontalDamageBoost",
{
"enemyDamage": {
"enemy": "Waver",
"hits": 1,
"type": "contact"
}
}
],
"reusableRoomwideNotable": "Bubble Mountain Damage Boost",
"note": "Damage Boost off a Waver to cross the gap."
},
{
"link": [
7,
1
],
"name": "Hero Shot Shinespark",
"entranceCondition": {
"comeInShinecharged": {
"framesRequired": 45
}
},
"requires": [
"canHeroShot",
"canShinechargeMovementTricky",
{
"shinespark": {
"frames": 36,
"excessFrames": 0
}
}
],
"exitCondition": {
"leaveWithSpark": {}
},
"unlocksDoors": [
{
"types": [
"super"
],
"requires": []
},
{
"types": [
"missiles",
"powerbomb"
],
"requires": [
"never"
]
}
],
"note": [
"Run and jump, fire a shot mid-air, and activate the shinespark wind-up.",
"Wait until the shot is at a specific position before sparking.",
"Sparking too late will cause the shot to despawn before reaching the door.",
"Sparking too early will cause Samus to bonk the door as it will not yet be open.",
"A beam shot, Missile, or Super can be used."
]
},
{
"link": [
7,
1
],
"name": "Grapple Teleport X-Ray Climb",
"entranceCondition": {
"comeInWithGrappleTeleport": {
"blockPositions": [
[
2,
28
],
[
2,
29
],
[
2,
34
]
]
}
},
"requires": [
"canXRayClimb"
],
"bypassesDoorShell": true,
"note": [
"Exit the previous room with Samus in a standing pose (while grappled) with a horizontal position of 21 (as far right as possible).",
"After teleporting, press right to release Grapple while staying standing (not being forced into a crouch).",
"Then X-ray climb to get up to the door transition above, without needing to open the door.",
"At the beginning of the climb, avoid pressing left without X-Ray being held, to prevent triggering the transition of the lower door."
]
},
{
"link": [
7,
2
],
"name": "Grapple Teleport",
"entranceCondition": {
"comeInWithGrappleTeleport": {
"blockPositions": [
[
2,
28
],
[
2,
29
]
]
}
},
"requires": [],
"bypassesDoorShell": true
},
{
"link": [
7,
2
],
"name": "Carry Grapple Teleport (Middle Position)",
"entranceCondition": {
"comeInWithGrappleTeleport": {
"blockPositions": [
[
2,
28
]
]
}
},
"requires": [],
"bypassesDoorShell": true,
"exitCondition": {
"leaveWithGrappleTeleport": {
"blockPositions": [
[
2,
28
]
]
}
}
},
{
"link": [
7,
2
],
"name": "Carry Grapple Teleport (Bottom Position)",
"entranceCondition": {
"comeInWithGrappleTeleport": {
"blockPositions": [
[
2,
29
]
]
}
},
"requires": [],
"bypassesDoorShell": true,
"exitCondition": {
"leaveWithGrappleTeleport": {
"blockPositions": [
[
2,
29
]
]
}
}
},
{
"link": [
7,
2
],
"name": "Grapple Teleport X-Ray Climb",
"entranceCondition": {
"comeInWithGrappleTeleport": {
"blockPositions": [
[
2,
34
]
]
}
},
"requires": [
"canXRayClimb"
],
"bypassesDoorShell": true,
"note": [
"Exit the previous room with Samus in a standing pose (while grappled) with a horizontal position of 21 (as far right as possible).",
"After teleporting, press right to release Grapple while staying standing (not being forced into a crouch).",
"Then X-ray climb to get up to the door transition above, without needing to open the door.",
"At the beginning of the climb, avoid pressing left without X-Ray being held, to prevent triggering the transition of the lower door."
]
},
{
"link": [
7,
3
],
"name": "Grapple Teleport",
"entranceCondition": {
"comeInWithGrappleTeleport": {
"blockPositions": [
[
2,
34
]
]
}
},
"requires": [],
"bypassesDoorShell": true
},
{
"link": [
7,
3
],
"name": "Carry Grapple Teleport",
"entranceCondition": {
"comeInWithGrappleTeleport": {
"blockPositions": [
[
2,
34
]
]
}
},
"requires": [],
"bypassesDoorShell": true,
"exitCondition": {
"leaveWithGrappleTeleport": {
"blockPositions": [
[
2,
34
]
]
}
}
},
{
"link": [
7,
6
],
"name": "Base",
"requires": []
},
{
"link": [
7,
6
],
"name": "Carry Shinecharge",
"entranceCondition": {
"comeInShinecharged": {
"framesRequired": 120
}
},
"requires": [
"canShinechargeMovementComplex"
],
"exitCondition": {
"leaveShinecharged": {
"framesRemaining": "auto"
}
},
"unlocksDoors": [
{
"types": [
"super"
],
"requires": []
},
{
"types": [
"missiles",
"powerbomb"
],
"requires": [
"never"
]
}
]
},
{
"link": [
7,
6
],
"name": "Come In Shinecharged, Leave Sparking",
"entranceCondition": {
"comeInShinecharged": {
"framesRequired": 105
}
},
"requires": [
{
  "shinespark": {
    "frames": 5
  }
}
],
"exitCondition": {
"leaveWithSpark": {}
},
"unlocksDoors": [
{
"types": [
"super"
],
"requires": []
},
{
"types": [
"missiles",
"powerbomb"
],
"requires": [
"never"
]
}
]
},
{
"link": [
7,
6
],
"name": "Come in Running, Leave Shinecharged",
"entranceCondition": {
"comeInShinecharging": {
"length": 2.5,
"openEnd": 1
}
},
"requires": [],
"exitCondition": {
"leaveShinecharged": {
"framesRemaining": 55
}
},
"unlocksDoors": [
{
"types": [
"super"
],
"requires": []
},
{
"types": [
"missiles",
"powerbomb"
],
"requires": [
"never"
]
}
]
},
{
"link": [
7,
7
],
"name": "Leave with Runway",
"requires": [],
"exitCondition": {
"leaveWithRunway": {
"length": 3.5,
"openEnd": 1
}
}
},
{
"link": [
7,
7
],
"name": "Leave With Runway - Frozen Sova",
"requires": [
"h_canFrozenEnemyRunway",
"SpaceJump",
"canBePatient",
{
"or": [
{
"obstaclesCleared": [
"A"
]
},
"h_canBombThings"
]
}
],
"exitCondition": {
"leaveWithRunway": {
"length": 5,
"openEnd": 1
}
},
"note": [
"Place a Power Bomb on the bottom stair attached to the door in order to prevent killing the Sova, or free a Sova from the Morph maze with Bombs.",
"If coming from below, be sure to lure the Sova to the bottom before placing a Power Bomb near the blocks in order to prevent killing it.",
"Use Space Jump to follow the Sova to the top right door. Freeze it just at the bottom of the small stairs, as Samus can run over the half-tile gap that remains."
]
},
{
"link": [
7,
7
],
"name": "Cacatac and Waver Farm",
"requires": [
{
"resetRoom": {
"nodes": [
6,
7
],
"mustStayPut": false
}
},
{
"refill": [
"Energy",
"Missile",
"Super"
]
}
]
},
{
"link": [
7,
7
],
"name": "Crystal Flash",
"requires": [
"h_canCrystalFlash"
]
},
{
"link": [
7,
9
],
"name": "Base",
"requires": []
},
{
"link": [
8,
9
],
"name": "Base",
"requires": [
{
  "or": [
    "canWalljump",
    "HiJump",
    "h_canFly",
    "canUseFrozenEnemies",
    "canSpringBallJumpMidAir"
  ]
}
]
},
{
"link": [
8,
9
],
"name": "X-Mode Shinespark",
"requires": [
"canXMode",
"canBounceBall",
"canLateralMidAirMorph",
"canShinechargeMovement",
{
"canShineCharge": {
"usedTiles": 33,
"openEnd": 2
}
},
"h_XModeSpikeHitLeniency",
"h_XModeSpikeHitLeniency",
{
"shinespark": {
"frames": 6
}
}
]
},
{
"link": [
9,
1
],
"name": "Base",
"requires": [
"h_canFly"
]
},
{
"link": [
9,
1
],
"name": "Dual Jump Assist",
"requires": [
"HiJump",
"canSpringBallJumpMidAir"
]
},
{
"link": [
9,
1
],
"name": "Bubble Mountain Springwall",
"requires": [
"canSpringwall"
]
},
{
"link": [
9,
1
],
"name": "Bubble Mountain HiJump Walljump (Left)",
"requires": [
"HiJump",
"canPreciseWalljump"
],
"note": "This is the same size of ledge as writg, so it should be equally possible."
},
{
"link": [
9,
1
],
"name": "Bubble Mountain Hjless Walljump (Left)",
"requires": [
"canInsaneWalljump"
],
"note": "This is the same size of ledge as writg, so it should be equally possible."
},
{
"link": [
9,
1
],
"name": "Frozen Waver",
"requires": [
"canUseFrozenEnemies",
{
"or": [
"canTrickyUseFrozenEnemies",
"canWalljump",
"HiJump",
"canSpringBallJumpMidAir",
"h_canCrouchJumpDownGrab"
]
}
]
},
{
"link": [
9,
1
],
"name": "Speedy Jump with Grapple",
"requires": [
"HiJump",
"SpeedBooster",
"canPreciseGrapple"
],
"note": "Jump from the Save room door runway and use Grapple to grab onto the Grapple Blocks."
},
{
"link": [
9,
1
],
"name": "Bubble Mountain Tricky Spring Ball Jump with Grapple",
"notable": true,
"requires": [
"canTrickySpringBallJump",
"canPreciseGrapple"
],
"note": [
"Perform a very tight Spring Ball jump from the Save room door runway, starting from either a crouch or spin jump,",
"then use Grapple to barely reach the ceiling blocks."
]
},
{
"link": [
9,
2
],
"name": "Base",
"requires": []
},
{
"link": [
9,
3
],
"name": "Base",
"requires": []
},
{
"link": [
9,
5
],
"name": "Power Bomb Blocks",
"requires": [
{
  "or": [
    "h_canUsePowerBombs",
    {
      "obstaclesCleared": [
        "A"
      ]
    }
  ]
}
],
"clearsObstacles": [
"A"
]
},
{
"link": [
9,
5
],
"name": "Morph Maze",
"requires": [
"h_canUseMorphBombs"
]
},
{
"link": [
9,
7
],
"name": "Base",
"requires": [
"h_canFly"
]
},
{
"link": [
9,
7
],
"name": "Walljump with HiJump",
"requires": [
"HiJump",
"canWalljump"
]
},
{
"link": [
9,
7
],
"name": "Frozen Waver",
"requires": [
"canUseFrozenEnemies",
{
"or": [
"canTrickyUseFrozenEnemies",
"canWalljump",
"HiJump"
]
}
]
},
{
"link": [
9,
7
],
"name": "Dual Jump Assist",
"requires": [
"HiJump",
"canTrickySpringBallJump"
],
"note": "Run and Jump into a Springball Jump from the Save Room runway."
},
{
"link": [
9,
7
],
"name": "Bubble Mountain Right Side Delayed Walljumps",
"notable": true,
"requires": [
"canDelayedWalljump",
"canConsecutiveWalljump"
],
"note": "A tricky, delayed walljump makes it possible to climb to top right in-room, with nothing."
},
{
"link": [
9,
8
],
"name": "Base",
"requires": []
},
{
"link": [
9,
9
],
"name": "Crystal Flash",
"requires": [
"h_canCrystalFlash"
],
"clearsObstacles": [
"A"
]
}
]
}