Crocomire's Room
Room ID: 122

|
Requires: {
"or": [
"h_CrocomireCameraFix",
"f_DefeatedCrocomire"
]
}
Exit condition: {
"leaveWithRunway": {
"length": 3,
"openEnd": 1
}
}
|
|
Requires: "h_CrocomireCameraFix"
{
"canShineCharge": {
"usedTiles": 14,
"openEnd": 1
}
}
Exit condition: {
"leaveShinecharged": {
"framesRemaining": 45
}
}
|
|
Requires: "f_DefeatedCrocomire"
"canShinechargeMovement"
{
"canShineCharge": {
"usedTiles": 33,
"openEnd": 2
}
}
Exit condition: {
"leaveShinecharged": {
"framesRemaining": 60
}
}
|
|
Requires: "h_canCrystalFlash" |
|
Requires: "f_DefeatedCrocomire" |
|
Exit condition: {
"leaveWithDoorFrameBelow": {
"height": 2
}
}
|
|
Requires: "f_DefeatedCrocomire" Exit condition: {
"leaveWithPlatformBelow": {
"height": 10,
"leftPosition": -38.5,
"rightPosition": 41.5
}
}
|
|
From: 2
Top Door
To: 2
Top Door
Exit condition: {
"leaveWithPlatformBelow": {
"height": 10,
"leftPosition": -21,
"rightPosition": 11.5
}
}
|
|
|
|
Requires: "h_canCrystalFlash" |
|
Requires: "f_DefeatedCrocomire"
{
"or": [
"SpaceJump",
"Grapple"
]
}
|
|
Requires: "f_DefeatedCrocomire"
"Gravity"
{
"acidFrames": 40
}
|
|
Requires: "f_DefeatedCrocomire"
{
"acidFrames": 100
}
|
|
Requires: "canTrickySpringBallJump"
"canTrickyJump"
"canLateralMidAirMorph"
{
"acidFrames": 55
}
|
|
Requires: "h_canCeilingBombJump" "canLongCeilingBombJump" "canBePatient" |
|
|
|
Requires: "f_DefeatedCrocomire" |
|
Requires: "f_DefeatedCrocomire" |
|
Requires: {
"or": [
"SpeedBooster",
"HiJump",
"h_canFly",
"canWalljump",
"canSpringBallJumpMidAir"
]
}
|
|
Get a normal height jump by not pressing run while SpeedBooster is equipped, as the Shinespark is stored. Requires: "canWalljump"
"canShinechargeMovement"
{
"canShineCharge": {
"usedTiles": 33,
"openEnd": 2
}
}
{
"or": [
"f_DefeatedCrocomire",
{
"canShineCharge": {
"usedTiles": 22,
"openEnd": 1
}
}
]
}
Exit condition: {
"leaveShinecharged": {
"framesRemaining": 130
}
}
|
|
From: 5
Central Junction
To: 2
Top Door
Requires: "canShinechargeMovement"
{
"canShineCharge": {
"usedTiles": 33,
"openEnd": 2
}
}
{
"or": [
"f_DefeatedCrocomire",
{
"canShineCharge": {
"usedTiles": 31,
"openEnd": 0
}
}
]
}
Exit condition: {
"leaveShinecharged": {
"framesRemaining": 80
}
}
|
|
Requires: "HiJump"
"canShinechargeMovement"
{
"canShineCharge": {
"usedTiles": 33,
"openEnd": 2
}
}
{
"or": [
"f_DefeatedCrocomire",
{
"canShineCharge": {
"usedTiles": 22,
"openEnd": 1
}
}
]
}
Exit condition: {
"leaveShinecharged": {
"framesRemaining": 140
}
}
|
|
Requires: "SpaceJump"
"canShinechargeMovement"
{
"canShineCharge": {
"usedTiles": 33,
"openEnd": 2
}
}
{
"or": [
"f_DefeatedCrocomire",
{
"canShineCharge": {
"usedTiles": 22,
"openEnd": 1
}
}
]
}
Exit condition: {
"leaveShinecharged": {
"framesRemaining": 100
}
}
|
|
Requires: {
"canShineCharge": {
"usedTiles": 33,
"openEnd": 2
}
}
{
"or": [
"f_DefeatedCrocomire",
{
"canShineCharge": {
"usedTiles": 31,
"openEnd": 0
}
}
]
}
{
"shinespark": {
"frames": 9
}
}
Exit condition: {
"leaveWithSpark": {}
}
|
|
|
|
Requires: "h_canCrystalFlash" |
|
Requires: {
"or": [
"SpaceJump",
"Grapple"
]
}
|
|
Requires: "Gravity"
{
"acidFrames": 20
}
{
"or": [
"canWalljump",
{
"acidFrames": 10
}
]
}
|
|
Requires: "canWalljump"
{
"acidFrames": 45
}
|
|
Requires: "canLateralMidAirMorph"
"canWalljump"
{
"acidFrames": 35
}
|
|
Requires: "canLateralMidAirMorph"
"canTrickySpringBallJump"
{
"acidFrames": 25
}
|
|
Requires: "canMidairShinespark"
{
"canShineCharge": {
"usedTiles": 33,
"openEnd": 2
}
}
{
"or": [
{
"shinespark": {
"frames": 45,
"excessFrames": 5
}
},
{
"and": [
"canShinechargeMovementComplex",
{
"shinespark": {
"frames": 5
}
}
]
}
]
}
|
|
With a precise enough jump, it's possible to avoid acid damage without a shinespark. Requires: "SpeedBooster" "canTrickyJump" "canWalljump" |
|
With a precise enough jump and a quick airball, it's possible to avoid acid damage without a shinespark or wall jump. Requires: "SpeedBooster" "canInsaneJump" "canLateralMidAirMorph" |
|
Requires: "h_canCeilingBombJump" "canLongCeilingBombJump" "canBePatient" |
|
|
|
Requires: "Charge"
{
"or": [
"canDodgeWhileShooting",
{
"enemyDamage": {
"enemy": "Crocomire",
"type": "contact",
"hits": 5
}
}
]
}
Clears obstacles: f_DefeatedCrocomire |
|
Requires: {
"ammo": {
"type": "Missile",
"count": 50
}
}
Clears obstacles: f_DefeatedCrocomire |
|
Farming requires somewhat careful dodging in order to minimize energy drops. Requires: "canDodgeWhileShooting"
{
"or": [
{
"ammo": {
"type": "Missile",
"count": 2
}
},
{
"ammo": {
"type": "Super",
"count": 2
}
}
]
}
{
"or": [
"canTrickyJump",
{
"ammo": {
"type": "Missile",
"count": 25
}
}
]
}
{
"resourceCapacity": [
{
"type": "Missile",
"count": 10
}
]
}
Clears obstacles: f_DefeatedCrocomire |
|
While Crocomire's farmables may drop Supers, the rate is too low to rely on. If you run out, Croc will most likely push you into the spikes. It takes 8 Supers to kill croc if you don't let it move forward. Requires: {
"ammo": {
"type": "Super",
"count": 8
}
}
{
"or": [
"canDodgeWhileShooting",
{
"ammo": {
"type": "Super",
"count": 5
}
}
]
}
{
"or": [
"canTrickyJump",
{
"ammo": {
"type": "Super",
"count": 2
}
}
]
}
Clears obstacles: f_DefeatedCrocomire |
|
From: 4
Crocomire (locked)
To: 7
Crocomire (unlocked)
Notable: true 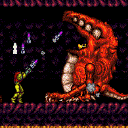

This can be a very long fight if Crocomire is stingy with the farming phases. Farming requires careful dodging in order to minimize energy drops. Delay grabbing all of the drops until necessary to reduce the chance of running out of ammo. Requires: "canDodgeWhileShooting"
"canBeVeryPatient"
{
"or": [
{
"ammo": {
"type": "Missile",
"count": 2
}
},
{
"ammo": {
"type": "Super",
"count": 2
}
}
]
}
{
"resourceCapacity": [
{
"type": "Missile",
"count": 5
}
]
}
Clears obstacles: f_DefeatedCrocomire |
|
|
|
Requires: {
"obstaclesCleared": [
"f_DefeatedCrocomire"
]
}
"canShinechargeMovement"
{
"canShineCharge": {
"usedTiles": 33,
"openEnd": 2
}
}
Exit condition: {
"leaveShinecharged": {
"framesRemaining": 60
}
}
|
|
Requires: {
"obstaclesCleared": [
"f_DefeatedCrocomire"
]
}
|
|
Requires: {
"obstaclesCleared": [
"f_DefeatedCrocomire"
]
}
Exit condition: {
"leaveWithPlatformBelow": {
"height": 10,
"leftPosition": -38.5,
"rightPosition": 41.5
}
}
|
|
Requires: {
"obstaclesCleared": [
"f_DefeatedCrocomire"
]
}
{
"or": [
"SpaceJump",
"Grapple"
]
}
|
|
Requires: {
"obstaclesCleared": [
"f_DefeatedCrocomire"
]
}
"Gravity"
{
"acidFrames": 40
}
|
|
Requires: {
"obstaclesCleared": [
"f_DefeatedCrocomire"
]
}
{
"acidFrames": 100
}
|
|
Requires: {
"obstaclesCleared": [
"f_DefeatedCrocomire"
]
}
|
|
Requires: {
"obstaclesCleared": [
"f_DefeatedCrocomire"
]
}
|
{
"$schema": "../../../schema/m3-room.schema.json",
"id": 122,
"name": "Crocomire's Room",
"area": "Norfair",
"subarea": "Upper",
"subsubarea": "Crocomire",
"playable": true,
"roomEnvironments": [
{
"heated": false
}
],
"roomAddress": "0x7A98D",
"nodes": [
{
"id": 1,
"name": "Left Door",
"nodeType": "door",
"nodeSubType": "blue",
"nodeAddress": "0x00193de",
"doorEnvironments": [
{
"physics": "air"
}
]
},
{
"id": 2,
"name": "Top Door",
"nodeType": "door",
"nodeSubType": "grey",
"nodeAddress": "0x00193ea",
"doorEnvironments": [
{
"physics": "air"
}
],
"spawnAt": 5,
"locks": [
{
"name": "Crocomire Room Grey Lock (to Crocomire Speedway)",
"lockType": "gameFlag",
"unlockStrats": [
{
"name": "Base",
"notable": false,
"requires": [
"f_DefeatedCrocomire"
]
}
]
}
]
},
{
"id": 3,
"name": "Item",
"nodeType": "item",
"nodeSubType": "visible",
"nodeItem": "ETank",
"nodeAddress": "0x78BA4"
},
{
"id": 4,
"name": "Crocomire (locked)",
"nodeType": "junction",
"nodeSubType": "boss"
},
{
"id": 5,
"name": "Central Junction",
"nodeType": "junction",
"nodeSubType": "junction"
},
{
"id": 6,
"name": "Junction Behind Crocomire",
"nodeType": "junction",
"nodeSubType": "junction"
},
{
"id": 7,
"name": "Crocomire (unlocked)",
"nodeType": "event",
"nodeSubType": "boss",
"yields": [
"f_DefeatedCrocomire"
]
}
],
"enemies": [
{
"id": "e1",
"groupName": "Crocomire",
"enemyName": "Crocomire",
"quantity": 1,
"homeNodes": [
4
],
"stopSpawn": [
"f_DefeatedCrocomire"
]
}
],
"links": [
{
"from": 1,
"to": [
{
"id": 1
},
{
"id": 5
}
]
},
{
"from": 2,
"to": [
{
"id": 2
},
{
"id": 5
}
]
},
{
"from": 3,
"to": [
{
"id": 3
},
{
"id": 6
}
]
},
{
"from": 4,
"to": [
{
"id": 5
},
{
"id": 6
}
]
},
{
"from": 5,
"to": [
{
"id": 1
},
{
"id": 2
},
{
"id": 4
},
{
"id": 5
}
]
},
{
"from": 6,
"to": [
{
"id": 3
},
{
"id": 4
}
]
}
],
"strats": [
{
"link": [
1,
1
],
"name": "Leave with Runway",
"requires": [
{
  "or": [
    "h_CrocomireCameraFix",
    "f_DefeatedCrocomire"
  ]
}
],
"exitCondition": {
"leaveWithRunway": {
"length": 3,
"openEnd": 1
}
}
},
{
"link": [
1,
1
],
"name": "Leave ShineCharged, Croc Alive",
"requires": [
"h_CrocomireCameraFix",
{
"canShineCharge": {
"usedTiles": 14,
"openEnd": 1
}
}
],
"exitCondition": {
"leaveShinecharged": {
"framesRemaining": 45
}
}
},
{
"link": [
1,
1
],
"name": "Leave Shinecharged",
"requires": [
"f_DefeatedCrocomire",
"canShinechargeMovement",
{
"canShineCharge": {
"usedTiles": 33,
"openEnd": 2
}
}
],
"exitCondition": {
"leaveShinecharged": {
"framesRemaining": 60
}
}
},
{
"link": [
1,
1
],
"name": "Crystal Flash",
"requires": [
"h_canCrystalFlash"
]
},
{
"link": [
1,
5
],
"name": "Base",
"requires": [
"f_DefeatedCrocomire"
]
},
{
"link": [
2,
2
],
"name": "Leave With Door Frame Below",
"requires": [],
"exitCondition": {
"leaveWithDoorFrameBelow": {
"height": 2
}
}
},
{
"link": [
2,
2
],
"name": "Leave With Platform Below",
"requires": [
"f_DefeatedCrocomire"
],
"exitCondition": {
"leaveWithPlatformBelow": {
"height": 10,
"leftPosition": -38.5,
"rightPosition": 41.5
}
}
},
{
"link": [
2,
2
],
"name": "Leave With Platform Below - Crocomire Alive",
"requires": [],
"exitCondition": {
"leaveWithPlatformBelow": {
"height": 10,
"leftPosition": -21,
"rightPosition": 11.5
}
}
},
{
"link": [
2,
5
],
"name": "Base",
"requires": []
},
{
"link": [
3,
3
],
"name": "Crystal Flash",
"requires": [
"h_canCrystalFlash"
]
},
{
"link": [
3,
6
],
"name": "Base",
"requires": [
"f_DefeatedCrocomire",
{
"or": [
"SpaceJump",
"Grapple"
]
}
]
},
{
"link": [
3,
6
],
"name": "Gravity Acid",
"requires": [
"f_DefeatedCrocomire",
"Gravity",
{
"acidFrames": 40
}
]
},
{
"link": [
3,
6
],
"name": "Acid Bath",
"requires": [
"f_DefeatedCrocomire",
{
"acidFrames": 100
}
]
},
{
"link": [
3,
6
],
"name": "Tricky Spring Ball Jumps",
"requires": [
"canTrickySpringBallJump",
"canTrickyJump",
"canLateralMidAirMorph",
{
"acidFrames": 55
}
]
},
{
"link": [
3,
6
],
"name": "Ceiling Bomb Jump",
"requires": [
"h_canCeilingBombJump",
"canLongCeilingBombJump",
"canBePatient"
]
},
{
"link": [
4,
5
],
"name": "Base",
"requires": []
},
{
"link": [
4,
6
],
"name": "Base",
"requires": [
"f_DefeatedCrocomire"
]
},
{
"link": [
5,
1
],
"name": "Base",
"requires": [
"f_DefeatedCrocomire"
]
},
{
"link": [
5,
2
],
"name": "Base",
"requires": [
{
  "or": [
    "SpeedBooster",
    "HiJump",
    "h_canFly",
    "canWalljump",
    "canSpringBallJumpMidAir"
  ]
}
]
},
{
"link": [
5,
2
],
"name": "Leave Shinecharged with Walljump",
"requires": [
"canWalljump",
"canShinechargeMovement",
{
"canShineCharge": {
"usedTiles": 33,
"openEnd": 2
}
},
{
"or": [
"f_DefeatedCrocomire",
{
"canShineCharge": {
"usedTiles": 22,
"openEnd": 1
}
}
]
}
],
"exitCondition": {
"leaveShinecharged": {
"framesRemaining": 130
}
},
"unlocksDoors": [
{
"types": [
"ammo"
],
"requires": []
}
],
"note": "Get a normal height jump by not pressing run while SpeedBooster is equipped, as the Shinespark is stored."
},
{
"link": [
5,
2
],
"name": "Leave Shinecharged with Speedy Jump",
"requires": [
"canShinechargeMovement",
{
"canShineCharge": {
"usedTiles": 33,
"openEnd": 2
}
},
{
"or": [
"f_DefeatedCrocomire",
{
"canShineCharge": {
"usedTiles": 31,
"openEnd": 0
}
}
]
}
],
"exitCondition": {
"leaveShinecharged": {
"framesRemaining": 80
}
},
"unlocksDoors": [
{
"types": [
"ammo"
],
"requires": []
}
]
},
{
"link": [
5,
2
],
"name": "Leave Shinecharged with HiJump",
"requires": [
"HiJump",
"canShinechargeMovement",
{
"canShineCharge": {
"usedTiles": 33,
"openEnd": 2
}
},
{
"or": [
"f_DefeatedCrocomire",
{
"canShineCharge": {
"usedTiles": 22,
"openEnd": 1
}
}
]
}
],
"exitCondition": {
"leaveShinecharged": {
"framesRemaining": 140
}
},
"unlocksDoors": [
{
"types": [
"ammo"
],
"requires": []
}
]
},
{
"link": [
5,
2
],
"name": "Leave Shinecharged with Spacejump",
"requires": [
"SpaceJump",
"canShinechargeMovement",
{
"canShineCharge": {
"usedTiles": 33,
"openEnd": 2
}
},
{
"or": [
"f_DefeatedCrocomire",
{
"canShineCharge": {
"usedTiles": 22,
"openEnd": 1
}
}
]
}
],
"exitCondition": {
"leaveShinecharged": {
"framesRemaining": 100
}
},
"unlocksDoors": [
{
"types": [
"ammo"
],
"requires": []
}
]
},
{
"link": [
5,
2
],
"name": "Leave Sparking",
"requires": [
{
"canShineCharge": {
"usedTiles": 33,
"openEnd": 2
}
},
{
"or": [
"f_DefeatedCrocomire",
{
"canShineCharge": {
"usedTiles": 31,
"openEnd": 0
}
}
]
},
{
"shinespark": {
"frames": 9
}
}
],
"exitCondition": {
"leaveWithSpark": {}
},
"unlocksDoors": [
{
"types": [
"ammo"
],
"requires": []
}
]
},
{
"link": [
5,
4
],
"name": "Base",
"requires": []
},
{
"link": [
5,
5
],
"name": "Crystal Flash",
"requires": [
"h_canCrystalFlash"
]
},
{
"link": [
6,
3
],
"name": "Base",
"requires": [
{
  "or": [
    "SpaceJump",
    "Grapple"
  ]
}
]
},
{
"link": [
6,
3
],
"name": "Gravity Acid",
"requires": [
"Gravity",
{
"acidFrames": 20
},
{
"or": [
"canWalljump",
{
"acidFrames": 10
}
]
}
]
},
{
"link": [
6,
3
],
"name": "Acid Bath Wall Jump",
"requires": [
"canWalljump",
{
"acidFrames": 45
}
]
},
{
"link": [
6,
3
],
"name": "Airball Wall Jump",
"requires": [
"canLateralMidAirMorph",
"canWalljump",
{
"acidFrames": 35
}
]
},
{
"link": [
6,
3
],
"name": "Airball Spring Ball Jump",
"requires": [
"canLateralMidAirMorph",
"canTrickySpringBallJump",
{
"acidFrames": 25
}
]
},
{
"link": [
6,
3
],
"name": "Shinespark",
"requires": [
"canMidairShinespark",
{
"canShineCharge": {
"usedTiles": 33,
"openEnd": 2
}
},
{
"or": [
{
"shinespark": {
"frames": 45,
"excessFrames": 5
}
},
{
"and": [
"canShinechargeMovementComplex",
{
"shinespark": {
"frames": 5
}
}
]
}
]
}
]
},
{
"link": [
6,
3
],
"name": "Speedjump Wall Jump",
"requires": [
"SpeedBooster",
"canTrickyJump",
"canWalljump"
],
"note": "With a precise enough jump, it's possible to avoid acid damage without a shinespark."
},
{
"link": [
6,
3
],
"name": "Insane Speedy Airball",
"requires": [
"SpeedBooster",
"canInsaneJump",
"canLateralMidAirMorph"
],
"note": "With a precise enough jump and a quick airball, it's possible to avoid acid damage without a shinespark or wall jump."
},
{
"link": [
6,
3
],
"name": "Ceiling Bomb Jump",
"requires": [
"h_canCeilingBombJump",
"canLongCeilingBombJump",
"canBePatient"
]
},
{
"link": [
6,
4
],
"name": "Base",
"requires": []
},
{
"name": "Charge",
"notable": false,
"requires": [
"Charge",
{
"or": [
"canDodgeWhileShooting",
{
"enemyDamage": {
"enemy": "Crocomire",
"type": "contact",
"hits": 5
}
}
]
}
],
"link": [
4,
7
],
"clearsObstacles": [
"f_DefeatedCrocomire"
]
},
{
"name": "Missiles",
"notable": false,
"requires": [
{
  "ammo": {
    "type": "Missile",
    "count": 50
  }
}
],
"devNote": "Some farming will still be useful, but without dodging efficiently, many of the drops will be energy.",
"link": [
4,
7
],
"clearsObstacles": [
"f_DefeatedCrocomire"
]
},
{
"name": "Farm Missiles",
"notable": false,
"requires": [
"canDodgeWhileShooting",
{
"or": [
{
"ammo": {
"type": "Missile",
"count": 2
}
},
{
"ammo": {
"type": "Super",
"count": 2
}
}
]
},
{
"or": [
"canTrickyJump",
{
"ammo": {
"type": "Missile",
"count": 25
}
}
]
},
{
"resourceCapacity": [
{
"type": "Missile",
"count": 10
}
]
}
],
"note": "Farming requires somewhat careful dodging in order to minimize energy drops.",
"devNote": [
"Crocomire does not have a farming phase until he has been hit twice.",
"It is possible to get to the farming phase with 1 PB, but sometimes Croc will just rush Samus into the spikes without ever having farm phases, so it is ignored here."
],
"link": [
4,
7
],
"clearsObstacles": [
"f_DefeatedCrocomire"
]
},
{
"name": "Supers",
"notable": false,
"requires": [
{
"ammo": {
"type": "Super",
"count": 8
}
},
{
"or": [
"canDodgeWhileShooting",
{
"ammo": {
"type": "Super",
"count": 5
}
}
]
},
{
"or": [
"canTrickyJump",
{
"ammo": {
"type": "Super",
"count": 2
}
}
]
}
],
"note": [
"While Crocomire's farmables may drop Supers, the rate is too low to rely on.",
"If you run out, Croc will most likely push you into the spikes.",
"It takes 8 Supers to kill croc if you don't let it move forward."
],
"link": [
4,
7
],
"clearsObstacles": [
"f_DefeatedCrocomire"
]
},
{
"name": "Crocomire with 5 Missiles",
"notable": true,
"requires": [
"canDodgeWhileShooting",
"canBeVeryPatient",
{
"or": [
{
"ammo": {
"type": "Missile",
"count": 2
}
},
{
"ammo": {
"type": "Super",
"count": 2
}
}
]
},
{
"resourceCapacity": [
{
"type": "Missile",
"count": 5
}
]
}
],
"note": [
"This can be a very long fight if Crocomire is stingy with the farming phases.",
"Farming requires careful dodging in order to minimize energy drops. Delay grabbing all of the drops until necessary to reduce the chance of running out of ammo."
],
"devNote": [
"This strat is notable, not because it's harder than its required tech, but because its tedious, RNG heavy, and players might not want to encounter it.",
"Crocomire does not have a farming phase until he has been hit twice.",
"It is possible to get to the farming phase with 1 PB, but sometimes Croc will just rush Samus into the spikes without ever having farm phases, so it is ignored here."
],
"link": [
4,
7
],
"clearsObstacles": [
"f_DefeatedCrocomire"
]
},
{
"link": [
7,
4
],
"name": "Base",
"notable": false,
"requires": []
},
{
"link": [
1,
1
],
"name": "Leave Shinecharged",
"requires": [
{
  "obstaclesCleared": [
    "f_DefeatedCrocomire"
  ]
},
"canShinechargeMovement",
{
"canShineCharge": {
"usedTiles": 33,
"openEnd": 2
}
}
],
"exitCondition": {
"leaveShinecharged": {
"framesRemaining": 60
}
}
},
{
"link": [
1,
5
],
"name": "Base",
"requires": [
{
  "obstaclesCleared": [
    "f_DefeatedCrocomire"
  ]
}
]
},
{
"link": [
2,
2
],
"name": "Leave With Platform Below",
"requires": [
{
  "obstaclesCleared": [
    "f_DefeatedCrocomire"
  ]
}
],
"exitCondition": {
"leaveWithPlatformBelow": {
"height": 10,
"leftPosition": -38.5,
"rightPosition": 41.5
}
}
},
{
"link": [
3,
6
],
"name": "Base",
"requires": [
{
  "obstaclesCleared": [
    "f_DefeatedCrocomire"
  ]
},
{
"or": [
"SpaceJump",
"Grapple"
]
}
]
},
{
"link": [
3,
6
],
"name": "Gravity Acid",
"requires": [
{
"obstaclesCleared": [
"f_DefeatedCrocomire"
]
},
"Gravity",
{
"acidFrames": 40
}
]
},
{
"link": [
3,
6
],
"name": "Acid Bath",
"requires": [
{
"obstaclesCleared": [
"f_DefeatedCrocomire"
]
},
{
"acidFrames": 100
}
]
},
{
"link": [
4,
6
],
"name": "Base",
"requires": [
{
"obstaclesCleared": [
"f_DefeatedCrocomire"
]
}
]
},
{
"link": [
5,
1
],
"name": "Base",
"requires": [
{
"obstaclesCleared": [
"f_DefeatedCrocomire"
]
}
]
}
],
"obstacles": [
{
"id": "f_DefeatedCrocomire",
"name": "f_DefeatedCrocomire"
}
]
}