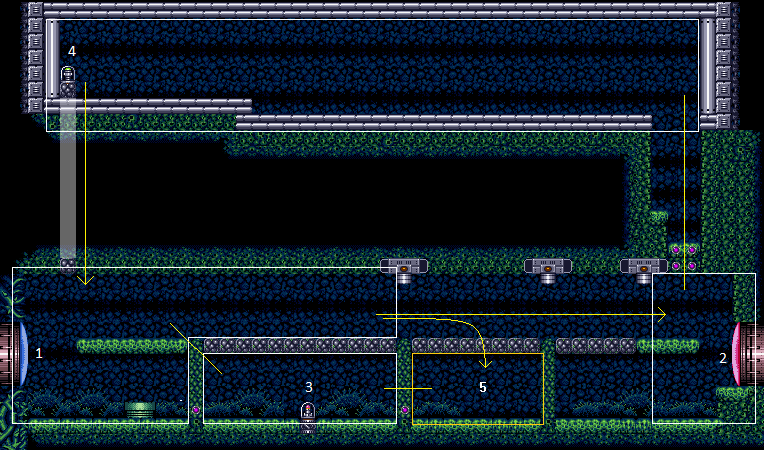
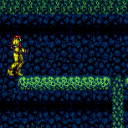
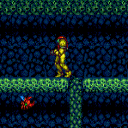
Early Supers Room
Room ID: 45
|
Exit condition: {
"leaveWithRunway": {
"length": 1,
"openEnd": 1
}
}
|
|
Use a Frozen Zeb to extend the runway. The bug's height when standing next to the pipe is optimal. Requires: "h_canFrozenEnemyRunway"
{
"or": [
"Morph",
"canTwoTileSqueeze",
{
"enemyDamage": {
"enemy": "Zeb",
"hits": 1,
"type": "contact"
}
}
]
}
Exit condition: {
"leaveWithRunway": {
"length": 3,
"openEnd": 0
}
}
|
|
From: 1
Left Door
To: 1
Left Door
Notable: true 
Gain a shinecharge on the long, lower platform in the screen above, then carry it left and down. Use crumble quick drops, land on the floor at the bottom, spin jump left into the doorway, and activate the spark. The required movement here is very precise, as the 180 shinecharge frames is only barely enough. Requires: {
"obstaclesNotCleared": [
"A"
]
}
"h_canCrouchJumpDownGrab"
{
"canShineCharge": {
"usedTiles": 17,
"openEnd": 0
}
}
"canShinechargeMovementTricky"
"canQuickCrumbleEscape"
{
"shinespark": {
"frames": 1
}
}
Exit condition: {
"leaveWithSpark": {}
}
|
|
Requires: {
"refill": [
"Energy",
"Missile",
"Super"
]
}
|
|
Exit condition: {
"leaveWithGModeSetup": {}
}
|
|
Requires: {
"obstaclesNotCleared": [
"A"
]
}
"SpeedBooster"
Clears obstacles: A |
|
Notable: true 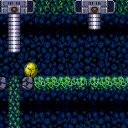
Mockball to roll over the crumble blocks without falling down, and under the gate before it closes. Requires: {
"obstaclesNotCleared": [
"A"
]
}
"canMockball"
Clears obstacles: A |
|
Run then do a very small spin jump to clip into the left side of the first gate. While inside the gate, back up to get the maximum run distance using either Moonwalk or X-Ray Turnaround and repeat for the next gate. It is also possible to clip into the gates by aiming down while in the spin jump. A down-back is also possible for clipping into the first gate, but it is generally harder. Requires: {
"obstaclesNotCleared": [
"A"
]
}
"canCrouchGateClip"
{
"or": [
"canXRayTurnaround",
"canMoonwalk"
]
}
Clears obstacles: A |
|
From: 1
Left Door
To: 2
Right Door
Notable: true 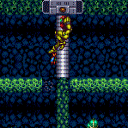
Spawn a Zeb then run and do a very small spin jump to clip into the first gate before the Zeb reaches you. Do a damage boost off of the Zeb while inside the first gate to get enough speed to clip into the next gate. It is also possible to clip into the gates by aiming down while in the spin jump. Requires: {
"obstaclesNotCleared": [
"A"
]
}
"canCrouchGateClip"
"canCameraManip"
"canHorizontalDamageBoost"
{
"enemyDamage": {
"enemy": "Zeb",
"hits": 2,
"type": "contact"
}
}
Clears obstacles: A |
|
Requires: {
"obstaclesNotCleared": [
"A"
]
}
{
"canShineCharge": {
"usedTiles": 33,
"openEnd": 2
}
}
Exit condition: {
"leaveShinecharged": {
"framesRemaining": 110
}
}
|
|
From: 1
Left Door
To: 2
Right Door
Gain the shinecharge near the edge of the runway so that you slide off quickly, while shooting the door open. Requires: {
"obstaclesNotCleared": [
"A"
]
}
{
"canShineCharge": {
"usedTiles": 33,
"openEnd": 2
}
}
"canShinechargeMovementComplex"
Exit condition: {
"leaveShinecharged": {
"framesRemaining": 140
}
}
|
|
Stand to the right of the Zeb farm and freeze the Zeb as it starts moving horizontally. get onto the platform above the Zeb and wait for the Zeb to thaw and make it close to the right edge of the screen. Use a mockball to get to the right side of the room, ending it as quickly as possible at the end to prevent the Zeb going off screen. Freeze the Zeb adjacent to the right runway in order to extend it by a short distance. Requires: {
"obstaclesNotCleared": [
"A"
]
}
"h_canTrickyFrozenEnemyRunway"
"canMockball"
"canTrickyJump"
Exit condition: {
"leaveWithRunway": {
"length": 3,
"openEnd": 0
}
}
|
|
The only way the Wavers will get to the door is if the right crumble blocks are all broken. This assumes that Samus comes from the left with Speed, a mockball, or a crouch gate clip. After the crumbles are broken, shoot the ceiling block and wait by the door for the Waver to come. Note that if Samus takes more than 35 seconds after entering the room, before shooting the ceiling, the Waver will not come down. Requires: {
"obstaclesNotCleared": [
"A"
]
}
{
"or": [
"SpeedBooster",
"canMockball",
{
"and": [
"canCrouchGateClip",
{
"or": [
"canXRayTurnaround",
"canMoonwalk"
]
}
]
}
]
}
Exit condition: {
"leaveWithGModeSetup": {}
}
|
|
This has no requirements, but getting back out does. Clears obstacles: A |
|
Crouch on the right side of the Zeb spawning pipe. While holding down, let it hit Samus, then Freeze it immediately. Requires: "canTrickyUseFrozenEnemies" Clears obstacles: A, B |
|
Entrance condition: {
"comeInWithGrappleTeleport": {
"blockPositions": [
[
12,
12
],
[
12,
13
]
]
}
}
|
|
Requires: {
"obstaclesNotCleared": [
"A"
]
}
"SpeedBooster"
Clears obstacles: A |
|
Entrance condition: {
"comeInWithGrappleTeleport": {
"blockPositions": [
[
2,
18
],
[
2,
28
],
[
2,
29
]
]
}
}
Bypasses door shell: true |
|
From: 2
Right Door
To: 1
Left Door
Entrance condition: {
"comeInWithGrappleTeleport": {
"blockPositions": [
[
2,
18
]
]
}
}
Exit condition: {
"leaveWithGrappleTeleport": {
"blockPositions": [
[
2,
18
]
]
}
}
Bypasses door shell: true |
|
From: 2
Right Door
To: 1
Left Door
Entrance condition: {
"comeInWithGrappleTeleport": {
"blockPositions": [
[
2,
28
]
]
}
}
Exit condition: {
"leaveWithGrappleTeleport": {
"blockPositions": [
[
2,
28
]
]
}
}
Bypasses door shell: true |
|
From: 2
Right Door
To: 1
Left Door
Entrance condition: {
"comeInWithGrappleTeleport": {
"blockPositions": [
[
2,
29
]
]
}
}
Exit condition: {
"leaveWithGrappleTeleport": {
"blockPositions": [
[
2,
29
]
]
}
}
Bypasses door shell: true |
|
Use the runway on the screen above to gain a shinecharge near the edge of the runway. Requires: {
"or": [
"canWalljump",
"HiJump",
"h_canFly",
"canSpringBallJumpMidAir",
"h_canCrouchJumpDownGrab"
]
}
{
"canShineCharge": {
"usedTiles": 25,
"openEnd": 1
}
}
Exit condition: {
"leaveShinecharged": {
"framesRemaining": 40
}
}
|
|
From: 2
Right Door
To: 2
Right Door
Use the runway on the screen above to gain a shinecharge near the edge of the runway, sliding off quickly. Requires: {
"or": [
"canWalljump",
"HiJump",
"h_canFly",
"canSpringBallJumpMidAir",
"h_canCrouchJumpDownGrab"
]
}
{
"canShineCharge": {
"usedTiles": 25,
"openEnd": 1
}
}
"canShinechargeMovementComplex"
Exit condition: {
"leaveShinecharged": {
"framesRemaining": 70
}
}
|
|
Exit condition: {
"leaveWithRunway": {
"length": 2,
"openEnd": 1
}
}
|
|
Requires: "h_canCrystalFlash" |
|
Requires: {
"or": [
"canWalljump",
"HiJump",
"h_canFly",
"canSpringBallJumpMidAir"
]
}
Clears obstacles: A |
|
Requires: "h_canCrouchJumpDownGrab" Clears obstacles: A |
|
Entrance condition: {
"comeInWithGrappleTeleport": {
"blockPositions": [
[
7,
2
]
]
}
}
|
|
Requires: "h_canBombThings" |
|
It is possible to do a quick crumble escape twice, requiring no other items or tech. It is easier to escape by doing a quick crumble escape, followed by a crumble block jump or using spring ball or space jump. Requires: "canQuickCrumbleEscape" |
|
Prepare a pipe bug to Ice clip through the crumble blocks, using Morph and X-Ray. It can be tested on the solid blocks directly above the pipe spawner. Climb onto the frozen bug by rolling under it and jumping while holding down. Requires: {
"obstaclesCleared": [
"B"
]
}
"h_canXRayCeilingClip"
"canTrickyUseFrozenEnemies"
|
|
Requires: "h_canBombThings" |
|
|
|
|
|
Requires: "h_canBombThings" |
{
"$schema": "../../../schema/m3-room.schema.json",
"id": 45,
"name": "Early Supers Room",
"area": "Brinstar",
"subarea": "Green",
"playable": true,
"roomAddress": "0x79BC8",
"roomEnvironments": [
{
"heated": false
}
],
"nodes": [
{
"id": 1,
"name": "Left Door",
"nodeType": "door",
"nodeSubType": "blue",
"nodeAddress": "0x0018d4e",
"doorEnvironments": [
{
"physics": "air"
}
]
},
{
"id": 2,
"name": "Right Door",
"nodeType": "door",
"nodeSubType": "red",
"nodeAddress": "0x0018d5a",
"doorEnvironments": [
{
"physics": "air"
}
],
"locks": [
{
"name": "Early Supers Red Lock (to Brinstar Reserve)",
"lockType": "coloredDoor",
"unlockStrats": [
{
"name": "Base",
"notable": false,
"requires": [
"h_canOpenRedDoors"
]
}
]
}
]
},
{
"id": 3,
"name": "Lower Item",
"nodeType": "item",
"nodeSubType": "visible",
"nodeItem": "Missile",
"nodeAddress": "0x78518"
},
{
"id": 4,
"name": "Top Left Item",
"nodeType": "item",
"nodeSubType": "visible",
"nodeItem": "Super",
"nodeAddress": "0x7851E"
},
{
"id": 5,
"name": "Junction (Sidehopper Pit)",
"nodeType": "junction",
"nodeSubType": "junction",
"devNote": "FIXME: There doesn't seem to be any use in ever going to this node. Should it be removed?"
}
],
"obstacles": [
{
"id": "A",
"name": "Gates Have Closed",
"obstacleType": "inanimate"
},
{
"id": "B",
"name": "Zeb Frozen Right of Pipe",
"obstacleType": "abstract"
}
],
"enemies": [
{
"id": "e1",
"groupName": "Early Supers Zeb",
"enemyName": "Zeb",
"quantity": 1,
"homeNodes": [
1
],
"farmCycles": [
{
"name": "Crouch over spawn point",
"cycleFrames": 120,
"requires": []
}
]
},
{
"id": "e2",
"groupName": "Early Supers Wavers",
"enemyName": "Waver",
"quantity": 4,
"homeNodes": [
4
]
},
{
"id": "e3",
"groupName": "Early Supers Top Small sidehoppers",
"enemyName": "Sm. Sidehopper",
"quantity": 3,
"homeNodes": [
4
]
},
{
"id": "e4",
"groupName": "Early Supers Bottom Small sidehoppers",
"enemyName": "Sm. Sidehopper",
"quantity": 2,
"homeNodes": [
5
]
}
],
"links": [
{
"from": 1,
"to": [
{
"id": 1
},
{
"id": 2
},
{
"id": 3
},
{
"id": 4
},
{
"id": 5
}
]
},
{
"from": 2,
"to": [
{
"id": 1
},
{
"id": 2
},
{
"id": 4
}
]
},
{
"from": 3,
"to": [
{
"id": 1
},
{
"id": 5
}
]
},
{
"from": 4,
"to": [
{
"id": 1
},
{
"id": 2
},
{
"id": 4
}
]
},
{
"from": 5,
"to": [
{
"id": 3
}
]
}
],
"strats": [
{
"link": [
1,
1
],
"name": "Leave With Runway",
"requires": [],
"exitCondition": {
"leaveWithRunway": {
"length": 1,
"openEnd": 1
}
}
},
{
"link": [
1,
1
],
"name": "Leave With Runway - Frozen Zeb",
"requires": [
"h_canFrozenEnemyRunway",
{
"or": [
"Morph",
"canTwoTileSqueeze",
{
"enemyDamage": {
"enemy": "Zeb",
"hits": 1,
"type": "contact"
}
}
]
}
],
"exitCondition": {
"leaveWithRunway": {
"length": 3,
"openEnd": 0
}
},
"note": "Use a Frozen Zeb to extend the runway. The bug's height when standing next to the pipe is optimal."
},
{
"link": [
1,
1
],
"name": "Early Supers Leave With Spark To The Left",
"notable": true,
"requires": [
{
"obstaclesNotCleared": [
"A"
]
},
"h_canCrouchJumpDownGrab",
{
"canShineCharge": {
"usedTiles": 17,
"openEnd": 0
}
},
"canShinechargeMovementTricky",
"canQuickCrumbleEscape",
{
"shinespark": {
"frames": 1
}
}
],
"exitCondition": {
"leaveWithSpark": {}
},
"note": [
"Gain a shinecharge on the long, lower platform in the screen above, then carry it left and down.",
"Use crumble quick drops, land on the floor at the bottom, spin jump left into the doorway, and activate the spark.",
"The required movement here is very precise, as the 180 shinecharge frames is only barely enough."
],
"devNote": [
"This starts at node 1 to be able to unlock the door first if needed.",
"Getting up to the platform above is possible by running to the right and crouch-jumping up."
]
},
{
"link": [
1,
1
],
"name": "Zeb Farm",
"requires": [
{
  "refill": [
    "Energy",
    "Missile",
    "Super"
  ]
}
]
},
{
"link": [
1,
1
],
"name": "G-Mode Setup - Get Hit By Zeb",
"notable": false,
"requires": [],
"exitCondition": {
"leaveWithGModeSetup": {}
}
},
{
"link": [
1,
2
],
"name": "Speed Through",
"requires": [
{
"obstaclesNotCleared": [
"A"
]
},
"SpeedBooster"
],
"clearsObstacles": [
"A"
]
},
{
"link": [
1,
2
],
"name": "Early Supers Mockball",
"notable": true,
"requires": [
{
"obstaclesNotCleared": [
"A"
]
},
"canMockball"
],
"clearsObstacles": [
"A"
],
"failures": [
{
"name": "Crumble Fall",
"leadsToNode": 3,
"note": "Falls down into node 3 with no possiblity of quick crumble escape."
}
],
"note": "Mockball to roll over the crumble blocks without falling down, and under the gate before it closes."
},
{
"link": [
1,
2
],
"name": "Early Supers Crouch Gate Clip Jump",
"requires": [
{
"obstaclesNotCleared": [
"A"
]
},
"canCrouchGateClip",
{
"or": [
"canXRayTurnaround",
"canMoonwalk"
]
}
],
"clearsObstacles": [
"A"
],
"failures": [
{
"name": "Crumble Fall",
"leadsToNode": 3,
"note": "Falls down into node 3 with no possiblity of quick crumble escape."
}
],
"note": [
"Run then do a very small spin jump to clip into the left side of the first gate.",
"While inside the gate, back up to get the maximum run distance using either Moonwalk or X-Ray Turnaround and repeat for the next gate.",
"It is also possible to clip into the gates by aiming down while in the spin jump.",
"A down-back is also possible for clipping into the first gate, but it is generally harder."
]
},
{
"link": [
1,
2
],
"name": "Early Supers Crouch Gate Clip Damage Boost",
"notable": true,
"requires": [
{
"obstaclesNotCleared": [
"A"
]
},
"canCrouchGateClip",
"canCameraManip",
"canHorizontalDamageBoost",
{
"enemyDamage": {
"enemy": "Zeb",
"hits": 2,
"type": "contact"
}
}
],
"clearsObstacles": [
"A"
],
"failures": [
{
"name": "Crumble Fall",
"leadsToNode": 3,
"note": "Falls down into node 3 with no possiblity of quick crumble escape."
}
],
"note": [
"Spawn a Zeb then run and do a very small spin jump to clip into the first gate before the Zeb reaches you.",
"Do a damage boost off of the Zeb while inside the first gate to get enough speed to clip into the next gate.",
"It is also possible to clip into the gates by aiming down while in the spin jump."
]
},
{
"link": [
1,
2
],
"name": "Leave Shinecharged (Speed Through)",
"requires": [
{
"obstaclesNotCleared": [
"A"
]
},
{
"canShineCharge": {
"usedTiles": 33,
"openEnd": 2
}
}
],
"exitCondition": {
"leaveShinecharged": {
"framesRemaining": 110
}
},
"unlocksDoors": [
{
"types": [
"super"
],
"requires": []
},
{
"types": [
"missiles",
"powerbomb"
],
"requires": [
{
"or": [
"canWalljump",
"HiJump",
"h_canFly",
"canSpringBallJumpMidAir",
"h_canCrouchJumpDownGrab"
]
},
{
"resetRoom": {
"nodes": [
1
],
"mustStayPut": false
}
}
]
}
]
},
{
"link": [
1,
2
],
"name": "Leave Shinecharged (Speed Through and Slide Off)",
"requires": [
{
"obstaclesNotCleared": [
"A"
]
},
{
"canShineCharge": {
"usedTiles": 33,
"openEnd": 2
}
},
"canShinechargeMovementComplex"
],
"exitCondition": {
"leaveShinecharged": {
"framesRemaining": 140
}
},
"unlocksDoors": [
{
"types": [
"super"
],
"requires": []
},
{
"types": [
"missiles",
"powerbomb"
],
"requires": [
{
"or": [
"canWalljump",
"HiJump",
"h_canFly",
"canSpringBallJumpMidAir",
"h_canCrouchJumpDownGrab"
]
},
{
"resetRoom": {
"nodes": [
1
],
"mustStayPut": false
}
}
]
}
],
"note": "Gain the shinecharge near the edge of the runway so that you slide off quickly, while shooting the door open."
},
{
"link": [
1,
2
],
"name": "Leave With Runway - Frozen Zeb",
"requires": [
{
"obstaclesNotCleared": [
"A"
]
},
"h_canTrickyFrozenEnemyRunway",
"canMockball",
"canTrickyJump"
],
"exitCondition": {
"leaveWithRunway": {
"length": 3,
"openEnd": 0
}
},
"unlocksDoors": [
{
"types": [
"missiles",
"super"
],
"requires": []
},
{
"types": [
"powerbomb"
],
"requires": [
{
"or": [
"canWalljump",
"HiJump",
"h_canFly",
"canSpringBallJumpMidAir",
"h_canCrouchJumpDownGrab"
]
},
{
"resetRoom": {
"nodes": [
1
],
"mustStayPut": false
}
}
]
}
],
"note": [
"Stand to the right of the Zeb farm and freeze the Zeb as it starts moving horizontally.",
"get onto the platform above the Zeb and wait for the Zeb to thaw and make it close to the right edge of the screen.",
"Use a mockball to get to the right side of the room, ending it as quickly as possible at the end to prevent the Zeb going off screen.",
"Freeze the Zeb adjacent to the right runway in order to extend it by a short distance."
]
},
{
"link": [
1,
2
],
"name": "G-Mode Setup - Get Hit By Waver",
"notable": false,
"requires": [
{
"obstaclesNotCleared": [
"A"
]
},
{
"or": [
"SpeedBooster",
"canMockball",
{
"and": [
"canCrouchGateClip",
{
"or": [
"canXRayTurnaround",
"canMoonwalk"
]
}
]
}
]
}
],
"exitCondition": {
"leaveWithGModeSetup": {}
},
"unlocksDoors": [
{
"types": [
"ammo"
],
"requires": []
}
],
"note": [
"The only way the Wavers will get to the door is if the right crumble blocks are all broken.",
"This assumes that Samus comes from the left with Speed, a mockball, or a crouch gate clip.",
"After the crumbles are broken, shoot the ceiling block and wait by the door for the Waver to come.",
"Note that if Samus takes more than 35 seconds after entering the room, before shooting the ceiling, the Waver will not come down."
],
"devNote": [
"FIXME: It is possible to come in from the right and get under the gate to break the crumbles."
]
},
{
"link": [
1,
3
],
"name": "Base",
"requires": [],
"clearsObstacles": [
"A"
],
"note": "This has no requirements, but getting back out does."
},
{
"link": [
1,
3
],
"name": "Prepare Frozen Zeb",
"requires": [
"canTrickyUseFrozenEnemies"
],
"clearsObstacles": [
"A",
"B"
],
"note": [
"Crouch on the right side of the Zeb spawning pipe.",
"While holding down, let it hit Samus, then Freeze it immediately."
],
"devNote": "This setup takes damage, but you can farm before and after."
},
{
"link": [
1,
4
],
"name": "Grapple Teleport",
"entranceCondition": {
"comeInWithGrappleTeleport": {
"blockPositions": [
[
12,
12
],
[
12,
13
]
]
}
},
"requires": []
},
{
"link": [
1,
5
],
"name": "Base",
"requires": [
{
"obstaclesNotCleared": [
"A"
]
},
"SpeedBooster"
],
"clearsObstacles": [
"A"
],
"devNote": "There are other ways to get here, but there is no reason to go there, so they are omitted."
},
{
"link": [
2,
1
],
"name": "Grapple Teleport",
"entranceCondition": {
"comeInWithGrappleTeleport": {
"blockPositions": [
[
2,
18
],
[
2,
28
],
[
2,
29
]
]
}
},
"requires": [],
"bypassesDoorShell": true
},
{
"link": [
2,
1
],
"name": "Carry Grapple Teleport (Top Position)",
"entranceCondition": {
"comeInWithGrappleTeleport": {
"blockPositions": [
[
2,
18
]
]
}
},
"requires": [],
"bypassesDoorShell": true,
"exitCondition": {
"leaveWithGrappleTeleport": {
"blockPositions": [
[
2,
18
]
]
}
}
},
{
"link": [
2,
1
],
"name": "Carry Grapple Teleport (Middle Position)",
"entranceCondition": {
"comeInWithGrappleTeleport": {
"blockPositions": [
[
2,
28
]
]
}
},
"requires": [],
"bypassesDoorShell": true,
"exitCondition": {
"leaveWithGrappleTeleport": {
"blockPositions": [
[
2,
28
]
]
}
}
},
{
"link": [
2,
1
],
"name": "Carry Grapple Teleport (Bottom Position)",
"entranceCondition": {
"comeInWithGrappleTeleport": {
"blockPositions": [
[
2,
29
]
]
}
},
"requires": [],
"bypassesDoorShell": true,
"exitCondition": {
"leaveWithGrappleTeleport": {
"blockPositions": [
[
2,
29
]
]
}
}
},
{
"link": [
2,
2
],
"name": "Leave Shinecharged (Run Above)",
"requires": [
{
"or": [
"canWalljump",
"HiJump",
"h_canFly",
"canSpringBallJumpMidAir",
"h_canCrouchJumpDownGrab"
]
},
{
"canShineCharge": {
"usedTiles": 25,
"openEnd": 1
}
}
],
"exitCondition": {
"leaveShinecharged": {
"framesRemaining": 40
}
},
"unlocksDoors": [
{
"types": [
"ammo"
],
"requires": []
}
],
"note": "Use the runway on the screen above to gain a shinecharge near the edge of the runway."
},
{
"link": [
2,
2
],
"name": "Leave Shinecharged (Run Above and Slide Off)",
"requires": [
{
"or": [
"canWalljump",
"HiJump",
"h_canFly",
"canSpringBallJumpMidAir",
"h_canCrouchJumpDownGrab"
]
},
{
"canShineCharge": {
"usedTiles": 25,
"openEnd": 1
}
},
"canShinechargeMovementComplex"
],
"exitCondition": {
"leaveShinecharged": {
"framesRemaining": 70
}
},
"unlocksDoors": [
{
"types": [
"ammo"
],
"requires": []
}
],
"note": "Use the runway on the screen above to gain a shinecharge near the edge of the runway, sliding off quickly."
},
{
"link": [
2,
2
],
"name": "Leave With Runway",
"exitCondition": {
"leaveWithRunway": {
"length": 2,
"openEnd": 1
}
},
"requires": []
},
{
"link": [
2,
2
],
"name": "Crystal Flash",
"requires": [
"h_canCrystalFlash"
]
},
{
"link": [
2,
4
],
"name": "Base",
"requires": [
{
  "or": [
    "canWalljump",
    "HiJump",
    "h_canFly",
    "canSpringBallJumpMidAir"
  ]
}
],
"clearsObstacles": [
"A"
]
},
{
"link": [
2,
4
],
"name": "Crouch Jump Down Grab",
"requires": [
"h_canCrouchJumpDownGrab"
],
"clearsObstacles": [
"A"
]
},
{
"link": [
2,
4
],
"name": "Grapple Teleport",
"entranceCondition": {
"comeInWithGrappleTeleport": {
"blockPositions": [
[
7,
2
]
]
}
},
"requires": []
},
{
"link": [
3,
1
],
"name": "Base",
"requires": [
"h_canBombThings"
]
},
{
"link": [
3,
1
],
"name": "Early Supers Quick Crumble Escape",
"requires": [
"canQuickCrumbleEscape"
],
"failures": [
{
"name": "Crumble Failure",
"note": "Failure leaves you in node 3 with solid crumble blocks above your head."
}
],
"note": [
"It is possible to do a quick crumble escape twice, requiring no other items or tech.",
"It is easier to escape by doing a quick crumble escape, followed by a crumble block jump or using spring ball or space jump."
]
},
{
"link": [
3,
1
],
"name": "Ice Clip",
"requires": [
{
"obstaclesCleared": [
"B"
]
},
"h_canXRayCeilingClip",
"canTrickyUseFrozenEnemies"
],
"note": [
"Prepare a pipe bug to Ice clip through the crumble blocks, using Morph and X-Ray.",
"It can be tested on the solid blocks directly above the pipe spawner.",
"Climb onto the frozen bug by rolling under it and jumping while holding down."
]
},
{
"link": [
3,
5
],
"name": "Base",
"requires": [
"h_canBombThings"
]
},
{
"link": [
4,
1
],
"name": "Base",
"requires": []
},
{
"link": [
4,
2
],
"name": "Base",
"requires": []
},
{
"link": [
5,
3
],
"name": "Base",
"requires": [
"h_canBombThings"
]
}
]
}