Hi Jump Energy Tank Room
Room ID: 88

|
Exit condition: {
"leaveWithRunway": {
"length": 1,
"openEnd": 1
}
}
|
|
Requires: "h_canCrystalFlash" |
|
Note that breaking the left bomb blocks and either the crumble blocks or the other bomb blocks could make the Sova go in a loop without ever getting to the door (unless using a Super). Because of this it is advised not to break the bomb blocks. But if breaking them is necessary, it is possible to do so, even with a Power Bomb. Place the Power Bomb while the Sova is in the bottom left section of the room, while it is moving counter-clockwise. Exit condition: {
"leaveWithGModeSetup": {}
}
|
|
It takes the Sova about 25 seconds to hit Samus. Requires: {
"enemyDamage": {
"enemy": "Sova",
"type": "contact",
"hits": 1
}
}
|
|
After teleporting, hold left and release Grapple to remain in a standing pose (and not be force crouched). X-ray climb a specific distance, performing exactly 15 X-Ray stand-ups. Then morph and roll out to the right. If Bombs, Power Bombs, or Screw Attack are available, this can allow more lenience in how far to climb. Entrance condition: {
"comeInWithGrappleTeleport": {
"blockPositions": [
[
12,
13
]
]
}
}
Requires: "canXRayClimb" "Morph" "canOffScreenMovement" |
|
Requires: "Morph"
{
"or": [
"canWalljump",
"HiJump",
"h_canFly",
"canUseFrozenEnemies"
]
}
|
|
Notable: true Crouch jump and let the Sova move into Samus from the right, to get a upward boost, then hold left to boost horizontally to the ledge. Then crouch jump from the slope on the left, and morph into a neutral damage boost. Requires: "Morph"
"canCrouchJump"
"canTrickyJump"
"canNeutralDamageBoost"
"canHorizontalDamageBoost"
{
"enemyDamage": {
"enemy": "Sova",
"type": "contact",
"hits": 2
}
}
|
|
Requires: "Morph"
{
"or": [
"canWalljump",
"h_canFly",
"canUseFrozenEnemies"
]
}
|
|
Entrance condition: {
"comeInWithGrappleTeleport": {
"blockPositions": [
[
5,
3
],
[
7,
2
]
]
}
}
|
|
From: 2
Right Door
To: 1
Left Door
Entrance condition: {
"comeInWithGrappleTeleport": {
"blockPositions": [
[
2,
18
],
[
2,
19
],
[
2,
29
]
]
}
}
Bypasses door shell: true |
|
From: 2
Right Door
To: 1
Left Door
Entrance condition: {
"comeInWithGrappleTeleport": {
"blockPositions": [
[
2,
18
]
]
}
}
Exit condition: {
"leaveWithGrappleTeleport": {
"blockPositions": [
[
2,
18
]
]
}
}
Bypasses door shell: true |
|
From: 2
Right Door
To: 1
Left Door
Entrance condition: {
"comeInWithGrappleTeleport": {
"blockPositions": [
[
2,
19
]
]
}
}
Exit condition: {
"leaveWithGrappleTeleport": {
"blockPositions": [
[
2,
19
]
]
}
}
Bypasses door shell: true |
|
From: 2
Right Door
To: 1
Left Door
Entrance condition: {
"comeInWithGrappleTeleport": {
"blockPositions": [
[
2,
29
]
]
}
}
Exit condition: {
"leaveWithGrappleTeleport": {
"blockPositions": [
[
2,
29
]
]
}
}
Bypasses door shell: true |
|
Exit condition: {
"leaveWithRunway": {
"length": 7,
"openEnd": 0
}
}
|
|
Requires: "h_canCrystalFlash" |
|
From: 2
Right Door
To: 2
Right Door
Release the Sova by breaking the crumble blocks. The Sova will then take 40 seconds to get to the door. Note that breaking the left bomb blocks and either the crumble blocks or the other bomb blocks could make the Sova go in a loop without ever getting to the door (unless using a Super). Because of this it is advised not to break the bomb blocks. But if breaking them is necessary, it is possible to do so, even with a Power Bomb. Place the Power Bomb while the Sova is in the bottom left section of the room, while it is moving counter-clockwise. Exit condition: {
"leaveWithGModeSetup": {}
}
|
|
|
|
Entrance condition: {
"comeInWithGrappleTeleport": {
"blockPositions": [
[
5,
3
],
[
7,
2
]
]
}
}
Requires: "Morph" |
|
|
|
Requires: "Morph"
{
"or": [
"h_canBombThings",
{
"obstaclesCleared": [
"C"
]
}
]
}
Clears obstacles: C |
|
Clears obstacles: A |
|
Requires: "Morph" |
|
Requires: "Morph"
{
"or": [
"h_canBombThings",
{
"obstaclesCleared": [
"C"
]
}
]
}
Clears obstacles: C |
|
Requires: "Morph" |
|
Requires: {
"or": [
"h_canBombThings",
{
"obstaclesCleared": [
"B"
]
}
]
}
Clears obstacles: B |
|
From: 5
Junction Below Right Item
To: 3
Top Right Item
Notable: true 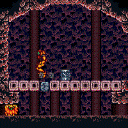
The crumble blocks do not respawn, so it is possible to enter from the right, obtain the left item and return, without needing to break the bomb blocks. Requires: {
"obstaclesCleared": [
"A"
]
}
|
|
From: 5
Junction Below Right Item
To: 3
Top Right Item
Requires: "Morph" "canXRayStandUp" "canPartialFloorClip" "canCeilingClip" |
{
"$schema": "../../../schema/m3-room.schema.json",
"id": 88,
"name": "Hi Jump Energy Tank Room",
"area": "Norfair",
"subarea": "Upper",
"subsubarea": "West",
"playable": true,
"roomAddress": "0x7AA41",
"roomEnvironments": [
{
"heated": false
}
],
"nodes": [
{
"id": 1,
"name": "Left Door",
"nodeType": "door",
"nodeSubType": "blue",
"nodeAddress": "0x0019426",
"doorEnvironments": [
{
"physics": "air"
}
]
},
{
"id": 2,
"name": "Right Door",
"nodeType": "door",
"nodeSubType": "grey",
"nodeAddress": "0x001941a",
"doorEnvironments": [
{
"physics": "air"
}
],
"locks": [
{
"name": "HiJump E-Tank Grey Lock (to Business Center)",
"lockType": "killEnemies",
"unlockStrats": [
{
"name": "Base",
"notable": false,
"requires": []
}
],
"yields": [
"f_ZebesAwake"
],
"note": "The enemy is reachable with no requirement and killable with Power Beam."
}
]
},
{
"id": 3,
"name": "Top Right Item",
"nodeType": "item",
"nodeSubType": "visible",
"nodeItem": "ETank",
"nodeAddress": "0x78BEC"
},
{
"id": 4,
"name": "Top Left Item",
"nodeType": "item",
"nodeSubType": "visible",
"nodeItem": "Missile",
"nodeAddress": "0x78BE6"
},
{
"id": 5,
"name": "Junction Below Right Item",
"nodeType": "junction",
"nodeSubType": "junction",
"note": "Just below the Energy tank. Reachable to kill the Sova without Morph."
}
],
"obstacles": [
{
"id": "A",
"name": "Crumble blocks",
"obstacleType": "inanimate"
},
{
"id": "B",
"name": "E-tank bomb blocks",
"obstacleType": "inanimate"
},
{
"id": "C",
"name": "Missile bomb blocks",
"obstacleType": "inanimate"
}
],
"enemies": [
{
"id": "e1",
"groupName": "HiJump E-Tank Sova",
"enemyName": "Sova",
"quantity": 1,
"homeNodes": [
1,
4,
5
]
}
],
"links": [
{
"from": 1,
"to": [
{
"id": 1
},
{
"id": 3
},
{
"id": 4
},
{
"id": 5
}
]
},
{
"from": 2,
"to": [
{
"id": 1
},
{
"id": 2
},
{
"id": 3
},
{
"id": 4
}
]
},
{
"from": 3,
"to": [
{
"id": 2
},
{
"id": 4
},
{
"id": 5
}
]
},
{
"from": 4,
"to": [
{
"id": 1
},
{
"id": 3
}
]
},
{
"from": 5,
"to": [
{
"id": 1
},
{
"id": 3
}
]
}
],
"strats": [
{
"link": [
1,
1
],
"name": "Leave with Runway",
"requires": [],
"exitCondition": {
"leaveWithRunway": {
"length": 1,
"openEnd": 1
}
}
},
{
"link": [
1,
1
],
"name": "Crystal Flash",
"requires": [
"h_canCrystalFlash"
]
},
{
"link": [
1,
1
],
"name": "G-Mode Setup - Get Hit By Sova",
"notable": false,
"requires": [],
"exitCondition": {
"leaveWithGModeSetup": {}
},
"note": [
"Note that breaking the left bomb blocks and either the crumble blocks or the other bomb blocks could make the Sova go in a loop without ever getting to the door (unless using a Super).",
"Because of this it is advised not to break the bomb blocks. But if breaking them is necessary, it is possible to do so, even with a Power Bomb.",
"Place the Power Bomb while the Sova is in the bottom left section of the room, while it is moving counter-clockwise."
]
},
{
"link": [
1,
1
],
"name": "G-Mode Regain Mobility",
"requires": [
{
  "enemyDamage": {
    "enemy": "Sova",
    "type": "contact",
    "hits": 1
  }
}
],
"gModeRegainMobility": {},
"note": "It takes the Sova about 25 seconds to hit Samus."
},
{
"link": [
1,
3
],
"name": "Grapple Teleport",
"entranceCondition": {
"comeInWithGrappleTeleport": {
"blockPositions": [
[
12,
13
]
]
}
},
"requires": [
"canXRayClimb",
"Morph",
"canOffScreenMovement"
],
"note": [
"After teleporting, hold left and release Grapple to remain in a standing pose (and not be force crouched).",
"X-ray climb a specific distance, performing exactly 15 X-Ray stand-ups.",
"Then morph and roll out to the right.",
"If Bombs, Power Bombs, or Screw Attack are available, this can allow more lenience in how far to climb."
]
},
{
"link": [
1,
4
],
"name": "Base",
"requires": [
"Morph",
{
"or": [
"canWalljump",
"HiJump",
"h_canFly",
"canUseFrozenEnemies"
]
}
]
},
{
"link": [
1,
4
],
"name": "HiJump E-Tank Sova Boost",
"notable": true,
"requires": [
"Morph",
"canCrouchJump",
"canTrickyJump",
"canNeutralDamageBoost",
"canHorizontalDamageBoost",
{
"enemyDamage": {
"enemy": "Sova",
"type": "contact",
"hits": 2
}
}
],
"note": [
"Crouch jump and let the Sova move into Samus from the right, to get a upward boost, then hold left to boost horizontally to the ledge.",
"Then crouch jump from the slope on the left, and morph into a neutral damage boost."
]
},
{
"link": [
1,
5
],
"name": "Base",
"requires": [
"Morph",
{
"or": [
"canWalljump",
"h_canFly",
"canUseFrozenEnemies"
]
}
]
},
{
"link": [
2,
1
],
"name": "Grapple Teleport",
"entranceCondition": {
"comeInWithGrappleTeleport": {
"blockPositions": [
[
5,
3
],
[
7,
2
]
]
}
},
"requires": []
},
{
"link": [
2,
1
],
"name": "Grapple Teleport Door Lock Skip",
"entranceCondition": {
"comeInWithGrappleTeleport": {
"blockPositions": [
[
2,
18
],
[
2,
19
],
[
2,
29
]
]
}
},
"requires": [],
"bypassesDoorShell": true
},
{
"link": [
2,
1
],
"name": "Carry Grapple Teleport (Top Position)",
"entranceCondition": {
"comeInWithGrappleTeleport": {
"blockPositions": [
[
2,
18
]
]
}
},
"requires": [],
"bypassesDoorShell": true,
"exitCondition": {
"leaveWithGrappleTeleport": {
"blockPositions": [
[
2,
18
]
]
}
}
},
{
"link": [
2,
1
],
"name": "Carry Grapple Teleport (Middle Position)",
"entranceCondition": {
"comeInWithGrappleTeleport": {
"blockPositions": [
[
2,
19
]
]
}
},
"requires": [],
"bypassesDoorShell": true,
"exitCondition": {
"leaveWithGrappleTeleport": {
"blockPositions": [
[
2,
19
]
]
}
}
},
{
"link": [
2,
1
],
"name": "Carry Grapple Teleport (Bottom Position)",
"entranceCondition": {
"comeInWithGrappleTeleport": {
"blockPositions": [
[
2,
29
]
]
}
},
"requires": [],
"bypassesDoorShell": true,
"exitCondition": {
"leaveWithGrappleTeleport": {
"blockPositions": [
[
2,
29
]
]
}
}
},
{
"link": [
2,
2
],
"name": "Leave with Runway",
"requires": [],
"exitCondition": {
"leaveWithRunway": {
"length": 7,
"openEnd": 0
}
},
"devNote": [
"The bomb blocks have to be intact, but it's always possible to get to this node without breaking them.",
"If the bomb blocks were broken, this runway could be extended with a frozen Sova."
]
},
{
"link": [
2,
2
],
"name": "Crystal Flash",
"requires": [
"h_canCrystalFlash"
]
},
{
"link": [
2,
2
],
"name": "G-Mode Setup - Get Hit By Sova",
"notable": false,
"requires": [],
"exitCondition": {
"leaveWithGModeSetup": {}
},
"note": [
"Release the Sova by breaking the crumble blocks. The Sova will then take 40 seconds to get to the door.",
"Note that breaking the left bomb blocks and either the crumble blocks or the other bomb blocks could make the Sova go in a loop without ever getting to the door (unless using a Super).",
"Because of this it is advised not to break the bomb blocks. But if breaking them is necessary, it is possible to do so, even with a Power Bomb.",
"Place the Power Bomb while the Sova is in the bottom left section of the room, while it is moving counter-clockwise."
]
},
{
"link": [
2,
3
],
"name": "Base",
"requires": []
},
{
"link": [
2,
4
],
"name": "Grapple Teleport",
"entranceCondition": {
"comeInWithGrappleTeleport": {
"blockPositions": [
[
5,
3
],
[
7,
2
]
]
}
},
"requires": [
"Morph"
]
},
{
"link": [
3,
2
],
"name": "Base",
"requires": []
},
{
"link": [
3,
4
],
"name": "Base",
"requires": [
"Morph",
{
"or": [
"h_canBombThings",
{
"obstaclesCleared": [
"C"
]
}
]
}
],
"clearsObstacles": [
"C"
]
},
{
"link": [
3,
5
],
"name": "Base",
"requires": [],
"clearsObstacles": [
"A"
]
},
{
"link": [
4,
1
],
"name": "Base",
"requires": [
"Morph"
]
},
{
"link": [
4,
3
],
"name": "Base",
"requires": [
"Morph",
{
"or": [
"h_canBombThings",
{
"obstaclesCleared": [
"C"
]
}
]
}
],
"clearsObstacles": [
"C"
]
},
{
"link": [
5,
1
],
"name": "Base",
"requires": [
"Morph"
]
},
{
"link": [
5,
3
],
"name": "Base",
"requires": [
{
  "or": [
    "h_canBombThings",
    {
      "obstaclesCleared": [
        "B"
      ]
    }
  ]
}
],
"clearsObstacles": [
"B"
]
},
{
"link": [
5,
3
],
"name": "HiJump E-Tank Return Through Crumble Blocks",
"notable": true,
"requires": [
{
  "obstaclesCleared": [
    "A"
  ]
}
],
"note": "The crumble blocks do not respawn, so it is possible to enter from the right, obtain the left item and return, without needing to break the bomb blocks."
},
{
"link": [
5,
3
],
"name": "HiJump Etank X-Ray Clip",
"requires": [
"Morph",
"canXRayStandUp",
"canPartialFloorClip",
"canCeilingClip"
]
}
]
}