The Worst Room In The Game
Room ID: 135

|
Exit condition: {
"leaveWithRunway": {
"length": 4,
"openEnd": 1
}
}
|
|
Requires: "h_canHeatedCrystalFlash" |
|
Requires: "h_canNavigateHeatRooms"
{
"heatFrames": 180
}
|
|
It is possible to get past the pirate without waiting by moving fast enough, or by making it turn around. Requires: "h_canNavigateHeatRooms"
{
"or": [
{
"and": [
"canTrickyJump",
{
"heatFrames": 150
}
]
},
{
"and": [
"canCarefulJump",
{
"heatFrames": 300
}
]
},
{
"and": [
{
"enemyKill": {
"enemies": [
[
"Yellow Space Pirate (standing)"
]
],
"explicitWeapons": [
"ScrewAttack",
"Charge+Ice+Wave+Plasma"
]
}
},
{
"heatFrames": 240
}
]
},
{
"heatFrames": 360
}
]
}
|
|
From: 2
Bottom Left Door
To: 1
Top Left Door
Enter with G-mode direct, back up to between 1 and 6 pixels from the door transition, and activate X-ray to get very deep stuck in the door. Climb up 5 screens, and perform a turnaround buffered spin-jump away from the door to trigger the transition, bypassing any lock on the door. Entrance condition: {
"comeInWithGMode": {
"mode": "direct",
"morphed": false
}
}
Requires: "h_heatProof" "canXRayClimb" "canBeVeryPatient" Bypasses door shell: true |
|
From: 2
Bottom Left Door
To: 2
Bottom Left Door
Exit condition: {
"leaveWithRunway": {
"length": 4,
"openEnd": 0
}
}
|
|
From: 2
Bottom Left Door
To: 2
Bottom Left Door
Refreeze the Namihe after laying the Power Bomb, to avoid taking damage. Requires: "Plasma" "Ice" "h_canHeatedCrystalFlash" |
|
From: 2
Bottom Left Door
To: 2
Bottom Left Door
Perform the Crystal Flash on the bottom part of the floating platform, to avoid taking damage. Afterward, reset the room if needed to manipulate the Pirates. Requires: {
"heatFrames": 60
}
"h_canHeatedCrystalFlash"
{
"heatFrames": 90
}
{
"resetRoom": {
"nodes": [
2
],
"mustStayPut": false
}
}
|
|
From: 2
Bottom Left Door
To: 4
Junction Above Bomb Blocks
Requires: "h_canNavigateHeatRooms"
"SpaceJump"
"ScrewAttack"
{
"or": [
{
"and": [
"canConsecutiveWalljump",
{
"heatFrames": 240
}
]
},
{
"and": [
"HiJump",
{
"heatFrames": 240
}
]
},
{
"heatFrames": 360
}
]
}
|
|
From: 2
Bottom Left Door
To: 4
Junction Above Bomb Blocks
Entrance condition: {
"comeInShinecharged": {
"framesRequired": 60
}
}
Requires: "h_canNavigateHeatRooms"
{
"shinespark": {
"frames": 40,
"excessFrames": 3
}
}
{
"heatFrames": 240
}
Clears obstacles: A |
|
From: 2
Bottom Left Door
To: 4
Junction Above Bomb Blocks
Notable: true 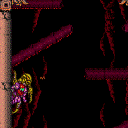
Jump with some run speed to place the power bomb high enough to break the bomb blocks. During the explosion, jump through the left wall pirate and precisely walljump to reach the upper area. Requires: "h_canNavigateHeatRooms"
"HiJump"
"SpeedBooster"
"canPreciseWalljump"
"canCarefulJump"
"h_canUsePowerBombs"
"canHitbox"
{
"heatFrames": 420
}
{
"or": [
"h_heatResistant",
"canPauseAbuse",
{
"resourceCapacity": [
{
"type": "RegularEnergy",
"count": 149
}
]
}
]
}
Clears obstacles: A |
|
From: 2
Bottom Left Door
To: 4
Junction Above Bomb Blocks
Use ScrewAttack to remove the left wall pirate and walljump high enough to place a power bomb to destroy the bomb blocks Then walljump up again to reach the upper region. Requires: "h_canNavigateHeatRooms"
"h_canUsePowerBombs"
"canPreciseWalljump"
"canConsecutiveWalljump"
"HiJump"
"ScrewAttack"
{
"heatFrames": 330
}
{
"or": [
"h_heatResistant",
"canPauseAbuse",
{
"resourceCapacity": [
{
"type": "RegularEnergy",
"count": 149
}
]
}
]
}
Clears obstacles: A |
|
From: 2
Bottom Left Door
To: 4
Junction Above Bomb Blocks
Notable: true 
Avoid the bottom pirates and jump high enough to break the bomb blocks with a power bomb. During the explosion, climb the right wall passing through any pirates and use a movement item to reach the top. Requires: "h_canNavigateHeatRooms"
"canPreciseWalljump"
"canHitbox"
"h_canUsePowerBombs"
"canTrickyJump"
{
"or": [
"canSpringwall",
"HiJump",
"SpaceJump"
]
}
{
"heatFrames": 530
}
{
"or": [
"h_heatResistant",
"canPauseAbuse",
{
"resourceCapacity": [
{
"type": "RegularEnergy",
"count": 149
}
]
}
]
}
Clears obstacles: A |
|
From: 2
Bottom Left Door
To: 4
Junction Above Bomb Blocks
Notable: true 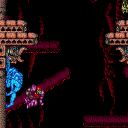
Freeze the pirates to use as platforms to get up through the bomb blocks. Note that the pirates' hitboxes are larger than they seem. Requires: "canTrickyUseFrozenEnemies"
"Charge"
"h_heatProof"
"canDelayedWalljump"
{
"or": [
"h_canDestroyBombWalls",
{
"obstaclesCleared": [
"A"
]
}
]
}
Clears obstacles: A |
|
From: 2
Bottom Left Door
To: 4
Junction Above Bomb Blocks
Notable: true 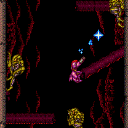
Deal an exact amount of damage to a wall pirate to freeze it while breaking the bomb blocks with a power bomb without taking damage. Quickly move to the right side and walljump up to the right height to power bomb out the bomb blocks, double hitting the top wall pirate. Wait for the full power bomb effect to end and wall jump once on the right wall and hit top pirate with 1 missile and 1 super. Jump and shoot the top pirate with a charge+ice shot. Hold a charge and walljump up the left wall and freeze the top pirate when it jumps across. Use the pirate to jump to the higher area. Requires: "h_canNavigateHeatRooms"
"canTrickyUseFrozenEnemies"
"Charge"
"canPreciseWalljump"
"canWalljumpWithCharge"
"Morph"
{
"ammo": {
"type": "Missile",
"count": 1
}
}
{
"ammo": {
"type": "Super",
"count": 1
}
}
{
"ammo": {
"type": "PowerBomb",
"count": 1
}
}
{
"heatFrames": 870
}
{
"or": [
"h_heatResistant",
{
"and": [
"canInsaneJump",
"canPauseAbuse"
]
},
{
"resourceCapacity": [
{
"type": "RegularEnergy",
"count": 149
}
]
}
]
}
Clears obstacles: A |
|
From: 2
Bottom Left Door
To: 4
Junction Above Bomb Blocks
Notable: true 
Deal an exact amount of damage to a wall pirate to freeze it while breaking the bomb blocks with a power bomb without taking damage. Wait briefly on the left side of the center platform, then jump and shoot 4 missiles at the top pirate. Walljump up the left wall such that the lower pirates are on screen long enough to jump accross to the left. Place a Bomb on the left wall to hit the top pirate when it jumps over, followed by a power bomb. Unmorph precisely below the middle pirate so both top pirates will jump back to the right, and begin charging Ice. Walljump up the left wall with charge held and freeze the top pirate when it jumps over and use it to reach the upper region. Requires: "h_canNavigateHeatRooms"
"canTrickyUseFrozenEnemies"
"Charge"
"canPreciseWalljump"
"canResetFallSpeed"
"canWalljumpWithCharge"
"h_canUseMorphBombs"
{
"ammo": {
"type": "Missile",
"count": 4
}
}
{
"ammo": {
"type": "PowerBomb",
"count": 1
}
}
{
"heatFrames": 900
}
{
"or": [
"h_heatResistant",
{
"and": [
"canInsaneJump",
"canPauseAbuse"
]
},
{
"resourceCapacity": [
{
"type": "RegularEnergy",
"count": 149
}
]
}
]
}
Clears obstacles: A |
|
From: 2
Bottom Left Door
To: 4
Junction Above Bomb Blocks
Notable: true 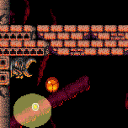
Ignore the Yellow Pirates by walljumping up the left side to start a diagonal bomb jump from the wall, including a power bomb to clear the bomb blocks. Two quick walljumps upon entering the room can position Samus to get the left pirate to jump to the right and jump over the right pirate's lazer attack. Jump up the left wall and begin bomb jumping starting with a power bomb. Requires: "h_canNavigateHeatRooms"
"canFastWalljumpClimb"
"canWallJumpBombBoost"
"h_canDiagonalBombJump"
"h_canUsePowerBombs"
{
"heatFrames": 930
}
{
"or": [
"h_heatResistant",
{
"and": [
"canInsaneJump",
"canPauseAbuse"
]
},
{
"resourceCapacity": [
{
"type": "RegularEnergy",
"count": 149
}
]
}
]
}
Clears obstacles: A |
|
From: 2
Bottom Left Door
To: 4
Junction Above Bomb Blocks
Notable: true 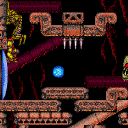
Climb Writg while avoiding wall pirates and Namihe flames. Immediately climb above the Namihe flames and wait for the wall pirate to jump across into Samus. Once the pirate starts going up, resume X-Ray climbing. This is a Two screen X-Ray climb. Watch for enemies when fixing the camera after the climb. Entrance condition: {
"comeInWithDoorStuckSetup": {}
}
Requires: "canXRayClimb"
{
"enemyDamage": {
"enemy": "Namihe",
"type": "fireball",
"hits": 2
}
}
{
"enemyDamage": {
"enemy": "Yellow Space Pirate (wall)",
"type": "contact",
"hits": 1
}
}
{
"heatFrames": 2800
}
|
|
From: 2
Bottom Left Door
To: 6
Bottom Platform Junction With Pirates Killed
Being heatproof allows slower kill methods. Requires: "h_heatProof"
{
"enemyKill": {
"enemies": [
[
"Yellow Space Pirate (wall)",
"Yellow Space Pirate (wall)"
],
[
"Yellow Space Pirate (wall)"
]
],
"excludedWeapons": [
"Bombs"
]
}
}
|
|
From: 2
Bottom Left Door
To: 6
Bottom Platform Junction With Pirates Killed
Requires: "h_canNavigateHeatRooms"
"ScrewAttack"
{
"or": [
{
"and": [
"canWalljump",
{
"heatFrames": 265
}
]
},
{
"and": [
"HiJump",
{
"heatFrames": 240
}
]
},
{
"heatFrames": 430
}
]
}
|
|
From: 2
Bottom Left Door
To: 6
Bottom Platform Junction With Pirates Killed
Requires: "h_canNavigateHeatRooms"
{
"enemyKill": {
"enemies": [
[
"Yellow Space Pirate (wall)",
"Yellow Space Pirate (wall)"
],
[
"Yellow Space Pirate (wall)"
]
],
"explicitWeapons": [
"Charge+Plasma"
]
}
}
{
"heatFrames": 450
}
|
|
From: 2
Bottom Left Door
To: 6
Bottom Platform Junction With Pirates Killed
The bottom wall pirates can be killed while stacked to save ammo. Requires: "h_canNavigateHeatRooms"
{
"or": [
{
"and": [
{
"enemyKill": {
"enemies": [
[
"Yellow Space Pirate (wall)"
],
[
"Yellow Space Pirate (wall)"
]
],
"explicitWeapons": [
"Super"
]
}
},
{
"heatFrames": 395
}
]
},
{
"and": [
{
"enemyKill": {
"enemies": [
[
"Yellow Space Pirate (wall)"
],
[
"Yellow Space Pirate (wall)"
],
[
"Yellow Space Pirate (wall)"
]
],
"explicitWeapons": [
"Super"
]
}
},
{
"heatFrames": 330
}
]
}
]
}
|
|
From: 2
Bottom Left Door
To: 6
Bottom Platform Junction With Pirates Killed
The bottom wall pirates can be killed while stacked to save ammo, but it is not expected. Requires: "h_canNavigateHeatRooms"
{
"enemyKill": {
"enemies": [
[
"Yellow Space Pirate (wall)"
],
[
"Yellow Space Pirate (wall)"
],
[
"Yellow Space Pirate (wall)"
]
],
"explicitWeapons": [
"Missile"
]
}
}
{
"heatFrames": 600
}
|
|
From: 2
Bottom Left Door
To: 6
Bottom Platform Junction With Pirates Killed
Requires: "h_canNavigateHeatRooms"
{
"enemyKill": {
"enemies": [
[
"Yellow Space Pirate (wall)"
],
[
"Yellow Space Pirate (wall)"
],
[
"Yellow Space Pirate (wall)"
]
],
"explicitWeapons": [
"Charge+Ice+Wave+Spazer"
]
}
}
{
"heatFrames": 900
}
|
|
From: 2
Bottom Left Door
To: 6
Bottom Platform Junction With Pirates Killed
Jump morph from the center platform to place the first Power Bomb Place two more on the platform itself to kill the bottom pirates Use a fourth to break the bomb blocks while also killing the last pirate. Requires: "h_canNavigateHeatRooms"
{
"or": [
"canSpringBallJumpMidAir",
"SpaceJump",
"canWalljump",
"h_canIBJ",
{
"and": [
"SpeedBooster",
"HiJump"
]
}
]
}
{
"enemyKill": {
"enemies": [
[
"Yellow Space Pirate (wall)",
"Yellow Space Pirate (wall)",
"Yellow Space Pirate (wall)"
]
],
"explicitWeapons": [
"PowerBombPeriphery"
]
}
}
{
"heatFrames": 790
}
{
"or": [
"h_heatResistant",
"canPauseAbuse",
{
"resourceCapacity": [
{
"type": "RegularEnergy",
"count": 149
}
]
}
]
}
Clears obstacles: A |
|
Requires: "h_heatProof" |
|
Requires: "h_canNavigateHeatRooms"
{
"or": [
"ScrewAttack",
{
"and": [
{
"heatFrames": 60
},
{
"enemyKill": {
"enemies": [
[
"Yellow Space Pirate (standing)"
]
],
"explicitWeapons": [
"Missile",
"Super",
"Charge+Plasma"
]
}
}
]
}
]
}
{
"heatFrames": 300
}
|
|
Safely clear the shot blocks from the door without drawing fire from the space pirate. Requires: "h_canNavigateHeatRooms"
"canCarefulJump"
{
"heatFrames": 210
}
|
|
Entrance condition: {
"comeInWithGrappleTeleport": {
"blockPositions": [
[
5,
3
],
[
7,
2
]
]
}
}
Requires: {
"heatFrames": 50
}
|
|
From: 3
Top Right Door
To: 1
Top Left Door
Exit the previous room with Samus in a standing pose (while grappled). After teleporting, press right to release Grapple while staying standing (not being forced into a crouch). Then X-ray climb to get up to the door transition, without needing to open the door. Kill the Pirate, or climb quickly to minimize damage from it. Entrance condition: {
"comeInWithGrappleTeleport": {
"blockPositions": [
[
2,
18
],
[
2,
19
]
]
}
}
Requires: "canXRayClimb"
{
"heatFrames": 1600
}
{
"or": [
{
"enemyDamage": {
"enemy": "Yellow Space Pirate (standing)",
"type": "laser",
"hits": 2
}
},
{
"and": [
"canInsaneJump",
{
"enemyDamage": {
"enemy": "Yellow Space Pirate (standing)",
"type": "laser",
"hits": 1
}
}
]
},
{
"and": [
{
"enemyKill": {
"enemies": [
[
"Yellow Space Pirate (standing)"
]
],
"explicitWeapons": [
"Missile",
"Super",
"Charge+Plasma"
]
}
},
{
"heatFrames": 120
}
]
}
]
}
Bypasses door shell: true |
|
From: 3
Top Right Door
To: 1
Top Left Door
Exit the previous room with Samus in a standing pose (while grappled). After teleporting, press right to release Grapple while staying standing (not being forced into a crouch). Then X-ray climb to get up to the door transition, without needing to open the door. Climb quickly in order to minimize damage from the Namihe and the Pirate. Entrance condition: {
"comeInWithGrappleTeleport": {
"blockPositions": [
[
2,
34
]
]
}
}
Requires: "canXRayClimb"
{
"heatFrames": 2800
}
{
"enemyDamage": {
"enemy": "Namihe",
"type": "kago",
"hits": 9
}
}
{
"enemyDamage": {
"enemy": "Yellow Space Pirate (standing)",
"type": "laser",
"hits": 1
}
}
Bypasses door shell: true |
|
Exit condition: {
"leaveWithRunway": {
"length": 5,
"openEnd": 0
}
}
|
|
Requires: "h_canHeatedCrystalFlash" |
|
Spinjump over the pirate, or clear shot blocks first for more space. Requires: "h_canNavigateHeatRooms"
{
"or": [
{
"and": [
{
"or": [
"canTrickyJump",
{
"enemyKill": {
"enemies": [
[
"Yellow Space Pirate (standing)"
]
],
"explicitWeapons": [
"ScrewAttack"
]
}
}
]
},
{
"heatFrames": 100
}
]
},
{
"heatFrames": 180
}
]
}
|
|
Requires: "h_canNavigateHeatRooms"
{
"heatFrames": 180
}
{
"or": [
"ScrewAttack",
{
"and": [
"h_canUsePowerBombs",
{
"heatFrames": 70
}
]
},
{
"and": [
"h_canUseMorphBombs",
{
"heatFrames": 200
}
]
},
{
"obstaclesCleared": [
"A"
]
}
]
}
Clears obstacles: A |
|
From: 4
Junction Above Bomb Blocks
To: 4
Junction Above Bomb Blocks
Requires: "h_canHeatedCrystalFlash" |
|
From: 4
Junction Above Bomb Blocks
To: 5
Junction Below Top Pirate
Requires: "h_canNavigateHeatRooms"
{
"heatFrames": 200
}
|
|
From: 4
Junction Above Bomb Blocks
To: 5
Junction Below Top Pirate
Requires: "h_canNavigateHeatRooms"
"HiJump"
{
"heatFrames": 150
}
|
|
From: 5
Junction Below Top Pirate
To: 1
Top Left Door
Requires: "h_canNavigateHeatRooms"
{
"heatFrames": 520
}
|
|
From: 5
Junction Below Top Pirate
To: 1
Top Left Door
Requires: "h_canNavigateHeatRooms"
"HiJump"
"canTrickyJump"
"canMidAirMorph"
{
"heatFrames": 240
}
|
|
From: 5
Junction Below Top Pirate
To: 1
Top Left Door
Requires: "h_canNavigateHeatRooms"
"canWallJumpInstantMorph"
"canTrickyJump"
"canInsaneWalljump"
{
"heatFrames": 290
}
|
|
Requires: "canHitbox"
"h_canUsePowerBombs"
{
"heatFrames": 280
}
|
|
From: 5
Junction Below Top Pirate
To: 1
Top Left Door
Requires: "h_canNavigateHeatRooms"
{
"or": [
{
"and": [
{
"enemyKill": {
"enemies": [
[
"Yellow Space Pirate (standing)"
]
],
"explicitWeapons": [
"ScrewAttack",
"Charge+Ice+Wave+Plasma"
]
}
},
{
"heatFrames": 240
}
]
},
{
"and": [
{
"enemyKill": {
"enemies": [
[
"Yellow Space Pirate (standing)"
]
],
"explicitWeapons": [
"Missile",
"Charge+Plasma"
]
}
},
{
"heatFrames": 360
}
]
},
{
"and": [
{
"enemyKill": {
"enemies": [
[
"Yellow Space Pirate (standing)"
]
],
"explicitWeapons": [
"Super"
]
}
},
{
"heatFrames": 320
}
]
}
]
}
|
|
From: 5
Junction Below Top Pirate
To: 3
Top Right Door
Requires: "h_canNavigateHeatRooms"
{
"heatFrames": 520
}
|
|
From: 5
Junction Below Top Pirate
To: 3
Top Right Door
Requires: "h_canNavigateHeatRooms"
"HiJump"
"canMidAirMorph"
"canTrickyJump"
{
"heatFrames": 160
}
|
|
From: 5
Junction Below Top Pirate
To: 3
Top Right Door
Requires: "h_canNavigateHeatRooms"
"canInsaneWalljump"
"canWallJumpInstantMorph"
"canTrickyJump"
{
"heatFrames": 160
}
|
|
Requires: "canHitbox"
"h_canUsePowerBombs"
{
"heatFrames": 180
}
|
|
From: 5
Junction Below Top Pirate
To: 3
Top Right Door
Requires: "h_canNavigateHeatRooms"
{
"or": [
{
"and": [
{
"enemyKill": {
"enemies": [
[
"Yellow Space Pirate (standing)"
]
],
"explicitWeapons": [
"ScrewAttack",
"Charge+Ice+Wave+Plasma"
]
}
},
{
"heatFrames": 180
}
]
},
{
"and": [
{
"enemyKill": {
"enemies": [
[
"Yellow Space Pirate (standing)"
]
],
"explicitWeapons": [
"Missile",
"Charge+Plasma"
]
}
},
{
"heatFrames": 280
}
]
},
{
"and": [
{
"enemyKill": {
"enemies": [
[
"Yellow Space Pirate (standing)"
]
],
"explicitWeapons": [
"Super"
]
}
},
{
"heatFrames": 210
}
]
}
]
}
|
|
From: 5
Junction Below Top Pirate
To: 4
Junction Above Bomb Blocks
Requires: "h_canNavigateHeatRooms"
{
"heatFrames": 160
}
|
|
From: 5
Junction Below Top Pirate
To: 5
Junction Below Top Pirate
Requires: "h_heatProof"
{
"or": [
"ScrewAttack",
{
"and": [
"Charge",
"Plasma",
"Wave",
"Ice"
]
}
]
}
{
"resetRoom": {
"nodes": [
1,
3
],
"mustStayPut": false
}
}
{
"refill": [
"Energy",
"Missile"
]
}
|
|
From: 5
Junction Below Top Pirate
To: 5
Junction Below Top Pirate
Refreeze the Namihe after laying the Power Bomb, to avoid taking damage. Requires: "Plasma" "Ice" "h_canHeatedCrystalFlash" |
|
From: 5
Junction Below Top Pirate
To: 5
Junction Below Top Pirate
Perform the Crystal Flash on top of the Namihe. At the start of the Crystal Flash, Samus will take one Namihe contact hit (10 energy damage without suits). Requires: {
"heatFrames": 40
}
{
"enemyDamage": {
"enemy": "Namihe",
"type": "kago",
"hits": 1
}
}
"h_canHeatedCrystalFlash"
{
"heatFrames": 40
}
|
|
From: 6
Bottom Platform Junction With Pirates Killed
To: 4
Junction Above Bomb Blocks
Requires: "h_canNavigateHeatRooms"
"h_canIBJ"
{
"or": [
{
"and": [
"canJumpIntoIBJ",
{
"heatFrames": 1460
}
]
},
{
"and": [
"canDoubleBombJump",
{
"heatFrames": 1000
}
]
},
{
"and": [
"canJumpIntoIBJ",
"canDoubleBombJump",
{
"heatFrames": 800
}
]
},
{
"heatFrames": 2000
}
]
}
{
"or": [
"h_canUsePowerBombs",
{
"and": [
"h_canBombAboveIBJ",
"canStaggeredIBJ",
{
"heatFrames": 180
}
]
},
{
"and": [
"h_heatProof",
"canBePatient"
]
},
{
"obstaclesCleared": [
"A"
]
}
]
}
Clears obstacles: A |
|
From: 6
Bottom Platform Junction With Pirates Killed
To: 4
Junction Above Bomb Blocks
Requires: "h_canNavigateHeatRooms"
"SpaceJump"
{
"or": [
{
"and": [
"canConsecutiveWalljump",
{
"heatFrames": 260
}
]
},
{
"heatFrames": 360
}
]
}
{
"or": [
"ScrewAttack",
{
"and": [
"h_canUsePowerBombs",
{
"or": [
{
"and": [
"canWalljump",
{
"heatFrames": 120
}
]
},
{
"heatFrames": 200
}
]
}
]
},
{
"and": [
"h_canUseMorphBombs",
{
"or": [
{
"and": [
"canConsecutiveWalljump",
{
"heatFrames": 520
}
]
},
{
"heatFrames": 800
}
]
}
]
},
{
"obstaclesCleared": [
"A"
]
}
]
}
Clears obstacles: A |
|
From: 6
Bottom Platform Junction With Pirates Killed
To: 4
Junction Above Bomb Blocks
Requires: "h_canNavigateHeatRooms"
"canSpringwall"
"canConsecutiveWalljump"
{
"heatFrames": 300
}
{
"or": [
{
"and": [
"h_canUsePowerBombs",
{
"heatFrames": 180
}
]
},
{
"and": [
"h_canUseMorphBombs",
{
"heatFrames": 800
}
]
},
{
"obstaclesCleared": [
"A"
]
}
]
}
Clears obstacles: A |
|
From: 6
Bottom Platform Junction With Pirates Killed
To: 4
Junction Above Bomb Blocks
Requires: "h_canNavigateHeatRooms"
"HiJump"
"canPreciseWalljump"
"canConsecutiveWalljump"
{
"heatFrames": 300
}
{
"or": [
{
"and": [
"h_canUsePowerBombs",
{
"heatFrames": 200
}
]
},
{
"and": [
"canDelayedWalljump",
"canWallJumpInstantMorph",
"h_canUseMorphBombs",
{
"heatFrames": 520
}
]
},
{
"obstaclesCleared": [
"A"
]
}
]
}
Clears obstacles: A |
|
From: 6
Bottom Platform Junction With Pirates Killed
To: 4
Junction Above Bomb Blocks
Requires: "canInsaneWalljump"
"canConsecutiveWalljump"
"h_heatProof"
{
"or": [
"h_canUsePowerBombs",
{
"obstaclesCleared": [
"A"
]
}
]
}
Clears obstacles: A |
|
From: 6
Bottom Platform Junction With Pirates Killed
To: 4
Junction Above Bomb Blocks
Notable: true 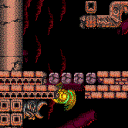
Break the bomb blocks in The Worst Room In The Game with extremely precise walljumps. Either with a fully delayed max height jump from the wall, or with an instant turnaround after jumping from the lower layer of bomb blocks. Requires: "h_heatProof" "HiJump" "ScrewAttack" "canInsaneWalljump" "canInsaneJump" "canConsecutiveWalljump" "canMidairWiggle" Clears obstacles: A |
|
From: 6
Bottom Platform Junction With Pirates Killed
To: 6
Bottom Platform Junction With Pirates Killed
Requires: "h_canHeatedCrystalFlash" |
{
"$schema": "../../../schema/m3-room.schema.json",
"id": 135,
"name": "The Worst Room In The Game",
"area": "Norfair",
"subarea": "Lower",
"subsubarea": "East",
"playable": true,
"roomAddress": "0x7B4AD",
"roomEnvironments": [
{
"heated": true
}
],
"nodes": [
{
"id": 1,
"name": "Top Left Door",
"nodeType": "door",
"nodeSubType": "blue",
"nodeAddress": "0x0019972",
"doorEnvironments": [
{
"physics": "air"
}
]
},
{
"id": 2,
"name": "Bottom Left Door",
"nodeType": "door",
"nodeSubType": "blue",
"nodeAddress": "0x001998a",
"doorEnvironments": [
{
"physics": "air"
}
]
},
{
"id": 3,
"name": "Top Right Door",
"nodeType": "door",
"nodeSubType": "blue",
"nodeAddress": "0x001997e",
"doorEnvironments": [
{
"physics": "air"
}
]
},
{
"id": 4,
"name": "Junction Above Bomb Blocks",
"nodeType": "junction",
"nodeSubType": "junction"
},
{
"id": 5,
"name": "Junction Below Top Pirate",
"nodeType": "junction",
"nodeSubType": "junction"
},
{
"id": 6,
"name": "Bottom Platform Junction With Pirates Killed",
"nodeType": "junction",
"nodeSubType": "junction"
}
],
"obstacles": [
{
"id": "A",
"name": "Bomb Blocks",
"obstacleType": "inanimate"
}
],
"enemies": [
{
"id": "e1",
"groupName": "Writg Wall Pirates",
"enemyName": "Yellow Space Pirate (wall)",
"quantity": 3,
"homeNodes": [
2
],
"dropRequires": [
"h_heatProof"
]
},
{
"id": "e2",
"groupName": "Writg Bottom Namihe",
"enemyName": "Namihe",
"quantity": 1,
"homeNodes": [
2
],
"dropRequires": [
"h_heatProof"
]
},
{
"id": "e3",
"groupName": "Writg Top Namihes",
"enemyName": "Namihe",
"quantity": 4,
"homeNodes": [
4,
5
],
"dropRequires": [
"h_heatProof"
]
},
{
"id": "e4",
"groupName": "Writg Standing Pirates",
"enemyName": "Yellow Space Pirate (standing)",
"quantity": 3,
"homeNodes": [
4,
5
],
"dropRequires": [
"h_heatProof"
]
}
],
"links": [
{
"from": 1,
"to": [
{
"id": 1
},
{
"id": 3
},
{
"id": 5
}
]
},
{
"from": 2,
"to": [
{
"id": 1
},
{
"id": 2
},
{
"id": 4,
"note": "This link is for strats that don't require killing the pirates."
},
{
"id": 6,
"devNote": "This is a one-way link because the way back goes 4 -> 2."
}
]
},
{
"from": 3,
"to": [
{
"id": 1
},
{
"id": 3
},
{
"id": 5
}
]
},
{
"from": 4,
"to": [
{
"id": 2
},
{
"id": 4
},
{
"id": 5
}
]
},
{
"from": 5,
"to": [
{
"id": 1
},
{
"id": 3
},
{
"id": 4
},
{
"id": 5
}
]
},
{
"from": 6,
"to": [
{
"id": 4,
"note": "This is a one-way link because the way back goes 4 -> 2."
},
{
"id": 6
}
]
}
],
"strats": [
{
"link": [
1,
1
],
"name": "Leave With Runway",
"requires": [],
"exitCondition": {
"leaveWithRunway": {
"length": 4,
"openEnd": 1
}
}
},
{
"link": [
1,
1
],
"name": "Crystal Flash",
"requires": [
"h_canHeatedCrystalFlash"
]
},
{
"link": [
1,
3
],
"name": "Base",
"requires": [
"h_canNavigateHeatRooms",
{
"heatFrames": 180
}
]
},
{
"link": [
1,
5
],
"name": "Base",
"requires": [
"h_canNavigateHeatRooms",
{
"or": [
{
"and": [
"canTrickyJump",
{
"heatFrames": 150
}
]
},
{
"and": [
"canCarefulJump",
{
"heatFrames": 300
}
]
},
{
"and": [
{
"enemyKill": {
"enemies": [
[
"Yellow Space Pirate (standing)"
]
],
"explicitWeapons": [
"ScrewAttack",
"Charge+Ice+Wave+Plasma"
]
}
},
{
"heatFrames": 240
}
]
},
{
"heatFrames": 360
}
]
}
],
"note": "It is possible to get past the pirate without waiting by moving fast enough, or by making it turn around."
},
{
"link": [
2,
1
],
"name": "Very Deep Stuck X-Ray Climb",
"entranceCondition": {
"comeInWithGMode": {
"mode": "direct",
"morphed": false
}
},
"requires": [
"h_heatProof",
"canXRayClimb",
"canBeVeryPatient"
],
"bypassesDoorShell": true,
"note": [
"Enter with G-mode direct, back up to between 1 and 6 pixels from the door transition, and activate X-ray to get very deep stuck in the door.",
"Climb up 5 screens, and perform a turnaround buffered spin-jump away from the door to trigger the transition, bypassing any lock on the door."
]
},
{
"link": [
2,
2
],
"name": "Leave With Runway",
"requires": [],
"exitCondition": {
"leaveWithRunway": {
"length": 4,
"openEnd": 0
}
}
},
{
"link": [
2,
2
],
"name": "Crystal Flash (Frozen Namihe)",
"requires": [
"Plasma",
"Ice",
"h_canHeatedCrystalFlash"
],
"note": [
"Refreeze the Namihe after laying the Power Bomb, to avoid taking damage."
]
},
{
"link": [
2,
2
],
"name": "Crystal Flash (Floating Platform)",
"requires": [
{
"heatFrames": 60
},
"h_canHeatedCrystalFlash",
{
"heatFrames": 90
},
{
"resetRoom": {
"nodes": [
2
],
"mustStayPut": false
}
}
],
"note": [
"Perform the Crystal Flash on the bottom part of the floating platform, to avoid taking damage.",
"Afterward, reset the room if needed to manipulate the Pirates."
]
},
{
"link": [
2,
4
],
"name": "Space Jump Screw Attack",
"requires": [
"h_canNavigateHeatRooms",
"SpaceJump",
"ScrewAttack",
{
"or": [
{
"and": [
"canConsecutiveWalljump",
{
"heatFrames": 240
}
]
},
{
"and": [
"HiJump",
{
"heatFrames": 240
}
]
},
{
"heatFrames": 360
}
]
}
]
},
{
"link": [
2,
4
],
"name": "Shinespark",
"entranceCondition": {
"comeInShinecharged": {
"framesRequired": 60
}
},
"requires": [
"h_canNavigateHeatRooms",
{
"shinespark": {
"frames": 40,
"excessFrames": 3
}
},
{
"heatFrames": 240
}
],
"clearsObstacles": [
"A"
]
},
{
"link": [
2,
4
],
"name": "Writg New Route with HiJump, Speed, and PowerBombs",
"notable": true,
"requires": [
"h_canNavigateHeatRooms",
"HiJump",
"SpeedBooster",
"canPreciseWalljump",
"canCarefulJump",
"h_canUsePowerBombs",
"canHitbox",
{
"heatFrames": 420
},
{
"or": [
"h_heatResistant",
"canPauseAbuse",
{
"resourceCapacity": [
{
"type": "RegularEnergy",
"count": 149
}
]
}
]
}
],
"clearsObstacles": [
"A"
],
"note": [
"Jump with some run speed to place the power bomb high enough to break the bomb blocks.",
"During the explosion, jump through the left wall pirate and precisely walljump to reach the upper area."
],
"devNote": "With Reserves only, canPauseAbuse is used as a proxy for pause abuse or optimal reserve management and character movement."
},
{
"link": [
2,
4
],
"name": "HiJump, Screw, and PowerBomb",
"requires": [
"h_canNavigateHeatRooms",
"h_canUsePowerBombs",
"canPreciseWalljump",
"canConsecutiveWalljump",
"HiJump",
"ScrewAttack",
{
"heatFrames": 330
},
{
"or": [
"h_heatResistant",
"canPauseAbuse",
{
"resourceCapacity": [
{
"type": "RegularEnergy",
"count": 149
}
]
}
]
}
],
"clearsObstacles": [
"A"
],
"note": [
"Use ScrewAttack to remove the left wall pirate and walljump high enough to place a power bomb to destroy the bomb blocks",
"Then walljump up again to reach the upper region."
],
"devNote": "With Reserves only, canPauseAbuse is used as a proxy for pause abuse or optimal reserve management and character movement."
},
{
"link": [
2,
4
],
"name": "WRITG with PowerBombs and a Jump Assist",
"notable": true,
"requires": [
"h_canNavigateHeatRooms",
"canPreciseWalljump",
"canHitbox",
"h_canUsePowerBombs",
"canTrickyJump",
{
"or": [
"canSpringwall",
"HiJump",
"SpaceJump"
]
},
{
"heatFrames": 530
},
{
"or": [
"h_heatResistant",
"canPauseAbuse",
{
"resourceCapacity": [
{
"type": "RegularEnergy",
"count": 149
}
]
}
]
}
],
"clearsObstacles": [
"A"
],
"note": [
"Avoid the bottom pirates and jump high enough to break the bomb blocks with a power bomb.",
"During the explosion, climb the right wall passing through any pirates and use a movement item to reach the top."
],
"devNote": "With Reserves only, canPauseAbuse is used as a proxy for pause abuse or optimal reserve management and character movement."
},
{
"link": [
2,
4
],
"name": "Writg Frozen Pirate Platforms",
"notable": true,
"requires": [
"canTrickyUseFrozenEnemies",
"Charge",
"h_heatProof",
"canDelayedWalljump",
{
"or": [
"h_canDestroyBombWalls",
{
"obstaclesCleared": [
"A"
]
}
]
}
],
"clearsObstacles": [
"A"
],
"note": [
"Freeze the pirates to use as platforms to get up through the bomb blocks. Note that the pirates' hitboxes are larger than they seem."
]
},
{
"link": [
2,
4
],
"name": "Writg Low Ice Pirate Freeze",
"notable": true,
"requires": [
"h_canNavigateHeatRooms",
"canTrickyUseFrozenEnemies",
"Charge",
"canPreciseWalljump",
"canWalljumpWithCharge",
"Morph",
{
"ammo": {
"type": "Missile",
"count": 1
}
},
{
"ammo": {
"type": "Super",
"count": 1
}
},
{
"ammo": {
"type": "PowerBomb",
"count": 1
}
},
{
"heatFrames": 870
},
{
"or": [
"h_heatResistant",
{
"and": [
"canInsaneJump",
"canPauseAbuse"
]
},
{
"resourceCapacity": [
{
"type": "RegularEnergy",
"count": 149
}
]
}
]
}
],
"clearsObstacles": [
"A"
],
"note": [
"Deal an exact amount of damage to a wall pirate to freeze it while breaking the bomb blocks with a power bomb without taking damage.",
"Quickly move to the right side and walljump up to the right height to power bomb out the bomb blocks, double hitting the top wall pirate.",
"Wait for the full power bomb effect to end and wall jump once on the right wall and hit top pirate with 1 missile and 1 super.",
"Jump and shoot the top pirate with a charge+ice shot.",
"Hold a charge and walljump up the left wall and freeze the top pirate when it jumps across.",
"Use the pirate to jump to the higher area."
],
"devNote": "With Reserves only, this strat requires much more precise movement and either pause abuse or optimal reserve management."
},
{
"link": [
2,
4
],
"name": "Writg New Low Ice Pirate Freeze",
"notable": true,
"requires": [
"h_canNavigateHeatRooms",
"canTrickyUseFrozenEnemies",
"Charge",
"canPreciseWalljump",
"canResetFallSpeed",
"canWalljumpWithCharge",
"h_canUseMorphBombs",
{
"ammo": {
"type": "Missile",
"count": 4
}
},
{
"ammo": {
"type": "PowerBomb",
"count": 1
}
},
{
"heatFrames": 900
},
{
"or": [
"h_heatResistant",
{
"and": [
"canInsaneJump",
"canPauseAbuse"
]
},
{
"resourceCapacity": [
{
"type": "RegularEnergy",
"count": 149
}
]
}
]
}
],
"clearsObstacles": [
"A"
],
"note": [
"Deal an exact amount of damage to a wall pirate to freeze it while breaking the bomb blocks with a power bomb without taking damage.",
"Wait briefly on the left side of the center platform, then jump and shoot 4 missiles at the top pirate.",
"Walljump up the left wall such that the lower pirates are on screen long enough to jump accross to the left.",
"Place a Bomb on the left wall to hit the top pirate when it jumps over, followed by a power bomb.",
"Unmorph precisely below the middle pirate so both top pirates will jump back to the right, and begin charging Ice.",
"Walljump up the left wall with charge held and freeze the top pirate when it jumps over and use it to reach the upper region."
],
"devNote": "With Reserves only, this strat requires much more precise movement and either pause abuse or optimal reserve management."
},
{
"link": [
2,
4
],
"name": "Writg Power Bomb Diagonal Bomb Jump",
"notable": true,
"requires": [
"h_canNavigateHeatRooms",
"canFastWalljumpClimb",
"canWallJumpBombBoost",
"h_canDiagonalBombJump",
"h_canUsePowerBombs",
{
"heatFrames": 930
},
{
"or": [
"h_heatResistant",
{
"and": [
"canInsaneJump",
"canPauseAbuse"
]
},
{
"resourceCapacity": [
{
"type": "RegularEnergy",
"count": 149
}
]
}
]
}
],
"clearsObstacles": [
"A"
],
"note": [
"Ignore the Yellow Pirates by walljumping up the left side to start a diagonal bomb jump from the wall, including a power bomb to clear the bomb blocks.",
"Two quick walljumps upon entering the room can position Samus to get the left pirate to jump to the right and jump over the right pirate's lazer attack.",
"Jump up the left wall and begin bomb jumping starting with a power bomb."
],
"devNote": [
"There is a very similar strat using an HBJ that is a little faster but more precise and overall harder.",
"With Reserves only, this strat requires much more precise movement and either pause abuse or optimal reserve management."
]
},
{
"link": [
2,
4
],
"name": "Writg X-Ray Climb",
"notable": true,
"entranceCondition": {
"comeInWithDoorStuckSetup": {}
},
"requires": [
"canXRayClimb",
{
"enemyDamage": {
"enemy": "Namihe",
"type": "fireball",
"hits": 2
}
},
{
"enemyDamage": {
"enemy": "Yellow Space Pirate (wall)",
"type": "contact",
"hits": 1
}
},
{
"heatFrames": 2800
}
],
"note": [
"Climb Writg while avoiding wall pirates and Namihe flames.",
"Immediately climb above the Namihe flames and wait for the wall pirate to jump across into Samus.",
"Once the pirate starts going up, resume X-Ray climbing.",
"This is a Two screen X-Ray climb. Watch for enemies when fixing the camera after the climb."
],
"devNote": "Two Namihe hits as leniency."
},
{
"link": [
2,
6
],
"name": "HeatProof Pirates Kill",
"requires": [
"h_heatProof",
{
"enemyKill": {
"enemies": [
[
"Yellow Space Pirate (wall)",
"Yellow Space Pirate (wall)"
],
[
"Yellow Space Pirate (wall)"
]
],
"excludedWeapons": [
"Bombs"
]
}
}
],
"note": "Being heatproof allows slower kill methods.",
"devNote": "Bombs are still excluded because they take 30 bombs each and that's ridiculous."
},
{
"link": [
2,
6
],
"name": "Screw Attack Pirates Kill",
"requires": [
"h_canNavigateHeatRooms",
"ScrewAttack",
{
"or": [
{
"and": [
"canWalljump",
{
"heatFrames": 265
}
]
},
{
"and": [
"HiJump",
{
"heatFrames": 240
}
]
},
{
"heatFrames": 430
}
]
}
]
},
{
"link": [
2,
6
],
"name": "Charge Plasma Pirates Kill",
"requires": [
"h_canNavigateHeatRooms",
{
"enemyKill": {
"enemies": [
[
"Yellow Space Pirate (wall)",
"Yellow Space Pirate (wall)"
],
[
"Yellow Space Pirate (wall)"
]
],
"explicitWeapons": [
"Charge+Plasma"
]
}
},
{
"heatFrames": 450
}
]
},
{
"link": [
2,
6
],
"name": "Supers Pirates Kill",
"requires": [
"h_canNavigateHeatRooms",
{
"or": [
{
"and": [
{
"enemyKill": {
"enemies": [
[
"Yellow Space Pirate (wall)"
],
[
"Yellow Space Pirate (wall)"
]
],
"explicitWeapons": [
"Super"
]
}
},
{
"heatFrames": 395
}
]
},
{
"and": [
{
"enemyKill": {
"enemies": [
[
"Yellow Space Pirate (wall)"
],
[
"Yellow Space Pirate (wall)"
],
[
"Yellow Space Pirate (wall)"
]
],
"explicitWeapons": [
"Super"
]
}
},
{
"heatFrames": 330
}
]
}
]
}
],
"note": "The bottom wall pirates can be killed while stacked to save ammo."
},
{
"link": [
2,
6
],
"name": "Missiles Pirates Kill",
"requires": [
"h_canNavigateHeatRooms",
{
"enemyKill": {
"enemies": [
[
"Yellow Space Pirate (wall)"
],
[
"Yellow Space Pirate (wall)"
],
[
"Yellow Space Pirate (wall)"
]
],
"explicitWeapons": [
"Missile"
]
}
},
{
"heatFrames": 600
}
],
"note": "The bottom wall pirates can be killed while stacked to save ammo, but it is not expected."
},
{
"link": [
2,
6
],
"name": "Full Spazer Pirates Kill",
"requires": [
"h_canNavigateHeatRooms",
{
"enemyKill": {
"enemies": [
[
"Yellow Space Pirate (wall)"
],
[
"Yellow Space Pirate (wall)"
],
[
"Yellow Space Pirate (wall)"
]
],
"explicitWeapons": [
"Charge+Ice+Wave+Spazer"
]
}
},
{
"heatFrames": 900
}
]
},
{
"link": [
2,
6
],
"name": "Power Bomb Pirates Kill + Bomb Blocks",
"requires": [
"h_canNavigateHeatRooms",
{
"or": [
"canSpringBallJumpMidAir",
"SpaceJump",
"canWalljump",
"h_canIBJ",
{
"and": [
"SpeedBooster",
"HiJump"
]
}
]
},
{
"enemyKill": {
"enemies": [
[
"Yellow Space Pirate (wall)",
"Yellow Space Pirate (wall)",
"Yellow Space Pirate (wall)"
]
],
"explicitWeapons": [
"PowerBombPeriphery"
]
}
},
{
"heatFrames": 790
},
{
"or": [
"h_heatResistant",
"canPauseAbuse",
{
"resourceCapacity": [
{
"type": "RegularEnergy",
"count": 149
}
]
}
]
}
],
"clearsObstacles": [
"A"
],
"note": [
"Jump morph from the center platform to place the first Power Bomb",
"Place two more on the platform itself to kill the bottom pirates",
"Use a fourth to break the bomb blocks while also killing the last pirate."
],
"devNote": [
"It's not really possible to hit all enemies with double-PB hits while not taking damage.",
"Using Power Bomb Periphery is based on a strat that allows killing them and taking out the blocks with 4 PBs.",
"This calculation ends up taking 5, leaving a spare PB.",
"The movement item used does not increase heat frames except for IBJ in which case the PB can be used while IBJing.",
"With Reserves only, canPauseAbuse is used as a proxy for pause abuse or optimal reserve management and character movement."
]
},
{
"link": [
3,
1
],
"name": "Base",
"requires": [
"h_heatProof"
]
},
{
"link": [
3,
1
],
"name": "Kill the Pirate",
"requires": [
"h_canNavigateHeatRooms",
{
"or": [
"ScrewAttack",
{
"and": [
{
"heatFrames": 60
},
{
"enemyKill": {
"enemies": [
[
"Yellow Space Pirate (standing)"
]
],
"explicitWeapons": [
"Missile",
"Super",
"Charge+Plasma"
]
}
}
]
}
]
},
{
"heatFrames": 300
}
]
},
{
"link": [
3,
1
],
"name": "Avoid the Top Pirate",
"requires": [
"h_canNavigateHeatRooms",
"canCarefulJump",
{
"heatFrames": 210
}
],
"note": "Safely clear the shot blocks from the door without drawing fire from the space pirate."
},
{
"link": [
3,
1
],
"name": "Grapple Teleport",
"entranceCondition": {
"comeInWithGrappleTeleport": {
"blockPositions": [
[
5,
3
],
[
7,
2
]
]
}
},
"requires": [
{
  "heatFrames": 50
}
]
},
{
"link": [
3,
1
],
"name": "Grapple Teleport X-Ray Climb",
"entranceCondition": {
"comeInWithGrappleTeleport": {
"blockPositions": [
[
2,
18
],
[
2,
19
]
]
}
},
"requires": [
"canXRayClimb",
{
"heatFrames": 1600
},
{
"or": [
{
"enemyDamage": {
"enemy": "Yellow Space Pirate (standing)",
"type": "laser",
"hits": 2
}
},
{
"and": [
"canInsaneJump",
{
"enemyDamage": {
"enemy": "Yellow Space Pirate (standing)",
"type": "laser",
"hits": 1
}
}
]
},
{
"and": [
{
"enemyKill": {
"enemies": [
[
"Yellow Space Pirate (standing)"
]
],
"explicitWeapons": [
"Missile",
"Super",
"Charge+Plasma"
]
}
},
{
"heatFrames": 120
}
]
}
]
}
],
"bypassesDoorShell": true,
"note": [
"Exit the previous room with Samus in a standing pose (while grappled).",
"After teleporting, press right to release Grapple while staying standing (not being forced into a crouch).",
"Then X-ray climb to get up to the door transition, without needing to open the door.",
"Kill the Pirate, or climb quickly to minimize damage from it."
],
"devNote": [
"It is possible to avoid all damage from the Pirate, but it's unclear if this can be done reliably or is RNG-dependent."
]
},
{
"link": [
3,
1
],
"name": "Grapple Teleport X-Ray Climb (Two Screens)",
"entranceCondition": {
"comeInWithGrappleTeleport": {
"blockPositions": [
[
2,
34
]
]
}
},
"requires": [
"canXRayClimb",
{
"heatFrames": 2800
},
{
"enemyDamage": {
"enemy": "Namihe",
"type": "kago",
"hits": 9
}
},
{
"enemyDamage": {
"enemy": "Yellow Space Pirate (standing)",
"type": "laser",
"hits": 1
}
}
],
"bypassesDoorShell": true,
"note": [
"Exit the previous room with Samus in a standing pose (while grappled).",
"After teleporting, press right to release Grapple while staying standing (not being forced into a crouch).",
"Then X-ray climb to get up to the door transition, without needing to open the door.",
"Climb quickly in order to minimize damage from the Namihe and the Pirate."
]
},
{
"link": [
3,
3
],
"name": "Leave With Runway",
"requires": [],
"exitCondition": {
"leaveWithRunway": {
"length": 5,
"openEnd": 0
}
}
},
{
"link": [
3,
3
],
"name": "Crystal Flash",
"requires": [
"h_canHeatedCrystalFlash"
]
},
{
"link": [
3,
5
],
"name": "Base",
"requires": [
"h_canNavigateHeatRooms",
{
"or": [
{
"and": [
{
"or": [
"canTrickyJump",
{
"enemyKill": {
"enemies": [
[
"Yellow Space Pirate (standing)"
]
],
"explicitWeapons": [
"ScrewAttack"
]
}
}
]
},
{
"heatFrames": 100
}
]
},
{
"heatFrames": 180
}
]
}
],
"note": "Spinjump over the pirate, or clear shot blocks first for more space."
},
{
"link": [
4,
2
],
"name": "Base",
"requires": [
"h_canNavigateHeatRooms",
{
"heatFrames": 180
},
{
"or": [
"ScrewAttack",
{
"and": [
"h_canUsePowerBombs",
{
"heatFrames": 70
}
]
},
{
"and": [
"h_canUseMorphBombs",
{
"heatFrames": 200
}
]
},
{
"obstaclesCleared": [
"A"
]
}
]
}
],
"clearsObstacles": [
"A"
]
},
{
"link": [
4,
4
],
"name": "Crystal Flash",
"requires": [
"h_canHeatedCrystalFlash"
]
},
{
"link": [
4,
5
],
"name": "Base",
"requires": [
"h_canNavigateHeatRooms",
{
"heatFrames": 200
}
]
},
{
"link": [
4,
5
],
"name": "HiJump",
"requires": [
"h_canNavigateHeatRooms",
"HiJump",
{
"heatFrames": 150
}
]
},
{
"link": [
5,
1
],
"name": "Wait for Pirate",
"requires": [
"h_canNavigateHeatRooms",
{
"heatFrames": 520
}
]
},
{
"link": [
5,
1
],
"name": "HiJump Pirate Dodge",
"requires": [
"h_canNavigateHeatRooms",
"HiJump",
"canTrickyJump",
"canMidAirMorph",
{
"heatFrames": 240
}
]
},
{
"link": [
5,
1
],
"name": "HJBless Pirate Dodge",
"requires": [
"h_canNavigateHeatRooms",
"canWallJumpInstantMorph",
"canTrickyJump",
"canInsaneWalljump",
{
"heatFrames": 290
}
]
},
{
"link": [
5,
1
],
"name": "HitBox",
"requires": [
"canHitbox",
"h_canUsePowerBombs",
{
"heatFrames": 280
}
],
"unlocksDoors": [
{
"types": [
"powerbomb"
],
"requires": []
}
]
},
{
"link": [
5,
1
],
"name": "Fast Pirate Kill",
"requires": [
"h_canNavigateHeatRooms",
{
"or": [
{
"and": [
{
"enemyKill": {
"enemies": [
[
"Yellow Space Pirate (standing)"
]
],
"explicitWeapons": [
"ScrewAttack",
"Charge+Ice+Wave+Plasma"
]
}
},
{
"heatFrames": 240
}
]
},
{
"and": [
{
"enemyKill": {
"enemies": [
[
"Yellow Space Pirate (standing)"
]
],
"explicitWeapons": [
"Missile",
"Charge+Plasma"
]
}
},
{
"heatFrames": 360
}
]
},
{
"and": [
{
"enemyKill": {
"enemies": [
[
"Yellow Space Pirate (standing)"
]
],
"explicitWeapons": [
"Super"
]
}
},
{
"heatFrames": 320
}
]
}
]
}
]
},
{
"link": [
5,
3
],
"name": "Wait for Pirate",
"requires": [
"h_canNavigateHeatRooms",
{
"heatFrames": 520
}
]
},
{
"link": [
5,
3
],
"name": "HiJump Pirate Dodge",
"requires": [
"h_canNavigateHeatRooms",
"HiJump",
"canMidAirMorph",
"canTrickyJump",
{
"heatFrames": 160
}
]
},
{
"link": [
5,
3
],
"name": "HJBless Pirate Dodge",
"requires": [
"h_canNavigateHeatRooms",
"canInsaneWalljump",
"canWallJumpInstantMorph",
"canTrickyJump",
{
"heatFrames": 160
}
]
},
{
"link": [
5,
3
],
"name": "HitBox",
"requires": [
"canHitbox",
"h_canUsePowerBombs",
{
"heatFrames": 180
}
],
"unlocksDoors": [
{
"types": [
"powerbomb"
],
"requires": [],
"useImplicitRequires": false
}
]
},
{
"link": [
5,
3
],
"name": "Fast Pirate Kill",
"requires": [
"h_canNavigateHeatRooms",
{
"or": [
{
"and": [
{
"enemyKill": {
"enemies": [
[
"Yellow Space Pirate (standing)"
]
],
"explicitWeapons": [
"ScrewAttack",
"Charge+Ice+Wave+Plasma"
]
}
},
{
"heatFrames": 180
}
]
},
{
"and": [
{
"enemyKill": {
"enemies": [
[
"Yellow Space Pirate (standing)"
]
],
"explicitWeapons": [
"Missile",
"Charge+Plasma"
]
}
},
{
"heatFrames": 280
}
]
},
{
"and": [
{
"enemyKill": {
"enemies": [
[
"Yellow Space Pirate (standing)"
]
],
"explicitWeapons": [
"Super"
]
}
},
{
"heatFrames": 210
}
]
}
]
}
]
},
{
"link": [
5,
4
],
"name": "Base",
"requires": [
"h_canNavigateHeatRooms",
{
"heatFrames": 160
}
]
},
{
"link": [
5,
5
],
"name": "Yellow Space Pirates Farm",
"requires": [
"h_heatProof",
{
"or": [
"ScrewAttack",
{
"and": [
"Charge",
"Plasma",
"Wave",
"Ice"
]
}
]
},
{
"resetRoom": {
"nodes": [
1,
3
],
"mustStayPut": false
}
},
{
"refill": [
"Energy",
"Missile"
]
}
]
},
{
"link": [
5,
5
],
"name": "Crystal Flash (Frozen Namihe)",
"requires": [
"Plasma",
"Ice",
"h_canHeatedCrystalFlash"
],
"note": [
"Refreeze the Namihe after laying the Power Bomb, to avoid taking damage."
]
},
{
"link": [
5,
5
],
"name": "Crystal Flash (On Top of Namihe)",
"requires": [
{
"heatFrames": 40
},
{
"enemyDamage": {
"enemy": "Namihe",
"type": "kago",
"hits": 1
}
},
"h_canHeatedCrystalFlash",
{
"heatFrames": 40
}
],
"note": [
"Perform the Crystal Flash on top of the Namihe.",
"At the start of the Crystal Flash, Samus will take one Namihe contact hit (10 energy damage without suits)."
]
},
{
"link": [
6,
4
],
"name": "IBJ",
"requires": [
"h_canNavigateHeatRooms",
"h_canIBJ",
{
"or": [
{
"and": [
"canJumpIntoIBJ",
{
"heatFrames": 1460
}
]
},
{
"and": [
"canDoubleBombJump",
{
"heatFrames": 1000
}
]
},
{
"and": [
"canJumpIntoIBJ",
"canDoubleBombJump",
{
"heatFrames": 800
}
]
},
{
"heatFrames": 2000
}
]
},
{
"or": [
"h_canUsePowerBombs",
{
"and": [
"h_canBombAboveIBJ",
"canStaggeredIBJ",
{
"heatFrames": 180
}
]
},
{
"and": [
"h_heatProof",
"canBePatient"
]
},
{
"obstaclesCleared": [
"A"
]
}
]
}
],
"clearsObstacles": [
"A"
]
},
{
"link": [
6,
4
],
"name": "SpaceJump",
"requires": [
"h_canNavigateHeatRooms",
"SpaceJump",
{
"or": [
{
"and": [
"canConsecutiveWalljump",
{
"heatFrames": 260
}
]
},
{
"heatFrames": 360
}
]
},
{
"or": [
"ScrewAttack",
{
"and": [
"h_canUsePowerBombs",
{
"or": [
{
"and": [
"canWalljump",
{
"heatFrames": 120
}
]
},
{
"heatFrames": 200
}
]
}
]
},
{
"and": [
"h_canUseMorphBombs",
{
"or": [
{
"and": [
"canConsecutiveWalljump",
{
"heatFrames": 520
}
]
},
{
"heatFrames": 800
}
]
}
]
},
{
"obstaclesCleared": [
"A"
]
}
]
}
],
"clearsObstacles": [
"A"
]
},
{
"link": [
6,
4
],
"name": "Writg Springwall",
"requires": [
"h_canNavigateHeatRooms",
"canSpringwall",
"canConsecutiveWalljump",
{
"heatFrames": 300
},
{
"or": [
{
"and": [
"h_canUsePowerBombs",
{
"heatFrames": 180
}
]
},
{
"and": [
"h_canUseMorphBombs",
{
"heatFrames": 800
}
]
},
{
"obstaclesCleared": [
"A"
]
}
]
}
],
"clearsObstacles": [
"A"
]
},
{
"link": [
6,
4
],
"name": "Writg Hj Walljump",
"requires": [
"h_canNavigateHeatRooms",
"HiJump",
"canPreciseWalljump",
"canConsecutiveWalljump",
{
"heatFrames": 300
},
{
"or": [
{
"and": [
"h_canUsePowerBombs",
{
"heatFrames": 200
}
]
},
{
"and": [
"canDelayedWalljump",
"canWallJumpInstantMorph",
"h_canUseMorphBombs",
{
"heatFrames": 520
}
]
},
{
"obstaclesCleared": [
"A"
]
}
]
}
],
"clearsObstacles": [
"A"
]
},
{
"link": [
6,
4
],
"name": "Writg Hjless Walljump",
"requires": [
"canInsaneWalljump",
"canConsecutiveWalljump",
"h_heatProof",
{
"or": [
"h_canUsePowerBombs",
{
"obstaclesCleared": [
"A"
]
}
]
}
],
"clearsObstacles": [
"A"
]
},
{
"link": [
6,
4
],
"name": "Writg HiJump and Only Screw",
"notable": true,
"requires": [
"h_heatProof",
"HiJump",
"ScrewAttack",
"canInsaneWalljump",
"canInsaneJump",
"canConsecutiveWalljump",
"canMidairWiggle"
],
"clearsObstacles": [
"A"
],
"note": [
"Break the bomb blocks in The Worst Room In The Game with extremely precise walljumps.",
"Either with a fully delayed max height jump from the wall, or with an instant turnaround after jumping from the lower layer of bomb blocks."
]
},
{
"link": [
6,
6
],
"name": "Crystal Flash",
"requires": [
"h_canHeatedCrystalFlash"
]
}
]
}