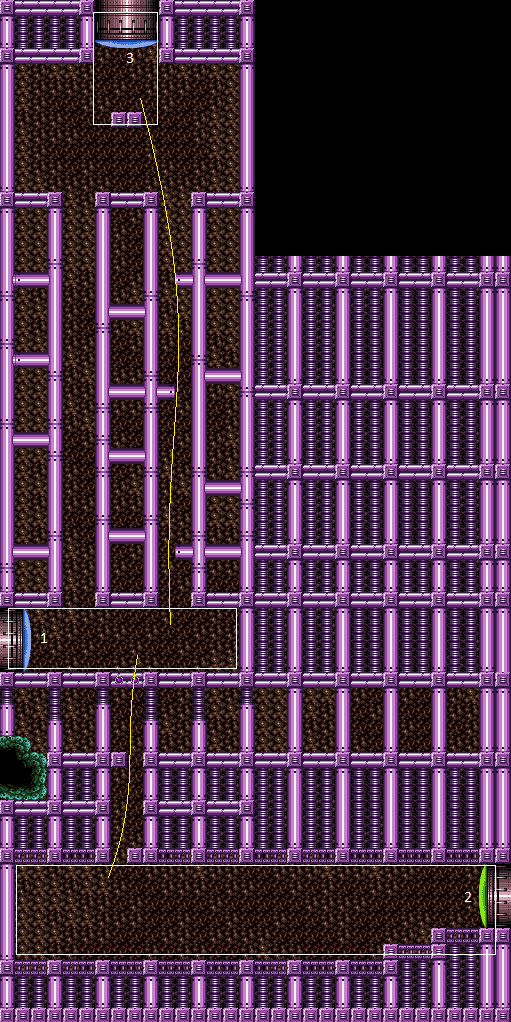
Crab Shaft
Room ID: 175
|
Exit condition: {
"leaveWithRunway": {
"length": 14,
"openEnd": 0
}
}
|
|
Entrance condition: {
"comeInRunning": {
"speedBooster": true,
"minTiles": 2
}
}
Requires: "canStutterWaterShineCharge"
"canShinechargeMovementComplex"
{
"canShineCharge": {
"usedTiles": 33,
"openEnd": 2
}
}
{
"or": [
{
"shinespark": {
"frames": 12
}
},
{
"and": [
"canShinechargeMovementTricky",
{
"shinespark": {
"frames": 3
}
}
]
}
]
}
Exit condition: {
"leaveWithSpark": {}
}
|
|
Requires: {
"resetRoom": {
"nodes": [
1
],
"mustStayPut": false
}
}
{
"refill": [
"Energy",
"PowerBomb"
]
}
|
|
Requires: "h_canCrystalFlash" |
|
Exit condition: {
"leaveWithGModeSetup": {}
}
|
|
Requires: {
"ammo": {
"type": "Super",
"count": 1
}
}
{
"enemyDamage": {
"enemy": "Sciser",
"type": "contact",
"hits": 1
}
}
|
|
|
|
From: 1
Left Door
To: 2
Right Door
Slide into the hole where the shot block was and sink to the bottom. Shoot the door using a Hero shot and time the shinespark to follow the shot. Entrance condition: {
"comeInShinecharging": {
"length": 1,
"openEnd": 0
}
}
Requires: "canWaterShineCharge"
"canHeroShot"
"canShinechargeMovementTricky"
"canMidairShinespark"
{
"shinespark": {
"frames": 39
}
}
Exit condition: {
"leaveWithSpark": {
"position": "bottom"
}
}
|
|
From: 1
Left Door
To: 2
Right Door
Slide into the hole where the shot block was and sink to the bottom. Shoot the door using a Hero shot and time the shinespark to follow the shot. Either kill the ceiling crab so that Samus can jump forward, or stationary spinjump to avoid using the Shinespark early. Entrance condition: {
"comeInShinecharging": {
"length": 1,
"openEnd": 0
}
}
Requires: "canWaterShineCharge"
"canHeroShot"
"canShinechargeMovementTricky"
"canMidairShinespark"
"HiJump"
{
"or": [
{
"and": [
"Plasma",
"Wave"
]
},
"canStationarySpinJump"
]
}
{
"shinespark": {
"frames": 41
}
}
Exit condition: {
"leaveWithSpark": {}
}
|
|
From: 1
Left Door
To: 2
Right Door
Spinjump through the shotblocks and fire a Plasma + Wave shot on the way down, clearing the crabs. Begin the Shinespark windup while the Beam shot travels towards the door to open it. Entrance condition: {
"comeInShinecharging": {
"length": 0,
"openEnd": 0
}
}
Requires: "canWaterShineCharge"
"canHeroShot"
"canShinechargeMovementTricky"
"canMidairShinespark"
"Plasma"
"Wave"
{
"shinespark": {
"frames": 41
}
}
Exit condition: {
"leaveWithSpark": {}
}
|
|
Requires: "Gravity"
{
"or": [
"HiJump",
"canWalljump",
"h_canFly",
"canUseFrozenEnemies"
]
}
|
|
From: 1
Left Door
To: 3
Top Door
Notable: true 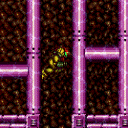
Wall jump back and forth up the shaft. It's a really long climb. Requires: "canSuitlessMaridia" "HiJump" "canConsecutiveWalljump" |
|
Entrance condition: {
"comeInShinecharged": {
"framesRequired": 60
}
}
Requires: "h_canNavigateUnderwater"
{
"shinespark": {
"frames": 40,
"excessFrames": 6
}
}
{
"or": [
"canCrouchJump",
"Gravity",
"HiJump",
"canSpringBallJumpMidAir",
{
"and": [
"canTrickyUseFrozenEnemies",
{
"ammo": {
"type": "Super",
"count": 1
}
}
]
}
]
}
|
|
Entrance condition: {
"comeInShinecharging": {
"length": 13,
"openEnd": 0
}
}
Requires: "Gravity"
{
"shinespark": {
"frames": 40,
"excessFrames": 6
}
}
|
|
After storing the shinecharge, spin jump back to the left and spark aligned against the right side of the left shaft. At the top of the room, hold right in order to land on the platform below the door. Entrance condition: {
"comeInRunning": {
"speedBooster": true,
"minTiles": 2
}
}
Requires: "canStutterWaterShineCharge"
"canShinechargeMovementComplex"
{
"canShineCharge": {
"usedTiles": 33,
"openEnd": 2
}
}
{
"shinespark": {
"frames": 40,
"excessFrames": 6
}
}
{
"or": [
"canCrouchJump",
"Gravity",
"HiJump",
"canSpringBallJumpMidAir",
{
"and": [
"canTrickyUseFrozenEnemies",
{
"ammo": {
"type": "Super",
"count": 1
}
}
]
}
]
}
|
|
Notable: true 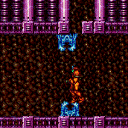
Freeze a crab multiple times to climb the upper Crab Shaft. It may be easier to climb the left shaft by knocking the crab off the wall, or by bringing up a crab from the lower area. Requires: "h_canNavigateUnderwater"
"canTrickyUseFrozenEnemies"
"canCarefulJump"
{
"or": [
"canCrouchJump",
"Gravity",
"HiJump",
"canSpringBallJumpMidAir",
{
"ammo": {
"type": "Super",
"count": 1
}
}
]
}
|
|
Requires: "canSuitlessMaridia" "HiJump" "canUseFrozenEnemies" |
|
Requires: "canSuitlessMaridia" "canTrickySpringBallJump" "canUseFrozenEnemies" |
|
Requires: "canSuitlessMaridia" "canSpringBallJumpMidAir" "HiJump" |
|
Only requires a runway of approximately 1 tile in the adjacent room. Entrance condition: {
"comeInJumping": {
"speedBooster": "any",
"minTiles": 1
}
}
Requires: "HiJump" "canTrickyJump" "canCrossRoomJumpIntoWater" "canMomentumConservingTurnaround" |
|
Requires running a very precise distance of 12 tiles in the adjacent room. Entrance condition: {
"comeInJumping": {
"speedBooster": true,
"minTiles": 12
}
}
Requires: "canCrossRoomJumpIntoWater"
"canMomentumConservingTurnaround"
"canTrickyDashJump"
"canDownGrab"
{
"or": [
"canCrouchJump",
"Gravity",
"HiJump",
"canSpringBallJumpMidAir",
{
"and": [
"canTrickyUseFrozenEnemies",
{
"ammo": {
"type": "Super",
"count": 1
}
}
]
}
]
}
|
|
Requires around 19 tiles in the adjacent room. Entrance condition: {
"comeInJumping": {
"speedBooster": true,
"minTiles": 19
}
}
Requires: "canCrossRoomJumpIntoWater"
"canMomentumConservingTurnaround"
{
"or": [
"canCrouchJump",
"Gravity",
"HiJump",
"canSpringBallJumpMidAir",
{
"and": [
"canTrickyUseFrozenEnemies",
{
"ammo": {
"type": "Super",
"count": 1
}
}
]
}
]
}
|
|
Requires running a very precise distance equivalent to a runway of 7 tiles with no open end in the adjacent room, to hit a peak in the speed / height relationship. The spring ball jump is used after landing near the top, to get to the platform below the door. Entrance condition: {
"comeInJumping": {
"speedBooster": true,
"minTiles": 6.4375
}
}
Requires: "canTrickyDashJump" "canSpringBallJumpMidAir" "canCrossRoomJumpIntoWater" "canMomentumConservingTurnaround" |
|
Entrance condition: {
"comeInWithGMode": {
"mode": "any",
"morphed": true
}
}
Requires: "Gravity" "h_canArtificialMorphIBJ" |
|
Notable: true 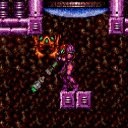
Shoot the shot block in the middle of the room, to allow a global Sciser (crab) to pass to the top part of the room. Use Ice to climb the Scisers to the top of the room. Shoot a Super as a Sciser crawls near the top door, then freeze it mid-air and use it to clip up past the door shell. If you don't have Morph and X-Ray, you must shoot the Super while the Sciser is on a block next to the door, not on the door itself. Requires: {
"ammo": {
"type": "Super",
"count": 1
}
}
"canTrickyUseFrozenEnemies"
{
"or": [
"h_canXRayCeilingClip",
{
"and": [
"Gravity",
"canPreciseCeilingClip"
]
}
]
}
Bypasses door shell: true |
|
Entrance condition: {
"comeInWithGrappleTeleport": {
"blockPositions": [
[
12,
12
],
[
12,
13
]
]
}
}
Requires: {
"or": [
"canUseFrozenEnemies",
"HiJump",
"canSpringBallJumpMidAir"
]
}
|
|
Requires: "Gravity" |
|
Requires: "canSuitlessMaridia"
"HiJump"
{
"or": [
"h_canCrouchJumpDownGrab",
"canSpringBallJumpMidAir",
"canUseFrozenEnemies"
]
}
|
|
Requires: "canSuitlessMaridia"
"canSpringBallJumpMidAir"
{
"or": [
"h_canMaxHeightSpringBallJump",
"HiJump",
"canUseFrozenEnemies"
]
}
|
|
Involves a Super to freeze a crab in midair. Requires: "canSuitlessMaridia"
"canTrickyUseFrozenEnemies"
{
"ammo": {
"type": "Super",
"count": 1
}
}
|
|
Notable: true
Freeze a crab below the opening, and another one at the ceiling on the lip of the entrance. Stand on a frozen crab and crouch jump to the one on the ceiling. When against the top crab, press into it to be pushed up onto it. Requires: "canSuitlessMaridia" "canTrickyUseFrozenEnemies" "canCrouchJump" |
|
Notable: true
Similar to naked watering hole escape. Freeze a crab under the gap above, do a stationary spinjump facing right, then walljump until you're up. Another frozen crab can help complete the way up. Requires: "canSunkenTileWideWallClimb" "canUseFrozenEnemies" "canStationarySpinJump" |
|
Entrance condition: {
"comeInWithGrappleTeleport": {
"blockPositions": [
[
5,
3
],
[
7,
2
],
[
3,
12
],
[
3,
13
]
]
}
}
|
|
Entrance condition: {
"comeInWithGrappleTeleport": {
"blockPositions": [
[
2,
34
]
]
}
}
Bypasses door shell: true |
|
Entrance condition: {
"comeInWithGrappleTeleport": {
"blockPositions": [
[
2,
34
]
]
}
}
Exit condition: {
"leaveWithGrappleTeleport": {
"blockPositions": [
[
2,
34
]
]
}
}
Bypasses door shell: true |
|
Exit condition: {
"leaveWithRunway": {
"length": 4,
"openEnd": 1
}
}
|
|
Freeze a crab to extend the runway while leaving a half-tile gap between the crab and the runway to extend it as much as possible. Requires: "h_canFrozenEnemyRunway" Exit condition: {
"leaveWithRunway": {
"length": 6,
"openEnd": 0
}
}
|
|
Requires: {
"resetRoom": {
"nodes": [
2
],
"mustStayPut": false
}
}
{
"refill": [
"Energy",
"PowerBomb"
]
}
|
|
Requires: "Gravity"
"canShinechargeMovement"
{
"canShineCharge": {
"usedTiles": 23,
"openEnd": 0
}
}
Exit condition: {
"leaveShinecharged": {
"framesRemaining": 90
}
}
|
|
Requires: "h_canCrystalFlash" |
|
Exit condition: {
"leaveWithGModeSetup": {}
}
|
|
Requires: {
"enemyDamage": {
"enemy": "Sciser",
"type": "contact",
"hits": 1
}
}
|
|
From: 2
Right Door
To: 3
Top Door
Entrance condition: {
"comeInWithGrappleTeleport": {
"blockPositions": [
[
5,
3
]
]
}
}
Requires: "canCrouchJump" |
|
If the top door is blue, it will open immediately after the teleport, not allowing Samus to swing directly onto the platform. Entrance condition: {
"comeInWithGrappleTeleport": {
"blockPositions": [
[
7,
2
]
]
}
}
Requires: {
"or": [
"canUseFrozenEnemies",
"HiJump",
"canSpringBallJumpMidAir"
]
}
|
|
Entrance condition: {
"comeInWithGrappleTeleport": {
"blockPositions": [
[
3,
12
],
[
3,
13
]
]
}
}
Requires: {
"or": [
"canUseFrozenEnemies",
"HiJump",
"canSpringBallJumpMidAir"
]
}
|
|
|
|
Requires: "h_canCrystalFlash" "canCrouchJump" |
|
The Global crab in the upper section can be knocked off the wall to enter the left side of the above door. Otherwise, there are more crabs in the lower section of the room. Requires: "canUpwardGModeSetup"
"canTrickyUseFrozenEnemies"
{
"or": [
{
"ammo": {
"type": "Super",
"count": 1
}
},
"Gravity",
{
"and": [
"canSuitlessMaridia",
{
"or": [
"HiJump",
"canBePatient"
]
}
]
}
]
}
Exit condition: {
"leaveWithGModeSetup": {}
}
|
|
Requires: {
"ammo": {
"type": "Super",
"count": 1
}
}
{
"enemyDamage": {
"enemy": "Sciser",
"type": "contact",
"hits": 1
}
}
|
{
"$schema": "../../../schema/m3-room.schema.json",
"id": 175,
"name": "Crab Shaft",
"area": "Maridia",
"subarea": "Inner",
"subsubarea": "Pink",
"playable": true,
"roomAddress": "0x7D1A3",
"roomEnvironments": [
{
"heated": false
}
],
"nodes": [
{
"id": 1,
"name": "Left Door",
"nodeType": "door",
"nodeSubType": "blue",
"nodeAddress": "0x001a4b0",
"doorEnvironments": [
{
"physics": "water"
}
]
},
{
"id": 2,
"name": "Right Door",
"nodeType": "door",
"nodeSubType": "green",
"nodeAddress": "0x001a4c8",
"doorEnvironments": [
{
"physics": "water"
}
],
"locks": [
{
"name": "Crab Shaft Green Lock (to Aqueduct)",
"lockType": "coloredDoor",
"unlockStrats": [
{
"name": "Base",
"notable": false,
"requires": [
"h_canOpenGreenDoors"
]
}
]
}
]
},
{
"id": 3,
"name": "Top Door",
"nodeType": "door",
"nodeSubType": "blue",
"nodeAddress": "0x001a4bc",
"doorEnvironments": [
{
"physics": "water"
}
],
"devNote": "No spawnAt and no junction below, because the door can be entered with just a crouch jump"
}
],
"enemies": [
{
"id": "e1",
"groupName": "Crab Shaft Bottom Scisers",
"enemyName": "Sciser",
"quantity": 3,
"homeNodes": [
2
]
},
{
"id": "e2",
"groupName": "Crab Shaft Top Sciser",
"enemyName": "Sciser",
"quantity": 1,
"homeNodes": [
3
]
}
],
"reusableRoomwideNotable": [
{
"name": "Crab Shaft Ice Only Crab Climb",
"note": "Climb the frozen crabs Suitless without the help of SpringBall jumps or HiJump."
}
],
"links": [
{
"from": 1,
"to": [
{
"id": 1
},
{
"id": 2
},
{
"id": 3
}
]
},
{
"from": 2,
"to": [
{
"id": 1
},
{
"id": 2
},
{
"id": 3
}
]
},
{
"from": 3,
"to": [
{
"id": 1
},
{
"id": 3
}
]
}
],
"strats": [
{
"link": [
1,
1
],
"name": "Leave with Runway",
"requires": [],
"exitCondition": {
"leaveWithRunway": {
"length": 14,
"openEnd": 0
}
}
},
{
"link": [
1,
1
],
"name": "Suitless Water Shinecharge, Leave with Spark",
"entranceCondition": {
"comeInRunning": {
"speedBooster": true,
"minTiles": 2
}
},
"requires": [
"canStutterWaterShineCharge",
"canShinechargeMovementComplex",
{
"canShineCharge": {
"usedTiles": 33,
"openEnd": 2
}
},
{
"or": [
{
"shinespark": {
"frames": 12
}
},
{
"and": [
"canShinechargeMovementTricky",
{
"shinespark": {
"frames": 3
}
}
]
}
]
}
],
"exitCondition": {
"leaveWithSpark": {}
},
"unlocksDoors": [
{
"types": [
"missiles",
"super"
],
"requires": []
},
{
"types": [
"powerbomb"
],
"requires": [
"never"
]
}
]
},
{
"link": [
1,
1
],
"name": "Sciser Farm",
"requires": [
{
"resetRoom": {
"nodes": [
1
],
"mustStayPut": false
}
},
{
"refill": [
"Energy",
"PowerBomb"
]
}
]
},
{
"link": [
1,
1
],
"name": "Crystal Flash",
"requires": [
"h_canCrystalFlash"
]
},
{
"link": [
1,
1
],
"name": "G-Mode Setup - Get Hit By Sciser",
"notable": false,
"requires": [],
"exitCondition": {
"leaveWithGModeSetup": {}
}
},
{
"link": [
1,
1
],
"name": "G-Mode Regain Mobility",
"requires": [
{
"ammo": {
"type": "Super",
"count": 1
}
},
{
"enemyDamage": {
"enemy": "Sciser",
"type": "contact",
"hits": 1
}
}
],
"gModeRegainMobility": {}
},
{
"link": [
1,
2
],
"name": "Base",
"requires": []
},
{
"link": [
1,
2
],
"name": "Come in Shinecharging, Leave with Shinespark (Bottom)",
"entranceCondition": {
"comeInShinecharging": {
"length": 1,
"openEnd": 0
}
},
"requires": [
"canWaterShineCharge",
"canHeroShot",
"canShinechargeMovementTricky",
"canMidairShinespark",
{
"shinespark": {
"frames": 39
}
}
],
"exitCondition": {
"leaveWithSpark": {
"position": "bottom"
}
},
"unlocksDoors": [
{
"types": [
"super"
],
"requires": []
},
{
"types": [
"missiles",
"powerbomb"
],
"requires": [
"never"
]
}
],
"note": [
"Slide into the hole where the shot block was and sink to the bottom.",
"Shoot the door using a Hero shot and time the shinespark to follow the shot."
]
},
{
"link": [
1,
2
],
"name": "Come in Shinecharging, Leave with Shinespark (Top, HiJump)",
"entranceCondition": {
"comeInShinecharging": {
"length": 1,
"openEnd": 0
}
},
"requires": [
"canWaterShineCharge",
"canHeroShot",
"canShinechargeMovementTricky",
"canMidairShinespark",
"HiJump",
{
"or": [
{
"and": [
"Plasma",
"Wave"
]
},
"canStationarySpinJump"
]
},
{
"shinespark": {
"frames": 41
}
}
],
"exitCondition": {
"leaveWithSpark": {}
},
"unlocksDoors": [
{
"types": [
"super"
],
"requires": [
{
"ammo": {
"type": "Super",
"count": 1
}
}
]
},
{
"types": [
"missiles",
"powerbomb"
],
"requires": [
"never"
]
}
],
"note": [
"Slide into the hole where the shot block was and sink to the bottom.",
"Shoot the door using a Hero shot and time the shinespark to follow the shot.",
"Either kill the ceiling crab so that Samus can jump forward, or stationary spinjump to avoid using the Shinespark early."
]
},
{
"link": [
1,
2
],
"name": "Come in Shinecharging, Leave with Shinespark (Top, Wave+Plasma)",
"entranceCondition": {
"comeInShinecharging": {
"length": 0,
"openEnd": 0
}
},
"requires": [
"canWaterShineCharge",
"canHeroShot",
"canShinechargeMovementTricky",
"canMidairShinespark",
"Plasma",
"Wave",
{
"shinespark": {
"frames": 41
}
}
],
"exitCondition": {
"leaveWithSpark": {}
},
"unlocksDoors": [
{
"types": [
"ammo"
],
"requires": [
"never"
]
}
],
"note": [
"Spinjump through the shotblocks and fire a Plasma + Wave shot on the way down, clearing the crabs.",
"Begin the Shinespark windup while the Beam shot travels towards the door to open it."
]
},
{
"link": [
1,
3
],
"name": "Base",
"requires": [
"Gravity",
{
"or": [
"HiJump",
"canWalljump",
"h_canFly",
"canUseFrozenEnemies"
]
}
]
},
{
"link": [
1,
3
],
"name": "Crab Shaft Suitless Walljump Climb with HiJump",
"notable": true,
"requires": [
"canSuitlessMaridia",
"HiJump",
"canConsecutiveWalljump"
],
"note": "Wall jump back and forth up the shaft. It's a really long climb."
},
{
"link": [
1,
3
],
"name": "Come In Shinecharged, Shinespark",
"entranceCondition": {
"comeInShinecharged": {
"framesRequired": 60
}
},
"requires": [
"h_canNavigateUnderwater",
{
"shinespark": {
"frames": 40,
"excessFrames": 6
}
},
{
"or": [
"canCrouchJump",
"Gravity",
"HiJump",
"canSpringBallJumpMidAir",
{
"and": [
"canTrickyUseFrozenEnemies",
{
"ammo": {
"type": "Super",
"count": 1
}
}
]
}
]
}
],
"devNote": "This does not require canWaterShineCharge, as you can store the shinecharge before entering the room."
},
{
"link": [
1,
3
],
"name": "Come In Shinecharging, Shinespark",
"entranceCondition": {
"comeInShinecharging": {
"length": 13,
"openEnd": 0
}
},
"requires": [
"Gravity",
{
"shinespark": {
"frames": 40,
"excessFrames": 6
}
}
],
"devNote": [
"FIXME: It is possible to shinespark through the top door.",
"--Open the top door, shortcharge, turn off gravity while jumping up the left shaft, diagonal spark to the right."
]
},
{
"link": [
1,
3
],
"name": "Suitless Water Shinecharge",
"entranceCondition": {
"comeInRunning": {
"speedBooster": true,
"minTiles": 2
}
},
"requires": [
"canStutterWaterShineCharge",
"canShinechargeMovementComplex",
{
"canShineCharge": {
"usedTiles": 33,
"openEnd": 2
}
},
{
"shinespark": {
"frames": 40,
"excessFrames": 6
}
},
{
"or": [
"canCrouchJump",
"Gravity",
"HiJump",
"canSpringBallJumpMidAir",
{
"and": [
"canTrickyUseFrozenEnemies",
{
"ammo": {
"type": "Super",
"count": 1
}
}
]
}
]
}
],
"note": [
"After storing the shinecharge, spin jump back to the left and spark aligned against the right side of the left shaft.",
"At the top of the room, hold right in order to land on the platform below the door."
]
},
{
"link": [
1,
3
],
"name": "Crab Shaft Crab Climb",
"notable": true,
"requires": [
"h_canNavigateUnderwater",
"canTrickyUseFrozenEnemies",
"canCarefulJump",
{
"or": [
"canCrouchJump",
"Gravity",
"HiJump",
"canSpringBallJumpMidAir",
{
"ammo": {
"type": "Super",
"count": 1
}
}
]
}
],
"reusableRoomwideNotable": "Crab Shaft Ice Only Crab Climb",
"note": [
"Freeze a crab multiple times to climb the upper Crab Shaft.",
"It may be easier to climb the left shaft by knocking the crab off the wall, or by bringing up a crab from the lower area."
]
},
{
"link": [
1,
3
],
"name": "Frozen HiJump",
"requires": [
"canSuitlessMaridia",
"HiJump",
"canUseFrozenEnemies"
]
},
{
"link": [
1,
3
],
"name": "Frozen SpringBall",
"requires": [
"canSuitlessMaridia",
"canTrickySpringBallJump",
"canUseFrozenEnemies"
]
},
{
"link": [
1,
3
],
"name": "Dual Jump Assist",
"requires": [
"canSuitlessMaridia",
"canSpringBallJumpMidAir",
"HiJump"
]
},
{
"link": [
1,
3
],
"name": "Cross Room Jump with HiJump",
"entranceCondition": {
"comeInJumping": {
"speedBooster": "any",
"minTiles": 1
}
},
"requires": [
"HiJump",
"canTrickyJump",
"canCrossRoomJumpIntoWater",
"canMomentumConservingTurnaround"
],
"note": "Only requires a runway of approximately 1 tile in the adjacent room.",
"devNote": "Possible with no openend using a harder jump but a runway that small doesn't exist."
},
{
"link": [
1,
3
],
"name": "Cross Room Tricky Dash Jump",
"entranceCondition": {
"comeInJumping": {
"speedBooster": true,
"minTiles": 12
}
},
"requires": [
"canCrossRoomJumpIntoWater",
"canMomentumConservingTurnaround",
"canTrickyDashJump",
"canDownGrab",
{
"or": [
"canCrouchJump",
"Gravity",
"HiJump",
"canSpringBallJumpMidAir",
{
"and": [
"canTrickyUseFrozenEnemies",
{
"ammo": {
"type": "Super",
"count": 1
}
}
]
}
]
}
],
"note": "Requires running a very precise distance of 12 tiles in the adjacent room."
},
{
"link": [
1,
3
],
"name": "Cross Room Jump with Speedbooster",
"entranceCondition": {
"comeInJumping": {
"speedBooster": true,
"minTiles": 19
}
},
"requires": [
"canCrossRoomJumpIntoWater",
"canMomentumConservingTurnaround",
{
"or": [
"canCrouchJump",
"Gravity",
"HiJump",
"canSpringBallJumpMidAir",
{
"and": [
"canTrickyUseFrozenEnemies",
{
"ammo": {
"type": "Super",
"count": 1
}
}
]
}
]
}
],
"note": "Requires around 19 tiles in the adjacent room.",
"devNote": "This is on a spike in the speed graph, but would work even if it weren't. And higher tile counts work too."
},
{
"link": [
1,
3
],
"name": "Cross Room Jump with Speedbooster, Spring Ball",
"entranceCondition": {
"comeInJumping": {
"speedBooster": true,
"minTiles": 6.4375
}
},
"requires": [
"canTrickyDashJump",
"canSpringBallJumpMidAir",
"canCrossRoomJumpIntoWater",
"canMomentumConservingTurnaround"
],
"note": [
"Requires running a very precise distance equivalent to a runway of 7 tiles with no open end in the adjacent room, to hit a peak in the speed / height relationship.",
"The spring ball jump is used after landing near the top, to get to the platform below the door."
]
},
{
"link": [
1,
3
],
"name": "G-Mode Morph",
"entranceCondition": {
"comeInWithGMode": {
"mode": "any",
"morphed": true
}
},
"requires": [
"Gravity",
"h_canArtificialMorphIBJ"
]
},
{
"link": [
1,
3
],
"name": "Crab Shaft Sciser Ice Clip Door Lock Skip",
"notable": true,
"requires": [
{
"ammo": {
"type": "Super",
"count": 1
}
},
"canTrickyUseFrozenEnemies",
{
"or": [
"h_canXRayCeilingClip",
{
"and": [
"Gravity",
"canPreciseCeilingClip"
]
}
]
}
],
"bypassesDoorShell": true,
"note": [
"Shoot the shot block in the middle of the room, to allow a global Sciser (crab) to pass to the top part of the room.",
"Use Ice to climb the Scisers to the top of the room.",
"Shoot a Super as a Sciser crawls near the top door, then freeze it mid-air and use it to clip up past the door shell.",
"If you don't have Morph and X-Ray, you must shoot the Super while the Sciser is on a block next to the door, not on the door itself."
]
},
{
"link": [
1,
3
],
"name": "Grapple Teleport",
"entranceCondition": {
"comeInWithGrappleTeleport": {
"blockPositions": [
[
12,
12
],
[
12,
13
]
]
}
},
"requires": [
{
  "or": [
    "canUseFrozenEnemies",
    "HiJump",
    "canSpringBallJumpMidAir"
  ]
}
],
"devNote": [
"The requirements are for getting onto the platform and through the door.",
"FIXME: It could be cleaner to add a node below the platform."
]
},
{
"link": [
2,
1
],
"name": "Base",
"requires": [
"Gravity"
]
},
{
"link": [
2,
1
],
"name": "Suitless HiJump",
"requires": [
"canSuitlessMaridia",
"HiJump",
{
"or": [
"h_canCrouchJumpDownGrab",
"canSpringBallJumpMidAir",
"canUseFrozenEnemies"
]
}
]
},
{
"link": [
2,
1
],
"name": "Suitless SpringBall",
"requires": [
"canSuitlessMaridia",
"canSpringBallJumpMidAir",
{
"or": [
"h_canMaxHeightSpringBallJump",
"HiJump",
"canUseFrozenEnemies"
]
}
]
},
{
"link": [
2,
1
],
"name": "Crab Shaft Bottom Frozen Falling Crab",
"requires": [
"canSuitlessMaridia",
"canTrickyUseFrozenEnemies",
{
"ammo": {
"type": "Super",
"count": 1
}
}
],
"note": "Involves a Super to freeze a crab in midair."
},
{
"link": [
2,
1
],
"name": "Crab Shaft Bottom Frozen Crab Steps",
"notable": true,
"requires": [
"canSuitlessMaridia",
"canTrickyUseFrozenEnemies",
"canCrouchJump"
],
"reusableRoomwideNotable": "Crab Shaft Ice Only Crab Climb",
"note": [
"Freeze a crab below the opening, and another one at the ceiling on the lip of the entrance.",
"Stand on a frozen crab and crouch jump to the one on the ceiling.",
"When against the top crab, press into it to be pushed up onto it."
]
},
{
"link": [
2,
1
],
"name": "Crab Shaft Bottom Repetitive Walljumps",
"notable": true,
"requires": [
"canSunkenTileWideWallClimb",
"canUseFrozenEnemies",
"canStationarySpinJump"
],
"reusableRoomwideNotable": "Crab Shaft Ice Only Crab Climb",
"note": [
"Similar to naked watering hole escape.",
"Freeze a crab under the gap above, do a stationary spinjump facing right, then walljump until you're up.",
"Another frozen crab can help complete the way up."
]
},
{
"link": [
2,
1
],
"name": "Grapple Teleport",
"entranceCondition": {
"comeInWithGrappleTeleport": {
"blockPositions": [
[
5,
3
],
[
7,
2
],
[
3,
12
],
[
3,
13
]
]
}
},
"requires": []
},
{
"link": [
2,
1
],
"name": "Grapple Teleport",
"entranceCondition": {
"comeInWithGrappleTeleport": {
"blockPositions": [
[
2,
34
]
]
}
},
"requires": [],
"bypassesDoorShell": true
},
{
"link": [
2,
1
],
"name": "Carry Grapple Teleport",
"entranceCondition": {
"comeInWithGrappleTeleport": {
"blockPositions": [
[
2,
34
]
]
}
},
"requires": [],
"bypassesDoorShell": true,
"exitCondition": {
"leaveWithGrappleTeleport": {
"blockPositions": [
[
2,
34
]
]
}
}
},
{
"link": [
2,
2
],
"name": "Leave with Runway",
"requires": [],
"exitCondition": {
"leaveWithRunway": {
"length": 4,
"openEnd": 1
}
}
},
{
"link": [
2,
2
],
"name": "Leave With Runway - Frozen Sciser",
"requires": [
"h_canFrozenEnemyRunway"
],
"exitCondition": {
"leaveWithRunway": {
"length": 6,
"openEnd": 0
}
},
"note": "Freeze a crab to extend the runway while leaving a half-tile gap between the crab and the runway to extend it as much as possible."
},
{
"link": [
2,
2
],
"name": "Sciser Farm",
"requires": [
{
"resetRoom": {
"nodes": [
2
],
"mustStayPut": false
}
},
{
"refill": [
"Energy",
"PowerBomb"
]
}
]
},
{
"link": [
2,
2
],
"name": "Leave Shinecharged",
"requires": [
"Gravity",
"canShinechargeMovement",
{
"canShineCharge": {
"usedTiles": 23,
"openEnd": 0
}
}
],
"exitCondition": {
"leaveShinecharged": {
"framesRemaining": 90
}
}
},
{
"link": [
2,
2
],
"name": "Crystal Flash",
"requires": [
"h_canCrystalFlash"
]
},
{
"link": [
2,
2
],
"name": "G-Mode Setup - Get Hit By Sciser",
"notable": false,
"requires": [],
"exitCondition": {
"leaveWithGModeSetup": {}
}
},
{
"link": [
2,
2
],
"name": "G-Mode Regain Mobility",
"requires": [
{
  "enemyDamage": {
    "enemy": "Sciser",
    "type": "contact",
    "hits": 1
  }
}
],
"gModeRegainMobility": {}
},
{
"link": [
2,
3
],
"name": "Grapple Teleport (from Red Brinstar Firefleas)",
"entranceCondition": {
"comeInWithGrappleTeleport": {
"blockPositions": [
[
5,
3
]
]
}
},
"requires": [
"canCrouchJump"
],
"devNote": [
"The canCrouchJump is for getting up through the door.",
"FIXME: It could be cleaner to add a node below the door and use a spawnAt."
]
},
{
"link": [
2,
3
],
"name": "Grapple Teleport (from Moat)",
"entranceCondition": {
"comeInWithGrappleTeleport": {
"blockPositions": [
[
7,
2
]
]
}
},
"requires": [
{
  "or": [
    "canUseFrozenEnemies",
    "HiJump",
    "canSpringBallJumpMidAir"
  ]
}
],
"note": [
"If the top door is blue, it will open immediately after the teleport, not allowing Samus to swing directly onto the platform."
],
"devNote": [
"FIXME: It could be cleaner to add a node below the platform.",
"FIXME: Add a variation with canRiskPermanentLossOfAccess if the door is not blue."
]
},
{
"link": [
2,
3
],
"name": "Grapple Teleport",
"entranceCondition": {
"comeInWithGrappleTeleport": {
"blockPositions": [
[
3,
12
],
[
3,
13
]
]
}
},
"requires": [
{
  "or": [
    "canUseFrozenEnemies",
    "HiJump",
    "canSpringBallJumpMidAir"
  ]
}
],
"devNote": [
"Here Samus spawns at or slightly inside the left wall; the additional requirements are for getting up to the door from there.",
"FIXME: It could be cleaner to add a node below the platform."
]
},
{
"link": [
3,
1
],
"name": "Base",
"requires": []
},
{
"link": [
3,
3
],
"name": "Crystal Flash",
"requires": [
"h_canCrystalFlash",
"canCrouchJump"
],
"devNote": [
"The canCrouchJump is for getting up through the door.",
"FIXME: It could be cleaner to add a node below the door and use a spawnAt."
]
},
{
"link": [
3,
3
],
"name": "G-Mode Setup - Frozen Sciser",
"notable": false,
"requires": [
"canUpwardGModeSetup",
"canTrickyUseFrozenEnemies",
{
"or": [
{
"ammo": {
"type": "Super",
"count": 1
}
},
"Gravity",
{
"and": [
"canSuitlessMaridia",
{
"or": [
"HiJump",
"canBePatient"
]
}
]
}
]
}
],
"exitCondition": {
"leaveWithGModeSetup": {}
},
"note": [
"The Global crab in the upper section can be knocked off the wall to enter the left side of the above door.",
"Otherwise, there are more crabs in the lower section of the room."
]
},
{
"link": [
3,
3
],
"name": "G-Mode Regain Mobility",
"requires": [
{
"ammo": {
"type": "Super",
"count": 1
}
},
{
"enemyDamage": {
"enemy": "Sciser",
"type": "contact",
"hits": 1
}
}
],
"gModeRegainMobility": {},
"devNote": "Requires entering on either side of the doorway, but not in the center."
}
]
}