canShinespark (Basic)

The ability to use the Speed Booster to store a shinecharge, then fly in a direction until an obstacle is hit or Samus gets down to 29 energy. Assumes Samus can shinespark vertically or diagonally from the ground.
Strats ()
|
Notable: true 
Diagonal shinespark up the climb to break the bomb blocks to the top right morph tunnel. A consistent place to spark from is the small platform below the bomb block, using a crouch jump and then a diagonal spark (not a crouched diagonal spark). Entrance condition: {
"comeInShinecharged": {
"framesRequired": 55
},
"comesThroughToilet": "no"
}
Requires: "canShinechargeMovementComplex"
{
"or": [
"canCrouchJump",
"canMidairShinespark"
]
}
{
"shinespark": {
"frames": 5
}
}
|
|
From: 1
Top Door
To: 3
Top Right Door
Notable: true
Diagonal shinespark up the climb to break the bomb blocks to the top right morph tunnel. A consistent place to spark from is the small platform below the bomb block, using a crouch jump and then a diagonal spark (not a crouched diagonal spark). Entrance condition: {
"comeInShinecharged": {
"framesRequired": 65
},
"comesThroughToilet": "yes"
}
Requires: "canShinechargeMovementComplex"
{
"or": [
"canCrouchJump",
"canMidairShinespark"
]
}
{
"shinespark": {
"frames": 5
}
}
|
|
From: 2
Bottom Left Door
To: 3
Top Right Door
Notable: true
Starting with a crouch, diagonal shinespark to the top to break the bomb blocks to the morph tunnels on the right. Entrance condition: {
"comeInShinecharging": {
"length": 14,
"openEnd": 0
}
}
Requires: "Morph"
{
"shinespark": {
"frames": 147
}
}
Clears obstacles: A |
|
From: 2
Bottom Left Door
To: 4
Middle Right Door
Notable: true
Diagonal shinespark up the climb to break the bomb blocks to the morph tunnels on the right. Entrance condition: {
"comeInShinecharging": {
"length": 14,
"openEnd": 0
}
}
Requires: "Morph"
{
"shinespark": {
"frames": 147,
"excessFrames": 124
}
}
Clears obstacles: A |
|
Entrance condition: {
"comeInWithSpark": {}
}
Requires: {
"shinespark": {
"frames": 43,
"excessFrames": 17
}
}
Clears obstacles: A |
|
Entrance condition: {
"comeInWithSpark": {
"position": "bottom"
}
}
Requires: {
"shinespark": {
"frames": 43,
"excessFrames": 17
}
}
Clears obstacles: A |
|
From: 5
Bottom Right Door
To: 3
Top Right Door
Notable: true
Starting with a crouch, diagonal shinespark to the top to break the bomb blocks to the morph tunnels on the right. Entrance condition: {
"comeInShinecharging": {
"length": 12,
"openEnd": 0
}
}
Requires: "Morph"
{
"shinespark": {
"frames": 147
}
}
Clears obstacles: A |
|
From: 5
Bottom Right Door
To: 4
Middle Right Door
Notable: true
Diagonal shinespark up the climb to break the bomb blocks to the morph tunnels on the right. Entrance condition: {
"comeInShinecharging": {
"length": 12,
"openEnd": 0
}
}
Requires: "Morph"
{
"shinespark": {
"frames": 147,
"excessFrames": 124
}
}
Clears obstacles: A |
|
Notable: true
Starting with a crouch, diagonal shinespark to the top to break the bomb blocks to the morph tunnels on the right. Requires: "Morph"
{
"canShineCharge": {
"usedTiles": 28,
"openEnd": 0
}
}
{
"shinespark": {
"frames": 147
}
}
{
"obstaclesCleared": [
"A"
]
}
|
|
Notable: true
Diagonal shinespark up the climb to break the bomb blocks to the morph tunnels on the right. Requires: "Morph"
{
"canShineCharge": {
"usedTiles": 28,
"openEnd": 0
}
}
{
"shinespark": {
"frames": 147,
"excessFrames": 124
}
}
{
"obstaclesCleared": [
"A"
]
}
|
|
Entrance condition: {
"comeInWithSpark": {}
}
Requires: {
"shinespark": {
"frames": 65,
"excessFrames": 6
}
}
|
|
From: 1
Top Left Door
To: 4
Top Junction (Right of Spikes)
Entrance condition: {
"comeInShinecharging": {
"length": 3,
"openEnd": 1
}
}
Requires: "canHorizontalShinespark"
{
"or": [
{
"shinespark": {
"frames": 56,
"excessFrames": 6
}
},
{
"and": [
"canShinechargeMovement",
"canMidairShinespark",
{
"shinespark": {
"frames": 41,
"excessFrames": 4
}
}
]
}
]
}
|
|
From: 1
Top Left Door
To: 6
Top Junction with Temporary Blue (Right of Morph Tunnel)
Notable: true 
Use X-Mode to store a spikesuit, and then convert that to a blue suit with more X-Mode. Requires: "canSuperJump"
"Morph"
{
"spikeHits": 3
}
{
"canShineCharge": {
"usedTiles": 33,
"openEnd": 2
}
}
{
"shinespark": {
"frames": 5
}
}
{
"spikeHits": 2
}
{
"or": [
{
"spikeHits": 1
},
"Grapple",
"SpaceJump"
]
}
|
|
Charge a Shinespark running left, then get blue suit speed by running back to the right to jump through the Boyons. Requires: "canCarefulJump"
"canShinechargeMovementComplex"
{
"canShineCharge": {
"usedTiles": 33,
"openEnd": 2
}
}
{
"shinespark": {
"frames": 130,
"excessFrames": 6
}
}
|
|
This is doable without a short charge, but it's essentially harder than the bluesuit jump. With a quick charge, it can serve as a less scary strat. Requires: "canShinechargeMovement"
{
"canShineCharge": {
"usedTiles": 25,
"openEnd": 2
}
}
{
"shinespark": {
"frames": 130,
"excessFrames": 6
}
}
{
"obstaclesCleared": [
"A"
]
}
Clears obstacles: A |
|
Requires: "canUseFrozenEnemies"
{
"canShineCharge": {
"usedTiles": 33,
"openEnd": 2
}
}
{
"shinespark": {
"frames": 130,
"excessFrames": 6
}
}
|
|
From: 2
Bottom Left Door
To: 3
Item
Quickly Walljump to conserve health on the shinespark. Requires: "canUseFrozenEnemies"
"canShinechargeMovementComplex"
"canFastWalljumpClimb"
{
"canShineCharge": {
"usedTiles": 33,
"openEnd": 2
}
}
{
"shinespark": {
"frames": 98,
"excessFrames": 6
}
}
|
|
Use an extra speedy jump or walljump to conserve health on the shinespark. Requires: "canUseFrozenEnemies"
"canShinechargeMovement"
"HiJump"
{
"canShineCharge": {
"usedTiles": 33,
"openEnd": 2
}
}
{
"shinespark": {
"frames": 108,
"excessFrames": 6
}
}
|
|
Store a Shinespark and then jump through the Boyons using Screw Attack. Requires: "canCarefulJump"
"canShinechargeMovement"
"ScrewAttack"
{
"canShineCharge": {
"usedTiles": 33,
"openEnd": 2
}
}
{
"shinespark": {
"frames": 130,
"excessFrames": 6
}
}
|
|
Entrance condition: {
"comeInWithSpark": {}
}
Requires: {
"shinespark": {
"frames": 21
}
}
Exit condition: {
"leaveWithSpark": {}
}
|
|
Entrance condition: {
"comeInWithSpark": {}
}
Requires: {
"shinespark": {
"frames": 21
}
}
Exit condition: {
"leaveWithSpark": {}
}
|
|
Notable: true 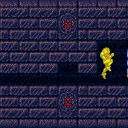
Tight movement is needed to enter with a shinecharge, carry it through the morph tunnel, and spark out the right door in time. Entrance condition: {
"comeInShinecharging": {
"length": 2,
"openEnd": 0
}
}
Requires: "Morph"
"canShinechargeMovementTricky"
{
"shinespark": {
"frames": 7
}
}
Exit condition: {
"leaveWithSpark": {
"position": "bottom"
}
}
|
|
Shinespark through the top of the door to reach the breakable blocks. Entrance condition: {
"comeInWithSpark": {}
}
Requires: "canMidairShinespark"
{
"shinespark": {
"frames": 154,
"excessFrames": 107
}
}
Clears obstacles: A |
|
Entrance condition: {
"comeInShinecharging": {
"length": 30,
"openEnd": 1,
"steepUpTiles": 9
}
}
Requires: "canHorizontalShinespark"
{
"shinespark": {
"frames": 125,
"excessFrames": 33
}
}
Clears obstacles: A |
|
Requires: {
"obstaclesCleared": [
"C"
]
}
{
"shinespark": {
"frames": 125
}
}
{
"or": [
{
"canShineCharge": {
"usedTiles": 30,
"openEnd": 1,
"steepUpTiles": 9
}
},
{
"and": [
{
"canShineCharge": {
"usedTiles": 31,
"openEnd": 1,
"steepUpTiles": 9
}
},
{
"doorUnlockedAtNode": 3
}
]
}
]
}
Exit condition: {
"leaveWithSpark": {
"position": "top"
}
}
|
|
Store the spark on the right side of the ledge. Run left and do a big jump towards the gauntlet door and then midair spark at the right time. The lines in the background make for a good way to measure height. Requires: "canMidairShinespark"
"canShinechargeMovementComplex"
{
"canShineCharge": {
"usedTiles": 19,
"steepUpTiles": 2,
"steepDownTiles": 1,
"openEnd": 2
}
}
{
"or": [
{
"shinespark": {
"frames": 95,
"excessFrames": 33
}
},
{
"and": [
"canShinechargeMovementTricky",
{
"shinespark": {
"frames": 87,
"excessFrames": 33
}
}
]
}
]
}
Clears obstacles: A |
|
From: 4
Bottom Right Door
To: 1
Top Left Door
Store the spark on the right side of the ledge. Run left and do a big jump towards the gauntlet door and then midair spark at the right time. The lines in the background make for a good way to measure height. Requires: {
"obstaclesCleared": [
"C"
]
}
"canMidairShinespark"
"canShinechargeMovementComplex"
{
"canShineCharge": {
"usedTiles": 19,
"steepUpTiles": 2,
"steepDownTiles": 1,
"openEnd": 2
}
}
{
"or": [
{
"shinespark": {
"frames": 96
}
},
{
"and": [
"canShinechargeMovementTricky",
{
"shinespark": {
"frames": 88
}
}
]
}
]
}
Exit condition: {
"leaveWithSpark": {
"position": "top"
}
}
|
|
Requires: "canHorizontalShinespark"
{
"canShineCharge": {
"usedTiles": 19,
"steepUpTiles": 2,
"steepDownTiles": 1,
"openEnd": 2
}
}
{
"shinespark": {
"frames": 125,
"excessFrames": 33
}
}
Clears obstacles: A |
|
Requires: {
"obstaclesCleared": [
"C"
]
}
{
"shinespark": {
"frames": 125
}
}
{
"canShineCharge": {
"usedTiles": 19,
"steepUpTiles": 2,
"steepDownTiles": 1,
"openEnd": 2
}
}
Exit condition: {
"leaveWithSpark": {
"position": "top"
}
}
|
|
Requires: {
"canShineCharge": {
"usedTiles": 19,
"steepUpTiles": 2,
"steepDownTiles": 1,
"openEnd": 2
}
}
{
"shinespark": {
"frames": 45,
"excessFrames": 13
}
}
|
|
From: 4
Bottom Right Door
To: 3
Top Right Door
Climb up 3 screens. Entrance condition: {
"comeInShinecharged": {
"framesRequired": 1
}
}
Requires: {
"shinespark": {
"frames": 1,
"excessFrames": 1
}
}
"canShinesparkDeepStuck"
"canXRayClimb"
"canBePatient"
|
|
Requires: {
"or": [
{
"and": [
{
"canShineCharge": {
"usedTiles": 33,
"openEnd": 2
}
},
{
"shinespark": {
"frames": 78,
"excessFrames": 13
}
}
]
},
{
"and": [
"canShinechargeMovement",
{
"canShineCharge": {
"usedTiles": 33,
"openEnd": 2
}
},
{
"shinespark": {
"frames": 65,
"excessFrames": 13
}
}
]
}
]
}
|
|
Shinespark diagonally from the small hill left of the ship to break part way into the hidden bomb wall, then use Bombs or another means to continue to the left. Requires: {
"canShineCharge": {
"usedTiles": 33,
"openEnd": 2
}
}
{
"shinespark": {
"frames": 40
}
}
{
"or": [
"h_canDestroyBombWalls",
{
"obstaclesCleared": [
"A"
]
}
]
}
Clears obstacles: A |
|
From: 1
Top Left Door
To: 1
Top Left Door
From the left, break the bomb blocks by shinesparking from the neighboring room. After the blocks respawn and the Geemer is near, destroy them again using blue speed from the right. This opens a path for the Geemer to hit Samus through the transition. Entrance condition: {
"comeInWithSpark": {}
}
Requires: "h_ZebesIsAwake"
{
"shinespark": {
"frames": 67,
"excessFrames": 42
}
}
"canCarefulJump"
{
"canShineCharge": {
"usedTiles": 25,
"steepUpTiles": 3,
"steepDownTiles": 3,
"openEnd": 1
}
}
Exit condition: {
"leaveWithGModeSetup": {}
}
|
|
Entrance condition: {
"comeInWithSpark": {}
}
Requires: {
"shinespark": {
"frames": 67,
"excessFrames": 42
}
}
|
|
From: 2
Middle Left Door
To: 3
Bottom Left Horizontal Door
Entrance condition: {
"comeInShinecharged": {
"framesRequired": 170
}
}
Requires: "canShinechargeMovementComplex"
{
"shinespark": {
"frames": 6
}
}
Exit condition: {
"leaveWithSpark": {}
}
|
|
From: 7
Bottom Left Vertical Door
To: 7
Bottom Left Vertical Door
Entrance condition: {
"comeInWithSpark": {},
"comesThroughToilet": "any"
}
Requires: {
"shinespark": {
"frames": 3,
"excessFrames": 3
}
}
|
|
Break the bomb wall while blue, or spark diagonally next to it. Requires: {
"or": [
"canCarefulJump",
{
"and": [
"canShinechargeMovement",
{
"shinespark": {
"frames": 2
}
}
]
}
]
}
{
"canShineCharge": {
"usedTiles": 25,
"steepUpTiles": 3,
"steepDownTiles": 3,
"openEnd": 1
}
}
|
|
From: 8
Central Junction
To: 1
Top Left Door
Break the bomb wall while blue, or spark diagonally next to it. Open the door then charge the spark again and spark through the wall and door. Requires: {
"or": [
"canCarefulJump",
{
"and": [
"canShinechargeMovement",
{
"shinespark": {
"frames": 2
}
}
]
}
]
}
{
"canShineCharge": {
"usedTiles": 25,
"steepUpTiles": 3,
"steepDownTiles": 3,
"openEnd": 1
}
}
{
"shinespark": {
"frames": 28
}
}
Exit condition: {
"leaveWithSpark": {}
}
|
|
From: 1
Left Door
To: 4
Middle Junction (Left of Morph Tunnel)
It is possible to return to the farm after sparking to regain Energy. Requires: "canHorizontalShinespark"
{
"obstaclesCleared": [
"B"
]
}
{
"or": [
{
"canShineCharge": {
"usedTiles": 14,
"openEnd": 0,
"steepUpTiles": 1,
"steepDownTiles": 1
}
},
{
"and": [
{
"canShineCharge": {
"usedTiles": 15,
"openEnd": 0,
"steepUpTiles": 1,
"steepDownTiles": 1
}
},
{
"doorUnlockedAtNode": 1
}
]
}
]
}
{
"shinespark": {
"frames": 54
}
}
Clears obstacles: A |
|
From: 1
Left Door
To: 4
Middle Junction (Left of Morph Tunnel)
Enter through the top of the door to reach all the way to the shot block wall. Entrance condition: {
"comeInWithSpark": {}
}
Requires: "canMidairShinespark"
{
"shinespark": {
"frames": 90,
"excessFrames": 17
}
}
Clears obstacles: A, B |
|
From: 1
Left Door
To: 4
Middle Junction (Left of Morph Tunnel)
Charge the Shinespark just before getting to the bug, then Midair Shinespark to make it all the way to the shot blocks. Entrance condition: {
"comeInShinecharging": {
"length": 5,
"openEnd": 0,
"steepUpTiles": 0,
"steepDownTiles": 1
}
}
Requires: "canMidairShinespark"
"canShinechargeMovement"
{
"shinespark": {
"frames": 77,
"excessFrames": 17
}
}
Clears obstacles: A, B |
|
From: 1
Left Door
To: 4
Middle Junction (Left of Morph Tunnel)
To use the full runway, kill the Zebbo with Wave, then Midair Shinespark to make it all the way to the shot blocks. Entrance condition: {
"comeInShinecharging": {
"length": 14,
"openEnd": 0,
"steepUpTiles": 1,
"steepDownTiles": 1
}
}
Requires: "Wave"
{
"acidFrames": 11
}
{
"or": [
"Gravity",
{
"acidFrames": 5
}
]
}
"canMidairShinespark"
"canShinechargeMovement"
{
"shinespark": {
"frames": 77,
"excessFrames": 17
}
}
Clears obstacles: A, B |
|
From: 2
Right Door
To: 1
Left Door
Notable: true 
Use SpeedBooster to break the runway Bomb block and then to shinespark across the room, saving Power Bombs. One Power Bomb is still needed to break the tunnel block. The shinespark timer is very tight and breaking the runway block while storing the Shinespark is required as it saves movement frames. Entrance condition: {
"comeInShinecharging": {
"length": 8,
"openEnd": 0
}
}
Requires: "canSlowShortCharge"
"canShinechargeMovementTricky"
"h_canUsePowerBombs"
"HiJump"
"Gravity"
{
"acidFrames": 16
}
"canInsaneJump"
{
"shinespark": {
"frames": 93,
"excessFrames": 15
}
}
|
|
It is possible to run through the Yapping Maw while it is attacking a different direction. But that likely requires acid damage and isn't entirely reliable. Requires: {
"obstaclesCleared": [
"A"
]
}
"canMidairShinespark"
"canShinechargeMovement"
{
"shinespark": {
"frames": 45
}
}
{
"canShineCharge": {
"usedTiles": 18,
"openEnd": 1,
"startingDownTiles": 0,
"steepDownTiles": 1,
"steepUpTiles": 2
}
}
Exit condition: {
"leaveWithSpark": {
"position": "top"
}
}
|
|
Requires: {
"obstaclesCleared": [
"A"
]
}
"canMidairShinespark"
{
"enemyKill": {
"enemies": [
[
"Yapping Maw"
]
]
}
}
{
"shinespark": {
"frames": 45
}
}
{
"canShineCharge": {
"usedTiles": 21,
"openEnd": 0,
"startingDownTiles": 1,
"steepDownTiles": 2,
"steepUpTiles": 2
}
}
Exit condition: {
"leaveWithSpark": {
"position": "top"
}
}
|
|
Freeze the Yapping Maw while it is in the air, extended. Requires: {
"obstaclesCleared": [
"A"
]
}
"canMidairShinespark"
"canUseFrozenEnemies"
{
"shinespark": {
"frames": 45
}
}
{
"canShineCharge": {
"usedTiles": 21,
"openEnd": 0,
"startingDownTiles": 1,
"steepDownTiles": 2,
"steepUpTiles": 2
}
}
Exit condition: {
"leaveWithSpark": {
"position": "top"
}
}
|
|
Entrance condition: {
"comeInWithSpark": {}
}
Requires: {
"shinespark": {
"frames": 95,
"excessFrames": 20
}
}
|
|
Shinespark from the end of the entry runway, just past the down slope. Samus will crash into the last set of blocks preventing access to the opposite door. Entrance condition: {
"comeInShinecharged": {
"framesRequired": 37
}
}
Requires: "canShinechargeMovement"
"canHorizontalShinespark"
{
"shinespark": {
"frames": 70
}
}
{
"or": [
"Morph",
"canTunnelCrawl",
"canTurnaroundAimCancel",
{
"and": [
"canTwoTileSqueeze",
"canXRayTurnaround"
]
}
]
}
|
|
Shinespark below the top block or Samus will crash into a solid wall. Entrance condition: {
"comeInShinecharged": {
"framesRequired": 50
}
}
Requires: "canShinechargeMovement"
"canMidairShinespark"
{
"shinespark": {
"frames": 85,
"excessFrames": 20
}
}
|
|
Entrance condition: {
"comeInWithSpark": {}
}
Requires: {
"shinespark": {
"frames": 95,
"excessFrames": 13
}
}
|
|
Wait for the acid to clear before moving to shinespark on the other side of the bomb blocks. Entrance condition: {
"comeInShinecharging": {
"length": 6,
"openEnd": 1,
"steepUpTiles": 1,
"steepDownTiles": 1
}
}
Requires: "canMidairShinespark"
"canShinechargeMovement"
{
"shinespark": {
"frames": 80,
"excessFrames": 13
}
}
|
|
From: 2
Right Door
To: 2
Right Door
Notable: true 
Jump towards the yapping maw before it is on screen so it moves up. Quickly move it off camera so it will be `frozen` in place. Shortcharge like normal. If the Yapping Maw is returning to its hole, it will usually not grab Samus. Requires: {
"obstaclesCleared": [
"A"
]
}
"canMidairShinespark"
"canCameraManip"
{
"shinespark": {
"frames": 45
}
}
{
"canShineCharge": {
"usedTiles": 22,
"openEnd": 0,
"startingDownTiles": 2,
"steepDownTiles": 3,
"steepUpTiles": 2
}
}
Exit condition: {
"leaveWithSpark": {
"position": "top"
}
}
|
|
From: 2
Right Door
To: 2
Right Door
Requires: {
"obstaclesCleared": [
"A"
]
}
"canMidairShinespark"
{
"shinespark": {
"frames": 45
}
}
{
"canShineCharge": {
"usedTiles": 18,
"openEnd": 1,
"startingDownTiles": 2,
"steepDownTiles": 3,
"steepUpTiles": 1
}
}
Exit condition: {
"leaveWithSpark": {
"position": "top"
}
}
|
|
Requires: {
"obstaclesCleared": [
"A"
]
}
"canMidairShinespark"
{
"enemyKill": {
"enemies": [
[
"Yapping Maw"
]
]
}
}
{
"shinespark": {
"frames": 45
}
}
{
"canShineCharge": {
"usedTiles": 22,
"openEnd": 0,
"startingDownTiles": 2,
"steepDownTiles": 3,
"steepUpTiles": 2
}
}
Exit condition: {
"leaveWithSpark": {
"position": "top"
}
}
|
|
From: 3
Bottom Left Door
To: 4
Bottom Right Door
Entrance condition: {
"comeInShinecharged": {
"framesRequired": 10
}
}
Requires: {
"shinespark": {
"frames": 21
}
}
Exit condition: {
"leaveWithSpark": {}
}
|
|
From: 4
Bottom Right Door
To: 3
Bottom Left Door
Entrance condition: {
"comeInShinecharged": {
"framesRequired": 10
}
}
Requires: {
"shinespark": {
"frames": 21
}
}
Exit condition: {
"leaveWithSpark": {}
}
|
|
From: 2
Elevator
To: 1
Left Door
Entrance condition: {
"comeInShinecharged": {
"framesRequired": 95
}
}
Requires: "f_TourianOpen"
"Gravity"
"HiJump"
"canWalljump"
"canShinechargeMovementComplex"
{
"shinespark": {
"frames": 9
}
}
Exit condition: {
"leaveWithSpark": {}
}
|
|
Entrance condition: {
"comeInShinecharged": {
"framesRequired": 105
}
}
Requires: "f_TourianOpen"
"Gravity"
"HiJump"
"canShinechargeMovementComplex"
{
"shinespark": {
"frames": 7
}
}
Exit condition: {
"leaveWithSpark": {}
}
|
|
Entrance condition: {
"comeInShinecharged": {
"framesRequired": 120
}
}
Requires: "f_TourianOpen"
"Gravity"
"canWalljump"
"canShinechargeMovementComplex"
{
"shinespark": {
"frames": 8
}
}
Exit condition: {
"leaveWithSpark": {}
}
|
|
Jump to the right side and diagonal spark left to escape the water. To spark as quickly as possible, buffer a spin jump by holding left (or right) and jump while riding the elevator. Entrance condition: {
"comeInShinecharged": {
"framesRequired": 35
}
}
Requires: "f_TourianOpen"
"h_canNavigateUnderwater"
"canShinechargeMovement"
{
"shinespark": {
"frames": 21,
"excessFrames": 8
}
}
|
|
Jump to either side and vertically spark out. To spark as quickly as possible, buffer a spin jump by holding left (or right) and jump while riding the elevator. Entrance condition: {
"comeInShinecharged": {
"framesRequired": 20
}
}
Requires: "f_TourianOpen"
"h_canNavigateUnderwater"
"canShinechargeMovement"
{
"shinespark": {
"frames": 24,
"excessFrames": 9
}
}
|
|
From: 1
Left Door
To: 2
Right Door
Gain a shinecharge while entering the room. Move quickly to the right, either dodging the enemies or using them to damage boost. Shoot open the door and spark through. Entrance condition: {
"comeInShinecharging": {
"length": 4,
"openEnd": 1,
"steepDownTiles": 2
}
}
Requires: "canShinechargeMovementTricky"
{
"shinespark": {
"frames": 15
}
}
Exit condition: {
"leaveWithSpark": {
"position": "bottom"
}
}
|
|
Fire a Plasma shot while running into the room, jump and activate the shinespark wind-up mid-air. Wait to spark right until just as the Plasma shot goes off screen. Entrance condition: {
"comeInShinecharged": {
"framesRequired": 40
}
}
Requires: "Plasma"
"canHeroShot"
"canShinechargeMovementTricky"
"canMidairShinespark"
{
"shinespark": {
"frames": 37
}
}
Exit condition: {
"leaveWithSpark": {
"position": "bottom"
}
}
|
|
From: 2
Right Door
To: 1
Left Door
Gain a shinecharge while entering the room. Move quickly to the left, dodging the enemies. Shoot open the door and spark through. Entrance condition: {
"comeInShinecharging": {
"length": 8,
"openEnd": 1,
"steepDownTiles": 2
}
}
Requires: "canShinechargeMovementTricky"
{
"shinespark": {
"frames": 9
}
}
Exit condition: {
"leaveWithSpark": {}
}
|
|
From: 2
Right Door
To: 1
Left Door
Gain a shinecharge while entering the room. Move quickly to the left, using Plasma or Screw Attack to avoid being hit by enemies. Shoot open the door and spark through. Entrance condition: {
"comeInShinecharging": {
"length": 8,
"openEnd": 1,
"steepDownTiles": 2
}
}
Requires: {
"or": [
"Plasma",
"ScrewAttack"
]
}
"canShinechargeMovementComplex"
{
"shinespark": {
"frames": 9
}
}
Exit condition: {
"leaveWithSpark": {}
}
|
|
From: 2
Right Door
To: 1
Left Door
Run into the room, and just before Samus would run into the water, fire a Plasma shot and make a big jump across the room. The shot should clear the enemies and open the door. Activate the shinespark mid-air. Entrance condition: {
"comeInShinecharged": {
"framesRequired": 70
}
}
Requires: "Plasma"
"canShinechargeMovementComplex"
{
"shinespark": {
"frames": 24
}
}
Exit condition: {
"leaveWithSpark": {}
}
|
|
From: 2
Right Door
To: 1
Left Door
Run and jump through the room with Screw Attack. As the door starts to come on camera, shoot it open, carefully avoiding enemies from blocking the shot. Jump and activate the shinespark mid-air. Entrance condition: {
"comeInShinecharged": {
"framesRequired": 100
}
}
Requires: "ScrewAttack"
"canShinechargeMovementComplex"
{
"shinespark": {
"frames": 24
}
}
Exit condition: {
"leaveWithSpark": {}
}
|
|
Run into the room, and fire a Plasma shot. Depending on the vertical position needed for the spark, either stop on a dime and activate the shinespark from the ground, or continue running and jump into a midair shinespark. Wait to spark until just as the Plasma shot goes off screen. Entrance condition: {
"comeInShinecharged": {
"framesRequired": 40
}
}
Requires: "Plasma"
"canHeroShot"
"canShinechargeMovementTricky"
{
"shinespark": {
"frames": 28
}
}
Exit condition: {
"leaveWithSpark": {}
}
|
|
Enter on the right side of the doorway to reduce the amount of energy used. Entrance condition: {
"comeInWithSpark": {},
"comesThroughToilet": "any"
}
Requires: {
"shinespark": {
"frames": 2,
"excessFrames": 2
}
}
|
|
Notable: true 
Enter the room while building a shinespark and use it on the lowest part of the ramp to diagonally spark up and out of the water. Use very low jump height space jumps to carry momentum to the far side of the submerged ramp. Both Choots must be killed. Using Screw Attack: stay a little bit high in the water so that it remains active for the second Choot. Using Plasma or ammo: kill the first Choot while running down the middle platform, and the second while gliding above it after spacejumping through the water. Then shinespark up and use SpaceJump to reach the door. Entrance condition: {
"comeInShinecharging": {
"length": 6,
"openEnd": 1,
"steepDownTiles": 1
}
}
Requires: {
"or": [
"ScrewAttack",
"canPseudoScrew",
"Plasma",
{
"ammo": {
"type": "Missile",
"count": 1
}
},
{
"ammo": {
"type": "Super",
"count": 1
}
}
]
}
{
"or": [
"ScrewAttack",
"Plasma",
{
"ammo": {
"type": "Missile",
"count": 1
}
},
{
"ammo": {
"type": "Super",
"count": 1
}
}
]
}
{
"shinespark": {
"frames": 14,
"excessFrames": 5
}
}
"canShinechargeMovementComplex"
"SpaceJump"
"canTrickyJump"
"canMidairShinespark"
|
|
From: 1
Left Door
To: 2
Right Door
Notable: true 
Enter the room while building a shinespark and use it on the lowest part of the ramp to diagonally spark up and out of the water. Use very low jump height space jumps to carry momentum to the far side of the submerged ramp. Freeze the first Choot from the middle platform. Either SpaceJump just right so as to pass above the second Choot, or freeze it as it touches Samus to pass through without losing speed. Then shinespark up and use SpaceJump to reach the door. Entrance condition: {
"comeInShinecharging": {
"length": 6,
"openEnd": 1,
"steepDownTiles": 1
}
}
Requires: "Ice"
"Wave"
"Spazer"
"canDodgeWhileShooting"
{
"shinespark": {
"frames": 14,
"excessFrames": 5
}
}
"canShinechargeMovementComplex"
"canMidairShinespark"
"SpaceJump"
"canTrickyJump"
|
|
From: 1
Left Door
To: 2
Right Door
Notable: true
Enter the room while building a shinespark and use it on the lowest part of the ramp to diagonally spark up and out of the water. Unmorphing with the correct timing and positioning for the Shinespark are very precise, and there are no extra frames on the Shinespark timer to work with. Carry the shinespark to the bottom of the ramp either with a bounce ball which takes damage from the Choot, or delay the first Choot with two shots and then use a late mockball. Then shinespark up and use SpaceJump to reach the door. Entrance condition: {
"comeInShinecharging": {
"length": 6,
"openEnd": 1,
"steepDownTiles": 1
}
}
Requires: {
"or": [
{
"and": [
{
"enemyDamage": {
"enemy": "Choot",
"type": "contact",
"hits": 1
}
},
"canNeutralDamageBoost",
"canBounceBall"
]
},
{
"and": [
"canDodgeWhileShooting",
"canMockball"
]
}
]
}
{
"shinespark": {
"frames": 14,
"excessFrames": 5
}
}
"canShinechargeMovementComplex"
"SpaceJump"
"canTrickyJump"
|
|
Enter the room while building a shinespark and use it on the lowest part of the ramp to cross the room and reach a raised ledge on the right side wall. From there, use SpaceJump to escape the water. Carry the shinespark to the bottom of the ramp by delaying the first Choot with two Power Beam shots, killing it, or bounceballing through it. The Choot can be shot diagonally from the middle platform, and again by running off that platform and aiming down to float above it. Entrance condition: {
"comeInShinecharging": {
"length": 6,
"openEnd": 1,
"steepDownTiles": 1
}
}
Requires: "canShinechargeMovementComplex"
"canCarefulJump"
{
"or": [
{
"and": [
"canMidairShinespark",
"canDodgeWhileShooting"
]
},
{
"and": [
{
"enemyDamage": {
"enemy": "Choot",
"type": "contact",
"hits": 1
}
},
"canNeutralDamageBoost",
"canBounceBall"
]
},
{
"and": [
"canMockball",
{
"or": [
"canPseudoScrew",
"ScrewAttack",
"Plasma",
"Wave",
{
"ammo": {
"type": "Missile",
"count": 1
}
},
{
"ammo": {
"type": "Super",
"count": 1
}
}
]
}
]
}
]
}
"canHorizontalShinespark"
{
"shinespark": {
"frames": 123,
"excessFrames": 5
}
}
"canSpaceJumpWaterBounce"
{
"or": [
{
"and": [
"HiJump",
"canSpaceJumpWaterEscape"
]
},
{
"and": [
"canTrickyJump",
"canDownGrab"
]
},
"canWalljump"
]
}
|
|
Horizontally shinespark from the grassy patch on the ledge near the door, then jump across the platforms. Entrance condition: {
"comeInShinecharged": {
"framesRequired": 10
}
}
Requires: "canHorizontalShinespark"
{
"shinespark": {
"frames": 35
}
}
|
|
From: 3
Junction (Left side Pit)
To: 1
Left Door
Notable: true 
Quickly climb the submerged structures. Not dashing may make platforming easier. Requires: "canShinechargeMovementComplex"
"canMidairShinespark"
"Gravity"
{
"canShineCharge": {
"usedTiles": 20,
"openEnd": 0,
"steepUpTiles": 2,
"steepDownTiles": 4,
"startingDownTiles": 1
}
}
{
"shinespark": {
"frames": 23
}
}
Exit condition: {
"leaveWithSpark": {}
}
|
|
From: 4
Junction (Right side Pit)
To: 2
Right Door
Requires: "canShinechargeMovementComplex"
"Gravity"
"canWalljump"
{
"canShineCharge": {
"usedTiles": 22,
"openEnd": 0,
"steepUpTiles": 3,
"steepDownTiles": 3,
"startingDownTiles": 1
}
}
{
"shinespark": {
"frames": 10
}
}
Exit condition: {
"leaveWithSpark": {}
}
|
|
Requires: "Gravity"
{
"canShineCharge": {
"usedTiles": 22,
"steepUpTiles": 3,
"steepDownTiles": 3,
"openEnd": 0
}
}
{
"shinespark": {
"frames": 25,
"excessFrames": 5
}
}
|
|
Entrance condition: {
"comeInWithSpark": {},
"comesThroughToilet": "any"
}
Requires: {
"shinespark": {
"frames": 3,
"excessFrames": 3
}
}
|
|
Enter on the left side of the doorway to reduce the amount of energy used. Entrance condition: {
"comeInWithSpark": {},
"comesThroughToilet": "any"
}
Requires: {
"shinespark": {
"frames": 3,
"excessFrames": 3
}
}
|
|
From: 1
Left Door
To: 2
Right Door
Entrance condition: {
"comeInShinecharged": {
"framesRequired": 10
}
}
Requires: {
"shinespark": {
"frames": 21
}
}
Exit condition: {
"leaveWithSpark": {}
}
|
|
From: 2
Right Door
To: 1
Left Door
Entrance condition: {
"comeInShinecharged": {
"framesRequired": 10
}
}
Requires: {
"shinespark": {
"frames": 21
}
}
Exit condition: {
"leaveWithSpark": {}
}
|
|
Run and jump onto the pedestal. Jump again to the right, and shinespark diagonally to make it past the water. Entrance condition: {
"comeInShinecharged": {
"framesRequired": 130
}
}
Requires: "canShinechargeMovementComplex"
{
"shinespark": {
"frames": 7
}
}
|
|
Run and jump, fire a shot mid-air, and activate the shinespark wind-up. Wait until the shot is at a specific position before sparking. Sparking too late will cause the shot to despawn before reaching the door. Sparking too early will cause Samus to bonk the door as it will not yet be open. A beam shot, Missile, or Super can be used. Entrance condition: {
"comeInShinecharged": {
"framesRequired": 40
}
}
Requires: "canShinechargeMovementTricky"
"canHeroShot"
{
"shinespark": {
"frames": 38
}
}
Exit condition: {
"leaveWithSpark": {}
}
|
|
Run and jump onto the pedestal. Jump again to the right to bring the door on-camera. Fire a shot mid-air, and activate the shinespark wind-up. Wait until the shot hits the door before sparking. Entrance condition: {
"comeInShinecharged": {
"framesRequired": 140
}
}
Requires: "canShinechargeMovementComplex"
"canHeroShot"
{
"shinespark": {
"frames": 19
}
}
Exit condition: {
"leaveWithSpark": {}
}
|
|
Entrance condition: {
"comeInWithSpark": {}
}
Requires: {
"shinespark": {
"frames": 42,
"excessFrames": 7
}
}
|
|
Run, fire a shot mid-air, jump, and activate a mid-air shinespark to the left. Sparking too late will cause the shot to despawn before reaching the door. Sparking too early will cause Samus to bonk the door as it will not yet be open. A beam shot, Missile, or Super can be used. Entrance condition: {
"comeInShinecharged": {
"framesRequired": 25
}
}
Requires: "canShinechargeMovementTricky"
"canHeroShot"
{
"shinespark": {
"frames": 39
}
}
Exit condition: {
"leaveWithSpark": {}
}
|
|
Come into the room with a shinecharge, run and jump to the left, firing a shot just before landing on the pedestal. Activate the shinespark either just before landing on the pedestal or just afterward (depending on the vertical position needed for the spark). Entrance condition: {
"comeInShinecharged": {
"framesRequired": 90
}
}
Requires: "canShinechargeMovementComplex"
{
"shinespark": {
"frames": 23
}
}
Exit condition: {
"leaveWithSpark": {}
}
|
|
After gaining a shinecharge, run back to the door to make space for a running jump to the left, firing a shot just before landing on the pedestal. Activate the shinespark either just before landing on the pedestal or just afterward (depending on the vertical position needed for the spark). Entrance condition: {
"comeInShinecharging": {
"length": 4,
"openEnd": 0
}
}
Requires: "canShinechargeMovementComplex"
{
"shinespark": {
"frames": 23
}
}
Exit condition: {
"leaveWithSpark": {}
}
|
|
Entrance condition: {
"comeInWithSpark": {}
}
Requires: {
"shinespark": {
"frames": 23,
"excessFrames": 0
}
}
Clears obstacles: A |
|
Requires: {
"shinespark": {
"frames": 19,
"excessFrames": 19
}
}
{
"obstaclesCleared": [
"A"
]
}
|
|
From: 1
Lower Section - Bottom Left Door
To: 5
Lower Section - Bottom Right Door
Entrance condition: {
"comeInShinecharging": {
"length": 23,
"openEnd": 1,
"steepUpTiles": 1,
"steepDownTiles": 6
}
}
Requires: "canHorizontalShinespark"
{
"or": [
{
"shinespark": {
"frames": 131,
"excessFrames": 35
}
},
{
"and": [
"canShinechargeMovement",
"canMidairShinespark",
{
"shinespark": {
"frames": 106,
"excessFrames": 35
}
}
]
}
]
}
|
|
From: 1
Lower Section - Bottom Left Door
To: 5
Lower Section - Bottom Right Door
Entrance condition: {
"comeInWithSpark": {}
}
Requires: {
"shinespark": {
"frames": 146,
"excessFrames": 35
}
}
|
|
From: 2
Upper Right Section - Top Right Door
To: 2
Upper Right Section - Top Right Door
Requires: "canTrickyDashJump"
"canWalljump"
"canShinechargeMovementComplex"
{
"shinespark": {
"frames": 20
}
}
Exit condition: {
"leaveWithSpark": {}
}
|
|
From: 4
Lower Section - Top Right Door
To: 5
Lower Section - Bottom Right Door
While falling out the door, swing out to the left a couple tiles before moving back right, in order to make the camera scroll. Run, jump, fire a shot mid-air, and activate a well-timed mid-air shinespark to make it through the door. Entrance condition: {
"comeInShinecharged": {
"framesRequired": 170
}
}
Requires: "canShinechargeMovementComplex"
"canHeroShot"
{
"shinespark": {
"frames": 22
}
}
Exit condition: {
"leaveWithSpark": {}
}
|
|
From: 4
Lower Section - Top Right Door
To: 8
Bridge Right Door (Same Connection as Lower Section - Bottom Right Door)
Notable: true 
Climb up 1 screen. Entrance condition: {
"comeInShinecharged": {
"framesRequired": 1
}
}
Requires: "canSkipDoorLock"
{
"shinespark": {
"frames": 1,
"excessFrames": 1
}
}
"canShinesparkDeepStuck"
"canXRayClimb"
|
|
From: 4
Lower Section - Top Right Door
To: 12
Top Junction
Climb up 2 screens. Entrance condition: {
"comeInShinecharged": {
"framesRequired": 1
}
}
Requires: {
"shinespark": {
"frames": 1,
"excessFrames": 1
}
}
"canShinesparkDeepStuck"
"canXRayClimb"
|
|
From: 5
Lower Section - Bottom Right Door
To: 3
Upper Right Section - Bottom Right Door
Climb up 3 screens. Entrance condition: {
"comeInShinecharged": {
"framesRequired": 1
}
}
Requires: {
"shinespark": {
"frames": 1,
"excessFrames": 1
}
}
"canShinesparkDeepStuck"
"canXRayClimb"
"canBePatient"
|
|
From: 5
Lower Section - Bottom Right Door
To: 4
Lower Section - Top Right Door
Jump to the submerged platform, then jump again. Requires: "Gravity"
"canShinechargeMovement"
"canMidairShinespark"
{
"canShineCharge": {
"usedTiles": 33,
"openEnd": 2
}
}
{
"shinespark": {
"frames": 35,
"excessFrames": 10
}
}
|
|
From: 5
Lower Section - Bottom Right Door
To: 4
Lower Section - Top Right Door
Requires: "Gravity"
{
"canShineCharge": {
"usedTiles": 33,
"openEnd": 2
}
}
{
"shinespark": {
"frames": 50,
"excessFrames": 10
}
}
|
|
From: 6
Middle Right Door (By Zeb Farm)
To: 12
Top Junction
Climb up 1 screen. Entrance condition: {
"comeInShinecharged": {
"framesRequired": 1
}
}
Requires: {
"shinespark": {
"frames": 1,
"excessFrames": 1
}
}
"canShinesparkDeepStuck"
"canXRayClimb"
|
|
From: 12
Top Junction
To: 6
Middle Right Door (By Zeb Farm)
Notable: true 
Preopen the door and shotblock, then go back and charge a shinespark. Springball through the short morphball tunnel to just have enough time to shinespark out the door. Requires: "canShinechargeMovementComplex"
"h_canUseSpringBall"
{
"canShineCharge": {
"usedTiles": 33,
"openEnd": 2
}
}
{
"shinespark": {
"frames": 25
}
}
Exit condition: {
"leaveWithSpark": {}
}
|
|
Requires: {
"canShineCharge": {
"usedTiles": 33,
"openEnd": 2
}
}
{
"shinespark": {
"frames": 36
}
}
|
|
From: 13
Bottom Junction
To: 1
Lower Section - Bottom Left Door
Jump to the runway connected to the left side door before sparking. Requires: "Gravity"
"canShinechargeMovementComplex"
{
"canShineCharge": {
"usedTiles": 33,
"openEnd": 2
}
}
{
"shinespark": {
"frames": 38
}
}
Exit condition: {
"leaveWithSpark": {}
}
|
|
From: 13
Bottom Junction
To: 5
Lower Section - Bottom Right Door
Requires: "Gravity"
{
"canShineCharge": {
"usedTiles": 33,
"openEnd": 2
}
}
{
"shinespark": {
"frames": 17,
"excessFrames": 5
}
}
|
|
From: 13
Bottom Junction
To: 5
Lower Section - Bottom Right Door
Requires: "Gravity"
"canShinechargeMovementComplex"
"canPreciseWalljump"
{
"canShineCharge": {
"usedTiles": 33,
"openEnd": 2
}
}
{
"shinespark": {
"frames": 15
}
}
Exit condition: {
"leaveWithSpark": {}
}
|
|
From: 13
Bottom Junction
To: 5
Lower Section - Bottom Right Door
Requires: "canHorizontalShinespark"
{
"or": [
{
"canShineCharge": {
"usedTiles": 23,
"openEnd": 1,
"steepUpTiles": 6,
"steepDownTiles": 1
}
},
{
"and": [
{
"canShineCharge": {
"usedTiles": 24,
"openEnd": 1,
"steepUpTiles": 6,
"steepDownTiles": 1
}
},
{
"doorUnlockedAtNode": 1
}
]
}
]
}
{
"or": [
{
"shinespark": {
"frames": 131
}
},
{
"and": [
"canShinechargeMovement",
"canMidairShinespark",
{
"shinespark": {
"frames": 106
}
}
]
}
]
}
|
|
From: 13
Bottom Junction
To: 5
Lower Section - Bottom Right Door
Open the right door before sparking to spark out of it. Requires: {
"or": [
"canCarefulJump",
"Grapple",
"Wave",
"SpaceJump"
]
}
{
"or": [
{
"canShineCharge": {
"usedTiles": 23,
"openEnd": 1,
"steepUpTiles": 6,
"steepDownTiles": 1
}
},
{
"and": [
{
"canShineCharge": {
"usedTiles": 24,
"openEnd": 1,
"steepUpTiles": 6,
"steepDownTiles": 1
}
},
{
"doorUnlockedAtNode": 1
}
]
}
]
}
{
"or": [
{
"shinespark": {
"frames": 131
}
},
{
"and": [
"canShinechargeMovement",
"canMidairShinespark",
{
"shinespark": {
"frames": 106
}
}
]
}
]
}
Exit condition: {
"leaveWithSpark": {}
}
|
|
G-Mode Setup - Get Hit By Geemer - Broken Power Bomb Blocks (Extreme)
Blue Brinstar Energy Tank Room
From: 2
Top Left Door
To: 2
Top Left Door
Falling down the shaft and breaking the crumble block does not require Morph. Requires: "h_ZebesIsAwake"
{
"or": [
"h_canDestroyBombWalls",
{
"obstaclesCleared": [
"A"
]
}
]
}
"h_canUsePowerBombs"
{
"canShineCharge": {
"usedTiles": 33,
"openEnd": 2
}
}
{
"shinespark": {
"frames": 43
}
}
Exit condition: {
"leaveWithGModeSetup": {}
}
|
|
Requires: {
"or": [
"h_canUsePowerBombs",
{
"obstaclesCleared": [
"C"
]
}
]
}
{
"canShineCharge": {
"usedTiles": 33,
"openEnd": 2
}
}
{
"shinespark": {
"frames": 43
}
}
Clears obstacles: A, B, C |
|
From: 4
Right Item
To: 2
Top Left Door
Breaking the Power Bomb blocks exactly wide enough makes it easier to quickly enter the one-tile gap. Aligning the Power Bomb with the left side of the ceiling fixture that sticks down will position the explosion correctly for this. Requires: {
"or": [
"h_canUsePowerBombs",
{
"obstaclesCleared": [
"C"
]
}
]
}
"canShinechargeMovementComplex"
"canFastWalljumpClimb"
{
"canShineCharge": {
"usedTiles": 33,
"openEnd": 2
}
}
{
"shinespark": {
"frames": 17
}
}
Clears obstacles: A, B, C |
|
From: 1
Top Left Door
To: 3
Bottom Left Door
Entrance condition: {
"comeInShinecharged": {
"framesRequired": 160
}
}
Requires: "Morph"
{
"shinespark": {
"frames": 6
}
}
Exit condition: {
"leaveWithSpark": {
"position": "bottom"
}
}
|
|
Entrance condition: {
"comeInWithSpark": {}
}
Requires: {
"shinespark": {
"frames": 40,
"excessFrames": 9
}
}
Clears obstacles: C |
|
From: 1
Left Door
To: 1
Left Door
Notable: true 
Gain a shinecharge on the long, lower platform in the screen above, then carry it left and down. Use crumble quick drops, land on the floor at the bottom, spin jump left into the doorway, and activate the spark. The required movement here is very precise, as the 180 shinecharge frames is only barely enough. Requires: {
"obstaclesNotCleared": [
"A"
]
}
"h_canCrouchJumpDownGrab"
{
"canShineCharge": {
"usedTiles": 17,
"openEnd": 0
}
}
"canShinechargeMovementTricky"
"canQuickCrumbleEscape"
{
"shinespark": {
"frames": 1
}
}
Exit condition: {
"leaveWithSpark": {}
}
|
|
From: 1
Left Door
To: 2
Right Door
Depending on Samus' momentum when entering the room, it may be necessary to make a small jump before shooting open the door, to avoid a Beetom from blocking the shot. Entrance condition: {
"comeInShinecharged": {
"framesRequired": 30
}
}
Requires: "canShinechargeMovementComplex"
{
"shinespark": {
"frames": 16
}
}
Exit condition: {
"leaveWithSpark": {}
}
|
|
From: 2
Right Door
To: 1
Left Door
Depending on Samus' momentum when entering the room, it may be necessary to make a small jump before shooting open the door, to avoid a Beetom from blocking the shot. Entrance condition: {
"comeInShinecharged": {
"framesRequired": 30
}
}
Requires: "canShinechargeMovementComplex"
{
"shinespark": {
"frames": 16
}
}
Exit condition: {
"leaveWithSpark": {}
}
|
|
From: 2
Above Power Bomb Blocks - Top Left Door
To: 3
Above Power Bomb Blocks - Top Right Door
Entrance condition: {
"comeInShinecharged": {
"framesRequired": 10
}
}
Requires: {
"shinespark": {
"frames": 21
}
}
Exit condition: {
"leaveWithSpark": {}
}
|
|
From: 2
Above Power Bomb Blocks - Top Left Door
To: 5
Above Power Bomb Blocks - Bottom Left Door
Entrance condition: {
"comeInShinecharged": {
"framesRequired": 140
}
}
Requires: "canShinechargeMovementComplex"
{
"shinespark": {
"frames": 6
}
}
Exit condition: {
"leaveWithSpark": {}
}
|
|
From: 2
Above Power Bomb Blocks - Top Left Door
To: 6
Above Power Bomb Blocks - Bottom Right Door
Entrance condition: {
"comeInShinecharged": {
"framesRequired": 140
}
}
Requires: "canShinechargeMovementComplex"
{
"shinespark": {
"frames": 17
}
}
Exit condition: {
"leaveWithSpark": {}
}
|
|
From: 3
Above Power Bomb Blocks - Top Right Door
To: 2
Above Power Bomb Blocks - Top Left Door
Entrance condition: {
"comeInShinecharged": {
"framesRequired": 10
}
}
Requires: "canShinechargeMovementComplex"
{
  "shinespark": {
    "frames": 21
  }
}
Exit condition: {
"leaveWithSpark": {}
}
|
|
From: 3
Above Power Bomb Blocks - Top Right Door
To: 4
Above Power Bomb Blocks - Middle Left Door
Entrance condition: {
"comeInShinecharged": {
"framesRequired": 100
}
}
Requires: "canShinechargeMovementComplex"
{
"shinespark": {
"frames": 2
}
}
Exit condition: {
"leaveWithSpark": {}
}
|
|
From: 3
Above Power Bomb Blocks - Top Right Door
To: 5
Above Power Bomb Blocks - Bottom Left Door
Entrance condition: {
"comeInShinecharged": {
"framesRequired": 150
}
}
Requires: "canShinechargeMovementComplex"
{
"shinespark": {
"frames": 6
}
}
Exit condition: {
"leaveWithSpark": {}
}
|
|
From: 3
Above Power Bomb Blocks - Top Right Door
To: 5
Above Power Bomb Blocks - Bottom Left Door
Entrance condition: {
"comeInShinecharging": {
"length": 4,
"openEnd": 1
}
}
Requires: "canShinechargeMovementComplex"
{
"shinespark": {
"frames": 4
}
}
Exit condition: {
"leaveWithSpark": {}
}
|
|
From: 3
Above Power Bomb Blocks - Top Right Door
To: 6
Above Power Bomb Blocks - Bottom Right Door
Entrance condition: {
"comeInShinecharged": {
"framesRequired": 150
}
}
Requires: "canShinechargeMovementComplex"
{
"shinespark": {
"frames": 17
}
}
Exit condition: {
"leaveWithSpark": {}
}
|
|
From: 3
Above Power Bomb Blocks - Top Right Door
To: 6
Above Power Bomb Blocks - Bottom Right Door
Entrance condition: {
"comeInShinecharging": {
"length": 4,
"openEnd": 1
}
}
Requires: "canShinechargeMovementComplex"
{
"shinespark": {
"frames": 17
}
}
Exit condition: {
"leaveWithSpark": {}
}
|
|
From: 4
Above Power Bomb Blocks - Middle Left Door
To: 2
Above Power Bomb Blocks - Top Left Door
Entrance condition: {
"comeInShinecharged": {
"framesRequired": 110
}
}
Requires: "canWalljump"
"canShinechargeMovementComplex"
{
"shinespark": {
"frames": 6
}
}
Exit condition: {
"leaveWithSpark": {}
}
|
|
From: 4
Above Power Bomb Blocks - Middle Left Door
To: 2
Above Power Bomb Blocks - Top Left Door
Entrance condition: {
"comeInShinecharged": {
"framesRequired": 80
}
}
Requires: "HiJump"
"canWalljump"
"canShinechargeMovementComplex"
{
"shinespark": {
"frames": 7
}
}
Exit condition: {
"leaveWithSpark": {}
}
|
|
From: 4
Above Power Bomb Blocks - Middle Left Door
To: 2
Above Power Bomb Blocks - Top Left Door
Entrance condition: {
"comeInShinecharged": {
"framesRequired": 95
}
}
Requires: "HiJump"
"canShinechargeMovementComplex"
{
"shinespark": {
"frames": 9
}
}
Exit condition: {
"leaveWithSpark": {}
}
|
|
From: 4
Above Power Bomb Blocks - Middle Left Door
To: 2
Above Power Bomb Blocks - Top Left Door
Entrance condition: {
"comeInShinecharged": {
"framesRequired": 130
}
}
Requires: "canShinechargeMovementTricky"
{
"shinespark": {
"frames": 8
}
}
Exit condition: {
"leaveWithSpark": {}
}
|
|
From: 4
Above Power Bomb Blocks - Middle Left Door
To: 3
Above Power Bomb Blocks - Top Right Door
Entrance condition: {
"comeInShinecharged": {
"framesRequired": 80
}
}
Requires: "HiJump"
"canShinechargeMovementComplex"
{
"shinespark": {
"frames": 8
}
}
Exit condition: {
"leaveWithSpark": {}
}
|
|
From: 4
Above Power Bomb Blocks - Middle Left Door
To: 3
Above Power Bomb Blocks - Top Right Door
Entrance condition: {
"comeInShinecharged": {
"framesRequired": 130
}
}
Requires: "canShinechargeMovementTricky"
{
"shinespark": {
"frames": 14
}
}
Exit condition: {
"leaveWithSpark": {}
}
|
|
From: 4
Above Power Bomb Blocks - Middle Left Door
To: 3
Above Power Bomb Blocks - Top Right Door
Entrance condition: {
"comeInShinecharged": {
"framesRequired": 120
}
}
Requires: "canShinechargeMovementComplex"
{
"shinespark": {
"frames": 16
}
}
Exit condition: {
"leaveWithSpark": {}
}
|
|
From: 4
Above Power Bomb Blocks - Middle Left Door
To: 3
Above Power Bomb Blocks - Top Right Door
Entrance condition: {
"comeInShinecharging": {
"length": 2,
"openEnd": 0
}
}
Requires: "canShinechargeMovementTricky"
{
"shinespark": {
"frames": 6
}
}
Exit condition: {
"leaveWithSpark": {}
}
|
|
From: 4
Above Power Bomb Blocks - Middle Left Door
To: 5
Above Power Bomb Blocks - Bottom Left Door
Entrance condition: {
"comeInShinecharged": {
"framesRequired": 90
}
}
Requires: "canShinechargeMovementComplex"
{
"shinespark": {
"frames": 5
}
}
Exit condition: {
"leaveWithSpark": {}
}
|
|
From: 4
Above Power Bomb Blocks - Middle Left Door
To: 6
Above Power Bomb Blocks - Bottom Right Door
Entrance condition: {
"comeInShinecharged": {
"framesRequired": 85
}
}
Requires: "canShinechargeMovementComplex"
{
"shinespark": {
"frames": 17
}
}
Exit condition: {
"leaveWithSpark": {}
}
|
|
From: 5
Above Power Bomb Blocks - Bottom Left Door
To: 2
Above Power Bomb Blocks - Top Left Door
Entrance condition: {
"comeInShinecharged": {
"framesRequired": 165
}
}
Requires: "HiJump"
"canShinechargeMovementTricky"
{
"shinespark": {
"frames": 12
}
}
Exit condition: {
"leaveWithSpark": {}
}
|
|
From: 5
Above Power Bomb Blocks - Bottom Left Door
To: 3
Above Power Bomb Blocks - Top Right Door
Entrance condition: {
"comeInShinecharged": {
"framesRequired": 165
}
}
Requires: "HiJump"
"canShinechargeMovementTricky"
{
"shinespark": {
"frames": 12
}
}
Exit condition: {
"leaveWithSpark": {}
}
|
|
From: 5
Above Power Bomb Blocks - Bottom Left Door
To: 4
Above Power Bomb Blocks - Middle Left Door
Entrance condition: {
"comeInShinecharged": {
"framesRequired": 110
}
}
Requires: "canWalljump"
"canShinechargeMovementComplex"
{
"shinespark": {
"frames": 6
}
}
Exit condition: {
"leaveWithSpark": {}
}
|
|
From: 5
Above Power Bomb Blocks - Bottom Left Door
To: 4
Above Power Bomb Blocks - Middle Left Door
Entrance condition: {
"comeInShinecharged": {
"framesRequired": 75
}
}
Requires: "canShinechargeMovementTricky"
{
"shinespark": {
"frames": 5
}
}
Exit condition: {
"leaveWithSpark": {}
}
|
|
From: 5
Above Power Bomb Blocks - Bottom Left Door
To: 4
Above Power Bomb Blocks - Middle Left Door
Entrance condition: {
"comeInShinecharged": {
"framesRequired": 130
}
}
Requires: "canShinechargeMovementTricky"
{
"shinespark": {
"frames": 5
}
}
Exit condition: {
"leaveWithSpark": {}
}
|
|
From: 5
Above Power Bomb Blocks - Bottom Left Door
To: 6
Above Power Bomb Blocks - Bottom Right Door
Entrance condition: {
"comeInShinecharged": {
"framesRequired": 10
}
}
Requires: {
"shinespark": {
"frames": 21
}
}
Exit condition: {
"leaveWithSpark": {}
}
|
|
From: 6
Above Power Bomb Blocks - Bottom Right Door
To: 2
Above Power Bomb Blocks - Top Left Door
Entrance condition: {
"comeInShinecharging": {
"length": 12,
"openEnd": 0
}
}
Requires: "HiJump"
"canShinechargeMovementComplex"
{
"shinespark": {
"frames": 10
}
}
Exit condition: {
"leaveWithSpark": {}
}
|
|
From: 6
Above Power Bomb Blocks - Bottom Right Door
To: 3
Above Power Bomb Blocks - Top Right Door
Entrance condition: {
"comeInShinecharging": {
"length": 12,
"openEnd": 0
}
}
Requires: "HiJump"
"canShinechargeMovementComplex"
{
"shinespark": {
"frames": 9
}
}
Exit condition: {
"leaveWithSpark": {}
}
|
|
From: 6
Above Power Bomb Blocks - Bottom Right Door
To: 5
Above Power Bomb Blocks - Bottom Left Door
Entrance condition: {
"comeInShinecharged": {
"framesRequired": 10
}
}
Requires: {
"shinespark": {
"frames": 21
}
}
Exit condition: {
"leaveWithSpark": {}
}
|
|
From: 7
Below Power Bomb Blocks - Top Right Door
To: 8
Below Power Bomb Blocks - Bottom Left Door
Come in with a shinecharge, and perform a moonfall off the ledge. While falling, fire a shot at the door and immediately activate the shinespark wind-up, to horizontally spark through the door. Entrance condition: {
"comeInShinecharged": {
"framesRequired": 140
}
}
Requires: "canMoonfall"
"canShinechargeMovementTricky"
{
"shinespark": {
"frames": 12
}
}
Exit condition: {
"leaveWithSpark": {}
}
|
|
From: 9
Right Etecoon Shaft - Top Left Door
To: 10
Right Etecoon Shaft - Bottom Left Door
Notable: true 
Run from left to right to gain a shinecharge, then immediately moonfall down the shaft. There is just barely enough time to shoot the door open (if not already open) and spark out. Requires: {
"canShineCharge": {
"usedTiles": 17,
"openEnd": 0
}
}
"canMoonfall"
"canShinechargeMovementComplex"
{
"shinespark": {
"frames": 12
}
}
Exit condition: {
"leaveWithSpark": {}
}
|
|
From: 10
Right Etecoon Shaft - Bottom Left Door
To: 9
Right Etecoon Shaft - Top Left Door
Entrance condition: {
"comeInShinecharged": {
"framesRequired": 30
}
}
Requires: {
"shinespark": {
"frames": 75,
"excessFrames": 5
}
}
|
|
From: 10
Right Etecoon Shaft - Bottom Left Door
To: 14
Right Etecoon Shaft - Wall Jump Climb Checkpoint Junction
This is specifically for shinesparking on low energy, where the shinespark will end before reaching the top. Entrance condition: {
"comeInShinecharged": {
"framesRequired": 30
}
}
Requires: "canShinechargeMovement"
{
"shinespark": {
"frames": 75,
"excessFrames": 64
}
}
|
|
From: 10
Right Etecoon Shaft - Bottom Left Door
To: 14
Right Etecoon Shaft - Wall Jump Climb Checkpoint Junction
This is a diagonal shinespark into the underside of the left side middle ledge, minimizing energy usage. Needs HJB to bonk at the right place without walljumping. Entrance condition: {
"comeInShinecharged": {
"framesRequired": 60
}
}
Requires: "HiJump"
"canShinechargeMovement"
"canMidairShinespark"
{
"shinespark": {
"frames": 20,
"excessFrames": 11
}
}
|
|
Requires: "canShinechargeMovement"
{
"canShineCharge": {
"usedTiles": 18,
"openEnd": 1
}
}
{
"shinespark": {
"frames": 9,
"excessFrames": 5
}
}
|
|
Entrance condition: {
"comeInWithSpark": {}
}
Requires: {
"shinespark": {
"frames": 42,
"excessFrames": 14
}
}
|
|
From: 1
Top Left Door
To: 4
Item (Through the Pipe)
Spark flush against the right wall (diagonal helps) then quickly down grab or down back after to barely get into the pipe. Requires: "Morph"
"canDownGrab"
"canShinechargeMovementComplex"
{
"canShineCharge": {
"usedTiles": 18,
"openEnd": 1
}
}
{
"shinespark": {
"frames": 15
}
}
|
|
From: 1
Top Left Door
To: 5
Junction The Left End of Morph Tube
Spark flush against the right wall (diagonal helps) then quickly down back to barely get into the pipe. Requires: "canDownBack"
"canShinechargeMovementComplex"
{
"canShineCharge": {
"usedTiles": 18,
"openEnd": 1
}
}
{
"shinespark": {
"frames": 15
}
}
|
|
Use the runway below the bug pipe to gain a shinecharge. Then walljump off the bomb blocks and the bug pipe to approach the door and spark out. Requires: "canPreciseWalljump"
{
"canShineCharge": {
"usedTiles": 17,
"openEnd": 1
}
}
"canShinechargeMovementTricky"
{
"shinespark": {
"frames": 19
}
}
Exit condition: {
"leaveWithSpark": {}
}
|
|
Entrance condition: {
"comeInWithSpark": {},
"comesThroughToilet": "any"
}
Requires: {
"shinespark": {
"frames": 16,
"excessFrames": 16
}
}
|
|
Entrance condition: {
"comeInWithSpark": {},
"comesThroughToilet": "any"
}
Requires: {
"obstaclesCleared": [
"f_DefeatedSporeSpawn"
]
}
{
"shinespark": {
"frames": 3,
"excessFrames": 3
}
}
|
|
From: 2
Right Side - Top Door
To: 2
Right Side - Top Door
Requires: {
"canShineCharge": {
"usedTiles": 25,
"openEnd": 1
}
}
"canShinechargeMovementComplex"
{
"or": [
"HiJump",
"canWalljump"
]
}
{
"shinespark": {
"frames": 28
}
}
Exit condition: {
"leaveWithSpark": {}
}
|
|
From: 3
Left Side - Top Middle Door (Main Entrance)
To: 10
Top Item (Above Hopper Pit)
Entrance condition: {
"comeInShinecharging": {
"length": 24,
"openEnd": 1
}
}
Requires: "canHorizontalShinespark"
{
"shinespark": {
"frames": 38,
"excessFrames": 7
}
}
|
|
From: 4
Left Side - Middle Doorway (Behind the Power Bomb Blocks)
To: 10
Top Item (Above Hopper Pit)
Perform a horizontal shinespark through the door transition, from a horizontal position that triggers a deep transition in the door. Sparking from one or two pixels away from the door is an example position that works (if possible in the neighboring room). In general, about one third of positions will work, with working positions occuring in periodic windows that are each approximately two pixels wide, separated by bad windows that are approximately 4 pixels wide. If successful, Samus will spawn inside the Power Bomb blocks. After the shinespark crash animation ends, Samus should be standing and able to X-Ray climb. Entrance condition: {
"comeInWithSpark": {}
}
Requires: "canDeepTransition"
{
"shinespark": {
"frames": 2,
"excessFrames": 2
}
}
"canXRayClimb"
|
|
From: 13
Central Junction
To: 1
Left Side - Top Door
Notable: true 
Shinecharge towards the top right door. Then turn around for a fast mockball after jumping the bug pipe. Requires: {
"obstaclesCleared": [
"A"
]
}
{
"canShineCharge": {
"usedTiles": 17,
"openEnd": 0
}
}
"canShinechargeMovementComplex"
"canMockball"
{
"shinespark": {
"frames": 10
}
}
Exit condition: {
"leaveWithSpark": {}
}
|
|
From: 13
Central Junction
To: 10
Top Item (Above Hopper Pit)
Requires: {
"or": [
{
"and": [
{
"canShineCharge": {
"usedTiles": 16,
"openEnd": 1
}
},
{
"shinespark": {
"frames": 24,
"excessFrames": 4
}
}
]
},
{
"and": [
"canHorizontalShinespark",
{
"canShineCharge": {
"usedTiles": 24,
"openEnd": 1
}
},
{
"shinespark": {
"frames": 38,
"excessFrames": 7
}
}
]
},
{
"and": [
"canHorizontalShinespark",
{
"doorUnlockedAtNode": 3
},
{
"canShineCharge": {
"usedTiles": 25,
"openEnd": 1
}
},
{
"shinespark": {
"frames": 38,
"excessFrames": 7
}
}
]
}
]
}
|
|
From: 2
Bottom Left Door
To: 3
Right Door
Notable: true 
Quickly wall jump up the right wall and shinespark up to barely get above the speed blocks without any tanks. Requires: "canFastWalljumpClimb"
"canShinechargeMovementComplex"
"canMidairShinespark"
{
"canShineCharge": {
"usedTiles": 33,
"openEnd": 2
}
}
{
"shinespark": {
"frames": 73,
"excessFrames": 3
}
}
|
|
Requires: "HiJump"
"canFastWalljumpClimb"
"canShinechargeMovementComplex"
"canMidairShinespark"
{
"canShineCharge": {
"usedTiles": 33,
"openEnd": 2
}
}
{
"shinespark": {
"frames": 67,
"excessFrames": 3
}
}
|
|
Diagonal spark left to save health. Requires: {
"canShineCharge": {
"usedTiles": 33,
"openEnd": 2
}
}
{
"shinespark": {
"frames": 110,
"excessFrames": 3
}
}
|
|
Diagonal spark left to save health. Requires: "canShinechargeMovement"
"HiJump"
"canMidairShinespark"
{
"canShineCharge": {
"usedTiles": 33,
"openEnd": 2
}
}
{
"shinespark": {
"frames": 85,
"excessFrames": 3
}
}
|
|
From: 1
Left Door
To: 1
Left Door
Entrance condition: {
"comeInWithSpark": {}
}
Requires: "canPrepareForNextRoom"
{
"shinespark": {
"frames": 24
}
}
Clears obstacles: A |
|
Pink Hoppers Shinespark into the Wall to Ride the Elevator, Come in Shinecharged (Very Hard)
Pink Brinstar Hopper Room
From: 2
Right Door
To: 3
Top Junction
Notable: true 
Shinesparking horizontally into the wall will trigger the elevator as Samus's echos hit it. Entrance condition: {
"comeInShinecharged": {
"framesRequired": 45
}
}
Requires: "canHorizontalShinespark"
{
"shinespark": {
"frames": 1,
"excessFrames": 1
}
}
Clears obstacles: B |
|
Pink Hoppers Shinespark into the Wall to Ride the Elevator, Come in Shinecharging (Very Hard)
Pink Brinstar Hopper Room
From: 2
Right Door
To: 3
Top Junction
Notable: true
Shinesparking horizontally into the wall will trigger the elevator as Samus's echos hit it. Entrance condition: {
"comeInShinecharging": {
"length": 5,
"openEnd": 1
}
}
Requires: "canHorizontalShinespark"
{
"shinespark": {
"frames": 1,
"excessFrames": 1
}
}
Clears obstacles: B |
|
Pink Hoppers Shinespark into the Wall to Ride the Elevator, Come in Shinesparking (Very Hard)
Pink Brinstar Hopper Room
From: 2
Right Door
To: 3
Top Junction
Notable: true
Shinesparking horizontally into the wall will trigger the elevator as Samus's echos hit it. Entrance condition: {
"comeInWithSpark": {}
}
Requires: "canHorizontalShinespark"
{
"shinespark": {
"frames": 15,
"excessFrames": 6
}
}
Clears obstacles: B |
|
From: 2
Right Door
To: 3
Top Junction
Entrance condition: {
"comeInShinecharged": {
"framesRequired": 1
}
}
Requires: {
"shinespark": {
"frames": 22,
"excessFrames": 4
}
}
Clears obstacles: B |
|
From: 2
Right Door
To: 3
Top Junction
Entrance condition: {
"comeInShinecharging": {
"length": 5,
"openEnd": 1
}
}
Requires: {
"or": [
{
"shinespark": {
"frames": 22,
"excessFrames": 4
}
},
{
"and": [
"canMidairShinespark",
{
"shinespark": {
"frames": 15,
"excessFrames": 3
}
}
]
},
{
"and": [
"canMidairShinespark",
"HiJump",
{
"shinespark": {
"frames": 12,
"excessFrames": 4
}
}
]
}
]
}
Clears obstacles: B |
|
From: 3
Item
To: 4
Top Left Junction
Notable: true 
Gain a shinecharge by running right-to-left, either using the short runway (with unbroken Super block) or an extended runway by taking a spike hit. Then spin jump, hit the ceiling, aim down, break the Super block, and turn around to quick drop through the crumble block. During the item message box, buffer the inputs to turn around to the right and jump. Once under the crumble block (the left part of it), press up while still holding jump, to immediately activate the spark and make it up in time. Requires: {
"or": [
{
"canShineCharge": {
"usedTiles": 16,
"openEnd": 0
}
},
{
"and": [
{
"canShineCharge": {
"usedTiles": 23,
"openEnd": 0
}
},
{
"spikeHits": 1
},
"canIframeSpikeJump"
]
}
]
}
"canShinechargeMovementComplex"
"canQuickCrumbleEscape"
{
"or": [
{
"shinespark": {
"frames": 19,
"excessFrames": 7
}
},
{
"and": [
{
"shinespark": {
"frames": 19,
"excessFrames": 15
}
},
"canCrumbleJump"
]
}
]
}
{
"obstaclesCleared": [
"A",
"B"
]
}
|
|
Stand to the right of the right-most bug pipe, and run to the right to gain a shortcharge. Run back to the left, jump over the bug pipes, and shinespark through the left door. Requires: {
"canShineCharge": {
"usedTiles": 21,
"steepUpTiles": 2,
"openEnd": 0
}
}
"canShinechargeMovement"
{
"shinespark": {
"frames": 20
}
}
Exit condition: {
"leaveWithSpark": {}
}
|
|
Entrance condition: {
"comeInShinecharged": {
"framesRequired": 40
}
}
Requires: "canHorizontalShinespark"
{
"shinespark": {
"frames": 155,
"excessFrames": 10
}
}
Clears obstacles: A |
|
Charge a spark on the dry platform, and jump into a mid-air spark across the room and through the door. Requires: {
"canShineCharge": {
"usedTiles": 32,
"openEnd": 1
}
}
"canMidairShinespark"
{
"shinespark": {
"frames": 75
}
}
Exit condition: {
"leaveWithSpark": {}
}
|
|
From: 3
Dry Platform Junction
To: 1
Right Door
Charge a spark going left, then build speed and jump far to the right into a mid-air spark across the room and through the door. Requires: {
"canShineCharge": {
"usedTiles": 32,
"openEnd": 1
}
}
"canShinechargeMovement"
"canCarefulJump"
"canMidairShinespark"
{
"shinespark": {
"frames": 62
}
}
Exit condition: {
"leaveWithSpark": {}
}
|
|
Run from left to right on the dry platform to gain a shinecharge. Then fall off and spark to the left to break the speed blocks. Requires: {
"canShineCharge": {
"usedTiles": 32,
"openEnd": 1
}
}
"canShinechargeMovement"
"canHorizontalShinespark"
{
"shinespark": {
"frames": 72,
"excessFrames": 10
}
}
|
|
Run and jump onto the platform in the middle of the room. Fire a shot and activate the shinespark wind-up. Wait until the shot hits the door before sparking. Entrance condition: {
"comeInShinecharged": {
"framesRequired": 110
}
}
Requires: "canShinechargeMovementComplex"
{
"shinespark": {
"frames": 26
}
}
Exit condition: {
"leaveWithSpark": {}
}
|
|
Run and jump, fire a shot mid-air, and activate the shinespark wind-up. Wait until the shot is at a specific position before sparking. Sparking too late will cause the shot to despawn before reaching the door. Sparking too early will cause Samus to bonk the door as it will not yet be open. A beam shot, Missile, or Super can be used. Entrance condition: {
"comeInShinecharged": {
"framesRequired": 45
}
}
Requires: "canShinechargeMovementTricky"
{
"shinespark": {
"frames": 38
}
}
Exit condition: {
"leaveWithSpark": {}
}
|
|
Run and jump onto the platform in the middle of the room, using Screw Attack to avoid being knocked back by the Skrees. Fire a shot and activate the shinespark wind-up. Wait until the shot hits the door before sparking. Entrance condition: {
"comeInShinecharged": {
"framesRequired": 110
}
}
Requires: "ScrewAttack"
"canShinechargeMovementComplex"
{
"shinespark": {
"frames": 26
}
}
Exit condition: {
"leaveWithSpark": {}
}
|
|
Run and jump, fire a shot mid-air, and activate the shinespark wind-up. Wait until the shot is at a specific position before sparking. Sparking too late will cause the shot to despawn before reaching the door. Sparking too early will cause Samus to bonk the door as it will not yet be open. A beam shot, Missile, or Super can be used. Entrance condition: {
"comeInShinecharged": {
"framesRequired": 45
}
}
Requires: "canShinechargeMovementTricky"
{
"enemyDamage": {
"enemy": "Skree",
"type": "contact",
"hits": 1
}
}
{
"shinespark": {
"frames": 38
}
}
Exit condition: {
"leaveWithSpark": {}
}
|
|
From: 1
Left Door
To: 2
Bottom Right Door
Run and jump onto the third single-tile platform, then jump over the Cacatac (or kill it). Fire a shot and activate the shinespark wind-up. Wait until the shot hits the door before sparking. Entrance condition: {
"comeInShinecharged": {
"framesRequired": 140
}
}
Requires: "canShinechargeMovementComplex"
{
"or": [
{
"enemyDamage": {
"enemy": "Cacatac",
"type": "spike",
"hits": 1
}
},
{
"enemyKill": {
"enemies": [
[
"Cacatac"
]
],
"explicitWeapons": [
"Missile",
"Super",
"Wave",
"Spazer",
"Plasma"
]
}
}
]
}
{
"shinespark": {
"frames": 24
}
}
Exit condition: {
"leaveWithSpark": {}
}
|
|
Run and jump, fire a shot mid-air, and activate the shinespark wind-up. Wait until the shot is at a specific position before sparking. Sparking too late will cause the shot to despawn before reaching the door. Sparking too early will cause Samus to bonk the door as it will not yet be open. A beam shot, Missile, or Super can be used. Entrance condition: {
"comeInShinecharged": {
"framesRequired": 40
}
}
Requires: "canShinechargeMovementTricky"
"canHeroShot"
{
"shinespark": {
"frames": 38
}
}
Exit condition: {
"leaveWithSpark": {}
}
|
|
From: 2
Bottom Right Door
To: 1
Left Door
Kill the Cacatac, and reach the center of the room. Fire a shot and activate the shinespark wind-up. Wait until the shot hits the door before sparking. Entrance condition: {
"comeInShinecharging": {
"length": 3,
"openEnd": 1
}
}
Requires: "canShinechargeMovementComplex"
{
"shinespark": {
"frames": 24
}
}
Exit condition: {
"leaveWithSpark": {}
}
|
|
Run and jump, fire a shot mid-air, and activate the shinespark wind-up. Wait until the shot is at a specific position before sparking. Sparking too late will cause the shot to despawn before reaching the door. Sparking too early will cause Samus to bonk the door as it will not yet be open. A beam shot, Missile, or Super can be used. Entrance condition: {
"comeInShinecharged": {
"framesRequired": 40
}
}
Requires: "canShinechargeMovementTricky"
"canHeroShot"
{
"shinespark": {
"frames": 38
}
}
Exit condition: {
"leaveWithSpark": {}
}
|
|
Slow rolling or getting a fast mockball work equally well. Requires: {
"canShineCharge": {
"usedTiles": 17,
"openEnd": 0
}
}
"canShinechargeMovementTricky"
"Morph"
{
"obstaclesCleared": [
"A"
]
}
{
"shinespark": {
"frames": 22
}
}
Exit condition: {
"leaveWithSpark": {}
}
|
|
From: 2
Middle Left Door
To: 1
Top Left Door
Entrance condition: {
"comeInShinecharged": {
"framesRequired": 160
}
}
Requires: "HiJump"
"canShinechargeMovementTricky"
{
"shinespark": {
"frames": 11
}
}
Exit condition: {
"leaveWithSpark": {}
}
|
|
From: 2
Middle Left Door
To: 4
Bottom Right Door
Entrance condition: {
"comeInShinecharged": {
"framesRequired": 90
}
}
Requires: "HiJump"
"canShinechargeMovementComplex"
{
"shinespark": {
"frames": 4
}
}
Exit condition: {
"leaveWithSpark": {}
}
|
|
From: 2
Middle Left Door
To: 4
Bottom Right Door
Ledge grab precisely in front of the Cacatac, and jump immediately before it would hit you. If the shinespark wind-up is activated as early as possible, then a Cacatac spike hit will be taken. Entrance condition: {
"comeInShinecharged": {
"framesRequired": 120
}
}
Requires: "canWalljump"
"canShinechargeMovementTricky"
{
"enemyDamage": {
"enemy": "Cacatac",
"type": "spike",
"hits": 1
}
}
{
"shinespark": {
"frames": 6
}
}
Exit condition: {
"leaveWithSpark": {}
}
|
|
From: 2
Middle Left Door
To: 4
Bottom Right Door
Diagonal shinespark on entry, or move to the right a bit first to save some Energy. Entrance condition: {
"comeInShinecharged": {
"framesRequired": 1
}
}
Requires: {
"shinespark": {
"frames": 32,
"excessFrames": 21
}
}
|
|
From: 4
Bottom Right Door
To: 1
Top Left Door
Entrance condition: {
"comeInShinecharged": {
"framesRequired": 85
}
}
Requires: "HiJump"
"canShinechargeMovementComplex"
{
"shinespark": {
"frames": 9
}
}
Exit condition: {
"leaveWithSpark": {}
}
|
|
From: 4
Bottom Right Door
To: 1
Top Left Door
Entrance condition: {
"comeInShinecharged": {
"framesRequired": 125
}
}
Requires: "canWalljump"
"canShinechargeMovementComplex"
{
"shinespark": {
"frames": 10
}
}
Exit condition: {
"leaveWithSpark": {}
}
|
|
Use the Spikes in the center of the room to build a Shinespark with X-Mode. There are sections of the room where using more complex movement can be used to save a Spike hit when X-Moding. Requires: "h_canXMode"
"h_XModeSpikeHit"
"h_XModeSpikeHit"
"canIframeSpikeJump"
{
"or": [
"SpaceJump",
"h_XModeSpikeHit"
]
}
{
"canShineCharge": {
"usedTiles": 33,
"openEnd": 2
}
}
{
"shinespark": {
"frames": 50
}
}
Exit condition: {
"leaveWithSpark": {}
}
|
|
From: 1
Left Door
To: 2
Right Door
Entrance condition: {
"comeInShinecharging": {
"length": 6,
"openEnd": 1
}
}
Requires: "canHorizontalShinespark"
{
"or": [
{
"shinespark": {
"frames": 142,
"excessFrames": 60
}
},
{
"and": [
"canShinechargeMovement",
"canMidairShinespark",
{
"shinespark": {
"frames": 134,
"excessFrames": 60
}
}
]
}
]
}
|
|
From: 1
Left Door
To: 2
Right Door
Enter the door high to avoid a frame perfect spike hit. Entrance condition: {
"comeInWithSpark": {}
}
Requires: {
"shinespark": {
"frames": 146,
"excessFrames": 60
}
}
|
|
From: 2
Right Door
To: 1
Left Door
Use the really small runway in the pit in the middle of the room. The door must be already opened. Requires: {
"obstaclesCleared": [
"A"
]
}
"canMidairShinespark"
"canShinechargeMovementComplex"
{
"canShineCharge": {
"usedTiles": 13,
"openEnd": 0
}
}
{
"shinespark": {
"frames": 107
}
}
Exit condition: {
"leaveWithSpark": {}
}
|
|
Jump from the runway near the right door to bounce onto spikes for X-Mode. Store a spark in X-Mode and use that to shinepark across the room. Bumping a solid tile before activating X-Mode will remove dash state, preventing shinecharging. The left door must have been opened previously, in order to shinespark through it. Requires: {
"obstaclesCleared": [
"A"
]
}
"canMidairShinespark"
"h_canXMode"
{
"spikeHits": 1
}
{
"canShineCharge": {
"usedTiles": 33,
"openEnd": 2
}
}
{
"or": [
{
"shinespark": {
"frames": 146
}
},
{
"and": [
"SpaceJump",
{
"shinespark": {
"frames": 50
}
}
]
}
]
}
Exit condition: {
"leaveWithSpark": {}
}
|
|
From: 2
Right Door
To: 1
Left Door
Entrance condition: {
"comeInShinecharging": {
"length": 4,
"openEnd": 1
}
}
Requires: "canHorizontalShinespark"
{
"shinespark": {
"frames": 143,
"excessFrames": 6
}
}
|
|
From: 2
Right Door
To: 1
Left Door
Entrance condition: {
"comeInWithSpark": {}
}
Requires: {
"shinespark": {
"frames": 146,
"excessFrames": 6
}
}
|
|
Use the really small runway in the pit in the middle of the room. Requires: "canMidairShinespark"
"canShinechargeMovementComplex"
{
"canShineCharge": {
"usedTiles": 13,
"openEnd": 0
}
}
{
"shinespark": {
"frames": 107,
"excessFrames": 6
}
}
|
|
Jump from the runway near the right door to bounce onto spikes for X-Mode. Store a spark in X-Mode and use that to shinepark across the room. Bumping a solid tile before activating X-Mode will remove dash state, preventing shinecharging. Requires: "canMidairShinespark"
"h_canXMode"
{
"spikeHits": 2
}
{
"canShineCharge": {
"usedTiles": 33,
"openEnd": 2
}
}
{
"shinespark": {
"frames": 146,
"excessFrames": 6
}
}
|
|
From: 2
Right Door
To: 2
Right Door
Requires opening the door, then going to the pit in the middle of the room to use the really small runway. Requires: "canShinechargeMovementComplex"
"canMidairShinespark"
{
"canShineCharge": {
"usedTiles": 13,
"openEnd": 0
}
}
{
"shinespark": {
"frames": 50
}
}
Exit condition: {
"leaveWithSpark": {}
}
|
|
From: 1
Top Left Door
To: 5
Top Right Door
Entrance condition: {
"comeInShinecharged": {
"framesRequired": 1
}
}
Requires: {
"shinespark": {
"frames": 68,
"excessFrames": 20
}
}
"canUseFrozenEnemies"
|
|
From: 1
Top Left Door
To: 5
Top Right Door
Notable: true 

Come in shinecharged from the top left door. With missiles selected, position Samus roughly in the horizontal center of the room. Crouch, aim up, then in very quick succession, shoot a missile upwards then spark up. If done correctly, Samus will pass the Missile, break the bomb block platforms, then be passed by the Missile which will break the shot blocks at the top. Entrance condition: {
"comeInShinecharged": {
"framesRequired": 100
}
}
Requires: "canHeroShot"
{
"shinespark": {
"frames": 77,
"excessFrames": 3
}
}
{
"ammo": {
"type": "Missile",
"count": 1
}
}
|
|
From: 1
Top Left Door
To: 5
Top Right Door
Notable: true
Come in shinecharging from the top left door. With missiles selected, position Samus roughly in the horizontal center of the room. Crouch, aim up, then in very quick succession, shoot a missile upwards then spark up. If done correctly, Samus will pass the Missile, break the bomb block platforms, then be passed by the Missile which will break the shot blocks at the top. Entrance condition: {
"comeInShinecharging": {
"length": 10,
"openEnd": 1
}
}
Requires: "canHeroShot"
{
"shinespark": {
"frames": 77,
"excessFrames": 3
}
}
{
"ammo": {
"type": "Missile",
"count": 1
}
}
|
|
Entrance condition: {
"comeInShinecharging": {
"length": 10,
"openEnd": 1
}
}
Requires: {
"or": [
{
"shinespark": {
"frames": 68,
"excessFrames": 29
}
},
{
"and": [
"canMidairShinespark",
{
"shinespark": {
"frames": 60,
"excessFrames": 28
}
}
]
}
]
}
"canUseFrozenEnemies"
|
|
From: 1
Top Left Door
To: 5
Top Right Door
Entrance condition: {
"comeInShinecharged": {
"framesRequired": 50
}
}
Requires: "canMidairShinespark"
{
"shinespark": {
"frames": 60,
"excessFrames": 28
}
}
"canUseFrozenEnemies"
|
|
From: 1
Top Left Door
To: 5
Top Right Door
Entrance condition: {
"comeInShinecharged": {
"framesRequired": 20
}
}
Requires: {
"shinespark": {
"frames": 68,
"excessFrames": 29
}
}
"canUseFrozenEnemies"
|
|
From: 3
Bottom Left Door
To: 4
Bottom Right Door
Entrance condition: {
"comeInShinecharged": {
"framesRequired": 10
}
}
Requires: {
"shinespark": {
"frames": 21
}
}
Exit condition: {
"leaveWithSpark": {}
}
|
|
From: 3
Bottom Left Door
To: 6
Junction (Above Bottom Rippers)
Entrance condition: {
"comeInShinecharged": {
"framesRequired": 40
}
}
Requires: {
"shinespark": {
"frames": 45,
"excessFrames": 5
}
}
|
|
From: 3
Bottom Left Door
To: 6
Junction (Above Bottom Rippers)
Entrance condition: {
"comeInShinecharging": {
"length": 12,
"openEnd": 0
}
}
Requires: {
"shinespark": {
"frames": 45,
"excessFrames": 5
}
}
|
|
From: 3
Bottom Left Door
To: 7
Junction (Bottom Rippers)
Immediately perform a diagonal spark up to the right ledge on entry. Entrance condition: {
"comeInShinecharged": {
"framesRequired": 5
}
}
Requires: {
"shinespark": {
"frames": 34,
"excessFrames": 10
}
}
{
"enemyDamage": {
"enemy": "Ripper",
"type": "contact",
"hits": 1
}
}
|
|
From: 3
Bottom Left Door
To: 7
Junction (Bottom Rippers)
Perform a diagonal spark up to the right ledge. Entrance condition: {
"comeInShinecharging": {
"length": 12,
"openEnd": 0
}
}
Requires: {
"shinespark": {
"frames": 34,
"excessFrames": 10
}
}
{
"enemyDamage": {
"enemy": "Ripper",
"type": "contact",
"hits": 1
}
}
|
|
From: 4
Bottom Right Door
To: 3
Bottom Left Door
Entrance condition: {
"comeInShinecharged": {
"framesRequired": 10
}
}
Requires: {
"shinespark": {
"frames": 21
}
}
Exit condition: {
"leaveWithSpark": {}
}
|
|
From: 4
Bottom Right Door
To: 6
Junction (Above Bottom Rippers)
Entrance condition: {
"comeInShinecharged": {
"framesRequired": 30
}
}
Requires: {
"shinespark": {
"frames": 45,
"excessFrames": 5
}
}
|
|
From: 4
Bottom Right Door
To: 6
Junction (Above Bottom Rippers)
Entrance condition: {
"comeInShinecharging": {
"length": 12,
"openEnd": 0
}
}
Requires: {
"shinespark": {
"frames": 45,
"excessFrames": 5
}
}
|
|
From: 4
Bottom Right Door
To: 7
Junction (Bottom Rippers)
Immediately perform a diagonal spark up to the right ledge on entry. Entrance condition: {
"comeInShinecharged": {
"framesRequired": 5
}
}
Requires: {
"shinespark": {
"frames": 34,
"excessFrames": 10
}
}
{
"enemyDamage": {
"enemy": "Ripper",
"type": "contact",
"hits": 1
}
}
|
|
From: 4
Bottom Right Door
To: 7
Junction (Bottom Rippers)
Perform a diagonal spark up to the right ledge. Entrance condition: {
"comeInShinecharging": {
"length": 12,
"openEnd": 0
}
}
Requires: {
"shinespark": {
"frames": 34,
"excessFrames": 10
}
}
{
"enemyDamage": {
"enemy": "Ripper",
"type": "contact",
"hits": 1
}
}
|
|
From: 1
Left Door
To: 2
Top Right Door
Entrance condition: {
"comeInShinecharged": {
"framesRequired": 105
}
}
Requires: "HiJump"
"canShinechargeMovementComplex"
{
"shinespark": {
"frames": 6
}
}
Exit condition: {
"leaveWithSpark": {}
}
|
|
From: 1
Left Door
To: 3
Bottom Right Door
Run and jump to the center of the room. Fire a shot to open the door, jump over the pillar, and spark out of the room. Entrance condition: {
"comeInShinecharged": {
"framesRequired": 125
}
}
Requires: "canShinechargeMovementComplex"
{
"shinespark": {
"frames": 20
}
}
Exit condition: {
"leaveWithSpark": {}
}
|
|
From: 1
Left Door
To: 3
Bottom Right Door
Gain a shinecharge while running into the room, sliding off the ledge, then jump to the center of the room. Fire a shot to open the door, jump over the pillar, and spark out of the room. Entrance condition: {
"comeInShinecharging": {
"length": 4,
"openEnd": 1
}
}
Requires: "canShinechargeMovementTricky"
{
"shinespark": {
"frames": 16
}
}
Exit condition: {
"leaveWithSpark": {}
}
|
|
Run and jump, fire a shot mid-air, and activate the shinespark wind-up. Wait until the shot is at a specific position before sparking. Sparking too late will cause the shot to despawn before reaching the door. Sparking too early will cause Samus to bonk the door as it will not yet be open. A beam shot, Missile, or Super can be used. Entrance condition: {
"comeInShinecharged": {
"framesRequired": 40
}
}
Requires: "canShinechargeMovementTricky"
"canHeroShot"
{
"shinespark": {
"frames": 36
}
}
Exit condition: {
"leaveWithSpark": {}
}
|
|
From: 3
Bottom Right Door
To: 1
Left Door
Run and jump to the center of the room and over the pillar. Fire a shot and activate the shinespark wind-up. Wait until the shot hits the door before sparking. Entrance condition: {
"comeInShinecharged": {
"framesRequired": 110
}
}
Requires: "canShinechargeMovementComplex"
{
"shinespark": {
"frames": 25
}
}
Exit condition: {
"leaveWithSpark": {}
}
|
|
Run and jump, fire a shot mid-air, and activate the shinespark wind-up. Wait until the shot is at a specific position before sparking. Sparking too late will cause the shot to despawn before reaching the door. Sparking too early will cause Samus to bonk the door as it will not yet be open. A beam shot, Missile, or Super can be used. Entrance condition: {
"comeInShinecharged": {
"framesRequired": 40
}
}
Requires: "canShinechargeMovementTricky"
"canHeroShot"
"canMidairShinespark"
{
"shinespark": {
"frames": 38
}
}
Exit condition: {
"leaveWithSpark": {
"position": "top"
}
}
|
|
From: 2
Elevator
To: 1
Left Door
Entrance condition: {
"comeInShinecharged": {
"framesRequired": 15
}
}
Requires: "canShinechargeMovementComplex"
{
"shinespark": {
"frames": 12
}
}
Exit condition: {
"leaveWithSpark": {}
}
|
|
Entrance condition: {
"comeInWithSpark": {},
"comesThroughToilet": "any"
}
Requires: {
"shinespark": {
"frames": 5,
"excessFrames": 5
}
}
|
|
From: 5
Kihunter Junction
To: 2
Bottom Right Door
Notable: true 
Charge a spark, then break the shot blocks, drop through, and spark out the bottom right door. Requires: "canShinechargeMovementComplex"
{
"obstaclesCleared": [
"C"
]
}
{
"obstaclesNotCleared": [
"D"
]
}
{
"canShineCharge": {
"usedTiles": 25,
"openEnd": 0
}
}
{
"shinespark": {
"frames": 20
}
}
Exit condition: {
"leaveWithSpark": {}
}
|
|
From: 5
Kihunter Junction
To: 3
Top Right Door
Notable: true 

Generate a charge on the left side and carry it through the morph tunnel and out the right door. Requires: {
"obstaclesCleared": [
"B",
"C",
"D"
]
}
{
"canShineCharge": {
"usedTiles": 13,
"openEnd": 2
}
}
"canShinechargeMovementTricky"
"Morph"
{
"shinespark": {
"frames": 13
}
}
Exit condition: {
"leaveWithSpark": {}
}
|
|
From: 5
Kihunter Junction
To: 3
Top Right Door
Notable: true
Generate a charge on the left side and carry it through the morph tunnel and out the right door. Requires: {
"obstaclesCleared": [
"B",
"C"
]
}
{
"obstaclesNotCleared": [
"D"
]
}
{
"canShineCharge": {
"usedTiles": 31,
"openEnd": 1
}
}
"canShinechargeMovementTricky"
"Morph"
{
"shinespark": {
"frames": 13
}
}
Exit condition: {
"leaveWithSpark": {}
}
|
|
From: 1
Top Left Door
To: 2
Bottom Left Door
Enter with a shinecharge, jumping and aiming down and shoot the block. While falling, kill the Zeela or perform a Kago through it. Quickly reach the door below and spark out. Entrance condition: {
"comeInShinecharged": {
"framesRequired": 165
}
}
Requires: {
"or": [
{
"enemyKill": {
"enemies": [
[
"Zeela"
]
],
"explicitWeapons": [
"Wave",
"Spazer",
"Plasma",
"Missile",
"Super"
]
}
},
{
"and": [
"canKago",
{
"enemyDamage": {
"enemy": "Zeela",
"type": "contact",
"hits": 1
}
}
]
}
]
}
"canShinechargeMovementTricky"
{
"shinespark": {
"frames": 4
}
}
Exit condition: {
"leaveWithSpark": {}
}
|
|
From: 1
Top Left Door
To: 2
Bottom Left Door
Gain a shinecharging while entering the room, and angle diagonally down to shoot the block. While falling, kill the Zeela or perform a Kago through it. Quickly reach the door below and spark out. Entrance condition: {
"comeInShinecharging": {
"length": 5,
"openEnd": 0
}
}
Requires: {
"or": [
{
"enemyKill": {
"enemies": [
[
"Zeela"
]
],
"explicitWeapons": [
"Wave",
"Spazer",
"Plasma",
"Missile",
"Super"
]
}
},
{
"and": [
"canKago",
{
"enemyDamage": {
"enemy": "Zeela",
"type": "contact",
"hits": 1
}
}
]
}
]
}
"canShinechargeMovementTricky"
{
"shinespark": {
"frames": 5
}
}
Exit condition: {
"leaveWithSpark": {}
}
|
|
From: 2
Bottom Left Door
To: 1
Top Left Door
Enter with a shinecharge, and move up toward the door above. Use Wave or Plasma to shoot open the door from below while killing the approaching Zeelas. Entrance condition: {
"comeInShinecharged": {
"framesRequired": 160
}
}
Requires: {
"enemyKill": {
"enemies": [
[
"Zeela"
]
],
"explicitWeapons": [
"Wave",
"Plasma"
]
}
}
"canShinechargeMovementTricky"
{
"shinespark": {
"frames": 2
}
}
Exit condition: {
"leaveWithSpark": {}
}
|
|
From: 2
Bottom Left Door
To: 1
Top Left Door
Enter with a shinecharge, and move up toward the door above. Use Wave or Plasma to shoot open the door from below while killing the approaching Zeelas. Entrance condition: {
"comeInShinecharging": {
"length": 4,
"openEnd": 0
}
}
Requires: {
"enemyKill": {
"enemies": [
[
"Zeela"
]
],
"explicitWeapons": [
"Wave",
"Plasma"
]
}
}
"canShinechargeMovementTricky"
{
"shinespark": {
"frames": 2
}
}
Exit condition: {
"leaveWithSpark": {}
}
|
|
Entrance condition: {
"comeInShinecharged": {
"framesRequired": 40
}
}
Requires: {
"shinespark": {
"frames": 8
}
}
{
"heatFrames": 50
}
Exit condition: {
"leaveWithSpark": {}
}
|
|
From: 3
Top Door
To: 2
Right Door
Entrance condition: {
"comeInShinecharged": {
"framesRequired": 30
},
"comesThroughToilet": "any"
}
Requires: "canShinechargeMovementComplex"
{
"shinespark": {
"frames": 10,
"excessFrames": 0
}
}
{
"heatFrames": 50
}
Exit condition: {
"leaveWithSpark": {}
}
|
|
Shoot diagonally to clear the Skree and shot block before jumping and sparking diagonally mid-air to the above area. Entrance condition: {
"comeInShinecharging": {
"length": 2,
"openEnd": 0
}
}
Requires: "canShinechargeMovementComplex"
"canMidairShinespark"
{
"heatFrames": 300
}
{
"shinespark": {
"frames": 14,
"excessFrames": 3
}
}
|
|
From: 1
Bottom Left Door
To: 2
Top Right Door
Shoot diagonally to clear the Skree and shot block before jumping and sparking diagonally mid-air to the above area. Entrance condition: {
"comeInShinecharged": {
"framesRequired": 80
}
}
Requires: "canShinechargeMovementComplex"
"canMidairShinespark"
{
"heatFrames": 270
}
{
"shinespark": {
"frames": 13,
"excessFrames": 3
}
}
|
|
From: 2
Top Right Door
To: 1
Bottom Left Door
Fall through the shot blocks and shoot around the Skree to open the door without falling into the lava to shinespark out of the room. Entrance condition: {
"comeInShinecharging": {
"length": 6,
"openEnd": 0
}
}
Requires: "canShinechargeMovementTricky"
{
"heatFrames": 165
}
{
"shinespark": {
"frames": 15
}
}
Exit condition: {
"leaveWithSpark": {}
}
|
|
From: 2
Top Right Door
To: 1
Bottom Left Door
Fall through the shot blocks and shoot around the Skree to open the door without falling into the lava to shinespark out of the room. Entrance condition: {
"comeInShinecharged": {
"framesRequired": 115
}
}
Requires: "canShinechargeMovementTricky"
{
"heatFrames": 165
}
{
"shinespark": {
"frames": 15
}
}
Exit condition: {
"leaveWithSpark": {}
}
|
|
Jump over the Waver, fire a shot mid-air, and activate the shinespark wind-up. Wait until the shot is at a specific position before sparking. Sparking too late will cause the shot to despawn before reaching the door. Sparking too early will cause Samus to bonk the door as it will not yet be open. A beam shot, Missile, or Super can be used. Entrance condition: {
"comeInShinecharged": {
"framesRequired": 50
}
}
Requires: "canHeroShot"
"canShinechargeMovementComplex"
{
"shinespark": {
"frames": 35,
"excessFrames": 0
}
}
Exit condition: {
"leaveWithSpark": {}
}
|
|
Entrance condition: {
"comeInWithSpark": {}
}
Requires: {
"shinespark": {
"frames": 42,
"excessFrames": 22
}
}
|
|
From: 2
Left Side - Top Middle Door
To: 1
Left Side - Top Door
Entrance condition: {
"comeInShinecharged": {
"framesRequired": 105
}
}
Requires: "HiJump"
"SpaceJump"
"canShinechargeMovementComplex"
{
"shinespark": {
"frames": 20,
"excessFrames": 0
}
}
Exit condition: {
"leaveWithSpark": {}
}
|
|
From: 2
Left Side - Top Middle Door
To: 1
Left Side - Top Door
Entrance condition: {
"comeInShinecharged": {
"framesRequired": 125
}
}
Requires: "HiJump"
"canPreciseWalljump"
"canShinechargeMovementTricky"
{
"shinespark": {
"frames": 18,
"excessFrames": 0
}
}
Exit condition: {
"leaveWithSpark": {}
}
|
|
From: 2
Left Side - Top Middle Door
To: 1
Left Side - Top Door
Entrance condition: {
"comeInShinecharging": {
"length": 2,
"openEnd": 1
}
}
Requires: {
"shinespark": {
"frames": 27,
"excessFrames": 2
}
}
|
|
From: 2
Left Side - Top Middle Door
To: 1
Left Side - Top Door
Entrance condition: {
"comeInShinecharged": {
"framesRequired": 22
}
}
Requires: "canShinechargeMovement"
"canMidairShinespark"
{
"shinespark": {
"frames": 19
}
}
|
|
From: 2
Left Side - Top Middle Door
To: 1
Left Side - Top Door
Entrance condition: {
"comeInShinecharged": {
"framesRequired": 50
}
}
Requires: {
"shinespark": {
"frames": 27,
"excessFrames": 2
}
}
|
|
From: 2
Left Side - Top Middle Door
To: 3
Left Side - Bottom Middle Door
Entrance condition: {
"comeInShinecharged": {
"framesRequired": 105
}
}
Requires: "canShinechargeMovement"
{
"shinespark": {
"frames": 7,
"excessFrames": 0
}
}
Exit condition: {
"leaveWithSpark": {}
}
|
|
From: 2
Left Side - Top Middle Door
To: 7
Top Right Door
Entrance condition: {
"comeInShinecharged": {
"framesRequired": 125
}
}
Requires: "HiJump"
"canWalljump"
"canShinechargeMovementTricky"
{
"shinespark": {
"frames": 27,
"excessFrames": 0
}
}
Exit condition: {
"leaveWithSpark": {}
}
|
|
From: 2
Left Side - Top Middle Door
To: 7
Top Right Door
Entrance condition: {
"comeInShinecharging": {
"length": 2,
"openEnd": 0
}
}
Requires: "HiJump"
"SpaceJump"
"canHeroShot"
"canShinechargeMovementComplex"
{
"shinespark": {
"frames": 31,
"excessFrames": 0
}
}
Exit condition: {
"leaveWithSpark": {}
}
|
|
From: 2
Left Side - Top Middle Door
To: 7
Top Right Door
Entrance condition: {
"comeInShinecharging": {
"length": 2,
"openEnd": 1
}
}
Requires: {
"shinespark": {
"frames": 22,
"excessFrames": 2
}
}
|
|
From: 2
Left Side - Top Middle Door
To: 7
Top Right Door
Entrance condition: {
"comeInShinecharged": {
"framesRequired": 5
}
}
Requires: {
"shinespark": {
"frames": 22,
"excessFrames": 2
}
}
|
|
From: 3
Left Side - Bottom Middle Door
To: 1
Left Side - Top Door
Entrance condition: {
"comeInShinecharging": {
"length": 5,
"openEnd": 0
}
}
Requires: "canShinechargeMovement"
{
"shinespark": {
"frames": 39
}
}
|
|
From: 3
Left Side - Bottom Middle Door
To: 1
Left Side - Top Door
Entrance condition: {
"comeInShinecharging": {
"length": 5,
"openEnd": 0
}
}
Requires: "canShinechargeMovementComplex"
{
"shinespark": {
"frames": 20,
"excessFrames": 2
}
}
|
|
From: 3
Left Side - Bottom Middle Door
To: 1
Left Side - Top Door
Entrance condition: {
"comeInShinecharged": {
"framesRequired": 35
}
}
Requires: "canShinechargeMovement"
{
"shinespark": {
"frames": 39
}
}
|
|
From: 3
Left Side - Bottom Middle Door
To: 2
Left Side - Top Middle Door
Entrance condition: {
"comeInShinecharged": {
"framesRequired": 125
}
}
Requires: "canShinechargeMovementComplex"
{
"shinespark": {
"frames": 5
}
}
Exit condition: {
"leaveWithSpark": {}
}
|
|
From: 3
Left Side - Bottom Middle Door
To: 2
Left Side - Top Middle Door
Entrance condition: {
"comeInShinecharged": {
"framesRequired": 90
}
}
Requires: "HiJump"
"canShinechargeMovementComplex"
{
"enemyDamage": {
"enemy": "Waver",
"type": "contact",
"hits": 1
}
}
{
"shinespark": {
"frames": 7,
"excessFrames": 0
}
}
Exit condition: {
"leaveWithSpark": {}
}
|
|
From: 3
Left Side - Bottom Middle Door
To: 7
Top Right Door
Diagonal spark from the Save Room Door steps. Entrance condition: {
"comeInShinecharging": {
"length": 5,
"openEnd": 0
}
}
Requires: "canShinechargeMovementComplex"
{
"shinespark": {
"frames": 26
}
}
|
|
From: 3
Left Side - Bottom Middle Door
To: 7
Top Right Door
Diagonal spark from the Save Room Door steps. Entrance condition: {
"comeInShinecharged": {
"framesRequired": 100
}
}
Requires: "canShinechargeMovementComplex"
{
"shinespark": {
"frames": 26
}
}
|
|
From: 5
Bottom Door
To: 4
Left Side - Bottom Door
Entrance condition: {
"comeInShinecharged": {
"framesRequired": 40
},
"comesThroughToilet": "any"
}
Requires: "canShinechargeMovement"
{
"shinespark": {
"frames": 9
}
}
Exit condition: {
"leaveWithSpark": {}
}
|
|
Entrance condition: {
"comeInWithSpark": {},
"comesThroughToilet": "any"
}
Requires: {
"shinespark": {
"frames": 12,
"excessFrames": 12
}
}
|
|
From: 6
Middle Right Door
To: 1
Left Side - Top Door
Entrance condition: {
"comeInShinecharged": {
"framesRequired": 115
}
}
Requires: "canMidairShinespark"
"canShinechargeMovementComplex"
{
"shinespark": {
"frames": 30,
"excessFrames": 6
}
}
|
|
From: 6
Middle Right Door
To: 1
Left Side - Top Door
Entrance condition: {
"comeInShinecharging": {
"length": 4,
"openEnd": 0
}
}
Requires: "canMidairShinespark"
"canShinechargeMovementComplex"
{
"shinespark": {
"frames": 30,
"excessFrames": 6
}
}
|
|
From: 6
Middle Right Door
To: 7
Top Right Door
Entrance condition: {
"comeInShinecharged": {
"framesRequired": 120
}
}
Requires: "canMidairShinespark"
"canShinechargeMovementComplex"
{
"shinespark": {
"frames": 15
}
}
Exit condition: {
"leaveWithSpark": {}
}
|
|
From: 6
Middle Right Door
To: 7
Top Right Door
Entrance condition: {
"comeInShinecharged": {
"framesRequired": 80
}
}
Requires: "HiJump"
"canMidairShinespark"
"canShinechargeMovementComplex"
{
"shinespark": {
"frames": 11
}
}
Exit condition: {
"leaveWithSpark": {}
}
|
|
From: 6
Middle Right Door
To: 7
Top Right Door
Entrance condition: {
"comeInShinecharging": {
"length": 4,
"openEnd": 0
}
}
Requires: "canShinechargeMovementTricky"
{
"shinespark": {
"frames": 5,
"excessFrames": 0
}
}
Exit condition: {
"leaveWithSpark": {}
}
|
|
From: 7
Top Right Door
To: 1
Left Side - Top Door
Dealing with spikes is up to luck. It is possible to shoot the Cacatac while jumping towards it. Entrance condition: {
"comeInShinecharged": {
"framesRequired": 100
}
}
Requires: "canShinechargeMovementComplex"
"canMidairShinespark"
"canCarefulJump"
{
"shinespark": {
"frames": 30,
"excessFrames": 6
}
}
|
|
Run and jump, fire a shot mid-air, and activate the shinespark wind-up. Wait until the shot is at a specific position before sparking. Sparking too late will cause the shot to despawn before reaching the door. Sparking too early will cause Samus to bonk the door as it will not yet be open. A beam shot, Missile, or Super can be used. Entrance condition: {
"comeInShinecharged": {
"framesRequired": 45
}
}
Requires: "canHeroShot"
"canShinechargeMovementTricky"
{
"shinespark": {
"frames": 36,
"excessFrames": 0
}
}
Exit condition: {
"leaveWithSpark": {}
}
|
|
From: 7
Top Right Door
To: 1
Left Side - Top Door
Dealing with spikes is up to luck. It is possible to shoot the Cacatac while jumping towards it. Entrance condition: {
"comeInShinecharging": {
"length": 2.5,
"openEnd": 1
}
}
Requires: "canShinechargeMovementComplex"
"canMidairShinespark"
"canCarefulJump"
{
"shinespark": {
"frames": 30,
"excessFrames": 6
}
}
|
|
Entrance condition: {
"comeInWithSpark": {}
}
Requires: {
"shinespark": {
"frames": 41,
"excessFrames": 2
}
}
|
|
From: 7
Top Right Door
To: 1
Left Side - Top Door
Kill the Cacatac and quickly jump over to its platform. Shoot towards the top-left door to open it, then follow the shot by jumping over the pit before initiating the shinespark. Entrance condition: {
"comeInShinecharging": {
"length": 2.5,
"openEnd": 1
}
}
Requires: "canShinechargeMovementComplex"
"canMidairShinespark"
"canTrickyJump"
"canHeroShot"
{
"shinespark": {
"frames": 25
}
}
{
"or": [
{
"and": [
"Wave",
"Spazer"
]
},
"Plasma",
{
"ammo": {
"type": "Missile",
"count": 2
}
},
{
"ammo": {
"type": "Super",
"count": 2
}
}
]
}
|
|
From: 7
Top Right Door
To: 6
Middle Right Door
Entrance condition: {
"comeInShinecharged": {
"framesRequired": 105
}
}
Requires: {
"shinespark": {
"frames": 5
}
}
Exit condition: {
"leaveWithSpark": {}
}
|
|
Requires: "canXMode"
"canBounceBall"
"canLateralMidAirMorph"
"canShinechargeMovement"
{
"canShineCharge": {
"usedTiles": 33,
"openEnd": 2
}
}
"h_XModeSpikeHitLeniency"
"h_XModeSpikeHitLeniency"
{
"shinespark": {
"frames": 6
}
}
|
|
Entrance condition: {
"comeInWithSpark": {
"position": "top"
}
}
Requires: {
"heatFrames": 240
}
{
"shinespark": {
"frames": 57,
"excessFrames": 0
}
}
|
|
Entrance condition: {
"comeInShinecharging": {
"length": 5,
"openEnd": 0,
"gentleUpTiles": 2
}
}
Requires: "canShinechargeMovementTricky"
"canHorizontalShinespark"
{
"heatFrames": 225
}
{
"shinespark": {
"frames": 53,
"excessFrames": 0
}
}
{
"heatFrames": 105
}
|
|
From: 1
Left Door
To: 5
Bottom Right Junction
Entrance condition: {
"comeInShinecharged": {
"framesRequired": 100
}
}
Requires: "canShinechargeMovement"
"canHorizontalShinespark"
{
"heatFrames": 155
}
{
"shinespark": {
"frames": 54,
"excessFrames": 15
}
}
{
"heatFrames": 105
}
|
|
From: 2
Right Door
To: 3
Bottom Left Junction
Entrance condition: {
"comeInShinecharged": {
"framesRequired": 105
}
}
Requires: "canShinechargeMovement"
"canHorizontalShinespark"
{
"heatFrames": 195
}
{
"shinespark": {
"frames": 58,
"excessFrames": 0
}
}
{
"heatFrames": 105
}
|
|
From: 4
Bottom Junction (Cleared Runway)
To: 1
Left Door
It is possible to shoot upwards from the ground then immediately as the shot is leaving the screen, press up and jump to shinespark without delay. A Charge shot can help, as it slows down the shot. Requires: "canHeroShot"
{
"canShineCharge": {
"usedTiles": 33,
"openEnd": 2
}
}
{
"heatFrames": 250
}
{
"shinespark": {
"frames": 22,
"excessFrames": 3
}
}
|
|
Jump and shoot the block, then quickly run away and back to charge the shinespark and shine through before the block respawns. Requires: {
"canShineCharge": {
"usedTiles": 33,
"openEnd": 2
}
}
{
"heatFrames": 500
}
{
"shinespark": {
"frames": 22,
"excessFrames": 3
}
}
|
|
From: 4
Bottom Junction (Cleared Runway)
To: 1
Left Door
With plasma, it is possible to shoot the block from the ground and immediately shinespark. Other beams will disappear off-screen before Samus has moved up enough. A charge shot can be used instead, as it moves a bit slower, but there is a relatively small window. Requires: "Plasma"
{
"canShineCharge": {
"usedTiles": 33,
"openEnd": 2
}
}
{
"heatFrames": 250
}
{
"shinespark": {
"frames": 22,
"excessFrames": 3
}
}
|
|
Requires: "canWalljump"
"canShinechargeMovement"
{
"canShineCharge": {
"usedTiles": 33,
"openEnd": 2
}
}
{
"heatFrames": 380
}
{
"shinespark": {
"frames": 16,
"excessFrames": 4
}
}
|
|
Entrance condition: {
"comeInShinecharged": {
"framesRequired": 40
}
}
Requires: {
"shinespark": {
"frames": 27,
"excessFrames": 4
}
}
{
"heatFrames": 200
}
|
|
Requires: {
"canShineCharge": {
"usedTiles": 28,
"gentleUpTiles": 3,
"gentleDownTiles": 3,
"openEnd": 0
}
}
{
"or": [
{
"shinespark": {
"frames": 27,
"excessFrames": 4
}
},
{
"and": [
"canMidairShinespark",
{
"shinespark": {
"frames": 17,
"excessFrames": 4
}
}
]
}
]
}
{
"heatFrames": 380
}
|
|
From: 2
Bottom Left Door
To: 1
Top Left Door
Climb up 1 screen. Entrance condition: {
"comeInShinecharged": {
"framesRequired": 1
}
}
Requires: {
"shinespark": {
"frames": 1,
"excessFrames": 1
}
}
"canShinesparkDeepStuck"
"canXRayClimb"
"canBePatient"
{
"heatFrames": 1600
}
|
|
Requires: {
"canShineCharge": {
"usedTiles": 28,
"gentleUpTiles": 3,
"gentleDownTiles": 3,
"openEnd": 0
}
}
{
"shinespark": {
"frames": 24,
"excessFrames": 8
}
}
{
"heatFrames": 300
}
{
"or": [
"canHeroShot",
{
"heatFrames": 100
}
]
}
|
|
From: 3
Right Door
To: 3
Right Door
Notable: true 
Charge a spark along the bottom of Double Chamber and use it to spark through the right side door. Requires opening the door and shutter first. Requires: "HiJump"
"Morph"
{
"or": [
{
"obstaclesCleared": [
"A"
]
},
{
"heatFrames": 240
}
]
}
{
"or": [
{
"and": [
"canTrickyDashJump",
"canWalljump"
]
},
"SpaceJump"
]
}
{
"canShineCharge": {
"usedTiles": 28,
"gentleUpTiles": 3,
"gentleDownTiles": 3,
"openEnd": 0
}
}
{
"heatFrames": 780
}
{
"shinespark": {
"frames": 57
}
}
Exit condition: {
"leaveWithSpark": {}
}
Clears obstacles: A |
|
From: 3
Right Door
To: 3
Right Door
Notable: true
Charge a spark along the bottom of Double Chamber and use it to spark through the right side door. Requires opening the door and shutter first. Requires: "HiJump"
{
"or": [
"SpaceJump",
"Grapple"
]
}
{
"or": [
{
"obstaclesCleared": [
"A"
]
},
"Wave",
{
"and": [
"h_canHeatedBlueGateGlitch",
{
"heatFrames": 60
}
]
}
]
}
{
"or": [
{
"and": [
"canTrickyDashJump",
"canWalljump"
]
},
"SpaceJump"
]
}
{
"canShineCharge": {
"usedTiles": 28,
"gentleUpTiles": 3,
"gentleDownTiles": 3,
"openEnd": 0
}
}
{
"heatFrames": 780
}
{
"shinespark": {
"frames": 57
}
}
Exit condition: {
"leaveWithSpark": {}
}
Clears obstacles: A |
|
Jump into the spikes and try to bounce on the crumble blocks moving towards the door. Requires: "h_canXMode"
"h_XModeSpikeHit"
"h_XModeSpikeHit"
"h_XModeSpikeHit"
"canWalljump"
"SpeedBooster"
{
"heatFrames": 540
}
{
"shinespark": {
"frames": 5
}
}
Exit condition: {
"leaveWithSpark": {}
}
|
|
Entrance condition: {
"comeInShinecharging": {
"length": 5,
"openEnd": 0
}
}
Requires: "canHorizontalShinespark"
{
"heatFrames": 140
}
{
"shinespark": {
"frames": 45,
"excessFrames": 14
}
}
|
|
Entrance condition: {
"comeInWithSpark": {}
}
Requires: {
"heatFrames": 140
}
{
"shinespark": {
"frames": 51,
"excessFrames": 14
}
}
|
|
A short hop from the door can bounce on the crumbles. Just be careful of being pushed back onto the crumble blocks by the spikes. Requires: "h_canXMode"
"h_XModeSpikeHit"
"h_XModeSpikeHit"
"canTrickyJump"
"canMidairShinespark"
{
"canShineCharge": {
"usedTiles": 33,
"openEnd": 2
}
}
{
"heatFrames": 400
}
{
"shinespark": {
"frames": 12,
"excessFrames": 4
}
}
|
|
A short hop from the ledge can bounce on the crumbles and into the spikes. Just be careful of being pushed back onto the crumble blocks by the spikes. Requires: "h_canXMode"
"h_XModeSpikeHit"
"h_XModeSpikeHit"
"canTrickyJump"
"canIframeSpikeJump"
"canMidairShinespark"
{
"canShineCharge": {
"usedTiles": 33,
"openEnd": 2
}
}
{
"heatFrames": 480
}
{
"shinespark": {
"frames": 11,
"excessFrames": 4
}
}
|
|
Entrance condition: {
"comeInShinecharged": {
"framesRequired": 10
}
}
Requires: {
"shinespark": {
"frames": 21
}
}
Exit condition: {
"leaveWithSpark": {}
}
|
|
Entrance condition: {
"comeInShinecharged": {
"framesRequired": 10
}
}
Requires: {
"shinespark": {
"frames": 21
}
}
Exit condition: {
"leaveWithSpark": {}
}
|
|
Fire a shot on the way up to clear the shot block. Perform a mockball but unmorph after exiting the Morph hole and Kill the Geruta while falling, if possible. Fire a shot to open the door, then jump forward and Shinespark out. Entrance condition: {
"comeInShinecharging": {
"length": 3,
"openEnd": 0
}
}
Requires: "canShinechargeMovementTricky"
"canMidairShinespark"
"canMockball"
{
"or": [
{
"enemyKill": {
"enemies": [
[
"Geruta"
]
],
"explicitWeapons": [
"Missile",
"Super",
"Wave",
"Spazer",
"Plasma"
]
}
},
{
"enemyDamage": {
"enemy": "Geruta",
"type": "contact",
"hits": 1
}
}
]
}
{
"heatFrames": 200
}
{
"shinespark": {
"frames": 16,
"excessFrames": 0
}
}
Exit condition: {
"leaveWithSpark": {}
}
|
|
From: 1
Top Left Door
To: 4
Top Right Door
Entrance condition: {
"comeInShinecharged": {
"framesRequired": 10
}
}
Requires: {
"shinespark": {
"frames": 21
}
}
{
"heatFrames": 60
}
Exit condition: {
"leaveWithSpark": {}
}
|
|
From: 1
Top Left Door
To: 4
Top Right Door
Entrance condition: {
"comeInShinecharging": {
"length": 3,
"openEnd": 0
}
}
Requires: {
"heatFrames": 60
}
{
"shinespark": {
"frames": 17,
"excessFrames": 0
}
}
Exit condition: {
"leaveWithSpark": {}
}
|
|
From: 4
Top Right Door
To: 1
Top Left Door
Entrance condition: {
"comeInShinecharged": {
"framesRequired": 10
}
}
Requires: {
"shinespark": {
"frames": 21
}
}
{
"heatFrames": 60
}
Exit condition: {
"leaveWithSpark": {}
}
|
|
From: 4
Top Right Door
To: 1
Top Left Door
Entrance condition: {
"comeInShinecharging": {
"length": 3,
"openEnd": 0
}
}
Requires: {
"heatFrames": 60
}
{
"shinespark": {
"frames": 17,
"excessFrames": 0
}
}
Exit condition: {
"leaveWithSpark": {}
}
|
|
Notable: true 
Store the shinespark on the last possible pixels of runway. Quickly drop to the nearby namihe and damage boost using its flame. Hold the damage boost until just before being below the above platform and spark upwards Entrance condition: {
"comeInShinecharging": {
"length": 4,
"openEnd": 1
}
}
Requires: "Gravity"
{
"or": [
"h_lavaProof",
"canSuitlessLavaDive"
]
}
"canShinechargeMovementTricky"
"canHorizontalDamageBoost"
{
"shinespark": {
"frames": 33
}
}
{
"heatFrames": 320
}
{
"lavaFrames": 155
}
{
"enemyDamage": {
"enemy": "Namihe",
"type": "fireball",
"hits": 1
}
}
|
|
From: 1
Left Door
To: 2
Right Door
Entrance condition: {
"comeInShinecharged": {
"framesRequired": 10
}
}
Requires: {
"shinespark": {
"frames": 21
}
}
{
"heatFrames": 55
}
Exit condition: {
"leaveWithSpark": {}
}
|
|
From: 2
Right Door
To: 1
Left Door
Entrance condition: {
"comeInShinecharged": {
"framesRequired": 10
}
}
Requires: {
"shinespark": {
"frames": 21
}
}
{
"heatFrames": 55
}
Exit condition: {
"leaveWithSpark": {}
}
|
|
From: 4
Bottom of Elevator Ride
To: 1
Left Door
Entrance condition: {
"comeInShinecharged": {
"framesRequired": 20
}
}
Requires: "h_LowerNorfairElevatorUpwardFrames"
{
"shinespark": {
"frames": 6
}
}
{
"heatFrames": 50
}
Exit condition: {
"leaveWithSpark": {}
}
|
|
From: 4
Bottom of Elevator Ride
To: 2
Right Door
Entrance condition: {
"comeInShinecharged": {
"framesRequired": 20
}
}
Requires: "h_LowerNorfairElevatorUpwardFrames"
{
"shinespark": {
"frames": 6
}
}
{
"heatFrames": 50
}
Exit condition: {
"leaveWithSpark": {}
}
|
|
Entrance condition: {
"comeInWithSpark": {}
}
Requires: "canMidairShinespark"
{
"shinespark": {
"frames": 38,
"excessFrames": 1
}
}
{
"heatFrames": 160
}
|
|
From: 1
Left Door
To: 2
Right Door
Jump over the Refill station before Shinesparking. Entrance condition: {
"comeInShinecharged": {
"framesRequired": 50
}
}
Requires: "canShinechargeMovement"
{
"shinespark": {
"frames": 11
}
}
Exit condition: {
"leaveWithSpark": {
"position": "bottom"
}
}
|
|
From: 1
Left Door
To: 2
Right Door
Entrance condition: {
"comeInShinecharged": {
"framesRequired": 10
}
}
Requires: "canShinechargeMovement"
{
  "shinespark": {
    "frames": 21
  }
}
Exit condition: {
"leaveWithSpark": {
"position": "top"
}
}
|
|
From: 2
Right Door
To: 1
Left Door
Jump over the Refill station before Shinesparking. Entrance condition: {
"comeInShinecharged": {
"framesRequired": 50
}
}
Requires: "canShinechargeMovement"
{
"shinespark": {
"frames": 11
}
}
Exit condition: {
"leaveWithSpark": {
"position": "bottom"
}
}
|
|
From: 2
Right Door
To: 1
Left Door
Entrance condition: {
"comeInShinecharged": {
"framesRequired": 10
}
}
Requires: "canShinechargeMovement"
{
"shinespark": {
"frames": 21
}
}
Exit condition: {
"leaveWithSpark": {
"position": "top"
}
}
|
|
From: 1
Top Door
To: 2
Top Right Door
Entrance condition: {
"comeInShinecharged": {
"framesRequired": 100
},
"comesThroughToilet": "any"
}
Requires: "canShinechargeMovementComplex"
{
"heatFrames": 120
}
{
"shinespark": {
"frames": 5
}
}
Exit condition: {
"leaveWithSpark": {}
}
|
|
Entrance condition: {
"comeInShinecharging": {
"length": 3,
"openEnd": 0
}
}
Requires: "canShinechargeMovementComplex"
{
"heatFrames": 175
}
{
"shinespark": {
"frames": 8
}
}
Exit condition: {
"leaveWithSpark": {}
}
|
|
From: 2
Top Right Door
To: 3
Bottom Right Door
Entrance condition: {
"comeInShinecharged": {
"framesRequired": 110
}
}
Requires: {
"shinespark": {
"frames": 5
}
}
{
"heatFrames": 120
}
Exit condition: {
"leaveWithSpark": {}
}
|
|
From: 3
Bottom Right Door
To: 2
Top Right Door
Entrance condition: {
"comeInShinecharged": {
"framesRequired": 125
}
}
Requires: "HiJump"
"canShinechargeMovementComplex"
{
"heatFrames": 155
}
{
"shinespark": {
"frames": 6,
"excessFrames": 0
}
}
Exit condition: {
"leaveWithSpark": {}
}
|
|
From: 3
Bottom Right Door
To: 2
Top Right Door
Entrance condition: {
"comeInShinecharged": {
"framesRequired": 90
}
}
Requires: "HiJump"
"canShinechargeMovementComplex"
{
"heatFrames": 125
}
{
"shinespark": {
"frames": 4,
"excessFrames": 0
}
}
Exit condition: {
"leaveWithSpark": {}
}
|
|
From: 3
Bottom Right Door
To: 2
Top Right Door
Entrance condition: {
"comeInShinecharging": {
"length": 12,
"openEnd": 0
}
}
Requires: "canShinechargeMovementComplex"
{
"heatFrames": 195
}
{
"shinespark": {
"frames": 9,
"excessFrames": 0
}
}
Exit condition: {
"leaveWithSpark": {}
}
|
|
Entrance condition: {
"comeInWithSpark": {},
"comesThroughToilet": "any"
}
Requires: {
"shinespark": {
"frames": 40,
"excessFrames": 40
}
}
|
|
Enter on the either side of the doorway to make it to the top. Entrance condition: {
"comeInWithSpark": {},
"comesThroughToilet": "no"
}
Requires: {
"shinespark": {
"frames": 40,
"excessFrames": 6
}
}
|
|
Spark in line with the top of the door. Sparking too low or too high will crash early. Entrance condition: {
"comeInShinecharged": {
"framesRequired": 13
}
}
Requires: "canMidairShinespark"
{
"heatFrames": 205
}
{
"shinespark": {
"frames": 92,
"excessFrames": 5
}
}
|
|
Spark in line with the top of the door. Sparking too low or too high will crash early. Entrance condition: {
"comeInWithSpark": {
"position": "top"
}
}
Requires: "canMidairShinespark"
{
"heatFrames": 195
}
{
"shinespark": {
"frames": 95,
"excessFrames": 5
}
}
|
|
Spark in line with the top of the door. Sparking too low or too high will crash early. Entrance condition: {
"comeInShinecharging": {
"length": 3,
"openEnd": 1
}
}
Requires: "canMidairShinespark"
{
"heatFrames": 210
}
{
"shinespark": {
"frames": 90,
"excessFrames": 5
}
}
|
|
Spark in line with the top of the door. Sparking too low or too high will crash early. Entrance condition: {
"comeInShinecharged": {
"framesRequired": 13
}
}
Requires: "canMidairShinespark"
{
"heatFrames": 205
}
{
"shinespark": {
"frames": 92,
"excessFrames": 3
}
}
|
|
Spark in line with the top of the door. Sparking too low or too high will crash early. Entrance condition: {
"comeInWithSpark": {
"position": "top"
}
}
Requires: "canMidairShinespark"
{
"heatFrames": 195
}
{
"shinespark": {
"frames": 95,
"excessFrames": 3
}
}
|
|
Spark in line with the top of the door. Sparking too low or too high will crash early. Entrance condition: {
"comeInShinecharging": {
"length": 3,
"openEnd": 1
}
}
Requires: "canMidairShinespark"
{
"heatFrames": 210
}
{
"shinespark": {
"frames": 90,
"excessFrames": 3
}
}
|
|
From: 1
Left Shaft - Top Left Door
To: 4
Left Shaft - Top Right Door
Entrance condition: {
"comeInShinecharging": {
"length": 7,
"openEnd": 1
}
}
Requires: {
"or": [
{
"and": [
"canShinechargeMovementComplex",
{
"heatFrames": 225
},
{
"shinespark": {
"frames": 15,
"excessFrames": 0
}
}
]
},
{
"and": [
"canShinechargeMovementTricky",
{
"heatFrames": 215
},
{
"shinespark": {
"frames": 6,
"excessFrames": 0
}
}
]
}
]
}
Exit condition: {
"leaveWithSpark": {}
}
|
|
From: 2
Left Shaft - Bottom Right Door
To: 3
Left Shaft - Middle Right Door
Entrance condition: {
"comeInShinecharging": {
"length": 12,
"openEnd": 0,
"gentleUpTiles": 4
}
}
Requires: "canShinechargeMovementComplex"
{
"or": [
"HiJump",
"canWalljump"
]
}
{
"shinespark": {
"frames": 5
}
}
{
"heatFrames": 230
}
Exit condition: {
"leaveWithSpark": {}
}
|
|
From: 3
Left Shaft - Middle Right Door
To: 2
Left Shaft - Bottom Right Door
Entrance condition: {
"comeInShinecharged": {
"framesRequired": 145
}
}
Requires: "canShinechargeMovementComplex"
{
"shinespark": {
"frames": 18
}
}
{
"heatFrames": 190
}
Exit condition: {
"leaveWithSpark": {
"position": "top"
}
}
|
|
From: 3
Left Shaft - Middle Right Door
To: 2
Left Shaft - Bottom Right Door
Entrance condition: {
"comeInShinecharging": {
"length": 3,
"openEnd": 1
}
}
Requires: "canShinechargeMovementComplex"
{
"shinespark": {
"frames": 5
}
}
{
"heatFrames": 220
}
Exit condition: {
"leaveWithSpark": {
"position": "top"
}
}
|
|
From: 3
Left Shaft - Middle Right Door
To: 4
Left Shaft - Top Right Door
Entrance condition: {
"comeInShinecharged": {
"framesRequired": 140
}
}
Requires: "HiJump"
"canTrickyJump"
"canShinechargeMovementComplex"
{
"shinespark": {
"frames": 9
}
}
{
"heatFrames": 170
}
Exit condition: {
"leaveWithSpark": {}
}
|
|
From: 4
Left Shaft - Top Right Door
To: 1
Left Shaft - Top Left Door
Entrance condition: {
"comeInShinecharging": {
"length": 3,
"openEnd": 0
}
}
Requires: "HiJump"
"canTrickyJump"
"canShinechargeMovementComplex"
"canDodgeWhileShooting"
{
"or": [
{
"ammo": {
"type": "Missile",
"count": 1
}
},
"Plasma"
]
}
{
"shinespark": {
"frames": 14
}
}
{
"heatFrames": 190
}
Exit condition: {
"leaveWithSpark": {}
}
|
|
From: 4
Left Shaft - Top Right Door
To: 3
Left Shaft - Middle Right Door
Entrance condition: {
"comeInShinecharging": {
"length": 3,
"openEnd": 1
}
}
Requires: {
"or": [
{
"and": [
"canShinechargeMovementComplex",
{
"heatFrames": 215
},
{
"shinespark": {
"frames": 15,
"excessFrames": 0
}
}
]
},
{
"and": [
"canShinechargeMovementTricky",
{
"heatFrames": 195
},
{
"shinespark": {
"frames": 5,
"excessFrames": 0
}
}
]
}
]
}
Exit condition: {
"leaveWithSpark": {}
}
|
|
Align with the right side of a wall or door then turn around and shinespark in order to avoid colliding with a slope. Requires: {
"obstaclesCleared": [
"A"
]
}
"canShinechargeMovementComplex"
"canHorizontalShinespark"
{
"canShineCharge": {
"usedTiles": 33,
"openEnd": 2
}
}
{
"heatFrames": 335
}
{
"shinespark": {
"frames": 221
}
}
|
|
Entrance condition: {
"comeInShinecharging": {
"length": 3,
"openEnd": 0
}
}
Requires: {
"or": [
{
"and": [
"canHorizontalShinespark",
{
"shinespark": {
"frames": 76,
"excessFrames": 4
}
},
{
"heatFrames": 210
}
]
},
{
"and": [
"canShinechargeMovement",
"canMidairShinespark",
{
"shinespark": {
"frames": 67,
"excessFrames": 4
}
},
{
"heatFrames": 300
}
]
}
]
}
|
|
Entrance condition: {
"comeInWithSpark": {}
}
Requires: {
"shinespark": {
"frames": 80,
"excessFrames": 4
}
}
{
"heatFrames": 210
}
|
|
Entrance condition: {
"comeInShinecharging": {
"length": 3,
"openEnd": 0
}
}
Requires: {
"or": [
{
"and": [
"canHorizontalShinespark",
{
"shinespark": {
"frames": 76,
"excessFrames": 4
}
},
{
"heatFrames": 210
}
]
},
{
"and": [
"canShinechargeMovement",
"canMidairShinespark",
{
"shinespark": {
"frames": 67,
"excessFrames": 4
}
},
{
"heatFrames": 300
}
]
}
]
}
|
|
Entrance condition: {
"comeInWithSpark": {}
}
Requires: {
"shinespark": {
"frames": 80,
"excessFrames": 4
}
}
{
"heatFrames": 210
}
|
|
From: 1
Top Left Door
To: 3
Top Right Door
Entrance condition: {
"comeInShinecharged": {
"framesRequired": 80
}
}
Requires: "canShinechargeMovementComplex"
{
"heatFrames": 100
}
{
"shinespark": {
"frames": 16,
"excessFrames": 0
}
}
Exit condition: {
"leaveWithSpark": {}
}
|
|
From: 1
Top Left Door
To: 3
Top Right Door
Entrance condition: {
"comeInShinecharged": {
"framesRequired": 35
}
}
Requires: "canShinechargeMovementTricky"
"canHeroShot"
{
"heatFrames": 85
}
{
"shinespark": {
"frames": 37,
"excessFrames": 0
}
}
Exit condition: {
"leaveWithSpark": {}
}
|
|
From: 3
Top Right Door
To: 1
Top Left Door
Entrance condition: {
"comeInShinecharged": {
"framesRequired": 80
}
}
Requires: "canShinechargeMovementComplex"
{
"heatFrames": 100
}
{
"shinespark": {
"frames": 16,
"excessFrames": 0
}
}
Exit condition: {
"leaveWithSpark": {}
}
|
|
From: 3
Top Right Door
To: 1
Top Left Door
Entrance condition: {
"comeInShinecharged": {
"framesRequired": 35
}
}
Requires: "canShinechargeMovementTricky"
"canHeroShot"
{
"heatFrames": 85
}
{
"shinespark": {
"frames": 37,
"excessFrames": 0
}
}
Exit condition: {
"leaveWithSpark": {}
}
|
|
From: 1
Top Left Door
To: 3
Bottom Left Door
Entrance condition: {
"comeInShinecharging": {
"length": 4,
"openEnd": 1,
"gentleDownTiles": 2
}
}
Requires: "canShinechargeMovementComplex"
{
"or": [
{
"shinespark": {
"frames": 10
}
},
{
"enemyDamage": {
"enemy": "Sova",
"type": "contact",
"hits": 1
}
}
]
}
{
"shinespark": {
"frames": 2
}
}
Exit condition: {
"leaveWithSpark": {}
}
|
|
From: 1
Top Left Door
To: 6
Top Right Door
Shoot the door open while entering, land near the door, then run and jump under the platform above to get to the right side quickly. Entrance condition: {
"comeInShinecharged": {
"framesRequired": 75
}
}
Requires: {
"shinespark": {
"frames": 6,
"excessFrames": 0
}
}
Exit condition: {
"leaveWithSpark": {}
}
|
|
From: 1
Top Left Door
To: 6
Top Right Door
After landing, do a small jump and spark mid-air. Alternatively, if you can avoid tripping while entering the room, another option is to moonwalk back against the left door to get high enough to spark without bonking the platform on the right. Entrance condition: {
"comeInShinecharged": {
"framesRequired": 30
}
}
Requires: "canMidairShinespark"
{
"shinespark": {
"frames": 18
}
}
Exit condition: {
"leaveWithSpark": {
"position": "bottom"
}
}
|
|
From: 2
Middle Left Door
To: 1
Top Left Door
Carefully avoid hitting the Sova. Entrance condition: {
"comeInShinecharged": {
"framesRequired": 90
}
}
Requires: "HiJump"
"canShinechargeMovementComplex"
{
"shinespark": {
"frames": 6,
"excessFrames": 0
}
}
Exit condition: {
"leaveWithSpark": {}
}
|
|
From: 2
Middle Left Door
To: 1
Top Left Door
Carefully avoid hitting the Sova. Entrance condition: {
"comeInShinecharged": {
"framesRequired": 70
}
}
Requires: "HiJump"
"canShinechargeMovementComplex"
{
"shinespark": {
"frames": 10,
"excessFrames": 0
}
}
Exit condition: {
"leaveWithSpark": {
"position": "bottom"
}
}
|
|
From: 2
Middle Left Door
To: 1
Top Left Door
Spin-jump up and kill the Sova from the left just before landing on its platform. Entrance condition: {
"comeInShinecharged": {
"framesRequired": 115
}
}
Requires: "canShinechargeMovementComplex"
{
"or": [
"ScrewAttack",
"canTrickyJump"
]
}
{
"enemyKill": {
"enemies": [
[
"Sova"
]
],
"explicitWeapons": [
"ScrewAttack",
"Wave",
"Spazer",
"Plasma",
"Missile",
"Super"
]
}
}
{
"shinespark": {
"frames": 7,
"excessFrames": 0
}
}
Exit condition: {
"leaveWithSpark": {}
}
|
|
From: 2
Middle Left Door
To: 1
Top Left Door
Spin-jump up and kill the Sova from the left just before landing on its platform. Entrance condition: {
"comeInShinecharged": {
"framesRequired": 105
}
}
Requires: "canShinechargeMovementComplex"
{
"or": [
"ScrewAttack",
"canTrickyJump"
]
}
{
"enemyKill": {
"enemies": [
[
"Sova"
]
],
"explicitWeapons": [
"ScrewAttack",
"Wave",
"Spazer",
"Plasma",
"Missile",
"Super"
]
}
}
{
"shinespark": {
"frames": 10,
"excessFrames": 0
}
}
Exit condition: {
"leaveWithSpark": {
"position": "bottom"
}
}
|
|
From: 2
Middle Left Door
To: 3
Bottom Left Door
Entrance condition: {
"comeInShinecharged": {
"framesRequired": 90
}
}
Requires: "canShinechargeMovementComplex"
{
"shinespark": {
"frames": 2,
"excessFrames": 0
}
}
Exit condition: {
"leaveWithSpark": {}
}
|
|
From: 2
Middle Left Door
To: 4
Bottom Right Door
Entrance condition: {
"comeInShinecharging": {
"length": 3,
"openEnd": 1
}
}
Requires: "canShinechargeMovementTricky"
{
"shinespark": {
"frames": 12,
"excessFrames": 0
}
}
Exit condition: {
"leaveWithSpark": {
"position": "top"
}
}
|
|
From: 2
Middle Left Door
To: 6
Top Right Door
Entrance condition: {
"comeInShinecharged": {
"framesRequired": 100
}
}
Requires: "HiJump"
"canShinechargeMovementComplex"
{
"shinespark": {
"frames": 7,
"excessFrames": 0
}
}
Exit condition: {
"leaveWithSpark": {}
}
|
|
From: 2
Middle Left Door
To: 6
Top Right Door
Entrance condition: {
"comeInShinecharged": {
"framesRequired": 80
}
}
Requires: "HiJump"
"canShinechargeMovementComplex"
{
"shinespark": {
"frames": 10,
"excessFrames": 0
}
}
Exit condition: {
"leaveWithSpark": {
"position": "bottom"
}
}
|
|
From: 2
Middle Left Door
To: 6
Top Right Door
Spin-jump up and kill the Sova from the left just before landing on its platform. Entrance condition: {
"comeInShinecharged": {
"framesRequired": 125
}
}
Requires: "canShinechargeMovementComplex"
{
"or": [
"ScrewAttack",
"canTrickyJump"
]
}
{
"enemyKill": {
"enemies": [
[
"Sova"
]
],
"explicitWeapons": [
"ScrewAttack",
"Wave",
"Spazer",
"Plasma",
"Missile",
"Super"
]
}
}
{
"shinespark": {
"frames": 7,
"excessFrames": 0
}
}
Exit condition: {
"leaveWithSpark": {
"position": "bottom"
}
}
|
|
From: 2
Middle Left Door
To: 6
Top Right Door
Entrance condition: {
"comeInShinecharged": {
"framesRequired": 100
}
}
Requires: "canShinechargeMovementComplex"
{
"or": [
"ScrewAttack",
"canTrickyJump"
]
}
{
"enemyKill": {
"enemies": [
[
"Sova"
]
],
"explicitWeapons": [
"ScrewAttack",
"Wave",
"Spazer",
"Plasma",
"Missile",
"Super"
]
}
}
{
"shinespark": {
"frames": 10,
"excessFrames": 0
}
}
Exit condition: {
"leaveWithSpark": {
"position": "bottom"
}
}
|
|
From: 3
Bottom Left Door
To: 1
Top Left Door
Entrance condition: {
"comeInShinecharging": {
"length": 12,
"openEnd": 0
}
}
Requires: "HiJump"
"canShinechargeMovementTricky"
{
"shinespark": {
"frames": 10
}
}
Exit condition: {
"leaveWithSpark": {}
}
|
|
From: 3
Bottom Left Door
To: 2
Middle Left Door
Entrance condition: {
"comeInShinecharged": {
"framesRequired": 105
}
}
Requires: "canShinechargeMovementComplex"
{
"shinespark": {
"frames": 8,
"excessFrames": 0
}
}
Exit condition: {
"leaveWithSpark": {}
}
|
|
From: 3
Bottom Left Door
To: 2
Middle Left Door
Entrance condition: {
"comeInShinecharged": {
"framesRequired": 85
}
}
Requires: "HiJump"
"canShinechargeMovementComplex"
{
"shinespark": {
"frames": 8,
"excessFrames": 0
}
}
Exit condition: {
"leaveWithSpark": {}
}
|
|
From: 3
Bottom Left Door
To: 4
Bottom Right Door
Fall around the floating platform with either a Downback or by jumping down with a Spinjump. Entrance condition: {
"comeInShinecharged": {
"framesRequired": 100
}
}
Requires: "canShinechargeMovementComplex"
{
"shinespark": {
"frames": 11,
"excessFrames": 0
}
}
Exit condition: {
"leaveWithSpark": {
"position": "top"
}
}
|
|
From: 3
Bottom Left Door
To: 5
Middle Right Door
Entrance condition: {
"comeInShinecharged": {
"framesRequired": 10
}
}
Requires: {
"shinespark": {
"frames": 21
}
}
Exit condition: {
"leaveWithSpark": {}
}
|
|
From: 3
Bottom Left Door
To: 6
Top Right Door
Entrance condition: {
"comeInShinecharging": {
"length": 12,
"openEnd": 0
}
}
Requires: "HiJump"
"canShinechargeMovementTricky"
"canInsaneJump"
{
"shinespark": {
"frames": 6
}
}
Exit condition: {
"leaveWithSpark": {}
}
|
|
From: 3
Bottom Left Door
To: 6
Top Right Door
Entrance condition: {
"comeInShinecharging": {
"length": 12,
"openEnd": 0
}
}
Requires: "HiJump"
"canShinechargeMovementTricky"
{
"shinespark": {
"frames": 10
}
}
Exit condition: {
"leaveWithSpark": {
"position": "bottom"
}
}
|
|
From: 4
Bottom Right Door
To: 3
Bottom Left Door
Entrance condition: {
"comeInShinecharged": {
"framesRequired": 140
}
}
Requires: "canShinechargeMovementTricky"
{
"shinespark": {
"frames": 8,
"excessFrames": 0
}
}
Exit condition: {
"leaveWithSpark": {}
}
|
|
From: 4
Bottom Right Door
To: 3
Bottom Left Door
Entrance condition: {
"comeInShinecharged": {
"framesRequired": 120
}
}
Requires: "HiJump"
"canShinechargeMovementTricky"
{
"shinespark": {
"frames": 9,
"excessFrames": 0
}
}
Exit condition: {
"leaveWithSpark": {}
}
|
|
From: 4
Bottom Right Door
To: 5
Middle Right Door
Entrance condition: {
"comeInShinecharged": {
"framesRequired": 140
}
}
Requires: "canShinechargeMovementTricky"
{
"shinespark": {
"frames": 8,
"excessFrames": 0
}
}
Exit condition: {
"leaveWithSpark": {}
}
|
|
From: 4
Bottom Right Door
To: 5
Middle Right Door
Entrance condition: {
"comeInShinecharged": {
"framesRequired": 115
}
}
Requires: "HiJump"
"canShinechargeMovementTricky"
{
"shinespark": {
"frames": 9,
"excessFrames": 0
}
}
Exit condition: {
"leaveWithSpark": {}
}
|
|
From: 5
Middle Right Door
To: 1
Top Left Door
Quickly climb the left side of the room to just have enough time to shinespark out the door. Requires precise ledge grabs, but some precise walljumps can make it slightly easier. Entrance condition: {
"comeInShinecharging": {
"length": 12,
"openEnd": 0
}
}
Requires: "HiJump"
"canMidairShinespark"
"canShinechargeMovementTricky"
"canInsaneJump"
{
"shinespark": {
"frames": 5
}
}
Exit condition: {
"leaveWithSpark": {}
}
|
|
From: 5
Middle Right Door
To: 1
Top Left Door
Quickly climb the right side of the room to just have enough time to shinespark out the door. Entrance condition: {
"comeInShinecharging": {
"length": 4,
"openEnd": 1
}
}
Requires: "HiJump"
"canMidairShinespark"
"canShinechargeMovementTricky"
{
"shinespark": {
"frames": 6
}
}
Exit condition: {
"leaveWithSpark": {}
}
|
|
From: 5
Middle Right Door
To: 2
Middle Left Door
Entrance condition: {
"comeInShinecharged": {
"framesRequired": 135
}
}
Requires: "canShinechargeMovementComplex"
{
"shinespark": {
"frames": 7,
"excessFrames": 0
}
}
Exit condition: {
"leaveWithSpark": {}
}
|
|
From: 5
Middle Right Door
To: 2
Middle Left Door
Entrance condition: {
"comeInShinecharged": {
"framesRequired": 75
}
}
Requires: "HiJump"
"canShinechargeMovementComplex"
{
"shinespark": {
"frames": 11,
"excessFrames": 0
}
}
Exit condition: {
"leaveWithSpark": {}
}
|
|
From: 5
Middle Right Door
To: 2
Middle Left Door
Entrance condition: {
"comeInShinecharged": {
"framesRequired": 100
}
}
Requires: "canShinechargeMovementComplex"
"canWalljump"
{
"shinespark": {
"frames": 11,
"excessFrames": 0
}
}
Exit condition: {
"leaveWithSpark": {}
}
|
|
From: 5
Middle Right Door
To: 3
Bottom Left Door
Entrance condition: {
"comeInShinecharged": {
"framesRequired": 10
}
}
Requires: {
"shinespark": {
"frames": 21
}
}
Exit condition: {
"leaveWithSpark": {}
}
|
|
From: 5
Middle Right Door
To: 4
Bottom Right Door
Fall around the floating platform with either a Downback or by jumping down with a Spinjump. Entrance condition: {
"comeInShinecharged": {
"framesRequired": 100
}
}
Requires: "canShinechargeMovementComplex"
{
"shinespark": {
"frames": 11,
"excessFrames": 0
}
}
Exit condition: {
"leaveWithSpark": {
"position": "top"
}
}
|
|
From: 5
Middle Right Door
To: 6
Top Right Door
Quickly climb the right side of the room to just have enough time to shinespark out the door. Entrance condition: {
"comeInShinecharging": {
"length": 4,
"openEnd": 1
}
}
Requires: "HiJump"
"canMidairShinespark"
"canShinechargeMovementTricky"
"canInsaneJump"
{
"shinespark": {
"frames": 6
}
}
Exit condition: {
"leaveWithSpark": {}
}
|
|
From: 5
Middle Right Door
To: 6
Top Right Door
Quickly climb the right side of the room to just have enough time to shinespark out the door. Entrance condition: {
"comeInShinecharging": {
"length": 5,
"openEnd": 1
}
}
Requires: "HiJump"
"canMidairShinespark"
"canShinechargeMovementTricky"
{
"shinespark": {
"frames": 10
}
}
Exit condition: {
"leaveWithSpark": {
"position": "bottom"
}
}
|
|
From: 6
Top Right Door
To: 1
Top Left Door
Entrance condition: {
"comeInShinecharged": {
"framesRequired": 65
}
}
Requires: {
"shinespark": {
"frames": 5
}
}
Exit condition: {
"leaveWithSpark": {}
}
|
|
From: 6
Top Right Door
To: 1
Top Left Door
Entrance condition: {
"comeInShinecharged": {
"framesRequired": 10
}
}
Requires: {
"shinespark": {
"frames": 21
}
}
Exit condition: {
"leaveWithSpark": {
"position": "bottom"
}
}
|
|
From: 6
Top Right Door
To: 3
Bottom Left Door
Entrance condition: {
"comeInShinecharging": {
"length": 4,
"openEnd": 1
}
}
Requires: "canShinechargeMovementComplex"
{
"shinespark": {
"frames": 15
}
}
Exit condition: {
"leaveWithSpark": {}
}
|
|
Requires: "HiJump"
{
"or": [
{
"and": [
{
"doorUnlockedAtNode": 3
},
{
"doorUnlockedAtNode": 5
},
{
"canShineCharge": {
"usedTiles": 14,
"openEnd": 0
}
}
]
},
{
"and": [
{
"or": [
{
"doorUnlockedAtNode": 3
},
{
"doorUnlockedAtNode": 5
}
]
},
{
"canShineCharge": {
"usedTiles": 13,
"openEnd": 0
}
}
]
},
{
"canShineCharge": {
"usedTiles": 12,
"openEnd": 0
}
}
]
}
"canShinechargeMovementTricky"
{
"shinespark": {
"frames": 10
}
}
Exit condition: {
"leaveWithSpark": {}
}
|
|
Requires: "HiJump"
{
"or": [
{
"and": [
{
"doorUnlockedAtNode": 3
},
{
"doorUnlockedAtNode": 5
},
{
"canShineCharge": {
"usedTiles": 14,
"openEnd": 0
}
}
]
},
{
"and": [
{
"or": [
{
"doorUnlockedAtNode": 3
},
{
"doorUnlockedAtNode": 5
}
]
},
{
"canShineCharge": {
"usedTiles": 13,
"openEnd": 0
}
}
]
},
{
"canShineCharge": {
"usedTiles": 12,
"openEnd": 0
}
}
]
}
"canShinechargeMovementTricky"
"canInsaneJump"
{
"shinespark": {
"frames": 6
}
}
Exit condition: {
"leaveWithSpark": {}
}
|
|
Requires: "HiJump"
{
"or": [
{
"and": [
{
"doorUnlockedAtNode": 3
},
{
"doorUnlockedAtNode": 5
},
{
"canShineCharge": {
"usedTiles": 14,
"openEnd": 0
}
}
]
},
{
"and": [
{
"or": [
{
"doorUnlockedAtNode": 3
},
{
"doorUnlockedAtNode": 5
}
]
},
{
"canShineCharge": {
"usedTiles": 13,
"openEnd": 0
}
}
]
},
{
"canShineCharge": {
"usedTiles": 12,
"openEnd": 0
}
}
]
}
"canShinechargeMovementTricky"
{
"shinespark": {
"frames": 10
}
}
Exit condition: {
"leaveWithSpark": {
"position": "bottom"
}
}
|
|
From: 2
Right Door
To: 2
Right Door
Notable: true 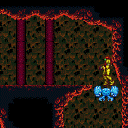

Enter from the right door and spin jump onto the first ledge while barely landing on the ledge in order to prevent getting the Geruta on camera. Walk against the left wall and jump to trigger the Geruta. It should now be moving leftwards. Stand on the next platform against the right wall and shoot the Geruta to get it one shot away from being frozen. After a few swoops, it will come down; either freeze it or tank a hit. Then go up and stand on the corner and freeze it when it is in position. The Geruta will be stuck below and keep swooping, so if Energy permits, Samus will have several attempts. Quickly shinecharge left to right, kill the Geruta and spark out the bottom right door. Entrance condition: {
"comeInNormally": {}
}
Requires: "h_canTrickyFrozenEnemyRunway"
"canCarefulJump"
{
"canShineCharge": {
"usedTiles": 17,
"openEnd": 1
}
}
"canShinechargeMovementTricky"
{
"heatFrames": 1260
}
{
"shinespark": {
"frames": 2,
"excessFrames": 0
}
}
Exit condition: {
"leaveWithSpark": {}
}
|
|
From: 2
Right Door
To: 3
Item
Notable: true
Enter from the right door and spin jump onto the first ledge while barely landing on the ledge in order to prevent getting the Geruta on camera. Walk against the left wall and jump to trigger the Geruta. It should now be moving leftwards. Stand on the next platform against the right wall and shoot the Geruta to get it one shot away from being frozen. After a few swoops, it will come down; either freeze it or tank a hit. Then go up and stand on the corner and freeze it when it is in position. The Geruta will be stuck below and keep swooping, so if Energy permits, Samus will have several attempts. With full heat protection, Samus can quickly shinecharge left to right then run and spark midair to the left to save Energy. Entrance condition: {
"comeInNormally": {}
}
Requires: "h_canTrickyFrozenEnemyRunway"
"canCarefulJump"
"canHorizontalShinespark"
{
"canShineCharge": {
"usedTiles": 17,
"openEnd": 1
}
}
{
"heatFrames": 1050
}
{
"or": [
{
"shinespark": {
"frames": 55,
"excessFrames": 15
}
},
{
"and": [
"h_heatProof",
"canMidairShinespark",
{
"shinespark": {
"frames": 32,
"excessFrames": 15
}
}
]
}
]
}
|
|
Requires: "canHorizontalShinespark"
{
"canShineCharge": {
"usedTiles": 15,
"openEnd": 2
}
}
{
"shinespark": {
"frames": 50
}
}
{
"heatFrames": 600
}
|
|
Watch out for the Geruda. Running left before jumping to bring it on camera will make it swoop left. Entrance condition: {
"comeInShinecharging": {
"length": 4,
"openEnd": 0
}
}
Requires: "canHorizontalShinespark"
{
"shinespark": {
"frames": 70,
"excessFrames": 12
}
}
"canShinechargeMovementComplex"
{
"heatFrames": 330
}
|
|
Watch out for the Geruda. Running left before jumping to bring it on camera will make it swoop left. Entrance condition: {
"comeInShinecharged": {
"framesRequired": 110
}
}
Requires: "canHorizontalShinespark"
{
"shinespark": {
"frames": 70,
"excessFrames": 12
}
}
"canShinechargeMovementComplex"
{
"heatFrames": 330
}
|
|
From: 3
Bottom Door
To: 2
Far Left Door
Notable: true 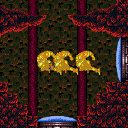
Spark left through the speed blocks through Croc Speedway. Then run to the right and back to get speed to go through the rest. The shinespark expects to kill the crumble bridge pirate, to be safe. Entrance condition: {
"comeInShinecharged": {
"framesRequired": 35
},
"comesThroughToilet": "any"
}
Requires: "canShinechargeMovement"
"canHorizontalShinespark"
{
"shinespark": {
"frames": 86,
"excessFrames": 10
}
}
{
"heatFrames": 700
}
Clears obstacles: A |
|
Entrance condition: {
"comeInWithSpark": {},
"comesThroughToilet": "any"
}
Requires: {
"shinespark": {
"frames": 6,
"excessFrames": 6
}
}
{
"heatFrames": 120
}
|
|
Entrance condition: {
"comeInWithSpark": {},
"comesThroughToilet": "no"
}
Requires: {
"shinespark": {
"frames": 6
}
}
{
"heatFrames": 85
}
|
|
From: 4
Bottom Right Door
To: 2
Far Left Door
Notable: true
Spark left through the speed blocks through Croc Speedway. Then run to the right and back to get speed to go through the rest. The shinespark expects to kill the crumble bridge pirate, to be safe. Entrance condition: {
"comeInShinecharging": {
"length": 1,
"openEnd": 1
}
}
Requires: "canShinechargeMovement"
"canHorizontalShinespark"
{
"shinespark": {
"frames": 84,
"excessFrames": 10
}
}
{
"heatFrames": 760
}
Clears obstacles: A |
|
From: 4
Bottom Right Door
To: 2
Far Left Door
Notable: true
Spark left through the speed blocks through Croc Speedway. Then run to the right and back to get speed to go through the rest. The shinespark expects to kill the crumble bridge pirate, to be safe. Entrance condition: {
"comeInWithSpark": {
"position": "bottom"
}
}
Requires: {
"shinespark": {
"frames": 94,
"excessFrames": 10
}
}
{
"heatFrames": 700
}
Clears obstacles: A |
|
From: 5
Top Right Door
To: 2
Far Left Door
Notable: true
The timer is tight, so run through the Cacatacs and mid-air spark left through the speed blocks. Then run to the right and back to get speed to go through the rest. The shinespark expects to kill the crumble bridge pirate, to be safe. Entrance condition: {
"comeInShinecharging": {
"length": 5,
"openEnd": 1
}
}
Requires: "canShinechargeMovementTricky"
"canTrickyJump"
"canMidairShinespark"
{
"enemyDamage": {
"enemy": "Cacatac",
"type": "spike",
"hits": 1
}
}
{
"shinespark": {
"frames": 92,
"excessFrames": 10
}
}
{
"heatFrames": 900
}
Clears obstacles: A |
|
From: 6
Bottom Right Junction
To: 5
Top Right Door
Move very quickly to bring a shinespark from the speedway up to the Save Room door. Preclear the Cacatacs, and it may help to not run while platforming if HiJump is not available. Requires: "h_heatProof"
{
"obstaclesCleared": [
"A"
]
}
"canShinechargeMovementTricky"
{
"canShineCharge": {
"usedTiles": 33,
"openEnd": 2
}
}
{
"shinespark": {
"frames": 12
}
}
Exit condition: {
"leaveWithSpark": {}
}
|
|
Entrance condition: {
"comeInShinecharged": {
"framesRequired": 60
}
}
Requires: "canHorizontalShinespark"
{
"shinespark": {
"frames": 20
}
}
{
"heatFrames": 175
}
|
|
It has to be setup really close to the left side of the right platforms, otherwise it also requires a crumble jump at the top. Entrance condition: {
"comeInShinecharged": {
"framesRequired": 60
}
}
Requires: {
"shinespark": {
"frames": 59
}
}
{
"heatFrames": 250
}
|
|
It is easiest to do a diagonal shinespark up the left wall, then hold left, angle down, and spam shoot to easily grab the item. Entrance condition: {
"comeInShinecharged": {
"framesRequired": 30
}
}
Requires: {
"shinespark": {
"frames": 59
}
}
{
"heatFrames": 250
}
|
|
From: 7
Junction Below Power Bomb Blocks
To: 2
Middle Left Door
Requires: {
"obstaclesCleared": [
"C",
"D"
]
}
"SpeedBooster"
"canShinechargeMovement"
{
"or": [
{
"shinespark": {
"frames": 19,
"excessFrames": 4
}
},
{
"and": [
"canShinechargeMovementComplex",
"canMidairShinespark",
{
"shinespark": {
"frames": 6,
"excessFrames": 4
}
}
]
}
]
}
|
|
From: 3
Bottom Right Door
To: 5
Junction Above Morph Tunnel
Reaching the Morph hole can be tricky with SpeedBooster but no HiJump. Entrance condition: {
"comeInShinecharged": {
"framesRequired": 70
}
}
Requires: "canMidAirMorph"
"canShinechargeMovementComplex"
{
"heatFrames": 210
}
{
"shinespark": {
"frames": 23,
"excessFrames": 3
}
}
|
|
Requires: {
"canShineCharge": {
"usedTiles": 33,
"openEnd": 2
}
}
{
"or": [
"f_DefeatedCrocomire",
{
"canShineCharge": {
"usedTiles": 31,
"openEnd": 0
}
}
]
}
{
"shinespark": {
"frames": 9
}
}
Exit condition: {
"leaveWithSpark": {}
}
|
|
Requires: "canMidairShinespark"
{
"canShineCharge": {
"usedTiles": 33,
"openEnd": 2
}
}
{
"or": [
{
"shinespark": {
"frames": 45,
"excessFrames": 5
}
},
{
"and": [
"canShinechargeMovementComplex",
{
"shinespark": {
"frames": 5
}
}
]
}
]
}
|
|
From: 2
Bottom Right Door
To: 1
Top Right Door
Entrance condition: {
"comeInShinecharged": {
"framesRequired": 13
}
}
Requires: {
"shinespark": {
"frames": 40
}
}
|
|
Entrance condition: {
"comeInShinecharging": {
"length": 9,
"openEnd": 0
}
}
Requires: {
"shinespark": {
"frames": 40
}
}
|
|
Requires: {
"obstaclesCleared": [
"A"
]
}
{
"shinespark": {
"frames": 40
}
}
|
|
Requires: {
"obstaclesCleared": [
"A"
]
}
{
"shinespark": {
"frames": 6
}
}
Exit condition: {
"leaveWithSpark": {}
}
|
|
Build some run speed to jump to the opposite runway to open the door before Shinesparking. Entrance condition: {
"comeInShinecharging": {
"length": 9,
"openEnd": 0
}
}
Requires: "canShinechargeMovement"
{
"shinespark": {
"frames": 11
}
}
Exit condition: {
"leaveWithSpark": {}
}
|
|
Entrance condition: {
"comeInShinecharged": {
"framesRequired": 120
}
}
Requires: "canShinechargeMovementComplex"
{
"shinespark": {
"frames": 36
}
}
|
|
From: 1
Left Door
To: 3
Junction Left of Green Gate
Entrance condition: {
"comeInWithSpark": {}
}
Requires: {
"shinespark": {
"frames": 56,
"excessFrames": 1
}
}
|
|
From: 1
Left Door
To: 3
Junction Left of Green Gate
Entrance condition: {
"comeInShinecharging": {
"length": 3,
"openEnd": 1
}
}
Requires: "canHorizontalShinespark"
{
"shinespark": {
"frames": 54,
"excessFrames": 1
}
}
|
|
Entrance condition: {
"comeInWithSpark": {}
}
Requires: {
"shinespark": {
"frames": 43,
"excessFrames": 8
}
}
|
|
Entrance condition: {
"comeInShinecharged": {
"framesRequired": 45
}
}
Requires: "canHorizontalShinespark"
{
"shinespark": {
"frames": 29,
"excessFrames": 5
}
}
|
|
From: 1
Top Left Door
To: 4
Top Right Door
Entrance condition: {
"comeInShinecharged": {
"framesRequired": 130
}
}
Requires: "SpaceJump"
"canShinechargeMovementComplex"
"canMidairShinespark"
{
"shinespark": {
"frames": 21
}
}
Exit condition: {
"leaveWithSpark": {}
}
|
|
Enter on the far right side of the doorway to reach the ledge above. Entrance condition: {
"comeInWithSpark": {},
"comesThroughToilet": "no"
}
Requires: {
"shinespark": {
"frames": 25,
"excessFrames": 5
}
}
|
|
Entrance condition: {
"comeInShinecharged": {
"framesRequired": 10
},
"comesThroughToilet": "any"
}
Requires: {
"shinespark": {
"frames": 25
}
}
|
|
Enter on the left side of the doorway to reduce the amount of energy used. Entrance condition: {
"comeInWithSpark": {},
"comesThroughToilet": "any"
}
Requires: {
"shinespark": {
"frames": 15,
"excessFrames": 15
}
}
|
|
Entrance condition: {
"comeInShinecharging": {
"length": 10,
"openEnd": 0,
"gentleDownTiles": 4
}
}
Requires: {
"shinespark": {
"frames": 25
}
}
|
|
From: 3
Bottom Right Door
To: 1
Top Left Door
Kill the Gamets with Wave Beam when entering the room. Entrance condition: {
"comeInShinecharging": {
"length": 18,
"openEnd": 1,
"gentleDownTiles": 4,
"gentleUpTiles": 2
}
}
Requires: "Wave"
"canDodgeWhileShooting"
{
"shinespark": {
"frames": 25,
"excessFrames": 5
}
}
|
|
From: 3
Bottom Right Door
To: 1
Top Left Door
Entrance condition: {
"comeInShinecharged": {
"framesRequired": 160
}
}
Requires: "SpaceJump"
"canShinechargeMovementComplex"
"canMidairShinespark"
{
"shinespark": {
"frames": 21
}
}
Exit condition: {
"leaveWithSpark": {}
}
|
|
Entrance condition: {
"comeInShinecharging": {
"length": 10,
"openEnd": 0,
"gentleDownTiles": 4
}
}
Requires: {
"shinespark": {
"frames": 25
}
}
|
|
From: 3
Bottom Right Door
To: 4
Top Right Door
Climb up 1 screen. Entrance condition: {
"comeInShinecharged": {
"framesRequired": 1
}
}
Requires: {
"shinespark": {
"frames": 1,
"excessFrames": 1
}
}
"canShinesparkDeepStuck"
"canXRayClimb"
|
|
From: 3
Bottom Right Door
To: 4
Top Right Door
Kill the Gamets with Wave Beam when entering the room. Entrance condition: {
"comeInShinecharging": {
"length": 18,
"openEnd": 1,
"gentleDownTiles": 4,
"gentleUpTiles": 2
}
}
Requires: "Wave"
"canDodgeWhileShooting"
{
"shinespark": {
"frames": 25
}
}
|
|
From: 3
Bottom Right Door
To: 4
Top Right Door
Entrance condition: {
"comeInShinecharging": {
"length": 7,
"openEnd": 1,
"gentleDownTiles": 3
}
}
Requires: "SpaceJump"
"canShinechargeMovementComplex"
"canMidairShinespark"
{
"shinespark": {
"frames": 15
}
}
Exit condition: {
"leaveWithSpark": {}
}
|
|
Entrance condition: {
"comeInWithSpark": {}
}
Requires: {
"shinespark": {
"frames": 43,
"excessFrames": 8
}
}
|
|
Entrance condition: {
"comeInShinecharged": {
"framesRequired": 45
}
}
Requires: "canHorizontalShinespark"
{
"shinespark": {
"frames": 29,
"excessFrames": 5
}
}
|
|
From: 4
Top Right Door
To: 1
Top Left Door
Entrance condition: {
"comeInShinecharged": {
"framesRequired": 130
}
}
Requires: "SpaceJump"
"canShinechargeMovementComplex"
"canMidairShinespark"
{
"shinespark": {
"frames": 21
}
}
Exit condition: {
"leaveWithSpark": {}
}
|
|
Requires: {
"or": [
{
"canShineCharge": {
"usedTiles": 18,
"openEnd": 1,
"gentleUpTiles": 2,
"gentleDownTiles": 4
}
},
{
"and": [
{
"doorUnlockedAtNode": 3
},
{
"canShineCharge": {
"usedTiles": 19,
"openEnd": 1,
"gentleUpTiles": 2,
"gentleDownTiles": 4
}
}
]
}
]
}
{
"shinespark": {
"frames": 25,
"excessFrames": 5
}
}
|
|
Requires: {
"or": [
{
"canShineCharge": {
"usedTiles": 18,
"openEnd": 1,
"gentleUpTiles": 2,
"gentleDownTiles": 4
}
},
{
"and": [
{
"doorUnlockedAtNode": 3
},
{
"canShineCharge": {
"usedTiles": 19,
"openEnd": 1,
"gentleUpTiles": 2,
"gentleDownTiles": 4
}
}
]
}
]
}
{
"shinespark": {
"frames": 25
}
}
|
|
From: 5
Main Junction
To: 4
Top Right Door
Requires: "canWalljump"
"canShinechargeMovementComplex"
{
"or": [
{
"canShineCharge": {
"usedTiles": 18,
"openEnd": 1,
"gentleUpTiles": 2,
"gentleDownTiles": 4
}
},
{
"and": [
{
"doorUnlockedAtNode": 3
},
{
"canShineCharge": {
"usedTiles": 19,
"openEnd": 0,
"gentleUpTiles": 2,
"gentleDownTiles": 4
}
}
]
}
]
}
{
"shinespark": {
"frames": 15
}
}
Exit condition: {
"leaveWithSpark": {}
}
|
|
Takes three walljumps, and must shinespark at the apex. Entrance condition: {
"comeInShinecharged": {
"framesRequired": 110
}
}
Requires: "canPreciseWalljump"
"canConsecutiveWalljump"
"canShinechargeMovement"
"canMidairShinespark"
{
"shinespark": {
"frames": 78
}
}
|
|
From: 1
Left Door
To: 3
Item
Walljump or build run speed using the full runway to jump high enough for the shinespark. Entrance condition: {
"comeInShinecharged": {
"framesRequired": 80
}
}
Requires: {
"or": [
{
"and": [
"canWalljump",
{
"shinespark": {
"frames": 20
}
}
]
},
"canTrickyDashJump"
]
}
"HiJump"
"canShinechargeMovement"
"canMidairShinespark"
{
"shinespark": {
"frames": 60
}
}
|
|
Walljump or build run speed using the full runway to jump high enough for the shinespark. Entrance condition: {
"comeInShinecharging": {
"length": 9,
"openEnd": 0
}
}
Requires: {
"or": [
{
"and": [
"canWalljump",
{
"shinespark": {
"frames": 20
}
}
]
},
"canTrickyDashJump"
]
}
"HiJump"
"canShinechargeMovement"
"canMidairShinespark"
{
"shinespark": {
"frames": 60
}
}
|
|
Takes three walljumps, and must shinespark at the apex. Entrance condition: {
"comeInShinecharging": {
"length": 9,
"openEnd": 0
}
}
Requires: "canPreciseWalljump"
"canConsecutiveWalljump"
"canShinechargeMovement"
"canMidairShinespark"
{
"shinespark": {
"frames": 78
}
}
|
|
Notable: true 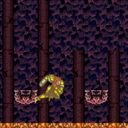
Store a shinespark near the Grapple Room door and use the remaining runway to jump as far as possible to the right. Once near the acid platforms, Shinespark diagonally to reach the Missile Location. Entrance condition: {
"comeInShinecharged": {
"framesRequired": 175
}
}
Requires: "canTrickyJump"
"canShinechargeMovementComplex"
"canMidairShinespark"
{
"shinespark": {
"frames": 40
}
}
|
|
From: 2
Right Vertical Door
To: 4
Right Junction with Speed Blocks Broken
Spark from the ground, left of the Power Bomb blocks. Entrance condition: {
"comeInShinecharged": {
"framesRequired": 80
},
"comesThroughToilet": "any"
}
Requires: "canHorizontalShinespark"
{
"shinespark": {
"frames": 115
}
}
Clears obstacles: B |
|
From: 2
Right Vertical Door
To: 4
Right Junction with Speed Blocks Broken
Spark from the ground, left of the Power Bomb blocks. Entrance condition: {
"comeInShinecharged": {
"framesRequired": 80
},
"comesThroughToilet": "any"
}
Requires: "canHorizontalShinespark"
{
"shinespark": {
"frames": 115,
"excessFrames": 85
}
}
{
"or": [
"canTrickyJump",
{
"and": [
{
"or": [
"canWalljump",
"HiJump"
]
},
{
"acidFrames": 25
}
]
},
{
"and": [
"Gravity",
{
"acidFrames": 20
}
]
}
]
}
Clears obstacles: B |
|
From: 4
Right Junction with Speed Blocks Broken
To: 1
Left Door
Notable: true 
Charge a spark to the right, then come back, run and jump, and do a horizontal spark at the apex. Requires: "canShinechargeMovement"
"canMidairShinespark"
{
"canShineCharge": {
"usedTiles": 32,
"openEnd": 1
}
}
{
"shinespark": {
"frames": 52
}
}
|
|
From: 4
Right Junction with Speed Blocks Broken
To: 1
Left Door
Fire off the shinespark at the apex of two consecutive walljumps. Requires: "canWalljump"
"canShinechargeMovement"
"canMidairShinespark"
{
"canShineCharge": {
"usedTiles": 32,
"openEnd": 1
}
}
{
"shinespark": {
"frames": 90
}
}
|
|
From: 4
Right Junction with Speed Blocks Broken
To: 3
Item
Requires: {
"canShineCharge": {
"usedTiles": 32,
"openEnd": 1
}
}
{
"shinespark": {
"frames": 40
}
}
|
|
From: 5
Small Platforms Junction
To: 4
Right Junction with Speed Blocks Broken
Notable: true 
Gravity makes it possible to charge a spark in the acid in order to break the speed blocks. Requires: "Gravity"
"canShinechargeMovement"
"canHorizontalShinespark"
{
"canShineCharge": {
"usedTiles": 33,
"openEnd": 2
}
}
{
"acidFrames": 140
}
{
"shinespark": {
"frames": 35
}
}
Clears obstacles: B |
|
Entrance condition: {
"comeInWithSpark": {},
"comesThroughToilet": "any"
}
Requires: {
"shinespark": {
"frames": 2,
"excessFrames": 2
}
}
|
|
Entrance condition: {
"comeInShinecharged": {
"framesRequired": 2
}
}
Requires: {
"shinespark": {
"frames": 58,
"excessFrames": 2
}
}
|
|
Entrance condition: {
"comeInShinecharging": {
"length": 3,
"openEnd": 0
}
}
Requires: {
"shinespark": {
"frames": 58,
"excessFrames": 2
}
}
|
|
Entrance condition: {
"comeInWithSpark": {}
}
Requires: "h_canNavigateHeatRooms"
{
"heatFrames": 125
}
{
"shinespark": {
"frames": 36
}
}
|
|
From: 2
Bottom Right Door
To: 5
Bottom Junction Right of Morph Tunnel
Entrance condition: {
"comeInWithSpark": {}
}
Requires: "h_canNavigateHeatRooms"
{
"heatFrames": 125
}
{
"shinespark": {
"frames": 41,
"excessFrames": 6
}
}
|
|
Entrance condition: {
"comeInWithSpark": {
"position": "bottom"
}
}
Requires: "h_canNavigateHeatRooms"
{
"shinespark": {
"frames": 18,
"excessFrames": 5
}
}
{
"heatFrames": 100
}
|
|
Entrance condition: {
"comeInWithSpark": {
"position": "top"
}
}
Requires: "h_canNavigateHeatRooms"
{
"shinespark": {
"frames": 19,
"excessFrames": 8
}
}
{
"heatFrames": 120
}
|
|
From: 5
Golden Torizo (locked)
To: 4
Hidden Right Item
Notable: true 
One vertical spark is needed to open up the area directly above. A running jump is used to jump high enough into the revealed hole for a horizontal spark. Requires: "h_canNavigateHeatRooms"
{
"obstaclesCleared": [
"f_DefeatedGoldenTorizo"
]
}
"canShinechargeMovementComplex"
"HiJump"
{
"canShineCharge": {
"usedTiles": 28,
"openEnd": 0
}
}
{
"heatFrames": 900
}
{
"shinespark": {
"frames": 11
}
}
|
|
From: 5
Golden Torizo (locked)
To: 4
Hidden Right Item
Notable: true
One vertical spark is needed to open up the area directly above. Then, a second horizontal spark is performed where those blocks were cleared. Try to aim for the seam between tiles to break more blocks. And the left side of the opening may be slightly easier. Requires: "h_canNavigateHeatRooms"
{
"obstaclesCleared": [
"f_DefeatedGoldenTorizo"
]
}
"canShinechargeMovementComplex"
"canPreciseWalljump"
"canConsecutiveWalljump"
{
"canShineCharge": {
"usedTiles": 28,
"openEnd": 0
}
}
{
"heatFrames": 900
}
{
"shinespark": {
"frames": 11
}
}
|
|
Entrance condition: {
"comeInShinecharged": {
"framesRequired": 25
}
}
Requires: "h_canNavigateHeatRooms"
{
"heatFrames": 200
}
{
"shinespark": {
"frames": 31,
"excessFrames": 10
}
}
Clears obstacles: B |
|
Entrance condition: {
"comeInShinecharged": {
"framesRequired": 50
}
}
Requires: "h_canNavigateHeatRooms"
{
"heatFrames": 250
}
{
"shinespark": {
"frames": 41,
"excessFrames": 4
}
}
Clears obstacles: A, B |
|
From: 2
Middle Right Door
To: 3
Top Right Door
Jump into Screw Attack Room and spark diagonally once above the center of the door vertically. Or diagonally spark anywhere that is not the bottom of the door in the previous room. Entrance condition: {
"comeInShinecharged": {
"framesRequired": 15
}
}
Requires: "h_canNavigateHeatRooms"
"canMidairShinespark"
"canShinechargeMovement"
"canPrepareForNextRoom"
{
"heatFrames": 250
}
{
"shinespark": {
"frames": 18,
"excessFrames": 4
}
}
Clears obstacles: A |
|
Entrance condition: {
"comeInShinecharged": {
"framesRequired": 50
}
}
Requires: "h_canNavigateHeatRooms"
{
"heatFrames": 250
}
{
"shinespark": {
"frames": 35,
"excessFrames": 4
}
}
Clears obstacles: A |
|
From: 4
Item
To: 2
Middle Right Door
Notable: true 
Diagonally shinespark towards the middle door. Requires: "canShinechargeMovement"
{
"obstaclesCleared": [
"C"
]
}
{
"canShineCharge": {
"usedTiles": 33,
"openEnd": 2
}
}
{
"heatFrames": 240
}
{
"shinespark": {
"frames": 31,
"excessFrames": 10
}
}
Clears obstacles: B |
|
From: 4
Item
To: 3
Top Right Door
Notable: true
Carry a shinecharge down though the bomb blocks and shinespark back up. Requires: "canShinechargeMovement"
{
"obstaclesCleared": [
"C"
]
}
{
"canShineCharge": {
"usedTiles": 33,
"openEnd": 2
}
}
{
"heatFrames": 270
}
{
"shinespark": {
"frames": 41,
"excessFrames": 4
}
}
Clears obstacles: A, B |
|
From: 3
Bottom Platform Junction
To: 1
Left Door
Notable: true 
There is just enough runway below the left door to build a shinespark. Requires: "h_heatProof"
"Gravity"
"canSuitlessLavaDive"
{
"canShineCharge": {
"usedTiles": 13,
"openEnd": 1
}
}
{
"shinespark": {
"frames": 55
}
}
{
"acidFrames": 600
}
|
|
Spark vertically on room entry. Entrance condition: {
"comeInShinecharged": {
"framesRequired": 5
}
}
Requires: "h_canNavigateHeatRooms"
{
"shinespark": {
"frames": 21,
"excessFrames": 5
}
}
{
"heatFrames": 250
}
|
|
Entrance condition: {
"comeInShinecharged": {
"framesRequired": 45
}
}
Requires: {
"shinespark": {
"frames": 12
}
}
"h_canUsePowerBombs"
{
"heatFrames": 400
}
Clears obstacles: A |
|
From: 2
Bottom Left Door
To: 1
Top Left Door
Climb up 1 screen. Entrance condition: {
"comeInShinecharged": {
"framesRequired": 1
}
}
Requires: "canShinesparkDeepStuck"
{
"shinespark": {
"frames": 1,
"excessFrames": 1
}
}
"canXRayClimb"
{
"heatFrames": 1600
}
|
|
Entrance condition: {
"comeInShinecharged": {
"framesRequired": 45
}
}
Requires: {
"shinespark": {
"frames": 12
}
}
"h_canUsePowerBombs"
{
"heatFrames": 400
}
Clears obstacles: A |
|
From: 3
Bottom Right Door
To: 1
Top Left Door
Climb up 1 screen. Entrance condition: {
"comeInShinecharged": {
"framesRequired": 1
}
}
Requires: {
"shinespark": {
"frames": 1,
"excessFrames": 1
}
}
"canShinesparkDeepStuck"
"canXRayClimb"
{
"heatFrames": 1650
}
|
|
Entrance condition: {
"comeInShinecharged": {
"framesRequired": 15
}
}
Requires: "h_canNavigateHeatRooms"
"canMidairShinespark"
{
"shinespark": {
"frames": 57,
"excessFrames": 4
}
}
{
"heatFrames": 230
}
|
|
Entrance condition: {
"comeInShinecharged": {
"framesRequired": 15
}
}
Requires: "h_canNavigateHeatRooms"
"canMidairShinespark"
{
"shinespark": {
"frames": 59,
"excessFrames": 5
}
}
{
"heatFrames": 190
}
|
|
From: 2
Right Vertical Door
To: 2
Right Vertical Door
Entrance condition: {
"comeInWithSpark": {},
"comesThroughToilet": "any"
}
Requires: {
"shinespark": {
"frames": 5,
"excessFrames": 5
}
}
{
"heatFrames": 120
}
|
|
Leave Shinecharged Through Top of Door - Open Door First (Very Hard)
Lower Norfair Spring Ball Maze Room
From: 4
Item
To: 3
Bottom Horizontal Door
Open the door to be able to spark out. Shinecharge near the missile location, then fall back down and run to the right before sparking out the right door. The Alcoons must have been cleared prior in order to be able to spark out. Requires: {
"canShineCharge": {
"usedTiles": 27,
"gentleUpTiles": 2,
"openEnd": 1
}
}
{
"obstaclesCleared": [
"A",
"C"
]
}
{
"heatFrames": 390
}
"canShinechargeMovementComplex"
{
"shinespark": {
"frames": 30
}
}
Exit condition: {
"leaveWithSpark": {}
}
|
|
From: 4
Item
To: 3
Bottom Horizontal Door
Open the door to be able to spark out. Shinecharge near the missile location, then fall back down and spark out the right door. The door must have been opened prior in order to be able to spark out of it. Requires: {
"canShineCharge": {
"usedTiles": 27,
"gentleUpTiles": 2,
"openEnd": 1
}
}
{
"obstaclesCleared": [
"A",
"C"
]
}
{
"heatFrames": 390
}
"canShinechargeMovement"
{
"shinespark": {
"frames": 35
}
}
Exit condition: {
"leaveWithSpark": {
"position": "bottom"
}
}
|
|
Spring Ball Maze - Hero Shot Shinespark through the Right Door (Very Hard)
Lower Norfair Spring Ball Maze Room
From: 4
Item
To: 3
Bottom Horizontal Door
Shinecharge near the missile location, then fall down and shoot a beam shot through the lower half of the large stalactite. Shinespark to the right before the shot goes off screen, and have it open the door before Samus gets there. Requires: {
"canShineCharge": {
"usedTiles": 27,
"gentleUpTiles": 2,
"openEnd": 1
}
}
{
"obstaclesCleared": [
"A"
]
}
{
"heatFrames": 370
}
"canShinechargeMovementComplex"
"canHeroShot"
{
"shinespark": {
"frames": 31
}
}
{
"doorUnlockedAtNode": 3
}
Exit condition: {
"leaveWithSpark": {
"position": "bottom"
}
}
|
|
Entrance condition: {
"comeInShinecharged": {
"framesRequired": 16
}
}
Requires: "h_canNavigateHeatRooms"
"canShinechargeMovement"
"canMidairShinespark"
{
"shinespark": {
"frames": 75,
"excessFrames": 10
}
}
{
"heatFrames": 270
}
|
|
Requires: "h_canNavigateHeatRooms"
"canMidairShinespark"
"canShinechargeMovement"
{
"canShineCharge": {
"usedTiles": 24,
"openEnd": 1
}
}
{
"shinespark": {
"frames": 75,
"excessFrames": 5
}
}
{
"heatFrames": 380
}
|
|
From: 3
Metal Pirates Junction
To: 3
Metal Pirates Junction
Notable: true 
Use the Echoes created by shinesparking to defeat the Metal Pirates. This involves Shineparking into a precise point while also turning the Pirates vulnerable as the echoes reach them. Requires: "h_canNavigateHeatRooms"
"canUseSpeedEchoes"
"canHitbox"
{
"heatFrames": 450
}
{
"canShineCharge": {
"usedTiles": 33,
"openEnd": 2
}
}
{
"shinespark": {
"frames": 18
}
}
Clears obstacles: A |
|
More heat frames than shinespark frames because the shinespark bonk takes some time. Entrance condition: {
"comeInWithSpark": {}
}
Requires: "h_canNavigateHeatRooms"
{
"heatFrames": 160
}
{
"shinespark": {
"frames": 80
}
}
Clears obstacles: C, E, F |
|
Jump before shinesparking to avoid an early crash. Entrance condition: {
"comeInShinecharged": {
"framesRequired": 15
}
}
Requires: "canMidairShinespark"
{
"shinespark": {
"frames": 78,
"excessFrames": 8
}
}
{
"heatFrames": 210
}
|
|
Jump before shinesparking to avoid an early crash. Entrance condition: {
"comeInShinecharged": {
"framesRequired": 15
}
}
Requires: "canMidairShinespark"
{
"shinespark": {
"frames": 78,
"excessFrames": 4
}
}
{
"heatFrames": 210
}
|
|
From: 2
Bottom Right Vertical Door
To: 2
Bottom Right Vertical Door
Entrance condition: {
"comeInWithSpark": {},
"comesThroughToilet": "any"
}
Requires: {
"shinespark": {
"frames": 4,
"excessFrames": 4
}
}
{
"heatFrames": 120
}
|
|
From: 2
Bottom Left Door
To: 4
Junction Above Bomb Blocks
Entrance condition: {
"comeInShinecharged": {
"framesRequired": 60
}
}
Requires: "h_canNavigateHeatRooms"
{
"shinespark": {
"frames": 40,
"excessFrames": 3
}
}
{
"heatFrames": 240
}
Clears obstacles: A |
|
From: 4
Junction Right of Power Bomb Blocks
To: 4
Junction Right of Power Bomb Blocks
Use I-Frames from the first Dessgeega to run through the remaining enemies and store a shinespark. 1-tap Shortcharge, then run back towards the Hoppers and try to hit all three at once by shinesparking horizontally as the ceiling hopper jumps down. Requires: {
"canShineCharge": {
"usedTiles": 25,
"openEnd": 1,
"steepUpTiles": 4
}
}
{
"enemyDamage": {
"enemy": "Dessgeega",
"type": "contact",
"hits": 1
}
}
"canHitbox"
"canShinechargeMovementComplex"
"canHorizontalShinespark"
{
"shinespark": {
"frames": 40
}
}
{
"heatFrames": 330
}
Clears obstacles: D |
|
From: 7
Junction Left of Morph Tunnel
To: 7
Junction Left of Morph Tunnel
Use I-Frames from the first Dessgeega to run through the remaining enemies and store a shinespark. It helps to run towards the first hopper to take damage and then not stutter. Mid-air spark to kill all three at once. Requires: {
"canShineCharge": {
"usedTiles": 17,
"openEnd": 1
}
}
{
"enemyDamage": {
"enemy": "Dessgeega",
"type": "contact",
"hits": 1
}
}
"canHitbox"
"canMidairShinespark"
"canShinechargeMovementComplex"
{
"shinespark": {
"frames": 40
}
}
{
"heatFrames": 310
}
Clears obstacles: D |
|
Requires: "canShinechargeMovement"
{
"canShineCharge": {
"usedTiles": 33,
"openEnd": 2
}
}
"canMidairShinespark"
{
"shinespark": {
"frames": 80
}
}
Exit condition: {
"leaveWithSpark": {}
}
|
|
Entrance condition: {
"comeInWithSpark": {},
"comesThroughToilet": "any"
}
Requires: {
"shinespark": {
"frames": 6,
"excessFrames": 6
}
}
|
|
Requires: "SpeedBooster"
"canShinechargeMovementTricky"
"canMockball"
{
"obstaclesCleared": [
"A"
]
}
{
"shinespark": {
"frames": 3
}
}
Exit condition: {
"leaveWithSpark": {}
}
|
|
From: 1
Top Left Door
To: 1
Top Left Door
Entrance condition: {
"comeInWithSpark": {}
}
Requires: {
"shinespark": {
"frames": 71,
"excessFrames": 21
}
}
Exit condition: {
"leaveWithRunway": {
"length": 45,
"openEnd": 1
}
}
|
|
Entrance condition: {
"comeInWithSpark": {}
}
Requires: {
"shinespark": {
"frames": 91,
"excessFrames": 8
}
}
|
|
From: 4
Bottom Chozo Item (locked)
To: 5
Top Right Item (locked)
Requires: {
"canShineCharge": {
"usedTiles": 33,
"openEnd": 2
}
}
{
"shinespark": {
"frames": 40
}
}
{
"obstaclesCleared": [
"A"
]
}
|
|
From: 4
Bottom Chozo Item (locked)
To: 5
Top Right Item (locked)
Requires: {
"canShineCharge": {
"usedTiles": 33,
"openEnd": 2
}
}
{
"shinespark": {
"frames": 40
}
}
"h_canUsePowerBombs"
Clears obstacles: A |
|
Entrance condition: {
"comeInShinecharged": {
"framesRequired": 10
}
}
Requires: {
"shinespark": {
"frames": 21
}
}
Exit condition: {
"leaveWithSpark": {}
}
|
|
Entrance condition: {
"comeInShinecharged": {
"framesRequired": 10
}
}
Requires: {
"shinespark": {
"frames": 21
}
}
Exit condition: {
"leaveWithSpark": {}
}
|
|
Land on the first spike platform, and use it to run and jump far enough through the room to trigger the fourth spike platform to fall. Fire a shot mid-air and activate the shinespark wind-up. Wait until the shot is at a specific position before sparking. Sparking too late will cause the shot to despawn before reaching the door. Sparking too early will cause Samus to bonk the door as it will not yet be open. A beam shot, Missile, or Super can be used. Entrance condition: {
"comeInShinecharged": {
"framesRequired": 85
}
}
Requires: "Gravity"
"canShinechargeMovementTricky"
"canHeroShot"
"canMidairShinespark"
{
"shinespark": {
"frames": 31
}
}
Exit condition: {
"leaveWithSpark": {}
}
|
|
Land on the floor, then jump and fire a shot mid-air and activate the shinespark wind-up. Wait until the shot is at a specific position before sparking. Sparking too late will cause the shot to despawn before reaching the door. Sparking too early will cause Samus to bonk the door as it will not yet be open. A beam shot, Missile, or Super can be used. Entrance condition: {
"comeInShinecharged": {
"framesRequired": 70
}
}
Requires: {
"not": "f_DefeatedPhantoon"
}
"canRiskPermanentLossOfAccess"
"canShinechargeMovementTricky"
"canHeroShot"
"canMidairShinespark"
{
"shinespark": {
"frames": 37
}
}
Exit condition: {
"leaveWithSpark": {}
}
|
|
Entrance condition: {
"comeInShinecharging": {
"length": 0,
"openEnd": 1
}
}
Requires: {
"not": "f_DefeatedPhantoon"
}
"canRiskPermanentLossOfAccess"
"canShinechargeMovementComplex"
"canMidairShinespark"
{
"shinespark": {
"frames": 20
}
}
Exit condition: {
"leaveWithSpark": {}
}
|
|
From: 1
Left Door
To: 2
Right Door
Entrance condition: {
"comeInShinecharging": {
"length": 0,
"openEnd": 1
}
}
Requires: {
"not": "f_DefeatedPhantoon"
}
"canRiskPermanentLossOfAccess"
"canShinechargeMovementTricky"
"canMidairShinespark"
{
"shinespark": {
"frames": 8
}
}
Exit condition: {
"leaveWithSpark": {}
}
|
|
Wait for the first spike platform to fall, jump onto it, and use it to run and jump far enough through the room to trigger the fourth spike platform to fall. Fire a shot mid-air and activate the shinespark wind-up. Wait until the shot is at a specific position before sparking. Sparking too late will cause the shot to despawn before reaching the door. Sparking too early will cause Samus to bonk the door as it will not yet be open. A beam shot, Missile, or Super can be used. Entrance condition: {
"comeInShinecharged": {
"framesRequired": 115
}
}
Requires: "Gravity"
"canShinechargeMovementTricky"
"canHeroShot"
"canMidairShinespark"
{
"shinespark": {
"frames": 31
}
}
Exit condition: {
"leaveWithSpark": {
"position": "top"
}
}
|
|
Land on the floor, then jump and fire a shot mid-air and activate the shinespark wind-up. Wait until the shot is at a specific position before sparking. Sparking too late will cause the shot to despawn before reaching the door. Sparking too early will cause Samus to bonk the door as it will not yet be open. A beam shot, Missile, or Super can be used. Entrance condition: {
"comeInShinecharged": {
"framesRequired": 70
}
}
Requires: {
"not": "f_DefeatedPhantoon"
}
"canRiskPermanentLossOfAccess"
"canShinechargeMovementTricky"
"canHeroShot"
"canMidairShinespark"
{
"shinespark": {
"frames": 37
}
}
Exit condition: {
"leaveWithSpark": {}
}
|
|
Entrance condition: {
"comeInShinecharging": {
"length": 0,
"openEnd": 1
}
}
Requires: {
"not": "f_DefeatedPhantoon"
}
"canRiskPermanentLossOfAccess"
"canShinechargeMovementComplex"
"canMidairShinespark"
{
"shinespark": {
"frames": 20
}
}
Exit condition: {
"leaveWithSpark": {}
}
|
|
From: 2
Right Door
To: 1
Left Door
Entrance condition: {
"comeInShinecharging": {
"length": 0,
"openEnd": 1
}
}
Requires: {
"not": "f_DefeatedPhantoon"
}
"canRiskPermanentLossOfAccess"
"canShinechargeMovementTricky"
"canMidairShinespark"
{
"shinespark": {
"frames": 8
}
}
Exit condition: {
"leaveWithSpark": {}
}
|
|
From: 1
Left Door
To: 1
Left Door
Start at least 2 tiles from the water line, and stutter just before entering the water in order to charge a spark in room. Requires: "f_DefeatedPhantoon"
"canStutterWaterShineCharge"
"canShinechargeMovementTricky"
"canWalljump"
{
"or": [
"canSpaceJumpWaterBounce",
"HiJump"
]
}
{
"canShineCharge": {
"usedTiles": 33,
"openEnd": 2
}
}
{
"shinespark": {
"frames": 29
}
}
Exit condition: {
"leaveWithSpark": {}
}
|
|
From: 1
Left Door
To: 1
Left Door
Start at least 2 tiles from the water line, and stutter just before entering the water in order to charge a spark in room. Requires: "f_DefeatedPhantoon"
"canStutterWaterShineCharge"
"canShinechargeMovementComplex"
{
"canShineCharge": {
"usedTiles": 33,
"openEnd": 2
}
}
{
"shinespark": {
"frames": 20
}
}
Exit condition: {
"leaveWithSpark": {
"position": "bottom"
}
}
|
|
From: 1
Left Door
To: 2
Right Door
If needed, shoot the Bull to prevent it from blocking Samus' path. Entrance condition: {
"comeInShinecharged": {
"framesRequired": 150
}
}
Requires: "SpaceJump"
"canShinechargeMovementComplex"
{
"shinespark": {
"frames": 9
}
}
Exit condition: {
"leaveWithSpark": {}
}
|
|
Entrance condition: {
"comeInShinecharged": {
"framesRequired": 30
}
}
Requires: "canMidairShinespark"
{
"shinespark": {
"frames": 39,
"excessFrames": 10
}
}
|
|
Entrance condition: {
"comeInShinecharging": {
"length": 3,
"openEnd": 1
}
}
Requires: "canShinechargeMovement"
{
"shinespark": {
"frames": 7,
"excessFrames": 2
}
}
|
|
From: 1
Left Door
To: 2
Right Door
Entrance condition: {
"comeInShinecharging": {
"length": 10,
"openEnd": 0,
"steepDownTiles": 1
}
}
Requires: "canWaterShineCharge"
{
"shinespark": {
"frames": 7,
"excessFrames": 2
}
}
|
|
Start at least 2 tiles from the water line, and stutter just before entering the water in order to charge a spark in room. Requires: "canStutterWaterShineCharge"
{
"canShineCharge": {
"usedTiles": 33,
"openEnd": 2
}
}
{
"shinespark": {
"frames": 7,
"excessFrames": 2
}
}
|
|
Enter the room with a shinecharge. Run and jump over the Bull (if power is on). Fire a shot mid-air, and activate the shinespark wind-up. Wait to spark until the shot as reached the door. Entrance condition: {
"comeInShinecharged": {
"framesRequired": 75
}
}
Requires: "canShinechargeMovementComplex"
{
"shinespark": {
"frames": 25
}
}
Exit condition: {
"leaveWithSpark": {}
}
|
|
Enter the room with a shinecharge. Run and jump off the ledge. Fire a shot mid-air and activate the shinespark wind-up. Take a hit from the the Bull (if power is on). Wait until the shot is at a specific position before sparking. Sparking too late will cause the shot to despawn before reaching the door. Sparking too early will cause Samus to bonk the door as it will not yet be open. A beam shot, Missile, or Super can be used. Entrance condition: {
"comeInShinecharged": {
"framesRequired": 60
}
}
Requires: "canShinechargeMovementTricky"
"canHeroShot"
{
"or": [
{
"enemyDamage": {
"enemy": "Bull",
"type": "contact",
"hits": 1
}
},
{
"and": [
{
"not": "f_DefeatedPhantoon"
},
"canRiskPermanentLossOfAccess"
]
}
]
}
{
"shinespark": {
"frames": 32
}
}
Exit condition: {
"leaveWithSpark": {}
}
|
|
From: 1
Right Door
To: 1
Right Door
Requires: "h_canXMode"
"h_XModeThornHit"
"h_XModeThornHit"
"SpaceJump"
"HiJump"
"canShinechargeMovementComplex"
{
"canShineCharge": {
"usedTiles": 33,
"openEnd": 2
}
}
{
"shinespark": {
"frames": 21
}
}
{
"or": [
{
"and": [
"f_DefeatedPhantoon",
"Gravity"
]
},
{
"and": [
{
"not": "f_DefeatedPhantoon"
},
"canRiskPermanentLossOfAccess"
]
}
]
}
Exit condition: {
"leaveWithSpark": {}
}
|
|
From: 1
Right Door
To: 2
Item (locked)
Jump as far as possible before activating the spark, while sparking high enough to crash into the Chozo statue's hand. Entrance condition: {
"comeInShinecharged": {
"framesRequired": 100
}
}
Requires: "canShinechargeMovementComplex"
"canMidairShinespark"
{
"shinespark": {
"frames": 33,
"excessFrames": 7
}
}
{
"not": "f_DefeatedPhantoon"
}
{
"or": [
"canRiskPermanentLossOfAccess",
"canCarefulJump"
]
}
|
|
From: 1
Right Door
To: 2
Item (locked)
Gain a shinecharge while entering the room. Run back to the door, and then run left and jump as far as possible before activating the spark, while sparking high enough to crash into the Chozo statue's hand. Entrance condition: {
"comeInShinecharging": {
"length": 7,
"openEnd": 0,
"steepDownTiles": 2
}
}
Requires: "canShinechargeMovementComplex"
"canMidairShinespark"
{
"shinespark": {
"frames": 33,
"excessFrames": 7
}
}
{
"or": [
"canRiskPermanentLossOfAccess",
"canCarefulJump"
]
}
|
|
From: 1
Right Door
To: 2
Item (locked)
Entrance condition: {
"comeInWithSpark": {}
}
Requires: {
"shinespark": {
"frames": 59,
"excessFrames": 7
}
}
|
|
From: 2
Top Left Door
To: 4
Top Right Door
Entrance condition: {
"comeInShinecharged": {
"framesRequired": 10
}
}
Requires: {
"shinespark": {
"frames": 21
}
}
Exit condition: {
"leaveWithSpark": {}
}
|
|
From: 4
Top Right Door
To: 2
Top Left Door
Entrance condition: {
"comeInShinecharged": {
"framesRequired": 10
}
}
Requires: {
"shinespark": {
"frames": 21
}
}
Exit condition: {
"leaveWithSpark": {}
}
|
|
From: 5
Middle Right Door
To: 2
Top Left Door
Entrance condition: {
"comeInShinecharged": {
"framesRequired": 155
}
}
Requires: {
"shinespark": {
"frames": 17
}
}
Exit condition: {
"leaveWithSpark": {}
}
|
|
From: 5
Middle Right Door
To: 4
Top Right Door
Entrance condition: {
"comeInShinecharged": {
"framesRequired": 155
}
}
Requires: {
"shinespark": {
"frames": 2
}
}
Exit condition: {
"leaveWithSpark": {}
}
|
|
Enter on the left side of the doorway to reduce the amount of energy used. Entrance condition: {
"comeInWithSpark": {},
"comesThroughToilet": "no"
}
Requires: {
"shinespark": {
"frames": 2,
"excessFrames": 2
}
}
|
|
Entrance condition: {
"comeInWithSpark": {},
"comesThroughToilet": "yes"
}
Requires: {
"shinespark": {
"frames": 9,
"excessFrames": 9
}
}
|
|
From: 1
Bottom Left Door
To: 2
Bottom Right Door
Entrance condition: {
"comeInShinecharged": {
"framesRequired": 10
}
}
Requires: {
"shinespark": {
"frames": 21
}
}
Exit condition: {
"leaveWithSpark": {}
}
|
|
Entrance condition: {
"comeInShinecharging": {
"length": 13,
"openEnd": 0
}
}
Requires: {
"shinespark": {
"frames": 24,
"excessFrames": 6
}
}
|
|
From: 1
Bottom Left Door
To: 4
Farm Junction Left of Gate
Entrance condition: {
"comeInShinecharged": {
"framesRequired": 35
}
}
Requires: {
"shinespark": {
"frames": 24,
"excessFrames": 6
}
}
|
|
From: 2
Bottom Right Door
To: 1
Bottom Left Door
Entrance condition: {
"comeInShinecharged": {
"framesRequired": 10
}
}
Requires: {
"shinespark": {
"frames": 21
}
}
Exit condition: {
"leaveWithSpark": {}
}
|
|
Entrance condition: {
"comeInShinecharging": {
"length": 13,
"openEnd": 0
}
}
Requires: {
"shinespark": {
"frames": 24,
"excessFrames": 6
}
}
|
|
From: 2
Bottom Right Door
To: 4
Farm Junction Left of Gate
Entrance condition: {
"comeInShinecharged": {
"framesRequired": 45
}
}
Requires: {
"shinespark": {
"frames": 24,
"excessFrames": 6
}
}
|
|
Entrance condition: {
"comeInWithSpark": {}
}
Requires: {
"or": [
{
"shinespark": {
"frames": 24
}
},
{
"and": [
"Gravity",
{
"shinespark": {
"frames": 21
}
}
]
}
]
}
Exit condition: {
"leaveWithSpark": {}
}
|
|
From: 2
Bottom Left Door
To: 3
Bottom Right Door
Entrance condition: {
"comeInShinecharged": {
"framesRequired": 25
}
}
Requires: {
"shinespark": {
"frames": 23
}
}
Exit condition: {
"leaveWithSpark": {}
}
|
|
From: 3
Bottom Right Door
To: 2
Bottom Left Door
Entrance condition: {
"comeInShinecharged": {
"framesRequired": 25
}
}
Requires: {
"shinespark": {
"frames": 23
}
}
Exit condition: {
"leaveWithSpark": {}
}
|
|
Entrance condition: {
"comeInWithSpark": {}
}
Requires: {
"or": [
{
"shinespark": {
"frames": 24
}
},
{
"and": [
"Gravity",
{
"shinespark": {
"frames": 21
}
}
]
}
]
}
Exit condition: {
"leaveWithSpark": {}
}
|
|
From: 1
Left Door
To: 1
Left Door
Entrance condition: {
"comeInRunning": {
"speedBooster": true,
"minTiles": 2
}
}
Requires: "canSuitlessMaridia"
"canShinechargeMovementComplex"
"canStutterWaterShineCharge"
{
"shinespark": {
"frames": 3
}
}
Exit condition: {
"leaveWithSpark": {}
}
|
|
Entrance condition: {
"comeInShinecharged": {
"framesRequired": 30
}
}
Requires: "h_canNavigateUnderwater"
{
"shinespark": {
"frames": 55
}
}
|
|
From: 2
Bottom Right Door
To: 5
Platform Junction Near Top Left Door
Start the dash as close to the door transition as possible in order to have a larger window for storing the shinecharge. Entrance condition: {
"comeInRunning": {
"speedBooster": true,
"minTiles": 0.4375
}
}
Requires: "canWaterShineCharge"
{
"or": [
{
"shinespark": {
"frames": 41,
"excessFrames": 7
}
},
{
"and": [
"canMidairShinespark",
{
"shinespark": {
"frames": 38,
"excessFrames": 7
}
}
]
}
]
}
|
|
From: 2
Bottom Right Door
To: 6
Middle Junction Near Top Left Pirate
Start the dash as close to the door transition as possible in order to have a larger window for storing the shinecharge. With low energy, shinespark diagonally to the middle ledge on the left. Entrance condition: {
"comeInRunning": {
"speedBooster": true,
"minTiles": 0.4375
}
}
Requires: "canWaterShineCharge"
{
"or": [
{
"shinespark": {
"frames": 43,
"excessFrames": 26
}
},
{
"and": [
"canMidairShinespark",
{
"shinespark": {
"frames": 38,
"excessFrames": 25
}
}
]
}
]
}
{
"or": [
{
"enemyDamage": {
"enemy": "Pink Space Pirate (standing)",
"type": "contact",
"hits": 1
}
},
{
"enemyKill": {
"enemies": [
[
"Pink Space Pirate (standing)"
]
],
"explicitWeapons": [
"Plasma"
]
}
}
]
}
{
"or": [
"h_canCrouchJumpDownGrab",
"canSpringBallJumpMidAir",
{
"and": [
"Ice",
"Plasma"
]
}
]
}
|
|
From: 2
Bottom Right Door
To: 6
Middle Junction Near Top Left Pirate
Start the dash as close to the door transition as possible in order to have a larger window for storing the shinecharge. Spark up and fall onto the platform left of the fish. Entrance condition: {
"comeInRunning": {
"speedBooster": true,
"minTiles": 0.4375
}
}
Requires: "canWaterShineCharge"
{
"or": [
{
"shinespark": {
"frames": 43,
"excessFrames": 9
}
},
{
"and": [
"canMidairShinespark",
{
"shinespark": {
"frames": 38,
"excessFrames": 9
}
}
]
}
]
}
|
|
Entrance condition: {
"comeInShinecharged": {
"framesRequired": 15
},
"comesThroughToilet": "any"
}
Requires: "h_canNavigateUnderwater"
"canHorizontalShinespark"
{
"shinespark": {
"frames": 90
}
}
|
|
Requires Samus to enter in a state that can diagonally spark immediately. Entrance condition: {
"comeInShinecharged": {
"framesRequired": 10
},
"comesThroughToilet": "any"
}
Requires: "h_canNavigateUnderwater"
"canPrepareForNextRoom"
"canMidairShinespark"
{
"shinespark": {
"frames": 3,
"excessFrames": 0
}
}
|
|
Immediately spark after the door transition into the wall just to the right of the top right door. Entrance condition: {
"comeInShinecharged": {
"framesRequired": 10
},
"comesThroughToilet": "any"
}
Requires: "Gravity"
"canPrepareForNextRoom"
"canMidairShinespark"
{
"shinespark": {
"frames": 70,
"excessFrames": 16
}
}
|
|
From: 4
Top Left Door
To: 7
Spawn At Junction Near Top Right Door
Immediately spark after the door transition into the wall just to the right of the top right door. Entrance condition: {
"comeInShinecharged": {
"framesRequired": 10
},
"comesThroughToilet": "any"
}
Requires: "canSuitlessMaridia"
"canPrepareForNextRoom"
"canMidairShinespark"
{
"shinespark": {
"frames": 88,
"excessFrames": 21
}
}
|
|
Entrance condition: {
"comeInWithSpark": {}
}
Requires: {
"or": [
{
"shinespark": {
"frames": 24
}
},
{
"and": [
"Gravity",
{
"shinespark": {
"frames": 21
}
}
]
},
{
"and": [
{
"not": "f_MaridiaTubeBroken"
},
"canRiskPermanentLossOfAccess",
{
"shinespark": {
"frames": 21
}
}
]
}
]
}
Exit condition: {
"leaveWithSpark": {}
}
|
|
From: 2
Bottom Right Door
To: 3
Top Right Doorway
Climb up 1 screen. Entrance condition: {
"comeInShinecharged": {
"framesRequired": 1
}
}
Requires: {
"shinespark": {
"frames": 1,
"excessFrames": 1
}
}
"canShinesparkDeepStuck"
"canXRayClimb"
|
|
Entrance condition: {
"comeInWithSpark": {}
}
Requires: {
"or": [
{
"shinespark": {
"frames": 24
}
},
{
"and": [
"Gravity",
{
"shinespark": {
"frames": 21
}
}
]
},
{
"and": [
{
"not": "f_MaridiaTubeBroken"
},
"canRiskPermanentLossOfAccess",
{
"shinespark": {
"frames": 21
}
}
]
}
]
}
Exit condition: {
"leaveWithSpark": {}
}
|
|
Enter on the right side of the doorway to reduce the amount of energy used. Entrance condition: {
"comeInWithSpark": {},
"comesThroughToilet": "any"
}
Requires: {
"shinespark": {
"frames": 6,
"excessFrames": 6
}
}
|
|
Entrance condition: {
"comeInShinecharged": {
"framesRequired": 80
},
"comesThroughToilet": "any"
}
Requires: "Gravity"
{
"or": [
{
"shinespark": {
"frames": 77,
"excessFrames": 3
}
},
{
"and": [
"canMidairShinespark",
{
"shinespark": {
"frames": 69,
"excessFrames": 3
}
}
]
}
]
}
Clears obstacles: A |
|
Entrance condition: {
"comeInShinecharged": {
"framesRequired": 120
},
"comesThroughToilet": "any"
}
Requires: "canSuitlessMaridia"
{
"shinespark": {
"frames": 77,
"excessFrames": 2
}
}
Clears obstacles: A |
|
To avoid breaking the speed blocks, align Samus on the first plant, just to the left of the door. Entrance condition: {
"comeInShinecharged": {
"framesRequired": 60
},
"comesThroughToilet": "any"
}
Requires: "Gravity"
"canMidairShinespark"
{
"shinespark": {
"frames": 71,
"excessFrames": 3
}
}
|
|
To avoid breaking the speed blocks, align Samus on the first plant, just to the left of the door. Entrance condition: {
"comeInShinecharged": {
"framesRequired": 40
},
"comesThroughToilet": "any"
}
Requires: "Gravity"
{
"shinespark": {
"frames": 76,
"excessFrames": 3
}
}
|
|
Entrance condition: {
"comeInShinecharged": {
"framesRequired": 60
},
"comesThroughToilet": "any"
}
Requires: "canSuitlessMaridia"
{
"shinespark": {
"frames": 76,
"excessFrames": 3
}
}
|
|
Entrance condition: {
"comeInShinecharged": {
"framesRequired": 100
},
"comesThroughToilet": "any"
}
Requires: "canSuitlessMaridia"
"canMidairShinespark"
{
"shinespark": {
"frames": 73,
"excessFrames": 3
}
}
|
|
Entrance condition: {
"comeInShinecharging": {
"length": 4,
"steepDownTiles": 1,
"openEnd": 1
}
}
Requires: "Gravity"
{
"or": [
{
"shinespark": {
"frames": 77,
"excessFrames": 3
}
},
{
"and": [
"canMidairShinespark",
{
"shinespark": {
"frames": 69,
"excessFrames": 3
}
}
]
}
]
}
Clears obstacles: A |
|
From: 2
Bottom Right Door
To: 6
Speed Blocked Item
Entrance condition: {
"comeInShinecharged": {
"framesRequired": 120
}
}
Requires: "Gravity"
{
"or": [
{
"shinespark": {
"frames": 77,
"excessFrames": 3
}
},
{
"and": [
"canMidairShinespark",
{
"shinespark": {
"frames": 69,
"excessFrames": 3
}
}
]
}
]
}
Clears obstacles: A |
|
Entrance condition: {
"comeInShinecharging": {
"length": 1,
"openEnd": 1
}
}
Requires: "canSuitlessMaridia"
{
"shinespark": {
"frames": 77,
"excessFrames": 2
}
}
Clears obstacles: A |
|
To avoid breaking the speed blocks, align Samus on the first plant, just to the left of the door. Entrance condition: {
"comeInShinecharging": {
"length": 4,
"steepDownTiles": 1,
"openEnd": 1
}
}
Requires: "Gravity"
{
"or": [
{
"shinespark": {
"frames": 76,
"excessFrames": 3
}
},
{
"and": [
"canMidairShinespark",
{
"shinespark": {
"frames": 71,
"excessFrames": 3
}
}
]
}
]
}
|
|
From: 2
Bottom Right Door
To: 9
Junction Below Speed Blocks
To avoid breaking the speed blocks, align Samus on the first plant, just to the left of the door. Entrance condition: {
"comeInShinecharged": {
"framesRequired": 70
}
}
Requires: "Gravity"
{
"or": [
{
"shinespark": {
"frames": 76,
"excessFrames": 3
}
},
{
"and": [
"canMidairShinespark",
{
"shinespark": {
"frames": 71,
"excessFrames": 3
}
}
]
}
]
}
|
|
From: 2
Bottom Right Door
To: 9
Junction Below Speed Blocks
Entrance condition: {
"comeInShinecharging": {
"length": 1,
"openEnd": 1
}
}
Requires: "canSuitlessMaridia"
{
"or": [
{
"shinespark": {
"frames": 76,
"excessFrames": 3
}
},
{
"and": [
"canMidairShinespark",
{
"shinespark": {
"frames": 71,
"excessFrames": 3
}
}
]
}
]
}
|
|
From: 2
Bottom Right Door
To: 9
Junction Below Speed Blocks
Entrance condition: {
"comeInShinecharged": {
"framesRequired": 100
}
}
Requires: "canSuitlessMaridia"
"canShinechargeMovement"
{
"or": [
{
"shinespark": {
"frames": 76,
"excessFrames": 3
}
},
{
"and": [
"canMidairShinespark",
{
"shinespark": {
"frames": 71,
"excessFrames": 3
}
}
]
}
]
}
|
|
From: 3
Middle Right Door
To: 3
Middle Right Door
Entrance condition: {
"comeInRunning": {
"speedBooster": true,
"minTiles": 1
}
}
Requires: "canStutterWaterShineCharge"
"canShinechargeMovementComplex"
{
"canShineCharge": {
"usedTiles": 33,
"openEnd": 2
}
}
{
"shinespark": {
"frames": 19
}
}
Exit condition: {
"leaveWithSpark": {
"position": "bottom"
}
}
|
|
From: 3
Middle Right Door
To: 3
Middle Right Door
Entrance condition: {
"comeInRunning": {
"speedBooster": true,
"minTiles": 2
}
}
Requires: "canStutterWaterShineCharge"
"canShinechargeMovementComplex"
{
"canShineCharge": {
"usedTiles": 33,
"openEnd": 2
}
}
{
"or": [
{
"shinespark": {
"frames": 9
}
},
{
"and": [
"canShinechargeMovementTricky",
{
"shinespark": {
"frames": 2
}
}
]
}
]
}
Exit condition: {
"leaveWithSpark": {}
}
|
|
From: 3
Middle Right Door
To: 3
Middle Right Door
Entrance condition: {
"comeInRunning": {
"speedBooster": true,
"minTiles": 1
}
}
Requires: "canStutterWaterShineCharge"
"canShinechargeMovementTricky"
{
"canShineCharge": {
"usedTiles": 33,
"openEnd": 2
}
}
{
"shinespark": {
"frames": 11
}
}
Exit condition: {
"leaveWithSpark": {}
}
|
|
Requires: "Gravity"
{
"or": [
{
"canShineCharge": {
"usedTiles": 24,
"gentleUpTiles": 3,
"gentleDownTiles": 3,
"openEnd": 1
}
},
{
"and": [
{
"doorUnlockedAtNode": 3
},
{
"canShineCharge": {
"usedTiles": 25,
"gentleUpTiles": 3,
"gentleDownTiles": 3,
"openEnd": 1
}
}
]
}
]
}
{
"or": [
{
"shinespark": {
"frames": 77,
"excessFrames": 2
}
},
{
"and": [
"canMidairShinespark",
{
"shinespark": {
"frames": 50,
"excessFrames": 2
}
}
]
}
]
}
Clears obstacles: A |
|
Entrance condition: {
"comeInShinecharging": {
"length": 24,
"gentleUpTiles": 3,
"gentleDownTiles": 3,
"openEnd": 1
}
}
Requires: "Gravity"
{
"or": [
{
"shinespark": {
"frames": 77,
"excessFrames": 2
}
},
{
"and": [
"canMidairShinespark",
{
"shinespark": {
"frames": 50,
"excessFrames": 2
}
}
]
}
]
}
Clears obstacles: A |
|
From: 3
Middle Right Door
To: 6
Speed Blocked Item
Entrance condition: {
"comeInShinecharged": {
"framesRequired": 150
}
}
Requires: "Gravity"
"canMidairShinespark"
"canCarefulJump"
"canShinechargeMovement"
{
"shinespark": {
"frames": 50,
"excessFrames": 2
}
}
Clears obstacles: A |
|
From: 3
Middle Right Door
To: 6
Speed Blocked Item
This can be done with only a door-frame runway in the adjacent room. Entrance condition: {
"comeInRunning": {
"speedBooster": true,
"minTiles": 1
}
}
Requires: "canStutterWaterShineCharge"
"canMidairShinespark"
{
"canShineCharge": {
"usedTiles": 33,
"openEnd": 2
}
}
{
"shinespark": {
"frames": 62,
"excessFrames": 2
}
}
Clears obstacles: A |
|
Entrance condition: {
"comeInShinecharging": {
"length": 7,
"openEnd": 1
}
}
Requires: "canWaterShineCharge"
"canMidairShinespark"
"canCarefulJump"
"canShinechargeMovement"
{
"canShineCharge": {
"usedTiles": 33,
"openEnd": 2
}
}
{
"shinespark": {
"frames": 62,
"excessFrames": 2
}
}
Clears obstacles: A |
|
Requires: "Gravity"
{
"or": [
{
"canShineCharge": {
"usedTiles": 24,
"gentleUpTiles": 3,
"gentleDownTiles": 3,
"openEnd": 1
}
},
{
"and": [
{
"doorUnlockedAtNode": 3
},
{
"canShineCharge": {
"usedTiles": 25,
"gentleUpTiles": 3,
"gentleDownTiles": 3,
"openEnd": 1
}
}
]
}
]
}
{
"or": [
{
"shinespark": {
"frames": 76,
"excessFrames": 3
}
},
{
"and": [
"canMidairShinespark",
{
"shinespark": {
"frames": 50,
"excessFrames": 3
}
}
]
}
]
}
|
|
Entrance condition: {
"comeInShinecharged": {
"framesRequired": 80
}
}
Requires: "Gravity"
"canShinechargeMovement"
"canMidairShinespark"
{
"shinespark": {
"frames": 50,
"excessFrames": 3
}
}
|
|
Entrance condition: {
"comeInShinecharging": {
"length": 24,
"gentleUpTiles": 3,
"gentleDownTiles": 3,
"openEnd": 1
}
}
Requires: "Gravity"
{
"or": [
{
"shinespark": {
"frames": 76,
"excessFrames": 3
}
},
{
"and": [
"canMidairShinespark",
{
"shinespark": {
"frames": 50,
"excessFrames": 3
}
}
]
}
]
}
|
|
From: 3
Middle Right Door
To: 9
Junction Below Speed Blocks
Entrance condition: {
"comeInShinecharged": {
"framesRequired": 100
}
}
Requires: "Gravity"
{
"shinespark": {
"frames": 58,
"excessFrames": 3
}
}
|
|
Entrance condition: {
"comeInShinecharged": {
"framesRequired": 145
}
}
Requires: "canSuitlessMaridia"
"canShinechargeMovement"
"canMidairShinespark"
{
"shinespark": {
"frames": 55,
"excessFrames": 3
}
}
|
|
From: 3
Middle Right Door
To: 9
Junction Below Speed Blocks
This can be done with only a door-frame runway in the adjacent room. Entrance condition: {
"comeInRunning": {
"speedBooster": true,
"minTiles": 1
}
}
Requires: "canStutterWaterShineCharge"
"canMidairShinespark"
{
"canShineCharge": {
"usedTiles": 33,
"openEnd": 2
}
}
{
"shinespark": {
"frames": 35,
"excessFrames": 3
}
}
|
|
From: 3
Middle Right Door
To: 9
Junction Below Speed Blocks
Entrance condition: {
"comeInShinecharging": {
"length": 7,
"openEnd": 1
}
}
Requires: "canWaterShineCharge"
"canMidairShinespark"
{
"canShineCharge": {
"usedTiles": 33,
"openEnd": 2
}
}
{
"shinespark": {
"frames": 35,
"excessFrames": 3
}
}
|
|
Requires: "Gravity"
{
"canShineCharge": {
"usedTiles": 17,
"steepUpTiles": 1,
"openEnd": 0
}
}
{
"or": [
{
"shinespark": {
"frames": 77,
"excessFrames": 3
}
},
{
"and": [
"canMidairShinespark",
{
"shinespark": {
"frames": 69,
"excessFrames": 3
}
}
]
}
]
}
Clears obstacles: A |
|
From: 8
Bottom Junction
To: 9
Junction Below Speed Blocks
To avoid breaking the speed blocks, align Samus on the first plant, just to the left of the door. Requires: "Gravity"
{
"canShineCharge": {
"usedTiles": 17,
"steepUpTiles": 1,
"openEnd": 0
}
}
{
"or": [
{
"shinespark": {
"frames": 76,
"excessFrames": 3
}
},
{
"and": [
"canMidairShinespark",
{
"shinespark": {
"frames": 69,
"excessFrames": 3
}
}
]
}
]
}
|
|
From: 1
Left Door
To: 1
Left Door
Entrance condition: {
"comeInRunning": {
"speedBooster": true,
"minTiles": 2
}
}
Requires: "canStutterWaterShineCharge"
"canShinechargeMovementComplex"
{
"canShineCharge": {
"usedTiles": 33,
"openEnd": 2
}
}
{
"or": [
{
"shinespark": {
"frames": 9
}
},
{
"and": [
"canShinechargeMovementTricky",
{
"shinespark": {
"frames": 2
}
}
]
}
]
}
Exit condition: {
"leaveWithSpark": {}
}
|
|
Requires: "Gravity"
{
"canShineCharge": {
"usedTiles": 19,
"gentleUpTiles": 2,
"openEnd": 1
}
}
"canShinechargeMovement"
{
"or": [
{
"shinespark": {
"frames": 60,
"excessFrames": 5
}
},
{
"and": [
"canMidairShinespark",
{
"shinespark": {
"frames": 55,
"excessFrames": 5
}
}
]
},
{
"and": [
"canMidairShinespark",
"HiJump",
{
"shinespark": {
"frames": 50,
"excessFrames": 5
}
}
]
}
]
}
Clears obstacles: B |
|
Entrance condition: {
"comeInShinecharging": {
"length": 18,
"gentleUpTiles": 2,
"openEnd": 1
}
}
Requires: "Gravity"
"canShinechargeMovement"
{
"or": [
{
"shinespark": {
"frames": 60,
"excessFrames": 5
}
},
{
"and": [
"canMidairShinespark",
{
"shinespark": {
"frames": 55,
"excessFrames": 5
}
}
]
},
{
"and": [
"canMidairShinespark",
"HiJump",
{
"shinespark": {
"frames": 50,
"excessFrames": 5
}
}
]
}
]
}
Clears obstacles: B |
|
Entrance condition: {
"comeInShinecharged": {
"framesRequired": 110
}
}
Requires: "Gravity"
"canShinechargeMovement"
{
"shinespark": {
"frames": 60
}
}
Clears obstacles: B |
|
Entrance condition: {
"comeInRunning": {
"speedBooster": true,
"minTiles": 2
}
}
Requires: "canStutterWaterShineCharge"
"canShinechargeMovement"
{
"canShineCharge": {
"usedTiles": 33,
"openEnd": 2
}
}
{
"or": [
{
"shinespark": {
"frames": 61,
"excessFrames": 7
}
},
{
"and": [
"canMidairShinespark",
{
"shinespark": {
"frames": 56,
"excessFrames": 7
}
}
]
},
{
"and": [
"canMidairShinespark",
"HiJump",
{
"shinespark": {
"frames": 52,
"excessFrames": 7
}
}
]
}
]
}
Clears obstacles: B |
|
Entrance condition: {
"comeInShinecharging": {
"length": 4,
"openEnd": 1
}
}
Requires: "canWaterShineCharge"
"canShinechargeMovement"
{
"canShineCharge": {
"usedTiles": 33,
"openEnd": 2
}
}
{
"or": [
{
"shinespark": {
"frames": 61,
"excessFrames": 7
}
},
{
"and": [
"canMidairShinespark",
{
"shinespark": {
"frames": 56,
"excessFrames": 7
}
}
]
},
{
"and": [
"canMidairShinespark",
"HiJump",
{
"shinespark": {
"frames": 52,
"excessFrames": 7
}
}
]
}
]
}
Clears obstacles: B |
|
Entrance condition: {
"comeInShinecharged": {
"framesRequired": 80
}
}
Requires: "Gravity"
{
"shinespark": {
"frames": 43,
"excessFrames": 4
}
}
|
|
Requires: "Gravity"
{
"canShineCharge": {
"usedTiles": 19,
"gentleUpTiles": 2,
"openEnd": 1
}
}
{
"or": [
{
"shinespark": {
"frames": 43,
"excessFrames": 4
}
},
{
"and": [
"canMidairShinespark",
{
"shinespark": {
"frames": 37,
"excessFrames": 5
}
}
]
},
{
"and": [
"canMidairShinespark",
"HiJump",
{
"shinespark": {
"frames": 32,
"excessFrames": 4
}
}
]
}
]
}
|
|
Entrance condition: {
"comeInShinecharging": {
"length": 18,
"gentleUpTiles": 2,
"openEnd": 1
}
}
Requires: "Gravity"
{
"or": [
{
"shinespark": {
"frames": 43,
"excessFrames": 4
}
},
{
"and": [
"canMidairShinespark",
{
"shinespark": {
"frames": 37,
"excessFrames": 5
}
}
]
},
{
"and": [
"canMidairShinespark",
"HiJump",
{
"shinespark": {
"frames": 32,
"excessFrames": 4
}
}
]
}
]
}
|
|
From: 1
Left Door
To: 3
Hidden Right Item
Requires at least 2 tiles in the adjacent room. Entrance condition: {
"comeInRunning": {
"speedBooster": true,
"minTiles": 2
}
}
Requires: "canStutterWaterShineCharge"
"canShinechargeMovement"
{
"canShineCharge": {
"usedTiles": 33,
"openEnd": 2
}
}
{
"or": [
{
"shinespark": {
"frames": 47,
"excessFrames": 5
}
},
{
"and": [
"canMidairShinespark",
{
"shinespark": {
"frames": 44,
"excessFrames": 5
}
}
]
},
{
"and": [
"canMidairShinespark",
"HiJump",
{
"shinespark": {
"frames": 41,
"excessFrames": 5
}
}
]
}
]
}
|
|
Entrance condition: {
"comeInShinecharging": {
"length": 4,
"openEnd": 1
}
}
Requires: "canWaterShineCharge"
"canShinechargeMovement"
{
"canShineCharge": {
"usedTiles": 33,
"openEnd": 2
}
}
{
"or": [
{
"shinespark": {
"frames": 47,
"excessFrames": 5
}
},
{
"and": [
"canMidairShinespark",
{
"shinespark": {
"frames": 44,
"excessFrames": 5
}
}
]
},
{
"and": [
"canMidairShinespark",
"HiJump",
{
"shinespark": {
"frames": 41,
"excessFrames": 5
}
}
]
}
]
}
|
|
Entrance condition: {
"comeInWithSpark": {
"position": "bottom"
}
}
Requires: "Gravity"
{
"shinespark": {
"frames": 112,
"excessFrames": 7
}
}
|
|
Entrance condition: {
"comeInWithSpark": {
"position": "bottom"
}
}
Requires: {
"shinespark": {
"frames": 143,
"excessFrames": 10
}
}
|
|
From: 1
Top Left Door
To: 9
Spawn At Junction Below Top Door
Notable: true .png)
.gif)
Crouch on the lowest stair, then shinespark horizontally to bonk at the top corner of the grapple block. Down grab to get onto it. Entrance condition: {
"comeInShinecharged": {
"framesRequired": 110
}
}
Requires: "canSuitlessMaridia"
"h_canCrouchJumpDownGrab"
"canHorizontalShinespark"
{
"shinespark": {
"frames": 56,
"excessFrames": 0
}
}
|
|
Shinespark up left to get all the way up to the door. Entrance condition: {
"comeInShinecharged": {
"framesRequired": 5
},
"comesThroughToilet": "any"
}
Requires: "canSuitlessMaridia"
{
"shinespark": {
"frames": 62,
"excessFrames": 8
}
}
|
|
Shinespark up right through the rightmost gap to land directly by the door. Requires: "Gravity"
{
"canShineCharge": {
"usedTiles": 33,
"openEnd": 2
}
}
{
"shinespark": {
"frames": 65
}
}
|
|
Entrance condition: {
"comeInWithSpark": {},
"comesThroughToilet": "any"
}
Requires: {
"shinespark": {
"frames": 58,
"excessFrames": 29
}
}
|
|
Shinespark up in the middle of the three upward pathways near either the right or left wall. Requires: "Gravity"
{
"canShineCharge": {
"usedTiles": 33,
"openEnd": 2
}
}
{
"shinespark": {
"frames": 61
}
}
|
|
Entrance condition: {
"comeInWithSpark": {},
"comesThroughToilet": "any"
}
Requires: {
"shinespark": {
"frames": 58,
"excessFrames": 16
}
}
|
|
Entrance condition: {
"comeInWithSpark": {},
"comesThroughToilet": "any"
}
Requires: {
"shinespark": {
"frames": 60,
"excessFrames": 60
}
}
|
|
Entrance condition: {
"comeInWithSpark": {},
"comesThroughToilet": "any"
}
Requires: {
"shinespark": {
"frames": 60,
"excessFrames": 43
}
}
|
|
Shinespark up left to get onto the platform below the door. If gravity suit is on, hold right to land on the platform. Entrance condition: {
"comeInShinecharged": {
"framesRequired": 5
},
"comesThroughToilet": "any"
}
Requires: "Gravity"
{
"shinespark": {
"frames": 62,
"excessFrames": 8
}
}
|
|
From: 3
Bottom Right Door
To: 9
Spawn At Junction Below Top Door
Shinespark up left to get onto the platform below the door. If gravity suit is on, hold right to land on the platform. Entrance condition: {
"comeInShinecharged": {
"framesRequired": 5
},
"comesThroughToilet": "any"
}
Requires: "canSuitlessMaridia"
{
"shinespark": {
"frames": 62,
"excessFrames": 6
}
}
|
|
Entrance condition: {
"comeInWithSpark": {},
"comesThroughToilet": "any"
}
Requires: {
"shinespark": {
"frames": 60,
"excessFrames": 15
}
}
|
|
Entrance condition: {
"comeInWithSpark": {
"position": "bottom"
}
}
Requires: {
"shinespark": {
"frames": 127,
"excessFrames": 10
}
}
|
|
Entrance condition: {
"comeInWithSpark": {}
}
Requires: {
"shinespark": {
"frames": 127,
"excessFrames": 28
}
}
|
|
Entrance condition: {
"comeInShinecharged": {
"framesRequired": 15
},
"comesThroughToilet": "any"
}
Requires: "canSuitlessMaridia"
"canMidairShinespark"
"canPrepareForNextRoom"
{
"shinespark": {
"frames": 67,
"excessFrames": 10
}
}
|
|
Entrance condition: {
"comeInShinecharged": {
"framesRequired": 90
},
"comesThroughToilet": "any"
}
Requires: "canSuitlessMaridia"
"canHorizontalShinespark"
{
"shinespark": {
"frames": 61,
"excessFrames": 10
}
}
|
|
Entrance condition: {
"comeInShinecharged": {
"framesRequired": 55
},
"comesThroughToilet": "any"
}
Requires: "Gravity"
"canMidairShinespark"
{
"shinespark": {
"frames": 69,
"excessFrames": 6
}
}
|
|
Entrance condition: {
"comeInShinecharged": {
"framesRequired": 15
},
"comesThroughToilet": "any"
}
Requires: "Gravity"
"canMidairShinespark"
"canPrepareForNextRoom"
{
"shinespark": {
"frames": 72,
"excessFrames": 6
}
}
|
|
Entrance condition: {
"comeInShinecharged": {
"framesRequired": 20
},
"comesThroughToilet": "any"
}
Requires: "canSuitlessMaridia"
"canMidairShinespark"
"canPrepareForNextRoom"
{
"shinespark": {
"frames": 93,
"excessFrames": 12
}
}
|
|
Entrance condition: {
"comeInShinecharged": {
"framesRequired": 90
},
"comesThroughToilet": "any"
}
Requires: "canSuitlessMaridia"
"canMidairShinespark"
{
"shinespark": {
"frames": 86,
"excessFrames": 12
}
}
|
|
From: 6
Left Morph Passage Doorway
To: 11
Upper Left Ledge Junction
Perform a horizontal shinespark through the top of the door transition, from a horizontal position that triggers a deep door transition. Sparking from one or two pixels away from the door is an example position that works (if possible in the neighboring room). If successful, after the shinespark crash animation ends Samus should be standing inside the wall and be able to X-Ray climb. Entrance condition: {
"comeInWithSpark": {
"position": "top"
}
}
Requires: "canDeepTransition"
{
"shinespark": {
"frames": 2,
"excessFrames": 2
}
}
"canXRayClimb"
|
|
Requires: "Gravity"
{
"canShineCharge": {
"usedTiles": 33,
"openEnd": 2
}
}
{
"shinespark": {
"frames": 61
}
}
Exit condition: {
"leaveWithSpark": {}
}
|
|
Run right-to-left to gain a shinecharge on the upper right ledge. Use a gravity jump, Space Jump, or HiJump to approach the door above and spark out. Requires: "Gravity"
{
"or": [
"SpaceJump",
"canGravityJump",
{
"and": [
"HiJump",
{
"or": [
"canWalljump",
"canTrickyDashJump"
]
}
]
}
]
}
{
"canShineCharge": {
"usedTiles": 20,
"gentleUpTiles": 3,
"gentleDownTiles": 1,
"steepUpTiles": 1,
"openEnd": 0
}
}
"canShinechargeMovementComplex"
"canMidairShinespark"
{
"shinespark": {
"frames": 8
}
}
Exit condition: {
"leaveWithSpark": {}
}
|
|
Entrance condition: {
"comeInShinecharged": {
"framesRequired": 5
},
"comesThroughToilet": "any"
}
Requires: "Morph"
{
"shinespark": {
"frames": 25,
"excessFrames": 6
}
}
|
|
Enter on the right side of the doorway to be able to get up out of the water and onto the top platform. Entrance condition: {
"comeInWithSpark": {},
"comesThroughToilet": "no"
}
Requires: "Morph"
{
"shinespark": {
"frames": 25,
"excessFrames": 6
}
}
|
|
Enter on the left side of the doorway to reduce the amount of energy used. Entrance condition: {
"comeInWithSpark": {},
"comesThroughToilet": "any"
}
Requires: {
"shinespark": {
"frames": 14,
"excessFrames": 14
}
}
|
|
From: 2
Bottom Door
To: 3
Bottom Right Ledge
Entrance condition: {
"comeInShinecharged": {
"framesRequired": 5
},
"comesThroughToilet": "any"
}
Requires: {
"shinespark": {
"frames": 18,
"excessFrames": 11
}
}
|
|
From: 1
Left Door
To: 2
Right Door
Entrance condition: {
"comeInShinecharged": {
"framesRequired": 10
}
}
Requires: {
"shinespark": {
"frames": 21
}
}
Exit condition: {
"leaveWithSpark": {}
}
|
|
From: 2
Right Door
To: 1
Left Door
Entrance condition: {
"comeInShinecharged": {
"framesRequired": 10
}
}
Requires: {
"shinespark": {
"frames": 21
}
}
Exit condition: {
"leaveWithSpark": {}
}
|
|
Entrance condition: {
"comeInRunning": {
"speedBooster": true,
"minTiles": 2.4375
}
}
Requires: "canSuitlessMaridia"
"h_canUsePowerBombs"
"canStutterWaterShineCharge"
"canShinechargeMovement"
{
"canShineCharge": {
"usedTiles": 33,
"openEnd": 2
}
}
{
"shinespark": {
"frames": 25,
"excessFrames": 11
}
}
Clears obstacles: A |
|
Entrance condition: {
"comeInShinecharged": {
"framesRequired": 130
}
}
Requires: "canSuitlessMaridia"
"h_canUsePowerBombs"
"canShinechargeMovement"
{
"shinespark": {
"frames": 25,
"excessFrames": 11
}
}
Clears obstacles: A |
|
From: 2
Bottom Left Door
To: 2
Bottom Left Door
Entrance condition: {
"comeInRunning": {
"speedBooster": true,
"minTiles": 2
}
}
Requires: "canSuitlessMaridia"
"canShinechargeMovementComplex"
"canStutterWaterShineCharge"
{
"canShineCharge": {
"usedTiles": 33,
"openEnd": 2
}
}
{
"or": [
{
"shinespark": {
"frames": 12
}
},
{
"and": [
"canShinechargeMovementTricky",
{
"shinespark": {
"frames": 3
}
}
]
}
]
}
Exit condition: {
"leaveWithSpark": {}
}
|
|
Entrance condition: {
"comeInRunning": {
"speedBooster": true,
"minTiles": 0.4375
}
}
Requires: "canSuitlessMaridia"
"canShinechargeMovementComplex"
"canWaterShineCharge"
"canHorizontalShinespark"
{
"canShineCharge": {
"usedTiles": 33,
"openEnd": 2
}
}
{
"shinespark": {
"frames": 139,
"excessFrames": 66
}
}
|
|
Entrance condition: {
"comeInRunning": {
"speedBooster": true,
"minTiles": 0.4375
}
}
Requires: "canWaterShineCharge"
{
"canShineCharge": {
"usedTiles": 33,
"openEnd": 2
}
}
{
"shinespark": {
"frames": 37,
"excessFrames": 3
}
}
|
|
Requires: "Gravity"
{
"canShineCharge": {
"usedTiles": 33,
"openEnd": 2
}
}
{
"shinespark": {
"frames": 40,
"excessFrames": 7
}
}
|
|
Entrance condition: {
"comeInRunning": {
"speedBooster": true,
"minTiles": 0.4375
}
}
Requires: "canWaterShineCharge"
{
"canShineCharge": {
"usedTiles": 33,
"openEnd": 2
}
}
{
"shinespark": {
"frames": 40,
"excessFrames": 7
}
}
|
|
Requires: "Gravity"
{
"canShineCharge": {
"usedTiles": 33,
"openEnd": 2
}
}
{
"shinespark": {
"frames": 37,
"excessFrames": 3
}
}
|
|
Entrance condition: {
"comeInRunning": {
"speedBooster": true,
"minTiles": 2.4375
}
}
Requires: "canWaterShineCharge"
"canShinechargeMovement"
{
"canShineCharge": {
"usedTiles": 33,
"openEnd": 2
}
}
{
"shinespark": {
"frames": 37,
"excessFrames": 3
}
}
|
|
From: 2
Bottom Left Door
To: 9
Junction Below Top Door
Start running next to the transition (But at least 1 pixel away) so that Samus has very low run speed. Entrance condition: {
"comeInRunning": {
"speedBooster": true,
"minTiles": 0.4375
}
}
Requires: "canWaterShineCharge"
"canShinechargeMovementComplex"
{
"canShineCharge": {
"usedTiles": 33,
"openEnd": 2
}
}
{
"shinespark": {
"frames": 34,
"excessFrames": 3
}
}
|
|
Requires: "Gravity"
{
"or": [
{
"canShineCharge": {
"usedTiles": 20,
"openEnd": 2
}
},
{
"and": [
"canEnemyExtendRunway",
{
"canShineCharge": {
"usedTiles": 21,
"openEnd": 2
}
}
]
}
]
}
{
"shinespark": {
"frames": 25
}
}
|
|
Entrance condition: {
"comeInShinecharged": {
"framesRequired": 35
},
"comesThroughToilet": "any"
}
Requires: "Gravity"
"canHorizontalShinespark"
{
"shinespark": {
"frames": 78,
"excessFrames": 16
}
}
|
|
Entrance condition: {
"comeInShinecharged": {
"framesRequired": 55
},
"comesThroughToilet": "any"
}
Requires: "canSuitlessMaridia"
"canHorizontalShinespark"
{
"shinespark": {
"frames": 99,
"excessFrames": 29
}
}
|
|
Entrance condition: {
"comeInShinecharged": {
"framesRequired": 60
}
}
Requires: "canSuitlessMaridia"
"canHorizontalShinespark"
{
"shinespark": {
"frames": 159,
"excessFrames": 43
}
}
Clears obstacles: A |
|
Entrance condition: {
"comeInShinechargedJumping": {
"framesRequired": 22
}
}
Requires: "Morph"
"canCrossRoomJumpIntoWater"
"canShinechargeMovement"
"canMidairShinespark"
{
"shinespark": {
"frames": 55
}
}
|
|
Entrance condition: {
"comeInShinecharged": {
"framesRequired": 80
}
}
Requires: "Gravity"
"canHorizontalShinespark"
{
"shinespark": {
"frames": 115,
"excessFrames": 12
}
}
Clears obstacles: A |
|
Coming in with zero momentum, all it takes is one non-HiJump full height jump forward, then activate. Entrance condition: {
"comeInShinecharged": {
"framesRequired": 160
}
}
Requires: "canSuitlessMaridia"
"canHorizontalShinespark"
{
"shinespark": {
"frames": 147,
"excessFrames": 15
}
}
Clears obstacles: A |
|
From: 4
Right Door
To: 4
Right Door
Entrance condition: {
"comeInRunning": {
"speedBooster": true,
"minTiles": 2
}
}
Requires: "canStutterWaterShineCharge"
"canShinechargeMovementComplex"
{
"or": [
{
"shinespark": {
"frames": 12
}
},
{
"and": [
"canShinechargeMovementTricky",
{
"shinespark": {
"frames": 3
}
}
]
}
]
}
Exit condition: {
"leaveWithSpark": {}
}
|
|
From: 4
Right Door
To: 6
Junction Right of Morph Passage
Entrance condition: {
"comeInShinechargedJumping": {
"framesRequired": 20
}
}
Requires: "Morph"
"canCrossRoomJumpIntoWater"
"canShinechargeMovement"
"canMidairShinespark"
{
"shinespark": {
"frames": 46,
"excessFrames": 3
}
}
|
|
From: 4
Right Door
To: 6
Junction Right of Morph Passage
Shinespark diagonally over the zoa pit or run through the speed blocks and shinespark after turning around. Entrance condition: {
"comeInRunning": {
"speedBooster": true,
"minTiles": 2
}
}
Requires: "Morph"
"canStutterWaterShineCharge"
{
"shinespark": {
"frames": 8
}
}
|
|
From: 4
Right Door
To: 6
Junction Right of Morph Passage
Shinespark diagonally over the zoa pit or run through the speed blocks and shinespark after turning around. Entrance condition: {
"comeInShinecharging": {
"length": 6,
"openEnd": 1
}
}
Requires: "Morph"
"canWaterShineCharge"
{
"shinespark": {
"frames": 8
}
}
|
|
Entrance condition: {
"comeInWithSpark": {},
"comesThroughToilet": "any"
}
Requires: {
"shinespark": {
"frames": 8,
"excessFrames": 8
}
}
|
|
From: 2
Right Door
To: 1
Bottom Left Door
Notable: true 
Quickly move next to the first set of speed blocks at the left end of the hole. Shoot a Wave shot, then just before it goes off screen, horizontally spark to the left to get through all the shot and speed blocks. A spin jump may be used to move horizontally into place much quicker. Entrance condition: {
"comeInShinecharged": {
"framesRequired": 120
}
}
Requires: "canSuitlessMaridia"
"canCarefulJump"
"Wave"
"canShinechargeMovementComplex"
"canHorizontalShinespark"
{
"shinespark": {
"frames": 75,
"excessFrames": 8
}
}
|
|
From: 2
Right Door
To: 1
Bottom Left Door
Notable: true
Quickly move next to the first set of speed blocks at the left end of the hole. Shoot a Wave shot, then just before it goes off screen, horizontally spark to the left to get through all the shot and speed blocks. A spin jump may be used to move horizontally into place much quicker. Entrance condition: {
"comeInShinecharging": {
"length": 2,
"openEnd": 1
}
}
Requires: "canWaterShineCharge"
"Wave"
"canShinechargeMovementComplex"
"canHorizontalShinespark"
{
"shinespark": {
"frames": 75,
"excessFrames": 8
}
}
|
|
Entrance condition: {
"comeInShinecharged": {
"framesRequired": 60
}
}
Requires: "canShinechargeMovement"
"canMidairShinespark"
"canCarefulJump"
{
"shinespark": {
"frames": 125,
"excessFrames": 20
}
}
|
|
Entrance condition: {
"comeInShinecharged": {
"framesRequired": 60
}
}
Requires: "canShinechargeMovement"
"canMidairShinespark"
"canCarefulJump"
{
"shinespark": {
"frames": 125,
"excessFrames": 6
}
}
|
|
Entrance condition: {
"comeInShinecharged": {
"framesRequired": 20
}
}
Requires: "h_canNavigateUnderwater"
{
"shinespark": {
"frames": 24,
"excessFrames": 6
}
}
|
|
Entrance condition: {
"comeInShinecharged": {
"framesRequired": 60
}
}
Requires: "canShinechargeMovement"
"canMidairShinespark"
"canCarefulJump"
{
"shinespark": {
"frames": 125
}
}
|
|
Entrance condition: {
"comeInRunning": {
"speedBooster": true,
"minTiles": 2
}
}
Requires: "canStutterWaterShineCharge"
"canShinechargeMovementComplex"
{
"canShineCharge": {
"usedTiles": 33,
"openEnd": 2
}
}
{
"or": [
{
"shinespark": {
"frames": 12
}
},
{
"and": [
"canShinechargeMovementTricky",
{
"shinespark": {
"frames": 3
}
}
]
}
]
}
Exit condition: {
"leaveWithSpark": {}
}
|
|
From: 1
Left Door
To: 2
Right Door
Slide into the hole where the shot block was and sink to the bottom. Shoot the door using a Hero shot and time the shinespark to follow the shot. Entrance condition: {
"comeInShinecharging": {
"length": 1,
"openEnd": 0
}
}
Requires: "canWaterShineCharge"
"canHeroShot"
"canShinechargeMovementTricky"
"canMidairShinespark"
{
"shinespark": {
"frames": 39
}
}
Exit condition: {
"leaveWithSpark": {
"position": "bottom"
}
}
|
|
From: 1
Left Door
To: 2
Right Door
Slide into the hole where the shot block was and sink to the bottom. Shoot the door using a Hero shot and time the shinespark to follow the shot. Either kill the ceiling crab so that Samus can jump forward, or stationary spinjump to avoid using the Shinespark early. Entrance condition: {
"comeInShinecharging": {
"length": 1,
"openEnd": 0
}
}
Requires: "canWaterShineCharge"
"canHeroShot"
"canShinechargeMovementTricky"
"canMidairShinespark"
"HiJump"
{
"or": [
{
"and": [
"Plasma",
"Wave"
]
},
"canStationarySpinJump"
]
}
{
"shinespark": {
"frames": 41
}
}
Exit condition: {
"leaveWithSpark": {}
}
|
|
From: 1
Left Door
To: 2
Right Door
Spinjump through the shotblocks and fire a Plasma + Wave shot on the way down, clearing the crabs. Begin the Shinespark windup while the Beam shot travels towards the door to open it. Entrance condition: {
"comeInShinecharging": {
"length": 0,
"openEnd": 0
}
}
Requires: "canWaterShineCharge"
"canHeroShot"
"canShinechargeMovementTricky"
"canMidairShinespark"
"Plasma"
"Wave"
{
"shinespark": {
"frames": 41
}
}
Exit condition: {
"leaveWithSpark": {}
}
|
|
Entrance condition: {
"comeInShinecharged": {
"framesRequired": 60
}
}
Requires: "h_canNavigateUnderwater"
{
"shinespark": {
"frames": 40,
"excessFrames": 6
}
}
{
"or": [
"canCrouchJump",
"Gravity",
"HiJump",
"canSpringBallJumpMidAir",
{
"and": [
"canTrickyUseFrozenEnemies",
{
"ammo": {
"type": "Super",
"count": 1
}
}
]
}
]
}
|
|
Entrance condition: {
"comeInShinecharging": {
"length": 13,
"openEnd": 0
}
}
Requires: "Gravity"
{
"shinespark": {
"frames": 40,
"excessFrames": 6
}
}
|
|
After storing the shinecharge, spin jump back to the left and spark aligned against the right side of the left shaft. At the top of the room, hold right in order to land on the platform below the door. Entrance condition: {
"comeInRunning": {
"speedBooster": true,
"minTiles": 2
}
}
Requires: "canStutterWaterShineCharge"
"canShinechargeMovementComplex"
{
"canShineCharge": {
"usedTiles": 33,
"openEnd": 2
}
}
{
"shinespark": {
"frames": 40,
"excessFrames": 6
}
}
{
"or": [
"canCrouchJump",
"Gravity",
"HiJump",
"canSpringBallJumpMidAir",
{
"and": [
"canTrickyUseFrozenEnemies",
{
"ammo": {
"type": "Super",
"count": 1
}
}
]
}
]
}
|
|
Entrance condition: {
"comeInShinecharged": {
"framesRequired": 30
}
}
Requires: {
"shinespark": {
"frames": 22
}
}
Exit condition: {
"leaveWithSpark": {}
}
|
|
Entrance condition: {
"comeInShinecharged": {
"framesRequired": 30
}
}
Requires: {
"shinespark": {
"frames": 22
}
}
Exit condition: {
"leaveWithSpark": {}
}
|
|
Entrance condition: {
"comeInShinecharged": {
"framesRequired": 50
}
}
Requires: "Gravity"
{
"shinespark": {
"frames": 25
}
}
|
|
Takes more time to setup than with Gravity, but you can spark from a bit further out because of the water physics. Entrance condition: {
"comeInShinecharged": {
"framesRequired": 90
}
}
Requires: "canSuitlessMaridia"
{
"shinespark": {
"frames": 25
}
}
|
|
From: 3
Draygon (locked)
To: 2
Right Door (locked)
Notable: true 
Charge a shinespark in the bottom of Draygon's room, then Gravity jump up in order to shinespark out of the right door. Requires: "canGravityJump"
"canShinechargeMovementComplex"
"canMidairShinespark"
{
"canShineCharge": {
"usedTiles": 20,
"openEnd": 1
}
}
{
"shinespark": {
"frames": 14
}
}
Exit condition: {
"leaveWithSpark": {}
}
|
|
Requires: "Gravity"
{
"canShineCharge": {
"usedTiles": 22,
"openEnd": 1
}
}
{
"or": [
{
"shinespark": {
"frames": 26,
"excessFrames": 5
}
},
{
"and": [
"canMidairShinespark",
{
"shinespark": {
"frames": 20,
"excessFrames": 4
}
}
]
}
]
}
|
|
From: 3
Draygon (locked)
To: 6
Draygon (unlocked)
Notable: true 
Shinecharge in-room, then horizontally spark through Draygon multiple times. It takes 3 Shinesparks if that is the only source of damage onto Draygon. Be careful of taking damage at the end of a Shinespark when near walls and on the killing Shinespark. Requires: "Gravity"
"canMidairShinespark"
"canShinechargeMovementComplex"
{
"or": [
"canShinechargeMovementTricky",
"h_canBreakThreeDraygonTurrets"
]
}
{
"canShineCharge": {
"usedTiles": 22,
"openEnd": 0
}
}
{
"enemyDamage": {
"enemy": "Draygon",
"type": "contact",
"hits": 2
}
}
{
"or": [
"HiJump",
{
"enemyDamage": {
"enemy": "Draygon",
"type": "contact",
"hits": 1
}
}
]
}
{
"shinespark": {
"frames": 150
}
}
Clears obstacles: f_DefeatedDraygon |
|
Requires: "h_canXMode"
"h_XModeSpikeHit"
"h_XModeSpikeHit"
{
"or": [
"h_XModeSpikeHit",
"canStationarySpinJump"
]
}
"Gravity"
"HiJump"
"SpaceJump"
"canShinechargeMovementComplex"
"canMidairShinespark"
{
"canShineCharge": {
"usedTiles": 33,
"openEnd": 2
}
}
{
"shinespark": {
"frames": 10
}
}
Exit condition: {
"leaveWithSpark": {}
}
|
|
Entrance condition: {
"comeInShinecharged": {
"framesRequired": 10
}
}
Requires: "Gravity"
{
"shinespark": {
"frames": 21,
"excessFrames": 5
}
}
|
|
From: 2
Right Door
To: 4
Top Right Ledge Junction
Entrance condition: {
"comeInShinecharged": {
"framesRequired": 10
}
}
Requires: {
"shinespark": {
"frames": 22,
"excessFrames": 5
}
}
|
|
From: 2
Right Door
To: 4
Top Right Ledge Junction
Requires: "Gravity"
"h_canXMode"
"h_XModeSpikeHit"
"h_XModeSpikeHit"
{
"or": [
"h_XModeSpikeHit",
"canStationarySpinJump"
]
}
{
"canShineCharge": {
"usedTiles": 33,
"openEnd": 2
}
}
{
"shinespark": {
"frames": 25,
"excessFrames": 5
}
}
|
|
Jump out of the sand before Shinesparking. Entrance condition: {
"comeInShinecharged": {
"framesRequired": 105
},
"comesThroughToilet": "any"
}
Requires: "canPlayInSand"
"canSunkenTileWideWallClimb"
"canShinechargeMovementComplex"
{
"or": [
"canMidairShinespark",
"canCarefulJump"
]
}
{
"shinespark": {
"frames": 11
}
}
|
|
From: 1
Top Sand Entrance
To: 4
Right Item
The shinespark must be performed near the upper ledge, and not inside the sandfall. Entrance condition: {
"comeInShinecharged": {
"framesRequired": 60
},
"comesThroughToilet": "any"
}
Requires: "Gravity"
"Morph"
"canMidairShinespark"
"canShinechargeMovement"
"canPrepareForNextRoom"
{
"shinespark": {
"frames": 18
}
}
|
|
Shinespark vertically from the sand to get onto the first ledge. Carefully jump onto the second ledge and return to lure the Boulder, or shoot it with a Super. Entrance condition: {
"comeInShinecharged": {
"framesRequired": 90
},
"comesThroughToilet": "any"
}
Requires: "Gravity"
"Morph"
"canPlayInSand"
"canShinechargeMovement"
{
"shinespark": {
"frames": 12
}
}
{
"or": [
"canCarefulJump",
{
"ammo": {
"type": "Super",
"count": 1
}
},
{
"enemyDamage": {
"enemy": "Boulder",
"type": "contact",
"hits": 1
}
}
]
}
|
|
From: 1
Top Sand Entrance
To: 4
Right Item
The shinespark must be performed near the upper ledge, and not inside the sandfall. Entrance condition: {
"comeInShinecharged": {
"framesRequired": 70
},
"comesThroughToilet": "any"
}
Requires: "canSuitlessMaridia"
"Morph"
"canMidairShinespark"
"canShinechargeMovementComplex"
"canPrepareForNextRoom"
{
"shinespark": {
"frames": 18
}
}
|
|
From: 1
Top Sand Entrance
To: 4
Right Item
Shinespark vertically from the sand to get onto the first ledge. Carefully get to the second ledge and return to lure the Boulder, or shoot it with a Super. Entrance condition: {
"comeInShinecharged": {
"framesRequired": 140
},
"comesThroughToilet": "any"
}
Requires: "canSuitlessMaridia"
"Morph"
"canPlayInSand"
"canShinechargeMovementComplex"
{
"shinespark": {
"frames": 12
}
}
{
"or": [
"HiJump",
"canSpringBallJumpMidAir",
"canSunkenTileWideWallClimb"
]
}
{
"or": [
"canTrickyJump",
{
"ammo": {
"type": "Super",
"count": 1
}
},
{
"enemyDamage": {
"enemy": "Boulder",
"type": "contact",
"hits": 1
}
}
]
}
|
|
Entrance condition: {
"comeInShinecharged": {
"framesRequired": 10
}
}
Requires: "Gravity"
{
"shinespark": {
"frames": 20,
"excessFrames": 3
}
}
|
|
Entrance condition: {
"comeInShinecharged": {
"framesRequired": 10
}
}
Requires: {
"shinespark": {
"frames": 22,
"excessFrames": 5
}
}
|
|
Entrance condition: {
"comeInShinecharged": {
"framesRequired": 30
}
}
Requires: {
"shinespark": {
"frames": 20,
"excessFrames": 3
}
}
|
|
From: 2
Bottom Left Door
To: 1
Top Left Door
Enter the room with a careful amount of momentum where Samus must spend extra time slowing down during the stutter, but must not have much run speed. Entrance condition: {
"comeInRunning": {
"speedBooster": true,
"minTiles": 2.4375
}
}
Requires: "canStutterWaterShineCharge"
{
"canShineCharge": {
"usedTiles": 33,
"openEnd": 2
}
}
{
"or": [
{
"enemyDamage": {
"enemy": "Mochtroid",
"type": "contact",
"hits": 2
}
},
{
"and": [
"canDodgeWhileShooting",
{
"or": [
"Wave",
"Spazer",
"Plasma",
{
"ammo": {
"type": "Missile",
"count": 1
}
},
{
"ammo": {
"type": "Super",
"count": 1
}
}
]
}
]
}
]
}
{
"shinespark": {
"frames": 20,
"excessFrames": 3
}
}
|
|
Entrance condition: {
"comeInShinecharging": {
"length": 3,
"openEnd": 0
}
}
Requires: "canWaterShineCharge"
{
"shinespark": {
"frames": 20,
"excessFrames": 3
}
}
|
|
From: 2
Bottom Left Door
To: 2
Bottom Left Door
Enter the room with a careful amount of momentum where Samus must spend extra time slowing down during the stutter, but must not have much run speed. Entrance condition: {
"comeInRunning": {
"speedBooster": true,
"minTiles": 2.4375
}
}
Requires: "canStutterWaterShineCharge"
"canShinechargeMovementComplex"
{
"canShineCharge": {
"usedTiles": 33,
"openEnd": 2
}
}
{
"or": [
{
"enemyDamage": {
"enemy": "Mochtroid",
"type": "contact",
"hits": 2
}
},
{
"and": [
"canDodgeWhileShooting",
{
"or": [
"Wave",
"Spazer",
"Plasma",
{
"ammo": {
"type": "Missile",
"count": 1
}
},
{
"ammo": {
"type": "Super",
"count": 1
}
}
]
}
]
}
]
}
{
"or": [
{
"shinespark": {
"frames": 12
}
},
{
"and": [
"canShinechargeMovementTricky",
{
"shinespark": {
"frames": 3
}
}
]
}
]
}
Exit condition: {
"leaveWithSpark": {}
}
|
|
Entrance condition: {
"comeInShinecharged": {
"framesRequired": 10
}
}
Requires: {
"shinespark": {
"frames": 38,
"excessFrames": 3
}
}
|
|
From: 2
Bottom Left Door
To: 4
Top Right Door
Enter the room with a careful amount of momentum where Samus must spend extra time slowing down during the stutter, but must not have much run speed. Entrance condition: {
"comeInRunning": {
"speedBooster": true,
"minTiles": 2.4375
}
}
Requires: "canStutterWaterShineCharge"
{
"canShineCharge": {
"usedTiles": 33,
"openEnd": 2
}
}
{
"or": [
{
"enemyDamage": {
"enemy": "Mochtroid",
"type": "contact",
"hits": 2
}
},
{
"and": [
"canDodgeWhileShooting",
{
"or": [
"Wave",
"Spazer",
"Plasma",
{
"ammo": {
"type": "Missile",
"count": 1
}
},
{
"ammo": {
"type": "Super",
"count": 1
}
}
]
}
]
}
]
}
{
"shinespark": {
"frames": 39,
"excessFrames": 4
}
}
|
|
Entrance condition: {
"comeInShinecharging": {
"length": 3,
"openEnd": 0
}
}
Requires: "canWaterShineCharge"
{
"canShineCharge": {
"usedTiles": 33,
"openEnd": 2
}
}
{
"shinespark": {
"frames": 39,
"excessFrames": 4
}
}
|
|
From: 3
Bottom Right Door
To: 1
Top Left Door
Charge a shinespark below the Oums, near the bottom right door, quickly move through the morph tunnel and spark up left to the middle door. This is an alternative to wall jumping. Requires: "Morph"
"Gravity"
"canShinechargeMovementComplex"
{
"or": [
{
"and": [
{
"canShineCharge": {
"usedTiles": 33,
"openEnd": 0
}
},
{
"shinespark": {
"frames": 20,
"excessFrames": 3
}
}
]
},
{
"and": [
"canMidairShinespark",
{
"canShineCharge": {
"usedTiles": 33,
"openEnd": 0
}
},
{
"shinespark": {
"frames": 15,
"excessFrames": 3
}
}
]
}
]
}
|
|
From: 3
Bottom Right Door
To: 2
Bottom Left Door
Notable: true 
Quickly shoot out the 3 shot blocks then horizontal spark breaking the speed blocks. Wait for the Oums to roll on their own to a place where they can be climbed. Do not stand on the Oums when they begin to attack. Entrance condition: {
"comeInShinecharged": {
"framesRequired": 100
}
}
Requires: "Morph"
"canSuitlessMaridia"
"canUseEnemies"
"canHorizontalShinespark"
{
"shinespark": {
"frames": 91,
"excessFrames": 4
}
}
|
|
Halfie Climb Enter with Shinespark from the Bottom Right (Conserve Health) (Very Hard)
Halfie Climb Room
From: 3
Bottom Right Door
To: 2
Bottom Left Door
Notable: true
Quickly shoot out the 3 shot blocks then horizontal spark breaking the speed blocks. Jump forward to save some health before Shinesparking Wait for the Oums to roll on their own to a place where they can be climbed. Do not stand on the Oums when they begin to attack. Entrance condition: {
"comeInShinecharged": {
"framesRequired": 125
}
}
Requires: "Morph"
"canSuitlessMaridia"
"canUseEnemies"
"canHorizontalShinespark"
"canShinechargeMovementComplex"
{
"shinespark": {
"frames": 70,
"excessFrames": 4
}
}
|
|
From: 3
Bottom Right Door
To: 4
Top Right Door
Charge a shinespark below the Oums, near the bottom right door, quickly move through the morph tunnel and spark up to the top door. This is an alternative to wall jumping. Requires: "Morph"
"Gravity"
"canShinechargeMovementComplex"
{
"or": [
{
"and": [
{
"canShineCharge": {
"usedTiles": 33,
"openEnd": 0
}
},
{
"shinespark": {
"frames": 39,
"excessFrames": 4
}
}
]
},
{
"and": [
"canMidairShinespark",
{
"canShineCharge": {
"usedTiles": 33,
"openEnd": 0
}
},
{
"shinespark": {
"frames": 33,
"excessFrames": 3
}
}
]
}
]
}
|
|
Entrance condition: {
"comeInShinecharging": {
"length": 12,
"openEnd": 0
}
}
Requires: "Gravity"
{
"shinespark": {
"frames": 40,
"excessFrames": 8
}
}
|
|
From: 2
Bottom Right Door
To: 1
Top Left Door
Entrance condition: {
"comeInShinecharged": {
"framesRequired": 40
}
}
Requires: "Gravity"
{
"shinespark": {
"frames": 40,
"excessFrames": 8
}
}
|
|
It takes a bit more time to set up the spark when suitless. Entrance condition: {
"comeInShinecharged": {
"framesRequired": 60
}
}
Requires: "canSuitlessMaridia"
{
"shinespark": {
"frames": 40,
"excessFrames": 8
}
}
|
|
Entrance condition: {
"comeInRunning": {
"speedBooster": true,
"minTiles": 2.4375
}
}
Requires: "canStutterWaterShineCharge"
{
"canShineCharge": {
"usedTiles": 33,
"openEnd": 2
}
}
{
"shinespark": {
"frames": 40,
"excessFrames": 8
}
}
|
|
From: 2
Bottom Right Door
To: 2
Bottom Right Door
Enter the room with a careful amount of momentum where Samus must spend extra time slowing down during the stutter, but must not have much run speed. Entrance condition: {
"comeInRunning": {
"speedBooster": true,
"minTiles": 2.4375
}
}
Requires: "canStutterWaterShineCharge"
"canShinechargeMovementComplex"
{
"canShineCharge": {
"usedTiles": 33,
"openEnd": 2
}
}
{
"or": [
{
"shinespark": {
"frames": 12
}
},
{
"and": [
"canShinechargeMovementTricky",
{
"shinespark": {
"frames": 3
}
}
]
}
]
}
Exit condition: {
"leaveWithSpark": {}
}
|
|
Entrance condition: {
"comeInShinecharged": {
"framesRequired": 4
}
}
Requires: "Gravity"
{
"shinespark": {
"frames": 20,
"excessFrames": 0
}
}
|
|
Entrance condition: {
"comeInShinecharged": {
"framesRequired": 20
}
}
Requires: "canSuitlessMaridia"
{
"shinespark": {
"frames": 20,
"excessFrames": 0
}
}
|
|
From: 1
Top Sand Entrance
To: 7
Below Morph Tunnel Junction
Shoot the shot block before reaching the sand and then shinespark up. A diagonal ShineSpark will most likely not have any horizontal movement when performed from the sand. Entrance condition: {
"comeInShinecharged": {
"framesRequired": 85
},
"comesThroughToilet": "any"
}
Requires: "h_canNavigateUnderwater"
"canPlayInSand"
"canShinechargeMovementComplex"
"Wave"
{
"shinespark": {
"frames": 24,
"excessFrames": 5
}
}
|
|
From: 1
Top Sand Entrance
To: 7
Below Morph Tunnel Junction
Shoot the shot block on the descent then shinespark diagonally up before hitting the sand. Entrance condition: {
"comeInShinecharged": {
"framesRequired": 55
},
"comesThroughToilet": "any"
}
Requires: "h_canNavigateUnderwater"
"canMidairShinespark"
"canShinechargeMovementComplex"
"Wave"
"canPrepareForNextRoom"
{
"shinespark": {
"frames": 17
}
}
|
|
From: 1
Top Sand Entrance
To: 7
Below Morph Tunnel Junction
Break the shot block before reaching the sand and then shinespark up. A diagonal ShineSpark will most likely not have any horizontal movement when performed from the sand. Entrance condition: {
"comeInShinecharged": {
"framesRequired": 160
},
"comesThroughToilet": "any"
}
Requires: "h_canNavigateUnderwater"
"canPlayInSand"
"canHeroShot"
"canTrickyJump"
"canShinechargeMovementTricky"
{
"shinespark": {
"frames": 25,
"excessFrames": 4
}
}
|
|
From: 1
Top Sand Entrance
To: 7
Below Morph Tunnel Junction
Break the shot block before reaching the sand and then shinespark up. Samus cannot shinespark after unmorphing until she touches the sand and this can be used to shoot upwards without sparking. A diagonal ShineSpark will most likely not have any horizontal movement when performed from the sand. Entrance condition: {
"comeInShinecharged": {
"framesRequired": 150
},
"comesThroughToilet": "any"
}
Requires: "h_canNavigateUnderwater"
"canPlayInSand"
"canShinechargeMovementTricky"
{
"or": [
"canResetFallSpeed",
{
"and": [
"canPrepareForNextRoom",
"h_canUsePowerBombs"
]
}
]
}
{
"shinespark": {
"frames": 24,
"excessFrames": 5
}
}
|
|
Enter with a high shinespark through the door then shoot the opposite door and fall into it. Entrance condition: {
"comeInWithSpark": {
"position": "top"
}
}
Requires: "canMidairShinespark"
"canPrepareForNextRoom"
{
"shinespark": {
"frames": 20
}
}
|
|
Enter with a high shinespark through the door then shoot the opposite door and fall into it. Entrance condition: {
"comeInWithSpark": {
"position": "top"
}
}
Requires: "canMidairShinespark"
"canPrepareForNextRoom"
{
"shinespark": {
"frames": 20
}
}
|
|
Entrance condition: {
"comeInWithSpark": {}
}
Requires: {
"shinespark": {
"frames": 22,
"excessFrames": 11
}
}
|
|
Entrance condition: {
"comeInWithSpark": {}
}
Requires: {
"shinespark": {
"frames": 22,
"excessFrames": 11
}
}
|
|
Entrance condition: {
"comeInShinecharging": {
"length": 2,
"openEnd": 1
}
}
Requires: {
"shinespark": {
"frames": 58,
"excessFrames": 6
}
}
|
|
From: 1
Bottom Left Door
To: 2
Top Right Door
Climb up 2.5 screens. Stop when about half of Samus (or less) is visible at the top of the screen. Turn-around a couple times to move to the right, to get close to falling out. Then perform a buffered spin-jump while turning around to the right, to make it onto the platform. The Choot will be safely off-camera and will not hit Samus while passing through it. Entrance condition: {
"comeInWithDoorStuckSetup": {}
}
Requires: "canShinesparkDeepStuck"
{
"shinespark": {
"frames": 1,
"excessFrames": 1
}
}
"canXRayClimb"
"canBePatient"
"canOffScreenMovement"
|
|
Entrance condition: {
"comeInShinecharged": {
"framesRequired": 20
}
}
Requires: {
"shinespark": {
"frames": 58,
"excessFrames": 6
}
}
|
|
Entrance condition: {
"comeInShinecharged": {
"framesRequired": 95
}
}
Requires: "canMidairShinespark"
"canShinechargeMovementComplex"
{
"or": [
"HiJump",
"canWalljump"
]
}
{
"shinespark": {
"frames": 17
}
}
Exit condition: {
"leaveWithSpark": {}
}
|
|
Entrance condition: {
"comeInShinecharged": {
"framesRequired": 5
}
}
Requires: {
"shinespark": {
"frames": 21,
"excessFrames": 10
}
}
{
"enemyDamage": {
"enemy": "Ripper",
"type": "contact",
"hits": 1
}
}
|
|
Use Hijump or one walljump on the left before a diagonal spark. Entrance condition: {
"comeInShinecharged": {
"framesRequired": 60
}
}
Requires: "canMidairShinespark"
"canShinechargeMovement"
{
"or": [
"HiJump",
"canWalljump"
]
}
{
"shinespark": {
"frames": 45,
"excessFrames": 11
}
}
|
|
Entrance condition: {
"comeInShinecharged": {
"framesRequired": 130
}
}
Requires: "canShinechargeMovement"
{
"shinespark": {
"frames": 2
}
}
Exit condition: {
"leaveWithSpark": {}
}
|
|
Entrance condition: {
"comeInShinecharging": {
"length": 2,
"openEnd": 1
}
}
Requires: {
"shinespark": {
"frames": 36,
"excessFrames": 10
}
}
|
|
Entrance condition: {
"comeInShinecharged": {
"framesRequired": 20
}
}
Requires: {
"shinespark": {
"frames": 36,
"excessFrames": 10
}
}
|
|
From: 3
Junction Left of Morph Tunnel
To: 1
Left Door
Notable: true 
Charge a spark below towards the right then run back and jump up and spark out of the left door. Requires: "canShinechargeMovementComplex"
"canTrickyDashJump"
{
"canShineCharge": {
"usedTiles": 22,
"openEnd": 2
}
}
{
"shinespark": {
"frames": 15
}
}
Exit condition: {
"leaveWithSpark": {}
}
|
|
From: 3
Junction Left of Morph Tunnel
To: 1
Left Door
Charge a spark below towards the right then run back and jump up and spark out of the left door. Requires: "canShinechargeMovementComplex"
"HiJump"
{
"canShineCharge": {
"usedTiles": 22,
"openEnd": 2
}
}
{
"shinespark": {
"frames": 15
}
}
Exit condition: {
"leaveWithSpark": {}
}
|
|
From: 3
Junction Left of Morph Tunnel
To: 2
Right Door
Charge on the central runway then carry the spark through the morph tunnel and out the right door. The door can be shot just before initiating the spark. This is easier with Gravity because the tide won't interfere. Requires: "Gravity"
"canShinechargeMovementComplex"
"canCarefulJump"
"Morph"
{
"canShineCharge": {
"usedTiles": 22,
"openEnd": 2
}
}
{
"shinespark": {
"frames": 30
}
}
Exit condition: {
"leaveWithSpark": {}
}
|
|
From: 3
Junction Left of Morph Tunnel
To: 2
Right Door
Charge on the central runway then carry the spark through the morph tunnel and out the right door. This can be done by being careful not to fall off of the runway and into the water or timing the tide. The door can be shot just before initiating the spark. Requires: "canShinechargeMovementComplex"
"canCarefulJump"
"Morph"
{
"canShineCharge": {
"usedTiles": 22,
"openEnd": 1
}
}
{
"shinespark": {
"frames": 30
}
}
Exit condition: {
"leaveWithSpark": {}
}
|
|
From: 2
Item
To: 1
Top Left Door (locked)
Using the bottom of the room, shortcharge to use the echoes created by shinesparking to kill all of the Standing Pirates. Either lead the pirate to the left wall or take a hit to gain iframes to use the full runway to charge a spark To lead a pirate, have it shoot in the direction you want it to go. Then jump overhead and crouch on the other side. Or, jump and aim down while on the sloped tiles just above to lower the camera and wait for the pirate to move to the correct spot. Turn around and diagonal spark the ceiling to kill the lowest pirate, and later the middle pirates. Building a spark towards the left allows for enough run speed to jump to the middle level. Then vertical shinespark out which kills the top pirate. Requires: {
"or": [
"Morph",
"canCarefulJump",
"canCameraManip"
]
}
"canShinechargeMovementComplex"
{
"canShineCharge": {
"usedTiles": 21,
"openEnd": 0
}
}
{
"shinespark": {
"frames": 30,
"excessFrames": 7
}
}
"canUseSpeedEchoes"
{
"or": [
"canCameraManip",
{
"and": [
{
"canShineCharge": {
"usedTiles": 19,
"openEnd": 0
}
},
{
"shinespark": {
"frames": 2,
"excessFrames": 2
}
}
]
},
{
"and": [
{
"canShineCharge": {
"usedTiles": 21,
"openEnd": 0
}
},
{
"shinespark": {
"frames": 3,
"excessFrames": 3
}
},
{
"enemyDamage": {
"enemy": "Pink Space Pirate (standing)",
"type": "laser",
"hits": 1
}
}
]
}
]
}
Clears obstacles: A |
|
Pseudo screw the left pirate, or clear the left side with shinesparks, then IBJ out Requires: "h_canIBJ"
{
"or": [
{
"and": [
"canShinechargeMovement",
"canUseSpeedEchoes",
{
"canShineCharge": {
"usedTiles": 19,
"openEnd": 0
}
},
{
"shinespark": {
"frames": 1,
"excessFrames": 1
}
}
]
},
{
"and": [
"canShinechargeMovement",
"canUseSpeedEchoes",
{
"enemyDamage": {
"enemy": "Pink Space Pirate (standing)",
"type": "contact",
"hits": 1
}
},
{
"canShineCharge": {
"usedTiles": 21,
"openEnd": 0
}
},
{
"shinespark": {
"frames": 2,
"excessFrames": 2
}
}
]
},
{
"and": [
"canPseudoScrew",
{
"enemyDamage": {
"enemy": "Pink Space Pirate (standing)",
"type": "contact",
"hits": 1
}
}
]
}
]
}
|
|
From: 3
Central Junction with all Standing Pirates Killed
To: 1
Top Left Door (locked)
Requires: "canShinechargeMovement"
{
"or": [
{
"and": [
"HiJump",
{
"canShineCharge": {
"usedTiles": 21,
"openEnd": 0
}
},
{
"shinespark": {
"frames": 21,
"excessFrames": 7
}
}
]
},
{
"and": [
"canShinechargeMovementComplex",
"canCarefulJump",
{
"canShineCharge": {
"usedTiles": 21,
"openEnd": 0
}
},
{
"shinespark": {
"frames": 30,
"excessFrames": 7
}
}
]
}
]
}
|
|
Enter on the right side of the doorway to reduce the amount of energy used. Entrance condition: {
"comeInWithSpark": {},
"comesThroughToilet": "any"
}
Requires: {
"shinespark": {
"frames": 6,
"excessFrames": 6
}
}
|
|
Spark vertically to avoid hitting the right ledge. Entrance condition: {
"comeInShinecharged": {
"framesRequired": 120
},
"comesThroughToilet": "any"
}
Requires: "canShinechargeMovementComplex"
"canMidairShinespark"
{
"shinespark": {
"frames": 37,
"excessFrames": 10
}
}
{
"or": [
{
"enemyDamage": {
"enemy": "Choot",
"type": "contact",
"hits": 1
}
},
{
"enemyKill": {
"enemies": [
[
"Choot"
]
],
"explicitWeapons": [
"Missile",
"Super",
"ScrewAttack",
"PseudoScrew",
"Plasma",
"Charge+Wave",
"Charge+Spazer"
]
}
}
]
}
|
|
Start the dash close to the door to help avoid getting hit by the first Owtch. Spark up while on the right side of the platform. To avoid the Owtch on the platform, it may help to jump on the left side of the platform then jump again and spark midair above the right side. Requires: "Gravity"
"SpeedBooster"
"canShinechargeMovement"
{
"shinespark": {
"frames": 90,
"excessFrames": 50
}
}
|
|
From: 2
Bottom Right Door
To: 1
Left Vertical Door
Start the dash as close to the door transition as possible to help avoid getting hit by the first Owtch. Store the shine charge while high up on the left slope. Spark up while on the right side of the platform. To avoid the Owtch on the platform, it may help to jump on the left side of the platform then jump again and spark midair above the right side. Entrance condition: {
"comeInRunning": {
"speedBooster": true,
"minTiles": 0.4375
}
}
Requires: "canWaterShineCharge"
"canShinechargeMovementComplex"
{
"or": [
{
"shinespark": {
"frames": 90,
"excessFrames": 50
}
},
{
"and": [
{
"shinespark": {
"frames": 90,
"excessFrames": 57
}
},
{
"or": [
"canWalljump",
"HiJump",
"canSpringBallJumpMidAir",
"h_canFly"
]
}
]
}
]
}
|
|
Gain a shinecharge by running right-to-left on the underwater runway on the right side of the room. Perform quick ledge-grabs to reach the platform in front of the door in time to spark out. Requires: "Gravity"
"SpeedBooster"
{
"enemyKill": {
"enemies": [
[
"Owtch",
"Owtch"
]
]
}
}
"canShinechargeMovementComplex"
{
"canShineCharge": {
"usedTiles": 16,
"openEnd": 2,
"gentleDownTiles": 2,
"gentleUpTiles": 2,
"steepDownTiles": 1,
"steepUpTiles": 1,
"startingDownTiles": 1
}
}
{
"shinespark": {
"frames": 10
}
}
Exit condition: {
"leaveWithSpark": {}
}
|
|
From: 2
Bottom Right Door
To: 3
Middle Right Door
Climb up 2 screens. Entrance condition: {
"comeInShinecharged": {
"framesRequired": 1
}
}
Requires: {
"shinespark": {
"frames": 1,
"excessFrames": 1
}
}
"canShinesparkDeepStuck"
"canXRayClimb"
|
|
Gain a shinecharge by running right-to-left on the underwater runway on the right side of the room. Use HiJump or a Spring Ball jump to quickly exit the water to the left and spark up. Requires: "Gravity"
"SpeedBooster"
{
"or": [
"HiJump",
"canTrickySpringBallJump",
"canWalljump",
{
"and": [
"canGravityJump",
"canShinechargeMovementTricky"
]
}
]
}
{
"enemyKill": {
"enemies": [
[
"Owtch",
"Owtch"
]
]
}
}
"canShinechargeMovementComplex"
{
"canShineCharge": {
"usedTiles": 16,
"openEnd": 2,
"gentleDownTiles": 2,
"gentleUpTiles": 2,
"steepDownTiles": 1,
"steepUpTiles": 1,
"startingDownTiles": 1
}
}
{
"shinespark": {
"frames": 43,
"excessFrames": 3
}
}
|
|
Start the dash close to the door to help avoid getting hit by the first Owtch. Spark up while on the right side of the platform. To avoid the Owtch on the platform, it may help to jump on the left side of the platform then jump again and spark midair above the right side. Requires: "Gravity"
"SpeedBooster"
"canShinechargeMovement"
{
"shinespark": {
"frames": 90,
"excessFrames": 11
}
}
|
|
Start the dash as close to the door transition as possible to help avoid getting hit by the first Owtch. Store the shine charge while high up on the left slope. Spark up while on the right side of the platform. To avoid the Owtch on the platform, it may help to jump on the left side of the platform then jump again and spark midair above the right side. Entrance condition: {
"comeInRunning": {
"speedBooster": true,
"minTiles": 0.4375
}
}
Requires: "canWaterShineCharge"
"canShinechargeMovementComplex"
{
"shinespark": {
"frames": 90,
"excessFrames": 11
}
}
|
|
Shinespark from the left side of the water, or the very edge of the land. It helps to face right before Shinesparking. Entrance condition: {
"comeInShinecharged": {
"framesRequired": 120
}
}
Requires: "canShinechargeMovementComplex"
{
"or": [
{
"shinespark": {
"frames": 43,
"excessFrames": 3
}
},
{
"and": [
"canMidairShinespark",
{
"shinespark": {
"frames": 30,
"excessFrames": 3
}
}
]
}
]
}
|
|
Shinespark from the tile to the right of the Choot. It helps to face right before Shinesparking. Entrance condition: {
"comeInShinecharged": {
"framesRequired": 145
}
}
Requires: "canShinechargeMovementComplex"
"canCarefulJump"
{
"shinespark": {
"frames": 49
}
}
|
|
A diagonal spark may take damage from the Choot It helps to face right before Shinesparking. Entrance condition: {
"comeInShinecharged": {
"framesRequired": 45
}
}
Requires: "canShinechargeMovementComplex"
"canMidairShinespark"
{
"shinespark": {
"frames": 13
}
}
|
|
From: 1
Left Door
To: 2
Right Door
Entrance condition: {
"comeInShinecharged": {
"framesRequired": 10
}
}
Requires: {
"shinespark": {
"frames": 21
}
}
Exit condition: {
"leaveWithSpark": {}
}
|
|
From: 2
Right Door
To: 1
Left Door
Entrance condition: {
"comeInShinecharged": {
"framesRequired": 10
}
}
Requires: {
"shinespark": {
"frames": 21
}
}
Exit condition: {
"leaveWithSpark": {}
}
|
|
Finish shinecharging on the raised plateau, then climb up and spark out the left door. Requires: "Gravity"
"canShinechargeMovement"
"HiJump"
{
"canShineCharge": {
"usedTiles": 33,
"openEnd": 2
}
}
{
"shinespark": {
"frames": 2
}
}
Exit condition: {
"leaveWithSpark": {}
}
|
|
Spark diagonally from the right side of the doorway. Entrance condition: {
"comeInShinecharged": {
"framesRequired": 5
},
"comesThroughToilet": "no"
}
Requires: {
"shinespark": {
"frames": 40,
"excessFrames": 18
}
}
|
|
From: 2
Bottom Door
To: 1
Left Door
Entrance condition: {
"comeInShinecharged": {
"framesRequired": 10
},
"comesThroughToilet": "yes"
}
Requires: {
"shinespark": {
"frames": 40,
"excessFrames": 18
}
}
|
|
Entrance condition: {
"comeInWithSpark": {},
"comesThroughToilet": "any"
}
Requires: {
"shinespark": {
"frames": 7,
"excessFrames": 7
}
}
|
|
From: 2
Bottom Door
To: 4
Water Level Junction
Spark vertically by the first plant on the right to hit the floating island. Entrance condition: {
"comeInShinecharged": {
"framesRequired": 50
},
"comesThroughToilet": "no"
}
Requires: "canSuitlessMaridia"
"canShinechargeMovement"
{
"shinespark": {
"frames": 14,
"excessFrames": 4
}
}
|
|
From: 2
Bottom Door
To: 4
Water Level Junction
Spark vertically by the first plant on the right to hit the floating island. Entrance condition: {
"comeInShinecharged": {
"framesRequired": 60
},
"comesThroughToilet": "yes"
}
Requires: "canSuitlessMaridia"
"canShinechargeMovement"
{
"shinespark": {
"frames": 14,
"excessFrames": 4
}
}
|
|
Shinespark midair to avoid bonking. Jump outward before sparking save Energy. Entrance condition: {
"comeInShinecharging": {
"length": 3,
"openEnd": 0
}
}
Requires: "Gravity"
"canMidairShinespark"
"canShinechargeMovement"
{
"shinespark": {
"frames": 51,
"excessFrames": 4
}
}
|
|
Spark through the top of the door to avoid bonking. Entrance condition: {
"comeInWithSpark": {}
}
Requires: "Gravity"
"canMidairShinespark"
{
"shinespark": {
"frames": 61,
"excessFrames": 6
}
}
|
|
Spark through the top of the door to avoid bonking. Entrance condition: {
"comeInWithSpark": {}
}
Requires: "canMidairShinespark"
{
"shinespark": {
"frames": 75,
"excessFrames": 7
}
}
|
|
From: 1
Left Door
To: 2
Right Door
Gain an extra half-tile of runway by coming in very slowly to prevent falling off. Entrance condition: {
"comeInShinecharging": {
"length": 1,
"openEnd": 0
}
}
Requires: "canShinechargeMovementComplex"
"canSlowShortCharge"
"canMidairShinespark"
{
"canShineCharge": {
"usedTiles": 14,
"openEnd": 0
}
}
{
"shinespark": {
"frames": 69,
"excessFrames": 7
}
}
|
|
Shinespark midair to avoid bonking. Jump outward before sparking save Energy. Entrance condition: {
"comeInShinecharging": {
"length": 3,
"openEnd": 0
}
}
Requires: "Gravity"
"canMidairShinespark"
"canShinechargeMovement"
{
"shinespark": {
"frames": 51,
"excessFrames": 4
}
}
|
|
Spark through the top of the door to avoid bonking. Entrance condition: {
"comeInWithSpark": {}
}
Requires: "Gravity"
"canMidairShinespark"
{
"shinespark": {
"frames": 61,
"excessFrames": 6
}
}
|
|
Spark through the top of the door to avoid bonking. Entrance condition: {
"comeInWithSpark": {}
}
Requires: "canMidairShinespark"
{
"shinespark": {
"frames": 75,
"excessFrames": 7
}
}
|
|
From: 2
Right Door
To: 1
Left Door
Gain an extra half-tile of runway by coming in very slowly to prevent falling off. Entrance condition: {
"comeInShinecharging": {
"length": 1,
"openEnd": 0
}
}
Requires: "canShinechargeMovementComplex"
"canSlowShortCharge"
"canMidairShinespark"
{
"canShineCharge": {
"usedTiles": 14,
"openEnd": 0
}
}
{
"shinespark": {
"frames": 69,
"excessFrames": 7
}
}
|
|
Get the shinecharge then move towards and shinespark out the left door. Entrance condition: {
"comeInRunning": {
"speedBooster": true,
"minTiles": 2.4375
}
}
Requires: "canStutterWaterShineCharge"
"canShinechargeMovementComplex"
{
"canShineCharge": {
"usedTiles": 33,
"openEnd": 2
}
}
{
"or": [
{
"shinespark": {
"frames": 9
}
},
{
"and": [
"canShinechargeMovementTricky",
{
"shinespark": {
"frames": 2
}
}
]
}
]
}
Exit condition: {
"leaveWithSpark": {}
}
|
|
Entrance condition: {
"comeInShinecharged": {
"framesRequired": 25
}
}
Requires: {
"shinespark": {
"frames": 23
}
}
Exit condition: {
"leaveWithSpark": {}
}
|
|
From: 1
Left Door
To: 4
Junction Below Top Door
The spark takes Samus directly to the top platform. Entrance condition: {
"comeInShinecharged": {
"framesRequired": 30
}
}
Requires: "h_canNavigateUnderwater"
{
"shinespark": {
"frames": 23,
"excessFrames": 10
}
}
|
|
From: 1
Left Door
To: 4
Junction Below Top Door
Spark diagonally through the bomb blocks. Entrance condition: {
"comeInRunning": {
"speedBooster": true,
"minTiles": 2.4375
}
}
Requires: "canStutterWaterShineCharge"
{
"canShineCharge": {
"usedTiles": 33,
"openEnd": 2
}
}
{
"shinespark": {
"frames": 23,
"excessFrames": 10
}
}
|
|
Spark vertically through the bomb blocks. It is still possible to break the blocks while below 30 Energy by jumping before sparking. Entrance condition: {
"comeInShinecharged": {
"framesRequired": 40
}
}
Requires: "h_canNavigateUnderwater"
{
"or": [
{
"shinespark": {
"frames": 10,
"excessFrames": 8
}
},
{
"and": [
"canMidairShinespark",
{
"shinespark": {
"frames": 7,
"excessFrames": 7
}
}
]
}
]
}
|
|
From: 1
Left Door
To: 6
Junction Above Bomb Blocks
Spark vertically through the bomb blocks. It is still possible to break the blocks while below 30 Energy by jumping before sparking. Entrance condition: {
"comeInRunning": {
"speedBooster": true,
"minTiles": 2.4375
}
}
Requires: "canStutterWaterShineCharge"
{
"canShineCharge": {
"usedTiles": 33,
"openEnd": 2
}
}
{
"or": [
{
"shinespark": {
"frames": 10,
"excessFrames": 8
}
},
{
"and": [
"canMidairShinespark",
{
"shinespark": {
"frames": 7,
"excessFrames": 7
}
}
]
}
]
}
|
|
Entrance condition: {
"comeInShinecharged": {
"framesRequired": 25
}
}
Requires: {
"shinespark": {
"frames": 23
}
}
Exit condition: {
"leaveWithSpark": {}
}
|
|
Get the shinecharge and move towards then shinespark out the right door. Entrance condition: {
"comeInRunning": {
"speedBooster": true,
"minTiles": 2.4375
}
}
Requires: "canStutterWaterShineCharge"
"canShinechargeMovementComplex"
{
"canShineCharge": {
"usedTiles": 33,
"openEnd": 2
}
}
{
"or": [
{
"shinespark": {
"frames": 9
}
},
{
"and": [
"canShinechargeMovementTricky",
{
"shinespark": {
"frames": 2
}
}
]
}
]
}
Exit condition: {
"leaveWithSpark": {}
}
|
|
From: 2
Right Door
To: 4
Junction Below Top Door
The spark takes Samus directly to the top platform. Entrance condition: {
"comeInShinecharged": {
"framesRequired": 30
}
}
Requires: "h_canNavigateUnderwater"
{
"shinespark": {
"frames": 23,
"excessFrames": 10
}
}
|
|
From: 2
Right Door
To: 4
Junction Below Top Door
Spark diagonally through the bomb blocks. Entrance condition: {
"comeInRunning": {
"speedBooster": true,
"minTiles": 2.4375
}
}
Requires: "canStutterWaterShineCharge"
{
"canShineCharge": {
"usedTiles": 33,
"openEnd": 2
}
}
{
"shinespark": {
"frames": 23,
"excessFrames": 10
}
}
|
|
Spark vertically through the bomb blocks. It is still possible to break the blocks while below 30 Energy by jumping before sparking. Entrance condition: {
"comeInShinecharged": {
"framesRequired": 40
}
}
Requires: "h_canNavigateUnderwater"
{
"or": [
{
"shinespark": {
"frames": 10,
"excessFrames": 8
}
},
{
"and": [
"canMidairShinespark",
{
"shinespark": {
"frames": 7,
"excessFrames": 7
}
}
]
}
]
}
|
|
From: 2
Right Door
To: 6
Junction Above Bomb Blocks
Spark vertically through the bomb blocks. It is still possible to break the blocks while below 30 Energy by jumping before sparking. Entrance condition: {
"comeInRunning": {
"speedBooster": true,
"minTiles": 2.4375
}
}
Requires: "canStutterWaterShineCharge"
{
"canShineCharge": {
"usedTiles": 33,
"openEnd": 2
}
}
{
"or": [
{
"shinespark": {
"frames": 10,
"excessFrames": 8
}
},
{
"and": [
"canMidairShinespark",
{
"shinespark": {
"frames": 7,
"excessFrames": 7
}
}
]
}
]
}
|
|
From: 1
West Leg Left Door
To: 2
East Leg Right Door
Notable: true 
Preselect Grapple and be ready to use it when entering the room. Release up or angle up before release grapple so the shinespark does not activate instantly. Use the windup frames for a shinespark to extend the duration timer. Entrance condition: {
"comeInShinecharged": {
"framesRequired": 150
}
}
Requires: "h_canNavigateUnderwater"
"canShinechargeMovement"
"Grapple"
{
"shinespark": {
"frames": 65
}
}
{
"enemyDamage": {
"enemy": "Menu",
"type": "contact",
"hits": 1
}
}
|
|
From: 3
West Leg Right Door
To: 2
East Leg Right Door
Notable: true
Preselect Grapple and be ready to use it when entering the room. Release up or angle up before release grapple so the shinespark does not activate instantly. Use the windup frames for a shinespark to extend the duration timer. Entrance condition: {
"comeInShinecharged": {
"framesRequired": 150
}
}
Requires: "h_canNavigateUnderwater"
"canShinechargeMovement"
"Grapple"
{
"shinespark": {
"frames": 65
}
}
{
"enemyDamage": {
"enemy": "Menu",
"type": "contact",
"hits": 1
}
}
|
|
Entrance condition: {
"comeInShinecharging": {
"length": 3,
"openEnd": 0
}
}
Requires: "Gravity"
"canHorizontalShinespark"
{
"shinespark": {
"frames": 76,
"excessFrames": 4
}
}
|
|
Entrance condition: {
"comeInWithSpark": {}
}
Requires: "Gravity"
{
"shinespark": {
"frames": 77,
"excessFrames": 4
}
}
|
|
Entrance condition: {
"comeInWithSpark": {}
}
Requires: {
"shinespark": {
"frames": 99,
"excessFrames": 5
}
}
|
|
From: 1
Left Door
To: 2
Right Door
Gain an extra half-tile of runway by coming in very slowly to prevent falling off. Entrance condition: {
"comeInShinecharging": {
"length": 1,
"openEnd": 0
}
}
Requires: "canShinechargeMovementComplex"
"canSlowShortCharge"
"canMidairShinespark"
{
"canShineCharge": {
"usedTiles": 14,
"openEnd": 0
}
}
{
"shinespark": {
"frames": 88,
"excessFrames": 5
}
}
|
|
Entrance condition: {
"comeInShinecharging": {
"length": 3,
"openEnd": 0
}
}
Requires: "Gravity"
"canHorizontalShinespark"
{
"shinespark": {
"frames": 76,
"excessFrames": 4
}
}
|
|
Entrance condition: {
"comeInWithSpark": {}
}
Requires: "Gravity"
{
"shinespark": {
"frames": 78,
"excessFrames": 4
}
}
|
|
Entrance condition: {
"comeInWithSpark": {}
}
Requires: {
"shinespark": {
"frames": 99,
"excessFrames": 5
}
}
|
|
From: 2
Right Door
To: 1
Left Door
Gain an extra half-tile of runway by coming in very slowly to prevent falling off. Entrance condition: {
"comeInShinecharging": {
"length": 1,
"openEnd": 0
}
}
Requires: "canShinechargeMovementComplex"
"canSlowShortCharge"
"canMidairShinespark"
{
"canShineCharge": {
"usedTiles": 14,
"openEnd": 0
}
}
{
"shinespark": {
"frames": 90,
"excessFrames": 5
}
}
|
|
From: 1
Left Door
To: 1
Left Door
Get the shinecharge while killing the crab, then move towards and shinespark out the left door. Entrance condition: {
"comeInRunning": {
"speedBooster": true,
"minTiles": 2.4375
}
}
Requires: "canStutterWaterShineCharge"
"canShinechargeMovementComplex"
{
"canShineCharge": {
"usedTiles": 33,
"openEnd": 2
}
}
{
"or": [
{
"shinespark": {
"frames": 9
}
},
{
"and": [
"canShinechargeMovementTricky",
{
"shinespark": {
"frames": 2
}
}
]
}
]
}
{
"or": [
"Wave",
"Spazer",
"Plasma",
{
"ammo": {
"type": "Missile",
"count": 2
}
},
{
"ammo": {
"type": "Super",
"count": 1
}
}
]
}
Exit condition: {
"leaveWithSpark": {}
}
|
|
From: 1
Left Door
To: 2
Right Door
Entrance condition: {
"comeInShinecharged": {
"framesRequired": 25
}
}
Requires: {
"shinespark": {
"frames": 23
}
}
Exit condition: {
"leaveWithSpark": {}
}
|
|
From: 2
Right Door
To: 1
Left Door
Entrance condition: {
"comeInShinecharged": {
"framesRequired": 25
}
}
Requires: {
"shinespark": {
"frames": 23
}
}
Exit condition: {
"leaveWithSpark": {}
}
|
|
From: 2
Right Door
To: 2
Right Door
Get the shinecharge, carefully jump over the crab and move towards then shinespark out the right door. Entrance condition: {
"comeInRunning": {
"speedBooster": true,
"minTiles": 2.4375
}
}
Requires: "canStutterWaterShineCharge"
"canShinechargeMovementComplex"
"canCarefulJump"
{
"canShineCharge": {
"usedTiles": 33,
"openEnd": 2
}
}
{
"or": [
{
"shinespark": {
"frames": 9
}
},
{
"and": [
"canShinechargeMovementTricky",
{
"shinespark": {
"frames": 2
}
}
]
}
]
}
Exit condition: {
"leaveWithSpark": {}
}
|
|
Gain a shinecharge by running right-to-left on the leftmost runway. Then run toward the right, jumping twice before sparking mid-air. Requires: {
"obstaclesCleared": [
"A"
]
}
"canShinechargeMovementTricky"
{
"canShineCharge": {
"usedTiles": 15,
"openEnd": 0
}
}
{
"shinespark": {
"frames": 35
}
}
Exit condition: {
"leaveWithSpark": {}
}
|
|
From: 1
Top Right Door
To: 2
Left Door
Entrance condition: {
"comeInShinecharged": {
"framesRequired": 95
},
"comesThroughToilet": "no"
}
Requires: "canShinechargeMovementTricky"
{
"enemyDamage": {
"enemy": "Blue Sidehopper",
"type": "contact",
"hits": 1
}
}
"canMidairShinespark"
{
"shinespark": {
"frames": 21
}
}
Exit condition: {
"leaveWithSpark": {}
}
|
|
Entrance condition: {
"comeInWithSpark": {}
}
Requires: {
"shinespark": {
"frames": 32,
"excessFrames": 7
}
}
|
|
Spark through the top of the door to avoid the platforms. Entrance condition: {
"comeInWithSpark": {}
}
Requires: "canMidairShinespark"
{
"shinespark": {
"frames": 112,
"excessFrames": 16
}
}
|
|
Spark through the top of the door to avoid the platforms. Entrance condition: {
"comeInWithSpark": {}
}
Requires: "canMidairShinespark"
{
"shinespark": {
"frames": 112,
"excessFrames": 35
}
}
|
|
From: 3
Junction (Get Past Metroids, Left to Right)
To: 2
Right Door
Requires: "canMidairShinespark"
{
"canShineCharge": {
"usedTiles": 31,
"openEnd": 0
}
}
{
"or": [
{
"and": [
{
"obstaclesCleared": [
"A"
]
},
{
"shinespark": {
"frames": 54
}
}
]
},
{
"and": [
"HiJump",
{
"shinespark": {
"frames": 54
}
}
]
},
{
"and": [
{
"metroidFrames": 300
},
{
"shinespark": {
"frames": 54
}
}
]
},
{
"and": [
"canTrickyJump",
{
"shinespark": {
"frames": 75,
"excessFrames": 16
}
}
]
}
]
}
|
|
From: 4
Junction (Get Past Metroids, Right to Left)
To: 1
Left Door (locked)
Requires: "canMidairShinespark"
{
"canShineCharge": {
"usedTiles": 23,
"openEnd": 0
}
}
{
"shinespark": {
"frames": 80,
"excessFrames": 5
}
}
{
"or": [
{
"obstaclesCleared": [
"A"
]
},
"Ice",
"ScrewAttack",
"canPseudoScrew",
{
"metroidFrames": 200
}
]
}
|
|
From: 1
Top Right Door
To: 2
Bottom Right Door (locked)
Entrance condition: {
"comeInShinecharged": {
"framesRequired": 102
}
}
Requires: "canShinechargeMovementTricky"
{
"shinespark": {
"frames": 22
}
}
{
"or": [
"f_KilledMetroidRoom2",
"canMetroidAvoid"
]
}
Exit condition: {
"leaveWithSpark": {}
}
|
|
From: 1
Top Right Door
To: 2
Bottom Right Door (locked)
Entrance condition: {
"comeInShinecharging": {
"length": 2,
"openEnd": 1
}
}
Requires: "canShinechargeMovementTricky"
{
"shinespark": {
"frames": 7
}
}
{
"or": [
"f_KilledMetroidRoom2",
"canMetroidAvoid"
]
}
Exit condition: {
"leaveWithSpark": {}
}
|
|
From: 2
Bottom Right Door (locked)
To: 1
Top Right Door
Spinjump into the opening below the top door. Entrance condition: {
"comeInShinecharged": {
"framesRequired": 80
}
}
Requires: "HiJump"
"canCarefulJump"
"canShinechargeMovementComplex"
{
  "shinespark": {
    "frames": 6
  }
}
{
"or": [
"f_KilledMetroidRoom2",
"canMetroidAvoid"
]
}
Exit condition: {
"leaveWithSpark": {}
}
|
|
From: 2
Bottom Right Door (locked)
To: 1
Top Right Door
Wall jump up the right wall and either mid-air morph to fit through the gap below the top door. Alternatively use a mid-air wiggle to reduce the height of Samus' hitbox after the walljump, to be able to fit through the gap without morphing. Shoot the door open and spark out. Entrance condition: {
"comeInShinecharged": {
"framesRequired": 110
}
}
Requires: "canWallJumpInstantMorph"
"canShinechargeMovementComplex"
{
"shinespark": {
"frames": 5
}
}
{
"or": [
"f_KilledMetroidRoom2",
"canMetroidAvoid"
]
}
Exit condition: {
"leaveWithSpark": {}
}
|
|
From: 2
Bottom Right Door (locked)
To: 1
Top Right Door
Wall jump up the right wall and use a mid-air wiggle to reduce the height of Samus' hitbox after the walljump, to be able to fit through the gap without morphing. Shoot the door open and spark out. Entrance condition: {
"comeInShinecharged": {
"framesRequired": 105
}
}
Requires: "canWalljump"
"canMidairWiggle"
"canShinechargeMovementTricky"
{
"shinespark": {
"frames": 5
}
}
{
"or": [
"f_KilledMetroidRoom2",
"canMetroidAvoid"
]
}
Exit condition: {
"leaveWithSpark": {}
}
|
|
From: 2
Bottom Right Door (locked)
To: 1
Top Right Door
Not pressing dash will make the platforming easier, unless HiJump is also equipped. Entrance condition: {
"comeInShinecharging": {
"length": 2,
"openEnd": 0
}
}
Requires: "canShinechargeMovementComplex"
{
"shinespark": {
"frames": 7
}
}
"f_KilledMetroidRoom2"
Exit condition: {
"leaveWithSpark": {}
}
|
|
Entrance condition: {
"comeInWithSpark": {}
}
Requires: {
"shinespark": {
"frames": 112,
"excessFrames": 6
}
}
|
|
Entrance condition: {
"comeInWithSpark": {}
}
Requires: {
"shinespark": {
"frames": 112,
"excessFrames": 23
}
}
|
|
Requires: {
"or": [
"canMetroidAvoid",
"Ice",
"f_KilledMetroidRoom3"
]
}
{
"canShineCharge": {
"usedTiles": 29,
"openEnd": 2
}
}
{
"or": [
{
"shinespark": {
"frames": 75
}
},
{
"and": [
"canShinechargeMovementComplex",
{
"shinespark": {
"frames": 50
}
}
]
}
]
}
Exit condition: {
"leaveWithSpark": {}
}
|
|
Entrance condition: {
"comeInWithSpark": {},
"comesThroughToilet": "any"
}
Requires: "f_KilledMetroidRoom4"
{
"shinespark": {
"frames": 1,
"excessFrames": 1
}
}
|
|
From: 2
Right Door
To: 3
Mother Brain (locked)
Notable: true 

Shinespark diagonally into the lower Rinka Spawner while holding down, spamming jump, then pressing forward, in order to glitch through the first Mother Brain Zebetites during Samus' i-frames. The remaining Zebetites will not spawn. Entrance condition: {
"comeInShinecharged": {
"framesRequired": 100
}
}
Requires: {
"shinespark": {
"frames": 4
}
}
{
"enemyDamage": {
"enemy": "Rinka",
"type": "contact",
"hits": 1
}
}
"i_Objective1Complete"
"i_Objective2Complete"
"i_Objective3Complete"
"i_Objective4Complete"
|
|
From: 2
Right Door
To: 3
Mother Brain (locked)
Notable: true
Shinespark diagonally into the lower Rinka Spawner while holding down, spamming jump, then pressing forward, in order to glitch through the first Mother Brain Zebetites during Samus' i-frames. The remaining Zebetites will not spawn. Entrance condition: {
"comeInShinecharging": {
"length": 4,
"openEnd": 1
}
}
Requires: {
"shinespark": {
"frames": 4
}
}
{
"enemyDamage": {
"enemy": "Rinka",
"type": "contact",
"hits": 1
}
}
"i_Objective1Complete"
"i_Objective2Complete"
"i_Objective3Complete"
"i_Objective4Complete"
|
|
From: 2
Middle Left Door
To: 1
Top Left Door
Entrance condition: {
"comeInShinecharged": {
"framesRequired": 75
}
}
Requires: "HiJump"
"canShinechargeMovementComplex"
{
"shinespark": {
"frames": 8
}
}
Exit condition: {
"leaveWithSpark": {}
}
|
|
From: 2
Middle Left Door
To: 1
Top Left Door
Entrance condition: {
"comeInShinecharged": {
"framesRequired": 165
}
}
Requires: "canShinechargeMovementTricky"
{
"shinespark": {
"frames": 5
}
}
Exit condition: {
"leaveWithSpark": {}
}
|
|
From: 2
Middle Left Door
To: 1
Top Left Door
Entrance condition: {
"comeInShinecharged": {
"framesRequired": 100
}
}
Requires: "canWalljump"
"canShinechargeMovementComplex"
{
"shinespark": {
"frames": 4
}
}
Exit condition: {
"leaveWithSpark": {}
}
|
|
From: 3
Bottom Left Door
To: 1
Top Left Door
Entrance condition: {
"comeInShinecharged": {
"framesRequired": 165
}
}
Requires: "HiJump"
"canShinechargeMovementComplex"
{
"shinespark": {
"frames": 4
}
}
Exit condition: {
"leaveWithSpark": {}
}
|
|
From: 3
Bottom Left Door
To: 1
Top Left Door
Entrance condition: {
"comeInShinecharged": {
"framesRequired": 155
}
}
Requires: "HiJump"
"canWalljump"
"canShinechargeMovementComplex"
{
"shinespark": {
"frames": 2
}
}
Exit condition: {
"leaveWithSpark": {}
}
|
|
From: 3
Bottom Left Door
To: 2
Middle Left Door
Entrance condition: {
"comeInShinecharged": {
"framesRequired": 80
}
}
Requires: "HiJump"
"canWalljump"
"canShinechargeMovementComplex"
{
"shinespark": {
"frames": 5
}
}
Exit condition: {
"leaveWithSpark": {}
}
|
|
From: 3
Bottom Left Door
To: 2
Middle Left Door
Entrance condition: {
"comeInShinecharged": {
"framesRequired": 85
}
}
Requires: "HiJump"
"canShinechargeMovementComplex"
{
"shinespark": {
"frames": 7
}
}
Exit condition: {
"leaveWithSpark": {}
}
|
|
From: 3
Bottom Left Door
To: 2
Middle Left Door
Entrance condition: {
"comeInShinecharged": {
"framesRequired": 145
}
}
Requires: "HiJump"
"canShinechargeMovementComplex"
{
"shinespark": {
"frames": 6
}
}
Exit condition: {
"leaveWithSpark": {}
}
|
|
From: 3
Bottom Left Door
To: 2
Middle Left Door
Entrance condition: {
"comeInShinecharged": {
"framesRequired": 110
}
}
Requires: "canWalljump"
"canShinechargeMovementComplex"
{
"shinespark": {
"frames": 6
}
}
Exit condition: {
"leaveWithSpark": {}
}
|
|
From: 3
Bottom Left Door
To: 2
Middle Left Door
Entrance condition: {
"comeInShinecharging": {
"length": 12,
"openEnd": 0
}
}
Requires: "canShinechargeMovementTricky"
{
"shinespark": {
"frames": 6
}
}
Exit condition: {
"leaveWithSpark": {}
}
|
|
From: 1
Top Right Doorway
To: 2
Left Door
Use Wave to clear the seaweed quickly. Entrance condition: {
"comeInShinecharging": {
"length": 4,
"openEnd": 0
}
}
Requires: "Wave"
"canShinechargeMovementComplex"
{
"shinespark": {
"frames": 5
}
}
Exit condition: {
"leaveWithSpark": {}
}
|
|
From: 1
Top Right Doorway
To: 3
Bottom Right Door
Use Wave to clear the seaweed quickly. Entrance condition: {
"comeInShinecharged": {
"framesRequired": 125
}
}
Requires: "Wave"
"canShinechargeMovementComplex"
{
"shinespark": {
"frames": 2
}
}
Exit condition: {
"leaveWithSpark": {}
}
|
|
From: 1
Top Right Doorway
To: 3
Bottom Right Door
Clear the seaweed one block at a time, with just barely enough time remaining to spark out the door. Entrance condition: {
"comeInShinecharging": {
"length": 4,
"openEnd": 0
}
}
Requires: "canShinechargeMovementTricky"
{
"shinespark": {
"frames": 2
}
}
Exit condition: {
"leaveWithSpark": {}
}
|
|
From: 2
Left Door
To: 3
Bottom Right Door
Angle down to shoot the first seaweed block at the level of Samus' knees. Take four tiny steps forward, firing a shot with forward momentum on each step, destroying the seaweed at the level of Samus' head, with the last shot continuing on to open the door. Do one more angle down shot to destroy the last seaweed block at Samus' knees. Then shinespark through the door. Entrance condition: {
"comeInShinecharged": {
"framesRequired": 110
}
}
Requires: "canShinechargeMovementTricky"
{
"shinespark": {
"frames": 18
}
}
Exit condition: {
"leaveWithSpark": {
"position": "bottom"
}
}
|
|
From: 2
Left Door
To: 3
Bottom Right Door
Gain a shinecharge while entering the room. Angle down to shoot the first seaweed block at the level of Samus' knees. Take four tiny steps forward, firing a shot with forward momentum on each step, destroying the seaweed at the level of Samus' head, with the last shot continuing on to open the door. Do one more angle down shot to destroy the last seaweed block at Samus' knees. To minimize energy usage, jump across the room before shinesparking through the door. Entrance condition: {
"comeInShinecharging": {
"length": 2,
"openEnd": 0
}
}
Requires: "canShinechargeMovementTricky"
{
"shinespark": {
"frames": 5
}
}
Exit condition: {
"leaveWithSpark": {
"position": "bottom"
}
}
|
|
From: 3
Bottom Right Door
To: 1
Top Right Doorway
Entrance condition: {
"comeInShinecharged": {
"framesRequired": 100
}
}
Requires: "HiJump"
"canWalljump"
"canShinechargeMovementComplex"
{
"shinespark": {
"frames": 5
}
}
Exit condition: {
"leaveWithSpark": {}
}
|
|
From: 3
Bottom Right Door
To: 1
Top Right Doorway
Entrance condition: {
"comeInShinecharged": {
"framesRequired": 130
}
}
Requires: "canWalljump"
"canShinechargeMovementComplex"
{
"shinespark": {
"frames": 4
}
}
Exit condition: {
"leaveWithSpark": {}
}
|
|
From: 3
Bottom Right Door
To: 2
Left Door
Use five shots to destroy the seaweed blocks: Buffer the first shot while entering the room. Spin jump for the second shot (landing on the slightly raised platform), firing at an intermediate height in order to destroy two blocks. Fire two shots while standing on the platform. Spin jump for the final shot, and activate the shinespark mid-air. Entrance condition: {
"comeInShinecharged": {
"framesRequired": 100
}
}
Requires: "canShinechargeMovementComplex"
{
"shinespark": {
"frames": 14
}
}
Exit condition: {
"leaveWithSpark": {
"position": "bottom"
}
}
|
|
From: 3
Bottom Right Door
To: 2
Left Door
Use single well-timed Wave shot to clear the seaweed quickly. Entrance condition: {
"comeInShinecharged": {
"framesRequired": 30
}
}
Requires: "Wave"
"canShinechargeMovementComplex"
{
"shinespark": {
"frames": 18
}
}
Exit condition: {
"leaveWithSpark": {
"position": "bottom"
}
}
|
|
Entrance condition: {
"comeInWithSpark": {},
"comesThroughToilet": "any"
}
Requires: {
"shinespark": {
"frames": 4,
"excessFrames": 4
}
}
|
|
From: 1
Top Door
To: 2
Right Door
Entrance condition: {
"comeInShinecharged": {
"framesRequired": 95
},
"comesThroughToilet": "any"
}
Requires: {
"or": [
{
"ammo": {
"type": "Super",
"count": 1
}
},
{
"and": [
"Plasma",
"Wave"
]
},
{
"and": [
"Plasma",
"canHitbox"
]
}
]
}
"canShinechargeMovementTricky"
{
"shinespark": {
"frames": 2
}
}
Exit condition: {
"leaveWithSpark": {}
}
|
|
From: 2
Right Door
To: 1
Top Door
Enter shinecharged with a spin-jump. Perform quick ledge-grabs to reach the top of the room and spark out. Entrance condition: {
"comeInShinecharged": {
"framesRequired": 130
}
}
Requires: "canPrepareForNextRoom"
"ScrewAttack"
"HiJump"
"canWalljump"
"canShinechargeMovementTricky"
{
"shinespark": {
"frames": 6
}
}
Exit condition: {
"leaveWithSpark": {}
}
|
|
From: 2
Right Door
To: 1
Top Door
Enter shinecharged with a spin-jump. Perform quick ledge-grabs to reach the top of the room and spark out. Entrance condition: {
"comeInShinecharged": {
"framesRequired": 155
}
}
Requires: "canPrepareForNextRoom"
"canShinechargeMovementTricky"
{
"shinespark": {
"frames": 6
}
}
Exit condition: {
"leaveWithSpark": {}
}
|
|
Fall through the speed blocks from above with Temporary Blue, or kill the pirates from above with speed echoes. Requires: {
"enemyDamage": {
"enemy": "Tourian Space Pirate (all)",
"type": "contact",
"hits": 1
}
}
{
"or": [
"canTemporaryBlue",
{
"and": [
"canUseSpeedEchoes",
{
"canShineCharge": {
"usedTiles": 33,
"openEnd": 2
}
},
{
  "shinespark": {
    "frames": 2,
    "excessFrames": 2
  }
}
]
}
]
}
|
|
Entrance condition: {
"comeInShinecharged": {
"framesRequired": 15
}
}
Requires: "canPrepareForNextRoom"
"canShinechargeMovement"
"canMidairShinespark"
{
"shinespark": {
"frames": 57,
"excessFrames": 13
}
}
|
|
From: 3
Bottom of Shaft
To: 1
Left Door
Notable: true 
Gain a shinecharge by running right-to-left at the bottom of the room. Move quickly to minimize damage from the acid, which will begin rising as soon as you reach the bottom of the room. Shinespark up the shaft. Requires: "Gravity"
{
"canShineCharge": {
"usedTiles": 17,
"openEnd": 0
}
}
{
"acidFrames": 90
}
"canShinechargeMovementComplex"
"canMidairShinespark"
{
"shinespark": {
"frames": 76,
"excessFrames": 6
}
}
|
|
From: 3
Bottom of Shaft
To: 1
Left Door
Notable: true
Gain a shinecharge by running right-to-left at the bottom of the room, performing a stutter just before the acid reaches Samus' feet. Use spin jumps to minimize damage from the acid, and spark diagonally (to the left) mid-air to make it up the shaft. Requires: "canStutterWaterShineCharge"
{
"acidFrames": 215
}
"canShinechargeMovementTricky"
"canMidairShinespark"
{
"shinespark": {
"frames": 83,
"excessFrames": 2
}
}
|
|
From: 1
Elevator
To: 2
Left Door
Do a short spin-jump off the left side of the elevator and hold right to make it around the ledge. Entrance condition: {
"comeInShinecharged": {
"framesRequired": 90
}
}
Requires: "canShinechargeMovementComplex"
{
"shinespark": {
"frames": 12
}
}
Exit condition: {
"leaveWithSpark": {}
}
|
|
From: 1
Elevator
To: 3
Right Door
Do a short spin-jump off the left side of the elevator and hold right to make it around the ledge. Entrance condition: {
"comeInShinecharged": {
"framesRequired": 90
}
}
Requires: "canShinechargeMovementComplex"
{
"shinespark": {
"frames": 13
}
}
Exit condition: {
"leaveWithSpark": {}
}
|
|
From: 2
Left Door
To: 3
Right Door
Entrance condition: {
"comeInShinecharged": {
"framesRequired": 10
}
}
Requires: {
"shinespark": {
"frames": 21
}
}
Exit condition: {
"leaveWithSpark": {}
}
|
|
From: 3
Right Door
To: 2
Left Door
Entrance condition: {
"comeInShinecharged": {
"framesRequired": 10
}
}
Requires: {
"shinespark": {
"frames": 21
}
}
Exit condition: {
"leaveWithSpark": {}
}
|