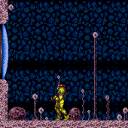
canTrickyJump (Very Hard)

Executing a jump that requires very precise timing.
Dependencies: canCarefulJump
Strats ()
|
Climb Temporary Blue Chain Through Bomb Blocks Without XRay (Bottom Left to Bottom, Cross-Room) (Extreme)
Climb
From: 2
Bottom Left Door
To: 4
Middle Right Door
Notable: true 
A Temporary Blue Chain with movement assists to climb up and destroy the bomb blocks blocking the bottom morph tunnel. Entrance condition: {
"comeInShinecharging": {
"length": 14,
"openEnd": 0
}
}
Requires: "canChainTemporaryBlue"
{
"or": [
"HiJump",
"canTrickySpringBallJump"
]
}
"canTrickyJump"
Clears obstacles: A |
|
Overload PLMs using the scroll block next to the bottom right bomb blocks, allowing passage through them by making them become air. If Morph is unavailable, then careful movement will be required to get past the Pirates without taking a hit. If using a PB to kill the pirates, overload the PLMs at the bottom. If the top bomb block is hit with a PB before PLMs are overloaded, they will remain solid. Entrance condition: {
"comeInWithGMode": {
"mode": "any",
"morphed": true
}
}
Requires: {
"or": [
"Morph",
{
"and": [
"h_canArtificialMorphSpringBall",
{
"or": [
"HiJump",
"canCarefulJump"
]
}
]
},
{
"and": [
"h_canArtificialMorphIBJ",
"canTrickyJump"
]
},
{
"and": [
"h_canArtificialMorphMovement",
"h_canArtificialMorphPowerBomb"
]
}
]
}
|
|
From: 6
Main Junction
To: 3
Top Right Door
Notable: true
A long Temporary Blue Chain with x-ray turnarounds to climb up and destroy the bomb blocks blocking the top morph tunnel. Requires: "canChainTemporaryBlue"
"canXRayTurnaround"
"canTrickyJump"
"canBePatient"
{
"canShineCharge": {
"usedTiles": 27.5,
"openEnd": 0
}
}
{
"obstaclesCleared": [
"A"
]
}
|
|
From: 6
Main Junction
To: 4
Middle Right Door
Notable: true
A Temporary Blue Chain with x-ray turnarounds to climb up and destroy the bomb blocks blocking the bottom morph tunnel. Requires: "canChainTemporaryBlue"
"canXRayTurnaround"
"canTrickyJump"
{
"canShineCharge": {
"usedTiles": 27.5,
"openEnd": 0
}
}
{
"obstaclesCleared": [
"A"
]
}
|
|
Climb Temporary Blue Chain Through Bomb Blocks Without XRay (Bottom Left to Bottom, In-Room) (Extreme)
Climb
From: 6
Main Junction
To: 4
Middle Right Door
Notable: true
A Temporary Blue Chain with movement assists to climb up and destroy the bomb blocks blocking the bottom morph tunnel. Requires: "canChainTemporaryBlue"
{
"or": [
"HiJump",
"canTrickySpringBallJump"
]
}
"canTrickyJump"
{
"obstaclesCleared": [
"A"
]
}
{
"or": [
{
"canShineCharge": {
"usedTiles": 18,
"openEnd": 0
}
},
{
"and": [
{
"canShineCharge": {
"usedTiles": 19,
"openEnd": 0
}
},
{
"doorUnlockedAtNode": 2
}
]
}
]
}
|
|
Notable: true 
Wall jump up 9 times, placing a PB at the top. Only works in direct g-mode with the item still uncollected. Entrance condition: {
"comeInWithGMode": {
"mode": "direct",
"morphed": false
}
}
Requires: {
"itemNotCollectedAtNode": 3
}
"canConsecutiveWalljump"
"Morph"
{
"or": [
"canRiskPermanentLossOfAccess",
"canXRayClimb"
]
}
{
"ammo": {
"type": "PowerBomb",
"count": 9
}
}
"canBeVeryPatient"
{
"or": [
"canUseFrozenEnemies",
"canTrickyJump",
{
"and": [
"ScrewAttack",
"SpaceJump"
]
},
{
"and": [
"canCarefulJump",
{
"or": [
"ScrewAttack",
"SpeedBooster"
]
}
]
},
{
"enemyKill": {
"enemies": [
[
"Boyon",
"Boyon",
"Boyon",
"Boyon"
]
]
}
},
{
"enemyDamage": {
"enemy": "Boyon",
"hits": 1,
"type": "contact"
}
}
]
}
|
|
From: 2
Bottom Left Door
To: 5
Bottom Junction (Right of Boyons)
Intentionally take damage before attempting to jump through to avoid falling in the acid. Requires: {
"or": [
{
"and": [
{
"enemyDamage": {
"enemy": "Boyon",
"hits": 3,
"type": "contact"
}
},
"Gravity",
{
"acidFrames": 30
}
]
},
{
"and": [
{
"enemyDamage": {
"enemy": "Boyon",
"hits": 2,
"type": "contact"
}
},
"canCarefulJump"
]
},
{
"and": [
{
"enemyDamage": {
"enemy": "Boyon",
"hits": 1,
"type": "contact"
}
},
"canTrickyJump"
]
}
]
}
|
|
From: 5
Bottom Junction (Right of Boyons)
To: 2
Bottom Left Door
Intentionally take damage before attempting to jump through to avoid falling in the acid. Requires: {
"or": [
{
"and": [
{
"enemyDamage": {
"enemy": "Boyon",
"hits": 3,
"type": "contact"
}
},
"Gravity",
{
"acidFrames": 30
}
]
},
{
"and": [
{
"enemyDamage": {
"enemy": "Boyon",
"hits": 2,
"type": "contact"
}
},
"canCarefulJump"
]
},
{
"and": [
{
"enemyDamage": {
"enemy": "Boyon",
"hits": 1,
"type": "contact"
}
},
"canTrickyJump"
]
}
]
}
|
|
From: 6
Top Junction with Temporary Blue (Right of Morph Tunnel)
To: 3
Item
Unmorph on the leftmost edge of the Speed blocks and jump across. Landing on the right side Speedblock, and the solid tile, gives enough time to run to the item and fall before the block respawns. Or jump fully over the Speed blocks and turn around using X-Ray after collecting the item. Requires: "canChainTemporaryBlue"
{
"or": [
"canTrickyJump",
"canXRayTurnaround"
]
}
Clears obstacles: B |
|
From: 5
Alcatraz Door
To: 8
Central Junction
Wait 3 minutes for a global Geemer to waddle over, or shoot a Super 20 to 30 seconds after entering the room to knock it off the ceiling and save a lot of time. Freeze the Geemer as it turns onto the middle slope of the left wall to escape - it helps to freeze the geemer from below. Alternatively, use a Super to knock it off the wall and freeze it mid-air. Requires: "h_ZebesIsAwake"
"Morph"
"canTrickyUseFrozenEnemies"
{
"or": [
"canBeVeryPatient",
{
"ammo": {
"type": "Super",
"count": 1
}
}
]
}
{
"or": [
"canTrickyJump",
{
"and": [
"canCarefulJump",
{
"ammo": {
"type": "Super",
"count": 1
}
}
]
}
]
}
|
|
From: 5
Alcatraz Door
To: 8
Central Junction
Run and spin jump into a spring ball jump, starting from the floating platform. Requires: "canTrickySpringBallJump" "canTrickyJump" |
|
From: 2
Right Door (locked)
To: 3
Item (locked)
Without Morph, the pirates will not spawn. Use Power Bomb horizontal boosts to move toward the left side of the room in artificial morph. Roll off the third blue platform from the right door and lay a Power Bomb against the left wall to get into range of the bomb blocks. Unmorph and use X-ray to cancel G-mode. It may be best to do this before the PB explodes, in case PLMs are already overloaded. Entrance condition: {
"comeInWithGMode": {
"mode": "any",
"morphed": true
}
}
Requires: "h_canArtificialMorphBombHorizontally"
"h_canArtificialMorphPowerBomb"
"h_canArtificialMorphPowerBomb"
"h_canArtificialMorphPowerBomb"
{
"or": [
"h_canArtificialMorphPowerBomb",
"canTrickyJump"
]
}
Clears obstacles: A |
|
Carefully walk through the room. It is possible but tricky to do so damageless, but it is always possible to go back and farm if needed. While in the morph tunnel, simply unmorph to break the bomb blocks overhead. Requires: {
"obstaclesCleared": [
"D"
]
}
"Morph"
{
"or": [
"canTrickyJump",
{
"acidFrames": 20
}
]
}
Clears obstacles: A |
|
Carefully walk through the room. It is possible but tricky to do so damageless. Requires: {
"obstaclesCleared": [
"D"
]
}
"Morph"
{
"or": [
"canTrickyJump",
{
"acidFrames": 10
}
]
}
Clears obstacles: A |
|
From: 3
Item
To: 4
Middle Junction (Left of Morph Tunnel)
Grab the item and quickly return through the blocks before they respawn. Requires: "canTrickyJump"
{
"obstaclesCleared": [
"E"
]
}
Resets obstacles: E |
|
From: 4
Middle Junction (Left of Morph Tunnel)
To: 1
Left Door
After destroying a single bomb block, Samus can spin jump into its spot to quickly escape the acid. To avoid the acid completely, morph quickly at the right height and place a bomb. Requires: {
"or": [
"canCarefulJump",
{
"acidFrames": 35
}
]
}
"h_canUseMorphBombs"
{
"or": [
"canTrickyJump",
{
"and": [
"canCarefulJump",
"h_canBombHorizontally",
{
"acidFrames": 35
}
]
},
{
"acidFrames": 100
}
]
}
{
"or": [
{
"and": [
"canTrickyJump",
"canStaggeredWalljump"
]
},
{
"and": [
"canCarefulJump",
{
"acidFrames": 35
}
]
},
{
"acidFrames": 100
}
]
}
Clears obstacles: A, B |
|
Break the tunnel block with a Bomb and then return to safety. Break the runway block on the next cycle. SpringBall helps avoid acid damage. Bombing Samus up through the runway with a second Bomb can help, or it can trap Samus in the acid if liquid physics take effect. Requires: "h_canUseMorphBombs"
{
"or": [
"h_canUseSpringBall",
{
"acidFrames": 10
}
]
}
{
"or": [
"canInsaneJump",
{
"and": [
"canTrickyJump",
{
"acidFrames": 10
}
]
},
{
"and": [
"canCarefulJump",
{
"acidFrames": 120
}
]
},
{
"acidFrames": 200
}
]
}
|
|
Requires: "h_canUseMorphBombs"
{
"or": [
"canTrickyJump",
"Ice",
{
"ammo": {
"type": "Super",
"count": 2
}
},
{
"acidFrames": 100
}
]
}
{
"or": [
"canDodgeWhileShooting",
"Wave",
"Spazer",
{
"enemyDamage": {
"enemy": "Waver",
"type": "contact",
"hits": 2
}
}
]
}
{
"or": [
"canCarefulJump",
{
"and": [
"h_canUseSpringBall",
{
"acidFrames": 20
}
]
},
{
"and": [
"Gravity",
{
"acidFrames": 20
}
]
},
{
"acidFrames": 60
}
]
}
Clears obstacles: A |
|
From: 1
Left Door
To: 2
Right Door
Notable: true 
This is a series of precise jumps to fit between the solid walls while clearing a path through the room. Breaking the center blocks opens up a runway that can be used to charge a new spark in room. Entrance condition: {
"comeInShinecharging": {
"length": 6,
"openEnd": 1,
"steepUpTiles": 1,
"steepDownTiles": 1
}
}
Requires: "canBlueSpaceJump" "canTrickyJump" Clears obstacles: A |
|
Requires: "h_canUseMorphBombs"
{
"or": [
"canDodgeWhileShooting",
"Ice",
{
"ammo": {
"type": "Super",
"count": 2
}
},
{
"acidFrames": 100
}
]
}
{
"or": [
"canTrickyJump",
"Wave",
{
"enemyDamage": {
"enemy": "Waver",
"type": "contact",
"hits": 2
}
}
]
}
{
"or": [
"canCarefulJump",
{
"acidFrames": 30
}
]
}
Clears obstacles: A |
|
From: 2
Right Door
To: 1
Left Door
Notable: true
This is a series of precise jumps to fit between the solid walls while clearing a path through the room. Breaking the center blocks opens up a runway that can be used to charge a new spark in room. Entrance condition: {
"comeInShinecharging": {
"length": 6,
"openEnd": 1,
"steepUpTiles": 1,
"steepDownTiles": 1
}
}
Requires: "canBlueSpaceJump" "canTrickyJump" Clears obstacles: A |
|
From: 9
Junction Below Items
To: 3
Bottom Left Door
It is possible to shake the beetom off near the right door, then lure it down to the bottom without taking more hits (or to kill the Pirates with Bombs). Requires: {
"or": [
"Morph",
{
"obstaclesCleared": [
"A"
]
}
]
}
{
"or": [
{
"and": [
{
"enemyKill": {
"enemies": [
[
"Green Space Pirate (standing)",
"Green Space Pirate (standing)",
"Green Space Pirate (standing)"
],
[
"Green Space Pirate (standing)",
"Green Space Pirate (standing)"
]
]
}
},
{
"or": [
{
"enemyDamage": {
"enemy": "Beetom",
"type": "contact",
"hits": 8
}
},
{
"and": [
"canTrickyJump",
"canEscapeEnemyGrab",
{
"enemyDamage": {
"enemy": "Beetom",
"type": "contact",
"hits": 5
}
}
]
}
]
}
]
},
{
"and": [
{
"enemyDamage": {
"enemy": "Beetom",
"type": "contact",
"hits": 5
}
},
{
"enemyDamage": {
"enemy": "Green Space Pirate (standing)",
"type": "contact",
"hits": 3
}
}
]
}
]
}
Exit condition: {
"leaveWithGModeSetup": {
"knockback": false
}
}
|
|
From: 9
Junction Below Items
To: 4
Bottom Right Door
It is possible to shake the beetom off near the right door, then lure it down to the bottom without taking more hits (or to kill the Pirates with Bombs). Requires: {
"or": [
"Morph",
{
"obstaclesCleared": [
"A"
]
}
]
}
{
"or": [
{
"and": [
{
"enemyKill": {
"enemies": [
[
"Green Space Pirate (standing)",
"Green Space Pirate (standing)",
"Green Space Pirate (standing)"
],
[
"Green Space Pirate (standing)",
"Green Space Pirate (standing)"
]
]
}
},
{
"or": [
{
"enemyDamage": {
"enemy": "Beetom",
"type": "contact",
"hits": 8
}
},
{
"and": [
"canTrickyJump",
"canEscapeEnemyGrab",
{
"enemyDamage": {
"enemy": "Beetom",
"type": "contact",
"hits": 5
}
}
]
}
]
}
]
},
{
"and": [
{
"enemyDamage": {
"enemy": "Beetom",
"type": "contact",
"hits": 5
}
},
{
"enemyDamage": {
"enemy": "Green Space Pirate (standing)",
"type": "contact",
"hits": 3
}
}
]
}
]
}
Exit condition: {
"leaveWithGModeSetup": {
"knockback": false
}
}
|
|
Use a Waver to damage boost across part of the room, then pass through any remaining enemies while IFrames are active. Killing the first waver and damage boosting with the second may be easier. Entrance condition: {
"comeInShinecharged": {
"framesRequired": 140
}
}
Requires: "canShinechargeMovementTricky"
"canHorizontalDamageBoost"
"canTrickyJump"
"canHitbox"
{
"enemyDamage": {
"enemy": "Waver",
"type": "contact",
"hits": 1
}
}
Exit condition: {
"leaveShinecharged": {
"framesRemaining": "auto"
}
}
|
|
Jump into the Choot to damage boost across part of the room, then pass through any remaining enemies while IFrames are active. Entrance condition: {
"comeInShinecharged": {
"framesRequired": 150
}
}
Requires: "canShinechargeMovementTricky"
"canHorizontalDamageBoost"
"canTrickyJump"
"canHitbox"
{
"enemyDamage": {
"enemy": "Choot",
"type": "contact",
"hits": 1
}
}
Exit condition: {
"leaveShinecharged": {
"framesRemaining": "auto"
}
}
|
|
Notable: true 
Enter the room while building a shinespark and use it on the lowest part of the ramp to diagonally spark up and out of the water. Use very low jump height space jumps to carry momentum to the far side of the submerged ramp. Both Choots must be killed. Using Screw Attack: stay a little bit high in the water so that it remains active for the second Choot. Using Plasma or ammo: kill the first Choot while running down the middle platform, and the second while gliding above it after spacejumping through the water. Then shinespark up and use SpaceJump to reach the door. Entrance condition: {
"comeInShinecharging": {
"length": 6,
"openEnd": 1,
"steepDownTiles": 1
}
}
Requires: {
"or": [
"ScrewAttack",
"canPseudoScrew",
"Plasma",
{
"ammo": {
"type": "Missile",
"count": 1
}
},
{
"ammo": {
"type": "Super",
"count": 1
}
}
]
}
{
"or": [
"ScrewAttack",
"Plasma",
{
"ammo": {
"type": "Missile",
"count": 1
}
},
{
"ammo": {
"type": "Super",
"count": 1
}
}
]
}
{
"shinespark": {
"frames": 14,
"excessFrames": 5
}
}
"canShinechargeMovementComplex"
"SpaceJump"
"canTrickyJump"
"canMidairShinespark"
|
|
From: 1
Left Door
To: 2
Right Door
Notable: true 
Enter the room while building a shinespark and use it on the lowest part of the ramp to diagonally spark up and out of the water. Use very low jump height space jumps to carry momentum to the far side of the submerged ramp. Freeze the first Choot from the middle platform. Either SpaceJump just right so as to pass above the second Choot, or freeze it as it touches Samus to pass through without losing speed. Then shinespark up and use SpaceJump to reach the door. Entrance condition: {
"comeInShinecharging": {
"length": 6,
"openEnd": 1,
"steepDownTiles": 1
}
}
Requires: "Ice"
"Wave"
"Spazer"
"canDodgeWhileShooting"
{
"shinespark": {
"frames": 14,
"excessFrames": 5
}
}
"canShinechargeMovementComplex"
"canMidairShinespark"
"SpaceJump"
"canTrickyJump"
|
|
From: 1
Left Door
To: 2
Right Door
Notable: true
Enter the room while building a shinespark and use it on the lowest part of the ramp to diagonally spark up and out of the water. Unmorphing with the correct timing and positioning for the Shinespark are very precise, and there are no extra frames on the Shinespark timer to work with. Carry the shinespark to the bottom of the ramp either with a bounce ball which takes damage from the Choot, or delay the first Choot with two shots and then use a late mockball. Then shinespark up and use SpaceJump to reach the door. Entrance condition: {
"comeInShinecharging": {
"length": 6,
"openEnd": 1,
"steepDownTiles": 1
}
}
Requires: {
"or": [
{
"and": [
{
"enemyDamage": {
"enemy": "Choot",
"type": "contact",
"hits": 1
}
},
"canNeutralDamageBoost",
"canBounceBall"
]
},
{
"and": [
"canDodgeWhileShooting",
"canMockball"
]
}
]
}
{
"shinespark": {
"frames": 14,
"excessFrames": 5
}
}
"canShinechargeMovementComplex"
"SpaceJump"
"canTrickyJump"
|
|
From: 1
Left Door
To: 2
Right Door
Notable: true 
Build up run speed and then use controlled springball bounces to cross the ocean to the far right ledge, and then use SpaceJump to reach the door. Mockball down the submerged ramp and begin SpringBall bouncing under water using the platforms. Disable SpringBall after the final jump once Samus starts falling again as a way to gain extra speed. Requires: "canTrickyJump"
"canSpaceJumpWaterBounce"
"canSpringBallBounce"
"canSpringFling"
"canMockball"
{
"or": [
"canDownGrab",
"canWalljump"
]
}
|
|
Enter the room while building a shinespark and use it on the lowest part of the ramp to cross the room and reach a raised ledge on the right side wall. From there, use SpaceJump to escape the water. Carry the shinespark to the bottom of the ramp by delaying the first Choot with two Power Beam shots, killing it, or bounceballing through it. The Choot can be shot diagonally from the middle platform, and again by running off that platform and aiming down to float above it. Entrance condition: {
"comeInShinecharging": {
"length": 6,
"openEnd": 1,
"steepDownTiles": 1
}
}
Requires: "canShinechargeMovementComplex"
"canCarefulJump"
{
"or": [
{
"and": [
"canMidairShinespark",
"canDodgeWhileShooting"
]
},
{
"and": [
{
"enemyDamage": {
"enemy": "Choot",
"type": "contact",
"hits": 1
}
},
"canNeutralDamageBoost",
"canBounceBall"
]
},
{
"and": [
"canMockball",
{
"or": [
"canPseudoScrew",
"ScrewAttack",
"Plasma",
"Wave",
{
"ammo": {
"type": "Missile",
"count": 1
}
},
{
"ammo": {
"type": "Super",
"count": 1
}
}
]
}
]
}
]
}
"canHorizontalShinespark"
{
"shinespark": {
"frames": 123,
"excessFrames": 5
}
}
"canSpaceJumpWaterBounce"
{
"or": [
{
"and": [
"HiJump",
"canSpaceJumpWaterEscape"
]
},
{
"and": [
"canTrickyJump",
"canDownGrab"
]
},
"canWalljump"
]
}
|
|
Run for 7 tiles for enough speed to springball from the submerged platform up to the platform enemy, above the water. Turning on SpeedBooster midjump, after running 7+ tiles, will automatically hit the run speed requirement. It is not necessary to enter the water to clear the rightmost Choot. Requires: "canTrickyJump" "SpeedBooster" "canSpringBallBounce" "canMockball" "SpaceJump" |
|
Requires: "canSuitlessMaridia"
"canSpaceJumpWaterBounce"
{
"or": [
"canWalljump",
{
"and": [
"canSpaceJumpWaterEscape",
"HiJump"
]
},
{
"and": [
"canTrickyJump",
"canDownGrab"
]
}
]
}
|
|
From: 3
Junction (Left side Pit)
To: 2
Right Door
Notable: true .png)
.gif)
Get to the right of the Choot on the rightmost platform. Spin jump up to the right, break spin while aligned with the wall, then freeze the Choot and stand on it while it is midair to the right of the stalagmite. Jump from the Choot to the water line and space jump at the water line to the Kamer platform. Requires: "canSpaceJumpWaterBounce" "canTrickyUseFrozenEnemies" "canTrickyJump" |
|
Execution of this strat is non-trivial, and failing will lead to falling into the pit. Depending on item loadout, that could be a softlock. Requires: "canDisableEquipment"
"canCarefulJump"
{
"or": [
{
"doorUnlockedAtNode": 2
},
"canTrickyJump",
"canLateralMidAirMorph",
"SpeedBooster"
]
}
|
|
From: 5
Lower Section - Bottom Right Door
To: 4
Lower Section - Top Right Door
Attach to the ripper when it is all the way left. Build momentum and launch Heavensward. Requires: "canTrickyJump" "canPreciseGrapple" |
|
From: 6
Middle Right Door (By Zeb Farm)
To: 12
Top Junction
Unmorph and cancel g-mode, shoot the shot block, then x-ray standup, partial floor clip, and down grab to the ledge. Wiggle to escape. Entrance condition: {
"comeInWithGMode": {
"mode": "any",
"morphed": true
}
}
Requires: "canXRayStandUp"
"canPartialFloorClip"
"canDownGrab"
{
"or": [
"h_canArtificialMorphSpringBall",
{
"and": [
"h_canArtificialMorphBombs",
{
"or": [
"canTrickyJump",
{
"enemyDamage": {
"enemy": "Zeb",
"hits": 1,
"type": "contact"
}
}
]
}
]
},
{
"and": [
"h_canArtificialMorphBombHorizontally",
{
"or": [
{
"and": [
"canTrickyJump",
"h_canArtificialMorphPowerBomb"
]
},
{
"and": [
"canNeutralDamageBoost",
{
"enemyDamage": {
"enemy": "Zeb",
"hits": 3,
"type": "contact"
}
}
]
}
]
}
]
}
]
}
|
|
It's not even necessary to jump through the door, the in-room doorsill gives enough running room to make it up. Requires: {
"doorUnlockedAtNode": 2
}
"canPreciseWalljump"
"canCarefulJump"
{
"or": [
"canTrickyJump",
"canMoonwalk",
"canXRayTurnaround",
"Morph"
]
}
|
|
In direct g-mode, the door will not close, and the in-room doorsill gives enough running room to make it up to the invisible ledge. Entrance condition: {
"comeInWithGMode": {
"mode": "direct",
"morphed": false
}
}
Requires: "canPreciseWalljump"
"canCarefulJump"
{
"or": [
"canTrickyJump",
"canMoonwalk",
"canXRayTurnaround",
"Morph"
]
}
|
|
Use both Geemers to climb the tall shaft by repeatedly freezing them. Note that one moves locally when on camera and the other moves globally. Requires: {
"or": [
"h_canUsePowerBombs",
{
"and": [
{
"obstaclesCleared": [
"B"
]
},
"Morph"
]
},
{
"obstaclesCleared": [
"C"
]
}
]
}
{
"or": [
{
"obstaclesCleared": [
"A"
]
},
"ScrewAttack",
{
"and": [
"h_canUseMorphBombs",
"canMidAirMorph"
]
}
]
}
"canTrickyUseFrozenEnemies"
"canTrickyJump"
"canCameraManip"
Clears obstacles: A, B |
|
From: 4
Right Item
To: 2
Top Left Door
Use both Geemers to climb the tall shaft by repeatedly freezing them. Note that one moves locally when on camera and the other moves globally. Once Samus is close to the top Bomb Block, freeze one Geemer low and jump as high as possible before placing a power bomb. Continue climbing with the Geemer that survives. Requires: {
"or": [
"h_canUsePowerBombs",
{
"and": [
{
"obstaclesCleared": [
"B"
]
},
"Morph"
]
},
{
"obstaclesCleared": [
"C"
]
}
]
}
"h_canUsePowerBombs"
"canMidAirMorph"
"canTrickyUseFrozenEnemies"
"canTrickyJump"
"canBePatient"
"canCameraManip"
Clears obstacles: A, B |
|
From: 1
Left Door
To: 5
Left Item (locked)
Tank the Sidehopper hits or kill them after a single hit by quickly placing a Power Bomb. It is also possible to kill the Sidehoppers with a very fast Screw Attack, if Samus has Morph Ball. Overload the PLMs by rolling through the camera scroll blocks which are 4 tiles to the right of the stair by the door. Roll under the last Sidehopper and through the bomb blocks. Entrance condition: {
"comeInWithGMode": {
"mode": "direct",
"morphed": true
}
}
Requires: {
"or": [
{
"enemyDamage": {
"enemy": "Sidehopper",
"type": "contact",
"hits": 3
}
},
{
"and": [
{
"enemyDamage": {
"enemy": "Sidehopper",
"type": "contact",
"hits": 1
}
},
{
"ammo": {
"type": "PowerBomb",
"count": 1
}
}
]
},
{
"and": [
"Morph",
"ScrewAttack",
"canTrickyJump"
]
}
]
}
Clears obstacles: D |
|
From: 1
Left Door
To: 4
Right Hidden Item
Notable: true 
Speedball through the morphtunnel and use it to break the bomb blocks in front of the hidden Missile location. This can be done using springball, or by unmorphing and using Temporary Blue to bounce through the bomb blocks. Entrance condition: {
"comeInSpeedballing": {
"runway": {
"length": 4,
"openEnd": 1
}
}
}
Requires: "canSpeedball"
"canTrickyJump"
{
"or": [
"canTemporaryBlue",
"h_canUseSpringBall"
]
}
|
|
From: 3
Middle Visible Item
To: 4
Right Hidden Item
Notable: true 
A single very precise jump into the bomb blocks can break both sets of blocks with screw attack. Obtaining the item requires morph, so this strat has no soft lock risk. Alternatively, tunnel crawl through to break both blocks with multiple, less precise jumps. Requires: "Morph"
"ScrewAttack"
{
"or": [
"canTunnelCrawl",
{
"and": [
"canTwoTileSqueeze",
"canTrickyJump"
]
}
]
}
|
|
Stand to the right of the Zeb farm and freeze the Zeb as it starts moving horizontally. get onto the platform above the Zeb and wait for the Zeb to thaw and make it close to the right edge of the screen. Use a mockball to get to the right side of the room, ending it as quickly as possible at the end to prevent the Zeb going off screen. Freeze the Zeb adjacent to the right runway in order to extend it by a short distance. Requires: {
"obstaclesNotCleared": [
"A"
]
}
"h_canTrickyFrozenEnemyRunway"
"canMockball"
"canTrickyJump"
Exit condition: {
"leaveWithRunway": {
"length": 3,
"openEnd": 0
}
}
|
|
From: 3
Bottom Left Door
To: 6
Junction (Right of Tunnel)
Notable: true 
Moving left to right is a bit more tricky to get into the tunnel. Land aiming down approximately 3 pixels inside the leftmost tile. If Samus is too far left she will fall out, too far right and a thorn pushes her out, not aiming down puts her stuck in crouch. Then spinjump right to take a thorn hit and get wedged in the ceiling. Then start the crawl while taking constant thorn damage. Perform one jump per thorn hit. Note that if Samus is hit by the thorn before landing, aiming down is not necessary. Note that a moonfall may be helpful to get into the tunnel. Without moonwalk, a downback can be used instead: fall off with low speed and start a downback right away. (This doesn't always work.) Requires: "canTunnelCrawl"
"canTrickyJump"
{
"thornHits": 31
}
|
|
From: 4
Bottom Right Door
To: 7
Junction (Zebbo Farms)
Notable: true 
When entering the room, it is recommended to open the door to be used as a quick escape if a Beetom attaches to Samus. Wait for the first Beetom to get stuck under one of the platforms. It may be necessary to lure it to the right. At this point, the farm can be used to gain energy. Jump into the thorns to get invulnerability frames, then run through, luring the Beetoms under the platforms while clearing and using the farms. Note that it is possible to shake a Beetom off of Samus by rapidly turning left and right, or angling up and down, etc. Samus will take 2-4 hits. Requires: "canTrickyJump" Clears obstacles: A |
|
From: 6
Junction (Right of Tunnel)
To: 3
Bottom Left Door
Notable: true
Moving right to left is a bit easier to get into the tunnel. Land aiming down approximately 3 pixels inside the rightmost tile. If Samus is too far right she will fall out, too far left and a thorn pushes her out, not aiming down puts her stuck in crouch. Then spinjump left to take a thorn hit and get wedged in the ceiling. Then start the crawl while taking constant thorn damage. Perform one jump per thorn hit. Note that if Samus is hit by the thorn before landing, aiming down is not necessary. Note that a downback may be helpful to get into the tunnel: stand fully on the left side of the nearby ledge and run off then start and hold a downback to land in position. Requires: "canTunnelCrawl"
"canTrickyJump"
{
"thornHits": 31
}
{
"obstaclesCleared": [
"A"
]
}
|
|
From: 6
Junction (Right of Tunnel)
To: 7
Junction (Zebbo Farms)
Notable: true
Wait for the first Beetom to get stuck under the first platform, then get to the first farm. If the second Beetom is making this farm difficult to use, it may be easier to use the next farm. Jump into the thorns to get invulnerability frames, then run through, luring the Beetoms under the platforms while clearing and using the farms. Note that it is possible to shake a Beetom off of Samus by rapidly turning left and right, or angling up and down, etc. Samus will take 2-4 hits. Requires: "canTrickyJump"
{
"obstaclesNotCleared": [
"B"
]
}
Clears obstacles: A |
|
From: 1
Left Door
To: 1
Left Door
Notable: true 
Stand in the pit and freeze the Beetoms by shooting up. Keep them all separated and equally spaced apart to maximize the length of the runway. Freeze the Beetoms that aren't currently in use to avoid them from attaching to Samus and stacking together. Requires: "canTrickyJump"
"h_canFrozenEnemyRunway"
{
"enemyDamage": {
"enemy": "Beetom",
"type": "contact",
"hits": 2
}
}
Exit condition: {
"leaveWithRunway": {
"length": 8,
"openEnd": 1
}
}
|
|
Jump on the first possible frame. Can be buffered to extend the window to 7 frames. Or jump just before the transition. Entrance condition: {
"comeInJumping": {
"speedBooster": "any",
"minTiles": 3
}
}
Requires: "canTrickyJump" |
|
Jump on the first possible frame. Can be buffered to extend the window to 7 frames. Or jump just before the transition. Entrance condition: {
"comeInJumping": {
"speedBooster": "any",
"minTiles": 3
}
}
Requires: "canTrickyJump" |
|
From: 2
Right Door
To: 2
Right Door
Notable: true
Stand in the pit and freeze the Beetoms by shooting up. Keep them all separated and equally spaced apart to maximize the length of the runway. Freeze the Beetoms that aren't currently in use to avoid them from attaching to Samus and stacking together. Requires: "canTrickyJump"
"h_canFrozenEnemyRunway"
{
"enemyDamage": {
"enemy": "Beetom",
"type": "contact",
"hits": 2
}
}
Exit condition: {
"leaveWithRunway": {
"length": 8,
"openEnd": 1
}
}
|
|
From: 13
Below Power Bomb Blocks - Main Junction
To: 14
Right Etecoon Shaft - Wall Jump Climb Checkpoint Junction
Notable: true 
Break the bomb block at the bottom right of the main shaft. Bring a Zeela down to the bottom of the room. Morph inside the tunnel, take a Zeela hit, then jump, aim down, and shoot to freeze the Zeela as it starts to move up and while Samus is close to landing. Jump and aim down to get on top of the Zeela. If the Zeela is precisely positioned exactly 12 pixels above the ground, you can press up to make Samus stand; Otherwise, if you have X-ray, then the Zeela should be frozen lower, and you can morph and unmorph and use X-ray to force Samus to stand up; in this case there is a 6-pixel window over which it works, with the Zeela being between 4 and 9 pixels above the ground. In either case, after standing up on top of the Zeela, jump and aim down to break the crumble block. Then, before the crumble respawns, morph and use Spring Ball (if available) to jump back up and into the tunnel; without Spring Ball, a quick mid-air morph also works but is more difficult. Requires: "h_canBombThings"
"h_additionalBomb"
{
"enemyDamage": {
"enemy": "Zeela",
"type": "contact",
"hits": 1
}
}
"canTrickyUseFrozenEnemies"
"canTrickyJump"
{
"or": [
"canXRayCeilingClip",
{
"and": [
"canPreciseCeilingClip",
"canInsaneJump",
"canBeVeryPatient"
]
}
]
}
{
"or": [
"h_canUseSpringBall",
{
"and": [
"can4HighMidAirMorph",
"canInsaneJump"
]
}
]
}
{
"or": [
"canBePatient",
{
"obstaclesNotCleared": [
"A"
]
}
]
}
|
|
Entrance condition: {
"comeInRunning": {
"speedBooster": true,
"minTiles": 15
}
}
Requires: "canTrickyJump" "canLateralMidAirMorph" |
|
Requires an adjacent runway of at least 26 tiles. Jump immediately before the transition. Entrance condition: {
"comeInJumping": {
"speedBooster": true,
"minTiles": 26
}
}
Requires: "canTrickyJump" |
|
Requires: "SpeedBooster" "canTrickyJump" "canLateralMidAirMorph" "can4HighMidAirMorph" |
|
From: 3
Bottom Right Door
To: 1
Top Left Door
Notable: true 
Build up some run speed and then extend the Grapple Beam through the Blue Gate, while jumping, to open it from the wrong side. Requires: "Grapple" "SpeedBooster" "canTrickyJump" |
|
From: 3
Bottom Right Door
To: 2
Top Right Door
Use a Power Bombs to kill the first three hoppers, or carefully dodge them by quickly rolling between the first two tall flowers and waiting for the hopper to jump over Samus. The middle hopper can be killed safely with many Bombs by staying on the top left of the raised ground, without overhanging or the hopper can hit Samus. Alternatively, lure and spring ball jump past it. Killing the bugs in their pipes is possible without getting hit, or use spring ball to jump past them. Once the bugs are killed once they will stop respawning. The last hopper can be carefully killed with Bombs, killed with a Power Bomb, or dodged and lured off the edge. IBJ or bomb boost spring ball jump up to the top right door. Entrance condition: {
"comeInWithGMode": {
"mode": "indirect",
"morphed": true
}
}
Requires: {
"or": [
"canTrickyJump",
{
"and": [
"h_canArtificialMorphBombs",
"h_canArtificialMorphPowerBomb"
]
},
{
"ammo": {
"type": "PowerBomb",
"count": 3
}
}
]
}
{
"or": [
"h_canArtificialMorphIBJ",
{
"and": [
"h_canArtificialMorphSpringBallBombJump",
"h_additionalBomb"
]
}
]
}
|
|
From: 3
Bottom Right Door
To: 4
Item (Through the Pipe)
Use a Power Bombs to kill the first three hoppers, or carefully dodge them by quickly rolling between the first two tall flowers and waiting for the hopper to jump over Samus. The middle hopper can be killed safely with many Bombs by staying on the top left of the raised ground, without overhanging or the hopper can hit Samus. Alternatively, lure and spring ball jump past it. Killing the bugs in their pipes is possible without getting hit, or use spring ball to jump past them. Once the bugs are killed once they will stop respawning. The last hopper can be carefully killed with Bombs, or killed with a Power Bomb, or dodged and lured off the edge. IBJ, bomb boost spring ball jump, or HiJump Spring Fling up to the pipe. Entrance condition: {
"comeInWithGMode": {
"mode": "indirect",
"morphed": true
}
}
Requires: {
"or": [
"canTrickyJump",
{
"and": [
"h_canArtificialMorphBombs",
"h_canArtificialMorphPowerBomb"
]
},
{
"ammo": {
"type": "PowerBomb",
"count": 3
}
}
]
}
{
"or": [
"h_canArtificialMorphIBJ",
"h_canArtificialMorphSpringBallBombJump",
{
"and": [
"HiJump",
"h_canArtificialMorphSpringBall"
]
}
]
}
|
|
From: 1
Left Side - Top Door
To: 4
Left Side - Middle Doorway (Behind the Power Bomb Blocks)
Roll through the camera scroll blocks and then through the bomb block. Avoiding the Sidehoppers can be tricky. Continue through the room to the Sidehoppers below the Grapple blocks, and carefully kill both of them with a single Power Bomb. Bounce up through the crumble blocks to the door to the left Entrance condition: {
"comeInWithGMode": {
"mode": "any",
"morphed": true
}
}
Requires: {
"or": [
"canTrickyJump",
"h_canArtificialMorphPowerBomb",
{
"enemyDamage": {
"enemy": "Sm. Sidehopper",
"hits": 1,
"type": "contact"
}
}
]
}
"h_canArtificialMorphSpringBall"
"h_canArtificialMorphPowerBomb"
Clears obstacles: C |
|
G-mode Morph Overload PLMs with Power Bombs and Spring Ball, Break Power Bomb Blocks (Extreme)
Big Pink
From: 1
Left Side - Top Door
To: 4
Left Side - Middle Doorway (Behind the Power Bomb Blocks)
Roll through the camera scroll blocks and then through the bomb block. Avoiding the Sidehoppers can be tricky. Continue through the room to the Sidehoppers below the Grapple blocks, and carefully kill both of them with a single Power Bomb. Bounce up through the crumble blocks to the door to the left Use a Power Bomb then quickly exit G-Mode before it explodes to also break the blocks. Entrance condition: {
"comeInWithGMode": {
"mode": "any",
"morphed": true
}
}
Requires: {
"or": [
"canTrickyJump",
"h_canArtificialMorphPowerBomb",
{
"enemyDamage": {
"enemy": "Sm. Sidehopper",
"hits": 1,
"type": "contact"
}
}
]
}
"h_canArtificialMorphSpringBall"
"h_canArtificialMorphPowerBomb"
"h_canArtificialMorphPowerBomb"
Clears obstacles: B, C |
|
From: 1
Left Side - Top Door
To: 12
Bottom Chozo Item
Roll through the camera scroll blocks and then through the bomb block. Avoiding the Sidehoppers can be tricky. Carefully roll through the rest of the room and through the bomb blocks to the lowest item. Entrance condition: {
"comeInWithGMode": {
"mode": "any",
"morphed": true
}
}
Requires: {
"or": [
"canTrickyJump",
"h_canArtificialMorphPowerBomb",
{
"enemyDamage": {
"enemy": "Sm. Sidehopper",
"hits": 1,
"type": "contact"
}
}
]
}
"h_canArtificialMorphPowerBomb"
"h_canArtificialMorphPowerBomb"
|
|
From: 1
Left Side - Top Door
To: 15
G-Mode Morph Junction (Middle Right)
Roll through the camera scroll blocks and then through the bomb block. Avoiding the hoppers can be tricky. Entrance condition: {
"comeInWithGMode": {
"mode": "any",
"morphed": true
}
}
Requires: {
"or": [
"Morph",
"canTrickyJump",
"h_canArtificialMorphPowerBomb",
{
"enemyDamage": {
"enemy": "Sm. Sidehopper",
"hits": 1,
"type": "contact"
}
}
]
}
{
"or": [
"h_canArtificialMorphMovement",
{
"and": [
"h_canArtificialMorphPowerBomb",
"h_canArtificialMorphPowerBomb"
]
}
]
}
|
|
From: 2
Right Side - Top Door
To: 4
Left Side - Middle Doorway (Behind the Power Bomb Blocks)
Overload PLMs using the camera scroll blocks in front of the bomb blocks to the top left door. Avoiding the Sidehoppers can be tricky. Continue through the room to the Sidehoppers below the Grapple blocks, and carefully kill both of them with a single Power Bomb. Bounce up through the crumble blocks to the door to the left Entrance condition: {
"comeInWithGMode": {
"mode": "any",
"morphed": true
}
}
Requires: {
"or": [
"canTrickyJump",
"h_canArtificialMorphPowerBomb",
{
"enemyDamage": {
"enemy": "Sm. Sidehopper",
"hits": 1,
"type": "contact"
}
}
]
}
"h_canArtificialMorphSpringBall"
"h_canArtificialMorphPowerBomb"
Clears obstacles: C |
|
G-mode Morph Overload PLMs with Power Bombs and Spring Ball, Break Power Bomb Blocks (Extreme)
Big Pink
From: 2
Right Side - Top Door
To: 4
Left Side - Middle Doorway (Behind the Power Bomb Blocks)
Overload PLMs using the camera scroll blocks in front of the bomb blocks to the top left door. Avoiding the Sidehoppers can be tricky. Continue through the room to the Sidehoppers below the Grapple blocks, and carefully kill both of them with a single Power Bomb. Bounce up through the crumble blocks to the door to the left Use a Power Bomb then quickly exit G-Mode before it explodes to also break the blocks. Entrance condition: {
"comeInWithGMode": {
"mode": "any",
"morphed": true
}
}
Requires: {
"or": [
"canTrickyJump",
"h_canArtificialMorphPowerBomb",
{
"enemyDamage": {
"enemy": "Sm. Sidehopper",
"hits": 1,
"type": "contact"
}
}
]
}
"h_canArtificialMorphSpringBall"
"h_canArtificialMorphPowerBomb"
"h_canArtificialMorphPowerBomb"
Clears obstacles: B, C |
|
From: 2
Right Side - Top Door
To: 15
G-Mode Morph Junction (Middle Right)
Avoiding the hoppers can be tricky. Entrance condition: {
"comeInWithGMode": {
"mode": "any",
"morphed": true
}
}
Requires: {
"or": [
"Morph",
{
"and": [
{
"or": [
"canTrickyJump",
{
"enemyDamage": {
"enemy": "Sm. Sidehopper",
"hits": 1,
"type": "contact"
}
}
]
},
{
"or": [
"h_canArtificialMorphSpringBall",
"h_canArtificialMorphIBJ"
]
}
]
},
"h_canArtificialMorphPowerBomb"
]
}
{
"or": [
"h_canArtificialMorphMovement",
{
"and": [
"h_canArtificialMorphPowerBomb",
"h_canArtificialMorphPowerBomb"
]
}
]
}
|
|
From: 7
Right Side - Bottom Middle Door (Behind the Super Block)
To: 13
Central Junction
Notable: true 
Quickly jump and precisely shoot the super block and in the same motion take out the bomb blocks with a speedball. Entrance condition: {
"comeInShinecharging": {
"length": 5,
"openEnd": 0
}
}
Requires: "canSpeedball"
"canTrickyJump"
"canSlowShortCharge"
{
"ammo": {
"type": "Super",
"count": 1
}
}
Clears obstacles: F |
|
From: 8
Right Side - Bottom Door
To: 1
Left Side - Top Door
While using multiple Power Bomb boost Spring Ball jumps, to climb the room, overload PLMs by moving through the camera scroll blocks in front of the passageway leading to the exit of Spore Spawn Supers. Note that one Power Bomb can be saved by carefully jumping out of this morph passageway. Kill or carefully dodge the Sidehoppers at the top, then Power Bomb boost Spring Ball jump up to the top left door and exit G-Mode. Entrance condition: {
"comeInWithGMode": {
"mode": "any",
"morphed": true
}
}
Requires: "h_canArtificialMorphSpringBallBombJump"
{
"ammo": {
"type": "PowerBomb",
"count": 3
}
}
{
"or": [
"canTrickyJump",
"h_canArtificialMorphPowerBomb"
]
}
{
"or": [
"canTrickyJump",
"h_canArtificialMorphPowerBomb",
{
"enemyDamage": {
"enemy": "Sm. Sidehopper",
"hits": 1,
"type": "contact"
}
}
]
}
|
|
From: 13
Central Junction
To: 7
Right Side - Bottom Middle Door (Behind the Super Block)
Notable: true 
Break the bomb blocks by jumping into them with speed. These is more easily done at low run speed. Requires: "canSpeedball"
"canLateralMidAirMorph"
"canSlowShortCharge"
"canTrickyJump"
{
"canShineCharge": {
"usedTiles": 20,
"openEnd": 2
}
}
"canOffScreenSuperShot"
Clears obstacles: F |
|
From: 13
Central Junction
To: 7
Right Side - Bottom Middle Door (Behind the Super Block)
Notable: true
Stop with Temporary Blue in front of the bomb blocks then jump and bounce into the morph tunnel to clear them. Requires: "canTrickyJump"
"canTemporaryBlue"
"canLateralMidAirMorph"
{
"canShineCharge": {
"usedTiles": 22,
"openEnd": 2
}
}
"canOffScreenSuperShot"
Clears obstacles: F |
|
From: 13
Central Junction
To: 10
Top Item (Above Hopper Pit)
Lead an enemy through parts of the room as a way to reach the Mission Impossible missile location. The respawning Zeb can be used by carfeully keeping it on camera and staying high enough that it does not attack. Wait for it to respawn before attempting to guide it. Or a Reo can be brought up to this section of room, but sometimes gets stuck on the way. Requires: {
"or": [
"canTrickyUseFrozenEnemies",
{
"and": [
"canTrickyJump",
"canHorizontalDamageBoost",
{
"enemyDamage": {
"enemy": "Zeb",
"type": "contact",
"hits": 1
}
}
]
}
]
}
"canCameraManip"
|
|
From: 15
G-Mode Morph Junction (Middle Right)
To: 1
Left Side - Top Door
Carefully dodge the Sidehoppers, or kill them with a Power Bomb. Be careful not to hit the bomb block with the Power Bomb or it will remain solid. With IBJ alone, it is easiest to IBJ from the bug pipe below to the ceiling, luring the Sidehoppers to the left. At the top, overload PLMs using the camera scroll block just in front of the block, then roll through it. Requires: {
"or": [
"Morph",
{
"and": [
"h_canArtificialMorphSpringBall",
"HiJump"
]
},
"h_canArtificialMorphIBJ"
]
}
{
"or": [
"Morph",
"canTrickyJump",
{
"enemyDamage": {
"enemy": "Sm. Sidehopper",
"hits": 1,
"type": "contact"
}
},
"h_canArtificialMorphPowerBomb"
]
}
|
|
From: 15
G-Mode Morph Junction (Middle Right)
To: 1
Left Side - Top Door
Go down and overload PLMs by moving through the camera scroll blocks in front of the passageway leading to the exit of Spore Spawn Supers. Use multiple Power Bomb boost Spring Ball jumps, to climb the room; note that one Power Bomb can be saved by carefully jumping out of this morph passageway. Kill or carefully dodge the Sidehoppers at the top, then Power Bomb boost Spring Ball jump up to the top left door and exit G-Mode. Requires: "h_canArtificialMorphSpringBallBombJump"
"h_canArtificialMorphPowerBomb"
"h_canArtificialMorphPowerBomb"
{
"or": [
"canTrickyJump",
"h_canArtificialMorphPowerBomb"
]
}
{
"or": [
"canTrickyJump",
"h_canArtificialMorphPowerBomb",
{
"enemyDamage": {
"enemy": "Sm. Sidehopper",
"hits": 1,
"type": "contact"
}
}
]
}
|
|
From: 15
G-Mode Morph Junction (Middle Right)
To: 4
Left Side - Middle Doorway (Behind the Power Bomb Blocks)
Carefully dodge the Reos to the left of the door leading to the Pink Hopper Room and lure them and the Sidehoppers close to each other. Place a Power Bomb to kill them and both Sidehoppers above. Go down below and lure the third Reo, below the Zeb pipe, off screen to the left. Overload PLMs by moving through the camera scroll blocks in front of the passageway leading to the exit of Spore Spawn Supers. Either carefully jump out of this morph tunnel or use a Power Bomb boost Spring Ball jump to get up to the ledge. Get into the Sidehopper pit and jump up and into the tunnel and go through the crumble blocks to the door to the left. Requires: "h_canArtificialMorphSpringBall"
"canCameraManip"
"h_canArtificialMorphPowerBomb"
{
"or": [
"HiJump",
"h_canArtificialMorphSpringBallBombJump",
"canTrickyJump"
]
}
Clears obstacles: C |
|
G-mode Morph Overload PLMs with Power Bombs and Spring Ball, Break Power Bomb Blocks (Medium)
Big Pink
From: 15
G-Mode Morph Junction (Middle Right)
To: 4
Left Side - Middle Doorway (Behind the Power Bomb Blocks)
Carefully dodge the Reos to the left of the door leading to the Pink Hopper Room and lure them and the Sidehoppers close to each other. Place a Power Bomb to kill them and both Sidehoppers above. Go down below and lure the third Reo, below the Zeb pipe, off screen to the left. Overload PLMs by moving through the camera scroll blocks in front of the passageway leading to the exit of Spore Spawn Supers. Either carefully jump out of this morph tunnel or use a Power Bomb boost Spring Ball jump to get up to the ledge. Get into the Sidehopper pit and jump up and into the tunnel and go through the crumble blocks to the door to the left. Use a Power Bomb then quickly exit G-Mode before it explodes to also break the blocks. Requires: "h_canArtificialMorphSpringBall"
"canCameraManip"
"h_canArtificialMorphPowerBomb"
"h_canArtificialMorphPowerBomb"
{
"or": [
"HiJump",
"h_canArtificialMorphSpringBallBombJump",
"canTrickyJump"
]
}
Clears obstacles: B, C |
|
From: 1
Left Door
To: 1
Left Door
Notable: true 
A consistent setup is to align with the wall below the door frame facing right. Jump and turn around to land on the door frame. Then jump and turn around again to return to being aligned with the wall but at the right height for shooting the Super. This strat involves shooting a Super diagonally from the correct height while flush against the left wall. Its acceleration will cause it to clip into the blue gate off-screen. Requires: {
"obstaclesCleared": [
"A"
]
}
{
"doorUnlockedAtNode": 1
}
"canTrickyJump"
"canOffScreenSuperShot"
Clears obstacles: B |
|
From: 1
Left Door
To: 1
Left Door
Notable: true
Jump straight up and shoot with the correct timing. This strat involves shooting a Super diagonally from the correct height while flush against the left wall. Its acceleration will cause it to clip into the blue gate off-screen. Requires: {
"obstaclesCleared": [
"A"
]
}
{
"or": [
"canTrickyJump",
"h_canBackIntoCorner"
]
}
"HiJump"
"canOffScreenSuperShot"
Clears obstacles: B |
|
From: 1
Left Door
To: 1
Left Door
Notable: true
Use a stationary spinjump, or spinjump against the wall and turn around without moving; and shoot with the same correct timing. This strat involves shooting a Super diagonally from the correct height while flush against the left wall. Its acceleration will cause it to clip into the blue gate off-screen. Requires: {
"obstaclesCleared": [
"A"
]
}
{
"or": [
"canTrickyJump",
"h_canBackIntoCorner"
]
}
"canStationarySpinJump"
"SpaceJump"
"canOffScreenSuperShot"
Clears obstacles: B |
|
Jump into the room and onto the Grapple block. Entrance condition: {
"comeInJumping": {
"speedBooster": true,
"minTiles": 34.4375
}
}
Requires: "canPrepareForNextRoom" "canTrickyJump" |
|
From: 1
Left Door
To: 3
Top Junction
Run from the left side to the right, then jump just before or at the end of the runway to get up onto the Grapple block. Requires: "HiJump"
"canTrickyJump"
"SpeedBooster"
{
"obstaclesCleared": [
"A"
]
}
|
|
From: 1
Left Door
To: 3
Top Junction
Perform a very precise Spring Ball jump from the doorframe onto the Grapple block. A running spin jump or crouch jump can be used. Requires: {
"doorUnlockedAtNode": 1
}
"canTrickySpringBallJump"
"canTrickyJump"
{
"obstaclesCleared": [
"A"
]
}
{
"obstaclesNotCleared": [
"C"
]
}
|
|
From: 1
Left Door
To: 3
Top Junction
Perform a very precise Spring Ball jump through the transition and onto the Grapple block. A running spin jump or crouch jump can be used. Entrance condition: {
"comeInJumping": {
"speedBooster": false,
"minTiles": 0.4375
}
}
Requires: "canPrepareForNextRoom" "canTrickySpringBallJump" "canTrickyJump" |
|
From: 2
Right Door
To: 3
Top Junction
Notable: true 
Start the elevator ride by using Screw Attack or Pseudo Screw in the hole. Kago the elevator to fall back in and hit the elevator again. This is much easier while the elevator is still rising, but can still be done with Morph afterwards. Unless HiJump is owned, this will need to be done once more to get high enough to get to the blue gate. Requires: "canKago"
{
"or": [
"ScrewAttack",
"canPseudoScrew"
]
}
{
"or": [
{
"and": [
"HiJump",
{
"or": [
"canCrouchJump",
"canDownGrab"
]
}
]
},
"canTrickyJump",
"Morph"
]
}
Clears obstacles: B |
|
From: 2
Right Door
To: 3
Top Junction
X-Ray climb until Samus is a little over halfway off screen; the position is not precise. Face right, then do a turnaround buffer spin jump into a Spring Ball jump to reach the ledge. The pause input can be pressed at the same time as the turnaround. It helps to do an airball to gain horizontal speed. The jump input after pausing should not be buffered, in order to allow a little time for the spring fling horizontal speed to take effect. Entrance condition: {
"comeInWithDoorStuckSetup": {}
}
Requires: "canXRayClimb" "canTrickyJump" "canLateralMidAirMorph" "canTrickySpringBallJump" "canSpringFling" |
|
Jump at the very end of the runway in-room. Requires a runway in the adjacent room of at least 6 tiles. Entrance condition: {
"comeInRunning": {
"speedBooster": true,
"minTiles": 6
}
}
Requires: "HiJump" "canTrickyJump" |
|
From: 4
Frozen Hopper Junction
To: 3
Top Junction
Use a Frozen Hopper as a platform to jump up to the Grapple Block with an additional movement item. Letting it jump from the spike ledge or the door frame will make the jump easier, but it is difficult to avoid Hopper damage when setting this up. Requires: {
"obstaclesNotCleared": [
"A"
]
}
"canTrickyUseFrozenEnemies"
{
"or": [
"HiJump",
"canSpringBallJumpMidAir"
]
}
{
"or": [
{
"enemyDamage": {
"enemy": "Sm. Sidehopper",
"type": "contact",
"hits": 1
}
},
"canTrickyJump"
]
}
|
|
From: 4
Frozen Hopper Junction
To: 4
Frozen Hopper Junction
Notable: true
This strat involves shooting a Super diagonally from the correct height while flush against the left wall. Its acceleration will cause it to clip into the blue gate off-screen. Jump straight up and shoot with the correct timing. Taking damage can be used to align against the wall. Requires: {
"obstaclesNotCleared": [
"A"
]
}
{
"or": [
"h_canBackIntoCorner",
{
"enemyDamage": {
"enemy": "Sm. Sidehopper",
"type": "contact",
"hits": 1
}
},
"canTrickyJump"
]
}
"HiJump"
"canOffScreenSuperShot"
Clears obstacles: B |
|
From: 1
Top Right Door
To: 4
Top Left Junction
Open the door and kill the first hopper from inside the doorway. It won't be able to hit Samus for many jumps. It is possible to quickly get back to the right and crouch against the the ledge while aiming upward to safely kill the Sidehopper. Alternatively, morph can help with the second hopper, as it won't be able to hit Samus. Requires: {
"doorUnlockedAtNode": 1
}
"canDodgeWhileShooting"
{
"or": [
"Morph",
"Spazer",
"Wave",
"Plasma",
{
"enemyKill": {
"enemies": [
[
"Sidehopper"
]
],
"explicitWeapons": [
"Missile"
]
}
},
{
"enemyDamage": {
"enemy": "Sidehopper",
"type": "contact",
"hits": 2
}
},
"canTrickyJump"
]
}
Clears obstacles: A |
|
Requires: {
"or": [
"canTrickyJump",
"Ice",
{
"obstaclesCleared": [
"A"
]
},
{
"and": [
"canCarefulJump",
"h_canUseSpringBall"
]
},
"can4HighMidAirMorph",
{
"and": [
"SpaceJump",
"canCarefulJump"
]
},
{
"and": [
"SpaceJump",
"ScrewAttack"
]
},
{
"and": [
"ScrewAttack",
"canCarefulJump"
]
}
]
}
|
|
From: 1
Right Door
To: 2
Chozo Item
Traverse the room with a small number of Power Bombs. If the Chozo item is still there, it is best to exit G-Mode before the final Power Bomb goes off to ensure that PLMs aren't overloaded. This strat can be done easily with 7 Power Bombs. Simply kill all of the Boyons before progressing. The final Power Bomb needs to be placed on the second to last floating platform or later to break the wall. Samus can use one Power Bomb and a Boyon hit to get from the door to the second platform, or from the second to fourth platform. Alternatively, when next to the Boyons, place a Power Bomb while the Boyon is low, slightly after the peak of the jump, hitbox through the Boyons. If the Boyons are killed, Samus can horizontally boost far enough to skip a platform. Samus can cross the room with any of the following: 7 PB; 6 PB and a horizontal boost; 5 PB and hitboxing the first Boyons; 5 PB and damage from the first Boyons; 4 PB and damage from the first Boyons and hitboxing the second; 3 PB and hitting both sets of Boyons. Note that if Samus falls into a Samus Eater, she will often be teleported into it when exiting G-Mode. Entrance condition: {
"comeInWithGMode": {
"mode": "any",
"morphed": true
}
}
Requires: "h_canArtificialMorphPowerBomb"
{
"or": [
{
"ammo": {
"type": "PowerBomb",
"count": 6
}
},
{
"and": [
{
"ammo": {
"type": "PowerBomb",
"count": 4
}
},
"h_canArtificialMorphBombHorizontally"
]
},
{
"and": [
{
"ammo": {
"type": "PowerBomb",
"count": 4
}
},
"canTrickyJump",
"canHitbox"
]
},
{
"and": [
{
"ammo": {
"type": "PowerBomb",
"count": 3
}
},
"h_canArtificialMorphBombHorizontally",
{
"enemyDamage": {
"enemy": "Boyon",
"type": "contact",
"hits": 1
}
}
]
},
{
"and": [
{
"ammo": {
"type": "PowerBomb",
"count": 2
}
},
"h_canArtificialMorphBombHorizontally",
{
"enemyDamage": {
"enemy": "Boyon",
"type": "contact",
"hits": 1
}
},
"canTrickyJump",
"canHitbox"
]
},
{
"and": [
{
"ammo": {
"type": "PowerBomb",
"count": 2
}
},
{
"enemyDamage": {
"enemy": "Boyon",
"type": "contact",
"hits": 2
}
}
]
}
]
}
Clears obstacles: A, B |
|
From: 1
Right Door
To: 2
Chozo Item
Traverse the room while rolling on the thorns and avoiding the Samus Eaters. Roll from the first platform onto the thorns under the first set of Boyons. When just past the first Boyons, turn right to damage boost up and hit the block and fall back on the thorns. While still facing right wait for the thorns to hit again; use the boost to get onto the next set of thorns and roll across them into the third Samus Eater before using a Power Bomb. Use the Power Bomb to boost up into the thorns. Hit the thorns again to get next to the Chozo statue. Place another Power Bomb and exit G-Mode before it goes off to break the wall. Note that if Samus is teleported into the Samus Eater when exiting G-Mode, then PLMs weren't properly overloaded before entering it. PLMs can be overloaded by waiting on their petals before entering them. Taking 2 thorn hits while under the first Boyons is important for this reason. Entrance condition: {
"comeInWithGMode": {
"mode": "any",
"morphed": true
}
}
Requires: "canIframeSpikeJump"
"canNeutralDamageBoost"
"canTrickyJump"
{
"thornHits": 5
}
"h_canArtificialMorphPowerBomb"
"h_additionalBomb"
Clears obstacles: B |
|
Requires: {
"or": [
"canTrickyJump",
"Ice",
{
"obstaclesCleared": [
"A"
]
},
{
"and": [
"canCarefulJump",
"h_canUseSpringBall"
]
},
"can4HighMidAirMorph",
{
"and": [
"SpaceJump",
"canCarefulJump"
]
},
{
"and": [
"SpaceJump",
"ScrewAttack"
]
},
{
"and": [
"ScrewAttack",
"canCarefulJump"
]
}
]
}
|
|
Notable: true 
Jump from the Spazer Room door with speed to break the bomb blocks. Time a precise shot during the jump to clear the shot block. Note: Spazer can trivially break the shot block by shooting forward before jumping. Entrance condition: {
"comeInShinecharging": {
"length": 3,
"openEnd": 1
}
}
Requires: "canSpeedball" "canTrickyJump" |
|
Use the Solid Blocks next to the Samus Eater to clip up through the Power Bomb Blocks. Carefully jump around the thorns, use HiJump to jump over them, or walk through them using IFrames. Requires: "canCeilingClip"
"canPartialFloorClip"
{
"or": [
{
"and": [
"canCarefulJump",
"HiJump",
"canTwoTileSqueeze",
{
"or": [
"canTrickyJump",
{
"thornHits": 1
}
]
}
]
},
{
"and": [
"canNeutralDamageBoost",
"canIframeSpikeJump",
{
"thornHits": 1
}
]
},
{
"and": [
"canPreciseWalljump",
"canTwoTileSqueeze"
]
}
]
}
|
|
Use the Solid Blocks next to the Samus Eater to clip up through the Power Bomb Blocks. The thorns do not cover the entire blocks above. Jump barely only onto the corner to avoid the damage. Carefully jump around the thorns, tunnel crawl slightly to avoid touching the thorns when partial floor clipping. Morph and x-ray can be used instead to setup the clip much easier. Requires: "canTrickyJump"
{
"or": [
"h_canXRayCeilingClip",
{
"and": [
"canTunnelCrawl",
"canPartialFloorClip"
]
}
]
}
"canCeilingClip"
|
|
The thorns do not cover the entire blocks above. Jump barely only onto the corner to avoid the damage. Requires: {
"obstaclesCleared": [
"B"
]
}
"canTrickyJump"
|
|
From: 1
Top Left Door
To: 1
Top Left Door
It takes around 3 minutes to get the Zero to this door. Let the Zero climb the right wall and jump on top of it in Morph Ball form to bounce up to the Cacatac platform. The Zero only moves on camera and the camera scrolls when exiting the morph tunnel. Let the Zero lead through the morph tunnel or wait for the it to get very close to Samus before touching the scroll block at the exit. Requires: "canBeVeryPatient"
"Morph"
"canNeutralDamageBoost"
"canTrickyJump"
"h_canCrouchJumpDownGrab"
{
"enemyDamage": {
"enemy": "Zero",
"type": "contact",
"hits": 1
}
}
Exit condition: {
"leaveWithGModeSetup": {}
}
|
|
From: 2
Middle Left Door
To: 2
Middle Left Door
It takes around 4 minutes to get the Zero to this door. Let the Zero climb the right wall and jump on top of it in Morph Ball form to bounce up to the Cacatac platform. The Zero only moves on camera and the camera scrolls when exiting the morph tunnel. Let the Zero lead through the morph tunnel or wait for the it to get very close to Samus before touching the scroll block at the exit. Requires: "canBeVeryPatient"
"Morph"
"canNeutralDamageBoost"
"canTrickyJump"
"h_canCrouchJumpDownGrab"
{
"enemyDamage": {
"enemy": "Zero",
"type": "contact",
"hits": 1
}
}
Exit condition: {
"leaveWithGModeSetup": {}
}
|
|
Let the Caterpillar climb the right wall and jump on top of it in Morph Ball form to bounce up to the Cacatac platform. Requires: "Morph"
"canNeutralDamageBoost"
"canTrickyJump"
"canCrouchJump"
{
"enemyDamage": {
"enemy": "Zero",
"type": "contact",
"hits": 1
}
}
|
|
From: 4
Bottom Right Door
To: 4
Bottom Right Door
Let the Caterpillar climb the right wall and jump on top of it in Morph Ball form to bounce up to the Cacatac platform. Requires: "Morph"
"canNeutralDamageBoost"
"canTrickyJump"
"canCrouchJump"
{
"enemyDamage": {
"enemy": "Zero",
"type": "contact",
"hits": 1
}
}
Exit condition: {
"leaveWithGModeSetup": {}
}
|
|
From: 5
Top Right Door (Through Morph Tunnel)
To: 5
Top Right Door (Through Morph Tunnel)
It takes around 2 minutes to get the Zero to this door. Let the Zero climb the right wall and jump on top of it in Morph Ball form to bounce up to the Cacatac platform. Requires: "canBePatient"
{
"or": [
{
"ammo": {
"type": "Super",
"count": 1
}
},
{
"obstaclesCleared": [
"A"
]
}
]
}
"Morph"
"canNeutralDamageBoost"
"canTrickyJump"
"h_canCrouchJumpDownGrab"
{
"enemyDamage": {
"enemy": "Zero",
"type": "contact",
"hits": 1
}
}
Exit condition: {
"leaveWithGModeSetup": {}
}
|
|
Notable: true 

Freeze the left-most Zeb while it is rising and is 1 pixel too low from making a flat runway. When it is close to thawing, run into the thorns to the left and hold left to avoid a vertical damage boost, then refreeze the Zeb as it crosses. It will now be 1 pixel higher. Freeze the Zeb again once it is in the perfect position to bridge the gap, which has a 2-3 pixel range. Requires: "canTrickyJump"
"h_canTrickyFrozenEnemyRunway"
{
"thornHits": 2
}
Exit condition: {
"leaveWithRunway": {
"length": 6,
"openEnd": 1
}
}
|
|
Notable: true 
If you wait long enough, a Waver will arrive. After it turns around to go back to the right, damage boost off of it, then follow it. Continue to hit it to get i-frames to avoid taking damage from any spikes. The amount of Waver hits can be reduced by running ahead on the spikes and taking damage from a second Waver instead of following the first Waver. Requires: "canHorizontalDamageBoost"
{
"enemyDamage": {
"enemy": "Waver",
"type": "contact",
"hits": 2
}
}
{
"or": [
{
"and": [
"canIframeSpikeJump",
"canTrickyJump"
]
},
{
"enemyDamage": {
"enemy": "Waver",
"type": "contact",
"hits": 3
}
}
]
}
|
|
Notable: true 
A precise strat that involves crossing both gaps by dboosting off Wavers. The Wavers are also used for iframes to avoid taking damage from any spikes. Requires: "canHorizontalDamageBoost"
"canTrickyJump"
{
"enemyDamage": {
"enemy": "Waver",
"type": "contact",
"hits": 6
}
}
|
|
From: 2
Right Door
To: 3
Safe Block in the Middle of the Room
Damage boost off of the Fireflea or a Waver in order to get onto the upper spikes. It is possible to quickly get into position to use the Waver or to wait for it to return. It is also possible (but not required in this strat) to perform a second damage boost off of the Wavers to avoid some spike damage. Requires: "canTrickyJump"
{
"enemyDamage": {
"enemy": "Waver",
"type": "contact",
"hits": 1
}
}
"canHorizontalDamageBoost"
{
"or": [
"canIframeSpikeJump",
{
"spikeHits": 1
}
]
}
|
|
From: 2
Right Door
To: 3
Safe Block in the Middle of the Room
Use the Fireflea when it moves to the right to cross the first gap. Requires: "canTrickyUseFrozenEnemies"
"HiJump"
"canCarefulJump"
{
"or": [
"canTrickyJump",
"canWalljump"
]
}
{
"spikeHits": 1
}
|
|
From: 2
Right Door
To: 3
Safe Block in the Middle of the Room
Requires: {
"or": [
"h_canTrickySpringwall",
{
"and": [
"h_canMaxHeightSpringBallJump",
"canNeutralDamageBoost"
]
}
]
}
{
"spikeHits": 1
}
|
|
From: 3
Safe Block in the Middle of the Room
To: 4
Small Ledge Below Left Door
Requires: "canIframeSpikeJump"
{
"or": [
{
"and": [
"canTrickyJump",
{
"spikeHits": 2
}
]
},
{
"spikeHits": 3
}
]
}
|
|
Requires: "HiJump"
"SpeedBooster"
{
"or": [
"canTrickyJump",
"canWalljump"
]
}
|
|
Requires: "h_IBJFromSpikes" |
|
From: 4
Small Ledge Below Left Door
To: 1
Left Door
Notable: true 

Jump to the door leading to X-Ray either by jumping from spikes or with a very precise jump. Cross the room by Jumping atop the spikes. Taking enemy damage can be used to reduce some spike damage. The final jump can either be made by jumping from the bottommost spike stair or from the safe stair. Setup run speed atop the spike stair by holding forward to be pushed backward. The safe stair jump is much harder, but can be made without every pixel of runway. Requires: "HiJump"
"canTrickyJump"
{
"or": [
{
"and": [
"canInsaneWalljump",
"canInsaneJump",
"h_canBackIntoCorner"
]
},
{
"and": [
{
"spikeHits": 1
},
"canPreciseWalljump",
"canIframeSpikeJump"
]
}
]
}
|
|
From: 3
Bottom Left Door
To: 6
Junction (Above Bottom Rippers)
Use two Power Bombs to kill the Rippers, or carefully pass the first two and place a single Power Bomb on the left ledge to kill them all. Exit G-Mode before the Power Bomb explodes in order to break the wall. Entrance condition: {
"comeInWithGMode": {
"mode": "any",
"morphed": true
}
}
Requires: "h_canArtificialMorphIBJ"
"h_canArtificialMorphPowerBomb"
{
"or": [
"canTrickyJump",
"h_canArtificialMorphPowerBomb"
]
}
"h_canArtificialMorphPowerBomb"
Clears obstacles: A |
|
From: 4
Bottom Right Door
To: 6
Junction (Above Bottom Rippers)
Use two Power Bombs to kill the Rippers, or carefully pass the first two and place a single Power Bomb on the left ledge to kill them all. Exit G-Mode before the Power Bomb explodes in order to break the wall. Entrance condition: {
"comeInWithGMode": {
"mode": "any",
"morphed": true
}
}
Requires: "h_canArtificialMorphIBJ"
"h_canArtificialMorphPowerBomb"
{
"or": [
"canTrickyJump",
"h_canArtificialMorphPowerBomb"
]
}
"h_canArtificialMorphPowerBomb"
Clears obstacles: A |
|
From: 7
Junction (Bottom Rippers)
To: 6
Junction (Above Bottom Rippers)
Requires: "canSpringBallJumpMidAir"
{
"or": [
"canWalljump",
{
"and": [
"HiJump",
"canTrickyJump"
]
}
]
}
{
"or": [
"canTrickySpringBallJump",
"canSpringwall"
]
}
|
|
From: 9
Junction (Top Rippers)
To: 5
Top Right Door
Notable: true 

Climb the top of Red Tower with just Space Jump. This can be done by dodging the Rippers and shooting the block as Samus is going upward, so she goes through the block as it breaks. HiJump or killing the Rippers can help but are not required. If the Rippers are killed, this can instead be done by shooting the block while falling right as it goes off screen, then using well-timed short space jumps to go up as rapidly as possible before the block respawns. Requires: "SpaceJump" "canTrickyJump" |
|
From: 9
Junction (Top Rippers)
To: 9
Junction (Top Rippers)
Kill the Rippers with Supers. Requires: {
"ammo": {
"type": "Super",
"count": 4
}
}
{
"or": [
"canWalljump",
"SpaceJump",
"h_canJumpIntoIBJ",
{
"and": [
"canSpringBallJumpMidAir",
{
"or": [
"HiJump",
"canTrickyJump"
]
}
]
}
]
}
Clears obstacles: B |
|
A running lateral mid-air morph can squeeze into the hole with good enough timing. Requires: "h_canDestroyBombWalls" "canLateralMidAirMorph" "canTrickyJump" |
|
From: 2
Right Door (locked)
To: 1
Left Door (locked)
Kill all of the enemies with Bombs. Samus will take a Baby Kraid spike hit while rolling through the invisible projectiles. It is not too difficult to IBJ and then bomb horizontally over the cluster of invisible spikes, but there is some risk because they are invisible. They occupy a slightly smaller space than what Baby Kraid was occupying. Entrance condition: {
"comeInWithGMode": {
"mode": "any",
"morphed": true
}
}
Requires: "h_canArtificialMorphBombs"
{
"or": [
{
"and": [
"h_canArtificialMorphIBJ",
"h_canArtificialMorphBombHorizontally",
"canTrickyJump"
]
},
{
"enemyDamage": {
"enemy": "Mini-Kraid",
"type": "spike",
"hits": 1
}
}
]
}
Clears obstacles: A |
|
Wait to hit one of Mini-Kraid's spikes, then run through. Requires: {
"or": [
"canCarefulJump",
{
"enemyDamage": {
"enemy": "Green Space Pirate (standing)",
"type": "contact",
"hits": 1
}
}
]
}
{
"or": [
"canTrickyJump",
{
"enemyDamage": {
"enemy": "Mini-Kraid",
"type": "spike",
"hits": 1
}
}
]
}
|
|
With Morph: Morph on the small ledge left of the Zeb spawner. After a Zeb starts moving horizontally, quickly unmorph and freeze it. After it thaws, refreeze it once it is in the correct position. Without Morph: Freeze the Zeb as it is rising. When it is close to thawing, walk into the spikes and continue to walk into the wall to prevent a vertical damage boost. Freeze the Zeb after it thaws, noting that it will rise one pixel relative to its first frozen location. Requires: {
"or": [
"Morph",
{
"and": [
"canTrickyEnemyExtendRunway",
"canTrickyJump",
{
"thornHits": 2
}
]
}
]
}
"h_canFrozenEnemyRunway"
Exit condition: {
"leaveWithRunway": {
"length": 7,
"openEnd": 0
}
}
|
|
From: 2
Top Right Door
To: 2
Top Right Door
Lure a Zeb up from below by freezing it or quickly moving after the Zeb has spawned, but before it becomes visible. Note that Samus must start on the right side of the Zeb in order for it to move rightwards once it starts moving horizontally. Requires: {
"or": [
"canUseFrozenEnemies",
"canTrickyJump"
]
}
Exit condition: {
"leaveWithGModeSetup": {}
}
|
|
From: 2
Top Right Door
To: 2
Top Right Door
Stand to the right of the Zeb farm then freeze the Zeb while it is still moving upward. Go to the top door and wait for the Zeb to arrive. Freeze it at the correct height, then drop below it and wait for it to thaw. Freeze it again in the correct horizontal position. Keep a half-tile gap between the Zeb and the runway to extend the runway as much as possible. Requires: "canTrickyJump" "h_canFrozenEnemyRunway" Exit condition: {
"leaveWithRunway": {
"length": 6,
"openEnd": 0
}
}
|
|
From: 3
Bottom Right Door
To: 3
Bottom Right Door
Lure a Zeb by freezing it or by moving quickly while carefully preventing it from going off screen. Requires: {
"or": [
"canUseFrozenEnemies",
"canTrickyJump"
]
}
Exit condition: {
"leaveWithGModeSetup": {}
}
|
|
From: 3
Bottom Right Door
To: 3
Bottom Right Door
With Morph: Morph on the small ledge right of the Zeb spawner. After a Zeb starts moving horizontally, quickly unmorph and freeze it. After it thaws, refreeze it once it is in the correct position. Without Morph: Freeze the Zeb as it is rising. When it is close to thawing, walk into the spikes and continue to walk into the wall to prevent a vertical damage boost. Freeze the Zeb after it thaws, noting that it will rise one pixel relative to its first frozen location. Requires: {
"or": [
"Morph",
{
"and": [
"canTrickyEnemyExtendRunway",
"canTrickyJump",
{
"thornHits": 2
}
]
}
]
}
"h_canFrozenEnemyRunway"
Exit condition: {
"leaveWithRunway": {
"length": 5,
"openEnd": 0
}
}
|
|
From: 1
Right Door
To: 1
Right Door
Notable: true 

Freeze multiple Beetoms to extend the runway. Continually refreeze the ones that are in a good position while manipulating the rest. This assumes three extra tiles of runway, which can be accomplished with two perfectly placed Beetoms, three adjacent ones, or four which are partially overlapping. Requires: {
"obstaclesNotCleared": [
"A"
]
}
"canTrickyJump"
"h_canTrickyFrozenEnemyRunway"
{
"enemyDamage": {
"enemy": "Beetom",
"type": "contact",
"hits": 6
}
}
Exit condition: {
"leaveWithRunway": {
"length": 4,
"openEnd": 1
}
}
|
|
From: 1
Right Door
To: 2
Hidden Ceiling Item
Roll in while avoiding the Beetoms. It is possible to kill them all without getting hit; one of the most safe areas is the center of the lower floor. Entrance condition: {
"comeInWithGMode": {
"mode": "indirect",
"morphed": true
}
}
Requires: {
"or": [
"h_canArtificialMorphPowerBomb",
{
"and": [
"h_canArtificialMorphBombs",
{
"or": [
"canTrickyJump",
{
"enemyDamage": {
"enemy": "Beetom",
"type": "contact",
"hits": 1
}
}
]
}
]
}
]
}
Clears obstacles: A |
|
Wait by the door briefly before spin jumping over and grabbing the item. It is also possible to do this instead by entering with run speed and quickly grabbing the item. Requires: "canTrickyJump"
{
"enemyDamage": {
"enemy": "Beetom",
"type": "contact",
"hits": 1
}
}
|
|
Jump between the kihunters to avoid damage. To kill the kihunters, shoot them as they come on screen. Requires: "canTrickyJump" "canDodgeWhileShooting" Clears obstacles: C |
|
Shoot the Skree and shotblock from the door. While avoiding Skree projectiles, jump to the next bubble platform followed by jumping directly up where the shot block used to be. Requires: "canPreciseWalljump"
"canTrickyJump"
{
"heatFrames": 220
}
|
|
From: 1
Left Side - Top Door
To: 1
Left Side - Top Door
Place a Power Bomb on the bottom stair attached to the door in order to prevent killing the Sova, or free a Sova from the Morph maze with Bombs. If coming from below, be sure to lure the Sova to the bottom before placing a Power Bomb near the blocks in order to prevent killing it. Use the frozen Sova to climb to the top left door. Stand on a low frozen Waver to lower the camera enough to get the Sova to move again. Requires: "h_canFrozenEnemyRunway"
{
"or": [
{
"obstaclesCleared": [
"A"
]
},
"h_canBombThings"
]
}
{
"or": [
"canTrickyJump",
"SpaceJump"
]
}
Exit condition: {
"leaveWithRunway": {
"length": 5,
"openEnd": 1
}
}
|
|
Requires: "canLateralMidAirMorph"
"canTrickyJump"
{
"or": [
"canCameraManip",
{
"enemyDamage": {
"enemy": "Cacatac",
"hits": 1,
"type": "contact"
}
}
]
}
|
|
From: 1
Left Side - Top Door
To: 7
Top Right Door
Kill King Cac by scrolling the camera, before attempting the jump. Requires: {
"doorUnlockedAtNode": 1
}
{
"or": [
"canTrickyJump",
{
"and": [
"SpeedBooster",
"canCarefulJump"
]
}
]
}
"canCameraManip"
|
|
Entrance condition: {
"comeInRunning": {
"minTiles": 2,
"speedBooster": "any"
}
}
Requires: {
"or": [
"canTrickyJump",
{
"and": [
"SpeedBooster",
"canCarefulJump"
]
}
]
}
{
"or": [
"ScrewAttack",
{
"and": [
"canNeutralDamageBoost",
{
"enemyDamage": {
"enemy": "Cacatac",
"hits": 1,
"type": "contact"
}
}
]
}
]
}
|
|
From: 2
Left Side - Top Middle Door
To: 1
Left Side - Top Door
Entrance condition: {
"comeInRunning": {
"minTiles": 35,
"speedBooster": true
}
}
Requires: "canTrickyJump" |
|
From: 2
Left Side - Top Middle Door
To: 1
Left Side - Top Door
Entrance condition: {
"comeInRunning": {
"minTiles": 15,
"speedBooster": true
}
}
Requires: "canTrickyJump"
"canTrickySpringBallJump"
"canNeutralDamageBoost"
{
"enemyDamage": {
"enemy": "Waver",
"type": "contact",
"hits": 1
}
}
|
|
From: 2
Left Side - Top Middle Door
To: 1
Left Side - Top Door
Entrance condition: {
"comeInRunning": {
"minTiles": 7,
"speedBooster": true
}
}
Requires: "canTrickyJump"
"HiJump"
{
"or": [
"ScrewAttack",
{
"enemyDamage": {
"enemy": "Waver",
"type": "contact",
"hits": 1
}
}
]
}
|
|
From: 2
Left Side - Top Middle Door
To: 7
Top Right Door
Entrance condition: {
"comeInRunning": {
"minTiles": 2.4375,
"speedBooster": false
}
}
Requires: "canPreciseWalljump" "canTrickyJump" |
|
Entrance condition: {
"comeInRunning": {
"minTiles": 35,
"speedBooster": true
}
}
Requires: "canTrickyJump" |
|
From: 2
Left Side - Top Middle Door
To: 7
Top Right Door
Entrance condition: {
"comeInRunning": {
"minTiles": 15,
"speedBooster": true
}
}
Requires: "canTrickyJump"
"canTrickySpringBallJump"
"canNeutralDamageBoost"
{
"enemyDamage": {
"enemy": "Cacatac",
"type": "contact",
"hits": 1
}
}
|
|
From: 7
Top Right Door
To: 1
Left Side - Top Door
Kill the Cacatac and quickly jump over to its platform. Shoot towards the top-left door to open it, then follow the shot by jumping over the pit before initiating the shinespark. Entrance condition: {
"comeInShinecharging": {
"length": 2.5,
"openEnd": 1
}
}
Requires: "canShinechargeMovementComplex"
"canMidairShinespark"
"canTrickyJump"
"canHeroShot"
{
"shinespark": {
"frames": 25
}
}
{
"or": [
{
"and": [
"Wave",
"Spazer"
]
},
"Plasma",
{
"ammo": {
"type": "Missile",
"count": 2
}
},
{
"ammo": {
"type": "Super",
"count": 2
}
}
]
}
|
|
Use the full runway of the top-right door to jump to the ledge below the Cacatac and mockball on it. Either full jump from the left side of this platform, or do a small hop followed by a big jump to cross the gap. Disabling Springball once past the Grapple Blocks makes this much easier. Requires: "canCarefulJump"
"canSpringBallBounce"
"canMockball"
{
"or": [
{
"doorUnlockedAtNode": 7
},
"canTrickyJump"
]
}
|
|
Requires: "canTrickyJump"
{
"heatFrames": 220
}
|
|
From: 1
Left Door
To: 4
Junction Above Item
Entrance condition: {
"comeInRunning": {
"minTiles": 5,
"speedBooster": true
}
}
Requires: "canTrickyJump" |
|
Requires: "canTrickyJump"
{
"or": [
"ScrewAttack",
{
"and": [
"canDodgeWhileShooting",
{
"or": [
"Wave",
"Spazer",
"Plasma",
"canPseudoScrew",
{
"ammo": {
"type": "Missile",
"count": 1
}
},
{
"ammo": {
"type": "Super",
"count": 1
}
}
]
}
]
},
{
"heatFrames": 5
}
]
}
{
"heatFrames": 220
}
|
|
Requires: "canTrickyJump"
{
"heatFrames": 160
}
|
|
From: 4
Junction Above Item
To: 2
Right Door
Requires: "canTrickyJump"
{
"heatFrames": 150
}
Exit condition: {
"leaveWithRunway": {
"length": 6,
"openEnd": 0,
"gentleDownTiles": 2,
"startingDownTiles": 2
}
}
|
|
From: 3
Bottom Left Junction
To: 1
Left Door
Notable: true 
Guide the morph tunnel Sova on top of the shot blocks by keeping it on camera. Move the camera away once it is on top of the shot blocks. It will not move while off camera. Stand directly below the OffCamera Sova and fire up and jump to break the shot blocks. Either lower its health while guiding it, or as it begins to fall, there is time. As it falls, shoot again to freeze it at the right height. As a backup, the same Sova can be frozen on the left wall, dropped from the shot blocks again, or frozen on the right wall. Requires: "canUseFrozenEnemies"
"canTrickyJump"
"canCameraManip"
{
"heatFrames": 1100
}
|
|
Either race the nearby sova to the morph tunnel or wait for the global Sova to come around. Build speed on the lower platform and jump towards the morph tunnel while performing a Midair Morph to reach the Sova in time. Guiding the local Sova around through the shot block again can be faster, but is not expected. Requires: "canNeutralDamageBoost"
"Morph"
{
"enemyDamage": {
"enemy": "Sova",
"hits": 1,
"type": "contact"
}
}
{
"or": [
{
"and": [
"canTrickyJump",
"canLateralMidAirMorph",
{
"heatFrames": 340
}
]
},
{
"heatFrames": 2700
}
]
}
|
|
From: 4
Bottom Junction (Cleared Runway)
To: 1
Left Door
Kill the enemies, break the shot block, then use the bottom to charge a spark. Quickly climb up before the block respawns, and continue through the left door. Requires: "HiJump"
"canShinechargeMovementComplex"
{
"canShineCharge": {
"usedTiles": 33,
"openEnd": 2
}
}
{
"or": [
"canPreciseWalljump",
"canTrickyJump",
"SpaceJump"
]
}
{
"heatFrames": 540
}
Exit condition: {
"leaveShinecharged": {
"framesRemaining": 35
}
}
|
|
From: 4
Bottom Junction (Cleared Runway)
To: 1
Left Door
Kill the enemies, then use the bottom to charge a spark. Shoot the shot block from the ground and follow it up so that it breaks, and continue through the left door. Requires: "HiJump"
"canShinechargeMovementComplex"
"canHeroShot"
{
"canShineCharge": {
"usedTiles": 33,
"openEnd": 2
}
}
{
"or": [
"canPreciseWalljump",
"canTrickyJump",
"SpaceJump"
]
}
{
"heatFrames": 310
}
Exit condition: {
"leaveShinecharged": {
"framesRemaining": 25
}
}
|
|
From: 2
Bottom Left Door
To: 1
Top Left Door
Spin jump into the room with at least 1 tile of run speed. Perform a lateral mid-air morph into a spring ball jump. Press against the left side of the first moving platform to gain enough height to get on top of it. Entrance condition: {
"comeInJumping": {
"minTiles": 1,
"speedBooster": "any"
}
}
Requires: "canPrepareForNextRoom"
"canLateralMidAirMorph"
"canTrickySpringBallJump"
"canTrickyJump"
{
"heatFrames": 160
}
|
|
Wall jump up the left wall, perform a delayed wall jump on the Fune to reach the door. Requires: "canDelayedWalljump"
"canConsecutiveWalljump"
"canTrickyJump"
"canUseEnemies"
{
"or": [
{
"heatFrames": 190
},
{
"and": [
"canPrepareForNextRoom",
{
"heatFrames": 120
}
]
}
]
}
|
|
From: 2
Bottom Left Door
To: 1
Top Left Door
Notable: true 
Wall jump up the left wall and then on the moving platform (Kamer) while avoiding the Fune's fireball. The Kamers will temporarily move down if Samus is below them, so it is best to walk under the first Kamer before climbing the wall. It is possible to freeze or kill the Fune with a Super or Power Bomb to make things easier. Requires: "canPreciseWalljump"
"canConsecutiveWalljump"
"canUseEnemies"
{
"or": [
{
"heatFrames": 560
},
{
"and": [
"canCarefulJump",
{
"heatFrames": 360
}
]
},
{
"and": [
"canTrickyJump",
{
"heatFrames": 240
}
]
},
{
"and": [
{
"or": [
"canUseFrozenEnemies",
{
"ammo": {
"type": "Super",
"count": 1
}
}
]
},
{
"heatFrames": 432
}
]
},
{
"and": [
{
"ammo": {
"type": "PowerBomb",
"count": 1
}
},
{
"heatFrames": 456
}
]
}
]
}
|
|
Requires: "canShinechargeMovementComplex"
"HiJump"
{
"or": [
"SpaceJump",
{
"and": [
"canPreciseWalljump",
"canTrickyJump"
]
}
]
}
{
"heatFrames": 400
}
{
"canShineCharge": {
"usedTiles": 28,
"gentleUpTiles": 3,
"gentleDownTiles": 3,
"openEnd": 0
}
}
Exit condition: {
"leaveShinecharged": {
"framesRemaining": 30
}
}
|
|
Jump through the door transition, and wall jump off the second moving platform to get on top. Entrance condition: {
"comeInJumping": {
"minTiles": 1,
"speedBooster": "any"
}
}
Requires: "canPrepareForNextRoom"
"HiJump"
"canWalljump"
"canTrickyJump"
{
"heatFrames": 260
}
|
|
Spin jump into the room with at least 2 tiles of run speed. Perform a lateral mid-air morph into a spring ball jump. Land on the second moving platform. Entrance condition: {
"comeInJumping": {
"minTiles": 2,
"speedBooster": "any"
}
}
Requires: "canPrepareForNextRoom"
"canLateralMidAirMorph"
"canTrickySpringBallJump"
"canTrickyJump"
{
"heatFrames": 280
}
|
|
Run to the right, wait a moment for the platforms to come down, then wall jump off the second platform from the right. Requires: "HiJump"
"canWalljump"
"canTrickyJump"
{
"heatFrames": 380
}
|
|
Requires: "h_HeatedIBJFromSpikes"
{
"heatFrames": 1100
}
|
|
A short hop from the door can bounce on the crumbles. Just be careful of being pushed back onto the crumble blocks by the spikes. Requires: "h_canXMode"
"h_XModeSpikeHit"
"h_XModeSpikeHit"
"canTrickyJump"
"canMidairShinespark"
{
"canShineCharge": {
"usedTiles": 33,
"openEnd": 2
}
}
{
"heatFrames": 400
}
{
"shinespark": {
"frames": 12,
"excessFrames": 4
}
}
|
|
Requires: "h_HeatedIBJFromSpikes"
{
"heatFrames": 1100
}
|
|
A short hop from the ledge can bounce on the crumbles and into the spikes. Just be careful of being pushed back onto the crumble blocks by the spikes. Requires: "h_canXMode"
"h_XModeSpikeHit"
"h_XModeSpikeHit"
"canTrickyJump"
"canIframeSpikeJump"
"canMidairShinespark"
{
"canShineCharge": {
"usedTiles": 33,
"openEnd": 2
}
}
{
"heatFrames": 480
}
{
"shinespark": {
"frames": 11,
"excessFrames": 4
}
}
|
|
From: 1
Left Door
To: 1
Left Door
Notable: true Use SpeedBooster to construct a structure for Moondancing that has 1 chest height block and 1 head height block to the right of it and no other Speed blocks. Crystal Flash below the lower block, exactly pixel aligned with its right side, to standup and then begin Moondancing. After Samus sinks through the floor tiles, use Grapple to return to a standing position and count an additional 145 moonfalls. Then use Grapple to return to a crouch and wiggle right and Turn-Around Aim Cancel to escape to the right. Finally, use SpeedBooster if needed to break the remaining Speed blocks and reach the door. Requires: "h_canCrystalFlash" "canTrickyJump" "canTurnaroundAimCancel" "canTemporaryBlue" "canExtendedMoondance" "canSpeedball" Exit condition: {
"leaveWithStoredFallSpeed": {
"fallSpeedInTiles": 2
}
}
|
|
From: 1
Left Door
To: 1
Left Door
Notable: true Use SpeedBooster to construct a structure for Moondancing that has 1 chest height block and 1 head height block to the right of it and no other Speed blocks. Crystal Flash below the lower block, exactly pixel aligned with its right side, to standup and then begin Moondancing. After Samus sinks through the bottom tile, it is possible to use Grapple to return to a crouch and wiggle right and then Turn-Around Aim Cancel to escape to the right. Without Grapple, count to 174 Moonfalls and delicately Moonfall so as to remain crouched and then wiggle to the right. Finally, use SpeedBooster if needed to break the remaining Speed blocks and reach the door. Requires: "h_canCrystalFlash" "canTrickyJump" "canTurnaroundAimCancel" "canTemporaryBlue" "canMoondance" "canSpeedball" Exit condition: {
"leaveWithStoredFallSpeed": {
"fallSpeedInTiles": 1
}
}
|
|
From: 1
Left Door
To: 2
Right Door
Notable: true Use SpeedBooster to construct a structure for Moondancing that has 1 chest height block and 1 head height block to the right of it and no other Speed blocks. Crystal Flash below the lower block, exactly pixel aligned with its right side, to standup and then begin Moondancing. After Samus sinks through the floor tiles, use Grapple to return to a standing position and count an additional 145 moonfalls. Then use Grapple to return to a crouch and wiggle right and Turn-Around Aim Cancel to escape to the right. Finally, use SpeedBooster if needed to break the remaining Speed blocks and reach the door. Requires: "h_canCrystalFlash" "canTrickyJump" "canTurnaroundAimCancel" "canTemporaryBlue" "canExtendedMoondance" "canSpeedball" Exit condition: {
"leaveWithStoredFallSpeed": {
"fallSpeedInTiles": 2
}
}
|
|
From: 1
Left Door
To: 2
Right Door
Notable: true Use SpeedBooster to construct a structure for Moondancing that has 1 chest height block and 1 head height block to the right of it and no other Speed blocks. Crystal Flash below the lower block, exactly pixel aligned with its right side, to standup and then begin Moondancing. After Samus sinks through the bottom tile, it is possible to use Grapple to return to a crouch and wiggle right and then Turn-Around Aim Cancel to escape to the right. Without Grapple, count to 174 Moonfalls and delicately Moonfall so as to remain crouched and then wiggle to the right. Finally, use SpeedBooster if needed to break the remaining Speed blocks and reach the door. Requires: "h_canCrystalFlash" "canTrickyJump" "canTurnaroundAimCancel" "canTemporaryBlue" "canMoondance" "canSpeedball" Exit condition: {
"leaveWithStoredFallSpeed": {
"fallSpeedInTiles": 1
}
}
|
|
From: 2
Right Door
To: 4
Lava, Left Wall
Build up a little run speed and do a small jump into the lava. Morph before reaching the lava, Bounce, and Unmorph shortly after sink slightly before floating down to the stairs. Requires: {
"or": [
"h_lavaProof",
"canSuitlessLavaDive"
]
}
"canTrickyJump"
"canBounceBall"
{
"heatFrames": 435
}
{
"lavaFrames": 305
}
|
|
From: 2
Right Door
To: 5
Lava, Center Namihe
Build up a little run speed and do a small jump into the lava. Morph before reaching the lava, Bounce, and Unmorph shortly after sink slightly before floating down to the stairs. Requires: {
"or": [
"h_lavaProof",
"canSuitlessLavaDive"
]
}
"canTrickyJump"
"canBounceBall"
{
"heatFrames": 330
}
{
"lavaFrames": 200
}
|
|
Walljump off of the lower half of the Upper-Left Namihe to cross to the right side wall. Continue Walljumping up from there, waiting for the above flame to pass if it is in the way. Requires: "HiJump"
"canSuitlessLavaDive"
"canUseEnemies"
"canTrickyJump"
"canStaggeredWalljump"
{
"heatFrames": 270
}
{
"lavaFrames": 240
}
|
|
From: 1
Right Door
To: 2
Chozo Ball Item
Clear the Dragons while moving towards the items with Space Jump and Screw Attack to make for a faster exit later. Requires: "SpaceJump"
"ScrewAttack"
"canTrickyJump"
{
"heatFrames": 199
}
Clears obstacles: A |
|
Requires: {
"or": [
"canTrickyJump",
{
"and": [
"ScrewAttack",
"canCarefulJump",
{
"heatFrames": 60
}
]
},
{
"and": [
{
"obstaclesCleared": [
"A"
]
},
{
"heatFrames": 60
}
]
}
]
}
{
"heatFrames": 230
}
|
|
Requires: {
"or": [
"canTrickyJump",
"SpaceJump",
{
"and": [
"ScrewAttack",
"canCarefulJump"
]
},
{
"and": [
{
"obstaclesCleared": [
"A"
]
},
{
"or": [
"canCarefulJump",
{
"heatFrames": 90
}
]
}
]
}
]
}
{
"heatFrames": 210
}
|
|
Requires: {
"or": [
{
"and": [
"canTrickyJump",
{
"heatFrames": 540
}
]
},
{
"heatFrames": 660
}
]
}
|
|
Build up run speed to travel farther when jumping. Requires: {
"heatFrames": 540
}
{
"or": [
"canTrickyJump",
{
"heatFrames": 160
}
]
}
|
|
Jump to the first long platform then use a the full platform to jump and mockball through the lava. Entrance condition: {
"comeInRunning": {
"minTiles": 0,
"speedBooster": "any"
}
}
Requires: "Gravity"
"canTrickyJump"
"canMockball"
{
"enemyDamage": {
"enemy": "Dragon",
"type": "contact",
"hits": 1
}
}
{
"heatFrames": 480
}
{
"lavaFrames": 240
}
|
|
From: 2
Left Shaft - Bottom Right Door
To: 3
Left Shaft - Middle Right Door
Quickly ledge grab the platform to run below the Multiviola and get ahead of it. Entrance condition: {
"comeInShinecharging": {
"length": 11,
"openEnd": 1,
"gentleUpTiles": 4
}
}
Requires: "HiJump"
"canShinechargeMovementComplex"
"canTrickyJump"
{
"heatFrames": 150
}
Exit condition: {
"leaveShinecharged": {
"framesRemaining": 60
}
}
|
|
From: 3
Left Shaft - Middle Right Door
To: 4
Left Shaft - Top Right Door
Entrance condition: {
"comeInShinecharged": {
"framesRequired": 140
}
}
Requires: "HiJump"
"canTrickyJump"
"canShinechargeMovementComplex"
{
"shinespark": {
"frames": 9
}
}
{
"heatFrames": 170
}
Exit condition: {
"leaveWithSpark": {}
}
|
|
From: 3
Left Shaft - Middle Right Door
To: 4
Left Shaft - Top Right Door
Entrance condition: {
"comeInShinecharging": {
"length": 3,
"openEnd": 0
}
}
Requires: "HiJump"
"canTrickyJump"
"canShinechargeMovementTricky"
{
"heatFrames": 170
}
Exit condition: {
"leaveShinecharged": {
"framesRemaining": 15
}
}
|
|
From: 4
Left Shaft - Top Right Door
To: 1
Left Shaft - Top Left Door
Entrance condition: {
"comeInShinecharging": {
"length": 3,
"openEnd": 0
}
}
Requires: "HiJump"
"canTrickyJump"
"canShinechargeMovementComplex"
"canDodgeWhileShooting"
{
"or": [
{
"ammo": {
"type": "Missile",
"count": 1
}
},
"Plasma"
]
}
{
"shinespark": {
"frames": 14
}
}
{
"heatFrames": 190
}
Exit condition: {
"leaveWithSpark": {}
}
|
|
From: 1
Left Door
To: 2
Right Door
Uses a runway of at least 14 tiles in the adjacent room. Disable SpeedBooster after jumping so that the lava will not take away all of Samus' momentum. Entrance condition: {
"comeInRunning": {
"minTiles": 14,
"speedBooster": true
}
}
Requires: "Gravity"
"canDisableEquipment"
"canSpringBallBounce"
"canTrickyJump"
{
"spikeHits": 1
}
{
"heatFrames": 240
}
{
"lavaFrames": 10
}
|
|
From: 1
Left Door
To: 2
Right Door
Notable: true 
While crossing the Spiky Lava, land on frozen Yapping Maws to reduce the number of spike hits needed. Damage boost towards then freeze the Leftmost enemy as it extends. Morph and unmorph while above the middle Yapping Maw to land on it just above the lava line. Ignore the rightmost Yapping Maw. Delay the damage boost from the spikes slightly in order to rise above the lava before moving. Requires: "canResetFallSpeed"
"canTrickyUseFrozenEnemies"
"canTrickyJump"
{
"or": [
"canHorizontalDamageBoost",
{
"and": [
{
"spikeHits": 2
},
{
"lavaFrames": 30
},
{
"heatFrames": 240
}
]
}
]
}
"canIframeSpikeJump"
{
"spikeHits": 2
}
{
"lavaFrames": 15
}
{
"heatFrames": 580
}
|
|
From: 1
Left Door
To: 2
Right Door
Uses a runway of at least 21 tiles in the adjacent room. It will help to perform the first jump with HiJump disabled. Disable SpeedBooster before Samus reaches the lava. Entrance condition: {
"comeInRunning": {
"minTiles": 21,
"speedBooster": true
}
}
Requires: "HiJump"
"canDisableEquipment"
"canSpringBallBounce"
"canTrickyJump"
{
"spikeHits": 1
}
{
"heatFrames": 200
}
{
"lavaFrames": 11
}
|
|
From: 1
Left Door
To: 2
Right Door
Uses a runway of at least 8 tiles in the adjacent room. It will help to perform the first jump with HiJump disabled. Disable SpeedBooster before Samus reaches the lava. Entrance condition: {
"comeInRunning": {
"minTiles": 8,
"speedBooster": true
}
}
Requires: "canTrickyJump"
"HiJump"
"canDisableEquipment"
"canSpringBallBounce"
{
"spikeHits": 2
}
{
"heatFrames": 311
}
{
"lavaFrames": 22
}
|
|
From: 2
Right Door
To: 1
Left Door
Uses a runway of at least 14 tiles in the adjacent room. Disable SpeedBooster after jumping so that the lava will not take away all of Samus' momentum. Entrance condition: {
"comeInRunning": {
"minTiles": 14,
"speedBooster": true
}
}
Requires: "Gravity"
"canDisableEquipment"
"canSpringBallBounce"
"canTrickyJump"
{
"spikeHits": 1
}
{
"heatFrames": 240
}
{
"lavaFrames": 10
}
|
|
From: 2
Right Door
To: 1
Left Door
Notable: true
While crossing the Spiky Lava, land on frozen Yapping Maws to reduce the number of spike hits needed. Morph and unmorph while above the rightmost Yapping Maw to land on it just above the lava line. Ignore the second Yapping Maw. Freeze the Leftmost enemy as it extends. Delay the damage boost from the spikes slightly in order to rise above the lava before moving. Requires: "canResetFallSpeed"
"canTrickyUseFrozenEnemies"
"canTrickyJump"
{
"or": [
"canHorizontalDamageBoost",
{
"and": [
{
"spikeHits": 1
},
{
"lavaFrames": 20
},
{
"heatFrames": 240
}
]
}
]
}
"canIframeSpikeJump"
{
"spikeHits": 2
}
{
"lavaFrames": 15
}
{
"heatFrames": 580
}
|
|
From: 2
Right Door
To: 1
Left Door
Uses a runway of at least 21 tiles in the adjacent room. It will help to perform the first jump with HiJump disabled. Disable SpeedBooster before Samus reaches the lava. Entrance condition: {
"comeInRunning": {
"minTiles": 21,
"speedBooster": true
}
}
Requires: "HiJump"
"canDisableEquipment"
"canSpringBallBounce"
"canTrickyJump"
{
"spikeHits": 1
}
{
"heatFrames": 200
}
{
"lavaFrames": 11
}
|
|
From: 2
Right Door
To: 1
Left Door
Uses a runway of at least 8 tiles in the adjacent room. It will help to perform the first jump with HiJump disabled. Disable SpeedBooster before Samus reaches the lava. Entrance condition: {
"comeInRunning": {
"minTiles": 8,
"speedBooster": true
}
}
Requires: "canTrickyJump"
"HiJump"
"canDisableEquipment"
"canSpringBallBounce"
{
"spikeHits": 2
}
{
"heatFrames": 311
}
{
"lavaFrames": 22
}
|
|
Use the Tripper to cross the first lava pit while avoiding all damage from the spikes and lava. If you do not have Morph, this is tricky but can be done by carefully timing a jump against the pillar and releasing the d-pad inputs, to land on the Tripper as early as possible. This allows the Tripper to sink low enough that crouching on the Tripper is enough to avoid spike damage. From the Tripper, run and jump directly onto the first pillar past the shutter; it can help to moonwalk back left on the Tripper to maximize run speed for the jump. From the pillar, run and jump directly into the lava rather than waiting for the second Tripper. Perform quick spin jumps to minimize lava damage. Requires: {
"or": [
"canTrickyJump",
"Morph"
]
}
"canSuitlessLavaDive"
{
"heatFrames": 760
}
{
"lavaFrames": 60
}
|
|
Wait for the Tripper to approach the right platform, then run onto and off its left side. Spin jump to the left one time, then jump up onto the right side of the Tripper. Run to the left and jump directly onto the first pillar after the shutter. Spin jump across the remaining lava, trying to minimize the time spent in lava. Requires: "canSuitlessLavaDive"
"canTrickyJump"
{
"heatFrames": 780
}
{
"lavaFrames": 100
}
|
|
From: 2
Middle Left Door
To: 1
Top Left Door
Spin-jump up and kill the Sova from the left just before landing on its platform. Entrance condition: {
"comeInShinecharged": {
"framesRequired": 140
}
}
Requires: "canShinechargeMovementComplex"
{
"or": [
"ScrewAttack",
"canTrickyJump"
]
}
{
"enemyKill": {
"enemies": [
[
"Sova"
]
],
"explicitWeapons": [
"ScrewAttack",
"Wave",
"Spazer",
"Plasma",
"Missile",
"Super"
]
}
}
Exit condition: {
"leaveShinecharged": {
"framesRemaining": "auto"
}
}
|
|
From: 2
Middle Left Door
To: 1
Top Left Door
Spin-jump up and kill the Sova from the left just before landing on its platform. Entrance condition: {
"comeInShinecharged": {
"framesRequired": 115
}
}
Requires: "canShinechargeMovementComplex"
{
"or": [
"ScrewAttack",
"canTrickyJump"
]
}
{
"enemyKill": {
"enemies": [
[
"Sova"
]
],
"explicitWeapons": [
"ScrewAttack",
"Wave",
"Spazer",
"Plasma",
"Missile",
"Super"
]
}
}
{
"shinespark": {
"frames": 7,
"excessFrames": 0
}
}
Exit condition: {
"leaveWithSpark": {}
}
|
|
From: 2
Middle Left Door
To: 1
Top Left Door
Spin-jump up and kill the Sova from the left just before landing on its platform. Entrance condition: {
"comeInShinecharged": {
"framesRequired": 105
}
}
Requires: "canShinechargeMovementComplex"
{
"or": [
"ScrewAttack",
"canTrickyJump"
]
}
{
"enemyKill": {
"enemies": [
[
"Sova"
]
],
"explicitWeapons": [
"ScrewAttack",
"Wave",
"Spazer",
"Plasma",
"Missile",
"Super"
]
}
}
{
"shinespark": {
"frames": 10,
"excessFrames": 0
}
}
Exit condition: {
"leaveWithSpark": {
"position": "bottom"
}
}
|
|
From: 2
Middle Left Door
To: 1
Top Left Door
Entrance condition: {
"comeInShinecharging": {
"length": 3,
"openEnd": 0
}
}
Requires: "canShinechargeMovementComplex"
"HiJump"
{
"or": [
"ScrewAttack",
"canTrickyJump"
]
}
Exit condition: {
"leaveShinecharged": {
"framesRemaining": 70
}
}
|
|
From: 2
Middle Left Door
To: 1
Top Left Door
Spin-jump up and kill the Sova from the left just before landing on its platform. Entrance condition: {
"comeInShinecharging": {
"length": 3,
"openEnd": 0
}
}
Requires: "canShinechargeMovementComplex"
{
"or": [
"ScrewAttack",
"canTrickyJump"
]
}
{
"enemyKill": {
"enemies": [
[
"Sova"
]
],
"explicitWeapons": [
"ScrewAttack",
"Wave",
"Spazer",
"Plasma",
"Missile",
"Super"
]
}
}
Exit condition: {
"leaveShinecharged": {
"framesRemaining": 40
}
}
|
|
From: 2
Middle Left Door
To: 6
Top Right Door
Spin-jump up and kill the Sova from the left just before landing on its platform. Entrance condition: {
"comeInShinecharged": {
"framesRequired": 135
}
}
Requires: "canShinechargeMovementComplex"
{
"or": [
"ScrewAttack",
"canTrickyJump"
]
}
{
"enemyKill": {
"enemies": [
[
"Sova"
]
],
"explicitWeapons": [
"ScrewAttack",
"Wave",
"Spazer",
"Plasma",
"Missile",
"Super"
]
}
}
Exit condition: {
"leaveShinecharged": {
"framesRemaining": "auto"
}
}
|
|
From: 2
Middle Left Door
To: 6
Top Right Door
Spin-jump up and kill the Sova from the left just before landing on its platform. Entrance condition: {
"comeInShinecharged": {
"framesRequired": 125
}
}
Requires: "canShinechargeMovementComplex"
{
"or": [
"ScrewAttack",
"canTrickyJump"
]
}
{
"enemyKill": {
"enemies": [
[
"Sova"
]
],
"explicitWeapons": [
"ScrewAttack",
"Wave",
"Spazer",
"Plasma",
"Missile",
"Super"
]
}
}
{
"shinespark": {
"frames": 7,
"excessFrames": 0
}
}
Exit condition: {
"leaveWithSpark": {
"position": "bottom"
}
}
|
|
From: 2
Middle Left Door
To: 6
Top Right Door
Entrance condition: {
"comeInShinecharged": {
"framesRequired": 100
}
}
Requires: "canShinechargeMovementComplex"
{
"or": [
"ScrewAttack",
"canTrickyJump"
]
}
{
"enemyKill": {
"enemies": [
[
"Sova"
]
],
"explicitWeapons": [
"ScrewAttack",
"Wave",
"Spazer",
"Plasma",
"Missile",
"Super"
]
}
}
{
"shinespark": {
"frames": 10,
"excessFrames": 0
}
}
Exit condition: {
"leaveWithSpark": {
"position": "bottom"
}
}
|
|
From: 2
Middle Left Door
To: 6
Top Right Door
Spin-jump up and kill the Sova from the left just before landing on its platform. Entrance condition: {
"comeInShinecharging": {
"length": 3,
"openEnd": 0
}
}
Requires: "canShinechargeMovementComplex"
{
"or": [
"ScrewAttack",
"canTrickyJump"
]
}
{
"enemyKill": {
"enemies": [
[
"Sova"
]
],
"explicitWeapons": [
"ScrewAttack",
"Wave",
"Spazer",
"Plasma",
"Missile",
"Super"
]
}
}
Exit condition: {
"leaveShinecharged": {
"framesRemaining": 35
}
}
|
|
Requires very efficient movement. Entrance condition: {
"comeInShinecharging": {
"length": 2,
"openEnd": 0
}
}
Requires: "canShinechargeMovementTricky" "canTrickyJump" "HiJump" Exit condition: {
"leaveShinecharged": {
"framesRemaining": 25
}
}
|
|
From: 2
Far Left Door
To: 2
Far Left Door
Notable: true 
Use SpeedBooster to construct a structure for Moondancing that has 1 chest height block and 1 head height block to the right of it and no other Speed blocks. Crystal Flash below the lower block, exactly pixel aligned with its right side, to standup and then begin Moondancing. After Samus sinks through the floor tiles, use Grapple to return to a standing position and count an additional 145 moonfalls. Then use Grapple to return to a crouch and wiggle right and Turn-Around Aim Cancel to escape to the right. Finally, use SpeedBooster if needed to break the remaining Speed blocks and reach the door. Requires: "h_heatProof" "SpeedBooster" "h_canCrystalFlash" "canTrickyJump" "canTurnaroundAimCancel" "canTemporaryBlue" "canExtendedMoondance" "canSpeedball" Exit condition: {
"leaveWithStoredFallSpeed": {
"fallSpeedInTiles": 2
}
}
|
|
From: 2
Far Left Door
To: 2
Far Left Door
Notable: true
Use SpeedBooster to construct a structure for Moondancing that has 1 chest height block and 1 head height block to the right of it and no other Speed blocks. Crystal Flash below the lower block, exactly pixel aligned with its right side, to standup and then begin Moondancing. After Samus sinks through the bottom tile, it is possible to use Grapple to return to a crouch and wiggle right and then Turn-Around Aim Cancel to escape to the right. Without Grapple, count to 174 Moonfalls and delicately Moonfall so as to remain crouched and then wiggle to the right. Finally, use SpeedBooster if needed to break the remaining Speed blocks and reach the door. Requires: "h_heatProof" "SpeedBooster" "h_canCrystalFlash" "canTrickyJump" "canTurnaroundAimCancel" "canTemporaryBlue" "canMoondance" "canSpeedball" Exit condition: {
"leaveWithStoredFallSpeed": {
"fallSpeedInTiles": 1
}
}
|
|
From: 5
Top Right Door
To: 1
Top of the Shaft Left Door
Requires: "canTrickyJump"
{
"or": [
"HiJump",
"canPreciseWalljump"
]
}
{
"heatFrames": 140
}
|
|
From: 5
Top Right Door
To: 2
Far Left Door
Notable: true 
The timer is tight, so run through the Cacatacs and mid-air spark left through the speed blocks. Then run to the right and back to get speed to go through the rest. The shinespark expects to kill the crumble bridge pirate, to be safe. Entrance condition: {
"comeInShinecharging": {
"length": 5,
"openEnd": 1
}
}
Requires: "canShinechargeMovementTricky"
"canTrickyJump"
"canMidairShinespark"
{
"enemyDamage": {
"enemy": "Cacatac",
"type": "spike",
"hits": 1
}
}
{
"shinespark": {
"frames": 92,
"excessFrames": 10
}
}
{
"heatFrames": 900
}
Clears obstacles: A |
|
From: 1
Top Right Door
To: 3
Hidden Item
Shoot the shot block, then crumble spin jump on the middle platform. Requires: "canCrumbleJump"
"canTrickyJump"
{
"heatFrames": 150
}
Clears obstacles: A |
|
From: 2
Bottom Right Door
To: 1
Top Right Door
Do 9 successive crumble jumps up the platforms. Requires: "canCrumbleJump"
"canTrickyJump"
{
"heatFrames": 800
}
|
|
Notable: true Crouch jump and let the Sova move into Samus from the right, to get a upward boost, then hold left to boost horizontally to the ledge. Then crouch jump from the slope on the left, and morph into a neutral damage boost. Requires: "Morph"
"canCrouchJump"
"canTrickyJump"
"canNeutralDamageBoost"
"canHorizontalDamageBoost"
{
"enemyDamage": {
"enemy": "Sova",
"type": "contact",
"hits": 2
}
}
|
|
From: 3
Bottom Left Door
To: 7
Junction Below Power Bomb Blocks
Avoiding damage from all enemies with just Power Beam is tricky, but doable. Enter the room holding angle to remove momentum and avoid getting hit by the Dessgeega. Requires: "canDodgeWhileShooting" "canTrickyJump" "canPrepareForNextRoom" "canStopOnADime" Clears obstacles: D |
|
From: 4
Junction Below Morph Tunnel
To: 2
Middle Right Door
Smoothly jump into the morph tunnel while killing the Sovas. Unmorph at the end of the tunnel to clear more Sovas is needed. Requires: "Morph"
"canTrickyJump"
{
"or": [
"canPreciseWalljump",
"HiJump"
]
}
{
"or": [
{
"enemyKill": {
"enemies": [
[
"Sova"
]
],
"explicitWeapons": [
"Wave",
"Spazer",
"Plasma",
"PowerBomb"
]
}
},
{
"enemyDamage": {
"enemy": "Sova",
"type": "contact",
"hits": 1
}
}
]
}
{
"heatFrames": 230
}
|
|
Requires: "canTrickySpringBallJump"
"canTrickyJump"
"canLateralMidAirMorph"
{
"acidFrames": 55
}
|
|
Farming requires somewhat careful dodging in order to minimize energy drops. Requires: "canDodgeWhileShooting"
{
"or": [
{
"ammo": {
"type": "Missile",
"count": 2
}
},
{
"ammo": {
"type": "Super",
"count": 2
}
}
]
}
{
"or": [
"canTrickyJump",
{
"ammo": {
"type": "Missile",
"count": 25
}
}
]
}
{
"resourceCapacity": [
{
"type": "Missile",
"count": 10
}
]
}
Clears obstacles: f_DefeatedCrocomire |
|
While Crocomire's farmables may drop Supers, the rate is too low to rely on. If you run out, Croc will most likely push you into the spikes. It takes 8 Supers to kill croc if you don't let it move forward. Requires: {
"ammo": {
"type": "Super",
"count": 8
}
}
{
"or": [
"canDodgeWhileShooting",
{
"ammo": {
"type": "Super",
"count": 5
}
}
]
}
{
"or": [
"canTrickyJump",
{
"ammo": {
"type": "Super",
"count": 2
}
}
]
}
Clears obstacles: f_DefeatedCrocomire |
|
With a precise enough jump, it's possible to avoid acid damage without a shinespark. Requires: "SpeedBooster" "canTrickyJump" "canWalljump" |
|
With SpeedBooster equipped, run from the top left platform and jump into an airball to reach the top right platform. It helps but is not required to moonwalk against the wall to maximize the available runway. Requires: "SpeedBooster" "canTrickyJump" "canLateralMidAirMorph" |
|
From: 1
Left Door
To: 2
Right Door
Lure the Geemers up out of the water. It may be helpful to freeze them on the ascent to prevent them from separating and moving horizontally. At the top, position a Gamet flush with the central runway. Positioning is much easier with Morph; simply morph on the runway before they start separating. Freeze the Gamet before it begins moving horizontally, and it will be able to turn to the right. Use it as a frozen platform to cross both bodies of water. Lure the Gamet to the right and freeze it while there is a half-tile gap between it and the runway in order to extend it as much as possible. Requires: "h_canNavigateUnderwater"
"canTrickyJump"
{
"or": [
"h_canTrickyFrozenEnemyRunway",
{
"and": [
"h_canFrozenEnemyRunway",
"Morph"
]
}
]
}
{
"or": [
{
"ammo": {
"type": "Super",
"count": 1
}
},
{
"obstaclesCleared": [
"A"
]
}
]
}
Exit condition: {
"leaveWithRunway": {
"length": 9,
"openEnd": 0
}
}
|
|
From: 1
Left Door
To: 3
Junction Left of Green Gate
Notable: true 
1- Stand near the farm point, on the edge of where you make Gamets spawn. 2- Wait for the water position to be high. 3- Move to make the Gamets spawn. Moonwalk is useful here. 4- Quickly climb up to the last ledge before the door. 5- Run, jump, dboost off a Gamet. 6- Dboost a second time off the Gamet to cross the second moat. Requires: "h_canNavigateUnderwater"
"canTrickyJump"
"canHorizontalDamageBoost"
{
"enemyDamage": {
"enemy": "Gamet",
"type": "contact",
"hits": 2
}
}
|
|
From: 1
Left Door
To: 3
Junction Left of Green Gate
With enough run speed, jump over the first moat and MockBall into a regular springball jump over the second moat. Entrance condition: {
"comeInRunning": {
"minTiles": 2,
"speedBooster": "any"
}
}
Requires: "canTrickyJump" "canMockball" "canSpringBallBounce" |
|
From: 1
Left Door
To: 4
Center Platform Junction
Entrance condition: {
"comeInRunning": {
"minTiles": 2,
"speedBooster": "any"
}
}
Requires: "canTrickyJump"
{
"or": [
"canWalljump",
"canLateralMidAirMorph"
]
}
|
|
Requires: "SpeedBooster"
"canTrickyJump"
{
"or": [
"canWalljump",
"canLateralMidAirMorph"
]
}
|
|
From: 1
Left Door
To: 4
Center Platform Junction
Wait for the water to be rising and perform a max height SpringBall Jump. Requires: "canSuitlessMaridia" "HiJump" "h_canMaxHeightSpringBallJump" |
|
From: 3
Junction Left of Green Gate
To: 4
Center Platform Junction
Requires: {
"or": [
"Grapple",
"SpaceJump",
"canResetFallSpeed",
{
"and": [
"canTrickyJump",
"canLateralMidAirMorph"
]
},
{
"and": [
"Gravity",
"canStaggeredWalljump"
]
}
]
}
|
|
From: 4
Center Platform Junction
To: 3
Junction Left of Green Gate
Jump when the water level is at its lowest. Requires: "canSuitlessMaridia" "canTrickyJump" "h_canDoubleSpringBallJumpWithHiJump" |
|
From: 4
Center Platform Junction
To: 3
Junction Left of Green Gate
Run and jump at the very edge of the center platform. Wait for the water level to begin lowering to walljump on the far edge. An airball may be a little easier. Requires: "canTrickyJump"
{
"or": [
"canLateralMidAirMorph",
"canInsaneWalljump",
{
"and": [
"SpeedBooster",
"canPreciseWalljump"
]
}
]
}
|
|
From: 5
Main Junction
To: 1
Top Left Door
Notable: true 
Use the moving platform (Kamer) to elevate the Gamets. Requires: "canTrickyJump"
{
"or": [
"h_canCrouchJumpDownGrab",
"canWalljump"
]
}
"canHorizontalDamageBoost"
{
"enemyDamage": {
"enemy": "Gamet",
"type": "contact",
"hits": 1
}
}
|
|
From: 5
Main Junction
To: 1
Top Left Door
Run on the the moving platform into a midair spring ball jump as far horizontal as possible. Unmorph or spring fling to reset fall speed can help. Requires: "canTrickyJump" "canTrickySpringBallJump" |
|
From: 5
Main Junction
To: 4
Top Right Door
Crouch jump then down grab starting from the moving platform. A very fast crouch jump is necessary in order to not have lowered the platform too low. Requires: "h_canCrouchJumpDownGrab" "canTrickyJump" |
|
Notable: true 
Store a shinespark near the Grapple Room door and use the remaining runway to jump as far as possible to the right. Once near the acid platforms, Shinespark diagonally to reach the Missile Location. Entrance condition: {
"comeInShinecharged": {
"framesRequired": 175
}
}
Requires: "canTrickyJump"
"canShinechargeMovementComplex"
"canMidairShinespark"
{
"shinespark": {
"frames": 40
}
}
|
|
From: 2
Right Vertical Door
To: 2
Right Vertical Door
Requires: {
"obstaclesCleared": [
"B"
]
}
"canTrickyJump"
Exit condition: {
"leaveWithPlatformBelow": {
"height": 9,
"leftPosition": -38.5,
"rightPosition": -7
}
}
|
|
From: 2
Right Vertical Door
To: 4
Right Junction with Speed Blocks Broken
Spark from the ground, left of the Power Bomb blocks. Entrance condition: {
"comeInShinecharged": {
"framesRequired": 80
},
"comesThroughToilet": "any"
}
Requires: "canHorizontalShinespark"
{
"shinespark": {
"frames": 115,
"excessFrames": 85
}
}
{
"or": [
"canTrickyJump",
{
"and": [
{
"or": [
"canWalljump",
"HiJump"
]
},
{
"acidFrames": 25
}
]
},
{
"and": [
"Gravity",
{
"acidFrames": 20
}
]
}
]
}
Clears obstacles: B |
|
From: 5
Small Platforms Junction
To: 1
Left Door
Requires: "h_canTrickySpringwall" |
|
Notable: true 
A particularly precise springwall. Aim the walljump at the bottom of the second sloped wall fixture, where it looks like you cant jump off of. Optimize pause timing, use an instant morph, and get a max height springball jump. A delayed wall jump helps. Requires: "HiJump" "h_canTrickySpringwall" "canPreciseWalljump" "can3HighWallMidAirMorph" |
|
From: 1
Top Right Door
To: 3
Acid Chozo Statue (locked)
Begin with SpeedBooster unequipped, and run&jump over the acid into an airball. Once Samus begins falling, equip SpringBall and SpeedBooster to safely land on the other side near the statue. Requires: "canSpringFling"
"canDisableEquipment"
"SpeedBooster"
"canTrickyJump"
"canLateralMidAirMorph"
{
"heatFrames": 210
}
|
|
From: 1
Top Right Door
To: 3
Acid Chozo Statue (locked)
There is a hole in the left side wall that Samus can fit into by shrinking her hitbox. Once in the wall, stand up if crouched then turnaround into a buffered spinjump to jump out of the acid. Requires: "h_canNavigateHeatRooms"
"canPartialFloorClip"
"canSuitlessLavaDive"
{
"or": [
{
"and": [
"canLateralMidAirMorph",
"canDownBack",
"canTrickyJump",
{
"acidFrames": 108
}
]
},
{
"and": [
"canTrickyJump",
{
"heatFrames": 30
},
{
"acidFrames": 136
}
]
},
{
"and": [
{
"heatFrames": 90
},
{
"acidFrames": 216
}
]
}
]
}
{
"heatFrames": 285
}
|
|
From: 2
Bottom Right Door
To: 5
Bottom Junction Right of Morph Tunnel
Wait for the first Holtz to attack then either use the Magdollite for IFrames, or avoid the projectiles and continue dodging bats. Requires: "h_canNavigateHeatRooms"
{
"or": [
"canTrickyJump",
{
"and": [
"canHorizontalDamageBoost",
"canCarefulJump",
{
"enemyDamage": {
"enemy": "Magdollite",
"type": "flame",
"hits": 1
}
}
]
}
]
}
{
"heatFrames": 330
}
|
|
From: 5
Bottom Junction Right of Morph Tunnel
To: 2
Bottom Right Door
Wait for the Magdollite to attack then either use it for IFrames, or jump over the swooping Holtzes. Requires: "h_canNavigateHeatRooms"
{
"or": [
"canTrickyJump",
{
"and": [
"canHorizontalDamageBoost",
"canCarefulJump",
{
"enemyDamage": {
"enemy": "Magdollite",
"type": "flame",
"hits": 1
}
}
]
}
]
}
{
"heatFrames": 375
}
|
|
Using momentum from the previous room, run and jump over the crumble blocks to reach the item. Entrance condition: {
"comeInRunning": {
"minTiles": 4,
"speedBooster": "any"
}
}
Requires: "canTrickyJump"
{
"heatFrames": 50
}
|
|
From: 5
Golden Torizo (locked)
To: 8
Golden Torizo (unlocked)
Notable: true 
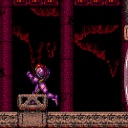
This strat requires some farming. It assumes starting with 15 supers for one session of farming. A safe farming method is to face left while standing in the safe spot. Then fire straight up to shoot the orbs as they appear. Jump up while GT's beak is not open to collect the drops. Plasma allows all of the orbs to be broken at once. Grapple allows for more drops to be collected by shooting diagonally, and collecting the items using Grapple. Keep the number of current Missiles below 31 so that GT will be guaranteed to use the attack which creates drops. Firing Supers requires a very steady fire rate so that for every Super Missile caught by GT, the next 4 Supers do damage. Requires: "h_canNavigateHeatRooms"
"canTrickyJump"
{
"ammo": {
"type": "Super",
"count": 15
}
}
{
"or": [
{
"and": [
"Plasma",
{
"heatFrames": 2700
}
]
},
{
"and": [
"canPreciseGrapple",
{
"heatFrames": 2700
}
]
},
{
"heatFrames": 3200
}
]
}
Clears obstacles: f_DefeatedGoldenTorizo |
|
From: 5
Golden Torizo (locked)
To: 8
Golden Torizo (unlocked)
Notable: true
This strat requires much farming. It assumes a capacity of and starting with only 5 supers for five sessions of farming. A safe farming method is to face left while standing in the safe spot. Then fire straight up to shoot the orbs as they appear. Jump up while GT's beak is not open to collect the drops. Plasma allows all of the orbs to be broken at once. Grapple allows for more drops to be collected by shooting diagonally, and collecting the items using Grapple. Keep the number of current Missiles below 31 so that GT will be guaranteed to use the attack which creates drops. Firing Supers requires a very steady fire rate so that for every Super Missile caught by GT, the next 4 Supers do damage. Requires: "h_canNavigateHeatRooms"
"canTrickyJump"
"canBePatient"
{
"ammo": {
"type": "Super",
"count": 5
}
}
{
"or": [
{
"and": [
"Plasma",
{
"heatFrames": 3100
}
]
},
{
"and": [
"canPreciseGrapple",
{
"heatFrames": 3200
}
]
},
{
"heatFrames": 4500
}
]
}
Clears obstacles: f_DefeatedGoldenTorizo |
|
From: 6
Golden Torizo Arena Junction (Fight Not Started)
To: 4
Hidden Right Item
Springball jump into GT to bounce to the upper level. Requires: "h_canNavigateHeatRooms"
{
"not": "f_DefeatedGoldenTorizo"
}
{
"or": [
"canRiskPermanentLossOfAccess",
"HiJump",
{
"and": [
"canTrickyJump",
"canSpringwall"
]
}
]
}
"canSpringBallJumpMidAir"
"canNeutralDamageBoost"
{
"enemyDamage": {
"enemy": "Golden Torizo",
"type": "contact",
"hits": 1
}
}
{
"ammo": {
"type": "PowerBomb",
"count": 1
}
}
{
"heatFrames": 300
}
|
|
From: 6
Golden Torizo Arena Junction (Fight Not Started)
To: 4
Hidden Right Item
Jump over the space below GT that is between the door and first foreground pillar and walljump up. Break the bomb blocks with a power bomb to make space. Then use Screw Attack to pass through the inactive GT. Requires: "h_canNavigateHeatRooms"
"ScrewAttack"
"canCarefulJump"
"canPreciseWalljump"
"h_canUsePowerBombs"
{
"or": [
"HiJump",
"canTrickyJump"
]
}
{
"heatFrames": 350
}
|
|
From: 2
Right Door
To: 3
Bottom Platform Junction
Notable: true 
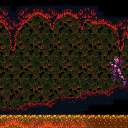
Dive into the acid to the left of the first floating platform to quickly sink to the bottom of the room. It is possible to jump directly over the pirate at the bottom of the ramp directly to the gap between platforms. Falling in this way will land between platforms at the bottom of the room unless Samus slows or catches herself on the way down. Requires: "h_canNavigateHeatRooms"
"canSuitlessLavaDive"
{
"or": [
"SpaceJump",
"canTrickyJump",
{
"and": [
"canLateralMidAirMorph",
"canCarefulJump"
]
},
{
"and": [
"ScrewAttack",
"canCarefulJump"
]
},
{
"and": [
"h_heatProof",
{
"enemyKill": {
"enemies": [
[
"Yellow Space Pirate (standing)"
]
]
}
},
"canCarefulJump"
]
}
]
}
{
"heatFrames": 140
}
{
"or": [
"canResetFallSpeed",
"canPreciseWalljump",
{
"and": [
{
"heatFrames": 60
},
{
"acidFrames": 60
}
]
}
]
}
{
"heatFrames": 330
}
{
"acidFrames": 330
}
|
|
From: 3
Bottom Platform Junction
To: 4
Center Floating Platforms Junction
Between the two pirates there is a short runway that can be used to jump to the higher platform. Requires: "h_canNavigateHeatRooms"
"canTrickyJump"
{
"heatFrames": 480
}
|
|
From: 5
Below Left Door Junction
To: 1
Left Door
Notable: true
Perform a gravity jump followed by a springball jump to reach the left side door. The gravity jump timing is very precise. Requires: "h_canNavigateHeatRooms"
"HiJump"
"canTrickyJump"
"canGravityJump"
"h_canCrouchJumpDownGrab"
"canSpringBallJumpMidAir"
{
"heatFrames": 600
}
{
"acidFrames": 600
}
|
|
From: 5
Below Left Door Junction
To: 1
Left Door
Notable: true
Acid allows for more time than water to perform Spring Ball jumps. This gives just barely enough time to fit in three spring ball jumps. Requires: "h_heatProof"
"canSuitlessLavaDive"
"canCrouchJump"
"h_canDoubleSpringBallJumpWithHiJump"
"canTrickyJump"
{
"acidFrames": 330
}
{
"acidFrames": 1000
}
|
|
Requires: "h_canNavigateHeatRooms"
"canPrepareForNextRoom"
{
"or": [
"SpaceJump",
"canWalljump",
"canTrickyJump",
"canStationarySpinJump"
]
}
{
"heatFrames": 80
}
Clears obstacles: A |
|
From: 1
Top Left Door
To: 1
Top Left Door
The Power Bombs must be placed carefully to hit the Pirate without destroying the PB blocks. This strat requires heatproof because it's pretty chaotic to execute. Requires: {
"obstaclesNotCleared": [
"A"
]
}
"h_heatProof"
"canDodgeWhileShooting"
"canTrickyJump"
{
"or": [
"canWalljump",
"HiJump",
"SpaceJump"
]
}
{
"enemyKill": {
"enemies": [
[
"Yellow Space Pirate (standing)",
"Yellow Space Pirate (wall)",
"Yellow Space Pirate (wall)"
]
],
"explicitWeapons": [
"PowerBombPeriphery"
]
}
}
Exit condition: {
"leaveWithRunway": {
"length": 13,
"openEnd": 0
}
}
|
|
From: 5
Bottom Junction
To: 1
Top Left Door
Run from the right door and jump at the very end of the raised flat ground. Aim down any time before the peak of the jump in order to not fall out of the block. Note that Samus can destroy the Power Bomb blocks above while waiting for the block to respawn. Requires: "canJumpIntoRespawningBlock"
"canTrickyJump"
{
"or": [
"canInsaneJump",
"h_heatProof"
]
}
{
"heatFrames": 550
}
{
"or": [
"h_canUsePowerBombs",
{
"obstaclesCleared": [
"A"
]
}
]
}
Clears obstacles: A |
|
From: 1
Left Door
To: 2
Top Door
Notable: true 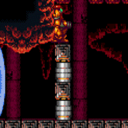
Stand next to the Crumble Blocks and jump into a Crystal Flash Clip to briefly clip into the ceiling above those blocks. Hold down exiting the Crystal Flash to shrink Samus' hitbox and on the next frame press forward to move above the Crumble blocks. Holding down and mashing forward sometimes works, or X-Ray can be used at the end of the Crystal Flash to more easily time the inputs. Requires: "h_heatProof" "h_canJumpIntoCrystalFlashClip" "canTrickyJump" |
|
Use the wider platforms to build run speed for jumping farther, faster. Requires: "h_canNavigateHeatRooms"
"canTrickyJump"
{
"heatFrames": 215
}
|
|
Requires: "h_canNavigateHeatRooms"
{
"or": [
"canTrickyJump",
{
"heatFrames": 30
}
]
}
{
"heatFrames": 180
}
|
|
From: 2
Bottom Left Door
To: 3
Top Right Door
Requires: "canTrickyJump" |
|
From: 2
Bottom Left Door
To: 6
Junction Behind Fune
Notable: true 
A well-done mid-air morph can get up and over the Fune using the boost from a projectile hit. It's best to hit the flame as soon as it spawns. It's a 2.5 tile high mid air morph. It can be performed similar to how a 2 or 3 tile high morph is performed. Requires: "h_canFourTileJumpMorph"
"canNeutralDamageBoost"
"canTrickyJump"
{
"enemyDamage": {
"enemy": "Fune",
"type": "fireball",
"hits": 3
}
}
|
|
From: 2
Bottom Left Door
To: 6
Junction Behind Fune
Notable: true 
A paricularly precise mid-air morph can get up and over the Fune without damage. Stand a half tile away from the Fune when jump morphing for a higher ceiling. It's a 2.5 tile high mid air morph. It can be performed similar to how a 2 or 3 tile high morph is performed. Requires: "h_canFourTileJumpMorph" "canTrickyJump" |
|
From: 3
Top Right Door
To: 2
Bottom Left Door
Notable: true 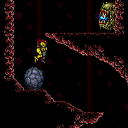
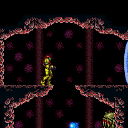
An extremely precise spinjump or walljump can avoid the top Boulder. The spinjump requires dash state and to jump right away. Aiming down shortly after helps by reducing Samus' hitbox. Requires: {
"or": [
"canInsaneWalljump",
"canTrickyJump"
]
}
|
|
Roll under the top Fune fireball then roll off the edge to avoid the first Boulder. Kill a Fune or use the Boulder for IFrames to get through the tricky section. It is also possible to Kago the Fune to save health compared to taking a Boulder hit. Requires: "Morph"
{
"or": [
"canTrickyJump",
{
"ammo": {
"type": "PowerBomb",
"count": 1
}
},
{
"ammo": {
"type": "Super",
"count": 1
}
},
{
"enemyDamage": {
"enemy": "Boulder",
"type": "contact",
"hits": 1
}
},
{
"and": [
{
"enemyDamage": {
"enemy": "Fune",
"type": "kago",
"hits": 1
}
},
"canKago",
"canHitbox"
]
},
{
"and": [
"Ice",
"canCarefulJump"
]
}
]
}
|
|
Use Space Jump to reset Samus' fall speed, by jumping, to avoid the topmost boulder. Requires: "SpaceJump"
"canCarefulJump"
{
"or": [
{
"ammo": {
"type": "Super",
"count": 1
}
},
{
"and": [
"canDisableEquipment",
"canPseudoScrew"
]
},
"Ice",
"canTrickyJump",
{
"enemyDamage": {
"enemy": "Boulder",
"type": "contact",
"hits": 1
}
}
]
}
|
|
From: 5
Firefleas Bottom Left Platform Junction
To: 7
Fireflea Statue's Claw Junction
Requires: "canConsecutiveWalljump"
"canPreciseWalljump"
"canCarefulJump"
{
"or": [
"canTrickyJump",
"canResetFallSpeed"
]
}
|
|
From: 5
Firefleas Bottom Left Platform Junction
To: 7
Fireflea Statue's Claw Junction
Set up to Damage boost off the highest Fireflea at the apex of your jump, next to the Ridley claw. It's precise, and can only be attempted once. Morphing can make the boost a little easier. Requires: "HiJump"
"canHorizontalDamageBoost"
"canTrickyJump"
"canCrouchJump"
{
"enemyDamage": {
"enemy": "Fireflea",
"hits": 1,
"type": "contact"
}
}
|
|
Take the platforms two at a time by building some run speed for each jump on a one tile runway. Requires: "h_canNavigateHeatRooms"
"canTrickyJump"
{
"heatFrames": 570
}
|
|
Take the platforms two at a time by building some run speed for each jump on a one tile runway. Requires: "h_canNavigateHeatRooms"
"canTrickyJump"
{
"heatFrames": 500
}
|
|
From: 4
Junction Below Bomb Blocks
To: 2
Top Right Door
Shoot the block before starting or in mid-air, then use spring ball to bounce on the crumb blocks and start an IBJ. The shot block respawns quickly so it's pretty unforgiving on the IBJ executions. Conservatively placing bombs for the IBJ will not make it up in time, unless the block is broken while IBJing. Requires: {
"obstaclesCleared": [
"A"
]
}
"h_canJumpIntoIBJ"
"h_canUseSpringBall"
{
"or": [
"canTrickyJump",
"canDoubleBombJump",
"canBombAboveIBJ",
{
"ammo": {
"type": "PowerBomb",
"count": 1
}
}
]
}
{
"heatFrames": 500
}
|
|
From: 4
Junction Below Bomb Blocks
To: 2
Top Right Door
This is possible by jumping on the crumble blocks into a mid-air spring ball jump, or by avoiding them. The crumbles can be avoided by starting with either an air ball, a 3 tile high mid-air morph, or a low spring wall. These are generally safer, as bouncing on the crumble blocks with Spring Ball is trivial. Requires: {
"obstaclesCleared": [
"A"
]
}
"canTrickySpringBallJump"
{
"heatFrames": 250
}
{
"or": [
{
"and": [
"can4HighMidAirMorph",
"canSpringFling"
]
},
"canLateralMidAirMorph",
"canCrumbleJump",
{
"and": [
"h_canTrickySpringwall",
"canPreciseWalljump"
]
}
]
}
|
|
From: 9
Junction Below Crumble Blocks, Set Up to Clip
To: 2
Top Right Door
Notable: true 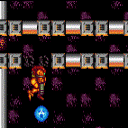
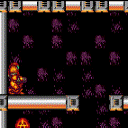
Ice Clip through the crumble blocks using a Multiviola from the bottom of the room and then Crumble Jump to clip through the bomb blocks. The ice clip can be setup by standing in a corner and firing forward when the Multiviola hits Samus, if it is moving downwards towards Samus. The Crumble Jump is done by aiming down (not immediately) after jumping, then changing Samus' hitbox once above the crumble blocks, and jumping again. Requires: "h_heatProof"
"canPreciseCeilingClip"
"canTrickyUseFrozenEnemies"
"canPartialFloorClip"
"canTrickyJump"
"canCrumbleJump"
{
"enemyDamage": {
"enemy": "Multiviola",
"type": "contact",
"hits": 1
}
}
{
"or": [
"h_canCrouchJumpDownGrab",
"canWalljump",
"canSpringBallJumpMidAir",
"HiJump",
"SpaceJump",
"h_canJumpIntoIBJ"
]
}
|
|
From: 1
Left Door
To: 2
Right Door
Notable: true 
Place the PBs next to the pillars in order to only use 2. Minimize acid by unmorphing high to land back on the jump spot or walljumping before placing the bomb. Requires: "Morph"
"canCarefulJump"
{
"ammo": {
"type": "PowerBomb",
"count": 2
}
}
{
"or": [
{
"and": [
"canCarefulJump",
"canResetFallSpeed",
{
"heatFrames": 660
}
]
},
{
"and": [
"canWalljump",
{
"heatFrames": 660
},
{
"or": [
"canWallJumpInstantMorph",
{
"acidFrames": 30
}
]
}
]
},
{
"and": [
"Gravity",
{
"heatFrames": 660
},
{
"acidFrames": 30
}
]
},
{
"and": [
"canTrickyJump",
"canSuitlessLavaDive",
{
"heatFrames": 720
},
{
"acidFrames": 52
}
]
}
]
}
{
"or": [
"canTrickyJump",
{
"and": [
"Gravity",
{
"heatFrames": 180
},
{
"acidFrames": 56
}
]
},
{
"and": [
"canSuitlessLavaDive",
{
"heatFrames": 240
},
{
"acidFrames": 96
}
]
}
]
}
{
"or": [
"h_heatResistant",
"canPauseAbuse",
{
"resourceCapacity": [
{
"type": "RegularEnergy",
"count": 149
}
]
}
]
}
|
|
The power bombs can be placed pretty far from the next pillar in line. PB1 - Above the mound of dirt on the ground. PB2 - On pillar 2 (not on the Puromi Fire Snake). PB3 - Near pillar 5. Requires: "canCarefulJump"
"Morph"
{
"ammo": {
"type": "PowerBomb",
"count": 3
}
}
{
"or": [
"canTrickyJump",
{
"enemyDamage": {
"enemy": "Puromi",
"type": "contact",
"hits": 1
}
}
]
}
{
"heatFrames": 670
}
{
"or": [
"canTrickyJump",
{
"and": [
"Gravity",
{
"heatFrames": 180
},
{
"acidFrames": 56
}
]
},
{
"and": [
"canSuitlessLavaDive",
{
"heatFrames": 240
},
{
"acidFrames": 96
}
]
}
]
}
{
"or": [
"h_heatResistant",
"canPauseAbuse",
{
"resourceCapacity": [
{
"type": "RegularEnergy",
"count": 149
}
]
}
]
}
|
|
From: 2
Right Door
To: 1
Left Door
Notable: true
Place the PBs next to the pillars in order to only use 2. Avoid acid during the first Power Bomb by walljumping before placing the bomb. Avoiding acid damage at the last jump is tricky but possible. Requires: "Morph"
{
"ammo": {
"type": "PowerBomb",
"count": 2
}
}
"canCarefulJump"
{
"or": [
{
"and": [
"canWallJumpInstantMorph",
{
"heatFrames": 690
}
]
},
{
"and": [
"canWalljump",
{
"heatFrames": 660
},
{
"acidFrames": 36
}
]
},
{
"and": [
"canSuitlessLavaDive",
{
"heatFrames": 840
},
{
"acidFrames": 84
}
]
},
{
"and": [
"Gravity",
{
"heatFrames": 660
},
{
"acidFrames": 24
}
]
}
]
}
{
"or": [
"canInsaneJump",
{
"and": [
"canTrickyJump",
"canLateralMidAirMorph",
{
"heatFrames": 10
},
{
"acidFrames": 10
}
]
},
{
"and": [
"canPreciseWalljump",
{
"heatFrames": 50
},
{
"acidFrames": 32
}
]
},
{
"and": [
"Gravity",
{
"heatFrames": 20
},
{
"acidFrames": 20
}
]
},
{
"and": [
"canSuitlessLavaDive",
{
"heatFrames": 50
},
{
"acidFrames": 50
}
]
}
]
}
{
"or": [
"h_heatResistant",
"canPauseAbuse",
{
"resourceCapacity": [
{
"type": "RegularEnergy",
"count": 149
}
]
}
]
}
|
|
Break spin to leave some blocks intact in order to avoid damage from Puromis. Avoiding acid damage at the last jump is tricky but possible. Requires: "canTrickyJump"
"ScrewAttack"
{
"heatFrames": 530
}
{
"or": [
"canLateralMidAirMorph",
{
"and": [
"canPreciseWalljump",
{
"heatFrames": 20
},
{
"acidFrames": 10
}
]
},
{
"and": [
{
"heatFrames": 20
},
{
"acidFrames": 24
}
]
}
]
}
|
|
From: 1
Top Left Door
To: 7
Junction At Middle Right Door With Bottom KiHunter Cleared
By breaking the shot blocks and maneuvering through the room effeciently Samus will not have to spend much time waiting on KiHunters. Entrance condition: {
"comeInRunning": {
"minTiles": 1,
"speedBooster": "any"
}
}
Requires: "canDodgeWhileShooting"
"canCarefulJump"
{
"or": [
"canTrickyJump",
"canDownBack"
]
}
{
"or": [
"Charge",
"Spazer",
"Plasma",
"Wave",
"canInsaneJump"
]
}
{
"heatFrames": 540
}
|
|
From: 3
Middle Right Door
To: 7
Junction At Middle Right Door With Bottom KiHunter Cleared
Notable: true 
The KiHunter can be baited by jumping into the door then walking left. Requires: "h_canNavigateHeatRooms"
"canTrickyJump"
{
"heatFrames": 100
}
|
|
From: 4
Top Right Door
To: 7
Junction At Middle Right Door With Bottom KiHunter Cleared
By breaking the shot blocks and maneuvering through the room effeciently Samus will not have to spend much time waiting on KiHunters. Entrance condition: {
"comeInRunning": {
"minTiles": 1,
"speedBooster": "any"
}
}
Requires: "canDodgeWhileShooting"
"canTrickyJump"
{
"or": [
"Charge",
"Spazer",
"Plasma",
"Wave",
{
"and": [
"canInsaneJump",
{
"or": [
"canDownBack",
"Morph"
]
}
]
}
]
}
{
"heatFrames": 540
}
|
|
From: 5
Top Junction Between Doors
To: 7
Junction At Middle Right Door With Bottom KiHunter Cleared
By breaking the shot blocks and maneuvering through the room effeciently Samus will not have to spend much time waiting on KiHunters. Requires: "canDodgeWhileShooting"
"canTrickyJump"
{
"or": [
"Spazer",
"Wave"
]
}
{
"heatFrames": 500
}
|
|
From: 7
Junction At Middle Right Door With Bottom KiHunter Cleared
To: 5
Top Junction Between Doors
Notable: true
The Middle KiHunter can be jumped past by waiting for the right timing, if it is in the way. Wait for the top KiHunter to exit the corridor and wait just below so that it will bonk the wall when it attempts to swoop, then jump past. It is possible the two KiHunters group up in the middle which may not be possible to pass without taking damage. Requires: "h_canNavigateHeatRooms"
"canTrickyJump"
{
"heatFrames": 710
}
|
|
It is possible to get past the pirate without waiting by moving fast enough, or by making it turn around. Requires: "h_canNavigateHeatRooms"
{
"or": [
{
"and": [
"canTrickyJump",
{
"heatFrames": 150
}
]
},
{
"and": [
"canCarefulJump",
{
"heatFrames": 300
}
]
},
{
"and": [
{
"enemyKill": {
"enemies": [
[
"Yellow Space Pirate (standing)"
]
],
"explicitWeapons": [
"ScrewAttack",
"Charge+Ice+Wave+Plasma"
]
}
},
{
"heatFrames": 240
}
]
},
{
"heatFrames": 360
}
]
}
|
|
From: 2
Bottom Left Door
To: 4
Junction Above Bomb Blocks
Notable: true 
Avoid the bottom pirates and jump high enough to break the bomb blocks with a power bomb. During the explosion, climb the right wall passing through any pirates and use a movement item to reach the top. Requires: "h_canNavigateHeatRooms"
"canPreciseWalljump"
"canHitbox"
"h_canUsePowerBombs"
"canTrickyJump"
{
"or": [
"canSpringwall",
"HiJump",
"SpaceJump"
]
}
{
"heatFrames": 530
}
{
"or": [
"h_heatResistant",
"canPauseAbuse",
{
"resourceCapacity": [
{
"type": "RegularEnergy",
"count": 149
}
]
}
]
}
Clears obstacles: A |
|
Spinjump over the pirate, or clear shot blocks first for more space. Requires: "h_canNavigateHeatRooms"
{
"or": [
{
"and": [
{
"or": [
"canTrickyJump",
{
"enemyKill": {
"enemies": [
[
"Yellow Space Pirate (standing)"
]
],
"explicitWeapons": [
"ScrewAttack"
]
}
}
]
},
{
"heatFrames": 100
}
]
},
{
"heatFrames": 180
}
]
}
|
|
From: 5
Junction Below Top Pirate
To: 1
Top Left Door
Requires: "h_canNavigateHeatRooms"
"canWallJumpInstantMorph"
"canTrickyJump"
"canInsaneWalljump"
{
"heatFrames": 290
}
|
|
From: 5
Junction Below Top Pirate
To: 1
Top Left Door
Requires: "h_canNavigateHeatRooms"
"HiJump"
"canTrickyJump"
"canMidAirMorph"
{
"heatFrames": 240
}
|
|
From: 5
Junction Below Top Pirate
To: 3
Top Right Door
Requires: "h_canNavigateHeatRooms"
"canInsaneWalljump"
"canWallJumpInstantMorph"
"canTrickyJump"
{
"heatFrames": 160
}
|
|
From: 5
Junction Below Top Pirate
To: 3
Top Right Door
Requires: "h_canNavigateHeatRooms"
"HiJump"
"canMidAirMorph"
"canTrickyJump"
{
"heatFrames": 160
}
|
|
From: 1
Top Left Door
To: 4
Junction Above Bomb Block
Notable: true 
Wait for the top one to pass by. Jump down when the lower two are by the left wall and jump over them when they swoop. Requires: "h_canNavigateHeatRooms"
"canTrickyJump"
{
"heatFrames": 500
}
|
|
From: 1
Top Left Door
To: 4
Junction Above Bomb Block
Shooting straight down can hit the KiHunter below. Jumping before shooting down can even double hit, instantly killing them. Requires: "h_canNavigateHeatRooms"
"Charge"
"Plasma"
"Ice"
"Wave"
{
"or": [
{
"heatFrames": 360
},
"canTrickyJump"
]
}
{
"heatFrames": 520
}
Clears obstacles: A |
|
By moving quickly, the KiHunters will be in favourable positions. Otherwise wait until it is safe to continue. Requires: "h_canNavigateHeatRooms"
"ScrewAttack"
{
"or": [
{
"heatFrames": 100
},
{
"and": [
"canCarefulJump",
{
"heatFrames": 50
}
]
},
"canTrickyJump"
]
}
{
"heatFrames": 330
}
Clears obstacles: A |
|
From: 2
Right Door
To: 4
Junction Above Bomb Block
Enter the room while spacejumping and weave between the pillars. Entrance condition: {
"comeInRunning": {
"minTiles": 4,
"speedBooster": "any"
}
}
Requires: "h_canNavigateHeatRooms"
"SpaceJump"
"Morph"
"canTrickyJump"
"canPrepareForNextRoom"
{
"heatFrames": 270
}
|
|
From: 4
Junction Above Bomb Block
To: 1
Top Left Door
Notable: true 
Read the movements of the Kihunters and jump over or roll under them as appropriate. Changing platforms is the hardest part: jumping extra high and morphing works sometimes, other times jump short and roll under. Requires: "h_canNavigateHeatRooms"
"canTrickyJump"
{
"or": [
{
"and": [
"canWallJumpInstantMorph",
"canPreciseWalljump"
]
},
{
"and": [
"SpeedBooster",
"HiJump",
"canMidAirMorph"
]
}
]
}
{
"heatFrames": 540
}
Clears obstacles: A |
|
From: 4
Junction Above Bomb Block
To: 1
Top Left Door
Wait for the Kihunters to move away from where Samus will jump up. This may mean Hitboxing through the middle KiHunter multiple times. Requires: "h_canNavigateHeatRooms"
"Plasma"
"canHitbox"
{
"or": [
"h_canCrouchJumpDownGrab",
"canWalljump",
"HiJump",
"SpaceJump"
]
}
"canTrickyJump"
{
"heatFrames": 600
}
Clears obstacles: A |
|
From: 4
Junction Above Bomb Block
To: 1
Top Left Door
Jump over the first Kihunter and attempt to either use IFrames to pass through the top Kihunter, or dodge it if possible. Requires: "h_canNavigateHeatRooms"
{
"or": [
"canWalljump",
"HiJump"
]
}
"canTrickyJump"
{
"or": [
{
"and": [
"canHorizontalDamageBoost",
"canHitbox",
{
"enemyDamage": {
"enemy": "Kihunter (red)",
"type": "contact",
"hits": 1
}
}
]
},
{
"enemyDamage": {
"enemy": "Kihunter (red)",
"type": "contact",
"hits": 2
}
}
]
}
Clears obstacles: A |
|
From: 1
Bottom Left Door
To: 1
Bottom Left Door
Requires: "canUseEnemies"
"canTrickyJump"
{
"heatFrames": 120
}
Exit condition: {
"leaveWithRunway": {
"length": 8,
"openEnd": 0
}
}
|
|
Requires: "canTrickyJump"
{
"heatFrames": 420
}
|
|
Requires: "h_canUsePowerBombs"
{
"or": [
{
"enemyDamage": {
"enemy": "Dessgeega",
"type": "contact",
"hits": 1
}
},
{
"and": [
"canHitbox",
"canTrickyJump"
]
}
]
}
{
"heatFrames": 240
}
Clears obstacles: A, B |
|
From: 5
Junction Below Shot Block
To: 7
Junction Left of Morph Tunnel
Notable: true 
Break the Power Bomb statue leaving 1 row of blocks. Partially clip beneath the Power Bomb blocks and the sold tiles beneath. Wait for a Dessgeega to jump over head and jump into it. The left ceiling Dessgeega works better. Aim down after jumping in order to fully boost over the solid statue. Damage boost to the right and use I-Frames to run through all of the enemies. Requires: {
"obstaclesNotCleared": [
"A"
]
}
"h_canUsePowerBombs"
"canTrickyJump"
"canPartialFloorClip"
"canCeilingClip"
"canHorizontalDamageBoost"
"canHitbox"
{
"enemyDamage": {
"enemy": "Dessgeega",
"type": "contact",
"hits": 1
}
}
{
"heatFrames": 225
}
|
|
From: 5
Junction Below Shot Block
To: 8
Junction Below Top Right Door
Notable: true
Break the Power Bomb statue leaving 1 row of blocks. Partially clip beneath the Power Bomb blocks and the sold tiles beneath. Wait for a Dessgeega to jump over head and jump into it. The left ceiling Dessgeega works better. Aim down after jumping in order to fully boost over the solid statue. Damage boost to the right and use I-Frames to run through all of the enemies. Begin shortcharging while running through the Dessgeegas for a speedball. It may help to end the damage boost early, but then it becomes more difficult to stutter for the shortcharge. Requires: {
"obstaclesNotCleared": [
"A"
]
}
"h_canUsePowerBombs"
"canPartialFloorClip"
"canCeilingClip"
"canTrickyJump"
"canHorizontalDamageBoost"
"canHitbox"
"canSpeedball"
{
"canShineCharge": {
"usedTiles": 16,
"openEnd": 1
}
}
{
"enemyDamage": {
"enemy": "Dessgeega",
"type": "contact",
"hits": 1
}
}
{
"heatFrames": 390
}
{
"or": [
"h_canUseSpringBall",
{
"hibashiHits": 1
}
]
}
|
|
From: 7
Junction Left of Morph Tunnel
To: 4
Junction Right of Power Bomb Blocks
Let the right hopper jump twice towards Samus. At the start of the second jump, jump above where the ground Dessgeega can jump but below where the ceiling enemy can reach. Mockball below the third hopper. Requires: "Morph"
{
"or": [
"canTrickyJump",
{
"and": [
"h_canUsePowerBombs",
"canCarefulJump",
"canHitbox"
]
}
]
}
"canMockball"
{
"heatFrames": 210
}
|
|
Requires: {
"or": [
"canDodgeWhileShooting",
"canTrickyJump",
{
"enemyKill": {
"enemies": [
[
"Kihunter (yellow)"
]
],
"explicitWeapons": [
"Missile",
"Super",
"ScrewAttack",
"Plasma",
"Ice+Wave+Spazer"
]
}
},
{
"enemyDamage": {
"enemy": "Kihunter (yellow)",
"type": "contact",
"hits": 1
}
}
]
}
|
|
Requires: {
"or": [
"canDodgeWhileShooting",
"canTrickyJump",
{
"enemyKill": {
"enemies": [
[
"Kihunter (yellow)"
],
[
"Kihunter (yellow)"
]
],
"explicitWeapons": [
"Missile",
"Super",
"ScrewAttack",
"Plasma",
"Ice+Wave+Spazer"
]
}
},
{
"enemyDamage": {
"enemy": "Kihunter (yellow)",
"type": "contact",
"hits": 2
}
}
]
}
|
|
Requires: {
"or": [
"canDodgeWhileShooting",
"canTrickyJump",
{
"enemyKill": {
"enemies": [
[
"Kihunter (yellow)"
],
[
"Kihunter (yellow)"
]
],
"explicitWeapons": [
"Missile",
"Super",
"ScrewAttack",
"Plasma",
"Ice+Wave+Spazer"
]
}
},
{
"enemyDamage": {
"enemy": "Kihunter (yellow)",
"type": "contact",
"hits": 1
}
}
]
}
|
|
Requires: {
"or": [
"canDodgeWhileShooting",
"canTrickyJump",
{
"enemyKill": {
"enemies": [
[
"Kihunter (yellow)"
]
],
"explicitWeapons": [
"Missile",
"Super",
"ScrewAttack",
"Plasma",
"Ice+Wave+Spazer"
]
}
},
{
"enemyDamage": {
"enemy": "Kihunter (yellow)",
"type": "contact",
"hits": 1
}
}
]
}
|
|
Notable: true 

On room entry, place a Power Bomb to kill the Atomic and land on the Workrobot. Wait for the Workrobot to move across the room until it meets with a second robot. Depending on where the robots meet, either roll off and quickly roll under the Atomic, stay on for a second to try to lure the Atomic left a bit, or use a Power Bomb to kill it. Be careful not to hit any of the invisible, stationary lasers, and don't place any Power Bombs too close to the right wall or it will hit the bomb block and it will no longer be passable. Quickly use the camera scroll blocks just left of the bomb blocks, in order to overload PLMs and go through them before the Atomic hits Samus. Entrance condition: {
"comeInWithGMode": {
"mode": "any",
"morphed": true
}
}
Requires: "f_DefeatedPhantoon"
"canBePatient"
"h_canArtificialMorphPowerBomb"
{
"or": [
"canTrickyJump",
"h_canArtificialMorphPowerBomb"
]
}
|
|
From: 2
Top Door
To: 3
Right Door
On room entry, dodge the atomic and quickly place a Power Bomb to kill both Atomics. It is tricky but possible to kill them both with a single Power Bomb placed on the right half of the platform. Wait for the Workrobot to pass, then roll off to the right of it. Be careful not to hit any of the invisible, stationary lasers. Use the camera scroll blocks just left of the bomb blocks, in order to overload PLMs and go through them. Entrance condition: {
"comeInWithGMode": {
"mode": "any",
"morphed": true
},
"comesThroughToilet": "any"
}
Requires: "f_DefeatedPhantoon"
"h_canArtificialMorphPowerBomb"
{
"or": [
"canTrickyJump",
"h_canArtificialMorphPowerBomb"
]
}
|
|
From: 1
Top Left Door
To: 1
Top Left Door
Notable: true 
Use SpeedBooster to construct a structure for Moondancing that has 1 chest height block and 1 head height block to the right of it and no other Speed blocks. Crystal Flash below the lower block, exactly pixel aligned with its right side, to standup and then begin Moondancing. After Samus sinks through the floor tiles, use Grapple to return to a standing position and count an additional 145 moonfalls. Then use Grapple to return to a crouch and wiggle right and Turn-Around Aim Cancel to escape to the right. Finally, shortcharge to break the remaining Speed blocks and reach the door. Requires: "h_canCrystalFlash"
"canTrickyJump"
"canTurnaroundAimCancel"
"canTemporaryBlue"
"canExtendedMoondance"
"canSpeedball"
"Grapple"
{
"canShineCharge": {
"openEnd": 0,
"usedTiles": 16,
"steepDownTiles": 4
}
}
Exit condition: {
"leaveWithStoredFallSpeed": {
"fallSpeedInTiles": 2
}
}
|
|
From: 1
Top Left Door
To: 1
Top Left Door
Notable: true
Use SpeedBooster to construct a structure for Moondancing that has 1 chest height block and 1 head height block to the right of it and no other Speed blocks. Crystal Flash below the lower block, exactly pixel aligned with its right side, to standup and then begin Moondancing. After Samus sinks through the bottom tile, it is possible to use Grapple to return to a crouch and wiggle right and then Turn-Around Aim Cancel to escape to the right. Without Grapple, count to 174 Moonfalls and delicately Moonfall so as to remain crouched and then wiggle to the right. Finally, shortcharge to break the remaining Speed blocks and reach the door. Requires: "h_canCrystalFlash"
"canTrickyJump"
"canTurnaroundAimCancel"
"canTemporaryBlue"
"canSpeedball"
"canMoondance"
{
"canShineCharge": {
"openEnd": 0,
"usedTiles": 16,
"steepDownTiles": 4
}
}
Exit condition: {
"leaveWithStoredFallSpeed": {
"fallSpeedInTiles": 1
}
}
|
|
From: 1
Top Left Door
To: 5
Top Right Item (locked)
Notable: true
Use SpeedBooster to construct a structure for Moondancing that has 1 chest height block and 1 head height block to the right of it and no other Speed blocks. Crystal Flash below the lower block, exactly pixel aligned with its right side, to standup and then begin Moondancing. After Samus sinks through the bottom tile, it is possible to use Grapple to return to a crouch and wiggle right and then Turn-Around Aim Cancel to escape to the right. Without Grapple, count to 174 Moonfalls and delicately Moonfall so as to remain crouched and then wiggle to the right. The Camera will not follow Samus after clipping. Requires: "h_canCrystalFlash"
"canTrickyJump"
"canTurnaroundAimCancel"
"canTemporaryBlue"
"canMoondance"
"canSpeedball"
{
"canShineCharge": {
"openEnd": 0,
"usedTiles": 16,
"steepDownTiles": 4
}
}
Clears obstacles: B |
|
From: 2
Middle Left Door
To: 6
Bowling Chozo Statue (locked)
This is doable even without any momentum from a previous room, but pretty tight. Requires: "canTrickyJump"
"canIframeSpikeJump"
{
"spikeHits": 2
}
|
|
From: 2
Middle Left Door
To: 6
Bowling Chozo Statue (locked)
Start with Springball disabled. Jump over the spikes and midair morph. SpringFling on the way down, SpringBall bounce through the spikes, then SpringFling again to reach the statue taking only one spike hit. Entrance condition: {
"comeInRunning": {
"minTiles": 12,
"speedBooster": true
}
}
Requires: "canTrickyJump"
"canSpringFling"
"canLateralMidAirMorph"
"canIframeSpikeJump"
{
"spikeHits": 1
}
|
|
From: 1
Right Door
To: 2
Item (locked)
In the spike pit, near the left wall, jump into an IBJ to climb out. Requires: "h_IBJFromThorns"
{
"not": "f_DefeatedPhantoon"
}
|
|
Fling Samus from the first set of grapple blocks to the second set without falling. Requires precise timing. It can help to perform a lateral mid-air morph and unmorph. Requires: "canPreciseGrapple"
"canTrickyJump"
{
"or": [
"canInsaneJump",
{
"and": [
"canLateralMidAirMorph",
{
"thornHits": 5
}
]
}
]
}
|
|
Fling Samus from the first set of grapple blocks to the second set without falling. Requires precise timing. Requires: "canPreciseGrapple" "canTrickyJump" |
|
Roll over the two crabs before the first gets to Samus. This is easier with Gravity Suit turned off. It is possible but difficult to roll from the doorway onto the platform with Gravity turned off. This requires backing up slightly after entering the room then quickly rolling before the crabs. It is a bit tighter in direct G-Mode. Entrance condition: {
"comeInWithGMode": {
"mode": "any",
"morphed": true
}
}
Requires: {
"or": [
"h_canArtificialMorphPowerBomb",
"h_canArtificialMorphSpringBall",
{
"and": [
"Gravity",
"h_canArtificialMorphBombs"
]
},
"canTrickyJump",
{
"enemyDamage": {
"enemy": "Sciser",
"type": "contact",
"hits": 1
}
}
]
}
|
|
From: 1
Top Left Doorway
To: 4
Top Right Doorway
To save a bomb, it is possible but difficult to roll from the doorway onto the platform with Gravity turned off. This requires backing up slightly after entering the room then quickly rolling before the crabs. It is a bit tighter in direct G-Mode. Entrance condition: {
"comeInWithGMode": {
"mode": "any",
"morphed": true
}
}
Requires: {
"or": [
"Morph",
"h_canArtificialMorphSpringBall",
{
"and": [
"Gravity",
"h_canArtificialMorphIBJ"
]
},
{
"and": [
"Gravity",
"h_canArtificialMorphBombHorizontally",
{
"or": [
"h_canArtificialMorphBombThings",
"canTrickyJump",
{
"enemyDamage": {
"enemy": "Sciser",
"type": "contact",
"hits": 1
}
}
]
}
]
}
]
}
Exit condition: {
"leaveWithGMode": {
"morphed": true
}
}
|
|
From: 2
Bottom Left Door
To: 1
Top Left Doorway
Notable: true 
Freeze one crab on the lip of the overhead opening and another on the edge of a doors platform then springballjump up. Use a Stationary Lateral Mid-Air Morph to gain enough jump height without bonking the ceiling. It is possible with a crouch jump to not need the second crab. Requires: "canSuitlessMaridia" "canTrickyJump" "canTrickySpringBallJump" "canTrickyUseFrozenEnemies" "canStationaryLateralMidAirMorph" |
|
Use a Super to knock off a crab and freeze it mid-air. Freeze a second crab on the edge of the hole above. Requires: "canSuitlessMaridia"
"canTrickyJump"
{
"ammo": {
"type": "Super",
"count": 1
}
}
"canTrickyUseFrozenEnemies"
"canSpringBallJumpMidAir"
|
|
From: 2
Bottom Left Door
To: 5
G-Mode Morph Junction (Top Half)
Entrance condition: {
"comeInWithGMode": {
"mode": "any",
"morphed": false
}
}
Requires: "Morph"
"h_canNavigateUnderwater"
{
"or": [
"canGravityJump",
{
"and": [
"Gravity",
"HiJump",
{
"or": [
"canSpringBallJumpMidAir",
"canWalljump"
]
}
]
},
{
"and": [
"canTrickyUseFrozenEnemies",
"HiJump",
"h_canCrouchJumpDownGrab"
]
},
{
"and": [
{
"ammo": {
"type": "Super",
"count": 1
}
},
"canTrickyUseFrozenEnemies",
"canOffScreenMovement"
]
},
{
"and": [
"canTrickyJump",
"canSpringBallJumpMidAir",
"canTrickyUseFrozenEnemies",
"canOffScreenMovement"
]
}
]
}
|
|
From: 3
Bottom Right Door
To: 5
G-Mode Morph Junction (Top Half)
Entrance condition: {
"comeInWithGMode": {
"mode": "any",
"morphed": false
}
}
Requires: "Morph"
"h_canNavigateUnderwater"
{
"or": [
"canGravityJump",
{
"and": [
"Gravity",
"HiJump",
{
"or": [
"canSpringBallJumpMidAir",
"canWalljump"
]
}
]
},
{
"and": [
"canTrickyUseFrozenEnemies",
"HiJump",
"h_canCrouchJumpDownGrab"
]
},
{
"and": [
{
"ammo": {
"type": "Super",
"count": 1
}
},
"canTrickyUseFrozenEnemies",
"canOffScreenMovement"
]
},
{
"and": [
"canTrickyJump",
"canSpringBallJumpMidAir",
"canTrickyUseFrozenEnemies",
"canOffScreenMovement"
]
}
]
}
|
|
From: 1
Bottom Left Door
To: 4
Top Left Door
Requires a runway of at least 18 tiles in the adjacent room. Entrance condition: {
"comeInJumping": {
"speedBooster": true,
"minTiles": 18
}
}
Requires: "canCrossRoomJumpIntoWater" "canTrickyJump" |
|
From: 1
Bottom Left Door
To: 5
Platform Junction Near Top Left Door
Requires a runway of at least 3 tiles in the adjacent room. Entrance condition: {
"comeInJumping": {
"speedBooster": true,
"minTiles": 3
}
}
Requires: "HiJump" "canCrossRoomJumpIntoWater" "canMomentumConservingTurnaround" "canTrickyJump" |
|
From: 1
Bottom Left Door
To: 5
Platform Junction Near Top Left Door
Requires a runway of at least 10 tiles in the adjacent room. Entrance condition: {
"comeInJumping": {
"speedBooster": true,
"minTiles": 10
}
}
Requires: "SpeedBooster" "canCrossRoomJumpIntoWater" "canSpringBallJumpMidAir" "canTrickyJump" |
|
From: 2
Bottom Right Door
To: 6
Middle Junction Near Top Left Pirate
The second jump is harder than a normal mid-air springball jump. Use either a stationary lateral mid air morph, to gain enough horizontal momentum, or a SpringFling to reduce Samus' fall speed as soon as it begins to build up. Requires: "canSuitlessMaridia"
"canTrickySpringBallJump"
{
"or": [
"canStationaryLateralMidAirMorph",
"canSpringFling"
]
}
{
"or": [
"canTrickyJump",
{
"enemyDamage": {
"enemy": "Pink Space Pirate (standing)",
"type": "contact",
"hits": 1
}
},
{
"enemyKill": {
"enemies": [
[
"Pink Space Pirate (standing)"
]
],
"explicitWeapons": [
"Plasma"
]
}
}
]
}
|
|
From: 5
Platform Junction Near Top Left Door
To: 4
Top Left Door
Notable: true 
Build up run speed and jump at the last moment to reach the door. Requires: "Gravity" "canTrickyJump" |
|
From: 5
Platform Junction Near Top Left Door
To: 4
Top Left Door
Notable: true
Jump towards the door with HiJump equipped. A Flatley style jump can position Samus over the edge of the ledge, closer to the door. Turning around while facing down, just before touching the ceiling, is another way to move Samus a few pixels closer to the door. Requires: "canSuitlessMaridia"
"HiJump"
"canTrickyJump"
{
"or": [
"canFlatleyJump",
"canMomentumConservingTurnaround"
]
}
|
|
From: 5
Platform Junction Near Top Left Door
To: 4
Top Left Door
Notable: true
Jump towards the door with a Springball Jump, jumping as late as possible. A Flatley style jump can position Samus over the edge of the ledge, closer to the door, allowing for an earlier Springball jump. The slight fall from a Flatley Jump helps with the Springball jump, but then Samus must unmorph to extend her hitbox to touch the transition. A Stationary Lateral MidAir Morph also helps with this jump. Unmorphing after a missed jump can return Samus to the ledge to try again. Requires: "canSuitlessMaridia"
"canTrickySpringBallJump"
{
"or": [
"canTrickyJump",
"canStationaryLateralMidAirMorph"
]
}
|
|
From: 6
Middle Junction Near Top Left Pirate
To: 5
Platform Junction Near Top Left Door
Freeze the fish a bit left of the peak in its swim cycle. Build run speed on top of the fish before jumping to the ledge. The positioning is more lenient if the fish is frozen while moving leftward. Requires: "canSuitlessMaridia" "canTrickyJump" "canTrickyUseFrozenEnemies" |
|
Only requires a runway of 1 tile in the adjacent room. This strat is slightly easier on the right side at low run speeds, but the same otherwise. Entrance condition: {
"comeInJumping": {
"speedBooster": false,
"minTiles": 0.4375
}
}
Requires: {
"obstaclesCleared": [
"f_MaridiaTubeBroken"
]
}
"canCrossRoomJumpIntoWater"
"canTrickyJump"
|
|
Assumes a runway of at least 21 tiles in the adjacent room. End Samus' momentum where no platforms are over head. Shoot the door while rising to pass through. Entrance condition: {
"comeInJumping": {
"speedBooster": true,
"minTiles": 21
}
}
Requires: {
"obstaclesCleared": [
"f_MaridiaTubeBroken"
]
}
"canCrossRoomJumpIntoWater"
"canMidairWiggle"
"canTrickyJump"
|
|
Only requires a runway of one tile in the adjacent room. This strat is slightly easier on the right side at low run speeds, but the same otherwise. Entrance condition: {
"comeInJumping": {
"speedBooster": false,
"minTiles": 0.4375
}
}
Requires: {
"obstaclesCleared": [
"f_MaridiaTubeBroken"
]
}
"canCrossRoomJumpIntoWater"
"canTrickyJump"
|
|
From: 5
Inside Maridia Tube (locked)
To: 4
Top Door
Jump as the first action after breaking the tube to gravity jump to the top of the room. Open the door and go through it during the ascent. This can only be attempted once. Requires: {
"obstaclesCleared": [
"f_MaridiaTubeBroken"
]
}
{
"obstaclesCleared": [
"A"
]
}
"canRiskPermanentLossOfAccess"
"canSuitlessMaridia"
"canTrickyJump"
|
|
From: 1
Bottom Door
To: 3
Middle Right Door
Run and spin jump to the left through the transition with as much horiziontal speed as possible, without bonking the door frame. Hold left through the transition to avoid the fish and land on the platform to the left. Then reach the platform above either using a crouch-jump down-grab or by freezing the fish. Entrance condition: {
"comeInWithPlatformBelow": {
"maxHeight": 6,
"maxLeftPosition": -0.5,
"minRightPosition": 4.5
},
"comesThroughToilet": "yes"
}
Requires: "canCrossRoomJumpIntoWater"
"canTrickyJump"
{
"or": [
"h_canCrouchJumpDownGrab",
"canUseFrozenEnemies"
]
}
|
|
From: 2
Bottom Right Door
To: 3
Middle Right Door
Run with enough speed to jump (after the transition) to reach the far left ledge. Either kill or Kago through the Fish enemy. At slightly higher run speeds, Samus can jump from the bottom of the slope and avoid the fish. Entrance condition: {
"comeInRunning": {
"minTiles": 7,
"speedBooster": true
}
}
Requires: "HiJump"
"canCrossRoomJumpIntoWater"
"canTrickyJump"
"canDodgeWhileShooting"
{
"or": [
{
"ammo": {
"type": "Super",
"count": 1
}
},
{
"and": [
"Charge",
"Plasma"
]
},
{
"and": [
"Plasma",
"canHitbox"
]
},
{
"and": [
"canKago",
"canLateralMidAirMorph",
{
"enemyDamage": {
"enemy": "Skultera",
"type": "contact",
"hits": 1
}
}
]
}
]
}
|
|
From: 3
Middle Right Door
To: 9
Junction Below Speed Blocks
Notable: true 
The tricky part is getting to the ledge below the missiles. There are two ways to do this: 1. Stand on a frozen crab with a frozen fish at the lowest height of its cycle to the right. Further to the right is better as long as it can be stood upon without the ledge above. Perform a stationary lateral midair morph into a max height spring ball jump to get onto the fish before it thaws. Press against the fish for the maximum amount of time possible while moving upwards in order to gain more height in order to get on top of it. 2. Freeze the global crab on the right wall, get onto it and up and onto the frozen fish before it thaws. Be careful not to fall through the crab. A fail will require Samus to reset the room, or wait a very long time in order for the crab to circle the room. Using a Super may make the crab fall on a floating platform, and it still takes more than a minute to return. Note that it is possible to turn off ice beam to immediately thaw any frozen enemies; this can help get the crab and fish in a good cycle with each other. Requires: "canSuitlessMaridia" "canTrickySpringBallJump" "canTrickyUseFrozenEnemies" "canTrickyJump" |
|
From: 3
Middle Right Door
To: 9
Junction Below Speed Blocks
Notable: true 
Use the slow global crab and Skulteras to get up. The last part, just below the item is the hardest. Get onto the global crab on the right wall. Either freeze the Skultera close to the wall and wall jump between them. or, a harder option without wall jumps is to refreeze the crab again, higher on the wall, while being careful not to clip through it. Freeze the Skultera at the left, near its minimum and jump to it, then the solid ground. Note that the fish will be pushed down slightly over time because of the sloped tiles, but it will be at its minimum by the time the global crab has arrived. Requires: "canSuitlessMaridia"
"canCrazyCrabClimb"
"canBeVeryPatient"
{
"or": [
"canSunkenTileWideWallClimb",
"canTrickyJump"
]
}
|
|
From: 9
Junction Below Speed Blocks
To: 4
Top Right Door
Notable: true
Be sure not to lure the first crab on the right wall until the slow global crab is near. Freeze the crab coming down as a platform to stand on to jump onto the frozen global crab on the right. Near the end, use the global crab to get onto the top left corner of the room, then jump towards the walkway leading to the door. Requires: "canBeExtremelyPatient"
"canSuitlessMaridia"
"canCrazyCrabClimb"
"canTrickyJump"
{
"obstaclesNotCleared": [
"A"
]
}
|
|
From: 9
Junction Below Speed Blocks
To: 4
Top Right Door
Be sure not to get the first downward moving crab on screen until Samus is in position to quickly and accurately shoot and freeze it. This is much tighter with spring ball relative to HiJump. Performing a max height spring ball jump from the frozen crab can get Samus to the next ledge. Getting to the ledge with the fish is particularly precise. Either stand at the very edge of the platform and perform a very precise max heigh spring ball jump, or stand against the left wall and and perform a slightly less tight stationary lateral morph into spring ball jump. Requires: "canSuitlessMaridia"
"canTrickyUseFrozenEnemies"
"canTrickySpringBallJump"
"canDodgeWhileShooting"
{
"or": [
"canInsaneJump",
{
"and": [
"Spazer",
"Wave"
]
},
"h_canMaxHeightSpringBallJump",
"Plasma"
]
}
{
"or": [
"h_canMaxHeightSpringBallJump",
"canStationaryLateralMidAirMorph"
]
}
|
|
From: 9
Junction Below Speed Blocks
To: 4
Top Right Door
Using the slow global crab to ascend the top section of Main Street requires the speed blocks to not be broken. If they are broken, the local fast crab can be used instead by letting it fall and climb the left wall. The trickiest part is getting to the second ledge. Freeze the crab when it is overhead and spring ball jump up onto it. Follow the crab up while using it as a platform multiple times. Requires: "canSuitlessMaridia"
"canSpringBallJumpMidAir"
"canTrickyUseFrozenEnemies"
"canTrickyJump"
{
"or": [
{
"obstaclesNotCleared": [
"A"
]
},
"canCrazyCrabClimb"
]
}
|
|
Requires getting back on Mama Turtle while she is at the right. Requires: "h_canNavigateUnderwater"
{
"or": [
"canTrickyJump",
{
"enemyDamage": {
"enemy": "Kame (Tatori)",
"type": "contact",
"hits": 1
}
}
]
}
Clears obstacles: A |
|
Jump over or on to Mama Turtle. The easiest method is to jump over her by jumping on her babies, spin jumping off of them and over her, then breaking spin before landing. Requires: "canSuitlessMaridia" "canTrickyJump" "canUseEnemies" |
|
Briefly run on the top ledge on either side (left is slightly easier) then jump and wall jump on the grapple block. Requires: "HiJump" "canTrickyJump" "SpeedBooster" "canWalljump" Clears obstacles: B |
|
Time a pause before jumping to give a significant momentum boost in order to reach the Grapple Block. Requires: "h_canMaxHeightSpringBallJump" "canSpringFling" Clears obstacles: B |
|
From: 1
Top Left Door
To: 12
G-Mode Junction (In Morph Tunnel)
Bounce from the right peak into the morph tunnel. Samus can't bounce twice in a single fall, so start from the right ground, not the raised scaffolding by the door. Entrance condition: {
"comeInWithGMode": {
"mode": "any",
"morphed": true
}
}
Requires: "canSuitlessMaridia"
"canTrickyJump"
{
"or": [
"h_EverestMorphTunnelExpanded",
{
"enemyDamage": {
"enemy": "Sciser",
"type": "contact",
"hits": 1
}
}
]
}
|
|
Near the bottom left door, there are three pathways upwards: one directly above the door and two to the right. Between the right pathways, is a crab moving to the right. Shooting a super against the wall will make it fall off and move left. Climb the crab up the left wall. Watch out for the crab above that is heading into the morph tunnel. Jump to the right platform before the upward crab goes into the tunnel. Lure the crab out of the hole by running to the right of the hill then back left or use moonwalk to scroll the camera. Near the end is particularly tricky. When the crab is on the underside of the metal blocks, freeze it and use it as a stepping platform. To do this, crouch jump and while moving upwards, hold left against the crab to get extra vertical movement. Down grabbing at the top is helpful. Requires: "canSuitlessMaridia"
"canCrazyCrabClimb"
"canTrickyJump"
"h_canCrouchJumpDownGrab"
"canCameraManip"
{
"ammo": {
"type": "Super",
"count": 1
}
}
|
|
From: 2
Bottom Left Door
To: 7
Lower Hills Junction
Stand on higher ground on the right side and face left. Crouch jump and immediately press left (almost simultaneously) to avoid bonking the ceiling. Requires: "Gravity" "h_canCrouchJumpDownGrab" "canTrickyJump" |
|
Run and jump up through the door using SpeedBooster in the room below, with HiJump equipped. Immediately after jumping, break spin and turn left to avoid hitting the crab (alternatively, you can wiggle after the transition). It helps to use a little less than the full runway. Make it all the way up to the top right door. Entrance condition: {
"comeInWithPlatformBelow": {
"maxHeight": 10,
"maxLeftPosition": -38.5,
"minRightPosition": -2
},
"comesThroughToilet": "any"
}
Requires: "canCrossRoomJumpIntoWater" "SpeedBooster" "HiJump" "canTrickyJump" |
|
From: 3
Bottom Right Door
To: 10
Upper Right Ledge Junction
Run and jump up through the door using HiJump and SpeedBooster in the room below and Springball Jump at the peak of the jump. Entrance condition: {
"comeInWithPlatformBelow": {
"maxHeight": 7,
"maxLeftPosition": 2.5,
"minRightPosition": -2.5
},
"comesThroughToilet": "any"
}
Requires: "canCrossRoomJumpIntoWater" "HiJump" "SpeedBooster" "canTrickySpringBallJump" "canTrickyJump" |
|
From: 3
Bottom Right Door
To: 10
Upper Right Ledge Junction
Wall jump off either side of the door frame in the room below and Springball Jump at the height of the jump. Entrance condition: {
"comeInWithWallJumpBelow": {
"minHeight": 2
},
"comesThroughToilet": "any"
}
Requires: "canCrossRoomJumpIntoWater" "HiJump" "canTrickySpringBallJump" "canTrickyJump" |
|
From: 5
Top Door
To: 12
G-Mode Junction (In Morph Tunnel)
Bounce from the right peak into the morph tunnel. Samus can't bounce twice in a single fall, so come to a stop on the top platform or avoid it completely. Entrance condition: {
"comeInWithGMode": {
"mode": "any",
"morphed": true
},
"comesThroughToilet": "any"
}
Requires: "canSuitlessMaridia"
"canTrickyJump"
{
"enemyDamage": {
"enemy": "Sciser",
"type": "contact",
"hits": 1
}
}
{
"or": [
"h_EverestMorphTunnelExpanded",
{
"enemyDamage": {
"enemy": "Sciser",
"type": "contact",
"hits": 1
}
}
]
}
|
|
From: 7
Lower Hills Junction
To: 10
Upper Right Ledge Junction
Notable: true 
Climbing the right side of Mt. Everest with only two supers and ice. (As used in 14% Icebooster) Requires luring 2 crabs. Use a super to knock off and freeze a crab midair. Be sure to lure a crab to the next section to crab climb further. If Samus has 2 supers, it is easier to bring 3 crabs; the third is from the morph tunnel to the left. Lure 2 crabs to the next section for a slightly easier crab climb. Note: The hardest part of this climb is the pixel precision when jumping around a ledge. Too many pixels: left is a fall, right you clip through the crab, low you miss the jump and fall, high is a bonk or crab clip. Requires: "canSuitlessMaridia"
"canCrazyCrabClimb"
"canTrickyJump"
"canBeVeryPatient"
{
"ammo": {
"type": "Super",
"count": 1
}
}
Clears obstacles: A, B |
|
From: 7
Lower Hills Junction
To: 10
Upper Right Ledge Junction
Notable: true 
Use the crab near the bottom right door. Before the final jump, freeze the crab high enough on the right wall that it can be lured up to the flat platform. Perform the final jump as it is unfreezing so it starts moving upward. Then go to the lower ground a bit to the right, jump and aim down to lower the camera to lure the crab. Note: The hardest part of this climb is the pixel precision when jumping around a ledge. Too many pixels: left is a fall, right you clip through the crab, low you miss the jump and fall, high is a bonk or crab clip. Requires: "canSuitlessMaridia" "canCrazyCrabClimb" "HiJump" "canTrickyJump" "canCameraManip" Clears obstacles: A, B |
|
From: 7
Lower Hills Junction
To: 10
Upper Right Ledge Junction
Notable: true
Use the crab near the bottom right door. Only one spring ball jump is needed, it is to get up onto the flat platform. After the spring ball jump, if the crab did not follow, go to the lower ground a bit to the right, jump and aim down to lower the camera to lure the crab. Note: The hardest part of this climb is the pixel precision when jumping around a ledge. Too many pixels: left is a fall, right you clip through the crab, low you miss the jump and fall, high is a bonk or crab clip. Requires: "canSuitlessMaridia" "canCrazyCrabClimb" "canTrickySpringBallJump" "canTrickyJump" "canCameraManip" Clears obstacles: A, B |
|
From: 7
Lower Hills Junction
To: 10
Upper Right Ledge Junction
Notable: true 
Climbing the right side of Mt. Everest with only two supers and ice. (As used in 14% Icebooster) Requires luring 3 crabs; the third crab is from the morph tunnel to the left. Use a super to knock off and freeze a crab midair. Be sure two crabs make it to the next section in order to crab climb further. Note: The hardest part of this climb is the pixel precision when jumping around a ledge. Too many pixels: left is a fall, right you clip through the crab, low you miss the jump and fall, high is a bonk or crab clip. Requires: "canSuitlessMaridia"
"canCrazyCrabClimb"
"canTrickyJump"
"canBeVeryPatient"
{
"ammo": {
"type": "Super",
"count": 1
}
}
Clears obstacles: A, B |
|
From: 8
Higher Hill Junction
To: 9
Spawn At Junction Below Top Door
Barely works without HiJump with a late gravity jump. Requires: "canGravityJump"
{
"or": [
"HiJump",
"canTrickyJump"
]
}
|
|
From: 10
Upper Right Ledge Junction
To: 4
Top Right Door
Notable: true
Requires having already lured a crab to this location, likely from above the bottom right door. Freeze the crab very high before going to the ledge on the right, delay jumping so it thaws and moves up a bit while on screen, jump aim down to lower the camera and lure it more. Alternatively, using moonwalk and a flatley jump at the top can prevent needing the crab again. Note: The hardest part of this climb is the pixel precision when jumping around a ledge. Too many pixels: left is a fall, right you clip through the crab, low you miss the jump and fall, high is a bonk or crab clip. Requires: "canSuitlessMaridia"
"canCrazyCrabClimb"
"HiJump"
"canTrickyJump"
"canCameraManip"
{
"obstaclesCleared": [
"B"
]
}
|
|
From: 10
Upper Right Ledge Junction
To: 4
Top Right Door
Notable: true
Requires having already lured a crab to this location, likely from above the bottom right door. Freeze the crab high before going to the ledge on the right, delay spring ball jumping so it thaws and moves up while on screen, jump aim down to lower the camera and lure it more. Freeze the crab again to use as a platform, approximately knee high. Jump on it and then jump to the platform above. Note: The hardest part of this climb is the pixel precision when jumping around a ledge. Too many pixels: left is a fall, right you clip through the crab, low you miss the jump and fall, high is a bonk or crab clip. Requires: "canSuitlessMaridia"
"canCrazyCrabClimb"
"canTrickySpringBallJump"
"canTrickyJump"
"canCameraManip"
{
"obstaclesCleared": [
"B"
]
}
|
|
From: 10
Upper Right Ledge Junction
To: 4
Top Right Door
Notable: true
Climbing the right side of Mt. Everest with only two supers and ice. (As used in 14% Icebooster) Requires originally luring 3 crabs. Two crabs and one super are needed from this location. Use a super to knock off and freeze a crab midair. Once close to the upper platform, freeze the crab at knee height to stand on it to jump up. Note: The hardest part of this climb is the pixel precision when jumping around a ledge. Too many pixels: left is a fall, right you clip through the crab, low you miss the jump and fall, high is a bonk or crab clip. Requires: "canSuitlessMaridia"
"canCrazyCrabClimb"
"canTrickyJump"
"canBeVeryPatient"
{
"ammo": {
"type": "Super",
"count": 1
}
}
{
"obstaclesCleared": [
"A"
]
}
|
|
From: 10
Upper Right Ledge Junction
To: 4
Top Right Door
Climbing the right side of Mt. Everest with only two supers, ice, and HiJump. Requires originally luring 3 crabs. Two crabs and one super are needed from this location. Use a super to knock off and freeze a crab midair. Jump on it and freeze the second as a platform to jump up to the door. Requires: "canSuitlessMaridia"
"HiJump"
"canTrickyUseFrozenEnemies"
{
"ammo": {
"type": "Super",
"count": 1
}
}
{
"obstaclesCleared": [
"A"
]
}
"canTrickyJump"
|
|
From: 10
Upper Right Ledge Junction
To: 4
Top Right Door
Notable: true
Climbing the right side of Mt. Everest with only one super and ice. (A trickier version than that used in 14% Icebooster) Requires having already lured a crab to this location, likely from above the bottom right door. Once close to the upper platform, freeze the crab at knee height to stand on it to jump up. Note: The hardest part of this climb is the pixel precision when jumping around a ledge. Too many pixels: left is a fall, right you clip through the crab, low you miss the jump and fall, high is a bonk or crab clip. Requires: "canSuitlessMaridia"
"canCrazyCrabClimb"
"canTrickyJump"
{
"obstaclesCleared": [
"B"
]
}
|
|
From: 10
Upper Right Ledge Junction
To: 4
Top Right Door
Requires having already lured a crab, likely from above the bottom right door. Freeze the crab midway up the right wall and jump and spring ball jump up to the door. Requires: "canSuitlessMaridia"
"HiJump"
"canSpringBallJumpMidAir"
"canTrickyUseFrozenEnemies"
{
  "obstaclesCleared": [
    "B"
  ]
}
"canTrickyJump"
|
|
From: 10
Upper Right Ledge Junction
To: 4
Top Right Door
Crouch at the edge of the overhang. Jump and just after the peak of the jump, grapple to the grapple blocks. This strat is finicky, and failure doesn't usually allow a second try (assuming the Powamp is not there). This is possible to do without a crouch jump, but it is much harder. Requires: "canSuitlessMaridia"
"canPreciseGrapple"
{
"or": [
"canCrouchJump",
"canTrickyJump"
]
}
|
|
From: 11
Upper Left Ledge Junction
To: 9
Spawn At Junction Below Top Door
Running does not help. This is most easily done with a late jump at the bottom of the slope. It is a bit less precise with an air ball or turning gravity suit back on and wall jumping on the platform at the end. Requires: "canGravityJump"
{
"or": [
"canTrickyJump",
{
"and": [
"canLateralMidAirMorph",
"canCarefulJump"
]
}
]
}
|
|
From: 2
Bottom Left Door
To: 7
Top Right Left Item
Notable: true 
PLMs can be overloaded in direct G-Mode with a single Power Bomb if both items are still there and 2 PBs if only one item is. There is a row of tiles that works, just above and to the left of the right door. The row is one tile higher than the horizontal pipe that is part of the door frame, spanning from the left to one tile away from the right wall. Entrance condition: {
"comeInWithGMode": {
"mode": "direct",
"morphed": false
}
}
Requires: {
"or": [
{
"itemNotCollectedAtNode": 7
},
{
"itemNotCollectedAtNode": 8
}
]
}
"h_canUsePowerBombs"
"h_canUsePowerBombs"
"h_canNavigateUnderwater"
"canSnailClimb"
{
"or": [
"Gravity",
"h_canMaxHeightSpringBallJump",
{
"and": [
"HiJump",
{
"or": [
"canCrouchJump",
"canDownGrab"
]
}
]
}
]
}
|
|
From: 5
Right Door
To: 7
Top Right Left Item
Notable: true
PLMs can be overloaded in direct G-Mode with a single Power Bomb if both items are still there and 2 PBs if only one item is. There is a row of tiles that works, just above and to the left of the right door. The row is one tile higher than the horizontal pipe that is part of the door frame, spanning from the left to one tile away from the right wall. Entrance condition: {
"comeInWithGMode": {
"mode": "direct",
"morphed": false
}
}
Requires: {
"or": [
{
"itemNotCollectedAtNode": 7
},
{
"itemNotCollectedAtNode": 8
}
]
}
"h_canUsePowerBombs"
"h_canUsePowerBombs"
"h_canNavigateUnderwater"
"canSnailClimb"
{
"or": [
"Gravity",
"h_canMaxHeightSpringBallJump",
{
"and": [
"HiJump",
{
"or": [
"canCrouchJump",
"canDownGrab"
]
}
]
}
]
}
|
|
From: 6
Top Door
To: 7
Top Right Left Item
Notable: true
PLMs can be overloaded in direct G-Mode with a single Power Bomb if both items are still there and 2 PBs if only one item is. There is a row of tiles that works, just above and to the left of the right door. The row is one tile higher than the horizontal pipe that is part of the door frame, spanning from the left to one tile away from the right wall. Entrance condition: {
"comeInWithGMode": {
"mode": "direct",
"morphed": false
},
"comesThroughToilet": "no"
}
Requires: {
"or": [
{
"itemNotCollectedAtNode": 7
},
{
"itemNotCollectedAtNode": 8
}
]
}
"h_canUsePowerBombs"
"h_canUsePowerBombs"
"h_canNavigateUnderwater"
"canSnailClimb"
{
"or": [
"Gravity",
"h_canMaxHeightSpringBallJump",
{
"and": [
"HiJump",
{
"or": [
"canCrouchJump",
"canDownGrab"
]
}
]
}
]
}
|
|
Requires: "Gravity"
"canLateralMidAirMorph"
"canCarefulJump"
{
"or": [
"canTrickyJump",
"canSpringBallBounce"
]
}
|
|
Crouch on rightmost pixel of the ledge to the left of the door, jump then move over quickly without spin jumping. Requires: "canCrouchJump" "canTrickyJump" |
|
From: 10
G-Mode Morph Junction (By Bottom Left Door)
To: 11
G-Mode Overloaded PLMs Junction (By Bottom Left Door)
It is barely possible to start a snail climb with just Spring Ball. Get a snail positioned such that it is on the bottom of an overhang above, and sticking out a bit to be usable as a platform. Use Spring Ball to jump and press against the snail for the maximum possible duration, in order to gain enough height to get onto it. Requires: "h_canArtificialMorphBombs" "h_canArtificialMorphSpringBall" "canSnailClimb" "canTrickyJump" |
|
From: 11
G-Mode Overloaded PLMs Junction (By Bottom Left Door)
To: 7
Top Right Left Item
After PLMs are overloaded, use a snail to help climb to the top right items. Requires: "canSnailClimb"
{
"or": [
"Gravity",
"h_canMaxHeightSpringBallJump",
{
"and": [
"HiJump",
{
"or": [
"canCrouchJump",
"canDownGrab"
]
}
]
}
]
}
|
|
Entrance condition: {
"comeInWithGMode": {
"mode": "any",
"morphed": true
}
}
Requires: {
"or": [
"h_canArtificialMorphBombs",
{
"and": [
"h_canArtificialMorphPowerBomb",
"h_additionalBomb",
{
"or": [
"canTrickyJump",
"h_canArtificialMorphSpringBall",
"Gravity",
"h_additionalBomb"
]
}
]
},
{
"and": [
"Gravity",
{
"enemyDamage": {
"enemy": "Puyo",
"type": "contact",
"hits": 1
}
}
]
},
{
"and": [
"h_canArtificialMorphSpringBall",
{
"enemyDamage": {
"enemy": "Puyo",
"type": "contact",
"hits": 3
}
}
]
},
{
"enemyDamage": {
"enemy": "Puyo",
"type": "contact",
"hits": 7
}
}
]
}
Exit condition: {
"leaveWithGMode": {
"morphed": true
}
}
|
|
Enter the room with blue speed, and jump into a speedball. Entrance condition: {
"comeInShinecharging": {
"length": 0,
"openEnd": 1
}
}
Requires: "canWaterShineCharge" "canSpeedball" "canTrickyJump" |
|
Needs max horizontal speed coming from 43 runway tiles in the adjacent room. Jump after the transition. Entrance condition: {
"comeInJumping": {
"speedBooster": true,
"minTiles": 43
}
}
Requires: "canTrickyJump" "canLateralMidAirMorph" "canCrossRoomJumpIntoWater" |
|
From: 1
Left Door
To: 5
Item
Needs a runway of 7 tiles with no open end in the adjacent room, to get enough height. This is a peak of height with speed booster, no hjb, while underwater. Jump before the transition with SpeedBooster off and then SpeedBooster back on after reaching the ceiling and Morphing. Entrance condition: {
"comeInJumping": {
"speedBooster": true,
"minTiles": 6.4375
}
}
Requires: "canLateralMidAirMorph"
"canDisableEquipment"
"canCrossRoomJumpIntoWater"
"canSpringBallBounce"
{
"or": [
{
"enemyDamage": {
"enemy": "Puyo",
"type": "contact",
"hits": 1
}
},
"canInsaneJump",
{
"and": [
"Plasma",
"canTrickyJump"
]
}
]
}
|
|
Entrance condition: {
"comeInWithGMode": {
"mode": "any",
"morphed": true
}
}
Requires: {
"or": [
{
"and": [
"Gravity",
"h_canArtificialMorphIBJ"
]
},
{
"and": [
"h_canArtificialMorphSpringBall",
{
"or": [
"Gravity",
"HiJump"
]
},
{
"or": [
"canTrickyJump",
"h_canArtificialMorphPowerBomb"
]
}
]
}
]
}
|
|
Be careful not to touch or bomb the sand in order to grab the item before PLMs are overloaded. Entrance condition: {
"comeInWithGMode": {
"mode": "direct",
"morphed": true
}
}
Requires: {
"or": [
{
"and": [
"Gravity",
"h_canArtificialMorphIBJ",
"canDodgeWhileShooting"
]
},
{
"and": [
"h_canArtificialMorphSpringBall",
{
"or": [
"Gravity",
"HiJump"
]
},
{
"or": [
"canTrickyJump",
"h_canArtificialMorphPowerBomb"
]
}
]
}
]
}
Clears obstacles: B |
|
Overload PLMs by touching the sand, then move through the speed blocks. Shoot the Puyo while crouching to increase accuracy. Avoiding the right pit is much easier without Gravity or HiJump. Standing on the edge and spin jumping to the left is much easier than a running jump. While on the left side of this platform, the Puyo to the left will start moving; carefully kill it. Entrance condition: {
"comeInWithGMode": {
"mode": "any",
"morphed": true
}
}
Requires: {
"or": [
"canTrickyJump",
{
"and": [
"Gravity",
"SpaceJump"
]
}
]
}
|
|
Overload PLMs by touching the sand, then move through the speed blocks. Shoot the Puyo while crouching to increase accuracy. Avoiding the right pit is much easier without Gravity or HiJump. Standing on the edge and spin jumping to the left is much easier than a running jump. While on the left side of this platform, the Puyo to the left will start moving; carefully kill or dodge it. Entrance condition: {
"comeInWithGMode": {
"mode": "any",
"morphed": false
}
}
Requires: {
"or": [
"canTrickyJump",
{
"and": [
"Gravity",
"SpaceJump"
]
}
]
}
Exit condition: {
"leaveWithGMode": {
"morphed": false
}
}
|
|
With Gravity, or Spring Ball and HiJump, it is easiest to go through the Morph maze at the top of the room and fall into the the sand. Otherwise, the overload PLMs by touching the sand, or by bombing the speed blocks, to be able to go through to the left. Killing the Zoas with Bombs or Power Bombs will prevent them from respawning, although it is possible but tricky to dodge them with just Spring Ball. Entrance condition: {
"comeInWithGMode": {
"mode": "any",
"morphed": true
}
}
Requires: {
"or": [
{
"and": [
"h_canArtificialMorphSpringBall",
{
"or": [
"Gravity",
"HiJump"
]
}
]
},
{
"and": [
"Gravity",
"h_canArtificialMorphIBJ"
]
},
{
"and": [
"h_canArtificialMorphSpringBall",
{
"or": [
"canTrickyJump",
"h_canArtificialMorphBombThings"
]
}
]
}
]
}
Exit condition: {
"leaveWithGMode": {
"morphed": true
}
}
|
|
From: 2
Right Door
To: 1
Bottom Left Door
Notable: true 
Crouch under the crumble blocks while aiming upward, using both angle buttons then freeze the Mochtroid while it is on Samus. Jump onto the Mochtroid by quickly pressing down after jumping, when on it, press up to stand then jump through the ceiling. With no jump assists, use a frozen Mochtroid as a platform to get to the ledge above the door. Requires: "h_canNavigateUnderwater"
"canCeilingClip"
"canUseFrozenEnemies"
{
"or": [
{
"and": [
"h_canCrouchJumpDownGrab",
"canTrickyJump"
]
},
"HiJump",
"Gravity",
"canSpringBallJumpMidAir"
]
}
|
|
From: 2
Right Door
To: 1
Bottom Left Door
Find the crumble blocks and crystal flash mid-air, just below them. They are on the far left of the ceiling of the middle left pathway. Hold down as the CF ends to break the non-respawning crumble blocks. This is for the much harder version, without Gravity and Bombs. Requires: "h_canJumpIntoCrystalFlashClip"
"canSuitlessMaridia"
{
"or": [
{
"and": [
"h_canCrouchJumpDownGrab",
"canTrickyJump"
]
},
"HiJump",
"Gravity",
"canSpringBallJumpMidAir"
]
}
|
|
Requires: "h_canNavigateUnderwater"
{
"or": [
{
"and": [
"h_canCrouchJumpDownGrab",
"canTrickyJump"
]
},
"HiJump",
"Gravity",
"canSpringBallJumpMidAir"
]
}
Exit condition: {
"leaveWithGModeSetup": {
"knockback": false
}
}
|
|
From: 1
Left Door
To: 3
Top Right Door
Notable: true 
Climb a mochtroid with ice using the wall to help guide them. Mochtroid damage is pretty hard to avoid, but it is possible. Requires: "canSuitlessMaridia"
"canMochtroidIceClimb"
"canPlayInSand"
"canCameraManip"
"canTrickyJump"
{
"or": [
"canInsaneJump",
{
"enemyDamage": {
"enemy": "Mochtroid",
"type": "contact",
"hits": 2
}
}
]
}
|
|
Climb a mochtroid with ice using the wall to help guide them. It is very easy to take damage if not preemptive with freezes. Mochtroid movement and freeze timing gets harder at the waterline. Requires: "h_canNavigateUnderwater"
"canMochtroidIceClimb"
"canPlayInSand"
"canCameraManip"
{
"or": [
"Gravity",
"HiJump"
]
}
"canTrickyJump"
{
"or": [
"canInsaneJump",
{
"enemyDamage": {
"enemy": "Mochtroid",
"type": "contact",
"hits": 2
}
}
]
}
|
|
Requires a runway of one tile in the adjacent room. Entrance condition: {
"comeInJumping": {
"speedBooster": "any",
"minTiles": 1
}
}
Requires: "HiJump" "canTrickyJump" "canCrossRoomJumpIntoWater" "canMomentumConservingTurnaround" "canDownGrab" |
|
Requires a runway of one tile in the adjacent room. Entrance condition: {
"comeInJumping": {
"speedBooster": false,
"minTiles": 1
}
}
Requires: "h_canJumpIntoIBJ"
"canTrickyJump"
"canCrossRoomJumpIntoWater"
"canMomentumConservingTurnaround"
{
"enemyDamage": {
"enemy": "Mochtroid",
"type": "contact",
"hits": 2
}
}
|
|
Pause for the Gravity Jump as late as possible and then repause as soon as possible for the SpringBall Jump. Requires: "canTrickySpringBallJump" "canGravityJump" "canTrickyJump" |
|
Notable: true Stay out of the water, and by extension the sand, of Colosseum by using the spikes as platforms. Morphing before landing on the spikes helps to be able to control the knockback. The final spike jump (which would be the most difficult) is avoided by doing a crouch jump into spring ball jump into IBJ to reach the left door. Perform the spring ball jump near max height. Place the first bomb between about 4 and 6 frames after the spring ball jump; ideally it should be just above the water line. Press pause between about 5 and 10 frames after placing the bomb, to disable Spring Ball (a 'spring fling', to reset fall speed). Place the second bomb soon after regaining control, while the game is fading back in. Requires: "HiJump"
"canPreciseWalljump"
"canIframeSpikeJump"
{
"spikeHits": 2
}
"canNeutralDamageBoost"
{
"or": [
"canHorizontalDamageBoost",
{
"spikeHits": 1
}
]
}
"h_canMaxHeightSpringBallJump"
{
"or": [
"canSpringFling",
"canInsaneJump"
]
}
"canBombJumpWaterEscape"
"h_canJumpIntoIBJ"
|
|
From: 3
Top Right Door
To: 1
Left Door
Notable: true
Jump out of the sand to lure down mochtroids to freeze. It's recommended to bring a Mochtroid into the middle section of the room. Mochtroid damage is pretty hard to avoid, but can be. Requires: "canSuitlessMaridia"
"canTrickyJump"
"canPlayInSand"
"canMochtroidIceClimb"
"canCameraManip"
{
"or": [
"canInsaneJump",
{
"enemyDamage": {
"enemy": "Mochtroid",
"type": "contact",
"hits": 2
}
}
]
}
|
|
Jump out of the sand to lure down mochtroids to freeze. It's recommended to bring a Mochtroid into the middle section of the room. Mochtroid damage is pretty hard to avoid, but can be. Mochtroid movement and freeze timing gets harder at the waterline. Requires: "h_canNavigateUnderwater"
{
"or": [
"Gravity",
"HiJump"
]
}
"canTrickyJump"
"canPlayInSand"
"canMochtroidIceClimb"
"canCameraManip"
{
"or": [
"canInsaneJump",
{
"enemyDamage": {
"enemy": "Mochtroid",
"type": "contact",
"hits": 2
}
}
]
}
|
|
Only requires a runway of approximately 1 tile in the adjacent room. Entrance condition: {
"comeInJumping": {
"speedBooster": "any",
"minTiles": 1
}
}
Requires: "HiJump" "canTrickyJump" "canCrossRoomJumpIntoWater" "canMomentumConservingTurnaround" |
|
Requires: "canSuitlessMaridia"
"canSpringBallJumpMidAir"
{
"or": [
"h_canMaxHeightSpringBallJump",
"HiJump",
"canUseFrozenEnemies"
]
}
|
|
Requires a runway of at least 2 tiles in the adjacent room. Jump as late as possible to avoid the ledge hanging over the door. Entrance condition: {
"comeInJumping": {
"speedBooster": "any",
"minTiles": 2
}
}
Requires: "canCrossRoomJumpIntoWater" "canTrickyJump" |
|
From: 1
Left Door (locked)
To: 2
Right Door (locked)
Requires a runway of at least 2 tiles (with no open end) in the adjacent room. Jump as late as possible to avoid the ledge hanging over the door. Entrance condition: {
"comeInJumping": {
"speedBooster": false,
"minTiles": 1.4375
}
}
Requires: "canCrossRoomJumpIntoWater" "canTrickyJump" |
|
From: 1
Left Door (locked)
To: 2
Right Door (locked)
Requires an air ball and a runway of only 1 tile in the adjacent room. Aim to morph on contact with the ceiling to slide accross it for extra distance. Entrance condition: {
"comeInJumping": {
"speedBooster": "any",
"minTiles": 1
}
}
Requires: "canCrossRoomJumpIntoWater" "canLateralMidAirMorph" "canTrickyJump" |
|
Requires: "Gravity"
{
"or": [
"SpaceJump",
"canWalljump",
"h_IBJFromSpikes",
{
"and": [
"h_canIBJ",
"h_canHBJ"
]
},
"h_canDiagonalBombJump"
]
}
|
|
From: 2
Right Door
To: 4
Top Right Ledge Junction
Requires a runway of at least 1 tile in the adjacent room, although it is easier with more. Entrance condition: {
"comeInJumping": {
"speedBooster": "any",
"minTiles": 1
}
}
Requires: "HiJump"
{
"or": [
"canWalljump",
"canTrickyJump",
"SpeedBooster"
]
}
"canCrossRoomJumpIntoWater"
|
|
From: 2
Right Door
To: 4
Top Right Ledge Junction
Requires a runway of at least 17 tiles in the adjacent room. Entrance condition: {
"comeInJumping": {
"speedBooster": true,
"minTiles": 17
}
}
Requires: "canCrossRoomJumpIntoWater" "canTrickyJump" |
|
From: 2
Right Door
To: 4
Top Right Ledge Junction
Notable: true 
Requires a runway of at least 1 tiles in the adjacent room, although it is easier with more. Start the IBJ as far left as possible. The furthest right is just right of the waterfall. Turning around, carefully, is one way to lose forward momentum and begin the IBJ. At the top of the IBJ bomb to the left and unmorph to reset fall speed. Entrance condition: {
"comeInJumping": {
"speedBooster": false,
"minTiles": 1
}
}
Requires: "h_canJumpIntoIBJ" "h_canBombHorizontally" "h_canResetFallSpeed" "canCrossRoomJumpIntoWater" "canTrickyJump" |
|
From: 2
Right Door
To: 4
Top Right Ledge Junction
There is just enough distance for a MidAir SpringBall jump to reach without HiJump. Requires: "Gravity"
"canSpringBallJumpMidAir"
{
"or": [
"HiJump",
{
"and": [
"h_canMaxHeightSpringBallJump",
"canSpringFling"
]
}
]
}
|
|
From: 2
Right Door
To: 4
Top Right Ledge Junction
SpringBall jump just as Samus exits the water to reach the distant ledge. To get enough horizontal distance, either use a Stationary Lateral Mid-Air Morph with a crouch jump for extra height, or spin jump out before morphing. Or SpringBall jump part of the way over and land on a Bomb explosion to cross the rest of the distance. Requires: "canSuitlessMaridia"
"HiJump"
"h_canMaxHeightSpringBallJump"
"canTrickyJump"
{
"or": [
"canStationaryLateralMidAirMorph",
{
"and": [
"canJumpIntoIBJ",
"h_canBombHorizontally"
]
}
]
}
|
|
Requires: "Gravity"
"h_canIBJ"
{
"or": [
"h_canBombHorizontally",
"h_IBJFromSpikes"
]
}
|
|
Requires: "Gravity"
{
"or": [
"SpaceJump",
"canWalljump",
"canSpringBallJumpMidAir",
"h_canDiagonalBombJump",
"h_IBJFromSpikes"
]
}
|
|
Cacatac Alley HiJumpless Double SpringBall Jump and Bomb-Grapple-Jump (Beyond)
East Cactus Alley Room
From: 5
Bottom Middle Junction
To: 4
Top Right Ledge Junction
Notable: true 
1) Crouch jump and then SpringBall jump. 2) Bomb-Grapple-Jump using the distant Cacatac who is above the water. 3) SpringBall jump again just as Samus exits the water. Requires: "canBombGrappleJump" "canDoubleSpringBallJumpMidAir" "h_canMaxHeightSpringBallJump" |
|
It's possible to get out of the sand suitless and without HiJump after falling from the chute, by hugging the left side and moving quickly. Requires: "canSuitlessMaridia"
"canPlayInSand"
{
"or": [
{
"and": [
"h_canMaxHeightSpringBallJump",
{
"or": [
"canWalljump",
"can4HighMidAirMorph",
"h_canJumpIntoIBJ"
]
}
]
}
]
}
|
|
From: 1
Top Sand Entrance
To: 4
Right Item
Notable: true 
By using the sandfall physics, it is possible to springballjump to the Maridia Power Bomb location without Gravity or HiJump. This requires a very precise spinjump into the sandfall which also exits the sandfall, after being pushed down, with more height than a regular jump. It is very easy to fall into the sand and be unable to escape. Requires: "canSuitlessMaridia" "canSandfallBounce" "canTrickySpringBallJump" "canTrickyJump" |
|
From: 1
Top Sand Entrance
To: 4
Right Item
Shinespark vertically from the sand to get onto the first ledge. Carefully get to the second ledge and return to lure the Boulder, or shoot it with a Super. Entrance condition: {
"comeInShinecharged": {
"framesRequired": 140
},
"comesThroughToilet": "any"
}
Requires: "canSuitlessMaridia"
"Morph"
"canPlayInSand"
"canShinechargeMovementComplex"
{
"shinespark": {
"frames": 12
}
}
{
"or": [
"HiJump",
"canSpringBallJumpMidAir",
"canSunkenTileWideWallClimb"
]
}
{
"or": [
"canTrickyJump",
{
"ammo": {
"type": "Super",
"count": 1
}
},
{
"enemyDamage": {
"enemy": "Boulder",
"type": "contact",
"hits": 1
}
}
]
}
|
|
Requires a runway of 1 tile in the adjacent room. Use Space Jump or a wall jump after getting out of the water. Entrance condition: {
"comeInJumping": {
"speedBooster": "any",
"minTiles": 1
}
}
Requires: "canCrossRoomJumpIntoWater"
"canTrickyJump"
{
"or": [
"canWalljump",
"SpaceJump"
]
}
|
|
From: 1
Top Left Door
To: 4
Top Right Door
Requires a runway of 4 tile in the adjacent room. Entrance condition: {
"comeInJumping": {
"speedBooster": true,
"minTiles": 4
}
}
Requires: "canCrossRoomJumpIntoWater" "canTrickyJump" "HiJump" |
|
Only requires a runway of approximately 1 tile in the adjacent room. Take two Mochtroid hits or kill it using a Power Bomb or 5 Bombs. Entrance condition: {
"comeInJumping": {
"minTiles": 1,
"speedBooster": "any"
}
}
Requires: "h_canJumpIntoIBJ"
{
"or": [
{
"ammo": {
"type": "PowerBomb",
"count": 1
}
},
{
"and": [
"h_canCeilingBombJump",
{
"enemyDamage": {
"enemy": "Mochtroid",
"type": "contact",
"hits": 1
}
}
]
},
{
"and": [
"h_canDoubleBombJump",
{
"enemyDamage": {
"enemy": "Mochtroid",
"type": "contact",
"hits": 2
}
}
]
}
]
}
"canCrossRoomJumpIntoWater"
"canMomentumConservingTurnaround"
"canTrickyJump"
|
|
SpringBall jump just as Samus exits the water to reach the distant ledge. A Crouch jump makes the SpringBall jump easier, but at the cost of some horizontal movement. Requires: "canSuitlessMaridia" "HiJump" "canTrickyJump" "h_canMaxHeightSpringBallJump" "canStationaryLateralMidAirMorph" |
|
From: 2
Bottom Left Door
To: 4
Top Right Door
Requires a runway of 38 tiles in the adjacent room. Entrance condition: {
"comeInJumping": {
"speedBooster": true,
"minTiles": 38
}
}
Requires: "canTrickyJump" "canCrossRoomJumpIntoWater" |
|
From: 2
Bottom Left Door
To: 4
Top Right Door
Requires a runway of 8 tiles in the adjacent room. Entrance condition: {
"comeInJumping": {
"speedBooster": true,
"minTiles": 8
}
}
Requires: "HiJump" "canDownGrab" "canTrickyJump" "canCrossRoomJumpIntoWater" |
|
From: 2
Bottom Left Door
To: 4
Top Right Door
Requires a runway of 1 tile in the adjacent room. There is just enough room to wall jump after breaking the water. Entrance condition: {
"comeInJumping": {
"speedBooster": false,
"minTiles": 1
}
}
Requires: "canPreciseWalljump" "canTrickyJump" "canCrossRoomJumpIntoWater" |
|
Requires a runway of at least 2 tiles (with no open end) in the adjacent room. Entrance condition: {
"comeInJumping": {
"speedBooster": false,
"minTiles": 1.4375
}
}
Requires: "canCrossRoomJumpIntoWater" "canMomentumConservingTurnaround" "canTrickyJump" |
|
From: 1
Top Sand Entrance
To: 7
Below Morph Tunnel Junction
Get to the left side of the room while avoiding the hole in the ground, jump up through the Morph tunnel. Jump up to the ledge with either Gravity, HiJump and a Crouch Jump Down Grab, or a maximum height Spring Ball Jump. Entrance condition: {
"comeInWithGMode": {
"mode": "any",
"morphed": false
},
"comesThroughToilet": "any"
}
Requires: "Morph"
{
"or": [
"Gravity",
{
"and": [
"canSuitlessMaridia",
"HiJump",
"h_canCrouchJumpDownGrab"
]
},
{
"and": [
"canSuitlessMaridia",
"h_canMaxHeightSpringBallJump"
]
}
]
}
|
|
From: 1
Top Sand Entrance
To: 7
Below Morph Tunnel Junction
Break the shot block before reaching the sand and then shinespark up. A diagonal ShineSpark will most likely not have any horizontal movement when performed from the sand. Entrance condition: {
"comeInShinecharged": {
"framesRequired": 160
},
"comesThroughToilet": "any"
}
Requires: "h_canNavigateUnderwater"
"canPlayInSand"
"canHeroShot"
"canTrickyJump"
"canShinechargeMovementTricky"
{
"shinespark": {
"frames": 25,
"excessFrames": 4
}
}
|
|
From: 1
Top Sand Entrance
To: 7
Below Morph Tunnel Junction
HiJump with a good jump from the sand can reach the Solid Rock Maze region. Use the sandfall if Samus gets stuck in the sand. Bouncing on the sand as springball can reach the above maze by altering Samus' fall height, like by bouncing under the solid ledge before trying to jump up. Requires: "canSuitlessMaridia"
{
"or": [
"canPrepareForNextRoom",
"canPlayInSand"
]
}
"HiJump"
"h_canMaxHeightSpringBallJump"
|
|
From: 1
Left Door
To: 3
Right Door
Notable: true 
Build up run speed and jump into the transition to cross this room without touching the water. Shoot open the opposite door upon entering and morph before touching the ceiling to bounce into the open door. Entrance condition: {
"comeInJumping": {
"speedBooster": "any",
"minTiles": 6
}
}
Requires: "Morph" "canTrickyJump" "canLateralMidAirMorph" |
|
From: 1
Left Door
To: 3
Right Door
Notable: true
Build up run speed and jump into the transition to cross this room without touching the water. Shoot open the opposite door upon entering and morph before touching the ceiling to bounce into the open door. Entrance condition: {
"comeInJumping": {
"speedBooster": true,
"minTiles": 5
}
}
Requires: "Morph" "canTrickyJump" "canLateralMidAirMorph" |
|
From: 1
Left Door
To: 3
Right Door
Notable: true 
From the doorframe, wait for the Zoa to rise out of the water, then use it to damage boost into the open opposite door. Requires: "canSuitlessMaridia"
"canTrickyJump"
"canHorizontalDamageBoost"
{
"enemyDamage": {
"enemy": "Zoa",
"type": "contact",
"hits": 1
}
}
|
|
From: 3
Right Door
To: 1
Left Door
Notable: true
Build up run speed and jump into the transition to cross this room without touching the water. Shoot open the opposite door upon entering and morph before touching the ceiling to bounce into the open door. Entrance condition: {
"comeInJumping": {
"speedBooster": "any",
"minTiles": 6
}
}
Requires: "Morph" "canTrickyJump" "canLateralMidAirMorph" |
|
From: 3
Right Door
To: 1
Left Door
Notable: true
Build up run speed and jump into the transition to cross this room without touching the water. Shoot open the opposite door upon entering and morph before touching the ceiling to bounce into the open door. Entrance condition: {
"comeInJumping": {
"speedBooster": true,
"minTiles": 5
}
}
Requires: "Morph" "canTrickyJump" "canLateralMidAirMorph" |
|
From: 3
Right Door
To: 1
Left Door
Notable: true
From the doorframe, wait for the Zoa to rise out of the water, then use it to damage boost into the open opposite door. Requires: "canTrickyJump"
"canHorizontalDamageBoost"
{
"enemyDamage": {
"enemy": "Zoa",
"type": "contact",
"hits": 1
}
}
|
|
From: 4
Junction Below Left Door
To: 5
Junction Below Right Door
Notable: true 
Avoid the Yapping Maw after entering by not standing in one place for too long. Kill the Zoa and quickly jump across the sand. Hitting the Zoas will drop Samus deep into the sand below. Requires: "canSuitlessMaridia" "canTrickyJump" "canPlayInSand" |
|
From: 5
Junction Below Right Door
To: 4
Junction Below Left Door
Notable: true
Avoid the Yapping Maw after entering by not standing in one place for too long. Kill the Zoa and quickly jump across the sand. Hitting the Zoas will drop Samus deep into the sand below. Requires: "canSuitlessMaridia" "canTrickyJump" "canPlayInSand" |
|
From: 1
Left Door
To: 2
Right Door
Notable: true 
Kill all the Zoas and don't pick up their drops. If the door is unlocked, stand in the doorframe and jump across the room. Otherwise, jump across the sand, starting 1.5 tiles away from the sandfall. Hold jump and forward the whole time. Samus will dip into the sand, but still make it to the other side. Requires: "canSuitlessMaridia"
"canCarefulJump"
{
"or": [
{
"doorUnlockedAtNode": 1
},
"canTrickyJump"
]
}
"canPlayInSand"
|
|
From: 2
Right Door
To: 1
Left Door
Notable: true
Kill all the Zoas and don't pick up their drops. If the door is unlocked, stand in the doorframe and jump across the room. Otherwise, jump across the sand, starting 1.5 tiles away from the sandfall. Hold jump and forward the whole time. Samus will dip into the sand, but still make it to the other side. Requires: "canSuitlessMaridia"
"canCarefulJump"
{
"or": [
{
"doorUnlockedAtNode": 2
},
"canTrickyJump"
]
}
"canPlayInSand"
|
|
From: 2
Right Door
To: 3
Junction Left of Morph Tunnel
With Gravity, it's possible to move forward and mid-air morph into the morph passage. The momentum can push Samus into the tunnel, no need to press forward while in mid-air. Requires: "Morph"
"Gravity"
"canTrickyJump"
{
"obstaclesCleared": [
"A"
]
}
|
|
From: 3
Junction Left of Morph Tunnel
To: 1
Left Door
Requires: {
"or": [
"h_canIBJ",
"canWalljump",
"canSpringBallJumpMidAir"
]
}
{
"or": [
{
"enemyKill": {
"enemies": [
[
"Menu",
"Menu",
"Menu"
]
],
"explicitWeapons": [
"PowerBomb",
"ScrewAttack",
"Wave",
"Spazer",
"Plasma",
"Missile",
"Super"
]
}
},
{
"and": [
{
"enemyKill": {
"enemies": [
[
"Menu",
"Menu",
"Menu"
]
]
}
},
{
"or": [
{
"and": [
"canDodgeWhileShooting",
"canTrickyJump"
]
},
{
"and": [
"canDodgeWhileShooting",
{
"enemyDamage": {
"enemy": "Menu",
"type": "contact",
"hits": 1
}
}
]
},
{
"enemyDamage": {
"enemy": "Menu",
"type": "contact",
"hits": 2
}
}
]
}
]
}
]
}
|
|
Watch the right-side standing pirate walk towards the wall as far as possible from below. The available running space is just enough to jump up and walljump the ledge by the door. Requires: "HiJump" "SpeedBooster" "canTrickyJump" "canWalljump" |
|
From: 2
Bottom Right Door
To: 3
Middle Right Door
Notable: true 
Use the Skultera to get onto the top right platform. There are two distinct ways to get up using the top Skultera. 1. Freeze it at the bottom of its path to the left. Crouch jump and down grab to get onto it. The positioning is very precise. 2. Freeze it about a half-tile from the right wall and very quickly stationary spin jump and quickly walljump mash to get up before it thaws. This may be easier by jumping away from the wall, towards the fish, to gain height faster. Requires: "canSuitlessMaridia"
"canTrickyUseFrozenEnemies"
{
"or": [
{
"and": [
"canTrickyJump",
"h_canCrouchJumpDownGrab"
]
},
{
"and": [
"canStationarySpinJump",
"canSunkenTileWideWallClimb"
]
}
]
}
|
|
From: 3
Middle Right Door
To: 4
Top Right Door
Requires: "canTrickyUseFrozenEnemies" "HiJump" "SpeedBooster" "canTrickyJump" "canSpringBallJumpMidAir" |
|
Shoot the Choot either before landing or from the safety of the ledge edge. If bomb jumping, there is a timing for rolling under the Choot. Requires: {
"or": [
"canConsecutiveWalljump",
"h_canFly"
]
}
{
"or": [
"canTrickyJump",
{
"and": [
"canCarefulJump",
{
"enemyKill": {
"enemies": [
[
"Choot"
]
],
"explicitWeapons": [
"Missile",
"Super"
]
}
}
]
}
]
}
|
|
From: 2
Bottom Door
To: 1
Left Door
Using SpeedBooster in the room below and the full length of the runway (starting with Samus hanging over the edge as far as possible), run and jump precisely to make it through without bonking the door frame. Break spin before the transition to expand Samus' hitbox and trigger the transition earlier, retaining more speed and also making it easier to avoid bonking. Hold left through the transition to initiate a turn-around while entering the room. Land on the small platform at the top of the room. Entrance condition: {
"comeInWithPlatformBelow": {
"minHeight": 9,
"maxHeight": 9,
"maxLeftPosition": -38.5,
"minRightPosition": -7
},
"comesThroughToilet": "any"
}
Requires: "canCrossRoomJumpIntoWater" "SpeedBooster" "canTrickyJump" "canInsaneJump" |
|
From: 2
Bottom Door
To: 4
Water Level Junction
Gain run speed to the right and jump through the door without bonking the door frame. After the transition, continue holding right while remaining in spin jump. This strat could also be performed without passing through the Toilet, but a precise down-grab would be needed to get onto the ledge at the end; in this case it would be easier to perform a standing jump instead. Entrance condition: {
"comeInWithPlatformBelow": {
"minHeight": 6,
"maxHeight": 6,
"maxLeftPosition": -2.5,
"minRightPosition": -0.5
},
"comesThroughToilet": "yes"
}
Requires: "canCrossRoomJumpIntoWater" "canTrickyJump" |
|
From: 2
Bottom Door
To: 4
Water Level Junction
Using SpeedBooster in the room below, run and jump, pressing against the right side of the door frame through the transition without breaking spin. It may be necessary to use less runway than is available, to avoid getting too much vertical speed. Entrance condition: {
"comeInWithPlatformBelow": {
"minHeight": 9,
"maxHeight": 10,
"maxLeftPosition": -34.5,
"minRightPosition": -7
},
"comesThroughToilet": "no"
}
Requires: "canCrossRoomJumpIntoWater" "SpeedBooster" "canTrickyJump" |
|
From: 2
Bottom Door
To: 4
Water Level Junction
Standing on the platform in the room below, jump up (crouch jump makes it easier) and press right against the door frame through the transition. After the transition, perform a spring ball jump mid-air to reach the ledge. Entrance condition: {
"comeInWithPlatformBelow": {
"minHeight": 7,
"maxHeight": 7,
"maxLeftPosition": 1,
"minRightPosition": 1
},
"comesThroughToilet": "no"
}
Requires: "canCrossRoomJumpIntoWater"
"canTrickySpringBallJump"
{
"or": [
"canCrouchJump",
"canTrickyJump"
]
}
|
|
From: 4
Water Level Junction
To: 1
Left Door
Crouch jump + down grab only works as a way out of the water on the right side. Requires: "canSuitlessMaridia" "h_canCrouchJumpDownGrab" "canTrickyJump" |
|
Getting out with only Gravity and no wall jump requires a tight crouch jump and down grab while above the water: Position very close to the edge, and press forward immediately after crouch jumping (almost simultaneously). Requires: "Gravity" "canTrickyJump" "h_canCrouchJumpDownGrab" |
|
This is a max height springball jump. Requires: "canSuitlessMaridia" "h_canMaxHeightSpringBallJump" |
|
From: 1
Left Door
To: 3
Junction Below Right Door
Quickly shoot to break the shot block and then do a momentumConservingTurnaround to ascend into the little region. Another movement item will be needed to get closer to the crumble blocks. Entrance condition: {
"comeInJumping": {
"speedBooster": false,
"minTiles": 2
}
}
Requires: "canTrickyJump"
"canCrossRoomJumpIntoWater"
"canMomentumConservingTurnaround"
{
"or": [
"canUseFrozenEnemies",
"canSpringBallJumpMidAir",
"HiJump"
]
}
|
|
From: 1
Left Door
To: 3
Junction Below Right Door
It is recommended to shoot the ceiling block immediately upon room entry to bring one of the Puyos down so that it will not be a problem later. Requires: "canSuitlessMaridia"
"h_canMaxHeightSpringBallJump"
{
"or": [
"can4HighMidAirMorph",
"canStationaryLateralMidAirMorph",
{
"and": [
"canNeutralDamageBoost",
{
"enemyDamage": {
"enemy": "Puyo",
"type": "contact",
"hits": 2
}
}
]
}
]
}
|
|
From: 1
Left Door
To: 3
Junction Below Right Door
It is recommended to shoot the ceiling block immediately upon room entry to bring one of the Puyos down so that it will not be a problem later. Requires: "canSuitlessMaridia"
"canTrickySpringBallJump"
"canTrickyJump"
"canJumpIntoRespawningBlock"
{
"or": [
"can4HighMidAirMorph",
"canStationaryLateralMidAirMorph"
]
}
|
|
From: 3
Junction Below Right Door
To: 2
Right Door
Notable: true 
Freeze the Puyo at standing-shot height and then jump on top of it with a spinjump before morphing, unmorphing, and using X-Ray to standup and clip. Standing on a side of the room and shooting forward will freeze the Puyo at the correct height. Requires: "Gravity"
"h_canXRayCeilingClip"
"canTrickyUseFrozenEnemies"
{
"or": [
"canTrickyJump",
{
"enemyDamage": {
"enemy": "Puyo",
"type": "contact",
"hits": 2
}
}
]
}
|
|
From: 1
Left Door
To: 2
Right Door
Notable: true 
Enter with enough run speed to jump (after the transition) across the full room using one SpringBall Jump. When exiting the first Sandfall, Samus will be rising still. That is the time to Springball jump. Entrance condition: {
"comeInRunning": {
"minTiles": 10,
"speedBooster": true
}
}
Requires: "canPlayInSand" "canCrossRoomJumpIntoWater" "canLateralMidAirMorph" "canTrickySpringBallJump" "canTrickyJump" |
|
From: 1
Left Door
To: 4
Junction Below Sand Entrance
Requires a runway of 7 tiles (with no open end) in the adjacent room. Jump into an air ball on room entry in order to get to the first pillar. Aim down after the transition to avoid hitting the overhang near the door. Entrance condition: {
"comeInJumping": {
"speedBooster": false,
"minTiles": 6.4375
}
}
Requires: "canCrossRoomJumpIntoWater"
"canPlayInSand"
"canLateralMidAirMorph"
{
"or": [
"canTrickyJump",
{
"and": [
"canCarefulJump",
{
"enemyDamage": {
"enemy": "Evir",
"type": "contact",
"hits": 1
}
}
]
}
]
}
|
|
From: 1
Left Door
To: 4
Junction Below Sand Entrance
Bomb boost through the doorway as close to the door transition as possible in order to get as far as possible. Entrance condition: {
"comeInWithBombBoost": {}
}
Requires: "canCrossRoomJumpIntoWater" "canTrickyJump" |
|
Gain momentum in the room to the left, then jump at the edge of the runway in this room in order to jump off of the sand and land on the first pillar. Requires a runway of 7 tiles (with no open end) in the adjacent room, and killing the second Evir with a quick super or two plasma hits (note that the particle despawns as the Evir dies). Entrance condition: {
"comeInJumping": {
"speedBooster": false,
"minTiles": 6.4375
}
}
Requires: "canCrossRoomJumpIntoWater"
"canPlayInSand"
"canTrickyJump"
{
"enemyKill": {
"enemies": [
[
"Evir"
]
],
"explicitWeapons": [
"Plasma",
"Super"
]
}
}
|
|
From: 2
Right Door
To: 1
Left Door
Notable: true
Enter with enough run speed to jump (after the transition) across the full room using one SpringBall Jump. When exiting the first Sandfall, Samus will be rising still. That is the time to Springball jump. Alternatively, an immediate pause can be used to SpringBall jump during the first narrow gap between Sandfalls. Sometimes Samus will land above the sand on the far left end of the room, where it will be necessary to unmorph and jump out. Entrance condition: {
"comeInRunning": {
"minTiles": 10,
"speedBooster": true
}
}
Requires: "canPlayInSand" "canCrossRoomJumpIntoWater" "canLateralMidAirMorph" "canTrickySpringBallJump" "canTrickyJump" |
|
From: 2
Right Door
To: 2
Right Door
The Evir won't shoot unless Samus enters the sand falls. Getting to the transition tiles while standing before the projectile can be tricky. With no movement items besides Gravity, walk off the platform while facing right, turn around spin jump to barely enter the sand fall before landing back on the platform and quickly getting to the door. Requires: "Gravity" "canTrickyJump" Exit condition: {
"leaveWithGModeSetup": {}
}
|
|
Gain momentum in the room to the right, then jump immediately on entry in order to land on the first pillar. Jumping too late will likely put Samus into the pit. Requires a small runway of only one tile or less in the adjacent room. Jumping before the door transition will set Samus straight into an Evir projectile, knocking her into the sand. Entrance condition: {
"comeInRunning": {
"speedBooster": false,
"minTiles": 0.4375
}
}
Requires: "canCrossRoomJumpIntoWater" "canPlayInSand" "canTrickyJump" "canTrickyUseFrozenEnemies" |
|
The sand does not impede Samus in G-Mode. It is possible to jump to the tall pillar with nothing, requiring a subpixel precise jump. Running before jumping doesn't help. Stand one pixel from the right edge and spinjump to the right. Entrance condition: {
"comeInWithGMode": {
"mode": "any",
"morphed": false
},
"comesThroughToilet": "any"
}
Requires: "h_canNavigateUnderwater"
{
"or": [
"Gravity",
"HiJump",
"canSpringBallJumpMidAir",
"canTrickyJump"
]
}
|
|
To safely avoid the Evir shot, enter in a spin jump from either the far left or far right side of the transition. Requires: "canPrepareForNextRoom"
"canPlayInSand"
"canTrickyJump"
{
"or": [
"Gravity",
"HiJump",
"canInsaneJump"
]
}
|
|
From: 4
Junction Below Sand Entrance
To: 1
Left Door
Notable: true .png)
.gif)
If entering from the sandfall above, come in at the far left of the transition, with either a spin-jump or i-frames, to avoid the Evir shot; land on the right side of the pillar to the left, being careful to not bring left Evir on camera. If coming from the right side of the room, then moonwalk on the center pillar to scroll the camera as far right as possible, to avoid getting hit by an Evir shot; alternatively, jump slightly to the left and freeze the Evir, then return back to the center pillar before jumping across the sand. Freeze the right Evir and jump onto it. Quickly move left and fire an angle-down shot to freeze the left Evir before it descends too far. Jump onto the left Evir, back up to the right side of it to maximize space to build momentum, and jump to the left onto the sand and then onto the ledge. If Samus does not quite get enough height to make it onto the ledge, then break spin, turn around to the right, land on the sand again, and do a turnaround spin-jump to the left. If the Evirs descend too far, it is possible to use a Power Bomb to bring them back up again, but caution is needed to avoid killing the first Evir, and it is difficult to avoid getting shot. Requires: "canSuitlessMaridia"
"canTrickyJump"
"canTrickyUseFrozenEnemies"
"canPlayInSand"
{
"or": [
"canCameraManip",
{
"and": [
{
"ammo": {
"type": "PowerBomb",
"count": 1
}
},
{
"enemyDamage": {
"enemy": "Evir",
"type": "particle",
"hits": 2
}
}
]
}
]
}
|
|
Requires: "canSuitlessMaridia"
"HiJump"
"canPlayInSand"
{
"or": [
"canTrickyJump",
{
"enemyDamage": {
"enemy": "Evir",
"type": "particle",
"hits": 1
}
},
"Ice",
{
"enemyKill": {
"enemies": [
[
"Evir"
],
[
"Evir"
]
],
"explicitWeapons": [
"Super",
"Plasma",
"PowerBombPeriphery"
]
}
}
]
}
|
|
From: 4
Junction Below Sand Entrance
To: 1
Left Door
Requires: "Gravity"
{
"or": [
"canPlayInSand",
"canWalljump",
"h_canUseSpringBall"
]
}
{
"or": [
"canTrickyJump",
{
"enemyDamage": {
"enemy": "Evir",
"type": "particle",
"hits": 1
}
},
"Ice",
"ScrewAttack",
{
"enemyKill": {
"enemies": [
[
"Evir"
],
[
"Evir"
]
],
"explicitWeapons": [
"Super",
"Plasma",
"PowerBombPeriphery"
]
}
}
]
}
|
|
From: 4
Junction Below Sand Entrance
To: 2
Right Door
Notable: true .png)
.gif)
From the sand fall, quickly get onto the left platform to prevent the right side Evir from lowering too far. Jump on the sand to the right while freezing the Evir as high as possible. Refreeze the Evir so it is a slightly higher platform than the right pillar. Perform a spring ball jump with a stationary lateral mid-air morph from the left side of the current platform to get onto the Evir. Use a running jump off of the Evir. As a backup, it may be possible to make the Evir rise again by hitting it with a PB - place the PB in the air to avoid double hitting and killing it. Requires: "canSuitlessMaridia" "canTrickyUseFrozenEnemies" "canPlayInSand" "h_canMaxHeightSpringBallJump" "canStationaryLateralMidAirMorph" |
|
Requires: "Gravity"
"canTrickyJump"
"canHorizontalDamageBoost"
{
"enemyDamage": {
"enemy": "Evir",
"type": "particle",
"hits": 1
}
}
|
|
Requires: "Gravity"
{
"or": [
"Ice",
"ScrewAttack",
{
"enemyKill": {
"enemies": [
[
"Evir"
]
],
"explicitWeapons": [
"Plasma",
"Super",
"PowerBombPeriphery"
]
}
},
{
"enemyDamage": {
"enemy": "Evir",
"type": "particle",
"hits": 1
}
}
]
}
{
"and": [
"canPlayInSand",
{
"or": [
"canWalljump",
"HiJump",
"canUseFrozenEnemies",
"canGravityJump",
{
"and": [
"canTrickyJump",
"can4HighMidAirMorph",
"canTrickySpringBallJump"
]
}
]
}
]
}
|
|
From: 4
Junction Below Sand Entrance
To: 2
Right Door
Let the Evir descend slightly from its spawn point to be at the correct height. A power bomb can be used to bring it back up if it falls too far. Requires: "canSuitlessMaridia" "HiJump" "canTrickyJump" "canTrickyUseFrozenEnemies" "canPlayInSand" |
|
From: 1
Left Door
To: 6
Junction Above Bomb Blocks
Notable: true 
Use Screw Attack to break the bomb block by entering from a non-water room with a spin jump. It helps to enter as low as possible and with as much horizontal speed as possible and with HiJump turned off. Even if executed correctly, the trick can fail with 50% probability due to collision oscillation. Entrance condition: {
"comeInJumping": {
"speedBooster": "any",
"minTiles": 4.4375
}
}
Requires: "canTrickyJump" "canCrossRoomJumpIntoWater" "ScrewAttack" |
|
From: 1
Left Door
To: 6
Junction Above Bomb Blocks
Notable: true
Use Screw Attack to break the bomb block by entering from a non-water room with a spin jump. It helps to enter as low as possible and with as much horizontal speed as possible and with HiJump turned off. Even if executed correctly, the trick can fail with 50% probability due to collision oscillation. Entrance condition: {
"comeInJumping": {
"speedBooster": true,
"minTiles": 3
}
}
Requires: "canTrickyJump" "canCrossRoomJumpIntoWater" "ScrewAttack" |
|
From: 2
Right Door
To: 6
Junction Above Bomb Blocks
Notable: true
Use Screw Attack to break the bomb block by entering from a non-water room with a spin jump. It helps to enter as low as possible and with as much horizontal speed as possible and with HiJump turned off. Even if executed correctly, the trick can fail with 50% probability due to collision oscillation. Entrance condition: {
"comeInJumping": {
"speedBooster": "any",
"minTiles": 4
}
}
Requires: "canTrickyJump" "canCrossRoomJumpIntoWater" "ScrewAttack" |
|
From: 2
Right Door
To: 6
Junction Above Bomb Blocks
Notable: true
Use Screw Attack to break the bomb block by entering from a non-water room with a spin jump. It helps to enter as low as possible and with as much horizontal speed as possible and with HiJump turned off. Even if executed correctly, the trick can fail with 50% probability due to collision oscillation. Entrance condition: {
"comeInJumping": {
"speedBooster": true,
"minTiles": 3
}
}
Requires: "canTrickyJump" "canCrossRoomJumpIntoWater" "ScrewAttack" |
|
Requires: "canSuitlessMaridia"
{
"or": [
{
"and": [
"HiJump",
{
"or": [
"canDownGrab",
"canSpringBallJumpMidAir",
"canConsecutiveWalljump"
]
}
]
},
"h_canMaxHeightSpringBallJump"
]
}
|
|
From: 4
West Leg Sand
To: 5
Junction Above Grapple Block
Notable: true 
Gets above the grapple block by doing a well-positioned and well-timed Gravity jump following a good jump off the sand. It is also possible to do this off of a wall jump on the side immediately followed by a gravity jump. Break spin before touching the sand, and then spinjump to get a good jump off of the sand. Breaking spin after jumping from the sand will remove horizontal momentum, or a stationary spinjump can help. Requires: "Grapple"
"canGravityJump"
"canPlayInSand"
"canCarefulJump"
{
"or": [
"canStationarySpinJump",
"canTrickyJump"
]
}
|
|
From: 4
West Leg Sand
To: 5
Junction Above Grapple Block
Requires a mid-air SpringBall jump off the sand. Break spin before touching the sand, and then spinjump to get a good jump off of the sand. A stationary spinjump or a turnaround spin jump can help but morphing will remove all horizontal momentum. Requires: "Grapple" "canSuitlessMaridia" "HiJump" "canSpringBallJumpMidAir" "canPlayInSand" "canTrickyJump" |
|
Using movement tricks to reduce fall speed even slightly can avoid touching the sand. A Flatley style turnaround over the grapple block hole reduces fall speed some, but also needs a down back or a tiny jump. Requires: "canSuitlessMaridia"
{
"or": [
{
"and": [
"canFlatleyJump",
{
"or": [
"canTrickyJump",
"canDownBack"
]
}
]
},
"canWalljump",
"h_canResetFallSpeed"
]
}
|
|
From: 5
Junction Above Grapple Block
To: 2
East Leg Right Door
Notable: true Wait the water tide to reach its peak, then crouch jump into a spring ball jump into an IBJ. Perform the spring ball jump near max height. Place the first bomb between about 4 and 6 frames after the spring ball jump; ideally it should be just above the water line. Press pause between about 5 and 10 frames after placing the bomb, to disable Spring Ball (a 'spring fling', to reset fall speed). Place the second bomb soon after regaining control, while the game is fading back in. When close to the top, perform a spring ball jump to reach the ledge; release jump as soon as Samus is high enough to clear the ledge, in order to avoid taking a Menu hit. Requires: "HiJump" "h_canMaxHeightSpringBallJump" "canSpringFling" "canBombJumpWaterEscape" "canDoubleBombJump" "h_canJumpIntoIBJ" |
|
It may be necessary to turn off Gravity Suit in order have more time to jump and morph underwater. Requires: "Morph"
"Gravity"
{
"or": [
"canWalljump",
"HiJump",
"h_canIBJ",
"canGravityJump",
"h_canSpringBallBombJump",
"canSpringBallJumpMidAir",
"SpaceJump",
{
"and": [
"canUnmorphBombBoost",
"canTrickyJump"
]
}
]
}
|
|
From: 2
Item
To: 1
Left Door
Notable: true 
Perform a canSunkenTileWideWallClimb to get to the water surface, then use space jump at the water surface. Then either use space jump when the water is low then a spring ball jump to escape, or space jump when the water is high into a tight midair morph. Requires: "Morph" "canSuitlessMaridia" "canSpringBallJumpMidAir" "canSunkenTileWideWallClimb" "canTrickyJump" "can4HighMidAirMorph" "canSpaceJumpWaterBounce" |
|
Gain momentum in the room to the left, then jump at the edge of the runway in order to land on the first pillar. Requires a runway of at least 2 tiles (with no open end) in the adjacent room. Entrance condition: {
"comeInRunning": {
"speedBooster": "any",
"minTiles": 1.4375
}
}
Requires: "HiJump" "canCrossRoomJumpIntoWater" "canTrickyJump" "canPlayInSand" |
|
Gain momentum in the room to the left, then jump in this room in order to land on the first pillar. Ensure that Speed Booster is disabled. With a short runway of 5 tiles (with no open end) in the adjacent room, it is required to jump as late as possible at the edge of the runway in this room. With any longer of a runway, the jump is much less precise. Entrance condition: {
"comeInRunning": {
"speedBooster": false,
"minTiles": 4.4375
}
}
Requires: "canCrossRoomJumpIntoWater" "canPlayInSand" "canTrickyJump" |
|
From: 1
Left Door
To: 5
Left Pillar Junction
Notable: true 
Time a bomb to hit Samus when she is morphed, 1 pixel into the sand, inside a sandfall, and moving horizontally. There is a setup using a Sand IBJ to rise up the sandfall from the floor and Sandfall Bounce with the correct timing. An alternate setup places the bomb before entering the sand and jumps into it with a very fast jump morph, using HiJump. Requires: "canSuitlessMaridia"
"canTrickyJump"
"canSandfallBounce"
"h_canUseMorphBombs"
{
"or": [
"canSandIBJ",
{
"and": [
"HiJump",
"can4HighMidAirMorph"
]
}
]
}
|
|
From: 2
Right Door
To: 2
Right Door
The Evir won't shoot unless Samus is on the left tile of the platform. Getting to the transition tiles while standing before the projectile can be tricky. Either do two quick small spin jumps, one onto it and one back, breaking spin before landing both times, or start with Samus' toe barely on the last tile, move left then do a short spin jump to the right, also breaking spin before landing. Requires: "canSuitlessMaridia" "canTurnaroundSpinJump" "canTrickyJump" Exit condition: {
"leaveWithGModeSetup": {}
}
|
|
From: 2
Right Door
To: 4
Below Sand Entrance
It is possible to cross this segment with nothing. Cancel spin before hitting the sand, then get a good jump off the sand in multiple places. Requires: "canSuitlessMaridia" "canTrickyJump" "canPlayInSand" |
|
Enter on the right side of the transition and move left to avoid damage. Requires: "canPrepareForNextRoom"
"canPlayInSand"
"canTrickyJump"
{
"or": [
"Gravity",
"HiJump",
"canInsaneJump"
]
}
|
|
From: 4
Below Sand Entrance
To: 2
Right Door
Notable: true .png)
.gif)
From the sand fall, quickly get onto the left platform to prevent the right side Evir from lowering too far. Freeze the right Evir, then jump on the sand to the right while shooting ice over the first Evir to also freeze the second. Freezing the first Evir very high up would also work. As a backup, it may be possible to make them rise again by hitting them with a PB - place the PB in the air to avoid double hitting and killing them. Requires: "canSuitlessMaridia" "canPlayInSand" "canTrickyJump" "canTrickyUseFrozenEnemies" |
|
From: 4
Below Sand Entrance
To: 2
Right Door
Notable: true 
Perform multiple stationary lateral mid-air morphs, while avoiding the Evir projectiles, to cross the room. It is necessary to start the jumps from the far side of the platforms in order to gain more horizontal momentum before entering the sand falls. Falling into the sand will often result in a soft lock. Requires: "canSuitlessMaridia"
"canPlayInSand"
"h_canMaxHeightSpringBallJump"
"canStationaryLateralMidAirMorph"
{
"or": [
{
"enemyKill": {
"enemies": [
[
"Evir"
]
],
"explicitWeapons": [
"Super",
"Missile",
"PowerBombPeriphery",
"Plasma"
]
}
},
{
"enemyDamage": {
"enemy": "Evir",
"type": "particle",
"hits": 1
}
}
]
}
|
|
From: 4
Below Sand Entrance
To: 5
Left Pillar Junction
Requires: "Gravity"
{
"or": [
"canPlayInSand",
"canWalljump",
"h_canUseSpringBall",
"canCarefulJump"
]
}
{
"or": [
{
"and": [
"ScrewAttack",
"canCarefulJump"
]
},
"canTrickyJump",
{
"enemyDamage": {
"enemy": "Evir",
"type": "particle",
"hits": 1
}
}
]
}
|
|
From: 4
Below Sand Entrance
To: 5
Left Pillar Junction
Requires: "canSuitlessMaridia"
"HiJump"
"canPlayInSand"
{
"or": [
"canTrickyJump",
{
"enemyDamage": {
"enemy": "Evir",
"type": "particle",
"hits": 1
}
}
]
}
|
|
From: 4
Below Sand Entrance
To: 5
Left Pillar Junction
Notable: true .png)
.gif)
Freeze the Evir quickly before it descends and use it to get to the platforms. Getting a good jump while on the right side of the floating block can get Samus to the leftmost block. With a clean jump off of the sand, Samus can then get onto the final vertical pillar. Requires: "canSuitlessMaridia" "canPlayInSand" "canTrickyJump" "canTrickyUseFrozenEnemies" |
|
From: 4
Below Sand Entrance
To: 5
Left Pillar Junction
Notable: true
Perform multiple stationary lateral mid-air morphs, while avoiding the Evir projectiles, to cross the room. It is necessary to start the jumps from the far side of the platforms in order to gain more horizontal momentum before entering the sand falls. Falling into the sand will often result in a soft lock. Requires: "canSuitlessMaridia"
"canPlayInSand"
"h_canMaxHeightSpringBallJump"
{
"or": [
{
"enemyKill": {
"enemies": [
[
"Evir"
]
],
"explicitWeapons": [
"Super",
"Missile",
"PowerBombPeriphery",
"Plasma"
]
}
},
{
"enemyDamage": {
"enemy": "Evir",
"type": "particle",
"hits": 1
}
}
]
}
|
|
From: 5
Left Pillar Junction
To: 4
Below Sand Entrance
Requires: "Gravity"
{
"or": [
"HiJump",
"canPreciseWalljump",
"canPlayInSand"
]
}
{
"or": [
"canTrickyJump",
{
"enemyDamage": {
"enemy": "Evir",
"type": "particle",
"hits": 1
}
}
]
}
|
|
From: 5
Left Pillar Junction
To: 4
Below Sand Entrance
Requires: "canSuitlessMaridia"
"HiJump"
"canPlayInSand"
{
"or": [
"canCarefulJump",
"canSpringBallJumpMidAir"
]
}
{
"or": [
"canTrickyJump",
{
"enemyDamage": {
"enemy": "Evir",
"type": "particle",
"hits": 1
}
}
]
}
|
|
From: 5
Left Pillar Junction
To: 4
Below Sand Entrance
Notable: true
Perform multiple stationary lateral mid-air morphs, while avoiding the Evir projectiles, to cross the room. It is necessary to start the jumps from the far side of the platforms in order to gain more horizontal momentum before entering the sand falls. Falling into the sand will often result in a soft lock. Requires: "canSuitlessMaridia" "canPlayInSand" "h_canMaxHeightSpringBallJump" "canStationaryLateralMidAirMorph" |
|
Notable: true 
Avoid the Baby Metroid by jumping over it many times in order to clear a path through the seaweed. Requires: {
"obstaclesNotCleared": [
"A"
]
}
"canMidAirMorph"
"HiJump"
"canTrickyJump"
"canBabyMetroidAvoid"
|
|
Jump over the Baby Metroid to avoid getting grabbed. Use Wave plus a Wide Beam to clear much of the seaweed with each shot. The classic counter clockwise skip ends with a mid air morph into the transition. Requires: {
"obstaclesNotCleared": [
"A"
]
}
"Wave"
{
"or": [
"Spazer",
"Plasma"
]
}
"canMidAirMorph"
"HiJump"
"SpeedBooster"
"canTrickyJump"
"canBabyMetroidAvoid"
|
|
Notable: true 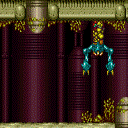
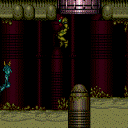
Enter through the far left side of the door. Wait for the top hopper to move right to start running. Run under the right Hopper and jump over the left Hopper to avoid all damage. Jump when Samus reaches the leftmost lump in the ground to avoid the left hopper. It helps to keep the camera scrolled to the right. Entrance condition: {
"comeInNormally": {},
"comesThroughToilet": "no"
}
Requires: "canTrickyJump"
{
"or": [
"canPrepareForNextRoom",
{
"and": [
"canCameraManip",
"canMoonwalk",
"canInsaneJump"
]
}
]
}
|
|
Requires: {
"or": [
"ScrewAttack",
"canTrickyJump",
{
"and": [
"canDodgeWhileShooting",
"canCameraManip",
{
"enemyKill": {
"enemies": [
[
"Blue Sidehopper",
"Blue Sidehopper"
]
]
}
}
]
}
]
}
Exit condition: {
"leaveWithGModeSetup": {}
}
|
|
Kill the top hopper quickly; the left hopper is more random. To be safe, plan to retreat right while attacking. It also helps to attempt to move the hopper off camera between attacks. Requires: "canDodgeWhileShooting"
"canTrickyJump"
"canCameraManip"
{
"enemyKill": {
"enemies": [
[
"Blue Sidehopper",
"Blue Sidehopper"
]
]
}
}
|
|
Wait for the top hopper to move right, then jump through the left hopper. The left hopper may be harder to dodge if the camera is scrolled to the left. Requires: "ScrewAttack"
"canCarefulJump"
{
"or": [
"canTrickyJump",
"SpaceJump",
{
"and": [
"canCameraManip",
"canPrepareForNextRoom"
]
},
{
"and": [
"canCameraManip",
"canMoonwalk"
]
}
]
}
|
|
Wait for the left hopper to move right so it does not follow Samus as IFrames run out. A damage boost using the top hopper also moves through the room fast enough to be safe. Requires: {
"enemyDamage": {
"enemy": "Blue Sidehopper",
"type": "contact",
"hits": 1
}
}
{
"or": [
"canHorizontalDamageBoost",
"canTrickyJump",
"canHitbox",
{
"enemyDamage": {
"enemy": "Blue Sidehopper",
"type": "contact",
"hits": 1
}
}
]
}
|
|
From: 2
Left Door
To: 1
Top Right Door
Notable: true 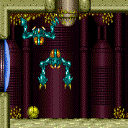
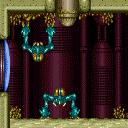
Time Samus' movement carefully to roll underneath a Blue Hopper and also race it to the far door. Enter the room in ball mode and let the hoppers jump against the wall a couple of times. After the lower hopper has long enough time between jumps, roll under and run to the door. Requires: "Morph" "canPrepareForNextRoom" "canTrickyJump" |
|
From: 2
Left Door
To: 1
Top Right Door
Notable: true Spin jump into the room with Screw Attack, holding left through the transition to land near the door. Do a turn-around spin jump to the right, bonking the ceiling and overhang and then falling straight down. Then run and spin jump to the right through the Hoppers, to make it to the door without taking damage. Requires: "canPrepareForNextRoom" "ScrewAttack" "canTrickyJump" |
|
Requires: "canPrepareForNextRoom"
{
"or": [
{
"and": [
"ScrewAttack",
"SpaceJump"
]
},
{
"and": [
"Morph",
{
"or": [
"canTrickyJump",
{
"enemyKill": {
"enemies": [
[
"Blue Sidehopper"
]
]
}
}
]
}
]
}
]
}
Exit condition: {
"leaveWithGModeSetup": {}
}
|
|
Notable: true 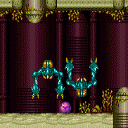
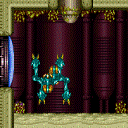
Enter the room from the left door, morph, and wait at the left wall. After 6 hops, the bottom Hopper will do three big hops in a row. Roll under the Hopper while it does the third of those three big hops. Quickly unmorph and run to the right side of the room. If successful, both Hoppers will remain off-camera, so you can safely Crystal Flash. Reset the room through the top door before returning to the left. Requires: {
"resetRoom": {
"nodes": [
1
],
"mustStayPut": false
}
}
{
"resetRoom": {
"nodes": [
2
],
"mustStayPut": false
}
}
"canTrickyJump"
"h_canCrystalFlash"
|
|
Wait for the Rinka to spawn, then jump, so the trajectory is as high as possible. Space jump makes this a bit easier. If the Metroids are alive, lure them off screen to the left. Requires: {
"or": [
"canTrickyJump",
"SpaceJump"
]
}
{
"or": [
"canMetroidAvoid",
"canUseFrozenEnemies",
"ScrewAttack",
"f_KilledMetroidRoom1"
]
}
Exit condition: {
"leaveWithGModeSetup": {}
}
|
|
From: 3
Junction (Get Past Metroids, Left to Right)
To: 2
Right Door
SpinJump often to reduce the amount of time spent in the acid. Requires: {
"acidFrames": 65
}
{
"or": [
{
"obstaclesCleared": [
"A"
]
},
{
"and": [
"canMetroidAvoid",
"canInsaneJump"
]
},
"ScrewAttack",
{
"and": [
"canPseudoScrew",
"canTrickyJump"
]
},
{
"metroidFrames": 150
}
]
}
{
"or": [
"canTrickyJump",
{
"enemyDamage": {
"enemy": "Rinka",
"type": "contact",
"hits": 1
}
}
]
}
|
|
From: 3
Junction (Get Past Metroids, Left to Right)
To: 2
Right Door
Freeze the middle Metroid as soon as it comes on screen to use as a platform to cross over the acid. If no Metroids are alive, the far left Rinka can be used instead, at a high angle. The left Rinka can also just be used to setup an angle with the Rinka near the left edge of the pool. Requires: "canTrickyUseFrozenEnemies"
"canTrickyJump"
"canCameraManip"
{
"or": [
"canInsaneJump",
{
"and": [
{
"not": "f_KilledMetroidRoom1"
},
{
"obstaclesNotCleared": [
"A"
]
},
"canRiskPermanentLossOfAccess"
]
}
]
}
|
|
From: 3
Junction (Get Past Metroids, Left to Right)
To: 2
Right Door
Notable: true Aim the leftmost Rinka to travel horizontally across the top of the room and use it to damage boost between the two floating platforms. Killing the Rinka will normalize it's respawn timer, which may help in setting up the correct angle. Let the Rinka stay far enough ahead of Samus that she can jump the full distance to the first platform without hitting it. And then once it has reached the right edge of the platform, use it to damage boost. Requires: {
"enemyDamage": {
"enemy": "Rinka",
"type": "contact",
"hits": 1
}
}
"canTrickyJump"
"canHorizontalDamageBoost"
"canCameraManip"
{
"or": [
{
"obstaclesCleared": [
"A"
]
},
"canMetroidAvoid"
]
}
|
|
From: 3
Junction (Get Past Metroids, Left to Right)
To: 2
Right Door
Requires: "canMidairShinespark"
{
"canShineCharge": {
"usedTiles": 31,
"openEnd": 0
}
}
{
"or": [
{
"and": [
{
"obstaclesCleared": [
"A"
]
},
{
"shinespark": {
"frames": 54
}
}
]
},
{
"and": [
"HiJump",
{
"shinespark": {
"frames": 54
}
}
]
},
{
"and": [
{
"metroidFrames": 300
},
{
"shinespark": {
"frames": 54
}
}
]
},
{
"and": [
"canTrickyJump",
{
"shinespark": {
"frames": 75,
"excessFrames": 16
}
}
]
}
]
}
|
|
From: 4
Junction (Get Past Metroids, Right to Left)
To: 1
Left Door (locked)
Requires: {
"or": [
{
"and": [
"canDelayedWalljump",
{
"acidFrames": 20
}
]
},
{
"and": [
"HiJump",
"canWalljump",
{
"acidFrames": 20
}
]
},
{
"and": [
"Gravity",
{
"acidFrames": 10
}
]
}
]
}
{
"or": [
{
"obstaclesCleared": [
"A"
]
},
"Ice",
"ScrewAttack",
"canMetroidAvoid",
{
"and": [
"canPseudoScrew",
"canTrickyJump"
]
},
{
"metroidFrames": 420
}
]
}
{
"or": [
"canInsaneJump",
{
"and": [
"canTrickyJump",
"canLateralMidAirMorph"
]
},
{
"and": [
"canTrickyJump",
"canPreciseWalljump",
{
"acidFrames": 16
}
]
},
{
"and": [
"Gravity",
{
"acidFrames": 16
}
]
},
{
"acidFrames": 27
}
]
}
|
|
From: 4
Junction (Get Past Metroids, Right to Left)
To: 1
Left Door (locked)
Use the lower Rinka as a platform to setup the angle for the top Rinka. Then use the frozen Rinka to cross the acid. Requires: "canTrickyUseFrozenEnemies" "canTrickyJump" "canCameraManip" |
|
From: 4
Junction (Get Past Metroids, Right to Left)
To: 1
Left Door (locked)
Notable: true Aim the ceiling Rinka to travel horizontally across the top of the room and use it to damage boost between the two floating platforms. Killing the lower Rinka shortly before killing the higher Rinka will synchronize their respawn timers so that Samus can jump when the lower Rinka reappears in order to get a good angle on the higher Rinka. Jump to the floating platform ahead of the high Rinka, jumping extra high to lead the Metroid out of the way if it is alive. Jump into the Rinka once it reaches the left edge of the platform to reach the next platform. Then use I-frames to pass through the Metroid if it is still alive. Requires: {
"enemyDamage": {
"enemy": "Rinka",
"type": "contact",
"hits": 1
}
}
"canTrickyJump"
"canHorizontalDamageBoost"
"canCameraManip"
{
"or": [
{
"obstaclesCleared": [
"A"
]
},
{
"and": [
"canMetroidAvoid",
"canHitbox"
]
}
]
}
{
"or": [
"canInsaneJump",
{
"enemyDamage": {
"enemy": "Rinka",
"type": "contact",
"hits": 1
}
},
{
"and": [
"canTrickyJump",
"canLateralMidAirMorph"
]
},
{
"and": [
"Gravity",
{
"acidFrames": 16
}
]
},
{
"acidFrames": 27
}
]
}
|
|
From: 4
Junction (Get Past Metroids, Right to Left)
To: 1
Left Door (locked)
Requires: "SpeedBooster"
"canCarefulJump"
{
"or": [
{
"obstaclesCleared": [
"A"
]
},
"Ice",
"canMetroidAvoid",
{
"metroidFrames": 200
}
]
}
{
"or": [
"canTrickyJump",
{
"acidFrames": 27
},
{
"and": [
{
"acidFrames": 16
},
"canPreciseWalljump"
]
},
{
"and": [
{
"acidFrames": 16
},
"Gravity"
]
}
]
}
|
|
From: 4
Junction (Get Past Metroids, Right to Left)
To: 1
Left Door (locked)
At max non-speed run speed, Spring Ball bounce on both platforms and avoid all acid. Land on the right side of the first platform to avoid the second Metroid. Bouncing on the second platform will usually avoid the third Metroid. Requires: "canSpringBallBounce"
"canCarefulJump"
{
"or": [
{
"obstaclesCleared": [
"A"
]
},
{
"and": [
"canTrickyJump",
"canMetroidAvoid"
]
},
{
"metroidFrames": 270
}
]
}
|
|
Requires: "canMetroidAvoid"
{
"or": [
"canTrickyJump",
"canMockball"
]
}
|
|
Requires: "canMetroidAvoid"
{
"or": [
"canTrickyJump",
"canMockball"
]
}
|
|
Requires: {
"or": [
"Ice",
{
"and": [
"ScrewAttack",
"canDodgeWhileShooting"
]
}
]
}
{
"or": [
"canDodgeWhileShooting",
{
"enemyDamage": {
"enemy": "Rinka",
"type": "contact",
"hits": 1
}
}
]
}
{
"or": [
"canTrickyJump",
{
"enemyDamage": {
"enemy": "Rinka",
"type": "contact",
"hits": 1
}
}
]
}
|
|
Requires: "Ice"
{
"enemyKill": {
"enemies": [
[
"Metroid",
"Metroid",
"Metroid"
]
],
"explicitWeapons": [
"Super",
"Missile"
]
}
}
{
"or": [
"canPrepareForNextRoom",
{
"resetRoom": {
"nodes": [
2
]
}
},
{
"and": [
"h_canUseMorphBombs",
"canDodgeWhileShooting",
"canEscapeEnemyGrab",
{
"metroidFrames": 120
}
]
}
]
}
{
"or": [
"canTrickyJump",
{
"enemyDamage": {
"enemy": "Rinka",
"type": "contact",
"hits": 1
}
}
]
}
Clears obstacles: A |
|
Climb to the middle section and kill all three Metroids while taking damage. Or use a tricky jump morph into the bottom left corner of room to kill all three Metroids from the bottom section. Requires: {
"enemyKill": {
"enemies": [
[
"Metroid",
"Metroid",
"Metroid"
]
],
"explicitWeapons": [
"PowerBomb"
]
}
}
{
"or": [
{
"and": [
"can4HighMidAirMorph",
"canTrickyJump",
{
"metroidFrames": 330
}
]
},
{
"metroidFrames": 530
}
]
}
Clears obstacles: A |
|
Carefully dodge the Rinkas, or take a hit, while carefully avoiding falling off, then use the I-Frames to use the runway. Requires: {
"or": [
"canTrickyJump",
{
"and": [
"canCarefulJump",
{
"enemyDamage": {
"enemy": "Rinka",
"type": "contact",
"hits": 1
}
}
]
}
]
}
Exit condition: {
"leaveWithRunway": {
"length": 5,
"openEnd": 1
}
}
|
|
From: 3
Mother Brain (locked)
To: 4
Mother Brain (Phases 2 and 3) (locked)
Requires: "h_canPartiallyBreakMotherBrainGlass"
{
"or": [
{
"and": [
{
"ammo": {
"type": "Super",
"count": 5
}
},
{
"ammo": {
"type": "Missile",
"count": 15
}
},
{
"or": [
"canTrickyUseFrozenEnemies",
"canTrickyJump",
{
"enemyDamage": {
"enemy": "Rinka",
"type": "contact",
"hits": 1
}
}
]
}
]
},
{
"and": [
{
"ammo": {
"type": "Super",
"count": 10
}
},
{
"ammo": {
"type": "Missile",
"count": 2
}
}
]
},
{
"and": [
"h_SupersDoubleDamageMotherBrain",
{
"ammo": {
"type": "Super",
"count": 4
}
},
{
"ammo": {
"type": "Missile",
"count": 8
}
}
]
},
{
"and": [
"h_SupersDoubleDamageMotherBrain",
{
"ammo": {
"type": "Super",
"count": 2
}
},
{
"ammo": {
"type": "Missile",
"count": 18
}
},
{
"or": [
"canTrickyUseFrozenEnemies",
"canTrickyJump",
{
"enemyDamage": {
"enemy": "Rinka",
"type": "contact",
"hits": 1
}
}
]
}
]
}
]
}
{
"or": [
"canTrickyUseFrozenEnemies",
{
"and": [
"canDodgeWhileShooting",
{
"enemyDamage": {
"enemy": "Rinka",
"type": "contact",
"hits": 1
}
}
]
},
{
"enemyDamage": {
"enemy": "Rinka",
"type": "contact",
"hits": 2
}
}
]
}
|
|
From: 3
Mother Brain (locked)
To: 4
Mother Brain (Phases 2 and 3) (locked)
Requires: "f_MotherBrainGlassBroken"
{
"or": [
{
"and": [
{
"ammo": {
"type": "Missile",
"count": 30
}
},
{
"or": [
"canTrickyUseFrozenEnemies",
"canTrickyJump",
{
"enemyDamage": {
"enemy": "Rinka",
"type": "contact",
"hits": 1
}
}
]
}
]
},
{
"and": [
{
"ammo": {
"type": "Super",
"count": 5
}
},
{
"ammo": {
"type": "Missile",
"count": 15
}
}
]
}
]
}
{
"or": [
"canTrickyUseFrozenEnemies",
{
"and": [
"canDodgeWhileShooting",
{
"enemyDamage": {
"enemy": "Rinka",
"type": "contact",
"hits": 1
}
}
]
},
{
"enemyDamage": {
"enemy": "Rinka",
"type": "contact",
"hits": 2
}
}
]
}
|
|
From: 3
Mother Brain (locked)
To: 4
Mother Brain (Phases 2 and 3) (locked)
Requires: "h_canPartiallyBreakMotherBrainGlass"
{
"ammo": {
"type": "Missile",
"count": 30
}
}
{
"or": [
"canTrickyUseFrozenEnemies",
{
"and": [
"canTrickyJump",
"canDodgeWhileShooting",
{
"enemyDamage": {
"enemy": "Rinka",
"type": "contact",
"hits": 1
}
}
]
},
{
"and": [
"canDodgeWhileShooting",
{
"enemyDamage": {
"enemy": "Rinka",
"type": "contact",
"hits": 2
}
}
]
},
{
"enemyDamage": {
"enemy": "Rinka",
"type": "contact",
"hits": 3
}
}
]
}
|
|
From: 3
Mother Brain (locked)
To: 7
Between Third and Fourth Zebetite (locked)
Requires: "Morph"
"f_KilledZebetites4"
{
"or": [
"canTrickyJump",
{
"and": [
"canCarefulJump",
"h_canUseSpringBall"
]
},
{
"enemyDamage": {
"enemy": "Rinka",
"type": "contact",
"hits": 1
}
}
]
}
|
|
From: 5
Between First and Second Zebetite (locked)
To: 6
Between Second and Third Zebetite (locked)
Requires: "Morph"
"f_KilledZebetites2"
{
"or": [
"canTrickyJump",
{
"and": [
"canCarefulJump",
"h_canUseSpringBall"
]
},
{
"enemyDamage": {
"enemy": "Rinka",
"type": "contact",
"hits": 1
}
}
]
}
{
"enemyDamage": {
"enemy": "Mother Brain 1",
"type": "turret",
"hits": 1
}
}
|
|
From: 6
Between Second and Third Zebetite (locked)
To: 5
Between First and Second Zebetite (locked)
Requires: "Morph"
"f_KilledZebetites2"
{
"or": [
"canTrickyJump",
{
"and": [
"canCarefulJump",
"h_canUseSpringBall"
]
},
{
"enemyDamage": {
"enemy": "Rinka",
"type": "contact",
"hits": 1
}
}
]
}
{
"enemyDamage": {
"enemy": "Mother Brain 1",
"type": "turret",
"hits": 1
}
}
|
|
From: 6
Between Second and Third Zebetite (locked)
To: 12
Between Second and Third Zebetite (unlocked)
Requires: "h_canOpenZebetites"
{
"or": [
{
"and": [
"canDodgeWhileShooting",
"canTrickyJump"
]
},
{
"enemyDamage": {
"enemy": "Rinka",
"type": "contact",
"hits": 1
}
}
]
}
|
|
From: 7
Between Third and Fourth Zebetite (locked)
To: 3
Mother Brain (locked)
Requires: "Morph"
"f_KilledZebetites4"
{
"or": [
"canTrickyJump",
{
"and": [
"canCarefulJump",
"h_canUseSpringBall"
]
},
{
"enemyDamage": {
"enemy": "Rinka",
"type": "contact",
"hits": 1
}
}
]
}
|
|
From: 8
Before First Zebetite (locked)
To: 3
Mother Brain (locked)
Notable: true 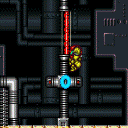
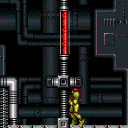
Glitch through the Mother Brain Zebetites by using a frozen Rinka and i-frames. Freeze the Rinka at its spawn location, then spinjump or Down-Back onto it after acquiring i-frames to clip inside of the Zebetite, then jump through. Note that Zebetites cause i-frames but deal no damage. Ice+Wave can freeze the Rinka from above. Ice+Plasma must freeze the Rinka from below while crouched. Requires: "canTrickyUseFrozenEnemies"
"Morph"
{
"or": [
"canTrickyJump",
{
"and": [
"canDownBack",
{
"enemyDamage": {
"enemy": "Rinka",
"type": "contact",
"hits": 1
}
}
]
}
]
}
{
"enemyDamage": {
"enemy": "Mother Brain 1",
"type": "turret",
"hits": 1
}
}
|
|
Lure a Rinka to the top door without letting it go off screen. The bottom right Rinka can be lured at the correct angle by standing on the central platform then jumping slightly before it moves. Requires: "canTrickyJump" Exit condition: {
"leaveWithGModeSetup": {}
}
|
|
Requires: "canCarefulJump"
{
"or": [
{
"and": [
"canTrickyJump",
"canDodgeWhileShooting"
]
},
{
"enemyKill": {
"enemies": [
[
"Tourian Space Pirate (all)",
"Tourian Space Pirate (all)"
]
],
"explicitWeapons": [
"Plasma",
"ScrewAttack",
"Missile",
"Super",
"PowerBomb"
]
}
},
{
"and": [
{
"or": [
"Ice",
"Wave",
"Spazer"
]
},
{
"or": [
"Morph",
"canDodgeWhileShooting"
]
}
]
},
{
"and": [
"Ice",
{
"enemyDamage": {
"enemy": "Tourian Space Pirate (all)",
"type": "laser",
"hits": 6
}
}
]
},
{
"and": [
{
"or": [
"Wave",
"Spazer"
]
},
{
"enemyDamage": {
"enemy": "Tourian Space Pirate (all)",
"type": "laser",
"hits": 3
}
}
]
},
{
"and": [
"Wave",
"Spazer",
{
"enemyDamage": {
"enemy": "Tourian Space Pirate (all)",
"type": "laser",
"hits": 2
}
}
]
}
]
}
Exit condition: {
"leaveWithRunway": {
"length": 26,
"openEnd": 1
}
}
|