canWalljump (Basic)
Strats ()
|
Requires: {
"or": [
"canWalljump",
"h_canFly",
"HiJump",
"canSpringBallJumpMidAir"
]
}
|
|
Requires: {
"or": [
"canWalljump",
"h_canFly"
]
}
{
"or": [
"h_canDestroyBombWalls",
{
"obstaclesCleared": [
"A"
]
}
]
}
Clears obstacles: A |
|
From: 6
Bottom Right Door (On the Left Shaft)
To: 2
Middle Left Door
Entrance condition: {
"comeInShinecharged": {
"framesRequired": 165
}
}
Requires: "canShinechargeMovementComplex" "HiJump" "canWalljump" Exit condition: {
"leaveShinecharged": {
"framesRemaining": "auto"
}
}
|
|
From: 7
Bottom Left Vertical Door
To: 3
Bottom Left Horizontal Door
Entrance condition: {
"comeInShinecharged": {
"framesRequired": 135
},
"comesThroughToilet": "any"
}
Requires: "HiJump" "canWalljump" "canShinechargeMovementComplex" Exit condition: {
"leaveShinecharged": {
"framesRemaining": "auto"
}
}
|
|
From: 7
Bottom Left Vertical Door
To: 6
Bottom Right Door (On the Left Shaft)
Entrance condition: {
"comeInShinecharged": {
"framesRequired": 135
},
"comesThroughToilet": "any"
}
Requires: "HiJump" "canWalljump" "canShinechargeMovementComplex" Exit condition: {
"leaveShinecharged": {
"framesRemaining": "auto"
}
}
|
|
From: 2
Elevator
To: 1
Left Door
Entrance condition: {
"comeInShinecharged": {
"framesRequired": 120
}
}
Requires: "f_TourianOpen" "Gravity" "HiJump" "canWalljump" "canShinechargeMovementComplex" Exit condition: {
"leaveShinecharged": {
"framesRemaining": "auto"
}
}
|
|
From: 2
Elevator
To: 1
Left Door
Entrance condition: {
"comeInShinecharged": {
"framesRequired": 95
}
}
Requires: "f_TourianOpen"
"Gravity"
"HiJump"
"canWalljump"
"canShinechargeMovementComplex"
{
"shinespark": {
"frames": 9
}
}
Exit condition: {
"leaveWithSpark": {}
}
|
|
Entrance condition: {
"comeInShinecharged": {
"framesRequired": 120
}
}
Requires: "f_TourianOpen"
"Gravity"
"canWalljump"
"canShinechargeMovementComplex"
{
"shinespark": {
"frames": 8
}
}
Exit condition: {
"leaveWithSpark": {}
}
|
|
Requires: "f_TourianOpen"
"Gravity"
{
"or": [
"HiJump",
"h_canFly",
"canSpringBallJumpMidAir",
"canWalljump",
"canGravityJump"
]
}
|
|
Requires: {
"or": [
"canCarefulJump",
"canUseFrozenEnemies",
"SpaceJump",
{
"and": [
"Gravity",
{
"or": [
"HiJump",
"canWalljump",
"h_canCrouchJumpDownGrab",
"h_canIBJ",
"canSpringBallJumpMidAir"
]
}
]
}
]
}
|
|
From: 1
Left Door
To: 2
Right Door
Notable: true Build up run speed and then use controlled springball bounces to cross the ocean to the far right ledge, and then use SpaceJump to reach the door. Mockball down the submerged ramp and begin SpringBall bouncing under water using the platforms. Disable SpringBall after the final jump once Samus starts falling again as a way to gain extra speed. Requires: "canTrickyJump"
"canSpaceJumpWaterBounce"
"canSpringBallBounce"
"canSpringFling"
"canMockball"
{
"or": [
"canDownGrab",
"canWalljump"
]
}
|
|
Enter the room while building a shinespark and use it on the lowest part of the ramp to cross the room and reach a raised ledge on the right side wall. From there, use SpaceJump to escape the water. Carry the shinespark to the bottom of the ramp by delaying the first Choot with two Power Beam shots, killing it, or bounceballing through it. The Choot can be shot diagonally from the middle platform, and again by running off that platform and aiming down to float above it. Entrance condition: {
"comeInShinecharging": {
"length": 6,
"openEnd": 1,
"steepDownTiles": 1
}
}
Requires: "canShinechargeMovementComplex"
"canCarefulJump"
{
"or": [
{
"and": [
"canMidairShinespark",
"canDodgeWhileShooting"
]
},
{
"and": [
{
"enemyDamage": {
"enemy": "Choot",
"type": "contact",
"hits": 1
}
},
"canNeutralDamageBoost",
"canBounceBall"
]
},
{
"and": [
"canMockball",
{
"or": [
"canPseudoScrew",
"ScrewAttack",
"Plasma",
"Wave",
{
"ammo": {
"type": "Missile",
"count": 1
}
},
{
"ammo": {
"type": "Super",
"count": 1
}
}
]
}
]
}
]
}
"canHorizontalShinespark"
{
"shinespark": {
"frames": 123,
"excessFrames": 5
}
}
"canSpaceJumpWaterBounce"
{
"or": [
{
"and": [
"HiJump",
"canSpaceJumpWaterEscape"
]
},
{
"and": [
"canTrickyJump",
"canDownGrab"
]
},
"canWalljump"
]
}
|
|
Requires: "canSuitlessMaridia"
"canSpaceJumpWaterBounce"
{
"or": [
"canWalljump",
{
"and": [
"canSpaceJumpWaterEscape",
"HiJump"
]
},
{
"and": [
"canTrickyJump",
"canDownGrab"
]
}
]
}
|
|
Requires: "Gravity"
{
"or": [
"canWalljump",
"HiJump",
"SpaceJump",
"h_canIBJ"
]
}
|
|
From: 4
Junction (Right side Pit)
To: 2
Right Door
Requires: "canShinechargeMovementComplex"
"Gravity"
"canWalljump"
{
"canShineCharge": {
"usedTiles": 22,
"openEnd": 0,
"steepUpTiles": 3,
"steepDownTiles": 3,
"startingDownTiles": 1
}
}
{
"shinespark": {
"frames": 10
}
}
Exit condition: {
"leaveWithSpark": {}
}
|
|
From: 4
Junction (Right side Pit)
To: 2
Right Door
Freeze the Choot when it swings right on its jump. Quickly get on top of it by first getting onto the pillar to the left, or with a SpringBall Jump. Perform a precise spring ball jump to get to the far right ledge, while avoiding hitting the water surface. While on the ledge, stand on the raised ground to the right and jump to the surface, then space jump across the water to the left. Requires: "canSuitlessMaridia"
"canTrickyUseFrozenEnemies"
"canCarefulJump"
"canSpringBallJumpMidAir"
{
"or": [
"canTrickySpringBallJump",
"canResetFallSpeed",
"canStationaryLateralMidAirMorph"
]
}
"canSpaceJumpWaterBounce"
"canWalljump"
|
|
Requires: "Gravity"
{
"or": [
"canWalljump",
"canGravityJump",
{
"and": [
"canSpringBallJumpMidAir",
"HiJump"
]
}
]
}
|
|
Requires: "Gravity"
{
"or": [
"canTrickySpringBallJump",
{
"and": [
"HiJump",
"canWalljump"
]
},
{
"and": [
"HiJump",
"canSpringBallJumpMidAir"
]
},
{
"and": [
"HiJump",
"SpeedBooster"
]
}
]
}
{
"obstaclesNotCleared": [
"A"
]
}
|
|
From: 2
Upper Right Section - Top Right Door
To: 2
Upper Right Section - Top Right Door
Requires: "HiJump" "canTrickyDashJump" "canWalljump" "canShinechargeMovementComplex" Exit condition: {
"leaveShinecharged": {
"framesRemaining": 55
}
}
|
|
From: 2
Upper Right Section - Top Right Door
To: 2
Upper Right Section - Top Right Door
Requires: "canTrickyDashJump"
"canWalljump"
"canShinechargeMovementComplex"
{
"shinespark": {
"frames": 20
}
}
Exit condition: {
"leaveWithSpark": {}
}
|
|
From: 4
Lower Section - Top Right Door
To: 8
Bridge Right Door (Same Connection as Lower Section - Bottom Right Door)
Notable: true Entrance condition: {
"comeInWithGMode": {
"mode": "direct",
"morphed": false
}
}
Requires: "canSkipDoorLock"
{
  "or": [
    "canArtificialMorph",
    "canWalljump",
    "SpaceJump",
    {
      "and": [
        "h_canIBJ",
        {
          "or": [
            "Gravity",
            "h_canJumpIntoIBJ",
            "h_canBombHorizontally"
          ]
        }
      ]
    },
    {
      "and": [
        "HiJump",
        "canSpringBallJumpMidAir"
      ]
    },
    "canPreciseGrapple"
  ]
}
"canXRayClimb"
|
|
From: 4
Lower Section - Top Right Door
To: 8
Bridge Right Door (Same Connection as Lower Section - Bottom Right Door)
Notable: true Enter with G-mode direct, back up to between 1 and 6 pixels from the door transition, and activate X-ray to get very deep stuck in the door. Climb up 1 screen, and perform a turnaround buffered spin-jump away from the door to trigger the transition, bypassing any lock on the door. Entrance condition: {
"comeInWithGMode": {
"mode": "direct",
"morphed": false
}
}
Requires: {
"or": [
"canArtificialMorph",
"canWalljump",
"SpaceJump",
{
"and": [
"h_canIBJ",
{
"or": [
"Gravity",
"h_canJumpIntoIBJ",
"h_canBombHorizontally"
]
}
]
},
{
"and": [
"HiJump",
"canSpringBallJumpMidAir"
]
},
"canPreciseGrapple"
]
}
"canXRayClimb"
Bypasses door shell: true |
|
From: 4
Lower Section - Top Right Door
To: 12
Top Junction
Climb up 2 screens. Entrance condition: {
"comeInWithGMode": {
"mode": "direct",
"morphed": false
}
}
Requires: {
"or": [
"canArtificialMorph",
"canWalljump",
"SpaceJump",
{
"and": [
"h_canIBJ",
{
"or": [
"Gravity",
"h_canJumpIntoIBJ",
"h_canBombHorizontally"
]
}
]
},
{
"and": [
"HiJump",
"canSpringBallJumpMidAir"
]
},
"canPreciseGrapple"
]
}
"canXRayClimb"
|
|
From: 5
Lower Section - Bottom Right Door
To: 4
Lower Section - Top Right Door
Requires: "canWalljump" |
|
Requires: "Gravity"
{
"or": [
"canWalljump",
"HiJump",
"h_canIBJ"
]
}
|
|
Wall jump when the water is low. Requires: "canWalljump" |
|
From: 2
Right Door
To: 1
Left Door
A doorsill with an open end is really all the room that's needed on the other side. Entrance condition: {
"comeInJumping": {
"speedBooster": "any",
"minTiles": 1
}
}
Requires: "canCarefulJump" "canWalljump" |
|
Requires: "SpaceJump"
{
"or": [
"canWalljump",
"canPrepareForNextRoom",
{
"and": [
"canSpaceJumpWaterEscape",
"HiJump"
]
}
]
}
|
|
Requires waiting until the last moment before SpringBall jumping. Requires: {
"doorUnlockedAtNode": 2
}
{
"or": [
"h_canCrouchJumpDownGrab",
"canWalljump"
]
}
"canSpringBallBombJump"
"h_canBombThings"
|
|
Requires: {
"or": [
"canWalljump",
"Morph",
"SpaceJump",
"HiJump"
]
}
|
|
From: 2
Right Door
To: 2
Right Door
Use the runway on the screen above to gain a shinecharge near the edge of the runway, sliding off quickly. Requires: {
"or": [
"canWalljump",
"HiJump",
"h_canFly",
"canSpringBallJumpMidAir",
"h_canCrouchJumpDownGrab"
]
}
{
"canShineCharge": {
"usedTiles": 25,
"openEnd": 1
}
}
"canShinechargeMovementComplex"
Exit condition: {
"leaveShinecharged": {
"framesRemaining": 70
}
}
|
|
Use the runway on the screen above to gain a shinecharge near the edge of the runway. Requires: {
"or": [
"canWalljump",
"HiJump",
"h_canFly",
"canSpringBallJumpMidAir",
"h_canCrouchJumpDownGrab"
]
}
{
"canShineCharge": {
"usedTiles": 25,
"openEnd": 1
}
}
Exit condition: {
"leaveShinecharged": {
"framesRemaining": 40
}
}
|
|
Requires: {
"or": [
"canWalljump",
"HiJump",
"h_canFly",
"canSpringBallJumpMidAir"
]
}
Clears obstacles: A |
|
From: 3
Bottom Left Door
To: 2
Top Right Door
Notable: true Jump and freeze the Beetom at a precise location in order to jump through the crumble blocks. The pixel window is larger and higher with Morph and an X-Ray Stand Up. Two Beetom hits are assumed, but with failed attempts it could take more, possibly requiring leaving the Beetom and going back to the right to farm. Requires: "h_canNonTrivialCeilingClip"
"canTrickyUseFrozenEnemies"
"Morph"
{
"enemyDamage": {
"enemy": "Beetom",
"type": "contact",
"hits": 2
}
}
{
"or": [
"canPreciseCeilingClip",
"canWalljump",
"HiJump",
"SpaceJump",
{
"enemyDamage": {
"enemy": "Beetom",
"type": "contact",
"hits": 2
}
}
]
}
|
|
From: 4
Above Power Bomb Blocks - Middle Left Door
To: 2
Above Power Bomb Blocks - Top Left Door
Entrance condition: {
"comeInShinecharged": {
"framesRequired": 105
}
}
Requires: "HiJump" "canWalljump" "canShinechargeMovementComplex" Exit condition: {
"leaveShinecharged": {
"framesRemaining": "auto"
}
}
|
|
From: 4
Above Power Bomb Blocks - Middle Left Door
To: 2
Above Power Bomb Blocks - Top Left Door
Entrance condition: {
"comeInShinecharged": {
"framesRequired": 130
}
}
Requires: "canWalljump" "canShinechargeMovementComplex" Exit condition: {
"leaveShinecharged": {
"framesRemaining": "auto"
}
}
|
|
From: 4
Above Power Bomb Blocks - Middle Left Door
To: 2
Above Power Bomb Blocks - Top Left Door
Entrance condition: {
"comeInShinecharged": {
"framesRequired": 110
}
}
Requires: "canWalljump"
"canShinechargeMovementComplex"
{
"shinespark": {
"frames": 6
}
}
Exit condition: {
"leaveWithSpark": {}
}
|
|
From: 4
Above Power Bomb Blocks - Middle Left Door
To: 2
Above Power Bomb Blocks - Top Left Door
Entrance condition: {
"comeInShinecharging": {
"length": 2,
"openEnd": 0
}
}
Requires: "canWalljump" "canShinechargeMovementComplex" Exit condition: {
"leaveShinecharged": {
"framesRemaining": 45
}
}
|
|
From: 4
Above Power Bomb Blocks - Middle Left Door
To: 2
Above Power Bomb Blocks - Top Left Door
Entrance condition: {
"comeInShinecharged": {
"framesRequired": 80
}
}
Requires: "HiJump"
"canWalljump"
"canShinechargeMovementComplex"
{
"shinespark": {
"frames": 7
}
}
Exit condition: {
"leaveWithSpark": {}
}
|
|
From: 4
Above Power Bomb Blocks - Middle Left Door
To: 3
Above Power Bomb Blocks - Top Right Door
Entrance condition: {
"comeInShinecharged": {
"framesRequired": 145
}
}
Requires: "canWalljump" "canShinechargeMovementComplex" Exit condition: {
"leaveShinecharged": {
"framesRemaining": "auto"
}
}
|
|
From: 5
Above Power Bomb Blocks - Bottom Left Door
To: 4
Above Power Bomb Blocks - Middle Left Door
Entrance condition: {
"comeInShinecharged": {
"framesRequired": 130
}
}
Requires: "canWalljump" "canShinechargeMovementComplex" Exit condition: {
"leaveShinecharged": {
"framesRemaining": "auto"
}
}
|
|
From: 5
Above Power Bomb Blocks - Bottom Left Door
To: 4
Above Power Bomb Blocks - Middle Left Door
Entrance condition: {
"comeInShinecharged": {
"framesRequired": 110
}
}
Requires: "canWalljump"
"canShinechargeMovementComplex"
{
"shinespark": {
"frames": 6
}
}
Exit condition: {
"leaveWithSpark": {}
}
|
|
From: 6
Above Power Bomb Blocks - Bottom Right Door
To: 4
Above Power Bomb Blocks - Middle Left Door
Entrance condition: {
"comeInShinecharging": {
"length": 12,
"openEnd": 0
}
}
Requires: "canWalljump" "canShinechargeMovementComplex" Exit condition: {
"leaveShinecharged": {
"framesRemaining": 35
}
}
|
|
From: 6
Above Power Bomb Blocks - Bottom Right Door
To: 4
Above Power Bomb Blocks - Middle Left Door
Entrance condition: {
"comeInShinecharging": {
"length": 12,
"openEnd": 0
}
}
Requires: "canWalljump" "canShinechargeMovementComplex" Exit condition: {
"leaveShinecharged": {
"framesRemaining": 55
}
}
|
|
From: 10
Right Etecoon Shaft - Bottom Left Door
To: 14
Right Etecoon Shaft - Wall Jump Climb Checkpoint Junction
Requires: {
"or": [
"canWalljump",
"h_canFly",
{
"and": [
"HiJump",
"canSpringBallJumpMidAir"
]
}
]
}
|
|
Use the runway below the bug pipe to gain a shinecharge. Use a wall jump to reach the door with shinecharge frames remaining. Requires: "canWalljump"
{
"canShineCharge": {
"usedTiles": 17,
"openEnd": 1
}
}
"canShinechargeMovementTricky"
Exit condition: {
"leaveShinecharged": {
"framesRemaining": 10
}
}
|
|
Requires: {
"or": [
"h_canFly",
"HiJump",
"canSpringBallJumpMidAir",
{
"and": [
"SpeedBooster",
"canWalljump"
]
}
]
}
|
|
Requires: {
"or": [
"HiJump",
"h_canFly",
"canWalljump",
"canUseFrozenEnemies",
"canSpringBallJumpMidAir"
]
}
|
|
From: 2
Right Side - Top Door
To: 2
Right Side - Top Door
Requires: {
"canShineCharge": {
"usedTiles": 25,
"openEnd": 1
}
}
"canShinechargeMovementComplex"
{
"or": [
"HiJump",
"canWalljump"
]
}
{
"shinespark": {
"frames": 28
}
}
Exit condition: {
"leaveWithSpark": {}
}
|
|
From: 4
Left Side - Middle Doorway (Behind the Power Bomb Blocks)
To: 4
Left Side - Middle Doorway (Behind the Power Bomb Blocks)
Carefully lure a Zeb from the pipe below while freezing it. Samus must start to the left of the pipe in order for the Zeb to move left at the end. Requires: "canTrickyUseFrozenEnemies"
{
"or": [
"h_canUsePowerBombs",
{
"obstaclesCleared": [
"B"
]
},
{
"and": [
"Morph",
{
"obstaclesCleared": [
"C"
]
}
]
}
]
}
{
"or": [
"canWalljump",
"HiJump",
"SpaceJump",
"canSpringBallJumpMidAir"
]
}
Exit condition: {
"leaveWithGModeSetup": {}
}
|
|
Requires: {
"or": [
"Grapple",
"h_canFly",
"canWalljump",
{
"and": [
"SpeedBooster",
"HiJump"
]
}
]
}
|
|
Requires: {
"or": [
{
"obstaclesCleared": [
"A"
]
},
{
"enemyDamage": {
"enemy": "Sm. Sidehopper",
"type": "contact",
"hits": 1
}
}
]
}
{
"or": [
"SpaceJump",
"canWalljump",
{
"and": [
"Grapple",
{
"obstaclesNotCleared": [
"C"
]
}
]
},
{
"and": [
"HiJump",
"canSpringBallJumpMidAir"
]
}
]
}
|
|
Entrance condition: {
"comeInJumping": {
"minTiles": 1,
"speedBooster": "any"
}
}
Requires: "canPrepareForNextRoom"
{
"or": [
"SpaceJump",
"canWalljump",
{
"and": [
"Grapple",
{
"obstaclesNotCleared": [
"C"
]
}
]
},
{
"and": [
"HiJump",
"canSpringBallJumpMidAir"
]
}
]
}
|
|
Requires: {
"or": [
"canWalljump",
"h_canFly",
{
"and": [
"HiJump",
"canSpringBallJumpMidAir"
]
}
]
}
Clears obstacles: B |
|
Requires: {
"obstaclesCleared": [
"B"
]
}
{
"or": [
"canCarefulJump",
"canWalljump",
"SpaceJump",
"Grapple"
]
}
|
|
Requires: "h_canBombThings"
{
"or": [
"HiJump",
"h_canFly",
"canWalljump"
]
}
|
|
Requires: {
"obstaclesCleared": [
"B"
]
}
{
"or": [
"HiJump",
"canWalljump",
"canSpringBallJumpMidAir",
"h_canFly",
"canSpringBallBombJump"
]
}
|
|
It takes around 3 minutes to get the Zero to this door. The Zero only moves on camera and the camera scrolls when exiting the morph tunnel. Let the Zero lead through the morph tunnel or wait for the it to get very close to Samus before touching the scroll block at the exit. Requires: "canBeVeryPatient"
"Morph"
{
"or": [
"HiJump",
"canWalljump",
"h_canFly",
"canTrickyUseFrozenEnemies",
"canSpringBallJumpMidAir"
]
}
Exit condition: {
"leaveWithGModeSetup": {}
}
|
|
From: 2
Middle Left Door
To: 2
Middle Left Door
It takes around 4 minutes to get the Zero to this door. The Zero only moves on camera and the camera scrolls when exiting the morph tunnel. Let the Zero lead through the morph tunnel or wait for the it to get very close to Samus before touching the scroll block at the exit. Requires: "canBeVeryPatient"
"Morph"
{
"or": [
"HiJump",
"canWalljump",
"h_canFly",
"canTrickyUseFrozenEnemies",
"canSpringBallJumpMidAir"
]
}
Exit condition: {
"leaveWithGModeSetup": {}
}
|
|
Requires: {
"or": [
"HiJump",
"canWalljump",
"h_canFly",
"canSpringBallJumpMidAir"
]
}
|
|
From: 2
Middle Left Door
To: 4
Bottom Right Door
Ledge grab precisely in front of the Cacatac, and jump immediately before it would hit you. Entrance condition: {
"comeInShinecharged": {
"framesRequired": 145
}
}
Requires: "canWalljump" "canShinechargeMovementTricky" Exit condition: {
"leaveShinecharged": {
"framesRemaining": "auto"
}
}
|
|
From: 2
Middle Left Door
To: 4
Bottom Right Door
Ledge grab precisely in front of the Cacatac, and jump immediately before it would hit you. If the shinespark wind-up is activated as early as possible, then a Cacatac spike hit will be taken. Entrance condition: {
"comeInShinecharged": {
"framesRequired": 120
}
}
Requires: "canWalljump"
"canShinechargeMovementTricky"
{
"enemyDamage": {
"enemy": "Cacatac",
"type": "spike",
"hits": 1
}
}
{
"shinespark": {
"frames": 6
}
}
Exit condition: {
"leaveWithSpark": {}
}
|
|
From: 2
Middle Left Door
To: 4
Bottom Right Door
Ledge grab precisely in front of the Cacatac, and jump immediately before it would hit you. Entrance condition: {
"comeInShinecharging": {
"length": 7,
"openEnd": 0
}
}
Requires: "canWalljump" "canShinechargeMovementTricky" Exit condition: {
"leaveShinecharged": {
"framesRemaining": 45
}
}
|
|
From: 2
Middle Left Door
To: 5
Top Right Door (Through Morph Tunnel)
Entrance condition: {
"comeInWithGMode": {
"mode": "indirect",
"morphed": true
}
}
Requires: {
"or": [
"h_canArtificialMorphIBJ",
{
"and": [
"h_canArtificialMorphSpringBallBombJump",
"h_additionalBomb"
]
},
{
"and": [
"h_canArtificialMorphSpringBall",
"HiJump"
]
},
{
"and": [
"Morph",
{
"or": [
"HiJump",
"canWalljump",
"h_canFly",
"canSpringBallJumpMidAir",
{
"and": [
"canTrickyDashJump",
"h_canCrouchJumpDownGrab"
]
}
]
}
]
}
]
}
|
|
Entrance condition: {
"comeInWithGMode": {
"mode": "any",
"morphed": false
}
}
Requires: {
"or": [
"HiJump",
"canWalljump",
"h_canFly",
"canSpringBallJumpMidAir",
{
"and": [
"canTrickyDashJump",
"h_canCrouchJumpDownGrab"
]
}
]
}
Exit condition: {
"leaveWithGMode": {
"morphed": false
}
}
|
|
Requires: {
"or": [
"HiJump",
"canWalljump",
"h_canFly"
]
}
|
|
From: 4
Bottom Right Door
To: 1
Top Left Door
Entrance condition: {
"comeInShinecharged": {
"framesRequired": 155
}
}
Requires: "canWalljump" "canShinechargeMovementComplex" Exit condition: {
"leaveShinecharged": {
"framesRemaining": "auto"
}
}
|
|
From: 4
Bottom Right Door
To: 1
Top Left Door
Entrance condition: {
"comeInShinecharged": {
"framesRequired": 125
}
}
Requires: "canWalljump"
"canShinechargeMovementComplex"
{
"shinespark": {
"frames": 10
}
}
Exit condition: {
"leaveWithSpark": {}
}
|
|
From: 4
Bottom Right Door
To: 1
Top Left Door
Entrance condition: {
"comeInShinecharging": {
"length": 2,
"openEnd": 0
}
}
Requires: "canWalljump" "canShinechargeMovementComplex" Exit condition: {
"leaveShinecharged": {
"framesRemaining": 25
}
}
|
|
From: 4
Bottom Right Door
To: 4
Bottom Right Door
Requires: {
"or": [
"HiJump",
"canWalljump",
"h_canFly",
"canTrickyUseFrozenEnemies",
"canSpringBallJumpMidAir"
]
}
Exit condition: {
"leaveWithGModeSetup": {}
}
|
|
From: 4
Bottom Right Door
To: 5
Top Right Door (Through Morph Tunnel)
Entrance condition: {
"comeInWithGMode": {
"mode": "indirect",
"morphed": true
}
}
Requires: {
"or": [
"h_canArtificialMorphIBJ",
"h_canArtificialMorphSpringBallBombJump",
{
"and": [
"h_canArtificialMorphSpringBall",
"HiJump"
]
},
{
"and": [
"Morph",
{
"or": [
"HiJump",
"canWalljump",
"h_canFly",
"canSpringBallJumpMidAir",
"h_canCrouchJumpDownGrab"
]
}
]
}
]
}
|
|
Entrance condition: {
"comeInWithGMode": {
"mode": "any",
"morphed": false
}
}
Requires: {
"or": [
"HiJump",
"canWalljump",
"h_canFly",
"canSpringBallJumpMidAir",
"h_canCrouchJumpDownGrab"
]
}
Exit condition: {
"leaveWithGMode": {
"morphed": false
}
}
|
|
From: 5
Top Right Door (Through Morph Tunnel)
To: 5
Top Right Door (Through Morph Tunnel)
Requires: {
"ammo": {
"type": "Super",
"count": 1
}
}
"Morph"
{
"or": [
"canWalljump",
"HiJump",
"SpaceJump"
]
}
{
"resetRoom": {
"nodes": [
5
],
"mustStayPut": false
}
}
{
"refill": [
"Energy",
"Super",
"PowerBomb"
]
}
|
|
From: 5
Top Right Door (Through Morph Tunnel)
To: 5
Top Right Door (Through Morph Tunnel)
It takes around 2 minutes to get the Zero to this door. Requires: "canBePatient"
{
"or": [
{
"ammo": {
"type": "Super",
"count": 1
}
},
{
"obstaclesCleared": [
"A"
]
}
]
}
"Morph"
{
"or": [
"HiJump",
"canWalljump",
"h_canFly",
"canTrickyUseFrozenEnemies",
"canSpringBallJumpMidAir"
]
}
Exit condition: {
"leaveWithGModeSetup": {}
}
|
|
From: 2
Right Door
To: 3
Safe Block in the Middle of the Room
Use the Fireflea when it moves to the right to cross the first gap. Requires: "canTrickyUseFrozenEnemies"
"HiJump"
"canCarefulJump"
{
"or": [
"canTrickyJump",
"canWalljump"
]
}
{
"spikeHits": 1
}
|
|
Requires: "HiJump"
"SpeedBooster"
{
"or": [
"canTrickyJump",
"canWalljump"
]
}
|
|
Freeze a Beetom at head height where Samus can Spinjump into it and begin Moondancing. After 175 Moonfalls, reposition the Beetom to chest height. If needed, the Beetom can be left at the door while Samus moves to the farm bugs. Requires: {
"obstaclesNotCleared": [
"A"
]
}
{
"or": [
"HiJump",
"SpaceJump",
"canWalljump"
]
}
"canExtendedMoondance"
"canTrickyUseFrozenEnemies"
{
"enemyDamage": {
"enemy": "Beetom",
"type": "contact",
"hits": 6
}
}
"h_ExtendedMoondanceBeetomLeniency"
Exit condition: {
"leaveWithStoredFallSpeed": {
"fallSpeedInTiles": 2
}
}
|
|
Freeze a Beetom at head height where Samus can Spinjump into it and begin Moondancing. If needed, the Beetom can be left at the door while Samus moves to the farm bugs. Requires: {
"obstaclesNotCleared": [
"A"
]
}
{
"or": [
"HiJump",
"SpaceJump",
"canWalljump"
]
}
"canMoondance"
"canTrickyUseFrozenEnemies"
{
"enemyDamage": {
"enemy": "Beetom",
"type": "contact",
"hits": 6
}
}
Exit condition: {
"leaveWithStoredFallSpeed": {
"fallSpeedInTiles": 1
}
}
|
|
Requires: {
"or": [
"HiJump",
"h_canFly",
"canWalljump"
]
}
|
|
From: 3
Bottom Left Door
To: 2
Middle Left Door (Behind Power Bomb Blocks)
Notable: true Gain R-mode while entering the room. Use the respawning bugs to refill reserve energy. Get grabbed by the Beetom and carry it to the 4-tile high gap one screen above the bottom-left door. Position Samus one pixel to the right of being against the wall. Jump and aim down, reaching the ceiling at the same time that reserves are triggered. This will force Samus to stand up, briefly clipping into the wall above. Immediately freeze the Beetom inside the wall, by buffering a shot during the reserve trigger. Use a Ripper to get knocked back onto the frozen Beetom. This will clip Samus one pixel left into the wall, making it possible to X-ray climb. X-ray climb up 2 screens. Entrance condition: {
"comeInWithRMode": {}
}
Requires: {
"or": [
"canWalljump",
"HiJump",
"h_canFly",
"canSpringBallJumpMidAir"
]
}
{
"enemyDamage": {
"enemy": "Beetom",
"type": "contact",
"hits": 1
}
}
{
"enemyDamage": {
"enemy": "Ripper",
"type": "contact",
"hits": 1
}
}
"canWallIceClip"
"canXRayClimb"
|
|
From: 4
Bottom Right Door
To: 2
Middle Left Door (Behind Power Bomb Blocks)
Notable: true Gain R-mode while entering the room. Use the respawning bugs to refill reserve energy. Get grabbed by the Beetom and carry it to the 4-tile high gap one screen above the bottom-left door. Position Samus one pixel to the right of being against the wall. Jump and aim down, reaching the ceiling at the same time that reserves are triggered. This will force Samus to stand up, briefly clipping into the wall above. Immediately freeze the Beetom inside the wall, by buffering a shot during the reserve trigger. Use a Ripper to get knocked back onto the frozen Beetom. This will clip Samus one pixel left into the wall, making it possible to X-ray climb. X-ray climb up 2 screens. Entrance condition: {
"comeInWithRMode": {}
}
Requires: {
"or": [
"canWalljump",
"HiJump",
"h_canFly",
"canSpringBallJumpMidAir"
]
}
{
"enemyDamage": {
"enemy": "Beetom",
"type": "contact",
"hits": 1
}
}
{
"enemyDamage": {
"enemy": "Ripper",
"type": "contact",
"hits": 1
}
}
"canWallIceClip"
"canXRayClimb"
|
|
Requires: {
"or": [
"canWalljump",
"HiJump",
"canSpringBallJumpMidAir",
"h_canFly"
]
}
|
|
From: 7
Junction (Bottom Rippers)
To: 6
Junction (Above Bottom Rippers)
Requires: "canWalljump" "h_canDiagonalBombJump" |
|
Requires: "h_canIBJ"
{
"or": [
{
"and": [
"canWalljump",
"ScrewAttack"
]
},
{
"and": [
{
"or": [
"canWalljump",
"canSpringBallJumpMidAir"
]
},
{
"ammo": {
"type": "PowerBomb",
"count": 1
}
}
]
},
{
"enemyKill": {
"enemies": [
[
"Ripper",
"Ripper",
"Ripper"
],
[
"Ripper"
]
],
"explicitWeapons": [
"Super",
"PowerBomb"
]
}
}
]
}
|
|
From: 7
Junction (Bottom Rippers)
To: 6
Junction (Above Bottom Rippers)
Requires: "canSpringBallJumpMidAir"
{
"or": [
"canWalljump",
{
"and": [
"HiJump",
"canTrickyJump"
]
}
]
}
{
"or": [
"canTrickySpringBallJump",
"canSpringwall"
]
}
|
|
From: 7
Junction (Bottom Rippers)
To: 6
Junction (Above Bottom Rippers)
Requires: "canUseFrozenEnemies"
{
"or": [
"HiJump",
"canWalljump",
"canSpringBallJumpMidAir",
"h_canIBJ"
]
}
|
|
This strat is for killing all of the Rippers and then using Space Jump to get up without consecutive wall jumps. Space jump up near the shot block, then shoot it while falling right as it goes off screen, then space jump back up. Requires: "SpaceJump"
{
"or": [
"HiJump",
{
"and": [
"canCarefulJump",
"canWalljump"
]
}
]
}
{
"obstaclesCleared": [
"B"
]
}
|
|
From: 9
Junction (Top Rippers)
To: 9
Junction (Top Rippers)
To kill the Rippers with a single Power Bomb without breaking the ledge, place the bomb just above the second Ripper. Requires: "h_canUsePowerBombs"
"canCarefulJump"
{
"or": [
"canWalljump",
"canSpringBallJumpMidAir",
"SpaceJump",
{
"and": [
"HiJump",
"canTrickyDashJump"
]
},
{
"and": [
"h_canJumpIntoIBJ",
{
"or": [
"canStaggeredIBJ",
"canDoubleBombJump"
]
}
]
}
]
}
Clears obstacles: B |
|
From: 9
Junction (Top Rippers)
To: 9
Junction (Top Rippers)
Kill the Rippers with Screw Attack. Break spin before landing to prevent breaking the platform. Requires: "ScrewAttack"
{
"or": [
"SpaceJump",
"canConsecutiveWalljump",
{
"and": [
"canWalljump",
"HiJump"
]
}
]
}
Clears obstacles: B |
|
From: 9
Junction (Top Rippers)
To: 9
Junction (Top Rippers)
Kill the Rippers with Supers. Requires: {
"ammo": {
"type": "Super",
"count": 4
}
}
{
"or": [
"canWalljump",
"SpaceJump",
"h_canJumpIntoIBJ",
{
"and": [
"canSpringBallJumpMidAir",
{
"or": [
"HiJump",
"canTrickyJump"
]
}
]
}
]
}
Clears obstacles: B |
|
Getting up during Phase 2 can be done by jumping on Kraid's projectile platforms or a well timed crouch jump + down grab. Requires: "Charge"
{
"or": [
"Wave",
"Spazer",
"Plasma",
"canBePatient"
]
}
{
"or": [
"HiJump",
"canWalljump",
"SpaceJump",
"canSpringBallJumpMidAir",
{
"and": [
"canDodgeWhileShooting",
{
"or": [
"canCarefulJump",
"h_canCrouchJumpDownGrab"
]
}
]
}
]
}
Clears obstacles: f_DefeatedKraid |
|
Only 2 Missiles are needed to get Kraid to stand up, after which they are farmable. Getting up during Phase 2 can be done by jumping on Kraid's projectile platforms or a well timed crouch jump + down grab. Requires: {
"ammo": {
"type": "Missile",
"count": 2
}
}
{
"or": [
"HiJump",
"canWalljump",
"SpaceJump",
"canSpringBallJumpMidAir",
{
"and": [
"canDodgeWhileShooting",
{
"or": [
"canCarefulJump",
"h_canCrouchJumpDownGrab"
]
}
]
}
]
}
Clears obstacles: f_DefeatedKraid |
|
4 supers are required to kill Kraid. Only 1 is needed to get him to stand up, after which they are farmable, even though the drop rate is low. Getting up during Phase 2 can be done by jumping on Kraid's projectile platforms or a well timed crouch jump + down grab. Requires: {
"or": [
{
"ammo": {
"type": "Super",
"count": 5
}
},
{
"and": [
{
"ammo": {
"type": "Super",
"count": 4
}
},
"canDodgeWhileShooting"
]
},
{
"and": [
{
"ammo": {
"type": "Super",
"count": 3
}
},
"canDodgeWhileShooting",
"canBePatient"
]
},
{
"and": [
{
"ammo": {
"type": "Super",
"count": 1
}
},
"canDodgeWhileShooting",
"canBeVeryPatient"
]
}
]
}
{
"or": [
"HiJump",
"canWalljump",
"SpaceJump",
"canSpringBallJumpMidAir",
{
"and": [
"canDodgeWhileShooting",
{
"or": [
"canCarefulJump",
"h_canCrouchJumpDownGrab"
]
}
]
}
]
}
Clears obstacles: f_DefeatedKraid |
|
The Kihunters can be killed from below but there is a chance one will drop down the hole. Watch them before breaking the shot block. Requires: {
"or": [
"HiJump",
"h_canFly",
"canWalljump"
]
}
Clears obstacles: C, D |
|
Requires: {
"or": [
"canWalljump",
"HiJump",
"SpaceJump",
"canTrickyUseFrozenEnemies",
"canSpringBallJumpMidAir"
]
}
{
"heatFrames": 350
}
|
|
King Cac can be killed by scrolling the camera before jumping across. Requires: "canWalljump"
"canCarefulJump"
{
"or": [
"canCameraManip",
"canStaggeredWalljump",
{
"and": [
"canNeutralDamageBoost",
{
"enemyDamage": {
"enemy": "Cacatac",
"type": "contact",
"hits": 1
}
}
]
}
]
}
|
|
From: 2
Left Side - Top Middle Door
To: 7
Top Right Door
Entrance condition: {
"comeInShinecharged": {
"framesRequired": 125
}
}
Requires: "HiJump"
"canWalljump"
"canShinechargeMovementTricky"
{
"shinespark": {
"frames": 27,
"excessFrames": 0
}
}
Exit condition: {
"leaveWithSpark": {}
}
|
|
From: 2
Left Side - Top Middle Door
To: 7
Top Right Door
Entrance condition: {
"comeInRunning": {
"minTiles": 4,
"speedBooster": false
}
}
Requires: "canWalljump" "canCarefulJump" |
|
From: 2
Left Side - Top Middle Door
To: 7
Top Right Door
Entrance condition: {
"comeInRunning": {
"minTiles": 5,
"speedBooster": "any"
}
}
Requires: "canWalljump" "canCarefulJump" |
|
From: 6
Middle Right Door
To: 7
Top Right Door
Entrance condition: {
"comeInShinecharging": {
"length": 4,
"openEnd": 0
}
}
Requires: "canShinechargeMovementComplex" "HiJump" "canWalljump" Exit condition: {
"leaveShinecharged": {
"framesRemaining": 45
}
}
|
|
Requires: {
"or": [
"canWalljump",
"HiJump",
"h_canFly",
"canUseFrozenEnemies",
"canSpringBallJumpMidAir"
]
}
|
|
Requires: "canUseFrozenEnemies"
{
"or": [
"canTrickyUseFrozenEnemies",
"canWalljump",
"HiJump",
"canSpringBallJumpMidAir",
"h_canCrouchJumpDownGrab"
]
}
|
|
Requires: "canUseFrozenEnemies"
{
"or": [
"canTrickyUseFrozenEnemies",
"canWalljump",
"HiJump"
]
}
|
|
Requires: "HiJump" "canWalljump" |
|
Requires: {
"or": [
"canPreciseWalljump",
"SpaceJump",
{
"and": [
"HiJump",
{
"or": [
"canWalljump",
"SpeedBooster"
]
}
]
}
]
}
{
"heatFrames": 210
}
|
|
From: 3
Bottom Left Junction
To: 3
Bottom Left Junction
Requires: "h_heatProof"
{
"or": [
{
"and": [
{
"resetRoom": {
"nodes": [
1
],
"mustStayPut": false
}
},
{
"or": [
"canWalljump",
"SpaceJump",
"h_canUseSpringBall"
]
}
]
},
{
"and": [
{
"resetRoom": {
"nodes": [
2
],
"mustStayPut": false
}
},
{
"or": [
"HiJump",
"SpaceJump"
]
}
]
}
]
}
{
"refill": [
"Energy",
"Missile",
"Super",
"PowerBomb"
]
}
|
|
From: 4
Bottom Junction (Cleared Runway)
To: 2
Right Door
Notable: true This is a precise strat which requires maximum run speed. Jump when passing under the floating platform and barely avoid hitting the rightmost wall. Wall jump on the horizontal spire near to the door. Requires: "canTrickyDashJump"
"canWalljump"
{
"heatFrames": 150
}
|
|
Requires: "canWalljump"
"canShinechargeMovement"
{
"canShineCharge": {
"usedTiles": 33,
"openEnd": 2
}
}
{
"heatFrames": 380
}
{
"shinespark": {
"frames": 16,
"excessFrames": 4
}
}
|
|
From: 2
Bottom Left Door
To: 1
Top Left Door
Notable: true Wall jump up the left wall and then on the moving platform (Kamer) while avoiding the Fune's fireball. The Kamers will temporarily move down if Samus is below them, so it is best to walk under the first Kamer before climbing the wall. Requires: "HiJump"
"canUseEnemies"
"canWalljump"
{
"or": [
{
"heatFrames": 360
},
{
"and": [
"canCarefulJump",
{
"heatFrames": 250
}
]
}
]
}
|
|
Jump through the door transition, and wall jump off the second moving platform to get on top. Entrance condition: {
"comeInJumping": {
"minTiles": 1,
"speedBooster": "any"
}
}
Requires: "canPrepareForNextRoom"
"HiJump"
"canWalljump"
"canTrickyJump"
{
"heatFrames": 260
}
|
|
Run to the right, wait a moment for the platforms to come down, then wall jump off the second platform from the right. Requires: "HiJump"
"canWalljump"
"canTrickyJump"
{
"heatFrames": 380
}
|
|
Starting from the left wall, run to the right and when on the center of the mound just to the right of the second moving platform from the right. Wall jump off of the platform as it moves down. Requires: "canTrickyDashJump"
"canWalljump"
{
"heatFrames": 300
}
|
|
From: 3
Right Door
To: 3
Right Door
Notable: true Charge a spark along the bottom of Double Chamber and use it to spark through the right side door. Requires opening the door and shutter first. Requires: "HiJump"
"Morph"
{
"or": [
{
"obstaclesCleared": [
"A"
]
},
{
"heatFrames": 240
}
]
}
{
"or": [
{
"and": [
"canTrickyDashJump",
"canWalljump"
]
},
"SpaceJump"
]
}
{
"canShineCharge": {
"usedTiles": 28,
"gentleUpTiles": 3,
"gentleDownTiles": 3,
"openEnd": 0
}
}
{
"heatFrames": 780
}
{
"shinespark": {
"frames": 57
}
}
Exit condition: {
"leaveWithSpark": {}
}
Clears obstacles: A |
|
From: 3
Right Door
To: 3
Right Door
Notable: true Charge a spark along the bottom of Double Chamber and use it to spark through the right side door. Requires opening the door and shutter first. Requires: "HiJump"
{
"or": [
"SpaceJump",
"Grapple"
]
}
{
"or": [
{
"obstaclesCleared": [
"A"
]
},
"Wave",
{
"and": [
"h_canHeatedBlueGateGlitch",
{
"heatFrames": 60
}
]
}
]
}
{
"or": [
{
"and": [
"canTrickyDashJump",
"canWalljump"
]
},
"SpaceJump"
]
}
{
"canShineCharge": {
"usedTiles": 28,
"gentleUpTiles": 3,
"gentleDownTiles": 3,
"openEnd": 0
}
}
{
"heatFrames": 780
}
{
"shinespark": {
"frames": 57
}
}
Exit condition: {
"leaveWithSpark": {}
}
Clears obstacles: A |
|
Jump into the spikes and try to bounce on the crumble blocks moving towards the door. Requires: "h_canXMode"
"h_XModeSpikeHit"
"h_XModeSpikeHit"
"h_XModeSpikeHit"
"canWalljump"
"SpeedBooster"
{
"heatFrames": 540
}
{
"shinespark": {
"frames": 5
}
}
Exit condition: {
"leaveWithSpark": {}
}
|
|
Requires: "canIframeSpikeJump"
{
"spikeHits": 1
}
"canWalljump"
"HiJump"
{
"heatFrames": 300
}
|
|
Requires: "canWalljump"
{
"heatFrames": 300
}
|
|
Requires: "canWalljump"
{
"heatFrames": 280
}
Exit condition: {
"leaveWithRunway": {
"length": 6,
"openEnd": 1
}
}
|
|
Samus will be slowed by lava if SpeedBooster is equipped, even with Gravity. Requires: {
"or": [
"h_lavaProof",
"canSuitlessLavaDive"
]
}
{
"or": [
{
"and": [
"HiJump",
{
"heatFrames": 270
},
{
"lavaFrames": 270
}
]
},
{
"and": [
{
"heatFrames": 295
},
{
"lavaFrames": 295
}
]
}
]
}
{
"or": [
{
"and": [
"SpaceJump",
"canCarefulJump",
{
"heatFrames": 100
}
]
},
{
"and": [
"canWalljump",
{
"heatFrames": 60
}
]
},
{
"and": [
"canSpringBallJumpMidAir",
{
"heatFrames": 100
}
]
},
{
"and": [
"canBombJumpWaterEscape",
{
"heatFrames": 180
},
{
"lavaFrames": 30
}
]
},
{
"and": [
"HiJump",
{
"heatFrames": 60
},
{
"lavaFrames": 10
}
]
}
]
}
|
|
Requires: {
"heatFrames": 70
}
{
"or": [
{
"and": [
{
"or": [
"canPreciseWalljump",
{
"and": [
"HiJump",
"canWalljump"
]
}
]
},
{
"lavaFrames": 30
}
]
},
{
"and": [
"Gravity",
{
"lavaFrames": 20
}
]
}
]
}
|
|
From: 3
Hidden Platform Item
To: 4
Junction Above Hidden Platform Item
Requires: {
"heatFrames": 50
}
{
"or": [
{
"and": [
"canWalljump",
{
"lavaFrames": 30
}
]
},
{
"and": [
"HiJump",
{
"lavaFrames": 30
}
]
},
{
"and": [
"Gravity",
{
"lavaFrames": 20
}
]
},
{
"and": [
"canUseFrozenEnemies",
{
"obstaclesNotCleared": [
"A"
]
},
{
"lavaFrames": 30
}
]
},
{
"and": [
{
"heatFrames": 190
},
{
"lavaFrames": 65
}
]
}
]
}
|
|
From: 2
Left Shaft - Bottom Right Door
To: 3
Left Shaft - Middle Right Door
Requires: {
"or": [
"canWalljump",
"HiJump",
"SpaceJump",
"h_canCrouchJumpDownGrab"
]
}
{
"heatFrames": 280
}
|
|
From: 2
Left Shaft - Bottom Right Door
To: 3
Left Shaft - Middle Right Door
Entrance condition: {
"comeInShinecharging": {
"length": 12,
"openEnd": 0,
"gentleUpTiles": 4
}
}
Requires: "canShinechargeMovementComplex"
{
"or": [
"HiJump",
"canWalljump"
]
}
{
"shinespark": {
"frames": 5
}
}
{
"heatFrames": 230
}
Exit condition: {
"leaveWithSpark": {}
}
|
|
From: 2
Left Shaft - Bottom Right Door
To: 3
Left Shaft - Middle Right Door
Requires: {
"or": [
"canWalljump",
"HiJump",
"SpaceJump",
"h_canCrouchJumpDownGrab"
]
}
{
"heatFrames": 260
}
Exit condition: {
"leaveWithRunway": {
"length": 4,
"openEnd": 1
}
}
|
|
From: 3
Left Shaft - Middle Right Door
To: 4
Left Shaft - Top Right Door
Requires: {
"or": [
"canWalljump",
"HiJump",
"SpaceJump",
"h_canCrouchJumpDownGrab"
]
}
{
"heatFrames": 310
}
|
|
From: 3
Left Shaft - Middle Right Door
To: 4
Left Shaft - Top Right Door
Requires: {
"or": [
"canWalljump",
"HiJump",
"SpaceJump",
"h_canCrouchJumpDownGrab"
]
}
{
"heatFrames": 290
}
Exit condition: {
"leaveWithRunway": {
"length": 4,
"openEnd": 1
}
}
|
|
Requires: {
"or": [
"canWalljump",
"HiJump",
"SpaceJump",
"h_canCrouchJumpDownGrab"
]
}
{
"heatFrames": 200
}
|
|
Requires: {
"or": [
"canWalljump",
"HiJump",
"SpaceJump",
"h_canCrouchJumpDownGrab"
]
}
{
"heatFrames": 100
}
|
|
From: 6
Left Shaft - Top Junction
To: 1
Left Shaft - Top Left Door
Requires: {
"or": [
"canWalljump",
"HiJump",
"h_canCrouchJumpDownGrab"
]
}
{
"heatFrames": 60
}
Exit condition: {
"leaveWithRunway": {
"length": 8,
"openEnd": 1
}
}
|
|
From: 6
Left Shaft - Top Junction
To: 6
Left Shaft - Top Junction
Requires: "h_heatProof"
{
"or": [
"canDodgeWhileShooting",
"ScrewAttack",
"Wave",
"Ice",
"Spazer",
"Plasma"
]
}
{
"or": [
"canWalljump",
"HiJump",
"h_canCrouchJumpDownGrab"
]
}
{
"resetRoom": {
"nodes": [
1,
2,
3,
4
],
"mustStayPut": false
}
}
{
"refill": [
"Missile",
"PowerBomb"
]
}
|
|
From: 1
Left Door
To: 2
Right Door
Perform a bounceball to minimize lava damage. Move quickly to reach the second Tripper on its first cycle. Ride it, morph to avoid spike damage, shoot open the door, and run off of the Tripper (rather than jumping off). Entrance condition: {
"comeInRunning": {
"minTiles": 3,
"speedBooster": false
}
}
Requires: "canBounceBall"
"canWalljump"
{
"heatFrames": 600
}
{
"lavaFrames": 60
}
|
|
From: 1
Left Door
To: 2
Right Door
Perform a bounceball to minimize lava damage. Move quickly to reach the second Tripper on its first cycle. Ride it, morph to avoid spike damage, shoot open the door, and run off of the Tripper (rather than jumping off). Entrance condition: {
"comeInRunning": {
"minTiles": 1,
"speedBooster": false
}
}
Requires: "canBounceBall"
"canWalljump"
{
"heatFrames": 600
}
{
"lavaFrames": 85
}
|
|
Spin-jump across both sets of lava, trying to minimize the time spent in lava. To get onto the first pillar, either use a wall jump off the pillar, or use the Tripper briefly as a platform by crouch jumping or down grabbing onto it. Requires: "canSuitlessLavaDive"
{
"heatFrames": 750
}
{
"lavaFrames": 120
}
{
"or": [
"canWalljump",
{
"and": [
{
"or": [
"canCrouchJump",
"canDownGrab"
]
},
{
"heatFrames": 110
},
{
"lavaFrames": 20
}
]
}
]
}
|
|
From: 2
Right Door
To: 1
Left Door
Perform a bounceball to minimize lava damage. Ride the second Tripper. Entrance condition: {
"comeInRunning": {
"minTiles": 3,
"speedBooster": false
}
}
Requires: "canBounceBall"
"canWalljump"
{
"heatFrames": 600
}
{
"lavaFrames": 60
}
|
|
From: 2
Right Door
To: 1
Left Door
Perform a bounceball to minimize lava damage. Ride the second Tripper. Entrance condition: {
"comeInRunning": {
"minTiles": 3,
"speedBooster": false
}
}
Requires: "canBounceBall"
"canWalljump"
{
"heatFrames": 600
}
{
"lavaFrames": 85
}
|
|
Spin-jump across both sets of lava, trying to minimize the time spent in lava. To get onto the first pillar, either use a wall jump off the pillar, or use the Tripper briefly as a platform by crouch jumping or down grabbing onto it. Requires: "canSuitlessLavaDive"
{
"heatFrames": 700
}
{
"lavaFrames": 130
}
{
"or": [
"canWalljump",
{
"and": [
{
"or": [
"canCrouchJump",
"canDownGrab"
]
},
{
"heatFrames": 220
},
{
"lavaFrames": 70
}
]
}
]
}
|
|
From: 5
Bottom Floating Platform Junction
To: 4
Top Floating Platform Junction
Requires: {
"or": [
"canWalljump",
"HiJump",
"SpaceJump"
]
}
{
"heatFrames": 125
}
|
|
Entrance condition: {
"comeInShinecharged": {
"framesRequired": 110
}
}
Requires: "canShinechargeMovementComplex" "canWalljump" Exit condition: {
"leaveShinecharged": {
"framesRemaining": "auto"
}
}
|
|
From: 3
Bottom Left Door
To: 2
Middle Left Door
Entrance condition: {
"comeInShinecharging": {
"length": 12,
"openEnd": 0
}
}
Requires: "canShinechargeMovementComplex" "canWalljump" Exit condition: {
"leaveShinecharged": {
"framesRemaining": 30
}
}
|
|
From: 5
Middle Right Door
To: 2
Middle Left Door
Entrance condition: {
"comeInShinecharged": {
"framesRequired": 135
}
}
Requires: "canShinechargeMovementComplex" "canWalljump" Exit condition: {
"leaveShinecharged": {
"framesRemaining": "auto"
}
}
|
|
From: 5
Middle Right Door
To: 2
Middle Left Door
Entrance condition: {
"comeInShinecharged": {
"framesRequired": 100
}
}
Requires: "canShinechargeMovementComplex"
"canWalljump"
{
"shinespark": {
"frames": 11,
"excessFrames": 0
}
}
Exit condition: {
"leaveWithSpark": {}
}
|
|
From: 5
Middle Right Door
To: 2
Middle Left Door
Entrance condition: {
"comeInShinecharging": {
"length": 12,
"openEnd": 0
}
}
Requires: "canShinechargeMovementComplex" "canWalljump" Exit condition: {
"leaveShinecharged": {
"framesRemaining": 45
}
}
|
|
Requires: {
"or": [
{
"and": [
{
"doorUnlockedAtNode": 3
},
{
"doorUnlockedAtNode": 5
},
{
"canShineCharge": {
"usedTiles": 14,
"openEnd": 0
}
}
]
},
{
"and": [
{
"or": [
{
"doorUnlockedAtNode": 3
},
{
"doorUnlockedAtNode": 5
}
]
},
{
"canShineCharge": {
"usedTiles": 13,
"openEnd": 0
}
}
]
},
{
"canShineCharge": {
"usedTiles": 12,
"openEnd": 0
}
}
]
}
"canShinechargeMovementComplex"
"canWalljump"
Exit condition: {
"leaveShinecharged": {
"framesRemaining": 30
}
}
|
|
Requires: "HiJump"
"SpeedBooster"
"canWalljump"
{
"heatFrames": 600
}
|
|
This can be done from the top right, single tile block. Requires: "HiJump"
"canWalljump"
{
"heatFrames": 600
}
|
|
From: 2
Bottom Right Door
To: 2
Bottom Right Door
To minimize heat frames, briefly wait for the Sova to be on the top right of the platform before knocking it off to shorten its path to the door. Requires: "h_canFrozenEnemyRunway"
{
"heatFrames": 360
}
{
"or": [
"canCrumbleJump",
"HiJump",
"canWalljump"
]
}
Exit condition: {
"leaveWithRunway": {
"length": 2,
"openEnd": 1
}
}
|
|
Requires: "Morph"
{
"or": [
"canWalljump",
"HiJump",
"h_canFly",
"canUseFrozenEnemies"
]
}
|
|
Requires: "Morph"
{
"or": [
"canWalljump",
"h_canFly",
"canUseFrozenEnemies"
]
}
|
|
From: 6
Top Left Door Spawn At Junction (Above Crumble Blocks)
To: 1
Top Left Door
Requires: "canPrepareForNextRoom" "canWalljump" |
|
Requires: {
"obstaclesCleared": [
"C"
]
}
{
"or": [
"canWalljump",
"HiJump",
"h_canFly",
"canSpringBallJumpMidAir"
]
}
|
|
Requires: "Morph"
{
"or": [
"HiJump",
{
"and": [
"SpaceJump",
{
"heatFrames": 40
}
]
},
"canWalljump",
"canSpringBallJumpMidAir",
{
"and": [
"h_canIBJ",
{
"heatFrames": 900
}
]
},
{
"and": [
"h_canJumpIntoIBJ",
{
"heatFrames": 240
}
]
},
{
"and": [
"h_canJumpIntoIBJ",
"h_canDoubleBombJump",
{
"heatFrames": 120
}
]
},
{
"and": [
"h_canDoubleBombJump",
{
"heatFrames": 300
}
]
}
]
}
{
"or": [
"h_heatProof",
{
"and": [
"Wave",
"Plasma"
]
},
"h_canUsePowerBombs"
]
}
{
"heatFrames": 260
}
|
|
Requires: "Morph"
{
"or": [
"HiJump",
{
"and": [
"SpaceJump",
{
"heatFrames": 40
}
]
},
"canWalljump",
"canSpringBallJumpMidAir",
{
"and": [
"h_canJumpIntoIBJ",
{
"heatFrames": 240
}
]
},
{
"and": [
"h_canJumpIntoIBJ",
"h_canDoubleBombJump",
{
"heatFrames": 120
}
]
},
{
"and": [
"h_canDoubleBombJump",
{
"heatFrames": 300
}
]
}
]
}
{
"heatFrames": 260
}
{
"enemyDamage": {
"enemy": "Sova",
"type": "contact",
"hits": 1
}
}
|
|
From: 4
Junction Below Morph Tunnel
To: 5
Junction Above Morph Tunnel
Requires: {
"or": [
{
"and": [
"canWalljump",
{
"heatFrames": 100
}
]
},
{
"and": [
"HiJump",
"canSpringBallJumpMidAir",
{
"heatFrames": 160
}
]
},
{
"and": [
"SpaceJump",
{
"heatFrames": 180
}
]
},
{
"and": [
"SpaceJump",
"HiJump",
{
"heatFrames": 120
}
]
}
]
}
|
|
Requires laying PBs on the very edge of the platform by the doorway, mostly hanging over the lava, in order to double hit the rightmost Boyon. Requires: "Morph"
"canWalljump"
"canCarefulJump"
{
"enemyKill": {
"enemies": [
[
"Boyon",
"Boyon",
"Boyon"
]
],
"explicitWeapons": [
"PowerBomb"
]
}
}
{
"heatFrames": 780
}
|
|
Jump and shoot supers diagonally down at the rightmost Boyon. Jump at the edge of the platform and shoot just before hitting the ceiling, or start one tile left and shoot while at the ceiling. Requires: "Morph"
"canWalljump"
"canCarefulJump"
{
"enemyKill": {
"enemies": [
[
"Boyon"
]
],
"explicitWeapons": [
"Super"
]
}
}
{
"heatFrames": 540
}
|
|
Requires: {
"or": [
"SpeedBooster",
"HiJump",
"h_canFly",
"canWalljump",
"canSpringBallJumpMidAir"
]
}
|
|
Get a normal height jump by not pressing run while SpeedBooster is equipped, as the Shinespark is stored. Requires: "canWalljump"
"canShinechargeMovement"
{
"canShineCharge": {
"usedTiles": 33,
"openEnd": 2
}
}
{
"or": [
"f_DefeatedCrocomire",
{
"canShineCharge": {
"usedTiles": 22,
"openEnd": 1
}
}
]
}
Exit condition: {
"leaveShinecharged": {
"framesRemaining": 130
}
}
|
|
Requires: "canWalljump"
{
"acidFrames": 45
}
|
|
Requires: "canLateralMidAirMorph"
"canWalljump"
{
"acidFrames": 35
}
|
|
Requires: "Gravity"
{
"acidFrames": 20
}
{
"or": [
"canWalljump",
{
"acidFrames": 10
}
]
}
|
|
With a precise enough jump, it's possible to avoid acid damage without a shinespark. Requires: "SpeedBooster" "canTrickyJump" "canWalljump" |
|
Requires: {
"or": [
"HiJump",
"canWalljump",
"h_canCrouchJumpDownGrab",
"canSpringBallJumpMidAir"
]
}
|
|
Requires: "Grapple"
{
"or": [
"HiJump",
"canWalljump"
]
}
|
|
Requires: "HiJump"
{
"or": [
"canWalljump",
"SpeedBooster"
]
}
|
|
Requires: "Gravity"
{
"or": [
"canWalljump",
"HiJump",
"canSpringBallJumpMidAir",
"h_canFly",
"canUseFrozenEnemies",
"canGravityJump"
]
}
|
|
From: 1
Left Door
To: 4
Center Platform Junction
Entrance condition: {
"comeInRunning": {
"minTiles": 2,
"speedBooster": "any"
}
}
Requires: "canTrickyJump"
{
"or": [
"canWalljump",
"canLateralMidAirMorph"
]
}
|
|
Requires: "SpeedBooster"
"canTrickyJump"
{
"or": [
"canWalljump",
"canLateralMidAirMorph"
]
}
|
|
From: 4
Center Platform Junction
To: 3
Junction Left of Green Gate
Requires: "Gravity"
{
"or": [
"canWalljump",
"canGravityJump",
"h_canFly",
{
"and": [
"HiJump",
"SpeedBooster"
]
}
]
}
|
|
From: 3
Bottom Right Door
To: 4
Top Right Door
Entrance condition: {
"comeInShinecharging": {
"length": 7,
"openEnd": 1,
"gentleDownTiles": 3
}
}
Requires: "canWalljump" "canFastWalljumpClimb" "canShinechargeMovementComplex" Exit condition: {
"leaveShinecharged": {
"framesRemaining": 15
}
}
|
|
In-room Speedy Jump up with HiJump and Leave while Shinecharged (Very Hard)
Post Crocomire Farming Room
From: 5
Main Junction
To: 1
Top Left Door
Shortcharge to the right and then jump from below the floating platform to reach the top left door. Requires: "HiJump"
"canShinechargeMovementComplex"
{
"or": [
"canWalljump",
"canTrickyDashJump"
]
}
{
"or": [
{
"canShineCharge": {
"usedTiles": 18,
"openEnd": 1,
"gentleUpTiles": 4,
"gentleDownTiles": 2
}
},
{
"and": [
{
"doorUnlockedAtNode": 3
},
{
"canShineCharge": {
"usedTiles": 19,
"openEnd": 1,
"gentleUpTiles": 4,
"gentleDownTiles": 2
}
}
]
}
]
}
Exit condition: {
"leaveShinecharged": {
"framesRemaining": 10
}
}
|
|
From: 5
Main Junction
To: 1
Top Left Door
Notable: true Requires: "canTrickyJump"
{
"or": [
"h_canCrouchJumpDownGrab",
"canWalljump"
]
}
"canHorizontalDamageBoost"
{
"enemyDamage": {
"enemy": "Gamet",
"type": "contact",
"hits": 1
}
}
|
|
From: 5
Main Junction
To: 1
Top Left Door
Notable: true Doesn't require opening the bottom right door. Just using the available space and jumping late enough. It does require killing the Gamets and leaving the drops there so they don't kill your momentum. Requires: "canTrickyDashJump" "canWalljump" |
|
Requires: {
"or": [
"HiJump",
"SpaceJump",
"canWalljump"
]
}
|
|
From: 5
Main Junction
To: 4
Top Right Door
Requires: "canWalljump"
"canShinechargeMovementComplex"
{
"or": [
{
"canShineCharge": {
"usedTiles": 18,
"openEnd": 1,
"gentleUpTiles": 2,
"gentleDownTiles": 4
}
},
{
"and": [
{
"doorUnlockedAtNode": 3
},
{
"canShineCharge": {
"usedTiles": 19,
"openEnd": 0,
"gentleUpTiles": 2,
"gentleDownTiles": 4
}
}
]
}
]
}
{
"shinespark": {
"frames": 15
}
}
Exit condition: {
"leaveWithSpark": {}
}
|
|
Jump with enough run speed to reach the wall below the Missile Item Location. Entrance condition: {
"comeInRunning": {
"minTiles": 29,
"speedBooster": true
}
}
Requires: "canWalljump" "canCarefulJump" |
|
From: 1
Left Door
To: 3
Item
Walljump or build run speed using the full runway to jump high enough for the shinespark. Entrance condition: {
"comeInShinecharged": {
"framesRequired": 80
}
}
Requires: {
"or": [
{
"and": [
"canWalljump",
{
"shinespark": {
"frames": 20
}
}
]
},
"canTrickyDashJump"
]
}
"HiJump"
"canShinechargeMovement"
"canMidairShinespark"
{
"shinespark": {
"frames": 60
}
}
|
|
Walljump or build run speed using the full runway to jump high enough for the shinespark. Entrance condition: {
"comeInShinecharging": {
"length": 9,
"openEnd": 0
}
}
Requires: {
"or": [
{
"and": [
"canWalljump",
{
"shinespark": {
"frames": 20
}
}
]
},
"canTrickyDashJump"
]
}
"HiJump"
"canShinechargeMovement"
"canMidairShinespark"
{
"shinespark": {
"frames": 60
}
}
|
|
From: 2
Right Vertical Door
To: 4
Right Junction with Speed Blocks Broken
Spark from the ground, left of the Power Bomb blocks. Entrance condition: {
"comeInShinecharged": {
"framesRequired": 80
},
"comesThroughToilet": "any"
}
Requires: "canHorizontalShinespark"
{
"shinespark": {
"frames": 115,
"excessFrames": 85
}
}
{
"or": [
"canTrickyJump",
{
"and": [
{
"or": [
"canWalljump",
"HiJump"
]
},
{
"acidFrames": 25
}
]
},
{
"and": [
"Gravity",
{
"acidFrames": 20
}
]
}
]
}
Clears obstacles: B |
|
From: 4
Right Junction with Speed Blocks Broken
To: 1
Left Door
Fire off the shinespark at the apex of two consecutive walljumps. Requires: "canWalljump"
"canShinechargeMovement"
"canMidairShinespark"
{
"canShineCharge": {
"usedTiles": 32,
"openEnd": 1
}
}
{
"shinespark": {
"frames": 90
}
}
|
|
From: 4
Right Junction with Speed Blocks Broken
To: 3
Item
Requires: "SpeedBooster"
"HiJump"
{
"or": [
"canSpringBallJumpMidAir",
"canWalljump"
]
}
|
|
Run on the moving platform (Kamer). Requires: "SpeedBooster" "HiJump" "canWalljump" "canCarefulJump" |
|
From: 5
Small Platforms Junction
To: 3
Item
Lure a Mella from the right by breaking the speed blocks or using Morph. Then manipulate it to go high enough to be used as a stepping stone once frozen. Without movement items it may be necessary to continue manipulating it from above, jumping and aiming down to freeze it. Requires: "canUseFrozenEnemies"
"canManipulateMellas"
{
"or": [
{
"and": [
"canBePatient",
"canWalljump"
]
},
"canBeVeryPatient"
]
}
{
"or": [
{
"obstaclesCleared": [
"B"
]
},
"Morph"
]
}
|
|
From: 5
Small Platforms Junction
To: 3
Item
Notable: true Freeze the Mella at a precise location in order to jump through the crumble block, then wall jump up the long channel and mid air morph to get out. The Mella pixel positioning window is larger and higher with Morph and an X-Ray Stand Up. Requires: "Morph"
"h_canNonTrivialCeilingClip"
"canTrickyUseFrozenEnemies"
{
"or": [
"canConsecutiveWalljump",
{
"and": [
"HiJump",
"canWalljump"
]
}
]
}
|
|
Requires: "h_canNavigateHeatRooms"
"canSuitlessLavaDive"
"Gravity"
{
"or": [
"HiJump",
"canWalljump",
"canSpringBallJumpMidAir",
"canGravityJump",
{
"and": [
"h_canIBJ",
{
"acidFrames": 1050
},
{
"heatFrames": 1050
}
]
}
]
}
{
"acidFrames": 100
}
{
"heatFrames": 255
}
|
|
From: 1
Top Right Door
To: 3
Acid Chozo Statue (locked)
Try to jump to the far left side raised ledges to reduce the time spent in acid. This could mean turning off HiJump, or airballing to jump farther. Requires: "h_canNavigateHeatRooms"
"canSuitlessLavaDive"
{
"or": [
"HiJump",
"canWalljump",
"canSpringBallJumpMidAir"
]
}
{
"acidFrames": 116
}
{
"heatFrames": 285
}
|
|
Requires: "h_canNavigateHeatRooms"
{
"obstaclesCleared": [
"f_UsedAcidChozoStatue"
]
}
{
"or": [
"HiJump",
"canWalljump",
"canSpringBallJumpMidAir",
{
"and": [
"h_canIBJ",
{
"heatFrames": 780
}
]
}
]
}
{
"heatFrames": 270
}
|
|
From: 4
Junction Above Acid Plug, Without Acid
To: 3
Acid Chozo Statue (locked)
Requires: "h_canNavigateHeatRooms"
{
"or": [
"HiJump",
"canWalljump",
"canSpringBallJumpMidAir",
{
"and": [
"h_canIBJ",
{
"heatFrames": 780
}
]
}
]
}
{
"heatFrames": 200
}
|
|
From: 5
Bottom Junction Right of Morph Tunnel
To: 4
Junction Above Acid Plug, Without Acid
Requires: "h_canNavigateHeatRooms"
{
"obstaclesCleared": [
"f_UsedAcidChozoStatue"
]
}
"h_canUseMorphBombs"
{
"or": [
"HiJump",
"canWalljump",
"canSpringBallJumpMidAir",
{
"and": [
"h_canIBJ",
{
"heatFrames": 1020
}
]
}
]
}
{
"heatFrames": 600
}
|
|
From: 5
Bottom Junction Right of Morph Tunnel
To: 4
Junction Above Acid Plug, Without Acid
Requires: "h_canNavigateHeatRooms"
{
"obstaclesCleared": [
"f_UsedAcidChozoStatue"
]
}
"h_canUsePowerBombs"
{
"or": [
"HiJump",
"canWalljump",
"canSpringBallJumpMidAir",
{
"and": [
"h_canIBJ",
{
"heatFrames": 1020
}
]
}
]
}
{
"heatFrames": 300
}
|
|
Requires: "h_canNavigateHeatRooms"
"h_canUsePowerBombs"
{
"heatFrames": 350
}
{
"or": [
"canPreciseWalljump",
"SpaceJump",
{
"and": [
"HiJump",
{
"or": [
"SpeedBooster",
"canWalljump",
"canSpringBallJumpMidAir"
]
}
]
}
]
}
|
|
From: 2
Middle Right Door
To: 3
Top Right Door
Enter with G-mode direct, back up to between 1 and 6 pixels from the door transition, and activate X-ray to get very deep stuck in the door. Climb up 1 screen, and perform a turnaround buffered spin-jump away from the door to trigger the transition, bypassing any lock on the door. Entrance condition: {
"comeInWithGMode": {
"mode": "direct",
"morphed": false
}
}
Requires: "h_heatProof"
{
"or": [
"canWalljump",
"h_canCrouchJumpDownGrab",
"HiJump",
"h_canFly",
"canArtificialMorph"
]
}
"canXRayClimb"
Bypasses door shell: true |
|
From: 3
Top Right Door
To: 2
Middle Right Door
After teleporting, as Samus swings to the right, begin holding down to extend Grapple just as Samus is slightly right of vertical. Samus should swing back left and get stuck on the floor one tile to the right of the Grapple attachment point. Release Grapple and Samus will clip through the floor. Entrance condition: {
"comeInWithGrappleTeleport": {
"blockPositions": [
[
5,
3
]
]
}
}
Requires: {
"heatFrames": 250
}
{
"or": [
"canWalljump",
"h_canCrouchJumpDownGrab"
]
}
|
|
Moonfall to clip through the Bomb blocks Break spin with Shot or Angle Aim to avoid clipping all the way to the bottom of the room. Entrance condition: {
"comeInWithStoredFallSpeed": {
"fallSpeedInTiles": 1
}
}
Requires: "canPrepareForNextRoom"
"canMoonfall"
{
"or": [
"canWalljump",
"h_canCrouchJumpDownGrab"
]
}
{
"heatFrames": 170
}
|
|
From: 5
Junction Above Bottom Blocks with Top Blocks Broken
To: 3
Top Right Door
Position yourself in the door way, then run and jump. Makes it possible to walljump up. Requires: "HiJump"
"SpeedBooster"
"canWalljump"
"canCarefulJump"
{
"doorUnlockedAtNode": 2
}
{
"heatFrames": 240
}
|
|
Requires: "h_canNavigateHeatRooms"
{
"or": [
{
"and": [
"canWalljump",
{
"heatFrames": 420
}
]
},
{
"and": [
"HiJump",
{
"heatFrames": 360
}
]
},
{
"and": [
"SpaceJump",
{
"heatFrames": 420
}
]
},
{
"and": [
"canSpringBallJumpMidAir",
"canCarefulJump",
{
"heatFrames": 520
}
]
}
]
}
|
|
Requires: "h_canNavigateHeatRooms"
"canPrepareForNextRoom"
{
"or": [
"SpaceJump",
"canWalljump",
"canTrickyJump",
"canStationarySpinJump"
]
}
{
"heatFrames": 80
}
Clears obstacles: A |
|
From: 1
Top Left Door
To: 1
Top Left Door
The Power Bombs must be placed carefully to hit the Pirate without destroying the PB blocks. This strat requires heatproof because it's pretty chaotic to execute. Requires: {
"obstaclesNotCleared": [
"A"
]
}
"h_heatProof"
"canDodgeWhileShooting"
"canTrickyJump"
{
"or": [
"canWalljump",
"HiJump",
"SpaceJump"
]
}
{
"enemyKill": {
"enemies": [
[
"Yellow Space Pirate (standing)",
"Yellow Space Pirate (wall)",
"Yellow Space Pirate (wall)"
]
],
"explicitWeapons": [
"PowerBombPeriphery"
]
}
}
Exit condition: {
"leaveWithRunway": {
"length": 13,
"openEnd": 0
}
}
|
|
Shoot the standing pirate with beam shots to prevent it from attacking. Let the wall pirate climb down a little bit to make passing it easier. Requires: "h_canNavigateHeatRooms"
{
"or": [
"canSpringBallJumpMidAir",
"canWalljump",
"SpaceJump"
]
}
{
"heatFrames": 420
}
|
|
Requires: {
"or": [
"SpaceJump",
"canPreciseWalljump",
{
"and": [
"HiJump",
{
"or": [
"canWalljump",
"SpeedBooster"
]
}
]
}
]
}
"h_canUsePowerBombs"
{
"refill": [
"Energy",
"PowerBomb"
]
}
|
|
From: 5
Firefleas Bottom Left Platform Junction
To: 7
Fireflea Statue's Claw Junction
Be careful not to touch the firefleas or they will die. Requires: {
"or": [
{
"and": [
"canWalljump",
"canUseFrozenEnemies"
]
},
{
"and": [
"HiJump",
"canUseFrozenEnemies"
]
},
"canTrickyUseFrozenEnemies"
]
}
|
|
From: 5
Firefleas Bottom Left Platform Junction
To: 7
Fireflea Statue's Claw Junction
Requires: "HiJump" "canWalljump" |
|
From: 7
Fireflea Statue's Claw Junction
To: 6
Junction Behind Fune
Requires: {
"or": [
"canWalljump",
"SpaceJump"
]
}
|
|
From: 7
Junction By Lower Alcoons (Left of Spike Pits)
To: 1
Left Door
Requires: "h_canNavigateHeatRooms"
{
"or": [
"canWalljump",
"HiJump",
"canSpringBallJumpMidAir",
"SpaceJump"
]
}
{
"heatFrames": 180
}
|
|
From: 7
Junction By Lower Alcoons (Left of Spike Pits)
To: 6
Junction By Left Door (Right of Pit)
Requires: "h_canNavigateHeatRooms"
{
"or": [
"canWalljump",
"HiJump",
"canSpringBallJumpMidAir",
"SpaceJump"
]
}
{
"heatFrames": 160
}
|
|
Requires: {
"obstaclesCleared": [
"B"
]
}
{
"heatFrames": 160
}
{
"or": [
"h_canCrouchJumpDownGrab",
"canWalljump",
"canSpringBallJumpMidAir",
"HiJump",
{
"and": [
"SpaceJump",
{
"heatFrames": 20
}
]
},
{
"and": [
"h_canSpringBallBombJump",
{
"heatFrames": 50
}
]
},
{
"and": [
"h_canJumpIntoIBJ",
{
"heatFrames": 60
}
]
}
]
}
|
|
From: 9
Junction Below Crumble Blocks, Set Up to Clip
To: 2
Top Right Door
Notable: true Ice Clip through the crumble blocks using a Multiviola from the bottom of the room and then Crumble Jump to clip through the bomb blocks. The ice clip can be setup by standing in a corner and firing forward when the Multiviola hits Samus, if it is moving downwards towards Samus. The Crumble Jump is done by aiming down (not immediately) after jumping, then changing Samus' hitbox once above the crumble blocks, and jumping again. Requires: "h_heatProof"
"canPreciseCeilingClip"
"canTrickyUseFrozenEnemies"
"canPartialFloorClip"
"canTrickyJump"
"canCrumbleJump"
{
"enemyDamage": {
"enemy": "Multiviola",
"type": "contact",
"hits": 1
}
}
{
"or": [
"h_canCrouchJumpDownGrab",
"canWalljump",
"canSpringBallJumpMidAir",
"HiJump",
"SpaceJump",
"h_canJumpIntoIBJ"
]
}
|
|
From: 9
Junction Below Crumble Blocks, Set Up to Clip
To: 2
Top Right Door
Notable: true Freeze the Multiviola on the left side, just below the solid block. XRay standup and jump to clip up, then jump again to get on top of the bomb blocks. Requires: "h_heatProof"
"h_canXRayCeilingClip"
"canTrickyUseFrozenEnemies"
{
"or": [
"h_canCrouchJumpDownGrab",
"canWalljump",
"canSpringBallJumpMidAir",
"HiJump",
"SpaceJump",
"h_canJumpIntoIBJ"
]
}
|
|
From: 1
Left Door
To: 2
Right Door
Notable: true Place the PBs next to the pillars in order to only use 2. Minimize acid by unmorphing high to land back on the jump spot or walljumping before placing the bomb. Requires: "Morph"
"canCarefulJump"
{
"ammo": {
"type": "PowerBomb",
"count": 2
}
}
{
"or": [
{
"and": [
"canCarefulJump",
"canResetFallSpeed",
{
"heatFrames": 660
}
]
},
{
"and": [
"canWalljump",
{
"heatFrames": 660
},
{
"or": [
"canWallJumpInstantMorph",
{
"acidFrames": 30
}
]
}
]
},
{
"and": [
"Gravity",
{
"heatFrames": 660
},
{
"acidFrames": 30
}
]
},
{
"and": [
"canTrickyJump",
"canSuitlessLavaDive",
{
"heatFrames": 720
},
{
"acidFrames": 52
}
]
}
]
}
{
"or": [
"canTrickyJump",
{
"and": [
"Gravity",
{
"heatFrames": 180
},
{
"acidFrames": 56
}
]
},
{
"and": [
"canSuitlessLavaDive",
{
"heatFrames": 240
},
{
"acidFrames": 96
}
]
}
]
}
{
"or": [
"h_heatResistant",
"canPauseAbuse",
{
"resourceCapacity": [
{
"type": "RegularEnergy",
"count": 149
}
]
}
]
}
|
|
From: 2
Right Door
To: 1
Left Door
Notable: true Place the PBs next to the pillars in order to only use 2. Avoid acid during the first Power Bomb by walljumping before placing the bomb. Avoiding acid damage at the last jump is tricky but possible. Requires: "Morph"
{
"ammo": {
"type": "PowerBomb",
"count": 2
}
}
"canCarefulJump"
{
"or": [
{
"and": [
"canWallJumpInstantMorph",
{
"heatFrames": 690
}
]
},
{
"and": [
"canWalljump",
{
"heatFrames": 660
},
{
"acidFrames": 36
}
]
},
{
"and": [
"canSuitlessLavaDive",
{
"heatFrames": 840
},
{
"acidFrames": 84
}
]
},
{
"and": [
"Gravity",
{
"heatFrames": 660
},
{
"acidFrames": 24
}
]
}
]
}
{
"or": [
"canInsaneJump",
{
"and": [
"canTrickyJump",
"canLateralMidAirMorph",
{
"heatFrames": 10
},
{
"acidFrames": 10
}
]
},
{
"and": [
"canPreciseWalljump",
{
"heatFrames": 50
},
{
"acidFrames": 32
}
]
},
{
"and": [
"Gravity",
{
"heatFrames": 20
},
{
"acidFrames": 20
}
]
},
{
"and": [
"canSuitlessLavaDive",
{
"heatFrames": 50
},
{
"acidFrames": 50
}
]
}
]
}
{
"or": [
"h_heatResistant",
"canPauseAbuse",
{
"resourceCapacity": [
{
"type": "RegularEnergy",
"count": 149
}
]
}
]
}
|
|
From: 3
Middle Right Door
To: 7
Junction At Middle Right Door With Bottom KiHunter Cleared
Notable: true Manipulate the Three KiHunters to avoid all of them when entering the room from the Save room door. Stop on a dime on entry for positioning, because it is precise. Wait 1 second then Morph and roll left, past the swooping kihunter. Quickly jump to the higher level and run into the left wall. Wait there for half a second; it helps to jump into the wall. The 2 KiHunters should be grouped above Samus and out of the way. Requires: "h_canNavigateHeatRooms"
"canStopOnADime"
"canCarefulJump"
"Morph"
{
"or": [
"HiJump",
"canWalljump"
]
}
{
"heatFrames": 80
}
|
|
From: 7
Junction At Middle Right Door With Bottom KiHunter Cleared
To: 5
Top Junction Between Doors
Notable: true Manipulate the Three KiHunters to avoid all of them when entering the room from the Save room door. Stop on a dime on entry for positioning, because it is precise. Wait 1 second then Morph and roll left, past the swooping kihunter. Quickly jump to the higher level and run into the left wall. Wait there for half a second; it helps to jump into the wall. The 2 KiHunters should be grouped above Samus and out of the way. Requires: "h_canNavigateHeatRooms"
"canStopOnADime"
"canCarefulJump"
"Morph"
{
"or": [
"HiJump",
"canWalljump"
]
}
{
"heatFrames": 490
}
|
|
Requires: "h_canNavigateHeatRooms"
"canWalljump"
{
"heatFrames": 200
}
|
|
From: 2
Bottom Left Door
To: 6
Bottom Platform Junction With Pirates Killed
Jump morph from the center platform to place the first Power Bomb Place two more on the platform itself to kill the bottom pirates Use a fourth to break the bomb blocks while also killing the last pirate. Requires: "h_canNavigateHeatRooms"
{
"or": [
"canSpringBallJumpMidAir",
"SpaceJump",
"canWalljump",
"h_canIBJ",
{
"and": [
"SpeedBooster",
"HiJump"
]
}
]
}
{
"enemyKill": {
"enemies": [
[
"Yellow Space Pirate (wall)",
"Yellow Space Pirate (wall)",
"Yellow Space Pirate (wall)"
]
],
"explicitWeapons": [
"PowerBombPeriphery"
]
}
}
{
"heatFrames": 790
}
{
"or": [
"h_heatResistant",
"canPauseAbuse",
{
"resourceCapacity": [
{
"type": "RegularEnergy",
"count": 149
}
]
}
]
}
Clears obstacles: A |
|
From: 2
Bottom Left Door
To: 6
Bottom Platform Junction With Pirates Killed
Requires: "h_canNavigateHeatRooms"
"ScrewAttack"
{
"or": [
{
"and": [
"canWalljump",
{
"heatFrames": 265
}
]
},
{
"and": [
"HiJump",
{
"heatFrames": 240
}
]
},
{
"heatFrames": 430
}
]
}
|
|
From: 6
Bottom Platform Junction With Pirates Killed
To: 4
Junction Above Bomb Blocks
Requires: "h_canNavigateHeatRooms"
"SpaceJump"
{
"or": [
{
"and": [
"canConsecutiveWalljump",
{
"heatFrames": 260
}
]
},
{
"heatFrames": 360
}
]
}
{
"or": [
"ScrewAttack",
{
"and": [
"h_canUsePowerBombs",
{
"or": [
{
"and": [
"canWalljump",
{
"heatFrames": 120
}
]
},
{
"heatFrames": 200
}
]
}
]
},
{
"and": [
"h_canUseMorphBombs",
{
"or": [
{
"and": [
"canConsecutiveWalljump",
{
"heatFrames": 520
}
]
},
{
"heatFrames": 800
}
]
}
]
},
{
"obstaclesCleared": [
"A"
]
}
]
}
Clears obstacles: A |
|
From: 2
Right Door
To: 4
Junction Above Bomb Block
Run into the acid to quickly jump over the first pillar. Build speed and jump over the second pillar to mockball through the tunnel without taking much acid damage. Entrance condition: {
"comeInRunning": {
"minTiles": 3,
"speedBooster": "any"
}
}
Requires: "h_canNavigateHeatRooms"
"canMockball"
"HiJump"
"SpeedBooster"
"canCarefulJump"
"canWalljump"
{
"or": [
"canInsaneWalljump",
{
"acidFrames": 30
}
]
}
{
"heatFrames": 310
}
{
"acidFrames": 5
}
|
|
From: 4
Junction Above Bomb Block
To: 1
Top Left Door
Wait for the Kihunters to move away from where Samus will jump up. This may mean Hitboxing through the middle KiHunter multiple times. Requires: "h_canNavigateHeatRooms"
"Plasma"
"canHitbox"
{
"or": [
"h_canCrouchJumpDownGrab",
"canWalljump",
"HiJump",
"SpaceJump"
]
}
"canTrickyJump"
{
"heatFrames": 600
}
Clears obstacles: A |
|
From: 4
Junction Above Bomb Block
To: 1
Top Left Door
Firing upwards has a good chance of hitting multiple Kihunters. And charge shot double hits will instantly kill a Kihunter. Requires: "h_canNavigateHeatRooms"
"Ice"
"Wave"
"Plasma"
{
"or": [
"Charge",
{
"heatFrames": 240
}
]
}
{
"or": [
"h_canCrouchJumpDownGrab",
"canWalljump",
"HiJump",
{
"and": [
"canSpringBallJumpMidAir",
{
"heatFrames": 120
}
]
},
"SpaceJump",
{
"and": [
"h_canIBJ",
"h_heatProof"
]
},
{
"and": [
"h_canSpringBallBombJump",
"h_additionalBomb",
"h_additionalBomb",
{
"heatFrames": 250
}
]
}
]
}
{
"heatFrames": 550
}
Clears obstacles: A |
|
From: 4
Junction Above Bomb Block
To: 1
Top Left Door
Fire up from below and try not to jump too high as that will out the camera in a bad position. Requires: "h_canNavigateHeatRooms"
"Ice"
"Wave"
"Spazer"
{
"or": [
"Charge",
"canCarefulJump",
"h_heatProof"
]
}
{
"or": [
"h_canCrouchJumpDownGrab",
"canWalljump",
"HiJump",
{
"and": [
"canSpringBallJumpMidAir",
{
"heatFrames": 120
}
]
},
"SpaceJump",
{
"and": [
"h_canIBJ",
"h_heatProof"
]
},
{
"and": [
"h_canSpringBallBombJump",
"h_additionalBomb",
"h_additionalBomb",
{
"heatFrames": 250
}
]
}
]
}
{
"heatFrames": 1520
}
Clears obstacles: A |
|
From: 4
Junction Above Bomb Block
To: 1
Top Left Door
Requires: "h_canNavigateHeatRooms"
{
"obstaclesCleared": [
"A"
]
}
{
"or": [
"h_canCrouchJumpDownGrab",
"canWalljump",
"HiJump",
{
"and": [
"canSpringBallJumpMidAir",
{
"heatFrames": 120
}
]
},
"SpaceJump",
{
"and": [
"h_canIBJ",
{
"heatFrames": 1820
}
]
},
{
"and": [
"h_canSpringBallBombJump",
"h_additionalBomb",
"h_additionalBomb",
{
"heatFrames": 250
}
]
}
]
}
{
"heatFrames": 390
}
|
|
From: 4
Junction Above Bomb Block
To: 1
Top Left Door
Jump over the first Kihunter and attempt to either use IFrames to pass through the top Kihunter, or dodge it if possible. Requires: "h_canNavigateHeatRooms"
{
"or": [
"canWalljump",
"HiJump"
]
}
"canTrickyJump"
{
"or": [
{
"and": [
"canHorizontalDamageBoost",
"canHitbox",
{
"enemyDamage": {
"enemy": "Kihunter (red)",
"type": "contact",
"hits": 1
}
}
]
},
{
"enemyDamage": {
"enemy": "Kihunter (red)",
"type": "contact",
"hits": 2
}
}
]
}
Clears obstacles: A |
|
Fire up from below and try not to jump too high as that will put the camera in a bad position. Requires: "h_canNavigateHeatRooms"
"Plasma"
{
"or": [
"canCarefulJump",
{
"heatFrames": 100
}
]
}
{
"or": [
"h_canCrouchJumpDownGrab",
"canWalljump",
"HiJump",
{
"and": [
"canSpringBallJumpMidAir",
{
"heatFrames": 120
}
]
},
"SpaceJump",
{
"and": [
"h_canIBJ",
"h_heatProof"
]
},
{
"and": [
"h_canSpringBallBombJump",
"h_additionalBomb",
"h_additionalBomb",
{
"heatFrames": 250
}
]
}
]
}
{
"heatFrames": 1360
}
Clears obstacles: A |
|
Requires: "h_canNavigateHeatRooms"
"ScrewAttack"
{
"or": [
"canWalljump",
{
"and": [
"h_canCrouchJumpDownGrab",
{
"heatFrames": 120
},
{
"or": [
"canCarefulJump",
{
"enemyDamage": {
"enemy": "Kihunter (red)",
"type": "contact",
"hits": 1
}
}
]
}
]
},
"HiJump",
{
"and": [
"canSpringBallJumpMidAir",
{
"heatFrames": 120
},
{
"enemyDamage": {
"enemy": "Kihunter (red)",
"type": "contact",
"hits": 2
}
}
]
},
"SpaceJump",
{
"and": [
"h_canIBJ",
"h_heatProof",
{
"enemyDamage": {
"enemy": "Kihunter (red)",
"type": "contact",
"hits": 2
}
}
]
}
]
}
{
"heatFrames": 500
}
Clears obstacles: A |
|
From: 4
Junction Above Bomb Block
To: 1
Top Left Door
Shoot them from below. It is possible for the KiHunters to fall through the gaps in the side, but is unlikely. Jumping may lower the camera position making it harder to shoot the KiHunters. But once it is lowered, jump to make them active and vulnerable to damage. Requires: "h_heatProof"
"canBePatient"
{
"enemyKill": {
"enemies": [
[
"Kihunter (red)",
"Kihunter (red)",
"Kihunter (red)"
]
]
}
}
{
"or": [
"h_canCrouchJumpDownGrab",
"canWalljump",
"HiJump",
"canSpringBallJumpMidAir",
"SpaceJump",
"h_canIBJ",
{
"and": [
"h_canSpringBallBombJump",
"h_additionalBomb",
"h_additionalBomb"
]
}
]
}
Clears obstacles: A |
|
Fire up from below and try not to jump too high as that will put the camera in a bad position. Requires: "h_canNavigateHeatRooms"
{
"enemyKill": {
"enemies": [
[
"Kihunter (red)",
"Kihunter (red)",
"Kihunter (red)"
]
],
"explicitWeapons": [
"Super"
]
}
}
{
"or": [
"canCarefulJump",
{
"heatFrames": 210
}
]
}
{
"or": [
"h_canCrouchJumpDownGrab",
"canWalljump",
"HiJump",
{
"and": [
"canSpringBallJumpMidAir",
{
"heatFrames": 120
}
]
},
"SpaceJump",
{
"and": [
"h_canIBJ",
"h_heatProof"
]
},
{
"and": [
"h_canSpringBallBombJump",
"h_additionalBomb",
"h_additionalBomb",
{
"heatFrames": 250
}
]
}
]
}
{
"heatFrames": 1300
}
Clears obstacles: A |
|
From: 4
Junction Above Bomb Block
To: 1
Top Left Door
Requires: "h_canNavigateHeatRooms"
{
"or": [
"h_canCrouchJumpDownGrab",
"canWalljump",
"HiJump",
{
"and": [
"canSpringBallJumpMidAir",
{
"heatFrames": 300
},
{
"enemyDamage": {
"enemy": "Kihunter (red)",
"type": "contact",
"hits": 1
}
}
]
},
{
"and": [
"h_canJumpIntoIBJ",
{
"heatFrames": 300
}
]
},
"SpaceJump"
]
}
{
"heatFrames": 570
}
{
"enemyDamage": {
"enemy": "Kihunter (red)",
"type": "contact",
"hits": 3
}
}
Clears obstacles: A |
|
From: 4
Junction Above Bomb Block
To: 1
Top Left Door
Requires: "h_canNavigateHeatRooms"
"Wave"
"Plasma"
{
"or": [
"h_canCrouchJumpDownGrab",
"canWalljump",
"HiJump",
{
"and": [
"canSpringBallJumpMidAir",
{
"heatFrames": 120
}
]
},
"SpaceJump",
{
"and": [
"h_canIBJ",
"h_heatProof"
]
},
{
"and": [
"h_canSpringBallBombJump",
"h_additionalBomb",
"h_additionalBomb",
{
"heatFrames": 250
}
]
}
]
}
{
"heatFrames": 940
}
Clears obstacles: A |
|
Requires: "canUseEnemies"
{
"or": [
{
"and": [
"canWalljump",
{
"heatFrames": 390
}
]
},
{
"and": [
"canConsecutiveWalljump",
"canCarefulJump",
{
"heatFrames": 330
}
]
},
{
"and": [
"HiJump",
{
"heatFrames": 490
}
]
},
{
"and": [
"h_canCrouchJumpDownGrab",
{
"heatFrames": 610
}
]
}
]
}
|
|
From: 1
Left Door
To: 1
Left Door
Start at least 2 tiles from the water line, and stutter just before entering the water in order to charge a spark in room. Requires: "f_DefeatedPhantoon"
"canStutterWaterShineCharge"
"canShinechargeMovementTricky"
"canWalljump"
{
"or": [
"canSpaceJumpWaterBounce",
"HiJump"
]
}
{
"canShineCharge": {
"usedTiles": 33,
"openEnd": 2
}
}
{
"shinespark": {
"frames": 29
}
}
Exit condition: {
"leaveWithSpark": {}
}
|
|
Entrance condition: {
"comeInShinecharged": {
"framesRequired": 160
}
}
Requires: "canShinechargeMovementComplex" "HiJump" "canWalljump" Exit condition: {
"leaveShinecharged": {
"framesRemaining": "auto"
}
}
|
|
From: 1
Left Door
To: 2
Right Door
Entrance condition: {
"comeInShinecharging": {
"length": 10,
"openEnd": 0,
"steepDownTiles": 1
}
}
Requires: "canWaterShineCharge" "HiJump" "canWalljump" "canShinechargeMovementComplex" Exit condition: {
"leaveShinecharged": {
"framesRemaining": 80
}
}
|
|
Requires at least 3 tiles to work, but some longer lengths don't work. Entrance condition: {
"comeInRunning": {
"speedBooster": true,
"minTiles": 3
}
}
Requires: "canSuitlessMaridia"
"canCarefulJump"
{
"or": [
"canWalljump",
"HiJump"
]
}
|
|
Requires: "HiJump" "canWalljump" |
|
It doesn't work from flush against the door. Start moving about half a tile away from it. Requires: "canSuitlessMaridia" "canTrickyDashJump" "canWalljump" |
|
From: 1
Left Door
To: 2
Right Door
Start at least 2 tiles from the water line, and stutter just before entering the water in order to charge a spark in room. Requires: "f_DefeatedPhantoon"
"canStutterWaterShineCharge"
"canShinechargeMovementComplex"
"canWalljump"
"HiJump"
{
"canShineCharge": {
"usedTiles": 33,
"openEnd": 2
}
}
Exit condition: {
"leaveShinecharged": {
"framesRemaining": 75
}
}
|
|
From: 1
Left Door
To: 2
Right Door
Start at least 2 tiles from the water line, and stutter just before entering the water in order to charge a spark in room. Requires: "f_DefeatedPhantoon"
"canStutterWaterShineCharge"
"canShinechargeMovementComplex"
"canWalljump"
"canSpaceJumpWaterBounce"
{
"canShineCharge": {
"usedTiles": 33,
"openEnd": 2
}
}
Exit condition: {
"leaveShinecharged": {
"framesRemaining": 30
}
}
|
|
From: 1
Right Door
To: 2
Item (locked)
From the top right platform, jump to the left into the thorns, then climb the left wall. Requires: {
"thornHits": 1
}
"canIframeSpikeJump"
"canWalljump"
{
"not": "f_DefeatedPhantoon"
}
{
"or": [
"canRiskPermanentLossOfAccess",
"canCarefulJump",
"Gravity"
]
}
|
|
Jump across the first platforms. It is fine to jump from them when they are a bit submerged. Get a bit of run speed on the final platform, and wall jump if necessary. When accidentally falling off the platforms, it may be best to take a spike hit and climb the left wall. Requires: "Gravity" "canWalljump" "f_DefeatedPhantoon" |
|
Requires: {
"or": [
"f_DefeatedPhantoon",
"SpaceJump",
{
"and": [
{
"thornHits": 1
},
{
"or": [
"HiJump",
"canWalljump",
"canIframeSpikeJump",
"Grapple",
"canHorizontalDamageBoost",
{
"thornHits": 1
}
]
}
]
}
]
}
|
|
Requires: {
"or": [
"canWalljump",
"HiJump",
"h_canFly",
"SpeedBooster",
"h_canCrouchJumpDownGrab",
"canSpringBallJumpMidAir",
"h_canSpringBallBombJump",
"canUseFrozenEnemies"
]
}
|
|
From: 1
Bottom Left Door
To: 3
Top Right Door
The gate will not spawn in indirect g-mode and is freely passable. Entrance condition: {
"comeInWithGMode": {
"mode": "indirect",
"morphed": false
}
}
Requires: {
"or": [
"canWalljump",
"h_canFly",
{
"and": [
"HiJump",
"canSpringBallJumpMidAir"
]
}
]
}
"canOffScreenMovement"
|
|
Requires: {
"or": [
"canWalljump",
"h_canFly",
{
"and": [
"HiJump",
"canSpringBallJumpMidAir"
]
}
]
}
|
|
From: 2
Bottom Right Door
To: 3
Top Right Door
The gate will not spawn in indirect g-mode and is freely passable. Entrance condition: {
"comeInWithGMode": {
"mode": "indirect",
"morphed": false
}
}
Requires: {
"or": [
"canWalljump",
"h_canFly",
{
"and": [
"HiJump",
"canSpringBallJumpMidAir"
]
}
]
}
"canOffScreenMovement"
|
|
Requires: "Morph"
"Gravity"
{
"or": [
"h_canFly",
{
"and": [
"HiJump",
"canWalljump"
]
},
{
"and": [
"HiJump",
"canSpringBallJumpMidAir"
]
}
]
}
|
|
Freeze a crab on the edge of the hole in the ceiling. Then get on top of it with Gravity and a wall jump, jump assist, or second frozen crab on the ground, or a suitless Spring Ball jump with HiJump. Requires: "canMidAirMorph"
"canUseFrozenEnemies"
{
"or": [
{
"and": [
"Gravity",
{
"or": [
"HiJump",
"canWalljump",
"canSpringBallJumpMidAir",
"canTrickyUseFrozenEnemies"
]
}
]
},
{
"and": [
"HiJump",
"canSpringBallJumpMidAir",
"canSuitlessMaridia"
]
}
]
}
|
|
Jump the first frame after running to gain just enough spinjump height. Requires: "canMidAirMorph" "Gravity" "canWalljump" "canTrickyDashJump" |
|
From: 2
Bottom Left Door
To: 5
G-Mode Morph Junction (Top Half)
Entrance condition: {
"comeInWithGMode": {
"mode": "any",
"morphed": false
}
}
Requires: "Morph"
"h_canNavigateUnderwater"
{
"or": [
"canGravityJump",
{
"and": [
"Gravity",
"HiJump",
{
"or": [
"canSpringBallJumpMidAir",
"canWalljump"
]
}
]
},
{
"and": [
"canTrickyUseFrozenEnemies",
"HiJump",
"h_canCrouchJumpDownGrab"
]
},
{
"and": [
{
"ammo": {
"type": "Super",
"count": 1
}
},
"canTrickyUseFrozenEnemies",
"canOffScreenMovement"
]
},
{
"and": [
"canTrickyJump",
"canSpringBallJumpMidAir",
"canTrickyUseFrozenEnemies",
"canOffScreenMovement"
]
}
]
}
|
|
From: 3
Bottom Right Door
To: 5
G-Mode Morph Junction (Top Half)
Entrance condition: {
"comeInWithGMode": {
"mode": "any",
"morphed": false
}
}
Requires: "Morph"
"h_canNavigateUnderwater"
{
"or": [
"canGravityJump",
{
"and": [
"Gravity",
"HiJump",
{
"or": [
"canSpringBallJumpMidAir",
"canWalljump"
]
}
]
},
{
"and": [
"canTrickyUseFrozenEnemies",
"HiJump",
"h_canCrouchJumpDownGrab"
]
},
{
"and": [
{
"ammo": {
"type": "Super",
"count": 1
}
},
"canTrickyUseFrozenEnemies",
"canOffScreenMovement"
]
},
{
"and": [
"canTrickyJump",
"canSpringBallJumpMidAir",
"canTrickyUseFrozenEnemies",
"canOffScreenMovement"
]
}
]
}
|
|
Requires: "Gravity"
{
"or": [
"canWalljump",
"h_canFly",
{
"and": [
"HiJump",
"SpeedBooster"
]
},
"canSpringBallJumpMidAir",
"canGravityJump"
]
}
|
|
Requires: "Gravity"
{
"or": [
"HiJump",
"canWalljump",
"h_canFly",
"canCarefulJump",
"canSpringBallJumpMidAir",
"canGravityJump",
{
"enemyDamage": {
"enemy": "Pink Space Pirate (standing)",
"type": "contact",
"hits": 1
}
},
{
"enemyKill": {
"enemies": [
[
"Pink Space Pirate (standing)"
]
],
"explicitWeapons": [
"Plasma",
"ScrewAttack"
]
}
}
]
}
|
|
Requires: "Gravity"
{
"or": [
"canWalljump",
"h_canFly",
"canUseFrozenEnemies",
"canGravityJump"
]
}
|
|
From: 6
Middle Junction Near Top Left Pirate
To: 7
Spawn At Junction Near Top Right Door
Requires: "Gravity"
{
"or": [
"HiJump",
"canWalljump",
"h_canFly",
"canGravityJump",
"canCarefulJump",
"canSpringBallJumpMidAir",
{
"enemyDamage": {
"enemy": "Pink Space Pirate (standing)",
"type": "contact",
"hits": 1
}
},
{
"enemyKill": {
"enemies": [
[
"Pink Space Pirate (standing)"
]
],
"explicitWeapons": [
"Plasma",
"ScrewAttack"
]
}
}
]
}
|
|
From: 1
Bottom Door
To: 1
Bottom Door
Freeze the bottom Skulltera and a Sciser above the door, to set up a moonfall between them, and aim down. After gaining enough speed, press forward to fall down and clip past the door shell below. Falling with too much speed can cause Samus to go out of bounds. Gravity Suit is needed in order to gain enough fall speed before the enemies thaw. Requires: "Gravity"
{
"or": [
"canWalljump",
"canGravityJump",
"h_canFly",
"HiJump",
"canSpringBallJumpMidAir"
]
}
"canEnemyStuckMoonfall"
"canTrickyUseFrozenEnemies"
Bypasses door shell: true |
|
Requires: "Gravity"
{
"or": [
"HiJump",
"canWalljump",
"h_canFly",
"canUseFrozenEnemies",
"canSpringBallJumpMidAir",
"canGravityJump"
]
}
|
|
Requires: "Gravity"
{
"or": [
"HiJump",
"canWalljump",
"h_canFly",
"canSpringBallJumpMidAir",
"canGravityJump"
]
}
|
|
Requires: "Gravity"
{
"or": [
"HiJump",
"canWalljump",
"h_canFly",
"canSpringBallJumpMidAir",
"h_canCrouchJumpDownGrab",
"canGravityJump"
]
}
|
|
Requires: "Gravity"
{
"or": [
"canWalljump",
"h_canFly"
]
}
|
|
Requires: "Gravity"
{
"or": [
"canWalljump",
"h_canFly"
]
}
|
|
Letting Mama Turtle sleep, climb the right wall using HiJump (with a down-grab) and escape the water with Space Jump . Requires: "canSuitlessMaridia"
"HiJump"
"canDownGrab"
{
"or": [
{
"and": [
"canSpaceJumpWaterBounce",
"canWalljump"
]
},
"canSpaceJumpWaterEscape"
]
}
|
|
Requires: {
"or": [
"canWalljump",
"SpaceJump",
"HiJump"
]
}
|
|
Briefly run on the top ledge on either side (left is slightly easier) then jump and wall jump on the grapple block. Requires: "HiJump" "canTrickyJump" "SpeedBooster" "canWalljump" Clears obstacles: B |
|
Requires: "Gravity"
{
"or": [
"HiJump",
"canWalljump",
"SpeedBooster",
"h_canFly",
"canSpringBallJumpMidAir",
"h_canSpringBallBombJump"
]
}
|
|
Requires: "Gravity"
{
"or": [
"HiJump",
"canWalljump",
"h_canFly",
"canSpringBallJumpMidAir"
]
}
|
|
From: 7
Lower Hills Junction
To: 10
Upper Right Ledge Junction
The run and jump is done from the middle peak in the floor. Not the one closest to the bottom right door. Run from the left edge to just right of the peak, jump and wall jump on the overhang. It may be worthwhile to kill the Powamps and crabs first. Requires: "Gravity" "HiJump" "canTrickyDashJump" "canWalljump" Clears obstacles: A, B |
|
Jump the first frame after running to gain just enough spinjump height. Requires: "Gravity" "canWalljump" "canTrickyDashJump" |
|
Run right-to-left to gain a shinecharge on the upper right ledge. Use a gravity jump, Space Jump, or HiJump to approach the door above and spark out. Requires: "Gravity"
{
"or": [
"SpaceJump",
"canGravityJump",
{
"and": [
"HiJump",
{
"or": [
"canWalljump",
"canTrickyDashJump"
]
}
]
}
]
}
{
"canShineCharge": {
"usedTiles": 20,
"gentleUpTiles": 3,
"gentleDownTiles": 1,
"steepUpTiles": 1,
"openEnd": 0
}
}
"canShinechargeMovementComplex"
"canMidairShinespark"
{
"shinespark": {
"frames": 8
}
}
Exit condition: {
"leaveWithSpark": {}
}
|
|
From: 10
Upper Right Ledge Junction
To: 4
Top Right Door
Requires: "Gravity"
{
"or": [
"canDelayedWalljump",
{
"and": [
"HiJump",
"canPreciseWalljump"
]
},
{
"and": [
"HiJump",
"canWalljump",
"SpeedBooster"
]
}
]
}
|
|
Requires: "canSuitlessMaridia"
"canUseFrozenEnemies"
{
"or": [
"canWalljump",
"canSpringBallJumpMidAir",
{
"and": [
"HiJump",
"canDownGrab"
]
},
"canBombJumpWaterEscape"
]
}
|
|
Requires: "canSuitlessMaridia"
"HiJump"
{
"or": [
{
"and": [
"canWalljump",
"canCarefulJump"
]
},
"canSpringBallJumpMidAir"
]
}
|
|
Requires: "canSuitlessMaridia"
{
"or": [
{
"and": [
"canSpaceJumpWaterBounce",
"canWalljump"
]
},
{
"and": [
"canSpaceJumpWaterEscape",
"HiJump"
]
}
]
}
|
|
Requires: "Morph"
{
"or": [
"HiJump",
"canWalljump",
"SpaceJump",
{
"and": [
"h_canIBJ",
"h_canBombHorizontally"
]
},
"canSpringBallJumpMidAir"
]
}
|
|
Requires: "Gravity"
{
"or": [
"canWalljump",
"h_canFly",
"SpeedBooster",
"canSpringBallJumpMidAir",
"canUseEnemies"
]
}
{
"or": [
{
"obstaclesCleared": [
"A"
]
},
"h_canUsePowerBombs"
]
}
Clears obstacles: A |
|
Requires: "Gravity"
{
"or": [
"SpaceJump",
"canWalljump",
"HiJump"
]
}
{
"canShineCharge": {
"usedTiles": 33,
"openEnd": 2
}
}
{
"or": [
{
"obstaclesCleared": [
"A"
]
},
"h_canUsePowerBombs"
]
}
Exit condition: {
"leaveShinecharged": {
"framesRemaining": 50
}
}
|
|
Requires: "Gravity"
{
"or": [
"canWalljump",
"h_canFly",
"SpeedBooster",
"Grapple",
{
"and": [
"HiJump",
"canSpringBallJumpMidAir"
]
},
{
"and": [
"HiJump",
"canUseEnemies"
]
}
]
}
|
|
Use a frozen Mochtroid to extend the length of the runway. Positioning the Mochtroid can be done by dropping down below then climbing back up with the frozen Mochtroid as a platform. Alternatively, freeze the Mochtroid with an angle-down shot while falling below then quickly climb back up. Requires: "h_canNavigateUnderwater"
"h_canFrozenEnemyRunway"
{
"or": [
"canMochtroidIceClimb",
{
"and": [
"Gravity",
{
"or": [
"SpaceJump",
"canWalljump"
]
}
]
}
]
}
{
"enemyDamage": {
"enemy": "Mochtroid",
"type": "contact",
"hits": 2
}
}
Exit condition: {
"leaveWithRunway": {
"length": 4,
"openEnd": 1
}
}
|
|
While that one walljump near the end is a bit precise, it does not require a delayed walljump. Requires: "Gravity"
{
"or": [
{
"and": [
"HiJump",
"canWalljump"
]
},
{
"and": [
"canPreciseWalljump",
"canConsecutiveWalljump"
]
},
{
"and": [
"Grapple",
"canCarefulJump"
]
}
]
}
|
|
From: 1
Left Door
To: 3
Top Right Door
Notable: true Use the spikes, which are not in the water, to jump from platform to platform as a way to cross the Colosseum. Requires knowing the position of every spike in the room, and hitting the spikes while morphed can help. The first jump is particularly tough. A SpringBallJump from the sand with HiJump, or Grapple can be used to get past it. Requires: "canWalljump"
"Morph"
"canCarefulJump"
"canIframeSpikeJump"
{
"or": [
"Grapple",
{
"and": [
"canSuitlessMaridia",
"canPlayInSand",
"HiJump",
"canNeutralDamageBoost",
"canTrickySpringBallJump",
{
"spikeHits": 2
}
]
}
]
}
{
"spikeHits": 1
}
{
"or": [
{
"spikeHits": 1
},
"canHorizontalDamageBoost"
]
}
|
|
From: 1
Left Door
To: 3
Top Right Door
Notable: true Use the spikes, which are not in the water, to jump from platform to platform as a way to cross the Colosseum. Requires knowing the position of every spike in the room, and hitting the spikes while morphed can help. The first jump is particularly tough. A springball rolling jump can be used to get past it. Entrance condition: {
"comeInRunning": {
"minTiles": 2,
"speedBooster": "any"
}
}
Requires: "canWalljump"
"Morph"
"canCarefulJump"
"canIframeSpikeJump"
"h_canUseSpringBall"
"canMockball"
{
"spikeHits": 3
}
{
"or": [
{
"spikeHits": 1
},
"canHorizontalDamageBoost"
]
}
|
|
From: 1
Left Door
To: 3
Top Right Door
Notable: true Land on each set of spikes as a way to jump to the next safe platform. The first jump can be done with a very precise damage boost to bounce forward off the spike, or using morph. Requires: "canWalljump"
"canInsaneJump"
"canHorizontalDamageBoost"
"canIframeSpikeJump"
{
"spikeHits": 3
}
{
"or": [
"Morph",
{
"spikeHits": 2
}
]
}
|
|
Requires: "Gravity"
{
"or": [
"canWalljump",
"h_canFly",
{
"and": [
"HiJump",
"canSpringBallJumpMidAir"
]
},
{
"and": [
"HiJump",
"canGravityJump"
]
}
]
}
|
|
Requires: "Gravity"
"canWalljump"
{
"or": [
"HiJump",
"canConsecutiveWalljump",
"Grapple"
]
}
|
|
Use a frozen Mochtroid to extend the length of the runway. Positioning the Mochtroid can be done by dropping down below then climbing back up with the frozen Mochtroid as a platform. Alternatively, freeze the Mochtroid with an angle-down shot while falling below then quickly climb back up. Requires: "h_canNavigateUnderwater"
"h_canFrozenEnemyRunway"
{
"or": [
"canMochtroidIceClimb",
{
"and": [
"Gravity",
{
"or": [
"SpaceJump",
"canWalljump"
]
}
]
}
]
}
{
"enemyDamage": {
"enemy": "Mochtroid",
"type": "contact",
"hits": 2
}
}
Exit condition: {
"leaveWithRunway": {
"length": 4,
"openEnd": 1
}
}
|
|
Requires: "Gravity"
{
"or": [
"HiJump",
"canWalljump",
"h_canFly",
"canUseFrozenEnemies"
]
}
|
|
Requires: "Gravity"
"HiJump"
"SpeedBooster"
{
"or": [
"canWalljump",
"canTrickyDashJump"
]
}
|
|
Requires: {
"or": [
{
"and": [
"Gravity",
{
"or": [
"SpaceJump",
{
"and": [
"canPreciseWalljump",
"canConsecutiveWalljump"
]
},
{
"and": [
"HiJump",
"canWalljump"
]
}
]
}
]
},
{
"and": [
"canSpaceJumpWaterBounce",
"canWalljump"
]
}
]
}
{
"resetRoom": {
"nodes": [
1
],
"mustStayPut": false
}
}
{
"refill": [
"Super"
]
}
|
|
Requires: {
"or": [
{
"and": [
"Gravity",
{
"or": [
"SpaceJump",
"canWalljump"
]
}
]
},
{
"and": [
"HiJump",
"canSpaceJumpWaterBounce",
"canWalljump"
]
}
]
}
{
"resetRoom": {
"nodes": [
2
],
"mustStayPut": false
}
}
{
"refill": [
"Energy",
"Super"
]
}
|
|
Requires: "Gravity"
{
"or": [
"SpaceJump",
"canWalljump",
"h_IBJFromSpikes",
{
"and": [
"h_canIBJ",
"h_canHBJ"
]
},
"h_canDiagonalBombJump"
]
}
|
|
From: 2
Right Door
To: 4
Top Right Ledge Junction
Requires a runway of at least 1 tile in the adjacent room, although it is easier with more. Entrance condition: {
"comeInJumping": {
"speedBooster": false,
"minTiles": 1
}
}
Requires: {
"or": [
"canWalljump",
"canTrickySpringBallJump",
"SpaceJump"
]
}
"canCrossRoomJumpIntoWater"
|
|
From: 2
Right Door
To: 4
Top Right Ledge Junction
Requires a runway of at least 1 tile in the adjacent room, although it is easier with more. Entrance condition: {
"comeInJumping": {
"speedBooster": "any",
"minTiles": 1
}
}
Requires: "HiJump"
{
"or": [
"canWalljump",
"canTrickyJump",
"SpeedBooster"
]
}
"canCrossRoomJumpIntoWater"
|
|
From: 2
Right Door
To: 4
Top Right Ledge Junction
Use SpaceJump to break out of the water. Afterward, it's easiest to use a wall jump to gain height but this is not required. Requires: "canSuitlessMaridia"
"HiJump"
{
"or": [
"canSpaceJumpWaterEscape",
{
"and": [
"canSpaceJumpWaterBounce",
"canWalljump"
]
}
]
}
|
|
From: 3
Junction Left of Morph Tunnel
To: 1
Left Door
Requires: "Gravity"
{
"or": [
{
"and": [
"canPreciseWalljump",
"canConsecutiveWalljump"
]
},
{
"and": [
"HiJump",
"canWalljump"
]
}
]
}
|
|
From: 3
Junction Left of Morph Tunnel
To: 1
Left Door
Requires: "canSuitlessMaridia"
{
"or": [
{
"and": [
"canSpaceJumpWaterBounce",
"canWalljump"
]
},
{
"and": [
"canSpaceJumpWaterEscape",
"HiJump"
]
}
]
}
|
|
Requires: "Gravity"
{
"or": [
"SpaceJump",
"canWalljump",
"canSpringBallJumpMidAir",
"h_canDiagonalBombJump",
"h_IBJFromSpikes"
]
}
|
|
From: 5
Bottom Middle Junction
To: 6
East Cactus Alley Junction (Right of Morph Tunnel)
Requires: "Gravity"
{
"or": [
"SpaceJump",
"h_canHBJ",
"h_canResetFallSpeed",
{
"enemyDamage": {
"enemy": "Cacatac",
"hits": 1,
"type": "spike"
}
}
]
}
{
"or": [
"SpaceJump",
"canWalljump",
"HiJump",
"h_canIBJ",
"h_canHBJ",
"h_canSpringBallBombJump",
{
"spikeHits": 1
}
]
}
|
|
From: 5
Bottom Middle Junction
To: 6
East Cactus Alley Junction (Right of Morph Tunnel)
Requires: "canSuitlessMaridia"
"HiJump"
{
"spikeHits": 1
}
{
"or": [
"canWalljump",
"canSpaceJumpWaterEscape",
"canSpringBallJumpMidAir",
{
"and": [
"h_canJumpIntoIBJ",
"h_canUseSpringBall"
]
},
{
"and": [
"h_canIBJ",
"canBombJumpWaterEscape"
]
},
{
"spikeHits": 1
}
]
}
|
|
From: 5
Bottom Middle Junction
To: 6
East Cactus Alley Junction (Right of Morph Tunnel)
This can be done by turning off Gravity and HiJump to jump over both spike pits. Requires: "canSuitlessMaridia"
"canSpringBallJumpMidAir"
{
"spikeHits": 1
}
{
"or": [
"canTrickySpringBallJump",
{
"and": [
"canWalljump",
"canSpaceJumpWaterBounce"
]
},
{
"and": [
"h_canJumpIntoIBJ",
"h_canUseSpringBall"
]
},
{
"and": [
"h_canIBJ",
"canBombJumpWaterEscape"
]
},
{
"spikeHits": 1
}
]
}
|
|
From: 6
East Cactus Alley Junction (Right of Morph Tunnel)
To: 5
Bottom Middle Junction
Requires: "canSuitlessMaridia"
{
"or": [
{
"spikeHits": 1
},
"canSpringBallJumpMidAir",
{
"and": [
"HiJump",
{
"or": [
"canWalljump",
"h_canCrouchJumpDownGrab",
"canSpaceJumpWaterEscape"
]
}
]
},
{
"and": [
"h_canIBJ",
"canBombJumpWaterEscape"
]
}
]
}
{
"or": [
{
"spikeHits": 1
},
"HiJump"
]
}
|
|
It's possible to get out of the sand suitless and without HiJump after falling from the chute, by hugging the left side and moving quickly. Requires: "canSuitlessMaridia"
"canPlayInSand"
{
"or": [
{
"and": [
"h_canMaxHeightSpringBallJump",
{
"or": [
"canWalljump",
"can4HighMidAirMorph",
"h_canJumpIntoIBJ"
]
}
]
}
]
}
|
|
Requires: "canSuitlessMaridia"
"HiJump"
{
"or": [
"canPlayInSand",
{
"and": [
"canPrepareForNextRoom",
"h_canUseSpringBall"
]
}
]
}
{
"or": [
{
"and": [
{
"or": [
"canWalljump",
"canSpaceJumpWaterEscape"
]
},
{
"or": [
"h_canCrouchJumpDownGrab",
"canSunkenTileWideWallClimb"
]
}
]
},
"canSpringBallJumpMidAir",
{
"and": [
"h_canCrouchJumpDownGrab",
"canBombJumpWaterEscape",
"h_canIBJ"
]
}
]
}
|
|
Requires: "Gravity"
"Morph"
"canPlayInSand"
{
"or": [
"canWalljump",
"canGravityJump",
"HiJump",
"canSpringBallJumpMidAir",
"canSandIBJ",
{
"and": [
"h_canUseSpringBall",
"h_canJumpIntoIBJ"
]
}
]
}
|
|
From: 1
Top Left Door
To: 1
Top Left Door
Use a frozen Mochtroid to extend the length of the runway. Positioning the Mochtroid can be done by dropping down below then climbing back up with the frozen Mochtroid as a platform. Alternatively, freeze the Mochtroid with an angle-down shot while falling below then quickly climb back up. Requires: "h_canNavigateUnderwater"
"h_canFrozenEnemyRunway"
{
"or": [
"canMochtroidIceClimb",
{
"and": [
"Gravity",
{
"or": [
"SpaceJump",
"canWalljump"
]
}
]
}
]
}
{
"enemyDamage": {
"enemy": "Mochtroid",
"type": "contact",
"hits": 2
}
}
Exit condition: {
"leaveWithRunway": {
"length": 3,
"openEnd": 1
}
}
|
|
Requires: "Gravity"
{
"or": [
"SpaceJump",
{
"and": [
"HiJump",
{
"or": [
"canSpringBallJumpMidAir",
"canWalljump"
]
}
]
},
"canConsecutiveWalljump"
]
}
|
|
Requires: "canSuitlessMaridia"
"HiJump"
{
"or": [
{
"and": [
"canSpaceJumpWaterBounce",
"canWalljump"
]
},
"canSpaceJumpWaterEscape"
]
}
|
|
Requires a runway of 1 tile in the adjacent room. Use Space Jump or a wall jump after getting out of the water. Entrance condition: {
"comeInJumping": {
"speedBooster": "any",
"minTiles": 1
}
}
Requires: "canCrossRoomJumpIntoWater"
"canTrickyJump"
{
"or": [
"canWalljump",
"SpaceJump"
]
}
|
|
Assumes a runway of at least 4 tiles in the adjacent room. Use Space Jump or a wall jump after getting out of the water. Entrance condition: {
"comeInJumping": {
"speedBooster": "any",
"minTiles": 4
}
}
Requires: "canCrossRoomJumpIntoWater"
{
"or": [
"canWalljump",
"SpaceJump"
]
}
|
|
Requires: "Gravity"
{
"or": [
"h_canFly",
"canWalljump",
"canGravityJump",
{
"and": [
"HiJump",
{
"or": [
"canSpringBallJumpMidAir",
"SpeedBooster"
]
}
]
}
]
}
|
|
From: 4
Top Right Door
To: 4
Top Right Door
Use a frozen Mochtroid to extend the length of the runway. Positioning the Mochtroid can be done by dropping down below then climbing back up with the frozen Mochtroid as a platform. Alternatively, freeze the Mochtroid with an angle-down shot while falling below then quickly climb back up. Requires: "h_canNavigateUnderwater"
"h_canFrozenEnemyRunway"
{
"or": [
"canMochtroidIceClimb",
{
"and": [
"Gravity",
{
"or": [
"SpaceJump",
"canWalljump"
]
}
]
}
]
}
{
"enemyDamage": {
"enemy": "Mochtroid",
"type": "contact",
"hits": 2
}
}
Exit condition: {
"leaveWithRunway": {
"length": 4,
"openEnd": 1
}
}
|
|
Requires: "Gravity"
{
"or": [
"h_canCrouchJumpDownGrab",
"canUseFrozenEnemies",
"canGravityJump",
"canWalljump",
"HiJump",
"canSpringBallJumpMidAir",
"h_canFly",
"h_canSpringBallBombJump"
]
}
|
|
Gravity with a good jump from the sand can reach the Solid Rock Maze region. Requires: "Gravity"
"canPlayInSand"
{
"or": [
"HiJump",
"canSpringBallJumpMidAir",
"canWalljump",
"h_canIBJ",
"canGravityJump"
]
}
|
|
Escape by wall jumping when the water is low or using a crouch jump and down grab when it's high. Requires: "canSuitlessMaridia"
"canCarefulJump"
{
"or": [
"canWalljump",
"h_canCrouchJumpDownGrab",
"canTrickySpringBallJump"
]
}
{
"doorUnlockedAtNode": 1
}
|
|
Escape by wall jumping when the water is low or using a crouch jump and down grab when it's high. Requires: "canSuitlessMaridia"
{
"ammo": {
"type": "Super",
"count": 1
}
}
{
"or": [
"canWalljump",
"h_canCrouchJumpDownGrab",
"canTrickySpringBallJump"
]
}
{
"doorUnlockedAtNode": 1
}
|
|
Escape by wall jumping when the water is low or using a crouch jump and down grab when it's high. Requires: "canSuitlessMaridia"
"canCarefulJump"
{
"or": [
"canWalljump",
"h_canCrouchJumpDownGrab",
"canTrickySpringBallJump"
]
}
{
"doorUnlockedAtNode": 3
}
|
|
From: 5
Junction Below Right Door
To: 3
Right Door
Escape by wall jumping when the water is low or using a crouch jump and down grab when it's high. Requires: "canSuitlessMaridia"
{
"ammo": {
"type": "Super",
"count": 1
}
}
{
"or": [
"canWalljump",
"h_canCrouchJumpDownGrab",
"canTrickySpringBallJump"
]
}
{
"doorUnlockedAtNode": 3
}
|
|
Requires: {
"or": [
"canWalljump",
"h_canFly",
{
"and": [
"HiJump",
{
"or": [
"canSpringBallJumpMidAir",
"canUseFrozenEnemies"
]
}
]
},
"canTrickySpringBallJump"
]
}
|
|
Requires: {
"or": [
"HiJump",
"h_canFly",
"canWalljump",
"h_canCrouchJumpDownGrab",
"canSpringBallJumpMidAir"
]
}
|
|
Entrance condition: {
"comeInShinecharged": {
"framesRequired": 95
}
}
Requires: "canMidairShinespark"
"canShinechargeMovementComplex"
{
"or": [
"HiJump",
"canWalljump"
]
}
{
"shinespark": {
"frames": 17
}
}
Exit condition: {
"leaveWithSpark": {}
}
|
|
Use Hijump or one walljump on the left before a diagonal spark. Entrance condition: {
"comeInShinecharged": {
"framesRequired": 60
}
}
Requires: "canMidairShinespark"
"canShinechargeMovement"
{
"or": [
"HiJump",
"canWalljump"
]
}
{
"shinespark": {
"frames": 45,
"excessFrames": 11
}
}
|
|
From: 1
Bottom Left Door
To: 4
G-Mode Junction (Top by Elevator)
It is possible to kill the Rippers with a single Power Bomb by placing it at least 2 tiles above the lowest Ripper inside the narrow section of the shaft. Entrance condition: {
"comeInWithGMode": {
"mode": "any",
"morphed": false
}
}
Requires: {
"or": [
{
"and": [
{
"enemyKill": {
"enemies": [
[
"Ripper",
"Ripper",
"Ripper"
]
]
}
},
{
"or": [
"canWalljump",
"SpaceJump"
]
}
]
},
{
"and": [
"h_canIBJ",
{
"ammo": {
"type": "Super",
"count": 3
}
}
]
},
{
"and": [
"h_canIBJ",
"h_canUsePowerBombs",
{
"or": [
"h_canUsePowerBombs",
"canStaggeredIBJ"
]
}
]
}
]
}
|
|
Requires: {
"or": [
"canConsecutiveWalljump",
{
"and": [
"HiJump",
"canWalljump"
]
},
"SpaceJump"
]
}
{
"enemyKill": {
"enemies": [
[
"Ripper",
"Ripper",
"Ripper"
]
]
}
}
|
|
From: 2
Right Door
To: 4
G-Mode Junction (Top by Elevator)
It is possible to kill the Rippers with a single Power Bomb by placing it at least 2 tiles above the lowest Ripper inside the narrow section of the shaft. Entrance condition: {
"comeInWithGMode": {
"mode": "any",
"morphed": false
}
}
Requires: {
"or": [
{
"and": [
{
"enemyKill": {
"enemies": [
[
"Ripper",
"Ripper",
"Ripper"
]
]
}
},
{
"or": [
"canWalljump",
"SpaceJump"
]
}
]
},
{
"and": [
"h_canIBJ",
{
"ammo": {
"type": "Super",
"count": 3
}
}
]
},
{
"and": [
"h_canIBJ",
"h_canUsePowerBombs",
{
"or": [
"h_canUsePowerBombs",
"canStaggeredIBJ"
]
}
]
}
]
}
|
|
From: 3
Junction Left of Morph Tunnel
To: 1
Left Door
Requires: {
"or": [
"h_canIBJ",
"canWalljump",
"canSpringBallJumpMidAir"
]
}
{
"or": [
{
"enemyKill": {
"enemies": [
[
"Menu",
"Menu",
"Menu"
]
],
"explicitWeapons": [
"PowerBomb",
"ScrewAttack",
"Wave",
"Spazer",
"Plasma",
"Missile",
"Super"
]
}
},
{
"and": [
{
"enemyKill": {
"enemies": [
[
"Menu",
"Menu",
"Menu"
]
]
}
},
{
"or": [
{
"and": [
"canDodgeWhileShooting",
"canTrickyJump"
]
},
{
"and": [
"canDodgeWhileShooting",
{
"enemyDamage": {
"enemy": "Menu",
"type": "contact",
"hits": 1
}
}
]
},
{
"enemyDamage": {
"enemy": "Menu",
"type": "contact",
"hits": 2
}
}
]
}
]
}
]
}
|
|
From: 3
Junction Left of Morph Tunnel
To: 1
Left Door
Charge a spark left and use the last bit of platform to jump up to the ledge above. Requires: "canShinechargeMovementComplex"
"HiJump"
"canWalljump"
{
"canShineCharge": {
"usedTiles": 20,
"openEnd": 2
}
}
Exit condition: {
"leaveShinecharged": {
"framesRemaining": 30
}
}
|
|
Watch the right-side standing pirate walk towards the wall as far as possible from below. The available running space is just enough to jump up and walljump the ledge by the door. Requires: "HiJump" "SpeedBooster" "canTrickyJump" "canWalljump" |
|
Take a hit from the pirate to gain iframes for running through the pirate to use for a longer runway. Requires: "HiJump"
"SpeedBooster"
"canWalljump"
"canCarefulJump"
{
"enemyDamage": {
"enemy": "Pink Space Pirate (standing)",
"hits": 1,
"type": "laser"
}
}
|
|
From: 3
Central Junction with all Standing Pirates Killed
To: 1
Top Left Door (locked)
Requires: "SpeedBooster" "HiJump" "canWalljump" |
|
Requires: {
"or": [
"HiJump",
"canWalljump",
"SpaceJump",
"canSpringBallJumpMidAir",
{
"and": [
"h_canIBJ",
{
"or": [
"canBombHorizontally",
"Gravity"
]
}
]
},
{
"and": [
"h_canSpringBallBombJump",
"h_additionalBomb",
"h_additionalBomb"
]
}
]
}
|
|
Requires: "Gravity"
{
"or": [
"canWalljump",
"HiJump",
"canSpringBallJumpMidAir",
"h_canFly"
]
}
|
|
From: 2
Bottom Right Door
To: 1
Left Vertical Door
Start the dash as close to the door transition as possible to help avoid getting hit by the first Owtch. Store the shine charge while high up on the left slope. Spark up while on the right side of the platform. To avoid the Owtch on the platform, it may help to jump on the left side of the platform then jump again and spark midair above the right side. Entrance condition: {
"comeInRunning": {
"speedBooster": true,
"minTiles": 0.4375
}
}
Requires: "canWaterShineCharge"
"canShinechargeMovementComplex"
{
"or": [
{
"shinespark": {
"frames": 90,
"excessFrames": 50
}
},
{
"and": [
{
"shinespark": {
"frames": 90,
"excessFrames": 57
}
},
{
"or": [
"canWalljump",
"HiJump",
"canSpringBallJumpMidAir",
"h_canFly"
]
}
]
}
]
}
|
|
Requires: "canSuitlessMaridia"
"HiJump"
"canSpringBallJumpMidAir"
{
"or": [
"h_canCrouchJumpDownGrab",
"canTrickySpringBallJump",
"canWalljump"
]
}
|
|
Gain a shinecharge by running right-to-left on the underwater runway on the right side of the room. Use HiJump or a Spring Ball jump to quickly exit the water to the left and spark up. Requires: "Gravity"
"SpeedBooster"
{
"or": [
"HiJump",
"canTrickySpringBallJump",
"canWalljump",
{
"and": [
"canGravityJump",
"canShinechargeMovementTricky"
]
}
]
}
{
"enemyKill": {
"enemies": [
[
"Owtch",
"Owtch"
]
]
}
}
"canShinechargeMovementComplex"
{
"canShineCharge": {
"usedTiles": 16,
"openEnd": 2,
"gentleDownTiles": 2,
"gentleUpTiles": 2,
"steepDownTiles": 1,
"steepUpTiles": 1,
"startingDownTiles": 1
}
}
{
"shinespark": {
"frames": 43,
"excessFrames": 3
}
}
|
|
Requires: "canTrickyUseFrozenEnemies" "HiJump" "canWalljump" |
|
From: 2
Bottom Door
To: 1
Left Door
Finish shinecharging on the raised plateau, then quickly climb up to the left door. Requires: "Gravity"
"canShinechargeMovementComplex"
"canWalljump"
{
"canShineCharge": {
"usedTiles": 33,
"openEnd": 2
}
}
Exit condition: {
"leaveShinecharged": {
"framesRemaining": 30
}
}
|
|
From: 2
Bottom Door
To: 1
Left Door
Finish shinecharging on the raised plateau, then quickly climb up to the left door. Requires: "Gravity"
"canShinechargeMovementComplex"
"canWalljump"
{
"canShineCharge": {
"usedTiles": 33,
"openEnd": 2
}
}
Exit condition: {
"leaveShinecharged": {
"framesRemaining": 15
}
}
|
|
Requires: "Gravity"
{
"or": [
"HiJump",
"canWalljump",
"h_canFly",
"SpeedBooster",
"h_canCrouchJumpDownGrab",
"canSpringBallJumpMidAir",
"canGravityJump"
]
}
|
|
Requires: "Gravity"
{
  "or": [
    "canWalljump",
    "HiJump",
    "h_canFly",
    "canSpringBallJumpMidAir"
  ]
}
|
|
Requires: "canSuitlessMaridia"
"HiJump"
{
"or": [
"canWalljump",
"h_canCrouchJumpDownGrab"
]
}
|
|
From: 4
Junction Below Sand Entrance
To: 1
Left Door
Requires: "Gravity"
{
"or": [
"canPlayInSand",
"canWalljump",
"h_canUseSpringBall"
]
}
{
"or": [
"canTrickyJump",
{
"enemyDamage": {
"enemy": "Evir",
"type": "particle",
"hits": 1
}
},
"Ice",
"ScrewAttack",
{
"enemyKill": {
"enemies": [
[
"Evir"
],
[
"Evir"
]
],
"explicitWeapons": [
"Super",
"Plasma",
"PowerBombPeriphery"
]
}
}
]
}
|
|
Requires: "Gravity"
{
"or": [
"Ice",
"ScrewAttack",
{
"enemyKill": {
"enemies": [
[
"Evir"
]
],
"explicitWeapons": [
"Plasma",
"Super",
"PowerBombPeriphery"
]
}
},
{
"enemyDamage": {
"enemy": "Evir",
"type": "particle",
"hits": 1
}
}
]
}
{
"and": [
"canPlayInSand",
{
"or": [
"canWalljump",
"HiJump",
"canUseFrozenEnemies",
"canGravityJump",
{
"and": [
"canTrickyJump",
"can4HighMidAirMorph",
"canTrickySpringBallJump"
]
}
]
}
]
}
|
|
Using movement tricks to reduce fall speed even slightly can avoid touching the sand. A Flatley style turnaround over the grapple block hole reduces fall speed some, but also needs a down back or a tiny jump. Requires: "canSuitlessMaridia"
{
"or": [
{
"and": [
"canFlatleyJump",
{
"or": [
"canTrickyJump",
"canDownBack"
]
}
]
},
"canWalljump",
"h_canResetFallSpeed"
]
}
|
|
Watch for the water level to start falling to time the jump to escape at its lowest point. Then use SpaceJump to splash on top of the water. Time another jump with the water level or walljump to fully escape the water. Requires: "canSuitlessMaridia"
{
"or": [
{
"and": [
"canSpaceJumpWaterBounce",
"canWalljump"
]
},
"canSpaceJumpWaterEscape"
]
}
"HiJump"
{
"or": [
{
"enemyDamage": {
"enemy": "Menu",
"type": "contact",
"hits": 1
}
},
"ScrewAttack",
"canStaggeredWalljump",
"canPseudoScrew"
]
}
|
|
It may be necessary to turn off Gravity Suit in order have more time to jump and morph underwater. Requires: "Morph"
"Gravity"
{
"or": [
"canWalljump",
"HiJump",
"h_canIBJ",
"canGravityJump",
"h_canSpringBallBombJump",
"canSpringBallJumpMidAir",
"SpaceJump",
{
"and": [
"canUnmorphBombBoost",
"canTrickyJump"
]
}
]
}
|
|
From: 4
Below Sand Entrance
To: 5
Left Pillar Junction
Requires: "Gravity"
{
"or": [
"canPlayInSand",
"canWalljump",
"h_canUseSpringBall",
"canCarefulJump"
]
}
{
"or": [
{
"and": [
"ScrewAttack",
"canCarefulJump"
]
},
"canTrickyJump",
{
"enemyDamage": {
"enemy": "Evir",
"type": "particle",
"hits": 1
}
}
]
}
|
|
From: 3
Junction (Get Past Metroids, Left to Right)
To: 2
Right Door
Requires: {
"or": [
{
"and": [
{
"or": [
"canWalljump",
"HiJump"
]
},
{
"acidFrames": 20
}
]
},
{
"and": [
"Gravity",
{
"acidFrames": 10
}
]
}
]
}
{
"or": [
{
"obstaclesCleared": [
"A"
]
},
"Ice",
"ScrewAttack",
{
"and": [
"canPseudoScrew",
"canDodgeWhileShooting"
]
},
"canMetroidAvoid",
{
"metroidFrames": 150
}
]
}
|
|
From: 4
Junction (Get Past Metroids, Right to Left)
To: 1
Left Door (locked)
Requires: {
"or": [
{
"and": [
"canDelayedWalljump",
{
"acidFrames": 20
}
]
},
{
"and": [
"HiJump",
"canWalljump",
{
"acidFrames": 20
}
]
},
{
"and": [
"Gravity",
{
"acidFrames": 10
}
]
}
]
}
{
"or": [
{
"obstaclesCleared": [
"A"
]
},
"Ice",
"ScrewAttack",
"canMetroidAvoid",
{
"and": [
"canPseudoScrew",
"canTrickyJump"
]
},
{
"metroidFrames": 420
}
]
}
{
"or": [
"canInsaneJump",
{
"and": [
"canTrickyJump",
"canLateralMidAirMorph"
]
},
{
"and": [
"canTrickyJump",
"canPreciseWalljump",
{
"acidFrames": 16
}
]
},
{
"and": [
"Gravity",
{
"acidFrames": 16
}
]
},
{
"acidFrames": 27
}
]
}
|
|
From: 2
Bottom Right Door (locked)
To: 1
Top Right Door
Wall jump up the right wall and use a mid-air wiggle to reduce the height of Samus' hitbox after the walljump, to be able to fit through the gap without morphing. Entrance condition: {
"comeInShinecharged": {
"framesRequired": 120
}
}
Requires: "canWalljump"
"canMidairWiggle"
"canShinechargeMovementTricky"
{
"or": [
"f_KilledMetroidRoom2",
"canMetroidAvoid"
]
}
Exit condition: {
"leaveShinecharged": {
"framesRemaining": "auto"
}
}
|
|
From: 2
Bottom Right Door (locked)
To: 1
Top Right Door
Wall jump up the right wall and use a mid-air wiggle to reduce the height of Samus' hitbox after the walljump, to be able to fit through the gap without morphing. Shoot the door open and spark out. Entrance condition: {
"comeInShinecharged": {
"framesRequired": 105
}
}
Requires: "canWalljump"
"canMidairWiggle"
"canShinechargeMovementTricky"
{
"shinespark": {
"frames": 5
}
}
{
"or": [
"f_KilledMetroidRoom2",
"canMetroidAvoid"
]
}
Exit condition: {
"leaveWithSpark": {}
}
|
|
From: 2
Bottom Right Door (locked)
To: 1
Top Right Door
Use a mid-air wiggle to reduce the height of Samus' hitbox after the walljump, to be able to fit through the gap without morphing. Entrance condition: {
"comeInShinecharging": {
"length": 2,
"openEnd": 0
}
}
Requires: "canWalljump" "canMidairWiggle" "canShinechargeMovementTricky" "f_KilledMetroidRoom2" Exit condition: {
"leaveShinecharged": {
"framesRemaining": 50
}
}
|
|
From: 2
Middle Left Door
To: 1
Top Left Door
Entrance condition: {
"comeInShinecharged": {
"framesRequired": 95
}
}
Requires: "HiJump" "canWalljump" "canShinechargeMovementComplex" Exit condition: {
"leaveShinecharged": {
"framesRemaining": "auto"
}
}
|
|
Entrance condition: {
"comeInShinecharged": {
"framesRequired": 115
}
}
Requires: "canWalljump" "canShinechargeMovementComplex" Exit condition: {
"leaveShinecharged": {
"framesRemaining": "auto"
}
}
|
|
From: 2
Middle Left Door
To: 1
Top Left Door
Entrance condition: {
"comeInShinecharged": {
"framesRequired": 100
}
}
Requires: "canWalljump"
"canShinechargeMovementComplex"
{
"shinespark": {
"frames": 4
}
}
Exit condition: {
"leaveWithSpark": {}
}
|
|
From: 2
Middle Left Door
To: 1
Top Left Door
Entrance condition: {
"comeInShinecharging": {
"length": 2,
"openEnd": 0
}
}
Requires: "HiJump" "canWalljump" "canShinechargeMovementComplex" Exit condition: {
"leaveShinecharged": {
"framesRemaining": 70
}
}
|
|
From: 2
Middle Left Door
To: 1
Top Left Door
Entrance condition: {
"comeInShinecharging": {
"length": 2,
"openEnd": 0
}
}
Requires: "canWalljump" "canShinechargeMovementComplex" Exit condition: {
"leaveShinecharged": {
"framesRemaining": 50
}
}
|
|
From: 3
Bottom Left Door
To: 1
Top Left Door
Entrance condition: {
"comeInShinecharged": {
"framesRequired": 155
}
}
Requires: "HiJump"
"canWalljump"
"canShinechargeMovementComplex"
{
"shinespark": {
"frames": 2
}
}
Exit condition: {
"leaveWithSpark": {}
}
|
|
From: 3
Bottom Left Door
To: 2
Middle Left Door
Entrance condition: {
"comeInShinecharged": {
"framesRequired": 100
}
}
Requires: "HiJump" "canWalljump" "canShinechargeMovementComplex" Exit condition: {
"leaveShinecharged": {
"framesRemaining": "auto"
}
}
|
|
From: 3
Bottom Left Door
To: 2
Middle Left Door
Entrance condition: {
"comeInShinecharged": {
"framesRequired": 120
}
}
Requires: "canWalljump" "canShinechargeMovementComplex" Exit condition: {
"leaveShinecharged": {
"framesRemaining": "auto"
}
}
|
|
From: 3
Bottom Left Door
To: 2
Middle Left Door
Entrance condition: {
"comeInShinecharged": {
"framesRequired": 80
}
}
Requires: "HiJump"
"canWalljump"
"canShinechargeMovementComplex"
{
"shinespark": {
"frames": 5
}
}
Exit condition: {
"leaveWithSpark": {}
}
|
|
From: 3
Bottom Left Door
To: 2
Middle Left Door
Entrance condition: {
"comeInShinecharged": {
"framesRequired": 110
}
}
Requires: "canWalljump"
"canShinechargeMovementComplex"
{
"shinespark": {
"frames": 6
}
}
Exit condition: {
"leaveWithSpark": {}
}
|
|
From: 3
Bottom Right Door
To: 1
Top Right Doorway
Entrance condition: {
"comeInShinecharged": {
"framesRequired": 120
}
}
Requires: "HiJump" "canWalljump" "canShinechargeMovementComplex" Exit condition: {
"leaveShinecharged": {
"framesRemaining": "auto"
}
}
|
|
From: 3
Bottom Right Door
To: 1
Top Right Doorway
Entrance condition: {
"comeInShinecharged": {
"framesRequired": 100
}
}
Requires: "HiJump"
"canWalljump"
"canShinechargeMovementComplex"
{
"shinespark": {
"frames": 5
}
}
Exit condition: {
"leaveWithSpark": {}
}
|
|
From: 3
Bottom Right Door
To: 1
Top Right Doorway
Entrance condition: {
"comeInShinecharged": {
"framesRequired": 130
}
}
Requires: "canWalljump"
"canShinechargeMovementComplex"
{
"shinespark": {
"frames": 4
}
}
Exit condition: {
"leaveWithSpark": {}
}
|
|
From: 2
Right Door
To: 1
Top Door
Enter shinecharged with a spin-jump. Perform quick ledge-grabs to reach the top of the room and spark out. Entrance condition: {
"comeInShinecharged": {
"framesRequired": 130
}
}
Requires: "canPrepareForNextRoom"
"ScrewAttack"
"HiJump"
"canWalljump"
"canShinechargeMovementTricky"
{
"shinespark": {
"frames": 6
}
}
Exit condition: {
"leaveWithSpark": {}
}
|
|
Run from or Roll under the pirate lazers. The Pirates will also not shoot if they come on screen while Samus is crouched. Requires: {
"or": [
"HiJump",
"canWalljump",
"h_canFly"
]
}
{
"or": [
{
"and": [
"canDodgeWhileShooting",
"canCameraManip",
{
"or": [
"Plasma",
{
"and": [
"h_hasBeamUpgrade",
"canBePatient"
]
},
"canBeVeryPatient"
]
}
]
},
{
"and": [
{
"or": [
"canBePatient",
{
"enemyDamage": {
"enemy": "Tourian Space Pirate (all)",
"type": "contact",
"hits": 1
}
}
]
},
{
"or": [
"Morph",
"canTurnaroundAimCancel",
"canXRayTurnaround"
]
}
]
}
]
}
|
|
Kill the Pirates fast enough that they won't attack, or shoot them from below with Wave. Requires: {
"or": [
"HiJump",
"canWalljump",
"h_canFly"
]
}
{
"or": [
"Wave",
"ScrewAttack",
{
"and": [
"Plasma",
"canXRayWaitForIFrames"
]
},
{
"enemyKill": {
"enemies": [
[
"Tourian Space Pirate (all)",
"Tourian Space Pirate (all)",
"Tourian Space Pirate (all)"
],
[
"Tourian Space Pirate (all)",
"Tourian Space Pirate (all)",
"Tourian Space Pirate (all)"
]
],
"explicitWeapons": [
"Missile",
"Super",
"Ice+Plasma"
]
}
}
]
}
|
|
Walk through the pirates either by taking damage or by using Plasma Beam. Requires: {
"or": [
"HiJump",
"canWalljump",
"h_canFly"
]
}
{
"or": [
{
"enemyDamage": {
"enemy": "Tourian Space Pirate (all)",
"type": "contact",
"hits": 3
}
},
{
"and": [
"Plasma",
"canHitbox"
]
}
]
}
|
|
The pirates are free to kill, although they take some time. Requires: {
"or": [
"HiJump",
"SpaceJump",
"canWalljump",
"h_canIBJ",
"canSpringBallJumpMidAir"
]
}
|
|
Requires: {
"or": [
"HiJump",
"SpaceJump",
"canWalljump",
"h_canCrouchJumpDownGrab",
"h_canJumpIntoIBJ",
"canSpringBallJumpMidAir"
]
}
{
"or": [
"canCarefulJump",
"ScrewAttack",
{
"enemyDamage": {
"enemy": "Tourian Space Pirate (all)",
"type": "contact",
"hits": 1
}
}
]
}
Clears obstacles: A |
|
Entrance condition: {
"comeInShinecharged": {
"framesRequired": 150
}
}
Requires: "canWalljump" "canShinechargeMovementTricky" Exit condition: {
"leaveShinecharged": {
"framesRemaining": "auto"
}
}
|
|
Entrance condition: {
"comeInShinecharged": {
"framesRequired": 135
}
}
Requires: "canWalljump" "canShinechargeMovementComplex" Exit condition: {
"leaveShinecharged": {
"framesRemaining": "auto"
}
}
|
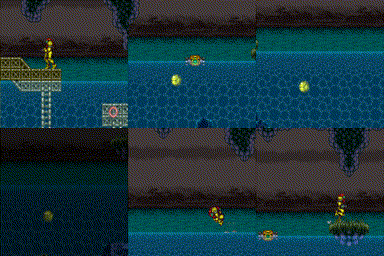
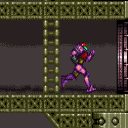
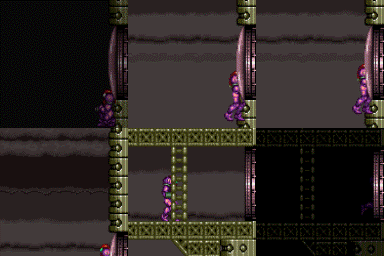
.png)
.gif)
.png)
.gif)
.png)
.gif)

