canShinechargeMovementComplex (Very Hard)
The ability to make multiple movement actions with a shinespark charge timer running to get into position to shinespark. This reposition may be necessary to avoid obstacles, conserve energy, etc.
Dependencies: canShinespark, canShinechargeMovement
Strats ()
|
Entrance condition: {
"comeInShinecharged": {
"framesRequired": 30
}
}
Requires: "canShinechargeMovementComplex" Exit condition: {
"leaveShinecharged": {
"framesRemaining": "auto"
}
}
|
|
Entrance condition: {
"comeInShinecharging": {
"length": 13,
"openEnd": 0
}
}
Requires: "canShinechargeMovementComplex" Exit condition: {
"leaveShinecharged": {
"framesRemaining": 130
}
}
|
|
From: 1
Left Door
To: 2
Elevator
Entrance condition: {
"comeInShinecharging": {
"length": 6,
"openEnd": 0
}
}
Requires: "canStopOnADime" "canShinechargeMovementComplex" Exit condition: {
"leaveShinecharged": {
"framesRemaining": 170
}
}
|
|
Entrance condition: {
"comeInShinecharged": {
"framesRequired": 45
}
}
Requires: "canShinechargeMovementComplex" Exit condition: {
"leaveShinecharged": {
"framesRemaining": "auto"
}
}
|
|
Notable: true 
Diagonal shinespark up the climb to break the bomb blocks to the top right morph tunnel. A consistent place to spark from is the small platform below the bomb block, using a crouch jump and then a diagonal spark (not a crouched diagonal spark). Entrance condition: {
"comeInShinecharged": {
"framesRequired": 55
},
"comesThroughToilet": "no"
}
Requires: "canShinechargeMovementComplex"
{
"or": [
"canCrouchJump",
"canMidairShinespark"
]
}
{
"shinespark": {
"frames": 5
}
}
|
|
From: 1
Top Door
To: 3
Top Right Door
Notable: true
Diagonal shinespark up the climb to break the bomb blocks to the top right morph tunnel. A consistent place to spark from is the small platform below the bomb block, using a crouch jump and then a diagonal spark (not a crouched diagonal spark). Entrance condition: {
"comeInShinecharged": {
"framesRequired": 65
},
"comesThroughToilet": "yes"
}
Requires: "canShinechargeMovementComplex"
{
"or": [
"canCrouchJump",
"canMidairShinespark"
]
}
{
"shinespark": {
"frames": 5
}
}
|
|
Charge a Shinespark running left, then get blue suit speed by running back to the right to jump through the Boyons. Requires: "canCarefulJump"
"canShinechargeMovementComplex"
{
"canShineCharge": {
"usedTiles": 33,
"openEnd": 2
}
}
{
"shinespark": {
"frames": 130,
"excessFrames": 6
}
}
|
|
From: 2
Bottom Left Door
To: 3
Item
Quickly Walljump to conserve health on the shinespark. Requires: "canUseFrozenEnemies"
"canShinechargeMovementComplex"
"canFastWalljumpClimb"
{
"canShineCharge": {
"usedTiles": 33,
"openEnd": 2
}
}
{
"shinespark": {
"frames": 98,
"excessFrames": 6
}
}
|
|
Store the spark on the right side of the ledge. Run left and do a big jump towards the gauntlet door and then midair spark at the right time. The lines in the background make for a good way to measure height. Requires: "canMidairShinespark"
"canShinechargeMovementComplex"
{
"canShineCharge": {
"usedTiles": 19,
"steepUpTiles": 2,
"steepDownTiles": 1,
"openEnd": 2
}
}
{
"or": [
{
"shinespark": {
"frames": 95,
"excessFrames": 33
}
},
{
"and": [
"canShinechargeMovementTricky",
{
"shinespark": {
"frames": 87,
"excessFrames": 33
}
}
]
}
]
}
Clears obstacles: A |
|
From: 4
Bottom Right Door
To: 1
Top Left Door
Store the spark on the right side of the ledge. Run left and do a big jump towards the gauntlet door and then midair spark at the right time. The lines in the background make for a good way to measure height. Requires: {
"obstaclesCleared": [
"C"
]
}
"canMidairShinespark"
"canShinechargeMovementComplex"
{
"canShineCharge": {
"usedTiles": 19,
"steepUpTiles": 2,
"steepDownTiles": 1,
"openEnd": 2
}
}
{
"or": [
{
"shinespark": {
"frames": 96
}
},
{
"and": [
"canShinechargeMovementTricky",
{
"shinespark": {
"frames": 88
}
}
]
}
]
}
Exit condition: {
"leaveWithSpark": {
"position": "top"
}
}
|
|
From: 2
Middle Left Door
To: 3
Bottom Left Horizontal Door
Entrance condition: {
"comeInShinecharged": {
"framesRequired": 170
}
}
Requires: "canShinechargeMovementComplex"
{
"shinespark": {
"frames": 6
}
}
Exit condition: {
"leaveWithSpark": {}
}
|
|
From: 2
Middle Left Door
To: 6
Bottom Right Door (On the Left Shaft)
Entrance condition: {
"comeInShinecharged": {
"framesRequired": 150
}
}
Requires: "canShinechargeMovementComplex" Exit condition: {
"leaveShinecharged": {
"framesRemaining": "auto"
}
}
|
|
From: 3
Bottom Left Horizontal Door
To: 2
Middle Left Door
Entrance condition: {
"comeInShinecharged": {
"framesRequired": 160
}
}
Requires: "canShinechargeMovementComplex" "HiJump" Exit condition: {
"leaveShinecharged": {
"framesRemaining": "auto"
}
}
|
|
From: 3
Bottom Left Horizontal Door
To: 6
Bottom Right Door (On the Left Shaft)
Entrance condition: {
"comeInShinecharged": {
"framesRequired": 110
}
}
Requires: "canShinechargeMovementComplex" Exit condition: {
"leaveShinecharged": {
"framesRemaining": "auto"
}
}
|
|
From: 3
Bottom Left Horizontal Door
To: 7
Bottom Left Vertical Door
Immediately after running off the ledge, turn back and press against the ledge, aim down, and shoot open the door. Move left to avoid the floating platform, then hold right against the floating platform to make it over to the door. Entrance condition: {
"comeInShinecharged": {
"framesRequired": 123
}
}
Requires: "canShinechargeMovementComplex" Exit condition: {
"leaveShinecharged": {
"framesRemaining": "auto"
}
}
|
|
From: 6
Bottom Right Door (On the Left Shaft)
To: 2
Middle Left Door
Entrance condition: {
"comeInShinecharged": {
"framesRequired": 165
}
}
Requires: "canShinechargeMovementComplex" "HiJump" "canWalljump" Exit condition: {
"leaveShinecharged": {
"framesRemaining": "auto"
}
}
|
|
From: 6
Bottom Right Door (On the Left Shaft)
To: 3
Bottom Left Horizontal Door
Entrance condition: {
"comeInShinecharged": {
"framesRequired": 110
}
}
Requires: "canShinechargeMovementComplex" Exit condition: {
"leaveShinecharged": {
"framesRemaining": "auto"
}
}
|
|
From: 6
Bottom Right Door (On the Left Shaft)
To: 7
Bottom Left Vertical Door
Notable: true 
Walk off the ledge (rather than running off), aim down, and shoot. Depending on your momentum coming in, if Zebes is awake you may need to shoot down twice, once to kill the Geemer and once to open the door. Press forward against the floating platform to make it through the door. Entrance condition: {
"comeInShinecharged": {
"framesRequired": 121
}
}
Requires: "canShinechargeMovementComplex" Exit condition: {
"leaveShinecharged": {
"framesRemaining": "auto"
}
}
|
|
From: 7
Bottom Left Vertical Door
To: 3
Bottom Left Horizontal Door
Entrance condition: {
"comeInShinecharged": {
"framesRequired": 135
},
"comesThroughToilet": "any"
}
Requires: "HiJump" "canWalljump" "canShinechargeMovementComplex" Exit condition: {
"leaveShinecharged": {
"framesRemaining": "auto"
}
}
|
|
From: 7
Bottom Left Vertical Door
To: 6
Bottom Right Door (On the Left Shaft)
Entrance condition: {
"comeInShinecharged": {
"framesRequired": 135
},
"comesThroughToilet": "any"
}
Requires: "HiJump" "canWalljump" "canShinechargeMovementComplex" Exit condition: {
"leaveShinecharged": {
"framesRemaining": "auto"
}
}
|
|
Entrance condition: {
"comeInShinecharged": {
"framesRequired": 30
}
}
Requires: "canShinechargeMovementComplex" Exit condition: {
"leaveShinecharged": {
"framesRemaining": "auto"
}
}
|
|
From: 1
Right Door
To: 2
Elevator
Entrance condition: {
"comeInShinecharging": {
"length": 6,
"openEnd": 0
}
}
Requires: "canShinechargeMovementComplex" Exit condition: {
"leaveShinecharged": {
"framesRemaining": 170
}
}
|
|
Entrance condition: {
"comeInShinecharged": {
"framesRequired": 48
}
}
Requires: "canShinechargeMovementComplex" Exit condition: {
"leaveShinecharged": {
"framesRemaining": "auto"
}
}
|
|
Entrance condition: {
"comeInShinecharged": {
"framesRequired": 100
}
}
Requires: "f_TourianOpen" "Gravity" "canShinechargeMovementComplex" Exit condition: {
"leaveShinecharged": {
"framesRemaining": "auto"
}
}
|
|
Entrance condition: {
"comeInShinecharged": {
"framesRequired": 120
}
}
Requires: "f_TourianOpen" "canSuitlessMaridia" "canShinechargeMovementComplex" Exit condition: {
"leaveShinecharged": {
"framesRemaining": "auto"
}
}
|
|
From: 2
Elevator
To: 1
Left Door
Entrance condition: {
"comeInShinecharged": {
"framesRequired": 120
}
}
Requires: "f_TourianOpen" "Gravity" "HiJump" "canWalljump" "canShinechargeMovementComplex" Exit condition: {
"leaveShinecharged": {
"framesRemaining": "auto"
}
}
|
|
From: 2
Elevator
To: 1
Left Door
Entrance condition: {
"comeInShinecharged": {
"framesRequired": 95
}
}
Requires: "f_TourianOpen"
"Gravity"
"HiJump"
"canWalljump"
"canShinechargeMovementComplex"
{
"shinespark": {
"frames": 9
}
}
Exit condition: {
"leaveWithSpark": {}
}
|
|
Entrance condition: {
"comeInShinecharged": {
"framesRequired": 105
}
}
Requires: "f_TourianOpen"
"Gravity"
"HiJump"
"canShinechargeMovementComplex"
{
"shinespark": {
"frames": 7
}
}
Exit condition: {
"leaveWithSpark": {}
}
|
|
Entrance condition: {
"comeInShinecharged": {
"framesRequired": 120
}
}
Requires: "f_TourianOpen"
"Gravity"
"canWalljump"
"canShinechargeMovementComplex"
{
"shinespark": {
"frames": 8
}
}
Exit condition: {
"leaveWithSpark": {}
}
|
|
From: 2
Right Door
To: 1
Left Door
Gain a shinecharge while entering the room. Move quickly to the left, using Plasma or Screw Attack to avoid being hit by enemies. Shoot open the door and spark through. Entrance condition: {
"comeInShinecharging": {
"length": 8,
"openEnd": 1,
"steepDownTiles": 2
}
}
Requires: {
"or": [
"Plasma",
"ScrewAttack"
]
}
"canShinechargeMovementComplex"
{
"shinespark": {
"frames": 9
}
}
Exit condition: {
"leaveWithSpark": {}
}
|
|
From: 2
Right Door
To: 1
Left Door
Run into the room, and just before Samus would run into the water, fire a Plasma shot and make a big jump across the room. The shot should clear the enemies and open the door. Activate the shinespark mid-air. Entrance condition: {
"comeInShinecharged": {
"framesRequired": 70
}
}
Requires: "Plasma"
"canShinechargeMovementComplex"
{
"shinespark": {
"frames": 24
}
}
Exit condition: {
"leaveWithSpark": {}
}
|
|
From: 2
Right Door
To: 1
Left Door
Run and jump through the room with Screw Attack. As the door starts to come on camera, shoot it open, carefully avoiding enemies from blocking the shot. Jump and activate the shinespark mid-air. Entrance condition: {
"comeInShinecharged": {
"framesRequired": 100
}
}
Requires: "ScrewAttack"
"canShinechargeMovementComplex"
{
"shinespark": {
"frames": 24
}
}
Exit condition: {
"leaveWithSpark": {}
}
|
|
Notable: true 
Enter the room while building a shinespark and use it on the lowest part of the ramp to diagonally spark up and out of the water. Use very low jump height space jumps to carry momentum to the far side of the submerged ramp. Both Choots must be killed. Using Screw Attack: stay a little bit high in the water so that it remains active for the second Choot. Using Plasma or ammo: kill the first Choot while running down the middle platform, and the second while gliding above it after spacejumping through the water. Then shinespark up and use SpaceJump to reach the door. Entrance condition: {
"comeInShinecharging": {
"length": 6,
"openEnd": 1,
"steepDownTiles": 1
}
}
Requires: {
"or": [
"ScrewAttack",
"canPseudoScrew",
"Plasma",
{
"ammo": {
"type": "Missile",
"count": 1
}
},
{
"ammo": {
"type": "Super",
"count": 1
}
}
]
}
{
"or": [
"ScrewAttack",
"Plasma",
{
"ammo": {
"type": "Missile",
"count": 1
}
},
{
"ammo": {
"type": "Super",
"count": 1
}
}
]
}
{
"shinespark": {
"frames": 14,
"excessFrames": 5
}
}
"canShinechargeMovementComplex"
"SpaceJump"
"canTrickyJump"
"canMidairShinespark"
|
|
From: 1
Left Door
To: 2
Right Door
Notable: true 
Enter the room while building a shinespark and use it on the lowest part of the ramp to diagonally spark up and out of the water. Use very low jump height space jumps to carry momentum to the far side of the submerged ramp. Freeze the first Choot from the middle platform. Either SpaceJump just right so as to pass above the second Choot, or freeze it as it touches Samus to pass through without losing speed. Then shinespark up and use SpaceJump to reach the door. Entrance condition: {
"comeInShinecharging": {
"length": 6,
"openEnd": 1,
"steepDownTiles": 1
}
}
Requires: "Ice"
"Wave"
"Spazer"
"canDodgeWhileShooting"
{
"shinespark": {
"frames": 14,
"excessFrames": 5
}
}
"canShinechargeMovementComplex"
"canMidairShinespark"
"SpaceJump"
"canTrickyJump"
|
|
From: 1
Left Door
To: 2
Right Door
Notable: true
Enter the room while building a shinespark and use it on the lowest part of the ramp to diagonally spark up and out of the water. Unmorphing with the correct timing and positioning for the Shinespark are very precise, and there are no extra frames on the Shinespark timer to work with. Carry the shinespark to the bottom of the ramp either with a bounce ball which takes damage from the Choot, or delay the first Choot with two shots and then use a late mockball. Then shinespark up and use SpaceJump to reach the door. Entrance condition: {
"comeInShinecharging": {
"length": 6,
"openEnd": 1,
"steepDownTiles": 1
}
}
Requires: {
"or": [
{
"and": [
{
"enemyDamage": {
"enemy": "Choot",
"type": "contact",
"hits": 1
}
},
"canNeutralDamageBoost",
"canBounceBall"
]
},
{
"and": [
"canDodgeWhileShooting",
"canMockball"
]
}
]
}
{
"shinespark": {
"frames": 14,
"excessFrames": 5
}
}
"canShinechargeMovementComplex"
"SpaceJump"
"canTrickyJump"
|
|
Enter the room while building a shinespark and use it on the lowest part of the ramp to cross the room and reach a raised ledge on the right side wall. From there, use SpaceJump to escape the water. Carry the shinespark to the bottom of the ramp by delaying the first Choot with two Power Beam shots, killing it, or bounceballing through it. The Choot can be shot diagonally from the middle platform, and again by running off that platform and aiming down to float above it. Entrance condition: {
"comeInShinecharging": {
"length": 6,
"openEnd": 1,
"steepDownTiles": 1
}
}
Requires: "canShinechargeMovementComplex"
"canCarefulJump"
{
"or": [
{
"and": [
"canMidairShinespark",
"canDodgeWhileShooting"
]
},
{
"and": [
{
"enemyDamage": {
"enemy": "Choot",
"type": "contact",
"hits": 1
}
},
"canNeutralDamageBoost",
"canBounceBall"
]
},
{
"and": [
"canMockball",
{
"or": [
"canPseudoScrew",
"ScrewAttack",
"Plasma",
"Wave",
{
"ammo": {
"type": "Missile",
"count": 1
}
},
{
"ammo": {
"type": "Super",
"count": 1
}
}
]
}
]
}
]
}
"canHorizontalShinespark"
{
"shinespark": {
"frames": 123,
"excessFrames": 5
}
}
"canSpaceJumpWaterBounce"
{
"or": [
{
"and": [
"HiJump",
"canSpaceJumpWaterEscape"
]
},
{
"and": [
"canTrickyJump",
"canDownGrab"
]
},
"canWalljump"
]
}
|
|
From: 3
Junction (Left side Pit)
To: 1
Left Door
Notable: true 
Quickly climb the submerged structures. Not dashing may make platforming easier. Requires: "canShinechargeMovementComplex"
"canMidairShinespark"
"Gravity"
{
"canShineCharge": {
"usedTiles": 20,
"openEnd": 0,
"steepUpTiles": 2,
"steepDownTiles": 4,
"startingDownTiles": 1
}
}
{
"shinespark": {
"frames": 23
}
}
Exit condition: {
"leaveWithSpark": {}
}
|
|
From: 4
Junction (Right side Pit)
To: 2
Right Door
Requires: "canShinechargeMovementComplex"
"Gravity"
{
"or": [
"HiJump",
"SpaceJump"
]
}
{
"canShineCharge": {
"usedTiles": 22,
"openEnd": 0,
"steepUpTiles": 3,
"steepDownTiles": 3,
"startingDownTiles": 1
}
}
Exit condition: {
"leaveShinecharged": {
"framesRemaining": 30
}
}
|
|
From: 4
Junction (Right side Pit)
To: 2
Right Door
Requires: "canShinechargeMovementComplex"
"Gravity"
"canWalljump"
{
"canShineCharge": {
"usedTiles": 22,
"openEnd": 0,
"steepUpTiles": 3,
"steepDownTiles": 3,
"startingDownTiles": 1
}
}
{
"shinespark": {
"frames": 10
}
}
Exit condition: {
"leaveWithSpark": {}
}
|
|
Entrance condition: {
"comeInShinecharged": {
"framesRequired": 85
}
}
Requires: "canShinechargeMovementComplex" Exit condition: {
"leaveShinecharged": {
"framesRemaining": "auto"
}
}
|
|
Entrance condition: {
"comeInShinecharged": {
"framesRequired": 85
}
}
Requires: "canShinechargeMovementComplex" Exit condition: {
"leaveShinecharged": {
"framesRemaining": "auto"
}
}
|
|
Run and jump onto the pedestal. Jump again to the right, and shinespark diagonally to make it past the water. Entrance condition: {
"comeInShinecharged": {
"framesRequired": 130
}
}
Requires: "canShinechargeMovementComplex"
{
"shinespark": {
"frames": 7
}
}
|
|
Run and jump onto the pedestal. Jump again to the right to bring the door on-camera. Fire a shot mid-air, and activate the shinespark wind-up. Wait until the shot hits the door before sparking. Entrance condition: {
"comeInShinecharged": {
"framesRequired": 140
}
}
Requires: "canShinechargeMovementComplex"
"canHeroShot"
{
"shinespark": {
"frames": 19
}
}
Exit condition: {
"leaveWithSpark": {}
}
|
|
Come into the room with a shinecharge, run and jump to the left, firing a shot just before landing on the pedestal. Activate the shinespark either just before landing on the pedestal or just afterward (depending on the vertical position needed for the spark). Entrance condition: {
"comeInShinecharged": {
"framesRequired": 90
}
}
Requires: "canShinechargeMovementComplex"
{
"shinespark": {
"frames": 23
}
}
Exit condition: {
"leaveWithSpark": {}
}
|
|
After gaining a shinecharge, run back to the door to make space for a running jump to the left, firing a shot just before landing on the pedestal. Activate the shinespark either just before landing on the pedestal or just afterward (depending on the vertical position needed for the spark). Entrance condition: {
"comeInShinecharging": {
"length": 4,
"openEnd": 0
}
}
Requires: "canShinechargeMovementComplex"
{
"shinespark": {
"frames": 23
}
}
Exit condition: {
"leaveWithSpark": {}
}
|
|
From: 2
Upper Right Section - Top Right Door
To: 2
Upper Right Section - Top Right Door
Requires: "HiJump" "SpaceJump" "canShinechargeMovementComplex" Exit condition: {
"leaveShinecharged": {
"framesRemaining": 30
}
}
|
|
From: 2
Upper Right Section - Top Right Door
To: 2
Upper Right Section - Top Right Door
Requires: "HiJump" "canTrickyDashJump" "canWalljump" "canShinechargeMovementComplex" Exit condition: {
"leaveShinecharged": {
"framesRemaining": 55
}
}
|
|
From: 2
Upper Right Section - Top Right Door
To: 2
Upper Right Section - Top Right Door
Requires: "HiJump" "canTrickyDashJump" "canShinechargeMovementComplex" Exit condition: {
"leaveShinecharged": {
"framesRemaining": 20
}
}
|
|
From: 2
Upper Right Section - Top Right Door
To: 2
Upper Right Section - Top Right Door
Requires: "canTrickyDashJump"
"canWalljump"
"canShinechargeMovementComplex"
{
"shinespark": {
"frames": 20
}
}
Exit condition: {
"leaveWithSpark": {}
}
|
|
From: 4
Lower Section - Top Right Door
To: 5
Lower Section - Bottom Right Door
While falling out the door, swing out to the left a couple tiles before moving back right, in order to make the camera scroll. Run, jump, fire a shot mid-air, and activate a well-timed mid-air shinespark to make it through the door. Entrance condition: {
"comeInShinecharged": {
"framesRequired": 170
}
}
Requires: "canShinechargeMovementComplex"
"canHeroShot"
{
"shinespark": {
"frames": 22
}
}
Exit condition: {
"leaveWithSpark": {}
}
|
|
From: 12
Top Junction
To: 6
Middle Right Door (By Zeb Farm)
Notable: true 
Preopen the door and shotblock, then go back and charge a shinespark. Springball through the short morphball tunnel to just have enough time to shinespark out the door. Requires: "canShinechargeMovementComplex"
"h_canUseSpringBall"
{
"canShineCharge": {
"usedTiles": 33,
"openEnd": 2
}
}
{
"shinespark": {
"frames": 25
}
}
Exit condition: {
"leaveWithSpark": {}
}
|
|
From: 13
Bottom Junction
To: 1
Lower Section - Bottom Left Door
Jump to the runway connected to the left side door before sparking. Requires: "Gravity"
"canShinechargeMovementComplex"
{
"canShineCharge": {
"usedTiles": 33,
"openEnd": 2
}
}
{
"shinespark": {
"frames": 38
}
}
Exit condition: {
"leaveWithSpark": {}
}
|
|
From: 13
Bottom Junction
To: 4
Lower Section - Top Right Door
Notable: true 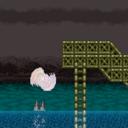

Spacejump out of the water then use walljumps up to the gravity suit room door. Requires: "canShinechargeMovementComplex"
"canFastWalljumpClimb"
"HiJump"
"Gravity"
"SpaceJump"
{
"canShineCharge": {
"usedTiles": 33,
"openEnd": 2
}
}
Exit condition: {
"leaveShinecharged": {
"framesRemaining": 35
}
}
|
|
From: 13
Bottom Junction
To: 4
Lower Section - Top Right Door
Notable: true 
Use walljumps to climb from the ocean floor up to the gravity suit room door. Requires: "canShinechargeMovementComplex"
"canFastWalljumpClimb"
"HiJump"
"Gravity"
{
"canShineCharge": {
"usedTiles": 33,
"openEnd": 2
}
}
Exit condition: {
"leaveShinecharged": {
"framesRemaining": 18
}
}
|
|
From: 13
Bottom Junction
To: 5
Lower Section - Bottom Right Door
Requires: "Gravity"
"canShinechargeMovementComplex"
{
"or": [
"HiJump",
"SpaceJump"
]
}
{
"canShineCharge": {
"usedTiles": 33,
"openEnd": 2
}
}
Exit condition: {
"leaveShinecharged": {
"framesRemaining": 40
}
}
|
|
From: 13
Bottom Junction
To: 5
Lower Section - Bottom Right Door
Requires: "Gravity"
"canShinechargeMovementComplex"
"canPreciseWalljump"
{
"canShineCharge": {
"usedTiles": 33,
"openEnd": 2
}
}
{
"shinespark": {
"frames": 15
}
}
Exit condition: {
"leaveWithSpark": {}
}
|
|
From: 4
Right Item
To: 2
Top Left Door
Breaking the Power Bomb blocks exactly wide enough makes it easier to quickly enter the one-tile gap. Aligning the Power Bomb with the left side of the ceiling fixture that sticks down will position the explosion correctly for this. Requires: {
"or": [
"h_canUsePowerBombs",
{
"obstaclesCleared": [
"C"
]
}
]
}
"canShinechargeMovementComplex"
"canFastWalljumpClimb"
{
"canShineCharge": {
"usedTiles": 33,
"openEnd": 2
}
}
{
"shinespark": {
"frames": 17
}
}
Clears obstacles: A, B, C |
|
Entrance condition: {
"comeInShinecharged": {
"framesRequired": 90
}
}
Requires: "canShinechargeMovementComplex" Exit condition: {
"leaveShinecharged": {
"framesRemaining": "auto"
}
}
|
|
Entrance condition: {
"comeInShinecharged": {
"framesRequired": 90
}
}
Requires: "canShinechargeMovementComplex" Exit condition: {
"leaveShinecharged": {
"framesRemaining": "auto"
}
}
|
|
Entrance condition: {
"comeInShinecharged": {
"framesRequired": 160
}
}
Requires: "Morph" "canShinechargeMovementComplex" Exit condition: {
"leaveShinecharged": {
"framesRemaining": "auto"
}
}
|
|
From: 1
Left Door
To: 2
Right Door
Gain the shinecharge near the edge of the runway so that you slide off quickly, while shooting the door open. Requires: {
"obstaclesNotCleared": [
"A"
]
}
{
"canShineCharge": {
"usedTiles": 33,
"openEnd": 2
}
}
"canShinechargeMovementComplex"
Exit condition: {
"leaveShinecharged": {
"framesRemaining": 140
}
}
|
|
From: 2
Right Door
To: 2
Right Door
Use the runway on the screen above to gain a shinecharge near the edge of the runway, sliding off quickly. Requires: {
"or": [
"canWalljump",
"HiJump",
"h_canFly",
"canSpringBallJumpMidAir",
"h_canCrouchJumpDownGrab"
]
}
{
"canShineCharge": {
"usedTiles": 25,
"openEnd": 1
}
}
"canShinechargeMovementComplex"
Exit condition: {
"leaveShinecharged": {
"framesRemaining": 70
}
}
|
|
Entrance condition: {
"comeInShinecharged": {
"framesRequired": 90
}
}
Requires: "canShinechargeMovementComplex"
{
"or": [
{
"enemyDamage": {
"enemy": "Beetom",
"type": "contact",
"hits": 6
}
},
{
"and": [
"ScrewAttack",
{
"enemyDamage": {
"enemy": "Beetom",
"type": "contact",
"hits": 3
}
}
]
}
]
}
Exit condition: {
"leaveShinecharged": {
"framesRemaining": "auto"
}
}
|
|
From: 1
Left Door
To: 2
Right Door
Depending on Samus' momentum when entering the room, it may be necessary to make a small jump before shooting open the door, to avoid a Beetom from blocking the shot. Entrance condition: {
"comeInShinecharged": {
"framesRequired": 30
}
}
Requires: "canShinechargeMovementComplex"
{
"shinespark": {
"frames": 16
}
}
Exit condition: {
"leaveWithSpark": {}
}
|
|
From: 1
Left Door
To: 2
Right Door
Entrance condition: {
"comeInShinecharging": {
"length": 2,
"openEnd": 1
}
}
Requires: "canShinechargeMovementComplex"
{
"or": [
{
"enemyDamage": {
"enemy": "Beetom",
"type": "contact",
"hits": 4
}
},
{
"and": [
"ScrewAttack",
{
"enemyDamage": {
"enemy": "Beetom",
"type": "contact",
"hits": 2
}
}
]
}
]
}
Exit condition: {
"leaveShinecharged": {
"framesRemaining": 95
}
}
|
|
Entrance condition: {
"comeInShinecharged": {
"framesRequired": 90
}
}
Requires: "canShinechargeMovementComplex"
{
"or": [
{
"enemyDamage": {
"enemy": "Beetom",
"type": "contact",
"hits": 6
}
},
{
"and": [
"ScrewAttack",
{
"enemyDamage": {
"enemy": "Beetom",
"type": "contact",
"hits": 3
}
}
]
}
]
}
Exit condition: {
"leaveShinecharged": {
"framesRemaining": "auto"
}
}
|
|
From: 2
Right Door
To: 1
Left Door
Depending on Samus' momentum when entering the room, it may be necessary to make a small jump before shooting open the door, to avoid a Beetom from blocking the shot. Entrance condition: {
"comeInShinecharged": {
"framesRequired": 30
}
}
Requires: "canShinechargeMovementComplex"
{
"shinespark": {
"frames": 16
}
}
Exit condition: {
"leaveWithSpark": {}
}
|
|
From: 2
Right Door
To: 1
Left Door
Entrance condition: {
"comeInShinecharging": {
"length": 2,
"openEnd": 1
}
}
Requires: "canShinechargeMovementComplex"
{
"or": [
{
"enemyDamage": {
"enemy": "Beetom",
"type": "contact",
"hits": 4
}
},
{
"and": [
"ScrewAttack",
{
"enemyDamage": {
"enemy": "Beetom",
"type": "contact",
"hits": 2
}
}
]
}
]
}
Exit condition: {
"leaveShinecharged": {
"framesRemaining": 100
}
}
|
|
From: 2
Above Power Bomb Blocks - Top Left Door
To: 3
Above Power Bomb Blocks - Top Right Door
Entrance condition: {
"comeInShinecharged": {
"framesRequired": 90
}
}
Requires: "canShinechargeMovementComplex" Exit condition: {
"leaveShinecharged": {
"framesRemaining": "auto"
}
}
|
|
From: 2
Above Power Bomb Blocks - Top Left Door
To: 3
Above Power Bomb Blocks - Top Right Door
Entrance condition: {
"comeInShinecharging": {
"length": 3,
"openEnd": 1
}
}
Requires: "canShinechargeMovementComplex" Exit condition: {
"leaveShinecharged": {
"framesRemaining": 90
}
}
|
|
From: 2
Above Power Bomb Blocks - Top Left Door
To: 4
Above Power Bomb Blocks - Middle Left Door
Entrance condition: {
"comeInShinecharged": {
"framesRequired": 110
}
}
Requires: "canShinechargeMovementComplex" Exit condition: {
"leaveShinecharged": {
"framesRemaining": "auto"
}
}
|
|
From: 2
Above Power Bomb Blocks - Top Left Door
To: 4
Above Power Bomb Blocks - Middle Left Door
Entrance condition: {
"comeInShinecharging": {
"length": 3,
"openEnd": 1
}
}
Requires: "canShinechargeMovementComplex" Exit condition: {
"leaveShinecharged": {
"framesRemaining": 80
}
}
|
|
From: 2
Above Power Bomb Blocks - Top Left Door
To: 5
Above Power Bomb Blocks - Bottom Left Door
Entrance condition: {
"comeInShinecharged": {
"framesRequired": 160
}
}
Requires: "canShinechargeMovementComplex" Exit condition: {
"leaveShinecharged": {
"framesRemaining": "auto"
}
}
|
|
From: 2
Above Power Bomb Blocks - Top Left Door
To: 5
Above Power Bomb Blocks - Bottom Left Door
Entrance condition: {
"comeInShinecharged": {
"framesRequired": 140
}
}
Requires: "canShinechargeMovementComplex"
{
"shinespark": {
"frames": 6
}
}
Exit condition: {
"leaveWithSpark": {}
}
|
|
From: 2
Above Power Bomb Blocks - Top Left Door
To: 5
Above Power Bomb Blocks - Bottom Left Door
Entrance condition: {
"comeInShinecharging": {
"length": 3,
"openEnd": 1
}
}
Requires: "canShinechargeMovementComplex" Exit condition: {
"leaveShinecharged": {
"framesRemaining": 25
}
}
|
|
From: 2
Above Power Bomb Blocks - Top Left Door
To: 6
Above Power Bomb Blocks - Bottom Right Door
Entrance condition: {
"comeInShinecharged": {
"framesRequired": 140
}
}
Requires: "canShinechargeMovementComplex"
{
"shinespark": {
"frames": 17
}
}
Exit condition: {
"leaveWithSpark": {}
}
|
|
From: 2
Above Power Bomb Blocks - Top Left Door
To: 6
Above Power Bomb Blocks - Bottom Right Door
Entrance condition: {
"comeInShinecharging": {
"length": 2,
"openEnd": 1
}
}
Requires: "canShinechargeMovementComplex" Exit condition: {
"leaveShinecharged": {
"framesRemaining": 10
}
}
|
|
From: 3
Above Power Bomb Blocks - Top Right Door
To: 2
Above Power Bomb Blocks - Top Left Door
Entrance condition: {
"comeInShinecharged": {
"framesRequired": 75
}
}
Requires: "canShinechargeMovementComplex" Exit condition: {
"leaveShinecharged": {
"framesRemaining": "auto"
}
}
|
|
From: 3
Above Power Bomb Blocks - Top Right Door
To: 2
Above Power Bomb Blocks - Top Left Door
Entrance condition: {
"comeInShinecharged": {
"framesRequired": 10
}
}
Requires: "canShinechargeMovementComplex"
{
"shinespark": {
"frames": 21
}
}
Exit condition: {
"leaveWithSpark": {}
}
|
|
From: 3
Above Power Bomb Blocks - Top Right Door
To: 2
Above Power Bomb Blocks - Top Left Door
Entrance condition: {
"comeInShinecharging": {
"length": 4,
"openEnd": 1
}
}
Requires: "canShinechargeMovementComplex" Exit condition: {
"leaveShinecharged": {
"framesRemaining": 95
}
}
|
|
From: 3
Above Power Bomb Blocks - Top Right Door
To: 4
Above Power Bomb Blocks - Middle Left Door
Entrance condition: {
"comeInShinecharged": {
"framesRequired": 115
}
}
Requires: "canShinechargeMovementComplex" Exit condition: {
"leaveShinecharged": {
"framesRemaining": "auto"
}
}
|
|
From: 3
Above Power Bomb Blocks - Top Right Door
To: 4
Above Power Bomb Blocks - Middle Left Door
Entrance condition: {
"comeInShinecharged": {
"framesRequired": 100
}
}
Requires: "canShinechargeMovementComplex"
{
"shinespark": {
"frames": 2
}
}
Exit condition: {
"leaveWithSpark": {}
}
|
|
From: 3
Above Power Bomb Blocks - Top Right Door
To: 4
Above Power Bomb Blocks - Middle Left Door
Entrance condition: {
"comeInShinecharging": {
"length": 4,
"openEnd": 1
}
}
Requires: "canShinechargeMovementComplex" Exit condition: {
"leaveShinecharged": {
"framesRemaining": 60
}
}
|
|
From: 3
Above Power Bomb Blocks - Top Right Door
To: 4
Above Power Bomb Blocks - Middle Left Door
Entrance condition: {
"comeInShinecharging": {
"length": 4,
"openEnd": 0
}
}
Requires: "canShinechargeMovementComplex" Exit condition: {
"leaveShinecharged": {
"framesRemaining": 75
}
}
|
|
From: 3
Above Power Bomb Blocks - Top Right Door
To: 5
Above Power Bomb Blocks - Bottom Left Door
Entrance condition: {
"comeInShinecharged": {
"framesRequired": 150
}
}
Requires: "canShinechargeMovementComplex"
{
"shinespark": {
"frames": 6
}
}
Exit condition: {
"leaveWithSpark": {}
}
|
|
From: 3
Above Power Bomb Blocks - Top Right Door
To: 5
Above Power Bomb Blocks - Bottom Left Door
Entrance condition: {
"comeInShinecharging": {
"length": 4,
"openEnd": 1
}
}
Requires: "canShinechargeMovementComplex"
{
"shinespark": {
"frames": 4
}
}
Exit condition: {
"leaveWithSpark": {}
}
|
|
From: 3
Above Power Bomb Blocks - Top Right Door
To: 6
Above Power Bomb Blocks - Bottom Right Door
Entrance condition: {
"comeInShinecharged": {
"framesRequired": 150
}
}
Requires: "canShinechargeMovementComplex"
{
"shinespark": {
"frames": 17
}
}
Exit condition: {
"leaveWithSpark": {}
}
|
|
From: 3
Above Power Bomb Blocks - Top Right Door
To: 6
Above Power Bomb Blocks - Bottom Right Door
Entrance condition: {
"comeInShinecharging": {
"length": 4,
"openEnd": 1
}
}
Requires: "canShinechargeMovementComplex"
{
"shinespark": {
"frames": 17
}
}
Exit condition: {
"leaveWithSpark": {}
}
|
|
From: 4
Above Power Bomb Blocks - Middle Left Door
To: 2
Above Power Bomb Blocks - Top Left Door
Entrance condition: {
"comeInShinecharged": {
"framesRequired": 105
}
}
Requires: "HiJump" "canWalljump" "canShinechargeMovementComplex" Exit condition: {
"leaveShinecharged": {
"framesRemaining": "auto"
}
}
|
|
From: 4
Above Power Bomb Blocks - Middle Left Door
To: 2
Above Power Bomb Blocks - Top Left Door
Entrance condition: {
"comeInShinecharged": {
"framesRequired": 130
}
}
Requires: "HiJump" "canShinechargeMovementComplex" Exit condition: {
"leaveShinecharged": {
"framesRemaining": "auto"
}
}
|
|
From: 4
Above Power Bomb Blocks - Middle Left Door
To: 2
Above Power Bomb Blocks - Top Left Door
Entrance condition: {
"comeInShinecharged": {
"framesRequired": 130
}
}
Requires: "canWalljump" "canShinechargeMovementComplex" Exit condition: {
"leaveShinecharged": {
"framesRemaining": "auto"
}
}
|
|
From: 4
Above Power Bomb Blocks - Middle Left Door
To: 2
Above Power Bomb Blocks - Top Left Door
Entrance condition: {
"comeInShinecharged": {
"framesRequired": 110
}
}
Requires: "canWalljump"
"canShinechargeMovementComplex"
{
  "shinespark": {
    "frames": 6
  }
}
Exit condition: {
"leaveWithSpark": {}
}
|
|
From: 4
Above Power Bomb Blocks - Middle Left Door
To: 2
Above Power Bomb Blocks - Top Left Door
Entrance condition: {
"comeInShinecharging": {
"length": 2,
"openEnd": 0
}
}
Requires: "canWalljump" "canShinechargeMovementComplex" Exit condition: {
"leaveShinecharged": {
"framesRemaining": 45
}
}
|
|
From: 4
Above Power Bomb Blocks - Middle Left Door
To: 2
Above Power Bomb Blocks - Top Left Door
Entrance condition: {
"comeInShinecharged": {
"framesRequired": 80
}
}
Requires: "HiJump"
"canWalljump"
"canShinechargeMovementComplex"
{
"shinespark": {
"frames": 7
}
}
Exit condition: {
"leaveWithSpark": {}
}
|
|
From: 4
Above Power Bomb Blocks - Middle Left Door
To: 2
Above Power Bomb Blocks - Top Left Door
Entrance condition: {
"comeInShinecharged": {
"framesRequired": 95
}
}
Requires: "HiJump"
"canShinechargeMovementComplex"
{
"shinespark": {
"frames": 9
}
}
Exit condition: {
"leaveWithSpark": {}
}
|
|
From: 4
Above Power Bomb Blocks - Middle Left Door
To: 2
Above Power Bomb Blocks - Top Left Door
Entrance condition: {
"comeInShinecharging": {
"length": 2,
"openEnd": 0
}
}
Requires: "HiJump" "canShinechargeMovementComplex" Exit condition: {
"leaveShinecharged": {
"framesRemaining": 60
}
}
|
|
From: 4
Above Power Bomb Blocks - Middle Left Door
To: 3
Above Power Bomb Blocks - Top Right Door
Entrance condition: {
"comeInShinecharged": {
"framesRequired": 110
}
}
Requires: "HiJump" "canShinechargeMovementComplex" Exit condition: {
"leaveShinecharged": {
"framesRemaining": "auto"
}
}
|
|
From: 4
Above Power Bomb Blocks - Middle Left Door
To: 3
Above Power Bomb Blocks - Top Right Door
Entrance condition: {
"comeInShinecharged": {
"framesRequired": 145
}
}
Requires: "canWalljump" "canShinechargeMovementComplex" Exit condition: {
"leaveShinecharged": {
"framesRemaining": "auto"
}
}
|
|
From: 4
Above Power Bomb Blocks - Middle Left Door
To: 3
Above Power Bomb Blocks - Top Right Door
Entrance condition: {
"comeInShinecharged": {
"framesRequired": 80
}
}
Requires: "HiJump"
"canShinechargeMovementComplex"
{
"shinespark": {
"frames": 8
}
}
Exit condition: {
"leaveWithSpark": {}
}
|
|
From: 4
Above Power Bomb Blocks - Middle Left Door
To: 3
Above Power Bomb Blocks - Top Right Door
Entrance condition: {
"comeInShinecharged": {
"framesRequired": 120
}
}
Requires: "canShinechargeMovementComplex"
{
"shinespark": {
"frames": 16
}
}
Exit condition: {
"leaveWithSpark": {}
}
|
|
From: 4
Above Power Bomb Blocks - Middle Left Door
To: 3
Above Power Bomb Blocks - Top Right Door
Entrance condition: {
"comeInShinecharging": {
"length": 2,
"openEnd": 0
}
}
Requires: "HiJump" "canShinechargeMovementComplex" Exit condition: {
"leaveShinecharged": {
"framesRemaining": 115
}
}
|
|
From: 4
Above Power Bomb Blocks - Middle Left Door
To: 3
Above Power Bomb Blocks - Top Right Door
Entrance condition: {
"comeInShinecharging": {
"length": 2,
"openEnd": 0
}
}
Requires: "canShinechargeMovementComplex" Exit condition: {
"leaveShinecharged": {
"framesRemaining": 20
}
}
|
|
From: 4
Above Power Bomb Blocks - Middle Left Door
To: 5
Above Power Bomb Blocks - Bottom Left Door
Entrance condition: {
"comeInShinecharged": {
"framesRequired": 110
}
}
Requires: "canShinechargeMovementComplex" Exit condition: {
"leaveShinecharged": {
"framesRemaining": "auto"
}
}
|
|
From: 4
Above Power Bomb Blocks - Middle Left Door
To: 5
Above Power Bomb Blocks - Bottom Left Door
Entrance condition: {
"comeInShinecharged": {
"framesRequired": 90
}
}
Requires: "canShinechargeMovementComplex"
{
"shinespark": {
"frames": 5
}
}
Exit condition: {
"leaveWithSpark": {}
}
|
|
From: 4
Above Power Bomb Blocks - Middle Left Door
To: 5
Above Power Bomb Blocks - Bottom Left Door
Entrance condition: {
"comeInShinecharging": {
"length": 2,
"openEnd": 1
}
}
Requires: "canShinechargeMovementComplex" Exit condition: {
"leaveShinecharged": {
"framesRemaining": 80
}
}
|
|
From: 4
Above Power Bomb Blocks - Middle Left Door
To: 6
Above Power Bomb Blocks - Bottom Right Door
Entrance condition: {
"comeInShinecharged": {
"framesRequired": 125
}
}
Requires: "canShinechargeMovementComplex" Exit condition: {
"leaveShinecharged": {
"framesRemaining": "auto"
}
}
|
|
From: 4
Above Power Bomb Blocks - Middle Left Door
To: 6
Above Power Bomb Blocks - Bottom Right Door
Entrance condition: {
"comeInShinecharged": {
"framesRequired": 85
}
}
Requires: "canShinechargeMovementComplex"
{
"shinespark": {
"frames": 17
}
}
Exit condition: {
"leaveWithSpark": {}
}
|
|
From: 4
Above Power Bomb Blocks - Middle Left Door
To: 6
Above Power Bomb Blocks - Bottom Right Door
Entrance condition: {
"comeInShinecharging": {
"length": 2,
"openEnd": 1
}
}
Requires: "canShinechargeMovementComplex" Exit condition: {
"leaveShinecharged": {
"framesRemaining": 60
}
}
|
|
From: 5
Above Power Bomb Blocks - Bottom Left Door
To: 4
Above Power Bomb Blocks - Middle Left Door
Entrance condition: {
"comeInShinecharged": {
"framesRequired": 95
}
}
Requires: "HiJump" "canShinechargeMovementComplex" Exit condition: {
"leaveShinecharged": {
"framesRemaining": "auto"
}
}
|
|
From: 5
Above Power Bomb Blocks - Bottom Left Door
To: 4
Above Power Bomb Blocks - Middle Left Door
Entrance condition: {
"comeInShinecharged": {
"framesRequired": 130
}
}
Requires: "canWalljump" "canShinechargeMovementComplex" Exit condition: {
"leaveShinecharged": {
"framesRemaining": "auto"
}
}
|
|
From: 5
Above Power Bomb Blocks - Bottom Left Door
To: 4
Above Power Bomb Blocks - Middle Left Door
Entrance condition: {
"comeInShinecharged": {
"framesRequired": 110
}
}
Requires: "canWalljump"
"canShinechargeMovementComplex"
{
"shinespark": {
"frames": 6
}
}
Exit condition: {
"leaveWithSpark": {}
}
|
|
From: 5
Above Power Bomb Blocks - Bottom Left Door
To: 4
Above Power Bomb Blocks - Middle Left Door
Entrance condition: {
"comeInShinecharging": {
"length": 12,
"openEnd": 0
}
}
Requires: "HiJump" "canShinechargeMovementComplex" Exit condition: {
"leaveShinecharged": {
"framesRemaining": 40
}
}
|
|
From: 5
Above Power Bomb Blocks - Bottom Left Door
To: 4
Above Power Bomb Blocks - Middle Left Door
Entrance condition: {
"comeInShinecharging": {
"length": 12,
"openEnd": 0
}
}
Requires: "canTrickyDashJump" "canShinechargeMovementComplex" Exit condition: {
"leaveShinecharged": {
"framesRemaining": 40
}
}
|
|
From: 6
Above Power Bomb Blocks - Bottom Right Door
To: 2
Above Power Bomb Blocks - Top Left Door
Entrance condition: {
"comeInShinecharging": {
"length": 12,
"openEnd": 0
}
}
Requires: "HiJump"
"canShinechargeMovementComplex"
{
"shinespark": {
"frames": 10
}
}
Exit condition: {
"leaveWithSpark": {}
}
|
|
From: 6
Above Power Bomb Blocks - Bottom Right Door
To: 3
Above Power Bomb Blocks - Top Right Door
Entrance condition: {
"comeInShinecharging": {
"length": 12,
"openEnd": 0
}
}
Requires: "HiJump"
"canShinechargeMovementComplex"
{
"shinespark": {
"frames": 9
}
}
Exit condition: {
"leaveWithSpark": {}
}
|
|
From: 6
Above Power Bomb Blocks - Bottom Right Door
To: 4
Above Power Bomb Blocks - Middle Left Door
Entrance condition: {
"comeInShinecharged": {
"framesRequired": 125
}
}
Requires: "HiJump" "canShinechargeMovementComplex" Exit condition: {
"leaveShinecharged": {
"framesRemaining": "auto"
}
}
|
|
From: 6
Above Power Bomb Blocks - Bottom Right Door
To: 4
Above Power Bomb Blocks - Middle Left Door
Entrance condition: {
"comeInShinecharged": {
"framesRequired": 140
}
}
Requires: "canTrickyDashJump" "canShinechargeMovementComplex" Exit condition: {
"leaveShinecharged": {
"framesRemaining": "auto"
}
}
|
|
From: 6
Above Power Bomb Blocks - Bottom Right Door
To: 4
Above Power Bomb Blocks - Middle Left Door
Entrance condition: {
"comeInShinecharged": {
"framesRequired": 130
}
}
Requires: "canTrickyDashJump" "canShinechargeMovementComplex" Exit condition: {
"leaveShinecharged": {
"framesRemaining": "auto"
}
}
|
|
From: 6
Above Power Bomb Blocks - Bottom Right Door
To: 4
Above Power Bomb Blocks - Middle Left Door
Entrance condition: {
"comeInShinecharging": {
"length": 12,
"openEnd": 0
}
}
Requires: "HiJump" "canShinechargeMovementComplex" Exit condition: {
"leaveShinecharged": {
"framesRemaining": 80
}
}
|
|
From: 6
Above Power Bomb Blocks - Bottom Right Door
To: 4
Above Power Bomb Blocks - Middle Left Door
Entrance condition: {
"comeInShinecharging": {
"length": 12,
"openEnd": 0
}
}
Requires: "canWalljump" "canShinechargeMovementComplex" Exit condition: {
"leaveShinecharged": {
"framesRemaining": 35
}
}
|
|
From: 6
Above Power Bomb Blocks - Bottom Right Door
To: 4
Above Power Bomb Blocks - Middle Left Door
Entrance condition: {
"comeInShinecharging": {
"length": 12,
"openEnd": 0
}
}
Requires: "canWalljump" "canShinechargeMovementComplex" Exit condition: {
"leaveShinecharged": {
"framesRemaining": 55
}
}
|
|
From: 9
Right Etecoon Shaft - Top Left Door
To: 10
Right Etecoon Shaft - Bottom Left Door
Notable: true 
Run from left to right to gain a shinecharge, then immediately moonfall down the shaft. There is just barely enough time to shoot the door open (if not already open) and spark out. Requires: {
"canShineCharge": {
"usedTiles": 17,
"openEnd": 0
}
}
"canMoonfall"
"canShinechargeMovementComplex"
{
"shinespark": {
"frames": 12
}
}
Exit condition: {
"leaveWithSpark": {}
}
|
|
From: 1
Top Left Door
To: 4
Item (Through the Pipe)
Spark flush against the right wall (diagonal helps) then quickly down grab or down back after to barely get into the pipe. Requires: "Morph"
"canDownGrab"
"canShinechargeMovementComplex"
{
"canShineCharge": {
"usedTiles": 18,
"openEnd": 1
}
}
{
"shinespark": {
"frames": 15
}
}
|
|
From: 1
Top Left Door
To: 5
Junction The Left End of Morph Tube
Spark flush against the right wall (diagonal helps) then quickly down back to barely get into the pipe. Requires: "canDownBack"
"canShinechargeMovementComplex"
{
"canShineCharge": {
"usedTiles": 18,
"openEnd": 1
}
}
{
"shinespark": {
"frames": 15
}
}
|
|
Use the runway below the bug pipe to gain a shinecharge. Use HiJump to reach the door with shinecharge frames remaining. Requires: "HiJump"
{
"canShineCharge": {
"usedTiles": 17,
"openEnd": 1
}
}
"canShinechargeMovementComplex"
Exit condition: {
"leaveShinecharged": {
"framesRemaining": 25
}
}
|
|
Store a shinecharge with enough space remaining to run and jump over all the steps with a single jump. Requires: {
"or": [
"canDodgeWhileShooting",
"ScrewAttack",
"h_hasBeamUpgrade"
]
}
{
"canShineCharge": {
"usedTiles": 25,
"openEnd": 0
}
}
"canShinechargeMovementComplex"
Exit condition: {
"leaveShinecharged": {
"framesRemaining": 75
}
}
|
|
From: 2
Top Right Door
To: 2
Top Right Door
Store a shinecharge with enough space remaining to run and jump over all the steps with a single jump. Requires: {
"canShineCharge": {
"usedTiles": 25,
"openEnd": 0
}
}
"canShinechargeMovementComplex"
Exit condition: {
"leaveShinecharged": {
"framesRemaining": 70
}
}
|
|
From: 2
Right Side - Top Door
To: 2
Right Side - Top Door
Requires: {
"canShineCharge": {
"usedTiles": 25,
"openEnd": 1
}
}
"canShinechargeMovementComplex"
{
"or": [
"HiJump",
"canWalljump"
]
}
{
"shinespark": {
"frames": 28
}
}
Exit condition: {
"leaveWithSpark": {}
}
|
|
From: 7
Right Side - Bottom Middle Door (Behind the Super Block)
To: 7
Right Side - Bottom Middle Door (Behind the Super Block)
Requires: {
"canShineCharge": {
"usedTiles": 24,
"openEnd": 1
}
}
"canShinechargeMovementComplex"
"Morph"
{
"obstaclesCleared": [
"F"
]
}
Exit condition: {
"leaveShinecharged": {
"framesRemaining": 25
}
}
|
|
From: 13
Central Junction
To: 1
Left Side - Top Door
Notable: true 
Shinecharge towards the top right door. Then turn around for a fast mockball after jumping the bug pipe. Requires: {
"obstaclesCleared": [
"A"
]
}
{
"canShineCharge": {
"usedTiles": 17,
"openEnd": 0
}
}
"canShinechargeMovementComplex"
"canMockball"
{
"shinespark": {
"frames": 10
}
}
Exit condition: {
"leaveWithSpark": {}
}
|
|
From: 2
Bottom Left Door
To: 3
Right Door
Notable: true 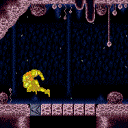
Quickly wall jump up the right wall and shinespark up to barely get above the speed blocks without any tanks. Requires: "canFastWalljumpClimb"
"canShinechargeMovementComplex"
"canMidairShinespark"
{
"canShineCharge": {
"usedTiles": 33,
"openEnd": 2
}
}
{
"shinespark": {
"frames": 73,
"excessFrames": 3
}
}
|
|
Requires: "HiJump"
"canFastWalljumpClimb"
"canShinechargeMovementComplex"
"canMidairShinespark"
{
"canShineCharge": {
"usedTiles": 33,
"openEnd": 2
}
}
{
"shinespark": {
"frames": 67,
"excessFrames": 3
}
}
|
|
From: 1
Top Right Door
To: 1
Top Right Door
Stand to the right of the center spike Run to the left, and continue running left while getting knocked back right by the spike. The spike i-frames allow shortcharging while running through the left two spike blocks. After gaining a shinecharge, turn back right, run, and jump through the door. Requires: {
"obstaclesCleared": [
"A"
]
}
{
"obstaclesNotCleared": [
"B"
]
}
{
"canShineCharge": {
"usedTiles": 23,
"openEnd": 0
}
}
{
"spikeHits": 1
}
"canIframeSpikeJump"
"canShinechargeMovementComplex"
Exit condition: {
"leaveShinecharged": {
"framesRemaining": 62
}
}
|
|
From: 3
Item
To: 4
Top Left Junction
Notable: true 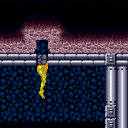
Gain a shinecharge by running right-to-left, either using the short runway (with unbroken Super block) or an extended runway by taking a spike hit. Then spin jump, hit the ceiling, aim down, break the Super block, and turn around to quick drop through the crumble block. During the item message box, buffer the inputs to turn around to the right and jump. Once under the crumble block (the left part of it), press up while still holding jump, to immediately activate the spark and make it up in time. Requires: {
"or": [
{
"canShineCharge": {
"usedTiles": 16,
"openEnd": 0
}
},
{
"and": [
{
"canShineCharge": {
"usedTiles": 23,
"openEnd": 0
}
},
{
"spikeHits": 1
},
"canIframeSpikeJump"
]
}
]
}
"canShinechargeMovementComplex"
"canQuickCrumbleEscape"
{
"or": [
{
"shinespark": {
"frames": 19,
"excessFrames": 7
}
},
{
"and": [
{
"shinespark": {
"frames": 19,
"excessFrames": 15
}
},
"canCrumbleJump"
]
}
]
}
{
"obstaclesCleared": [
"A",
"B"
]
}
|
|
Stand to the right of the right-most bug pipe, and run to the right to gain a shortcharge. Run back to the left, jump over the bug pipes with one jump, and exit through the left door. Requires: {
"canShineCharge": {
"usedTiles": 21,
"steepUpTiles": 2,
"openEnd": 0
}
}
"canShinechargeMovementComplex"
Exit condition: {
"leaveShinecharged": {
"framesRemaining": 15
}
}
|
|
From: 1
Left Door
To: 1
Left Door
Stand to the right of the right-most bug pipe, and run to the right to gain a shortcharge. Run back to the left, Space Jump over the bug pipes, and exit through the left door. Requires: {
"canShineCharge": {
"usedTiles": 21,
"steepUpTiles": 2,
"openEnd": 0
}
}
"SpaceJump"
"canShinechargeMovementComplex"
Exit condition: {
"leaveShinecharged": {
"framesRemaining": 25
}
}
|
|
Run and jump onto the platform in the middle of the room. Fire a shot and activate the shinespark wind-up. Wait until the shot hits the door before sparking. Entrance condition: {
"comeInShinecharged": {
"framesRequired": 110
}
}
Requires: "canShinechargeMovementComplex"
{
"shinespark": {
"frames": 26
}
}
Exit condition: {
"leaveWithSpark": {}
}
|
|
Run and jump onto the platform in the middle of the room, using Screw Attack to avoid being knocked back by the Skrees. Fire a shot and activate the shinespark wind-up. Wait until the shot hits the door before sparking. Entrance condition: {
"comeInShinecharged": {
"framesRequired": 110
}
}
Requires: "ScrewAttack"
"canShinechargeMovementComplex"
{
"shinespark": {
"frames": 26
}
}
Exit condition: {
"leaveWithSpark": {}
}
|
|
From: 1
Left Door
To: 2
Bottom Right Door
Run and jump onto the third single-tile platform, then jump over the Cacatac (or kill it). Fire a shot and activate the shinespark wind-up. Wait until the shot hits the door before sparking. Entrance condition: {
"comeInShinecharged": {
"framesRequired": 140
}
}
Requires: "canShinechargeMovementComplex"
{
"or": [
{
"enemyDamage": {
"enemy": "Cacatac",
"type": "spike",
"hits": 1
}
},
{
"enemyKill": {
"enemies": [
[
"Cacatac"
]
],
"explicitWeapons": [
"Missile",
"Super",
"Wave",
"Spazer",
"Plasma"
]
}
}
]
}
{
"shinespark": {
"frames": 24
}
}
Exit condition: {
"leaveWithSpark": {}
}
|
|
From: 2
Bottom Right Door
To: 1
Left Door
Kill the Cacatac, and reach the center of the room. Fire a shot and activate the shinespark wind-up. Wait until the shot hits the door before sparking. Entrance condition: {
"comeInShinecharging": {
"length": 3,
"openEnd": 1
}
}
Requires: "canShinechargeMovementComplex"
{
"shinespark": {
"frames": 24
}
}
Exit condition: {
"leaveWithSpark": {}
}
|
|
Entrance condition: {
"comeInShinecharged": {
"framesRequired": 160
}
}
Requires: "canShinechargeMovementComplex" Exit condition: {
"leaveShinecharged": {
"framesRemaining": "auto"
}
}
|
|
From: 1
Top Left Door
To: 2
Middle Left Door
Entrance condition: {
"comeInShinecharging": {
"length": 4,
"openEnd": 1
}
}
Requires: "canShinechargeMovementComplex" Exit condition: {
"leaveShinecharged": {
"framesRemaining": 35
}
}
|
|
Entrance condition: {
"comeInShinecharged": {
"framesRequired": 115
}
}
Requires: "canShinechargeMovementComplex" Exit condition: {
"leaveShinecharged": {
"framesRemaining": "auto"
}
}
|
|
From: 1
Top Left Door
To: 4
Bottom Right Door
Entrance condition: {
"comeInShinecharging": {
"length": 4,
"openEnd": 1
}
}
Requires: "canShinechargeMovementComplex" Exit condition: {
"leaveShinecharged": {
"framesRemaining": 80
}
}
|
|
Entrance condition: {
"comeInShinecharged": {
"framesRequired": 105
}
}
Requires: "canShinechargeMovementComplex" Exit condition: {
"leaveShinecharged": {
"framesRemaining": "auto"
}
}
|
|
Entrance condition: {
"comeInShinecharged": {
"framesRequired": 85
}
}
Requires: "HiJump" "canShinechargeMovementComplex" Exit condition: {
"leaveShinecharged": {
"framesRemaining": "auto"
}
}
|
|
From: 1
Top Left Door
To: 6
Elevator
Entrance condition: {
"comeInShinecharging": {
"length": 4,
"openEnd": 0
}
}
Requires: "canShinechargeMovementComplex" Exit condition: {
"leaveShinecharged": {
"framesRemaining": 60
}
}
|
|
From: 1
Top Left Door
To: 6
Elevator
Entrance condition: {
"comeInShinecharging": {
"length": 4,
"openEnd": 0
}
}
Requires: "HiJump" "canShinechargeMovementComplex" Exit condition: {
"leaveShinecharged": {
"framesRemaining": 80
}
}
|
|
From: 2
Middle Left Door
To: 4
Bottom Right Door
Entrance condition: {
"comeInShinecharged": {
"framesRequired": 90
}
}
Requires: "HiJump"
"canShinechargeMovementComplex"
{
"shinespark": {
"frames": 4
}
}
Exit condition: {
"leaveWithSpark": {}
}
|
|
From: 4
Bottom Right Door
To: 1
Top Left Door
Entrance condition: {
"comeInShinecharged": {
"framesRequired": 110
}
}
Requires: "HiJump" "canShinechargeMovementComplex" Exit condition: {
"leaveShinecharged": {
"framesRemaining": "auto"
}
}
|
|
From: 4
Bottom Right Door
To: 1
Top Left Door
Entrance condition: {
"comeInShinecharged": {
"framesRequired": 155
}
}
Requires: "canWalljump" "canShinechargeMovementComplex" Exit condition: {
"leaveShinecharged": {
"framesRemaining": "auto"
}
}
|
|
From: 4
Bottom Right Door
To: 1
Top Left Door
Entrance condition: {
"comeInShinecharged": {
"framesRequired": 85
}
}
Requires: "HiJump"
"canShinechargeMovementComplex"
{
"shinespark": {
"frames": 9
}
}
Exit condition: {
"leaveWithSpark": {}
}
|
|
From: 4
Bottom Right Door
To: 1
Top Left Door
Entrance condition: {
"comeInShinecharged": {
"framesRequired": 125
}
}
Requires: "canWalljump"
"canShinechargeMovementComplex"
{
"shinespark": {
"frames": 10
}
}
Exit condition: {
"leaveWithSpark": {}
}
|
|
From: 4
Bottom Right Door
To: 1
Top Left Door
Entrance condition: {
"comeInShinecharging": {
"length": 2,
"openEnd": 0
}
}
Requires: "HiJump" "canShinechargeMovementComplex" Exit condition: {
"leaveShinecharged": {
"framesRemaining": 60
}
}
|
|
From: 4
Bottom Right Door
To: 1
Top Left Door
Entrance condition: {
"comeInShinecharging": {
"length": 2,
"openEnd": 0
}
}
Requires: "canWalljump" "canShinechargeMovementComplex" Exit condition: {
"leaveShinecharged": {
"framesRemaining": 25
}
}
|
|
Entrance condition: {
"comeInShinecharged": {
"framesRequired": 110
}
}
Requires: "canShinechargeMovementComplex" Exit condition: {
"leaveShinecharged": {
"framesRemaining": "auto"
}
}
|
|
From: 4
Bottom Right Door
To: 2
Middle Left Door
Entrance condition: {
"comeInShinecharging": {
"length": 2,
"openEnd": 1
}
}
Requires: "canShinechargeMovementComplex" Exit condition: {
"leaveShinecharged": {
"framesRemaining": 75
}
}
|
|
Entrance condition: {
"comeInShinecharged": {
"framesRequired": 105
}
}
Requires: "canShinechargeMovementComplex" Exit condition: {
"leaveShinecharged": {
"framesRemaining": "auto"
}
}
|
|
From: 2
Right Door
To: 1
Left Door
Use the really small runway in the pit in the middle of the room. The door must be already opened. Requires: {
"obstaclesCleared": [
"A"
]
}
"canMidairShinespark"
"canShinechargeMovementComplex"
{
"canShineCharge": {
"usedTiles": 13,
"openEnd": 0
}
}
{
"shinespark": {
"frames": 107
}
}
Exit condition: {
"leaveWithSpark": {}
}
|
|
Use the really small runway in the pit in the middle of the room. Requires: "canMidairShinespark"
"canShinechargeMovementComplex"
{
"canShineCharge": {
"usedTiles": 13,
"openEnd": 0
}
}
{
"shinespark": {
"frames": 107,
"excessFrames": 6
}
}
|
|
From: 2
Right Door
To: 2
Right Door
Requires opening the door, then going to the pit in the middle of the room to use the really small runway. Requires: "canShinechargeMovementComplex"
"canMidairShinespark"
{
"canShineCharge": {
"usedTiles": 13,
"openEnd": 0
}
}
{
"shinespark": {
"frames": 50
}
}
Exit condition: {
"leaveWithSpark": {}
}
|
|
Entrance condition: {
"comeInShinecharged": {
"framesRequired": 130
}
}
Requires: "HiJump" "canShinechargeMovementComplex" Exit condition: {
"leaveShinecharged": {
"framesRemaining": "auto"
}
}
|
|
From: 1
Left Door
To: 2
Top Right Door
Entrance condition: {
"comeInShinecharged": {
"framesRequired": 105
}
}
Requires: "HiJump"
"canShinechargeMovementComplex"
{
"shinespark": {
"frames": 6
}
}
Exit condition: {
"leaveWithSpark": {}
}
|
|
From: 1
Left Door
To: 3
Bottom Right Door
Run and jump to the center of the room. Fire a shot to open the door, jump over the pillar, and spark out of the room. Entrance condition: {
"comeInShinecharged": {
"framesRequired": 125
}
}
Requires: "canShinechargeMovementComplex"
{
"shinespark": {
"frames": 20
}
}
Exit condition: {
"leaveWithSpark": {}
}
|
|
Entrance condition: {
"comeInShinecharged": {
"framesRequired": 145
}
}
Requires: "canShinechargeMovementComplex" Exit condition: {
"leaveShinecharged": {
"framesRemaining": "auto"
}
}
|
|
From: 3
Bottom Right Door
To: 1
Left Door
Run and jump to the center of the room and over the pillar. Fire a shot and activate the shinespark wind-up. Wait until the shot hits the door before sparking. Entrance condition: {
"comeInShinecharged": {
"framesRequired": 110
}
}
Requires: "canShinechargeMovementComplex"
{
"shinespark": {
"frames": 25
}
}
Exit condition: {
"leaveWithSpark": {}
}
|
|
Entrance condition: {
"comeInShinecharged": {
"framesRequired": 30
}
}
Requires: "canShinechargeMovementComplex" Exit condition: {
"leaveShinecharged": {
"framesRemaining": "auto"
}
}
|
|
From: 1
Left Door
To: 2
Elevator
Entrance condition: {
"comeInShinecharging": {
"length": 13,
"openEnd": 0
}
}
Requires: "canShinechargeMovementComplex" Exit condition: {
"leaveShinecharged": {
"framesRemaining": 130
}
}
|
|
From: 1
Left Door
To: 2
Elevator
Entrance condition: {
"comeInShinecharging": {
"length": 6,
"openEnd": 0
}
}
Requires: "canStopOnADime" "canShinechargeMovementComplex" Exit condition: {
"leaveShinecharged": {
"framesRemaining": 170
}
}
|
|
Entrance condition: {
"comeInShinecharged": {
"framesRequired": 45
}
}
Requires: "canShinechargeMovementComplex" Exit condition: {
"leaveShinecharged": {
"framesRemaining": "auto"
}
}
|
|
From: 2
Elevator
To: 1
Left Door
Entrance condition: {
"comeInShinecharged": {
"framesRequired": 15
}
}
Requires: "canShinechargeMovementComplex"
{
"shinespark": {
"frames": 12
}
}
Exit condition: {
"leaveWithSpark": {}
}
|
|
From: 5
Kihunter Junction
To: 2
Bottom Right Door
Notable: true 
Charge a spark, then break the shot blocks, drop through, and spark out the bottom right door. Requires: "canShinechargeMovementComplex"
{
"obstaclesCleared": [
"C"
]
}
{
"obstaclesNotCleared": [
"D"
]
}
{
"canShineCharge": {
"usedTiles": 25,
"openEnd": 0
}
}
{
"shinespark": {
"frames": 20
}
}
Exit condition: {
"leaveWithSpark": {}
}
|
|
Break spin to trigger the transition early, or use a wall jump. Entrance condition: {
"comeInShinecharged": {
"framesRequired": 65
}
}
Requires: "canShinechargeMovementComplex"
{
"heatFrames": 65
}
Exit condition: {
"leaveShinecharged": {
"framesRemaining": "auto"
}
}
|
|
Entrance condition: {
"comeInShinecharged": {
"framesRequired": 50
}
}
Requires: "HiJump"
"canShinechargeMovementComplex"
{
"heatFrames": 50
}
Exit condition: {
"leaveShinecharged": {
"framesRemaining": "auto"
}
}
|
|
Entrance condition: {
"comeInShinecharged": {
"framesRequired": 50
},
"comesThroughToilet": "any"
}
Requires: "canShinechargeMovementComplex"
{
"heatFrames": 50
}
Exit condition: {
"leaveShinecharged": {
"framesRemaining": "auto"
}
}
|
|
From: 3
Top Door
To: 2
Right Door
Entrance condition: {
"comeInShinecharged": {
"framesRequired": 30
},
"comesThroughToilet": "any"
}
Requires: "canShinechargeMovementComplex"
{
"shinespark": {
"frames": 10,
"excessFrames": 0
}
}
{
"heatFrames": 50
}
Exit condition: {
"leaveWithSpark": {}
}
|
|
Shoot diagonally to clear the Skree and shot block before jumping and sparking diagonally mid-air to the above area. Entrance condition: {
"comeInShinecharging": {
"length": 2,
"openEnd": 0
}
}
Requires: "canShinechargeMovementComplex"
"canMidairShinespark"
{
"heatFrames": 300
}
{
"shinespark": {
"frames": 14,
"excessFrames": 3
}
}
|
|
From: 1
Bottom Left Door
To: 2
Top Right Door
Shoot diagonally to clear the Skree and shot block before jumping and sparking diagonally mid-air to the above area. Entrance condition: {
"comeInShinecharged": {
"framesRequired": 80
}
}
Requires: "canShinechargeMovementComplex"
"canMidairShinespark"
{
"heatFrames": 270
}
{
"shinespark": {
"frames": 13,
"excessFrames": 3
}
}
|
|
From: 1
Left Side - Top Door
To: 2
Left Side - Top Middle Door
Entrance condition: {
"comeInShinecharging": {
"length": 3,
"openEnd": 1
}
}
Requires: "canShinechargeMovementComplex"
{
"or": [
{
"enemyKill": {
"enemies": [
[
"Waver"
],
[
"Waver"
]
],
"explicitWeapons": [
"Wave",
"Spazer",
"Plasma",
"Missile",
"Super",
"Grapple"
]
}
},
{
"enemyDamage": {
"enemy": "Waver",
"type": "contact",
"hits": 1
}
}
]
}
Exit condition: {
"leaveShinecharged": {
"framesRemaining": 70
}
}
|
|
Jump over the Waver, fire a shot mid-air, and activate the shinespark wind-up. Wait until the shot is at a specific position before sparking. Sparking too late will cause the shot to despawn before reaching the door. Sparking too early will cause Samus to bonk the door as it will not yet be open. A beam shot, Missile, or Super can be used. Entrance condition: {
"comeInShinecharged": {
"framesRequired": 50
}
}
Requires: "canHeroShot"
"canShinechargeMovementComplex"
{
"shinespark": {
"frames": 35,
"excessFrames": 0
}
}
Exit condition: {
"leaveWithSpark": {}
}
|
|
From: 2
Left Side - Top Middle Door
To: 1
Left Side - Top Door
Entrance condition: {
"comeInShinecharged": {
"framesRequired": 105
}
}
Requires: "HiJump"
"SpaceJump"
"canShinechargeMovementComplex"
{
"shinespark": {
"frames": 20,
"excessFrames": 0
}
}
Exit condition: {
"leaveWithSpark": {}
}
|
|
From: 2
Left Side - Top Middle Door
To: 1
Left Side - Top Door
Entrance condition: {
"comeInShinecharging": {
"length": 2,
"openEnd": 0
}
}
Requires: "HiJump" "SpaceJump" "canShinechargeMovementComplex" Exit condition: {
"leaveShinecharged": {
"framesRemaining": 35
}
}
|
|
From: 2
Left Side - Top Middle Door
To: 7
Top Right Door
Entrance condition: {
"comeInShinecharging": {
"length": 2,
"openEnd": 0
}
}
Requires: "HiJump"
"SpaceJump"
"canHeroShot"
"canShinechargeMovementComplex"
{
"shinespark": {
"frames": 31,
"excessFrames": 0
}
}
Exit condition: {
"leaveWithSpark": {}
}
|
|
From: 3
Left Side - Bottom Middle Door
To: 1
Left Side - Top Door
Entrance condition: {
"comeInShinecharging": {
"length": 5,
"openEnd": 0
}
}
Requires: "canShinechargeMovementComplex"
{
"shinespark": {
"frames": 20,
"excessFrames": 2
}
}
|
|
From: 3
Left Side - Bottom Middle Door
To: 2
Left Side - Top Middle Door
Entrance condition: {
"comeInShinecharging": {
"length": 5,
"openEnd": 0
}
}
Requires: "canShinechargeMovementComplex" Exit condition: {
"leaveShinecharged": {
"framesRemaining": 45
}
}
|
|
From: 3
Left Side - Bottom Middle Door
To: 2
Left Side - Top Middle Door
Entrance condition: {
"comeInShinecharging": {
"length": 5,
"openEnd": 0
}
}
Requires: "HiJump"
{
"enemyDamage": {
"enemy": "Waver",
"type": "contact",
"hits": 1
}
}
"canShinechargeMovementComplex"
Exit condition: {
"leaveShinecharged": {
"framesRemaining": 70
}
}
|
|
From: 3
Left Side - Bottom Middle Door
To: 2
Left Side - Top Middle Door
Entrance condition: {
"comeInShinecharged": {
"framesRequired": 125
}
}
Requires: "canShinechargeMovementComplex"
{
"shinespark": {
"frames": 5
}
}
Exit condition: {
"leaveWithSpark": {}
}
|
|
From: 3
Left Side - Bottom Middle Door
To: 2
Left Side - Top Middle Door
Entrance condition: {
"comeInShinecharged": {
"framesRequired": 90
}
}
Requires: "HiJump"
"canShinechargeMovementComplex"
{
"enemyDamage": {
"enemy": "Waver",
"type": "contact",
"hits": 1
}
}
{
"shinespark": {
"frames": 7,
"excessFrames": 0
}
}
Exit condition: {
"leaveWithSpark": {}
}
|
|
From: 3
Left Side - Bottom Middle Door
To: 7
Top Right Door
Diagonal spark from the Save Room Door steps. Entrance condition: {
"comeInShinecharging": {
"length": 5,
"openEnd": 0
}
}
Requires: "canShinechargeMovementComplex"
{
"shinespark": {
"frames": 26
}
}
|
|
From: 3
Left Side - Bottom Middle Door
To: 7
Top Right Door
Diagonal spark from the Save Room Door steps. Entrance condition: {
"comeInShinecharged": {
"framesRequired": 100
}
}
Requires: "canShinechargeMovementComplex"
{
"shinespark": {
"frames": 26
}
}
|
|
Entrance condition: {
"comeInShinecharged": {
"framesRequired": 70
},
"comesThroughToilet": "any"
}
Requires: "canShinechargeMovementComplex" Exit condition: {
"leaveShinecharged": {
"framesRemaining": "auto"
}
}
|
|
From: 6
Middle Right Door
To: 1
Left Side - Top Door
Entrance condition: {
"comeInShinecharged": {
"framesRequired": 115
}
}
Requires: "canMidairShinespark"
"canShinechargeMovementComplex"
{
"shinespark": {
"frames": 30,
"excessFrames": 6
}
}
|
|
From: 6
Middle Right Door
To: 1
Left Side - Top Door
Entrance condition: {
"comeInShinecharging": {
"length": 4,
"openEnd": 0
}
}
Requires: "canMidairShinespark"
"canShinechargeMovementComplex"
{
"shinespark": {
"frames": 30,
"excessFrames": 6
}
}
|
|
From: 6
Middle Right Door
To: 7
Top Right Door
Entrance condition: {
"comeInShinecharged": {
"framesRequired": 120
}
}
Requires: "canMidairShinespark"
"canShinechargeMovementComplex"
{
"shinespark": {
"frames": 15
}
}
Exit condition: {
"leaveWithSpark": {}
}
|
|
From: 6
Middle Right Door
To: 7
Top Right Door
Entrance condition: {
"comeInShinecharged": {
"framesRequired": 80
}
}
Requires: "HiJump"
"canMidairShinespark"
"canShinechargeMovementComplex"
{
"shinespark": {
"frames": 11
}
}
Exit condition: {
"leaveWithSpark": {}
}
|
|
From: 6
Middle Right Door
To: 7
Top Right Door
Entrance condition: {
"comeInShinecharging": {
"length": 4,
"openEnd": 0
}
}
Requires: "canShinechargeMovementComplex" "HiJump" "canWalljump" Exit condition: {
"leaveShinecharged": {
"framesRemaining": 45
}
}
|
|
From: 7
Top Right Door
To: 1
Left Side - Top Door
Dealing with spikes is up to luck. It is possible to shoot the Cacatac while jumping towards it. Entrance condition: {
"comeInShinecharged": {
"framesRequired": 100
}
}
Requires: "canShinechargeMovementComplex"
"canMidairShinespark"
"canCarefulJump"
{
"shinespark": {
"frames": 30,
"excessFrames": 6
}
}
|
|
From: 7
Top Right Door
To: 1
Left Side - Top Door
Dealing with spikes is up to luck. It is possible to shoot the Cacatac while jumping towards it. Entrance condition: {
"comeInShinecharging": {
"length": 2.5,
"openEnd": 1
}
}
Requires: "canShinechargeMovementComplex"
"canMidairShinespark"
"canCarefulJump"
{
"shinespark": {
"frames": 30,
"excessFrames": 6
}
}
|
|
From: 7
Top Right Door
To: 1
Left Side - Top Door
Kill the Cacatac and quickly jump over to its platform. Shoot towards the top-left door to open it, then follow the shot by jumping over the pit before initiating the shinespark. Entrance condition: {
"comeInShinecharging": {
"length": 2.5,
"openEnd": 1
}
}
Requires: "canShinechargeMovementComplex"
"canMidairShinespark"
"canTrickyJump"
"canHeroShot"
{
"shinespark": {
"frames": 25
}
}
{
"or": [
{
"and": [
"Wave",
"Spazer"
]
},
"Plasma",
{
"ammo": {
"type": "Missile",
"count": 2
}
},
{
"ammo": {
"type": "Super",
"count": 2
}
}
]
}
|
|
Entrance condition: {
"comeInShinecharged": {
"framesRequired": 120
}
}
Requires: "canShinechargeMovementComplex" Exit condition: {
"leaveShinecharged": {
"framesRemaining": "auto"
}
}
|
|
From: 4
Bottom Junction (Cleared Runway)
To: 1
Left Door
Kill the enemies, break the shot block, then use the bottom to charge a spark. Quickly climb up before the block respawns, and continue through the left door. Requires: "HiJump"
"canShinechargeMovementComplex"
{
"canShineCharge": {
"usedTiles": 33,
"openEnd": 2
}
}
{
"or": [
"canPreciseWalljump",
"canTrickyJump",
"SpaceJump"
]
}
{
"heatFrames": 540
}
Exit condition: {
"leaveShinecharged": {
"framesRemaining": 35
}
}
|
|
From: 4
Bottom Junction (Cleared Runway)
To: 1
Left Door
Kill the enemies, then use the bottom to charge a spark. Shoot the shot block from the ground and follow it up so that it breaks, and continue through the left door. Requires: "HiJump"
"canShinechargeMovementComplex"
"canHeroShot"
{
"canShineCharge": {
"usedTiles": 33,
"openEnd": 2
}
}
{
"or": [
"canPreciseWalljump",
"canTrickyJump",
"SpaceJump"
]
}
{
"heatFrames": 310
}
Exit condition: {
"leaveShinecharged": {
"framesRemaining": 25
}
}
|
|
From: 4
Bottom Junction (Cleared Runway)
To: 2
Right Door
Kill the enemies and use the bottom to charge a spark. Quickly climb then spark through the right door. Requires: "HiJump"
"canShinechargeMovementComplex"
{
"canShineCharge": {
"usedTiles": 33,
"openEnd": 2
}
}
{
"heatFrames": 320
}
Exit condition: {
"leaveShinecharged": {
"framesRemaining": 60
}
}
|
|
Requires: "canShinechargeMovementComplex"
"HiJump"
{
"or": [
"SpaceJump",
{
"and": [
"canPreciseWalljump",
"canTrickyJump"
]
}
]
}
{
"heatFrames": 400
}
{
"canShineCharge": {
"usedTiles": 28,
"gentleUpTiles": 3,
"gentleDownTiles": 3,
"openEnd": 0
}
}
Exit condition: {
"leaveShinecharged": {
"framesRemaining": 30
}
}
|
|
Entrance condition: {
"comeInShinecharged": {
"framesRequired": 90
}
}
Requires: "canShinechargeMovementComplex" Exit condition: {
"leaveShinecharged": {
"framesRemaining": "auto"
}
}
|
|
Entrance condition: {
"comeInShinecharged": {
"framesRequired": 90
}
}
Requires: "canShinechargeMovementComplex" Exit condition: {
"leaveShinecharged": {
"framesRemaining": "auto"
}
}
|
|
From: 1
Left Door
To: 4
Bottom of Elevator Ride
Entrance condition: {
"comeInShinecharged": {
"framesRequired": 30
}
}
Requires: "canShinechargeMovementComplex"
"h_LowerNorfairElevatorDownwardFrames"
{
"heatFrames": 30
}
Exit condition: {
"leaveShinecharged": {
"framesRemaining": "auto"
}
}
|
|
From: 2
Right Door
To: 4
Bottom of Elevator Ride
Entrance condition: {
"comeInShinecharged": {
"framesRequired": 30
}
}
Requires: "canShinechargeMovementComplex"
"h_LowerNorfairElevatorDownwardFrames"
{
"heatFrames": 30
}
Exit condition: {
"leaveShinecharged": {
"framesRemaining": "auto"
}
}
|
|
From: 4
Bottom of Elevator Ride
To: 1
Left Door
Entrance condition: {
"comeInShinecharged": {
"framesRequired": 50
}
}
Requires: "canShinechargeMovementComplex"
"h_LowerNorfairElevatorUpwardFrames"
{
"heatFrames": 50
}
Exit condition: {
"leaveShinecharged": {
"framesRemaining": "auto"
}
}
|
|
From: 4
Bottom of Elevator Ride
To: 2
Right Door
Entrance condition: {
"comeInShinecharged": {
"framesRequired": 50
}
}
Requires: "canShinechargeMovementComplex"
"h_LowerNorfairElevatorUpwardFrames"
{
"heatFrames": 50
}
Exit condition: {
"leaveShinecharged": {
"framesRemaining": "auto"
}
}
|
|
Entrance condition: {
"comeInShinecharged": {
"framesRequired": 90
}
}
Requires: "canShinechargeMovementComplex" Exit condition: {
"leaveShinecharged": {
"framesRemaining": "auto"
}
}
|
|
Entrance condition: {
"comeInShinecharged": {
"framesRequired": 90
}
}
Requires: "canShinechargeMovementComplex" Exit condition: {
"leaveShinecharged": {
"framesRemaining": "auto"
}
}
|
|
Entrance condition: {
"comeInShinecharged": {
"framesRequired": 115
},
"comesThroughToilet": "any"
}
Requires: "canShinechargeMovementComplex"
{
"heatFrames": 115
}
Exit condition: {
"leaveShinecharged": {
"framesRemaining": "auto"
}
}
|
|
From: 1
Top Door
To: 2
Top Right Door
Entrance condition: {
"comeInShinecharged": {
"framesRequired": 100
},
"comesThroughToilet": "any"
}
Requires: "canShinechargeMovementComplex"
{
"heatFrames": 120
}
{
"shinespark": {
"frames": 5
}
}
Exit condition: {
"leaveWithSpark": {}
}
|
|
Entrance condition: {
"comeInShinecharged": {
"framesRequired": 140
}
}
Requires: "canShinechargeMovementComplex"
"HiJump"
{
"heatFrames": 140
}
Exit condition: {
"leaveShinecharged": {
"framesRemaining": "auto"
}
}
|
|
Entrance condition: {
"comeInShinecharging": {
"length": 3,
"openEnd": 0
}
}
Requires: "canShinechargeMovementComplex"
"HiJump"
{
"heatFrames": 150
}
Exit condition: {
"leaveShinecharged": {
"framesRemaining": 35
}
}
|
|
Entrance condition: {
"comeInShinecharging": {
"length": 3,
"openEnd": 0
}
}
Requires: "canShinechargeMovementComplex"
{
"heatFrames": 175
}
{
"shinespark": {
"frames": 8
}
}
Exit condition: {
"leaveWithSpark": {}
}
|
|
Entrance condition: {
"comeInShinecharged": {
"framesRequired": 140
}
}
Requires: "canShinechargeMovementComplex"
{
"heatFrames": 140
}
Exit condition: {
"leaveShinecharged": {
"framesRemaining": "auto"
}
}
|
|
Entrance condition: {
"comeInShinecharged": {
"framesRequired": 115
}
}
Requires: "HiJump"
"canShinechargeMovementComplex"
{
"heatFrames": 115
}
Exit condition: {
"leaveShinecharged": {
"framesRemaining": "auto"
}
}
|
|
From: 3
Bottom Right Door
To: 2
Top Right Door
Entrance condition: {
"comeInShinecharged": {
"framesRequired": 125
}
}
Requires: "HiJump"
"canShinechargeMovementComplex"
{
"heatFrames": 155
}
{
"shinespark": {
"frames": 6,
"excessFrames": 0
}
}
Exit condition: {
"leaveWithSpark": {}
}
|
|
From: 3
Bottom Right Door
To: 2
Top Right Door
Entrance condition: {
"comeInShinecharged": {
"framesRequired": 90
}
}
Requires: "HiJump"
"canShinechargeMovementComplex"
{
"heatFrames": 125
}
{
"shinespark": {
"frames": 4,
"excessFrames": 0
}
}
Exit condition: {
"leaveWithSpark": {}
}
|
|
From: 3
Bottom Right Door
To: 2
Top Right Door
Entrance condition: {
"comeInShinecharging": {
"length": 12,
"openEnd": 0
}
}
Requires: "canShinechargeMovementComplex"
{
"heatFrames": 175
}
Exit condition: {
"leaveShinecharged": {
"framesRemaining": 40
}
}
|
|
From: 3
Bottom Right Door
To: 2
Top Right Door
Entrance condition: {
"comeInShinecharging": {
"length": 8,
"openEnd": 0
}
}
Requires: "canShinechargeMovementComplex"
{
"heatFrames": 165
}
Exit condition: {
"leaveShinecharged": {
"framesRemaining": 35
}
}
|
|
From: 3
Bottom Right Door
To: 2
Top Right Door
Entrance condition: {
"comeInShinecharging": {
"length": 8,
"openEnd": 0
}
}
Requires: "canShinechargeMovementComplex"
{
"heatFrames": 140
}
Exit condition: {
"leaveShinecharged": {
"framesRemaining": 60
}
}
|
|
From: 3
Bottom Right Door
To: 2
Top Right Door
Entrance condition: {
"comeInShinecharging": {
"length": 3,
"openEnd": 1
}
}
Requires: "canShinechargeMovementComplex"
{
"heatFrames": 140
}
Exit condition: {
"leaveShinecharged": {
"framesRemaining": 45
}
}
|
|
From: 3
Bottom Right Door
To: 2
Top Right Door
Entrance condition: {
"comeInShinecharging": {
"length": 3,
"openEnd": 1
}
}
Requires: "canShinechargeMovementComplex"
{
"heatFrames": 115
}
Exit condition: {
"leaveShinecharged": {
"framesRemaining": 70
}
}
|
|
From: 3
Bottom Right Door
To: 2
Top Right Door
Entrance condition: {
"comeInShinecharging": {
"length": 12,
"openEnd": 0
}
}
Requires: "canShinechargeMovementComplex"
{
"heatFrames": 195
}
{
"shinespark": {
"frames": 9,
"excessFrames": 0
}
}
Exit condition: {
"leaveWithSpark": {}
}
|
|
From: 1
Left Shaft - Top Left Door
To: 4
Left Shaft - Top Right Door
Entrance condition: {
"comeInShinecharging": {
"length": 7,
"openEnd": 1
}
}
Requires: {
"or": [
{
"and": [
"canShinechargeMovementComplex",
{
"heatFrames": 225
},
{
"shinespark": {
"frames": 15,
"excessFrames": 0
}
}
]
},
{
"and": [
"canShinechargeMovementTricky",
{
"heatFrames": 215
},
{
"shinespark": {
"frames": 6,
"excessFrames": 0
}
}
]
}
]
}
Exit condition: {
"leaveWithSpark": {}
}
|
|
From: 2
Left Shaft - Bottom Right Door
To: 3
Left Shaft - Middle Right Door
Quickly ledge grab the platform to run below the Multiviola and get ahead of it. Entrance condition: {
"comeInShinecharging": {
"length": 11,
"openEnd": 1,
"gentleUpTiles": 4
}
}
Requires: "HiJump"
"canShinechargeMovementComplex"
"canTrickyJump"
{
"heatFrames": 150
}
Exit condition: {
"leaveShinecharged": {
"framesRemaining": 60
}
}
|
|
From: 2
Left Shaft - Bottom Right Door
To: 3
Left Shaft - Middle Right Door
Entrance condition: {
"comeInShinecharging": {
"length": 12,
"openEnd": 0,
"gentleUpTiles": 4
}
}
Requires: "canShinechargeMovementComplex"
{
"or": [
"HiJump",
"canWalljump"
]
}
{
"shinespark": {
"frames": 5
}
}
{
"heatFrames": 230
}
Exit condition: {
"leaveWithSpark": {}
}
|
|
From: 3
Left Shaft - Middle Right Door
To: 2
Left Shaft - Bottom Right Door
Entrance condition: {
"comeInShinecharged": {
"framesRequired": 145
}
}
Requires: "canShinechargeMovementComplex"
{
"shinespark": {
"frames": 18
}
}
{
"heatFrames": 190
}
Exit condition: {
"leaveWithSpark": {
"position": "top"
}
}
|
|
From: 3
Left Shaft - Middle Right Door
To: 2
Left Shaft - Bottom Right Door
Entrance condition: {
"comeInShinecharging": {
"length": 3,
"openEnd": 1
}
}
Requires: "canShinechargeMovementComplex"
{
"shinespark": {
"frames": 5
}
}
{
"heatFrames": 220
}
Exit condition: {
"leaveWithSpark": {
"position": "top"
}
}
|
|
From: 3
Left Shaft - Middle Right Door
To: 4
Left Shaft - Top Right Door
Entrance condition: {
"comeInShinecharged": {
"framesRequired": 140
}
}
Requires: "HiJump"
"canTrickyJump"
"canShinechargeMovementComplex"
{
"shinespark": {
"frames": 9
}
}
{
"heatFrames": 170
}
Exit condition: {
"leaveWithSpark": {}
}
|
|
From: 4
Left Shaft - Top Right Door
To: 1
Left Shaft - Top Left Door
Entrance condition: {
"comeInShinecharging": {
"length": 3,
"openEnd": 0
}
}
Requires: "HiJump"
"canTrickyJump"
"canShinechargeMovementComplex"
"canDodgeWhileShooting"
{
"or": [
{
"ammo": {
"type": "Missile",
"count": 1
}
},
"Plasma"
]
}
{
"shinespark": {
"frames": 14
}
}
{
"heatFrames": 190
}
Exit condition: {
"leaveWithSpark": {}
}
|
|
From: 4
Left Shaft - Top Right Door
To: 3
Left Shaft - Middle Right Door
Entrance condition: {
"comeInShinecharging": {
"length": 3,
"openEnd": 1
}
}
Requires: {
"or": [
{
"and": [
"canShinechargeMovementComplex",
{
"heatFrames": 215
},
{
"shinespark": {
"frames": 15,
"excessFrames": 0
}
}
]
},
{
"and": [
"canShinechargeMovementTricky",
{
"heatFrames": 195
},
{
"shinespark": {
"frames": 5,
"excessFrames": 0
}
}
]
}
]
}
Exit condition: {
"leaveWithSpark": {}
}
|
|
Align with the right side of a wall or door then turn around and shinespark in order to avoid colliding with a slope. Requires: {
"obstaclesCleared": [
"A"
]
}
"canShinechargeMovementComplex"
"canHorizontalShinespark"
{
"canShineCharge": {
"usedTiles": 33,
"openEnd": 2
}
}
{
"heatFrames": 335
}
{
"shinespark": {
"frames": 221
}
}
|
|
Entrance condition: {
"comeInShinecharged": {
"framesRequired": 120
}
}
Requires: "canShinechargeMovementComplex"
{
"heatFrames": 120
}
Exit condition: {
"leaveShinecharged": {
"framesRemaining": "auto"
}
}
|
|
From: 1
Top Left Door
To: 3
Top Right Door
Entrance condition: {
"comeInShinecharged": {
"framesRequired": 80
}
}
Requires: "canShinechargeMovementComplex"
{
"heatFrames": 100
}
{
"shinespark": {
"frames": 16,
"excessFrames": 0
}
}
Exit condition: {
"leaveWithSpark": {}
}
|
|
From: 1
Top Left Door
To: 3
Top Right Door
Entrance condition: {
"comeInShinecharging": {
"length": 12,
"openEnd": 1
}
}
Requires: "canShinechargeMovementComplex"
{
"heatFrames": 155
}
Exit condition: {
"leaveShinecharged": {
"framesRemaining": 65
}
}
|
|
Entrance condition: {
"comeInShinecharged": {
"framesRequired": 120
}
}
Requires: "canShinechargeMovementComplex"
{
"heatFrames": 120
}
Exit condition: {
"leaveShinecharged": {
"framesRemaining": "auto"
}
}
|
|
From: 3
Top Right Door
To: 1
Top Left Door
Entrance condition: {
"comeInShinecharged": {
"framesRequired": 80
}
}
Requires: "canShinechargeMovementComplex"
{
"heatFrames": 100
}
{
"shinespark": {
"frames": 16,
"excessFrames": 0
}
}
Exit condition: {
"leaveWithSpark": {}
}
|
|
From: 3
Top Right Door
To: 1
Top Left Door
Entrance condition: {
"comeInShinecharging": {
"length": 12,
"openEnd": 1
}
}
Requires: "canShinechargeMovementComplex"
{
"heatFrames": 155
}
Exit condition: {
"leaveShinecharged": {
"framesRemaining": 65
}
}
|
|
From: 1
Top Left Door
To: 2
Middle Left Door
Entrance condition: {
"comeInShinecharged": {
"framesRequired": 145
}
}
Requires: {
"enemyDamage": {
"enemy": "Sova",
"type": "contact",
"hits": 1
}
}
"canShinechargeMovementComplex"
Exit condition: {
"leaveShinecharged": {
"framesRemaining": "auto"
}
}
|
|
From: 1
Top Left Door
To: 2
Middle Left Door
Entrance condition: {
"comeInShinecharged": {
"framesRequired": 125
}
}
Requires: {
"or": [
{
"enemyKill": {
"enemies": [
[
"Sova"
]
],
"explicitWeapons": [
"ScrewAttack",
"Wave",
"Spazer",
"Plasma",
"Missile",
"Super"
]
}
},
{
"and": [
{
"enemyKill": {
"enemies": [
[
"Sova"
]
],
"explicitWeapons": [
"PowerBeam"
]
}
},
"canDownBack"
]
}
]
}
"canShinechargeMovementComplex"
Exit condition: {
"leaveShinecharged": {
"framesRemaining": "auto"
}
}
|
|
From: 1
Top Left Door
To: 2
Middle Left Door
Entrance condition: {
"comeInShinecharging": {
"length": 4,
"openEnd": 1,
"gentleDownTiles": 2
}
}
Requires: "canShinechargeMovementComplex"
{
"or": [
"canDownBack",
{
"enemyDamage": {
"enemy": "Sova",
"type": "contact",
"hits": 1
}
}
]
}
Exit condition: {
"leaveShinecharged": {
"framesRemaining": 85
}
}
|
|
From: 1
Top Left Door
To: 3
Bottom Left Door
Entrance condition: {
"comeInShinecharging": {
"length": 4,
"openEnd": 1,
"gentleDownTiles": 2
}
}
Requires: "canShinechargeMovementComplex"
{
"or": [
{
"shinespark": {
"frames": 10
}
},
{
"enemyDamage": {
"enemy": "Sova",
"type": "contact",
"hits": 1
}
}
]
}
{
"shinespark": {
"frames": 2
}
}
Exit condition: {
"leaveWithSpark": {}
}
|
|
Shoot the door open while entering, then run and jump under the platform above to get to the right side quickly. Entrance condition: {
"comeInShinecharged": {
"framesRequired": 85
}
}
Requires: "canShinechargeMovementComplex" Exit condition: {
"leaveShinecharged": {
"framesRemaining": "auto"
}
}
|
|
From: 1
Top Left Door
To: 6
Top Right Door
Entrance condition: {
"comeInShinecharging": {
"length": 4,
"openEnd": 1,
"gentleDownTiles": 2
}
}
Requires: "canShinechargeMovementComplex" Exit condition: {
"leaveShinecharged": {
"framesRemaining": 85
}
}
|
|
Entrance condition: {
"comeInShinecharged": {
"framesRequired": 100
}
}
Requires: "HiJump" "canShinechargeMovementComplex" Exit condition: {
"leaveShinecharged": {
"framesRemaining": "auto"
}
}
|
|
Entrance condition: {
"comeInShinecharged": {
"framesRequired": 140
}
}
Requires: "canShinechargeMovementComplex" Exit condition: {
"leaveShinecharged": {
"framesRemaining": "auto"
}
}
|
|
Entrance condition: {
"comeInShinecharged": {
"framesRequired": 110
}
}
Requires: "canShinechargeMovementComplex" "canWalljump" Exit condition: {
"leaveShinecharged": {
"framesRemaining": "auto"
}
}
|
|
Carefully avoid hitting the Sova. Entrance condition: {
"comeInShinecharged": {
"framesRequired": 105
}
}
Requires: "HiJump" "canShinechargeMovementComplex" Exit condition: {
"leaveShinecharged": {
"framesRemaining": "auto"
}
}
|
|
From: 2
Middle Left Door
To: 1
Top Left Door
Spin-jump up and kill the Sova from the left just before landing on its platform. Entrance condition: {
"comeInShinecharged": {
"framesRequired": 140
}
}
Requires: "canShinechargeMovementComplex"
{
"or": [
"ScrewAttack",
"canTrickyJump"
]
}
{
"enemyKill": {
"enemies": [
[
"Sova"
]
],
"explicitWeapons": [
"ScrewAttack",
"Wave",
"Spazer",
"Plasma",
"Missile",
"Super"
]
}
}
Exit condition: {
"leaveShinecharged": {
"framesRemaining": "auto"
}
}
|
|
From: 2
Middle Left Door
To: 1
Top Left Door
Carefully avoid hitting the Sova. Entrance condition: {
"comeInShinecharged": {
"framesRequired": 90
}
}
Requires: "HiJump"
"canShinechargeMovementComplex"
{
"shinespark": {
"frames": 6,
"excessFrames": 0
}
}
Exit condition: {
"leaveWithSpark": {}
}
|
|
From: 2
Middle Left Door
To: 1
Top Left Door
Carefully avoid hitting the Sova. Entrance condition: {
"comeInShinecharged": {
"framesRequired": 70
}
}
Requires: "HiJump"
"canShinechargeMovementComplex"
{
"shinespark": {
"frames": 10,
"excessFrames": 0
}
}
Exit condition: {
"leaveWithSpark": {
"position": "bottom"
}
}
|
|
From: 2
Middle Left Door
To: 1
Top Left Door
Spin-jump up and kill the Sova from the left just before landing on its platform. Entrance condition: {
"comeInShinecharged": {
"framesRequired": 115
}
}
Requires: "canShinechargeMovementComplex"
{
"or": [
"ScrewAttack",
"canTrickyJump"
]
}
{
"enemyKill": {
"enemies": [
[
"Sova"
]
],
"explicitWeapons": [
"ScrewAttack",
"Wave",
"Spazer",
"Plasma",
"Missile",
"Super"
]
}
}
{
"shinespark": {
"frames": 7,
"excessFrames": 0
}
}
Exit condition: {
"leaveWithSpark": {}
}
|
|
From: 2
Middle Left Door
To: 1
Top Left Door
Spin-jump up and kill the Sova from the left just before landing on its platform. Entrance condition: {
"comeInShinecharged": {
"framesRequired": 105
}
}
Requires: "canShinechargeMovementComplex"
{
"or": [
"ScrewAttack",
"canTrickyJump"
]
}
{
"enemyKill": {
"enemies": [
[
"Sova"
]
],
"explicitWeapons": [
"ScrewAttack",
"Wave",
"Spazer",
"Plasma",
"Missile",
"Super"
]
}
}
{
"shinespark": {
"frames": 10,
"excessFrames": 0
}
}
Exit condition: {
"leaveWithSpark": {
"position": "bottom"
}
}
|
|
From: 2
Middle Left Door
To: 1
Top Left Door
Entrance condition: {
"comeInShinecharging": {
"length": 3,
"openEnd": 0
}
}
Requires: "canShinechargeMovementComplex"
"HiJump"
{
"or": [
"ScrewAttack",
"canTrickyJump"
]
}
Exit condition: {
"leaveShinecharged": {
"framesRemaining": 70
}
}
|
|
From: 2
Middle Left Door
To: 1
Top Left Door
Spin-jump up and kill the Sova from the left just before landing on its platform. Entrance condition: {
"comeInShinecharging": {
"length": 3,
"openEnd": 0
}
}
Requires: "canShinechargeMovementComplex"
{
"or": [
"ScrewAttack",
"canTrickyJump"
]
}
{
"enemyKill": {
"enemies": [
[
"Sova"
]
],
"explicitWeapons": [
"ScrewAttack",
"Wave",
"Spazer",
"Plasma",
"Missile",
"Super"
]
}
}
Exit condition: {
"leaveShinecharged": {
"framesRemaining": 40
}
}
|
|
From: 2
Middle Left Door
To: 3
Bottom Left Door
Entrance condition: {
"comeInShinecharged": {
"framesRequired": 90
}
}
Requires: "canShinechargeMovementComplex"
{
"shinespark": {
"frames": 2,
"excessFrames": 0
}
}
Exit condition: {
"leaveWithSpark": {}
}
|
|
From: 2
Middle Left Door
To: 6
Top Right Door
Jump over the platform with the Sova that would otherwise be in the way. Entrance condition: {
"comeInShinecharged": {
"framesRequired": 110
}
}
Requires: "HiJump" "canShinechargeMovementComplex" Exit condition: {
"leaveShinecharged": {
"framesRemaining": "auto"
}
}
|
|
From: 2
Middle Left Door
To: 6
Top Right Door
Spin-jump up and kill the Sova from the left just before landing on its platform. Entrance condition: {
"comeInShinecharged": {
"framesRequired": 135
}
}
Requires: "canShinechargeMovementComplex"
{
"or": [
"ScrewAttack",
"canTrickyJump"
]
}
{
"enemyKill": {
"enemies": [
[
"Sova"
]
],
"explicitWeapons": [
"ScrewAttack",
"Wave",
"Spazer",
"Plasma",
"Missile",
"Super"
]
}
}
Exit condition: {
"leaveShinecharged": {
"framesRemaining": "auto"
}
}
|
|
From: 2
Middle Left Door
To: 6
Top Right Door
Entrance condition: {
"comeInShinecharged": {
"framesRequired": 100
}
}
Requires: "HiJump"
"canShinechargeMovementComplex"
{
"shinespark": {
"frames": 7,
"excessFrames": 0
}
}
Exit condition: {
"leaveWithSpark": {}
}
|
|
From: 2
Middle Left Door
To: 6
Top Right Door
Entrance condition: {
"comeInShinecharged": {
"framesRequired": 80
}
}
Requires: "HiJump"
"canShinechargeMovementComplex"
{
"shinespark": {
"frames": 10,
"excessFrames": 0
}
}
Exit condition: {
"leaveWithSpark": {
"position": "bottom"
}
}
|
|
From: 2
Middle Left Door
To: 6
Top Right Door
Spin-jump up and kill the Sova from the left just before landing on its platform. Entrance condition: {
"comeInShinecharged": {
"framesRequired": 125
}
}
Requires: "canShinechargeMovementComplex"
{
"or": [
"ScrewAttack",
"canTrickyJump"
]
}
{
"enemyKill": {
"enemies": [
[
"Sova"
]
],
"explicitWeapons": [
"ScrewAttack",
"Wave",
"Spazer",
"Plasma",
"Missile",
"Super"
]
}
}
{
"shinespark": {
"frames": 7,
"excessFrames": 0
}
}
Exit condition: {
"leaveWithSpark": {
"position": "bottom"
}
}
|
|
From: 2
Middle Left Door
To: 6
Top Right Door
Entrance condition: {
"comeInShinecharged": {
"framesRequired": 100
}
}
Requires: "canShinechargeMovementComplex"
{
"or": [
"ScrewAttack",
"canTrickyJump"
]
}
{
"enemyKill": {
"enemies": [
[
"Sova"
]
],
"explicitWeapons": [
"ScrewAttack",
"Wave",
"Spazer",
"Plasma",
"Missile",
"Super"
]
}
}
{
"shinespark": {
"frames": 10,
"excessFrames": 0
}
}
Exit condition: {
"leaveWithSpark": {
"position": "bottom"
}
}
|
|
From: 2
Middle Left Door
To: 6
Top Right Door
Spin-jump up and kill the Sova from the left just before landing on its platform. Entrance condition: {
"comeInShinecharging": {
"length": 3,
"openEnd": 0
}
}
Requires: "canShinechargeMovementComplex"
{
"or": [
"ScrewAttack",
"canTrickyJump"
]
}
{
"enemyKill": {
"enemies": [
[
"Sova"
]
],
"explicitWeapons": [
"ScrewAttack",
"Wave",
"Spazer",
"Plasma",
"Missile",
"Super"
]
}
}
Exit condition: {
"leaveShinecharged": {
"framesRemaining": 35
}
}
|
|
Entrance condition: {
"comeInShinecharged": {
"framesRequired": 130
}
}
Requires: "canShinechargeMovementComplex" Exit condition: {
"leaveShinecharged": {
"framesRemaining": "auto"
}
}
|
|
From: 3
Bottom Left Door
To: 2
Middle Left Door
Entrance condition: {
"comeInShinecharged": {
"framesRequired": 105
}
}
Requires: "HiJump" "canShinechargeMovementComplex" Exit condition: {
"leaveShinecharged": {
"framesRemaining": "auto"
}
}
|
|
From: 3
Bottom Left Door
To: 2
Middle Left Door
Entrance condition: {
"comeInShinecharged": {
"framesRequired": 105
}
}
Requires: "canShinechargeMovementComplex"
{
"shinespark": {
"frames": 8,
"excessFrames": 0
}
}
Exit condition: {
"leaveWithSpark": {}
}
|
|
From: 3
Bottom Left Door
To: 2
Middle Left Door
Entrance condition: {
"comeInShinecharged": {
"framesRequired": 85
}
}
Requires: "HiJump"
"canShinechargeMovementComplex"
{
"shinespark": {
"frames": 8,
"excessFrames": 0
}
}
Exit condition: {
"leaveWithSpark": {}
}
|
|
From: 3
Bottom Left Door
To: 2
Middle Left Door
Entrance condition: {
"comeInShinecharging": {
"length": 12,
"openEnd": 0
}
}
Requires: "canShinechargeMovementComplex" "HiJump" Exit condition: {
"leaveShinecharged": {
"framesRemaining": 50
}
}
|
|
From: 3
Bottom Left Door
To: 2
Middle Left Door
Entrance condition: {
"comeInShinecharging": {
"length": 4,
"openEnd": 1
}
}
Requires: "canShinechargeMovementComplex" Exit condition: {
"leaveShinecharged": {
"framesRemaining": 30
}
}
|
|
From: 3
Bottom Left Door
To: 2
Middle Left Door
Entrance condition: {
"comeInShinecharging": {
"length": 12,
"openEnd": 0
}
}
Requires: "canShinechargeMovementComplex" "canWalljump" Exit condition: {
"leaveShinecharged": {
"framesRemaining": 30
}
}
|
|
Fall around the floating platform with either a Downback or by jumping down with a Spinjump. Entrance condition: {
"comeInShinecharged": {
"framesRequired": 135
}
}
Requires: "canShinechargeMovementComplex" Exit condition: {
"leaveShinecharged": {
"framesRemaining": "auto"
}
}
|
|
From: 3
Bottom Left Door
To: 4
Bottom Right Door
Fall around the floating platform with either a Downback or by jumping down with a Spinjump. Entrance condition: {
"comeInShinecharged": {
"framesRequired": 100
}
}
Requires: "canShinechargeMovementComplex"
{
"shinespark": {
"frames": 11,
"excessFrames": 0
}
}
Exit condition: {
"leaveWithSpark": {
"position": "top"
}
}
|
|
From: 3
Bottom Left Door
To: 4
Bottom Right Door
Fall around the floating platform with either a Downback or by jumping down with a Spinjump. Entrance condition: {
"comeInShinecharging": {
"length": 12,
"openEnd": 0
}
}
Requires: "canShinechargeMovementComplex" "canDownBack" Exit condition: {
"leaveShinecharged": {
"framesRemaining": 30
}
}
|
|
From: 3
Bottom Left Door
To: 4
Bottom Right Door
Fall around the floating platform with either a Downback or by jumping down with a Spinjump. Entrance condition: {
"comeInShinecharging": {
"length": 6,
"openEnd": 0
}
}
Requires: "canShinechargeMovementComplex" "canDownBack" Exit condition: {
"leaveShinecharged": {
"framesRemaining": 60
}
}
|
|
From: 5
Middle Right Door
To: 2
Middle Left Door
Entrance condition: {
"comeInShinecharged": {
"framesRequired": 110
}
}
Requires: "HiJump" "canShinechargeMovementComplex" Exit condition: {
"leaveShinecharged": {
"framesRemaining": "auto"
}
}
|
|
From: 5
Middle Right Door
To: 2
Middle Left Door
Entrance condition: {
"comeInShinecharged": {
"framesRequired": 135
}
}
Requires: "canShinechargeMovementComplex" "canWalljump" Exit condition: {
"leaveShinecharged": {
"framesRemaining": "auto"
}
}
|
|
From: 5
Middle Right Door
To: 2
Middle Left Door
Entrance condition: {
"comeInShinecharged": {
"framesRequired": 135
}
}
Requires: "canShinechargeMovementComplex"
{
"shinespark": {
"frames": 7,
"excessFrames": 0
}
}
Exit condition: {
"leaveWithSpark": {}
}
|
|
From: 5
Middle Right Door
To: 2
Middle Left Door
Entrance condition: {
"comeInShinecharged": {
"framesRequired": 75
}
}
Requires: "HiJump"
"canShinechargeMovementComplex"
{
"shinespark": {
"frames": 11,
"excessFrames": 0
}
}
Exit condition: {
"leaveWithSpark": {}
}
|
|
From: 5
Middle Right Door
To: 2
Middle Left Door
Entrance condition: {
"comeInShinecharged": {
"framesRequired": 100
}
}
Requires: "canShinechargeMovementComplex"
"canWalljump"
{
"shinespark": {
"frames": 11,
"excessFrames": 0
}
}
Exit condition: {
"leaveWithSpark": {}
}
|
|
From: 5
Middle Right Door
To: 2
Middle Left Door
Entrance condition: {
"comeInShinecharging": {
"length": 12,
"openEnd": 0
}
}
Requires: "canShinechargeMovementComplex" "HiJump" Exit condition: {
"leaveShinecharged": {
"framesRemaining": 60
}
}
|
|
From: 5
Middle Right Door
To: 2
Middle Left Door
Entrance condition: {
"comeInShinecharging": {
"length": 12,
"openEnd": 0
}
}
Requires: "canShinechargeMovementComplex" Exit condition: {
"leaveShinecharged": {
"framesRemaining": 30
}
}
|
|
From: 5
Middle Right Door
To: 2
Middle Left Door
Entrance condition: {
"comeInShinecharging": {
"length": 12,
"openEnd": 0
}
}
Requires: "canShinechargeMovementComplex" "canWalljump" Exit condition: {
"leaveShinecharged": {
"framesRemaining": 45
}
}
|
|
Fall around the floating platform with either a Downback or by jumping down with a Spinjump. Entrance condition: {
"comeInShinecharged": {
"framesRequired": 135
}
}
Requires: "canShinechargeMovementComplex" "canDownBack" Exit condition: {
"leaveShinecharged": {
"framesRemaining": "auto"
}
}
|
|
From: 5
Middle Right Door
To: 4
Bottom Right Door
Fall around the floating platform with either a Downback or by jumping down with a Spinjump. Entrance condition: {
"comeInShinecharging": {
"length": 12,
"openEnd": 0
}
}
Requires: "canShinechargeMovementComplex" "canDownBack" Exit condition: {
"leaveShinecharged": {
"framesRemaining": 30
}
}
|
|
From: 5
Middle Right Door
To: 4
Bottom Right Door
Fall around the floating platform with either a Downback or by jumping down with a Spinjump. Entrance condition: {
"comeInShinecharged": {
"framesRequired": 100
}
}
Requires: "canShinechargeMovementComplex"
{
"shinespark": {
"frames": 11,
"excessFrames": 0
}
}
Exit condition: {
"leaveWithSpark": {
"position": "top"
}
}
|
|
From: 5
Middle Right Door
To: 4
Bottom Right Door
Fall around the floating platform with either a Downback or by jumping down with a Spinjump. Entrance condition: {
"comeInShinecharging": {
"length": 4,
"openEnd": 1
}
}
Requires: "canShinechargeMovementComplex" "canDownBack" Exit condition: {
"leaveShinecharged": {
"framesRemaining": 60
}
}
|
|
Entrance condition: {
"comeInShinecharged": {
"framesRequired": 70
}
}
Requires: "canShinechargeMovementComplex" Exit condition: {
"leaveShinecharged": {
"framesRemaining": "auto"
}
}
|
|
From: 6
Top Right Door
To: 1
Top Left Door
Entrance condition: {
"comeInShinecharging": {
"length": 4,
"openEnd": 1
}
}
Requires: "canShinechargeMovementComplex" Exit condition: {
"leaveShinecharged": {
"framesRemaining": 80
}
}
|
|
From: 6
Top Right Door
To: 2
Middle Left Door
Entrance condition: {
"comeInShinecharged": {
"framesRequired": 135
}
}
Requires: {
"enemyDamage": {
"enemy": "Sova",
"type": "contact",
"hits": 1
}
}
"canShinechargeMovementComplex"
Exit condition: {
"leaveShinecharged": {
"framesRemaining": "auto"
}
}
|
|
From: 6
Top Right Door
To: 2
Middle Left Door
If Screw Attack is unavailable, do a low spin jump to make it over the Sova without taking a hit. Entrance condition: {
"comeInShinecharged": {
"framesRequired": 115
}
}
Requires: {
"or": [
"canShinechargeMovementTricky",
{
"and": [
"canShinechargeMovementComplex",
"ScrewAttack"
]
}
]
}
Exit condition: {
"leaveShinecharged": {
"framesRemaining": "auto"
}
}
|
|
From: 6
Top Right Door
To: 2
Middle Left Door
Entrance condition: {
"comeInShinecharging": {
"length": 4,
"openEnd": 1
}
}
Requires: "canShinechargeMovementComplex"
{
"enemyDamage": {
"enemy": "Sova",
"type": "contact",
"hits": 1
}
}
Exit condition: {
"leaveShinecharged": {
"framesRemaining": 50
}
}
|
|
From: 6
Top Right Door
To: 2
Middle Left Door
Shoot the top Sova while falling. Entrance condition: {
"comeInShinecharging": {
"length": 3,
"openEnd": 0
}
}
Requires: "canShinechargeMovementComplex"
{
"enemyKill": {
"enemies": [
[
"Sova"
]
],
"explicitWeapons": [
"ScrewAttack",
"Wave",
"Spazer",
"Plasma",
"Missile",
"Super"
]
}
}
Exit condition: {
"leaveShinecharged": {
"framesRemaining": 70
}
}
|
|
From: 6
Top Right Door
To: 3
Bottom Left Door
Entrance condition: {
"comeInShinecharging": {
"length": 4,
"openEnd": 1
}
}
Requires: "canShinechargeMovementComplex"
{
"shinespark": {
"frames": 15
}
}
Exit condition: {
"leaveWithSpark": {}
}
|
|
From: 6
Top Right Door
To: 5
Middle Right Door
Entrance condition: {
"comeInShinecharging": {
"length": 4,
"openEnd": 1
}
}
Requires: "canShinechargeMovementComplex" Exit condition: {
"leaveShinecharged": {
"framesRemaining": 30
}
}
|
|
Entrance condition: {
"comeInShinecharged": {
"framesRequired": 100
}
}
Requires: "HiJump" "canShinechargeMovementComplex" Exit condition: {
"leaveShinecharged": {
"framesRemaining": "auto"
}
}
|
|
Entrance condition: {
"comeInShinecharged": {
"framesRequired": 135
}
}
Requires: "canShinechargeMovementComplex" Exit condition: {
"leaveShinecharged": {
"framesRemaining": "auto"
}
}
|
|
Entrance condition: {
"comeInShinecharged": {
"framesRequired": 115
}
}
Requires: {
"enemyKill": {
"enemies": [
[
"Sova"
]
],
"explicitWeapons": [
"ScrewAttack",
"Wave",
"Spazer",
"Plasma",
"Missile",
"Super"
]
}
}
"canShinechargeMovementComplex"
Exit condition: {
"leaveShinecharged": {
"framesRemaining": "auto"
}
}
|
|
From: 6
Top Right Door
To: 7
Elevator
Entrance condition: {
"comeInShinecharging": {
"length": 3,
"openEnd": 0
}
}
Requires: "HiJump" "canShinechargeMovementComplex" Exit condition: {
"leaveShinecharged": {
"framesRemaining": 90
}
}
|
|
From: 6
Top Right Door
To: 7
Elevator
Jump over the Sova. Entrance condition: {
"comeInShinecharging": {
"length": 4,
"openEnd": 0
}
}
Requires: "canShinechargeMovementComplex" Exit condition: {
"leaveShinecharged": {
"framesRemaining": 40
}
}
|
|
From: 6
Top Right Door
To: 7
Elevator
Kill the Sova. Entrance condition: {
"comeInShinecharging": {
"length": 3,
"openEnd": 0
}
}
Requires: {
"enemyKill": {
"enemies": [
[
"Sova"
]
],
"explicitWeapons": [
"ScrewAttack",
"Wave",
"Spazer",
"Plasma",
"Missile",
"Super"
]
}
}
"canShinechargeMovementComplex"
Exit condition: {
"leaveShinecharged": {
"framesRemaining": 60
}
}
|
|
Entrance condition: {
"comeInShinecharged": {
"framesRequired": 125
}
}
Requires: "canShinechargeMovementComplex" Exit condition: {
"leaveShinecharged": {
"framesRemaining": "auto"
}
}
|
|
Entrance condition: {
"comeInShinecharged": {
"framesRequired": 140
}
}
Requires: "canShinechargeMovementComplex" "canDownBack" Exit condition: {
"leaveShinecharged": {
"framesRemaining": "auto"
}
}
|
|
Requires: {
"or": [
{
"and": [
{
"doorUnlockedAtNode": 3
},
{
"doorUnlockedAtNode": 5
},
{
"canShineCharge": {
"usedTiles": 14,
"openEnd": 0
}
}
]
},
{
"and": [
{
"or": [
{
"doorUnlockedAtNode": 3
},
{
"doorUnlockedAtNode": 5
}
]
},
{
"canShineCharge": {
"usedTiles": 13,
"openEnd": 0
}
}
]
},
{
"canShineCharge": {
"usedTiles": 12,
"openEnd": 0
}
}
]
}
"canShinechargeMovementComplex"
"HiJump"
Exit condition: {
"leaveShinecharged": {
"framesRemaining": 50
}
}
|
|
Requires: {
"or": [
{
"and": [
{
"doorUnlockedAtNode": 3
},
{
"doorUnlockedAtNode": 5
},
{
"canShineCharge": {
"usedTiles": 14,
"openEnd": 0
}
}
]
},
{
"and": [
{
"or": [
{
"doorUnlockedAtNode": 3
},
{
"doorUnlockedAtNode": 5
}
]
},
{
"canShineCharge": {
"usedTiles": 13,
"openEnd": 0
}
}
]
},
{
"canShineCharge": {
"usedTiles": 12,
"openEnd": 0
}
}
]
}
"canShinechargeMovementComplex"
"canWalljump"
Exit condition: {
"leaveShinecharged": {
"framesRemaining": 30
}
}
|
|
Fall around the floating platform with either a Downback or by jumping down with a Spinjump. Requires: {
"or": [
{
"and": [
{
"doorUnlockedAtNode": 3
},
{
"doorUnlockedAtNode": 5
},
{
"canShineCharge": {
"usedTiles": 14,
"openEnd": 0
}
}
]
},
{
"and": [
{
"or": [
{
"doorUnlockedAtNode": 3
},
{
"doorUnlockedAtNode": 5
}
]
},
{
"canShineCharge": {
"usedTiles": 13,
"openEnd": 0
}
}
]
},
{
"canShineCharge": {
"usedTiles": 12,
"openEnd": 0
}
}
]
}
"canShinechargeMovementComplex"
"canDownBack"
Exit condition: {
"leaveShinecharged": {
"framesRemaining": 30
}
}
|
|
Watch out for the Geruda. Running left before jumping to bring it on camera will make it swoop left. Entrance condition: {
"comeInShinecharging": {
"length": 4,
"openEnd": 0
}
}
Requires: "canHorizontalShinespark"
{
"shinespark": {
"frames": 70,
"excessFrames": 12
}
}
"canShinechargeMovementComplex"
{
"heatFrames": 330
}
|
|
Watch out for the Geruda. Running left before jumping to bring it on camera will make it swoop left. Entrance condition: {
"comeInShinecharged": {
"framesRequired": 110
}
}
Requires: "canHorizontalShinespark"
{
"shinespark": {
"frames": 70,
"excessFrames": 12
}
}
"canShinechargeMovementComplex"
{
"heatFrames": 330
}
|
|
From: 7
Junction Below Power Bomb Blocks
To: 2
Middle Left Door
Requires: {
"obstaclesCleared": [
"C",
"D"
]
}
"SpeedBooster"
"canShinechargeMovement"
{
"or": [
{
"shinespark": {
"frames": 19,
"excessFrames": 4
}
},
{
"and": [
"canShinechargeMovementComplex",
"canMidairShinespark",
{
"shinespark": {
"frames": 6,
"excessFrames": 4
}
}
]
}
]
}
|
|
From: 3
Bottom Right Door
To: 5
Junction Above Morph Tunnel
Reaching the Morph hole can be tricky with SpeedBooster but no HiJump. Entrance condition: {
"comeInShinecharged": {
"framesRequired": 70
}
}
Requires: "canMidAirMorph"
"canShinechargeMovementComplex"
{
"heatFrames": 210
}
{
"shinespark": {
"frames": 23,
"excessFrames": 3
}
}
|
|
Requires: "canMidairShinespark"
{
"canShineCharge": {
"usedTiles": 33,
"openEnd": 2
}
}
{
"or": [
{
"shinespark": {
"frames": 45,
"excessFrames": 5
}
},
{
"and": [
"canShinechargeMovementComplex",
{
"shinespark": {
"frames": 5
}
}
]
}
]
}
|
|
From: 1
Top Right Door
To: 2
Bottom Right Door
Entrance condition: {
"comeInShinecharged": {
"framesRequired": 165
}
}
Requires: "canShinechargeMovementComplex" Clears obstacles: A |
|
From: 2
Bottom Right Door
To: 2
Bottom Right Door
Entrance condition: {
"comeInShinecharged": {
"framesRequired": 60
}
}
Requires: "canShinechargeMovementComplex" Clears obstacles: A |
|
From: 2
Bottom Right Door
To: 2
Bottom Right Door
Entrance condition: {
"comeInShinecharging": {
"length": 9,
"openEnd": 0
}
}
Requires: "canShinechargeMovementComplex" Clears obstacles: A |
|
Entrance condition: {
"comeInShinecharged": {
"framesRequired": 120
}
}
Requires: "canShinechargeMovementComplex"
{
"shinespark": {
"frames": 36
}
}
|
|
From: 1
Top Left Door
To: 4
Top Right Door
Entrance condition: {
"comeInShinecharged": {
"framesRequired": 130
}
}
Requires: "SpaceJump"
"canShinechargeMovementComplex"
"canMidairShinespark"
{
"shinespark": {
"frames": 21
}
}
Exit condition: {
"leaveWithSpark": {}
}
|
|
From: 3
Bottom Right Door
To: 1
Top Left Door
Entrance condition: {
"comeInShinecharged": {
"framesRequired": 160
}
}
Requires: "SpaceJump"
"canShinechargeMovementComplex"
"canMidairShinespark"
{
"shinespark": {
"frames": 21
}
}
Exit condition: {
"leaveWithSpark": {}
}
|
|
From: 3
Bottom Right Door
To: 1
Top Left Door
Kill the Gamets with SpeedBooster and then jump directly up to the top left door. Entrance condition: {
"comeInShinecharging": {
"length": 10,
"openEnd": 0,
"gentleDownTiles": 4
}
}
Requires: "HiJump" "canShinechargeMovementComplex" "canTrickyDashJump" Exit condition: {
"leaveShinecharged": {
"framesRemaining": 20
}
}
|
|
From: 3
Bottom Right Door
To: 4
Top Right Door
Entrance condition: {
"comeInShinecharging": {
"length": 10,
"openEnd": 0,
"gentleDownTiles": 4
}
}
Requires: "HiJump" "canShinechargeMovementComplex" Exit condition: {
"leaveShinecharged": {
"framesRemaining": 45
}
}
|
|
From: 3
Bottom Right Door
To: 4
Top Right Door
Entrance condition: {
"comeInShinecharging": {
"length": 7,
"openEnd": 1,
"gentleDownTiles": 3
}
}
Requires: "SpaceJump"
"canShinechargeMovementComplex"
"canMidairShinespark"
{
"shinespark": {
"frames": 15
}
}
Exit condition: {
"leaveWithSpark": {}
}
|
|
From: 3
Bottom Right Door
To: 4
Top Right Door
Shoot the Gamets while entering the room for more runway. Entrance condition: {
"comeInShinecharging": {
"length": 18,
"openEnd": 0,
"gentleDownTiles": 4,
"gentleUpTiles": 2
}
}
Requires: "HiJump" "Wave" "canDodgeWhileShooting" "canShinechargeMovementComplex" Exit condition: {
"leaveShinecharged": {
"framesRemaining": 15
}
}
|
|
From: 3
Bottom Right Door
To: 4
Top Right Door
Entrance condition: {
"comeInShinecharging": {
"length": 7,
"openEnd": 1,
"gentleDownTiles": 3
}
}
Requires: "canWalljump" "canFastWalljumpClimb" "canShinechargeMovementComplex" Exit condition: {
"leaveShinecharged": {
"framesRemaining": 15
}
}
|
|
From: 4
Top Right Door
To: 1
Top Left Door
Entrance condition: {
"comeInShinecharged": {
"framesRequired": 130
}
}
Requires: "SpaceJump"
"canShinechargeMovementComplex"
"canMidairShinespark"
{
"shinespark": {
"frames": 21
}
}
Exit condition: {
"leaveWithSpark": {}
}
|
|
In-room Speedy Jump up with HiJump and Leave while Shinecharged (Very Hard)
Post Crocomire Farming Room
From: 5
Main Junction
To: 1
Top Left Door
Shortcharge to the right and then jump from below the floating platform to reach the top left door. Requires: "HiJump"
"canShinechargeMovementComplex"
{
"or": [
"canWalljump",
"canTrickyDashJump"
]
}
{
"or": [
{
"canShineCharge": {
"usedTiles": 18,
"openEnd": 1,
"gentleUpTiles": 4,
"gentleDownTiles": 2
}
},
{
"and": [
{
"doorUnlockedAtNode": 3
},
{
"canShineCharge": {
"usedTiles": 19,
"openEnd": 1,
"gentleUpTiles": 4,
"gentleDownTiles": 2
}
}
]
}
]
}
Exit condition: {
"leaveShinecharged": {
"framesRemaining": 10
}
}
|
|
From: 5
Main Junction
To: 4
Top Right Door
Requires: "HiJump"
"canShinechargeMovementComplex"
{
"or": [
{
"canShineCharge": {
"usedTiles": 18,
"openEnd": 1,
"gentleUpTiles": 2,
"gentleDownTiles": 4
}
},
{
"and": [
{
"doorUnlockedAtNode": 3
},
{
"canShineCharge": {
"usedTiles": 19,
"openEnd": 0,
"gentleUpTiles": 2,
"gentleDownTiles": 4
}
}
]
}
]
}
Exit condition: {
"leaveShinecharged": {
"framesRemaining": 10
}
}
|
|
From: 5
Main Junction
To: 4
Top Right Door
Requires: "canWalljump"
"canShinechargeMovementComplex"
{
"or": [
{
"canShineCharge": {
"usedTiles": 18,
"openEnd": 1,
"gentleUpTiles": 2,
"gentleDownTiles": 4
}
},
{
"and": [
{
"doorUnlockedAtNode": 3
},
{
"canShineCharge": {
"usedTiles": 19,
"openEnd": 0,
"gentleUpTiles": 2,
"gentleDownTiles": 4
}
}
]
}
]
}
{
"shinespark": {
"frames": 15
}
}
Exit condition: {
"leaveWithSpark": {}
}
|
|
Notable: true 
Store a shinespark near the Grapple Room door and use the remaining runway to jump as far as possible to the right. Once near the acid platforms, Shinespark diagonally to reach the Missile Location. Entrance condition: {
"comeInShinecharged": {
"framesRequired": 175
}
}
Requires: "canTrickyJump"
"canShinechargeMovementComplex"
"canMidairShinespark"
{
"shinespark": {
"frames": 40
}
}
|
|
Align with the runway while falling to avoid all of the platforms. The door can also be opened while falling to save some time. Entrance condition: {
"comeInShinecharging": {
"length": 3,
"openEnd": 1
}
}
Requires: "canShinechargeMovementComplex" Exit condition: {
"leaveShinecharged": {
"framesRemaining": 50
}
}
|
|
From: 5
Golden Torizo (locked)
To: 4
Hidden Right Item
Notable: true 
One vertical spark is needed to open up the area directly above. A running jump is used to jump high enough into the revealed hole for a horizontal spark. Requires: "h_canNavigateHeatRooms"
{
"obstaclesCleared": [
"f_DefeatedGoldenTorizo"
]
}
"canShinechargeMovementComplex"
"HiJump"
{
"canShineCharge": {
"usedTiles": 28,
"openEnd": 0
}
}
{
"heatFrames": 900
}
{
"shinespark": {
"frames": 11
}
}
|
|
From: 5
Golden Torizo (locked)
To: 4
Hidden Right Item
Notable: true
One vertical spark is needed to open up the area directly above. Then, a second horizontal spark is performed where those blocks were cleared. Try to aim for the seam between tiles to break more blocks. And the left side of the opening may be slightly easier. Requires: "h_canNavigateHeatRooms"
{
"obstaclesCleared": [
"f_DefeatedGoldenTorizo"
]
}
"canShinechargeMovementComplex"
"canPreciseWalljump"
"canConsecutiveWalljump"
{
"canShineCharge": {
"usedTiles": 28,
"openEnd": 0
}
}
{
"heatFrames": 900
}
{
"shinespark": {
"frames": 11
}
}
|
|
Leave Shinecharged Through Top of Door - Open Door First (Very Hard)
Lower Norfair Spring Ball Maze Room
From: 4
Item
To: 3
Bottom Horizontal Door
Open the door to be able to spark out. Shinecharge near the missile location, then fall back down and run to the right before sparking out the right door. The Alcoons must have been cleared prior in order to be able to spark out. Requires: {
"canShineCharge": {
"usedTiles": 27,
"gentleUpTiles": 2,
"openEnd": 1
}
}
{
"obstaclesCleared": [
"A",
"C"
]
}
{
"heatFrames": 390
}
"canShinechargeMovementComplex"
{
"shinespark": {
"frames": 30
}
}
Exit condition: {
"leaveWithSpark": {}
}
|
|
Spring Ball Maze - Hero Shot Shinespark through the Right Door (Very Hard)
Lower Norfair Spring Ball Maze Room
From: 4
Item
To: 3
Bottom Horizontal Door
Shinecharge near the missile location, then fall down and shoot a beam shot through the lower half of the large stalactite. Shinespark to the right before the shot goes off screen, and have it open the door before Samus gets there. Requires: {
"canShineCharge": {
"usedTiles": 27,
"gentleUpTiles": 2,
"openEnd": 1
}
}
{
"obstaclesCleared": [
"A"
]
}
{
"heatFrames": 370
}
"canShinechargeMovementComplex"
"canHeroShot"
{
"shinespark": {
"frames": 31
}
}
{
"doorUnlockedAtNode": 3
}
Exit condition: {
"leaveWithSpark": {
"position": "bottom"
}
}
|
|
From: 4
Junction Right of Power Bomb Blocks
To: 4
Junction Right of Power Bomb Blocks
Use I-Frames from the first Dessgeega to run through the remaining enemies and store a shinespark. 1-tap Shortcharge, then run back towards the Hoppers and try to hit all three at once by shinesparking horizontally as the ceiling hopper jumps down. Requires: {
"canShineCharge": {
"usedTiles": 25,
"openEnd": 1,
"steepUpTiles": 4
}
}
{
"enemyDamage": {
"enemy": "Dessgeega",
"type": "contact",
"hits": 1
}
}
"canHitbox"
"canShinechargeMovementComplex"
"canHorizontalShinespark"
{
"shinespark": {
"frames": 40
}
}
{
"heatFrames": 330
}
Clears obstacles: D |
|
From: 7
Junction Left of Morph Tunnel
To: 7
Junction Left of Morph Tunnel
Use I-Frames from the first Dessgeega to run through the remaining enemies and store a shinespark. It helps to run towards the first hopper to take damage and then not stutter. Mid-air spark to kill all three at once. Requires: {
"canShineCharge": {
"usedTiles": 17,
"openEnd": 1
}
}
{
"enemyDamage": {
"enemy": "Dessgeega",
"type": "contact",
"hits": 1
}
}
"canHitbox"
"canMidairShinespark"
"canShinechargeMovementComplex"
{
"shinespark": {
"frames": 40
}
}
{
"heatFrames": 310
}
Clears obstacles: D |
|
Requires: "f_DefeatedPhantoon"
"SpeedBooster"
"canShinechargeMovementComplex"
{
"obstaclesCleared": [
"A"
]
}
Exit condition: {
"leaveShinecharged": {
"framesRemaining": 50
}
}
|
|
Entrance condition: {
"comeInShinecharging": {
"length": 0,
"openEnd": 1
}
}
Requires: {
"not": "f_DefeatedPhantoon"
}
"canRiskPermanentLossOfAccess"
"canShinechargeMovementComplex"
"canMidairShinespark"
{
"shinespark": {
"frames": 20
}
}
Exit condition: {
"leaveWithSpark": {}
}
|
|
Entrance condition: {
"comeInShinecharging": {
"length": 0,
"openEnd": 1
}
}
Requires: {
"not": "f_DefeatedPhantoon"
}
"canRiskPermanentLossOfAccess"
"canShinechargeMovementComplex"
"canMidairShinespark"
{
"shinespark": {
"frames": 20
}
}
Exit condition: {
"leaveWithSpark": {}
}
|
|
From: 1
Left Door
To: 1
Left Door
Start at least 2 tiles from the water line, and stutter just before entering the water in order to charge a spark in room. Requires: "f_DefeatedPhantoon"
"canStutterWaterShineCharge"
"canShinechargeMovementComplex"
{
"canShineCharge": {
"usedTiles": 33,
"openEnd": 2
}
}
{
"shinespark": {
"frames": 20
}
}
Exit condition: {
"leaveWithSpark": {
"position": "bottom"
}
}
|
|
Entrance condition: {
"comeInShinecharged": {
"framesRequired": 110
}
}
Requires: "Gravity" "canShinechargeMovementComplex" Exit condition: {
"leaveShinecharged": {
"framesRemaining": "auto"
}
}
|
|
Entrance condition: {
"comeInShinecharged": {
"framesRequired": 160
}
}
Requires: "canShinechargeMovementComplex" "HiJump" "canWalljump" Exit condition: {
"leaveShinecharged": {
"framesRemaining": "auto"
}
}
|
|
From: 1
Left Door
To: 2
Right Door
If needed, shoot the Bull to prevent it from blocking Samus' path. Entrance condition: {
"comeInShinecharged": {
"framesRequired": 150
}
}
Requires: "SpaceJump"
"canShinechargeMovementComplex"
{
"shinespark": {
"frames": 9
}
}
Exit condition: {
"leaveWithSpark": {}
}
|
|
From: 1
Left Door
To: 2
Right Door
Entrance condition: {
"comeInShinecharging": {
"length": 19,
"openEnd": 0,
"steepDownTiles": 3
}
}
Requires: {
"or": [
"Gravity",
{
"and": [
{
"not": "f_DefeatedPhantoon"
},
"canRiskPermanentLossOfAccess"
]
}
]
}
"canShinechargeMovementComplex"
Exit condition: {
"leaveShinecharged": {
"framesRemaining": 100
}
}
|
|
From: 1
Left Door
To: 2
Right Door
Entrance condition: {
"comeInShinecharging": {
"length": 10,
"openEnd": 0,
"steepDownTiles": 1
}
}
Requires: "canWaterShineCharge" "HiJump" "canWalljump" "canShinechargeMovementComplex" Exit condition: {
"leaveShinecharged": {
"framesRemaining": 80
}
}
|
|
From: 1
Left Door
To: 2
Right Door
Start at least 2 tiles from the water line, and stutter just before entering the water in order to charge a spark in room. Requires: "f_DefeatedPhantoon"
"canStutterWaterShineCharge"
"canShinechargeMovementComplex"
"canWalljump"
"HiJump"
{
"canShineCharge": {
"usedTiles": 33,
"openEnd": 2
}
}
Exit condition: {
"leaveShinecharged": {
"framesRemaining": 75
}
}
|
|
From: 1
Left Door
To: 2
Right Door
Start at least 2 tiles from the water line, and stutter just before entering the water in order to charge a spark in room. Requires: "f_DefeatedPhantoon"
"canStutterWaterShineCharge"
"canShinechargeMovementComplex"
"canWalljump"
"canSpaceJumpWaterBounce"
{
"canShineCharge": {
"usedTiles": 33,
"openEnd": 2
}
}
Exit condition: {
"leaveShinecharged": {
"framesRemaining": 30
}
}
|
|
Enter the room with a shinecharge. Run and jump over the Bull (if power is on), and carry the shinecharge into the next room. Entrance condition: {
"comeInShinecharged": {
"framesRequired": 130
}
}
Requires: "Gravity" "canShinechargeMovementComplex" Exit condition: {
"leaveShinecharged": {
"framesRemaining": "auto"
}
}
|
|
Enter the room with a shinecharge. Use Space Jump to run and jump over the Bull and water (if power is on), and carry the shinecharge into the next room. Entrance condition: {
"comeInShinecharged": {
"framesRequired": 135
}
}
Requires: "SpaceJump" "canShinechargeMovementComplex" Exit condition: {
"leaveShinecharged": {
"framesRemaining": "auto"
}
}
|
|
Enter the room with a shinecharge. Run and jump over the Bull (if power is on). Fire a shot mid-air, and activate the shinespark wind-up. Wait to spark until the shot as reached the door. Entrance condition: {
"comeInShinecharged": {
"framesRequired": 75
}
}
Requires: "canShinechargeMovementComplex"
{
"shinespark": {
"frames": 25
}
}
Exit condition: {
"leaveWithSpark": {}
}
|
|
From: 2
Right Door
To: 1
Left Door
To maximize frames remaining, gain a shinecharge while sliding off the ledge into the water. Entrance condition: {
"comeInShinecharging": {
"length": 8,
"openEnd": 1,
"steepUpTiles": 2
}
}
Requires: "Gravity" "canShinechargeMovementComplex" Exit condition: {
"leaveShinecharged": {
"framesRemaining": 70
}
}
|
|
From: 1
Right Door
To: 1
Right Door
Requires: "h_canXMode"
"h_XModeThornHit"
"h_XModeThornHit"
"SpaceJump"
"HiJump"
"canShinechargeMovementComplex"
{
"canShineCharge": {
"usedTiles": 33,
"openEnd": 2
}
}
{
"shinespark": {
"frames": 21
}
}
{
"or": [
{
"and": [
"f_DefeatedPhantoon",
"Gravity"
]
},
{
"and": [
{
"not": "f_DefeatedPhantoon"
},
"canRiskPermanentLossOfAccess"
]
}
]
}
Exit condition: {
"leaveWithSpark": {}
}
|
|
From: 1
Right Door
To: 2
Item (locked)
Jump as far as possible before activating the spark, while sparking high enough to crash into the Chozo statue's hand. Entrance condition: {
"comeInShinecharged": {
"framesRequired": 100
}
}
Requires: "canShinechargeMovementComplex"
"canMidairShinespark"
{
"shinespark": {
"frames": 33,
"excessFrames": 7
}
}
{
"not": "f_DefeatedPhantoon"
}
{
"or": [
"canRiskPermanentLossOfAccess",
"canCarefulJump"
]
}
|
|
From: 1
Right Door
To: 2
Item (locked)
Gain a shinecharge while entering the room. Run back to the door, and then run left and jump as far as possible before activating the spark, while sparking high enough to crash into the Chozo statue's hand. Entrance condition: {
"comeInShinecharging": {
"length": 7,
"openEnd": 0,
"steepDownTiles": 2
}
}
Requires: "canShinechargeMovementComplex"
"canMidairShinespark"
{
"shinespark": {
"frames": 33,
"excessFrames": 7
}
}
{
"or": [
"canRiskPermanentLossOfAccess",
"canCarefulJump"
]
}
|
|
Entrance condition: {
"comeInShinecharged": {
"framesRequired": 70
}
}
Requires: "canShinechargeMovementComplex" Exit condition: {
"leaveShinecharged": {
"framesRemaining": "auto"
}
}
|
|
From: 2
Top Left Door
To: 4
Top Right Door
Entrance condition: {
"comeInShinecharging": {
"length": 5,
"openEnd": 1
}
}
Requires: "canShinechargeMovementComplex" Exit condition: {
"leaveShinecharged": {
"framesRemaining": 115
}
}
|
|
From: 2
Top Left Door
To: 5
Middle Right Door
Entrance condition: {
"comeInShinecharging": {
"length": 5,
"openEnd": 1
}
}
Requires: "canShinechargeMovementComplex" Exit condition: {
"leaveShinecharged": {
"framesRemaining": 5
}
}
|
|
Entrance condition: {
"comeInShinecharged": {
"framesRequired": 70
}
}
Requires: "canShinechargeMovementComplex" Exit condition: {
"leaveShinecharged": {
"framesRemaining": "auto"
}
}
|
|
From: 4
Top Right Door
To: 2
Top Left Door
Entrance condition: {
"comeInShinecharging": {
"length": 12,
"openEnd": 0,
"steepDownTiles": 7
}
}
Requires: "canShinechargeMovementComplex" Exit condition: {
"leaveShinecharged": {
"framesRemaining": 80
}
}
|
|
From: 4
Top Right Door
To: 2
Top Left Door
Entrance condition: {
"comeInShinecharging": {
"length": 5,
"openEnd": 1,
"steepDownTiles": 3
}
}
Requires: "canShinechargeMovementComplex" Exit condition: {
"leaveShinecharged": {
"framesRemaining": 115
}
}
|
|
From: 4
Top Right Door
To: 5
Middle Right Door
Entrance condition: {
"comeInShinecharged": {
"framesRequired": 150
}
}
Requires: "canShinechargeMovementComplex" Exit condition: {
"leaveShinecharged": {
"framesRemaining": "auto"
}
}
|
|
From: 4
Top Right Door
To: 5
Middle Right Door
Entrance condition: {
"comeInShinecharging": {
"length": 12,
"openEnd": 0,
"steepDownTiles": 7
}
}
Requires: "canShinechargeMovementComplex" Exit condition: {
"leaveShinecharged": {
"framesRemaining": 75
}
}
|
|
From: 1
Left Door
To: 1
Left Door
Entrance condition: {
"comeInRunning": {
"speedBooster": true,
"minTiles": 2
}
}
Requires: "canSuitlessMaridia"
"canShinechargeMovementComplex"
"canStutterWaterShineCharge"
{
"shinespark": {
"frames": 3
}
}
Exit condition: {
"leaveWithSpark": {}
}
|
|
From: 1
Left Door
To: 2
Right Door
Notable: true 
Requires a very precise stutter where Samus is moving slow enough while near the gate, so she can shoot it and it is fully open before she collides with it. A runway in the adjacent room of 2 tiles works best - with a longer runway, Samus will be moving too fast. Entrance condition: {
"comeInRunning": {
"speedBooster": true,
"minTiles": 1.4375
}
}
Requires: "canSuitlessMaridia"
"canShinechargeMovementComplex"
"canStutterWaterShineCharge"
"canDodgeWhileShooting"
{
"ammo": {
"type": "Super",
"count": 1
}
}
Exit condition: {
"leaveShinecharged": {
"framesRemaining": 70
}
}
|
|
From: 3
Middle Right Door
To: 3
Middle Right Door
Entrance condition: {
"comeInRunning": {
"speedBooster": true,
"minTiles": 1
}
}
Requires: "canStutterWaterShineCharge"
"canShinechargeMovementComplex"
{
"canShineCharge": {
"usedTiles": 33,
"openEnd": 2
}
}
{
"shinespark": {
"frames": 19
}
}
Exit condition: {
"leaveWithSpark": {
"position": "bottom"
}
}
|
|
From: 3
Middle Right Door
To: 3
Middle Right Door
Entrance condition: {
"comeInRunning": {
"speedBooster": true,
"minTiles": 2
}
}
Requires: "canStutterWaterShineCharge"
"canShinechargeMovementComplex"
{
"canShineCharge": {
"usedTiles": 33,
"openEnd": 2
}
}
{
"or": [
{
"shinespark": {
"frames": 9
}
},
{
"and": [
"canShinechargeMovementTricky",
{
"shinespark": {
"frames": 2
}
}
]
}
]
}
Exit condition: {
"leaveWithSpark": {}
}
|
|
From: 1
Left Door
To: 1
Left Door
Entrance condition: {
"comeInRunning": {
"speedBooster": true,
"minTiles": 2
}
}
Requires: "canStutterWaterShineCharge"
"canShinechargeMovementComplex"
{
"canShineCharge": {
"usedTiles": 33,
"openEnd": 2
}
}
{
"or": [
{
"shinespark": {
"frames": 9
}
},
{
"and": [
"canShinechargeMovementTricky",
{
"shinespark": {
"frames": 2
}
}
]
}
]
}
Exit condition: {
"leaveWithSpark": {}
}
|
|
From: 10
Upper Right Ledge Junction
To: 4
Top Right Door
Run right-to-left to gain a shinecharge on the upper right ledge. Requires: "Gravity"
"HiJump"
"SpaceJump"
{
"canShineCharge": {
"usedTiles": 20,
"gentleUpTiles": 3,
"gentleDownTiles": 1,
"steepUpTiles": 1,
"openEnd": 0
}
}
"canShinechargeMovementComplex"
Exit condition: {
"leaveShinecharged": {
"framesRemaining": 45
}
}
|
|
Run right-to-left to gain a shinecharge on the upper right ledge. Use a gravity jump, Space Jump, or HiJump to approach the door above and spark out. Requires: "Gravity"
{
"or": [
"SpaceJump",
"canGravityJump",
{
"and": [
"HiJump",
{
"or": [
"canWalljump",
"canTrickyDashJump"
]
}
]
}
]
}
{
"canShineCharge": {
"usedTiles": 20,
"gentleUpTiles": 3,
"gentleDownTiles": 1,
"steepUpTiles": 1,
"openEnd": 0
}
}
"canShinechargeMovementComplex"
"canMidairShinespark"
{
"shinespark": {
"frames": 8
}
}
Exit condition: {
"leaveWithSpark": {}
}
|
|
From: 11
Upper Left Ledge Junction
To: 1
Top Left Door
Notable: true 
Run right-to-left to gain a shinecharge on the ledge near the top-left door, and perform tight ledge-grabs to make it through the door with shinecharge frames remaining. This is a very short runway, making it an exceptionally difficult short-charge. Requires: "Gravity"
{
"canShineCharge": {
"usedTiles": 11,
"steepUpTiles": 5,
"openEnd": 2
}
}
"canShinechargeMovementComplex"
Exit condition: {
"leaveShinecharged": {
"framesRemaining": 30
}
}
|
|
From: 11
Upper Left Ledge Junction
To: 5
Top Door
Notable: true
Run right-to-left to gain a shinecharge on the ledge near the top-left door, and Space Jump to the top center door with shinecharge frames remaining. This is a very short runway, making it an exceptionally difficult short-charge. Requires: "Gravity"
"SpaceJump"
"canTrickyDashJump"
{
"canShineCharge": {
"usedTiles": 11,
"steepUpTiles": 5,
"openEnd": 2
}
}
"canShinechargeMovementComplex"
Exit condition: {
"leaveShinecharged": {
"framesRemaining": 15
}
}
|
|
From: 11
Upper Left Ledge Junction
To: 5
Top Door
Notable: true
Run right-to-left to gain a shinecharge on the ledge near the top-left door, and Space Jump to the top center door with shinecharge frames remaining. This is a very short runway, making it an exceptionally difficult short-charge. Requires: "Gravity"
"HiJump"
"SpaceJump"
{
"canShineCharge": {
"usedTiles": 11,
"steepUpTiles": 5,
"openEnd": 2
}
}
"canShinechargeMovementComplex"
Exit condition: {
"leaveShinecharged": {
"framesRemaining": 40
}
}
|
|
From: 2
Bottom Left Door
To: 2
Bottom Left Door
Entrance condition: {
"comeInRunning": {
"speedBooster": true,
"minTiles": 2
}
}
Requires: "canSuitlessMaridia"
"canShinechargeMovementComplex"
"canStutterWaterShineCharge"
{
"canShineCharge": {
"usedTiles": 33,
"openEnd": 2
}
}
{
"or": [
{
"shinespark": {
"frames": 12
}
},
{
"and": [
"canShinechargeMovementTricky",
{
"shinespark": {
"frames": 3
}
}
]
}
]
}
Exit condition: {
"leaveWithSpark": {}
}
|
|
Entrance condition: {
"comeInRunning": {
"speedBooster": true,
"minTiles": 0.4375
}
}
Requires: "canSuitlessMaridia"
"canShinechargeMovementComplex"
"canWaterShineCharge"
"canHorizontalShinespark"
{
"canShineCharge": {
"usedTiles": 33,
"openEnd": 2
}
}
{
"shinespark": {
"frames": 139,
"excessFrames": 66
}
}
|
|
From: 2
Bottom Left Door
To: 9
Junction Below Top Door
Start running next to the transition (But at least 1 pixel away) so that Samus has very low run speed. Entrance condition: {
"comeInRunning": {
"speedBooster": true,
"minTiles": 0.4375
}
}
Requires: "canWaterShineCharge"
"canShinechargeMovementComplex"
{
"canShineCharge": {
"usedTiles": 33,
"openEnd": 2
}
}
{
"shinespark": {
"frames": 34,
"excessFrames": 3
}
}
|
|
From: 4
Right Door
To: 4
Right Door
Entrance condition: {
"comeInRunning": {
"speedBooster": true,
"minTiles": 2
}
}
Requires: "canStutterWaterShineCharge"
"canShinechargeMovementComplex"
{
"or": [
{
"shinespark": {
"frames": 12
}
},
{
"and": [
"canShinechargeMovementTricky",
{
"shinespark": {
"frames": 3
}
}
]
}
]
}
Exit condition: {
"leaveWithSpark": {}
}
|
|
From: 2
Right Door
To: 1
Bottom Left Door
Notable: true 
Quickly move next to the first set of speed blocks at the left end of the hole. Shoot a Wave shot, then just before it goes off screen, horizontally spark to the left to get through all the shot and speed blocks. A spin jump may be used to move horizontally into place much quicker. Entrance condition: {
"comeInShinecharged": {
"framesRequired": 120
}
}
Requires: "canSuitlessMaridia"
"canCarefulJump"
"Wave"
"canShinechargeMovementComplex"
"canHorizontalShinespark"
{
"shinespark": {
"frames": 75,
"excessFrames": 8
}
}
|
|
From: 2
Right Door
To: 1
Bottom Left Door
Notable: true
Quickly move next to the first set of speed blocks at the left end of the hole. Shoot a Wave shot, then just before it goes off screen, horizontally spark to the left to get through all the shot and speed blocks. A spin jump may be used to move horizontally into place much quicker. Entrance condition: {
"comeInShinecharging": {
"length": 2,
"openEnd": 1
}
}
Requires: "canWaterShineCharge"
"Wave"
"canShinechargeMovementComplex"
"canHorizontalShinespark"
{
"shinespark": {
"frames": 75,
"excessFrames": 8
}
}
|
|
Entrance condition: {
"comeInRunning": {
"speedBooster": true,
"minTiles": 2
}
}
Requires: "canStutterWaterShineCharge"
"canShinechargeMovementComplex"
{
"canShineCharge": {
"usedTiles": 33,
"openEnd": 2
}
}
{
"or": [
{
"shinespark": {
"frames": 12
}
},
{
"and": [
"canShinechargeMovementTricky",
{
"shinespark": {
"frames": 3
}
}
]
}
]
}
Exit condition: {
"leaveWithSpark": {}
}
|
|
After storing the shinecharge, spin jump back to the left and spark aligned against the right side of the left shaft. At the top of the room, hold right in order to land on the platform below the door. Entrance condition: {
"comeInRunning": {
"speedBooster": true,
"minTiles": 2
}
}
Requires: "canStutterWaterShineCharge"
"canShinechargeMovementComplex"
{
"canShineCharge": {
"usedTiles": 33,
"openEnd": 2
}
}
{
"shinespark": {
"frames": 40,
"excessFrames": 6
}
}
{
"or": [
"canCrouchJump",
"Gravity",
"HiJump",
"canSpringBallJumpMidAir",
{
"and": [
"canTrickyUseFrozenEnemies",
{
"ammo": {
"type": "Super",
"count": 1
}
}
]
}
]
}
|
|
From: 3
Draygon (locked)
To: 2
Right Door (locked)
Notable: true 
Charge a shinespark in the bottom of Draygon's room, then Gravity jump up in order to shinespark out of the right door. Requires: "canGravityJump"
"canShinechargeMovementComplex"
"canMidairShinespark"
{
"canShineCharge": {
"usedTiles": 20,
"openEnd": 1
}
}
{
"shinespark": {
"frames": 14
}
}
Exit condition: {
"leaveWithSpark": {}
}
|
|
From: 3
Draygon (locked)
To: 6
Draygon (unlocked)
Notable: true 
Shinecharge in-room, then horizontally spark through Draygon multiple times. It takes 3 Shinesparks if that is the only source of damage onto Draygon. Be careful of taking damage at the end of a Shinespark when near walls and on the killing Shinespark. Requires: "Gravity"
"canMidairShinespark"
"canShinechargeMovementComplex"
{
"or": [
"canShinechargeMovementTricky",
"h_canBreakThreeDraygonTurrets"
]
}
{
"canShineCharge": {
"usedTiles": 22,
"openEnd": 0
}
}
{
"enemyDamage": {
"enemy": "Draygon",
"type": "contact",
"hits": 2
}
}
{
"or": [
"HiJump",
{
"enemyDamage": {
"enemy": "Draygon",
"type": "contact",
"hits": 1
}
}
]
}
{
"shinespark": {
"frames": 150
}
}
Clears obstacles: f_DefeatedDraygon |
|
Requires: "h_canXMode"
"h_XModeSpikeHit"
"h_XModeSpikeHit"
{
"or": [
"h_XModeSpikeHit",
"canStationarySpinJump"
]
}
"Gravity"
"HiJump"
"SpaceJump"
"canShinechargeMovementComplex"
"canMidairShinespark"
{
"canShineCharge": {
"usedTiles": 33,
"openEnd": 2
}
}
{
"shinespark": {
"frames": 10
}
}
Exit condition: {
"leaveWithSpark": {}
}
|
|
Requires: "h_canXMode"
"h_XModeSpikeHit"
"h_XModeSpikeHit"
{
"or": [
"h_XModeSpikeHit",
"canStationarySpinJump"
]
}
"Gravity"
"canShinechargeMovementComplex"
{
"canShineCharge": {
"usedTiles": 33,
"openEnd": 2
}
}
Exit condition: {
"leaveShinecharged": {
"framesRemaining": 100
}
}
|
|
Jump out of the sand before Shinesparking. Entrance condition: {
"comeInShinecharged": {
"framesRequired": 105
},
"comesThroughToilet": "any"
}
Requires: "canPlayInSand"
"canSunkenTileWideWallClimb"
"canShinechargeMovementComplex"
{
"or": [
"canMidairShinespark",
"canCarefulJump"
]
}
{
"shinespark": {
"frames": 11
}
}
|
|
From: 1
Top Sand Entrance
To: 4
Right Item
The shinespark must be performed near the upper ledge, and not inside the sandfall. Entrance condition: {
"comeInShinecharged": {
"framesRequired": 70
},
"comesThroughToilet": "any"
}
Requires: "canSuitlessMaridia"
"Morph"
"canMidairShinespark"
"canShinechargeMovementComplex"
"canPrepareForNextRoom"
{
"shinespark": {
"frames": 18
}
}
|
|
From: 1
Top Sand Entrance
To: 4
Right Item
Shinespark vertically from the sand to get onto the first ledge. Carefully get to the second ledge and return to lure the Boulder, or shoot it with a Super. Entrance condition: {
"comeInShinecharged": {
"framesRequired": 140
},
"comesThroughToilet": "any"
}
Requires: "canSuitlessMaridia"
"Morph"
"canPlayInSand"
"canShinechargeMovementComplex"
{
"shinespark": {
"frames": 12
}
}
{
"or": [
"HiJump",
"canSpringBallJumpMidAir",
"canSunkenTileWideWallClimb"
]
}
{
"or": [
"canTrickyJump",
{
"ammo": {
"type": "Super",
"count": 1
}
},
{
"enemyDamage": {
"enemy": "Boulder",
"type": "contact",
"hits": 1
}
}
]
}
|
|
From: 2
Bottom Left Door
To: 2
Bottom Left Door
Enter the room with a careful amount of momentum where Samus must spend extra time slowing down during the stutter, but must not have much run speed. Entrance condition: {
"comeInRunning": {
"speedBooster": true,
"minTiles": 2.4375
}
}
Requires: "canStutterWaterShineCharge"
"canShinechargeMovementComplex"
{
"canShineCharge": {
"usedTiles": 33,
"openEnd": 2
}
}
{
"or": [
{
"enemyDamage": {
"enemy": "Mochtroid",
"type": "contact",
"hits": 2
}
},
{
"and": [
"canDodgeWhileShooting",
{
"or": [
"Wave",
"Spazer",
"Plasma",
{
"ammo": {
"type": "Missile",
"count": 1
}
},
{
"ammo": {
"type": "Super",
"count": 1
}
}
]
}
]
}
]
}
{
"or": [
{
"shinespark": {
"frames": 12
}
},
{
"and": [
"canShinechargeMovementTricky",
{
"shinespark": {
"frames": 3
}
}
]
}
]
}
Exit condition: {
"leaveWithSpark": {}
}
|
|
From: 3
Bottom Right Door
To: 1
Top Left Door
Charge a shinespark below the Oums, near the bottom right door, quickly move through the morph tunnel and spark up left to the middle door. This is an alternative to wall jumping. Requires: "Morph"
"Gravity"
"canShinechargeMovementComplex"
{
"or": [
{
"and": [
{
"canShineCharge": {
"usedTiles": 33,
"openEnd": 0
}
},
{
"shinespark": {
"frames": 20,
"excessFrames": 3
}
}
]
},
{
"and": [
"canMidairShinespark",
{
"canShineCharge": {
"usedTiles": 33,
"openEnd": 0
}
},
{
"shinespark": {
"frames": 15,
"excessFrames": 3
}
}
]
}
]
}
|
|
Halfie Climb Enter with Shinespark from the Bottom Right (Conserve Health) (Very Hard)
Halfie Climb Room
From: 3
Bottom Right Door
To: 2
Bottom Left Door
Notable: true 
Quickly shoot out the 3 shot blocks then horizontal spark breaking the speed blocks. Jump forward to save some health before Shinesparking Wait for the Oums to roll on their own to a place where they can be climbed. Do not stand on the Oums when they begin to attack. Entrance condition: {
"comeInShinecharged": {
"framesRequired": 125
}
}
Requires: "Morph"
"canSuitlessMaridia"
"canUseEnemies"
"canHorizontalShinespark"
"canShinechargeMovementComplex"
{
"shinespark": {
"frames": 70,
"excessFrames": 4
}
}
|
|
From: 3
Bottom Right Door
To: 4
Top Right Door
Charge a shinespark below the Oums, near the bottom right door, quickly move through the morph tunnel and spark up to the top door. This is an alternative to wall jumping. Requires: "Morph"
"Gravity"
"canShinechargeMovementComplex"
{
"or": [
{
"and": [
{
"canShineCharge": {
"usedTiles": 33,
"openEnd": 0
}
},
{
"shinespark": {
"frames": 39,
"excessFrames": 4
}
}
]
},
{
"and": [
"canMidairShinespark",
{
"canShineCharge": {
"usedTiles": 33,
"openEnd": 0
}
},
{
"shinespark": {
"frames": 33,
"excessFrames": 3
}
}
]
}
]
}
|
|
From: 2
Bottom Right Door
To: 2
Bottom Right Door
Enter the room with a careful amount of momentum where Samus must spend extra time slowing down during the stutter, but must not have much run speed. Entrance condition: {
"comeInRunning": {
"speedBooster": true,
"minTiles": 2.4375
}
}
Requires: "canStutterWaterShineCharge"
"canShinechargeMovementComplex"
{
"canShineCharge": {
"usedTiles": 33,
"openEnd": 2
}
}
{
"or": [
{
"shinespark": {
"frames": 12
}
},
{
"and": [
"canShinechargeMovementTricky",
{
"shinespark": {
"frames": 3
}
}
]
}
]
}
Exit condition: {
"leaveWithSpark": {}
}
|
|
From: 1
Top Sand Entrance
To: 7
Below Morph Tunnel Junction
Shoot the shot block before reaching the sand and then shinespark up. A diagonal ShineSpark will most likely not have any horizontal movement when performed from the sand. Entrance condition: {
"comeInShinecharged": {
"framesRequired": 85
},
"comesThroughToilet": "any"
}
Requires: "h_canNavigateUnderwater"
"canPlayInSand"
"canShinechargeMovementComplex"
"Wave"
{
"shinespark": {
"frames": 24,
"excessFrames": 5
}
}
|
|
From: 1
Top Sand Entrance
To: 7
Below Morph Tunnel Junction
Shoot the shot block on the descent then shinespark diagonally up before hitting the sand. Entrance condition: {
"comeInShinecharged": {
"framesRequired": 55
},
"comesThroughToilet": "any"
}
Requires: "h_canNavigateUnderwater"
"canMidairShinespark"
"canShinechargeMovementComplex"
"Wave"
"canPrepareForNextRoom"
{
"shinespark": {
"frames": 17
}
}
|
|
Entrance condition: {
"comeInShinecharged": {
"framesRequired": 95
}
}
Requires: "canMidairShinespark"
"canShinechargeMovementComplex"
{
"or": [
"HiJump",
"canWalljump"
]
}
{
"shinespark": {
"frames": 17
}
}
Exit condition: {
"leaveWithSpark": {}
}
|
|
From: 3
Junction Left of Morph Tunnel
To: 1
Left Door
Notable: true 
Charge a spark below towards the right then run back and jump up and spark out of the left door. Requires: "canShinechargeMovementComplex"
"canTrickyDashJump"
{
"canShineCharge": {
"usedTiles": 22,
"openEnd": 2
}
}
{
"shinespark": {
"frames": 15
}
}
Exit condition: {
"leaveWithSpark": {}
}
|
|
From: 3
Junction Left of Morph Tunnel
To: 1
Left Door
Charge a spark left and use the last bit of platform to jump up to the ledge above. Requires: "canShinechargeMovementComplex"
"HiJump"
"canWalljump"
{
"canShineCharge": {
"usedTiles": 20,
"openEnd": 2
}
}
Exit condition: {
"leaveShinecharged": {
"framesRemaining": 30
}
}
|
|
From: 3
Junction Left of Morph Tunnel
To: 1
Left Door
Charge a spark below towards the right then run back and jump up and spark out of the left door. Requires: "canShinechargeMovementComplex"
"HiJump"
{
"canShineCharge": {
"usedTiles": 22,
"openEnd": 2
}
}
{
"shinespark": {
"frames": 15
}
}
Exit condition: {
"leaveWithSpark": {}
}
|
|
From: 3
Junction Left of Morph Tunnel
To: 2
Right Door
Charge on the central runway then carry the spark through the morph tunnel and out the right door. The door can be shot just before initiating the spark. This is easier with Gravity because the tide won't interfere. Requires: "Gravity"
"canShinechargeMovementComplex"
"canCarefulJump"
"Morph"
{
"canShineCharge": {
"usedTiles": 22,
"openEnd": 2
}
}
{
"shinespark": {
"frames": 30
}
}
Exit condition: {
"leaveWithSpark": {}
}
|
|
From: 3
Junction Left of Morph Tunnel
To: 2
Right Door
Charge on the central runway then carry the spark through the morph tunnel and out the right door. This can be done by being careful not to fall off of the runway and into the water or timing the tide. The door can be shot just before initiating the spark. Requires: "canShinechargeMovementComplex"
"canCarefulJump"
"Morph"
{
"canShineCharge": {
"usedTiles": 22,
"openEnd": 1
}
}
{
"shinespark": {
"frames": 30
}
}
Exit condition: {
"leaveWithSpark": {}
}
|
|
From: 2
Item
To: 1
Top Left Door (locked)
Using the bottom of the room, shortcharge to use the echoes created by shinesparking to kill all of the Standing Pirates. Either lead the pirate to the left wall or take a hit to gain iframes to use the full runway to charge a spark To lead a pirate, have it shoot in the direction you want it to go. Then jump overhead and crouch on the other side. Or, jump and aim down while on the sloped tiles just above to lower the camera and wait for the pirate to move to the correct spot. Turn around and diagonal spark the ceiling to kill the lowest pirate, and later the middle pirates. Building a spark towards the left allows for enough run speed to jump to the middle level. Then vertical shinespark out which kills the top pirate. Requires: {
"or": [
"Morph",
"canCarefulJump",
"canCameraManip"
]
}
"canShinechargeMovementComplex"
{
"canShineCharge": {
"usedTiles": 21,
"openEnd": 0
}
}
{
"shinespark": {
"frames": 30,
"excessFrames": 7
}
}
"canUseSpeedEchoes"
{
"or": [
"canCameraManip",
{
"and": [
{
"canShineCharge": {
"usedTiles": 19,
"openEnd": 0
}
},
{
"shinespark": {
"frames": 2,
"excessFrames": 2
}
}
]
},
{
"and": [
{
"canShineCharge": {
"usedTiles": 21,
"openEnd": 0
}
},
{
"shinespark": {
"frames": 3,
"excessFrames": 3
}
},
{
"enemyDamage": {
"enemy": "Pink Space Pirate (standing)",
"type": "laser",
"hits": 1
}
}
]
}
]
}
Clears obstacles: A |
|
From: 3
Central Junction with all Standing Pirates Killed
To: 1
Top Left Door (locked)
Requires: "canShinechargeMovement"
{
"or": [
{
"and": [
"HiJump",
{
"canShineCharge": {
"usedTiles": 21,
"openEnd": 0
}
},
{
"shinespark": {
"frames": 21,
"excessFrames": 7
}
}
]
},
{
"and": [
"canShinechargeMovementComplex",
"canCarefulJump",
{
"canShineCharge": {
"usedTiles": 21,
"openEnd": 0
}
},
{
"shinespark": {
"frames": 30,
"excessFrames": 7
}
}
]
}
]
}
|
|
Spark vertically to avoid hitting the right ledge. Entrance condition: {
"comeInShinecharged": {
"framesRequired": 120
},
"comesThroughToilet": "any"
}
Requires: "canShinechargeMovementComplex"
"canMidairShinespark"
{
"shinespark": {
"frames": 37,
"excessFrames": 10
}
}
{
"or": [
{
"enemyDamage": {
"enemy": "Choot",
"type": "contact",
"hits": 1
}
},
{
"enemyKill": {
"enemies": [
[
"Choot"
]
],
"explicitWeapons": [
"Missile",
"Super",
"ScrewAttack",
"PseudoScrew",
"Plasma",
"Charge+Wave",
"Charge+Spazer"
]
}
}
]
}
|
|
From: 2
Bottom Right Door
To: 1
Left Vertical Door
Start the dash as close to the door transition as possible to help avoid getting hit by the first Owtch. Store the shine charge while high up on the left slope. Spark up while on the right side of the platform. To avoid the Owtch on the platform, it may help to jump on the left side of the platform then jump again and spark midair above the right side. Entrance condition: {
"comeInRunning": {
"speedBooster": true,
"minTiles": 0.4375
}
}
Requires: "canWaterShineCharge"
"canShinechargeMovementComplex"
{
"or": [
{
"shinespark": {
"frames": 90,
"excessFrames": 50
}
},
{
"and": [
{
"shinespark": {
"frames": 90,
"excessFrames": 57
}
},
{
"or": [
"canWalljump",
"HiJump",
"canSpringBallJumpMidAir",
"h_canFly"
]
}
]
}
]
}
|
|
Gain a shinecharge by running right-to-left on the underwater runway on the right side of the room. Perform quick ledge-grabs to reach the platform in front of the door in time to spark out. Requires: "Gravity"
"SpeedBooster"
{
"enemyKill": {
"enemies": [
[
"Owtch",
"Owtch"
]
]
}
}
"canShinechargeMovementComplex"
{
"canShineCharge": {
"usedTiles": 16,
"openEnd": 2,
"gentleDownTiles": 2,
"gentleUpTiles": 2,
"steepDownTiles": 1,
"steepUpTiles": 1,
"startingDownTiles": 1
}
}
{
"shinespark": {
"frames": 10
}
}
Exit condition: {
"leaveWithSpark": {}
}
|
|
Gain a shinecharge by running right-to-left on the underwater runway on the right side of the room. Use HiJump or a Spring Ball jump to quickly exit the water to the left and spark up. Requires: "Gravity"
"SpeedBooster"
{
"or": [
"HiJump",
"canTrickySpringBallJump",
"canWalljump",
{
"and": [
"canGravityJump",
"canShinechargeMovementTricky"
]
}
]
}
{
"enemyKill": {
"enemies": [
[
"Owtch",
"Owtch"
]
]
}
}
"canShinechargeMovementComplex"
{
"canShineCharge": {
"usedTiles": 16,
"openEnd": 2,
"gentleDownTiles": 2,
"gentleUpTiles": 2,
"steepDownTiles": 1,
"steepUpTiles": 1,
"startingDownTiles": 1
}
}
{
"shinespark": {
"frames": 43,
"excessFrames": 3
}
}
|
|
Start the dash as close to the door transition as possible to help avoid getting hit by the first Owtch. Store the shine charge while high up on the left slope. Spark up while on the right side of the platform. To avoid the Owtch on the platform, it may help to jump on the left side of the platform then jump again and spark midair above the right side. Entrance condition: {
"comeInRunning": {
"speedBooster": true,
"minTiles": 0.4375
}
}
Requires: "canWaterShineCharge"
"canShinechargeMovementComplex"
{
"shinespark": {
"frames": 90,
"excessFrames": 11
}
}
|
|
Shinespark from the left side of the water, or the very edge of the land. It helps to face right before Shinesparking. Entrance condition: {
"comeInShinecharged": {
"framesRequired": 120
}
}
Requires: "canShinechargeMovementComplex"
{
"or": [
{
"shinespark": {
"frames": 43,
"excessFrames": 3
}
},
{
"and": [
"canMidairShinespark",
{
"shinespark": {
"frames": 30,
"excessFrames": 3
}
}
]
}
]
}
|
|
Shinespark from the tile to the right of the Choot. It helps to face right before Shinesparking. Entrance condition: {
"comeInShinecharged": {
"framesRequired": 145
}
}
Requires: "canShinechargeMovementComplex"
"canCarefulJump"
{
"shinespark": {
"frames": 49
}
}
|
|
A diagonal spark may take damage from the Choot It helps to face right before Shinesparking. Entrance condition: {
"comeInShinecharged": {
"framesRequired": 45
}
}
Requires: "canShinechargeMovementComplex"
"canMidairShinespark"
{
"shinespark": {
"frames": 13
}
}
|
|
From: 2
Bottom Door
To: 1
Left Door
Finish shinecharging on the raised plateau, then quickly climb up to the left door. Requires: "Gravity"
"canShinechargeMovementComplex"
"HiJump"
{
"canShineCharge": {
"usedTiles": 33,
"openEnd": 2
}
}
Exit condition: {
"leaveShinecharged": {
"framesRemaining": 65
}
}
|
|
From: 2
Bottom Door
To: 1
Left Door
Finish shinecharging on the raised plateau, then quickly climb up to the left door. Requires: "Gravity"
"canShinechargeMovementComplex"
"canWalljump"
{
"canShineCharge": {
"usedTiles": 33,
"openEnd": 2
}
}
Exit condition: {
"leaveShinecharged": {
"framesRemaining": 30
}
}
|
|
From: 2
Bottom Door
To: 1
Left Door
Shortcharge from right to left while finishing in the plants to the right of the raised plateau, then tricky dash jump up to the left door. Requires: "Gravity"
"canShinechargeMovementComplex"
"canTrickyDashJump"
{
"canShineCharge": {
"usedTiles": 20,
"gentleUpTiles": 2,
"gentleDownTiles": 4,
"steepUpTiles": 1,
"steepDownTiles": 2,
"openEnd": 1
}
}
Exit condition: {
"leaveShinecharged": {
"framesRemaining": 15
}
}
|
|
From: 2
Bottom Door
To: 1
Left Door
Finish shinecharging on the raised plateau, then quickly climb up to the left door. Requires: "Gravity"
"canShinechargeMovementComplex"
"canWalljump"
{
"canShineCharge": {
"usedTiles": 33,
"openEnd": 2
}
}
Exit condition: {
"leaveShinecharged": {
"framesRemaining": 15
}
}
|
|
From: 1
Left Door
To: 2
Right Door
Gain an extra half-tile of runway by coming in very slowly to prevent falling off. Entrance condition: {
"comeInShinecharging": {
"length": 1,
"openEnd": 0
}
}
Requires: "canShinechargeMovementComplex"
"canSlowShortCharge"
"canMidairShinespark"
{
"canShineCharge": {
"usedTiles": 14,
"openEnd": 0
}
}
{
"shinespark": {
"frames": 69,
"excessFrames": 7
}
}
|
|
From: 2
Right Door
To: 1
Left Door
Gain an extra half-tile of runway by coming in very slowly to prevent falling off. Entrance condition: {
"comeInShinecharging": {
"length": 1,
"openEnd": 0
}
}
Requires: "canShinechargeMovementComplex"
"canSlowShortCharge"
"canMidairShinespark"
{
"canShineCharge": {
"usedTiles": 14,
"openEnd": 0
}
}
{
"shinespark": {
"frames": 69,
"excessFrames": 7
}
}
|
|
Get the shinecharge then move towards and shinespark out the left door. Entrance condition: {
"comeInRunning": {
"speedBooster": true,
"minTiles": 2.4375
}
}
Requires: "canStutterWaterShineCharge"
"canShinechargeMovementComplex"
{
"canShineCharge": {
"usedTiles": 33,
"openEnd": 2
}
}
{
"or": [
{
"shinespark": {
"frames": 9
}
},
{
"and": [
"canShinechargeMovementTricky",
{
"shinespark": {
"frames": 2
}
}
]
}
]
}
Exit condition: {
"leaveWithSpark": {}
}
|
|
Get the shinecharge and move towards then shinespark out the right door. Entrance condition: {
"comeInRunning": {
"speedBooster": true,
"minTiles": 2.4375
}
}
Requires: "canStutterWaterShineCharge"
"canShinechargeMovementComplex"
{
"canShineCharge": {
"usedTiles": 33,
"openEnd": 2
}
}
{
"or": [
{
"shinespark": {
"frames": 9
}
},
{
"and": [
"canShinechargeMovementTricky",
{
"shinespark": {
"frames": 2
}
}
]
}
]
}
Exit condition: {
"leaveWithSpark": {}
}
|
|
From: 1
Left Door
To: 2
Right Door
Gain an extra half-tile of runway by coming in very slowly to prevent falling off. Entrance condition: {
"comeInShinecharging": {
"length": 1,
"openEnd": 0
}
}
Requires: "canShinechargeMovementComplex"
"canSlowShortCharge"
"canMidairShinespark"
{
"canShineCharge": {
"usedTiles": 14,
"openEnd": 0
}
}
{
"shinespark": {
"frames": 88,
"excessFrames": 5
}
}
|
|
From: 2
Right Door
To: 1
Left Door
Gain an extra half-tile of runway by coming in very slowly to prevent falling off. Entrance condition: {
"comeInShinecharging": {
"length": 1,
"openEnd": 0
}
}
Requires: "canShinechargeMovementComplex"
"canSlowShortCharge"
"canMidairShinespark"
{
"canShineCharge": {
"usedTiles": 14,
"openEnd": 0
}
}
{
"shinespark": {
"frames": 90,
"excessFrames": 5
}
}
|
|
From: 1
Left Door
To: 1
Left Door
Get the shinecharge while killing the crab, then move towards and shinespark out the left door. Entrance condition: {
"comeInRunning": {
"speedBooster": true,
"minTiles": 2.4375
}
}
Requires: "canStutterWaterShineCharge"
"canShinechargeMovementComplex"
{
"canShineCharge": {
"usedTiles": 33,
"openEnd": 2
}
}
{
"or": [
{
"shinespark": {
"frames": 9
}
},
{
"and": [
"canShinechargeMovementTricky",
{
"shinespark": {
"frames": 2
}
}
]
}
]
}
{
"or": [
"Wave",
"Spazer",
"Plasma",
{
"ammo": {
"type": "Missile",
"count": 2
}
},
{
"ammo": {
"type": "Super",
"count": 1
}
}
]
}
Exit condition: {
"leaveWithSpark": {}
}
|
|
From: 2
Right Door
To: 2
Right Door
Get the shinecharge, carefully jump over the crab and move towards then shinespark out the right door. Entrance condition: {
"comeInRunning": {
"speedBooster": true,
"minTiles": 2.4375
}
}
Requires: "canStutterWaterShineCharge"
"canShinechargeMovementComplex"
"canCarefulJump"
{
"canShineCharge": {
"usedTiles": 33,
"openEnd": 2
}
}
{
"or": [
{
"shinespark": {
"frames": 9
}
},
{
"and": [
"canShinechargeMovementTricky",
{
"shinespark": {
"frames": 2
}
}
]
}
]
}
Exit condition: {
"leaveWithSpark": {}
}
|
|
From: 2
Bottom Right Door (locked)
To: 1
Top Right Door
Spinjump into the opening below the top door. Entrance condition: {
"comeInShinecharged": {
"framesRequired": 105
}
}
Requires: "HiJump"
"canCarefulJump"
"canShinechargeMovementComplex"
{
"or": [
"f_KilledMetroidRoom2",
"canMetroidAvoid"
]
}
Exit condition: {
"leaveShinecharged": {
"framesRemaining": "auto"
}
}
|
|
From: 2
Bottom Right Door (locked)
To: 1
Top Right Door
Wall jump up the right wall and either mid-air morph to fit through the gap below the top door. Alternatively use a mid-air wiggle to reduce the height of Samus' hitbox after the walljump, to be able to fit through the gap without morphing. Entrance condition: {
"comeInShinecharged": {
"framesRequired": 140
}
}
Requires: "canWallJumpInstantMorph"
"canShinechargeMovementComplex"
{
"or": [
"f_KilledMetroidRoom2",
"canMetroidAvoid"
]
}
Exit condition: {
"leaveShinecharged": {
"framesRemaining": "auto"
}
}
|
|
From: 2
Bottom Right Door (locked)
To: 1
Top Right Door
Spinjump into the opening below the top door. Entrance condition: {
"comeInShinecharged": {
"framesRequired": 80
}
}
Requires: "HiJump"
"canCarefulJump"
"canShinechargeMovementComplex"
{
"shinespark": {
"frames": 6
}
}
{
"or": [
"f_KilledMetroidRoom2",
"canMetroidAvoid"
]
}
Exit condition: {
"leaveWithSpark": {}
}
|
|
From: 2
Bottom Right Door (locked)
To: 1
Top Right Door
Wall jump up the right wall and either mid-air morph to fit through the gap below the top door. Alternatively use a mid-air wiggle to reduce the height of Samus' hitbox after the walljump, to be able to fit through the gap without morphing. Shoot the door open and spark out. Entrance condition: {
"comeInShinecharged": {
"framesRequired": 110
}
}
Requires: "canWallJumpInstantMorph"
"canShinechargeMovementComplex"
{
"shinespark": {
"frames": 5
}
}
{
"or": [
"f_KilledMetroidRoom2",
"canMetroidAvoid"
]
}
Exit condition: {
"leaveWithSpark": {}
}
|
|
From: 2
Bottom Right Door (locked)
To: 1
Top Right Door
Spinjump into the opening below the top door. Entrance condition: {
"comeInShinecharging": {
"length": 2,
"openEnd": 0
}
}
Requires: "canShinechargeMovementComplex"
"HiJump"
"canCarefulJump"
{
"or": [
"f_KilledMetroidRoom2",
{
"and": [
"canMetroidAvoid",
"canShinechargeMovementTricky"
]
}
]
}
Exit condition: {
"leaveShinecharged": {
"framesRemaining": 50
}
}
|
|
From: 2
Bottom Right Door (locked)
To: 1
Top Right Door
Wall jump up the right wall and either mid-air morph to fit through the gap below the top door. Alternatively use a mid-air wiggle to reduce the height of Samus' hitbox after the walljump, to be able to fit through the gap without morphing. Entrance condition: {
"comeInShinecharging": {
"length": 2,
"openEnd": 0
}
}
Requires: "canShinechargeMovementComplex" "canWallJumpInstantMorph" "f_KilledMetroidRoom2" Exit condition: {
"leaveShinecharged": {
"framesRemaining": 30
}
}
|
|
From: 2
Bottom Right Door (locked)
To: 1
Top Right Door
Not pressing dash will make the platforming easier, unless HiJump is also equipped. Entrance condition: {
"comeInShinecharging": {
"length": 2,
"openEnd": 0
}
}
Requires: "canShinechargeMovementComplex"
{
"shinespark": {
"frames": 7
}
}
"f_KilledMetroidRoom2"
Exit condition: {
"leaveWithSpark": {}
}
|
|
Requires: {
"or": [
"canMetroidAvoid",
"Ice",
"f_KilledMetroidRoom3"
]
}
{
"canShineCharge": {
"usedTiles": 29,
"openEnd": 2
}
}
{
"or": [
{
"shinespark": {
"frames": 75
}
},
{
"and": [
"canShinechargeMovementComplex",
{
"shinespark": {
"frames": 50
}
}
]
}
]
}
Exit condition: {
"leaveWithSpark": {}
}
|
|
Entrance condition: {
"comeInShinecharged": {
"framesRequired": 86
}
}
Requires: "canShinechargeMovementComplex" Exit condition: {
"leaveShinecharged": {
"framesRemaining": "auto"
}
}
|
|
Entrance condition: {
"comeInShinecharged": {
"framesRequired": 143
}
}
Requires: "canShinechargeMovementComplex" Exit condition: {
"leaveShinecharged": {
"framesRemaining": "auto"
}
}
|
|
From: 2
Middle Left Door
To: 1
Top Left Door
Entrance condition: {
"comeInShinecharged": {
"framesRequired": 95
}
}
Requires: "HiJump" "canWalljump" "canShinechargeMovementComplex" Exit condition: {
"leaveShinecharged": {
"framesRemaining": "auto"
}
}
|
|
From: 2
Middle Left Door
To: 1
Top Left Door
Entrance condition: {
"comeInShinecharged": {
"framesRequired": 115
}
}
Requires: "HiJump" "canShinechargeMovementComplex" Exit condition: {
"leaveShinecharged": {
"framesRemaining": "auto"
}
}
|
|
Entrance condition: {
"comeInShinecharged": {
"framesRequired": 115
}
}
Requires: "canWalljump" "canShinechargeMovementComplex" Exit condition: {
"leaveShinecharged": {
"framesRemaining": "auto"
}
}
|
|
From: 2
Middle Left Door
To: 1
Top Left Door
Entrance condition: {
"comeInShinecharged": {
"framesRequired": 75
}
}
Requires: "HiJump"
"canShinechargeMovementComplex"
{
"shinespark": {
"frames": 8
}
}
Exit condition: {
"leaveWithSpark": {}
}
|
|
From: 2
Middle Left Door
To: 1
Top Left Door
Entrance condition: {
"comeInShinecharged": {
"framesRequired": 100
}
}
Requires: "canWalljump"
"canShinechargeMovementComplex"
{
"shinespark": {
"frames": 4
}
}
Exit condition: {
"leaveWithSpark": {}
}
|
|
From: 2
Middle Left Door
To: 1
Top Left Door
Entrance condition: {
"comeInShinecharging": {
"length": 2,
"openEnd": 0
}
}
Requires: "HiJump" "canShinechargeMovementComplex" Exit condition: {
"leaveShinecharged": {
"framesRemaining": 55
}
}
|
|
From: 2
Middle Left Door
To: 1
Top Left Door
Entrance condition: {
"comeInShinecharging": {
"length": 2,
"openEnd": 0
}
}
Requires: "HiJump" "canWalljump" "canShinechargeMovementComplex" Exit condition: {
"leaveShinecharged": {
"framesRemaining": 70
}
}
|
|
From: 2
Middle Left Door
To: 1
Top Left Door
Entrance condition: {
"comeInShinecharging": {
"length": 2,
"openEnd": 0
}
}
Requires: "canWalljump" "canShinechargeMovementComplex" Exit condition: {
"leaveShinecharged": {
"framesRemaining": 50
}
}
|
|
Entrance condition: {
"comeInShinecharged": {
"framesRequired": 105
}
}
Requires: "canShinechargeMovementComplex" Exit condition: {
"leaveShinecharged": {
"framesRemaining": "auto"
}
}
|
|
From: 2
Middle Left Door
To: 3
Bottom Left Door
Entrance condition: {
"comeInShinecharging": {
"length": 2,
"openEnd": 0
}
}
Requires: "canShinechargeMovementComplex" Exit condition: {
"leaveShinecharged": {
"framesRemaining": 85
}
}
|
|
From: 3
Bottom Left Door
To: 1
Top Left Door
Entrance condition: {
"comeInShinecharged": {
"framesRequired": 165
}
}
Requires: "HiJump"
"canShinechargeMovementComplex"
{
"shinespark": {
"frames": 4
}
}
Exit condition: {
"leaveWithSpark": {}
}
|
|
From: 3
Bottom Left Door
To: 1
Top Left Door
Entrance condition: {
"comeInShinecharged": {
"framesRequired": 155
}
}
Requires: "HiJump"
"canWalljump"
"canShinechargeMovementComplex"
{
"shinespark": {
"frames": 2
}
}
Exit condition: {
"leaveWithSpark": {}
}
|
|
From: 3
Bottom Left Door
To: 2
Middle Left Door
Entrance condition: {
"comeInShinecharged": {
"framesRequired": 115
}
}
Requires: "HiJump" "canShinechargeMovementComplex" Exit condition: {
"leaveShinecharged": {
"framesRemaining": "auto"
}
}
|
|
From: 3
Bottom Left Door
To: 2
Middle Left Door
Entrance condition: {
"comeInShinecharged": {
"framesRequired": 100
}
}
Requires: "HiJump" "canWalljump" "canShinechargeMovementComplex" Exit condition: {
"leaveShinecharged": {
"framesRemaining": "auto"
}
}
|
|
From: 3
Bottom Left Door
To: 2
Middle Left Door
Entrance condition: {
"comeInShinecharged": {
"framesRequired": 120
}
}
Requires: "canWalljump" "canShinechargeMovementComplex" Exit condition: {
"leaveShinecharged": {
"framesRemaining": "auto"
}
}
|
|
From: 3
Bottom Left Door
To: 2
Middle Left Door
Entrance condition: {
"comeInShinecharged": {
"framesRequired": 80
}
}
Requires: "HiJump"
"canWalljump"
"canShinechargeMovementComplex"
{
"shinespark": {
"frames": 5
}
}
Exit condition: {
"leaveWithSpark": {}
}
|
|
From: 3
Bottom Left Door
To: 2
Middle Left Door
Entrance condition: {
"comeInShinecharged": {
"framesRequired": 85
}
}
Requires: "HiJump"
"canShinechargeMovementComplex"
{
  "shinespark": {
    "frames": 7
  }
}
Exit condition: {
"leaveWithSpark": {}
}
|
|
From: 3
Bottom Left Door
To: 2
Middle Left Door
Entrance condition: {
"comeInShinecharged": {
"framesRequired": 145
}
}
Requires: "HiJump"
"canShinechargeMovementComplex"
{
  "shinespark": {
    "frames": 6
  }
}
Exit condition: {
"leaveWithSpark": {}
}
|
|
From: 3
Bottom Left Door
To: 2
Middle Left Door
Entrance condition: {
"comeInShinecharged": {
"framesRequired": 110
}
}
Requires: "canWalljump"
"canShinechargeMovementComplex"
{
"shinespark": {
"frames": 6
}
}
Exit condition: {
"leaveWithSpark": {}
}
|
|
From: 3
Bottom Left Door
To: 2
Middle Left Door
Entrance condition: {
"comeInShinecharging": {
"length": 12,
"openEnd": 0
}
}
Requires: "canShinechargeMovementComplex" Exit condition: {
"leaveShinecharged": {
"framesRemaining": 30
}
}
|
|
From: 3
Bottom Left Door
To: 2
Middle Left Door
Entrance condition: {
"comeInShinecharging": {
"length": 12,
"openEnd": 0
}
}
Requires: "canShinechargeMovementComplex" Exit condition: {
"leaveShinecharged": {
"framesRemaining": 45
}
}
|
|
Come in Shinecharging, Leave Shinecharged (Short Runway, HiJump Platforming) (Very Hard)
Rinka Shaft
From: 3
Bottom Left Door
To: 2
Middle Left Door
Entrance condition: {
"comeInShinecharging": {
"length": 4,
"openEnd": 0
}
}
Requires: "canShinechargeMovementComplex" Exit condition: {
"leaveShinecharged": {
"framesRemaining": 50
}
}
|
|
From: 3
Bottom Left Door
To: 2
Middle Left Door
Entrance condition: {
"comeInShinecharging": {
"length": 4,
"openEnd": 0
}
}
Requires: "canShinechargeMovementComplex" Exit condition: {
"leaveShinecharged": {
"framesRemaining": 75
}
}
|
|
From: 3
Bottom Left Door
To: 2
Middle Left Door
Entrance condition: {
"comeInShinecharging": {
"length": 4,
"openEnd": 0
}
}
Requires: "canShinechargeMovementComplex" Exit condition: {
"leaveShinecharged": {
"framesRemaining": 30
}
}
|
|
From: 3
Bottom Left Door
To: 2
Middle Left Door
Entrance condition: {
"comeInShinecharging": {
"length": 4,
"openEnd": 0
}
}
Requires: "canShinechargeMovementComplex" Exit condition: {
"leaveShinecharged": {
"framesRemaining": 55
}
}
|
|
From: 1
Top Right Doorway
To: 2
Left Door
Use Wave to clear the seaweed quickly. Entrance condition: {
"comeInShinecharging": {
"length": 4,
"openEnd": 0
}
}
Requires: "Wave"
"canShinechargeMovementComplex"
{
"shinespark": {
"frames": 5
}
}
Exit condition: {
"leaveWithSpark": {}
}
|
|
Use Wave to clear the seaweed quickly. Entrance condition: {
"comeInShinecharged": {
"framesRequired": 135
}
}
Requires: "Wave" "canShinechargeMovementComplex" Exit condition: {
"leaveShinecharged": {
"framesRemaining": "auto"
}
}
|
|
From: 1
Top Right Doorway
To: 3
Bottom Right Door
Use Wave to clear the seaweed quickly. Entrance condition: {
"comeInShinecharged": {
"framesRequired": 125
}
}
Requires: "Wave"
"canShinechargeMovementComplex"
{
  "shinespark": {
    "frames": 2
  }
}
Exit condition: {
"leaveWithSpark": {}
}
|
|
From: 1
Top Right Doorway
To: 3
Bottom Right Door
Use Wave or Spazer to clear the seaweed quickly. Entrance condition: {
"comeInShinecharging": {
"length": 4,
"openEnd": 0
}
}
Requires: {
"or": [
{
"and": [
"Wave",
"canShinechargeMovementComplex"
]
},
{
"and": [
"Spazer",
"canShinechargeMovementTricky"
]
}
]
}
Exit condition: {
"leaveShinecharged": {
"framesRemaining": 40
}
}
|
|
Use Wave to clear the seaweed quickly. Entrance condition: {
"comeInShinecharged": {
"framesRequired": 100
}
}
Requires: "Wave" "canShinechargeMovementComplex" Exit condition: {
"leaveShinecharged": {
"framesRemaining": "auto"
}
}
|
|
From: 3
Bottom Right Door
To: 1
Top Right Doorway
Entrance condition: {
"comeInShinecharged": {
"framesRequired": 120
}
}
Requires: "HiJump" "canWalljump" "canShinechargeMovementComplex" Exit condition: {
"leaveShinecharged": {
"framesRemaining": "auto"
}
}
|
|
From: 3
Bottom Right Door
To: 1
Top Right Doorway
Entrance condition: {
"comeInShinecharged": {
"framesRequired": 125
}
}
Requires: "HiJump" "canShinechargeMovementComplex" Exit condition: {
"leaveShinecharged": {
"framesRemaining": "auto"
}
}
|
|
From: 3
Bottom Right Door
To: 1
Top Right Doorway
Entrance condition: {
"comeInShinecharged": {
"framesRequired": 100
}
}
Requires: "HiJump"
"canWalljump"
"canShinechargeMovementComplex"
{
"shinespark": {
"frames": 5
}
}
Exit condition: {
"leaveWithSpark": {}
}
|
|
From: 3
Bottom Right Door
To: 1
Top Right Doorway
Entrance condition: {
"comeInShinecharged": {
"framesRequired": 130
}
}
Requires: "canWalljump"
"canShinechargeMovementComplex"
{
  "shinespark": {
    "frames": 4
  }
}
Exit condition: {
"leaveWithSpark": {}
}
|
|
Use single well-timed Wave shot to clear the seaweed quickly. Entrance condition: {
"comeInShinecharged": {
"framesRequired": 100
}
}
Requires: "Wave" "canShinechargeMovementComplex" Exit condition: {
"leaveShinecharged": {
"framesRemaining": "auto"
}
}
|
|
From: 3
Bottom Right Door
To: 2
Left Door
Use five shots to destroy the seaweed blocks: Buffer the first shot while entering the room. Spin jump for the second shot (landing on the slightly raised platform), firing at an intermediate height in order to destroy two blocks. Fire two shots while standing on the platform. Spin jump for the final shot, and activate the shinespark mid-air. Entrance condition: {
"comeInShinecharged": {
"framesRequired": 100
}
}
Requires: "canShinechargeMovementComplex"
{
"shinespark": {
"frames": 14
}
}
Exit condition: {
"leaveWithSpark": {
"position": "bottom"
}
}
|
|
From: 3
Bottom Right Door
To: 2
Left Door
Use single well-timed Wave shot to clear the seaweed quickly. Entrance condition: {
"comeInShinecharged": {
"framesRequired": 30
}
}
Requires: "Wave"
"canShinechargeMovementComplex"
{
"shinespark": {
"frames": 18
}
}
Exit condition: {
"leaveWithSpark": {
"position": "bottom"
}
}
|
|
From: 3
Bottom of Shaft
To: 1
Left Door
Notable: true 
Gain a shinecharge by running right-to-left at the bottom of the room. Move quickly to minimize damage from the acid, which will begin rising as soon as you reach the bottom of the room. Shinespark up the shaft. Requires: "Gravity"
{
"canShineCharge": {
"usedTiles": 17,
"openEnd": 0
}
}
{
"acidFrames": 90
}
"canShinechargeMovementComplex"
"canMidairShinespark"
{
"shinespark": {
"frames": 76,
"excessFrames": 6
}
}
|
|
From: 1
Elevator
To: 2
Left Door
Do a short spin-jump off the left side of the elevator and hold right to make it around the ledge. Entrance condition: {
"comeInShinecharged": {
"framesRequired": 90
}
}
Requires: "canShinechargeMovementComplex"
{
"shinespark": {
"frames": 12
}
}
Exit condition: {
"leaveWithSpark": {}
}
|
|
From: 1
Elevator
To: 3
Right Door
Do a short spin-jump off the left side of the elevator and hold right to make it around the ledge. Entrance condition: {
"comeInShinecharged": {
"framesRequired": 90
}
}
Requires: "canShinechargeMovementComplex"
{
"shinespark": {
"frames": 13
}
}
Exit condition: {
"leaveWithSpark": {}
}
|
|
Entrance condition: {
"comeInShinecharged": {
"framesRequired": 130
}
}
Requires: "HiJump" "canShinechargeMovementComplex" Exit condition: {
"leaveShinecharged": {
"framesRemaining": "auto"
}
}
|
|
Entrance condition: {
"comeInShinecharged": {
"framesRequired": 95
}
}
Requires: "canShinechargeMovementComplex" Exit condition: {
"leaveShinecharged": {
"framesRemaining": "auto"
}
}
|
|
From: 2
Left Door
To: 3
Right Door
Entrance condition: {
"comeInShinecharging": {
"length": 2,
"openEnd": 0
}
}
Requires: "canShinechargeMovementComplex" Exit condition: {
"leaveShinecharged": {
"framesRemaining": 80
}
}
|
|
Entrance condition: {
"comeInShinecharged": {
"framesRequired": 110
}
}
Requires: "HiJump" "canShinechargeMovementComplex" Exit condition: {
"leaveShinecharged": {
"framesRemaining": "auto"
}
}
|
|
Entrance condition: {
"comeInShinecharged": {
"framesRequired": 135
}
}
Requires: "canWalljump" "canShinechargeMovementComplex" Exit condition: {
"leaveShinecharged": {
"framesRemaining": "auto"
}
}
|
|
Entrance condition: {
"comeInShinecharged": {
"framesRequired": 95
}
}
Requires: "canShinechargeMovementComplex" Exit condition: {
"leaveShinecharged": {
"framesRemaining": "auto"
}
}
|
|
From: 3
Right Door
To: 2
Left Door
Entrance condition: {
"comeInShinecharging": {
"length": 2,
"openEnd": 0
}
}
Requires: "canShinechargeMovementComplex" Exit condition: {
"leaveShinecharged": {
"framesRemaining": 80
}
}
|