canCarefulJump (Medium)
Strats ()
|
Overload PLMs using the scroll block next to the bottom right bomb blocks, allowing passage through them by making them become air. If Morph is unavailable, then careful movement will be required to get past the Pirates without taking a hit. If using a PB to kill the pirates, overload the PLMs at the bottom. If the top bomb block is hit with a PB before PLMs are overloaded, they will remain solid. Entrance condition: {
"comeInWithGMode": {
"mode": "any",
"morphed": true
}
}
Requires: {
"or": [
"Morph",
{
"and": [
"h_canArtificialMorphSpringBall",
{
"or": [
"HiJump",
"canCarefulJump"
]
}
]
},
{
"and": [
"h_canArtificialMorphIBJ",
"canTrickyJump"
]
},
{
"and": [
"h_canArtificialMorphMovement",
"h_canArtificialMorphPowerBomb"
]
}
]
}
|
|
From: 1
Top Left Door
To: 5
Bottom Junction (Right of Boyons)
Quickly grapple to then release grapple on the grapple blocks a few times until they stop working. Be careful not to fall into the spikes. Entrance condition: {
"comeInWithGMode": {
"mode": "any",
"morphed": false
}
}
Requires: "Morph"
"Grapple"
{
"or": [
"canCarefulJump",
{
"spikeHits": 1
}
]
}
{
"or": [
"SpaceJump",
{
"and": [
{
"spikeHits": 1
},
{
"or": [
"canIframeSpikeJump",
{
"spikeHits": 1
}
]
}
]
}
]
}
|
|
From: 1
Top Left Door
To: 6
Top Junction with Temporary Blue (Right of Morph Tunnel)
Bounce into the spikes and use a SpeedKeep to run on spikes to setup for a speedball towards the item. A DamageBoost SpeedKeep could be used instead of a Spike SpeedKeep with enough runspeed. Entrance condition: {
"comeInRunning": {
"speedBooster": true,
"minTiles": 4
}
}
Requires: "canSpeedKeep"
"canCarefulJump"
{
"canShineCharge": {
"usedTiles": 21,
"openEnd": 2
}
}
{
"spikeHits": 1
}
{
"or": [
{
"spikeHits": 1
},
"canChainTemporaryBlue"
]
}
"canSpeedball"
|
|
From: 1
Top Left Door
To: 6
Top Junction with Temporary Blue (Right of Morph Tunnel)
Bounce into the spikes and use a SpeedKeep to run on spikes to setup for a speedball towards the item. Bouncing on the platform near the door saves a spike hit. Or a DamageBoost SpeedKeep could be used instead of a Spike SpeedKeep with enough runspeed. Entrance condition: {
"comeInRunning": {
"speedBooster": true,
"minTiles": 12
}
}
Requires: "canSpeedKeep"
"canCarefulJump"
"canSlowShortCharge"
"can4HighMidAirMorph"
{
"spikeHits": 1
}
"canSpeedball"
|
|
From: 1
Top Left Door
To: 6
Top Junction with Temporary Blue (Right of Morph Tunnel)
Use Springball on the spikes to cross the room with a Speedball. It helps to not be at full run speed when bouncing through the spike pit, but is still possible with very tight jumps. Then bounce into the Morph tunnel and use Springball to bounce all of the way through. Unmorphing before the Morph tunnel to better control the bounce can help. Entrance condition: {
"comeInShinecharging": {
"length": 3,
"openEnd": 1
}
}
Requires: "canSpeedball"
"canTemporaryBlue"
"canCarefulJump"
"canSpringBallBounce"
{
"or": [
"canTrickyDashJump",
"canChainTemporaryBlue"
]
}
{
"spikeHits": 1
}
|
|
Requires: {
"or": [
{
"enemyKill": {
"enemies": [
[
"Boyon",
"Boyon",
"Boyon",
"Boyon"
]
],
"excludedWeapons": [
"Bombs",
"PseudoScrew"
]
}
},
{
"and": [
"canBePatient",
"h_canUseMorphBombs"
]
},
{
"and": [
{
"enemyDamage": {
"enemy": "Boyon",
"type": "contact",
"hits": 16
}
},
"canCarefulJump",
"canPseudoScrew"
]
}
]
}
Clears obstacles: A |
|
Charge a Shinespark running left, then get blue suit speed by running back to the right to jump through the Boyons. Requires: "canCarefulJump"
"canShinechargeMovementComplex"
{
"canShineCharge": {
"usedTiles": 33,
"openEnd": 2
}
}
{
"shinespark": {
"frames": 130,
"excessFrames": 6
}
}
|
|
Notable: true Wall jump up 9 times, placing a PB at the top. Only works in direct g-mode with the item still uncollected. Entrance condition: {
"comeInWithGMode": {
"mode": "direct",
"morphed": false
}
}
Requires: {
"itemNotCollectedAtNode": 3
}
"canConsecutiveWalljump"
"Morph"
{
"or": [
"canRiskPermanentLossOfAccess",
"canXRayClimb"
]
}
{
"ammo": {
"type": "PowerBomb",
"count": 9
}
}
"canBeVeryPatient"
{
"or": [
"canTrivialUseFrozenEnemies",
"canTrickyJump",
{
"and": [
"ScrewAttack",
"SpaceJump"
]
},
{
"and": [
"canCarefulJump",
{
"or": [
"ScrewAttack",
"SpeedBooster"
]
}
]
},
{
"enemyKill": {
"enemies": [
[
"Boyon",
"Boyon",
"Boyon",
"Boyon"
]
]
}
},
{
"enemyDamage": {
"enemy": "Boyon",
"hits": 1,
"type": "contact"
}
}
]
}
|
|
Store a Shinespark and then jump through the Boyons using Screw Attack. Requires: "canCarefulJump"
"canShinechargeMovement"
"ScrewAttack"
{
"canShineCharge": {
"usedTiles": 33,
"openEnd": 2
}
}
{
"shinespark": {
"frames": 130,
"excessFrames": 6
}
}
|
|
From: 2
Bottom Left Door
To: 5
Bottom Junction (Right of Boyons)
Jump at the last tile to make it through all of the Boyons. Requires: "ScrewAttack"
{
"or": [
"canCarefulJump",
"SpaceJump",
"SpeedBooster"
]
}
|
|
From: 2
Bottom Left Door
To: 5
Bottom Junction (Right of Boyons)
Intentionally take damage before attempting to jump through to avoid falling in the acid. Requires: {
"or": [
{
"and": [
{
"enemyDamage": {
"enemy": "Boyon",
"hits": 3,
"type": "contact"
}
},
"Gravity",
{
"acidFrames": 30
}
]
},
{
"and": [
{
"enemyDamage": {
"enemy": "Boyon",
"hits": 2,
"type": "contact"
}
},
"canCarefulJump"
]
},
{
"and": [
{
"enemyDamage": {
"enemy": "Boyon",
"hits": 1,
"type": "contact"
}
},
"canTrickyJump"
]
}
]
}
|
|
From: 5
Bottom Junction (Right of Boyons)
To: 2
Bottom Left Door
Jump at the last tile to make it through all of the Boyons. Requires: "ScrewAttack"
{
"or": [
"canCarefulJump",
"SpaceJump",
"SpeedBooster"
]
}
|
|
From: 5
Bottom Junction (Right of Boyons)
To: 2
Bottom Left Door
Intentionally take damage before attempting to jump through to avoid falling in the acid. Requires: {
"or": [
{
"and": [
{
"enemyDamage": {
"enemy": "Boyon",
"hits": 3,
"type": "contact"
}
},
"Gravity",
{
"acidFrames": 30
}
]
},
{
"and": [
{
"enemyDamage": {
"enemy": "Boyon",
"hits": 2,
"type": "contact"
}
},
"canCarefulJump"
]
},
{
"and": [
{
"enemyDamage": {
"enemy": "Boyon",
"hits": 1,
"type": "contact"
}
},
"canTrickyJump"
]
}
]
}
|
|
A Power Bomb can be placed on the ledge above the Gauntlet Bomb blocks to destroy them. Requires: "SpeedBooster"
{
"or": [
"canCarefulJump",
"ScrewAttack",
"canLateralMidAirMorph"
]
}
{
"or": [
{
"obstaclesCleared": [
"A"
]
},
"h_canUsePowerBombs",
"ScrewAttack"
]
}
Clears obstacles: A |
|
From: 3
Top Right Door
To: 1
Top Left Door
Notable: true Use the runway near the Power Bomb room door to jump towards the Gauntlet Entrance room Bomb blocks and break them using the temporary blue effect from SpeedBooster. Using the full runway, a one tap shortcharge where the tap is at the top of the lowest slope, jump and then Morph once Samus begins descending to bounce through all of the Bomb blocks. A controlled release of the jump button works in place of the shortcharge, where the bottom of the thick dark line in the background at the top of the room works as a visual cue. Requires: "canCarefulJump"
"Morph"
"canLateralMidAirMorph"
{
"canShineCharge": {
"usedTiles": 30,
"openEnd": 2
}
}
Clears obstacles: A |
|
From: 3
Top Right Door
To: 1
Top Left Door
Notable: true Use the runway near the Power Bomb room door to jump to the left, morphing as Samus begins descending, to bounce through the Bomb blocks. Any time while bouncing, hold an angle button and unmorph to gain temporary blue; then chain it to reach the door with temporary blue. The jump can be set up by using the full runway with a one-tap shortcharge, with the tap being at the top of the lowest slope. Requires: "canCarefulJump"
"Morph"
"canLateralMidAirMorph"
{
"canShineCharge": {
"usedTiles": 30,
"openEnd": 2
}
}
"canLongChainTemporaryBlue"
Exit condition: {
"leaveWithTemporaryBlue": {}
}
Unlocks doors: {"types":["ammo"],"requires":[]}
|
|
From: 1
Top Left Door
To: 1
Top Left Door
From the left, break the bomb blocks by shinesparking from the neighboring room. After the blocks respawn and the Geemer is near, destroy them again using blue speed from the right. This opens a path for the Geemer to hit Samus through the transition. Entrance condition: {
"comeInWithSpark": {}
}
Requires: "h_ZebesIsAwake"
{
"shinespark": {
"frames": 67,
"excessFrames": 42
}
}
"canCarefulJump"
{
  "canShineCharge": {
    "usedTiles": 25,
    "steepUpTiles": 3,
    "steepDownTiles": 3,
    "openEnd": 1
  }
}
Exit condition: {
"leaveWithGModeSetup": {}
}
Unlocks doors: {"types":["ammo"],"requires":[]}
|
|
From: 1
Top Left Door
To: 1
Top Left Door
From the left, break the bomb blocks with blue speed from the neighboring room. After the blocks respawn and the Geemer is near, destroy them again using blue speed from the right. This opens a path for the Geemer to hit Samus through the transition. Entrance condition: {
"comeInShinecharging": {
"length": 13,
"openEnd": 0,
"steepUpTiles": 2,
"steepDownTiles": 2
}
}
Requires: "h_ZebesIsAwake"
"canCarefulJump"
{
"canShineCharge": {
"usedTiles": 25,
"steepUpTiles": 3,
"steepDownTiles": 3,
"openEnd": 1
}
}
Exit condition: {
"leaveWithGModeSetup": {}
}
Unlocks doors: {"types":["ammo"],"requires":[]}
|
|
From: 5
Alcatraz Door
To: 8
Central Junction
Wait 3 minutes for a global Geemer to waddle over, or shoot a Super 20 to 30 seconds after entering the room to knock it off the ceiling and save a lot of time. Freeze the Geemer as it turns onto the middle slope of the left wall to escape - it helps to freeze the geemer from below. Alternatively, use a Super to knock it off the wall and freeze it mid-air. Requires: "h_ZebesIsAwake"
"canMidAirMorph"
"canTrickyUseFrozenEnemies"
{
"or": [
"canBeVeryPatient",
{
"ammo": {
"type": "Super",
"count": 1
}
}
]
}
{
"or": [
"canTrickyJump",
{
"and": [
"canCarefulJump",
{
"ammo": {
"type": "Super",
"count": 1
}
}
]
}
]
}
|
|
From: 5
Alcatraz Door
To: 8
Central Junction
Requires: "canMidAirMorph" "canCarefulJump" "SpaceJump" |
|
From: 8
Central Junction
To: 1
Top Left Door
After the Geemer is near, destroy the bomb wall using blue speed from the right. This opens a path for the Geemer to hit Samus through the transition. Requires: "h_ZebesIsAwake"
"canCarefulJump"
{
"canShineCharge": {
"usedTiles": 25,
"steepUpTiles": 3,
"steepDownTiles": 3,
"openEnd": 1
}
}
Exit condition: {
"leaveWithGModeSetup": {}
}
Unlocks doors: {"types":["ammo"],"requires":[]}
|
|
From: 8
Central Junction
To: 1
Top Left Door
Requires: "canCarefulJump"
{
"canShineCharge": {
"usedTiles": 25,
"steepUpTiles": 3,
"steepDownTiles": 3,
"openEnd": 1
}
}
Exit condition: {
"leaveWithRunway": {
"length": 22,
"openEnd": 0,
"steepUpTiles": 4,
"steepDownTiles": 2
}
}
Unlocks doors: {"types":["ammo"],"requires":[]}
|
|
Break the bomb wall while blue, or spark diagonally next to it. Requires: {
"or": [
"canCarefulJump",
{
"and": [
"canShinechargeMovement",
{
"shinespark": {
"frames": 2
}
}
]
}
]
}
{
"canShineCharge": {
"usedTiles": 25,
"steepUpTiles": 3,
"steepDownTiles": 3,
"openEnd": 1
}
}
|
|
From: 8
Central Junction
To: 1
Top Left Door
Break the bomb wall while blue, or spark diagonally next to it. Open the door then charge the spark again and spark through the wall and door. Requires: {
"or": [
"canCarefulJump",
{
"and": [
"canShinechargeMovement",
{
"shinespark": {
"frames": 2
}
}
]
}
]
}
{
"canShineCharge": {
"usedTiles": 25,
"steepUpTiles": 3,
"steepDownTiles": 3,
"openEnd": 1
}
}
{
"shinespark": {
"frames": 28
}
}
Exit condition: {
"leaveWithSpark": {}
}
Unlocks doors: {"types":["ammo"],"requires":[]}
|
|
From: 1
Left Door
To: 4
Middle Junction (Left of Morph Tunnel)
Requires: {
"or": [
"canCarefulJump",
{
"acidFrames": 35
}
]
}
{
"or": [
"ScrewAttack",
{
"obstaclesCleared": [
"A",
"B"
]
}
]
}
Clears obstacles: A, B |
|
From: 1
Left Door
To: 4
Middle Junction (Left of Morph Tunnel)
Entrance condition: {
"comeInShinecharging": {
"length": 5,
"openEnd": 0,
"steepUpTiles": 0,
"steepDownTiles": 1
}
}
Requires: "canBlueSpaceJump" "canCarefulJump" Clears obstacles: A, B |
|
From: 1
Left Door
To: 4
Middle Junction (Left of Morph Tunnel)
To use the full runway, kill the Zebbo with Wave. Entrance condition: {
"comeInShinecharging": {
"length": 14,
"openEnd": 0,
"steepUpTiles": 1,
"steepDownTiles": 1
}
}
Requires: "Wave"
{
"acidFrames": 11
}
{
"or": [
"Gravity",
{
"acidFrames": 5
}
]
}
"canBlueSpaceJump"
"canCarefulJump"
Clears obstacles: A, B |
|
From: 1
Left Door
To: 4
Middle Junction (Left of Morph Tunnel)
When taking too much acid damage, it is always possible to return to the left and farm. Requires: {
"or": [
"canCarefulJump",
{
"acidFrames": 35
}
]
}
"h_canUseMorphBombs"
Clears obstacles: A, B |
|
From: 1
Left Door
To: 4
Middle Junction (Left of Morph Tunnel)
When taking too much acid damage, it is always possible to return to the left and farm. Requires: {
"or": [
"canCarefulJump",
{
"acidFrames": 35
}
]
}
{
"or": [
{
"and": [
"Morph",
{
"ammo": {
"type": "PowerBomb",
"count": 2
}
}
]
},
{
"obstaclesCleared": [
"A"
]
}
]
}
{
"or": [
"h_canUsePowerBombs",
{
"obstaclesCleared": [
"B"
]
}
]
}
Clears obstacles: A, B |
|
From: 2
Right Door
To: 4
Middle Junction (Left of Morph Tunnel)
Entrance condition: {
"comeInShinecharging": {
"length": 1,
"openEnd": 0
}
}
Requires: "canSpeedball"
"canCarefulJump"
"canSlowShortCharge"
{
"acidFrames": 60
}
|
|
Delay breaking the runway block so that it will not respawn too quickly. Wait for the acid to be rising to break the tunnel block, and then go through the tunnel on the next cycle. Requires: "h_canUseMorphBombs"
{
"or": [
"canCarefulJump",
{
"acidFrames": 40
}
]
}
|
|
From: 4
Middle Junction (Left of Morph Tunnel)
To: 1
Left Door
Requires: {
"or": [
"canCarefulJump",
{
"acidFrames": 35
}
]
}
{
"or": [
"ScrewAttack",
{
"and": [
{
"obstaclesCleared": [
"A"
]
},
{
"obstaclesCleared": [
"B"
]
}
]
}
]
}
Clears obstacles: A, B |
|
From: 4
Middle Junction (Left of Morph Tunnel)
To: 1
Left Door
After destroying a single bomb block, Samus can spin jump into its spot to quickly escape the acid. To avoid the acid completely, morph quickly at the right height and place a bomb. Requires: {
"or": [
"canCarefulJump",
{
"acidFrames": 35
}
]
}
"h_canUseMorphBombs"
{
"or": [
"canTrickyJump",
{
"and": [
"canCarefulJump",
"canBombHorizontally",
{
"acidFrames": 35
}
]
},
{
"acidFrames": 100
}
]
}
{
"or": [
{
"and": [
"canTrickyJump",
"canStaggeredWalljump"
]
},
{
"and": [
"canCarefulJump",
{
"acidFrames": 35
}
]
},
{
"acidFrames": 100
}
]
}
Clears obstacles: A, B |
|
From: 4
Middle Junction (Left of Morph Tunnel)
To: 1
Left Door
Requires: {
"or": [
"canCarefulJump",
{
"acidFrames": 35
}
]
}
"Morph"
{
"ammo": {
"type": "PowerBomb",
"count": 3
}
}
Clears obstacles: A, B |
|
Break the tunnel block with a Bomb and then return to safety. Break the runway block on the next cycle. SpringBall helps avoid acid damage. Bombing Samus up through the runway with a second Bomb can help, or it can trap Samus in the acid if liquid physics take effect. Requires: "h_canUseMorphBombs"
{
"or": [
"h_canUseSpringBall",
{
"acidFrames": 10
}
]
}
{
"or": [
"canInsaneJump",
{
"and": [
"canTrickyJump",
{
"acidFrames": 10
}
]
},
{
"and": [
"canCarefulJump",
{
"acidFrames": 120
}
]
},
{
"acidFrames": 200
}
]
}
|
|
From: 4
Middle Junction (Left of Morph Tunnel)
To: 3
Item
Requires: "h_canUsePowerBombs"
{
"or": [
"canCarefulJump",
"h_canUseSpringBall",
{
"acidFrames": 5
}
]
}
Clears obstacles: E |
|
Requires: "ScrewAttack"
{
"or": [
"canCarefulJump",
{
"acidFrames": 15
}
]
}
Clears obstacles: A |
|
Requires: "h_canUseMorphBombs"
{
"or": [
"canTrickyJump",
"Ice",
{
"ammo": {
"type": "Super",
"count": 2
}
},
{
"acidFrames": 100
}
]
}
{
"or": [
"canDodgeWhileShooting",
"Wave",
"Spazer",
{
"enemyDamage": {
"enemy": "Waver",
"type": "contact",
"hits": 2
}
}
]
}
{
"or": [
"canCarefulJump",
{
"and": [
"h_canUseSpringBall",
{
"acidFrames": 20
}
]
},
{
"and": [
"Gravity",
{
"acidFrames": 20
}
]
},
{
"acidFrames": 60
}
]
}
Clears obstacles: A |
|
Requires: "Morph"
{
"ammo": {
"type": "PowerBomb",
"count": 3
}
}
{
"or": [
"canDodgeWhileShooting",
{
"enemyDamage": {
"enemy": "Waver",
"type": "contact",
"hits": 1
}
}
]
}
{
"or": [
"canCarefulJump",
{
"ammo": {
"type": "PowerBomb",
"count": 1
}
},
{
"acidFrames": 104
}
]
}
Clears obstacles: A |
|
Requires: "ScrewAttack"
{
"or": [
"canCarefulJump",
{
"acidFrames": 15
}
]
}
{
"or": [
"canCarefulJump",
"Ice",
{
"ammo": {
"type": "Super",
"count": 1
}
},
{
"acidFrames": 100
}
]
}
Clears obstacles: A |
|
Requires: "h_canUseMorphBombs"
{
"or": [
"canDodgeWhileShooting",
"Ice",
{
"ammo": {
"type": "Super",
"count": 2
}
},
{
"acidFrames": 100
}
]
}
{
"or": [
"canTrickyJump",
"Wave",
{
"enemyDamage": {
"enemy": "Waver",
"type": "contact",
"hits": 2
}
}
]
}
{
"or": [
"canCarefulJump",
{
"acidFrames": 30
}
]
}
Clears obstacles: A |
|
Requires: "Morph"
{
"ammo": {
"type": "PowerBomb",
"count": 3
}
}
{
"or": [
"canDodgeWhileShooting",
"Ice",
{
"ammo": {
"type": "Super",
"count": 1
}
},
{
"acidFrames": 100
}
]
}
{
"or": [
"canCarefulJump",
{
"ammo": {
"type": "PowerBomb",
"count": 1
}
},
{
"acidFrames": 20
}
]
}
Clears obstacles: A |
|
From: 4
Bottom Right Door
To: 2
Middle Right Door
Requires: "canCarefulJump"
{
"enemyDamage": {
"enemy": "Green Space Pirate (standing)",
"type": "contact",
"hits": 3
}
}
|
|
Requires: {
"or": [
"canCarefulJump",
"canUseFrozenEnemies",
"SpaceJump",
{
"and": [
"Gravity",
{
"or": [
"HiJump",
"canWalljump",
"h_canCrouchJumpDownGrab",
"canIBJ",
"canSpringBallJumpMidAir"
]
}
]
}
]
}
|
|
Enter the room while building a shinespark and use it on the lowest part of the ramp to cross the room and reach a raised ledge on the right side wall. From there, use SpaceJump to escape the water. Carry the shinespark to the bottom of the ramp by delaying the first Choot with two Power Beam shots, killing it, or bounceballing through it. The Choot can be shot diagonally from the middle platform, and again by running off that platform and aiming down to float above it. Entrance condition: {
"comeInShinecharging": {
"length": 6,
"openEnd": 1,
"steepDownTiles": 1
}
}
Requires: "canShinechargeMovementComplex"
"canCarefulJump"
{
"or": [
{
"and": [
"canMidairShinespark",
"canDodgeWhileShooting"
]
},
{
"and": [
{
"enemyDamage": {
"enemy": "Choot",
"type": "contact",
"hits": 1
}
},
"canNeutralDamageBoost",
"canBounceBall"
]
},
{
"and": [
"canMockball",
{
"or": [
"canPseudoScrew",
"ScrewAttack",
"Plasma",
"Wave",
{
"ammo": {
"type": "Missile",
"count": 1
}
},
{
"ammo": {
"type": "Super",
"count": 1
}
}
]
}
]
}
]
}
"canHorizontalShinespark"
{
"shinespark": {
"frames": 123,
"excessFrames": 5
}
}
"canSpaceJumpWaterBounce"
{
"or": [
{
"and": [
"HiJump",
"canSpaceJumpWaterEscape"
]
},
{
"and": [
"canTrickyJump",
"canDownGrab"
]
},
"canWalljump"
]
}
|
|
From: 4
Junction (Right side Pit)
To: 2
Right Door
Freeze the Choot when it swings right on its jump. Quickly get on top of it by first getting onto the pillar to the left, or with a SpringBall Jump. Perform a precise spring ball jump to get to the far right ledge, while avoiding hitting the water surface. While on the ledge, stand on the raised ground to the right and jump to the surface, then space jump across the water to the left. Requires: "canSuitlessMaridia"
"canTrickyUseFrozenEnemies"
"canCarefulJump"
"canSpringBallJumpMidAir"
{
"or": [
"canTrickySpringBallJump",
"canResetFallSpeed",
"canStationaryLateralMidAirMorph"
]
}
"canSpaceJumpWaterBounce"
"canWalljump"
|
|
Execution of this strat is non-trivial, and failing will lead to falling into the pit. Depending on item loadout, that could be a softlock. Requires: "canDisableEquipment"
"canCarefulJump"
{
"or": [
{
"doorUnlockedAtNode": 2
},
"canTrickyJump",
"canLateralMidAirMorph",
"SpeedBooster"
]
}
|
|
Execution of this strat is non-trivial, and failing will lead to falling into the pit. Depending on item loadout, that could be a softlock. Entrance condition: {
"comeInRunning": {
"speedBooster": "any",
"minTiles": 2
}
}
Requires: "canDisableEquipment" "canCarefulJump" |
|
From: 4
Lower Section - Top Right Door
To: 15
G-Mode Morph Junction (By Left Door)
Entrance condition: {
"comeInWithGMode": {
"mode": "any",
"morphed": true
}
}
Requires: {
"or": [
"Morph",
{
"and": [
"Gravity",
"h_canArtificialMorphIBJ"
]
},
{
"and": [
"h_canArtificialMorphSpringBall",
{
"or": [
"Gravity",
"HiJump",
"canCarefulJump"
]
}
]
},
"h_canArtificialMorphHBJ",
"h_canArtificialMorphDiagonalBombJump"
]
}
|
|
From: 4
Lower Section - Top Right Door
To: 17
G-Mode Morph Junction Direct (By Left Door)
Entrance condition: {
"comeInWithGMode": {
"mode": "direct",
"morphed": true
}
}
Requires: {
"or": [
"Morph",
{
"and": [
"Gravity",
"h_canArtificialMorphIBJ"
]
},
{
"and": [
"h_canArtificialMorphSpringBall",
{
"or": [
"Gravity",
"HiJump",
"canCarefulJump"
]
}
]
},
"h_canArtificialMorphHBJ",
"h_canArtificialMorphDiagonalBombJump"
]
}
|
|
From: 5
Lower Section - Bottom Right Door
To: 15
G-Mode Morph Junction (By Left Door)
Entrance condition: {
"comeInWithGMode": {
"mode": "any",
"morphed": true
}
}
Requires: {
"or": [
"Morph",
{
"and": [
"Gravity",
"h_canArtificialMorphIBJ"
]
},
{
"and": [
"h_canArtificialMorphSpringBall",
{
"or": [
"Gravity",
"HiJump",
"canCarefulJump"
]
}
]
},
"h_canArtificialMorphHBJ",
"h_canArtificialMorphDiagonalBombJump"
]
}
|
|
From: 5
Lower Section - Bottom Right Door
To: 17
G-Mode Morph Junction Direct (By Left Door)
Entrance condition: {
"comeInWithGMode": {
"mode": "direct",
"morphed": true
}
}
Requires: {
"or": [
"Morph",
{
"and": [
"Gravity",
"h_canArtificialMorphIBJ"
]
},
{
"and": [
"h_canArtificialMorphSpringBall",
{
"or": [
"Gravity",
"HiJump",
"canCarefulJump"
]
}
]
},
"h_canArtificialMorphHBJ",
"h_canArtificialMorphDiagonalBombJump"
]
}
|
|
From: 12
Top Junction
To: 9
Top Hidden Item (Above Trippers)
Jump on the left platforms to get the middle Tripper on screen, luring it to the right. Get on the middle Tripper and use it to jump to the item. This requires a somewhat precise shot and jump, particularly if the top Tripper is in the way. The jump and shot can be easier and done at the apex of a single jump starting with a crouch. Freezing the Trippers can make this much easier. Requires: "canUseEnemies"
{
"or": [
"canCarefulJump",
"canUseFrozenEnemies",
"canPreciseWalljump"
]
}
|
|
From: 13
Bottom Junction
To: 5
Lower Section - Bottom Right Door
Open the right door before sparking to spark out of it. Requires: {
"or": [
"canCarefulJump",
"Grapple",
"Wave",
"SpaceJump"
]
}
{
"or": [
{
"canShineCharge": {
"usedTiles": 23,
"openEnd": 1,
"steepUpTiles": 6,
"steepDownTiles": 1
}
},
{
"and": [
{
"canShineCharge": {
"usedTiles": 24,
"openEnd": 1,
"steepUpTiles": 6,
"steepDownTiles": 1
}
},
{
"doorUnlockedAtNode": 1
}
]
}
]
}
{
"or": [
{
"shinespark": {
"frames": 131
}
},
{
"and": [
"canShinechargeMovement",
"canMidairShinespark",
{
"shinespark": {
"frames": 106
}
}
]
}
]
}
Exit condition: {
"leaveWithSpark": {}
}
Unlocks doors: {"nodeId":1,"types":["ammo"],"requires":[]}
{"nodeId":5,"types":["ammo"],"requires":[]}
|
|
From: 13
Bottom Junction
To: 5
Lower Section - Bottom Right Door
It may be best to have shorter, later jumps to prevent bonking the ceiling or hitting the Ripper. Requires: {
"or": [
"canCarefulJump",
"canConsecutiveWalljump"
]
}
|
|
From: 14
Morph Maze Junction (Below Super Block)
To: 12
Top Junction
It's possible to go down, grab the item, and return before the Super block respawns, if going quick enough. Requires: {
"obstaclesCleared": [
"A"
]
}
"canCarefulJump"
|
|
Shoot open the door and jump through it without going into the water below. Requires: "canCarefulJump" |
|
Shoot the bridge to see where it ends. Opening the door requires a shot that is fired while Samus has some momentum from running to the right. Charge a spark running left then run off right into a preopened door. Requires: {
"canShineCharge": {
"usedTiles": 19,
"openEnd": 1
}
}
"canShinechargeMovement"
"canCarefulJump"
Exit condition: {
"leaveShinecharged": {
"framesRemaining": 60
}
}
Unlocks doors: {"types":["powerbomb"],"requires":[]}
{"types":["missiles","super"],"requires":["canTrickyJump"]}
|
|
It's not even necessary to jump through the door, the in-room doorsill gives enough running room to make it up. Requires: {
"doorUnlockedAtNode": 2
}
"canPreciseWalljump"
"canCarefulJump"
{
"or": [
"canTrickyJump",
"canMoonwalk",
"canXRayTurnaround",
"Morph"
]
}
|
|
In direct g-mode, the door will not close, and the in-room doorsill gives enough running room to make it up to the invisible ledge. Entrance condition: {
"comeInWithGMode": {
"mode": "direct",
"morphed": false
}
}
Requires: "canPreciseWalljump"
"canCarefulJump"
{
"or": [
"canTrickyJump",
"canMoonwalk",
"canXRayTurnaround",
"Morph"
]
}
|
|
Entrance condition: {
"comeInJumping": {
"speedBooster": "any",
"minTiles": 3
}
}
Requires: "canCarefulJump" |
|
Entrance condition: {
"comeInJumping": {
"speedBooster": "any",
"minTiles": 2
}
}
Requires: "canCarefulJump" "canLateralMidAirMorph" |
|
From: 2
Right Door
To: 1
Left Door
A doorsill with an open end is really all the room that's needed on the other side. Entrance condition: {
"comeInJumping": {
"speedBooster": "any",
"minTiles": 1
}
}
Requires: "canCarefulJump" "canPreciseWalljump" |
|
Requires: {
"doorUnlockedAtNode": 2
}
"SpeedBooster"
"canLateralMidAirMorph"
"canCarefulJump"
|
|
From: 1
Bottom Left Door
To: 3
Hidden Ceiling Item
Does not require a shinespark. You can shoot the block, then just run and jump. Requires: "SpeedBooster" "canCarefulJump" |
|
Requires: {
"or": [
"canCarefulJump",
"canEscapeMorphLocation"
]
}
|
|
From: 10
Right Etecoon Shaft - Bottom Left Door
To: 14
Right Etecoon Shaft - Wall Jump Climb Checkpoint Junction
Run into the room and jump just before hitting the right wall. Requires at least 3 tiles (with no open end) in the adjacent room, but is easier with more. Entrance condition: {
"comeInRunning": {
"minTiles": 2.4375,
"speedBooster": true
}
}
Requires: "canCarefulJump" "HiJump" |
|
From: 1
Left Door
To: 3
Top Junction
Perform a Spring Ball jump from a speedy jump in the previous room. Entrance condition: {
"comeInJumping": {
"speedBooster": true,
"minTiles": 7
}
}
Requires: "canPrepareForNextRoom" "canTrickySpringBallJump" "canCarefulJump" |
|
Jump into the room and onto the Grapple block. Entrance condition: {
"comeInJumping": {
"speedBooster": true,
"minTiles": 6.4375
}
}
Requires: "canPrepareForNextRoom" "HiJump" "canDisableEquipment" "canCarefulJump" |
|
It is possible to kill the Sidehoppers damageless by jumping into the bottom left corner then quickly spin jumping again. Requires: "ScrewAttack"
{
"or": [
"canCarefulJump",
{
"enemyDamage": {
"enemy": "Sm. Sidehopper",
"type": "contact",
"hits": 1
}
}
]
}
Clears obstacles: A |
|
Jump far to the left in order to hit a small Sidehopper instead of a large one. Requires: {
"or": [
{
"enemyDamage": {
"enemy": "Sidehopper",
"type": "contact",
"hits": 1
}
},
{
"and": [
"canCarefulJump",
{
"enemyDamage": {
"enemy": "Sm. Sidehopper",
"type": "contact",
"hits": 1
}
}
]
}
]
}
|
|
Requires: {
"obstaclesCleared": [
"B"
]
}
{
"or": [
"canCarefulJump",
"canWalljump",
"SpaceJump",
"Grapple"
]
}
|
|
From: 3
Dry Platform Junction
To: 1
Right Door
Charge a spark going left, then build speed and jump far to the right into a mid-air spark across the room and through the door. Requires: {
"canShineCharge": {
"usedTiles": 32,
"openEnd": 1
}
}
"canShinechargeMovement"
"canCarefulJump"
"canMidairShinespark"
{
"shinespark": {
"frames": 62
}
}
Exit condition: {
"leaveWithSpark": {}
}
Unlocks doors: {"types":["ammo"],"requires":[]}
|
|
Requires: {
"or": [
"canTrickyJump",
"Ice",
{
"obstaclesCleared": [
"A"
]
},
{
"and": [
"canCarefulJump",
"h_canUseSpringBall"
]
},
"can4HighMidAirMorph",
{
"and": [
"SpaceJump",
"canCarefulJump"
]
},
{
"and": [
"SpaceJump",
"ScrewAttack"
]
},
{
"and": [
"ScrewAttack",
"canCarefulJump"
]
}
]
}
|
|
Entrance condition: {
"comeInShinecharging": {
"length": 3,
"openEnd": 1
}
}
Requires: "canCarefulJump" |
|
Requires: {
"or": [
{
"enemyDamage": {
"enemy": "Boyon",
"type": "contact",
"hits": 2
}
},
{
"and": [
"canCarefulJump",
{
"enemyDamage": {
"enemy": "Boyon",
"type": "contact",
"hits": 1
}
}
]
},
{
"and": [
"canHorizontalDamageBoost",
{
"enemyDamage": {
"enemy": "Boyon",
"type": "contact",
"hits": 1
}
}
]
}
]
}
|
|
Requires: {
"or": [
"canTrickyJump",
"Ice",
{
"obstaclesCleared": [
"A"
]
},
{
"and": [
"canCarefulJump",
"h_canUseSpringBall"
]
},
"can4HighMidAirMorph",
{
"and": [
"SpaceJump",
"canCarefulJump"
]
},
{
"and": [
"SpaceJump",
"ScrewAttack"
]
},
{
"and": [
"ScrewAttack",
"canCarefulJump"
]
}
]
}
|
|
Requires: {
"or": [
{
"enemyDamage": {
"enemy": "Boyon",
"type": "contact",
"hits": 2
}
},
{
"and": [
"canCarefulJump",
{
"enemyDamage": {
"enemy": "Boyon",
"type": "contact",
"hits": 1
}
}
]
},
{
"and": [
"canHorizontalDamageBoost",
{
"enemyDamage": {
"enemy": "Boyon",
"type": "contact",
"hits": 1
}
}
]
}
]
}
|
|
Shoot forward with spazer to break the shot block, then jump into the morph tunnel while staying blue to break a bomb block. Entrance condition: {
"comeInShinecharging": {
"length": 3,
"openEnd": 1
}
}
Requires: "Spazer" "canSpeedball" "canCarefulJump" |
|
Use the Solid Blocks next to the Samus Eater to clip up through the Power Bomb Blocks. Carefully jump around the thorns, use HiJump to jump over them, or walk through them using IFrames. Requires: "canCeilingClip"
"canPartialFloorClip"
{
"or": [
{
"and": [
"canCarefulJump",
"HiJump",
"canTwoTileSqueeze",
{
"or": [
"canTrickyJump",
{
"thornHits": 1
}
]
}
]
},
{
"and": [
"canNeutralDamageBoost",
"canIframeSpikeJump",
{
"thornHits": 1
}
]
},
{
"and": [
"canPreciseWalljump",
"canTwoTileSqueeze"
]
}
]
}
|
|
At this speed, sometimes Samus will still not jump high enough, but she should be able to get up most of the time. Entrance condition: {
"comeInRunning": {
"speedBooster": true,
"minTiles": 12
}
}
Requires: "canCarefulJump"
{
"enemyDamage": {
"enemy": "Cacatac",
"type": "contact",
"hits": 1
}
}
|
|
Notable: true Cross the gaps by freezing multiple enemies or by refreezing a Waver while standing on it. Be careful running on frozen enemies. Freeze the final Waver high and walljump up, or wait for the second Waver to come back. Requires: "canTrickyUseFrozenEnemies"
"canCarefulJump"
{
"spikeHits": 3
}
{
"or": [
"canIframeSpikeJump",
{
"spikeHits": 3
}
]
}
|
|
From: 2
Right Door
To: 3
Safe Block in the Middle of the Room
Use the Fireflea when it moves to the right to cross the first gap. Requires: "canTrickyUseFrozenEnemies"
"HiJump"
"canCarefulJump"
{
"or": [
"canTrickyJump",
"canWalljump"
]
}
{
"spikeHits": 1
}
|
|
From: 4
Small Ledge Below Left Door
To: 1
Left Door
Freeze the Waver that gets stuck in the left pit as high as possible in order to avoid a wall jump. Requires: "canTrickyUseFrozenEnemies" "HiJump" "canCarefulJump" |
|
Requires: "h_IBJFromSpikes" |
|
This strat is for killing all of the Rippers and then using Space Jump to get up without consecutive wall jumps. Space jump up near the shot block, then shoot it while falling right as it goes off screen, then space jump back up. Requires: "SpaceJump"
{
"or": [
"HiJump",
{
"and": [
"canCarefulJump",
"canWalljump"
]
}
]
}
{
"obstaclesCleared": [
"B"
]
}
|
|
From: 9
Junction (Top Rippers)
To: 9
Junction (Top Rippers)
To kill the Rippers with a single Power Bomb without breaking the ledge, place the bomb just above the second Ripper. Requires: "h_canUsePowerBombs"
"canCarefulJump"
{
"or": [
"canWalljump",
"canSpringBallJumpMidAir",
"SpaceJump",
{
"and": [
"HiJump",
"canTrickyDashJump"
]
},
{
"and": [
"canJumpIntoIBJ",
{
"or": [
"canStaggeredIBJ",
"canDoubleBombJump"
]
}
]
}
]
}
Clears obstacles: B |
|
Shoot the pirates to prevent their lasers, then jump over them. Tank one Mini-Kraid spike. Requires: "canCarefulJump"
{
"enemyDamage": {
"enemy": "Mini-Kraid",
"type": "spike",
"hits": 1
}
}
|
|
Requires: {
"or": [
{
"enemyKill": {
"enemies": [
[
"Green Space Pirate (standing)",
"Green Space Pirate (standing)",
"Green Space Pirate (standing)"
]
],
"excludedWeapons": [
"Bombs"
]
}
},
{
"and": [
{
"enemyKill": {
"enemies": [
[
"Green Space Pirate (standing)",
"Green Space Pirate (standing)",
"Green Space Pirate (standing)"
]
],
"explicitWeapons": [
"Bombs"
]
}
},
{
"or": [
"canCarefulJump",
{
"enemyDamage": {
"enemy": "Mini-Kraid",
"type": "spike",
"hits": 3
}
}
]
}
]
}
]
}
{
"or": [
"canDodgeWhileShooting",
"ScrewAttack",
{
"enemyDamage": {
"enemy": "Mini-Kraid",
"type": "spike",
"hits": 1
}
}
]
}
{
"or": [
{
"enemyKill": {
"enemies": [
[
"Mini-Kraid"
]
],
"excludedWeapons": [
"PowerBeam",
"Ice",
"Wave",
"Spazer",
"Bombs",
"Charge"
]
}
},
{
"and": [
{
"enemyKill": {
"enemies": [
[
"Mini-Kraid"
]
]
}
},
{
"enemyDamage": {
"enemy": "Mini-Kraid",
"type": "spike",
"hits": 3
}
}
]
}
]
}
Clears obstacles: A |
|
Shoot the pirates to prevent their lasers, then jump over them to get to the runway. Mini-Kraid spikes will block the runway fairly quickly; a shortcharge can allow for more run space but isn't required. Requires: "SpeedBooster"
"canCarefulJump"
{
"canShineCharge": {
"usedTiles": 29,
"openEnd": 2
}
}
Clears obstacles: A |
|
Wait to hit one of Mini-Kraid's spikes, then run through. Requires: {
"or": [
"canCarefulJump",
{
"enemyDamage": {
"enemy": "Green Space Pirate (standing)",
"type": "contact",
"hits": 1
}
}
]
}
{
"or": [
"canTrickyJump",
{
"enemyDamage": {
"enemy": "Mini-Kraid",
"type": "spike",
"hits": 1
}
}
]
}
|
|
Requires: {
"resetRoom": {
"nodes": [
1,
2
],
"mustStayPut": false
}
}
{
"or": [
"ScrewAttack",
{
"ammo": {
"type": "Super",
"count": 1
}
},
"Plasma",
{
"and": [
{
"or": [
"Ice",
"Wave",
"Spazer",
"SpeedBooster"
]
},
{
"or": [
"canCarefulJump",
{
"enemyDamage": {
"enemy": "Mini-Kraid",
"type": "stone",
"hits": 1
}
}
]
}
]
}
]
}
{
"refill": [
"Energy",
"Missile",
"Super"
]
}
|
|
Getting up during Phase 2 can be done by jumping on Kraid's projectile platforms or a well timed crouch jump + down grab. Requires: "Charge"
{
"or": [
"Wave",
"Spazer",
"Plasma",
"canBePatient"
]
}
{
"or": [
"HiJump",
"canWalljump",
"SpaceJump",
"canSpringBallJumpMidAir",
{
"and": [
"canDodgeWhileShooting",
{
"or": [
"canCarefulJump",
"h_canCrouchJumpDownGrab"
]
}
]
}
]
}
Clears obstacles: f_DefeatedKraid |
|
Only 2 Missiles are needed to get Kraid to stand up, after which they are farmable. Getting up during Phase 2 can be done by jumping on Kraid's projectile platforms or a well timed crouch jump + down grab. Requires: {
"ammo": {
"type": "Missile",
"count": 2
}
}
{
"or": [
"HiJump",
"canWalljump",
"SpaceJump",
"canSpringBallJumpMidAir",
{
"and": [
"canDodgeWhileShooting",
{
"or": [
"canCarefulJump",
"h_canCrouchJumpDownGrab"
]
}
]
}
]
}
Clears obstacles: f_DefeatedKraid |
|
4 supers are required to kill Kraid. Only 1 is needed to get him to stand up, after which they are farmable, even though the drop rate is low. Getting up during Phase 2 can be done by jumping on Kraid's projectile platforms or a well timed crouch jump + down grab. Requires: {
"or": [
{
"ammo": {
"type": "Super",
"count": 5
}
},
{
"and": [
{
"ammo": {
"type": "Super",
"count": 4
}
},
"canDodgeWhileShooting"
]
},
{
"and": [
{
"ammo": {
"type": "Super",
"count": 3
}
},
"canDodgeWhileShooting",
"canBePatient"
]
},
{
"and": [
{
"ammo": {
"type": "Super",
"count": 1
}
},
"canDodgeWhileShooting",
"canBeVeryPatient"
]
}
]
}
{
"or": [
"HiJump",
"canWalljump",
"SpaceJump",
"canSpringBallJumpMidAir",
{
"and": [
"canDodgeWhileShooting",
{
"or": [
"canCarefulJump",
"h_canCrouchJumpDownGrab"
]
}
]
}
]
}
Clears obstacles: f_DefeatedKraid |
|
Break all 3 super blocks to build enough run speed to jump over the pit. Requires: {
"obstaclesCleared": [
"A"
]
}
"canCarefulJump"
|
|
Requires: {
"enemyDamage": {
"enemy": "Kihunter (green)",
"type": "contact",
"hits": 1
}
}
{
"or": [
"canCarefulJump",
{
"enemyDamage": {
"enemy": "Kihunter (green)",
"type": "contact",
"hits": 1
}
}
]
}
{
"enemyKill": {
"enemies": [
[
"Kihunter (green)",
"Kihunter (green)",
"Kihunter (green)",
"Kihunter (green)"
]
],
"explicitWeapons": [
"PowerBeam"
]
}
}
Clears obstacles: C |
|
From: 1
Left Side - Top Door
To: 7
Top Right Door
Kill King Cac by scrolling the camera, before attempting the jump. Requires: {
"doorUnlockedAtNode": 1
}
{
"or": [
"canTrickyJump",
{
"and": [
"SpeedBooster",
"canCarefulJump"
]
}
]
}
"canCameraManip"
|
|
Entrance condition: {
"comeInRunning": {
"minTiles": 2,
"speedBooster": "any"
}
}
Requires: {
"or": [
"canTrickyJump",
{
"and": [
"SpeedBooster",
"canCarefulJump"
]
}
]
}
{
"or": [
"ScrewAttack",
{
"and": [
"canNeutralDamageBoost",
{
"enemyDamage": {
"enemy": "Cacatac",
"hits": 1,
"type": "contact"
}
}
]
}
]
}
|
|
King Cac can be killed by scrolling the camera before jumping across. Requires: "canWalljump"
"canCarefulJump"
{
"or": [
"canCameraManip",
"canStaggeredWalljump",
{
"and": [
"canNeutralDamageBoost",
{
"enemyDamage": {
"enemy": "Cacatac",
"type": "contact",
"hits": 1
}
}
]
}
]
}
|
|
From: 2
Left Side - Top Middle Door
To: 1
Left Side - Top Door
Entrance condition: {
"comeInRunning": {
"minTiles": 8,
"speedBooster": true
}
}
Requires: "canCarefulJump"
"HiJump"
{
"or": [
"ScrewAttack",
{
"enemyDamage": {
"enemy": "Waver",
"type": "contact",
"hits": 1
}
}
]
}
|
|
From: 2
Left Side - Top Middle Door
To: 7
Top Right Door
Entrance condition: {
"comeInRunning": {
"minTiles": 4,
"speedBooster": false
}
}
Requires: "canWalljump" "canCarefulJump" |
|
Entrance condition: {
"comeInRunning": {
"minTiles": 7,
"speedBooster": true
}
}
Requires: "canCarefulJump"
"HiJump"
{
"or": [
"ScrewAttack",
{
"enemyDamage": {
"enemy": "Cacatac",
"type": "contact",
"hits": 1
}
}
]
}
|
|
From: 2
Left Side - Top Middle Door
To: 7
Top Right Door
Entrance condition: {
"comeInRunning": {
"minTiles": 5,
"speedBooster": "any"
}
}
Requires: "canWalljump" "canCarefulJump" |
|
From: 7
Top Right Door
To: 1
Left Side - Top Door
Dealing with spikes is up to luck. It is possible to shoot the Cacatac while jumping towards it. Entrance condition: {
"comeInShinecharged": {
"framesRequired": 100
}
}
Requires: "canShinechargeMovementComplex"
"canMidairShinespark"
"canCarefulJump"
{
"shinespark": {
"frames": 30,
"excessFrames": 6
}
}
|
|
From: 7
Top Right Door
To: 1
Left Side - Top Door
Dealing with spikes is up to luck. It is possible to shoot the Cacatac while jumping towards it. Entrance condition: {
"comeInShinecharging": {
"length": 2.5,
"openEnd": 1
}
}
Requires: "canShinechargeMovementComplex"
"canMidairShinespark"
"canCarefulJump"
{
"shinespark": {
"frames": 30,
"excessFrames": 6
}
}
|
|
Use the full runway of the top-right door to jump to the ledge below the Cacatac and mockball on it. Either full jump from the left side of this platform, or do a small hop followed by a big jump to cross the gap. Disabling Springball once past the Grapple Blocks makes this much easier. Requires: "canCarefulJump"
"canSpringBallBounce"
"canMockball"
{
"or": [
{
"doorUnlockedAtNode": 7
},
"canTrickyJump"
]
}
|
|
Upon room entry, jump and mockball on top of the first pillar. Entrance condition: {
"comeInRunning": {
"minTiles": 3,
"speedBooster": "any"
}
}
Requires: "canCarefulJump"
"canMockball"
{
"heatFrames": 180
}
|
|
Build speed on the central platform and jump to the door. Requires: "canCarefulJump"
{
"heatFrames": 176
}
Unlocks doors: {"types":["missiles"],"requires":[{"heatFrames":25}]}
|
|
From: 2
Bottom Left Door
To: 1
Top Left Door
Notable: true Wall jump up the left wall and then on the moving platform (Kamer) while avoiding the Fune's fireball. The Kamers will temporarily move down if Samus is below them, so it is best to walk under the first Kamer before climbing the wall. It is possible to freeze or kill the Fune with a Super or Power Bomb to make things easier. Requires: "canPreciseWalljump"
"canConsecutiveWalljump"
"canUseEnemies"
{
"or": [
{
"heatFrames": 560
},
{
"and": [
"canCarefulJump",
{
"heatFrames": 360
}
]
},
{
"and": [
"canTrickyJump",
{
"heatFrames": 240
}
]
},
{
"and": [
{
"or": [
"canUseFrozenEnemies",
{
"ammo": {
"type": "Super",
"count": 1
}
}
]
},
{
"heatFrames": 432
}
]
},
{
"and": [
{
"ammo": {
"type": "PowerBomb",
"count": 1
}
},
{
"heatFrames": 456
}
]
}
]
}
|
|
From: 2
Bottom Left Door
To: 1
Top Left Door
Notable: true Wall jump up the left wall and then on the moving platform (Kamer) while avoiding the Fune's fireball. The Kamers will temporarily move down if Samus is below them, so it is best to walk under the first Kamer before climbing the wall. Requires: "HiJump"
"canUseEnemies"
"canWalljump"
{
"or": [
{
"heatFrames": 360
},
{
"and": [
"canCarefulJump",
{
"heatFrames": 250
}
]
}
]
}
|
|
Requires: "h_HeatedIBJFromSpikes"
{
"heatFrames": 1100
}
|
|
Entrance condition: {
"comeInRunning": {
"minTiles": 4,
"speedBooster": true
}
}
Requires: "canSpringFling"
"canLateralMidAirMorph"
"canCarefulJump"
{
"heatFrames": 120
}
|
|
Requires: "h_HeatedIBJFromSpikes"
{
"heatFrames": 1100
}
|
|
From: 2
Right Door
To: 4
Lava, Left Wall
Jump into the door frame so that Samus is falling when entering this room. Morph before reaching the lava and Bounce down to the bottom. Entrance condition: {
"comeInJumping": {
"minTiles": 4,
"speedBooster": false
}
}
Requires: {
"or": [
"h_lavaProof",
"canSuitlessLavaDive"
]
}
"canCarefulJump"
"canBounceBall"
{
"heatFrames": 330
}
{
"lavaFrames": 290
}
|
|
From: 2
Right Door
To: 5
Lava, Center Namihe
Jump into the door frame so that Samus is falling when entering this room. Morph before reaching the lava, Bounce, and Unmorph shortly after sink slightly before floating down to the stairs. Entrance condition: {
"comeInJumping": {
"minTiles": 4,
"speedBooster": false
}
}
Requires: {
"or": [
"h_lavaProof",
"canSuitlessLavaDive"
]
}
"canCarefulJump"
"canBounceBall"
{
"heatFrames": 230
}
{
"lavaFrames": 190
}
|
|
Samus will be slowed by lava if SpeedBooster is equipped, even with Gravity. Requires: "Gravity"
{
"or": [
"h_lavaProof",
"canSuitlessLavaDive"
]
}
{
"or": [
{
"and": [
"canDisableEquipment",
{
"heatFrames": 270
},
{
"lavaFrames": 230
}
]
},
{
"and": [
"canDisableEquipment",
"SpaceJump",
"canCarefulJump",
{
"heatFrames": 225
},
{
"lavaFrames": 180
}
]
},
{
"and": [
{
"heatFrames": 330
},
{
"lavaFrames": 300
}
]
}
]
}
|
|
Samus will be slowed by lava if SpeedBooster is equipped, even with Gravity. Requires: {
"or": [
"h_lavaProof",
"canSuitlessLavaDive"
]
}
{
"or": [
{
"and": [
"HiJump",
{
"heatFrames": 270
},
{
"lavaFrames": 270
}
]
},
{
"and": [
{
"heatFrames": 295
},
{
"lavaFrames": 295
}
]
}
]
}
{
"or": [
"canTrickyJump",
{
"and": [
{
"heatFrames": 60
},
{
"lavaFrames": 60
}
]
}
]
}
{
"or": [
{
"and": [
"SpaceJump",
"canCarefulJump",
{
"heatFrames": 100
}
]
},
{
"and": [
"canWalljump",
{
"heatFrames": 60
}
]
},
{
"and": [
"canSpringBallJumpMidAir",
{
"heatFrames": 100
}
]
},
{
"and": [
"canBombJumpWaterEscape",
{
"heatFrames": 180
},
{
"lavaFrames": 30
}
]
},
{
"and": [
"HiJump",
{
"heatFrames": 60
},
{
"lavaFrames": 10
}
]
}
]
}
|
|
Entrance condition: {
"comeInRunning": {
"speedBooster": "any",
"minTiles": 3
}
}
Requires: "SpaceJump"
"canCarefulJump"
{
"or": [
"ScrewAttack",
{
"and": [
"canPrepareForNextRoom",
"canPseudoScrew"
]
}
]
}
{
"heatFrames": 230
}
|
|
Requires: "h_heatProof"
{
"or": [
"h_lavaProof",
"canCarefulJump"
]
}
"Plasma"
{
"refill": [
"Energy",
"Missile"
]
}
|
|
Requires: {
"or": [
"canTrickyJump",
{
"and": [
"ScrewAttack",
"canCarefulJump",
{
"heatFrames": 60
}
]
},
{
"and": [
{
"obstaclesCleared": [
"A"
]
},
{
"heatFrames": 60
}
]
}
]
}
{
"heatFrames": 230
}
|
|
Requires: {
"or": [
"canTrickyJump",
"SpaceJump",
{
"and": [
"ScrewAttack",
"canCarefulJump"
]
},
{
"and": [
{
"obstaclesCleared": [
"A"
]
},
{
"or": [
"canCarefulJump",
{
"heatFrames": 90
}
]
}
]
}
]
}
{
"heatFrames": 210
}
|
|
Wait for the pirates to step towards the wall then jump on their platform. Shoot them to momentarily prevent them from shooting lasers. Requires: "canCarefulJump" |
|
Requires: {
"obstaclesCleared": [
"A"
]
}
{
"or": [
"h_heatProof",
{
"and": [
{
"heatFrames": 690
},
{
"or": [
{
"ammo": {
"type": "Super",
"count": 3
}
},
{
"ammo": {
"type": "Missile",
"count": 6
}
},
"ScrewAttack",
"Plasma",
"Spazer",
"Wave"
]
}
]
}
]
}
{
"or": [
{
"and": [
"canCarefulJump",
{
"heatFrames": 420
}
]
},
{
"and": [
{
"heatFrames": 720
},
{
"lavaFrames": 60
}
]
}
]
}
Unlocks doors: {"types":["missiles"],"requires":[{"heatFrames":20}]}
|
|
From: 1
Left Door
To: 2
Right Door
Entrance condition: {
"comeInRunning": {
"minTiles": 4,
"speedBooster": false
}
}
Requires: "Gravity"
"canCarefulJump"
"canDisableEquipment"
"canSpringBallBounce"
{
"spikeHits": 2
}
{
"heatFrames": 350
}
{
"lavaFrames": 20
}
|
|
From: 1
Left Door
To: 2
Right Door
It may help to perform the first jump with HiJump disabled. Entrance condition: {
"comeInRunning": {
"minTiles": 4,
"speedBooster": false
}
}
Requires: "canCarefulJump"
"HiJump"
"canDisableEquipment"
"canSpringBallBounce"
{
"spikeHits": 3
}
{
"heatFrames": 350
}
{
"lavaFrames": 32
}
|
|
From: 2
Right Door
To: 1
Left Door
It may help to perform the first jump with HiJump disabled. Entrance condition: {
"comeInRunning": {
"minTiles": 4,
"speedBooster": false
}
}
Requires: "canCarefulJump"
"HiJump"
"canDisableEquipment"
"canSpringBallBounce"
{
"spikeHits": 3
}
{
"heatFrames": 350
}
{
"lavaFrames": 32
}
|
|
If you have Speed Booster, unequip it to be able to run faster in the lava. Requires: "Gravity"
{
"heatFrames": 360
}
{
"lavaFrames": 130
}
{
"or": [
"canCarefulJump",
{
"heatFrames": 40
}
]
}
|
|
If you have Speed Booster, unequip it to be able to run faster in the lava. Requires: "Gravity"
{
"heatFrames": 360
}
{
"lavaFrames": 130
}
{
"or": [
"canCarefulJump",
{
"heatFrames": 40
}
]
}
|
|
Requires: "Gravity"
"Morph"
{
"or": [
{
"and": [
"canMockball",
"canCarefulJump",
{
"lavaFrames": 60
}
]
},
{
"lavaFrames": 100
}
]
}
{
"or": [
{
"lavaFrames": 150
},
{
"and": [
"SpaceJump",
{
"lavaFrames": 60
}
]
}
]
}
|
|
Requires: "canSuitlessLavaDive"
"Morph"
{
"or": [
{
"and": [
"canCarefulJump",
"canMockball",
{
"lavaFrames": 180
}
]
},
{
"lavaFrames": 220
}
]
}
{
"or": [
{
"and": [
"canSpaceJumpWaterBounce",
{
"lavaFrames": 120
}
]
},
{
"lavaFrames": 150
}
]
}
|
|
From: 2
Right Door
To: 2
Right Door
Notable: true Enter from the right door and spin jump onto the first ledge while barely landing on the ledge in order to prevent getting the Geruta on camera. Walk against the left wall and jump to trigger the Geruta. It should now be moving leftwards. Stand on the next platform against the right wall and shoot the Geruta to get it one shot away from being frozen. After a few swoops, it will come down; either freeze it or tank a hit. Then go up and stand on the corner and freeze it when it is in position. The Geruta will be stuck below and keep swooping, so if Energy permits, Samus will have several attempts. Quickly shinecharge left to right, kill the Geruta and spark out the bottom right door. Entrance condition: {
"comeInNormally": {}
}
Requires: "h_canTrickyFrozenEnemyRunway"
"canCarefulJump"
{
"canShineCharge": {
"usedTiles": 17,
"openEnd": 1
}
}
"canShinechargeMovementTricky"
{
"heatFrames": 1260
}
{
"shinespark": {
"frames": 2,
"excessFrames": 0
}
}
Exit condition: {
"leaveWithSpark": {}
}
Unlocks doors: {"types":["ammo"],"requires":[]}
|
|
From: 2
Right Door
To: 3
Item
Notable: true Enter from the right door and spin jump onto the first ledge while barely landing on the ledge in order to prevent getting the Geruta on camera. Walk against the left wall and jump to trigger the Geruta. It should now be moving leftwards. Stand on the next platform against the right wall and shoot the Geruta to get it one shot away from being frozen. After a few swoops, it will come down; either freeze it or tank a hit. Then go up and stand on the corner and freeze it when it is in position. The Geruta will be stuck below and keep swooping, so if Energy permits, Samus will have several attempts. With full heat protection, Samus can quickly shinecharge left to right then run and spark midair to the left to save Energy. Entrance condition: {
"comeInNormally": {}
}
Requires: "h_canTrickyFrozenEnemyRunway"
"canCarefulJump"
"canHorizontalShinespark"
{
"canShineCharge": {
"usedTiles": 17,
"openEnd": 1
}
}
{
"heatFrames": 1050
}
{
"or": [
{
"shinespark": {
"frames": 55,
"excessFrames": 15
}
},
{
"and": [
"h_heatProof",
"canMidairShinespark",
{
"shinespark": {
"frames": 32,
"excessFrames": 15
}
}
]
}
]
}
|
|
Notable: true Ride the Geruta left to reach the missile location by freezing it repeatedly. Stay on its left side when it touches the ceiling for the enemy to continue moving forward. It may not be possible to climb back up to the Geruta if Samus falls. When it moves towards the ceiling, reset Samus' fall speed using an unmorph or by taking knockback damage, in order to wait for the Geruta to fall low enough to refreeze. Requires: "canTrickyUseFrozenEnemies"
"canCarefulJump"
{
"or": [
"canResetFallSpeed",
{
"and": [
"canNeutralDamageBoost",
{
"enemyDamage": {
"enemy": "Geruta",
"type": "contact",
"hits": 3
}
}
]
}
]
}
{
"heatFrames": 3000
}
|
|
Requires: {
"heatFrames": 350
}
{
"or": [
{
"lavaFrames": 70
},
{
"and": [
"Gravity",
{
"lavaFrames": 45
}
]
}
]
}
{
"or": [
"canCarefulJump",
{
"enemyDamage": {
"enemy": "Dragon",
"type": "contact",
"hits": 1
}
},
{
"enemyKill": {
"enemies": [
[
"Dragon"
]
],
"explicitWeapons": [
"Super",
"Missile",
"Plasma",
"ScrewAttack"
]
}
}
]
}
|
|
Notable: true Jump and aim down to lower the camera so the middle platform Sova starts moving. Then freeze it by aiming down, shoot the shot block, and use the Sova as a stable platform. Requires: "canTrickyUseFrozenEnemies"
"canCarefulJump"
"canCameraManip"
{
"heatFrames": 350
}
Clears obstacles: A |
|
Entrance condition: {
"comeInRunning": {
"minTiles": 3,
"speedBooster": "any"
}
}
Requires: "SpaceJump"
"canCarefulJump"
{
"heatFrames": 135
}
|
|
Entrance condition: {
"comeInRunning": {
"minTiles": 3,
"speedBooster": "any"
}
}
Requires: "SpaceJump"
"canCarefulJump"
{
"heatFrames": 135
}
|
|
From: 7
Junction Below Power Bomb Blocks
To: 2
Middle Left Door
Notable: true Place a Power Bomb to break the Power Bomb blocks and the bomb blocks, without killing the global Sova. Wait 30-50 seconds for the Sova to get into position. Crouch jump, morph, and hold right against the wall, hitting the Sova from below while near the peak of Samus's jump. Continue holding right to pass through the Sova and onto the ledge above. Requires: "h_canUsePowerBombs"
"canCrouchJump"
"canCarefulJump"
"canNeutralDamageBoost"
{
"enemyDamage": {
"enemy": "Sova",
"hits": 1,
"type": "contact"
}
}
Clears obstacles: A, B, C |
|
From: 7
Junction Below Power Bomb Blocks
To: 3
Bottom Left Door
Avoiding damage from all enemies with just Power Beam is tricky, but doable. Requires: "canDodgeWhileShooting" "canCarefulJump" Clears obstacles: D |
|
With a fast mockball, it is possible to roll under all of the enemies. Requires: "canMockball" "canCarefulJump" |
|
Requires laying PBs on the very edge of the platform by the doorway, mostly hanging over the lava, in order to double hit the rightmost Boyon. Requires: "canMidAirMorph"
"canWalljump"
"canCarefulJump"
{
"enemyKill": {
"enemies": [
[
"Boyon",
"Boyon",
"Boyon"
]
],
"explicitWeapons": [
"PowerBomb"
]
}
}
{
"heatFrames": 780
}
|
|
Jump and shoot supers diagonally down at the rightmost Boyon. Jump at the edge of the platform and shoot just before hitting the ceiling, or start one tile left and shoot while at the ceiling. Requires: "canMidAirMorph"
"canWalljump"
"canCarefulJump"
{
"enemyKill": {
"enemies": [
[
"Boyon"
]
],
"explicitWeapons": [
"Super"
]
}
}
{
"heatFrames": 540
}
|
|
Use the full runway in order to get a good jump. Requires: "canMidAirMorph"
"SpeedBooster"
"canCarefulJump"
{
"heatFrames": 275
}
|
|
Run and jump from the second-highest platform on the left. Requires: "HiJump" "canCarefulJump" |
|
From: 1
Left Door
To: 3
Junction Left of Green Gate
With at least 6 tiles of run speed, jump over the first moat and MockBall into a regular springball jump over the second moat. Aim down before reaching the ceiling to increase the jump distance. Entrance condition: {
"comeInRunning": {
"minTiles": 6,
"speedBooster": "any"
}
}
Requires: "canCarefulJump" "canMockball" "canSpringBallBounce" |
|
From: 1
Left Door
To: 4
Center Platform Junction
Entrance condition: {
"comeInRunning": {
"minTiles": 6,
"speedBooster": "any"
}
}
Requires: "canCarefulJump" |
|
From: 1
Left Door
To: 4
Center Platform Junction
1- Stand near the farm point, on the edge of where you make Gamets spawn. 2- Wait for the water position to be high. 3- Move to make the Gamets spawn. Moonwalking while facing the stairs is useful here. 4- Quickly climb up to the last ledge before the door. 5- Run, jump, dboost off a Gamet. Requires: "h_canNavigateUnderwater"
"canHorizontalDamageBoost"
"canCarefulJump"
{
"or": [
"Gravity",
"HiJump",
"canTrickyJump"
]
}
{
"enemyDamage": {
"enemy": "Gamet",
"type": "contact",
"hits": 1
}
}
|
|
From: 1
Left Door
To: 4
Center Platform Junction
Entrance condition: {
"comeInRunning": {
"minTiles": 4,
"speedBooster": "any"
}
}
Requires: "canCarefulJump"
{
"or": [
"canTrickyJump",
"canWalljump",
"canLateralMidAirMorph"
]
}
|
|
From: 4
Center Platform Junction
To: 3
Junction Left of Green Gate
Requires: "canCarefulJump" "canLateralMidAirMorph" "canSpringFling" "SpeedBooster" |
|
From: 5
Main Junction
To: 1
Top Left Door
Run on the moving platform (Kamer). Requires: "HiJump" "canCarefulJump" |
|
Jump with enough run speed to reach the wall below the Missile Item Location. Entrance condition: {
"comeInRunning": {
"minTiles": 29,
"speedBooster": true
}
}
Requires: "canWalljump" "canCarefulJump" |
|
Run on the moving platform (Kamer). Requires: "SpeedBooster" "HiJump" "canWalljump" "canCarefulJump" |
|
Get a normal height jump by releasing run with SpeedBooster and no HiJump. Break spin to reach the transition without a wall jump. Entrance condition: {
"comeInShinecharging": {
"length": 9,
"openEnd": 0
}
}
Requires: "canShinechargeMovement" "canCarefulJump" Exit condition: {
"leaveShinecharged": {
"framesRemaining": 100
}
}
Unlocks doors: {"types":["super"],"requires":[]}
{"types":["missiles","powerbomb"],"requires":["never"]}
|
|
From: 2
Bottom Right Door
To: 5
Bottom Junction Right of Morph Tunnel
Wait for the first Holtz to attack then either use the Magdollite for IFrames, or avoid the projectiles and continue dodging bats. Requires: "h_canNavigateHeatRooms"
{
"or": [
"canTrickyJump",
{
"and": [
"canHorizontalDamageBoost",
"canCarefulJump",
{
"enemyDamage": {
"enemy": "Magdollite",
"type": "flame",
"hits": 1
}
}
]
}
]
}
{
"heatFrames": 330
}
|
|
From: 5
Bottom Junction Right of Morph Tunnel
To: 2
Bottom Right Door
Wait for the Magdollite to attack then either use it for IFrames, or jump over the swooping Holtzes. Requires: "h_canNavigateHeatRooms"
{
"or": [
"canTrickyJump",
{
"and": [
"canHorizontalDamageBoost",
"canCarefulJump",
{
"enemyDamage": {
"enemy": "Magdollite",
"type": "flame",
"hits": 1
}
}
]
}
]
}
{
"heatFrames": 375
}
|
|
From: 5
Bottom Junction Right of Morph Tunnel
To: 2
Bottom Right Door
Requires: "h_canNavigateHeatRooms"
{
"enemyDamage": {
"enemy": "Holtz",
"type": "contact",
"hits": 1
}
}
{
"or": [
{
"enemyDamage": {
"enemy": "Holtz",
"type": "contact",
"hits": 1
}
},
"canCarefulJump"
]
}
{
"heatFrames": 330
}
|
|
From: 6
Golden Torizo Arena Junction (Fight Not Started)
To: 4
Hidden Right Item
Jump a before reaching the rightmost floor pillar. Requires: "h_canNavigateHeatRooms"
"HiJump"
"SpeedBooster"
"canCarefulJump"
"ScrewAttack"
{
"heatFrames": 200
}
|
|
From: 6
Golden Torizo Arena Junction (Fight Not Started)
To: 4
Hidden Right Item
Jump over the space below GT that is between the door and first foreground pillar and walljump up. Break the bomb blocks with a power bomb to make space. Then use Screw Attack to pass through the inactive GT. Requires: "h_canNavigateHeatRooms"
"ScrewAttack"
"canCarefulJump"
"canPreciseWalljump"
"h_canUsePowerBombs"
{
"or": [
"canTrivialMidAirMorph",
"h_canUseSpringBall"
]
}
{
"or": [
"HiJump",
"canTrickyJump"
]
}
{
"heatFrames": 350
}
|
|
From: 5
Junction Above Bottom Blocks with Top Blocks Broken
To: 3
Top Right Door
Position yourself in the door way, then run and jump. Makes it possible to walljump up. Requires: "HiJump"
"SpeedBooster"
"canWalljump"
"canCarefulJump"
{
"doorUnlockedAtNode": 2
}
{
"heatFrames": 240
}
Unlocks doors: {"nodeId":2,"types":["missiles"],"requires":[{"heatFrames":50}]}
{"nodeId":2,"types":["super"],"requires":[]}
{"nodeId":2,"types":["powerbomb"],"requires":[{"heatFrames":110}]}
|
|
Entering with 3 tiles of run speed will let Samus pass under the ceiling and over the bottom center pirate. Pirates can be shot with any weapon to prevent them from firing. Entrance condition: {
"comeInRunning": {
"minTiles": 3,
"speedBooster": "any"
}
}
Requires: "canCarefulJump"
{
"heatFrames": 300
}
Clears obstacles: A |
|
From: 1
Left Door
To: 3
Bottom Platform Junction
Entering with 3 tiles of run speed will let Samus pass under the ceiling and over the bottom center pirate. Pirates can be shot with any weapon to prevent them from firing. Entrance condition: {
"comeInRunning": {
"minTiles": 3,
"speedBooster": "any"
}
}
Requires: "canCarefulJump"
{
"heatFrames": 240
}
Clears obstacles: A |
|
From: 2
Right Door
To: 3
Bottom Platform Junction
Notable: true Dive into the acid to the left of the first floating platform to quickly sink to the bottom of the room. It is possible to jump directly over the pirate at the bottom of the ramp directly to the gap between platforms. Falling in this way will land between platforms at the bottom of the room unless Samus slows or catches herself on the way down. Requires: {
"obstaclesNotCleared": [
"A"
]
}
"canSuitlessLavaDive"
{
"or": [
"SpaceJump",
"canTrickyJump",
{
"and": [
"canLateralMidAirMorph",
"canCarefulJump"
]
},
{
"and": [
"ScrewAttack",
"canCarefulJump"
]
},
{
"and": [
"h_heatProof",
{
"enemyKill": {
"enemies": [
[
"Yellow Space Pirate (standing)"
]
]
}
},
"canCarefulJump"
]
}
]
}
{
"heatFrames": 140
}
{
"or": [
"canResetFallSpeed",
"canPreciseWalljump",
{
"and": [
{
"heatFrames": 60
},
{
"acidFrames": 60
}
]
}
]
}
{
"heatFrames": 330
}
{
"acidFrames": 330
}
|
|
Requires: {
"obstaclesCleared": [
"A"
]
}
{
"or": [
{
"and": [
"canWalljump",
{
"heatFrames": 420
}
]
},
{
"and": [
"HiJump",
{
"heatFrames": 360
}
]
},
{
"and": [
"SpaceJump",
{
"heatFrames": 420
}
]
},
{
"and": [
"canSpringBallJumpMidAir",
"canCarefulJump",
{
"heatFrames": 520
}
]
}
]
}
|
|
Jump over or kill the final pirate in front of the door. Requires: {
"obstaclesCleared": [
"A"
]
}
{
"or": [
"canCarefulJump",
"canPreciseWalljump",
"ScrewAttack",
"canSpringBallJumpMidAir",
"SpaceJump",
{
"enemyDamage": {
"enemy": "Yellow Space Pirate (standing)",
"type": "contact",
"hits": 2
}
}
]
}
{
"heatFrames": 420
}
|
|
Requires: {
"obstaclesCleared": [
"A"
]
}
"HiJump"
{
"or": [
"SpeedBooster",
{
"heatFrames": 90
}
]
}
{
"heatFrames": 270
}
{
"or": [
"canCarefulJump",
"canLateralMidAirMorph",
"ScrewAttack",
{
"and": [
{
"enemyKill": {
"enemies": [
[
"Yellow Space Pirate (standing)"
]
],
"explicitWeapons": [
"Charge+Ice+Wave+Spazer"
]
}
},
{
"heatFrames": 240
}
]
},
{
"and": [
{
"enemyKill": {
"enemies": [
[
"Yellow Space Pirate (standing)"
]
],
"explicitWeapons": [
"Missile",
"Charge+Plasma"
]
}
},
{
"heatFrames": 120
}
]
},
{
"and": [
{
"enemyKill": {
"enemies": [
[
"Yellow Space Pirate (standing)"
]
],
"explicitWeapons": [
"Super"
]
}
},
{
"heatFrames": 60
}
]
}
]
}
|
|
Falling to the right of the floating platform is faster. Requires: {
"or": [
"canCarefulJump",
{
"enemyDamage": {
"enemy": "Yellow Space Pirate (wall)",
"type": "contact",
"hits": 1
}
}
]
}
{
"or": [
"canTrickyJump",
{
"heatFrames": 20
}
]
}
{
"heatFrames": 115
}
|
|
Clear one of the paired Fune heads with a Super Missile or Power Bomb. Run from or jump over the Boulders. Requires: {
"enemyKill": {
"enemies": [
[
"Fune"
]
]
}
}
"canCarefulJump"
|
|
The 2 Funes plus Boulder can be tricky. Try to activate the Boulder before jumping up to that platform. Requires: "ScrewAttack"
{
"or": [
"canCarefulJump",
"HiJump",
"SpaceJump",
{
"enemyKill": {
"enemies": [
[
"Fune"
]
]
}
}
]
}
|
|
Bomb diagonally to get over the Fune. Or land on a fireball to boost up. Requires: "h_canUseMorphBombs"
{
"or": [
{
"and": [
"canBombHorizontally",
{
"or": [
"Ice",
"canCarefulJump"
]
}
]
},
{
"and": [
"canNeutralDamageBoost",
{
"enemyDamage": {
"enemy": "Fune",
"type": "fireball",
"hits": 1
}
}
]
}
]
}
|
|
Roll under the top Fune fireball then roll off the edge to avoid the first Boulder. Kill a Fune or use the Boulder for IFrames to get through the tricky section. It is also possible to Kago the Fune to save health compared to taking a Boulder hit. Requires: "Morph"
{
"or": [
"canTrickyJump",
{
"ammo": {
"type": "PowerBomb",
"count": 1
}
},
{
"ammo": {
"type": "Super",
"count": 1
}
},
{
"enemyDamage": {
"enemy": "Boulder",
"type": "contact",
"hits": 1
}
},
{
"and": [
{
"enemyDamage": {
"enemy": "Fune",
"type": "kago",
"hits": 1
}
},
"canKago",
"canHitbox"
]
},
{
"and": [
"Ice",
"canCarefulJump"
]
}
]
}
|
|
Requires: {
"or": [
{
"ammo": {
"type": "Super",
"count": 2
}
},
{
"and": [
{
"ammo": {
"type": "Super",
"count": 1
}
},
{
"enemyDamage": {
"enemy": "Boulder",
"type": "contact",
"hits": 1
}
}
]
},
{
"and": [
"canDisableEquipment",
"canPseudoScrew"
]
}
]
}
{
"or": [
"Ice",
"canCarefulJump"
]
}
|
|
Requires: "ScrewAttack"
{
"or": [
"canCarefulJump",
"h_canUsePowerBombs",
{
"ammo": {
"type": "Super",
"count": 1
}
},
{
"and": [
"canDisableEquipment",
"canPseudoScrew"
]
},
{
"enemyDamage": {
"enemy": "Fune",
"type": "fireball",
"hits": 1
}
}
]
}
|
|
Use Space Jump to reset Samus' fall speed, by jumping, to avoid the topmost boulder. Requires: "SpaceJump"
"canCarefulJump"
{
"or": [
{
"ammo": {
"type": "Super",
"count": 1
}
},
{
"and": [
"canDisableEquipment",
"canPseudoScrew"
]
},
"Ice",
"canTrickyJump",
{
"enemyDamage": {
"enemy": "Boulder",
"type": "contact",
"hits": 1
}
}
]
}
|
|
From: 4
Firefleas Item
To: 5
Firefleas Bottom Left Platform Junction
Notable: true Avoid killing the Firefleas and instead freeze them as a way accross the spikes. It helps to freeze them low, closer to the spikes. Requires: "canTrickyUseFrozenEnemies" "canCarefulJump" |
|
From: 5
Firefleas Bottom Left Platform Junction
To: 4
Firefleas Item
Notable: true Avoid killing the Firefleas and instead freeze them as a way accross the spikes. It helps to freeze them low, closer to the spikes. Requires: "canTrickyUseFrozenEnemies" "canCarefulJump" |
|
From: 5
Firefleas Bottom Left Platform Junction
To: 7
Fireflea Statue's Claw Junction
This can only be attempted once. Requires: "canStaggeredWalljump"
"canCarefulJump"
"canHorizontalDamageBoost"
{
"enemyDamage": {
"enemy": "Fireflea",
"type": "contact",
"hits": 1
}
}
|
|
From: 5
Firefleas Bottom Left Platform Junction
To: 7
Fireflea Statue's Claw Junction
Requires: "canConsecutiveWalljump"
"canPreciseWalljump"
"canCarefulJump"
{
"or": [
"canTrickyJump",
"canResetFallSpeed"
]
}
|
|
From: 1
Left Door
To: 7
Junction By Lower Alcoons (Left of Spike Pits)
Requires: "h_canNavigateHeatRooms"
{
"or": [
"canDownBack",
"canCarefulJump"
]
}
{
"heatFrames": 120
}
|
|
From: 3
Bottom Horizontal Door
To: 7
Junction By Lower Alcoons (Left of Spike Pits)
Requires: "h_canNavigateHeatRooms"
"ScrewAttack"
{
"or": [
"canCarefulJump",
{
"heatFrames": 40
}
]
}
{
"heatFrames": 100
}
|
|
From: 3
Bottom Horizontal Door
To: 7
Junction By Lower Alcoons (Left of Spike Pits)
Requires: "h_canNavigateHeatRooms"
"canCarefulJump"
{
"heatFrames": 199
}
|
|
From: 3
Bottom Horizontal Door
To: 7
Junction By Lower Alcoons (Left of Spike Pits)
Kill the Alcoon without stopping. Requires: "h_canNavigateHeatRooms"
"canDodgeWhileShooting"
{
"or": [
{
"enemyKill": {
"enemies": [
[
"Alcoon"
]
],
"explicitWeapons": [
"Missile",
"Super",
"Wave+Plasma"
]
}
},
{
"and": [
"canPrepareForNextRoom",
"Charge",
"Wave",
"Spazer"
]
},
{
"and": [
"canPseudoScrew",
{
"heatFrames": 30
}
]
}
]
}
{
"or": [
"canCarefulJump",
{
"heatFrames": 10
}
]
}
{
"heatFrames": 100
}
|
|
From: 6
Junction By Left Door (Right of Pit)
To: 7
Junction By Lower Alcoons (Left of Spike Pits)
Requires: "h_canNavigateHeatRooms"
{
"or": [
"canDownBack",
"canCarefulJump"
]
}
{
"heatFrames": 120
}
|
|
From: 7
Junction By Lower Alcoons (Left of Spike Pits)
To: 3
Bottom Horizontal Door
Requires: "h_canNavigateHeatRooms"
"canCarefulJump"
{
"heatFrames": 240
}
|
|
From: 7
Junction By Lower Alcoons (Left of Spike Pits)
To: 7
Junction By Lower Alcoons (Left of Spike Pits)
Jump over the Alcoon and shoot open the door, then return. Requires: "canCarefulJump"
{
"heatFrames": 200
}
Clears obstacles: C |
|
Take the platforms one at a time. Requires: "h_canNavigateHeatRooms"
"canCarefulJump"
{
"or": [
{
"enemyDamage": {
"enemy": "Dragon",
"type": "fireball",
"hits": 2
}
},
"Ice",
{
"enemyKill": {
"enemies": [
[
"Dragon",
"Dragon"
]
],
"explicitWeapons": [
"Super",
"Plasma"
]
}
}
]
}
{
"heatFrames": 700
}
|
|
Taking the platforms one at a time is not fast enough to avoid the room hazards. Requires: "h_canNavigateHeatRooms"
"canCarefulJump"
{
"or": [
{
"enemyDamage": {
"enemy": "Dragon",
"type": "fireball",
"hits": 2
}
},
{
"enemyKill": {
"enemies": [
[
"Dragon",
"Dragon"
]
],
"explicitWeapons": [
"Super",
"Plasma"
]
}
},
"Ice"
]
}
{
"heatFrames": 700
}
|
|
From: 1
Left Door
To: 2
Right Door
Notable: true Place the PBs next to the pillars in order to only use 2. Minimize acid by unmorphing high to land back on the jump spot or walljumping before placing the bomb. Requires: "canMidAirMorph"
"canCarefulJump"
{
"ammo": {
"type": "PowerBomb",
"count": 2
}
}
{
"or": [
{
"and": [
"canCarefulJump",
"canResetFallSpeed",
{
"heatFrames": 660
}
]
},
{
"and": [
"canWalljump",
{
"heatFrames": 660
},
{
"or": [
"canWallJumpInstantMorph",
{
"acidFrames": 30
}
]
}
]
},
{
"and": [
"Gravity",
{
"heatFrames": 660
},
{
"acidFrames": 30
}
]
},
{
"and": [
"canTrickyJump",
"canSuitlessLavaDive",
{
"heatFrames": 720
},
{
"acidFrames": 52
}
]
}
]
}
{
"or": [
"canTrickyJump",
{
"and": [
"Gravity",
{
"heatFrames": 180
},
{
"acidFrames": 56
}
]
},
{
"and": [
"canSuitlessLavaDive",
{
"heatFrames": 240
},
{
"acidFrames": 96
}
]
}
]
}
{
"or": [
"h_heatResistant",
"canPauseAbuse",
{
"resourceCapacity": [
{
"type": "RegularEnergy",
"count": 149
}
]
}
]
}
Unlocks doors: {"types":["missiles"],"requires":[{"heatFrames":15},{"acidFrames":15}]}
{"types":["super"],"requires":[]}
{"types":["powerbomb"],"requires":[{"heatFrames":30},{"acidFrames":30}]}
|
|
Requires: "ScrewAttack"
{
"or": [
"canCarefulJump",
{
"heatFrames": 60
}
]
}
{
"heatFrames": 490
}
Unlocks doors: {"types":["missiles"],"requires":[{"heatFrames":30}]}
{"types":["super"],"requires":[]}
{"types":["powerbomb"],"requires":[{"heatFrames":60}]}
|
|
Entrance condition: {
"comeInRunning": {
"minTiles": 2,
"speedBooster": "any"
}
}
Requires: "ScrewAttack"
"SpaceJump"
"canCarefulJump"
{
"heatFrames": 300
}
Unlocks doors: {"types":["missiles"],"requires":[{"heatFrames":30}]}
{"types":["super"],"requires":[]}
{"types":["powerbomb"],"requires":[{"heatFrames":60}]}
|
|
The power bombs can be placed pretty far from the next pillar in line. PB1 - Above the mound of dirt on the ground. PB2 - On pillar 2 (not on the Puromi Fire Snake). PB3 - Near pillar 5. Requires: "canCarefulJump"
"Morph"
{
"ammo": {
"type": "PowerBomb",
"count": 3
}
}
{
"or": [
"canTrickyJump",
{
"enemyDamage": {
"enemy": "Puromi",
"type": "contact",
"hits": 1
}
}
]
}
{
"heatFrames": 670
}
{
"or": [
"canTrickyJump",
{
"and": [
"Gravity",
{
"heatFrames": 180
},
{
"acidFrames": 56
}
]
},
{
"and": [
"canSuitlessLavaDive",
{
"heatFrames": 240
},
{
"acidFrames": 96
}
]
}
]
}
{
"or": [
"h_heatResistant",
"canPauseAbuse",
{
"resourceCapacity": [
{
"type": "RegularEnergy",
"count": 149
}
]
}
]
}
Unlocks doors: {"types":["missiles"],"requires":[{"heatFrames":15},{"acidFrames":15}]}
{"types":["super"],"requires":[]}
{"types":["powerbomb"],"requires":[{"heatFrames":30},{"acidFrames":30}]}
|
|
Entrance condition: {
"comeInShinecharging": {
"length": 2,
"openEnd": 1
}
}
Requires: "canCarefulJump"
"canBlueSpaceJump"
{
"heatFrames": 300
}
Unlocks doors: {"types":["missiles"],"requires":[{"heatFrames":40}]}
{"types":["super"],"requires":[]}
{"types":["powerbomb"],"requires":[{"heatFrames":100}]}
|
|
From: 2
Right Door
To: 1
Left Door
Notable: true Place the PBs next to the pillars in order to only use 2. Avoid acid during the first Power Bomb by walljumping before placing the bomb. Avoiding acid damage at the last jump is tricky but possible. Requires: "canMidAirMorph"
{
"ammo": {
"type": "PowerBomb",
"count": 2
}
}
"canCarefulJump"
{
"or": [
{
"and": [
"canWallJumpInstantMorph",
{
"heatFrames": 690
}
]
},
{
"and": [
"canWalljump",
{
"heatFrames": 660
},
{
"acidFrames": 36
}
]
},
{
"and": [
"canSuitlessLavaDive",
{
"heatFrames": 840
},
{
"acidFrames": 84
}
]
},
{
"and": [
"Gravity",
{
"heatFrames": 660
},
{
"acidFrames": 24
}
]
}
]
}
{
"or": [
"canInsaneJump",
{
"and": [
"canTrickyJump",
"canLateralMidAirMorph",
{
"heatFrames": 10
},
{
"acidFrames": 10
}
]
},
{
"and": [
"canPreciseWalljump",
{
"heatFrames": 50
},
{
"acidFrames": 32
}
]
},
{
"and": [
"Gravity",
{
"heatFrames": 20
},
{
"acidFrames": 20
}
]
},
{
"and": [
"canSuitlessLavaDive",
{
"heatFrames": 50
},
{
"acidFrames": 50
}
]
}
]
}
{
"or": [
"h_heatResistant",
"canPauseAbuse",
{
"resourceCapacity": [
{
"type": "RegularEnergy",
"count": 149
}
]
}
]
}
Unlocks doors: {"types":["missiles"],"requires":[{"heatFrames":30},{"acidFrames":20}]}
{"types":["super"],"requires":[]}
{"types":["powerbomb"],"requires":[{"heatFrames":75},{"acidFrames":58}]}
|
|
Wait for the Puromis to pass so that Samus does not land on them. Requires: "canCarefulJump"
"ScrewAttack"
{
"or": [
{
"and": [
"canSuitlessLavaDive",
{
"heatFrames": 1800
},
{
"acidFrames": 116
}
]
},
{
"and": [
"Gravity",
{
"heatFrames": 1800
},
{
"acidFrames": 48
}
]
}
]
}
Unlocks doors: {"types":["missiles"],"requires":[{"heatFrames":30}]}
{"types":["super"],"requires":[]}
{"types":["powerbomb"],"requires":[{"heatFrames":60}]}
|
|
The power bombs can be placed far from the next pillar in line. PB1 - Near the broken pillar. PB2 - On the 2nd full pillar. PB3 - On the 4th full pillar. Wait for the Puromis to avoid damage but wait too long and the acid will cover the door. Requires: "Morph"
"canCarefulJump"
{
"ammo": {
"type": "PowerBomb",
"count": 3
}
}
{
"or": [
{
"and": [
"canSuitlessLavaDive",
{
"heatFrames": 840
},
{
"acidFrames": 206
}
]
},
{
"and": [
"Gravity",
{
"heatFrames": 810
},
{
"acidFrames": 55
}
]
}
]
}
{
"or": [
"h_heatResistant",
"canPauseAbuse",
{
"resourceCapacity": [
{
"type": "RegularEnergy",
"count": 149
}
]
}
]
}
Unlocks doors: {"types":["missiles"],"requires":[{"heatFrames":30},{"acidFrames":20}]}
{"types":["super"],"requires":[]}
{"types":["powerbomb"],"requires":[{"heatFrames":75},{"acidFrames":58}]}
|
|
Turn back to the left after entering the room then run under the Holtzes. Damage from a Zebbo from the right farm to gain invulnerability frames, then jump through the last two Holtzes. Requires: "h_canNavigateHeatRooms"
"canCarefulJump"
{
"enemyDamage": {
"enemy": "Zebbo",
"type": "contact",
"hits": 1
}
}
{
"heatFrames": 600
}
|
|
From: 1
Left Door
To: 3
Farm Junction Free of Holtzes
Place a power bomb near the door, then move right and jump under the Holtzes to the first platform. Continue placing power bombs while avoiding the Holtzes and avoiding luring the third one to the right. Requires: "h_canNavigateHeatRooms"
"canCarefulJump"
{
"enemyKill": {
"enemies": [
[
"Holtz",
"Holtz"
]
],
"explicitWeapons": [
"PowerBomb"
]
}
}
{
"heatFrames": 600
}
|
|
From: 1
Left Door
To: 3
Farm Junction Free of Holtzes
Turn back to the left after entering the room then run under the Holtzes. Avoid the third Holtz, then kill the fourth to clear the middle Zebbo farm. Requires: "h_canNavigateHeatRooms"
"canCarefulJump"
{
"or": [
"Plasma",
{
"and": [
"Ice",
"Wave",
"Spazer"
]
}
]
}
{
"heatFrames": 550
}
|
|
Requires: "h_canNavigateHeatRooms"
"canCarefulJump"
{
"enemyDamage": {
"enemy": "Zebbo",
"type": "contact",
"hits": 1
}
}
{
"heatFrames": 500
}
|
|
One easy way to do this is by waiting for the first Holtz to go under the first platform. Immediately when it hits the platform, move forward to lure the second Holtz. When they start going down, jump over them and quickly get to the left side of the first Zebbo farm, trapping 3 Holtzes underneath. Requires: "h_canNavigateHeatRooms"
"canCarefulJump"
{
"heatFrames": 400
}
|
|
From: 1
Top Left Door
To: 7
Junction At Middle Right Door With Bottom KiHunter Cleared
By breaking the shot blocks and maneuvering through the room effeciently Samus will not have to spend much time waiting on KiHunters. Entrance condition: {
"comeInRunning": {
"minTiles": 1,
"speedBooster": "any"
}
}
Requires: "canDodgeWhileShooting"
"canCarefulJump"
{
"or": [
"canTrickyJump",
"canDownBack"
]
}
{
"or": [
"Charge",
"Spazer",
"Plasma",
"Wave",
"canInsaneJump"
]
}
{
"heatFrames": 540
}
|
|
From: 3
Middle Right Door
To: 7
Junction At Middle Right Door With Bottom KiHunter Cleared
Notable: true Manipulate the Three KiHunters to avoid all of them when entering the room from the Save room door. Stop on a dime on entry for positioning, because it is precise. Wait 1 second then Morph and roll left, past the swooping kihunter. Quickly jump to the higher level and run into the left wall. Wait there for half a second; it helps to jump into the wall. The 2 KiHunters should be grouped above Samus and out of the way. Requires: "h_canNavigateHeatRooms"
"canStopOnADime"
"canCarefulJump"
"Morph"
{
"or": [
"HiJump",
"canWalljump"
]
}
{
"heatFrames": 80
}
|
|
From: 5
Top Junction Between Doors
To: 7
Junction At Middle Right Door With Bottom KiHunter Cleared
Use Plasma to run through Kihunters instead of waiting. Requires: "h_canNavigateHeatRooms"
"canHitbox"
"Plasma"
{
"or": [
"canDownBack",
{
"and": [
"canCarefulJump",
{
"heatFrames": 50
}
]
},
{
"heatFrames": 130
}
]
}
{
"heatFrames": 410
}
|
|
From: 7
Junction At Middle Right Door With Bottom KiHunter Cleared
To: 5
Top Junction Between Doors
Notable: true Manipulate the Three KiHunters to avoid all of them when entering the room from the Save room door. Stop on a dime on entry for positioning, because it is precise. Wait 1 second then Morph and roll left, past the swooping kihunter. Quickly jump to the higher level and run into the left wall. Wait there for half a second; it helps to jump into the wall. The 2 KiHunters should be grouped above Samus and out of the way. Requires: "h_canNavigateHeatRooms"
"canStopOnADime"
"canCarefulJump"
"Morph"
{
"or": [
"HiJump",
"canWalljump"
]
}
{
"heatFrames": 490
}
|
|
It is possible to get past the pirate without waiting by moving fast enough, or by making it turn around. Requires: "h_canNavigateHeatRooms"
{
"or": [
{
"and": [
"canTrickyJump",
{
"heatFrames": 150
}
]
},
{
"and": [
"canCarefulJump",
{
"heatFrames": 300
}
]
},
{
"and": [
{
"enemyKill": {
"enemies": [
[
"Yellow Space Pirate (standing)"
]
],
"explicitWeapons": [
"ScrewAttack",
"Charge+Ice+Wave+Plasma"
]
}
},
{
"heatFrames": 240
}
]
},
{
"heatFrames": 360
}
]
}
|
|
From: 2
Bottom Left Door
To: 4
Junction Above Bomb Blocks
Notable: true Jump with some run speed to place the power bomb high enough to break the bomb blocks. During the explosion, jump through the left wall pirate and precisely walljump to reach the upper area. Requires: "h_canNavigateHeatRooms"
"HiJump"
"SpeedBooster"
"canPreciseWalljump"
"canCarefulJump"
"h_canUsePowerBombs"
"canTrivialMidAirMorph"
"canHitbox"
{
"heatFrames": 420
}
{
"or": [
"h_heatResistant",
"canPauseAbuse",
{
"resourceCapacity": [
{
"type": "RegularEnergy",
"count": 149
}
]
}
]
}
Clears obstacles: A |
|
Safely clear the shot blocks from the door without drawing fire from the space pirate. Requires: "h_canNavigateHeatRooms"
"canCarefulJump"
{
"heatFrames": 210
}
|
|
By moving quickly, the KiHunters will be in favourable positions. Otherwise wait until it is safe to continue. Requires: "h_canNavigateHeatRooms"
"ScrewAttack"
{
"or": [
{
"heatFrames": 100
},
{
"and": [
"canCarefulJump",
{
"heatFrames": 50
}
]
},
"canTrickyJump"
]
}
{
"heatFrames": 330
}
Clears obstacles: A |
|
Jump to the previous level when the enemy gets close, or fight entirely from safety. Two supers can hit per cycle when shooting from above. Requires: "h_canNavigateHeatRooms"
{
"enemyKill": {
"enemies": [
[
"Kihunter (red)",
"Kihunter (red)",
"Kihunter (red)"
]
],
"explicitWeapons": [
"Super"
]
}
}
{
"heatFrames": 800
}
{
"or": [
"canDodgeWhileShooting",
{
"and": [
"canCarefulJump",
{
"heatFrames": 800
}
]
}
]
}
Clears obstacles: A |
|
From: 2
Right Door
To: 4
Junction Above Bomb Block
Run into the acid to quickly jump over the first pillar. Build speed and jump over the second pillar to mockball through the tunnel without taking much acid damage. Entrance condition: {
"comeInRunning": {
"minTiles": 3,
"speedBooster": "any"
}
}
Requires: "h_canNavigateHeatRooms"
"canMockball"
"HiJump"
"SpeedBooster"
"canCarefulJump"
"canWalljump"
{
"or": [
"canInsaneWalljump",
{
"acidFrames": 30
}
]
}
{
"heatFrames": 310
}
{
"acidFrames": 5
}
|
|
From: 2
Right Door
To: 4
Junction Above Bomb Block
Run into the acid to quickly jump over the first pillar. Build speed and jump over the second pillar to mockball through the tunnel without taking much acid damage. Requires: "h_canNavigateHeatRooms"
"canMockball"
"HiJump"
"SpeedBooster"
"canCarefulJump"
"Gravity"
{
"heatFrames": 310
}
{
"acidFrames": 25
}
|
|
From: 4
Junction Above Bomb Block
To: 1
Top Left Door
Fire up from below and try not to jump too high as that will out the camera in a bad position. Requires: "h_canNavigateHeatRooms"
"Ice"
"Wave"
"Spazer"
{
"or": [
"Charge",
"canCarefulJump",
"h_heatProof"
]
}
{
"or": [
"h_canCrouchJumpDownGrab",
"canWalljump",
"HiJump",
{
"and": [
"canSpringBallJumpMidAir",
{
"heatFrames": 120
}
]
},
"SpaceJump",
{
"and": [
"canIBJ",
"h_heatProof"
]
},
{
"and": [
"canSpringBallBombJump",
"h_additionalBomb",
"h_additionalBomb",
{
"heatFrames": 250
}
]
}
]
}
{
"heatFrames": 1520
}
Clears obstacles: A |
|
Fire up from below and try not to jump too high as that will put the camera in a bad position. Requires: "h_canNavigateHeatRooms"
"Plasma"
{
"or": [
"canCarefulJump",
{
"heatFrames": 100
}
]
}
{
"or": [
"h_canCrouchJumpDownGrab",
"canWalljump",
"HiJump",
{
"and": [
"canSpringBallJumpMidAir",
{
"heatFrames": 120
}
]
},
"SpaceJump",
{
"and": [
"canIBJ",
"h_heatProof"
]
},
{
"and": [
"canSpringBallBombJump",
"h_additionalBomb",
"h_additionalBomb",
{
"heatFrames": 250
}
]
}
]
}
{
"heatFrames": 1360
}
Clears obstacles: A |
|
Requires: "h_canNavigateHeatRooms"
"ScrewAttack"
{
"or": [
"canWalljump",
{
"and": [
"h_canCrouchJumpDownGrab",
{
"heatFrames": 120
},
{
"or": [
"canCarefulJump",
{
"enemyDamage": {
"enemy": "Kihunter (red)",
"type": "contact",
"hits": 1
}
}
]
}
]
},
"HiJump",
{
"and": [
"canSpringBallJumpMidAir",
{
"heatFrames": 120
},
{
"enemyDamage": {
"enemy": "Kihunter (red)",
"type": "contact",
"hits": 2
}
}
]
},
"SpaceJump",
{
"and": [
"canIBJ",
"h_heatProof",
{
"enemyDamage": {
"enemy": "Kihunter (red)",
"type": "contact",
"hits": 2
}
}
]
}
]
}
{
"heatFrames": 500
}
Clears obstacles: A |
|
Fire up from below and try not to jump too high as that will put the camera in a bad position. Requires: "h_canNavigateHeatRooms"
{
"enemyKill": {
"enemies": [
[
"Kihunter (red)",
"Kihunter (red)",
"Kihunter (red)"
]
],
"explicitWeapons": [
"Super"
]
}
}
{
"or": [
"canCarefulJump",
{
"heatFrames": 210
}
]
}
{
"or": [
"h_canCrouchJumpDownGrab",
"canWalljump",
"HiJump",
{
"and": [
"canSpringBallJumpMidAir",
{
"heatFrames": 120
}
]
},
"SpaceJump",
{
"and": [
"canIBJ",
"h_heatProof"
]
},
{
"and": [
"canSpringBallBombJump",
"h_additionalBomb",
"h_additionalBomb",
{
"heatFrames": 250
}
]
}
]
}
{
"heatFrames": 1300
}
Clears obstacles: A |
|
Requires: "h_canNavigateHeatRooms"
"Morph"
"SpaceJump"
{
"or": [
{
"heatFrames": 660
},
{
"and": [
"canCarefulJump",
{
"acidFrames": 2
},
{
"heatFrames": 600
}
]
}
]
}
|
|
Requires: "canUseEnemies"
{
"or": [
{
"and": [
"canWalljump",
{
"heatFrames": 390
}
]
},
{
"and": [
"canConsecutiveWalljump",
"canCarefulJump",
{
"heatFrames": 330
}
]
},
{
"and": [
"HiJump",
{
"heatFrames": 490
}
]
},
{
"and": [
"h_canCrouchJumpDownGrab",
{
"heatFrames": 610
}
]
}
]
}
|
|
From: 7
Junction Left of Morph Tunnel
To: 4
Junction Right of Power Bomb Blocks
Let the right hopper jump twice towards Samus. At the start of the second jump, jump above where the ground Dessgeega can jump but below where the ceiling enemy can reach. Mockball below the third hopper. Requires: "Morph"
{
"or": [
"canTrickyJump",
{
"and": [
"h_canUsePowerBombs",
"canCarefulJump",
"canHitbox"
]
}
]
}
"canMockball"
{
"heatFrames": 210
}
|
|
From: 7
Junction Left of Morph Tunnel
To: 6
Junction Left of Power Bomb Blocks
Requires: {
"obstaclesCleared": [
"D"
]
}
{
"canShineCharge": {
"usedTiles": 20,
"openEnd": 1,
"steepDownTiles": 4
}
}
"canCarefulJump"
{
"heatFrames": 200
}
Clears obstacles: C |
|
From: 7
Junction Left of Morph Tunnel
To: 6
Junction Left of Power Bomb Blocks
Requires: {
"obstaclesCleared": [
"C",
"D"
]
}
{
"canShineCharge": {
"usedTiles": 20,
"openEnd": 1,
"steepDownTiles": 4
}
}
"canCarefulJump"
"canChainTemporaryBlue"
{
"heatFrames": 240
}
Clears obstacles: B |
|
From: 8
Junction Below Top Right Door
To: 7
Junction Left of Morph Tunnel
Requires: {
"or": [
"canCarefulJump",
{
"hibashiHits": 1
}
]
}
"h_canUseMorphBombs"
{
"heatFrames": 300
}
|
|
From: 8
Junction Below Top Right Door
To: 7
Junction Left of Morph Tunnel
Requires: {
"or": [
"canCarefulJump",
{
"hibashiHits": 1
}
]
}
"Morph"
{
"ammo": {
"type": "PowerBomb",
"count": 2
}
}
{
"or": [
{
"heatFrames": 270
},
{
"and": [
"canPrepareForNextRoom",
{
"heatFrames": 240
}
]
}
]
}
|
|
Entrance condition: {
"comeInBlueSpinning": {
"unusableTiles": 1
}
}
Requires: "canSpeedball" "canCarefulJump" "canSlowShortCharge" Clears obstacles: A |
|
A bit easier than 2-hit bowling Requires: "canCarefulJump"
"canIframeSpikeJump"
"SpeedBooster"
{
"spikeHits": 2
}
|
|
From: 4
Bottom Chozo Item
To: 3
Bottom Left Door
Use Temporary Blue to bounce into the Morph Tunnel with temp blue then continue to the bomb block using SpringBall. Just left of center of the pit is a good place to bounce for entering the tunnel. Requires either a tight shortcharge or clearing the power bomb blocks to open up more runway. Requires: {
"obstaclesNotCleared": [
"B"
]
}
"h_canUseSpringBall"
"canTemporaryBlue"
"canCarefulJump"
{
"or": [
{
"and": [
"f_DefeatedPhantoon",
{
"canShineCharge": {
"usedTiles": 16,
"openEnd": 0
}
}
]
},
{
"and": [
{
"obstaclesCleared": [
"A"
]
},
{
"canShineCharge": {
"usedTiles": 33,
"openEnd": 2
}
},
{
"or": [
"f_DefeatedPhantoon",
"canMockball"
]
}
]
}
]
}
|
|
Requires: "canSuitlessMaridia" "canCarefulJump" |
|
Requires: "canSuitlessMaridia" "canCarefulJump" |
|
Requires at least 3 tiles to work, but some longer lengths don't work. Entrance condition: {
"comeInRunning": {
"speedBooster": true,
"minTiles": 3
}
}
Requires: "canSuitlessMaridia"
"canCarefulJump"
{
"or": [
"canWalljump",
"HiJump"
]
}
|
|
From: 1
Left Door
To: 2
Item (Behind the Bomb Wall)
Run on the conveyor to build Speed for breaking the bomb block. Push the right side Worker Robot onto the conveyor Jump low into the wall so Samus' head touches the block. Speed can be used to clear the Bulls. Requires: "f_DefeatedPhantoon"
"canCarefulJump"
{
"or": [
"canDodgeWhileShooting",
{
"enemyKill": {
"enemies": [
[
"Bull",
"Bull"
]
]
}
},
{
"enemyDamage": {
"enemy": "Bull",
"type": "contact",
"hits": 1
}
}
]
}
{
"canShineCharge": {
"usedTiles": 18,
"openEnd": 1
}
}
{
"or": [
"canTrivialMidAirMorph",
"h_canUseSpringBall",
"h_canBombThings"
]
}
|
|
From: 1
Right Door
To: 2
Item
Jump as far as possible before activating the spark, while sparking high enough to crash into the Chozo statue's hand. Entrance condition: {
"comeInShinecharged": {
"framesRequired": 100
}
}
Requires: "canShinechargeMovementComplex"
"canMidairShinespark"
{
"shinespark": {
"frames": 33,
"excessFrames": 7
}
}
{
"not": "f_DefeatedPhantoon"
}
{
"or": [
"canRiskPermanentLossOfAccess",
"canCarefulJump"
]
}
|
|
From: 1
Right Door
To: 2
Item
Gain a shinecharge while entering the room. Run back to the door, and then run left and jump as far as possible before activating the spark, while sparking high enough to crash into the Chozo statue's hand. Entrance condition: {
"comeInShinecharging": {
"length": 7,
"openEnd": 0,
"steepDownTiles": 2
}
}
Requires: "canShinechargeMovementComplex"
"canMidairShinespark"
{
"shinespark": {
"frames": 33,
"excessFrames": 7
}
}
{
"or": [
"canRiskPermanentLossOfAccess",
"canCarefulJump"
]
}
|
|
From: 1
Right Door
To: 2
Item
Run from the adjacent room and jump at the end of the platform. From the top right platform, jump to the left and wall jump just above the spikes and climb the left wall. Entrance condition: {
"comeInRunning": {
"speedBooster": true,
"minTiles": 3
}
}
Requires: "canCarefulJump"
"canConsecutiveWalljump"
{
"not": "f_DefeatedPhantoon"
}
|
|
From the top right platform, jump to the left into the thorns, then climb the left wall. Requires: {
"thornHits": 1
}
"canIframeSpikeJump"
"canWalljump"
{
"not": "f_DefeatedPhantoon"
}
{
"or": [
"canRiskPermanentLossOfAccess",
"canCarefulJump",
"Gravity"
]
}
|
|
From: 1
Right Door
To: 2
Item
Requires: {
"thornHits": 1
}
"HiJump"
"canSpringBallJumpMidAir"
{
"not": "f_DefeatedPhantoon"
}
{
"or": [
"canRiskPermanentLossOfAccess",
"canCarefulJump"
]
}
|
|
From: 1
Right Door
To: 2
Item
In the spike pit, near the left wall, jump into an IBJ to climb out. Requires: "h_IBJFromThorns"
{
"not": "f_DefeatedPhantoon"
}
|
|
From: 1
Right Door
To: 2
Item
Jump onto the first platform, which is easiest when the water is low. Continue jumping on the platforms to prevent them from going into the water. Get a bit of run speed on the final platform, which is easiest while the water is low, then jump to the solid ground. Requires: "canCarefulJump" "f_DefeatedPhantoon" |
|
If Spring Ball is unavailable, then either crouch jump and morph from the stairs, or run and jump into morph from the right of the stairs. If you have HiJump, it must be disabled. Requires: {
"obstaclesCleared": [
"B"
]
}
{
"or": [
{
"and": [
"canCarefulJump",
"canMidAirMorph",
"canDisableEquipment"
]
},
"h_canUseSpringBall"
]
}
|
|
From: 7
Bottom Door
To: 3
Bottom Left Door
In R-Mode, kill the Coverns until there is Energy in Samus's Reserves. Get into the Morph tunnel and go to the far left. Wait for Coverns to damage Samus down until Reserves trigger, forcing a stand up and enabling her to shoot the shot blocks and escape. Entrance condition: {
"comeInWithRMode": {},
"comesThroughToilet": "any"
}
Requires: {
"not": "f_DefeatedPhantoon"
}
"canRiskPermanentLossOfAccess"
{
"or": [
"canBePatient",
"Plasma"
]
}
{
"or": [
{
"and": [
"canCarefulJump",
"canMidAirMorph",
"canDisableEquipment"
]
},
"h_canUseSpringBall"
]
}
Clears obstacles: B |
|
If Spring Ball is unavailable, then either crouch jump and morph from the stairs, or run and jump into morph from the right of the stairs. If you have HiJump, it must be disabled. Requires: {
"or": [
"Wave",
"Spazer"
]
}
{
"or": [
{
"and": [
"canCarefulJump",
"canMidAirMorph",
"canDisableEquipment"
]
},
"h_canUseSpringBall"
]
}
Clears obstacles: B |
|
From: 7
Bottom Door
To: 3
Bottom Left Door
Use the Covern to partial ceiling clip so your beam can reach the shot block of the ceiling at the end of the Morph tunnel to the left. It is possible to mid-air morph to get into the morph tunnel with nothing, from the Covern, the ground, or the stairs below. Requires: "canTrickyUseFrozenEnemies"
"canCeilingClip"
{
"not": "f_DefeatedPhantoon"
}
"canRiskPermanentLossOfAccess"
{
"or": [
{
"and": [
"canCarefulJump",
"canMidAirMorph",
"canDisableEquipment"
]
},
"h_canUseSpringBall"
]
}
Clears obstacles: B |
|
Requires: "Gravity"
{
"or": [
"HiJump",
"canWalljump",
"h_canFly",
"canCarefulJump",
"canSpringBallJumpMidAir",
"canGravityJump",
{
"enemyDamage": {
"enemy": "Pink Space Pirate (standing)",
"type": "contact",
"hits": 1
}
},
{
"enemyKill": {
"enemies": [
[
"Pink Space Pirate (standing)"
]
],
"explicitWeapons": [
"Plasma",
"ScrewAttack"
]
}
}
]
}
|
|
From: 4
Top Left Door
To: 5
Platform Junction Near Top Left Door
Notable: true Wall jump in the room above, on the right wall of the doorway, immdiately before the door transition. Failure will likely result in a soft lock. To get to the ledge: If the room above has normal physics, hold right in this room. If the room above has water physics, shoot to break spin while holding right in this room. Entrance condition: {
"comeInNormally": {},
"comesThroughToilet": "any"
}
Requires: "canSuitlessMaridia" "canPreciseWalljump" "canPrepareForNextRoom" "canMidairWiggle" "canCarefulJump" |
|
From: 6
Middle Junction Near Top Left Pirate
To: 7
Spawn At Junction Near Top Right Door
Requires: "Gravity"
{
"or": [
"HiJump",
"canWalljump",
"h_canFly",
"canGravityJump",
"canCarefulJump",
"canSpringBallJumpMidAir",
{
"enemyDamage": {
"enemy": "Pink Space Pirate (standing)",
"type": "contact",
"hits": 1
}
},
{
"enemyKill": {
"enemies": [
[
"Pink Space Pirate (standing)"
]
],
"explicitWeapons": [
"Plasma",
"ScrewAttack"
]
}
}
]
}
|
|
From: 6
Middle Junction Near Top Left Pirate
To: 7
Spawn At Junction Near Top Right Door
Requires: "canSuitlessMaridia" "canCarefulJump" "HiJump" |
|
From: 6
Middle Junction Near Top Left Pirate
To: 7
Spawn At Junction Near Top Right Door
Requires: "canSuitlessMaridia"
"canCarefulJump"
"canSpringBallJumpMidAir"
{
"or": [
"canTrickyJump",
"canStationaryLateralMidAirMorph",
"canSpringFling"
]
}
|
|
From: 2
Bottom Right Door
To: 3
Middle Right Door
Run with enough speed to jump (after the transition) to reach the far left ledge. Entrance condition: {
"comeInRunning": {
"minTiles": 12.4375,
"speedBooster": true
}
}
Requires: "canCrossRoomJumpIntoWater" "canCarefulJump" |
|
From: 3
Middle Right Door
To: 6
Speed Blocked Item
Entrance condition: {
"comeInShinecharged": {
"framesRequired": 150
}
}
Requires: "Gravity"
"canMidairShinespark"
"canCarefulJump"
"canShinechargeMovement"
{
"shinespark": {
"frames": 50,
"excessFrames": 2
}
}
Clears obstacles: A |
|
Entrance condition: {
"comeInShinecharging": {
"length": 7,
"openEnd": 1
}
}
Requires: "canWaterShineCharge"
"canMidairShinespark"
"canCarefulJump"
"canShinechargeMovement"
{
"canShineCharge": {
"usedTiles": 33,
"openEnd": 2
}
}
{
"shinespark": {
"frames": 62,
"excessFrames": 2
}
}
Clears obstacles: A |
|
Ride Mama Turtle. To avoid getting hit, shoot one of her babies to wake her up, then quickly get on her back. Requires: "h_canNavigateUnderwater"
"canUseEnemies"
{
"or": [
"canCarefulJump",
{
"enemyDamage": {
"enemy": "Kame (Tatori)",
"type": "contact",
"hits": 1
}
}
]
}
Clears obstacles: A |
|
Requires: "canSuitlessMaridia" "canCarefulJump" "HiJump" |
|
Reveal the item while jumping to the right wall and collect it as Samus falls past. Requires: "canDodgeWhileShooting"
"canCarefulJump"
{
"or": [
"Wave",
"Spazer",
{
"and": [
"canTrickyJump",
"canDodgeWhileShooting",
{
"ammo": {
"type": "Missile",
"count": 5
}
}
]
},
{
"and": [
"canTrickyJump",
"canResetFallSpeed",
"canDownBack"
]
},
"canInsaneJump"
]
}
|
|
From: 11
Upper Left Ledge Junction
To: 9
Spawn At Junction Below Top Door
This is most easily done with a late jump at the bottom of the slope. It is a bit less precise with an air ball or turning gravity suit back on and wall jumping on the platform at the end. An alternate method is to airball simultaneously with the gravity jump pause. Requires: "canGravityJump"
{
"or": [
"canTrickyJump",
{
"and": [
"can4HighMidAirMorph",
"canCarefulJump",
"canLateralMidAirMorph"
]
}
]
}
|
|
Requires: "canSuitlessMaridia"
"HiJump"
{
"or": [
{
"and": [
"canWalljump",
"canCarefulJump"
]
},
"canSpringBallJumpMidAir"
]
}
|
|
Requires: "Gravity"
"canLateralMidAirMorph"
"canCarefulJump"
{
"or": [
"canTrickyJump",
"canSpringBallBounce"
]
}
|
|
From: 1
Bottom Left Door
To: 2
Right Door
Find the crumble blocks and crystal flash mid-air, just below them. They are on the far right of the ceiling of the bottom right pathway. Hold down as the CF ends to break the non-respawning crumble blocks. This is for the much harder version, without Gravity and Bombs. Requires: "h_canJumpIntoCrystalFlashClip"
"canSuitlessMaridia"
{
"or": [
"HiJump",
"canSpringBallJumpMidAir",
{
"and": [
"h_canCrouchJumpDownGrab",
"canCarefulJump"
]
},
"canUseFrozenEnemies"
]
}
|
|
From: 2
Right Door
To: 1
Bottom Left Door
Notable: true Quickly move next to the first set of speed blocks at the left end of the hole. Shoot a Wave shot, then just before it goes off screen, horizontally spark to the left to get through all the shot and speed blocks. A spin jump may be used to move horizontally into place much quicker. Entrance condition: {
"comeInShinecharged": {
"framesRequired": 120
}
}
Requires: "canSuitlessMaridia"
"canCarefulJump"
"Wave"
"canShinechargeMovementComplex"
"canHorizontalShinespark"
{
"shinespark": {
"frames": 75,
"excessFrames": 8
}
}
|
|
From: 1
Top Left Sand Entrance
To: 5
Hidden Morph Tunnel Junction
Entrance condition: {
"comeInNormally": {},
"comesThroughToilet": "no"
}
Requires: "Morph"
{
"enemyDamage": {
"enemy": "Bull",
"type": "contact",
"hits": 1
}
}
{
"or": [
"canPrepareForNextRoom",
"canCarefulJump"
]
}
|
|
From: 3
Top Right Sand Entrance
To: 5
Hidden Morph Tunnel Junction
Entrance condition: {
"comeInNormally": {},
"comesThroughToilet": "no"
}
Requires: "Morph"
{
"enemyDamage": {
"enemy": "Bull",
"type": "contact",
"hits": 1
}
}
{
"or": [
"canPrepareForNextRoom",
"canCarefulJump"
]
}
|
|
Entrance condition: {
"comeInShinecharged": {
"framesRequired": 60
}
}
Requires: "canShinechargeMovement"
"canMidairShinespark"
"canCarefulJump"
{
"shinespark": {
"frames": 125,
"excessFrames": 20
}
}
|
|
While that one walljump near the end is a bit precise, it does not require a delayed walljump. Requires: "Gravity"
{
"or": [
{
"and": [
"HiJump",
"canWalljump"
]
},
{
"and": [
"canPreciseWalljump",
"canConsecutiveWalljump"
]
},
{
"and": [
"Grapple",
"canCarefulJump"
]
}
]
}
|
|
From: 1
Left Door
To: 3
Top Right Door
Notable: true Use the spikes, which are not in the water, to jump from platform to platform as a way to cross the Colosseum. Requires knowing the position of every spike in the room, and hitting the spikes while morphed can help. The first jump is particularly tough. A SpringBallJump from the sand with HiJump, or Grapple can be used to get past it. Requires: "canWalljump"
"Morph"
"canCarefulJump"
"canIframeSpikeJump"
{
"or": [
"Grapple",
{
"and": [
"canSuitlessMaridia",
"canPlayInSand",
"HiJump",
"canNeutralDamageBoost",
"canTrickySpringBallJump",
{
"spikeHits": 2
}
]
}
]
}
{
"spikeHits": 1
}
{
"or": [
{
"spikeHits": 1
},
"canHorizontalDamageBoost"
]
}
|
|
From: 1
Left Door
To: 3
Top Right Door
Notable: true Use the spikes, which are not in the water, to jump from platform to platform as a way to cross the Colosseum. Requires knowing the position of every spike in the room, and hitting the spikes while morphed can help. The first jump is particularly tough. A springball rolling jump can be used to get past it. Entrance condition: {
"comeInRunning": {
"minTiles": 2,
"speedBooster": "any"
}
}
Requires: "canWalljump"
"Morph"
"canCarefulJump"
"canIframeSpikeJump"
"h_canUseSpringBall"
"canMockball"
{
"spikeHits": 3
}
{
"or": [
{
"spikeHits": 1
},
"canHorizontalDamageBoost"
]
}
|
|
Notable: true Freeze a crab multiple times to climb the upper Crab Shaft. It may be easier to climb the left shaft by knocking the crab off the wall, or by bringing up a crab from the lower area. Requires: "h_canNavigateUnderwater"
"canTrickyUseFrozenEnemies"
"canCarefulJump"
{
"or": [
"canCrouchJump",
"Gravity",
"HiJump",
"canSpringBallJumpMidAir",
{
"ammo": {
"type": "Super",
"count": 1
}
}
]
}
|
|
Requires: "Gravity"
{
"or": [
"SpaceJump",
"canWalljump",
"h_IBJFromSpikes",
{
"and": [
"canIBJ",
"canHBJ"
]
},
"canDiagonalBombJump"
]
}
|
|
Requires: "Gravity"
"canIBJ"
{
"or": [
"canBombHorizontally",
"h_IBJFromSpikes"
]
}
|
|
Jump from the raised alcove. A down grab can help. Requires: "Gravity" "HiJump" "SpeedBooster" "canCarefulJump" |
|
Requires: "Gravity"
{
"or": [
"SpaceJump",
"canWalljump",
"canSpringBallJumpMidAir",
"canDiagonalBombJump",
"h_IBJFromSpikes"
]
}
|
|
From: 5
Bottom Middle Junction
To: 4
Top Right Ledge Junction
Notable: true When the Cacatac on the ground fires a spike, perform a springball Jump to break the waterline and then hit the spike for extra height. Requires: "HiJump"
"canSuitlessMaridia"
"canCarefulJump"
"canTrickySpringBallJump"
"canLateralMidAirMorph"
"canNeutralDamageBoost"
{
"enemyDamage": {
"enemy": "Cacatac",
"hits": 2,
"type": "spike"
}
}
|
|
From: 5
Bottom Middle Junction
To: 6
East Cactus Alley Junction (Right of Morph Tunnel)
This can be done by turning off Gravity and HiJump to jump over both spike pits. Requires: "canSuitlessMaridia"
"canDisableEquipment"
"canCarefulJump"
{
"or": [
"Gravity",
"HiJump",
"canSpringBallJumpMidAir"
]
}
|
|
From: 6
East Cactus Alley Junction (Right of Morph Tunnel)
To: 5
Bottom Middle Junction
This can be done by turning off Gravity and HiJump to jump over both spike pits. Requires: "canSuitlessMaridia" "canDisableEquipment" "canCarefulJump" |
|
Jump out of the sand before Shinesparking. Entrance condition: {
"comeInShinecharged": {
"framesRequired": 105
},
"comesThroughToilet": "any"
}
Requires: "canPlayInSand"
"canSunkenTileWideWallClimb"
"canShinechargeMovementComplex"
{
"or": [
"canMidairShinespark",
"canCarefulJump"
]
}
{
"shinespark": {
"frames": 11
}
}
|
|
Requires: "Gravity"
{
"or": [
"canWallJumpInstantMorph",
{
"and": [
"SpaceJump",
"Morph",
{
"or": [
"canMidAirMorph",
"canCarefulJump",
{
"ammo": {
"type": "Super",
"count": 1
}
},
{
"enemyDamage": {
"enemy": "Boulder",
"type": "contact",
"hits": 1
}
}
]
}
]
}
]
}
|
|
Requires: "Gravity"
"Morph"
"canPlayInSand"
{
"or": [
{
"and": [
{
"or": [
"canWalljump",
"canGravityJump",
"HiJump",
"canSpringBallJumpMidAir"
]
},
{
"or": [
"canMidAirMorph",
"canCarefulJump",
{
"ammo": {
"type": "Super",
"count": 1
}
},
{
"enemyDamage": {
"enemy": "Boulder",
"type": "contact",
"hits": 1
}
}
]
}
]
},
{
"and": [
"h_canUseSpringBall",
"canJumpIntoIBJ"
]
},
"canSandIBJ"
]
}
|
|
Shinespark vertically from the sand to get onto the first ledge. Carefully jump onto the second ledge and return to lure the Boulder, or shoot it with a Super. Entrance condition: {
"comeInShinecharged": {
"framesRequired": 90
},
"comesThroughToilet": "any"
}
Requires: "Gravity"
"Morph"
"canPlayInSand"
"canShinechargeMovement"
{
"shinespark": {
"frames": 12
}
}
{
"or": [
"canCarefulJump",
{
"ammo": {
"type": "Super",
"count": 1
}
},
{
"enemyDamage": {
"enemy": "Boulder",
"type": "contact",
"hits": 1
}
}
]
}
|
|
Requires: "canGravityJump" "HiJump" "SpeedBooster" "canCarefulJump" |
|
Jump and morph directly into the morph tunnel. Using a walljump can help make the jump safer. Requires: "canMidAirMorph"
"Gravity"
{
"or": [
"canWallJumpInstantMorph",
"canCarefulJump"
]
}
|
|
From: 7
Below Morph Tunnel Junction
To: 5
Morph Tunnel Junction
Requires: "canSuitlessMaridia" "canTrickySpringBallJump" "canCarefulJump" |
|
Escape by wall jumping when the water is low or using a crouch jump and down grab when it's high. Requires: "canSuitlessMaridia"
"canCarefulJump"
{
"or": [
"canWalljump",
"h_canCrouchJumpDownGrab",
"canTrickySpringBallJump"
]
}
{
"doorUnlockedAtNode": 1
}
Unlocks doors: {"nodeId":1,"types":["missiles"],"requires":["canDodgeWhileShooting"]}
{"nodeId":1,"types":["super"],"requires":[]}
{"nodeId":1,"types":["powerbomb"],"requires":["canTrickyJump"]}
|
|
From: 4
Junction Below Left Door
To: 5
Junction Below Right Door
Freeze the Zoa as it spawns and jump on it then jump across the room. Freeze any Yapping Maws that attack and use them or a frozen Zoa as a platform to leave. Requires: "canSuitlessMaridia" "canUseFrozenEnemies" "canCarefulJump" |
|
Escape by wall jumping when the water is low or using a crouch jump and down grab when it's high. Requires: "canSuitlessMaridia"
"canCarefulJump"
{
"or": [
"canWalljump",
"h_canCrouchJumpDownGrab",
"canTrickySpringBallJump"
]
}
{
"doorUnlockedAtNode": 3
}
Unlocks doors: {"nodeId":3,"types":["missiles"],"requires":["canDodgeWhileShooting"]}
{"nodeId":3,"types":["super"],"requires":[]}
{"nodeId":3,"types":["powerbomb"],"requires":["canTrickyJump"]}
|
|
From: 5
Junction Below Right Door
To: 4
Junction Below Left Door
Freeze the Zoa as it spawns and jump on it then jump across the room. Freeze any Yapping Maws that attack and use them or a frozen Zoa as a platform to leave. Requires: "canSuitlessMaridia" "canUseFrozenEnemies" "canCarefulJump" |
|
From: 1
Left Door
To: 2
Right Door
Notable: true Kill all the Zoas and don't pick up their drops. If the door is unlocked, stand in the doorframe and jump across the room. Otherwise, jump across the sand, starting 1.5 tiles away from the sandfall. Hold jump and forward the whole time. Samus will dip into the sand, but still make it to the other side. Requires: "canSuitlessMaridia"
"canCarefulJump"
{
"or": [
{
"doorUnlockedAtNode": 1
},
"canTrickyJump"
]
}
"canPlayInSand"
|
|
From: 2
Right Door
To: 1
Left Door
Notable: true Kill all the Zoas and don't pick up their drops. If the door is unlocked, stand in the doorframe and jump across the room. Otherwise, jump across the sand, starting 1.5 tiles away from the sandfall. Hold jump and forward the whole time. Samus will dip into the sand, but still make it to the other side. Requires: "canSuitlessMaridia"
"canCarefulJump"
{
"or": [
{
"doorUnlockedAtNode": 2
},
"canTrickyJump"
]
}
"canPlayInSand"
|
|
Only the lowest three Rippers that are above the right door need to be killed. The highest of the three can barely be reached with a Super and HiJump. Or a PB placed slightly higher than a standard max jump, done by jumping from the door ledge, from an IBJ while avoiding the Ripper, or using 2 PBs. Requires: "canIBJ"
{
"or": [
{
"and": [
{
"enemyKill": {
"enemies": [
[
"Ripper",
"Ripper",
"Ripper"
]
],
"explicitWeapons": [
"PowerBomb"
]
}
},
{
"or": [
"HiJump",
"canCarefulJump"
]
}
]
},
{
"enemyKill": {
"enemies": [
[
"Ripper",
"Ripper"
],
[
"Ripper"
]
],
"explicitWeapons": [
"PowerBomb"
]
}
},
{
"and": [
{
"enemyKill": {
"enemies": [
[
"Ripper",
"Ripper",
"Ripper"
]
],
"explicitWeapons": [
"Super"
]
}
},
"HiJump"
]
}
]
}
|
|
From: 3
Junction Left of Morph Tunnel
To: 2
Right Door
Charge on the central runway then carry the spark through the morph tunnel and out the right door. The door can be shot just before initiating the spark. This is easier with Gravity because the tide won't interfere. Requires: "Gravity"
"canShinechargeMovementComplex"
"canCarefulJump"
"Morph"
{
"canShineCharge": {
"usedTiles": 22,
"openEnd": 2
}
}
{
"shinespark": {
"frames": 30
}
}
Exit condition: {
"leaveWithSpark": {}
}
Unlocks doors: {"types":["super"],"requires":[]}
{
"types": [
"missiles",
"powerbomb"
],
"requires": [
{
"or": [
"h_canUseSpringBall",
"h_canBombThings",
"h_canThreeTileJumpMorph"
]
}
]
}
|
|
From: 3
Junction Left of Morph Tunnel
To: 2
Right Door
Charge on the central runway then carry the spark through the morph tunnel and out the right door. This can be done by being careful not to fall off of the runway and into the water or timing the tide. The door can be shot just before initiating the spark. Requires: "canShinechargeMovementComplex"
"canCarefulJump"
"Morph"
{
"canShineCharge": {
"usedTiles": 22,
"openEnd": 1
}
}
{
"shinespark": {
"frames": 30
}
}
Exit condition: {
"leaveWithSpark": {}
}
Unlocks doors: {"types":["super"],"requires":[]}
{
"types": [
"missiles",
"powerbomb"
],
"requires": [
{
"or": [
"h_canUseSpringBall",
"h_canBombThings",
"h_canThreeTileJumpMorph"
]
}
]
}
|
|
Take a hit from the pirate to gain iframes for running through the pirate to use for a longer runway. Requires: "HiJump"
"SpeedBooster"
"canWalljump"
"canCarefulJump"
{
"enemyDamage": {
"enemy": "Pink Space Pirate (standing)",
"hits": 1,
"type": "laser"
}
}
|
|
Using the bottom of the room, shortcharge to use the echoes created by shinesparking to kill all of the Standing Pirates. Either lead the pirate to the left wall or take a hit to gain iframes to use the full runway to charge a spark To lead a pirate, have it shoot in the direction you want it to go. Then jump overhead and crouch on the other side. Or, jump and aim down while on the sloped tiles just above to lower the camera and wait for the pirate to move to the correct spot. Turn around and diagonal spark the ceiling to kill the lowest pirate, and later the middle pirates. Building a spark towards the left allows for enough run speed to jump to the middle level. Then vertical shinespark out which kills the top pirate. Requires: {
"or": [
"Morph",
"canCarefulJump",
"canCameraManip"
]
}
"canShinechargeMovementComplex"
{
"canShineCharge": {
"usedTiles": 21,
"openEnd": 0
}
}
{
"shinespark": {
"frames": 30,
"excessFrames": 7
}
}
"canUseSpeedEchoes"
{
"or": [
"canCameraManip",
{
"and": [
{
"canShineCharge": {
"usedTiles": 19,
"openEnd": 0
}
},
{
"shinespark": {
"frames": 2,
"excessFrames": 2
}
}
]
},
{
"and": [
{
"canShineCharge": {
"usedTiles": 21,
"openEnd": 0
}
},
{
"shinespark": {
"frames": 3,
"excessFrames": 3
}
},
{
"enemyDamage": {
"enemy": "Pink Space Pirate (standing)",
"type": "laser",
"hits": 1
}
}
]
}
]
}
Clears obstacles: A |
|
From: 3
Central Junction with all Standing Pirates Killed
To: 1
Top Left Door
Requires: "canShinechargeMovement"
{
"or": [
{
"and": [
"HiJump",
{
"canShineCharge": {
"usedTiles": 21,
"openEnd": 0
}
},
{
"shinespark": {
"frames": 21,
"excessFrames": 7
}
}
]
},
{
"and": [
"canShinechargeMovementComplex",
"canCarefulJump",
{
"canShineCharge": {
"usedTiles": 21,
"openEnd": 0
}
},
{
"shinespark": {
"frames": 30,
"excessFrames": 7
}
}
]
}
]
}
|
|
From: 2
Bottom Right Door
To: 1
Left Vertical Door
Requires: "canSuitlessMaridia" "HiJump" "canCarefulJump" "canTrickyUseFrozenEnemies" "h_canCrouchJumpDownGrab" |
|
Shoot the Choot either before landing or from the safety of the ledge edge. If bomb jumping, there is a timing for rolling under the Choot. Requires: {
"or": [
"canConsecutiveWalljump",
"h_canFly"
]
}
{
"or": [
"canTrickyJump",
{
"and": [
"canCarefulJump",
{
"enemyKill": {
"enemies": [
[
"Choot"
]
],
"explicitWeapons": [
"Missile",
"Super"
]
}
}
]
}
]
}
|
|
Shinespark from the tile to the right of the Choot. It helps to face right before Shinesparking. Entrance condition: {
"comeInShinecharged": {
"framesRequired": 145
}
}
Requires: "canShinechargeMovementComplex"
"canCarefulJump"
{
"shinespark": {
"frames": 49
}
}
|
|
Dodge the Puyos and kill the Choots. Expects two to three Puyo hits. Requires: {
"enemyDamage": {
"enemy": "Puyo",
"type": "contact",
"hits": 2
}
}
{
"or": [
"canCarefulJump",
{
"enemyDamage": {
"enemy": "Puyo",
"type": "contact",
"hits": 1
}
}
]
}
|
|
Safely kill the first Choot, then roll through the bottom of the room after passing the two Puyos. Expects one to two Puyo hits while crossing the room. Requires: "h_canNavigateUnderwater"
"Morph"
{
"enemyDamage": {
"enemy": "Puyo",
"type": "contact",
"hits": 1
}
}
{
"or": [
"canCarefulJump",
{
"enemyDamage": {
"enemy": "Puyo",
"type": "contact",
"hits": 1
}
}
]
}
|
|
From: 1
Left Door
To: 4
Junction Below Sand Entrance
Requires a runway of 7 tiles (with no open end) in the adjacent room. Jump into an air ball on room entry in order to get to the first pillar. Aim down after the transition to avoid hitting the overhang near the door. Entrance condition: {
"comeInJumping": {
"speedBooster": false,
"minTiles": 6.4375
}
}
Requires: "canCrossRoomJumpIntoWater"
"canPlayInSand"
"canLateralMidAirMorph"
{
"or": [
"canTrickyJump",
{
"and": [
"canCarefulJump",
{
"enemyDamage": {
"enemy": "Evir",
"type": "contact",
"hits": 1
}
}
]
}
]
}
|
|
Wait a little bit for the Evirs to descend some before jumping. Requires: "Gravity"
{
"or": [
"canCarefulJump",
{
"enemyDamage": {
"enemy": "Evir",
"type": "particle",
"hits": 1
}
}
]
}
|
|
From: 1
Left Door
To: 4
Junction Below Sand Entrance
By entering the room with run speed, it is possible to jump over the pair of Evirs. Entrance condition: {
"comeInRunning": {
"speedBooster": "any",
"minTiles": 3.4375
}
}
Requires: "canCrossRoomJumpIntoWater" "HiJump" "canCarefulJump" |
|
From: 1
Left Door
To: 4
Junction Below Sand Entrance
By entering the room with run speed, it is possible to jump over the pair of Evirs. Entrance condition: {
"comeInRunning": {
"speedBooster": true,
"minTiles": 3
}
}
Requires: "canCrossRoomJumpIntoWater" "HiJump" "canCarefulJump" |
|
From: 4
West Leg Sand
To: 5
Junction Above Grapple Block
Notable: true Gets above the grapple block by doing a well-positioned and well-timed Gravity jump following a good jump off the sand. It is also possible to do this off of a wall jump on the side immediately followed by a gravity jump. Break spin before touching the sand, and then spinjump to get a good jump off of the sand. Breaking spin after jumping from the sand will remove horizontal momentum, or a stationary spinjump can help. Requires: "Grapple"
"canGravityJump"
"canPlayInSand"
"canCarefulJump"
{
"or": [
"canStationarySpinJump",
"canTrickyJump"
]
}
|
|
From: 4
West Leg Sand
To: 5
Junction Above Grapple Block
Break the grapple block, then jump on the sand to get through the hole. Break spin before touching the sand, and then spinjump to get a good jump off of the sand. Breaking spin after jumping from the sand will remove horizontal momentum, or a stationary spinjump can help. Requires: "Gravity" "Grapple" "HiJump" "canCarefulJump" "canPlayInSand" |
|
Entrance condition: {
"comeInWithGMode": {
"mode": "any",
"morphed": false
}
}
Requires: "h_canNavigateUnderwater"
{
"or": [
"canCarefulJump",
"h_canCrouchJumpDownGrab",
"HiJump",
"Gravity",
"canSpringBallJumpMidAir"
]
}
{
"or": [
"canCarefulJump",
{
"enemyDamage": {
"enemy": "Evir",
"type": "particle",
"hits": 1
}
}
]
}
|
|
Gain momentum in the room to the left, then jump in this room in order to land on the first pillar. Ensure that Speed Booster is disabled. With a short runway of 5 tiles in the adjacent room, it is required to jump as late as possible at the edge of the runway in this room. With any longer of a runway, the jump is much less precise. Entrance condition: {
"comeInRunning": {
"speedBooster": false,
"minTiles": 5
}
}
Requires: "canCrossRoomJumpIntoWater" "canPlayInSand" "canCarefulJump" |
|
Entrance condition: {
"comeInWithGMode": {
"mode": "any",
"morphed": false
}
}
Requires: "h_canNavigateUnderwater" "canCarefulJump" |
|
From: 2
Right Door
To: 4
Below Sand Entrance
Requires: "Gravity"
{
"or": [
"ScrewAttack",
"canCarefulJump",
{
"enemyDamage": {
"enemy": "Evir",
"type": "particle",
"hits": 1
}
}
]
}
|
|
From: 2
Right Door
To: 4
Below Sand Entrance
Requires: "canSuitlessMaridia"
"HiJump"
"canPlayInSand"
{
"or": [
"canCarefulJump",
{
"enemyDamage": {
"enemy": "Evir",
"type": "particle",
"hits": 1
}
}
]
}
|
|
Entrance condition: {
"comeInWithGMode": {
"mode": "any",
"morphed": false
},
"comesThroughToilet": "any"
}
Requires: "h_canNavigateUnderwater"
{
"or": [
"canCarefulJump",
"h_canCrouchJumpDownGrab",
"HiJump",
"Gravity",
"canSpringBallJumpMidAir"
]
}
{
"or": [
"canCarefulJump",
{
"enemyDamage": {
"enemy": "Evir",
"type": "particle",
"hits": 1
}
}
]
}
|
|
From: 4
Below Sand Entrance
To: 2
Right Door
Requires: "Gravity"
{
"or": [
"canPlayInSand",
"canUseFrozenEnemies",
"canCarefulJump"
]
}
{
"or": [
"canCarefulJump",
{
"enemyDamage": {
"enemy": "Evir",
"type": "particle",
"hits": 1
}
}
]
}
|
|
From: 4
Below Sand Entrance
To: 2
Right Door
Requires: "canSuitlessMaridia"
"canPlayInSand"
"HiJump"
{
"or": [
"canCarefulJump",
{
"enemyDamage": {
"enemy": "Evir",
"type": "particle",
"hits": 1
}
}
]
}
|
|
From: 4
Below Sand Entrance
To: 5
Left Pillar Junction
Requires: "Gravity"
{
"or": [
"canPlayInSand",
"canWalljump",
"h_canUseSpringBall",
"canCarefulJump"
]
}
{
"or": [
{
"and": [
"ScrewAttack",
"canCarefulJump"
]
},
"canTrickyJump",
{
"enemyDamage": {
"enemy": "Evir",
"type": "particle",
"hits": 1
}
}
]
}
|
|
From: 5
Left Pillar Junction
To: 4
Below Sand Entrance
Requires: "canSuitlessMaridia"
"HiJump"
"canPlayInSand"
{
"or": [
"canCarefulJump",
"canSpringBallJumpMidAir"
]
}
{
"or": [
"canTrickyJump",
{
"enemyDamage": {
"enemy": "Evir",
"type": "particle",
"hits": 1
}
}
]
}
{
"or": [
"canSandfallBounce",
{
"enemyDamage": {
"enemy": "Evir",
"type": "particle",
"hits": 1
}
}
]
}
|
|
From: 2
Right Door
To: 2
Right Door
Get the shinecharge, carefully jump over the crab and move towards then shinespark out the right door. Entrance condition: {
"comeInRunning": {
"speedBooster": true,
"minTiles": 2.4375
}
}
Requires: "canStutterWaterShineCharge"
"canShinechargeMovementComplex"
"canCarefulJump"
{
"canShineCharge": {
"usedTiles": 33,
"openEnd": 2
}
}
{
"or": [
{
"shinespark": {
"frames": 9
}
},
{
"and": [
"canShinechargeMovementTricky",
{
"shinespark": {
"frames": 2
}
}
]
}
]
}
Exit condition: {
"leaveWithSpark": {}
}
Unlocks doors: {"types":["super"],"requires":[]}
{"types":["missiles","powerbomb"],"requires":["never"]}
|
|
Wait for the top hopper to move right, then jump through the left hopper. The left hopper may be harder to dodge if the camera is scrolled to the left. Requires: "ScrewAttack"
"canCarefulJump"
{
"or": [
"canTrickyJump",
"SpaceJump",
{
"enemyDamage": {
"enemy": "Blue Sidehopper",
"type": "contact",
"hits": 1
}
}
]
}
Unlocks doors: {"types":["super"],"requires":[]}
{"types":["missiles","powerbomb"],"requires":[{"enemyDamage":{"enemy":"Blue Sidehopper","type":"contact","hits":1}}]}
|
|
Jump far enough to land on the first floor pillar. Entrance condition: {
"comeInShinecharging": {
"length": 0,
"openEnd": 0
}
}
Requires: "canPrepareForNextRoom"
{
"or": [
"SpaceJump",
"canCarefulJump"
]
}
|
|
Requires: {
"enemyDamage": {
"enemy": "Blue Sidehopper",
"type": "contact",
"hits": 1
}
}
{
"or": [
"canCarefulJump",
{
"enemyDamage": {
"enemy": "Blue Sidehopper",
"type": "contact",
"hits": 1
}
}
]
}
|
|
Jump Immediately upon entry, or before the transition. Entrance condition: {
"comeInShinecharging": {
"length": 1,
"openEnd": 1
}
}
Requires: "canBlueSpaceJump" "canCarefulJump" |
|
Jump Immediately upon entry, or before the transition. Entrance condition: {
"comeInShinecharging": {
"length": 1,
"openEnd": 1
}
}
Requires: "canBlueSpaceJump" "canCarefulJump" |
|
From: 3
Junction (Get Past Metroids, Left to Right)
To: 2
Right Door
At max run speed without SpeedBooster, you can bounce on both platforms and avoid all acid. Jump from the center of the rightmost X in the background. Bounce again on the second platform to avoid any Metroid or Rinkas. Requires: "h_canUseSpringBall"
"canSpringBallBounce"
"canCarefulJump"
{
"or": [
{
"obstaclesCleared": [
"A"
]
},
"canMetroidAvoid",
"ScrewAttack",
{
"metroidFrames": 200
}
]
}
|
|
From: 3
Junction (Get Past Metroids, Left to Right)
To: 2
Right Door
Use the full runway to gain echoes and enough speed to reach the far platform. Requires: "SpeedBooster"
"canCarefulJump"
{
"or": [
{
"obstaclesCleared": [
"A"
]
},
"Ice",
"ScrewAttack",
"canPseudoScrew",
"canMetroidAvoid",
{
"metroidFrames": 130
}
]
}
|
|
From: 4
Junction (Get Past Metroids, Right to Left)
To: 1
Left Door
Requires: "SpeedBooster"
"canCarefulJump"
{
"or": [
{
"obstaclesCleared": [
"A"
]
},
"Ice",
"canMetroidAvoid",
{
"metroidFrames": 200
}
]
}
{
"or": [
"canTrickyJump",
{
"acidFrames": 27
},
{
"and": [
{
"acidFrames": 16
},
"canPreciseWalljump"
]
},
{
"and": [
{
"acidFrames": 16
},
"Gravity"
]
}
]
}
|
|
From: 4
Junction (Get Past Metroids, Right to Left)
To: 1
Left Door
At max non-speed run speed, Spring Ball bounce on both platforms and avoid all acid. Land on the right side of the first platform to avoid the second Metroid. Bouncing on the second platform will usually avoid the third Metroid. Requires: "canSpringBallBounce"
"canCarefulJump"
{
"or": [
{
"obstaclesCleared": [
"A"
]
},
{
"and": [
"canTrickyJump",
"canMetroidAvoid"
]
},
{
"metroidFrames": 270
}
]
}
|
|
From: 2
Bottom Right Door
To: 1
Top Right Door
Spinjump into the opening below the top door. Entrance condition: {
"comeInShinecharged": {
"framesRequired": 105
}
}
Requires: "HiJump"
"canCarefulJump"
"canShinechargeMovementComplex"
{
"or": [
"f_KilledMetroidRoom2",
"canMetroidAvoid"
]
}
Exit condition: {
"leaveShinecharged": {
"framesRemaining": "auto"
}
}
Unlocks doors: {"types":["super"],"requires":[]}
{"types":["missiles","powerbomb"],"requires":["never"]}
|
|
From: 2
Bottom Right Door
To: 1
Top Right Door
Spinjump into the opening below the top door. Entrance condition: {
"comeInShinecharged": {
"framesRequired": 80
}
}
Requires: "HiJump"
"canCarefulJump"
"canShinechargeMovementComplex"
{
"shinespark": {
"frames": 6
}
}
{
"or": [
"f_KilledMetroidRoom2",
"canMetroidAvoid"
]
}
Exit condition: {
"leaveWithSpark": {}
}
Unlocks doors: {"types":["super"],"requires":[]}
{"types":["missiles","powerbomb"],"requires":["never"]}
|
|
From: 2
Bottom Right Door
To: 1
Top Right Door
Spinjump into the opening below the top door. Entrance condition: {
"comeInShinecharging": {
"length": 2,
"openEnd": 0
}
}
Requires: "canShinechargeMovementComplex"
"HiJump"
"canCarefulJump"
{
"or": [
"f_KilledMetroidRoom2",
{
"and": [
"canMetroidAvoid",
"canShinechargeMovementTricky"
]
}
]
}
Exit condition: {
"leaveShinecharged": {
"framesRemaining": 50
}
}
Unlocks doors: {"types":["super"],"requires":[]}
{"types":["missiles","powerbomb"],"requires":["never"]}
|
|
Jump Immediately upon entry, or before the transition. Entrance condition: {
"comeInShinecharging": {
"length": 1,
"openEnd": 1
}
}
Requires: "canBlueSpaceJump" "canCarefulJump" |
|
Use ScrewAttack or a PseudoScrew to prevent Metroids from attaching to Samus. These abilities may also be used to temporarily prevent damage from Metroids if they do attach. Requires: {
"or": [
"ScrewAttack",
"canPseudoScrew"
]
}
{
"or": [
"canDodgeWhileShooting",
{
"and": [
"canCarefulJump",
"SpaceJump"
]
}
]
}
|
|
Entrance condition: {
"comeInShinecharging": {
"length": 3,
"openEnd": 1
}
}
Requires: "canBlueSpaceJump" "canCarefulJump" |
|
Use ScrewAttack or a PseudoScrew to prevent Metroids from attaching to Samus. These abilities may also be used to temporarily prevent damage from Metroids if they do attach. Requires: {
"or": [
"ScrewAttack",
"canPseudoScrew"
]
}
{
"or": [
"canDodgeWhileShooting",
{
"and": [
"canCarefulJump",
"SpaceJump"
]
}
]
}
|
|
Notable: true Avoid all of the Rinkas and Metroids with no equipment and taking no damage. One way to do this is to bait the top Rinkas to fire upwards, and then carefully spinjump around each corner as the Metroid below passes by. Requires: "canMetroidAvoid" "canCarefulJump" |
|
Requires: {
"or": [
"Ice",
{
"and": [
"ScrewAttack",
"canDodgeWhileShooting"
]
}
]
}
{
"or": [
"canCarefulJump",
{
"enemyDamage": {
"enemy": "Rinka",
"type": "contact",
"hits": 1
}
}
]
}
|
|
From: 2
Bottom Door
To: 1
Top Left Door
Notable: true Avoid all of the Rinkas and Metroids with no equipment and taking no damage. Begin by shooting the bottom Metroid hold it in place, and wait right below the first ledge. Once the middle Metroid passes by, jump up and shoot any Rinkas that are in the way. Repeat for the next ledge, clear any Rinkas, and then run to the door. Requires: "canMetroidAvoid" "canDodgeWhileShooting" "canCarefulJump" |
|
Carefully dodge the Rinkas, or take a hit, while carefully avoiding falling off, then use the I-Frames to use the runway. Requires: {
"or": [
"canTrickyJump",
{
"and": [
"canCarefulJump",
{
"enemyDamage": {
"enemy": "Rinka",
"type": "contact",
"hits": 1
}
}
]
}
]
}
Exit condition: {
"leaveWithRunway": {
"length": 5,
"openEnd": 1
}
}
|
|
Requires: "Morph"
"f_KilledZebetites4"
{
"or": [
{
"and": [
"canTrickyJump",
"canMidAirMorph"
]
},
{
"and": [
"canCarefulJump",
"h_canUseSpringBall"
]
},
{
"and": [
{
"enemyDamage": {
"enemy": "Rinka",
"type": "contact",
"hits": 1
}
},
{
"or": [
"canTrivialMidAirMorph",
"canNeutralDamageBoost",
"h_canUseSpringBall",
"h_canBombThings"
]
}
]
}
]
}
|
|
From: 5
Between First and Second Zebetite
To: 6
Between Second and Third Zebetite
Requires: "Morph"
"f_KilledZebetites2"
{
"or": [
{
"and": [
"canTrickyJump",
"canMidAirMorph"
]
},
{
"and": [
"canCarefulJump",
"h_canUseSpringBall"
]
},
{
"and": [
{
"enemyDamage": {
"enemy": "Rinka",
"type": "contact",
"hits": 1
}
},
{
"or": [
"canTrivialMidAirMorph",
"canNeutralDamageBoost",
"h_canUseSpringBall",
"h_canBombThings"
]
}
]
}
]
}
{
"enemyDamage": {
"enemy": "Mother Brain 1",
"type": "turret",
"hits": 1
}
}
|
|
From: 5
Between First and Second Zebetite
To: 8
Before First Zebetite
Requires: "f_KilledZebetites1"
{
"or": [
"canCarefulJump",
{
"enemyDamage": {
"enemy": "Rinka",
"type": "contact",
"hits": 1
}
}
]
}
|
|
From: 6
Between Second and Third Zebetite
To: 5
Between First and Second Zebetite
Requires: "Morph"
"f_KilledZebetites2"
{
"or": [
{
"and": [
"canTrickyJump",
"canMidAirMorph"
]
},
{
"and": [
"canCarefulJump",
"h_canUseSpringBall"
]
},
{
"and": [
{
"enemyDamage": {
"enemy": "Rinka",
"type": "contact",
"hits": 1
}
},
{
"or": [
"canTrivialMidAirMorph",
"canNeutralDamageBoost",
"h_canUseSpringBall",
"h_canBombThings"
]
}
]
}
]
}
{
"enemyDamage": {
"enemy": "Mother Brain 1",
"type": "turret",
"hits": 1
}
}
|
|
From: 6
Between Second and Third Zebetite
To: 7
Between Third and Fourth Zebetite
Requires: "f_KilledZebetites3"
{
"or": [
"canCarefulJump",
{
"enemyDamage": {
"enemy": "Rinka",
"type": "contact",
"hits": 1
}
}
]
}
|
|
Requires: "Morph"
"f_KilledZebetites4"
{
"or": [
{
"and": [
"canTrickyJump",
"canMidAirMorph"
]
},
{
"and": [
"canCarefulJump",
"h_canUseSpringBall"
]
},
{
"and": [
{
"enemyDamage": {
"enemy": "Rinka",
"type": "contact",
"hits": 1
}
},
{
"or": [
"canTrivialMidAirMorph",
"canNeutralDamageBoost",
"h_canUseSpringBall",
"h_canBombThings"
]
}
]
}
]
}
|
|
From: 7
Between Third and Fourth Zebetite
To: 6
Between Second and Third Zebetite
Requires: "f_KilledZebetites3"
{
"or": [
"canCarefulJump",
{
"enemyDamage": {
"enemy": "Rinka",
"type": "contact",
"hits": 1
}
}
]
}
|
|
From: 8
Before First Zebetite
To: 5
Between First and Second Zebetite
Requires: "f_KilledZebetites1"
{
"or": [
"canCarefulJump",
{
"enemyDamage": {
"enemy": "Rinka",
"type": "contact",
"hits": 1
}
}
]
}
|
|
Requires: {
"obstaclesNotCleared": [
"A"
]
}
{
"or": [
"canCarefulJump",
"ScrewAttack",
"Morph",
{
"enemyDamage": {
"enemy": "Tourian Space Pirate (all)",
"type": "contact",
"hits": 1
}
}
]
}
{
"or": [
"canDodgeWhileShooting",
"Morph",
{
"enemyKill": {
"enemies": [
[
"Tourian Space Pirate (all)",
"Tourian Space Pirate (all)"
]
],
"explicitWeapons": [
"Plasma",
"ScrewAttack",
"Missile",
"Super"
]
}
},
{
"enemyDamage": {
"enemy": "Tourian Space Pirate (all)",
"type": "laser",
"hits": 8
}
},
{
"and": [
"Ice",
{
"enemyDamage": {
"enemy": "Tourian Space Pirate (all)",
"type": "laser",
"hits": 6
}
}
]
},
{
"and": [
{
"or": [
"Wave",
"Spazer"
]
},
{
"enemyDamage": {
"enemy": "Tourian Space Pirate (all)",
"type": "laser",
"hits": 3
}
}
]
},
{
"and": [
"Wave",
"Spazer",
{
"enemyDamage": {
"enemy": "Tourian Space Pirate (all)",
"type": "laser",
"hits": 2
}
}
]
}
]
}
Exit condition: {
"leaveWithRunway": {
"length": 26,
"openEnd": 1
}
}
|
|
Requires: "canCarefulJump"
{
"or": [
{
"and": [
"canTrickyJump",
"canDodgeWhileShooting"
]
},
{
"enemyKill": {
"enemies": [
[
"Tourian Space Pirate (all)",
"Tourian Space Pirate (all)"
]
],
"explicitWeapons": [
"Plasma",
"ScrewAttack",
"Missile",
"Super",
"PowerBomb"
]
}
},
{
"and": [
{
"or": [
"Ice",
"Wave",
"Spazer"
]
},
{
"or": [
"Morph",
"canDodgeWhileShooting"
]
}
]
},
{
"and": [
"Ice",
{
"enemyDamage": {
"enemy": "Tourian Space Pirate (all)",
"type": "laser",
"hits": 6
}
}
]
},
{
"and": [
{
"or": [
"Wave",
"Spazer"
]
},
{
"enemyDamage": {
"enemy": "Tourian Space Pirate (all)",
"type": "laser",
"hits": 3
}
}
]
},
{
"and": [
"Wave",
"Spazer",
{
"enemyDamage": {
"enemy": "Tourian Space Pirate (all)",
"type": "laser",
"hits": 2
}
}
]
}
]
}
Exit condition: {
"leaveWithRunway": {
"length": 26,
"openEnd": 1
}
}
|
|
Requires: {
"or": [
"canCarefulJump",
"ScrewAttack",
"Morph",
{
"enemyDamage": {
"enemy": "Tourian Space Pirate (all)",
"type": "contact",
"hits": 1
}
}
]
}
|
|
From: 3
Bottom of Shaft
To: 1
Left Door
Notable: true Navigate Leodox Room in reverse by killing or distracting the right side pirates and manipulating or dodging the left side pirates during the shaft climb. The acid starts rising when Samus is at the bottom of the long climb. The right-side pirates can be killed while going down to prevent having to dodge their lasers during the climb. Alternatively, jump and force the pirates to shoot just before starting to climb. Requires: {
"or": [
"canCarefulJump",
"ScrewAttack",
"HiJump"
]
}
{
"or": [
"canConsecutiveWalljump",
{
"and": [
"SpaceJump",
{
"or": [
"HiJump",
{
"and": [
"canCarefulJump",
{
"acidFrames": 20
},
{
"enemyDamage": {
"enemy": "Tourian Space Pirate (all)",
"type": "contact",
"hits": 1
}
}
]
},
{
"acidFrames": 100
}
]
}
]
}
]
}
|
|
Requires: {
"or": [
"HiJump",
"SpaceJump",
"canWalljump",
"h_canCrouchJumpDownGrab",
"canJumpIntoIBJ",
"canSpringBallJumpMidAir"
]
}
{
"or": [
"canCarefulJump",
"ScrewAttack",
{
"enemyDamage": {
"enemy": "Tourian Space Pirate (all)",
"type": "contact",
"hits": 1
}
}
]
}
Clears obstacles: A |
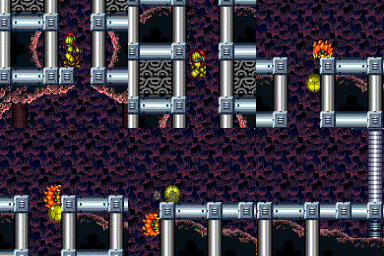
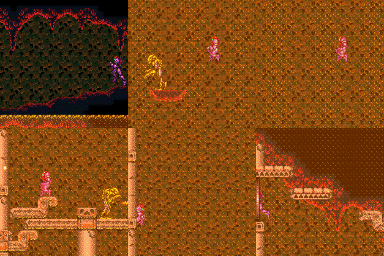
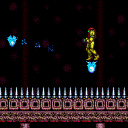
.png)
.gif)
.png)
.gif)
