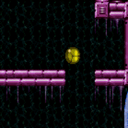
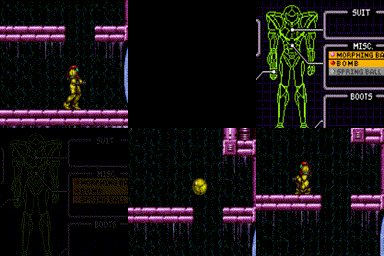
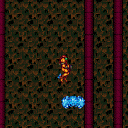
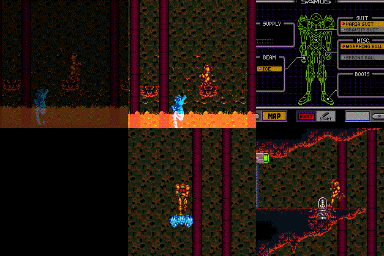
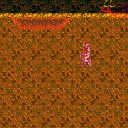
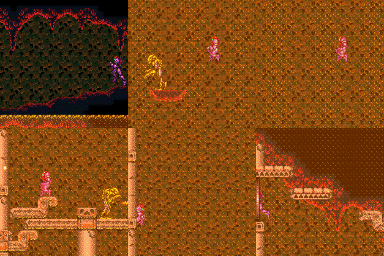
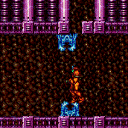
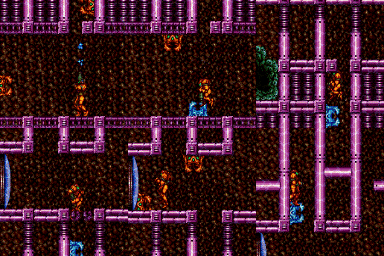
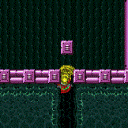
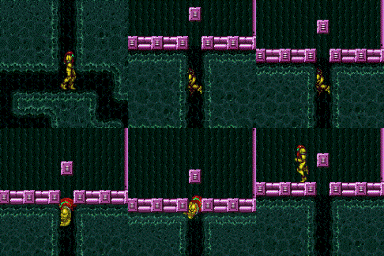
canSpringBallJumpMidAir (Medium)
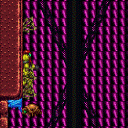
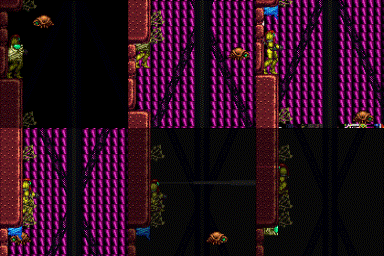
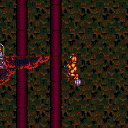
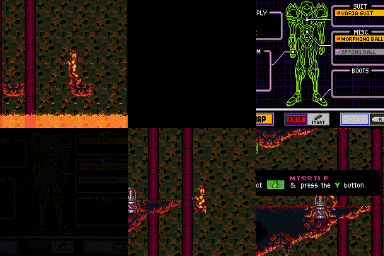
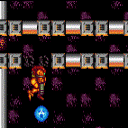
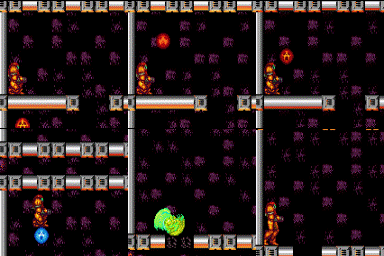
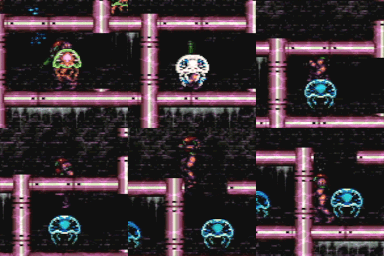
It is possible to use Spring Ball while mid-air, if Samus is still climbing upwards. This gives an additional jump, allowing her to go higher. This can be done by morphing in mid-air, then quickly turning on Spring Ball while still climbing upwards, and then jumping again. This is often done most easily by buffering the Spring Ball jump: while unpausing after turning on Spring Ball, press and hold jump starting anytime after the pause menu has finished fading out (i.e. while the screen is black). This is often combined with a crouch jump to gain a bit more height.
Dependencies: canDisableEquipment, canMidAirMorph
Strats ()
|
Requires: {
"or": [
"canWalljump",
"h_canFly",
"HiJump",
"canSpringBallJumpMidAir"
]
}
|
|
Requires: {
"or": [
"h_canFly",
"SpeedBooster",
{
"and": [
"HiJump",
"canSpringBallJumpMidAir"
]
}
]
}
|
|
From: 7
Junction (Left Ledge Below Bomb Blocks)
To: 1
Top Left Door
Requires: "canSpringBallJumpMidAir"
{
"or": [
"h_canBombThings",
{
"obstaclesCleared": [
"A"
]
}
]
}
Clears obstacles: A |
|
Requires: "f_TourianOpen"
"Gravity"
{
"or": [
"HiJump",
"h_canFly",
"canSpringBallJumpMidAir",
"canWalljump",
"canGravityJump"
]
}
|
|
From: 4
Underwater Statues Event (locked)
To: 3
Statues Event (locked)
Requires: "f_TourianOpen" "canSuitlessMaridia" "HiJump" "canSpringBallJumpMidAir" |
|
Requires: {
"or": [
"canCarefulJump",
"canUseFrozenEnemies",
"SpaceJump",
{
"and": [
"Gravity",
{
"or": [
"HiJump",
"canWalljump",
"h_canCrouchJumpDownGrab",
"h_canIBJ",
"canSpringBallJumpMidAir"
]
}
]
}
]
}
|
|
From: 3
Junction (Left side Pit)
To: 1
Left Door
Requires: "canSuitlessMaridia" "canSpringBallJumpMidAir" |
|
From: 3
Junction (Left side Pit)
To: 4
Junction (Right side Pit)
Requires: "canSuitlessMaridia" "canSpringBallJumpMidAir" |
|
Requires: "canSuitlessMaridia"
"HiJump"
{
"or": [
"canSpringBallJumpMidAir",
"canSpaceJumpWaterBounce"
]
}
|
|
From: 4
Junction (Right side Pit)
To: 2
Right Door
Freeze the Choot when it swings right on its jump. Quickly get on top of it by first getting onto the pillar to the left, or with a SpringBall Jump. Perform a precise spring ball jump to get to the far right ledge, while avoiding hitting the water surface. While on the ledge, stand on the raised ground to the right and jump to the surface, then space jump across the water to the left. Requires: "canSuitlessMaridia"
"canTrickyUseFrozenEnemies"
"canCarefulJump"
"canSpringBallJumpMidAir"
{
"or": [
"canTrickySpringBallJump",
"canResetFallSpeed",
"canStationaryLateralMidAirMorph"
]
}
"canSpaceJumpWaterBounce"
"canWalljump"
|
|
From: 4
Junction (Right side Pit)
To: 3
Junction (Left side Pit)
Requires: "canSuitlessMaridia" "canSpringBallJumpMidAir" |
|
Requires: "Gravity"
{
"or": [
"canWalljump",
"canGravityJump",
{
"and": [
"canSpringBallJumpMidAir",
"HiJump"
]
}
]
}
|
|
Requires: "Gravity"
{
"or": [
"canTrickySpringBallJump",
{
"and": [
"HiJump",
"canWalljump"
]
},
{
"and": [
"HiJump",
"canSpringBallJumpMidAir"
]
},
{
"and": [
"HiJump",
"SpeedBooster"
]
}
]
}
{
"obstaclesNotCleared": [
"A"
]
}
|
|
From: 4
Lower Section - Top Right Door
To: 8
Bridge Right Door (Same Connection as Lower Section - Bottom Right Door)
Notable: true Entrance condition: {
"comeInWithGMode": {
"mode": "direct",
"morphed": false
}
}
Requires: "canSkipDoorLock"
{
"or": [
"canArtificialMorph",
"canWalljump",
"SpaceJump",
{
"and": [
"h_canIBJ",
{
"or": [
"Gravity",
"h_canJumpIntoIBJ",
"h_canBombHorizontally"
]
}
]
},
{
"and": [
"HiJump",
"canSpringBallJumpMidAir"
]
},
"canPreciseGrapple"
]
}
"canXRayClimb"
|
|
From: 4
Lower Section - Top Right Door
To: 8
Bridge Right Door (Same Connection as Lower Section - Bottom Right Door)
Notable: true Enter with G-mode direct, back up to between 1 and 6 pixels from the door transition, and activate X-ray to get very deep stuck in the door. Climb up 1 screen, and perform a turnaround buffered spin-jump away from the door to trigger the transition, bypassing any lock on the door. Entrance condition: {
"comeInWithGMode": {
"mode": "direct",
"morphed": false
}
}
Requires: {
"or": [
"canArtificialMorph",
"canWalljump",
"SpaceJump",
{
"and": [
"h_canIBJ",
{
"or": [
"Gravity",
"h_canJumpIntoIBJ",
"h_canBombHorizontally"
]
}
]
},
{
"and": [
"HiJump",
"canSpringBallJumpMidAir"
]
},
"canPreciseGrapple"
]
}
"canXRayClimb"
Bypasses door shell: true |
|
From: 4
Lower Section - Top Right Door
To: 12
Top Junction
Climb up 2 screens. Entrance condition: {
"comeInWithGMode": {
"mode": "direct",
"morphed": false
}
}
Requires: {
"or": [
"canArtificialMorph",
"canWalljump",
"SpaceJump",
{
"and": [
"h_canIBJ",
{
"or": [
"Gravity",
"h_canJumpIntoIBJ",
"h_canBombHorizontally"
]
}
]
},
{
"and": [
"HiJump",
"canSpringBallJumpMidAir"
]
},
"canPreciseGrapple"
]
}
"canXRayClimb"
|
|
From: 5
Lower Section - Bottom Right Door
To: 4
Lower Section - Top Right Door
Requires: "HiJump" "canSpringBallJumpMidAir" |
|
From: 16
G-Mode Morph Overloaded PLMs Junction (By Left Door)
To: 14
Morph Maze Junction (Below Super Block)
Requires: {
"or": [
{
"and": [
"SpaceJump",
"Morph"
]
},
"h_canArtificialMorphIBJ",
{
"and": [
"canTrickyDashJump",
"canSpringBallJumpMidAir",
"HiJump"
]
}
]
}
|
|
Requires: {
"or": [
"HiJump",
"SpaceJump",
"canSpringBallJumpMidAir"
]
}
|
|
From: 2
Right Door
To: 2
Right Door
Use the runway on the screen above to gain a shinecharge near the edge of the runway, sliding off quickly. Requires: {
"or": [
"canWalljump",
"HiJump",
"h_canFly",
"canSpringBallJumpMidAir",
"h_canCrouchJumpDownGrab"
]
}
{
"canShineCharge": {
"usedTiles": 25,
"openEnd": 1
}
}
"canShinechargeMovementComplex"
Exit condition: {
"leaveShinecharged": {
"framesRemaining": 70
}
}
|
|
Use the runway on the screen above to gain a shinecharge near the edge of the runway. Requires: {
"or": [
"canWalljump",
"HiJump",
"h_canFly",
"canSpringBallJumpMidAir",
"h_canCrouchJumpDownGrab"
]
}
{
"canShineCharge": {
"usedTiles": 25,
"openEnd": 1
}
}
Exit condition: {
"leaveShinecharged": {
"framesRemaining": 40
}
}
|
|
Requires: {
"or": [
"canWalljump",
"HiJump",
"h_canFly",
"canSpringBallJumpMidAir"
]
}
Clears obstacles: A |
|
From: 10
Right Etecoon Shaft - Bottom Left Door
To: 14
Right Etecoon Shaft - Wall Jump Climb Checkpoint Junction
Requires: {
"or": [
"canWalljump",
"h_canFly",
{
"and": [
"HiJump",
"canSpringBallJumpMidAir"
]
}
]
}
|
|
Requires: {
"or": [
"h_canFly",
"HiJump",
"canSpringBallJumpMidAir",
{
"and": [
"SpeedBooster",
"canWalljump"
]
}
]
}
|
|
Requires: {
"or": [
"HiJump",
"h_canFly",
"canWalljump",
"canUseFrozenEnemies",
"canSpringBallJumpMidAir"
]
}
|
|
From: 4
Left Side - Middle Doorway (Behind the Power Bomb Blocks)
To: 4
Left Side - Middle Doorway (Behind the Power Bomb Blocks)
Carefully lure a Zeb from the pipe below while freezing it. Samus must start to the left of the pipe in order for the Zeb to move left at the end. Requires: "canTrickyUseFrozenEnemies"
{
"or": [
"h_canUsePowerBombs",
{
"obstaclesCleared": [
"B"
]
},
{
"and": [
"Morph",
{
"obstaclesCleared": [
"C"
]
}
]
}
]
}
{
"or": [
"canWalljump",
"HiJump",
"SpaceJump",
"canSpringBallJumpMidAir"
]
}
Exit condition: {
"leaveWithGModeSetup": {}
}
|
|
Requires: {
"or": [
{
"obstaclesCleared": [
"A"
]
},
{
"enemyDamage": {
"enemy": "Sm. Sidehopper",
"type": "contact",
"hits": 1
}
}
]
}
{
"or": [
"SpaceJump",
"canWalljump",
{
"and": [
"Grapple",
{
"obstaclesNotCleared": [
"C"
]
}
]
},
{
"and": [
"HiJump",
"canSpringBallJumpMidAir"
]
}
]
}
|
|
Entrance condition: {
"comeInJumping": {
"minTiles": 1,
"speedBooster": "any"
}
}
Requires: "canPrepareForNextRoom"
{
"or": [
"SpaceJump",
"canWalljump",
{
"and": [
"Grapple",
{
"obstaclesNotCleared": [
"C"
]
}
]
},
{
"and": [
"HiJump",
"canSpringBallJumpMidAir"
]
}
]
}
|
|
Requires: {
"or": [
"canWalljump",
"h_canFly",
{
"and": [
"HiJump",
"canSpringBallJumpMidAir"
]
}
]
}
Clears obstacles: B |
|
From: 4
Frozen Hopper Junction
To: 3
Top Junction
Use a Frozen Hopper as a platform to jump up to the Grapple Block with an additional movement item. Letting it jump from the spike ledge or the door frame will make the jump easier, but it is difficult to avoid Hopper damage when setting this up. Requires: {
"obstaclesNotCleared": [
"A"
]
}
"canTrickyUseFrozenEnemies"
{
"or": [
"HiJump",
"canSpringBallJumpMidAir"
]
}
{
"or": [
{
"enemyDamage": {
"enemy": "Sm. Sidehopper",
"type": "contact",
"hits": 1
}
},
"canTrickyJump"
]
}
|
|
Requires: {
"obstaclesCleared": [
"B"
]
}
{
"or": [
"HiJump",
"canWalljump",
"canSpringBallJumpMidAir",
"h_canFly",
"canSpringBallBombJump"
]
}
|
|
It takes around 3 minutes to get the Zero to this door. The Zero only moves on camera and the camera scrolls when exiting the morph tunnel. Let the Zero lead through the morph tunnel or wait for the it to get very close to Samus before touching the scroll block at the exit. Requires: "canBeVeryPatient"
"Morph"
{
"or": [
"HiJump",
"canWalljump",
"h_canFly",
"canTrickyUseFrozenEnemies",
"canSpringBallJumpMidAir"
]
}
Exit condition: {
"leaveWithGModeSetup": {}
}
|
|
From: 2
Middle Left Door
To: 2
Middle Left Door
It takes around 4 minutes to get the Zero to this door. The Zero only moves on camera and the camera scrolls when exiting the morph tunnel. Let the Zero lead through the morph tunnel or wait for the it to get very close to Samus before touching the scroll block at the exit. Requires: "canBeVeryPatient"
"Morph"
{
"or": [
"HiJump",
"canWalljump",
"h_canFly",
"canTrickyUseFrozenEnemies",
"canSpringBallJumpMidAir"
]
}
Exit condition: {
"leaveWithGModeSetup": {}
}
|
|
Requires: {
"or": [
"HiJump",
"canWalljump",
"h_canFly",
"canSpringBallJumpMidAir"
]
}
|
|
From: 2
Middle Left Door
To: 5
Top Right Door (Through Morph Tunnel)
Entrance condition: {
"comeInWithGMode": {
"mode": "indirect",
"morphed": true
}
}
Requires: {
"or": [
"h_canArtificialMorphIBJ",
{
"and": [
"h_canArtificialMorphSpringBallBombJump",
"h_additionalBomb"
]
},
{
"and": [
"h_canArtificialMorphSpringBall",
"HiJump"
]
},
{
"and": [
"Morph",
{
"or": [
"HiJump",
"canWalljump",
"h_canFly",
"canSpringBallJumpMidAir",
{
"and": [
"canTrickyDashJump",
"h_canCrouchJumpDownGrab"
]
}
]
}
]
}
]
}
|
|
Entrance condition: {
"comeInWithGMode": {
"mode": "any",
"morphed": false
}
}
Requires: {
"or": [
"HiJump",
"canWalljump",
"h_canFly",
"canSpringBallJumpMidAir",
{
"and": [
"canTrickyDashJump",
"h_canCrouchJumpDownGrab"
]
}
]
}
Exit condition: {
"leaveWithGMode": {
"morphed": false
}
}
|
|
From: 4
Bottom Right Door
To: 4
Bottom Right Door
Requires: {
"or": [
"HiJump",
"canWalljump",
"h_canFly",
"canTrickyUseFrozenEnemies",
"canSpringBallJumpMidAir"
]
}
Exit condition: {
"leaveWithGModeSetup": {}
}
|
|
From: 4
Bottom Right Door
To: 5
Top Right Door (Through Morph Tunnel)
Entrance condition: {
"comeInWithGMode": {
"mode": "indirect",
"morphed": true
}
}
Requires: {
"or": [
"h_canArtificialMorphIBJ",
"h_canArtificialMorphSpringBallBombJump",
{
"and": [
"h_canArtificialMorphSpringBall",
"HiJump"
]
},
{
"and": [
"Morph",
{
"or": [
"HiJump",
"canWalljump",
"h_canFly",
"canSpringBallJumpMidAir",
"h_canCrouchJumpDownGrab"
]
}
]
}
]
}
|
|
Entrance condition: {
"comeInWithGMode": {
"mode": "any",
"morphed": false
}
}
Requires: {
"or": [
"HiJump",
"canWalljump",
"h_canFly",
"canSpringBallJumpMidAir",
"h_canCrouchJumpDownGrab"
]
}
Exit condition: {
"leaveWithGMode": {
"morphed": false
}
}
|
|
From: 5
Top Right Door (Through Morph Tunnel)
To: 5
Top Right Door (Through Morph Tunnel)
It takes around 2 minutes to get the Zero to this door. Requires: "canBePatient"
{
"or": [
{
"ammo": {
"type": "Super",
"count": 1
}
},
{
"obstaclesCleared": [
"A"
]
}
]
}
"Morph"
{
"or": [
"HiJump",
"canWalljump",
"h_canFly",
"canTrickyUseFrozenEnemies",
"canSpringBallJumpMidAir"
]
}
Exit condition: {
"leaveWithGModeSetup": {}
}
|
|
From: 2
Right Door
To: 3
Safe Block in the Middle of the Room
Requires: "HiJump"
"canSpringBallJumpMidAir"
{
"spikeHits": 1
}
|
|
From: 4
Small Ledge Below Left Door
To: 1
Left Door
Requires: "HiJump"
"canSpringBallJumpMidAir"
{
"or": [
"canTrickySpringBallJump",
{
"and": [
"canIframeSpikeJump",
{
"spikeHits": 1
}
]
}
]
}
|
|
From: 3
Bottom Left Door
To: 2
Middle Left Door (Behind Power Bomb Blocks)
Notable: true Gain R-mode while entering the room. Use the respawning bugs to refill reserve energy. Get grabbed by the Beetom and carry it to the 4-tile high gap one screen above the bottom-left door. Position Samus one pixel to the right of being against the wall. Jump and aim down, reaching the ceiling at the same time that reserves are triggered. This will force Samus to stand up, briefly clipping into the wall above. Immediately freeze the Beetom inside the wall, by buffering a shot during the reserve trigger. Use a Ripper to get knocked back onto the frozen Beetom. This will clip Samus one pixel left into the wall, making it possible to X-ray climb. X-ray climb up 2 screens. Entrance condition: {
"comeInWithRMode": {}
}
Requires: {
"or": [
"canWalljump",
"HiJump",
"h_canFly",
"canSpringBallJumpMidAir"
]
}
{
"enemyDamage": {
"enemy": "Beetom",
"type": "contact",
"hits": 1
}
}
{
"enemyDamage": {
"enemy": "Ripper",
"type": "contact",
"hits": 1
}
}
"canWallIceClip"
"canXRayClimb"
|
|
From: 4
Bottom Right Door
To: 2
Middle Left Door (Behind Power Bomb Blocks)
Notable: true Gain R-mode while entering the room. Use the respawning bugs to refill reserve energy. Get grabbed by the Beetom and carry it to the 4-tile high gap one screen above the bottom-left door. Position Samus one pixel to the right of being against the wall. Jump and aim down, reaching the ceiling at the same time that reserves are triggered. This will force Samus to stand up, briefly clipping into the wall above. Immediately freeze the Beetom inside the wall, by buffering a shot during the reserve trigger. Use a Ripper to get knocked back onto the frozen Beetom. This will clip Samus one pixel left into the wall, making it possible to X-ray climb. X-ray climb up 2 screens. Entrance condition: {
"comeInWithRMode": {}
}
Requires: {
"or": [
"canWalljump",
"HiJump",
"h_canFly",
"canSpringBallJumpMidAir"
]
}
{
"enemyDamage": {
"enemy": "Beetom",
"type": "contact",
"hits": 1
}
}
{
"enemyDamage": {
"enemy": "Ripper",
"type": "contact",
"hits": 1
}
}
"canWallIceClip"
"canXRayClimb"
|
|
Requires: {
"or": [
"canWalljump",
"HiJump",
"canSpringBallJumpMidAir",
"h_canFly"
]
}
|
|
Requires: "h_canIBJ"
{
"or": [
{
"and": [
"canWalljump",
"ScrewAttack"
]
},
{
"and": [
{
"or": [
"canWalljump",
"canSpringBallJumpMidAir"
]
},
{
"ammo": {
"type": "PowerBomb",
"count": 1
}
}
]
},
{
"enemyKill": {
"enemies": [
[
"Ripper",
"Ripper",
"Ripper"
],
[
"Ripper"
]
],
"explicitWeapons": [
"Super",
"PowerBomb"
]
}
}
]
}
|
|
From: 7
Junction (Bottom Rippers)
To: 6
Junction (Above Bottom Rippers)
Requires: "canSpringBallJumpMidAir"
{
"or": [
"canWalljump",
{
"and": [
"HiJump",
"canTrickyJump"
]
}
]
}
{
"or": [
"canTrickySpringBallJump",
"canSpringwall"
]
}
|
|
From: 7
Junction (Bottom Rippers)
To: 6
Junction (Above Bottom Rippers)
Requires: "canUseFrozenEnemies"
{
"or": [
"HiJump",
"canWalljump",
"canSpringBallJumpMidAir",
"h_canIBJ"
]
}
|
|
From: 9
Junction (Top Rippers)
To: 9
Junction (Top Rippers)
To kill the Rippers with a single Power Bomb without breaking the ledge, place the bomb just above the second Ripper. Requires: "h_canUsePowerBombs"
"canCarefulJump"
{
"or": [
"canWalljump",
"canSpringBallJumpMidAir",
"SpaceJump",
{
"and": [
"HiJump",
"canTrickyDashJump"
]
},
{
"and": [
"h_canJumpIntoIBJ",
{
"or": [
"canStaggeredIBJ",
"canDoubleBombJump"
]
}
]
}
]
}
Clears obstacles: B |
|
From: 9
Junction (Top Rippers)
To: 9
Junction (Top Rippers)
Kill the Rippers with Supers. Requires: {
"ammo": {
"type": "Super",
"count": 4
}
}
{
"or": [
"canWalljump",
"SpaceJump",
"h_canJumpIntoIBJ",
{
"and": [
"canSpringBallJumpMidAir",
{
"or": [
"HiJump",
"canTrickyJump"
]
}
]
}
]
}
Clears obstacles: B |
|
Getting up during Phase 2 can be done by jumping on Kraid's projectile platforms or a well timed crouch jump + down grab. Requires: "Charge"
{
"or": [
"Wave",
"Spazer",
"Plasma",
"canBePatient"
]
}
{
"or": [
"HiJump",
"canWalljump",
"SpaceJump",
"canSpringBallJumpMidAir",
{
"and": [
"canDodgeWhileShooting",
{
"or": [
"canCarefulJump",
"h_canCrouchJumpDownGrab"
]
}
]
}
]
}
Clears obstacles: f_DefeatedKraid |
|
Only 2 Missiles are needed to get Kraid to stand up, after which they are farmable. Getting up during Phase 2 can be done by jumping on Kraid's projectile platforms or a well timed crouch jump + down grab. Requires: {
"ammo": {
"type": "Missile",
"count": 2
}
}
{
"or": [
"HiJump",
"canWalljump",
"SpaceJump",
"canSpringBallJumpMidAir",
{
"and": [
"canDodgeWhileShooting",
{
"or": [
"canCarefulJump",
"h_canCrouchJumpDownGrab"
]
}
]
}
]
}
Clears obstacles: f_DefeatedKraid |
|
4 supers are required to kill Kraid. Only 1 is needed to get him to stand up, after which they are farmable, even though the drop rate is low. Getting up during Phase 2 can be done by jumping on Kraid's projectile platforms or a well timed crouch jump + down grab. Requires: {
"or": [
{
"ammo": {
"type": "Super",
"count": 5
}
},
{
"and": [
{
"ammo": {
"type": "Super",
"count": 4
}
},
"canDodgeWhileShooting"
]
},
{
"and": [
{
"ammo": {
"type": "Super",
"count": 3
}
},
"canDodgeWhileShooting",
"canBePatient"
]
},
{
"and": [
{
"ammo": {
"type": "Super",
"count": 1
}
},
"canDodgeWhileShooting",
"canBeVeryPatient"
]
}
]
}
{
"or": [
"HiJump",
"canWalljump",
"SpaceJump",
"canSpringBallJumpMidAir",
{
"and": [
"canDodgeWhileShooting",
{
"or": [
"canCarefulJump",
"h_canCrouchJumpDownGrab"
]
}
]
}
]
}
Clears obstacles: f_DefeatedKraid |
|
Use Springball as a movement item to reach the Kraid Mouth ledge by jumping from the elevator runway, or by jumping from below. Requires: {
"or": [
"h_canSpringBallBombJump",
"canSpringBallJumpMidAir",
{
"and": [
"canMockball",
"h_canUseSpringBall"
]
}
]
}
|
|
Requires: {
"or": [
"canWalljump",
"HiJump",
"SpaceJump",
"canTrickyUseFrozenEnemies",
"canSpringBallJumpMidAir"
]
}
{
"heatFrames": 350
}
|
|
Requires: {
"or": [
"canWalljump",
"HiJump",
"h_canFly",
"canUseFrozenEnemies",
"canSpringBallJumpMidAir"
]
}
|
|
Requires: "HiJump" "canSpringBallJumpMidAir" |
|
Requires: "canUseFrozenEnemies"
{
"or": [
"canTrickyUseFrozenEnemies",
"canWalljump",
"HiJump",
"canSpringBallJumpMidAir",
"h_canCrouchJumpDownGrab"
]
}
|
|
Requires: "canSpringBallJumpMidAir"
{
"heatFrames": 200
}
|
|
From: 2
Bottom Left Door
To: 1
Top Left Door
Spin jump into the room with at least 1 tile of run speed. Then perform a mid-air Spring Ball jump to reach the ledge above. Entrance condition: {
"comeInJumping": {
"minTiles": 1,
"speedBooster": "any"
}
}
Requires: "HiJump"
"canPrepareForNextRoom"
"canSpringBallJumpMidAir"
{
"heatFrames": 120
}
|
|
Requires: "HiJump"
"canSpringBallJumpMidAir"
{
"heatFrames": 160
}
|
|
Requires: "HiJump"
"canSpringBallJumpMidAir"
{
"heatFrames": 250
}
|
|
Requires: "canIframeSpikeJump"
{
"spikeHits": 1
}
"canSpringBallJumpMidAir"
{
"heatFrames": 300
}
|
|
Requires: "canIframeSpikeJump"
{
"spikeHits": 1
}
"canSpringBallJumpMidAir"
{
"heatFrames": 300
}
|
|
Samus will be slowed by lava if SpeedBooster is equipped, even with Gravity. Requires: {
"or": [
"h_lavaProof",
"canSuitlessLavaDive"
]
}
{
"or": [
{
"and": [
"HiJump",
{
"heatFrames": 270
},
{
"lavaFrames": 270
}
]
},
{
"and": [
{
"heatFrames": 295
},
{
"lavaFrames": 295
}
]
}
]
}
{
"or": [
{
"and": [
"SpaceJump",
"canCarefulJump",
{
"heatFrames": 100
}
]
},
{
"and": [
"canWalljump",
{
"heatFrames": 60
}
]
},
{
"and": [
"canSpringBallJumpMidAir",
{
"heatFrames": 100
}
]
},
{
"and": [
"canBombJumpWaterEscape",
{
"heatFrames": 180
},
{
"lavaFrames": 30
}
]
},
{
"and": [
"HiJump",
{
"heatFrames": 60
},
{
"lavaFrames": 10
}
]
}
]
}
|
|
From: 3
Hidden Platform Item
To: 2
Chozo Ball Item
Requires: "canSpringBallJumpMidAir"
{
"heatFrames": 80
}
{
"lavaFrames": 25
}
|
|
From: 3
Hidden Platform Item
To: 4
Junction Above Hidden Platform Item
Requires: "canSpringBallJumpMidAir"
{
"heatFrames": 80
}
{
"lavaFrames": 25
}
|
|
Notable: true Uses a bomb boost at the end of a mid-air SpringBall jump. Also requires a crouchjump and downgrab to complete the maneuver. Requires: "canSpringBallJumpMidAir"
"canUnmorphBombBoost"
"h_canCrouchJumpDownGrab"
{
"heatFrames": 800
}
|
|
Notable: true Requires: "canTrickyUseFrozenEnemies"
"canSpringBallJumpMidAir"
{
"heatFrames": 1600
}
{
"enemyDamage": {
"enemy": "Geruta",
"type": "contact",
"hits": 1
}
}
|
|
Requires: "HiJump"
"canSpringBallJumpMidAir"
{
"heatFrames": 600
}
|
|
Requires: {
"obstaclesCleared": [
"C"
]
}
{
"or": [
"canWalljump",
"HiJump",
"h_canFly",
"canSpringBallJumpMidAir"
]
}
|
|
Requires: "Morph"
{
"or": [
"HiJump",
{
"and": [
"SpaceJump",
{
"heatFrames": 40
}
]
},
"canWalljump",
"canSpringBallJumpMidAir",
{
"and": [
"h_canIBJ",
{
"heatFrames": 900
}
]
},
{
"and": [
"h_canJumpIntoIBJ",
{
"heatFrames": 240
}
]
},
{
"and": [
"h_canJumpIntoIBJ",
"h_canDoubleBombJump",
{
"heatFrames": 120
}
]
},
{
"and": [
"h_canDoubleBombJump",
{
"heatFrames": 300
}
]
}
]
}
{
"or": [
"h_heatProof",
{
"and": [
"Wave",
"Plasma"
]
},
"h_canUsePowerBombs"
]
}
{
"heatFrames": 260
}
|
|
Requires: "Morph"
{
"or": [
"HiJump",
{
"and": [
"SpaceJump",
{
"heatFrames": 40
}
]
},
"canWalljump",
"canSpringBallJumpMidAir",
{
"and": [
"h_canJumpIntoIBJ",
{
"heatFrames": 240
}
]
},
{
"and": [
"h_canJumpIntoIBJ",
"h_canDoubleBombJump",
{
"heatFrames": 120
}
]
},
{
"and": [
"h_canDoubleBombJump",
{
"heatFrames": 300
}
]
}
]
}
{
"heatFrames": 260
}
{
"enemyDamage": {
"enemy": "Sova",
"type": "contact",
"hits": 1
}
}
|
|
From: 4
Junction Below Morph Tunnel
To: 5
Junction Above Morph Tunnel
Requires: {
"or": [
{
"and": [
"canWalljump",
{
"heatFrames": 100
}
]
},
{
"and": [
"HiJump",
"canSpringBallJumpMidAir",
{
"heatFrames": 160
}
]
},
{
"and": [
"SpaceJump",
{
"heatFrames": 180
}
]
},
{
"and": [
"SpaceJump",
"HiJump",
{
"heatFrames": 120
}
]
}
]
}
|
|
Requires: {
"or": [
"SpeedBooster",
"HiJump",
"h_canFly",
"canWalljump",
"canSpringBallJumpMidAir"
]
}
|
|
Requires: {
"or": [
"HiJump",
"canWalljump",
"h_canCrouchJumpDownGrab",
"canSpringBallJumpMidAir"
]
}
|
|
Requires: "canSpringBallJumpMidAir" |
|
Requires: "Gravity"
{
"or": [
"canWalljump",
"HiJump",
"canSpringBallJumpMidAir",
"h_canFly",
"canUseFrozenEnemies",
"canGravityJump"
]
}
|
|
From: 4
Right Junction with Speed Blocks Broken
To: 3
Item
Requires: "SpeedBooster"
"HiJump"
{
"or": [
"canSpringBallJumpMidAir",
"canWalljump"
]
}
|
|
Requires: "h_canNavigateHeatRooms"
"canSuitlessLavaDive"
"Gravity"
{
"or": [
"HiJump",
"canWalljump",
"canSpringBallJumpMidAir",
"canGravityJump",
{
"and": [
"h_canIBJ",
{
"acidFrames": 1050
},
{
"heatFrames": 1050
}
]
}
]
}
{
"acidFrames": 100
}
{
"heatFrames": 255
}
|
|
From: 1
Top Right Door
To: 3
Acid Chozo Statue (locked)
Try to jump to the far left side raised ledges to reduce the time spent in acid. This could mean turning off HiJump, or airballing to jump farther. Requires: "h_canNavigateHeatRooms"
"canSuitlessLavaDive"
{
"or": [
"HiJump",
"canWalljump",
"canSpringBallJumpMidAir"
]
}
{
"acidFrames": 116
}
{
"heatFrames": 285
}
|
|
Requires: "h_canNavigateHeatRooms"
{
"obstaclesCleared": [
"f_UsedAcidChozoStatue"
]
}
{
"or": [
"HiJump",
"canWalljump",
"canSpringBallJumpMidAir",
{
"and": [
"h_canIBJ",
{
"heatFrames": 780
}
]
}
]
}
{
"heatFrames": 270
}
|
|
From: 4
Junction Above Acid Plug, Without Acid
To: 3
Acid Chozo Statue (locked)
Requires: "h_canNavigateHeatRooms"
{
"or": [
"HiJump",
"canWalljump",
"canSpringBallJumpMidAir",
{
"and": [
"h_canIBJ",
{
"heatFrames": 780
}
]
}
]
}
{
"heatFrames": 200
}
|
|
From: 5
Bottom Junction Right of Morph Tunnel
To: 4
Junction Above Acid Plug, Without Acid
Requires: "h_canNavigateHeatRooms"
{
"obstaclesCleared": [
"f_UsedAcidChozoStatue"
]
}
"h_canUseMorphBombs"
{
"or": [
"HiJump",
"canWalljump",
"canSpringBallJumpMidAir",
{
"and": [
"h_canIBJ",
{
"heatFrames": 1020
}
]
}
]
}
{
"heatFrames": 600
}
|
|
From: 5
Bottom Junction Right of Morph Tunnel
To: 4
Junction Above Acid Plug, Without Acid
Requires: "h_canNavigateHeatRooms"
{
"obstaclesCleared": [
"f_UsedAcidChozoStatue"
]
}
"h_canUsePowerBombs"
{
"or": [
"HiJump",
"canWalljump",
"canSpringBallJumpMidAir",
{
"and": [
"h_canIBJ",
{
"heatFrames": 1020
}
]
}
]
}
{
"heatFrames": 300
}
|
|
Requires: "h_canNavigateHeatRooms"
"h_canUsePowerBombs"
{
"heatFrames": 350
}
{
"or": [
"canPreciseWalljump",
"SpaceJump",
{
"and": [
"HiJump",
{
"or": [
"SpeedBooster",
"canWalljump",
"canSpringBallJumpMidAir"
]
}
]
}
]
}
|
|
From: 6
Golden Torizo Arena Junction (Fight Not Started)
To: 4
Hidden Right Item
Springball jump into GT to bounce to the upper level. Requires: "h_canNavigateHeatRooms"
{
"not": "f_DefeatedGoldenTorizo"
}
{
"or": [
"canRiskPermanentLossOfAccess",
"HiJump",
{
"and": [
"canTrickyJump",
"canSpringwall"
]
}
]
}
"canSpringBallJumpMidAir"
"canNeutralDamageBoost"
{
"enemyDamage": {
"enemy": "Golden Torizo",
"type": "contact",
"hits": 1
}
}
{
"ammo": {
"type": "PowerBomb",
"count": 1
}
}
{
"heatFrames": 300
}
|
|
Requires: "h_canNavigateHeatRooms"
{
"or": [
{
"and": [
"canWalljump",
{
"heatFrames": 420
}
]
},
{
"and": [
"HiJump",
{
"heatFrames": 360
}
]
},
{
"and": [
"SpaceJump",
{
"heatFrames": 420
}
]
},
{
"and": [
"canSpringBallJumpMidAir",
"canCarefulJump",
{
"heatFrames": 520
}
]
}
]
}
|
|
Jump over or kill the final pirate in front of the door. Requires: "h_canNavigateHeatRooms"
{
"or": [
"canCarefulJump",
"canPreciseWalljump",
"ScrewAttack",
"canSpringBallJumpMidAir",
"SpaceJump",
{
"enemyDamage": {
"enemy": "Yellow Space Pirate (standing)",
"type": "contact",
"hits": 2
}
}
]
}
{
"heatFrames": 420
}
|
|
From: 5
Below Left Door Junction
To: 1
Left Door
Notable: true Perform a gravity jump followed by a springball jump to reach the left side door. The gravity jump timing is very precise. Requires: "h_canNavigateHeatRooms"
"HiJump"
"canTrickyJump"
"canGravityJump"
"h_canCrouchJumpDownGrab"
"canSpringBallJumpMidAir"
{
"heatFrames": 600
}
{
"acidFrames": 600
}
|
|
Shoot the standing pirate with beam shots to prevent it from attacking. Let the wall pirate climb down a little bit to make passing it easier. Requires: "h_canNavigateHeatRooms"
{
"or": [
"canSpringBallJumpMidAir",
"canWalljump",
"SpaceJump"
]
}
{
"heatFrames": 420
}
|
|
Requires: "h_canNavigateHeatRooms"
{
"or": [
"canPreciseWalljump",
"canSpringBallJumpMidAir",
"SpaceJump"
]
}
{
"heatFrames": 400
}
{
"or": [
"h_canUsePowerBombs",
{
"obstaclesCleared": [
"A"
]
}
]
}
Clears obstacles: A |
|
From: 5
Firefleas Bottom Left Platform Junction
To: 7
Fireflea Statue's Claw Junction
Requires: "HiJump" "canSpringBallJumpMidAir" |
|
From: 7
Fireflea Statue's Claw Junction
To: 6
Junction Behind Fune
Requires: "HiJump" "canSpringBallJumpMidAir" |
|
From: 7
Junction By Lower Alcoons (Left of Spike Pits)
To: 1
Left Door
Requires: "h_canNavigateHeatRooms"
{
"or": [
"canWalljump",
"HiJump",
"canSpringBallJumpMidAir",
"SpaceJump"
]
}
{
"heatFrames": 180
}
|
|
From: 7
Junction By Lower Alcoons (Left of Spike Pits)
To: 6
Junction By Left Door (Right of Pit)
Requires: "h_canNavigateHeatRooms"
{
"or": [
"canWalljump",
"HiJump",
"canSpringBallJumpMidAir",
"SpaceJump"
]
}
{
"heatFrames": 160
}
|
|
Requires: {
"obstaclesCleared": [
"B"
]
}
{
"heatFrames": 160
}
{
"or": [
"h_canCrouchJumpDownGrab",
"canWalljump",
"canSpringBallJumpMidAir",
"HiJump",
{
"and": [
"SpaceJump",
{
"heatFrames": 20
}
]
},
{
"and": [
"h_canSpringBallBombJump",
{
"heatFrames": 50
}
]
},
{
"and": [
"h_canJumpIntoIBJ",
{
"heatFrames": 60
}
]
}
]
}
|
|
From: 9
Junction Below Crumble Blocks, Set Up to Clip
To: 2
Top Right Door
Notable: true Ice Clip through the crumble blocks using a Multiviola from the bottom of the room and then Crumble Jump to clip through the bomb blocks. The ice clip can be setup by standing in a corner and firing forward when the Multiviola hits Samus, if it is moving downwards towards Samus. The Crumble Jump is done by aiming down (not immediately) after jumping, then changing Samus' hitbox once above the crumble blocks, and jumping again. Requires: "h_heatProof"
"canPreciseCeilingClip"
"canTrickyUseFrozenEnemies"
"canPartialFloorClip"
"canTrickyJump"
"canCrumbleJump"
{
"enemyDamage": {
"enemy": "Multiviola",
"type": "contact",
"hits": 1
}
}
{
"or": [
"h_canCrouchJumpDownGrab",
"canWalljump",
"canSpringBallJumpMidAir",
"HiJump",
"SpaceJump",
"h_canJumpIntoIBJ"
]
}
|
|
From: 9
Junction Below Crumble Blocks, Set Up to Clip
To: 2
Top Right Door
Notable: true Freeze the Multiviola on the left side, just below the solid block. XRay standup and jump to clip up, then jump again to get on top of the bomb blocks. Requires: "h_heatProof"
"h_canXRayCeilingClip"
"canTrickyUseFrozenEnemies"
{
"or": [
"h_canCrouchJumpDownGrab",
"canWalljump",
"canSpringBallJumpMidAir",
"HiJump",
"SpaceJump",
"h_canJumpIntoIBJ"
]
}
|
|
From: 2
Bottom Left Door
To: 6
Bottom Platform Junction With Pirates Killed
Jump morph from the center platform to place the first Power Bomb Place two more on the platform itself to kill the bottom pirates Use a fourth to break the bomb blocks while also killing the last pirate. Requires: "h_canNavigateHeatRooms"
{
"or": [
"canSpringBallJumpMidAir",
"SpaceJump",
"canWalljump",
"h_canIBJ",
{
"and": [
"SpeedBooster",
"HiJump"
]
}
]
}
{
"enemyKill": {
"enemies": [
[
"Yellow Space Pirate (wall)",
"Yellow Space Pirate (wall)",
"Yellow Space Pirate (wall)"
]
],
"explicitWeapons": [
"PowerBombPeriphery"
]
}
}
{
"heatFrames": 790
}
{
"or": [
"h_heatResistant",
"canPauseAbuse",
{
"resourceCapacity": [
{
"type": "RegularEnergy",
"count": 149
}
]
}
]
}
Clears obstacles: A |
|
From: 4
Junction Above Bomb Block
To: 1
Top Left Door
Firing upwards has a good chance of hitting multiple Kihunters. And charge shot double hits will instantly kill a Kihunter. Requires: "h_canNavigateHeatRooms"
"Ice"
"Wave"
"Plasma"
{
"or": [
"Charge",
{
"heatFrames": 240
}
]
}
{
"or": [
"h_canCrouchJumpDownGrab",
"canWalljump",
"HiJump",
{
"and": [
"canSpringBallJumpMidAir",
{
"heatFrames": 120
}
]
},
"SpaceJump",
{
"and": [
"h_canIBJ",
"h_heatProof"
]
},
{
"and": [
"h_canSpringBallBombJump",
"h_additionalBomb",
"h_additionalBomb",
{
"heatFrames": 250
}
]
}
]
}
{
"heatFrames": 550
}
Clears obstacles: A |
|
From: 4
Junction Above Bomb Block
To: 1
Top Left Door
Fire up from below and try not to jump too high as that will out the camera in a bad position. Requires: "h_canNavigateHeatRooms"
"Ice"
"Wave"
"Spazer"
{
"or": [
"Charge",
"canCarefulJump",
"h_heatProof"
]
}
{
"or": [
"h_canCrouchJumpDownGrab",
"canWalljump",
"HiJump",
{
"and": [
"canSpringBallJumpMidAir",
{
"heatFrames": 120
}
]
},
"SpaceJump",
{
"and": [
"h_canIBJ",
"h_heatProof"
]
},
{
"and": [
"h_canSpringBallBombJump",
"h_additionalBomb",
"h_additionalBomb",
{
"heatFrames": 250
}
]
}
]
}
{
"heatFrames": 1520
}
Clears obstacles: A |
|
From: 4
Junction Above Bomb Block
To: 1
Top Left Door
Requires: "h_canNavigateHeatRooms"
{
"obstaclesCleared": [
"A"
]
}
{
"or": [
"h_canCrouchJumpDownGrab",
"canWalljump",
"HiJump",
{
"and": [
"canSpringBallJumpMidAir",
{
"heatFrames": 120
}
]
},
"SpaceJump",
{
"and": [
"h_canIBJ",
{
"heatFrames": 1820
}
]
},
{
"and": [
"h_canSpringBallBombJump",
"h_additionalBomb",
"h_additionalBomb",
{
"heatFrames": 250
}
]
}
]
}
{
"heatFrames": 390
}
|
|
Fire up from below and try not to jump too high as that will put the camera in a bad position. Requires: "h_canNavigateHeatRooms"
"Plasma"
{
"or": [
"canCarefulJump",
{
"heatFrames": 100
}
]
}
{
"or": [
"h_canCrouchJumpDownGrab",
"canWalljump",
"HiJump",
{
"and": [
"canSpringBallJumpMidAir",
{
"heatFrames": 120
}
]
},
"SpaceJump",
{
"and": [
"h_canIBJ",
"h_heatProof"
]
},
{
"and": [
"h_canSpringBallBombJump",
"h_additionalBomb",
"h_additionalBomb",
{
"heatFrames": 250
}
]
}
]
}
{
"heatFrames": 1360
}
Clears obstacles: A |
|
Requires: "h_canNavigateHeatRooms"
"ScrewAttack"
{
"or": [
"canWalljump",
{
"and": [
"h_canCrouchJumpDownGrab",
{
"heatFrames": 120
},
{
"or": [
"canCarefulJump",
{
"enemyDamage": {
"enemy": "Kihunter (red)",
"type": "contact",
"hits": 1
}
}
]
}
]
},
"HiJump",
{
"and": [
"canSpringBallJumpMidAir",
{
"heatFrames": 120
},
{
"enemyDamage": {
"enemy": "Kihunter (red)",
"type": "contact",
"hits": 2
}
}
]
},
"SpaceJump",
{
"and": [
"h_canIBJ",
"h_heatProof",
{
"enemyDamage": {
"enemy": "Kihunter (red)",
"type": "contact",
"hits": 2
}
}
]
}
]
}
{
"heatFrames": 500
}
Clears obstacles: A |
|
From: 4
Junction Above Bomb Block
To: 1
Top Left Door
Shoot them from below. It is possible for the KiHunters to fall through the gaps in the side, but is unlikely. Jumping may lower the camera position making it harder to shoot the KiHunters. But once it is lowered, jump to make them active and vulnerable to damage. Requires: "h_heatProof"
"canBePatient"
{
"enemyKill": {
"enemies": [
[
"Kihunter (red)",
"Kihunter (red)",
"Kihunter (red)"
]
]
}
}
{
"or": [
"h_canCrouchJumpDownGrab",
"canWalljump",
"HiJump",
"canSpringBallJumpMidAir",
"SpaceJump",
"h_canIBJ",
{
"and": [
"h_canSpringBallBombJump",
"h_additionalBomb",
"h_additionalBomb"
]
}
]
}
Clears obstacles: A |
|
Fire up from below and try not to jump too high as that will put the camera in a bad position. Requires: "h_canNavigateHeatRooms"
{
"enemyKill": {
"enemies": [
[
"Kihunter (red)",
"Kihunter (red)",
"Kihunter (red)"
]
],
"explicitWeapons": [
"Super"
]
}
}
{
"or": [
"canCarefulJump",
{
"heatFrames": 210
}
]
}
{
"or": [
"h_canCrouchJumpDownGrab",
"canWalljump",
"HiJump",
{
"and": [
"canSpringBallJumpMidAir",
{
"heatFrames": 120
}
]
},
"SpaceJump",
{
"and": [
"h_canIBJ",
"h_heatProof"
]
},
{
"and": [
"h_canSpringBallBombJump",
"h_additionalBomb",
"h_additionalBomb",
{
"heatFrames": 250
}
]
}
]
}
{
"heatFrames": 1300
}
Clears obstacles: A |
|
From: 4
Junction Above Bomb Block
To: 1
Top Left Door
Requires: "h_canNavigateHeatRooms"
{
"or": [
"h_canCrouchJumpDownGrab",
"canWalljump",
"HiJump",
{
"and": [
"canSpringBallJumpMidAir",
{
"heatFrames": 300
},
{
"enemyDamage": {
"enemy": "Kihunter (red)",
"type": "contact",
"hits": 1
}
}
]
},
{
"and": [
"h_canJumpIntoIBJ",
{
"heatFrames": 300
}
]
},
"SpaceJump"
]
}
{
"heatFrames": 570
}
{
"enemyDamage": {
"enemy": "Kihunter (red)",
"type": "contact",
"hits": 3
}
}
Clears obstacles: A |
|
From: 4
Junction Above Bomb Block
To: 1
Top Left Door
Requires: "h_canNavigateHeatRooms"
"Wave"
"Plasma"
{
"or": [
"h_canCrouchJumpDownGrab",
"canWalljump",
"HiJump",
{
"and": [
"canSpringBallJumpMidAir",
{
"heatFrames": 120
}
]
},
"SpaceJump",
{
"and": [
"h_canIBJ",
"h_heatProof"
]
},
{
"and": [
"h_canSpringBallBombJump",
"h_additionalBomb",
"h_additionalBomb",
{
"heatFrames": 250
}
]
}
]
}
{
"heatFrames": 940
}
Clears obstacles: A |
|
Requires: "canSuitlessMaridia" "canSpringBallJumpMidAir" |
|
Requires: {
"or": [
"canWalljump",
"HiJump",
"h_canFly",
"SpeedBooster",
"h_canCrouchJumpDownGrab",
"canSpringBallJumpMidAir",
"h_canSpringBallBombJump",
"canUseFrozenEnemies"
]
}
|
|
From: 1
Bottom Left Door
To: 3
Top Right Door
The gate will not spawn in indirect g-mode and is freely passable. Entrance condition: {
"comeInWithGMode": {
"mode": "indirect",
"morphed": false
}
}
Requires: {
"or": [
"canWalljump",
"h_canFly",
{
"and": [
"HiJump",
"canSpringBallJumpMidAir"
]
}
]
}
"canOffScreenMovement"
|
|
Requires: {
"or": [
"canWalljump",
"h_canFly",
{
"and": [
"HiJump",
"canSpringBallJumpMidAir"
]
}
]
}
|
|
From: 2
Bottom Right Door
To: 3
Top Right Door
The gate will not spawn in indirect g-mode and is freely passable. Entrance condition: {
"comeInWithGMode": {
"mode": "indirect",
"morphed": false
}
}
Requires: {
"or": [
"canWalljump",
"h_canFly",
{
"and": [
"HiJump",
"canSpringBallJumpMidAir"
]
}
]
}
"canOffScreenMovement"
|
|
Requires: "Morph"
"Gravity"
{
"or": [
"h_canFly",
{
"and": [
"HiJump",
"canWalljump"
]
},
{
"and": [
"HiJump",
"canSpringBallJumpMidAir"
]
}
]
}
|
|
Freeze a crab on the edge of the hole in the ceiling. Then get on top of it with Gravity and a wall jump, jump assist, or second frozen crab on the ground, or a suitless Spring Ball jump with HiJump. Requires: "canMidAirMorph"
"canUseFrozenEnemies"
{
"or": [
{
"and": [
"Gravity",
{
"or": [
"HiJump",
"canWalljump",
"canSpringBallJumpMidAir",
"canTrickyUseFrozenEnemies"
]
}
]
},
{
"and": [
"HiJump",
"canSpringBallJumpMidAir",
"canSuitlessMaridia"
]
}
]
}
|
|
Use a Super to knock off a crab and freeze it mid-air. Freeze a second crab on the edge of the hole above. Requires: "canSuitlessMaridia"
"canTrickyJump"
{
"ammo": {
"type": "Super",
"count": 1
}
}
"canTrickyUseFrozenEnemies"
"canSpringBallJumpMidAir"
|
|
From: 2
Bottom Left Door
To: 5
G-Mode Morph Junction (Top Half)
Entrance condition: {
"comeInWithGMode": {
"mode": "any",
"morphed": false
}
}
Requires: "Morph"
"h_canNavigateUnderwater"
{
"or": [
"canGravityJump",
{
"and": [
"Gravity",
"HiJump",
{
"or": [
"canSpringBallJumpMidAir",
"canWalljump"
]
}
]
},
{
"and": [
"canTrickyUseFrozenEnemies",
"HiJump",
"h_canCrouchJumpDownGrab"
]
},
{
"and": [
{
"ammo": {
"type": "Super",
"count": 1
}
},
"canTrickyUseFrozenEnemies",
"canOffScreenMovement"
]
},
{
"and": [
"canTrickyJump",
"canSpringBallJumpMidAir",
"canTrickyUseFrozenEnemies",
"canOffScreenMovement"
]
}
]
}
|
|
From: 3
Bottom Right Door
To: 5
G-Mode Morph Junction (Top Half)
Entrance condition: {
"comeInWithGMode": {
"mode": "any",
"morphed": false
}
}
Requires: "Morph"
"h_canNavigateUnderwater"
{
"or": [
"canGravityJump",
{
"and": [
"Gravity",
"HiJump",
{
"or": [
"canSpringBallJumpMidAir",
"canWalljump"
]
}
]
},
{
"and": [
"canTrickyUseFrozenEnemies",
"HiJump",
"h_canCrouchJumpDownGrab"
]
},
{
"and": [
{
"ammo": {
"type": "Super",
"count": 1
}
},
"canTrickyUseFrozenEnemies",
"canOffScreenMovement"
]
},
{
"and": [
"canTrickyJump",
"canSpringBallJumpMidAir",
"canTrickyUseFrozenEnemies",
"canOffScreenMovement"
]
}
]
}
|
|
Requires: "Gravity"
{
"or": [
"canWalljump",
"h_canFly",
{
"and": [
"HiJump",
"SpeedBooster"
]
},
"canSpringBallJumpMidAir",
"canGravityJump"
]
}
|
|
From: 1
Bottom Left Door
To: 5
Platform Junction Near Top Left Door
Requires a runway of at least 10 tiles in the adjacent room. Entrance condition: {
"comeInJumping": {
"speedBooster": true,
"minTiles": 10
}
}
Requires: "SpeedBooster" "canCrossRoomJumpIntoWater" "canSpringBallJumpMidAir" "canTrickyJump" |
|
Requires: "Gravity"
{
"or": [
"HiJump",
"canWalljump",
"h_canFly",
"canCarefulJump",
"canSpringBallJumpMidAir",
"canGravityJump",
{
"enemyDamage": {
"enemy": "Pink Space Pirate (standing)",
"type": "contact",
"hits": 1
}
},
{
"enemyKill": {
"enemies": [
[
"Pink Space Pirate (standing)"
]
],
"explicitWeapons": [
"Plasma",
"ScrewAttack"
]
}
}
]
}
|
|
Requires: "canSuitlessMaridia"
"HiJump"
{
"or": [
"canCarefulJump",
"canSpringBallJumpMidAir",
{
"enemyDamage": {
"enemy": "Pink Space Pirate (standing)",
"type": "contact",
"hits": 1
}
},
{
"enemyKill": {
"enemies": [
[
"Pink Space Pirate (standing)"
]
],
"explicitWeapons": [
"Plasma"
]
}
}
]
}
|
|
From: 2
Bottom Right Door
To: 6
Middle Junction Near Top Left Pirate
Start the dash as close to the door transition as possible in order to have a larger window for storing the shinecharge. With low energy, shinespark diagonally to the middle ledge on the left. Entrance condition: {
"comeInRunning": {
"speedBooster": true,
"minTiles": 0.4375
}
}
Requires: "canWaterShineCharge"
{
"or": [
{
"shinespark": {
"frames": 43,
"excessFrames": 26
}
},
{
"and": [
"canMidairShinespark",
{
"shinespark": {
"frames": 38,
"excessFrames": 25
}
}
]
}
]
}
{
"or": [
{
"enemyDamage": {
"enemy": "Pink Space Pirate (standing)",
"type": "contact",
"hits": 1
}
},
{
"enemyKill": {
"enemies": [
[
"Pink Space Pirate (standing)"
]
],
"explicitWeapons": [
"Plasma"
]
}
}
]
}
{
"or": [
"h_canCrouchJumpDownGrab",
"canSpringBallJumpMidAir",
{
"and": [
"Ice",
"Plasma"
]
}
]
}
|
|
From: 5
Platform Junction Near Top Left Door
To: 4
Top Left Door
Requires: "canSuitlessMaridia"
"canUseFrozenEnemies"
{
"or": [
"HiJump",
"canSpringBallJumpMidAir"
]
}
|
|
From: 6
Middle Junction Near Top Left Pirate
To: 5
Platform Junction Near Top Left Door
Requires: "canSuitlessMaridia"
{
"or": [
"HiJump",
"canSpringBallJumpMidAir"
]
}
|
|
From: 6
Middle Junction Near Top Left Pirate
To: 7
Spawn At Junction Near Top Right Door
Requires: "Gravity"
{
"or": [
"HiJump",
"canWalljump",
"h_canFly",
"canGravityJump",
"canCarefulJump",
"canSpringBallJumpMidAir",
{
"enemyDamage": {
"enemy": "Pink Space Pirate (standing)",
"type": "contact",
"hits": 1
}
},
{
"enemyKill": {
"enemies": [
[
"Pink Space Pirate (standing)"
]
],
"explicitWeapons": [
"Plasma",
"ScrewAttack"
]
}
}
]
}
|
|
From: 6
Middle Junction Near Top Left Pirate
To: 7
Spawn At Junction Near Top Right Door
Requires: "canSuitlessMaridia"
"canCarefulJump"
{
"or": [
"HiJump",
"canSpringBallJumpMidAir"
]
}
|
|
Requires: "canSuitlessMaridia"
{
"or": [
"HiJump",
"canSpringBallJumpMidAir"
]
}
|
|
From: 5
Inside Maridia Tube (locked)
To: 6
Above Maridia Tube (locked)
Requires: {
"obstaclesCleared": [
"f_MaridiaTubeBroken"
]
}
"canSuitlessMaridia"
"canSpringBallJumpMidAir"
|
|
Requires: "canSuitlessMaridia" "canSpringBallJumpMidAir" |
|
From: 1
Bottom Door
To: 1
Bottom Door
Freeze the bottom Skulltera and a Sciser above the door, to set up a moonfall between them, and aim down. After gaining enough speed, press forward to fall down and clip past the door shell below. Falling with too much speed can cause Samus to go out of bounds. Gravity Suit is needed in order to gain enough fall speed before the enemies thaw. Requires: "Gravity"
{
"or": [
"canWalljump",
"canGravityJump",
"h_canFly",
"HiJump",
"canSpringBallJumpMidAir"
]
}
"canEnemyStuckMoonfall"
"canTrickyUseFrozenEnemies"
Bypasses door shell: true |
|
From: 2
Bottom Right Door
To: 3
Middle Right Door
Only requires a runway of one tile in the adjacent room. Bomb boost through the doorway, then use spring ball to get to the bottom left ledge. To avoid hitting the Skultera, place the bomb a few pixels from the doorway. One way to setup the positioning of the bomb is to place it, unmorph, rotate, and remorph Entrance condition: {
"comeInWithBombBoost": {}
}
Requires: "canSpringBallBombJump"
"canCrossRoomJumpIntoWater"
{
"or": [
"Gravity",
"HiJump",
"canSpringBallJumpMidAir",
"h_canCrouchJumpDownGrab"
]
}
|
|
Requires: "Gravity"
{
"or": [
"HiJump",
"canWalljump",
"h_canFly",
"canUseFrozenEnemies",
"canSpringBallJumpMidAir",
"canGravityJump"
]
}
|
|
From: 3
Middle Right Door
To: 9
Junction Below Speed Blocks
Requires: "canSuitlessMaridia" "HiJump" "canSpringBallJumpMidAir" |
|
From: 4
Top Right Door
To: 6
Speed Blocked Item
Bring a Shinecharge from the top door to the speed blocks below the Missile item location. Be especially mindfull of the aquatic life during the descent. Line up directly below the speed blocks when jumping up, especially if using a SpringBall jump. Entrance condition: {
"comeInRunning": {
"speedBooster": true,
"minTiles": 1.4375
}
}
Requires: "canChainTemporaryBlue"
"canXRayTurnaround"
"canStutterWaterShineCharge"
{
"or": [
"Gravity",
{
"and": [
"canSuitlessMaridia",
"HiJump"
]
},
{
"and": [
"canSuitlessMaridia",
"canSpringBallJumpMidAir"
]
}
]
}
|
|
Requires: "Gravity"
{
"or": [
"HiJump",
"canWalljump",
"h_canFly",
"canSpringBallJumpMidAir",
"canGravityJump"
]
}
|
|
Requires: "canSuitlessMaridia" "HiJump" "canSpringBallJumpMidAir" |
|
Requires: "Gravity"
{
"or": [
"HiJump",
"canWalljump",
"h_canFly",
"canSpringBallJumpMidAir",
"h_canCrouchJumpDownGrab",
"canGravityJump"
]
}
|
|
From: 9
Junction Below Speed Blocks
To: 4
Top Right Door
Using the slow global crab to ascend the top section of Main Street requires the speed blocks to not be broken. If they are broken, the local fast crab can be used instead by letting it fall and climb the left wall. The trickiest part is getting to the second ledge. Freeze the crab when it is overhead and spring ball jump up onto it. Follow the crab up while using it as a platform multiple times. Requires: "canSuitlessMaridia"
"canSpringBallJumpMidAir"
"canTrickyUseFrozenEnemies"
"canTrickyJump"
{
"or": [
{
"obstaclesNotCleared": [
"A"
]
},
"canCrazyCrabClimb"
]
}
|
|
Requires: "canSuitlessMaridia" "HiJump" "canSpringBallJumpMidAir" |
|
Requires: "h_canNavigateUnderwater"
{
"or": [
"Gravity",
{
"obstaclesNotCleared": [
"A"
]
},
{
"enemyDamage": {
"enemy": "Kame (Tatori)",
"type": "contact",
"hits": 1
}
}
]
}
{
"or": [
"Gravity",
"HiJump",
"canSpringBallJumpMidAir",
"h_canCrouchJumpDownGrab",
"canUseEnemies"
]
}
|
|
Requires: "canSuitlessMaridia"
"canCarefulJump"
{
"or": [
"HiJump",
"Morph"
]
}
{
"or": [
"HiJump",
"canSpringBallJumpMidAir",
"h_canCrouchJumpDownGrab",
"canUseEnemies"
]
}
|
|
Spring Ball jump from Mama Turtle's back. With a fail, if you haven't moved horizontally, simply fall straight down to land safely back on Mama Turtle. Requires: "HiJump" "canSpringBallJumpMidAir" Clears obstacles: B |
|
From: 1
Top Left Door
To: 1
Top Left Door
Follow the crab from the bottom right door to the top left door. This takes approximately 90 seconds. It is also possible to knock the crab off of the middle peak with a super and follow it to the left which may save time. Requires: "Gravity"
"canBePatient"
{
"or": [
"SpaceJump",
{
"and": [
{
"ammo": {
"type": "Super",
"count": 1
}
},
{
"or": [
"HiJump",
"canSpringBallJumpMidAir",
"canGravityJump",
"canConsecutiveWalljump",
"SpeedBooster"
]
}
]
}
]
}
Exit condition: {
"leaveWithGModeSetup": {}
}
|
|
From: 1
Top Left Door
To: 1
Top Left Door
Follow the crab from the bottom right door to the top left door with Gravity or Grapple. It is also possible to knock the crab off of the middle peak with a super and follow it to the left with Ice or HiJump and Spring Ball. Requires: "canBeVeryPatient"
{
"or": [
"canGravityJump",
{
"and": [
"canPreciseGrapple",
{
"or": [
"HiJump",
"Gravity"
]
}
]
},
{
"and": [
{
"ammo": {
"type": "Super",
"count": 1
}
},
{
"or": [
"canTrickyUseFrozenEnemies",
{
"and": [
"HiJump",
"canSpringBallJumpMidAir"
]
}
]
}
]
}
]
}
Exit condition: {
"leaveWithGModeSetup": {}
}
|
|
From: 1
Top Left Door
To: 1
Top Left Door
Follow the crab from the bottom right door to the top left door. This takes approximately 90 seconds. It is also possible to knock the crab off of the middle peak with a super and follow it to the left which may save time. Requires: "h_canFrozenEnemyRunway"
"Gravity"
"canBePatient"
{
"or": [
"SpaceJump",
{
"and": [
{
"ammo": {
"type": "Super",
"count": 1
}
},
{
"or": [
"HiJump",
"canSpringBallJumpMidAir",
"canGravityJump",
"canConsecutiveWalljump",
"SpeedBooster"
]
}
]
}
]
}
Exit condition: {
"leaveWithRunway": {
"length": 4,
"openEnd": 0
}
}
|
|
Requires: "Gravity"
{
"or": [
"HiJump",
"canWalljump",
"SpeedBooster",
"h_canFly",
"canSpringBallJumpMidAir",
"h_canSpringBallBombJump"
]
}
|
|
From: 2
Bottom Left Door
To: 7
Lower Hills Junction
Use the frozen crab as a platform. Requires: "canSuitlessMaridia"
"canUseFrozenEnemies"
{
"or": [
"HiJump",
"canSpringBallJumpMidAir"
]
}
|
|
Requires: "canSuitlessMaridia" "HiJump" "canSpringBallJumpMidAir" |
|
From: 2
Bottom Left Door
To: 8
Higher Hill Junction
Standing on the platform in the room below, crouch jump and perform a spring ball jump mid-air just before reaching the transition. Entrance condition: {
"comeInWithPlatformBelow": {
"minHeight": 10,
"maxHeight": 10,
"maxLeftPosition": 2,
"minRightPosition": -2
},
"comesThroughToilet": "any"
}
Requires: "canCrossRoomJumpIntoWater" "canCrouchJump" "canSpringBallJumpMidAir" |
|
From: 2
Bottom Left Door
To: 8
Higher Hill Junction
Standing on the platform in the room below, perform a spring ball jump mid-air just before reaching the transition. Entrance condition: {
"comeInWithPlatformBelow": {
"maxHeight": 9,
"maxLeftPosition": 2,
"minRightPosition": -2
},
"comesThroughToilet": "any"
}
Requires: "canCrossRoomJumpIntoWater" "canSpringBallJumpMidAir" |
|
Requires: "Gravity"
{
"or": [
"HiJump",
"canWalljump",
"h_canFly",
"canSpringBallJumpMidAir"
]
}
|
|
From: 3
Bottom Right Door
To: 7
Lower Hills Junction
Standing on the platform in the room below, perform a spring ball jump mid-air just before reaching the transition. Entrance condition: {
"comeInWithPlatformBelow": {
"maxHeight": 10,
"maxLeftPosition": 2,
"minRightPosition": -2
},
"comesThroughToilet": "any"
}
Requires: "canCrossRoomJumpIntoWater" "canSpringBallJumpMidAir" |
|
Requires: "canSuitlessMaridia" "HiJump" "canSpringBallJumpMidAir" |
|
Requires: {
"or": [
{
"and": [
"Gravity",
"SpaceJump"
]
},
{
"and": [
"HiJump",
"canPreciseGrapple",
{
"or": [
"Gravity",
"canSpringBallJumpMidAir"
]
}
]
},
{
"and": [
"HiJump",
"canGravityJump",
"canBeVeryPatient"
]
}
]
}
"canUpwardGModeSetup"
"canTrickyUseFrozenEnemies"
{
"or": [
"Morph",
"canTwoTileSqueeze"
]
}
Exit condition: {
"leaveWithGModeSetup": {}
}
|
|
From: 8
Higher Hill Junction
To: 11
Upper Left Ledge Junction
Requires: "canSuitlessMaridia" "HiJump" "canSpringBallJumpMidAir" |
|
Requires: "Gravity"
{
"or": [
"HiJump",
"canSpringBallJumpMidAir",
"h_canFly"
]
}
|
|
Requires: "canSuitlessMaridia" "HiJump" "canSpringBallJumpMidAir" |
|
From: 10
Upper Right Ledge Junction
To: 4
Top Right Door
Requires having already lured a crab, likely from above the bottom right door. Freeze the crab midway up the right wall and jump and spring ball jump up to the door. Requires: "canSuitlessMaridia"
"HiJump"
"canSpringBallJumpMidAir"
"canTrickyUseFrozenEnemies"
{
"obstaclesCleared": [
"B"
]
}
"canTrickyJump"
|
|
This strat uses the grapple blocks at the top left, not the Powamp. Failure also doesn't usually allow a second try (assuming the Powamp is not there). Requires: "canSuitlessMaridia"
"Grapple"
{
"or": [
"HiJump",
"canSpringBallJumpMidAir"
]
}
|
|
Requires: "canSuitlessMaridia"
{
"or": [
"HiJump",
"canSpringBallJumpMidAir"
]
}
|
|
Requires: "canSuitlessMaridia"
"canUseFrozenEnemies"
{
"or": [
"canWalljump",
"canSpringBallJumpMidAir",
{
"and": [
"HiJump",
"canDownGrab"
]
},
"canBombJumpWaterEscape"
]
}
|
|
Requires: "canSuitlessMaridia"
"HiJump"
{
"or": [
{
"and": [
"canWalljump",
"canCarefulJump"
]
},
"canSpringBallJumpMidAir"
]
}
|
|
Requires: "Morph"
{
"or": [
"HiJump",
"canWalljump",
"SpaceJump",
{
"and": [
"h_canIBJ",
"h_canBombHorizontally"
]
},
"canSpringBallJumpMidAir"
]
}
|
|
From: 1
Middle Left Door
To: 9
Junction Below Top Door
Bomb the Power Bomb blocks below to overload PLMs, then go up through the crumble blocks to escape. Entrance condition: {
"comeInWithGMode": {
"mode": "any",
"morphed": true
}
}
Requires: "h_canArtificialMorphBombs"
"h_canNavigateUnderwater"
{
"or": [
{
"and": [
"Gravity",
"h_canArtificialMorphIBJ"
]
},
{
"and": [
"HiJump",
"canSpringBallJumpMidAir"
]
},
{
"and": [
"HiJump",
"canConsecutiveWalljump",
"canPreciseWalljump"
]
}
]
}
|
|
From: 1
Middle Left Door
To: 11
G-Mode Overloaded PLMs Junction (By Bottom Left Door)
Bomb the PB blocks below to overload PLMs, then go up through the crumble blocks to escape. Entrance condition: {
"comeInWithGMode": {
"mode": "any",
"morphed": true
}
}
Requires: "h_canArtificialMorphBombs"
"h_canNavigateUnderwater"
{
"or": [
{
"and": [
"Gravity",
"h_canArtificialMorphIBJ"
]
},
{
"and": [
"HiJump",
"canSpringBallJumpMidAir"
]
},
{
"and": [
"HiJump",
"canConsecutiveWalljump",
"canPreciseWalljump"
]
}
]
}
|
|
Requires: "Gravity"
{
"or": [
"canWalljump",
"h_canFly",
"SpeedBooster",
"canSpringBallJumpMidAir",
"canUseEnemies"
]
}
{
"or": [
{
"obstaclesCleared": [
"A"
]
},
"h_canUsePowerBombs"
]
}
Clears obstacles: A |
|
Requires: "canSuitlessMaridia"
"HiJump"
"canSpringBallJumpMidAir"
{
"or": [
{
"obstaclesCleared": [
"A"
]
},
"h_canUsePowerBombs"
]
}
Clears obstacles: A |
|
Requires: "Gravity"
{
"or": [
"canWalljump",
"h_canFly",
"SpeedBooster",
"Grapple",
{
"and": [
"HiJump",
"canSpringBallJumpMidAir"
]
},
{
"and": [
"HiJump",
"canUseEnemies"
]
}
]
}
|
|
Requires: {
"or": [
"Gravity",
"HiJump",
"canSpringBallJumpMidAir"
]
}
|
|
From: 4
Right Door
To: 6
Junction Right of Morph Passage
Requires: "canSuitlessMaridia"
{
"or": [
"canSpringBallJumpMidAir",
"HiJump"
]
}
|
|
From: 1
Bottom Left Door
To: 2
Right Door
Find the crumble blocks and crystal flash mid-air, just below them. They are on the far right of the ceiling of the bottom right pathway. Hold down as the CF ends to break the non-respawning crumble blocks. This is for the much harder version, without Gravity and Bombs. Requires: "h_canJumpIntoCrystalFlashClip"
"canSuitlessMaridia"
{
"or": [
"HiJump",
"canSpringBallJumpMidAir",
{
"and": [
"h_canCrouchJumpDownGrab",
"canCarefulJump"
]
},
"canUseFrozenEnemies"
]
}
|
|
From: 2
Right Door
To: 1
Bottom Left Door
Notable: true Crouch under the crumble blocks while aiming upward, using both angle buttons then freeze the Mochtroid while it is on Samus. Jump onto the Mochtroid by quickly pressing down after jumping, when on it, press up to stand then jump through the ceiling. With no jump assists, use a frozen Mochtroid as a platform to get to the ledge above the door. Requires: "h_canNavigateUnderwater"
"canCeilingClip"
"canUseFrozenEnemies"
{
"or": [
{
"and": [
"h_canCrouchJumpDownGrab",
"canTrickyJump"
]
},
"HiJump",
"Gravity",
"canSpringBallJumpMidAir"
]
}
|
|
From: 2
Right Door
To: 1
Bottom Left Door
Find the crumble blocks and crystal flash mid-air, just below them. They are on the far left of the ceiling of the middle left pathway. Hold down as the CF ends to break the non-respawning crumble blocks. This is for the much harder version, without Gravity and Bombs. Requires: "h_canJumpIntoCrystalFlashClip"
"canSuitlessMaridia"
{
"or": [
{
"and": [
"h_canCrouchJumpDownGrab",
"canTrickyJump"
]
},
"HiJump",
"Gravity",
"canSpringBallJumpMidAir"
]
}
|
|
Requires: "h_canNavigateUnderwater"
{
"or": [
{
"and": [
"h_canCrouchJumpDownGrab",
"canTrickyJump"
]
},
"HiJump",
"Gravity",
"canSpringBallJumpMidAir"
]
}
Exit condition: {
"leaveWithGModeSetup": {
"knockback": false
}
}
|
|
Requires: "Gravity"
{
"or": [
"canWalljump",
"h_canFly",
{
"and": [
"HiJump",
"canSpringBallJumpMidAir"
]
},
{
"and": [
"HiJump",
"canGravityJump"
]
}
]
}
|
|
Entrance condition: {
"comeInShinecharged": {
"framesRequired": 60
}
}
Requires: "h_canNavigateUnderwater"
{
"shinespark": {
"frames": 40,
"excessFrames": 6
}
}
{
"or": [
"canCrouchJump",
"Gravity",
"HiJump",
"canSpringBallJumpMidAir",
{
"and": [
"canTrickyUseFrozenEnemies",
{
"ammo": {
"type": "Super",
"count": 1
}
}
]
}
]
}
|
|
Notable: true Freeze a crab multiple times to climb the upper Crab Shaft. It may be easier to climb the left shaft by knocking the crab off the wall, or by bringing up a crab from the lower area. Requires: "h_canNavigateUnderwater"
"canTrickyUseFrozenEnemies"
"canCarefulJump"
{
"or": [
"canCrouchJump",
"Gravity",
"HiJump",
"canSpringBallJumpMidAir",
{
"ammo": {
"type": "Super",
"count": 1
}
}
]
}
|
|
Requires around 19 tiles in the adjacent room. Entrance condition: {
"comeInJumping": {
"speedBooster": true,
"minTiles": 19
}
}
Requires: "canCrossRoomJumpIntoWater"
"canMomentumConservingTurnaround"
{
"or": [
"canCrouchJump",
"Gravity",
"HiJump",
"canSpringBallJumpMidAir",
{
"and": [
"canTrickyUseFrozenEnemies",
{
"ammo": {
"type": "Super",
"count": 1
}
}
]
}
]
}
|
|
Requires running a very precise distance equivalent to a runway of 7 tiles with no open end in the adjacent room, to hit a peak in the speed / height relationship. The spring ball jump is used after landing near the top, to get to the platform below the door. Entrance condition: {
"comeInJumping": {
"speedBooster": true,
"minTiles": 6.4375
}
}
Requires: "canTrickyDashJump" "canSpringBallJumpMidAir" "canCrossRoomJumpIntoWater" "canMomentumConservingTurnaround" |
|
Requires running a very precise distance of 12 tiles in the adjacent room. Entrance condition: {
"comeInJumping": {
"speedBooster": true,
"minTiles": 12
}
}
Requires: "canCrossRoomJumpIntoWater"
"canMomentumConservingTurnaround"
"canTrickyDashJump"
"canDownGrab"
{
"or": [
"canCrouchJump",
"Gravity",
"HiJump",
"canSpringBallJumpMidAir",
{
"and": [
"canTrickyUseFrozenEnemies",
{
"ammo": {
"type": "Super",
"count": 1
}
}
]
}
]
}
|
|
Requires: "canSuitlessMaridia" "canSpringBallJumpMidAir" "HiJump" |
|
Entrance condition: {
"comeInWithGrappleTeleport": {
"blockPositions": [
[
12,
12
],
[
12,
13
]
]
}
}
Requires: {
"or": [
"canUseFrozenEnemies",
"HiJump",
"canSpringBallJumpMidAir"
]
}
|
|
After storing the shinecharge, spin jump back to the left and spark aligned against the right side of the left shaft. At the top of the room, hold right in order to land on the platform below the door. Entrance condition: {
"comeInRunning": {
"speedBooster": true,
"minTiles": 2
}
}
Requires: "canStutterWaterShineCharge"
"canShinechargeMovementComplex"
{
"canShineCharge": {
"usedTiles": 33,
"openEnd": 2
}
}
{
"shinespark": {
"frames": 40,
"excessFrames": 6
}
}
{
"or": [
"canCrouchJump",
"Gravity",
"HiJump",
"canSpringBallJumpMidAir",
{
"and": [
"canTrickyUseFrozenEnemies",
{
"ammo": {
"type": "Super",
"count": 1
}
}
]
}
]
}
|
|
Requires: "canSuitlessMaridia"
"HiJump"
{
"or": [
"h_canCrouchJumpDownGrab",
"canSpringBallJumpMidAir",
"canUseFrozenEnemies"
]
}
|
|
Requires: "canSuitlessMaridia"
"canSpringBallJumpMidAir"
{
"or": [
"h_canMaxHeightSpringBallJump",
"HiJump",
"canUseFrozenEnemies"
]
}
|
|
Entrance condition: {
"comeInWithGrappleTeleport": {
"blockPositions": [
[
3,
12
],
[
3,
13
]
]
}
}
Requires: {
"or": [
"canUseFrozenEnemies",
"HiJump",
"canSpringBallJumpMidAir"
]
}
|
|
If the top door is blue, it will open immediately after the teleport, not allowing Samus to swing directly onto the platform. Entrance condition: {
"comeInWithGrappleTeleport": {
"blockPositions": [
[
7,
2
]
]
}
}
Requires: {
"or": [
"canUseFrozenEnemies",
"HiJump",
"canSpringBallJumpMidAir"
]
}
|
|
Requires: "Gravity" "HiJump" "canSpringBallJumpMidAir" |
|
From: 2
Right Door
To: 4
Top Right Ledge Junction
There is just enough distance for a MidAir SpringBall jump to reach without HiJump. Requires: "Gravity"
"canSpringBallJumpMidAir"
{
"or": [
"HiJump",
{
"and": [
"h_canMaxHeightSpringBallJump",
"canSpringFling"
]
}
]
}
|
|
From: 3
Junction Left of Morph Tunnel
To: 1
Left Door
Requires: "Gravity"
{
"or": [
"canSpringwall",
{
"and": [
"HiJump",
"canSpringBallJumpMidAir"
]
}
]
}
|
|
From: 3
Junction Left of Morph Tunnel
To: 1
Left Door
Start the jump from the raised alcove. Requires: "canSuitlessMaridia" "HiJump" "canSpringBallJumpMidAir" |
|
Requires: "Gravity"
{
"or": [
"SpaceJump",
"canWalljump",
"canSpringBallJumpMidAir",
"h_canDiagonalBombJump",
"h_IBJFromSpikes"
]
}
|
|
From: 5
Bottom Middle Junction
To: 6
East Cactus Alley Junction (Right of Morph Tunnel)
This can be done by turning off Gravity and HiJump to jump over both spike pits. Requires: "canSuitlessMaridia"
"canDisableEquipment"
"canCarefulJump"
{
"or": [
"Gravity",
"HiJump",
"canSpringBallJumpMidAir"
]
}
|
|
From: 5
Bottom Middle Junction
To: 6
East Cactus Alley Junction (Right of Morph Tunnel)
Requires: "canSuitlessMaridia"
"HiJump"
{
"spikeHits": 1
}
{
"or": [
"canWalljump",
"canSpaceJumpWaterEscape",
"canSpringBallJumpMidAir",
{
"and": [
"h_canJumpIntoIBJ",
"h_canUseSpringBall"
]
},
{
"and": [
"h_canIBJ",
"canBombJumpWaterEscape"
]
},
{
"spikeHits": 1
}
]
}
|
|
From: 5
Bottom Middle Junction
To: 6
East Cactus Alley Junction (Right of Morph Tunnel)
This can be done by turning off Gravity and HiJump to jump over both spike pits. Requires: "canSuitlessMaridia"
"canSpringBallJumpMidAir"
{
"spikeHits": 1
}
{
"or": [
"canTrickySpringBallJump",
{
"and": [
"canWalljump",
"canSpaceJumpWaterBounce"
]
},
{
"and": [
"h_canJumpIntoIBJ",
"h_canUseSpringBall"
]
},
{
"and": [
"h_canIBJ",
"canBombJumpWaterEscape"
]
},
{
"spikeHits": 1
}
]
}
|
|
From: 6
East Cactus Alley Junction (Right of Morph Tunnel)
To: 5
Bottom Middle Junction
Requires: "canSuitlessMaridia"
{
"or": [
{
"spikeHits": 1
},
"canSpringBallJumpMidAir",
{
"and": [
"HiJump",
{
"or": [
"canWalljump",
"h_canCrouchJumpDownGrab",
"canSpaceJumpWaterEscape"
]
}
]
},
{
"and": [
"h_canIBJ",
"canBombJumpWaterEscape"
]
}
]
}
{
"or": [
{
"spikeHits": 1
},
"HiJump"
]
}
|
|
Requires: "canSuitlessMaridia"
"HiJump"
{
"or": [
"canPlayInSand",
{
"and": [
"canPrepareForNextRoom",
"h_canUseSpringBall"
]
}
]
}
{
"or": [
{
"and": [
{
"or": [
"canWalljump",
"canSpaceJumpWaterEscape"
]
},
{
"or": [
"h_canCrouchJumpDownGrab",
"canSunkenTileWideWallClimb"
]
}
]
},
"canSpringBallJumpMidAir",
{
"and": [
"h_canCrouchJumpDownGrab",
"canBombJumpWaterEscape",
"h_canIBJ"
]
}
]
}
|
|
Requires: "Gravity"
"Morph"
"canPlayInSand"
{
"or": [
"canWalljump",
"canGravityJump",
"HiJump",
"canSpringBallJumpMidAir",
"canSandIBJ",
{
"and": [
"h_canUseSpringBall",
"h_canJumpIntoIBJ"
]
}
]
}
|
|
Requires: "Morph" "canSuitlessMaridia" "canPlayInSand" "HiJump" "canSpringBallJumpMidAir" |
|
From: 1
Top Sand Entrance
To: 4
Right Item
Shinespark vertically from the sand to get onto the first ledge. Carefully get to the second ledge and return to lure the Boulder, or shoot it with a Super. Entrance condition: {
"comeInShinecharged": {
"framesRequired": 140
},
"comesThroughToilet": "any"
}
Requires: "canSuitlessMaridia"
"Morph"
"canPlayInSand"
"canShinechargeMovementComplex"
{
"shinespark": {
"frames": 12
}
}
{
"or": [
"HiJump",
"canSpringBallJumpMidAir",
"canSunkenTileWideWallClimb"
]
}
{
"or": [
"canTrickyJump",
{
"ammo": {
"type": "Super",
"count": 1
}
},
{
"enemyDamage": {
"enemy": "Boulder",
"type": "contact",
"hits": 1
}
}
]
}
|
|
Requires: "Gravity"
{
"or": [
"SpaceJump",
{
"and": [
"HiJump",
{
"or": [
"canSpringBallJumpMidAir",
"canWalljump"
]
}
]
},
"canConsecutiveWalljump"
]
}
|
|
Requires: "Gravity"
{
"or": [
"h_canFly",
"canWalljump",
"canGravityJump",
{
"and": [
"HiJump",
{
"or": [
"canSpringBallJumpMidAir",
"SpeedBooster"
]
}
]
}
]
}
|
|
Run away from the oums and reclimb after each if jumping over them is difficult. Requires: "Morph"
"canSuitlessMaridia"
{
"or": [
"canSpringBallJumpMidAir",
"HiJump",
"canSunkenTileWideWallClimb"
]
}
|
|
From: 3
Bottom Right Door
To: 2
Bottom Left Door
Requires: "Morph"
"canSuitlessMaridia"
{
"or": [
"canSpringBallJumpMidAir",
"HiJump"
]
}
|
|
Requires: "Gravity"
{
"or": [
"canGravityJump",
"h_canFly",
"canSpringBallJumpMidAir",
"HiJump"
]
}
|
|
Requires: "canSuitlessMaridia" "HiJump" "canSpringBallJumpMidAir" |
|
Requires: "Gravity"
{
"or": [
"h_canCrouchJumpDownGrab",
"canUseFrozenEnemies",
"canGravityJump",
"canWalljump",
"HiJump",
"canSpringBallJumpMidAir",
"h_canFly",
"h_canSpringBallBombJump"
]
}
|
|
From: 1
Bottom Left Door
To: 2
Top Right Door
Requires: "canSuitlessMaridia"
"HiJump"
{
"or": [
"canSpringBallJumpMidAir",
"canSpaceJumpWaterBounce",
"canUseFrozenEnemies"
]
}
|
|
Gravity with a good jump from the sand can reach the Solid Rock Maze region. Requires: "Gravity"
"canPlayInSand"
{
"or": [
"HiJump",
"canSpringBallJumpMidAir",
"canWalljump",
"h_canIBJ",
"canGravityJump"
]
}
|
|
Requires: {
"or": [
"canWalljump",
"h_canFly",
{
"and": [
"HiJump",
{
"or": [
"canSpringBallJumpMidAir",
"canUseFrozenEnemies"
]
}
]
},
"canTrickySpringBallJump"
]
}
|
|
Requires: {
"or": [
"HiJump",
"h_canFly",
"canWalljump",
"h_canCrouchJumpDownGrab",
"canSpringBallJumpMidAir"
]
}
|
|
From: 3
Junction Left of Morph Tunnel
To: 1
Left Door
Requires: {
"or": [
"h_canIBJ",
"canWalljump",
"canSpringBallJumpMidAir"
]
}
{
"or": [
{
"enemyKill": {
"enemies": [
[
"Menu",
"Menu",
"Menu"
]
],
"explicitWeapons": [
"PowerBomb",
"ScrewAttack",
"Wave",
"Spazer",
"Plasma",
"Missile",
"Super"
]
}
},
{
"and": [
{
"enemyKill": {
"enemies": [
[
"Menu",
"Menu",
"Menu"
]
]
}
},
{
"or": [
{
"and": [
"canDodgeWhileShooting",
"canTrickyJump"
]
},
{
"and": [
"canDodgeWhileShooting",
{
"enemyDamage": {
"enemy": "Menu",
"type": "contact",
"hits": 1
}
}
]
},
{
"enemyDamage": {
"enemy": "Menu",
"type": "contact",
"hits": 2
}
}
]
}
]
}
]
}
|
|
Requires: "HiJump" "canSpringBallJumpMidAir" |
|
From: 3
Central Junction with all Standing Pirates Killed
To: 1
Top Left Door (locked)
Requires: "HiJump" "canSpringBallJumpMidAir" |
|
Requires: {
"or": [
"HiJump",
"canWalljump",
"SpaceJump",
"canSpringBallJumpMidAir",
{
"and": [
"h_canIBJ",
{
"or": [
"canBombHorizontally",
"Gravity"
]
}
]
},
{
"and": [
"h_canSpringBallBombJump",
"h_additionalBomb",
"h_additionalBomb"
]
}
]
}
|
|
Requires: "Gravity"
{
"or": [
"canWalljump",
"HiJump",
"canSpringBallJumpMidAir",
"h_canFly"
]
}
|
|
From: 2
Bottom Right Door
To: 1
Left Vertical Door
Start the dash as close to the door transition as possible to help avoid getting hit by the first Owtch. Store the shine charge while high up on the left slope. Spark up while on the right side of the platform. To avoid the Owtch on the platform, it may help to jump on the left side of the platform then jump again and spark midair above the right side. Entrance condition: {
"comeInRunning": {
"speedBooster": true,
"minTiles": 0.4375
}
}
Requires: "canWaterShineCharge"
"canShinechargeMovementComplex"
{
"or": [
{
"shinespark": {
"frames": 90,
"excessFrames": 50
}
},
{
"and": [
{
"shinespark": {
"frames": 90,
"excessFrames": 57
}
},
{
"or": [
"canWalljump",
"HiJump",
"canSpringBallJumpMidAir",
"h_canFly"
]
}
]
}
]
}
|
|
Requires: "canSuitlessMaridia"
"HiJump"
"canSpringBallJumpMidAir"
{
"or": [
"h_canCrouchJumpDownGrab",
"canTrickySpringBallJump",
"canWalljump"
]
}
|
|
Requires: "canSuitlessMaridia"
{
"or": [
"HiJump",
"canSpringBallJumpMidAir"
]
}
|
|
From: 3
Middle Right Door
To: 4
Top Right Door
Requires: "canTrickyUseFrozenEnemies" "HiJump" "SpeedBooster" "canTrickyJump" "canSpringBallJumpMidAir" |
|
From: 3
Middle Right Door
To: 4
Top Right Door
Requires: "canTrickyUseFrozenEnemies" "HiJump" "canSpringBallJumpMidAir" "canUnmorphBombBoost" |
|
Requires: "Gravity"
{
"or": [
"HiJump",
"canWalljump",
"h_canFly",
"SpeedBooster",
"h_canCrouchJumpDownGrab",
"canSpringBallJumpMidAir",
"canGravityJump"
]
}
|
|
From: 2
Bottom Door
To: 4
Water Level Junction
The fish can safely be damaged from the door until they are ready to be used as platforms. Requires: "h_canNavigateUnderwater"
"canUseFrozenEnemies"
{
"or": [
"canTrickyUseFrozenEnemies",
"HiJump",
"canSpringBallJumpMidAir",
"Gravity",
"h_canCrouchJumpDownGrab"
]
}
|
|
From: 2
Bottom Door
To: 4
Water Level Junction
Requires: "canSuitlessMaridia" "HiJump" "canSpringBallJumpMidAir" |
|
Requires: {
"or": [
"Gravity",
"HiJump",
"canSpringBallJumpMidAir"
]
}
|
|
Requires: "Gravity"
{
  "or": [
    "canWalljump",
    "HiJump",
    "h_canFly",
    "canSpringBallJumpMidAir"
  ]
}
|
|
From: 1
Left Door
To: 3
Junction Below Right Door
Quickly shoot to break the shot block and then do a momentumConservingTurnaround to ascend into the little region. Another movement item will be needed to get closer to the crumble blocks. Entrance condition: {
"comeInJumping": {
"speedBooster": false,
"minTiles": 2
}
}
Requires: "canTrickyJump"
"canCrossRoomJumpIntoWater"
"canMomentumConservingTurnaround"
{
"or": [
"canUseFrozenEnemies",
"canSpringBallJumpMidAir",
"HiJump"
]
}
|
|
Requires: "canSuitlessMaridia"
"HiJump"
{
"or": [
"canSpringBallJumpMidAir",
"h_canCrouchJumpDownGrab",
"canUseFrozenEnemies"
]
}
|
|
The sand does not impede Samus in G-Mode. It is possible to jump to the tall pillar with nothing, requiring a subpixel precise jump. Running before jumping doesn't help. Stand one pixel from the right edge and spinjump to the right. Entrance condition: {
"comeInWithGMode": {
"mode": "any",
"morphed": false
}
}
Requires: "h_canNavigateUnderwater"
{
"or": [
"Gravity",
"HiJump",
"canSpringBallJumpMidAir",
"canInsaneJump"
]
}
|
|
The sand does not impede Samus in G-Mode. Entrance condition: {
"comeInWithGMode": {
"mode": "any",
"morphed": false
}
}
Requires: "h_canNavigateUnderwater"
{
"or": [
"Gravity",
"HiJump",
"canSpringBallJumpMidAir"
]
}
|
|
The sand does not impede Samus in G-Mode. Entrance condition: {
"comeInWithGMode": {
"mode": "any",
"morphed": false
},
"comesThroughToilet": "any"
}
Requires: "h_canNavigateUnderwater"
{
"or": [
"Gravity",
"HiJump",
"canSpringBallJumpMidAir"
]
}
|
|
The sand does not impede Samus in G-Mode. It is possible to jump to the tall pillar with nothing, requiring a subpixel precise jump. Running before jumping doesn't help. Stand one pixel from the right edge and spinjump to the right. Entrance condition: {
"comeInWithGMode": {
"mode": "any",
"morphed": false
},
"comesThroughToilet": "any"
}
Requires: "h_canNavigateUnderwater"
{
"or": [
"Gravity",
"HiJump",
"canSpringBallJumpMidAir",
"canTrickyJump"
]
}
|
|
Requires: {
"or": [
"HiJump",
"canSpringBallJumpMidAir"
]
}
|
|
Requires: "canSuitlessMaridia"
{
"or": [
{
"and": [
"HiJump",
{
"or": [
"canDownGrab",
"canSpringBallJumpMidAir",
"canConsecutiveWalljump"
]
}
]
},
"h_canMaxHeightSpringBallJump"
]
}
|
|
From: 4
West Leg Sand
To: 5
Junction Above Grapple Block
Requires a mid-air SpringBall jump off the sand. Break spin before touching the sand, and then spinjump to get a good jump off of the sand. A stationary spinjump or a turnaround spin jump can help but morphing will remove all horizontal momentum. Requires: "Grapple" "canSuitlessMaridia" "HiJump" "canSpringBallJumpMidAir" "canPlayInSand" "canTrickyJump" |
|
It may be necessary to turn off Gravity Suit in order have more time to jump and morph underwater. Requires: "Morph"
"Gravity"
{
"or": [
"canWalljump",
"HiJump",
"h_canIBJ",
"canGravityJump",
"h_canSpringBallBombJump",
"canSpringBallJumpMidAir",
"SpaceJump",
{
"and": [
"canUnmorphBombBoost",
"canTrickyJump"
]
}
]
}
|
|
From: 2
Item
To: 1
Left Door
Notable: true Perform a canSunkenTileWideWallClimb to get to the water surface, then use space jump at the water surface. Then either use space jump when the water is low then a spring ball jump to escape, or space jump when the water is high into a tight midair morph. Requires: "Morph" "canSuitlessMaridia" "canSpringBallJumpMidAir" "canSunkenTileWideWallClimb" "canTrickyJump" "can4HighMidAirMorph" "canSpaceJumpWaterBounce" |
|
Requires: "Morph" "canSuitlessMaridia" "HiJump" "canSpringBallJumpMidAir" |
|
Entrance condition: {
"comeInWithGMode": {
"mode": "any",
"morphed": false
}
}
Requires: "h_canNavigateUnderwater"
{
"or": [
"canCarefulJump",
"h_canCrouchJumpDownGrab",
"HiJump",
"Gravity",
"canSpringBallJumpMidAir"
]
}
{
"or": [
"canCarefulJump",
{
"enemyDamage": {
"enemy": "Evir",
"type": "particle",
"hits": 1
}
}
]
}
|
|
Entrance condition: {
"comeInWithGMode": {
"mode": "any",
"morphed": false
},
"comesThroughToilet": "any"
}
Requires: "h_canNavigateUnderwater"
{
"or": [
"canCarefulJump",
"h_canCrouchJumpDownGrab",
"HiJump",
"Gravity",
"canSpringBallJumpMidAir"
]
}
{
"or": [
"canCarefulJump",
{
"enemyDamage": {
"enemy": "Evir",
"type": "particle",
"hits": 1
}
}
]
}
|
|
From: 5
Left Pillar Junction
To: 4
Below Sand Entrance
Requires: "canSuitlessMaridia"
"HiJump"
"canPlayInSand"
{
"or": [
"canCarefulJump",
"canSpringBallJumpMidAir"
]
}
{
"or": [
"canTrickyJump",
{
"enemyDamage": {
"enemy": "Evir",
"type": "particle",
"hits": 1
}
}
]
}
|
|
The pirates are free to kill, although they take some time. Requires: {
"or": [
"HiJump",
"SpaceJump",
"canWalljump",
"h_canIBJ",
"canSpringBallJumpMidAir"
]
}
|
|
Requires: {
"or": [
"HiJump",
"SpaceJump",
"canWalljump",
"h_canCrouchJumpDownGrab",
"h_canJumpIntoIBJ",
"canSpringBallJumpMidAir"
]
}
{
"or": [
"canCarefulJump",
"ScrewAttack",
{
"enemyDamage": {
"enemy": "Tourian Space Pirate (all)",
"type": "contact",
"hits": 1
}
}
]
}
Clears obstacles: A |
