canShinechargeMovement (Medium)
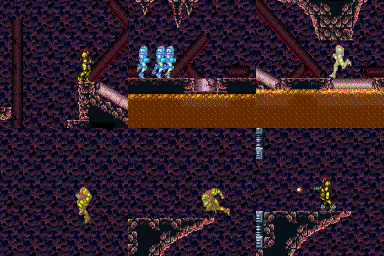
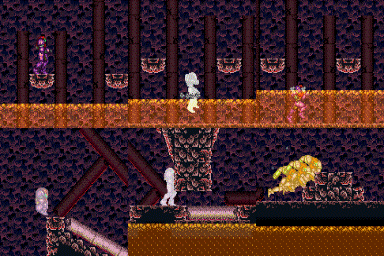
The ability to perform simple jumps with a shinespark charge timer running to get into position to shinespark. This reposition may be necessary to avoid obstacles, conserve energy, etc.
Dependencies: canShinespark
Strats ()
|
Requires: "h_canXMode"
"h_XModeSpikeHit"
"h_XModeSpikeHit"
"canShinechargeMovement"
"canIframeSpikeJump"
{
"canShineCharge": {
"usedTiles": 33,
"openEnd": 2
}
}
Exit condition: {
"leaveShinecharged": {
"framesRemaining": 70
}
}
|
|
From: 1
Top Left Door
To: 4
Top Junction (Right of Spikes)
Entrance condition: {
"comeInShinecharging": {
"length": 3,
"openEnd": 1
}
}
Requires: "canHorizontalShinespark"
{
"or": [
{
"shinespark": {
"frames": 56,
"excessFrames": 6
}
},
{
"and": [
"canShinechargeMovement",
"canMidairShinespark",
{
"shinespark": {
"frames": 41,
"excessFrames": 4
}
}
]
}
]
}
|
|
This is doable without a short charge, but it's essentially harder than the bluesuit jump. With a quick charge, it can serve as a less scary strat. Requires: "canShinechargeMovement"
{
"canShineCharge": {
"usedTiles": 25,
"openEnd": 2
}
}
{
"shinespark": {
"frames": 130,
"excessFrames": 6
}
}
{
"obstaclesCleared": [
"A"
]
}
Clears obstacles: A |
|
Use an extra speedy jump or walljump to conserve health on the shinespark. Requires: "canUseFrozenEnemies"
"canShinechargeMovement"
"HiJump"
{
"canShineCharge": {
"usedTiles": 33,
"openEnd": 2
}
}
{
"shinespark": {
"frames": 108,
"excessFrames": 6
}
}
|
|
Store a Shinespark and then jump through the Boyons using Screw Attack. Requires: "canCarefulJump"
"canShinechargeMovement"
"ScrewAttack"
{
"canShineCharge": {
"usedTiles": 33,
"openEnd": 2
}
}
{
"shinespark": {
"frames": 130,
"excessFrames": 6
}
}
|
|
Entrance condition: {
"comeInShinecharged": {
"framesRequired": 50
}
}
Requires: "canShinechargeMovement" Exit condition: {
"leaveShinecharged": {
"framesRemaining": "auto"
}
}
|
|
Entrance condition: {
"comeInShinecharged": {
"framesRequired": 50
}
}
Requires: "canShinechargeMovement" Exit condition: {
"leaveShinecharged": {
"framesRemaining": "auto"
}
}
|
|
Requires: "canShinechargeMovement"
{
"canShineCharge": {
"usedTiles": 33,
"openEnd": 2
}
}
Exit condition: {
"leaveShinecharged": {
"framesRemaining": 120
}
}
|
|
Requires: "canShinechargeMovement"
{
"canShineCharge": {
"usedTiles": 33,
"openEnd": 2
}
}
Exit condition: {
"leaveShinecharged": {
"framesRemaining": 140
}
}
|
|
Requires: {
"or": [
{
"and": [
{
"canShineCharge": {
"usedTiles": 33,
"openEnd": 2
}
},
{
"shinespark": {
"frames": 78,
"excessFrames": 13
}
}
]
},
{
"and": [
"canShinechargeMovement",
{
"canShineCharge": {
"usedTiles": 33,
"openEnd": 2
}
},
{
"shinespark": {
"frames": 65,
"excessFrames": 13
}
}
]
}
]
}
|
|
Break the bomb wall while blue, or spark diagonally next to it. Requires: {
"or": [
"canCarefulJump",
{
"and": [
"canShinechargeMovement",
{
"shinespark": {
"frames": 2
}
}
]
}
]
}
{
"canShineCharge": {
"usedTiles": 25,
"steepUpTiles": 3,
"steepDownTiles": 3,
"openEnd": 1
}
}
|
|
From: 8
Central Junction
To: 1
Top Left Door
Break the bomb wall while blue, or spark diagonally next to it. Open the door then charge the spark again and spark through the wall and door. Requires: {
"or": [
"canCarefulJump",
{
"and": [
"canShinechargeMovement",
{
"shinespark": {
"frames": 2
}
}
]
}
]
}
{
"canShineCharge": {
"usedTiles": 25,
"steepUpTiles": 3,
"steepDownTiles": 3,
"openEnd": 1
}
}
{
"shinespark": {
"frames": 28
}
}
Exit condition: {
"leaveWithSpark": {}
}
|
|
From: 8
Central Junction
To: 4
Top Right Door
Requires: "canShinechargeMovement"
{
"canShineCharge": {
"usedTiles": 25,
"openEnd": 1,
"steepUpTiles": 3,
"steepDownTiles": 3
}
}
Exit condition: {
"leaveShinecharged": {
"framesRemaining": 30
}
}
|
|
From: 1
Left Door
To: 4
Middle Junction (Left of Morph Tunnel)
Charge the Shinespark just before getting to the bug, then Midair Shinespark to make it all the way to the shot blocks. Entrance condition: {
"comeInShinecharging": {
"length": 5,
"openEnd": 0,
"steepUpTiles": 0,
"steepDownTiles": 1
}
}
Requires: "canMidairShinespark"
"canShinechargeMovement"
{
"shinespark": {
"frames": 77,
"excessFrames": 17
}
}
Clears obstacles: A, B |
|
From: 1
Left Door
To: 4
Middle Junction (Left of Morph Tunnel)
To use the full runway, kill the Zebbo with Wave, then Midair Shinespark to make it all the way to the shot blocks. Entrance condition: {
"comeInShinecharging": {
"length": 14,
"openEnd": 0,
"steepUpTiles": 1,
"steepDownTiles": 1
}
}
Requires: "Wave"
{
"acidFrames": 11
}
{
"or": [
"Gravity",
{
"acidFrames": 5
}
]
}
"canMidairShinespark"
"canShinechargeMovement"
{
"shinespark": {
"frames": 77,
"excessFrames": 17
}
}
Clears obstacles: A, B |
|
It is possible to run through the Yapping Maw while it is attacking a different direction. But that likely requires acid damage and isn't entirely reliable. Requires: {
"obstaclesCleared": [
"A"
]
}
"canMidairShinespark"
"canShinechargeMovement"
{
"shinespark": {
"frames": 45
}
}
{
"canShineCharge": {
"usedTiles": 18,
"openEnd": 1,
"startingDownTiles": 0,
"steepDownTiles": 1,
"steepUpTiles": 2
}
}
Exit condition: {
"leaveWithSpark": {
"position": "top"
}
}
|
|
Shinespark from the end of the entry runway, just past the down slope. Samus will crash into the last set of blocks preventing access to the opposite door. Entrance condition: {
"comeInShinecharged": {
"framesRequired": 37
}
}
Requires: "canShinechargeMovement"
"canHorizontalShinespark"
{
"shinespark": {
"frames": 70
}
}
{
"or": [
"Morph",
"canTunnelCrawl",
"canTurnaroundAimCancel",
{
"and": [
"canTwoTileSqueeze",
"canXRayTurnaround"
]
}
]
}
|
|
Shinespark below the top block or Samus will crash into a solid wall. Entrance condition: {
"comeInShinecharged": {
"framesRequired": 50
}
}
Requires: "canShinechargeMovement"
"canMidairShinespark"
{
"shinespark": {
"frames": 85,
"excessFrames": 20
}
}
|
|
Wait for the acid to clear before moving to shinespark on the other side of the bomb blocks. Entrance condition: {
"comeInShinecharging": {
"length": 6,
"openEnd": 1,
"steepUpTiles": 1,
"steepDownTiles": 1
}
}
Requires: "canMidairShinespark"
"canShinechargeMovement"
{
"shinespark": {
"frames": 80,
"excessFrames": 13
}
}
|
|
Requires: "canShinechargeMovement"
{
"canShineCharge": {
"usedTiles": 33,
"openEnd": 2
}
}
Exit condition: {
"leaveShinecharged": {
"framesRemaining": 140
}
}
|
|
Requires: "canShinechargeMovement"
{
"canShineCharge": {
"usedTiles": 33,
"openEnd": 2
}
}
Exit condition: {
"leaveShinecharged": {
"framesRemaining": 140
}
}
|
|
Jump to the right side and diagonal spark left to escape the water. To spark as quickly as possible, buffer a spin jump by holding left (or right) and jump while riding the elevator. Entrance condition: {
"comeInShinecharged": {
"framesRequired": 35
}
}
Requires: "f_TourianOpen"
"h_canNavigateUnderwater"
"canShinechargeMovement"
{
"shinespark": {
"frames": 21,
"excessFrames": 8
}
}
|
|
Jump to either side and vertically spark out. To spark as quickly as possible, buffer a spin jump by holding left (or right) and jump while riding the elevator. Entrance condition: {
"comeInShinecharged": {
"framesRequired": 20
}
}
Requires: "f_TourianOpen"
"h_canNavigateUnderwater"
"canShinechargeMovement"
{
"shinespark": {
"frames": 24,
"excessFrames": 9
}
}
|
|
Requires: "canShinechargeMovement"
{
"canShineCharge": {
"usedTiles": 33,
"openEnd": 0,
"steepUpTiles": 2,
"steepDownTiles": 5
}
}
Exit condition: {
"leaveShinecharged": {
"framesRemaining": 65
}
}
|
|
Entrance condition: {
"comeInShinecharged": {
"framesRequired": 54
}
}
Requires: "canShinechargeMovement" Exit condition: {
"leaveShinecharged": {
"framesRemaining": "auto"
}
}
|
|
Entrance condition: {
"comeInShinecharged": {
"framesRequired": 60
},
"comesThroughToilet": "no"
}
Requires: "canShinechargeMovement" Exit condition: {
"leaveShinecharged": {
"framesRemaining": "auto"
}
}
|
|
From: 2
Bottom Door
To: 1
Right Door
Entrance condition: {
"comeInShinecharged": {
"framesRequired": 65
},
"comesThroughToilet": "yes"
}
Requires: "canShinechargeMovement" Exit condition: {
"leaveShinecharged": {
"framesRemaining": "auto"
}
}
|
|
Entrance condition: {
"comeInShinecharged": {
"framesRequired": 65
},
"comesThroughToilet": "any"
}
Requires: "canShinechargeMovement" Exit condition: {
"leaveShinecharged": {
"framesRemaining": "auto"
}
}
|
|
Entrance condition: {
"comeInShinecharged": {
"framesRequired": 65
},
"comesThroughToilet": "any"
}
Requires: "canShinechargeMovement" Exit condition: {
"leaveShinecharged": {
"framesRemaining": "auto"
}
}
|
|
From: 1
Lower Section - Bottom Left Door
To: 5
Lower Section - Bottom Right Door
Entrance condition: {
"comeInShinecharging": {
"length": 23,
"openEnd": 1,
"steepUpTiles": 1,
"steepDownTiles": 6
}
}
Requires: "canHorizontalShinespark"
{
"or": [
{
"shinespark": {
"frames": 131,
"excessFrames": 35
}
},
{
"and": [
"canShinechargeMovement",
"canMidairShinespark",
{
"shinespark": {
"frames": 106,
"excessFrames": 35
}
}
]
}
]
}
|
|
From: 5
Lower Section - Bottom Right Door
To: 4
Lower Section - Top Right Door
Jump to the submerged platform, then jump again. Requires: "Gravity"
"canShinechargeMovement"
"canMidairShinespark"
{
"canShineCharge": {
"usedTiles": 33,
"openEnd": 2
}
}
{
"shinespark": {
"frames": 35,
"excessFrames": 10
}
}
|
|
From: 13
Bottom Junction
To: 5
Lower Section - Bottom Right Door
Requires: "canHorizontalShinespark"
{
"or": [
{
"canShineCharge": {
"usedTiles": 23,
"openEnd": 1,
"steepUpTiles": 6,
"steepDownTiles": 1
}
},
{
"and": [
{
"canShineCharge": {
"usedTiles": 24,
"openEnd": 1,
"steepUpTiles": 6,
"steepDownTiles": 1
}
},
{
"doorUnlockedAtNode": 1
}
]
}
]
}
{
"or": [
{
"shinespark": {
"frames": 131
}
},
{
"and": [
"canShinechargeMovement",
"canMidairShinespark",
{
"shinespark": {
"frames": 106
}
}
]
}
]
}
|
|
From: 13
Bottom Junction
To: 5
Lower Section - Bottom Right Door
Open the right door before sparking to spark out of it. Requires: {
"or": [
"canCarefulJump",
"Grapple",
"Wave",
"SpaceJump"
]
}
{
"or": [
{
"canShineCharge": {
"usedTiles": 23,
"openEnd": 1,
"steepUpTiles": 6,
"steepDownTiles": 1
}
},
{
"and": [
{
"canShineCharge": {
"usedTiles": 24,
"openEnd": 1,
"steepUpTiles": 6,
"steepDownTiles": 1
}
},
{
"doorUnlockedAtNode": 1
}
]
}
]
}
{
"or": [
{
"shinespark": {
"frames": 131
}
},
{
"and": [
"canShinechargeMovement",
"canMidairShinespark",
{
"shinespark": {
"frames": 106
}
}
]
}
]
}
Exit condition: {
"leaveWithSpark": {}
}
|
|
Shoot the bridge to see where it ends. Opening the door requires a shot that is fired while Samus has some momentum from running to the right. Charge a spark running left then run off right into a preopened door. Requires: {
"canShineCharge": {
"usedTiles": 19,
"openEnd": 1
}
}
"canShinechargeMovement"
"canCarefulJump"
Exit condition: {
"leaveShinecharged": {
"framesRemaining": 60
}
}
|
|
From: 1
Left Door
To: 2
Right Door
Requires: {
"canShineCharge": {
"usedTiles": 19,
"openEnd": 2
}
}
"canShinechargeMovement"
"Gravity"
Exit condition: {
"leaveShinecharged": {
"framesRemaining": 100
}
}
|
|
From: 1
Bottom Left Door
To: 1
Bottom Left Door
Requires: {
"canShineCharge": {
"usedTiles": 31,
"openEnd": 0
}
}
"canShinechargeMovement"
Exit condition: {
"leaveShinecharged": {
"framesRemaining": 140
}
}
|
|
From: 1
Bottom Left Door
To: 1
Bottom Left Door
Requires: {
"obstaclesCleared": [
"C"
]
}
{
"canShineCharge": {
"usedTiles": 33,
"openEnd": 1
}
}
"canShinechargeMovement"
Exit condition: {
"leaveShinecharged": {
"framesRemaining": 120
}
}
|
|
Requires: {
"obstaclesCleared": [
"C"
]
}
"canShinechargeMovement"
{
"canShineCharge": {
"usedTiles": 25,
"openEnd": 0
}
}
Exit condition: {
"leaveShinecharged": {
"framesRemaining": 135
}
}
|
|
Requires: {
"canShineCharge": {
"usedTiles": 30,
"openEnd": 0
}
}
"canShinechargeMovement"
Exit condition: {
"leaveShinecharged": {
"framesRemaining": 130
}
}
|
|
Requires: {
"canShineCharge": {
"usedTiles": 30,
"openEnd": 0
}
}
"canShinechargeMovement"
Exit condition: {
"leaveShinecharged": {
"framesRemaining": 130
}
}
|
|
Requires: {
"canShineCharge": {
"usedTiles": 17,
"openEnd": 1
}
}
"canShinechargeMovement"
{
"obstaclesCleared": [
"A"
]
}
Exit condition: {
"leaveShinecharged": {
"framesRemaining": 60
}
}
|
|
From: 1
Top Left Door
To: 1
Top Left Door
Assumes taking some time to build run speed for jumping over the gap. Requires: {
"canShineCharge": {
"usedTiles": 20,
"openEnd": 0
}
}
"canShinechargeMovement"
Exit condition: {
"leaveShinecharged": {
"framesRemaining": 60
}
}
|
|
From: 1
Top Left Door
To: 1
Top Left Door
Assumes stopping two tiles before the gap, to have enough space run and gain enough speed to jump over the gap without needing to turn around first. Requires: {
"canShineCharge": {
"usedTiles": 18,
"openEnd": 1
}
}
"canShinechargeMovement"
Exit condition: {
"leaveShinecharged": {
"framesRemaining": 95
}
}
|
|
From: 2
Top Right Door
To: 3
Bottom Left Door
Quick dropping through the crumbles allows reaching the door with more shinecharge time remaining. Requires: {
"canShineCharge": {
"usedTiles": 20,
"openEnd": 1
}
}
"canShinechargeMovement"
"canQuickCrumbleEscape"
Exit condition: {
"leaveShinecharged": {
"framesRemaining": 50
}
}
|
|
From: 1
Left Door
To: 1
Left Door
Jump into the large patch of thorns from below. Requires: "h_canXMode"
"h_XModeThornHit"
"h_XModeThornHit"
"h_XModeThornHit"
{
"canShineCharge": {
"usedTiles": 33,
"openEnd": 2
}
}
"canShinechargeMovement"
Exit condition: {
"leaveShinecharged": {
"framesRemaining": 50
}
}
|
|
From: 9
Right Etecoon Shaft - Top Left Door
To: 9
Right Etecoon Shaft - Top Left Door
Requires: {
"canShineCharge": {
"usedTiles": 17,
"openEnd": 1
}
}
"canShinechargeMovement"
Exit condition: {
"leaveShinecharged": {
"framesRemaining": 120
}
}
|
|
From: 9
Right Etecoon Shaft - Top Left Door
To: 9
Right Etecoon Shaft - Top Left Door
Achieve a shinecharge before running into the wall, to be able to make it to the door faster. Requires: {
"canShineCharge": {
"usedTiles": 16,
"openEnd": 1
}
}
"canShinechargeMovement"
Exit condition: {
"leaveShinecharged": {
"framesRemaining": 135
}
}
|
|
From: 10
Right Etecoon Shaft - Bottom Left Door
To: 14
Right Etecoon Shaft - Wall Jump Climb Checkpoint Junction
This is specifically for shinesparking on low energy, where the shinespark will end before reaching the top. Entrance condition: {
"comeInShinecharged": {
"framesRequired": 30
}
}
Requires: "canShinechargeMovement"
{
"shinespark": {
"frames": 75,
"excessFrames": 64
}
}
|
|
From: 10
Right Etecoon Shaft - Bottom Left Door
To: 14
Right Etecoon Shaft - Wall Jump Climb Checkpoint Junction
This is a diagonal shinespark into the underside of the left side middle ledge, minimizing energy usage. Needs HJB to bonk at the right place without walljumping. Entrance condition: {
"comeInShinecharged": {
"framesRequired": 60
}
}
Requires: "HiJump"
"canShinechargeMovement"
"canMidairShinespark"
{
"shinespark": {
"frames": 20,
"excessFrames": 11
}
}
|
|
Requires: "canShinechargeMovement"
{
"canShineCharge": {
"usedTiles": 18,
"openEnd": 1
}
}
{
"shinespark": {
"frames": 9,
"excessFrames": 5
}
}
|
|
From: 1
Top Left Door
To: 3
Bottom Right Door
Requires: {
"canShineCharge": {
"usedTiles": 30,
"openEnd": 0
}
}
"canShinechargeMovement"
Exit condition: {
"leaveShinecharged": {
"framesRemaining": 120
}
}
|
|
Requires: {
"canShineCharge": {
"usedTiles": 22,
"openEnd": 0
}
}
"canShinechargeMovement"
Exit condition: {
"leaveShinecharged": {
"framesRemaining": 140
}
}
|
|
Requires: {
"canShineCharge": {
"usedTiles": 33,
"openEnd": 2
}
}
"canShinechargeMovement"
Exit condition: {
"leaveShinecharged": {
"framesRemaining": 150
}
}
|
|
Requires: {
"canShineCharge": {
"usedTiles": 33,
"openEnd": 2
}
}
"canShinechargeMovement"
Exit condition: {
"leaveShinecharged": {
"framesRemaining": 50
}
}
|
|
Requires: {
"canShineCharge": {
"usedTiles": 20,
"openEnd": 0
}
}
"canShinechargeMovement"
Exit condition: {
"leaveShinecharged": {
"framesRemaining": 140
}
}
|
|
From: 4
Left Side - Middle Doorway (Behind the Power Bomb Blocks)
To: 4
Left Side - Middle Doorway (Behind the Power Bomb Blocks)
Use the morph tunnel that used to have crumble blocks as a faster path to the Mission Impossible transition. Requires: "Morph"
{
"canShineCharge": {
"usedTiles": 16,
"openEnd": 0
}
}
{
"or": [
"canShinechargeMovementTricky",
{
"and": [
"canShinechargeMovement",
"h_canUseSpringBall"
]
}
]
}
{
"obstaclesCleared": [
"C"
]
}
Exit condition: {
"leaveShinecharged": {
"framesRemaining": 60
}
}
|
|
From: 6
Right Side - Top Middle Door
To: 6
Right Side - Top Middle Door
Requires: "canShinechargeMovement"
{
"canShineCharge": {
"usedTiles": 19,
"openEnd": 0
}
}
Exit condition: {
"leaveShinecharged": {
"framesRemaining": 110
}
}
|
|
Diagonal spark left to save health. Requires: "canShinechargeMovement"
"HiJump"
"canMidairShinespark"
{
"canShineCharge": {
"usedTiles": 33,
"openEnd": 2
}
}
{
"shinespark": {
"frames": 85,
"excessFrames": 3
}
}
|
|
From: 1
Top Right Door
To: 1
Top Right Door
Requires: {
"obstaclesCleared": [
"A"
]
}
"SpeedBooster"
"h_canXMode"
"h_XModeSpikeHit"
"h_XModeSpikeHit"
"canShinechargeMovement"
Exit condition: {
"leaveShinecharged": {
"framesRemaining": 100
}
}
|
|
Stand to the right of the right-most bug pipe, and run to the right to gain a shortcharge. Run back to the left, jump over the bug pipes, and shinespark through the left door. Requires: {
"canShineCharge": {
"usedTiles": 21,
"steepUpTiles": 2,
"openEnd": 0
}
}
"canShinechargeMovement"
{
"shinespark": {
"frames": 20
}
}
Exit condition: {
"leaveWithSpark": {}
}
|
|
Requires: "Gravity" "SpeedBooster" "canShinechargeMovement" Exit condition: {
"leaveShinecharged": {
"framesRemaining": 145
}
}
|
|
From: 3
Dry Platform Junction
To: 1
Right Door
Charge a spark going left, then build speed and jump far to the right into a mid-air spark across the room and through the door. Requires: {
"canShineCharge": {
"usedTiles": 32,
"openEnd": 1
}
}
"canShinechargeMovement"
"canCarefulJump"
"canMidairShinespark"
{
"shinespark": {
"frames": 62
}
}
Exit condition: {
"leaveWithSpark": {}
}
|
|
Run from left to right on the dry platform to gain a shinecharge. Then fall off and spark to the left to break the speed blocks. Requires: {
"canShineCharge": {
"usedTiles": 32,
"openEnd": 1
}
}
"canShinechargeMovement"
"canHorizontalShinespark"
{
"shinespark": {
"frames": 72,
"excessFrames": 10
}
}
|
|
From: 1
Left Door
To: 2
Right Door
Entrance condition: {
"comeInShinecharging": {
"length": 6,
"openEnd": 1
}
}
Requires: "canHorizontalShinespark"
{
"or": [
{
"shinespark": {
"frames": 142,
"excessFrames": 60
}
},
{
"and": [
"canShinechargeMovement",
"canMidairShinespark",
{
"shinespark": {
"frames": 134,
"excessFrames": 60
}
}
]
}
]
}
|
|
From: 2
Right Door
To: 2
Right Door
Store a spark in X-Mode and use that to leave with a shinecharge. Requires: "h_canXMode"
"h_XModeSpikeHit"
"h_XModeSpikeHit"
{
"canShineCharge": {
"usedTiles": 33,
"openEnd": 2
}
}
"canShinechargeMovement"
Exit condition: {
"leaveShinecharged": {
"framesRemaining": 40
}
}
|
|
Requires: {
"canShineCharge": {
"usedTiles": 33,
"openEnd": 2
}
}
"canShinechargeMovement"
{
"obstaclesCleared": [
"A"
]
}
Exit condition: {
"leaveShinecharged": {
"framesRemaining": 140
}
}
|
|
Requires: {
"canShineCharge": {
"usedTiles": 33,
"openEnd": 2
}
}
"canShinechargeMovement"
{
"obstaclesCleared": [
"A"
]
}
Exit condition: {
"leaveShinecharged": {
"framesRemaining": 135
}
}
|
|
Requires: {
"canShineCharge": {
"usedTiles": 22,
"openEnd": 0
}
}
"canShinechargeMovement"
{
"obstaclesCleared": [
"f_DefeatedKraid"
]
}
Exit condition: {
"leaveShinecharged": {
"framesRemaining": 135
}
}
|
|
Requires: {
"canShineCharge": {
"usedTiles": 22,
"openEnd": 0
}
}
"canShinechargeMovement"
{
"obstaclesCleared": [
"f_DefeatedKraid"
]
}
Exit condition: {
"leaveShinecharged": {
"framesRemaining": 135
}
}
|
|
Requires: {
"canShineCharge": {
"usedTiles": 17,
"openEnd": 1
}
}
"canShinechargeMovement"
Exit condition: {
"leaveShinecharged": {
"framesRemaining": 120
}
}
|
|
From: 2
Left Side - Top Middle Door
To: 1
Left Side - Top Door
Entrance condition: {
"comeInShinecharged": {
"framesRequired": 22
}
}
Requires: "canShinechargeMovement"
"canMidairShinespark"
{
"shinespark": {
"frames": 19
}
}
|
|
From: 2
Left Side - Top Middle Door
To: 3
Left Side - Bottom Middle Door
Entrance condition: {
"comeInShinecharged": {
"framesRequired": 115
}
}
Requires: "canShinechargeMovement" Exit condition: {
"leaveShinecharged": {
"framesRemaining": "auto"
}
}
|
|
From: 2
Left Side - Top Middle Door
To: 3
Left Side - Bottom Middle Door
Entrance condition: {
"comeInShinecharged": {
"framesRequired": 105
}
}
Requires: "canShinechargeMovement"
{
"shinespark": {
"frames": 7,
"excessFrames": 0
}
}
Exit condition: {
"leaveWithSpark": {}
}
|
|
From: 2
Left Side - Top Middle Door
To: 3
Left Side - Bottom Middle Door
Entrance condition: {
"comeInShinecharging": {
"length": 2,
"openEnd": 1
}
}
Requires: "canShinechargeMovement" Exit condition: {
"leaveShinecharged": {
"framesRemaining": 75
}
}
|
|
From: 3
Left Side - Bottom Middle Door
To: 1
Left Side - Top Door
Entrance condition: {
"comeInShinecharging": {
"length": 5,
"openEnd": 0
}
}
Requires: "canShinechargeMovement"
{
"shinespark": {
"frames": 39
}
}
|
|
From: 3
Left Side - Bottom Middle Door
To: 1
Left Side - Top Door
Entrance condition: {
"comeInShinecharged": {
"framesRequired": 35
}
}
Requires: "canShinechargeMovement"
{
"shinespark": {
"frames": 39
}
}
|
|
Entrance condition: {
"comeInShinecharged": {
"framesRequired": 70
}
}
Requires: "canShinechargeMovement" Exit condition: {
"leaveShinecharged": {
"framesRemaining": "auto"
}
}
|
|
From: 4
Left Side - Bottom Door
To: 5
Bottom Door
Entrance condition: {
"comeInShinecharging": {
"length": 4,
"openEnd": 1
}
}
Requires: "canShinechargeMovement" Exit condition: {
"leaveShinecharged": {
"framesRemaining": 130
}
}
|
|
From: 5
Bottom Door
To: 4
Left Side - Bottom Door
Entrance condition: {
"comeInShinecharged": {
"framesRequired": 40
},
"comesThroughToilet": "any"
}
Requires: "canShinechargeMovement"
{
"shinespark": {
"frames": 9
}
}
Exit condition: {
"leaveWithSpark": {}
}
|
|
Requires: "canXMode"
"canBounceBall"
"canLateralMidAirMorph"
"canShinechargeMovement"
{
  "canShineCharge": {
    "usedTiles": 33,
    "openEnd": 2
  }
}
"h_XModeSpikeHitLeniency"
"h_XModeSpikeHitLeniency"
{
"shinespark": {
"frames": 6
}
}
|
|
From: 1
Left Door
To: 5
Bottom Right Junction
Entrance condition: {
"comeInShinecharged": {
"framesRequired": 100
}
}
Requires: "canShinechargeMovement"
"canHorizontalShinespark"
{
"heatFrames": 155
}
{
"shinespark": {
"frames": 54,
"excessFrames": 15
}
}
{
"heatFrames": 105
}
|
|
From: 2
Right Door
To: 3
Bottom Left Junction
Entrance condition: {
"comeInShinecharged": {
"framesRequired": 105
}
}
Requires: "canShinechargeMovement"
"canHorizontalShinespark"
{
"heatFrames": 195
}
{
"shinespark": {
"frames": 58,
"excessFrames": 0
}
}
{
"heatFrames": 105
}
|
|
Requires: "canWalljump"
"canShinechargeMovement"
{
  "canShineCharge": {
    "usedTiles": 33,
    "openEnd": 2
  }
}
{
"heatFrames": 380
}
{
"shinespark": {
"frames": 16,
"excessFrames": 4
}
}
|
|
Entrance condition: {
"comeInShinecharging": {
"length": 3,
"openEnd": 1
}
}
Requires: "canShinechargeMovement"
{
"heatFrames": 150
}
Exit condition: {
"leaveShinecharged": {
"framesRemaining": 45
}
}
|
|
Requires: "canShinechargeMovement"
{
"heatFrames": 300
}
{
"canShineCharge": {
"usedTiles": 28,
"gentleUpTiles": 3,
"gentleDownTiles": 3,
"openEnd": 0
}
}
Exit condition: {
"leaveShinecharged": {
"framesRemaining": 140
}
}
|
|
From: 1
Left Door
To: 2
Right Door
Entrance condition: {
"comeInShinecharging": {
"length": 2,
"openEnd": 1
}
}
Requires: "canShinechargeMovement" Exit condition: {
"leaveShinecharged": {
"framesRemaining": 70
}
}
|
|
From: 2
Right Door
To: 1
Left Door
Entrance condition: {
"comeInShinecharging": {
"length": 2,
"openEnd": 1
}
}
Requires: "canShinechargeMovement" Exit condition: {
"leaveShinecharged": {
"framesRemaining": 70
}
}
|
|
From: 1
Left Door
To: 2
Right Door
Jump over the Refill station before Shinesparking. Entrance condition: {
"comeInShinecharged": {
"framesRequired": 50
}
}
Requires: "canShinechargeMovement"
{
"shinespark": {
"frames": 11
}
}
Exit condition: {
"leaveWithSpark": {
"position": "bottom"
}
}
|
|
From: 1
Left Door
To: 2
Right Door
Entrance condition: {
"comeInShinecharged": {
"framesRequired": 10
}
}
Requires: "canShinechargeMovement"
{
"shinespark": {
"frames": 21
}
}
Exit condition: {
"leaveWithSpark": {
"position": "top"
}
}
|
|
From: 1
Left Door
To: 2
Right Door
Entrance condition: {
"comeInShinecharging": {
"length": 2,
"openEnd": 1
}
}
Requires: "canShinechargeMovement" Exit condition: {
"leaveShinecharged": {
"framesRemaining": 60
}
}
|
|
From: 2
Right Door
To: 1
Left Door
Jump over the Refill station before Shinesparking. Entrance condition: {
"comeInShinecharged": {
"framesRequired": 50
}
}
Requires: "canShinechargeMovement"
{
"shinespark": {
"frames": 11
}
}
Exit condition: {
"leaveWithSpark": {
"position": "bottom"
}
}
|
|
From: 2
Right Door
To: 1
Left Door
Entrance condition: {
"comeInShinecharged": {
"framesRequired": 10
}
}
Requires: "canShinechargeMovement"
{
"shinespark": {
"frames": 21
}
}
Exit condition: {
"leaveWithSpark": {
"position": "top"
}
}
|
|
From: 2
Right Door
To: 1
Left Door
Entrance condition: {
"comeInShinecharging": {
"length": 2,
"openEnd": 1
}
}
Requires: "canShinechargeMovement" Exit condition: {
"leaveShinecharged": {
"framesRemaining": 60
}
}
|
|
Entrance condition: {
"comeInShinecharging": {
"length": 3,
"openEnd": 0
}
}
Requires: {
"or": [
{
"and": [
"canHorizontalShinespark",
{
"shinespark": {
"frames": 76,
"excessFrames": 4
}
},
{
"heatFrames": 210
}
]
},
{
"and": [
"canShinechargeMovement",
"canMidairShinespark",
{
"shinespark": {
"frames": 67,
"excessFrames": 4
}
},
{
"heatFrames": 300
}
]
}
]
}
|
|
From: 1
Top Left Door
To: 7
Elevator
Entrance condition: {
"comeInShinecharging": {
"length": 4,
"openEnd": 0,
"gentleDownTiles": 2
}
}
Requires: "canShinechargeMovement" Exit condition: {
"leaveShinecharged": {
"framesRemaining": 55
}
}
|
|
From: 3
Bottom Door
To: 2
Far Left Door
Notable: true Spark left through the speed blocks through Croc Speedway. Then run to the right and back to get speed to go through the rest. The shinespark expects to kill the crumble bridge pirate, to be safe. Entrance condition: {
"comeInShinecharged": {
"framesRequired": 35
},
"comesThroughToilet": "any"
}
Requires: "canShinechargeMovement"
"canHorizontalShinespark"
{
"shinespark": {
"frames": 86,
"excessFrames": 10
}
}
{
"heatFrames": 700
}
Clears obstacles: A |
|
From: 4
Bottom Right Door
To: 2
Far Left Door
Notable: true Spark left through the speed blocks through Croc Speedway. Then run to the right and back to get speed to go through the rest. The shinespark expects to kill the crumble bridge pirate, to be safe. Entrance condition: {
"comeInShinecharging": {
"length": 1,
"openEnd": 1
}
}
Requires: "canShinechargeMovement"
"canHorizontalShinespark"
{
"shinespark": {
"frames": 84,
"excessFrames": 10
}
}
{
"heatFrames": 760
}
Clears obstacles: A |
|
From: 6
Bottom Right Junction
To: 4
Bottom Right Door
Enabled by coming in from the left and breaking the speed blocks on the way, or coming in charged and opening the path to the left. Requires: "h_heatProof"
{
"obstaclesCleared": [
"A"
]
}
"canShinechargeMovement"
{
  "canShineCharge": {
    "usedTiles": 33,
    "openEnd": 2
  }
}
Exit condition: {
"leaveShinecharged": {
"framesRemaining": 60
}
}
|
|
From: 7
Junction Below Power Bomb Blocks
To: 2
Middle Left Door
Requires: {
"obstaclesCleared": [
"C",
"D"
]
}
"SpeedBooster"
"canShinechargeMovement"
{
"or": [
{
"shinespark": {
"frames": 19,
"excessFrames": 4
}
},
{
"and": [
"canShinechargeMovementComplex",
"canMidairShinespark",
{
"shinespark": {
"frames": 6,
"excessFrames": 4
}
}
]
}
]
}
|
|
Requires: {
"obstaclesCleared": [
"f_DefeatedCrocomire"
]
}
"canShinechargeMovement"
{
  "canShineCharge": {
    "usedTiles": 33,
    "openEnd": 2
  }
}
Exit condition: {
"leaveShinecharged": {
"framesRemaining": 60
}
}
|
|
Requires: "HiJump"
"canShinechargeMovement"
{
"canShineCharge": {
"usedTiles": 33,
"openEnd": 2
}
}
{
"or": [
"f_DefeatedCrocomire",
{
"canShineCharge": {
"usedTiles": 22,
"openEnd": 1
}
}
]
}
Exit condition: {
"leaveShinecharged": {
"framesRemaining": 140
}
}
|
|
Requires: "SpaceJump"
"canShinechargeMovement"
{
"canShineCharge": {
"usedTiles": 33,
"openEnd": 2
}
}
{
"or": [
"f_DefeatedCrocomire",
{
"canShineCharge": {
"usedTiles": 22,
"openEnd": 1
}
}
]
}
Exit condition: {
"leaveShinecharged": {
"framesRemaining": 100
}
}
|
|
From: 5
Central Junction
To: 2
Top Door
Requires: "canShinechargeMovement"
{
"canShineCharge": {
"usedTiles": 33,
"openEnd": 2
}
}
{
"or": [
"f_DefeatedCrocomire",
{
"canShineCharge": {
"usedTiles": 31,
"openEnd": 0
}
}
]
}
Exit condition: {
"leaveShinecharged": {
"framesRemaining": 80
}
}
|
|
Get a normal height jump by not pressing run while SpeedBooster is equipped, as the Shinespark is stored. Requires: "canWalljump"
"canShinechargeMovement"
{
"canShineCharge": {
"usedTiles": 33,
"openEnd": 2
}
}
{
"or": [
"f_DefeatedCrocomire",
{
"canShineCharge": {
"usedTiles": 22,
"openEnd": 1
}
}
]
}
Exit condition: {
"leaveShinecharged": {
"framesRemaining": 130
}
}
|
|
Build some run speed to jump to the opposite runway to open the door before Shinesparking. Entrance condition: {
"comeInShinecharging": {
"length": 9,
"openEnd": 0
}
}
Requires: "canShinechargeMovement"
{
"shinespark": {
"frames": 11
}
}
Exit condition: {
"leaveWithSpark": {}
}
|
|
Entrance condition: {
"comeInShinecharging": {
"length": 7,
"openEnd": 0
}
}
Requires: "canShinechargeMovement" Exit condition: {
"leaveShinecharged": {
"framesRemaining": 40
}
}
|
|
Takes three walljumps, and must shinespark at the apex. Entrance condition: {
"comeInShinecharged": {
"framesRequired": 110
}
}
Requires: "canPreciseWalljump"
"canConsecutiveWalljump"
"canShinechargeMovement"
"canMidairShinespark"
{
"shinespark": {
"frames": 78
}
}
|
|
From: 1
Left Door
To: 3
Item
Walljump or build run speed using the full runway to jump high enough for the shinespark. Entrance condition: {
"comeInShinecharged": {
"framesRequired": 80
}
}
Requires: {
"or": [
{
"and": [
"canWalljump",
{
"shinespark": {
"frames": 20
}
}
]
},
"canTrickyDashJump"
]
}
"HiJump"
"canShinechargeMovement"
"canMidairShinespark"
{
"shinespark": {
"frames": 60
}
}
|
|
Walljump or build run speed using the full runway to jump high enough for the shinespark. Entrance condition: {
"comeInShinecharging": {
"length": 9,
"openEnd": 0
}
}
Requires: {
"or": [
{
"and": [
"canWalljump",
{
"shinespark": {
"frames": 20
}
}
]
},
"canTrickyDashJump"
]
}
"HiJump"
"canShinechargeMovement"
"canMidairShinespark"
{
"shinespark": {
"frames": 60
}
}
|
|
Takes three walljumps, and must shinespark at the apex. Entrance condition: {
"comeInShinecharging": {
"length": 9,
"openEnd": 0
}
}
Requires: "canPreciseWalljump"
"canConsecutiveWalljump"
"canShinechargeMovement"
"canMidairShinespark"
{
"shinespark": {
"frames": 78
}
}
|
|
From: 2
Right Vertical Door
To: 2
Right Vertical Door
Get a normal height jump by releasing run with SpeedBooster and no HiJump. Break spin to reach the transition without a wall jump. Requires: {
"obstaclesCleared": [
"A",
"B"
]
}
"canShinechargeMovement"
Exit condition: {
"leaveShinecharged": {
"framesRemaining": 130
}
}
|
|
From: 2
Right Vertical Door
To: 2
Right Vertical Door
Get a normal height jump by releasing run with SpeedBooster and no HiJump. Break spin to reach the transition without a wall jump. Requires: {
"obstaclesCleared": [
"B"
]
}
"canShinechargeMovement"
{
"canShineCharge": {
"usedTiles": 32,
"openEnd": 1
}
}
Exit condition: {
"leaveShinecharged": {
"framesRemaining": 100
}
}
|
|
From: 4
Right Junction with Speed Blocks Broken
To: 1
Left Door
Notable: true Requires: "canShinechargeMovement"
"canMidairShinespark"
{
"canShineCharge": {
"usedTiles": 32,
"openEnd": 1
}
}
{
"shinespark": {
"frames": 52
}
}
|
|
From: 4
Right Junction with Speed Blocks Broken
To: 1
Left Door
Fire off the shinespark at the apex of two consecutive walljumps. Requires: "canWalljump"
"canShinechargeMovement"
"canMidairShinespark"
{
"canShineCharge": {
"usedTiles": 32,
"openEnd": 1
}
}
{
"shinespark": {
"frames": 90
}
}
|
|
From: 5
Small Platforms Junction
To: 4
Right Junction with Speed Blocks Broken
Notable: true Requires: "Gravity"
"canShinechargeMovement"
"canHorizontalShinespark"
{
"canShineCharge": {
"usedTiles": 33,
"openEnd": 2
}
}
{
"acidFrames": 140
}
{
"shinespark": {
"frames": 35
}
}
Clears obstacles: B |
|
Get a normal height jump by releasing run with SpeedBooster and no HiJump. Break spin to reach the transition without a wall jump. Entrance condition: {
"comeInShinecharging": {
"length": 9,
"openEnd": 0
}
}
Requires: "canShinechargeMovement" "canCarefulJump" Exit condition: {
"leaveShinecharged": {
"framesRemaining": 100
}
}
|
|
From: 2
Middle Right Door
To: 3
Top Right Door
Jump into Screw Attack Room and spark diagonally once above the center of the door vertically. Or diagonally spark anywhere that is not the bottom of the door in the previous room. Entrance condition: {
"comeInShinecharged": {
"framesRequired": 15
}
}
Requires: "h_canNavigateHeatRooms"
"canMidairShinespark"
"canShinechargeMovement"
"canPrepareForNextRoom"
{
"heatFrames": 250
}
{
"shinespark": {
"frames": 18,
"excessFrames": 4
}
}
Clears obstacles: A |
|
From: 2
Middle Right Door
To: 4
Item
Notable: true Entrance condition: {
"comeInShinecharged": {
"framesRequired": 125
}
}
Requires: "ScrewAttack"
"canShinechargeMovement"
{
"heatFrames": 120
}
Clears obstacles: B, C |
|
From: 3
Top Right Door
To: 4
Item
Notable: true Store a shinespark then use screw to break through the bomb blocks down to the Screw Attack item location. Entrance condition: {
"comeInShinecharging": {
"length": 12,
"openEnd": 0
}
}
Requires: "ScrewAttack"
"canShinechargeMovement"
{
"heatFrames": 170
}
Clears obstacles: A, B, C |
|
From: 4
Item
To: 2
Middle Right Door
Notable: true Requires: "canShinechargeMovement"
{
"obstaclesCleared": [
"C"
]
}
{
"canShineCharge": {
"usedTiles": 33,
"openEnd": 2
}
}
{
"heatFrames": 240
}
{
"shinespark": {
"frames": 31,
"excessFrames": 10
}
}
Clears obstacles: B |
|
From: 4
Item
To: 3
Top Right Door
Notable: true Requires: "canShinechargeMovement"
{
"obstaclesCleared": [
"C"
]
}
{
"canShineCharge": {
"usedTiles": 33,
"openEnd": 2
}
}
{
"heatFrames": 270
}
{
"shinespark": {
"frames": 41,
"excessFrames": 4
}
}
Clears obstacles: A, B |
|
From: 2
Bottom Left Door
To: 2
Bottom Left Door
Requires: {
"canShineCharge": {
"usedTiles": 20,
"gentleDownTiles": 2,
"openEnd": 1
}
}
{
"or": [
{
"enemyKill": {
"enemies": [
[
"Fune"
]
]
}
},
{
"obstaclesCleared": [
"A"
]
}
]
}
"canShinechargeMovement"
Exit condition: {
"leaveShinecharged": {
"framesRemaining": 120
}
}
|
|
Requires: {
"canShineCharge": {
"usedTiles": 27,
"gentleUpTiles": 2,
"openEnd": 0
}
}
{
"obstaclesCleared": [
"A"
]
}
{
"heatFrames": 260
}
"canShinechargeMovement"
Exit condition: {
"leaveShinecharged": {
"framesRemaining": 90
}
}
|
|
From: 4
Item
To: 3
Bottom Horizontal Door
Open the door to be able to spark out. Shinecharge near the missile location, then fall back down and spark out the right door. The door must have been opened prior in order to be able to spark out of it. Requires: {
"canShineCharge": {
"usedTiles": 27,
"gentleUpTiles": 2,
"openEnd": 1
}
}
{
"obstaclesCleared": [
"A",
"C"
]
}
{
"heatFrames": 390
}
"canShinechargeMovement"
{
"shinespark": {
"frames": 35
}
}
Exit condition: {
"leaveWithSpark": {
"position": "bottom"
}
}
|
|
Entrance condition: {
"comeInShinecharged": {
"framesRequired": 16
}
}
Requires: "h_canNavigateHeatRooms"
"canShinechargeMovement"
"canMidairShinespark"
{
"shinespark": {
"frames": 75,
"excessFrames": 10
}
}
{
"heatFrames": 270
}
|
|
Requires: "h_canNavigateHeatRooms"
"canMidairShinespark"
"canShinechargeMovement"
{
"canShineCharge": {
"usedTiles": 24,
"openEnd": 1
}
}
{
"shinespark": {
"frames": 75,
"excessFrames": 5
}
}
{
"heatFrames": 380
}
|
|
From: 3
Elevator Platform
To: 4
Top of Elevator Ride
Requires: {
"canShineCharge": {
"usedTiles": 24,
"openEnd": 1
}
}
"canShinechargeMovement"
"h_MainHallElevatorFrames"
{
"heatFrames": 300
}
Exit condition: {
"leaveShinecharged": {
"framesRemaining": 90
}
}
|
|
FIXME: Shorter runway shinecharges could be added from 3. Requires: "SpeedBooster"
"canShinechargeMovement"
{
"or": [
"canHitbox",
{
"obstaclesCleared": [
"A"
]
}
]
}
{
"heatFrames": 180
}
Exit condition: {
"leaveShinecharged": {
"framesRemaining": 120
}
}
|
|
FIXME: Shorter runway shinecharges could be added from 3. Requires: "SpeedBooster"
"canShinechargeMovement"
{
"or": [
"canHitbox",
{
"obstaclesCleared": [
"A"
]
}
]
}
{
"heatFrames": 180
}
Exit condition: {
"leaveShinecharged": {
"framesRemaining": 120
}
}
|
|
Requires: "canShinechargeMovement"
{
"canShineCharge": {
"usedTiles": 33,
"openEnd": 2
}
}
"canMidairShinespark"
{
"shinespark": {
"frames": 80
}
}
Exit condition: {
"leaveWithSpark": {}
}
|
|
Requires: "canShinechargeMovement"
{
"canShineCharge": {
"usedTiles": 14,
"openEnd": 0
}
}
Exit condition: {
"leaveShinecharged": {
"framesRemaining": 110
}
}
|
|
Requires: "canShinechargeMovement"
{
"canShineCharge": {
"usedTiles": 20,
"openEnd": 0
}
}
Exit condition: {
"leaveShinecharged": {
"framesRemaining": 60
}
}
|
|
Requires: "canShinechargeMovement"
{
"canShineCharge": {
"usedTiles": 33,
"openEnd": 2
}
}
Exit condition: {
"leaveShinecharged": {
"framesRemaining": 60
}
}
|
|
Requires: "canShinechargeMovement"
{
"canShineCharge": {
"usedTiles": 33,
"openEnd": 2
}
}
Exit condition: {
"leaveShinecharged": {
"framesRemaining": 135
}
}
|
|
Requires: "canShinechargeMovement"
{
"canShineCharge": {
"usedTiles": 33,
"openEnd": 2
}
}
Exit condition: {
"leaveShinecharged": {
"framesRemaining": 110
}
}
|
|
From: 2
Middle Left Door
To: 2
Middle Left Door
Requires: {
"not": "f_DefeatedPhantoon"
}
"canRiskPermanentLossOfAccess"
{
  "canShineCharge": {
    "usedTiles": 33,
    "openEnd": 2
  }
}
"canShinechargeMovement"
Exit condition: {
"leaveShinecharged": {
"framesRemaining": 140
}
}
|
|
From: 2
Middle Left Door
To: 2
Middle Left Door
Requires: "h_canXMode"
"h_XModeSpikeHit"
"h_XModeSpikeHit"
"h_XModeSpikeHit"
"canIframeSpikeJump"
{
  "canShineCharge": {
    "usedTiles": 33,
    "openEnd": 2
  }
}
"canShinechargeMovement"
Exit condition: {
"leaveShinecharged": {
"framesRemaining": 100
}
}
|
|
Jumping from the door and bouncing on the platform enemy works pretty well. Requires: "f_DefeatedPhantoon"
"h_canXMode"
"h_XModeSpikeHit"
"h_XModeSpikeHit"
"Gravity"
{
"canShineCharge": {
"usedTiles": 33,
"openEnd": 2
}
}
"canShinechargeMovement"
Exit condition: {
"leaveShinecharged": {
"framesRemaining": 80
}
}
|
|
Entrance condition: {
"comeInShinecharging": {
"length": 3,
"openEnd": 1
}
}
Requires: "canShinechargeMovement"
{
"shinespark": {
"frames": 7,
"excessFrames": 2
}
}
|
|
From: 1
Left Door
To: 1
Left Door
Requires: "f_DefeatedPhantoon"
{
"enemyKill": {
"enemies": [
[
"Bull",
"Bull"
]
]
}
}
"canShinechargeMovement"
{
"canShineCharge": {
"usedTiles": 20,
"openEnd": 2
}
}
Exit condition: {
"leaveShinecharged": {
"framesRemaining": 95
}
}
|
|
From: 1
Top Left Doorway
To: 4
Top Right Doorway
Entrance condition: {
"comeInShinecharging": {
"length": 2,
"openEnd": 0
}
}
Requires: "Gravity" "canShinechargeMovement" Exit condition: {
"leaveShinecharged": {
"framesRemaining": 80
}
}
|
|
From: 4
Top Right Doorway
To: 1
Top Left Doorway
Entrance condition: {
"comeInShinecharging": {
"length": 2,
"openEnd": 0
}
}
Requires: "Gravity" "canShinechargeMovement" Exit condition: {
"leaveShinecharged": {
"framesRemaining": 80
}
}
|
|
Requires: "Gravity"
"canShinechargeMovement"
{
"canShineCharge": {
"usedTiles": 33,
"openEnd": 2
}
}
Exit condition: {
"leaveShinecharged": {
"framesRemaining": 120
}
}
|
|
From: 2
Bottom Right Door
To: 9
Junction Below Speed Blocks
Entrance condition: {
"comeInShinecharged": {
"framesRequired": 100
}
}
Requires: "canSuitlessMaridia"
"canShinechargeMovement"
{
"or": [
{
"shinespark": {
"frames": 76,
"excessFrames": 3
}
},
{
"and": [
"canMidairShinespark",
{
"shinespark": {
"frames": 71,
"excessFrames": 3
}
}
]
}
]
}
|
|
Requires: "Gravity"
"canShinechargeMovement"
{
"or": [
{
"canShineCharge": {
"usedTiles": 24,
"gentleUpTiles": 3,
"gentleDownTiles": 3,
"openEnd": 1
}
},
{
"and": [
{
"doorUnlockedAtNode": 3
},
{
"canShineCharge": {
"usedTiles": 25,
"gentleUpTiles": 3,
"gentleDownTiles": 3,
"openEnd": 1
}
}
]
}
]
}
Exit condition: {
"leaveShinecharged": {
"framesRemaining": 76
}
}
|
|
Requires: "Gravity"
"canShinechargeMovement"
{
"or": [
{
"canShineCharge": {
"usedTiles": 24,
"gentleUpTiles": 3,
"gentleDownTiles": 3,
"openEnd": 1
}
},
{
"and": [
{
"doorUnlockedAtNode": 3
},
{
"canShineCharge": {
"usedTiles": 25,
"gentleUpTiles": 3,
"gentleDownTiles": 3,
"openEnd": 1
}
}
]
}
]
}
Exit condition: {
"leaveShinecharged": {
"framesRemaining": 40
}
}
|
|
From: 3
Middle Right Door
To: 6
Speed Blocked Item
Entrance condition: {
"comeInShinecharged": {
"framesRequired": 150
}
}
Requires: "Gravity"
"canMidairShinespark"
"canCarefulJump"
"canShinechargeMovement"
{
"shinespark": {
"frames": 50,
"excessFrames": 2
}
}
Clears obstacles: A |
|
Entrance condition: {
"comeInShinecharging": {
"length": 7,
"openEnd": 1
}
}
Requires: "canWaterShineCharge"
"canMidairShinespark"
"canCarefulJump"
"canShinechargeMovement"
{
"canShineCharge": {
"usedTiles": 33,
"openEnd": 2
}
}
{
"shinespark": {
"frames": 62,
"excessFrames": 2
}
}
Clears obstacles: A |
|
Entrance condition: {
"comeInShinecharged": {
"framesRequired": 80
}
}
Requires: "Gravity"
"canShinechargeMovement"
"canMidairShinespark"
{
"shinespark": {
"frames": 50,
"excessFrames": 3
}
}
|
|
Entrance condition: {
"comeInShinecharged": {
"framesRequired": 145
}
}
Requires: "canSuitlessMaridia"
"canShinechargeMovement"
"canMidairShinespark"
{
"shinespark": {
"frames": 55,
"excessFrames": 3
}
}
|
|
Requires: "Gravity"
"canShinechargeMovement"
{
"canShineCharge": {
"usedTiles": 17,
"startingDownTiles": 1,
"steepDownTiles": 2,
"openEnd": 0
}
}
Exit condition: {
"leaveShinecharged": {
"framesRemaining": 80
}
}
|
|
Requires: "Gravity"
{
"canShineCharge": {
"usedTiles": 19,
"gentleUpTiles": 2,
"openEnd": 1
}
}
"canShinechargeMovement"
{
"or": [
{
"shinespark": {
"frames": 60,
"excessFrames": 5
}
},
{
"and": [
"canMidairShinespark",
{
"shinespark": {
"frames": 55,
"excessFrames": 5
}
}
]
},
{
"and": [
"canMidairShinespark",
"HiJump",
{
"shinespark": {
"frames": 50,
"excessFrames": 5
}
}
]
}
]
}
Clears obstacles: B |
|
Entrance condition: {
"comeInShinecharging": {
"length": 18,
"gentleUpTiles": 2,
"openEnd": 1
}
}
Requires: "Gravity"
"canShinechargeMovement"
{
"or": [
{
"shinespark": {
"frames": 60,
"excessFrames": 5
}
},
{
"and": [
"canMidairShinespark",
{
"shinespark": {
"frames": 55,
"excessFrames": 5
}
}
]
},
{
"and": [
"canMidairShinespark",
"HiJump",
{
"shinespark": {
"frames": 50,
"excessFrames": 5
}
}
]
}
]
}
Clears obstacles: B |
|
Entrance condition: {
"comeInShinecharged": {
"framesRequired": 110
}
}
Requires: "Gravity"
"canShinechargeMovement"
{
"shinespark": {
"frames": 60
}
}
Clears obstacles: B |
|
Entrance condition: {
"comeInRunning": {
"speedBooster": true,
"minTiles": 2
}
}
Requires: "canStutterWaterShineCharge"
"canShinechargeMovement"
{
"canShineCharge": {
"usedTiles": 33,
"openEnd": 2
}
}
{
"or": [
{
"shinespark": {
"frames": 61,
"excessFrames": 7
}
},
{
"and": [
"canMidairShinespark",
{
"shinespark": {
"frames": 56,
"excessFrames": 7
}
}
]
},
{
"and": [
"canMidairShinespark",
"HiJump",
{
"shinespark": {
"frames": 52,
"excessFrames": 7
}
}
]
}
]
}
Clears obstacles: B |
|
Entrance condition: {
"comeInShinecharging": {
"length": 4,
"openEnd": 1
}
}
Requires: "canWaterShineCharge"
"canShinechargeMovement"
{
"canShineCharge": {
"usedTiles": 33,
"openEnd": 2
}
}
{
"or": [
{
"shinespark": {
"frames": 61,
"excessFrames": 7
}
},
{
"and": [
"canMidairShinespark",
{
"shinespark": {
"frames": 56,
"excessFrames": 7
}
}
]
},
{
"and": [
"canMidairShinespark",
"HiJump",
{
"shinespark": {
"frames": 52,
"excessFrames": 7
}
}
]
}
]
}
Clears obstacles: B |
|
From: 1
Left Door
To: 3
Hidden Right Item
Requires at least 2 tiles in the adjacent room. Entrance condition: {
"comeInRunning": {
"speedBooster": true,
"minTiles": 2
}
}
Requires: "canStutterWaterShineCharge"
"canShinechargeMovement"
{
"canShineCharge": {
"usedTiles": 33,
"openEnd": 2
}
}
{
"or": [
{
"shinespark": {
"frames": 47,
"excessFrames": 5
}
},
{
"and": [
"canMidairShinespark",
{
"shinespark": {
"frames": 44,
"excessFrames": 5
}
}
]
},
{
"and": [
"canMidairShinespark",
"HiJump",
{
"shinespark": {
"frames": 41,
"excessFrames": 5
}
}
]
}
]
}
|
|
Entrance condition: {
"comeInShinecharging": {
"length": 4,
"openEnd": 1
}
}
Requires: "canWaterShineCharge"
"canShinechargeMovement"
{
"canShineCharge": {
"usedTiles": 33,
"openEnd": 2
}
}
{
"or": [
{
"shinespark": {
"frames": 47,
"excessFrames": 5
}
},
{
"and": [
"canMidairShinespark",
{
"shinespark": {
"frames": 44,
"excessFrames": 5
}
}
]
},
{
"and": [
"canMidairShinespark",
"HiJump",
{
"shinespark": {
"frames": 41,
"excessFrames": 5
}
}
]
}
]
}
|
|
Entrance condition: {
"comeInRunning": {
"speedBooster": true,
"minTiles": 2.4375
}
}
Requires: "canSuitlessMaridia"
"h_canUsePowerBombs"
"canStutterWaterShineCharge"
"canShinechargeMovement"
{
"canShineCharge": {
"usedTiles": 33,
"openEnd": 2
}
}
{
"shinespark": {
"frames": 25,
"excessFrames": 11
}
}
Clears obstacles: A |
|
Entrance condition: {
"comeInShinecharged": {
"framesRequired": 130
}
}
Requires: "canSuitlessMaridia"
"h_canUsePowerBombs"
"canShinechargeMovement"
{
"shinespark": {
"frames": 25,
"excessFrames": 11
}
}
Clears obstacles: A |
|
Entrance condition: {
"comeInRunning": {
"speedBooster": true,
"minTiles": 2.4375
}
}
Requires: "canWaterShineCharge"
"canShinechargeMovement"
{
"canShineCharge": {
"usedTiles": 33,
"openEnd": 2
}
}
{
"shinespark": {
"frames": 37,
"excessFrames": 3
}
}
|
|
Dodge or kill the Owtch. The Owtch can be killed with a Power Bomb or while it is moving leftward with a Super, Charge, or Plasma. Requires: "Gravity"
"canShinechargeMovement"
{
"or": [
"canShinechargeMovement",
"Plasma",
"Charge",
{
"resourceCapacity": [
{
"type": "Super",
"count": 1
}
]
},
{
"and": [
"Morph",
{
"resourceCapacity": [
{
"type": "PowerBomb",
"count": 1
}
]
}
]
}
]
}
{
"canShineCharge": {
"usedTiles": 23,
"openEnd": 1,
"gentleDownTiles": 2,
"gentleUpTiles": 2,
"steepUpTiles": 1
}
}
Exit condition: {
"leaveShinecharged": {
"framesRemaining": 120
}
}
|
|
Entrance condition: {
"comeInShinechargedJumping": {
"framesRequired": 22
}
}
Requires: "Morph"
"canCrossRoomJumpIntoWater"
"canShinechargeMovement"
"canMidairShinespark"
{
"shinespark": {
"frames": 55
}
}
|
|
From: 4
Right Door
To: 6
Junction Right of Morph Passage
Entrance condition: {
"comeInShinechargedJumping": {
"framesRequired": 20
}
}
Requires: "Morph"
"canCrossRoomJumpIntoWater"
"canShinechargeMovement"
"canMidairShinespark"
{
"shinespark": {
"frames": 46,
"excessFrames": 3
}
}
|
|
Break all of the speed and shot blocks and open the door. Charge a shinespark, ending under the last vertical pipes. Carefully jump over the next pipe and through the doorway. Requires: "canShinechargeMovement"
"Gravity"
{
"canShineCharge": {
"usedTiles": 33,
"openEnd": 2
}
}
Exit condition: {
"leaveShinecharged": {
"framesRemaining": 85
}
}
|
|
Requires: "canShinechargeMovement"
"Gravity"
{
"canShineCharge": {
"usedTiles": 33,
"openEnd": 2
}
}
Exit condition: {
"leaveShinecharged": {
"framesRemaining": 120
}
}
|
|
Requires: "canShinechargeMovement"
"Gravity"
{
"obstaclesCleared": [
"f_DefeatedBotwoon"
]
}
{
"canShineCharge": {
"usedTiles": 16,
"openEnd": 0
}
}
Exit condition: {
"leaveShinecharged": {
"framesRemaining": 125
}
}
|
|
Requires: "canShinechargeMovement"
"Gravity"
{
"obstaclesCleared": [
"f_DefeatedBotwoon"
]
}
{
"canShineCharge": {
"usedTiles": 16,
"openEnd": 0
}
}
Exit condition: {
"leaveShinecharged": {
"framesRemaining": 55
}
}
|
|
Entrance condition: {
"comeInShinecharged": {
"framesRequired": 60
}
}
Requires: "canShinechargeMovement"
"canMidairShinespark"
"canCarefulJump"
{
"shinespark": {
"frames": 125,
"excessFrames": 20
}
}
|
|
Entrance condition: {
"comeInShinecharged": {
"framesRequired": 60
}
}
Requires: "canShinechargeMovement"
"canMidairShinespark"
"canCarefulJump"
{
"shinespark": {
"frames": 125,
"excessFrames": 6
}
}
|
|
Entrance condition: {
"comeInShinecharged": {
"framesRequired": 60
}
}
Requires: "canShinechargeMovement"
"canMidairShinespark"
"canCarefulJump"
{
"shinespark": {
"frames": 125
}
}
|
|
Requires: "Gravity"
"canShinechargeMovement"
{
"canShineCharge": {
"usedTiles": 23,
"openEnd": 0
}
}
Exit condition: {
"leaveShinecharged": {
"framesRemaining": 90
}
}
|
|
Requires: "Gravity"
"canShinechargeMovement"
{
"canShineCharge": {
"usedTiles": 22,
"openEnd": 0
}
}
Exit condition: {
"leaveShinecharged": {
"framesRemaining": 80
}
}
|
|
From: 1
Top Sand Entrance
To: 4
Right Item
The shinespark must be performed near the upper ledge, and not inside the sandfall. Entrance condition: {
"comeInShinecharged": {
"framesRequired": 60
},
"comesThroughToilet": "any"
}
Requires: "Gravity"
"Morph"
"canMidairShinespark"
"canShinechargeMovement"
"canPrepareForNextRoom"
{
"shinespark": {
"frames": 18
}
}
|
|
Shinespark vertically from the sand to get onto the first ledge. Carefully jump onto the second ledge and return to lure the Boulder, or shoot it with a Super. Entrance condition: {
"comeInShinecharged": {
"framesRequired": 90
},
"comesThroughToilet": "any"
}
Requires: "Gravity"
"Morph"
"canPlayInSand"
"canShinechargeMovement"
{
"shinespark": {
"frames": 12
}
}
{
"or": [
"canCarefulJump",
{
"ammo": {
"type": "Super",
"count": 1
}
},
{
"enemyDamage": {
"enemy": "Boulder",
"type": "contact",
"hits": 1
}
}
]
}
|
|
Requires: "Gravity"
"canShinechargeMovement"
{
"canShineCharge": {
"usedTiles": 33,
"openEnd": 2
}
}
Exit condition: {
"leaveShinecharged": {
"framesRemaining": 120
}
}
|
|
Use Hijump or one walljump on the left before a diagonal spark. Entrance condition: {
"comeInShinecharged": {
"framesRequired": 60
}
}
Requires: "canMidairShinespark"
"canShinechargeMovement"
{
"or": [
"HiJump",
"canWalljump"
]
}
{
"shinespark": {
"frames": 45,
"excessFrames": 11
}
}
|
|
Entrance condition: {
"comeInShinecharging": {
"length": 2,
"openEnd": 0
}
}
Requires: "canShinechargeMovement" Exit condition: {
"leaveShinecharged": {
"framesRemaining": 35
}
}
|
|
Entrance condition: {
"comeInShinecharged": {
"framesRequired": 130
}
}
Requires: "canShinechargeMovement"
{
"shinespark": {
"frames": 2
}
}
Exit condition: {
"leaveWithSpark": {}
}
|
|
Pseudo screw the left pirate, or clear the left side with shinesparks, then IBJ out Requires: "h_canIBJ"
{
"or": [
{
"and": [
"canShinechargeMovement",
"canUseSpeedEchoes",
{
"canShineCharge": {
"usedTiles": 19,
"openEnd": 0
}
},
{
"shinespark": {
"frames": 1,
"excessFrames": 1
}
}
]
},
{
"and": [
"canShinechargeMovement",
"canUseSpeedEchoes",
{
"enemyDamage": {
"enemy": "Pink Space Pirate (standing)",
"type": "contact",
"hits": 1
}
},
{
"canShineCharge": {
"usedTiles": 21,
"openEnd": 0
}
},
{
"shinespark": {
"frames": 2,
"excessFrames": 2
}
}
]
},
{
"and": [
"canPseudoScrew",
{
"enemyDamage": {
"enemy": "Pink Space Pirate (standing)",
"type": "contact",
"hits": 1
}
}
]
}
]
}
|
|
From: 3
Central Junction with all Standing Pirates Killed
To: 1
Top Left Door (locked)
Requires: "canShinechargeMovement"
{
"or": [
{
"and": [
"HiJump",
{
"canShineCharge": {
"usedTiles": 21,
"openEnd": 0
}
},
{
"shinespark": {
"frames": 21,
"excessFrames": 7
}
}
]
},
{
"and": [
"canShinechargeMovementComplex",
"canCarefulJump",
{
"canShineCharge": {
"usedTiles": 21,
"openEnd": 0
}
},
{
"shinespark": {
"frames": 30,
"excessFrames": 7
}
}
]
}
]
}
|
|
Start the dash close to the door to help avoid getting hit by the first Owtch. Spark up while on the right side of the platform. To avoid the Owtch on the platform, it may help to jump on the left side of the platform then jump again and spark midair above the right side. Requires: "Gravity"
"SpeedBooster"
"canShinechargeMovement"
{
"shinespark": {
"frames": 90,
"excessFrames": 50
}
}
|
|
Start the dash close to the door to help avoid getting hit by the first Owtch. Spark up while on the right side of the platform. To avoid the Owtch on the platform, it may help to jump on the left side of the platform then jump again and spark midair above the right side. Requires: "Gravity"
"SpeedBooster"
"canShinechargeMovement"
{
"shinespark": {
"frames": 90,
"excessFrames": 11
}
}
|
|
Finish shinecharging on the raised plateau, then climb up and spark out the left door. Requires: "Gravity"
"canShinechargeMovement"
"HiJump"
{
"canShineCharge": {
"usedTiles": 33,
"openEnd": 2
}
}
{
"shinespark": {
"frames": 2
}
}
Exit condition: {
"leaveWithSpark": {}
}
|
|
From: 2
Bottom Door
To: 4
Water Level Junction
Spark vertically by the first plant on the right to hit the floating island. Entrance condition: {
"comeInShinecharged": {
"framesRequired": 50
},
"comesThroughToilet": "no"
}
Requires: "canSuitlessMaridia"
"canShinechargeMovement"
{
"shinespark": {
"frames": 14,
"excessFrames": 4
}
}
|
|
From: 2
Bottom Door
To: 4
Water Level Junction
Spark vertically by the first plant on the right to hit the floating island. Entrance condition: {
"comeInShinecharged": {
"framesRequired": 60
},
"comesThroughToilet": "yes"
}
Requires: "canSuitlessMaridia"
"canShinechargeMovement"
{
"shinespark": {
"frames": 14,
"excessFrames": 4
}
}
|
|
Shinespark midair to avoid bonking. Jump outward before sparking save Energy. Entrance condition: {
"comeInShinecharging": {
"length": 3,
"openEnd": 0
}
}
Requires: "Gravity"
"canMidairShinespark"
"canShinechargeMovement"
{
"shinespark": {
"frames": 51,
"excessFrames": 4
}
}
|
|
Shinespark midair to avoid bonking. Jump outward before sparking save Energy. Entrance condition: {
"comeInShinecharging": {
"length": 3,
"openEnd": 0
}
}
Requires: "Gravity"
"canMidairShinespark"
"canShinechargeMovement"
{
"shinespark": {
"frames": 51,
"excessFrames": 4
}
}
|
|
From: 1
West Leg Left Door
To: 2
East Leg Right Door
Notable: true Preselect Grapple and be ready to use it when entering the room. Release up or angle up before release grapple so the shinespark does not activate instantly. Use the windup frames for a shinespark to extend the duration timer. Entrance condition: {
"comeInShinecharged": {
"framesRequired": 150
}
}
Requires: "h_canNavigateUnderwater"
"canShinechargeMovement"
"Grapple"
{
"shinespark": {
"frames": 65
}
}
{
"enemyDamage": {
"enemy": "Menu",
"type": "contact",
"hits": 1
}
}
|
|
From: 3
West Leg Right Door
To: 2
East Leg Right Door
Notable: true Preselect Grapple and be ready to use it when entering the room. Release up or angle up before release grapple so the shinespark does not activate instantly. Use the windup frames for a shinespark to extend the duration timer. Entrance condition: {
"comeInShinecharged": {
"framesRequired": 150
}
}
Requires: "h_canNavigateUnderwater"
"canShinechargeMovement"
"Grapple"
{
"shinespark": {
"frames": 65
}
}
{
"enemyDamage": {
"enemy": "Menu",
"type": "contact",
"hits": 1
}
}
|
|
Requires: {
"obstaclesCleared": [
"f_ShaktoolDoneDigging"
]
}
"canShinechargeMovement"
"canWaterShineCharge"
{
"canShineCharge": {
"usedTiles": 33,
"openEnd": 2
}
}
Exit condition: {
"leaveShinecharged": {
"framesRemaining": 80
}
}
|
|
Requires: {
"obstaclesCleared": [
"f_ShaktoolDoneDigging"
]
}
"canShinechargeMovement"
"Gravity"
{
"canShineCharge": {
"usedTiles": 33,
"openEnd": 2
}
}
Exit condition: {
"leaveShinecharged": {
"framesRemaining": 100
}
}
|
|
Requires: {
"obstaclesCleared": [
"f_ShaktoolDoneDigging"
]
}
"canShinechargeMovement"
"canWaterShineCharge"
{
"canShineCharge": {
"usedTiles": 33,
"openEnd": 2
}
}
Exit condition: {
"leaveShinecharged": {
"framesRemaining": 80
}
}
|
|
Requires: {
"obstaclesCleared": [
"f_ShaktoolDoneDigging"
]
}
"canShinechargeMovement"
"Gravity"
{
"canShineCharge": {
"usedTiles": 33,
"openEnd": 2
}
}
Exit condition: {
"leaveShinecharged": {
"framesRemaining": 100
}
}
|
|
Requires: {
"obstaclesCleared": [
"A"
]
}
"canShinechargeMovement"
{
"canShineCharge": {
"usedTiles": 15,
"openEnd": 0
}
}
Exit condition: {
"leaveShinecharged": {
"framesRemaining": 135
}
}
|
|
Requires: {
"canShineCharge": {
"usedTiles": 29,
"openEnd": 0
}
}
"canShinechargeMovement"
Exit condition: {
"leaveShinecharged": {
"framesRemaining": 145
}
}
|
|
Requires: {
"canShineCharge": {
"usedTiles": 29,
"openEnd": 0
}
}
"canShinechargeMovement"
Exit condition: {
"leaveShinecharged": {
"framesRemaining": 145
}
}
|
|
Requires: {
"or": [
"canMetroidAvoid",
"Ice",
"f_KilledMetroidRoom1"
]
}
"canShinechargeMovement"
{
"canShineCharge": {
"usedTiles": 31,
"openEnd": 1
}
}
Exit condition: {
"leaveShinecharged": {
"framesRemaining": 140
}
}
|
|
Requires: {
"or": [
"canMetroidAvoid",
"Ice",
"f_KilledMetroidRoom1"
]
}
"canShinechargeMovement"
{
"canShineCharge": {
"usedTiles": 23,
"openEnd": 1
}
}
Exit condition: {
"leaveShinecharged": {
"framesRemaining": 140
}
}
|
|
Requires: {
"or": [
"canMetroidAvoid",
"Ice",
"f_KilledMetroidRoom3"
]
}
"canShinechargeMovement"
{
"canShineCharge": {
"usedTiles": 29,
"openEnd": 2
}
}
Exit condition: {
"leaveShinecharged": {
"framesRemaining": 105
}
}
|
|
Requires: {
"canShineCharge": {
"usedTiles": 33,
"openEnd": 2
}
}
"canShinechargeMovement"
Exit condition: {
"leaveShinecharged": {
"framesRemaining": 135
}
}
|
|
Entrance condition: {
"comeInShinecharged": {
"framesRequired": 15
}
}
Requires: "canPrepareForNextRoom"
"canShinechargeMovement"
"canMidairShinespark"
{
"shinespark": {
"frames": 57,
"excessFrames": 13
}
}
|
