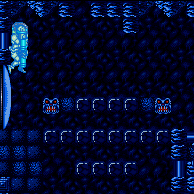
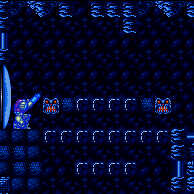
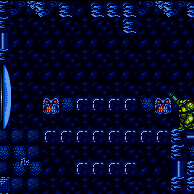
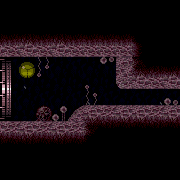
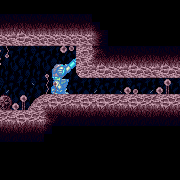
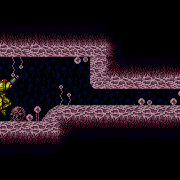
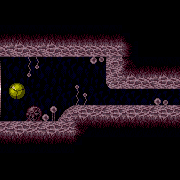
canSpringBallBounce (Very Hard)
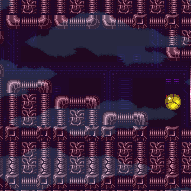
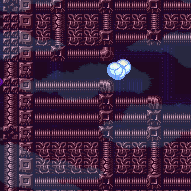
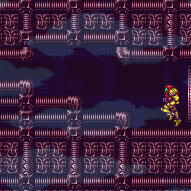
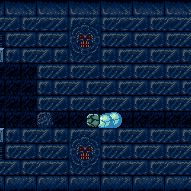
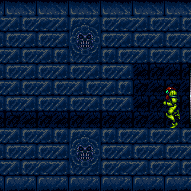
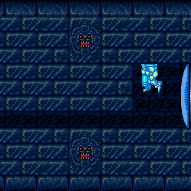
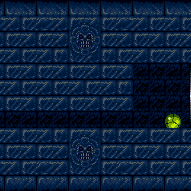
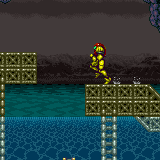
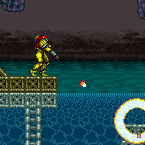
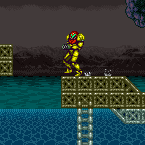
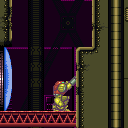
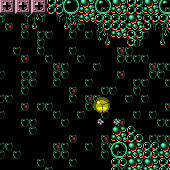
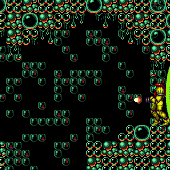
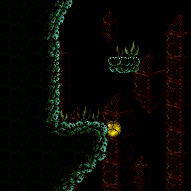
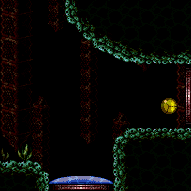
Using a lateral mid-air morph to bounce off a surface with Spring Ball while retaining previous momentum.
Dependencies: canSpeedyJump, canTrivialMidAirMorph, canMidAirMorph, canLateralMidAirMorph, canDash
Strats ()
From: 1
Left Door
To: 1
Left Door
Requires: "f_DefeatedBombTorizo" Exit condition: {
"leaveWithSpringBallBounce": {
"remoteRunway": {
"length": 8,
"openEnd": 1
},
"landingRunway": {
"length": 1,
"openEnd": 1
},
"movementType": "uncontrolled"
}
} |
From: 1
Left Door
To: 1
Left Door
Exit condition: {
"leaveWithSpringBallBounce": {
"remoteRunway": {
"length": 5,
"openEnd": 1
},
"landingRunway": {
"length": 1,
"openEnd": 1
},
"movementType": "uncontrolled"
}
} |
|
Entrance condition: {
"comeInWithBlueSpringBallBounce": {
"movementType": "any"
}
}Clears obstacles: A, B |
|
Entrance condition: {
"comeInWithBlueSpringBallBounce": {
"movementType": "controlled",
"maxExtraRunSpeed": "$3.F"
}
}Requires: "canInsaneJump" |
From: 3
Top Right Door
To: 6
Main Junction
Entrance condition: {
"comeInShinecharging": {
"length": 1,
"openEnd": 0
}
}Requires: "canInsaneJump" "canLongChainTemporaryBlue" "can4HighMidAirMorph" "canSpringBallBounce" Dev note: There is 1 unusable tile in this runway. |
From: 3
Top Right Door
To: 6
Main Junction
Entrance condition: {
"comeInWithTemporaryBlue": {}
}Requires: "canInsaneJump" "canLongChainTemporaryBlue" "can4HighMidAirMorph" "canSpringBallBounce" |
|
Entrance condition: {
"comeInWithBlueSpringBallBounce": {
"movementType": "controlled",
"maxExtraRunSpeed": "$3.F"
}
}Requires: "canInsaneJump" |
From: 4
Middle Right Door
To: 6
Main Junction
Entrance condition: {
"comeInShinecharging": {
"length": 2,
"openEnd": 0
}
}Requires: "canInsaneJump" "canLongChainTemporaryBlue" "canSpringBallBounce" "can4HighMidAirMorph" Dev note: There is 1 unusable tile in this runway. |
From: 4
Middle Right Door
To: 6
Main Junction
Entrance condition: {
"comeInWithTemporaryBlue": {}
}Requires: "canInsaneJump" "canLongChainTemporaryBlue" "canSpringBallBounce" "can4HighMidAirMorph" |
From: 5
Bottom Right Door
To: 2
Bottom Left Door
Entrance condition: {
"comeInWithBlueSpringBallBounce": {
"movementType": "controlled"
}
}Clears obstacles: A |
From: 1
Top Left Door
To: 4
Top Junction (Right of Spikes)
Entrance condition: {
"comeInWithSpringBallBounce": {
"speedBooster": true,
"movementType": "controlled",
"remoteAndLandingMinTiles": [
[
30,
1
]
]
}
}Requires: "canTrickyJump" "canLateralMidAirMorph" "canSpringFling" |
From: 1
Top Left Door
To: 6
Right of Morph Tunnel with Temporary Blue
Entrance condition: {
"comeInWithBlueSpringBallBounce": {
"movementType": "controlled",
"minExtraRunSpeed": "$5.8"
}
}Requires: "canTrickyJump" "canLateralMidAirMorph" "canSpringFling" "canTemporaryBlue" |
From: 1
Top Left Door
To: 6
Right of Morph Tunnel with Temporary Blue
Use Springball on the spikes to cross the room while retaining temporary blue. Then use Spring Ball to bounce all of the way through the Morph tunnel. Entrance condition: {
"comeInWithTemporaryBlue": {}
}Requires: "canChainTemporaryBlue"
"canSpringBallBounce"
{
"spikeHits": 3
} |
Come in Shinecharging, Leave With Temporary Blue (Spring Ball Bounce)
(Extreme)
Final Missile Bombway
From: 1
Left Door
To: 2
Right Door
Unmorph immediately after exiting the tunnel while still descending, to continue chaining temporary blue. The frame window for the unmorph depends on the alignment of Samus' bounces; in the worst case where Samus bounces upward while exiting, this method will unavoidably fail. Entrance condition: {
"comeInShinecharging": {
"length": 2,
"openEnd": 0
}
}Requires: "canChainTemporaryBlue" "canSpringBallBounce" "canInsaneJump" Exit condition: {
"leaveWithTemporaryBlue": {}
}Unlocks doors: {"types":["ammo"],"requires":[]}Dev note: FIXME: The canInsaneJump is for difficulty placement for the unmorph while exiting the tunnel; it may be better to introduce a specific tech for this? Doing a 'canPauseRemorphTemporaryBlue' is technically an alternative, but it seems to be significantly harder. |
Come in Shinecharging, Leave With Temporary Blue (Spring Ball Bounce)
(Extreme)
Final Missile Bombway
From: 2
Right Door
To: 1
Left Door
Unmorph immediately after exiting the tunnel while still descending, to continue chaining temporary blue. The frame window for the unmorph depends on the alignment of Samus' bounces; in the worst case where Samus bounces upward while exiting, this method will unavoidably fail. Entrance condition: {
"comeInShinecharging": {
"length": 2,
"openEnd": 0
}
}Requires: "canChainTemporaryBlue" "canSpringBallBounce" "canInsaneJump" Exit condition: {
"leaveWithTemporaryBlue": {}
}Unlocks doors: {"types":["ammo"],"requires":[]}Dev note: FIXME: The canInsaneJump is for difficulty placement for the unmorph while exiting the tunnel; it may be better to introduce a specific tech for this? Doing a 'canPauseRemorphTemporaryBlue' is technically an alternative, but it seems to be significantly harder. |
From: 2
Right Door
To: 1
Left Door
Entrance condition: {
"comeInShinecharging": {
"length": 2,
"openEnd": 0
}
}Requires: "canTemporaryBlue" "canSpringBallBounce" Dev note: There is 1 unusable tile in this runway. |
From: 2
Right Door
To: 1
Left Door
Entrance condition: {
"comeInWithBlueSpringBallBounce": {
"movementType": "controlled"
}
}Requires: "canInsaneJump" |
From: 2
Right Door
To: 1
Left Door
Entrance condition: {
"comeInWithTemporaryBlue": {}
}Requires: "canChainTemporaryBlue" "canSpringBallBounce" |
|
Exit condition: {
"leaveWithSpringBallBounce": {
"remoteRunway": {
"length": 31,
"openEnd": 0
},
"landingRunway": {
"length": 3,
"openEnd": 1
},
"movementType": "uncontrolled"
}
} |
|
Exit condition: {
"leaveWithSpringBallBounce": {
"remoteRunway": {
"length": 31,
"openEnd": 0
},
"landingRunway": {
"length": 3,
"openEnd": 1
},
"movementType": "uncontrolled"
}
} |
From: 1
Top Left Door
To: 1
Top Left Door
Gain speed using the long runway at the top-right of room, and use Space Jump to carry it across the room into a spring ball bounce into the other room. Requires: "canPreciseSpaceJump"
{
"obstaclesCleared": [
"A"
]
}Exit condition: {
"leaveWithSpringBallBounce": {
"remoteRunway": {
"length": 31,
"openEnd": 1,
"steepUpTiles": 9
},
"landingRunway": {
"length": 3,
"openEnd": 1
},
"maxExtraRunSpeed": "$5.A",
"movementType": "uncontrolled"
}
} |
From: 1
Top Left Door
To: 1
Top Left Door
Exit condition: {
"leaveWithSpringBallBounce": {
"remoteRunway": {
"length": 8,
"openEnd": 1
},
"landingRunway": {
"length": 3,
"openEnd": 1
},
"movementType": "uncontrolled"
}
} |
From: 1
Top Left Door
To: 7
Junction (Left Ledge Below Bomb Blocks)
Entrance condition: {
"comeInGettingBlueSpeed": {
"length": 3,
"openEnd": 0
}
}Requires: {
"or": [
"canBlueSpaceJump",
{
"and": [
"canSpringBallBounce",
"canTrickyJump"
]
},
"canLongChainTemporaryBlue"
]
}Clears obstacles: A |
From: 1
Top Left Door
To: 7
Junction (Left Ledge Below Bomb Blocks)
Entrance condition: {
"comeInWithBlueSpringBallBounce": {
"movementType": "controlled"
}
}Requires: "canTrickyJump" Clears obstacles: A |
From: 3
Top Right Door
To: 1
Top Left Door
Gain speed using the long runway at the top-right of room, do a big jump across the room into a mockball or speedball, then use controlled bounces to make it through the top-left door. Requires: {
"obstaclesCleared": [
"A",
"C"
]
}
"h_speedDash"
"canInsaneJump"Exit condition: {
"leaveWithSpringBallBounce": {
"remoteRunway": {
"length": 31,
"openEnd": 1,
"steepUpTiles": 9
},
"landingRunway": {
"length": 3,
"openEnd": 1
},
"minExtraRunSpeed": "$4.9",
"movementType": "controlled"
}
}Unlocks doors: {"types":["ammo"],"requires":[],"useImplicitRequires":false}Dev note: Unlocking doors would be done ahead-of-time when the door is opened, i.e. when obstacle 'C' is set. |
From: 8
Central Junction
To: 2
Middle Left Door
Requires: {
"canShineCharge": {
"usedTiles": 25,
"steepUpTiles": 3,
"steepDownTiles": 3,
"openEnd": 1
}
}
"canLongChainTemporaryBlue"
"canXRayTurnaround"
"can4HighMidAirMorph"
"canSpringBallBounce"Exit condition: {
"leaveWithTemporaryBlue": {}
}Unlocks doors: {"types":["ammo"],"requires":[]} |
From: 8
Central Junction
To: 5
Alcatraz Door
Requires: {
"canShineCharge": {
"usedTiles": 25,
"steepUpTiles": 3,
"steepDownTiles": 3,
"openEnd": 1
}
}
"canSpringBallBounce"
"canPauseRemorphTemporaryBlue"Exit condition: {
"leaveWithTemporaryBlue": {}
}Unlocks doors: {"types":["ammo"],"requires":[]} |
|
Bring temporary blue from the right side door all the way to the missile location using Springball, SpaceJump, or Morph-UnMorphs. Entrance condition: {
"comeInShinecharging": {
"length": 1,
"openEnd": 1
}
}Requires: "canTemporaryBlue"
"canInsaneJump"
{
"or": [
"canLongChainTemporaryBlue",
{
"and": [
"canSpeedball",
"canSpringBallBounce",
"canSlowShortCharge"
]
},
{
"and": [
"canBlueSpaceJump",
"canMockball",
"canSlowShortCharge"
]
}
]
}Clears obstacles: A Dev note: There is 1 unusable tile in this runway. |
|
Exit condition: {
"leaveWithSpringBallBounce": {
"remoteRunway": {
"length": 5,
"openEnd": 1
},
"landingRunway": {
"length": 2,
"openEnd": 1
},
"movementType": "uncontrolled"
}
}Dev note: One tile of landing runway is unusable; it could be used with a shorter remoteRunway, but there's no application yet. |
|
Exit condition: {
"leaveWithSpringBallBounce": {
"remoteRunway": {
"length": 5,
"openEnd": 1
},
"landingRunway": {
"length": 3,
"openEnd": 1
},
"movementType": "uncontrolled"
}
} |
From: 1
Left Door
To: 2
Right Door
Entrance condition: {
"comeInGettingBlueSpeed": {
"length": 6,
"openEnd": 1,
"steepUpTiles": 1,
"steepDownTiles": 1,
"minExtraRunSpeed": "$1.2",
"maxExtraRunSpeed": "$2.8"
}
}Requires: "canSlowShortCharge" "canSpeedball" "canSpringBallBounce" "canTrickyJump" Clears obstacles: A Dev note: FIXME: Larger speeds (as high as max speed $7.0) can also work but require greater precision It would also be possible to stop in the middle of the room and then gain blue speed in-room to continue. |
From: 1
Left Door
To: 2
Right Door
Entrance condition: {
"comeInWithBlueSpringBallBounce": {
"movementType": "controlled",
"minExtraRunSpeed": "$1.2",
"maxExtraRunSpeed": "$2.8"
}
}Requires: "canTrickyJump" Clears obstacles: A Dev note: FIXME: Larger speeds (as high as max speed $7.0) can also work but require greater precision It would also be possible to stop in the middle of the room and then gain blue speed in-room to continue. |
From: 2
Right Door
To: 1
Left Door
Entrance condition: {
"comeInGettingBlueSpeed": {
"length": 6,
"openEnd": 1,
"steepUpTiles": 1,
"steepDownTiles": 1,
"minExtraRunSpeed": "$2.2",
"maxExtraRunSpeed": "$2.8"
}
}Requires: "canSpeedball" "canSpringBallBounce" "canTrickyJump" Clears obstacles: A Dev note: FIXME: Larger speeds (as high as max speed $7.0) can also work but require greater precision It would also be possible to stop in the middle of the room and then gain blue speed in-room to continue. |
From: 2
Right Door
To: 1
Left Door
Entrance condition: {
"comeInWithBlueSpringBallBounce": {
"movementType": "controlled",
"minExtraRunSpeed": "$2.2",
"maxExtraRunSpeed": "$2.8"
}
}Requires: "canTrickyJump" Clears obstacles: A Dev note: FIXME: Larger speeds (as high as max speed $7.0) can also work but require greater precision It would also be possible to stop in the middle of the room and then gain blue speed in-room to continue. |
|
Exit condition: {
"leaveWithSpringBallBounce": {
"remoteRunway": {
"length": 45,
"openEnd": 1
},
"landingRunway": {
"length": 3,
"openEnd": 1
},
"movementType": "uncontrolled"
}
} |
|
Exit condition: {
"leaveWithSpringBallBounce": {
"remoteRunway": {
"length": 45,
"openEnd": 1
},
"landingRunway": {
"length": 3,
"openEnd": 1
},
"movementType": "uncontrolled"
}
} |
From: 2
Right Door
To: 2
Right Door
Exit condition: {
"leaveWithSpringBallBounce": {
"remoteRunway": {
"length": 30,
"openEnd": 1,
"gentleUpTiles": 2,
"steepDownTiles": 4
},
"landingRunway": {
"length": 1,
"openEnd": 1
},
"minExtraRunSpeed": "$1.9",
"movementType": "uncontrolled"
}
} |
|
Requires: "Gravity" "canBlueSpaceJump" Exit condition: {
"leaveWithSpringBallBounce": {
"remoteRunway": {
"length": 18,
"openEnd": 1,
"steepUpTiles": 1,
"steepDownTiles": 2
},
"landingRunway": {
"length": 8,
"openEnd": 1,
"steepUpTiles": 1
},
"movementType": "controlled"
}
} |
|
Run for 7 tiles for enough speed to Spring Ball from the submerged platform up to the platform enemy, above the water. Turning on Speed Booster midjump, after running 7+ tiles, will automatically hit the run speed requirement. It is not necessary to enter the water to clear the rightmost Choot. Requires: "canTrickyJump"
{
"or": [
{
"disableEquipment": "SpeedBooster"
},
"canTrickyDashJump"
]
}
"canSpeedyJump"
"canSpringBallBounce"
"canMockball"
"SpaceJump" |
|
Using an exact runway size of 7 tiles; use extremely precise, controlled Spring Ball bounces to cross the ocean. 7 tiles of runspeed can freely be achieved by requipping SpeedBooster after reaching the max normal run speed. Mockball down the submerged ramp and begin Spring Ball bouncing either above the water, or under water using the platforms. The final Spring Ball bounce must be on the left edge of the rightmost underwater platform. While the bounce is occuring, setup a mid-air Spring Ball Jump to escape the water and reach the door. Requires: {
"notable": "Speedy Spring Ball Bounce to the Door"
}
"canInsaneJump"
"canSpeedyJump"
"canSpringBallBounce"
"canDoubleSpringBallJumpMidAir"
"canMockball" |
From: 1
Left Door
To: 2
Right Door
Build up run speed and then use controlled Spring Ball bounces to cross the ocean to the far right ledge, and then use Space Jump to reach the door. Mockball down the submerged ramp and begin Spring Ball bouncing under water using the platforms. Disable Spring Ball after the final jump once Samus starts falling again as a way to gain extra speed. Requires: {
"notable": "Spring Ball Bounce to the Door with SpaceJump"
}
"canTrickyJump"
"canSpaceJumpWaterBounce"
"canSpringBallBounce"
"canSpringFling"
"canMockball"
{
"or": [
"canDownGrab",
"canWalljump"
]
} |
From: 2
Right Door
To: 2
Right Door
Requires: "Gravity" "SpaceJump" Exit condition: {
"leaveWithSpringBallBounce": {
"remoteRunway": {
"length": 17,
"openEnd": 1,
"steepUpTiles": 3,
"steepDownTiles": 2,
"startingDownTiles": 1
},
"landingRunway": {
"length": 5,
"openEnd": 1,
"steepUpTiles": 1
},
"movementType": "uncontrolled"
}
} |
|
Open the door and step as close to the transition as possible. Run, jump, lateral midair morph on the way down, then bounce off the pedestal to get to the other side. Requires: "canSpringBallBounce"
"canDisableEquipment"
{
"doorUnlockedAtNode": 1
}
{
"or": [
"canTrickyJump",
"h_useMorphBombs"
]
}Collects items: 3 |
|
Run, jump, lateral midair morph on the way down, then bounce off the pedestal to get to the other side. Entrance condition: {
"comeInRunning": {
"speedBooster": "any",
"minTiles": 1
}
}Requires: "canSpringBallBounce"
"canDisableEquipment"
{
"or": [
"canTrickyJump",
"h_useMorphBombs"
]
}Collects items: 3 |
From: 2
Upper Right Section - Top Right Door
To: 2
Upper Right Section - Top Right Door
Requires: "SpaceJump" Exit condition: {
"leaveWithSpringBallBounce": {
"remoteRunway": {
"length": 45,
"openEnd": 1
},
"landingRunway": {
"length": 7,
"openEnd": 1,
"steepUpTiles": 1
},
"movementType": "uncontrolled"
}
} |
From: 3
Upper Right Section - Bottom Right Door
To: 3
Upper Right Section - Bottom Right Door
Do a neutral bounce (lateral mid-air morph into not holding jump while landing) into an uncontrolled bounce. Requires: "canInsaneJump" Exit condition: {
"leaveWithSpringBallBounce": {
"remoteRunway": {
"length": 45,
"openEnd": 1
},
"landingRunway": {
"length": 7,
"openEnd": 1,
"steepUpTiles": 1
},
"minExtraRunSpeed": "$5.2",
"movementType": "uncontrolled"
}
} |
From: 3
Upper Right Section - Bottom Right Door
To: 3
Upper Right Section - Bottom Right Door
Requires: "SpaceJump" Exit condition: {
"leaveWithSpringBallBounce": {
"remoteRunway": {
"length": 45,
"openEnd": 1
},
"landingRunway": {
"length": 7,
"openEnd": 1,
"steepUpTiles": 1
},
"movementType": "uncontrolled"
}
} |
From: 4
Lower Section - Top Right Door
To: 4
Lower Section - Top Right Door
Requires: "canPreciseSpaceJump" Exit condition: {
"leaveWithSpringBallBounce": {
"remoteRunway": {
"length": 23,
"openEnd": 1,
"steepUpTiles": 1,
"steepDownTiles": 5
},
"landingRunway": {
"length": 1,
"openEnd": 1
},
"movementType": "uncontrolled"
}
} |
From: 4
Lower Section - Top Right Door
To: 4
Lower Section - Top Right Door
Requires: {
"canShineCharge": {
"usedTiles": 20,
"steepUpTiles": 1,
"steepDownTiles": 4,
"openEnd": 1
}
}
"canSpeedball"
"canSpringBallBounce"
"canTrickyJump"
"HiJump"
"canSpringBallJumpMidAir"
"canChainTemporaryBlue"Exit condition: {
"leaveWithTemporaryBlue": {}
} |
From: 5
Lower Section - Bottom Right Door
To: 5
Lower Section - Bottom Right Door
Use the runway on the left side of the room to gain speed and bounce across the room. Requires: "canTrickySpringBallBounce" Exit condition: {
"leaveWithSpringBallBounce": {
"remoteRunway": {
"length": 22,
"openEnd": 1
},
"landingRunway": {
"length": 9,
"openEnd": 1,
"steepUpTiles": 2
},
"minExtraRunSpeed": "$1.2",
"maxExtraRunSpeed": "$4.8",
"blue": "any",
"movementType": "controlled"
}
}Dev note: Higher speed (at least up to $4.C) is possible with greater difficulty. |
From: 5
Lower Section - Bottom Right Door
To: 5
Lower Section - Bottom Right Door
Requires: "canPreciseSpaceJump" Exit condition: {
"leaveWithSpringBallBounce": {
"remoteRunway": {
"length": 23,
"openEnd": 1,
"steepUpTiles": 1,
"steepDownTiles": 5
},
"landingRunway": {
"length": 9,
"openEnd": 1,
"steepUpTiles": 2
},
"movementType": "uncontrolled"
}
} |
From: 5
Lower Section - Bottom Right Door
To: 5
Lower Section - Bottom Right Door
Requires: {
"canShineCharge": {
"usedTiles": 20,
"steepUpTiles": 1,
"steepDownTiles": 4,
"openEnd": 1
}
}
"canSpeedball"
"canSpringBallBounce"
"canTrickyJump"
"canChainTemporaryBlue"Exit condition: {
"leaveWithTemporaryBlue": {}
} |
From: 1
Left Door
To: 2
Right Door
Requires: "canTrickyJump" Exit condition: {
"leaveWithSpringBallBounce": {
"remoteRunway": {
"length": 16,
"openEnd": 1
},
"landingRunway": {
"length": 1,
"openEnd": 1
},
"minExtraRunSpeed": "$1.2",
"maxExtraRunSpeed": "$3.9",
"movementType": "uncontrolled"
}
}Unlocks doors: {"types":["ammo"],"requires":[]} |
From: 1
Bottom Left Door
To: 1
Bottom Left Door
Exit condition: {
"leaveWithSpringBallBounce": {
"remoteRunway": {
"length": 23,
"openEnd": 1
},
"landingRunway": {
"length": 3,
"openEnd": 1
},
"movementType": "uncontrolled"
}
} |
From: 1
Bottom Left Door
To: 1
Bottom Left Door
Requires: {
"obstaclesCleared": [
"C"
]
}Exit condition: {
"leaveWithSpringBallBounce": {
"remoteRunway": {
"length": 31,
"openEnd": 0
},
"landingRunway": {
"length": 3,
"openEnd": 1
},
"movementType": "uncontrolled"
}
} |
From: 1
Top Left Door
To: 1
Top Left Door
Exit condition: {
"leaveWithSpringBallBounce": {
"remoteRunway": {
"length": 5,
"openEnd": 1
},
"landingRunway": {
"length": 1,
"openEnd": 1
},
"movementType": "uncontrolled"
}
} |
From: 1
Top Left Door
To: 3
Bottom Left Door
Entrance condition: {
"comeInShinecharging": {
"length": 1,
"openEnd": 0
}
}Requires: "canLongChainTemporaryBlue" "canSpringBallBounce" "canXRayTurnaround" Exit condition: {
"leaveWithTemporaryBlue": {}
}Unlocks doors: {"types":["ammo"],"requires":[]} |
|
Exit condition: {
"leaveWithSpringBallBounce": {
"remoteRunway": {
"length": 5,
"openEnd": 1
},
"landingRunway": {
"length": 1,
"openEnd": 1
},
"movementType": "uncontrolled"
}
} |
From: 2
Right Door
To: 3
Bottom Left Door
Entrance condition: {
"comeInShinecharging": {
"length": 1,
"openEnd": 0
}
}Requires: "canLongChainTemporaryBlue" "canSpringBallBounce" Exit condition: {
"leaveWithTemporaryBlue": {}
}Unlocks doors: {"types":["ammo"],"requires":[]} |
From: 3
Bottom Left Door
To: 1
Top Left Door
Entrance condition: {
"comeInShinecharging": {
"length": 2,
"openEnd": 0
}
}Requires: "canLongChainTemporaryBlue" "canSpringBallBounce" "canXRayTurnaround" Exit condition: {
"leaveWithTemporaryBlue": {}
}Unlocks doors: {"types":["ammo"],"requires":[]} |
From: 3
Bottom Left Door
To: 2
Right Door
Entrance condition: {
"comeInShinecharging": {
"length": 2,
"openEnd": 0
}
}Requires: "canLongChainTemporaryBlue" "canSpringBallBounce" "canXRayTurnaround" Exit condition: {
"leaveWithTemporaryBlue": {}
}Unlocks doors: {"types":["ammo"],"requires":[]} |
|
Requires: {
"obstaclesCleared": [
"C"
]
}Exit condition: {
"leaveWithSpringBallBounce": {
"remoteRunway": {
"length": 18,
"openEnd": 0
},
"landingRunway": {
"length": 4,
"openEnd": 1
},
"movementType": "uncontrolled"
}
} |
|
Exit condition: {
"leaveWithSpringBallBounce": {
"remoteRunway": {
"length": 23,
"openEnd": 0
},
"landingRunway": {
"length": 5,
"openEnd": 1
},
"movementType": "uncontrolled"
}
} |
From: 1
Left Door
To: 2
Right Door
Entrance condition: {
"comeInShinecharging": {
"length": 1,
"openEnd": 0
}
}Requires: "canTemporaryBlue" "canSpringBallBounce" Clears obstacles: A Dev note: There is 1 unusable tile in this runway. TODO: Add an insane speedball strat which is possible by jumping up through the door blue with very low speed. |
From: 1
Left Door
To: 2
Right Door
Entrance condition: {
"comeInWithTemporaryBlue": {}
}Requires: "canChainTemporaryBlue" "canSpringBallBounce" Clears obstacles: A Dev note: There is 1 unusable tile in this runway. |
|
Requires: {
"canShineCharge": {
"usedTiles": 17,
"openEnd": 1
}
}
"canTemporaryBlue"
"canSpringBallBounce"Clears obstacles: A |
From: 1
Left Door
To: 4
Right Hidden Item
Enter the room with a precisely positioned blue Spring Ball bounce. Enter the tunnel and bounce all the way through. Use a controlled bounce to break the bomb blocks. Entrance condition: {
"comeInWithBlueSpringBallBounce": {
"movementType": "controlled",
"maxExtraRunSpeed": "$2.4"
}
}Requires: "canInsaneJump" Collects items: 3 Dev note: Technically, it is always seems possible to reach the item pedestal with a spring fling, but without a bounce far to the right it requires an earlier pause press (before exiting the tunnel); this can be hard to prepare for since the earlier pause won't work if the bounce happens to be further right. |
From: 1
Left Door
To: 4
Right Hidden Item
Gain temporary blue at the end of the runway. Then spring ball bounce through the tunnel. Press pause while exiting the tunnel. If Samus bounced far enough right, disable spring ball (a 'spring fling') to make it directly onto the item pedestal, chaining temporary blue from there. Otherwise, unpause without disabling spring ball, and chain temporary blue by landing on the ground. Entrance condition: {
"comeInShinecharging": {
"length": 3,
"openEnd": 0
}
}Requires: "canTrickyJump" "canChainTemporaryBlue" "canSpringBallBounce" "canSpringFling" Collects items: 3 Dev note: Technically, it is always seems possible to reach the item pedestal with a spring fling, but without a bounce far to the right it requires an earlier pause press (before exiting the tunnel); this can be hard to prepare for since the earlier pause won't work if the bounce happens to be further right. |
From: 1
Left Door
To: 4
Right Hidden Item
Gain temporary blue at the end of the runway. Then spring ball bounce through the tunnel. Press pause while exiting the tunnel. If Samus bounced far enough right, disable spring ball (a 'spring fling') to make it directly onto the item pedestal, chaining temporary blue from there. Otherwise, unpause without disabling spring ball, and chain temporary blue by landing on the ground. Entrance condition: {
"comeInWithTemporaryBlue": {}
}Requires: "canTrickyJump" "canChainTemporaryBlue" "canSpringBallBounce" "canSpringFling" Collects items: 3 Dev note: Technically, it is always seems possible to reach the item pedestal with a spring fling, but without a bounce far to the right it requires an earlier pause press (before exiting the tunnel); this can be hard to prepare for since the earlier pause won't work if the bounce happens to be further right. |
|
Exit condition: {
"leaveWithSpringBallBounce": {
"remoteRunway": {
"length": 5,
"openEnd": 1
},
"landingRunway": {
"length": 1,
"openEnd": 1
},
"movementType": "uncontrolled"
}
} |
From: 3
Bottom Left Door
To: 4
Bottom Right Door
Gain temporary blue, and use Spring Ball to bounce through the spike tunnel. Then perform a long temporary blue chain across the room. Entrance condition: {
"comeInShinecharging": {
"length": 5,
"openEnd": 0
}
}Requires: "canSpringBallBounce"
{
"thornHits": 4
}
"canLongChainTemporaryBlue"Exit condition: {
"leaveWithTemporaryBlue": {}
}Unlocks doors: {"types":["ammo"],"requires":[]}Dev note: FIXME: It's possible to farm some drops along the way. |
From: 10
Right Etecoon Shaft - Bottom Left Door
To: 14
Right Etecoon Shaft - Wall Jump Checkpoint
Entrance condition: {
"comeInWithSpringBallBounce": {
"speedBooster": true,
"movementType": "any",
"remoteAndLandingMinTiles": [
[
42,
0
]
]
}
}Requires: "canTrickyJump" "canSpringBallBounce" Dev note: This needs a minimum extra run speed of $6.D. Speeds of $6.0 or $6.1 can also work but wouldn't provide a benefit over the in-room 'canTrickyDashJump' spring ball jump strat. |
From: 1
Top Left Door
To: 3
Bottom Right Door
Exit condition: {
"leaveWithSpringBallBounce": {
"remoteRunway": {
"length": 24,
"openEnd": 0
},
"landingRunway": {
"length": 4,
"openEnd": 1
},
"movementType": "uncontrolled"
}
}Unlocks doors: {"types":["ammo"],"requires":[]} |
From: 3
Bottom Right Door
To: 3
Bottom Right Door
Exit condition: {
"leaveWithSpringBallBounce": {
"remoteRunway": {
"length": 16,
"openEnd": 0
},
"landingRunway": {
"length": 4,
"openEnd": 1
},
"movementType": "uncontrolled"
}
} |
|
Exit condition: {
"leaveWithSpringBallBounce": {
"remoteRunway": {
"length": 45,
"openEnd": 1
},
"landingRunway": {
"length": 1,
"openEnd": 1
},
"movementType": "uncontrolled"
}
} |
From: 2
Right Door
To: 2
Right Door
Depending on the speed needed, first speedball from the bridge onto the floor and then bounce onto the ledge in front of the door. Exit condition: {
"leaveWithSpringBallBounce": {
"remoteRunway": {
"length": 45,
"openEnd": 1
},
"landingRunway": {
"length": 3,
"openEnd": 1
},
"minExtraRunSpeed": "$1.4",
"movementType": "controlled"
}
} |
From: 2
Right Door
To: 2
Right Door
Exit condition: {
"leaveWithSpringBallBounce": {
"remoteRunway": {
"length": 14,
"openEnd": 0
},
"landingRunway": {
"length": 3,
"openEnd": 1
},
"movementType": "uncontrolled"
}
} |
From: 1
Left Door
To: 1
Left Door
Exit condition: {
"leaveWithSpringBallBounce": {
"remoteRunway": {
"length": 31,
"openEnd": 0
},
"landingRunway": {
"length": 4,
"openEnd": 1
},
"movementType": "uncontrolled"
}
} |
|
Entrance condition: {
"comeInWithBlueSpringBallBounce": {
"movementType": "controlled",
"maxExtraRunSpeed": "$2.8"
}
}Requires: "canTrickySpringBallBounce" "canInsaneJump" Dev note: Higher speeds can work but are more difficult. |
From: 1
Left Side - Top Door
To: 13
Central Junction
Entrance condition: {
"comeInShinecharging": {
"length": 5,
"openEnd": 0,
"steepUpTiles": 1
}
}Requires: "canTemporaryBlue" "canSpringBallBounce" |
From: 1
Left Side - Top Door
To: 13
Central Junction
Entrance condition: {
"comeInWithTemporaryBlue": {}
}Requires: "canChainTemporaryBlue" "canSpringBallBounce" |
From: 6
Right Side - Top Middle Door
To: 6
Right Side - Top Middle Door
Exit condition: {
"leaveWithSpringBallBounce": {
"remoteRunway": {
"length": 17,
"openEnd": 0
},
"landingRunway": {
"length": 1,
"openEnd": 1
},
"movementType": "uncontrolled"
}
} |
From: 7
Right Side - Door Behind Super Block
To: 13
Central Junction
Position Samus next to the Super block, while keeping the speed effect with a Temporary Blue Chain, and break it. Then bounce into the morph tunnel, while keeping speed, and continuing all the way through with SpringBall Avoiding the Temporary Blue Chain is possible, but harder. Entrance condition: {
"comeInShinecharging": {
"length": 6,
"openEnd": 0
}
}Requires: "canChainTemporaryBlue"
"canSpringBallBounce"
{
"ammo": {
"type": "Super",
"count": 1
}
}Clears obstacles: F |
From: 7
Right Side - Door Behind Super Block
To: 13
Central Junction
Position Samus next to the Super block, while keeping the speed effect with a Temporary Blue Chain, and break it. Then bounce into the morph tunnel, while keeping speed, and continuing all the way through with SpringBall Entrance condition: {
"comeInWithTemporaryBlue": {}
}Requires: "canChainTemporaryBlue"
"canSpringBallBounce"
{
"ammo": {
"type": "Super",
"count": 1
}
}Clears obstacles: F |
From: 13
Central Junction
To: 1
Left Side - Top Door
Build a ShineCharge on the below platform and bring it up to the morph tunnel by chaining Temporary Blue. Aim to bounce into the tunnel opening and use springball to bounce the rest of the way while blue. Requires: {
"or": [
{
"and": [
{
"canShineCharge": {
"usedTiles": 25,
"openEnd": 0
}
},
"canXRayTurnaround"
]
},
{
"canShineCharge": {
"usedTiles": 21,
"openEnd": 0
}
}
]
}
"canChainTemporaryBlue"
"canSpringBallBounce"Clears obstacles: A |
From: 13
Central Junction
To: 7
Right Side - Door Behind Super Block
Perform a precise mockball or speedball into the morph tunnel. Then spring ball bounce through the door. Requires: {
"obstaclesCleared": [
"F"
]
}
"canTrickyJump"
"canLateralMidAirMorph"
"canTrickySpringBallBounce"Exit condition: {
"leaveWithSpringBallBounce": {
"remoteRunway": {
"length": 20,
"openEnd": 2
},
"landingRunway": {
"length": 3,
"openEnd": 1
},
"maxExtraRunSpeed": "$2.8",
"movementType": "controlled"
}
}Unlocks doors: {"types":["ammo"],"requires":[]}Dev note: Higher run speeds are possible but more difficult. |
From: 1
Top Right Door
To: 1
Top Right Door
Requires: {
"obstaclesCleared": [
"A"
]
}
{
"obstaclesNotCleared": [
"B"
]
}Exit condition: {
"leaveWithSpringBallBounce": {
"remoteRunway": {
"length": 16,
"openEnd": 1
},
"landingRunway": {
"length": 3,
"openEnd": 1
},
"minExtraRunSpeed": "$1.8",
"movementType": "uncontrolled"
}
} |
|
Entrance condition: {
"comeInWithSpringBallBounce": {
"speedBooster": true,
"movementType": "any",
"remoteAndLandingMinTiles": [
[
34,
1
]
]
}
}Dev note: This requires extra run speed of at least $6.0. |
|
Entrance condition: {
"comeInWithSpringBallBounce": {
"speedBooster": true,
"movementType": "any",
"remoteAndLandingMinTiles": [
[
42,
0
]
]
}
}Dev note: This requires extra run speed of at least $6.D. |
From: 2
Right Door
To: 3
Top Junction
Entrance condition: {
"comeInWithSpringBallBounce": {
"speedBooster": true,
"movementType": "any",
"remoteAndLandingMinTiles": [
[
32,
0
]
]
}
}Requires: "canTrickyDashJump" "canInsaneJump" Dev note: This requires extra run speed of either $6.0 or $6.1 |
From: 1
Right Door
To: 1
Right Door
Requires: "Gravity" Exit condition: {
"leaveWithSpringBallBounce": {
"remoteRunway": {
"length": 45,
"openEnd": 1
},
"landingRunway": {
"length": 2,
"openEnd": 1
},
"movementType": "uncontrolled"
}
} |
From: 1
Right Door
To: 2
Item
Entrance condition: {
"comeInWithBlueSpringBallBounce": {
"movementType": "controlled",
"maxExtraRunSpeed": "$3.F",
"minLandingTiles": 1
}
}Clears obstacles: A Dev note: Higher run speeds can also work but may require more landing tiles if the speedball occurs just before the transition. |
From: 3
Dry Platform Junction
To: 1
Right Door
Requires: "canTrickyJump" Exit condition: {
"leaveWithSpringBallBounce": {
"remoteRunway": {
"length": 32,
"openEnd": 1
},
"landingRunway": {
"length": 2,
"openEnd": 1
},
"movementType": "controlled"
}
}Unlocks doors: {"types":["ammo"],"requires":[]} |
From: 3
Dry Platform Junction
To: 1
Right Door
Perform a speedball into a temporary blue chain to reach the door. If HiJump and Spring Ball are unavailable, then getting out of the water requires a very precise jump: delay aiming down for the mid-air morph until after Samus is above the water line. Requires: {
"getBlueSpeed": {
"usedTiles": 32,
"openEnd": 1
}
}
"canChainTemporaryBlue"
"canSpeedball"
{
"or": [
"canInsaneJump",
"HiJump",
"canSpringBallBounce"
]
}Exit condition: {
"leaveWithTemporaryBlue": {}
}Unlocks doors: {"types":["ammo"],"requires":[]} |
From: 1
Right Door
To: 1
Right Door
Requires: {
"obstaclesCleared": [
"B"
]
}
"canTrickySpringBallBounce"
{
"or": [
{
"obstaclesCleared": [
"A"
]
},
{
"enemyDamage": {
"enemy": "Boyon",
"type": "contact",
"hits": 1
}
}
]
}Exit condition: {
"leaveWithSpringBallBounce": {
"remoteRunway": {
"length": 11,
"openEnd": 1
},
"landingRunway": {
"length": 4,
"openEnd": 1
},
"movementType": "controlled"
}
} |
From: 1
Right Door
To: 1
Right Door
Requires: {
"obstaclesCleared": [
"B"
]
}
"canTrickySpringBallBounce"Exit condition: {
"leaveWithSpringBallBounce": {
"remoteRunway": {
"length": 11,
"openEnd": 1
},
"landingRunway": {
"length": 4,
"openEnd": 1
},
"minExtraRunSpeed": "$2.D",
"movementType": "controlled"
}
} |
From: 1
Right Door
To: 1
Right Door
Requires: {
"obstaclesCleared": [
"B"
]
}
{
"or": [
{
"obstaclesCleared": [
"A"
]
},
"canTrickyJump"
]
}
"SpaceJump"Exit condition: {
"leaveWithSpringBallBounce": {
"remoteRunway": {
"length": 11,
"openEnd": 1
},
"landingRunway": {
"length": 4,
"openEnd": 1
},
"movementType": "uncontrolled"
}
} |
|
Exit condition: {
"leaveWithSpringBallBounce": {
"remoteRunway": {
"length": 5,
"openEnd": 2
},
"landingRunway": {
"length": 3,
"openEnd": 1
},
"movementType": "uncontrolled"
}
} |
From: 2
Bottom Right Door
To: 2
Bottom Right Door
Exit condition: {
"leaveWithSpringBallBounce": {
"remoteRunway": {
"length": 5,
"openEnd": 2
},
"landingRunway": {
"length": 3,
"openEnd": 1
},
"movementType": "uncontrolled"
}
} |
|
Exit condition: {
"leaveWithSpringBallBounce": {
"remoteRunway": {
"length": 8,
"openEnd": 1
},
"landingRunway": {
"length": 1,
"openEnd": 1
},
"movementType": "uncontrolled"
}
} |
From: 4
Bottom Right Door
To: 4
Bottom Right Door
Exit condition: {
"leaveWithSpringBallBounce": {
"remoteRunway": {
"length": 5,
"openEnd": 1
},
"landingRunway": {
"length": 1,
"openEnd": 1
},
"movementType": "uncontrolled"
}
} |
|
Requires: "SpaceJump" "canTrickyJump" Exit condition: {
"leaveWithSpringBallBounce": {
"remoteRunway": {
"length": 8,
"openEnd": 1
},
"landingRunway": {
"length": 3,
"openEnd": 1
},
"movementType": "uncontrolled"
}
} |
From: 2
Right Door
To: 2
Right Door
Space Jump all the way across the room from the left platform. Requires: "SpaceJump" "canTrickyJump" Exit condition: {
"leaveWithSpringBallBounce": {
"remoteRunway": {
"length": 5,
"openEnd": 1
},
"landingRunway": {
"length": 5,
"openEnd": 1
},
"movementType": "uncontrolled"
}
}Dev note: Another runway tile could be added if the door at node 1 is unlocked |
|
Exit condition: {
"leaveWithSpringBallBounce": {
"remoteRunway": {
"length": 4,
"openEnd": 2
},
"landingRunway": {
"length": 1,
"openEnd": 1
},
"movementType": "any"
}
} |
From: 1
Left Door
To: 1
Left Door
Exit condition: {
"leaveWithSpringBallBounce": {
"remoteRunway": {
"length": 5,
"openEnd": 1
},
"landingRunway": {
"length": 1,
"openEnd": 1
},
"movementType": "any"
}
} |
|
Exit condition: {
"leaveWithSpringBallBounce": {
"remoteRunway": {
"length": 4,
"openEnd": 2
},
"landingRunway": {
"length": 1,
"openEnd": 1
},
"movementType": "any"
}
} |
|
Requires: {
"obstaclesCleared": [
"A"
]
}Exit condition: {
"leaveWithSpringBallBounce": {
"remoteRunway": {
"length": 45,
"openEnd": 1
},
"landingRunway": {
"length": 3,
"openEnd": 1
},
"movementType": "uncontrolled"
}
} |
|
Requires: {
"obstaclesCleared": [
"A"
]
}Exit condition: {
"leaveWithSpringBallBounce": {
"remoteRunway": {
"length": 45,
"openEnd": 1
},
"landingRunway": {
"length": 4,
"openEnd": 1
},
"movementType": "uncontrolled"
}
} |
From: 1
Left Door
To: 3
Bottom Right Door
Requires: {
"doorUnlockedAtNode": 1
}
"SpaceJump"
"canTrickyJump"Exit condition: {
"leaveWithSpringBallBounce": {
"remoteRunway": {
"length": 5,
"openEnd": 1
},
"landingRunway": {
"length": 3,
"openEnd": 1
},
"movementType": "uncontrolled"
}
}Unlocks doors: {"types":["ammo"],"requires":[]} |
|
Requires: {
"or": [
"f_DefeatedKraid",
{
"obstaclesCleared": [
"f_DefeatedKraid"
]
}
]
}Exit condition: {
"leaveWithSpringBallBounce": {
"remoteRunway": {
"length": 18,
"openEnd": 1
},
"landingRunway": {
"length": 4,
"openEnd": 1
},
"movementType": "uncontrolled"
}
} |
|
Requires: {
"or": [
"f_DefeatedKraid",
{
"obstaclesCleared": [
"f_DefeatedKraid"
]
}
]
}Exit condition: {
"leaveWithSpringBallBounce": {
"remoteRunway": {
"length": 18,
"openEnd": 1
},
"landingRunway": {
"length": 4,
"openEnd": 1
},
"movementType": "uncontrolled"
}
} |
From: 1
Right Door
To: 1
Right Door
Requires: {
"obstaclesCleared": [
"A"
]
}Exit condition: {
"leaveWithSpringBallBounce": {
"remoteRunway": {
"length": 6,
"openEnd": 1
},
"landingRunway": {
"length": 1,
"openEnd": 1
},
"movementType": "uncontrolled"
}
} |
From: 3
Top Right Door
To: 3
Top Right Door
Gain temporary blue by running left to right. Spring ball bounce through the tunnel. Then continue chaining temporary blue through the door. Requires: {
"obstaclesCleared": [
"B",
"C"
]
}
{
"or": [
{
"and": [
{
"obstaclesCleared": [
"D"
]
},
{
"canShineCharge": {
"usedTiles": 17,
"openEnd": 1
}
}
]
},
{
"and": [
{
"obstaclesNotCleared": [
"D"
]
},
{
"canShineCharge": {
"usedTiles": 31,
"openEnd": 1
}
}
]
}
]
}
"canChainTemporaryBlue"
"canSpringBallBounce"Exit condition: {
"leaveWithTemporaryBlue": {}
} |
From: 3
Top Right Door
To: 5
Kihunter Junction
Spring ball bounce directly into the tunnel to break the bomb block with blue speed. The Kihunters can be killed by retreating to the morph tunnel if needed. Entrance condition: {
"comeInWithBlueSpringBallBounce": {
"movementType": "controlled",
"maxExtraRunSpeed": "$2.8"
}
}Requires: "canTrickySpringBallBounce" "canInsaneJump" Clears obstacles: B, C |
From: 2
Bottom Left Door
To: 3
Right Vertical Door
Unmorph immediately after exiting the tunnel while still descending, to continue chaining temporary blue. The frame window for the unmorph depends on the alignment of Samus' bounces. Even if Samus bounces upward out of the tunnel, it is possible to unmorph and use a pause buffer to remorph while retaining blue. Entrance condition: {
"comeInShinecharging": {
"length": 3,
"openEnd": 0
}
}Requires: "canChainTemporaryBlue"
"canSpringBallBounce"
{
"or": [
"canInsaneJump",
"canPauseRemorphTemporaryBlue"
]
}Exit condition: {
"leaveWithTemporaryBlue": {
"direction": "right"
}
}Unlocks doors: {"types":["ammo"],"requires":[]}Dev note: The runway has 1 unusable tile, to allow space to perform the blue bounce. |
From: 1
Left Side - Top Door
To: 7
Top Right Door
Entrance condition: {
"comeInWithBlueSpringBallBounce": {
"movementType": "controlled",
"minExtraRunSpeed": "$1.2",
"minLandingTiles": 0
}
}Requires: "canChainTemporaryBlue" Exit condition: {
"leaveWithTemporaryBlue": {}
}Unlocks doors: {"types":["ammo"],"requires":[]} |
|
Use the full runway of the top-right door to jump to the ledge below the Cacatac and mockball on it. Either full jump from the left side of this platform, or do a small hop followed by a big jump to cross the gap. Disabling Springball once past the Grapple Blocks makes this much easier. Requires: "canCarefulJump"
"canSpringBallBounce"
"canMockball"
{
"or": [
{
"doorUnlockedAtNode": 7
},
"canTrickyJump"
]
} |
|
Requires: "h_heatedRemoteRunwaySpringBall"
{
"heatFrames": 530
}Exit condition: {
"leaveWithSpringBallBounce": {
"remoteRunway": {
"length": 12,
"openEnd": 1
},
"landingRunway": {
"length": 6,
"openEnd": 1
},
"minExtraRunSpeed": "$2.0",
"movementType": "any"
}
}Dev note: This uses the runway in the middle of the room but logically starts at the door, to ensure it can be opened. |
From: 2
Bottom Left Door
To: 2
Bottom Left Door
Requires: {
"heatFrames": 275
}Exit condition: {
"leaveWithSpringBallBounce": {
"remoteRunway": {
"length": 18,
"openEnd": 0,
"gentleUpTiles": 3,
"gentleDownTiles": 3
},
"landingRunway": {
"length": 1,
"openEnd": 1
},
"movementType": "any"
}
} |
|
Pause immediately on room entry, and bounce just before Samus would roll off the runway. Unequip Spring Ball, then pause again as soon as possible and re-equip Spring Ball. In the case of entering with minimal extra run speed ($1.7): The bounce should be done on the last possible frame; otherwise the timing for the first pause is frame-perfect (with a 2-frame window for the second pause). With a first-frame pause and last-frame bounce, the second pause has a 4-frame window. With a second-frame pause and last-frame bounce, the second pause has a 3-frame window. With a third-frame pause and last-frame bounce, the second pause is frame-perfect. Entrance condition: {
"comeInWithMockball": {
"speedBooster": true,
"remoteAndLandingMinTiles": [
[
4,
0
]
]
}
}Requires: "canSpringBallBounce"
"canSpringFling"
"canInsaneJump"
"canBeVeryPatient"
{
"heatFrames": 145
} |
|
Entrance condition: {
"comeInWithMockball": {
"speedBooster": true,
"remoteAndLandingMinTiles": [
[
5,
0
]
]
}
}Requires: "canSpringBallBounce"
"canSpringFling"
{
"heatFrames": 150
} |
|
Entrance condition: {
"comeInWithMockball": {
"speedBooster": "any",
"remoteAndLandingMinTiles": [
[
6.4375,
0
]
]
}
}Requires: "canSpringBallBounce"
"canSpringFling"
{
"heatFrames": 140
} |
|
Requires: "h_heatedRemoteRunwaySpaceJump"
{
"heatFrames": 215
}Exit condition: {
"leaveWithSpringBallBounce": {
"remoteRunway": {
"length": 11,
"openEnd": 1
},
"landingRunway": {
"length": 6,
"openEnd": 1
},
"minExtraRunSpeed": "$2.0",
"movementType": "uncontrolled"
}
}Unlocks doors: {"types":["super"],"requires":[]}
{"types":["missiles","powerbomb"],"requires":["never"]} |
|
Requires: "h_heatedRemoteRunwaySpaceJump"
{
"heatFrames": 185
}Exit condition: {
"leaveWithSpringBallBounce": {
"remoteRunway": {
"length": 11,
"openEnd": 1
},
"landingRunway": {
"length": 6,
"openEnd": 1
},
"minExtraRunSpeed": "$2.0",
"movementType": "uncontrolled"
}
}Unlocks doors: {"types":["super"],"requires":[]}
{"types":["missiles","powerbomb"],"requires":["never"]} |
|
Requires: {
"heatFrames": 250
}Exit condition: {
"leaveWithSpringBallBounce": {
"remoteRunway": {
"length": 11,
"openEnd": 1
},
"landingRunway": {
"length": 1,
"openEnd": 1
},
"movementType": "uncontrolled"
}
} |
From: 1
Left Door
To: 2
Right Door
Use Space Jump, Spring Ball, to carry blue speed across the room; alternatively, use a long series of temporary blue chains. Entrance condition: {
"comeInGettingBlueSpeed": {
"length": 13,
"openEnd": 1
}
}Requires: "canChainTemporaryBlue"
{
"or": [
{
"and": [
"canSpeedball",
"canSpringBallBounce",
{
"heatFrames": 490
}
]
},
{
"and": [
"SpaceJump",
{
"heatFrames": 420
}
]
},
{
"and": [
"canSpeedball",
"canLongChainTemporaryBlue",
{
"heatFrames": 780
}
]
}
]
}Exit condition: {
"leaveWithTemporaryBlue": {}
}Unlocks doors: {"types":["super","powerbomb"],"requires":[]}
{"types":["missiles"],"requires":[{"heatFrames":50}]} |
From: 1
Left Door
To: 3
Top Door
Use Space Jump, Spring Ball, to carry blue speed across the room; alternatively, use a long series of temporary blue chains. Entrance condition: {
"comeInShinecharging": {
"length": 13,
"openEnd": 1
}
}Requires: "canChainTemporaryBlue"
{
"or": [
{
"and": [
"canSpeedball",
"canSpringBallBounce",
{
"heatFrames": 400
}
]
},
{
"and": [
"SpaceJump",
{
"heatFrames": 420
}
]
},
{
"and": [
"canSpeedball",
"canLongChainTemporaryBlue",
{
"heatFrames": 670
}
]
}
]
}Exit condition: {
"leaveWithTemporaryBlue": {
"direction": "right"
}
}Unlocks doors: {"types":["super","powerbomb"],"requires":[]}
{"types":["missiles"],"requires":[{"heatFrames":50}]} |
From: 2
Right Door
To: 1
Left Door
Use Space Jump, Spring Ball, to carry blue speed across the room; alternatively, use a long series of temporary blue chains. Entrance condition: {
"comeInGettingBlueSpeed": {
"length": 13,
"openEnd": 1
}
}Requires: "canChainTemporaryBlue"
{
"or": [
{
"and": [
"canSpeedball",
"canSpringBallBounce",
{
"heatFrames": 490
}
]
},
{
"and": [
"SpaceJump",
{
"heatFrames": 420
}
]
},
{
"and": [
"canSpeedball",
"canLongChainTemporaryBlue",
{
"heatFrames": 790
}
]
}
]
}Exit condition: {
"leaveWithTemporaryBlue": {}
}Unlocks doors: {"types":["super","powerbomb"],"requires":[]}
{"types":["missiles"],"requires":[{"heatFrames":50}]} |
From: 1
Left Door
To: 2
Right Door
Entrance condition: {
"comeInRunning": {
"speedBooster": false,
"minTiles": 4
}
}Requires: "Gravity"
"canCarefulJump"
"canSpringBallBounce"
{
"spikeHits": 2
}
{
"heatFrames": 350
}
{
"lavaFrames": 20
} |
From: 1
Left Door
To: 2
Right Door
Uses a runway of at least 14 tiles in the adjacent room. Disable SpeedBooster after jumping so that the lava will not take away all of Samus' momentum. Entrance condition: {
"comeInRunning": {
"speedBooster": true,
"minTiles": 14
}
}Requires: "Gravity"
{
"disableEquipment": "SpeedBooster"
}
"canSpringBallBounce"
"canTrickyJump"
{
"spikeHits": 1
}
{
"heatFrames": 240
}
{
"lavaFrames": 10
} |
From: 1
Left Door
To: 2
Right Door
Uses a runway of at least 21 tiles in the adjacent room. It will help to perform the first jump with HiJump disabled. Disable SpeedBooster before Samus reaches the lava. Entrance condition: {
"comeInRunning": {
"speedBooster": true,
"minTiles": 21
}
}Requires: "HiJump"
{
"disableEquipment": "HiJump"
}
{
"disableEquipment": "SpeedBooster"
}
"canSpringBallBounce"
"canTrickyJump"
{
"spikeHits": 1
}
{
"heatFrames": 200
}
{
"lavaFrames": 11
}Dev note: SpringFling can be used to extend the last SpringBall bounce so that runway can be shortened, but it mostly inflates the number of strats. |
From: 1
Left Door
To: 2
Right Door
It may help to perform the first jump with HiJump disabled. Entrance condition: {
"comeInRunning": {
"speedBooster": false,
"minTiles": 4
}
}Requires: "canCarefulJump"
"HiJump"
{
"disableEquipment": "HiJump"
}
"canSpringBallBounce"
{
"spikeHits": 3
}
{
"heatFrames": 350
}
{
"lavaFrames": 32
} |
From: 1
Left Door
To: 2
Right Door
Uses a runway of at least 8 tiles in the adjacent room. It will help to perform the first jump with HiJump disabled. Disable SpeedBooster before Samus reaches the lava. Entrance condition: {
"comeInRunning": {
"speedBooster": true,
"minTiles": 8
}
}Requires: "canTrickyJump"
"HiJump"
{
"disableEquipment": "HiJump"
}
{
"disableEquipment": "SpeedBooster"
}
"canSpringBallBounce"
{
"spikeHits": 2
}
{
"heatFrames": 311
}
{
"lavaFrames": 22
} |
From: 2
Right Door
To: 1
Left Door
Entrance condition: {
"comeInRunning": {
"speedBooster": false,
"minTiles": 4
}
}Requires: "Gravity"
"canSpringBallBounce"
{
"spikeHits": 2
}
{
"heatFrames": 350
}
{
"lavaFrames": 20
} |
From: 2
Right Door
To: 1
Left Door
Uses a runway of at least 14 tiles in the adjacent room. Disable SpeedBooster after jumping so that the lava will not take away all of Samus' momentum. Entrance condition: {
"comeInRunning": {
"speedBooster": true,
"minTiles": 14
}
}Requires: "Gravity"
{
"disableEquipment": "SpeedBooster"
}
"canSpringBallBounce"
"canTrickyJump"
{
"spikeHits": 1
}
{
"heatFrames": 240
}
{
"lavaFrames": 10
} |
From: 2
Right Door
To: 1
Left Door
Uses a runway of at least 21 tiles in the adjacent room. It will help to perform the first jump with HiJump disabled. Disable SpeedBooster before Samus reaches the lava. Entrance condition: {
"comeInRunning": {
"speedBooster": true,
"minTiles": 21
}
}Requires: "HiJump"
{
"disableEquipment": "HiJump"
}
{
"disableEquipment": "SpeedBooster"
}
"canSpringBallBounce"
"canTrickyJump"
{
"spikeHits": 1
}
{
"heatFrames": 200
}
{
"lavaFrames": 11
}Dev note: SpringFling can be used to extend the last SpringBall bounce so that runway can be shortened, but it mostly inflates the number of strats. |
From: 2
Right Door
To: 1
Left Door
It may help to perform the first jump with HiJump disabled. Entrance condition: {
"comeInRunning": {
"speedBooster": false,
"minTiles": 4
}
}Requires: "canCarefulJump"
"HiJump"
{
"disableEquipment": "HiJump"
}
"canSpringBallBounce"
{
"spikeHits": 3
}
{
"heatFrames": 350
}
{
"lavaFrames": 32
} |
From: 2
Right Door
To: 1
Left Door
Uses a runway of at least 8 tiles in the adjacent room. It will help to perform the first jump with HiJump disabled. Disable SpeedBooster before Samus reaches the lava. Entrance condition: {
"comeInRunning": {
"speedBooster": true,
"minTiles": 8
}
}Requires: "canTrickyJump"
"HiJump"
{
"disableEquipment": "HiJump"
}
{
"disableEquipment": "SpeedBooster"
}
"canSpringBallBounce"
{
"spikeHits": 2
}
{
"heatFrames": 311
}
{
"lavaFrames": 22
} |
From: 1
Left Door
To: 1
Left Door
Requires: "h_heatedRemoteRunwaySpaceJump"
{
"heatFrames": 320
}Exit condition: {
"leaveWithSpringBallBounce": {
"remoteRunway": {
"length": 5,
"openEnd": 2
},
"landingRunway": {
"length": 4,
"openEnd": 1
},
"minExtraRunSpeed": "$1.B",
"movementType": "uncontrolled"
}
} |
|
Requires: "h_heatedRemoteRunwayTrickySpringBall"
{
"heatFrames": 600
}
{
"or": [
"canTrickyDodgeEnemies",
{
"and": [
{
"heatFrames": 100
},
{
"enemyKill": {
"enemies": [
[
"Dragon"
],
[
"Dragon"
]
],
"excludedWeapons": [
"Bombs"
]
}
}
]
}
]
}Exit condition: {
"leaveWithSpringBallBounce": {
"remoteRunway": {
"length": 5,
"openEnd": 2
},
"landingRunway": {
"length": 4,
"openEnd": 1
},
"minExtraRunSpeed": "$1.A",
"movementType": "controlled"
}
} |
From: 2
Right Door
To: 2
Right Door
Requires: "h_heatedRemoteRunwaySpaceJump"
{
"heatFrames": 540
}
{
"or": [
"canTrickyDodgeEnemies",
{
"and": [
{
"heatFrames": 100
},
{
"enemyKill": {
"enemies": [
[
"Dragon"
],
[
"Dragon"
]
],
"excludedWeapons": [
"Bombs"
]
}
}
]
}
]
}Exit condition: {
"leaveWithSpringBallBounce": {
"remoteRunway": {
"length": 5,
"openEnd": 2
},
"landingRunway": {
"length": 4,
"openEnd": 1
},
"minExtraRunSpeed": "$1.A",
"movementType": "uncontrolled"
}
}Dev note: FIXME: a 1 -> 2 version of this could be added, to save heat frames. |
From: 3
Left Shaft - Middle Right Door
To: 3
Left Shaft - Middle Right Door
Requires: {
"heatFrames": 140
}Exit condition: {
"leaveWithSpringBallBounce": {
"remoteRunway": {
"length": 7,
"openEnd": 1
},
"landingRunway": {
"length": 4,
"openEnd": 1
},
"movementType": "uncontrolled"
}
} |
From: 4
Left Shaft - Top Right Door
To: 4
Left Shaft - Top Right Door
Requires: {
"heatFrames": 140
}Exit condition: {
"leaveWithSpringBallBounce": {
"remoteRunway": {
"length": 7,
"openEnd": 1
},
"landingRunway": {
"length": 4,
"openEnd": 1
},
"movementType": "uncontrolled"
}
} |
From: 6
Bottom Right Junction
To: 4
Bottom Right Door
Requires: {
"obstaclesCleared": [
"A"
]
}
"h_heatedRemoteRunwaySpringBall"
{
"heatFrames": 360
}Exit condition: {
"leaveWithSpringBallBounce": {
"remoteRunway": {
"length": 37,
"openEnd": 2,
"gentleDownTiles": 2
},
"landingRunway": {
"length": 2,
"openEnd": 1
},
"minExtraRunSpeed": "$3.2",
"movementType": "uncontrolled"
}
}Unlocks doors: {"types":["missiles"],"requires":[{"heatFrames":50}]}
{"types":["super"],"requires":[]}
{"types":["powerbomb"],"requires":[{"heatFrames":70}]} |
From: 2
Bottom Right Door
To: 2
Bottom Right Door
Requires: {
"heatFrames": 140
}Exit condition: {
"leaveWithSpringBallBounce": {
"remoteRunway": {
"length": 2,
"openEnd": 1
},
"landingRunway": {
"length": 1,
"openEnd": 1
},
"movementType": "uncontrolled"
}
} |
From: 1
Left Door
To: 1
Left Door
Requires: "canTrickyJump" Exit condition: {
"leaveWithSpringBallBounce": {
"remoteRunway": {
"length": 3,
"openEnd": 1
},
"landingRunway": {
"length": 1,
"openEnd": 0
},
"movementType": "uncontrolled"
}
} |
From: 2
Right Door
To: 4
Top Left Item
Entrance condition: {
"comeInShinecharging": {
"length": 2,
"openEnd": 0
}
}Requires: "canChainTemporaryBlue" "can4HighMidAirMorph" "canSpringBallBounce" Clears obstacles: B, C |
From: 2
Right Door
To: 4
Top Left Item
Entrance condition: {
"comeInWithTemporaryBlue": {}
}Requires: "canChainTemporaryBlue" "can4HighMidAirMorph" "canSpringBallBounce" Clears obstacles: C |
From: 1
Top Right Door
To: 1
Top Right Door
Requires: {
"heatFrames": 180
}Exit condition: {
"leaveWithSpringBallBounce": {
"remoteRunway": {
"length": 6,
"openEnd": 0
},
"landingRunway": {
"length": 1,
"openEnd": 1
},
"movementType": "uncontrolled"
}
} |
From: 2
Middle Right Door
To: 2
Middle Right Door
Requires: {
"heatFrames": 220
}Exit condition: {
"leaveWithSpringBallBounce": {
"remoteRunway": {
"length": 5,
"openEnd": 1
},
"landingRunway": {
"length": 3,
"openEnd": 1
},
"movementType": "uncontrolled"
}
} |
From: 1
Left Door
To: 1
Left Door
Requires: "h_heatedRemoteRunwaySpaceJump"
{
"heatFrames": 310
}Exit condition: {
"leaveWithSpringBallBounce": {
"remoteRunway": {
"length": 5,
"openEnd": 1
},
"landingRunway": {
"length": 3,
"openEnd": 1
},
"minExtraRunSpeed": "$1.A",
"movementType": "uncontrolled"
}
} |
From: 2
Right Door
To: 2
Right Door
Requires: "h_heatedRemoteRunwaySpaceJump"
{
"heatFrames": 310
}Exit condition: {
"leaveWithSpringBallBounce": {
"remoteRunway": {
"length": 5,
"openEnd": 1
},
"landingRunway": {
"length": 3,
"openEnd": 1
},
"minExtraRunSpeed": "$1.A",
"movementType": "uncontrolled"
}
} |
|
Requires: {
"or": [
"f_DefeatedCrocomire",
{
"obstaclesCleared": [
"f_DefeatedCrocomire"
]
}
]
}
"SpaceJump"Exit condition: {
"leaveWithSpringBallBounce": {
"remoteRunway": {
"length": 45,
"openEnd": 1
},
"landingRunway": {
"length": 3,
"openEnd": 1
},
"movementType": "uncontrolled"
}
} |
From: 1
Left Door
To: 1
Left Door
Requires: "h_CrocomireCameraFix" "SpaceJump" Exit condition: {
"leaveWithSpringBallBounce": {
"remoteRunway": {
"length": 14,
"openEnd": 1
},
"landingRunway": {
"length": 3,
"openEnd": 1
},
"movementType": "uncontrolled"
}
} |
|
Requires: {
"enemyKill": {
"enemies": [
[
"Fune"
]
]
}
}Exit condition: {
"leaveWithSpringBallBounce": {
"remoteRunway": {
"length": 4,
"openEnd": 1
},
"landingRunway": {
"length": 4,
"openEnd": 1
},
"minExtraRunSpeed": "$1.3",
"movementType": "uncontrolled"
}
} |
From: 2
Right Door
To: 2
Right Door
Exit condition: {
"leaveWithSpringBallBounce": {
"remoteRunway": {
"length": 2,
"openEnd": 1
},
"landingRunway": {
"length": 1,
"openEnd": 0
},
"movementType": "uncontrolled"
}
} |
From: 1
Left Door
To: 3
Junction Left of Green Gate
With at least two tiles of run speed, jump over the first moat by maximizing the jump distance and then mockball into a regular Spring Ball to jump over the second moat. Entrance condition: {
"comeInRunning": {
"speedBooster": true,
"minTiles": 2
}
}Requires: "canInsaneJump" "canMockball" "canSpringBallBounce" |
From: 1
Left Door
To: 3
Junction Left of Green Gate
With at least 6 tiles of run speed, jump over the first moat and mockball into a regular Spring Ball jump over the second moat. Aim down before reaching the ceiling to increase the jump distance. Entrance condition: {
"comeInRunning": {
"speedBooster": "any",
"minTiles": 6
}
}Requires: "canCarefulJump" "canMockball" "canSpringBallBounce" |
From: 1
Left Door
To: 3
Junction Left of Green Gate
With around four tiles of run speed, jump over the first moat and mockball into a regular Spring Ball jump over the second moat. Speed Booster makes the jump possible with a shorter runway, but the trajectory is less predictable. Entrance condition: {
"comeInRunning": {
"speedBooster": "any",
"minTiles": 4
}
}Requires: "canTrickyJump" "canMockball" "canSpringBallBounce" |
From: 4
Center Platform Junction
To: 1
Left Door
Requires: "SpaceJump" Exit condition: {
"leaveWithSpringBallBounce": {
"remoteRunway": {
"length": 7,
"openEnd": 2
},
"landingRunway": {
"length": 3,
"openEnd": 1
},
"movementType": "uncontrolled"
}
}Unlocks doors: {"types":["ammo"],"requires":[]} |
From: 4
Center Platform Junction
To: 2
Right Door
Requires: {
"obstaclesCleared": [
"A"
]
}
"SpaceJump"Exit condition: {
"leaveWithSpringBallBounce": {
"remoteRunway": {
"length": 7,
"openEnd": 2
},
"landingRunway": {
"length": 7,
"openEnd": 1
},
"movementType": "uncontrolled"
}
}Unlocks doors: {"types":["ammo"],"requires":[]} |
From: 2
Right Vertical Door
To: 1
Left Door
Requires: {
"obstaclesCleared": [
"A",
"B",
"E"
]
}
"canTrickySpringBallJump"
"canTrickySpringBallBounce"
"canInsaneJump"Exit condition: {
"leaveWithSpringBallBounce": {
"remoteRunway": {
"length": 45,
"openEnd": 1
},
"landingRunway": {
"length": 10,
"openEnd": 1
},
"minExtraRunSpeed": "$4.0",
"movementType": "controlled"
}
}Unlocks doors: {"types":["ammo"],"requires":[],"useImplicitRequires":false} |
From: 2
Right Vertical Door
To: 1
Left Door
Requires: {
"obstaclesCleared": [
"B",
"E"
]
}
"canSpeedyJump"
"canTrickySpringBallJump"
"canTrickySpringBallBounce"
"canInsaneJump"Exit condition: {
"leaveWithSpringBallBounce": {
"remoteRunway": {
"length": 32,
"openEnd": 1,
"gentleUpTiles": 6
},
"landingRunway": {
"length": 10,
"openEnd": 1
},
"minExtraRunSpeed": "$4.0",
"movementType": "controlled"
}
}Unlocks doors: {"types":["ammo"],"requires":[],"useImplicitRequires":false} |
From: 2
Right Vertical Door
To: 1
Left Door
Requires: {
"obstaclesCleared": [
"A",
"B",
"E"
]
}
"canPreciseSpaceJump"
"canInsaneJump"Exit condition: {
"leaveWithSpringBallBounce": {
"remoteRunway": {
"length": 45,
"openEnd": 1
},
"landingRunway": {
"length": 10,
"openEnd": 1
},
"movementType": "uncontrolled"
}
}Unlocks doors: {"types":["ammo"],"requires":[],"useImplicitRequires":false} |
From: 2
Right Vertical Door
To: 1
Left Door
Requires: {
"obstaclesCleared": [
"B",
"E"
]
}
"canPreciseSpaceJump"
"canInsaneJump"Exit condition: {
"leaveWithSpringBallBounce": {
"remoteRunway": {
"length": 32,
"openEnd": 1,
"gentleUpTiles": 6
},
"landingRunway": {
"length": 10,
"openEnd": 1
},
"movementType": "uncontrolled"
}
}Unlocks doors: {"types":["ammo"],"requires":[],"useImplicitRequires":false} |
From: 1
Top Right Door
To: 3
Acid Chozo Statue
Enter the room with a spin jump, with enough speed to bounce across the acid pit. If needed, a Spring fling near the end of Samus' descent can help. Entrance condition: {
"comeInSpinning": {
"speedBooster": "any",
"unusableTiles": 0,
"minExtraRunSpeed": "$1.7"
}
}Requires: "canSpringBallBounce"
{
"heatFrames": 135
} |
From: 5
Bottom Junction Right of Morph Tunnel
To: 2
Bottom Right Door
Requires: {
"obstaclesCleared": [
"A"
]
}
"h_heatedRemoteRunwayTrickySpringBall"
{
"heatFrames": 185
}Exit condition: {
"leaveWithSpringBallBounce": {
"remoteRunway": {
"length": 10,
"openEnd": 1
},
"landingRunway": {
"length": 4,
"openEnd": 1
},
"minExtraRunSpeed": "$2.0",
"movementType": "controlled"
}
}Unlocks doors: {"types":["missiles"],"requires":[{"heatFrames":50}]}
{"types":["super"],"requires":[]}
{"types":["powerbomb"],"requires":[{"heatFrames":50}]}Dev note: It is assumed that the door was shot open when entering on the right, but extra heat frames are included here for it. |
From: 5
Bottom Junction Right of Morph Tunnel
To: 2
Bottom Right Door
Requires: {
"obstaclesCleared": [
"A"
]
}
"h_heatedRemoteRunwaySpaceJump"
{
"heatFrames": 165
}Exit condition: {
"leaveWithSpringBallBounce": {
"remoteRunway": {
"length": 10,
"openEnd": 1
},
"landingRunway": {
"length": 4,
"openEnd": 1
},
"minExtraRunSpeed": "$2.0",
"movementType": "uncontrolled"
}
}Unlocks doors: {"types":["missiles"],"requires":[{"heatFrames":50}]}
{"types":["super"],"requires":[]}
{"types":["powerbomb"],"requires":[{"heatFrames":50}]} |
From: 2
Right Door
To: 1
Left Door
Requires: {
"obstaclesCleared": [
"A",
"B",
"C"
]
}
"h_heatedRemoteRunwayTrickySpringBall"
{
"heatFrames": 205
}Exit condition: {
"leaveWithSpringBallBounce": {
"remoteRunway": {
"length": 18,
"openEnd": 1
},
"landingRunway": {
"length": 5,
"openEnd": 1
},
"minExtraRunSpeed": "$4.0",
"movementType": "controlled"
}
}Unlocks doors: {"types":["ammo"],"requires":[],"useImplicitRequires":false} |
From: 2
Right Door
To: 1
Left Door
Requires: {
"obstaclesCleared": [
"A",
"B"
]
}
"h_heatedRemoteRunwaySpaceJump"
{
"heatFrames": 200
}Exit condition: {
"leaveWithSpringBallBounce": {
"remoteRunway": {
"length": 28,
"openEnd": 1
},
"landingRunway": {
"length": 5,
"openEnd": 1
},
"minExtraRunSpeed": "$4.0",
"movementType": "uncontrolled"
}
}Unlocks doors: {"types":["super"],"requires":[]}
{"types":["missiles","powerbomb"],"requires":[]}Dev note: If coming from the right, the Ripper on the left may still be alive, but it is not too hard to avoid. |
From: 3
Junction Left of Green Gate
To: 1
Left Door
Requires: {
"obstaclesCleared": [
"B",
"C"
]
}
"h_heatedRemoteRunwayTrickySpringBall"
{
"heatFrames": 240
}Exit condition: {
"leaveWithSpringBallBounce": {
"remoteRunway": {
"length": 18,
"openEnd": 1
},
"landingRunway": {
"length": 5,
"openEnd": 1
},
"minExtraRunSpeed": "$2.0",
"movementType": "controlled"
}
}Unlocks doors: {"types":["ammo"],"requires":[],"useImplicitRequires":false} |
From: 3
Junction Left of Green Gate
To: 1
Left Door
Requires: {
"obstaclesCleared": [
"B"
]
}
"h_heatedRemoteRunwaySpaceJump"
{
"heatFrames": 230
}Exit condition: {
"leaveWithSpringBallBounce": {
"remoteRunway": {
"length": 18,
"openEnd": 1
},
"landingRunway": {
"length": 5,
"openEnd": 1
},
"minExtraRunSpeed": "$2.0",
"movementType": "uncontrolled"
}
}Unlocks doors: {"types":["super"],"requires":[]}
{"types":["missiles","powerbomb"],"requires":[]}Dev note: If coming from the right, the Ripper on the left may still be alive, but it is not too hard to avoid. |
From: 1
Bottom Left Door
To: 1
Bottom Left Door
Requires: {
"heatFrames": 60
}Exit condition: {
"leaveWithSpringBallBounce": {
"remoteRunway": {
"length": 5,
"openEnd": 1
},
"landingRunway": {
"length": 1,
"openEnd": 1
},
"movementType": "uncontrolled"
}
} |
From: 2
Middle Right Door
To: 2
Middle Right Door
Requires: "HiJump"
"SpeedBooster"
{
"heatFrames": 180
}Exit condition: {
"leaveWithSpringBallBounce": {
"remoteRunway": {
"length": 4,
"openEnd": 2
},
"landingRunway": {
"length": 1,
"openEnd": 1
},
"movementType": "uncontrolled"
}
} |
From: 1
Left Door
To: 2
Right Door
Entrance condition: {
"comeInWithSpringBallBounce": {
"speedBooster": false,
"movementType": "controlled",
"remoteAndLandingMinTiles": [
[
30,
1
]
]
}
}Requires: "canTrickySpringBallBounce"
"canSpringFling"
{
"heatFrames": 140
} |
From: 1
Left Door
To: 2
Right Door
Entrance condition: {
"comeInWithSpringBallBounce": {
"speedBooster": "any",
"movementType": "controlled",
"remoteAndLandingMinTiles": [
[
7,
0
]
]
}
}Requires: "canTrickySpringBallBounce"
{
"heatFrames": 240
} |
From: 2
Right Door
To: 1
Left Door
Entrance condition: {
"comeInWithSpringBallBounce": {
"speedBooster": true,
"movementType": "any",
"remoteAndLandingMinTiles": [
[
33,
1
]
]
}
}Requires: "canTrickySpringBallBounce"
"canSpringFling"
{
"heatFrames": 155
} |
From: 2
Right Door
To: 1
Left Door
Entrance condition: {
"comeInWithSpringBallBounce": {
"speedBooster": "any",
"movementType": "controlled",
"remoteAndLandingMinTiles": [
[
7,
0
]
]
}
}Requires: "canTrickySpringBallBounce"
{
"heatFrames": 240
} |
|
Entrance condition: {
"comeInWithSpringBallBounce": {
"speedBooster": "any",
"movementType": "controlled",
"remoteAndLandingMinTiles": [
[
6.4725,
0
]
]
}
}Requires: "canSpringBallBounce"
{
"heatFrames": 265
} |
|
Entrance condition: {
"comeInRunning": {
"speedBooster": "any",
"minTiles": 3
}
}Requires: "canSpringBallBounce"
{
"heatFrames": 260
} |
|
Requires: "canSpringBallBounce"
{
"heatFrames": 280
} |
|
Requires: {
"obstaclesCleared": [
"A"
]
}Exit condition: {
"leaveWithSpringBallBounce": {
"remoteRunway": {
"length": 9,
"openEnd": 1
},
"landingRunway": {
"length": 1,
"openEnd": 1
},
"movementType": "uncontrolled"
}
} |
|
Requires: {
"obstaclesCleared": [
"A"
]
}
"canTrickySpringBallBounce"Exit condition: {
"leaveWithSpringBallBounce": {
"remoteRunway": {
"length": 38,
"openEnd": 0
},
"landingRunway": {
"length": 3,
"openEnd": 1
},
"movementType": "controlled"
}
} |
|
Requires: {
"obstaclesCleared": [
"A"
]
}
"canTrickySpringBallBounce"
"f_DefeatedPhantoon"Exit condition: {
"leaveWithSpringBallBounce": {
"remoteRunway": {
"length": 45,
"openEnd": 1
},
"landingRunway": {
"length": 3,
"openEnd": 1
},
"movementType": "controlled"
}
} |
|
Exit condition: {
"leaveWithSpringBallBounce": {
"remoteRunway": {
"length": 45,
"openEnd": 1
},
"landingRunway": {
"length": 1,
"openEnd": 1
},
"movementType": "uncontrolled"
}
} |
|
Requires: {
"obstaclesCleared": [
"A"
]
}Exit condition: {
"leaveWithSpringBallBounce": {
"remoteRunway": {
"length": 45,
"openEnd": 1
},
"landingRunway": {
"length": 2,
"openEnd": 1
},
"maxExtraRunSpeed": "$3.C",
"movementType": "controlled"
}
}Unlocks doors: {"types":["ammo"],"requires":[]}Dev note: Higher run speed can be used, especially if power is on, but it is more difficult and not clear yet if it's worth modeling. |
|
Bounce directly into the morph tunnel. This version allows preserving a flash suit. Entrance condition: {
"comeInWithBlueSpringBallBounce": {
"movementType": "controlled",
"maxExtraRunSpeed": "$1.A",
"minLandingTiles": 2
}
}Requires: "canTrickySpringBallBounce" "canInsaneJump" Clears obstacles: A |
From: 3
Right Door
To: 2
Top Door
Entrance condition: {
"comeInShinecharging": {
"length": 1,
"openEnd": 0
}
}Requires: "canChainTemporaryBlue" "canSpringBallBounce" Clears obstacles: A |
From: 3
Right Door
To: 2
Top Door
Entrance condition: {
"comeInWithTemporaryBlue": {}
}Requires: "canChainTemporaryBlue" "canSpringBallBounce" Clears obstacles: A |
From: 3
Right Door
To: 3
Right Door
If power is off, kago inside the left Workrobot, gaining speed at the start of the run by running in place. For extra run speeds between $5.9 and $5.C, Samus can jump over the island; For extra run speeds of $5.8 or lower, Samus can run under the island and jump over the Workrobot (only required if power is off). Higher speeds than $5.C could be obtained with the power on but with greater difficulty. Requires: {
"obstaclesCleared": [
"A"
]
}
{
"or": [
"canKago",
"f_DefeatedPhantoon"
]
}
"canTrickySpringBallBounce"
"canInsaneJump"Exit condition: {
"leaveWithSpringBallBounce": {
"remoteRunway": {
"length": 35,
"openEnd": 1
},
"landingRunway": {
"length": 1,
"openEnd": 1
},
"maxExtraRunSpeed": "$5.C",
"blue": "any",
"movementType": "controlled"
}
}Dev note: One tile of landing runway is considered unusable because at higher speeds it may not be possible to land far from the door. |
From: 3
Right Door
To: 3
Right Door
Requires: {
"obstaclesCleared": [
"A"
]
}
"canTrickyJump"Exit condition: {
"leaveWithSpringBallBounce": {
"remoteRunway": {
"length": 35,
"openEnd": 1
},
"landingRunway": {
"length": 2,
"openEnd": 1
},
"maxExtraRunSpeed": "$2.C",
"blue": "any",
"movementType": "controlled"
}
} |
From: 2
Middle Left Door
To: 2
Middle Left Door
Requires: {
"not": "f_DefeatedPhantoon"
}
"canRiskPermanentLossOfAccess"Exit condition: {
"leaveWithSpringBallBounce": {
"remoteRunway": {
"length": 31,
"openEnd": 0
},
"landingRunway": {
"length": 3,
"openEnd": 1
},
"movementType": "uncontrolled"
}
} |
From: 2
Middle Left Door
To: 2
Middle Left Door
Requires: "SpaceJump" Exit condition: {
"leaveWithSpringBallBounce": {
"remoteRunway": {
"length": 5,
"openEnd": 1
},
"landingRunway": {
"length": 3,
"openEnd": 1
},
"movementType": "uncontrolled"
}
} |
From: 2
Middle Left Door
To: 6
Bowling Chozo Statue
Enter the room with a mockball or bounce. Time a pause to unequip Spring Ball soon after bouncing after the spike hit. Pause again to re-equip Spring Ball on the way down. Entrance condition: {
"comeInWithSpringBallBounce": {
"speedBooster": true,
"movementType": "any",
"remoteAndLandingMinTiles": [
[
14,
1
]
]
}
}Requires: "canTrickyJump"
"canSpringFling"
"canLateralMidAirMorph"
"canUseIFrames"
{
"spikeHits": 1
}Dev note: This can be done with 13 tiles of run speed, with greater difficulty. |
From: 3
Bottom Left Door
To: 3
Bottom Left Door
Requires: {
"obstaclesNotCleared": [
"C"
]
}Exit condition: {
"leaveWithSpringBallBounce": {
"remoteRunway": {
"length": 6,
"openEnd": 1
},
"landingRunway": {
"length": 1,
"openEnd": 1
},
"movementType": "uncontrolled"
}
} |
From: 4
Bottom Chozo Item
To: 3
Bottom Left Door
Gain temporary blue, and bounce into the morph tunnel, using Spring Ball to reach the left side while retaining temporary blue. After bouncing up out of the tunnel, unmorph, aim down, and use a pause buffer to remorph and land or bounce on the door frame, chaining temporary blue into the next room. FIXME: This needs the item to be collected or unspawned, at least if using the long runway variant. Requires: {
"obstaclesNotCleared": [
"B"
]
}
{
"or": [
{
"and": [
"f_DefeatedPhantoon",
{
"canShineCharge": {
"usedTiles": 16,
"openEnd": 0
}
}
]
},
{
"and": [
{
"obstaclesCleared": [
"A"
]
},
{
"canShineCharge": {
"usedTiles": 35,
"openEnd": 1
}
},
{
"or": [
"f_DefeatedPhantoon",
"canSpeedball"
]
}
]
}
]
}
"canSpringBallBounce"
"canPauseRemorphTemporaryBlue"Exit condition: {
"leaveWithTemporaryBlue": {}
}Unlocks doors: {"types":["ammo"],"requires":[]} |
From: 4
Bottom Chozo Item
To: 3
Bottom Left Door
Use Temporary Blue to bounce into the Morph Tunnel with temp blue then continue to the bomb block using SpringBall. Just left of center of the pit is a good place to bounce for entering the tunnel. Requires either a tight shortcharge or clearing the power bomb blocks to open up more runway. Requires: {
"obstaclesNotCleared": [
"B"
]
}
{
"or": [
{
"and": [
"f_DefeatedPhantoon",
{
"canShineCharge": {
"usedTiles": 16,
"openEnd": 0
}
}
]
},
{
"and": [
{
"obstaclesCleared": [
"A"
]
},
{
"canShineCharge": {
"usedTiles": 35,
"openEnd": 1
}
},
{
"or": [
"f_DefeatedPhantoon",
"canSpeedball"
]
}
]
}
]
}
"canTemporaryBlue"
"canSpringBallBounce"Dev note: Killing phantoon only removes requirements for the strat. The runway is a bit longer with Phantoon killed and the Power Bomb blocks broken, but it shouldn't matter at this difficulty. FIXME: This needs the item to be collected or unspawned, at least if using the long runway variant. |
|
Exit condition: {
"leaveWithSpringBallBounce": {
"remoteRunway": {
"length": 5,
"openEnd": 1
},
"landingRunway": {
"length": 1,
"openEnd": 1
},
"movementType": "uncontrolled"
}
} |
From: 1
Left Door
To: 1
Left Door
Requires: {
"not": "f_DefeatedPhantoon"
}
"canRiskPermanentLossOfAccess"Exit condition: {
"leaveWithSpringBallBounce": {
"remoteRunway": {
"length": 4,
"openEnd": 2
},
"landingRunway": {
"length": 1,
"openEnd": 1
},
"movementType": "uncontrolled"
}
} |
|
Enter the room from the left to get the Kzans onto the correct cycle. Jump onto the Kzan second closest to the right door as it descends. Position on its left side, then run and jump immediately after Samus crosses above the water line, bouncing on the door frame ledge. Entrance condition: {
"comeInNormally": {}
}Requires: "canTrickyJump" Exit condition: {
"leaveWithSpringBallBounce": {
"remoteRunway": {
"length": 3,
"openEnd": 1
},
"landingRunway": {
"length": 1,
"openEnd": 1
},
"movementType": "uncontrolled"
}
}Unlocks doors: {"types":["ammo"],"requires":[]}Dev note: Entering from the left is not technically required, but it is more tricky otherwise. |
|
Enter the room from the right to get the Kzans onto the correct cycle. Jump onto the Kzan second closest to the left door as it descends. Position on its right side, then run and jump immediately after Samus crosses above the water line, bouncing on the door frame ledge. Entrance condition: {
"comeInNormally": {}
}Requires: "canTrickyJump" Exit condition: {
"leaveWithSpringBallBounce": {
"remoteRunway": {
"length": 3,
"openEnd": 1
},
"landingRunway": {
"length": 1,
"openEnd": 1
},
"movementType": "uncontrolled"
}
}Unlocks doors: {"types":["ammo"],"requires":[]}Dev note: Entering from the right is not technically required, but it is more tricky otherwise. |
From: 2
Right Door
To: 2
Right Door
Requires: {
"not": "f_DefeatedPhantoon"
}
"canRiskPermanentLossOfAccess"Exit condition: {
"leaveWithSpringBallBounce": {
"remoteRunway": {
"length": 4,
"openEnd": 2
},
"landingRunway": {
"length": 1,
"openEnd": 1
},
"movementType": "uncontrolled"
}
} |
From: 1
Left Door
To: 1
Left Door
Run on the conveyor closest to the door; its effective length is shortened due to moving in the same direction as Samus. Requires: {
"enemyKill": {
"enemies": [
[
"Bull",
"Bull"
]
]
}
}
"canTrickyJump"Exit condition: {
"leaveWithSpringBallBounce": {
"remoteRunway": {
"length": 8,
"openEnd": 0
},
"landingRunway": {
"length": 3,
"openEnd": 1
},
"movementType": "uncontrolled"
}
} |
From: 1
Left Door
To: 1
Left Door
Requires: {
"not": "f_DefeatedPhantoon"
}
"canRiskPermanentLossOfAccess"Exit condition: {
"leaveWithSpringBallBounce": {
"remoteRunway": {
"length": 11,
"openEnd": 2
},
"landingRunway": {
"length": 3,
"openEnd": 1
},
"movementType": "uncontrolled"
}
} |
|
From a standstill at the door, jump just before the first step. Do a lateral mid-air morph and bounce on the first platform. This should bounce on the third platform and get to the item. Requires: "canSpringBallBounce" "f_DefeatedPhantoon" |
From: 1
Right Door
To: 2
Item
Entrance condition: {
"comeInWithMockball": {
"speedBooster": true,
"remoteAndLandingMinTiles": [
[
19,
0
]
]
}
}Requires: "canTrickyJump"
"canSpringBallBounce"
"canSpringFling"
{
"or": [
"canInsaneJump",
{
"thornHits": 5
}
]
}
{
"not": "f_DefeatedPhantoon"
}Dev note: The 5 thornHits are for lenience since it is difficult to get this first try. |
From: 3
Bottom Left Door
To: 6
Bottom Right Door
Entrance condition: {
"comeInShinecharging": {
"length": 12,
"openEnd": 0
}
}Requires: "canTemporaryBlue" "canSpringBallBounce" Clears obstacles: A Dev note: There is 1 unusable tile in this runway. |
From: 3
Bottom Left Door
To: 6
Bottom Right Door
Requires: {
"obstaclesNotCleared": [
"B"
]
}
{
"or": [
{
"canShineCharge": {
"usedTiles": 12,
"openEnd": 1
}
},
{
"and": [
{
"doorUnlockedAtNode": 3
},
{
"canShineCharge": {
"usedTiles": 13,
"openEnd": 1
}
}
]
}
]
}
"canTemporaryBlue"
"canSpringBallBounce"Clears obstacles: A Dev note: There is 0.5 unusable tiles in this runway. |
From: 6
Bottom Right Door
To: 3
Bottom Left Door
Entrance condition: {
"comeInShinecharging": {
"length": 2,
"openEnd": 0
}
}Requires: "canTemporaryBlue" "canSpringBallBounce" Clears obstacles: A Dev note: There is 1 unusable tile in this runway. |
From: 6
Bottom Right Door
To: 3
Bottom Left Door
Entrance condition: {
"comeInWithTemporaryBlue": {}
}Requires: "canChainTemporaryBlue" "canSpringBallBounce" Clears obstacles: A Dev note: A comeInWithBlueSpringBallBounce strat would also be possible, but there's so little space available that we would need to more carefully define the matching requirements. |
From: 8
Item
To: 3
Bottom Left Door
Neutral bounce into the Morph tunnel, and SpringBall bounce to continue all the way through. Requires: "Morph"
{
"canShineCharge": {
"usedTiles": 16,
"steepDownTiles": 4,
"openEnd": 1
}
}
"canChainTemporaryBlue"
"canXRayTurnaround"
"canSpringBallBounce"Clears obstacles: C Dev note: Defeating Phantoon makes this strat easier. |
From: 8
Item
To: 3
Bottom Left Door
Requires: {
"not": "f_DefeatedPhantoon"
}
"canRiskPermanentLossOfAccess"
{
"canShineCharge": {
"usedTiles": 16,
"steepUpTiles": 4,
"openEnd": 0
}
}
"canTemporaryBlue"
"can4HighMidAirMorph"
"canSpringBallBounce"Clears obstacles: C |
From: 8
Item
To: 3
Bottom Left Door
Run towards the conveyor to more easily build the ShineCharge, and for an easier bounce into the morph tunnel. Neutral bounce into the Morph tunnel, and SpringBall bounce to continue all the way through. Requires: "f_DefeatedPhantoon"
{
"canShineCharge": {
"usedTiles": 20,
"steepDownTiles": 4,
"openEnd": 1
}
}
"canTemporaryBlue"
"canXRayTurnaround"
"canSpringBallBounce"
{
"or": [
"HiJump",
"canChainTemporaryBlue"
]
}Clears obstacles: C Dev note: 16 tiles plus conveyor pushback. |
From: 1
Right Door
To: 1
Right Door
If the power is on, time the jump for when the electricity is inactive. Requires: "canTrickyJump" Exit condition: {
"leaveWithSpringBallBounce": {
"remoteRunway": {
"length": 4,
"openEnd": 1
},
"landingRunway": {
"length": 3,
"openEnd": 1
},
"movementType": "uncontrolled"
}
} |
From: 3
Top Right Door
To: 3
Top Right Door
Requires: {
"obstaclesCleared": [
"A"
]
}
"canTrickySpringBallBounce"Exit condition: {
"leaveWithSpringBallBounce": {
"remoteRunway": {
"length": 15,
"openEnd": 2
},
"landingRunway": {
"length": 8,
"openEnd": 1
},
"maxExtraRunSpeed": "$1.8",
"blue": "yes",
"movementType": "controlled"
}
} |
From: 3
Top Right Door
To: 3
Top Right Door
Requires: {
"obstaclesCleared": [
"A"
]
}
"canPreciseSpaceJump"Exit condition: {
"leaveWithSpringBallBounce": {
"remoteRunway": {
"length": 15,
"openEnd": 2
},
"landingRunway": {
"length": 8,
"openEnd": 1
},
"movementType": "uncontrolled"
}
} |
|
Requires: "Gravity" Exit condition: {
"leaveWithSpringBallBounce": {
"remoteRunway": {
"length": 35,
"openEnd": 1
},
"landingRunway": {
"length": 5,
"openEnd": 1
},
"movementType": "uncontrolled"
}
} |
From: 2
Right Door
To: 2
Right Door
Requires: "Gravity"
{
"obstaclesCleared": [
"A"
]
}Exit condition: {
"leaveWithSpringBallBounce": {
"remoteRunway": {
"length": 45,
"openEnd": 1
},
"landingRunway": {
"length": 5,
"openEnd": 1
},
"movementType": "uncontrolled"
}
} |
From: 2
Bottom Left Door
To: 1
Top Left Doorway
Perform a gravity jump and use Spring Ball to bounce through the top of the hole. Use a pause buffer to remorph, also taking the opportunity to equip Gravity again. Then chain temporary blue into the next room. Entrance condition: {
"comeInShinecharging": {
"length": 1,
"openEnd": 0
}
}Requires: "canXRayCancelShinecharge" "canXRayTurnaround" "canGravityJump" "canSpringBallBounce" "canPauseRemorphTemporaryBlue" Exit condition: {
"leaveWithTemporaryBlue": {}
}Unlocks doors: {"types":["ammo"],"requires":[]} |
From: 2
Bottom Left Door
To: 1
Top Left Doorway
Unmorph just before hitting the ceiling, to conserve upward momentum. Continue moving right to avoid a crab hit, then morph again to make it through. Entrance condition: {
"comeInWithSpringBallBounce": {
"speedBooster": "any",
"movementType": "controlled",
"remoteAndLandingMinTiles": [
[
4.5625,
1
]
]
}
}Requires: {
"notable": "Cross Room Jump Morph"
}
"canCrossRoomJumpIntoWater"
"canMomentumConservingMorph"Dev note: Bounce with extra run speed at least $1.8. |
From: 2
Bottom Left Door
To: 1
Top Left Doorway
Unmorph just before hitting the ceiling, to conserve upward momentum. Continue moving right to avoid a crab hit, then morph again to make it through. If the runway is very short and the bounce is not on the last frame before the transition, then it may be necessary to perform a spring ball jump; in this case, pause soon after entering the room in order to unequip spring ball. Entrance condition: {
"comeInWithSpringBallBounce": {
"speedBooster": true,
"movementType": "uncontrolled",
"remoteAndLandingMinTiles": [
[
3,
1
]
]
}
}Requires: {
"notable": "Cross Room Jump Morph"
}
"canCrossRoomJumpIntoWater"
"canMomentumConservingMorph"Dev note: Bounce with extra run speed at least $1.2. FIXME: In these strats we probably also need to be able to express maxExtraRunSpeed or a maxTiles; maybe this entrance condition should be changed to have the same structure as comeInWithBlueSpringBallBounce? |
From: 2
Bottom Left Door
To: 1
Top Left Doorway
Unmorph just before hitting the ceiling, to conserve upward momentum. Continue moving right to avoid a crab hit, then morph again to make it through. Entrance condition: {
"comeInWithSpringBallBounce": {
"speedBooster": "any",
"movementType": "uncontrolled",
"remoteAndLandingMinTiles": [
[
3.5625,
1
]
]
}
}Requires: {
"notable": "Cross Room Jump Morph"
}
"canCrossRoomJumpIntoWater"
"canMomentumConservingMorph"Dev note: Bounce with extra run speed at least $1.5. |
|
Requires: "Gravity" Exit condition: {
"leaveWithSpringBallBounce": {
"remoteRunway": {
"length": 3,
"openEnd": 1
},
"landingRunway": {
"length": 2,
"openEnd": 1
},
"movementType": "uncontrolled"
}
} |
From: 2
Bottom Left Door
To: 4
Top Right Doorway
Jump through the transition with blue speed. Perform a very short speedball to kill the bottom crab and get into position below the hole. Perform a gravity jump and use Spring Ball to bounce through the top of the hole. Use a pause buffer to remorph, also taking the opportunity to equip Gravity again. Then chain temporary blue into the next room. Entrance condition: {
"comeInGettingBlueSpeed": {
"length": 0,
"openEnd": 1,
"maxExtraRunSpeed": "$1.A"
}
}Requires: "canSpeedball" "canGravityJump" "canSpringBallBounce" "canPauseRemorphTemporaryBlue" Exit condition: {
"leaveWithTemporaryBlue": {}
}Unlocks doors: {"types":["ammo"],"requires":[]}Dev note: This can be done at higher run speeds, with greater precision or an earlier jump through the door. |
From: 2
Bottom Left Door
To: 4
Top Right Doorway
Gain a shinecharge while entering, and either kill the crab before it touches Samus, or use X-Ray to cancel the shinecharge. Perform a gravity jump and use Spring Ball to bounce through the top of the hole. Use a pause buffer to remorph, also taking the opportunity to equip Gravity again. Then chain temporary blue into the next room. Entrance condition: {
"comeInShinecharging": {
"length": 1,
"openEnd": 0
}
}Requires: {
"or": [
"canXRayCancelShinecharge",
{
"enemyKill": {
"enemies": [
[
"Sciser"
]
],
"explicitWeapons": [
"Missile",
"Super",
"Grapple",
"Wave",
"Spazer",
"Plasma",
"Ice Shield"
]
}
}
]
}
"canGravityJump"
"canSpringBallBounce"
"canPauseRemorphTemporaryBlue"Exit condition: {
"leaveWithTemporaryBlue": {}
}Unlocks doors: {"types":["ammo"],"requires":[]} |
From: 3
Bottom Right Door
To: 1
Top Left Doorway
Perform a gravity jump and use Spring Ball to bounce through the top of the hole. Use a pause buffer to remorph, also taking the opportunity to equip Gravity again. Then chain temporary blue into the next room. Entrance condition: {
"comeInShinecharging": {
"length": 1,
"openEnd": 0
}
}Requires: "canGravityJump" "canSpringBallBounce" "canPauseRemorphTemporaryBlue" Exit condition: {
"leaveWithTemporaryBlue": {}
}Unlocks doors: {"types":["ammo"],"requires":[]} |
From: 3
Bottom Right Door
To: 3
Bottom Right Door
Requires: "Gravity" Exit condition: {
"leaveWithSpringBallBounce": {
"remoteRunway": {
"length": 3,
"openEnd": 1
},
"landingRunway": {
"length": 2,
"openEnd": 1
},
"movementType": "uncontrolled"
}
} |
From: 3
Bottom Right Door
To: 4
Top Right Doorway
Perform a gravity jump and use Spring Ball to bounce through the top of the hole. Use a pause buffer to remorph, also taking the opportunity to equip Gravity again. Then chain temporary blue into the next room. Entrance condition: {
"comeInShinecharging": {
"length": 1,
"openEnd": 0
}
}Requires: "canXRayTurnaround" "canGravityJump" "canSpringBallBounce" "canPauseRemorphTemporaryBlue" Exit condition: {
"leaveWithTemporaryBlue": {}
}Unlocks doors: {"types":["ammo"],"requires":[]} |
From: 3
Bottom Right Door
To: 4
Top Right Doorway
Unmorph just before hitting the ceiling, to conserve upward momentum. Then turn around, morph, and move through the tunnel to the right, avoiding crab damage. Entrance condition: {
"comeInWithSpringBallBounce": {
"speedBooster": "any",
"movementType": "controlled",
"remoteAndLandingMinTiles": [
[
4.5625,
1
]
]
}
}Requires: {
"notable": "Cross Room Jump Morph"
}
"canCrossRoomJumpIntoWater"
"canMomentumConservingMorph"Dev note: Bounce with extra run speed at least $1.8. |
From: 3
Bottom Right Door
To: 4
Top Right Doorway
Unmorph just before hitting the ceiling, to conserve upward momentum. Then turn around, morph, and move through the tunnel to the right, avoiding crab damage. If the runway is very short and the bounce is not on the last frame before the transition, then it may be necessary to perform a spring ball jump; in this case, pause soon after entering the room in order to unequip spring ball. Entrance condition: {
"comeInWithSpringBallBounce": {
"speedBooster": true,
"movementType": "any",
"remoteAndLandingMinTiles": [
[
3,
1
]
]
}
}Requires: {
"notable": "Cross Room Jump Morph"
}
"canCrossRoomJumpIntoWater"
"canMomentumConservingMorph"Dev note: Bounce with extra run speed at least $1.2. |
From: 3
Bottom Right Door
To: 4
Top Right Doorway
Unmorph just before hitting the ceiling, to conserve upward momentum. Then turn around, morph, and move through the tunnel to the right, avoiding crab damage. Entrance condition: {
"comeInWithSpringBallBounce": {
"speedBooster": "any",
"movementType": "uncontrolled",
"remoteAndLandingMinTiles": [
[
3.5625,
1
]
]
}
}Requires: {
"notable": "Cross Room Jump Morph"
}
"canCrossRoomJumpIntoWater"
"canMomentumConservingMorph"Dev note: Bounce with extra run speed at least $1.5. |
|
Requires: "Gravity" Exit condition: {
"leaveWithSpringBallBounce": {
"remoteRunway": {
"length": 8,
"openEnd": 1
},
"landingRunway": {
"length": 1,
"openEnd": 1
},
"movementType": "uncontrolled"
}
} |
|
Entrance condition: {
"comeInWithSpringBallBounce": {
"speedBooster": true,
"movementType": "any",
"remoteAndLandingMinTiles": [
[
22,
1
]
]
}
}Requires: "canCrossRoomJumpIntoWater" Exit condition: {
"leaveNormally": {}
}Unlocks doors: {"types":["super"],"requires":[]}
{"types":["missiles","powerbomb"],"requires":["never"]} |
From: 1
Bottom Left Door
To: 4
Top Left Door
Entrance condition: {
"comeInWithSpringBallBounce": {
"speedBooster": true,
"movementType": "any",
"remoteAndLandingMinTiles": [
[
18.4375,
1
]
]
}
}Requires: "canCrossRoomJumpIntoWater" "canTrickyDashJump" Exit condition: {
"leaveNormally": {}
}Unlocks doors: {"types":["super"],"requires":[]}
{"types":["missiles","powerbomb"],"requires":["never"]} |
From: 1
Bottom Left Door
To: 5
Platform Junction Near Top Left Door
Entrance condition: {
"comeInWithSpringBallBounce": {
"speedBooster": true,
"movementType": "any",
"remoteAndLandingMinTiles": [
[
19,
1
]
]
}
}Requires: "canCrossRoomJumpIntoWater" |
From: 1
Bottom Left Door
To: 5
Platform Junction Near Top Left Door
Requires running a precise distance of 7 tiles in the adjacent room, to hit a peak of the speed vs height graph. Entrance condition: {
"comeInWithSpringBallBounce": {
"speedBooster": true,
"movementType": "any",
"remoteAndLandingMinTiles": [
[
6.4375,
1
]
]
}
}Requires: "canTrickyDashJump" "canCrossRoomJumpIntoWater" |
From: 2
Bottom Right Door
To: 2
Bottom Right Door
Requires: "Gravity" Exit condition: {
"leaveWithSpringBallBounce": {
"remoteRunway": {
"length": 16,
"openEnd": 0,
"startingDownTiles": 1
},
"landingRunway": {
"length": 1,
"openEnd": 1
},
"maxExtraRunSpeed": "$3.5",
"movementType": "uncontrolled"
}
} |
From: 2
Bottom Right Door
To: 3
Middle Right Door
Morph while descending through the door transition in order to bounce after the transition. Here it is expected to use at least 19 tiles of runway in order to get a high enough bounce. Entrance condition: {
"comeInSpinning": {
"speedBooster": true,
"unusableTiles": 2,
"minExtraRunSpeed": "$4.0"
}
}Requires: "canSuitlessMaridia" "canSpringBallBounce" |
From: 2
Bottom Right Door
To: 3
Middle Right Door
Use Spring Ball to bounce after the transition. Here it is expected to use at least 19 tiles of runway in order to get a high enough bounce. Entrance condition: {
"comeInWithSpringBallBounce": {
"speedBooster": true,
"movementType": "any",
"remoteAndLandingMinTiles": [
[
19,
0
]
]
}
}Requires: "canSuitlessMaridia" |
From: 2
Bottom Right Door
To: 3
Middle Right Door
Use Spring Ball to bounce after the transition. Getting a high enough bounce requires speed in a specific range, corresponding to using about 7 tiles of runway. For the lowest speed in this range, a spring ball jump is needed to make it up; to prepare for this case, pause immediately when entering the room in order to unequip Spring Ball after the bounce. Entrance condition: {
"comeInWithSpringBallBounce": {
"speedBooster": true,
"movementType": "any",
"remoteAndLandingMinTiles": [
[
6.4375,
0
]
]
}
}Requires: "canSuitlessMaridia" "canTrickyDashJump" "canTrickySpringBallBounce" "canDoubleSpringBallJumpMidAir" |
From: 1
Top Left Door
To: 1
Top Left Door
Requires: "Gravity" "SpaceJump" "canTrickyJump" Exit condition: {
"leaveWithSpringBallBounce": {
"remoteRunway": {
"length": 20,
"openEnd": 1,
"gentleUpTiles": 3,
"gentleDownTiles": 1,
"steepUpTiles": 1
},
"landingRunway": {
"length": 2,
"openEnd": 1
},
"movementType": "uncontrolled"
}
} |
From: 4
Top Right Door
To: 4
Top Right Door
Requires: "Gravity" "SpaceJump" "canTrickyJump" Exit condition: {
"leaveWithSpringBallBounce": {
"remoteRunway": {
"length": 12,
"openEnd": 2,
"steepUpTiles": 5,
"steepDownTiles": 5
},
"landingRunway": {
"length": 4,
"openEnd": 1
},
"maxExtraRunSpeed": "$3.8",
"movementType": "uncontrolled"
}
} |
From: 4
Top Right Door
To: 9
Platform Below Top Door
In the previous room, gain max run speed without Speed Booster equipped, requiring about 7 tiles of runway (obtaining an extra run speed of $2.0). Enter the room either in a mockball (or process of mockballing), or descending from a controlled Spring Ball bounce. Just after the transition, jump or bounce to slightly less than full height. Pause to equip Speed Booster before bouncing on the first Grapple platform; this provides a boost in the bounce height to be able to make it to the Grapple platform below the top door. Entrance condition: {
"comeInWithSpringBallBounce": {
"speedBooster": false,
"movementType": "controlled",
"remoteAndLandingMinTiles": [
[
6.4375,
0
]
]
}
}Requires: {
"notable": "Spring Ball Bounce Right to Left"
}
"canSpeedyJump"
"canCrossRoomJumpIntoWater"
"canTrickySpringBallBounce" |
From: 4
Top Right Door
To: 11
Upper Left Ledge Junction
Enter the room morphed, either in a mockball on the ground or descending from a controlled bounce, with about 1 tile worth of speed (at least $0.9 extra run speed). Use Spring Ball to jump or do a controlled bounce after the transition. While descending and before bouncing on the first Grapple platform, perform two spring flings by pausing and unequipping Spring Ball, then pausing again and re-equipping it. Afterward, perform additional spring flings as needed to make it across the room, taking care to avoid the Powamp. Note that Samus must be fully morphed when entering the room (not in the middle of a morphing animation), or the spring flings will not work, assuming Speed Booster is not equipped. Entrance condition: {
"comeInWithSpringBallBounce": {
"speedBooster": "any",
"movementType": "controlled",
"adjacentMinTiles": 4,
"remoteAndLandingMinTiles": [
[
0.4375,
1
]
]
}
}Requires: {
"notable": "Spring Ball Bounce Right to Left"
}
"canCrossRoomJumpIntoWater"
"canTrickySpringBallBounce"
"canSpringFling"
"canInsaneJump" |
From: 4
Top Right Door
To: 11
Upper Left Ledge Junction
Enter the room morphed, either in a mockball on the ground or descending from a controlled bounce, with about 5 or more runway tiles worth of speed (at least $1.8 extra run speed). Use Spring Ball to jump or do a controlled bounce after the transition. Bounce on the first Grapple platform. Then perform a 'spring fling' by unequipping Spring Ball while descending, to reset Samus' vertical speed and be able to make it across room. Note that Samus must be fully morphed when entering the room (not in the middle of a morphing animation), or the spring fling will not work, assuming Speed Booster is not equipped. Entrance condition: {
"comeInWithSpringBallBounce": {
"speedBooster": "any",
"movementType": "controlled",
"adjacentMinTiles": 8,
"remoteAndLandingMinTiles": [
[
4.4375,
2
]
]
}
}Requires: {
"notable": "Spring Ball Bounce Right to Left"
}
"canCrossRoomJumpIntoWater"
"canTrickySpringBallBounce"
"canSpringFling"Dev note: This can be done with a mockball with only 1 landing tile, but this is more difficult and it's unclear if we can guarantee it works in every possible room; it shouldn't be important to model, because the low-speed variant of this strat already covers the more difficult case. |
From: 4
Top Right Door
To: 11
Upper Left Ledge Junction
Come in with speed in a specific range (extra run speed between $2.0 and $2.3), corresponding to using about 7 tiles of runway. Bounce on the two islands below, in order to make it up to the top-left part of the room. Entrance condition: {
"comeInWithSpringBallBounce": {
"speedBooster": true,
"movementType": "controlled",
"remoteAndLandingMinTiles": [
[
6.4375,
0
]
]
}
}Requires: "canTrickyDashJump" "canTrickySpringBallBounce" |
From: 5
Right Door
To: 5
Right Door
Requires: "Gravity" Exit condition: {
"leaveWithSpringBallBounce": {
"remoteRunway": {
"length": 6,
"openEnd": 1
},
"landingRunway": {
"length": 1,
"openEnd": 1
},
"movementType": "uncontrolled"
}
} |
|
Requires: "Gravity" Exit condition: {
"leaveWithSpringBallBounce": {
"remoteRunway": {
"length": 20,
"openEnd": 2
},
"landingRunway": {
"length": 1,
"openEnd": 1
},
"minExtraRunSpeed": "$0.F",
"movementType": "uncontrolled"
}
} |
From: 5
Right Door
To: 7
Top Right Left Item
Bounce onto the platform below the Speed blocks. Unmorph and continue holding up in order to break the Speed blocks while passing up through them. The top Speed blocks will respawn; to get on top of them, it can help to press against the wall (to discard blue speed) and then aim down to reduce Samus' hitbox. If available, using Grapple while aiming down can also help. Alternatively, if Samus breaks only the right column of Speed blocks, Samus can use the center left Speed block as a stepping stone. Be careful not to fall through the Speed blocks below as it will result in a softlock. Entrance condition: {
"comeInWithBlueSpringBallBounce": {
"movementType": "controlled",
"minExtraRunSpeed": "$3.4",
"maxExtraRunSpeed": "$4.C"
}
}Requires: {
"notable": "Suitless Blue Bomber"
}
"canSuitlessMaridia"
"HiJump"
"canTrickySpringBallBounce"
"canInsaneJump"
"canMomentumConservingMorph"Dev note: Lower or higher speeds could work but with greater difficulty. |
From: 5
Right Door
To: 7
Top Right Left Item
In the previous room, perform a relatively precise 1-tap in order to gain blue speed with momentum in a specific range, then use spring ball to bounce through the door transition. Bounce onto the platform below the Speed blocks. Unmorph and continue holding up in order to break the Speed blocks while passing up through them. The top Speed blocks will respawn; to get on top of them, it can help to press against the wall (to discard blue speed) and then aim down to reduce Samus' hitbox. If available, using Grapple while aiming down can also help. Alternatively, if Samus breaks only the right column of Speed blocks, Samus can use the center left Speed block as a stepping stone. Be careful not to fall through the Speed blocks below as it will result in a softlock. Entrance condition: {
"comeInWithBlueSpringBallBounce": {
"movementType": "controlled",
"minExtraRunSpeed": "$4.0",
"maxExtraRunSpeed": "$4.3"
}
}Requires: {
"notable": "Suitless Blue Bomber"
}
"canSuitlessMaridia"
"canTrickyDashJump"
"canInsaneJump"
"canTrickySpringBallBounce"
"canMomentumConservingMorph" |
|
Requires: "Gravity"
"canLateralMidAirMorph"
"canCarefulJump"
{
"or": [
"canTrickyJump",
"canSpringBallBounce"
]
} |
From: 1
Left Door
To: 1
Left Door
Requires: {
"obstaclesCleared": [
"A"
]
}
"Gravity"Exit condition: {
"leaveWithSpringBallBounce": {
"remoteRunway": {
"length": 18,
"openEnd": 1,
"gentleUpTiles": 2,
"gentleDownTiles": 2,
"steepUpTiles": 1
},
"landingRunway": {
"length": 3,
"openEnd": 1
},
"movementType": "uncontrolled"
}
} |
From: 1
Left Door
To: 1
Left Door
Requires: "Gravity" Exit condition: {
"leaveWithSpringBallBounce": {
"remoteRunway": {
"length": 27,
"openEnd": 0
},
"landingRunway": {
"length": 3,
"openEnd": 1
},
"movementType": "uncontrolled"
}
} |
From: 1
Left Door
To: 1
Left Door
Use Speed Booster to break the Speed blocks, and run from the right side of the room, using blue speed to run on top of the sand. Requires: "Gravity"
{
"getBlueSpeed": {
"usedTiles": 22,
"openEnd": 1
}
}Exit condition: {
"leaveWithSpringBallBounce": {
"remoteRunway": {
"length": 45,
"openEnd": 1
},
"landingRunway": {
"length": 3,
"openEnd": 1
},
"movementType": "uncontrolled"
}
} |
|
Entrance condition: {
"comeInWithBlueSpringBallBounce": {
"movementType": "controlled"
}
}Dev note: With a mid-air spring ball jump it would be possible to go through the morph tunnel. This strat exists mainly as a way to avoid collecting the item. |
From: 1
Left Door
To: 4
Right Door
Entrance condition: {
"comeInWithBlueSpringBallBounce": {
"movementType": "controlled"
}
}Requires: "canChainTemporaryBlue" Exit condition: {
"leaveWithTemporaryBlue": {}
}Unlocks doors: {"types":["ammo"],"requires":[]} |
From: 1
Left Door
To: 5
Item
Needs a runway of 7 tiles with no open end in the adjacent room, to get enough height. This is a peak of height with speed booster, no hjb, while underwater. Jump before the transition with SpeedBooster off and then SpeedBooster back on after reaching the ceiling and Morphing. Entrance condition: {
"comeInJumping": {
"speedBooster": true,
"minTiles": 6.4375
}
}Requires: "canLateralMidAirMorph"
{
"disableEquipment": "SpeedBooster"
}
"canCrossRoomJumpIntoWater"
"canSpringBallBounce"
{
"or": [
{
"enemyDamage": {
"enemy": "Puyo",
"type": "contact",
"hits": 1
}
},
"canInsaneJump",
{
"and": [
"Plasma",
"canTrickyJump"
]
},
"h_pauseAbuseMinimalReserveRefill"
]
}Collects items: 5 |
From: 4
Right Door
To: 7
Right of Sand with Blue Speed
Entrance condition: {
"comeInWithBlueSpringBallBounce": {
"movementType": "controlled"
}
}Dev note: With a mid-air spring ball jump it would be possible to go through the morph tunnel. This strat exists mainly as a way to avoid collecting the item, by passing through the Speed blocks. |
|
Chain temporary blue across the room in order to break the Speed blocks. If available, bouncing using Spring Ball can help speed this up significantly. If two Power Bombs are also available, they can be used to break the shot blocks along the way without needing to stop bouncing. Entrance condition: {
"comeInWithTemporaryBlue": {
"direction": "right"
},
"comesThroughToilet": "any"
}Requires: "canChainTemporaryBlue"
{
"or": [
"HiJump",
"canTrickySpringBallJump",
"canInsaneJump"
]
}
{
"or": [
{
"and": [
"canSpringBallBounce",
{
"or": [
{
"ammo": {
"type": "PowerBomb",
"count": 2
}
},
{
"and": [
"canLongChainTemporaryBlue",
"can4HighMidAirMorph"
]
}
]
}
]
},
{
"and": [
"canLongChainTemporaryBlue",
"canStationaryLateralMidAirMorph",
"can4HighMidAirMorph",
"canBeVeryPatient"
]
}
]
} |
From: 1
Bottom Left Door
To: 2
Right Door
Chain temporary blue across the room in order to break the Speed blocks. If available, bouncing using Spring Ball can help speed this up significantly. If two Power Bombs are also available, they can be used to break the shot blocks along the way without needing to stop bouncing. Entrance condition: {
"comeInWithTemporaryBlue": {
"direction": "left"
},
"comesThroughToilet": "any"
}Requires: "canChainTemporaryBlue"
"canXRayTurnaround"
{
"or": [
"HiJump",
"canTrickySpringBallJump",
"canInsaneJump"
]
}
{
"or": [
{
"and": [
"canSpringBallBounce",
{
"or": [
{
"ammo": {
"type": "PowerBomb",
"count": 2
}
},
{
"and": [
"canLongChainTemporaryBlue",
"can4HighMidAirMorph"
]
}
]
}
]
},
{
"and": [
"canLongChainTemporaryBlue",
"canStationaryLateralMidAirMorph",
"can4HighMidAirMorph",
"canBeVeryPatient"
]
}
]
} |
|
Chain temporary blue across the room in order to break the Speed blocks. If available, bouncing using Spring Ball can help speed this up significantly. If two Power Bombs are also available, they can be used to break the shot blocks along the way without needing to stop bouncing; the first Power Bomb must be placed at a specific time, about 1 tile to the left of the first set of Speed blocks; the second Power Bomb should be placed as early as possible after coming off cooldown. Entrance condition: {
"comeInWithTemporaryBlue": {}
}Requires: "canChainTemporaryBlue"
"canStationaryLateralMidAirMorph"
{
"or": [
{
"and": [
"canSpringBallBounce",
{
"or": [
{
"ammo": {
"type": "PowerBomb",
"count": 2
}
},
{
"and": [
"canLongChainTemporaryBlue",
"can4HighMidAirMorph"
]
}
]
}
]
},
{
"and": [
"canLongChainTemporaryBlue",
"can4HighMidAirMorph",
"canBeVeryPatient"
]
}
]
} |
From: 2
Right Door
To: 1
Bottom Left Door
Chain temporary blue across the room in order to break the Speed blocks, using Spring Ball to speed up the process. If two Power Bombs are also available, they can be used to break the shot blocks along the way without needing to stop bouncing; the first Power Bomb must be placed at a specific time, about 1 tile to the left of the first set of Speed blocks; the second Power Bomb should be placed as early as possible after coming off cooldown. Entrance condition: {
"comeInShinecharging": {
"length": 1,
"openEnd": 1
}
}Requires: "canLongChainTemporaryBlue" "canStationaryLateralMidAirMorph" "canSpringBallBounce" "canSpringBallJumpMidAir" "can4HighMidAirMorph" Exit condition: {
"leaveWithTemporaryBlue": {
"direction": "left"
}
}Unlocks doors: {"types":["ammo"],"requires":[]}Dev note: The slower version of this strat (with HiJump instead of Spring Ball) is not included; it could require too much patience, considering that the chain continues into the next room. |
|
Requires: "Gravity" Exit condition: {
"leaveWithSpringBallBounce": {
"remoteRunway": {
"length": 11,
"openEnd": 1
},
"landingRunway": {
"length": 1,
"openEnd": 1
},
"movementType": "uncontrolled"
}
} |
From: 1
Left Door
To: 4
Platform Below Top Door
Unmorphing helps with avoiding the crab. The spring ball jump is used to get through the door after landing near the top. Entrance condition: {
"comeInWithSpringBallBounce": {
"speedBooster": true,
"movementType": "any",
"remoteAndLandingMinTiles": [
[
18.4375,
1
]
]
}
}Requires: "canTrickyJump" "canCrossRoomJumpIntoWater" "canSpringBallJumpMidAir" |
From: 1
Left Door
To: 4
Platform Below Top Door
Requires gaining a specific amount of speed by running a distance equivalent to a runway of 7 tiles with no open end in the adjacent room, to hit a peak in the speed / height relationship. Unmorph to maintain momentum while sliding along the ceiling near the entrance. The spring ball jump is used after landing near the top, to get to the platform below the door. Entrance condition: {
"comeInWithSpringBallBounce": {
"speedBooster": true,
"movementType": "any",
"remoteAndLandingMinTiles": [
[
6.4375,
1
]
]
}
}Requires: "canTrickyDashJump" "canCrossRoomJumpIntoWater" "canMomentumConservingMorph" "canSpringBallJumpMidAir" |
|
Requires: "Gravity" Exit condition: {
"leaveWithSpringBallBounce": {
"remoteRunway": {
"length": 17,
"openEnd": 1
},
"landingRunway": {
"length": 3,
"openEnd": 1
},
"movementType": "uncontrolled"
}
} |
|
Requires: "Gravity" Exit condition: {
"leaveWithSpringBallBounce": {
"remoteRunway": {
"length": 17,
"openEnd": 1
},
"landingRunway": {
"length": 1,
"openEnd": 1
},
"movementType": "uncontrolled"
}
} |
From: 2
Bottom Left Door
To: 4
Top Right Door
Entrance condition: {
"comeInWithSpringBallBounce": {
"speedBooster": true,
"movementType": "any",
"remoteAndLandingMinTiles": [
[
39,
1
]
]
}
}Requires: "canCrossRoomJumpIntoWater" |
From: 2
Bottom Left Door
To: 4
Top Right Door
This requires gaining speed by running a precise distance of 34 tiles (extra run speed of $6.0 or $6.1). Entrance condition: {
"comeInWithSpringBallBounce": {
"speedBooster": true,
"movementType": "any",
"remoteAndLandingMinTiles": [
[
34,
1
]
]
}
}Requires: "canTrickyDashJump" "canCrossRoomJumpIntoWater" |
From: 2
Bottom Left Door
To: 4
Top Right Door
This requires gaining speed by running a precise distance of 7 tiles (extra run speed of $2.0 or $2.1). Immediately pause after the transition to unequip Spring Ball. Then equip Spring Ball again and perform a mid-air spring ball jump. Entrance condition: {
"comeInWithSpringBallBounce": {
"speedBooster": true,
"movementType": "any",
"remoteAndLandingMinTiles": [
[
6.4375,
1
]
]
}
}Requires: "canTrickyDashJump" "canDoubleSpringBallJumpMidAir" "canCrossRoomJumpIntoWater" |
Tricky Cross Room Spring Ball Bounce into Spring Ball Jump, Leave With Temporary Blue
(Extreme+)
Halfie Climb Room
From: 2
Bottom Left Door
To: 4
Top Right Door
Gaining blue speed with a precise amount of run speed (extra run speed of $2.0 or $2.1), and bounce through the transition. After the transition, press pause, unmorph, aim down, and unequip Spring Ball. Buffer a morph out of the pause. Pause again to equip Spring Ball and perform a mid-air spring ball jump, chaining temporary blue to the top of the room. Entrance condition: {
"comeInWithBlueSpringBallBounce": {
"movementType": "any",
"minExtraRunSpeed": "$2.0",
"maxExtraRunSpeed": "$2.1"
}
}Requires: "canTrickyDashJump" "canCrossRoomJumpIntoWater" "canPauseRemorphTemporaryBlue" "canDoubleSpringBallJumpMidAir" Exit condition: {
"leaveWithTemporaryBlue": {}
}Unlocks doors: {"types":["ammo"],"requires":[]} |
From: 3
Bottom Right Door
To: 3
Bottom Right Door
If needing high speed, try to prevent the Oums from falling to the floor, to prevent them from blocking the runway. Requires: "Gravity" Exit condition: {
"leaveWithSpringBallBounce": {
"remoteRunway": {
"length": 45,
"openEnd": 1
},
"landingRunway": {
"length": 1,
"openEnd": 1
},
"movementType": "uncontrolled"
}
} |
From: 2
Bottom Left Door
To: 1
Top Left Door
Entrance condition: {
"comeInWithSpringBallBounce": {
"speedBooster": true,
"movementType": "any",
"remoteAndLandingMinTiles": [
[
9,
1
]
]
}
}Requires: "canTrickyJump" "canCrossRoomJumpIntoWater" |
From: 2
Bottom Left Door
To: 1
Top Left Door
Entrance condition: {
"comeInWithSpringBallBounce": {
"speedBooster": true,
"movementType": "any",
"remoteAndLandingMinTiles": [
[
17,
1
]
]
}
}Requires: "canCrossRoomJumpIntoWater" |
From: 2
Bottom Left Door
To: 1
Top Left Door
Entrance condition: {
"comeInWithSpringBallBounce": {
"speedBooster": true,
"movementType": "any",
"remoteAndLandingMinTiles": [
[
6.4375,
1
]
]
}
}Requires: "canTrickyDashJump" "canCrossRoomJumpIntoWater" |
From: 2
Bottom Left Door
To: 1
Top Left Door
Gaining blue speed with a precise amount of run speed (extra run speed of $2.0 or $2.1), and bounce through the transition. After the transition, unmorph, hold an angle button, aim down, and pause near the peak of Samus' jump. Buffer a morph out of the pause to continue chaining temporary blue. Use a spring ball jump to escape the water. Entrance condition: {
"comeInWithBlueSpringBallBounce": {
"movementType": "any",
"minExtraRunSpeed": "$2.0",
"maxExtraRunSpeed": "$2.1"
}
}Requires: "canTrickyDashJump" "canCrossRoomJumpIntoWater" "canPauseRemorphTemporaryBlue" "canXRayTurnaround" "canTrickySpringBallJump" Exit condition: {
"leaveWithTemporaryBlue": {}
}Unlocks doors: {"types":["ammo"],"requires":[]} |
From: 1
Bottom Left Door
To: 2
Top Right Door
Entrance condition: {
"comeInWithSpringBallBounce": {
"speedBooster": "any",
"movementType": "controlled",
"remoteAndLandingMinTiles": [
[
3.5625,
1
]
]
}
}Requires: "canCrossRoomJumpIntoWater" |
From: 1
Bottom Left Door
To: 2
Top Right Door
Entrance condition: {
"comeInWithSpringBallBounce": {
"speedBooster": "any",
"movementType": "uncontrolled",
"remoteAndLandingMinTiles": [
[
2.5625,
1
]
]
}
}Requires: "canCrossRoomJumpIntoWater" "canTrickyJump" |
From: 1
Bottom Left Door
To: 2
Top Right Door
Unmorph just before hitting the overhang, to conserve momentum to make it on top. Entrance condition: {
"comeInWithSpringBallBounce": {
"speedBooster": "any",
"movementType": "controlled",
"remoteAndLandingMinTiles": [
[
2.5625,
1
]
]
}
}Requires: "canCrossRoomJumpIntoWater" "canMomentumConservingMorph" |
From: 1
Bottom Left Door
To: 2
Top Right Door
Unmorph just before hitting the overhang, to conserve momentum to make it on top. Entrance condition: {
"comeInWithSpringBallBounce": {
"speedBooster": false,
"movementType": "uncontrolled",
"remoteAndLandingMinTiles": [
[
1.5625,
1
]
]
}
}Requires: "canCrossRoomJumpIntoWater" "canTrickyJump" "canMomentumConservingMorph" |
From: 2
Top Right Door
To: 2
Top Right Door
Requires: {
"or": [
"Gravity",
"canCarefulJump"
]
}Exit condition: {
"leaveWithSpringBallBounce": {
"remoteRunway": {
"length": 6,
"openEnd": 1
},
"landingRunway": {
"length": 3,
"openEnd": 1
},
"movementType": "uncontrolled"
}
} |
From: 1
Bottom Left Door
To: 1
Bottom Left Door
Requires: "Gravity" Exit condition: {
"leaveWithSpringBallBounce": {
"remoteRunway": {
"length": 7,
"openEnd": 1
},
"landingRunway": {
"length": 2,
"openEnd": 1
},
"movementType": "uncontrolled"
}
} |
|
Gain speed using between 36 and 42 tiles of runway (extra run speed between $6.4 and $6.F). Unmorph to retain blue speed to pass safely through the Rippers. Entrance condition: {
"comeInWithBlueSpringBallBounce": {
"movementType": "any",
"minExtraRunSpeed": "$6.4"
}
}Requires: "HiJump" "canTrickyDashJump" "canInsaneJump" "canDownGrab" |
|
Requires: {
"obstaclesCleared": [
"A"
]
}Exit condition: {
"leaveWithSpringBallBounce": {
"remoteRunway": {
"length": 8,
"openEnd": 2
},
"landingRunway": {
"length": 3,
"openEnd": 1
},
"movementType": "uncontrolled"
}
} |
From: 3
Middle Right Door
To: 3
Middle Right Door
Exit condition: {
"leaveWithSpringBallBounce": {
"remoteRunway": {
"length": 8,
"openEnd": 2
},
"landingRunway": {
"length": 5,
"openEnd": 1
},
"movementType": "uncontrolled"
}
} |
|
Requires: "canTrickySpringBallBounce" Exit condition: {
"leaveWithSpringBallBounce": {
"remoteRunway": {
"length": 10,
"openEnd": 1
},
"landingRunway": {
"length": 6,
"openEnd": 1
},
"movementType": "controlled"
}
} |
|
Requires: "SpaceJump" Exit condition: {
"leaveWithSpringBallBounce": {
"remoteRunway": {
"length": 10,
"openEnd": 1
},
"landingRunway": {
"length": 6,
"openEnd": 1
},
"movementType": "uncontrolled"
}
} |
From: 1
Left Door
To: 1
Left Door
Requires: "canTrickyJump" Exit condition: {
"leaveWithSpringBallBounce": {
"remoteRunway": {
"length": 6,
"openEnd": 2
},
"landingRunway": {
"length": 5,
"openEnd": 1
},
"movementType": "controlled"
}
} |
From: 1
Left Door
To: 1
Left Door
Requires: "Gravity" "canTrickyJump" Exit condition: {
"leaveWithSpringBallBounce": {
"remoteRunway": {
"length": 14,
"openEnd": 1
},
"landingRunway": {
"length": 5,
"openEnd": 1
},
"movementType": "controlled"
}
}Dev note: FIXME: An extra half tile of runway could be gained by standing up inside the last tile of the platform. |
From: 1
Left Door
To: 1
Left Door
Requires: "SpaceJump" "canTrickyJump" Exit condition: {
"leaveWithSpringBallBounce": {
"remoteRunway": {
"length": 6,
"openEnd": 2
},
"landingRunway": {
"length": 5,
"openEnd": 1
},
"movementType": "uncontrolled"
}
} |
From: 1
Left Door
To: 1
Left Door
Requires: "Gravity" "SpaceJump" "canTrickyJump" Exit condition: {
"leaveWithSpringBallBounce": {
"remoteRunway": {
"length": 14,
"openEnd": 1
},
"landingRunway": {
"length": 5,
"openEnd": 1
},
"movementType": "uncontrolled"
}
}Dev note: FIXME: An extra half tile of runway could be gained by standing up inside the last tile of the platform. |
From: 1
Left Door
To: 1
Left Door
Requires: "Gravity" Exit condition: {
"leaveWithSpringBallBounce": {
"remoteRunway": {
"length": 8,
"openEnd": 0
},
"landingRunway": {
"length": 5,
"openEnd": 1
},
"movementType": "uncontrolled"
}
}Dev note: FIXME: An extra half tile of runway could be gained by standing up inside the last tile of the platform. |
From: 2
Right Door
To: 2
Right Door
Requires: "canTrickyJump" Exit condition: {
"leaveWithSpringBallBounce": {
"remoteRunway": {
"length": 6,
"openEnd": 2
},
"landingRunway": {
"length": 5,
"openEnd": 1
},
"movementType": "controlled"
}
} |
From: 2
Right Door
To: 2
Right Door
Requires: "canTrickyJump" "SpaceJump" Exit condition: {
"leaveWithSpringBallBounce": {
"remoteRunway": {
"length": 6,
"openEnd": 2
},
"landingRunway": {
"length": 5,
"openEnd": 1
},
"movementType": "uncontrolled"
}
} |
From: 2
Right Door
To: 2
Right Door
Requires: "Gravity" Exit condition: {
"leaveWithSpringBallBounce": {
"remoteRunway": {
"length": 14,
"openEnd": 1
},
"landingRunway": {
"length": 5,
"openEnd": 1
},
"movementType": "uncontrolled"
}
}Dev note: FIXME: If Morph or X-Ray is available, an extra half tile of runway could be gained by standing up inside the last tile of the platform. |
|
Exit condition: {
"leaveWithSpringBallBounce": {
"remoteRunway": {
"length": 6,
"openEnd": 2
},
"landingRunway": {
"length": 4,
"openEnd": 1
},
"movementType": "uncontrolled"
}
} |
From: 1
Left Door
To: 2
Right Door
Use a 3-tap or 4-tap to gain a speedball with a specific amount of speed in the other room (between $2.1 and $2.3 extra run speed), and either roll in or do a controlled bounce to enter while descending close to the ground. Bounce on the platform in front of the door, then bounce on the second-to-last pillar. Entrance condition: {
"comeInWithBlueSpringBallBounce": {
"movementType": "controlled",
"minExtraRunSpeed": "$2.1",
"maxExtraRunSpeed": "$2.3"
}
}Requires: {
"notable": "Cross-Room Blue Spring Ball Bounce (Left to Right)"
}
"canTrickyDashJump"
"canTrickySpringBallBounce"
"canInsaneJump" |
From: 1
Left Door
To: 2
Right Door
Use a 3-tap or 4-tap to gain a speedball with a specific amount of speed in the other room (between $2.1 and $2.3 extra run speed), and either roll in or do a controlled bounce to enter while descending close to the ground. Cross the room by bouncing on the pillars. Then chain temporary blue into the next room. Entrance condition: {
"comeInWithBlueSpringBallBounce": {
"movementType": "controlled",
"minExtraRunSpeed": "$2.1",
"maxExtraRunSpeed": "$2.3"
}
}Requires: {
"notable": "Cross-Room Blue Spring Ball Bounce (Left to Right)"
}
"canTrickyDashJump"
"canTrickySpringBallBounce"
"canInsaneJump"
"canChainTemporaryBlue"
"canBeVeryPatient"Exit condition: {
"leaveWithTemporaryBlue": {}
}Unlocks doors: {"types":["ammo"],"requires":[]}Dev note: The 'canBeVeryPatient' requirement is for difficulty placement as this is quite precise and unforgiving. |
From: 1
Left Door
To: 2
Right Door
Gain run speed using between 19 and 33 tiles in the other room, and either roll in or do a controlled bounce to enter while descending close to the ground. Bounce near the end of the platform in front of the door, clearing the whole room at once. Samus will go over the Evirs, so there is no need for blue speed. Entrance condition: {
"comeInWithSpringBallBounce": {
"speedBooster": true,
"movementType": "controlled",
"remoteAndLandingMinTiles": [
[
19.3625,
1
]
]
}
}Requires: {
"notable": "Cross-Room Spring Ball Bounce (Left to Right)"
}
"canTrickyJump" |
From: 1
Left Door
To: 2
Right Door
Enter with an extra run speed of between $2.1 and $2.3. Bounce over the first set of Evirs, and bounce on the first pillar to cross the room. If entering at lower speed ($2.1), it can help to time a pause to hit soon after bouncing on the first pillar, unequipping Spring Ball to boost Samus' horizontal speed. If Samus enters with low base speed (i.e. if mockballing with a short landing runway), it can affect Samus' horizontal speed even after the bounce. This can make it harder to clear the final pillar, though it can also help with clearing the initial Evirs. Entrance condition: {
"comeInWithSpringBallBounce": {
"speedBooster": true,
"movementType": "controlled",
"remoteAndLandingMinTiles": [
[
6.4375,
1
]
]
}
}Requires: {
"notable": "Cross-Room Tricky Spring Ball Bounce (Left to Right)"
}
"canTrickyDashJump"
"canInsaneJump"
"canTrickySpringBallBounce"
"canBeVeryPatient"Dev note: The canBeVeryPatient requirement is for difficulty placement, given the high likelihood of failure: with a mockball or bouncing entry, a frame-perfect release of jump is usually required. |
From: 2
Right Door
To: 1
Left Door
Gain a speedball in the other room, and either roll in or do a controlled bounce to enter while descending close to the ground. Bounce anywhere on the platform in front of the door, clearing the whole room at once. If needed, blue speed will destroy any Evirs along the way and allow bouncing on the sand at the end to make it onto the ledge. Entrance condition: {
"comeInWithBlueSpringBallBounce": {
"movementType": "controlled",
"minExtraRunSpeed": "$2.0"
}
}Requires: {
"notable": "Cross-Room Blue Spring Ball Bounce (Right to Left)"
}
{
"or": [
"canTrickyJump",
"canSlowShortCharge"
]
} |
From: 2
Right Door
To: 1
Left Door
Use a 3-tap or 4-tap to gain a speedball with a specific amount of speed in the other room (between $2.1 and $2.3 extra run speed), and either roll in or do a controlled bounce to enter while descending close to the ground. Bounce across the room, destroying the Evirs along the path, then bounce on the sand at the left side of the room, and unmorph to go straight up in the single-tile-wide space with no sandfall; perform a pause remorph to chain temporary blue to the door. Entrance condition: {
"comeInWithBlueSpringBallBounce": {
"movementType": "controlled",
"minExtraRunSpeed": "$2.1",
"maxExtraRunSpeed": "$2.3"
}
}Requires: {
"notable": "Cross-Room Blue Spring Ball Bounce (Right to Left)"
}
"canTrickyDashJump"
"canTrickySpringBallBounce"
"canPauseRemorphTemporaryBlue"
"canBeVeryPatient"Exit condition: {
"leaveWithTemporaryBlue": {}
}Unlocks doors: {"types":["ammo"],"requires":[]}Dev note: The 'canBeVeryPatient' requirement is for difficulty placement as this is quite precise and unforgiving. Bouncing on the pillars is also possible, as an alternative to doing a pause remorph. |
From: 2
Right Door
To: 1
Left Door
Gain run speed using between 19 and 33 tiles in the other room, and either roll in or do a controlled bounce to enter while descending close to the ground. Bounce near the end of the platform in front of the door, clearing the whole room at once. Samus will go over the Evirs, so there is no need for blue speed. Entrance condition: {
"comeInWithSpringBallBounce": {
"speedBooster": true,
"movementType": "controlled",
"remoteAndLandingMinTiles": [
[
19.3625,
1
]
]
}
}Requires: {
"notable": "Cross-Room Spring Ball Bounce (Right to Left)"
}
"canTrickyJump" |
From: 2
Right Door
To: 1
Left Door
Gain max run speed with Speed Booster unequipped (extra run speed $2.0), reequipping Speed Booster before the transition. Bounce over the first pillar and first Evir, bouncing on the second pillar; this requires releasing jump when Samus is about 2 tiles past the first pillar. From there, Samus should bounce over all the remaining Evirs. Entrance condition: {
"comeInWithSpringBallBounce": {
"speedBooster": true,
"movementType": "controlled",
"remoteAndLandingMinTiles": [
[
6.4375,
1
]
]
}
}Requires: {
"notable": "Cross-Room Tricky Spring Ball Bounce (Right to Left)"
}
"canTrickyDashJump"
"canTrickySpringBallBounce"
"canPlayInSand" |
|
Break the bomb block on the opposite side of the room. With extra run speeds between $1.2 and $1.D, it's not possible to break the bomb block directly with a bounce; but it is always possible to break them by chaining temporary blue (even if carrying a flash suit). Entrance condition: {
"comeInWithBlueSpringBallBounce": {
"movementType": "controlled"
}
}Requires: "h_underwaterChainTemporaryBlue" Clears obstacles: A |
|
Enter the room with a normalized extra run speed of $2.0, which can be obtained by gaining max run speed with Speedbooster unequipped; Speedbooster must then be reequipped before the transition. Use Spring Ball to jump within about the last half tile of runway, hold jump, and Samus should bounce off the floating block before the first Evir. After the bounce, perform a spring fling by unequipping and re-equipping Spring Ball, to make it easier to reach the pillar at the right of the room. If jumping or bouncing from further left of the entrance runway, an additional spring fling can be used to ensure Samus makes the bounce on the first floating block. Entrance condition: {
"comeInWithSpringBallBounce": {
"speedBooster": true,
"movementType": "controlled",
"adjacentMinTiles": 12,
"remoteAndLandingMinTiles": [
[
7,
1
]
]
}
}Requires: "canTrickySpringBallBounce" "canSpringFling" |
|
Requires: {
"obstaclesCleared": [
"A"
]
}Exit condition: {
"leaveWithSpringBallBounce": {
"remoteRunway": {
"length": 9,
"openEnd": 1
},
"landingRunway": {
"length": 1,
"openEnd": 1
},
"movementType": "uncontrolled"
}
} |
From: 1
Left Doorway
To: 2
Right Door
Requires: {
"obstaclesCleared": [
"A"
]
}
"canTrickyJump"Exit condition: {
"leaveWithSpringBallBounce": {
"remoteRunway": {
"length": 14,
"openEnd": 1
},
"landingRunway": {
"length": 1,
"openEnd": 1
},
"movementType": "controlled"
}
}Unlocks doors: {"types":["ammo"],"requires":[]} |
From: 1
Left Doorway
To: 2
Right Door
Requires: {
"obstaclesCleared": [
"A"
]
}
"SpaceJump"
"canTrickyJump"
Exit condition: {
"leaveWithSpringBallBounce": {
"remoteRunway": {
"length": 14,
"openEnd": 1
},
"landingRunway": {
"length": 1,
"openEnd": 1
},
"movementType": "uncontrolled"
}
}Unlocks doors: {"types":["ammo"],"requires":[]} |
|
Requires: {
"getBlueSpeed": {
"usedTiles": 14,
"openEnd": 1
}
}
"canChainTemporaryBlue"
{
"or": [
"canLongChainTemporaryBlue",
"canSpringBallBounce",
"SpaceJump"
]
}Exit condition: {
"leaveWithTemporaryBlue": {}
}Unlocks doors: {"types":["ammo"],"requires":[]} |
From: 2
Right Door
To: 1
Left Doorway
Requires: {
"obstaclesCleared": [
"A"
]
}
"canTrickyJump"Exit condition: {
"leaveWithSpringBallBounce": {
"remoteRunway": {
"length": 10,
"openEnd": 1
},
"landingRunway": {
"length": 1,
"openEnd": 1
},
"movementType": "uncontrolled"
}
}Unlocks doors: {"types":["ammo"],"requires":[]} |
|
Exit condition: {
"leaveWithSpringBallBounce": {
"remoteRunway": {
"length": 6,
"openEnd": 1
},
"landingRunway": {
"length": 1,
"openEnd": 1
},
"movementType": "uncontrolled"
}
} |
|
Exit condition: {
"leaveWithSpringBallBounce": {
"remoteRunway": {
"length": 21,
"openEnd": 0
},
"landingRunway": {
"length": 1,
"openEnd": 1
},
"movementType": "uncontrolled"
}
} |
|
Exit condition: {
"leaveWithSpringBallBounce": {
"remoteRunway": {
"length": 21,
"openEnd": 0
},
"landingRunway": {
"length": 1,
"openEnd": 1
},
"movementType": "uncontrolled"
}
} |
|
Requires: {
"or": [
"canMetroidAvoid",
"Ice",
{
"or": [
"f_KilledMetroidRoom1",
{
"obstaclesCleared": [
"f_KilledMetroidRoom1"
]
}
]
}
]
}Exit condition: {
"leaveWithSpringBallBounce": {
"remoteRunway": {
"length": 25,
"openEnd": 1
},
"landingRunway": {
"length": 3,
"openEnd": 1
},
"movementType": "uncontrolled"
}
} |
|
Requires: {
"or": [
"canTrickyDodgeEnemies",
{
"and": [
"canMetroidAvoid",
"Ice"
]
},
"ScrewAttack",
"canPseudoScrew",
{
"or": [
"f_KilledMetroidRoom1",
{
"obstaclesCleared": [
"f_KilledMetroidRoom1"
]
}
]
}
]
}
"canTrickySpringBallBounce"Exit condition: {
"leaveWithSpringBallBounce": {
"remoteRunway": {
"length": 31,
"openEnd": 1
},
"landingRunway": {
"length": 3,
"openEnd": 1
},
"minExtraRunSpeed": "$1.3",
"movementType": "controlled"
}
}Unlocks doors: {"types":["ammo"],"requires":[]}Dev note: FIXME: It is possible to open the door and leave with a controlled bounce in one motion. But then avoiding damage becomes unreliable. |
From: 1
Left Door
To: 2
Right Door
Requires: {
"or": [
"canTrickyDodgeEnemies",
{
"and": [
"canMetroidAvoid",
"Ice"
]
},
"ScrewAttack",
"canPseudoScrew",
{
"or": [
"f_KilledMetroidRoom1",
{
"obstaclesCleared": [
"f_KilledMetroidRoom1"
]
}
]
}
]
}
"canTrickyJump"
"canPreciseSpaceJump"Exit condition: {
"leaveWithSpringBallBounce": {
"remoteRunway": {
"length": 31,
"openEnd": 1
},
"landingRunway": {
"length": 3,
"openEnd": 1
},
"movementType": "uncontrolled"
}
}Unlocks doors: {"types":["ammo"],"requires":[]} |
|
At max run speed without SpeedBooster, you can bounce on both platforms and avoid all acid. Jump from the center of the rightmost X in the background. Bounce again on the second platform to avoid any Metroid or Rinkas. Requires: "canSpringBallBounce"
"canCarefulJump"
{
"or": [
{
"or": [
"f_KilledMetroidRoom1",
{
"obstaclesCleared": [
"f_KilledMetroidRoom1"
]
}
]
},
"canMetroidAvoid",
{
"metroidFrames": 200
}
]
}Dev note: Just doing the strat avoids almost all damage, so metroidframes values are mostly artificial. |
|
At max non-speed run speed, Spring Ball bounce on both platforms and avoid all acid. Land on the right side of the first platform to avoid the second Metroid. Bouncing on the second platform will usually avoid the third Metroid. Requires: "canSpringBallBounce"
"canCarefulJump"
{
"or": [
{
"or": [
"f_KilledMetroidRoom1",
{
"obstaclesCleared": [
"f_KilledMetroidRoom1"
]
}
]
},
{
"and": [
"canTrickyJump",
"canMetroidAvoid",
"canTrickyDodgeEnemies"
]
},
{
"metroidFrames": 270
}
]
} |
|
Requires: {
"or": [
"canMetroidAvoid",
"Ice",
{
"or": [
"f_KilledMetroidRoom1",
{
"obstaclesCleared": [
"f_KilledMetroidRoom1"
]
}
]
}
]
}Exit condition: {
"leaveWithSpringBallBounce": {
"remoteRunway": {
"length": 18,
"openEnd": 0
},
"landingRunway": {
"length": 1,
"openEnd": 1
},
"movementType": "uncontrolled"
}
} |
From: 1
Top Right Door
To: 1
Top Right Door
Requires: {
"or": [
"canMetroidAvoid",
"Ice",
{
"or": [
"f_KilledMetroidRoom2",
{
"obstaclesCleared": [
"f_KilledMetroidRoom2"
]
}
]
}
]
}Exit condition: {
"leaveWithSpringBallBounce": {
"remoteRunway": {
"length": 4,
"openEnd": 0
},
"landingRunway": {
"length": 1,
"openEnd": 1
},
"movementType": "uncontrolled"
}
} |
From: 2
Bottom Right Door
To: 2
Bottom Right Door
Requires: {
"or": [
"canMetroidAvoid",
"Ice",
{
"or": [
"f_KilledMetroidRoom2",
{
"obstaclesCleared": [
"f_KilledMetroidRoom2"
]
}
]
}
]
}Exit condition: {
"leaveWithSpringBallBounce": {
"remoteRunway": {
"length": 8,
"openEnd": 1
},
"landingRunway": {
"length": 1,
"openEnd": 1
},
"movementType": "uncontrolled"
}
} |
From: 1
Left Door
To: 1
Left Door
Requires: {
"or": [
"canMetroidAvoid",
{
"and": [
"Ice",
"canDodgeWhileShooting"
]
},
{
"or": [
"f_KilledMetroidRoom3",
{
"obstaclesCleared": [
"f_KilledMetroidRoom3"
]
}
]
}
]
}Exit condition: {
"leaveWithSpringBallBounce": {
"remoteRunway": {
"length": 29,
"openEnd": 2
},
"landingRunway": {
"length": 3,
"openEnd": 1
},
"minExtraRunSpeed": "$1.A",
"movementType": "uncontrolled"
}
} |
From: 1
Left Door
To: 1
Left Door
Exit condition: {
"leaveWithSpringBallBounce": {
"remoteRunway": {
"length": 7,
"openEnd": 1
},
"landingRunway": {
"length": 1,
"openEnd": 1
},
"movementType": "uncontrolled"
}
} |
From: 2
Right Door
To: 2
Right Door
Requires: "canTrickyJump"
{
"or": [
"canTrickyDodgeEnemies",
{
"and": [
"canMetroidAvoid",
{
"metroidFrames": 100
}
]
},
{
"or": [
"f_KilledMetroidRoom3",
{
"obstaclesCleared": [
"f_KilledMetroidRoom3"
]
}
]
}
]
}Exit condition: {
"leaveWithSpringBallBounce": {
"remoteRunway": {
"length": 29,
"openEnd": 2
},
"landingRunway": {
"length": 5,
"openEnd": 2
},
"movementType": "controlled"
}
} |
|
Requires: {
"or": [
"f_KilledMetroidRoom3",
{
"obstaclesCleared": [
"f_KilledMetroidRoom3"
]
}
]
}
{
"getBlueSpeed": {
"usedTiles": 29,
"openEnd": 2
}
}
"canChainTemporaryBlue"
{
"or": [
{
"and": [
"canLongChainTemporaryBlue",
{
"acidFrames": 20
},
{
"enemyDamage": {
"enemy": "Rinka",
"type": "contact",
"hits": 1
}
}
]
},
"canSpringBallBounce",
"SpaceJump"
]
}Exit condition: {
"leaveWithTemporaryBlue": {}
} |
From: 1
Top Left Door
To: 2
Bottom Door
Use X-ray immediately after shinecharging, in order to be able to dodge the Rinkas. Use spring ball to bounce through the 3-tile-high portion. Entrance condition: {
"comeInShinecharging": {
"length": 9,
"openEnd": 0
}
}Requires: {
"or": [
"f_KilledMetroidRoom4",
{
"obstaclesCleared": [
"f_KilledMetroidRoom4"
]
}
]
}
"canLongChainTemporaryBlue"
"canXRayTurnaround"
"canSpringBallBounce"Exit condition: {
"leaveWithTemporaryBlue": {
"direction": "any"
}
}Unlocks doors: {"types":["ammo"],"requires":[]}Dev note: It might technically be possible to get through the 3-tile-high part without Spring Ball, but this probably isn't really viable? |
|
Exit condition: {
"leaveWithSpringBallBounce": {
"remoteRunway": {
"length": 2,
"openEnd": 2
},
"landingRunway": {
"length": 1,
"openEnd": 1
},
"movementType": "uncontrolled"
}
} |
From: 1
Top Right Doorway
To: 1
Top Right Doorway
Exit condition: {
"leaveWithSpringBallBounce": {
"remoteRunway": {
"length": 7,
"openEnd": 1
},
"landingRunway": {
"length": 1,
"openEnd": 1
},
"movementType": "uncontrolled"
}
}Dev note: There is one unusable remote runway tile here, in order to allow space to reasonably perform the bounce. |
|
Use the floating platform near the bottom-left of the room. Exit condition: {
"leaveWithSpringBallBounce": {
"remoteRunway": {
"length": 3,
"openEnd": 2
},
"landingRunway": {
"length": 1,
"openEnd": 1
},
"movementType": "uncontrolled"
}
} |
|
Exit condition: {
"leaveWithSpringBallBounce": {
"remoteRunway": {
"length": 43,
"openEnd": 1
},
"landingRunway": {
"length": 1,
"openEnd": 1
},
"movementType": "uncontrolled"
}
} |
|
Requires: {
"obstaclesCleared": [
"A"
]
}Exit condition: {
"leaveWithSpringBallBounce": {
"remoteRunway": {
"length": 19,
"openEnd": 1
},
"landingRunway": {
"length": 1,
"openEnd": 1
},
"movementType": "uncontrolled"
}
} |
|
Exit condition: {
"leaveWithSpringBallBounce": {
"remoteRunway": {
"length": 3,
"openEnd": 1
},
"landingRunway": {
"length": 1,
"openEnd": 1
},
"movementType": "uncontrolled"
}
} |
From: 2
Right Door
To: 2
Right Door
Requires: "canTrickyJump" Exit condition: {
"leaveWithSpringBallBounce": {
"remoteRunway": {
"length": 9,
"openEnd": 0
},
"landingRunway": {
"length": 4,
"openEnd": 1
},
"movementType": "controlled"
}
} |
From: 2
Right Door
To: 2
Right Door
Requires: "canPreciseSpaceJump" Exit condition: {
"leaveWithSpringBallBounce": {
"remoteRunway": {
"length": 9,
"openEnd": 0
},
"landingRunway": {
"length": 4,
"openEnd": 1
},
"movementType": "uncontrolled"
}
} |
|
Exit condition: {
"leaveWithSpringBallBounce": {
"remoteRunway": {
"length": 5,
"openEnd": 1
},
"landingRunway": {
"length": 1,
"openEnd": 1
},
"movementType": "uncontrolled"
}
} |
From: 2
Left Door
To: 2
Left Door
Requires: {
"obstaclesCleared": [
"A"
]
}Exit condition: {
"leaveWithSpringBallBounce": {
"remoteRunway": {
"length": 7,
"openEnd": 0
},
"landingRunway": {
"length": 1,
"openEnd": 1
},
"movementType": "uncontrolled"
}
}Unlocks doors: {"types":["ammo"],"requires":[]} |
