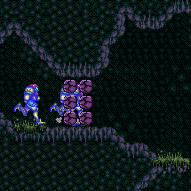
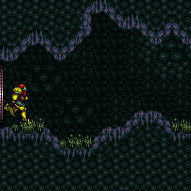
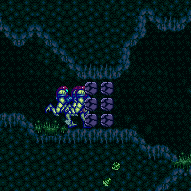
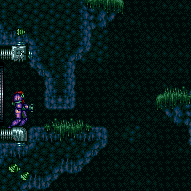
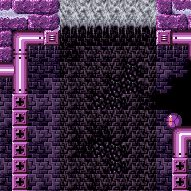
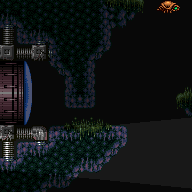
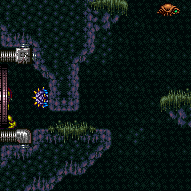
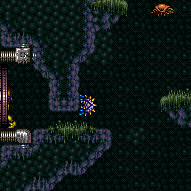
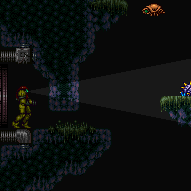
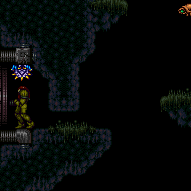
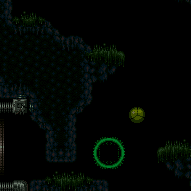
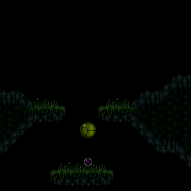
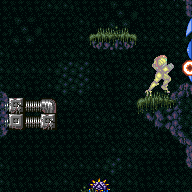
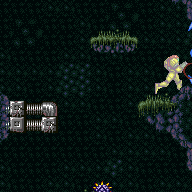
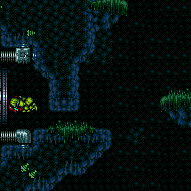
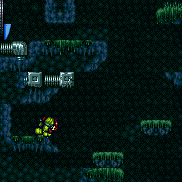
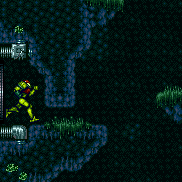
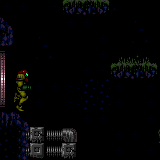
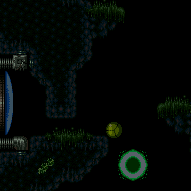
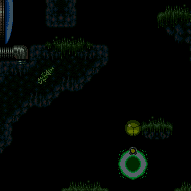
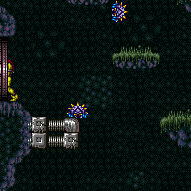
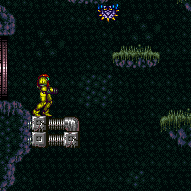
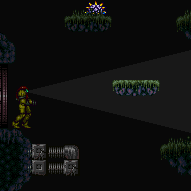
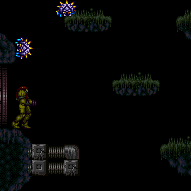
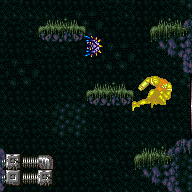
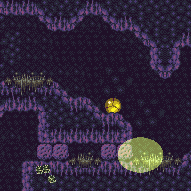
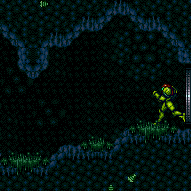
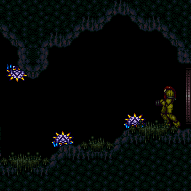
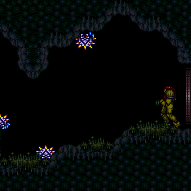
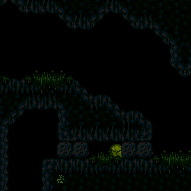
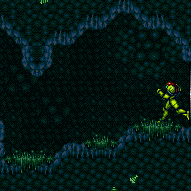
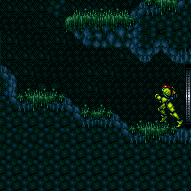
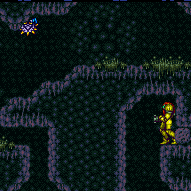
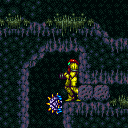
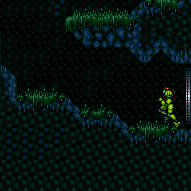
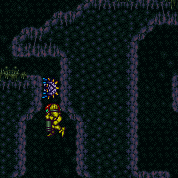
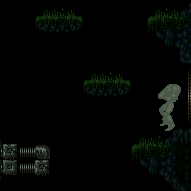
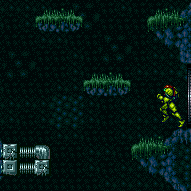
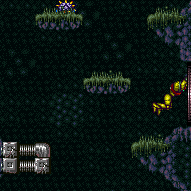
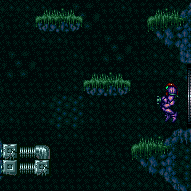
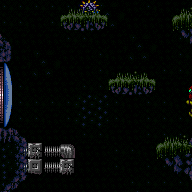
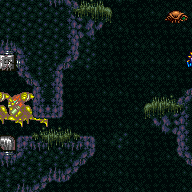
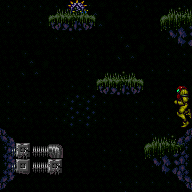
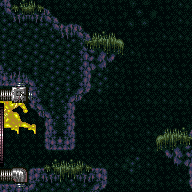
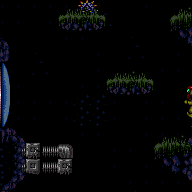
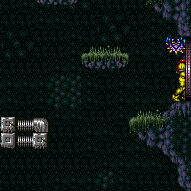
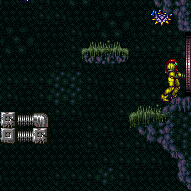
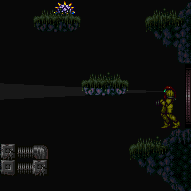
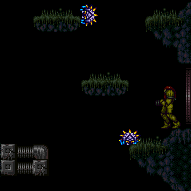
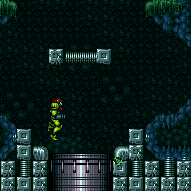
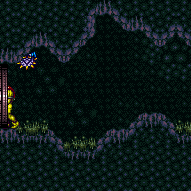
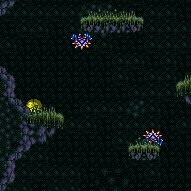
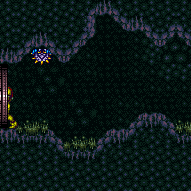
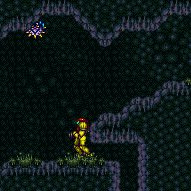
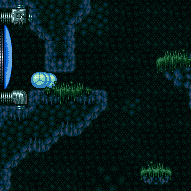
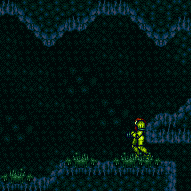
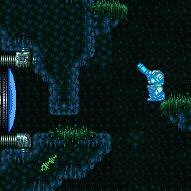
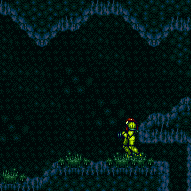
Parlor and Alcatraz
Room ID: 10
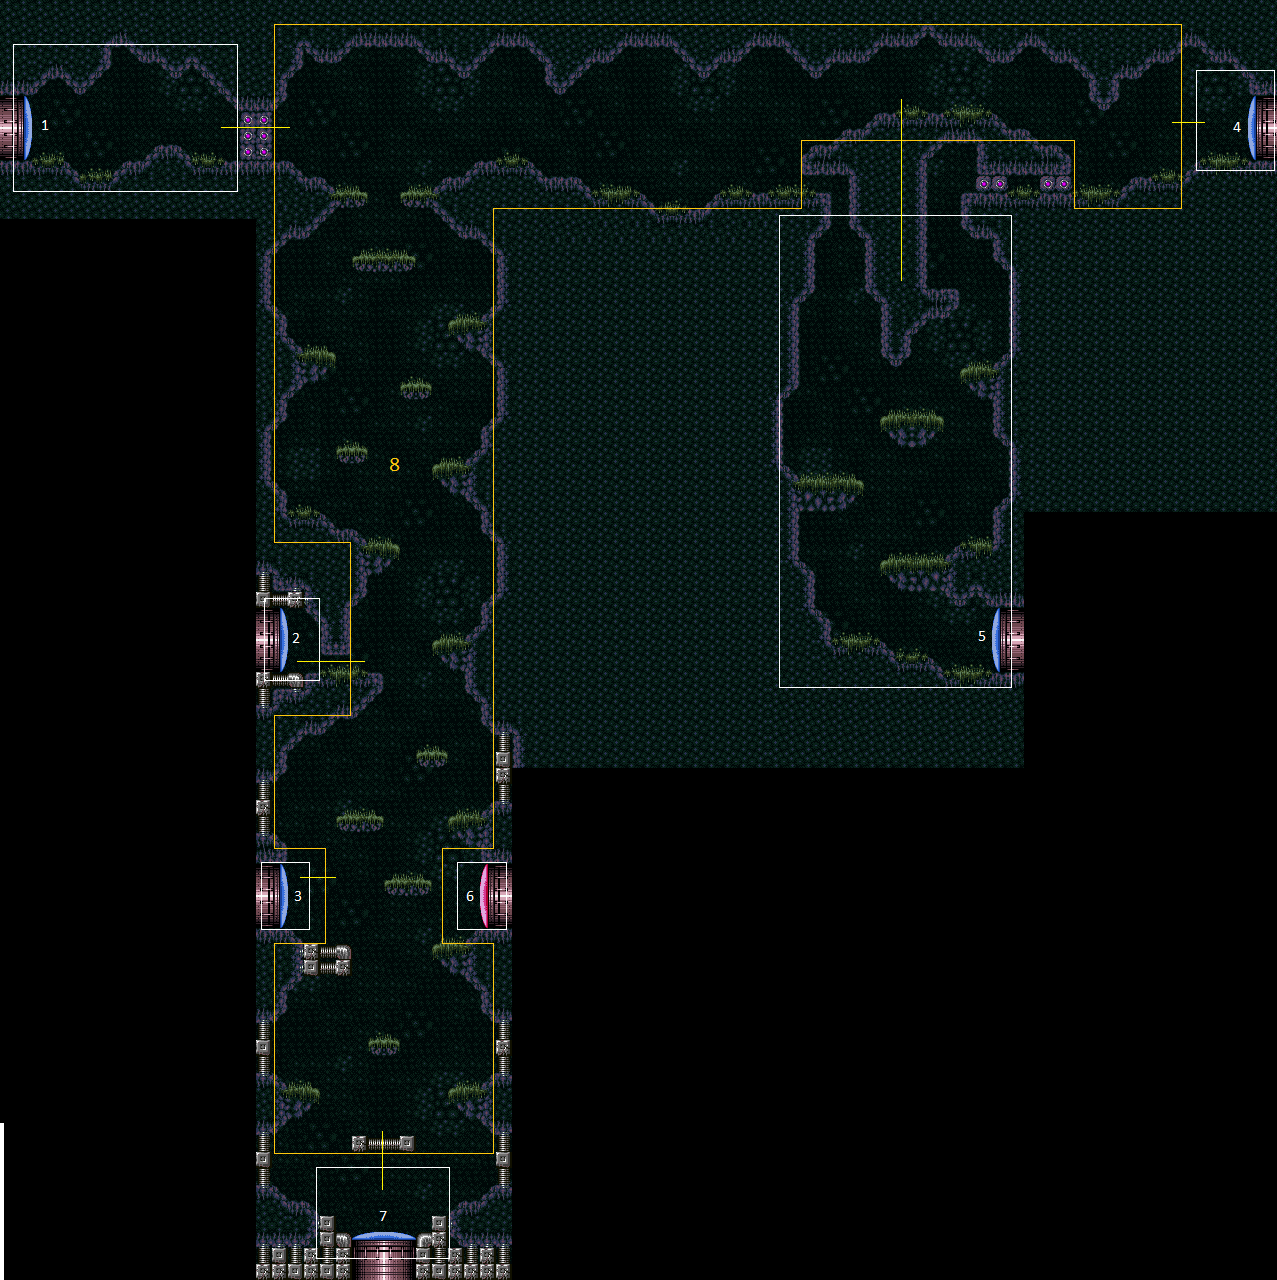
|
Entrance condition: {
"comeInWithRMode": {}
}Clears obstacles: R-Mode |
|
Exit condition: {
"leaveWithRunway": {
"length": 14,
"openEnd": 0,
"steepUpTiles": 2,
"steepDownTiles": 2
}
} |
From: 1
Top Left Door
To: 1
Top Left Door
Requires: "h_destroyBombWalls" Exit condition: {
"leaveWithRunway": {
"length": 22,
"openEnd": 0,
"steepUpTiles": 4,
"steepDownTiles": 2
}
} |
From: 1
Top Left Door
To: 1
Top Left Door
Entrance condition: {
"comeInGettingBlueSpeed": {
"length": 13,
"openEnd": 0,
"steepUpTiles": 2,
"steepDownTiles": 2
}
}Exit condition: {
"leaveWithRunway": {
"length": 22,
"openEnd": 0,
"steepUpTiles": 4,
"steepDownTiles": 2
}
}Unlocks doors: {"types":["ammo"],"requires":[]} |
|
Requires: {
"obstaclesNotCleared": [
"R-Mode"
]
}
"h_CrystalFlash" |
From: 1
Top Left Door
To: 1
Top Left Door
Destroy the bomb wall to open a path for the Geemer to hit Samus through the transition. If using a Power Bomb be careful not to kill the Geemer. Place the Power Bomb far left, next to the door, as the Geemer is leaving the flat part of the ceiling. Requires: "h_ZebesIsAwake" "h_destroyBombWalls" Exit condition: {
"leaveWithGModeSetup": {}
} |
From: 1
Top Left Door
To: 2
Middle Left Door
There are scroll PLMs one tile to the left of the Terminator bomb blocks which can be used to overload PLMs. The bomb blocks then become air and can be passed through. Go down to the Save door by falling and moving back and forth in the right places. Once you start going down you will be off-screen. Entrance condition: {
"comeInWithGMode": {
"mode": "any",
"morphed": true
}
}Requires: "canOffScreenMovement" |
From: 1
Top Left Door
To: 5
Alcatraz Door
There are scroll PLMs one tile to the left of the bomb blocks which can be used to overload PLMs. The bomb blocks then become air and can be passed through. Use Bombs, SpringBall, or a Geemer damage boost to get across the gap without unmorphing. To survive a Geemer hit, you will need Varia or Gravity or to come in with more than 4 energy (e.g. by coming in with indirect G-mode after leaving with G-mode immobile). Entrance condition: {
"comeInWithGMode": {
"mode": "any",
"morphed": true
}
}Requires: {
"or": [
"h_artificialMorphMovement",
"h_artificialMorphBombHorizontally",
{
"and": [
"canComplexGMode",
"canNeutralDamageBoost",
"h_ZebesIsAwake",
{
"enemyDamage": {
"enemy": "Geemer (blue)",
"type": "contact",
"hits": 1
}
}
]
}
]
} |
|
Requires: "h_destroyBombWalls" |
|
Entrance condition: {
"comeInWithSpark": {}
}Requires: {
"shinespark": {
"frames": 67,
"excessFrames": 42
}
}Dev note: FIXME: A strat could be added coming in shinecharged, with 1 frame, 1 excess frame, and no horizontal spark needed. |
|
Entrance condition: {
"comeInGettingBlueSpeed": {
"length": 13,
"openEnd": 0,
"steepUpTiles": 2,
"steepDownTiles": 2
}
} |
|
Requires: {
"or": [
{
"and": [
{
"doorUnlockedAtNode": 1
},
{
"getBlueSpeed": {
"usedTiles": 14,
"steepUpTiles": 2,
"steepDownTiles": 2,
"openEnd": 0
}
}
]
},
{
"getBlueSpeed": {
"usedTiles": 13,
"steepUpTiles": 2,
"steepDownTiles": 2,
"openEnd": 0
}
}
]
}Unlocks doors: {"nodeId":1,"types":["ammo"],"requires":[]} |
From: 1
Top Left Door
To: 8
Central Junction
There are scroll PLMs one tile to the left of the bomb blocks which can be used to overload PLMs. The bomb blocks then become air and can be passed through. Entrance condition: {
"comeInWithGMode": {
"mode": "any",
"morphed": false
}
} |
From: 2
Middle Left Door
To: 1
Top Left Door
Use artificial morph to pass through the tunnel, then unmorph and get up to the top of the room normally. There are scroll PLMs at the two-tile gap as Samus approach the top left bomb blocks, which can be used to overload PLMs. The bomb blocks then become air and can be passed through. Entrance condition: {
"comeInWithGMode": {
"mode": "any",
"morphed": true
}
} |
|
Entrance condition: {
"comeInWithGrappleTeleport": {
"blockPositions": [
[
12,
12
],
[
12,
13
]
]
}
} |
|
Fall into the first Samus Eater in Hellway or Alpha Power Bomb Room. After teleporting and passing through the transition, X-Ray climb 2 screens to reach the space behind the bomb blocks at the top of the room. Samus will be off-camera, but the slopes at the top will push the camera up, indicating when the climb is done. Entrance condition: {
"comeInWithSamusEaterTeleport": {
"floorPositions": [
[
1,
13
],
[
2,
13
]
],
"ceilingPositions": []
}
}Requires: "canLongXRayClimb" Dev note: FIXME: In Hellway, a ceiling Samus Eater could probably also work, and shorten the X-Ray climb. |
|
Entrance condition: {
"comeInWithRMode": {}
}Clears obstacles: R-Mode |
|
Exit condition: {
"leaveWithRunway": {
"length": 3,
"openEnd": 0
}
} |
From: 2
Middle Left Door
To: 2
Middle Left Door
Requires: "h_ZebesIsAwake" Exit condition: {
"leaveWithGModeSetup": {}
} |
|
Requires: {
"enemyDamage": {
"enemy": "Geemer (blue)",
"type": "contact",
"hits": 1
}
}
"h_ZebesIsAwake" |
From: 2
Middle Left Door
To: 3
Bottom Left Horizontal Door
Entrance condition: {
"comeInShinecharging": {
"length": 2,
"openEnd": 0
}
}Requires: "Morph"
"canShinechargeMovementTricky"
{
"shinespark": {
"frames": 6
}
}Exit condition: {
"leaveWithSpark": {}
}Unlocks doors: {"types":["super"],"requires":[]}
{"types":["missiles","powerbomb"],"requires":["never"]} |
From: 2
Middle Left Door
To: 5
Alcatraz Door
Use artificial morph to pass through the tunnel at the entrance of the room. Use Bombs or SpringBall to navigate to Alcatraz without unmorphing. Entrance condition: {
"comeInWithGMode": {
"mode": "any",
"morphed": true
}
}Requires: "h_artificialMorphMovement" |
From: 2
Middle Left Door
To: 6
Bottom Right Door (On the Left Shaft)
Entrance condition: {
"comeInShinecharging": {
"length": 2,
"openEnd": 0
}
}Requires: "Morph"
"canShinechargeMovementComplex"
{
"shineChargeFrames": 145
}Exit condition: {
"leaveShinecharged": {}
}Unlocks doors: {"types":["super"],"requires":[]}
{"types":["missiles","powerbomb"],"requires":["never"]} |
From: 2
Middle Left Door
To: 6
Bottom Right Door (On the Left Shaft)
Entrance condition: {
"comeInShinecharged": {}
}Requires: {
"shineChargeFrames": 145
}
"Morph"
"canShinechargeMovementComplex"Exit condition: {
"leaveShinecharged": {}
}Unlocks doors: {"types":["super"],"requires":[]}
{"types":["missiles","powerbomb"],"requires":["never"]} |
From: 2
Middle Left Door
To: 6
Bottom Right Door (On the Left Shaft)
Entrance condition: {
"comeInShinecharged": {}
}Requires: {
"shineChargeFrames": 120
}
"Morph"
"canShinechargeMovementComplex"
{
"shinespark": {
"frames": 7,
"excessFrames": 0
}
}Exit condition: {
"leaveWithSpark": {
"position": "bottom"
}
}Unlocks doors: {"types":["super"],"requires":[]}
{"types":["missiles","powerbomb"],"requires":["never"]} |
From: 2
Middle Left Door
To: 6
Bottom Right Door (On the Left Shaft)
Entrance condition: {
"comeInShinecharged": {}
}Requires: {
"shineChargeFrames": 140
}
"Morph"
"canShinechargeMovementComplex"
{
"shinespark": {
"frames": 5,
"excessFrames": 0
}
}Exit condition: {
"leaveWithSpark": {
"position": "top"
}
}Unlocks doors: {"types":["super"],"requires":[]}
{"types":["missiles","powerbomb"],"requires":["never"]} |
|
Requires: "Morph" |
|
Entrance condition: {
"comeInWithDoorStuckSetup": {}
}Requires: "canXRayClimb" |
|
Entrance condition: {
"comeInWithStoredFallSpeed": {
"fallSpeedInTiles": 2
}
} |
|
Entrance condition: {
"comeInWithGMode": {
"mode": "any",
"morphed": true
}
} |
From: 3
Bottom Left Horizontal Door
To: 1
Top Left Door
There are scroll PLMs throughout the room, which will overload PLMs when going through them. The bomb blocks then become air and can be passed through. Entrance condition: {
"comeInWithGMode": {
"mode": "any",
"morphed": false
}
} |
From: 3
Bottom Left Horizontal Door
To: 1
Top Left Door
If entering the transition too deeply, Samus may end up stuck slightly inside the Bomb blocks and the floor. This can be avoided by tapping up to retract Grapple (pulling Samus left and down), holding left while releasing Grapple, then jumping to clip up through the floor. If Morph is available, rolling out to the left is also an option. Entrance condition: {
"comeInWithGrappleTeleport": {
"blockPositions": [
[
12,
12
],
[
12,
13
]
]
}
} |
From: 3
Bottom Left Horizontal Door
To: 1
Top Left Door
Fall into the first Samus Eater in Hellway or Alpha Power Bomb Room. After teleporting and passing through the transition, X-Ray climb 3 screens to reach the space behind the bomb blocks at the top of the room. Samus will be off-camera, but the slopes at the top will push the camera up, indicating when the climb is done. Entrance condition: {
"comeInWithSamusEaterTeleport": {
"floorPositions": [
[
1,
13
],
[
8,
13
]
],
"ceilingPositions": []
}
}Requires: "canLongXRayClimb" "canBePatient" Dev note: FIXME: Other Samus Eaters can also probably work. In particular, in Hellway a ceiling Samus Eater could probably shorten the X-Ray climb. |
From: 3
Bottom Left Horizontal Door
To: 2
Middle Left Door
Entrance condition: {
"comeInShinecharged": {}
}Requires: {
"shineChargeFrames": 160
}
"canShinechargeMovementComplex"
"HiJump"
"Morph"Exit condition: {
"leaveShinecharged": {}
}Unlocks doors: {"types":["super"],"requires":[]}
{"types":["missiles","powerbomb"],"requires":["never"]} |
From: 3
Bottom Left Horizontal Door
To: 2
Middle Left Door
Entrance condition: {
"comeInShinecharged": {}
}Requires: {
"shineChargeFrames": 150
}
"canShinechargeMovementComplex"
"HiJump"
"Morph"
{
"shinespark": {
"frames": 3,
"excessFrames": 0
}
}Exit condition: {
"leaveWithSpark": {
"position": "top"
}
}Unlocks doors: {"types":["super"],"requires":[]}
{"types":["missiles","powerbomb"],"requires":["never"]} |
From: 3
Bottom Left Horizontal Door
To: 2
Middle Left Door
If needing to spark low through the door, hold angle-down while activating the spark, in order to avoid getting extra height from a crouch jump. Entrance condition: {
"comeInShinecharged": {}
}Requires: {
"shineChargeFrames": 140
}
"canShinechargeMovementComplex"
"HiJump"
"Morph"
{
"shinespark": {
"frames": 4,
"excessFrames": 0
}
}Exit condition: {
"leaveWithSpark": {
"position": "bottom"
}
}Unlocks doors: {"types":["super"],"requires":[]}
{"types":["missiles","powerbomb"],"requires":["never"]} |
From: 3
Bottom Left Horizontal Door
To: 2
Middle Left Door
Entrance condition: {
"comeInWithGMode": {
"mode": "any",
"morphed": true
}
}Requires: "h_artificialMorphMovement" |
From: 3
Bottom Left Horizontal Door
To: 3
Bottom Left Horizontal Door
Entrance condition: {
"comeInWithRMode": {}
}Clears obstacles: R-Mode |
From: 3
Bottom Left Horizontal Door
To: 3
Bottom Left Horizontal Door
Exit condition: {
"leaveWithRunway": {
"length": 5,
"openEnd": 1,
"steepUpTiles": 1
}
} |
From: 3
Bottom Left Horizontal Door
To: 3
Bottom Left Horizontal Door
There is a Geemer just below the door that only moves while on camera. Requires: "h_frozenEnemyRunway" "h_ZebesIsAwake" Exit condition: {
"leaveWithRunway": {
"length": 6,
"openEnd": 1,
"steepUpTiles": 1
}
} |
From: 3
Bottom Left Horizontal Door
To: 3
Bottom Left Horizontal Door
Requires: "h_ZebesIsAwake" Exit condition: {
"leaveWithGModeSetup": {}
} |
From: 3
Bottom Left Horizontal Door
To: 3
Bottom Left Horizontal Door
Requires: {
"enemyDamage": {
"enemy": "Geemer (blue)",
"type": "contact",
"hits": 1
}
}
"h_ZebesIsAwake"
"canBePatient" |
From: 3
Bottom Left Horizontal Door
To: 5
Alcatraz Door
Entrance condition: {
"comeInWithGMode": {
"mode": "any",
"morphed": true
}
}Requires: "h_artificialMorphMovement" |
From: 3
Bottom Left Horizontal Door
To: 6
Bottom Right Door (On the Left Shaft)
Entrance condition: {
"comeInShinecharged": {}
}Requires: {
"shineChargeFrames": 105
}
"canShinechargeMovementComplex"Exit condition: {
"leaveShinecharged": {}
}Unlocks doors: {"types":["super"],"requires":[]}
{"types":["missiles","powerbomb"],"requires":["never"]} |
From: 3
Bottom Left Horizontal Door
To: 6
Bottom Right Door (On the Left Shaft)
Shoot while entering the room, to open the door. Activate the spark immediately after landing, at a position low enough to pass underneath the platform. Entrance condition: {
"comeInShinecharged": {}
}Requires: {
"shineChargeFrames": 20
}
"canShinechargeMovementComplex"
{
"shinespark": {
"frames": 22,
"excessFrames": 0
}
}Exit condition: {
"leaveWithSpark": {
"position": "bottom"
}
}Unlocks doors: {"types":["super"],"requires":[]}
{"types":["missiles","powerbomb"],"requires":["never"]} |
From: 3
Bottom Left Horizontal Door
To: 6
Bottom Right Door (On the Left Shaft)
Entrance condition: {
"comeInShinecharged": {}
}Requires: {
"shineChargeFrames": 90
}
"canShinechargeMovementComplex"
"canCarefulJump"
{
"shinespark": {
"frames": 5,
"excessFrames": 0
}
}Exit condition: {
"leaveWithSpark": {
"position": "top"
}
}Unlocks doors: {"types":["super"],"requires":[]}
{"types":["missiles","powerbomb"],"requires":["never"]} |
From: 3
Bottom Left Horizontal Door
To: 7
Bottom Left Vertical Door
Immediately after running off the ledge, turn back and press against the ledge, aim down, and shoot open the door. Move left to avoid the floating platform, then hold right against the floating platform to make it over to the door. Entrance condition: {
"comeInShinecharged": {}
}Requires: {
"shineChargeFrames": 123
}
"canShinechargeMovementComplex"Exit condition: {
"leaveShinecharged": {}
}Unlocks doors: {"types":["ammo"],"requires":["never"]} |
|
|
From: 4
Top Right Door
To: 1
Top Left Door
There are scroll PLMs throughout the room, which will overload PLMs when going through them. The bomb blocks then become air and can be passed through. Entrance condition: {
"comeInWithGMode": {
"mode": "any",
"morphed": false
}
} |
|
Entrance condition: {
"comeInWithGrappleTeleport": {
"blockPositions": [
[
5,
3
],
[
7,
2
]
]
}
} |
From: 4
Top Right Door
To: 1
Top Left Door
Entrance condition: {
"comeInWithGrappleTeleport": {
"blockPositions": [
[
3,
12
],
[
3,
13
]
]
}
}Requires: {
"or": [
"canGrappleTeleportWallEscape",
{
"doorUnlockedAtNode": 1
}
]
}Unlocks doors: {"types":["ammo"],"requires":[]} |
From: 4
Top Right Door
To: 1
Top Left Door
Entrance condition: {
"comeInWithGrappleTeleport": {
"blockPositions": [
[
3,
12
],
[
3,
13
]
]
}
}Bypasses door shell: true |
From: 4
Top Right Door
To: 1
Top Left Door
Entrance condition: {
"comeInWithGrappleTeleport": {
"blockPositions": [
[
3,
12
]
]
}
}Exit condition: {
"leaveWithGrappleTeleport": {
"blockPositions": [
[
3,
12
]
]
}
}Bypasses door shell: true |
From: 4
Top Right Door
To: 1
Top Left Door
Entrance condition: {
"comeInWithGrappleTeleport": {
"blockPositions": [
[
3,
13
]
]
}
}Exit condition: {
"leaveWithGrappleTeleport": {
"blockPositions": [
[
3,
13
]
]
}
}Bypasses door shell: true |
From: 4
Top Right Door
To: 1
Top Left Door
Exit the previous room with Samus in a standing pose (while grappled). After teleporting, press right to release Grapple while staying standing (not being forced into a crouch). Then X-ray climb 1 screen to get up to the door transition, without needing to open the door. Samus will not be visible during the climb. Entrance condition: {
"comeInWithGrappleTeleport": {
"blockPositions": [
[
2,
18
],
[
2,
19
],
[
2,
28
],
[
2,
29
]
]
}
}Requires: "canXRayClimb" Bypasses door shell: true |
From: 4
Top Right Door
To: 1
Top Left Door
Exit the previous room with Samus in a standing pose (while grappled). After teleporting, press right to release Grapple while staying standing (not being forced into a crouch). Then X-ray climb 2 screens to get up to the door transition, without needing to open the door. Samus will not be visible during the climb. Entrance condition: {
"comeInWithGrappleTeleport": {
"blockPositions": [
[
2,
34
]
]
}
}Requires: "canLongXRayClimb" Bypasses door shell: true |
From: 4
Top Right Door
To: 2
Middle Left Door
A single Power Bomb, placed precisely and as early as possible, can get you over the Geemers and onto the ledge above Alcatraz without taking a hit. Alternatively Bombs or SpringBall can be used. Go down to the Save door by just falling and moving back and forth in the right places. Once you start going down you will be off-screen. Entrance condition: {
"comeInWithGMode": {
"mode": "any",
"morphed": true
}
}Requires: "canOffScreenMovement"
{
"or": [
"h_artificialMorphMovement",
"h_artificialMorphBombHorizontally"
]
} |
|
Entrance condition: {
"comeInWithRMode": {}
}Clears obstacles: R-Mode |
|
Exit condition: {
"leaveWithRunway": {
"length": 12,
"openEnd": 0,
"steepUpTiles": 2
}
} |
From: 4
Top Right Door
To: 4
Top Right Door
Requires: "h_ZebesIsAwake" Exit condition: {
"leaveWithGModeSetup": {}
} |
|
Requires: {
"enemyDamage": {
"enemy": "Geemer (blue)",
"type": "contact",
"hits": 1
}
}
"h_ZebesIsAwake" |
|
There are scroll PLMs one tile to the right of the bomb blocks which can be used to overload PLMs, turning the bomb blocks to air. However, if Zebes is awake, two Geemers block the way. The Geemer hits can be avoided with Bombs or SpringBall. Alternatively, use a Power Bombs, to kill the Geemers and another to boost over to the left Alcatraz entrance, as the Power Bomb blast will render the bomb blocks solid, unable to be turned to air. This is possible but tricky to do with a single Power Bomb: In direct G-mode, use Samus' i-frames to roll through the first Geemer and horizontally bomb boost onto the ledge. In indirect G-mode, roll immediately and place the Power Bomb just after the first downward slope to jump over both Geemers. Entrance condition: {
"comeInWithGMode": {
"mode": "any",
"morphed": true
}
}Requires: {
"or": [
"h_artificialMorphMovement",
{
"and": [
"h_artificialMorphPowerBomb",
{
"or": [
"h_additionalBomb",
"canTrickyGMode"
]
}
]
},
{
"enemyDamage": {
"enemy": "Geemer (blue)",
"type": "contact",
"hits": 1
}
},
"h_ZebesNotAwake"
]
} |
|
|
From: 5
Alcatraz Door
To: 1
Top Left Door
There are scroll PLMs next to the bomb blocks and on the ledge below the Alcatraz exit, which will overload PLMs when going through them. Samus will need to briefly navigate off-screen while to the right of Alcatraz before coming back left. Note that the global Geemer may still be in this area if traversing the room quickly, and can hit Samus off-screen. Entrance condition: {
"comeInWithGMode": {
"mode": "any",
"morphed": true
}
}Requires: "h_artificialMorphMovement"
{
"or": [
"canTrickyDodgeEnemies",
{
"enemyDamage": {
"enemy": "Geemer (blue)",
"type": "contact",
"hits": 1
}
},
"h_ZebesNotAwake"
]
} |
|
Entrance condition: {
"comeInWithGrappleTeleport": {
"blockPositions": [
[
5,
3
],
[
7,
2
]
]
}
} |
From: 5
Alcatraz Door
To: 1
Top Left Door
Entrance condition: {
"comeInWithGrappleTeleport": {
"blockPositions": [
[
3,
12
],
[
3,
13
]
]
}
}Requires: {
"or": [
"canGrappleTeleportWallEscape",
{
"doorUnlockedAtNode": 1
}
]
}Unlocks doors: {"types":["ammo"],"requires":[]} |
From: 5
Alcatraz Door
To: 1
Top Left Door
Entrance condition: {
"comeInWithGrappleTeleport": {
"blockPositions": [
[
3,
12
],
[
3,
13
]
]
}
}Bypasses door shell: true |
From: 5
Alcatraz Door
To: 1
Top Left Door
Entrance condition: {
"comeInWithGrappleTeleport": {
"blockPositions": [
[
3,
12
]
]
}
}Exit condition: {
"leaveWithGrappleTeleport": {
"blockPositions": [
[
3,
12
]
]
}
}Bypasses door shell: true |
From: 5
Alcatraz Door
To: 1
Top Left Door
Entrance condition: {
"comeInWithGrappleTeleport": {
"blockPositions": [
[
3,
13
]
]
}
}Exit condition: {
"leaveWithGrappleTeleport": {
"blockPositions": [
[
3,
13
]
]
}
}Bypasses door shell: true |
From: 5
Alcatraz Door
To: 1
Top Left Door
Exit the previous room with Samus in a standing pose (while grappled). After teleporting, press right to release Grapple while staying standing (not being forced into a crouch). Then X-ray climb 1 screeto get up to the door transition, without needing to open the door. Samus will not be visible during the climb. Entrance condition: {
"comeInWithGrappleTeleport": {
"blockPositions": [
[
2,
18
],
[
2,
19
],
[
2,
28
],
[
2,
29
]
]
}
}Requires: "canXRayClimb" Bypasses door shell: true |
From: 5
Alcatraz Door
To: 1
Top Left Door
Exit the previous room with Samus in a standing pose (while grappled). After teleporting, press right to release Grapple while staying standing (not being forced into a crouch). Then X-ray climb 2 screens to get up to the door transition, without needing to open the door. Samus will not be visible during the climb. Entrance condition: {
"comeInWithGrappleTeleport": {
"blockPositions": [
[
2,
34
]
]
}
}Requires: "canLongXRayClimb" Bypasses door shell: true |
From: 5
Alcatraz Door
To: 2
Middle Left Door
There are scroll PLMs next to the bomb blocks and on the ledge below the Alcatraz exit, which will overload PLMs when going through them. Samus will need to briefly navigate off-screen while to the right of Alcatraz before coming back left. Note that the global Geemer may still be in this area if traversing the room quickly, and can hit Samus off-screen. Again traverse off-screen while going down the left shaft and through the morph tunnel. Entrance condition: {
"comeInWithGMode": {
"mode": "any",
"morphed": true
}
}Requires: "canOffScreenMovement" "h_artificialMorphMovement" |
|
Entrance condition: {
"comeInWithRMode": {}
}Clears obstacles: R-Mode |
|
Exit condition: {
"leaveWithRunway": {
"length": 11,
"openEnd": 0,
"steepDownTiles": 2
}
} |
|
Requires: "ScrewAttack"
{
"cycleFrames": 180
}Farm cycle drops: 1 Ripper |
|
Requires: {
"obstaclesNotCleared": [
"R-Mode"
]
}
"h_CrystalFlash" |
From: 5
Alcatraz Door
To: 5
Alcatraz Door
It takes approximately 3.5 minutes for a global Geemer to reach this location, but this can be reduced by using a Super between 19 and 33 seconds after entering the room, to make a Geemer fall and take a shorter path. It is possible to climb the room and watch for the Geemer instead of timing it. Requires: "h_ZebesIsAwake"
{
"or": [
"canBeVeryPatient",
{
"ammo": {
"type": "Super",
"count": 1
}
}
]
}Exit condition: {
"leaveWithGModeSetup": {}
} |
|
It takes approximately 3.5 minutes for a global Geemer to reach this location. If using a Super, fire between 19 and 33 seconds after entering the room, then wait approximately 30 more seconds to be hit. Requires: {
"enemyDamage": {
"enemy": "Geemer (blue)",
"type": "contact",
"hits": 1
}
}
"h_ZebesIsAwake"
{
"or": [
"canBeVeryPatient",
{
"and": [
"canComplexGMode",
{
"ammo": {
"type": "Super",
"count": 1
}
}
]
}
]
}Dev note: FIXME: Should manipulating global enemies off screen be a tech? |
|
Requires: "h_bombThings" |
|
Requires: {
"notable": "Alcatraz Escape"
}
"canPreciseWalljump"
"canWallJumpInstantMorph"
{
"or": [
"HiJump",
"canConsecutiveWalljump"
]
} |
From: 5
Alcatraz Door
To: 8
Central Junction
Requires: "canMidAirMorph" "canCarefulJump" "SpaceJump" |
From: 5
Alcatraz Door
To: 8
Central Junction
Requires: "canTrickySpringBallJump" "canTrickyJump" |
|
Requires: "HiJump" "canMidAirMorph" "canTrickyDashJump" |
From: 5
Alcatraz Door
To: 8
Central Junction
Wait 3 minutes for a global Geemer to waddle over, or shoot a Super 20 to 30 seconds after entering the room to knock it off the ceiling and save a lot of time. Freeze the Geemer as it turns onto the middle slope of the left wall to escape - it helps to freeze the geemer from below. Alternatively, use a Super to knock it off the wall and freeze it mid-air. Requires: "h_ZebesIsAwake"
"canMidAirMorph"
"canTrickyUseFrozenEnemies"
{
"or": [
"canBeVeryPatient",
{
"ammo": {
"type": "Super",
"count": 1
}
}
]
}
{
"or": [
"canTrickyJump",
{
"and": [
"canCarefulJump",
{
"ammo": {
"type": "Super",
"count": 1
}
}
]
}
]
}Dev note: This is only really useful without wall jumps. |
From: 5
Alcatraz Door
To: 8
Central Junction
Wait for a global Geemer to make the long trip along the map, or shoot a Super 20 to 30 seconds after entering the room to knock it off the ceiling and save a lot of time. Freeze it just after it starts climbing the bomb blocks. Spin-jump above it, which will put Samus into a forced crouch where X-Ray cannot be used. Use Grapple to kill a second Geemer, restoring the ability to use X-Ray. Use X-Ray to stand up, then jump up through the ceiling. Requires: {
"notable": "Alcatraz Escape with Grapple X-Ray Ceiling Clip"
}
"h_ZebesIsAwake"
"canBePatient"
{
"or": [
"canBeVeryPatient",
{
"ammo": {
"type": "Super",
"count": 1
}
}
]
}
"h_preciseIceClip"
"canUseGrapple"
"canXRayStandUp"Dev note: Morph could also be used instead of Grapple, but with Morph there is an easier strat that goes up through the tunnel to the left. |
From: 5
Alcatraz Door
To: 8
Central Junction
Wait for a global Geemer to make the long trip along the map, or shoot a Super 20 to 30 seconds after entering the room to knock it off the ceiling and save a lot of time. Hold right against the bomb blocks, take damage from the Geemer, jump, aim-down, and shoot the Geemer shortly before landing. Samus should end up standing on the ground with the Geemer frozen on the wall with a 4-8 pixel gap between it and the ground (overlapping Samus' hitbox). Facing the bomb blocks and pressed against them, jump while holding down (but not crouched) and then hold forward (or forward and down) 5 frames later to break the aim-down pose. If successful, Samus will clip up through the ceiling. This can be attempted several times before the Geemer thaws. Requires: {
"notable": "Alcatraz Escape with HiJump Ceiling Clip"
}
"HiJump"
"h_ZebesIsAwake"
{
"or": [
"canBeVeryPatient",
{
"ammo": {
"type": "Super",
"count": 1
}
}
]
}
{
"tech": "canPreciseCeilingClip"
}
"canTrickyUseFrozenEnemies"
{
"enemyDamage": {
"enemy": "Geemer (blue)",
"type": "contact",
"hits": 1
}
}
"canInsaneJump" |
From: 5
Alcatraz Door
To: 8
Central Junction
Enter with direct G-Mode artificial morph, and perform a Crystal Flash to refill reserve energy. Do this all the way to the left, to prevent the Geemer from being destroyed by the lingering light orb. Wait for a global Geemer to make the long trip along the map, or shoot a Super 20 to 30 seconds after entering the room to knock it off the ceiling and save a lot of time. Either way, after the Geemer comes down into Alcatraz, shoot a Super to knock it off the ledge to make it bypass the light orb. Damage down until one Geemer hit away from running out of energy. If Samus has at least one Energy Tank, it will take longer to damage down, in which case an additional Super can be used to knock the Geemer onto the floating platform, to allow unlimited time for damaging down. A final Super can be used to knock the Geemer off the floating platform. Set reserves to manual, stand next to the bomb blocks, and wait for the Geemer to approach. Just before taking a hit, press pause. During the fade-out, hold forward to land quickly after knockback. At a precise moment just before the pause hits, jump and aim down; the aim-down can be buffered before jumping, e.g. by rolling from forward to down through a diagonal input. Set reserves to auto, then unpause while continuing to hold jump. If successful, the forced stand-up will occur close to the ceiling and while Samus still has upward momentum, allowing Samus to clip through. Entrance condition: {
"comeInWithGMode": {
"mode": "direct",
"morphed": true
}
}Requires: "canTrickyGMode"
{
"notable": "Alcatraz Escape G-Mode Crystal Flash Then Forced Standup"
}
"h_ZebesIsAwake"
"canBeVeryPatient"
{
"ammo": {
"type": "Super",
"count": 3
}
}
"h_artificialMorphCrystalFlash"
"canPauseAbuse"
{
"autoReserveTrigger": {}
}
"canRModeStandupClip"
{
"enemyDamage": {
"enemy": "Geemer (blue)",
"type": "contact",
"hits": 1
}
}Dev note: FIXME: A version of this strat could be added with canRiskPermanentLossOfAccess requiring fewer Supers and time, if Samus has no tanks. |
From: 5
Alcatraz Door
To: 8
Central Junction
There are scroll PLMs next to the bomb blocks and on the ledge below the Alcatraz exit, which will overload PLMs when going through them. Samus will need to briefly navigate off-screen while to the right of Alcatraz before coming back left. Note that the global Geemer may still be in this area if traversing the room quickly, and can hit Samus off-screen. Entrance condition: {
"comeInWithGMode": {
"mode": "any",
"morphed": true
}
}Requires: "h_artificialMorphMovement"
{
"or": [
"canTrickyDodgeEnemies",
{
"enemyDamage": {
"enemy": "Geemer (blue)",
"type": "contact",
"hits": 1
}
},
"h_ZebesNotAwake"
]
} |
From: 5
Alcatraz Door
To: 8
Central Junction
Wait 3 minutes for a global Geemer to waddle over, or shoot a Super 20 to 30 seconds after entering the room to knock it off the ceiling and save a lot of time. Damage down until Samus is one Geemer hit away from running out of energy, and set reserves to manual. Crouch jump at a very precise time and mid-air morph to contact the Geemer at the peak of the jump, pressing pause to be in the fade-out while getting hit and reaching 0 energy. Set reserves to auto, unpause, and hold left. While reserves are auto-refilling, Samus' i-frames will run out, allowing Samus to be hit by the Geemer again and be boosted high enough to reach the ledge. The screen will be black, which can be fixed by pausing and unpausing again. Requires: {
"notable": "Alcatraz Escape Double Damage Boost"
}
"h_ZebesIsAwake"
"HiJump"
"Morph"
{
"or": [
"canBeVeryPatient",
{
"ammo": {
"type": "Super",
"count": 1
}
}
]
}
"canCrouchJump"
"canInsaneJump"
"canReserveDoubleDamageBoost"
{
"autoReserveTrigger": {
"minReserveEnergy": 85
}
}
{
"enemyDamage": {
"enemy": "Geemer (blue)",
"type": "contact",
"hits": 1
}
} |
From: 5
Alcatraz Door
To: 8
Central Junction
Jump into the second Samus Eater in the ceiling of Hellway. After teleporting and passing through the transition, X-Ray climb about 2 screens to reach the top of the room. Samus will be off-camera, but the slopes at the top will push the camera up, indicating when the climb is done. Entrance condition: {
"comeInWithSamusEaterTeleport": {
"floorPositions": [],
"ceilingPositions": [
[
11,
13
]
]
}
}Requires: "canLongXRayClimb" Dev note: Several other Samus Eaters could probably also work. |
From: 6
Bottom Right Door (On the Left Shaft)
To: 1
Top Left Door
There are scroll PLMs throughout the room, which will overload PLMs when going through them. The bomb blocks then become air and can be passed through. Entrance condition: {
"comeInWithGMode": {
"mode": "any",
"morphed": false
}
} |
From: 6
Bottom Right Door (On the Left Shaft)
To: 1
Top Left Door
Entrance condition: {
"comeInWithGrappleTeleport": {
"blockPositions": [
[
5,
3
],
[
7,
2
]
]
}
} |
From: 6
Bottom Right Door (On the Left Shaft)
To: 1
Top Left Door
Entrance condition: {
"comeInWithGrappleTeleport": {
"blockPositions": [
[
3,
12
],
[
3,
13
]
]
}
}Requires: {
"or": [
"canGrappleTeleportWallEscape",
{
"doorUnlockedAtNode": 1
}
]
}Unlocks doors: {"types":["ammo"],"requires":[]} |
From: 6
Bottom Right Door (On the Left Shaft)
To: 1
Top Left Door
Entrance condition: {
"comeInWithGrappleTeleport": {
"blockPositions": [
[
3,
12
],
[
3,
13
]
]
}
}Bypasses door shell: true |
From: 6
Bottom Right Door (On the Left Shaft)
To: 1
Top Left Door
Entrance condition: {
"comeInWithGrappleTeleport": {
"blockPositions": [
[
3,
12
]
]
}
}Exit condition: {
"leaveWithGrappleTeleport": {
"blockPositions": [
[
3,
12
]
]
}
}Bypasses door shell: true |
From: 6
Bottom Right Door (On the Left Shaft)
To: 1
Top Left Door
Entrance condition: {
"comeInWithGrappleTeleport": {
"blockPositions": [
[
3,
13
]
]
}
}Exit condition: {
"leaveWithGrappleTeleport": {
"blockPositions": [
[
3,
13
]
]
}
}Bypasses door shell: true |
From: 6
Bottom Right Door (On the Left Shaft)
To: 1
Top Left Door
Exit the previous room with Samus in a standing pose (while grappled). After teleporting, press right to release Grapple while staying standing (not being forced into a crouch). Then X-ray climb 1 screen to get up to the door transition, without needing to open the door. Samus will not be visible during the climb. Entrance condition: {
"comeInWithGrappleTeleport": {
"blockPositions": [
[
2,
18
],
[
2,
19
],
[
2,
28
],
[
2,
29
]
]
}
}Requires: "canXRayClimb" Bypasses door shell: true |
From: 6
Bottom Right Door (On the Left Shaft)
To: 1
Top Left Door
Exit the previous room with Samus in a standing pose (while grappled). After teleporting, press right to release Grapple while staying standing (not being forced into a crouch). Then X-ray climb 2 screens to get up to the door transition, without needing to open the door. Samus will not be visible during the climb. Entrance condition: {
"comeInWithGrappleTeleport": {
"blockPositions": [
[
2,
34
]
]
}
}Requires: "canLongXRayClimb" Bypasses door shell: true |
From: 6
Bottom Right Door (On the Left Shaft)
To: 2
Middle Left Door
Entrance condition: {
"comeInWithGMode": {
"mode": "any",
"morphed": true
}
}Requires: "h_artificialMorphMovement" |
From: 6
Bottom Right Door (On the Left Shaft)
To: 2
Middle Left Door
Entrance condition: {
"comeInShinecharged": {}
}Requires: {
"shineChargeFrames": 165
}
"canShinechargeMovementComplex"
"HiJump"
"canWalljump"
"Morph"Exit condition: {
"leaveShinecharged": {}
}Unlocks doors: {"types":["super"],"requires":[]}
{"types":["missiles","powerbomb"],"requires":["never"]} |
From: 6
Bottom Right Door (On the Left Shaft)
To: 2
Middle Left Door
Entrance condition: {
"comeInShinecharged": {}
}Requires: {
"shineChargeFrames": 145
}
"canShinechargeMovementComplex"
"HiJump"
"canWalljump"
"Morph"
{
"shinespark": {
"frames": 5,
"excessFrames": 0
}
}Exit condition: {
"leaveWithSpark": {
"position": "bottom"
}
}Unlocks doors: {"types":["super"],"requires":[]}
{"types":["missiles","powerbomb"],"requires":["never"]} |
From: 6
Bottom Right Door (On the Left Shaft)
To: 2
Middle Left Door
Entrance condition: {
"comeInShinecharged": {}
}Requires: {
"shineChargeFrames": 155
}
"canShinechargeMovementComplex"
"HiJump"
"canWalljump"
"Morph"
{
"shinespark": {
"frames": 3,
"excessFrames": 0
}
}Exit condition: {
"leaveWithSpark": {
"position": "top"
}
}Unlocks doors: {"types":["super"],"requires":[]}
{"types":["missiles","powerbomb"],"requires":["never"]} |
From: 6
Bottom Right Door (On the Left Shaft)
To: 3
Bottom Left Horizontal Door
Entrance condition: {
"comeInShinecharged": {}
}Requires: {
"shineChargeFrames": 105
}
"canShinechargeMovementComplex"Exit condition: {
"leaveShinecharged": {}
}Unlocks doors: {"types":["super"],"requires":[]}
{"types":["missiles","powerbomb"],"requires":["never"]} |
From: 6
Bottom Right Door (On the Left Shaft)
To: 3
Bottom Left Horizontal Door
Shoot while entering the room, to open the door. Activate the spark immediately after landing, at a position low enough to pass underneath the platform. Entrance condition: {
"comeInShinecharged": {}
}Requires: {
"shineChargeFrames": 20
}
"canShinechargeMovementComplex"
{
"shinespark": {
"frames": 22,
"excessFrames": 0
}
}Exit condition: {
"leaveWithSpark": {
"position": "bottom"
}
}Unlocks doors: {"types":["super"],"requires":[]}
{"types":["missiles","powerbomb"],"requires":["never"]} |
From: 6
Bottom Right Door (On the Left Shaft)
To: 3
Bottom Left Horizontal Door
Entrance condition: {
"comeInShinecharged": {}
}Requires: {
"shineChargeFrames": 80
}
"canShinechargeMovementComplex"
{
"shinespark": {
"frames": 9,
"excessFrames": 0
}
}Exit condition: {
"leaveWithSpark": {
"position": "top"
}
}Unlocks doors: {"types":["super"],"requires":[]}
{"types":["missiles","powerbomb"],"requires":["never"]} |
From: 6
Bottom Right Door (On the Left Shaft)
To: 5
Alcatraz Door
Entrance condition: {
"comeInWithGMode": {
"mode": "any",
"morphed": true
}
}Requires: "h_artificialMorphMovement" |
From: 6
Bottom Right Door (On the Left Shaft)
To: 6
Bottom Right Door (On the Left Shaft)
Entrance condition: {
"comeInWithRMode": {}
}Clears obstacles: R-Mode |
From: 6
Bottom Right Door (On the Left Shaft)
To: 6
Bottom Right Door (On the Left Shaft)
Exit condition: {
"leaveWithRunway": {
"length": 4,
"openEnd": 1,
"steepUpTiles": 1
}
} |
From: 6
Bottom Right Door (On the Left Shaft)
To: 6
Bottom Right Door (On the Left Shaft)
Wait 2 minutes for a global Geemer, or use a Super to grab a closer one. Requires: "h_frozenEnemyRunway"
"h_ZebesIsAwake"
{
"or": [
"canBePatient",
{
"ammo": {
"type": "Super",
"count": 1
}
}
]
}Exit condition: {
"leaveWithRunway": {
"length": 5,
"openEnd": 1,
"steepUpTiles": 1
}
} |
From: 6
Bottom Right Door (On the Left Shaft)
To: 6
Bottom Right Door (On the Left Shaft)
Requires: "h_ZebesIsAwake"
{
"or": [
"canBePatient",
{
"ammo": {
"type": "Super",
"count": 1
}
}
]
}Exit condition: {
"leaveWithGModeSetup": {}
} |
From: 6
Bottom Right Door (On the Left Shaft)
To: 6
Bottom Right Door (On the Left Shaft)
Requires: {
"enemyDamage": {
"enemy": "Geemer (blue)",
"type": "contact",
"hits": 1
}
}
"h_ZebesIsAwake"
{
"or": [
"canBePatient",
{
"ammo": {
"type": "Super",
"count": 1
}
}
]
} |
From: 6
Bottom Right Door (On the Left Shaft)
To: 7
Bottom Left Vertical Door
Walk off the ledge (rather than running off), aim down, and shoot. Depending on your momentum coming in, if Zebes is awake you may need to shoot down twice, once to kill the Geemer and once to open the door. Press forward against the floating platform to make it through the door. Entrance condition: {
"comeInShinecharged": {}
}Requires: {
"shineChargeFrames": 121
}
"canShinechargeMovementTricky"Exit condition: {
"leaveShinecharged": {}
}Unlocks doors: {"types":["ammo"],"requires":["never"]} |
From: 6
Bottom Right Door (On the Left Shaft)
To: 8
Central Junction
|
From: 7
Bottom Left Vertical Door
To: 1
Top Left Door
There are scroll PLMs throughout the room, which will overload PLMs when going through them. The bomb blocks then become air and can be passed through. Entrance condition: {
"comeInWithGMode": {
"mode": "any",
"morphed": false
},
"comesThroughToilet": "any"
} |
From: 7
Bottom Left Vertical Door
To: 2
Middle Left Door
Entrance condition: {
"comeInWithGMode": {
"mode": "any",
"morphed": true
},
"comesThroughToilet": "any"
}Requires: "h_artificialMorphMovement" |
From: 7
Bottom Left Vertical Door
To: 3
Bottom Left Horizontal Door
Entrance condition: {
"comeInShinecharged": {},
"comesThroughToilet": "any"
}Requires: {
"shineChargeFrames": 125
}
"HiJump"
"canShinechargeMovementComplex"Exit condition: {
"leaveShinecharged": {}
}Unlocks doors: {"types":["super"],"requires":[]}
{"types":["missiles","powerbomb"],"requires":["never"]} |
From: 7
Bottom Left Vertical Door
To: 3
Bottom Left Horizontal Door
Entrance condition: {
"comeInShinecharged": {},
"comesThroughToilet": "any"
}Requires: {
"shineChargeFrames": 100
}
"HiJump"
"canShinechargeMovementComplex"
{
"shinespark": {
"frames": 8,
"excessFrames": 0
}
}Exit condition: {
"leaveWithSpark": {}
}Unlocks doors: {"types":["super"],"requires":[]}
{"types":["missiles","powerbomb"],"requires":["never"]} |
From: 7
Bottom Left Vertical Door
To: 5
Alcatraz Door
Entrance condition: {
"comeInWithGMode": {
"mode": "any",
"morphed": true
},
"comesThroughToilet": "any"
}Requires: "h_artificialMorphMovement" |
From: 7
Bottom Left Vertical Door
To: 6
Bottom Right Door (On the Left Shaft)
Entrance condition: {
"comeInShinecharged": {},
"comesThroughToilet": "any"
}Requires: {
"shineChargeFrames": 125
}
"HiJump"
"canShinechargeMovementComplex"Exit condition: {
"leaveShinecharged": {}
}Unlocks doors: {"types":["super"],"requires":[]}
{"types":["missiles","powerbomb"],"requires":["never"]} |
From: 7
Bottom Left Vertical Door
To: 6
Bottom Right Door (On the Left Shaft)
Entrance condition: {
"comeInShinecharged": {},
"comesThroughToilet": "any"
}Requires: {
"shineChargeFrames": 90
}
"HiJump"
"canShinechargeMovementComplex"
{
"shinespark": {
"frames": 12,
"excessFrames": 0
}
}Exit condition: {
"leaveWithSpark": {
"position": "bottom"
}
}Unlocks doors: {"types":["super"],"requires":[]}
{"types":["missiles","powerbomb"],"requires":["never"]} |
From: 7
Bottom Left Vertical Door
To: 6
Bottom Right Door (On the Left Shaft)
Entrance condition: {
"comeInShinecharged": {},
"comesThroughToilet": "any"
}Requires: {
"shineChargeFrames": 115
}
"HiJump"
"canShinechargeMovementComplex"
{
"shinespark": {
"frames": 5,
"excessFrames": 0
}
}Exit condition: {
"leaveWithSpark": {
"position": "top"
}
}Unlocks doors: {"types":["super"],"requires":[]}
{"types":["missiles","powerbomb"],"requires":["never"]} |
From: 7
Bottom Left Vertical Door
To: 7
Bottom Left Vertical Door
Entrance condition: {
"comeInWithRMode": {},
"comesThroughToilet": "no"
}Clears obstacles: R-Mode |
From: 7
Bottom Left Vertical Door
To: 7
Bottom Left Vertical Door
Entrance condition: {
"comeInWithSpark": {},
"comesThroughToilet": "any"
}Requires: {
"shinespark": {
"frames": 3,
"excessFrames": 3
}
}Dev note: This strat is not useful in-room, but can satisfy a strat in the room before with an exit shinespark. |
From: 7
Bottom Left Vertical Door
To: 7
Bottom Left Vertical Door
Use a Super to bring a Geemer down to the bottom floating platform. Freeze this Geemer along with a Geemer on the floor and use them to perform an enemy-stuck moonfall. After gaining sufficient speed, move toward the door and clip through the door shell. Falling with too much speed can cause Samus to go out of bounds. Requires: "h_ZebesIsAwake"
{
"ammo": {
"type": "Super",
"count": 1
}
}
"canEnemyStuckMoonfall"
"canFreeFallClip"
"canTrickyUseFrozenEnemies"Bypasses door shell: true |
From: 7
Bottom Left Vertical Door
To: 7
Bottom Left Vertical Door
Freeze a Geemer on the right of the overhang just below the door to Final Missile Bombway. Freeze a second Geemer on the top left of its platform and setup a moonfall between them. Fall off the Geemers and clip past the floating platform below, past the door shell, and into the transition. This setup is highly precise; if you do not have the right speed you may land on the platform below or the door shell. Falling with too much speed can also cause Samus to go out of bounds. Requires: {
"notable": "Ice Moonfall Door Lock Skip Without Supers"
}
"h_ZebesIsAwake"
"canEnemyStuckMoonfall"
"canTrickyUseFrozenEnemies"
"canFreeFallClip"Bypasses door shell: true |
From: 7
Bottom Left Vertical Door
To: 7
Bottom Left Vertical Door
Freeze a Geemer on the bottom of the overhang just below the door to Final Missile Bombway. Freeze a second Geemer on the top left of its platform and setup a moonfall between them. Fall off the Geemers and clip into the tile left of the door. Press up to get out of crouch and lose the stored vertical speed (so that X-Ray works). Then turn-around, open the door, and go into the door transition as the third Geemer hits you. Falling off the frozen Geemers requires relatively high precision: This setup is a 4 frame window, not too far left, so you can get to the door transition, not too far right such that you enter the transition when falling. Requires: {
"notable": "Downward G-Mode Setup with Ice"
}
"h_ZebesIsAwake"
"canEnemyStuckMoonfall"
"canFreeFallClip"
"canTrickyUseFrozenEnemies"
"canDownwardGModeSetup"Exit condition: {
"leaveWithGModeSetup": {}
} |
From: 7
Bottom Left Vertical Door
To: 7
Bottom Left Vertical Door
Line up with the far right or left side of doorframe in the room below, to be able to not fall back through after entry, as the door remains open. Be careful not to fall into the door while being hit by the Geemer. Requires: {
"enemyDamage": {
"enemy": "Geemer (blue)",
"type": "contact",
"hits": 1
}
}
"h_ZebesIsAwake"
{
"or": [
"canBePatient",
{
"ammo": {
"type": "Super",
"count": 1
}
}
]
} |
|
|
|
Requires: "h_destroyBombWalls" |
|
Requires: {
"or": [
{
"and": [
{
"getBlueSpeed": {
"usedTiles": 25,
"steepUpTiles": 3,
"steepDownTiles": 3,
"openEnd": 1
}
},
"canCarefulJump"
]
},
{
"and": [
{
"canShineCharge": {
"usedTiles": 25,
"steepUpTiles": 3,
"steepDownTiles": 3,
"openEnd": 1
}
},
"canShinechargeMovement",
{
"shinespark": {
"frames": 2
}
}
]
}
]
}Dev note: It is possible to come in the top right door, charge a spark, use a bounce ball, or blue space jump, but this is a bit easier anyway. |
From: 8
Central Junction
To: 1
Top Left Door
Break the bomb wall while blue, or spark diagonally next to it. Open the door then charge the spark again and spark through the wall and door. Requires: {
"canShineCharge": {
"usedTiles": 25,
"steepUpTiles": 3,
"steepDownTiles": 3,
"openEnd": 1
}
}
{
"or": [
"canCarefulJump",
{
"and": [
"canShinechargeMovement",
{
"shinespark": {
"frames": 2
}
}
]
}
]
}
{
"shinespark": {
"frames": 28
}
}Exit condition: {
"leaveWithSpark": {}
}Unlocks doors: {"types":["ammo"],"requires":[]}Dev note: The canCarefulJump or 2 spark frames could be reduced by having the door already open, but that's probably not worth modeling. |
From: 8
Central Junction
To: 1
Top Left Door
Requires: "h_destroyBombWalls" Exit condition: {
"leaveWithRunway": {
"length": 22,
"openEnd": 0,
"steepUpTiles": 4,
"steepDownTiles": 2
}
}Unlocks doors: {"types":["ammo"],"requires":[]} |
From: 8
Central Junction
To: 1
Top Left Door
Requires: "canCarefulJump"
{
"getBlueSpeed": {
"usedTiles": 25,
"steepUpTiles": 3,
"steepDownTiles": 3,
"openEnd": 1
}
}Exit condition: {
"leaveWithRunway": {
"length": 22,
"openEnd": 0,
"steepUpTiles": 4,
"steepDownTiles": 2
}
}Unlocks doors: {"types":["ammo"],"requires":[]} |
From: 8
Central Junction
To: 1
Top Left Door
Place the Power Bomb below the bomb blocks as the Geemer is leaving the flat part of the ceiling to break it and let the Geemer through. This opens a path for the Geemer to hit Samus through the transition. Requires: "h_ZebesIsAwake" "h_usePowerBomb" Exit condition: {
"leaveWithGModeSetup": {}
}Unlocks doors: {"types":["ammo"],"requires":[]} |
From: 8
Central Junction
To: 1
Top Left Door
After the Geemer is near, destroy the bomb wall using blue speed from the right. This opens a path for the Geemer to hit Samus through the transition. Requires: "h_ZebesIsAwake"
{
"getBlueSpeed": {
"usedTiles": 25,
"steepUpTiles": 3,
"steepDownTiles": 3,
"openEnd": 1
}
}Exit condition: {
"leaveWithGModeSetup": {}
}Unlocks doors: {"types":["ammo"],"requires":[]} |
|
Requires: "Morph" |
From: 8
Central Junction
To: 2
Middle Left Door
Requires: {
"canShineCharge": {
"usedTiles": 25,
"steepUpTiles": 3,
"steepDownTiles": 3,
"openEnd": 1
}
}
"canLongChainTemporaryBlue"
"canXRayTurnaround"
"can4HighMidAirMorph"
"canSpringBallBounce"Exit condition: {
"leaveWithTemporaryBlue": {}
}Unlocks doors: {"types":["ammo"],"requires":[]} |
|
|
From: 8
Central Junction
To: 3
Bottom Left Horizontal Door
Requires: {
"canShineCharge": {
"usedTiles": 25,
"steepUpTiles": 3,
"steepDownTiles": 3,
"openEnd": 1
}
}
"canLongChainTemporaryBlue"
"canXRayTurnaround"
"can4HighMidAirMorph"Exit condition: {
"leaveWithTemporaryBlue": {}
}Unlocks doors: {"types":["ammo"],"requires":[]} |
|
|
From: 8
Central Junction
To: 4
Top Right Door
Requires: {
"canShineCharge": {
"usedTiles": 17,
"steepUpTiles": 3,
"steepDownTiles": 3,
"openEnd": 2
}
}
{
"shineChargeFrames": 90
}Exit condition: {
"leaveShinecharged": {}
}Unlocks doors: {"types":["ammo"],"requires":[]} |
From: 8
Central Junction
To: 4
Top Right Door
Requires: "canShinechargeMovement"
{
"canShineCharge": {
"usedTiles": 25,
"steepUpTiles": 3,
"steepDownTiles": 3,
"openEnd": 1
}
}
{
"shineChargeFrames": 150
}Exit condition: {
"leaveShinecharged": {}
}Unlocks doors: {"types":["ammo"],"requires":[]} |
From: 8
Central Junction
To: 4
Top Right Door
Requires: {
"canShineCharge": {
"usedTiles": 25,
"steepUpTiles": 3,
"steepDownTiles": 3,
"openEnd": 1
}
}
"canLongChainTemporaryBlue"Exit condition: {
"leaveWithTemporaryBlue": {}
}Unlocks doors: {"types":["ammo"],"requires":[]} |
|
Requires: "Morph" |
From: 8
Central Junction
To: 5
Alcatraz Door
Unmorph a few tiles above the ground, and hold right to land on the platform aligning Samus with the top of the doorway. If needed, shoot the door open while falling, and hold jump to buffer the shinespark activation as soon as Samus lands. Requires: {
"canShineCharge": {
"usedTiles": 25,
"steepUpTiles": 3,
"steepDownTiles": 3,
"openEnd": 1
}
}
"Morph"
"canResetFallSpeed"
"canShinechargeMovementTricky"
{
"shinespark": {
"frames": 12,
"excessFrames": 0
}
}Exit condition: {
"leaveWithSpark": {
"position": "top"
}
}Unlocks doors: {"types":["super"],"requires":[]}
{"types":["missiles","powerbomb"],"requires":["never"]} |
From: 8
Central Junction
To: 5
Alcatraz Door
Perform a soft unmorph and run toward the door (shooting it open if needed). If needing to spark out the bottom of the doorway, then stop on a dime at the bottom of the runway before activating the spark; this requires precise movement, as there is barely enough time to make it. Requires: {
"canShineCharge": {
"usedTiles": 25,
"steepUpTiles": 3,
"steepDownTiles": 3,
"openEnd": 1
}
}
"Morph"
"canShinechargeMovementTricky"
"canInsaneJump"
{
"shinespark": {
"frames": 6,
"excessFrames": 0
}
}Exit condition: {
"leaveWithSpark": {}
}Unlocks doors: {"types":["super"],"requires":[]}
{"types":["missiles","powerbomb"],"requires":["never"]} |
From: 8
Central Junction
To: 5
Alcatraz Door
Requires: {
"canShineCharge": {
"usedTiles": 25,
"steepUpTiles": 3,
"steepDownTiles": 3,
"openEnd": 1
}
}
"canSpringBallBounce"
"canPauseRemorphTemporaryBlue"Exit condition: {
"leaveWithTemporaryBlue": {}
}Unlocks doors: {"types":["ammo"],"requires":[]} |
From: 8
Central Junction
To: 6
Bottom Right Door (On the Left Shaft)
|
From: 8
Central Junction
To: 6
Bottom Right Door (On the Left Shaft)
Requires: {
"canShineCharge": {
"usedTiles": 25,
"steepUpTiles": 3,
"steepDownTiles": 3,
"openEnd": 1
}
}
"canLongChainTemporaryBlue"
"canXRayTurnaround"
"can4HighMidAirMorph"Exit condition: {
"leaveWithTemporaryBlue": {}
}Unlocks doors: {"types":["ammo"],"requires":[]} |
|
|
From: 8
Central Junction
To: 7
Bottom Left Vertical Door
Requires: {
"canShineCharge": {
"usedTiles": 25,
"steepUpTiles": 3,
"steepDownTiles": 3,
"openEnd": 1
}
}
"canLongChainTemporaryBlue"
"canXRayTurnaround"
"can4HighMidAirMorph"Exit condition: {
"leaveWithTemporaryBlue": {
"direction": "any"
}
}Unlocks doors: {"types":["ammo"],"requires":[]} |
From: 8
Central Junction
To: 8
Central Junction
Farm Geemers and Skree for energy or else Crystal Flash. The bomb wall respawns so Crystal Flash can't be used to clear it. Shinecharge and get interrupted by the Ripper by the save room door, or leave a Geemer alive. Requires: "h_ZebesIsAwake"
{
"not": "f_ZebesSetAblaze"
}
{
"obstaclesCleared": [
"R-Mode"
]
}
{
"or": [
"h_CrystalFlashForReserveEnergy",
{
"and": [
"h_RModeCanRefillReserves",
{
"resourceMissingAtMost": [
{
"type": "Missile",
"count": 0
}
]
},
{
"partialRefill": {
"type": "ReserveEnergy",
"limit": 100
}
}
]
}
]
}
{
"canShineCharge": {
"usedTiles": 25,
"steepUpTiles": 3,
"steepDownTiles": 3,
"openEnd": 0
}
}
{
"autoReserveTrigger": {}
}
"canRModeSparkInterrupt"Resets obstacles: R-Mode |
|
Requires: "h_ZebesIsAwake"
{
"cycleFrames": 1860
}
{
"or": [
{
"resetRoom": {
"nodes": [
3,
4,
6,
7
]
}
},
{
"and": [
{
"resetRoom": {
"nodes": [
1
]
}
},
{
"cycleFrames": 420
},
{
"or": [
"ScrewAttack",
"h_useMorphBombs",
{
"and": [
{
"getBlueSpeed": {
"usedTiles": 25,
"steepUpTiles": 3,
"steepDownTiles": 3,
"openEnd": 1
}
},
"canCarefulJump"
]
}
]
}
]
},
{
"and": [
{
"resetRoom": {
"nodes": [
2
]
}
},
{
"cycleFrames": 240
},
"Morph"
]
},
{
"and": [
"Morph",
{
"resetRoom": {
"nodes": [
5
]
}
},
{
"cycleFrames": 420
},
{
"or": [
"h_bombThings",
{
"and": [
"SpaceJump",
"canMidAirMorph",
"canCarefulJump"
]
},
{
"and": [
{
"notable": "Alcatraz Escape"
},
"canPreciseWalljump",
"canConsecutiveWalljump",
"canWallJumpInstantMorph"
]
},
{
"and": [
"canTrickySpringBallJump",
"canTrickyJump"
]
},
{
"and": [
"HiJump",
"canTrickyDashJump",
"canMidAirMorph"
]
}
]
}
]
}
]
}Resets obstacles: R-Mode Farm cycle drops: 11 Geemer (blue) Dev note: A two-way farming strat could be added, e.g. if it is possible to reset the room at both the top-right and the bottom. |
|
Requires: {
"obstaclesNotCleared": [
"R-Mode"
]
}
"h_CrystalFlash" |
{
"$schema": "../../../schema/m3-room.schema.json",
"id": 10,
"name": "Parlor and Alcatraz",
"area": "Crateria",
"subarea": "Central",
"roomAddress": "0x792FD",
"roomEnvironments": [
{
"heated": false
}
],
"mapTileMask": [
[
1,
1,
1,
1,
1
],
[
0,
1,
0,
1,
0
],
[
0,
1,
0,
1,
0
],
[
0,
1,
0,
0,
0
],
[
0,
1,
0,
0,
0
]
],
"nodes": [
{
"id": 1,
"name": "Top Left Door",
"nodeType": "door",
"nodeSubType": "blue",
"nodeAddress": "0x001895e",
"doorOrientation": "left",
"doorEnvironments": [
{
"physics": "air"
}
],
"locks": [
{
"name": "Parlor Top Left Escape Lock (to Terminator)",
"lockType": "escapeFunnel",
"lock": [
"f_ZebesSetAblaze"
],
"unlockStrats": [
{
"name": "Base",
"requires": [
"never"
],
"flashSuitChecked": true
}
]
}
],
"mapTileMask": [
[
2,
1,
1,
1,
1
],
[
0,
1,
0,
1,
0
],
[
0,
1,
0,
1,
0
],
[
0,
1,
0,
0,
0
],
[
0,
1,
0,
0,
0
]
]
},
{
"id": 2,
"name": "Middle Left Door",
"nodeType": "door",
"nodeSubType": "blue",
"nodeAddress": "0x001899a",
"doorOrientation": "left",
"doorEnvironments": [
{
"physics": "air"
}
],
"locks": [
{
"name": "Parlor Middle Left Escape Lock (to Save)",
"lockType": "escapeFunnel",
"lock": [
"f_ZebesSetAblaze"
],
"unlockStrats": [
{
"name": "Base",
"requires": [
"never"
],
"flashSuitChecked": true
}
]
}
],
"mapTileMask": [
[
1,
1,
1,
1,
1
],
[
0,
1,
0,
1,
0
],
[
0,
2,
0,
1,
0
],
[
0,
1,
0,
0,
0
],
[
0,
1,
0,
0,
0
]
]
},
{
"id": 3,
"name": "Bottom Left Horizontal Door",
"nodeType": "door",
"nodeSubType": "blue",
"nodeAddress": "0x00189a6",
"doorOrientation": "left",
"doorEnvironments": [
{
"physics": "air"
}
],
"locks": [
{
"name": "Parlor Bottom Left Escape Lock (to Final Missile Bombway)",
"lockType": "escapeFunnel",
"lock": [
"f_ZebesSetAblaze"
],
"unlockStrats": [
{
"name": "Base",
"requires": [
"never"
],
"flashSuitChecked": true
}
]
}
],
"mapTileMask": [
[
1,
1,
1,
1,
1
],
[
0,
1,
0,
1,
0
],
[
0,
1,
0,
1,
0
],
[
0,
2,
0,
0,
0
],
[
0,
1,
0,
0,
0
]
]
},
{
"id": 4,
"name": "Top Right Door",
"nodeType": "door",
"nodeSubType": "blue",
"nodeAddress": "0x001896a",
"doorOrientation": "right",
"doorEnvironments": [
{
"physics": "air"
}
],
"mapTileMask": [
[
1,
1,
1,
1,
2
],
[
0,
1,
0,
1,
0
],
[
0,
1,
0,
1,
0
],
[
0,
1,
0,
0,
0
],
[
0,
1,
0,
0,
0
]
]
},
{
"id": 5,
"name": "Alcatraz Door",
"nodeType": "door",
"nodeSubType": "blue",
"nodeAddress": "0x0018982",
"doorOrientation": "right",
"doorEnvironments": [
{
"physics": "air"
}
],
"mapTileMask": [
[
1,
1,
1,
1,
1
],
[
0,
1,
0,
2,
0
],
[
0,
1,
0,
2,
0
],
[
0,
1,
0,
0,
0
],
[
0,
1,
0,
0,
0
]
]
},
{
"id": 6,
"name": "Bottom Right Door (On the Left Shaft)",
"nodeType": "door",
"nodeSubType": "red",
"nodeAddress": "0x0018976",
"doorOrientation": "right",
"doorEnvironments": [
{
"physics": "air"
}
],
"locks": [
{
"name": "Parlor Bottom Right Escape Lock (to Pre-Map)",
"lockType": "escapeFunnel",
"lock": [
"f_ZebesSetAblaze"
],
"unlockStrats": [
{
"name": "Base",
"requires": [
"never"
],
"flashSuitChecked": true
}
]
}
],
"mapTileMask": [
[
1,
1,
1,
1,
1
],
[
0,
1,
0,
1,
0
],
[
0,
1,
0,
1,
0
],
[
0,
2,
0,
0,
0
],
[
0,
1,
0,
0,
0
]
]
},
{
"id": 7,
"name": "Bottom Left Vertical Door",
"nodeType": "door",
"nodeSubType": "blue",
"nodeAddress": "0x001898e",
"doorOrientation": "down",
"doorEnvironments": [
{
"physics": "air"
}
],
"locks": [
{
"name": "Parlor Bottom Escape Lock (to Climb)",
"lockType": "escapeFunnel",
"lock": [
"f_ZebesSetAblaze"
],
"unlockStrats": [
{
"name": "Base",
"requires": [
"never"
],
"flashSuitChecked": true
}
]
}
],
"mapTileMask": [
[
1,
1,
1,
1,
1
],
[
0,
1,
0,
1,
0
],
[
0,
1,
0,
1,
0
],
[
0,
1,
0,
0,
0
],
[
0,
2,
0,
0,
0
]
]
},
{
"id": 8,
"name": "Central Junction",
"nodeType": "junction",
"nodeSubType": "junction",
"mapTileMask": [
[
1,
2,
2,
2,
2
],
[
0,
2,
0,
1,
0
],
[
0,
2,
0,
1,
0
],
[
0,
2,
0,
0,
0
],
[
0,
2,
0,
0,
0
]
]
}
],
"obstacles": [
{
"id": "R-Mode",
"name": "Entered with R-Mode",
"obstacleType": "abstract"
}
],
"enemies": [
{
"id": "e1",
"groupName": "Alcatraz Ripper",
"enemyName": "Ripper",
"quantity": 1,
"homeNodes": [
5
],
"spawn": [
"f_ZebesAwake"
],
"stopSpawn": [
"f_ZebesSetAblaze"
]
},
{
"id": "e2",
"groupName": "Parlor Ripper",
"enemyName": "Ripper",
"quantity": 1,
"homeNodes": [
8
],
"spawn": [
"f_ZebesAwake"
],
"stopSpawn": [
"f_ZebesSetAblaze"
]
},
{
"id": "e3",
"groupName": "Parlor Skrees",
"enemyName": "Skree",
"quantity": 3,
"homeNodes": [
8
],
"spawn": [
"f_ZebesAwake"
],
"stopSpawn": [
"f_ZebesSetAblaze"
]
},
{
"id": "e4",
"groupName": "Parlor Geemers",
"enemyName": "Geemer (blue)",
"quantity": 11,
"homeNodes": [
8
],
"spawn": [
"f_ZebesAwake"
],
"stopSpawn": [
"f_ZebesSetAblaze"
]
}
],
"links": [
{
"from": 1,
"to": [
{
"id": 1
},
{
"id": 2,
"note": "This link is only for G-mode strats bypassing the junction. Other strats should go 1 -> 8 -> 2."
},
{
"id": 5,
"note": "This link is only for G-mode strats bypassing the junction. Other strats should go 1 -> 8 -> 5."
},
{
"id": 8
}
]
},
{
"from": 2,
"to": [
{
"id": 1,
"note": "This link is only for G-mode strats bypassing the junction. Other strats should go 2 -> 8 -> 1."
},
{
"id": 2
},
{
"id": 3
},
{
"id": 5,
"note": "This link is only for G-mode strats bypassing the junction. Other strats should go 2 -> 8 -> 5."
},
{
"id": 6
},
{
"id": 8
}
]
},
{
"from": 3,
"to": [
{
"id": 1
},
{
"id": 2
},
{
"id": 3
},
{
"id": 5
},
{
"id": 6
},
{
"id": 7
},
{
"id": 8
}
]
},
{
"from": 4,
"to": [
{
"id": 1
},
{
"id": 2,
"note": "This link is only for G-mode strats bypassing the junction. Other strats should go 4 -> 8 -> 2."
},
{
"id": 4
},
{
"id": 5,
"note": "This link is only for G-mode strats bypassing the junction. Other strats should go 4 -> 8 -> 5."
},
{
"id": 8
}
]
},
{
"from": 5,
"to": [
{
"id": 1,
"note": "This link is only for G-mode strats bypassing the junction. Other strats should go 5 -> 8 -> 1."
},
{
"id": 2,
"note": "This link is only for G-mode strats bypassing the junction. Other strats should go 5 -> 8 -> 2."
},
{
"id": 5
},
{
"id": 8
}
]
},
{
"from": 6,
"to": [
{
"id": 1
},
{
"id": 2
},
{
"id": 3
},
{
"id": 5
},
{
"id": 7
},
{
"id": 6
},
{
"id": 8
}
]
},
{
"from": 7,
"to": [
{
"id": 1
},
{
"id": 2
},
{
"id": 3
},
{
"id": 5
},
{
"id": 6
},
{
"id": 7
},
{
"id": 8
}
]
},
{
"from": 8,
"to": [
{
"id": 1
},
{
"id": 2
},
{
"id": 3
},
{
"id": 4
},
{
"id": 5
},
{
"id": 6
},
{
"id": 7
},
{
"id": 8
}
]
}
],
"strats": [
{
"link": [
1,
1
],
"name": "Base (Unlock Door)",
"requires": [],
"unlocksDoors": [
{
"types": [
"ammo"
],
"requires": []
}
],
"flashSuitChecked": true
},
{
"link": [
1,
1
],
"name": "Base (Come In Normally)",
"entranceCondition": {
"comeInNormally": {}
},
"requires": [],
"flashSuitChecked": true
},
{
"link": [
1,
1
],
"name": "Base (Come In With Mockball)",
"entranceCondition": {
"comeInWithMockball": {
"adjacentMinTiles": 0,
"remoteAndLandingMinTiles": [
[
0,
0
]
],
"speedBooster": "any"
}
},
"requires": [],
"flashSuitChecked": true
},
{
"link": [
2,
2
],
"name": "Base (Unlock Door)",
"requires": [],
"unlocksDoors": [
{
"types": [
"ammo"
],
"requires": []
}
],
"flashSuitChecked": true
},
{
"link": [
2,
2
],
"name": "Base (Come In Normally)",
"entranceCondition": {
"comeInNormally": {}
},
"requires": [],
"flashSuitChecked": true
},
{
"link": [
2,
2
],
"name": "Base (Come In With Mockball)",
"entranceCondition": {
"comeInWithMockball": {
"adjacentMinTiles": 0,
"remoteAndLandingMinTiles": [
[
0,
0
]
],
"speedBooster": "any"
}
},
"requires": [],
"flashSuitChecked": true
},
{
"link": [
3,
3
],
"name": "Base (Unlock Door)",
"requires": [],
"unlocksDoors": [
{
"types": [
"ammo"
],
"requires": []
}
],
"flashSuitChecked": true
},
{
"link": [
3,
3
],
"name": "Base (Come In Normally)",
"entranceCondition": {
"comeInNormally": {}
},
"requires": [],
"flashSuitChecked": true
},
{
"link": [
3,
3
],
"name": "Base (Come In With Mockball)",
"entranceCondition": {
"comeInWithMockball": {
"adjacentMinTiles": 0,
"remoteAndLandingMinTiles": [
[
0,
0
]
],
"speedBooster": "any"
}
},
"requires": [],
"flashSuitChecked": true
},
{
"link": [
4,
4
],
"name": "Base (Unlock Door)",
"requires": [],
"unlocksDoors": [
{
"types": [
"ammo"
],
"requires": []
}
],
"flashSuitChecked": true
},
{
"link": [
4,
4
],
"name": "Base (Come In Normally)",
"entranceCondition": {
"comeInNormally": {}
},
"requires": [],
"flashSuitChecked": true
},
{
"link": [
4,
4
],
"name": "Base (Come In With Mockball)",
"entranceCondition": {
"comeInWithMockball": {
"adjacentMinTiles": 0,
"remoteAndLandingMinTiles": [
[
0,
0
]
],
"speedBooster": "any"
}
},
"requires": [],
"flashSuitChecked": true
},
{
"link": [
5,
5
],
"name": "Base (Unlock Door)",
"requires": [],
"unlocksDoors": [
{
"types": [
"ammo"
],
"requires": []
}
],
"flashSuitChecked": true
},
{
"link": [
5,
5
],
"name": "Base (Come In Normally)",
"entranceCondition": {
"comeInNormally": {}
},
"requires": [],
"flashSuitChecked": true
},
{
"link": [
5,
5
],
"name": "Base (Come In With Mockball)",
"entranceCondition": {
"comeInWithMockball": {
"adjacentMinTiles": 0,
"remoteAndLandingMinTiles": [
[
0,
0
]
],
"speedBooster": "any"
}
},
"requires": [],
"flashSuitChecked": true
},
{
"link": [
6,
6
],
"name": "Base (Unlock Door)",
"requires": [],
"unlocksDoors": [
{
"types": [
"ammo"
],
"requires": []
}
],
"flashSuitChecked": true
},
{
"link": [
6,
6
],
"name": "Base (Come In Normally)",
"entranceCondition": {
"comeInNormally": {}
},
"requires": [],
"flashSuitChecked": true
},
{
"link": [
6,
6
],
"name": "Base (Come In With Mockball)",
"entranceCondition": {
"comeInWithMockball": {
"adjacentMinTiles": 0,
"remoteAndLandingMinTiles": [
[
0,
0
]
],
"speedBooster": "any"
}
},
"requires": [],
"flashSuitChecked": true
},
{
"link": [
7,
7
],
"name": "Base (Unlock Door)",
"requires": [],
"unlocksDoors": [
{
"types": [
"ammo"
],
"requires": []
}
],
"flashSuitChecked": true
},
{
"link": [
7,
7
],
"name": "Base (Come In Normally)",
"entranceCondition": {
"comeInNormally": {}
},
"requires": [],
"flashSuitChecked": true
},
{
"link": [
7,
7
],
"name": "Base (Come In With Grapple Jump)",
"entranceCondition": {
"comeInWithGrappleJump": {
"position": "any"
}
},
"requires": [],
"flashSuitChecked": true
},
{
"id": 148,
"link": [
1,
1
],
"name": "R-Mode Entry",
"entranceCondition": {
"comeInWithRMode": {}
},
"requires": [],
"clearsObstacles": [
"R-Mode"
],
"flashSuitChecked": true,
"blueSuitChecked": true
},
{
"id": 1,
"link": [
1,
1
],
"name": "Leave with Runway",
"requires": [],
"exitCondition": {
"leaveWithRunway": {
"length": 14,
"openEnd": 0,
"steepUpTiles": 2,
"steepDownTiles": 2
}
},
"flashSuitChecked": true
},
{
"id": 2,
"link": [
1,
1
],
"name": "Leave with Runway, Broken Wall",
"requires": [
"h_destroyBombWalls"
],
"exitCondition": {
"leaveWithRunway": {
"length": 22,
"openEnd": 0,
"steepUpTiles": 4,
"steepDownTiles": 2
}
},
"flashSuitChecked": true
},
{
"id": 3,
"link": [
1,
1
],
"name": "Leave with Runway, Come in with Speed to Break the Wall",
"entranceCondition": {
"comeInGettingBlueSpeed": {
"length": 13,
"openEnd": 0,
"steepUpTiles": 2,
"steepDownTiles": 2
}
},
"requires": [],
"exitCondition": {
"leaveWithRunway": {
"length": 22,
"openEnd": 0,
"steepUpTiles": 4,
"steepDownTiles": 2
}
},
"unlocksDoors": [
{
"types": [
"ammo"
],
"requires": []
}
],
"flashSuitChecked": true
},
{
"id": 4,
"link": [
1,
1
],
"name": "Crystal Flash",
"requires": [
{
"obstaclesNotCleared": [
"R-Mode"
]
},
"h_CrystalFlash"
],
"flashSuitChecked": true
},
{
"id": 5,
"link": [
1,
1
],
"name": "G-Mode Setup - Bomb the Blocks and Get Hit By Geemer",
"requires": [
"h_ZebesIsAwake",
"h_destroyBombWalls"
],
"exitCondition": {
"leaveWithGModeSetup": {}
},
"flashSuitChecked": true,
"note": [
"Destroy the bomb wall to open a path for the Geemer to hit Samus through the transition.",
"If using a Power Bomb be careful not to kill the Geemer. Place the Power Bomb far left, next to the door, as the Geemer is leaving the flat part of the ceiling."
]
},
{
"id": 6,
"link": [
1,
2
],
"name": "G-Mode Morph through Bomb Blocks to Middle Left Door",
"entranceCondition": {
"comeInWithGMode": {
"mode": "any",
"morphed": true
}
},
"requires": [
"canOffScreenMovement"
],
"flashSuitChecked": true,
"note": [
"There are scroll PLMs one tile to the left of the Terminator bomb blocks which can be used to overload PLMs.",
"The bomb blocks then become air and can be passed through.",
"Go down to the Save door by falling and moving back and forth in the right places.",
"Once you start going down you will be off-screen."
]
},
{
"id": 7,
"link": [
1,
5
],
"name": "G-Mode Morph through Bomb Blocks into Alcatraz",
"entranceCondition": {
"comeInWithGMode": {
"mode": "any",
"morphed": true
}
},
"requires": [
{
  "or": [
    "h_artificialMorphMovement",
    "h_artificialMorphBombHorizontally",
    {
      "and": [
        "canComplexGMode",
        "canNeutralDamageBoost",
        "h_ZebesIsAwake",
        {
          "enemyDamage": {
            "enemy": "Geemer (blue)",
            "type": "contact",
            "hits": 1
          }
        }
      ]
    }
  ]
}
],
"flashSuitChecked": true,
"note": [
"There are scroll PLMs one tile to the left of the bomb blocks which can be used to overload PLMs.",
"The bomb blocks then become air and can be passed through.",
"Use Bombs, SpringBall, or a Geemer damage boost to get across the gap without unmorphing.",
"To survive a Geemer hit, you will need Varia or Gravity or to come in with more than 4 energy (e.g. by coming in with indirect G-mode after leaving with G-mode immobile)."
]
},
{
"id": 8,
"link": [
1,
8
],
"name": "Base",
"requires": [
"h_destroyBombWalls"
],
"flashSuitChecked": true
},
{
"id": 9,
"link": [
1,
8
],
"name": "Shinespark",
"entranceCondition": {
"comeInWithSpark": {}
},
"requires": [
{
  "shinespark": {
    "frames": 67,
    "excessFrames": 42
  }
}
],
"flashSuitChecked": true,
"devNote": "FIXME: A strat could be added coming in shinecharged, with 1 frame, 1 excess frame, and no horizontal spark needed."
},
{
"id": 10,
"link": [
1,
8
],
"name": "Blue Speed",
"entranceCondition": {
"comeInGettingBlueSpeed": {
"length": 13,
"openEnd": 0,
"steepUpTiles": 2,
"steepDownTiles": 2
}
},
"requires": [],
"flashSuitChecked": true
},
{
"id": 11,
"link": [
1,
8
],
"name": "In Room Shortcharge",
"requires": [
{
  "or": [
    {
      "and": [
        {
          "doorUnlockedAtNode": 1
        },
        {
          "getBlueSpeed": {
            "usedTiles": 14,
            "steepUpTiles": 2,
            "steepDownTiles": 2,
            "openEnd": 0
          }
        }
      ]
    },
    {
      "getBlueSpeed": {
        "usedTiles": 13,
        "steepUpTiles": 2,
        "steepDownTiles": 2,
        "openEnd": 0
      }
    }
  ]
}
],
"unlocksDoors": [
{
"nodeId": 1,
"types": [
"ammo"
],
"requires": []
}
],
"flashSuitChecked": true
},
{
"id": 12,
"link": [
1,
8
],
"name": "G-Mode through Bomb Blocks",
"entranceCondition": {
"comeInWithGMode": {
"mode": "any",
"morphed": false
}
},
"requires": [],
"flashSuitChecked": true,
"note": [
"There are scroll PLMs one tile to the left of the bomb blocks which can be used to overload PLMs.",
"The bomb blocks then become air and can be passed through."
]
},
{
"id": 13,
"link": [
2,
1
],
"name": "G-Mode Morph through Top Left Bomb Blocks",
"entranceCondition": {
"comeInWithGMode": {
"mode": "any",
"morphed": true
}
},
"requires": [],
"flashSuitChecked": true,
"note": [
"Use artificial morph to pass through the tunnel, then unmorph and get up to the top of the room normally.",
"There are scroll PLMs at the two-tile gap as Samus approach the top left bomb blocks, which can be used to overload PLMs.",
"The bomb blocks then become air and can be passed through."
]
},
{
"id": 14,
"link": [
2,
1
],
"name": "Grapple Teleport",
"entranceCondition": {
"comeInWithGrappleTeleport": {
"blockPositions": [
[
12,
12
],
[
12,
13
]
]
}
},
"requires": [],
"flashSuitChecked": true
},
{
"id": 138,
"link": [
2,
1
],
"name": "Samus Eater Teleport",
"entranceCondition": {
"comeInWithSamusEaterTeleport": {
"floorPositions": [
[
1,
13
],
[
2,
13
]
],
"ceilingPositions": []
}
},
"requires": [
"canLongXRayClimb"
],
"flashSuitChecked": true,
"note": [
"Fall into the first Samus Eater in Hellway or Alpha Power Bomb Room.",
"After teleporting and passing through the transition, X-Ray climb 2 screens to reach the space behind the bomb blocks at the top of the room.",
"Samus will be off-camera, but the slopes at the top will push the camera up, indicating when the climb is done."
],
"devNote": [
"FIXME: In Hellway, a ceiling Samus Eater could probably also work, and shorten the X-Ray climb."
]
},
{
"id": 149,
"link": [
2,
2
],
"name": "R-Mode Entry",
"entranceCondition": {
"comeInWithRMode": {}
},
"requires": [],
"clearsObstacles": [
"R-Mode"
],
"flashSuitChecked": true,
"blueSuitChecked": true
},
{
"id": 15,
"link": [
2,
2
],
"name": "Leave with Runway",
"requires": [],
"exitCondition": {
"leaveWithRunway": {
"length": 3,
"openEnd": 0
}
},
"flashSuitChecked": true
},
{
"id": 16,
"link": [
2,
2
],
"name": "G-Mode Setup - Get Hit By Geemer",
"requires": [
"h_ZebesIsAwake"
],
"exitCondition": {
"leaveWithGModeSetup": {}
},
"flashSuitChecked": true,
"note": [
"Wait 75 seconds for a global Geemer, or use a Super to grab a closer one."
]
},
{
"id": 17,
"link": [
2,
2
],
"name": "G-Mode Regain Mobility",
"requires": [
{
"enemyDamage": {
"enemy": "Geemer (blue)",
"type": "contact",
"hits": 1
}
},
"h_ZebesIsAwake"
],
"gModeRegainMobility": {},
"flashSuitChecked": true,
"note": "Wait 75 seconds for a global Geemer."
},
{
"id": 18,
"link": [
2,
3
],
"name": "Come In Shinecharging, Leave With Spark",
"entranceCondition": {
"comeInShinecharging": {
"length": 2,
"openEnd": 0
}
},
"requires": [
"Morph",
"canShinechargeMovementTricky",
{
"shinespark": {
"frames": 6
}
}
],
"exitCondition": {
"leaveWithSpark": {}
},
"unlocksDoors": [
{
"types": [
"super"
],
"requires": []
},
{
"types": [
"missiles",
"powerbomb"
],
"requires": [
"never"
]
}
],
"flashSuitChecked": true
},
{
"id": 19,
"link": [
2,
5
],
"name": "G-Mode Morph into Alcatraz",
"entranceCondition": {
"comeInWithGMode": {
"mode": "any",
"morphed": true
}
},
"requires": [
"h_artificialMorphMovement"
],
"flashSuitChecked": true,
"note": [
"Use artificial morph to pass through the tunnel at the entrance of the room.",
"Use Bombs or SpringBall to navigate to Alcatraz without unmorphing."
]
},
{
"id": 124,
"link": [
2,
6
],
"name": "Come In Shinecharging, Leave Shinecharged",
"entranceCondition": {
"comeInShinecharging": {
"length": 2,
"openEnd": 0
}
},
"requires": [
"Morph",
"canShinechargeMovementComplex",
{
"shineChargeFrames": 145
}
],
"exitCondition": {
"leaveShinecharged": {}
},
"unlocksDoors": [
{
"types": [
"super"
],
"requires": []
},
{
"types": [
"missiles",
"powerbomb"
],
"requires": [
"never"
]
}
],
"flashSuitChecked": true
},
{
"id": 20,
"link": [
2,
6
],
"name": "Carry Shinecharge",
"entranceCondition": {
"comeInShinecharged": {}
},
"requires": [
{
"shineChargeFrames": 145
},
"Morph",
"canShinechargeMovementComplex"
],
"exitCondition": {
"leaveShinecharged": {}
},
"unlocksDoors": [
{
"types": [
"super"
],
"requires": []
},
{
"types": [
"missiles",
"powerbomb"
],
"requires": [
"never"
]
}
],
"flashSuitChecked": true
},
{
"id": 125,
"link": [
2,
6
],
"name": "Come In Shinecharged, Leave With Spark (Bottom Position)",
"entranceCondition": {
"comeInShinecharged": {}
},
"requires": [
{
"shineChargeFrames": 120
},
"Morph",
"canShinechargeMovementComplex",
{
"shinespark": {
"frames": 7,
"excessFrames": 0
}
}
],
"exitCondition": {
"leaveWithSpark": {
"position": "bottom"
}
},
"unlocksDoors": [
{
"types": [
"super"
],
"requires": []
},
{
"types": [
"missiles",
"powerbomb"
],
"requires": [
"never"
]
}
],
"flashSuitChecked": true
},
{
"id": 126,
"link": [
2,
6
],
"name": "Come In Shinecharged, Leave With Spark (Top Position)",
"entranceCondition": {
"comeInShinecharged": {}
},
"requires": [
{
"shineChargeFrames": 140
},
"Morph",
"canShinechargeMovementComplex",
{
"shinespark": {
"frames": 5,
"excessFrames": 0
}
}
],
"exitCondition": {
"leaveWithSpark": {
"position": "top"
}
},
"unlocksDoors": [
{
"types": [
"super"
],
"requires": []
},
{
"types": [
"missiles",
"powerbomb"
],
"requires": [
"never"
]
}
],
"flashSuitChecked": true
},
{
"id": 21,
"link": [
2,
8
],
"name": "Base",
"requires": [
"Morph"
],
"flashSuitChecked": true
},
{
"id": 22,
"link": [
2,
8
],
"name": "X-Ray Climb",
"entranceCondition": {
"comeInWithDoorStuckSetup": {}
},
"requires": [
"canXRayClimb"
],
"flashSuitChecked": true,
"note": "This is a short climb of only a few tiles."
},
{
"id": 23,
"link": [
2,
8
],
"name": "Stored Moonfall Clip",
"entranceCondition": {
"comeInWithStoredFallSpeed": {
"fallSpeedInTiles": 2
}
},
"requires": [],
"flashSuitChecked": true,
"note": "Moonfall to become stuck in the ground, then moonfall again to clip fully through the floor."
},
{
"id": 24,
"link": [
2,
8
],
"name": "G-Mode Morph",
"entranceCondition": {
"comeInWithGMode": {
"mode": "any",
"morphed": true
}
},
"requires": [],
"flashSuitChecked": true
},
{
"id": 25,
"link": [
3,
1
],
"name": "G-Mode through Top Left Bomb Blocks",
"entranceCondition": {
"comeInWithGMode": {
"mode": "any",
"morphed": false
}
},
"requires": [],
"flashSuitChecked": true,
"note": [
"There are scroll PLMs throughout the room, which will overload PLMs when going through them.",
"The bomb blocks then become air and can be passed through."
]
},
{
"id": 26,
"link": [
3,
1
],
"name": "Grapple Teleport",
"entranceCondition": {
"comeInWithGrappleTeleport": {
"blockPositions": [
[
12,
12
],
[
12,
13
]
]
}
},
"requires": [],
"flashSuitChecked": true,
"note": [
"If entering the transition too deeply, Samus may end up stuck slightly inside the Bomb blocks and the floor.",
"This can be avoided by tapping up to retract Grapple (pulling Samus left and down), holding left while releasing Grapple, then jumping to clip up through the floor.",
"If Morph is available, rolling out to the left is also an option."
]
},
{
"id": 139,
"link": [
3,
1
],
"name": "Samus Eater Teleport",
"entranceCondition": {
"comeInWithSamusEaterTeleport": {
"floorPositions": [
[
1,
13
],
[
8,
13
]
],
"ceilingPositions": []
}
},
"requires": [
"canLongXRayClimb",
"canBePatient"
],
"flashSuitChecked": true,
"note": [
"Fall into the first Samus Eater in Hellway or Alpha Power Bomb Room.",
"After teleporting and passing through the transition, X-Ray climb 3 screens to reach the space behind the bomb blocks at the top of the room.",
"Samus will be off-camera, but the slopes at the top will push the camera up, indicating when the climb is done."
],
"devNote": [
"FIXME: Other Samus Eaters can also probably work.",
"In particular, in Hellway a ceiling Samus Eater could probably shorten the X-Ray climb."
]
},
{
"id": 27,
"link": [
3,
2
],
"name": "Carry Shinecharge",
"entranceCondition": {
"comeInShinecharged": {}
},
"requires": [
{
"shineChargeFrames": 160
},
"canShinechargeMovementComplex",
"HiJump",
"Morph"
],
"exitCondition": {
"leaveShinecharged": {}
},
"unlocksDoors": [
{
"types": [
"super"
],
"requires": []
},
{
"types": [
"missiles",
"powerbomb"
],
"requires": [
"never"
]
}
],
"flashSuitChecked": true
},
{
"id": 127,
"link": [
3,
2
],
"name": "Come in Shinecharged, Leave With Spark (Top Position)",
"entranceCondition": {
"comeInShinecharged": {}
},
"requires": [
{
"shineChargeFrames": 150
},
"canShinechargeMovementComplex",
"HiJump",
"Morph",
{
"shinespark": {
"frames": 3,
"excessFrames": 0
}
}
],
"exitCondition": {
"leaveWithSpark": {
"position": "top"
}
},
"unlocksDoors": [
{
"types": [
"super"
],
"requires": []
},
{
"types": [
"missiles",
"powerbomb"
],
"requires": [
"never"
]
}
],
"flashSuitChecked": true
},
{
"id": 128,
"link": [
3,
2
],
"name": "Come in Shinecharged, Leave With Spark (Bottom Position)",
"entranceCondition": {
"comeInShinecharged": {}
},
"requires": [
{
"shineChargeFrames": 140
},
"canShinechargeMovementComplex",
"HiJump",
"Morph",
{
"shinespark": {
"frames": 4,
"excessFrames": 0
}
}
],
"exitCondition": {
"leaveWithSpark": {
"position": "bottom"
}
},
"unlocksDoors": [
{
"types": [
"super"
],
"requires": []
},
{
"types": [
"missiles",
"powerbomb"
],
"requires": [
"never"
]
}
],
"flashSuitChecked": true,
"note": "If needing to spark low through the door, hold angle-down while activating the spark, in order to avoid getting extra height from a crouch jump."
},
{
"id": 28,
"link": [
3,
2
],
"name": "G-Mode Morph to Middle Left Door",
"entranceCondition": {
"comeInWithGMode": {
"mode": "any",
"morphed": true
}
},
"requires": [
"h_artificialMorphMovement"
],
"flashSuitChecked": true,
"note": "Use Bombs or SpringBall to navigate with artificial morph without unmorphing."
},
{
"id": 150,
"link": [
3,
3
],
"name": "R-Mode Entry",
"entranceCondition": {
"comeInWithRMode": {}
},
"requires": [],
"clearsObstacles": [
"R-Mode"
],
"flashSuitChecked": true,
"blueSuitChecked": true
},
{
"id": 29,
"link": [
3,
3
],
"name": "Leave with Runway",
"requires": [],
"exitCondition": {
"leaveWithRunway": {
"length": 5,
"openEnd": 1,
"steepUpTiles": 1
}
},
"flashSuitChecked": true
},
{
"id": 30,
"link": [
3,
3
],
"name": "Leave With Runway - Frozen Geemer",
"requires": [
"h_frozenEnemyRunway",
"h_ZebesIsAwake"
],
"exitCondition": {
"leaveWithRunway": {
"length": 6,
"openEnd": 1,
"steepUpTiles": 1
}
},
"flashSuitChecked": true,
"note": "There is a Geemer just below the door that only moves while on camera."
},
{
"id": 31,
"link": [
3,
3
],
"name": "G-Mode Setup - Get Hit By Geemer",
"requires": [
"h_ZebesIsAwake"
],
"exitCondition": {
"leaveWithGModeSetup": {}
},
"flashSuitChecked": true,
"note": "There is a Geemer just below the door that only moves while on camera."
},
{
"id": 32,
"link": [
3,
3
],
"name": "G-Mode Regain Mobility",
"requires": [
{
"enemyDamage": {
"enemy": "Geemer (blue)",
"type": "contact",
"hits": 1
}
},
"h_ZebesIsAwake",
"canBePatient"
],
"gModeRegainMobility": {},
"flashSuitChecked": true,
"note": "Wait 90 seconds for a global Geemer."
},
{
"id": 33,
"link": [
3,
5
],
"name": "G-Mode Morph into Alcatraz",
"entranceCondition": {
"comeInWithGMode": {
"mode": "any",
"morphed": true
}
},
"requires": [
"h_artificialMorphMovement"
],
"flashSuitChecked": true,
"note": "Use Bombs or SpringBall to navigate with artificial morph without unmorphing."
},
{
"id": 34,
"link": [
3,
6
],
"name": "Carry Shinecharge",
"entranceCondition": {
"comeInShinecharged": {}
},
"requires": [
{
"shineChargeFrames": 105
},
"canShinechargeMovementComplex"
],
"exitCondition": {
"leaveShinecharged": {}
},
"unlocksDoors": [
{
"types": [
"super"
],
"requires": []
},
{
"types": [
"missiles",
"powerbomb"
],
"requires": [
"never"
]
}
],
"flashSuitChecked": true
},
{
"id": 129,
"link": [
3,
6
],
"name": "Come in Shinecharged, Leave With Spark (Bottom Position)",
"entranceCondition": {
"comeInShinecharged": {}
},
"requires": [
{
"shineChargeFrames": 20
},
"canShinechargeMovementComplex",
{
"shinespark": {
"frames": 22,
"excessFrames": 0
}
}
],
"exitCondition": {
"leaveWithSpark": {
"position": "bottom"
}
},
"unlocksDoors": [
{
"types": [
"super"
],
"requires": []
},
{
"types": [
"missiles",
"powerbomb"
],
"requires": [
"never"
]
}
],
"flashSuitChecked": true,
"note": [
"Shoot while entering the room, to open the door.",
"Activate the spark immediately after landing, at a position low enough to pass underneath the platform."
]
},
{
"id": 130,
"link": [
3,
6
],
"name": "Come in Shinecharged, Leave With Spark (Top Position)",
"entranceCondition": {
"comeInShinecharged": {}
},
"requires": [
{
"shineChargeFrames": 90
},
"canShinechargeMovementComplex",
"canCarefulJump",
{
"shinespark": {
"frames": 5,
"excessFrames": 0
}
}
],
"exitCondition": {
"leaveWithSpark": {
"position": "top"
}
},
"unlocksDoors": [
{
"types": [
"super"
],
"requires": []
},
{
"types": [
"missiles",
"powerbomb"
],
"requires": [
"never"
]
}
],
"flashSuitChecked": true
},
{
"id": 35,
"link": [
3,
7
],
"name": "Carry Shinecharge",
"entranceCondition": {
"comeInShinecharged": {}
},
"requires": [
{
"shineChargeFrames": 123
},
"canShinechargeMovementComplex"
],
"exitCondition": {
"leaveShinecharged": {}
},
"unlocksDoors": [
{
"types": [
"ammo"
],
"requires": [
"never"
]
}
],
"flashSuitChecked": true,
"note": [
"Immediately after running off the ledge, turn back and press against the ledge, aim down, and shoot open the door.",
"Move left to avoid the floating platform, then hold right against the floating platform to make it over to the door."
]
},
{
"id": 36,
"link": [
3,
8
],
"name": "Base",
"requires": [],
"flashSuitChecked": true
},
{
"id": 37,
"link": [
4,
1
],
"name": "G-Mode through Top Left Bomb Blocks",
"entranceCondition": {
"comeInWithGMode": {
"mode": "any",
"morphed": false
}
},
"requires": [],
"flashSuitChecked": true,
"note": [
"There are scroll PLMs throughout the room, which will overload PLMs when going through them.",
"The bomb blocks then become air and can be passed through."
]
},
{
"id": 38,
"link": [
4,
1
],
"name": "Grapple Teleport",
"entranceCondition": {
"comeInWithGrappleTeleport": {
"blockPositions": [
[
5,
3
],
[
7,
2
]
]
}
},
"requires": [],
"flashSuitChecked": true
},
{
"id": 145,
"link": [
4,
1
],
"name": "Grapple Teleport Door Escape",
"entranceCondition": {
"comeInWithGrappleTeleport": {
"blockPositions": [
[
3,
12
],
[
3,
13
]
]
}
},
"requires": [
{
  "or": [
    "canGrappleTeleportWallEscape",
    {
      "doorUnlockedAtNode": 1
    }
  ]
}
],
"unlocksDoors": [
{
"types": [
"ammo"
],
"requires": []
}
],
"flashSuitChecked": true
},
{
"id": 39,
"link": [
4,
1
],
"name": "Grapple Teleport Door Lock Skip",
"entranceCondition": {
"comeInWithGrappleTeleport": {
"blockPositions": [
[
3,
12
],
[
3,
13
]
]
}
},
"requires": [],
"bypassesDoorShell": true,
"flashSuitChecked": true
},
{
"id": 40,
"link": [
4,
1
],
"name": "Carry Grapple Teleport (Top Position)",
"entranceCondition": {
"comeInWithGrappleTeleport": {
"blockPositions": [
[
3,
12
]
]
}
},
"requires": [],
"exitCondition": {
"leaveWithGrappleTeleport": {
"blockPositions": [
[
3,
12
]
]
}
},
"bypassesDoorShell": true,
"flashSuitChecked": true
},
{
"id": 41,
"link": [
4,
1
],
"name": "Carry Grapple Teleport (Bottom Position)",
"entranceCondition": {
"comeInWithGrappleTeleport": {
"blockPositions": [
[
3,
13
]
]
}
},
"requires": [],
"exitCondition": {
"leaveWithGrappleTeleport": {
"blockPositions": [
[
3,
13
]
]
}
},
"bypassesDoorShell": true,
"flashSuitChecked": true
},
{
"id": 42,
"link": [
4,
1
],
"name": "Grapple Teleport X-Ray Climb (1 Screen)",
"entranceCondition": {
"comeInWithGrappleTeleport": {
"blockPositions": [
[
2,
18
],
[
2,
19
],
[
2,
28
],
[
2,
29
]
]
}
},
"requires": [
"canXRayClimb"
],
"bypassesDoorShell": true,
"flashSuitChecked": true,
"note": [
"Exit the previous room with Samus in a standing pose (while grappled).",
"After teleporting, press right to release Grapple while staying standing (not being forced into a crouch).",
"Then X-ray climb 1 screen to get up to the door transition, without needing to open the door.",
"Samus will not be visible during the climb."
]
},
{
"id": 142,
"link": [
4,
1
],
"name": "Grapple Teleport X-Ray Climb (2 Screens)",
"entranceCondition": {
"comeInWithGrappleTeleport": {
"blockPositions": [
[
2,
34
]
]
}
},
"requires": [
"canLongXRayClimb"
],
"bypassesDoorShell": true,
"flashSuitChecked": true,
"note": [
"Exit the previous room with Samus in a standing pose (while grappled).",
"After teleporting, press right to release Grapple while staying standing (not being forced into a crouch).",
"Then X-ray climb 2 screens to get up to the door transition, without needing to open the door.",
"Samus will not be visible during the climb."
]
},
{
"id": 43,
"link": [
4,
2
],
"name": "G-Mode Morph to Middle Left Door",
"entranceCondition": {
"comeInWithGMode": {
"mode": "any",
"morphed": true
}
},
"requires": [
"canOffScreenMovement",
{
"or": [
"h_artificialMorphMovement",
"h_artificialMorphBombHorizontally"
]
}
],
"flashSuitChecked": true,
"note": [
"A single Power Bomb, placed precisely and as early as possible, can get you over the Geemers and onto the ledge above Alcatraz without taking a hit.",
"Alternatively Bombs or SpringBall can be used.",
"Go down to the Save door by just falling and moving back and forth in the right places.",
"Once you start going down you will be off-screen."
]
},
{
"id": 151,
"link": [
4,
4
],
"name": "R-Mode Entry",
"entranceCondition": {
"comeInWithRMode": {}
},
"requires": [],
"clearsObstacles": [
"R-Mode"
],
"flashSuitChecked": true,
"blueSuitChecked": true
},
{
"id": 44,
"link": [
4,
4
],
"name": "Leave with Runway",
"requires": [],
"exitCondition": {
"leaveWithRunway": {
"length": 12,
"openEnd": 0,
"steepUpTiles": 2
}
},
"flashSuitChecked": true
},
{
"id": 45,
"link": [
4,
4
],
"name": "G-Mode Setup - Get Hit By Geemer",
"requires": [
"h_ZebesIsAwake"
],
"exitCondition": {
"leaveWithGModeSetup": {}
},
"flashSuitChecked": true
},
{
"id": 46,
"link": [
4,
4
],
"name": "G-Mode Regain Mobility",
"requires": [
{
"enemyDamage": {
"enemy": "Geemer (blue)",
"type": "contact",
"hits": 1
}
},
"h_ZebesIsAwake"
],
"gModeRegainMobility": {},
"flashSuitChecked": true
},
{
"id": 47,
"link": [
4,
5
],
"name": "G-Mode Morph into Alcatraz",
"entranceCondition": {
"comeInWithGMode": {
"mode": "any",
"morphed": true
}
},
"requires": [
{
  "or": [
    "h_artificialMorphMovement",
    {
      "and": [
        "h_artificialMorphPowerBomb",
        {
          "or": [
            "h_additionalBomb",
            "canTrickyGMode"
          ]
        }
      ]
    },
    {
      "enemyDamage": {
        "enemy": "Geemer (blue)",
        "type": "contact",
        "hits": 1
      }
    },
    "h_ZebesNotAwake"
  ]
}
],
"flashSuitChecked": true,
"note": [
"There are scroll PLMs one tile to the right of the bomb blocks which can be used to overload PLMs, turning the bomb blocks to air.",
"However, if Zebes is awake, two Geemers block the way.",
"The Geemer hits can be avoided with Bombs or SpringBall.",
"Alternatively, use a Power Bombs, to kill the Geemers and another to boost over to the left Alcatraz entrance, as the Power Bomb blast will render the bomb blocks solid, unable to be turned to air.",
"This is possible but tricky to do with a single Power Bomb: In direct G-mode, use Samus' i-frames to roll through the first Geemer and horizontally bomb boost onto the ledge.",
"In indirect G-mode, roll immediately and place the Power Bomb just after the first downward slope to jump over both Geemers."
]
},
{
"id": 48,
"link": [
4,
8
],
"name": "Base",
"requires": [],
"flashSuitChecked": true
},
{
"id": 49,
"link": [
5,
1
],
"name": "G-Mode Morph through Top Left Bomb Blocks",
"entranceCondition": {
"comeInWithGMode": {
"mode": "any",
"morphed": true
}
},
"requires": [
"h_artificialMorphMovement",
{
"or": [
"canTrickyDodgeEnemies",
{
"enemyDamage": {
"enemy": "Geemer (blue)",
"type": "contact",
"hits": 1
}
},
"h_ZebesNotAwake"
]
}
],
"flashSuitChecked": true,
"note": [
"There are scroll PLMs next to the bomb blocks and on the ledge below the Alcatraz exit, which will overload PLMs when going through them.",
"Samus will need to briefly navigate off-screen while to the right of Alcatraz before coming back left.",
"Note that the global Geemer may still be in this area if traversing the room quickly, and can hit Samus off-screen."
]
},
{
"id": 50,
"link": [
5,
1
],
"name": "Grapple Teleport",
"entranceCondition": {
"comeInWithGrappleTeleport": {
"blockPositions": [
[
5,
3
],
[
7,
2
]
]
}
},
"requires": [],
"flashSuitChecked": true
},
{
"id": 146,
"link": [
5,
1
],
"name": "Grapple Teleport Door Escape",
"entranceCondition": {
"comeInWithGrappleTeleport": {
"blockPositions": [
[
3,
12
],
[
3,
13
]
]
}
},
"requires": [
{
  "or": [
    "canGrappleTeleportWallEscape",
    {
      "doorUnlockedAtNode": 1
    }
  ]
}
],
"unlocksDoors": [
{
"types": [
"ammo"
],
"requires": []
}
],
"flashSuitChecked": true
},
{
"id": 51,
"link": [
5,
1
],
"name": "Grapple Teleport Door Lock Skip",
"entranceCondition": {
"comeInWithGrappleTeleport": {
"blockPositions": [
[
3,
12
],
[
3,
13
]
]
}
},
"requires": [],
"bypassesDoorShell": true,
"flashSuitChecked": true
},
{
"id": 52,
"link": [
5,
1
],
"name": "Carry Grapple Teleport (Top Position)",
"entranceCondition": {
"comeInWithGrappleTeleport": {
"blockPositions": [
[
3,
12
]
]
}
},
"requires": [],
"exitCondition": {
"leaveWithGrappleTeleport": {
"blockPositions": [
[
3,
12
]
]
}
},
"bypassesDoorShell": true,
"flashSuitChecked": true
},
{
"id": 53,
"link": [
5,
1
],
"name": "Carry Grapple Teleport (Bottom Position)",
"entranceCondition": {
"comeInWithGrappleTeleport": {
"blockPositions": [
[
3,
13
]
]
}
},
"requires": [],
"exitCondition": {
"leaveWithGrappleTeleport": {
"blockPositions": [
[
3,
13
]
]
}
},
"bypassesDoorShell": true,
"flashSuitChecked": true
},
{
"id": 54,
"link": [
5,
1
],
"name": "Grapple Teleport X-Ray Climb (1 Screen)",
"entranceCondition": {
"comeInWithGrappleTeleport": {
"blockPositions": [
[
2,
18
],
[
2,
19
],
[
2,
28
],
[
2,
29
]
]
}
},
"requires": [
"canXRayClimb"
],
"bypassesDoorShell": true,
"flashSuitChecked": true,
"note": [
"Exit the previous room with Samus in a standing pose (while grappled).",
"After teleporting, press right to release Grapple while staying standing (not being forced into a crouch).",
"Then X-ray climb 1 screeto get up to the door transition, without needing to open the door.",
"Samus will not be visible during the climb."
]
},
{
"id": 143,
"link": [
5,
1
],
"name": "Grapple Teleport X-Ray Climb (2 Screens)",
"entranceCondition": {
"comeInWithGrappleTeleport": {
"blockPositions": [
[
2,
34
]
]
}
},
"requires": [
"canLongXRayClimb"
],
"bypassesDoorShell": true,
"flashSuitChecked": true,
"note": [
"Exit the previous room with Samus in a standing pose (while grappled).",
"After teleporting, press right to release Grapple while staying standing (not being forced into a crouch).",
"Then X-ray climb 2 screens to get up to the door transition, without needing to open the door.",
"Samus will not be visible during the climb."
]
},
{
"id": 55,
"link": [
5,
2
],
"name": "G-Mode Morph to Middle Left Door",
"entranceCondition": {
"comeInWithGMode": {
"mode": "any",
"morphed": true
}
},
"requires": [
"canOffScreenMovement",
"h_artificialMorphMovement"
],
"flashSuitChecked": true,
"note": [
"There are scroll PLMs next to the bomb blocks and on the ledge below the Alcatraz exit, which will overload PLMs when going through them.",
"Samus will need to briefly navigate off-screen while to the right of Alcatraz before coming back left.",
"Note that the global Geemer may still be in this area if traversing the room quickly, and can hit Samus off-screen.",
"Again traverse off-screen while going down the left shaft and through the morph tunnel."
]
},
{
"id": 152,
"link": [
5,
5
],
"name": "R-Mode Entry",
"entranceCondition": {
"comeInWithRMode": {}
},
"requires": [],
"clearsObstacles": [
"R-Mode"
],
"flashSuitChecked": true,
"blueSuitChecked": true
},
{
"id": 56,
"link": [
5,
5
],
"name": "Leave with Runway",
"requires": [],
"exitCondition": {
"leaveWithRunway": {
"length": 11,
"openEnd": 0,
"steepDownTiles": 2
}
},
"flashSuitChecked": true
},
{
"id": 141,
"link": [
5,
5
],
"name": "Ripper Farm",
"requires": [
"ScrewAttack",
{
"cycleFrames": 180
}
],
"farmCycleDrops": [
{
"enemy": "Ripper",
"count": 1
}
],
"flashSuitChecked": true
},
{
"id": 57,
"link": [
5,
5
],
"name": "Crystal Flash",
"requires": [
{
"obstaclesNotCleared": [
"R-Mode"
]
},
"h_CrystalFlash"
],
"flashSuitChecked": true
},
{
"id": 58,
"link": [
5,
5
],
"name": "G-Mode Setup - Get Hit By Geemer",
"requires": [
"h_ZebesIsAwake",
{
"or": [
"canBeVeryPatient",
{
"ammo": {
"type": "Super",
"count": 1
}
}
]
}
],
"exitCondition": {
"leaveWithGModeSetup": {}
},
"flashSuitChecked": true,
"note": [
"It takes approximately 3.5 minutes for a global Geemer to reach this location,",
"but this can be reduced by using a Super between 19 and 33 seconds after entering the room, to make a Geemer fall and take a shorter path.",
"It is possible to climb the room and watch for the Geemer instead of timing it."
]
},
{
"id": 59,
"link": [
5,
5
],
"name": "G-Mode Regain Mobility",
"requires": [
{
"enemyDamage": {
"enemy": "Geemer (blue)",
"type": "contact",
"hits": 1
}
},
"h_ZebesIsAwake",
{
"or": [
"canBeVeryPatient",
{
"and": [
"canComplexGMode",
{
"ammo": {
"type": "Super",
"count": 1
}
}
]
}
]
}
],
"gModeRegainMobility": {},
"flashSuitChecked": true,
"note": [
"It takes approximately 3.5 minutes for a global Geemer to reach this location.",
"If using a Super, fire between 19 and 33 seconds after entering the room, then wait approximately 30 more seconds to be hit."
],
"devNote": "FIXME: Should manipulating global enemies off screen be a tech?"
},
{
"id": 60,
"link": [
5,
8
],
"name": "Base",
"requires": [
"h_bombThings"
],
"flashSuitChecked": true
},
{
"id": 61,
"link": [
5,
8
],
"name": "Alcatraz Escape",
"requires": [
{
"notable": "Alcatraz Escape"
},
"canPreciseWalljump",
"canWallJumpInstantMorph",
{
"or": [
"HiJump",
"canConsecutiveWalljump"
]
}
],
"flashSuitChecked": true,
"note": "Wall jump up and midair morph to get out without needing to break the bomb blocks to the right."
},
{
"id": 62,
"link": [
5,
8
],
"name": "Space Jump Alcatraz Escape",
"requires": [
"canMidAirMorph",
"canCarefulJump",
"SpaceJump"
],
"flashSuitChecked": true
},
{
"id": 63,
"link": [
5,
8
],
"name": "Tricky Spring Ball Jump",
"requires": [
"canTrickySpringBallJump",
"canTrickyJump"
],
"flashSuitChecked": true,
"note": [
"Run and spin jump into a spring ball jump, starting from the floating platform."
]
},
{
"id": 64,
"link": [
5,
8
],
"name": "Tricky Dash Jump",
"requires": [
"HiJump",
"canMidAirMorph",
"canTrickyDashJump"
],
"flashSuitChecked": true,
"note": [
"The wall above can be used to align to a good starting position for the running jump."
]
},
{
"id": 65,
"link": [
5,
8
],
"name": "Frozen Geemer Alcatraz Escape",
"requires": [
"h_ZebesIsAwake",
"canMidAirMorph",
"canTrickyUseFrozenEnemies",
{
"or": [
"canBeVeryPatient",
{
"ammo": {
"type": "Super",
"count": 1
}
}
]
},
{
"or": [
"canTrickyJump",
{
"and": [
"canCarefulJump",
{
"ammo": {
"type": "Super",
"count": 1
}
}
]
}
]
}
],
"flashSuitChecked": true,
"note": [
"Wait 3 minutes for a global Geemer to waddle over, or shoot a Super 20 to 30 seconds after entering the room to knock it off the ceiling and save a lot of time.",
"Freeze the Geemer as it turns onto the middle slope of the left wall to escape - it helps to freeze the geemer from below.",
"Alternatively, use a Super to knock it off the wall and freeze it mid-air."
],
"devNote": "This is only really useful without wall jumps."
},
{
"id": 66,
"link": [
5,
8
],
"name": "Alcatraz Escape with Grapple X-Ray Ceiling Clip",
"requires": [
{
"notable": "Alcatraz Escape with Grapple X-Ray Ceiling Clip"
},
"h_ZebesIsAwake",
"canBePatient",
{
"or": [
"canBeVeryPatient",
{
"ammo": {
"type": "Super",
"count": 1
}
}
]
},
"h_preciseIceClip",
"canUseGrapple",
"canXRayStandUp"
],
"flashSuitChecked": true,
"note": [
"Wait for a global Geemer to make the long trip along the map, or shoot a Super 20 to 30 seconds after entering the room to knock it off the ceiling and save a lot of time.",
"Freeze it just after it starts climbing the bomb blocks.",
"Spin-jump above it, which will put Samus into a forced crouch where X-Ray cannot be used.",
"Use Grapple to kill a second Geemer, restoring the ability to use X-Ray.",
"Use X-Ray to stand up, then jump up through the ceiling."
],
"devNote": [
"Morph could also be used instead of Grapple, but with Morph there is an easier strat that goes up through the tunnel to the left."
]
},
{
"id": 67,
"link": [
5,
8
],
"name": "Alcatraz Escape with HiJump Ceiling Clip",
"requires": [
{
"notable": "Alcatraz Escape with HiJump Ceiling Clip"
},
"HiJump",
"h_ZebesIsAwake",
{
"or": [
"canBeVeryPatient",
{
"ammo": {
"type": "Super",
"count": 1
}
}
]
},
{
"tech": "canPreciseCeilingClip"
},
"canTrickyUseFrozenEnemies",
{
"enemyDamage": {
"enemy": "Geemer (blue)",
"type": "contact",
"hits": 1
}
},
"canInsaneJump"
],
"flashSuitChecked": true,
"note": [
"Wait for a global Geemer to make the long trip along the map, or shoot a Super 20 to 30 seconds after entering the room to knock it off the ceiling and save a lot of time.",
"Hold right against the bomb blocks, take damage from the Geemer, jump, aim-down, and shoot the Geemer shortly before landing.",
"Samus should end up standing on the ground with the Geemer frozen on the wall with a 4-8 pixel gap between it and the ground (overlapping Samus' hitbox).",
"Facing the bomb blocks and pressed against them, jump while holding down (but not crouched) and then hold forward (or forward and down) 5 frames later to break the aim-down pose.",
"If successful, Samus will clip up through the ceiling.",
"This can be attempted several times before the Geemer thaws."
]
},
{
"id": 68,
"link": [
5,
8
],
"name": "Alcatraz Escape G-Mode Crystal Flash Then Forced Standup",
"entranceCondition": {
"comeInWithGMode": {
"mode": "direct",
"morphed": true
}
},
"requires": [
"canTrickyGMode",
{
"notable": "Alcatraz Escape G-Mode Crystal Flash Then Forced Standup"
},
"h_ZebesIsAwake",
"canBeVeryPatient",
{
"ammo": {
"type": "Super",
"count": 3
}
},
"h_artificialMorphCrystalFlash",
"canPauseAbuse",
{
"autoReserveTrigger": {}
},
"canRModeStandupClip",
{
"enemyDamage": {
"enemy": "Geemer (blue)",
"type": "contact",
"hits": 1
}
}
],
"flashSuitChecked": true,
"note": [
"Enter with direct G-Mode artificial morph, and perform a Crystal Flash to refill reserve energy.",
"Do this all the way to the left, to prevent the Geemer from being destroyed by the lingering light orb.",
"Wait for a global Geemer to make the long trip along the map, or shoot a Super 20 to 30 seconds after entering the room to knock it off the ceiling and save a lot of time.",
"Either way, after the Geemer comes down into Alcatraz, shoot a Super to knock it off the ledge to make it bypass the light orb.",
"Damage down until one Geemer hit away from running out of energy.",
"If Samus has at least one Energy Tank, it will take longer to damage down, in which case an additional Super can be used to knock the Geemer onto the floating platform, to allow unlimited time for damaging down.",
"A final Super can be used to knock the Geemer off the floating platform.",
"Set reserves to manual, stand next to the bomb blocks, and wait for the Geemer to approach.",
"Just before taking a hit, press pause.",
"During the fade-out, hold forward to land quickly after knockback.",
"At a precise moment just before the pause hits, jump and aim down; the aim-down can be buffered before jumping, e.g. by rolling from forward to down through a diagonal input.",
"Set reserves to auto, then unpause while continuing to hold jump.",
"If successful, the forced stand-up will occur close to the ceiling and while Samus still has upward momentum, allowing Samus to clip through."
],
"devNote": "FIXME: A version of this strat could be added with canRiskPermanentLossOfAccess requiring fewer Supers and time, if Samus has no tanks."
},
{
"id": 69,
"link": [
5,
8
],
"name": "G-Mode Morph Alcatraz Escape",
"entranceCondition": {
"comeInWithGMode": {
"mode": "any",
"morphed": true
}
},
"requires": [
"h_artificialMorphMovement",
{
"or": [
"canTrickyDodgeEnemies",
{
"enemyDamage": {
"enemy": "Geemer (blue)",
"type": "contact",
"hits": 1
}
},
"h_ZebesNotAwake"
]
}
],
"flashSuitChecked": true,
"note": [
"There are scroll PLMs next to the bomb blocks and on the ledge below the Alcatraz exit, which will overload PLMs when going through them.",
"Samus will need to briefly navigate off-screen while to the right of Alcatraz before coming back left.",
"Note that the global Geemer may still be in this area if traversing the room quickly, and can hit Samus off-screen."
]
},
{
"id": 70,
"link": [
5,
8
],
"name": "Alcatraz Escape Double Damage Boost",
"requires": [
{
"notable": "Alcatraz Escape Double Damage Boost"
},
"h_ZebesIsAwake",
"HiJump",
"Morph",
{
"or": [
"canBeVeryPatient",
{
"ammo": {
"type": "Super",
"count": 1
}
}
]
},
"canCrouchJump",
"canInsaneJump",
"canReserveDoubleDamageBoost",
{
"autoReserveTrigger": {
"minReserveEnergy": 85
}
},
{
"enemyDamage": {
"enemy": "Geemer (blue)",
"type": "contact",
"hits": 1
}
}
],
"wallJumpAvoid": true,
"flashSuitChecked": true,
"note": [
"Wait 3 minutes for a global Geemer to waddle over, or shoot a Super 20 to 30 seconds after entering the room to knock it off the ceiling and save a lot of time.",
"Damage down until Samus is one Geemer hit away from running out of energy, and set reserves to manual.",
"Crouch jump at a very precise time and mid-air morph to contact the Geemer at the peak of the jump, pressing pause to be in the fade-out while getting hit and reaching 0 energy.",
"Set reserves to auto, unpause, and hold left.",
"While reserves are auto-refilling, Samus' i-frames will run out, allowing Samus to be hit by the Geemer again and be boosted high enough to reach the ledge.",
"The screen will be black, which can be fixed by pausing and unpausing again."
]
},
{
"id": 140,
"link": [
5,
8
],
"name": "Samus Eater Teleport, X-Ray Climb",
"entranceCondition": {
"comeInWithSamusEaterTeleport": {
"floorPositions": [],
"ceilingPositions": [
[
11,
13
]
]
}
},
"requires": [
"canLongXRayClimb"
],
"flashSuitChecked": true,
"note": [
"Jump into the second Samus Eater in the ceiling of Hellway.",
"After teleporting and passing through the transition, X-Ray climb about 2 screens to reach the top of the room.",
"Samus will be off-camera, but the slopes at the top will push the camera up, indicating when the climb is done."
],
"devNote": [
"Several other Samus Eaters could probably also work."
]
},
{
"id": 71,
"link": [
6,
1
],
"name": "G-Mode through Top Left Bomb Blocks",
"entranceCondition": {
"comeInWithGMode": {
"mode": "any",
"morphed": false
}
},
"requires": [],
"flashSuitChecked": true,
"note": [
"There are scroll PLMs throughout the room, which will overload PLMs when going through them.",
"The bomb blocks then become air and can be passed through."
]
},
{
"id": 72,
"link": [
6,
1
],
"name": "Grapple Teleport",
"entranceCondition": {
"comeInWithGrappleTeleport": {
"blockPositions": [
[
5,
3
],
[
7,
2
]
]
}
},
"requires": [],
"flashSuitChecked": true
},
{
"id": 147,
"link": [
6,
1
],
"name": "Grapple Teleport Door Escape",
"entranceCondition": {
"comeInWithGrappleTeleport": {
"blockPositions": [
[
3,
12
],
[
3,
13
]
]
}
},
"requires": [
{
  "or": [
    "canGrappleTeleportWallEscape",
    {
      "doorUnlockedAtNode": 1
    }
  ]
}
],
"unlocksDoors": [
{
"types": [
"ammo"
],
"requires": []
}
],
"flashSuitChecked": true
},
{
"id": 73,
"link": [
6,
1
],
"name": "Grapple Teleport Door Lock Skip",
"entranceCondition": {
"comeInWithGrappleTeleport": {
"blockPositions": [
[
3,
12
],
[
3,
13
]
]
}
},
"requires": [],
"bypassesDoorShell": true,
"flashSuitChecked": true
},
{
"id": 74,
"link": [
6,
1
],
"name": "Carry Grapple Teleport (Top Position)",
"entranceCondition": {
"comeInWithGrappleTeleport": {
"blockPositions": [
[
3,
12
]
]
}
},
"requires": [],
"exitCondition": {
"leaveWithGrappleTeleport": {
"blockPositions": [
[
3,
12
]
]
}
},
"bypassesDoorShell": true,
"flashSuitChecked": true
},
{
"id": 75,
"link": [
6,
1
],
"name": "Carry Grapple Teleport (Bottom Position)",
"entranceCondition": {
"comeInWithGrappleTeleport": {
"blockPositions": [
[
3,
13
]
]
}
},
"requires": [],
"exitCondition": {
"leaveWithGrappleTeleport": {
"blockPositions": [
[
3,
13
]
]
}
},
"bypassesDoorShell": true,
"flashSuitChecked": true
},
{
"id": 76,
"link": [
6,
1
],
"name": "Grapple Teleport X-Ray Climb (1 Screen)",
"entranceCondition": {
"comeInWithGrappleTeleport": {
"blockPositions": [
[
2,
18
],
[
2,
19
],
[
2,
28
],
[
2,
29
]
]
}
},
"requires": [
"canXRayClimb"
],
"bypassesDoorShell": true,
"flashSuitChecked": true,
"note": [
"Exit the previous room with Samus in a standing pose (while grappled).",
"After teleporting, press right to release Grapple while staying standing (not being forced into a crouch).",
"Then X-ray climb 1 screen to get up to the door transition, without needing to open the door.",
"Samus will not be visible during the climb."
]
},
{
"id": 144,
"link": [
6,
1
],
"name": "Grapple Teleport X-Ray Climb (2 Screens)",
"entranceCondition": {
"comeInWithGrappleTeleport": {
"blockPositions": [
[
2,
34
]
]
}
},
"requires": [
"canLongXRayClimb"
],
"bypassesDoorShell": true,
"flashSuitChecked": true,
"note": [
"Exit the previous room with Samus in a standing pose (while grappled).",
"After teleporting, press right to release Grapple while staying standing (not being forced into a crouch).",
"Then X-ray climb 2 screens to get up to the door transition, without needing to open the door.",
"Samus will not be visible during the climb."
]
},
{
"id": 77,
"link": [
6,
2
],
"name": "G-Mode Morph to Middle Left Door",
"entranceCondition": {
"comeInWithGMode": {
"mode": "any",
"morphed": true
}
},
"requires": [
"h_artificialMorphMovement"
],
"flashSuitChecked": true,
"note": "Use Bombs or SpringBall to navigate with artificial morph without unmorphing."
},
{
"id": 78,
"link": [
6,
2
],
"name": "Carry Shinecharge",
"entranceCondition": {
"comeInShinecharged": {}
},
"requires": [
{
"shineChargeFrames": 165
},
"canShinechargeMovementComplex",
"HiJump",
"canWalljump",
"Morph"
],
"exitCondition": {
"leaveShinecharged": {}
},
"unlocksDoors": [
{
"types": [
"super"
],
"requires": []
},
{
"types": [
"missiles",
"powerbomb"
],
"requires": [
"never"
]
}
],
"flashSuitChecked": true
},
{
"id": 131,
"link": [
6,
2
],
"name": "Come in Shinecharged, Leave With Spark (Bottom Position)",
"entranceCondition": {
"comeInShinecharged": {}
},
"requires": [
{
"shineChargeFrames": 145
},
"canShinechargeMovementComplex",
"HiJump",
"canWalljump",
"Morph",
{
"shinespark": {
"frames": 5,
"excessFrames": 0
}
}
],
"exitCondition": {
"leaveWithSpark": {
"position": "bottom"
}
},
"unlocksDoors": [
{
"types": [
"super"
],
"requires": []
},
{
"types": [
"missiles",
"powerbomb"
],
"requires": [
"never"
]
}
],
"flashSuitChecked": true
},
{
"id": 132,
"link": [
6,
2
],
"name": "Come in Shinecharged, Leave With Spark (Top Position)",
"entranceCondition": {
"comeInShinecharged": {}
},
"requires": [
{
"shineChargeFrames": 155
},
"canShinechargeMovementComplex",
"HiJump",
"canWalljump",
"Morph",
{
"shinespark": {
"frames": 3,
"excessFrames": 0
}
}
],
"exitCondition": {
"leaveWithSpark": {
"position": "top"
}
},
"unlocksDoors": [
{
"types": [
"super"
],
"requires": []
},
{
"types": [
"missiles",
"powerbomb"
],
"requires": [
"never"
]
}
],
"flashSuitChecked": true
},
{
"id": 79,
"link": [
6,
3
],
"name": "Carry Shinecharge",
"entranceCondition": {
"comeInShinecharged": {}
},
"requires": [
{
"shineChargeFrames": 105
},
"canShinechargeMovementComplex"
],
"exitCondition": {
"leaveShinecharged": {}
},
"unlocksDoors": [
{
"types": [
"super"
],
"requires": []
},
{
"types": [
"missiles",
"powerbomb"
],
"requires": [
"never"
]
}
],
"flashSuitChecked": true
},
{
"id": 133,
"link": [
6,
3
],
"name": "Come in Shinecharged, Leave With Spark (Bottom Position)",
"entranceCondition": {
"comeInShinecharged": {}
},
"requires": [
{
"shineChargeFrames": 20
},
"canShinechargeMovementComplex",
{
"shinespark": {
"frames": 22,
"excessFrames": 0
}
}
],
"exitCondition": {
"leaveWithSpark": {
"position": "bottom"
}
},
"unlocksDoors": [
{
"types": [
"super"
],
"requires": []
},
{
"types": [
"missiles",
"powerbomb"
],
"requires": [
"never"
]
}
],
"flashSuitChecked": true,
"note": [
"Shoot while entering the room, to open the door.",
"Activate the spark immediately after landing, at a position low enough to pass underneath the platform."
]
},
{
"id": 134,
"link": [
6,
3
],
"name": "Come in Shinecharged, Leave With Spark (Top Position)",
"entranceCondition": {
"comeInShinecharged": {}
},
"requires": [
{
"shineChargeFrames": 80
},
"canShinechargeMovementComplex",
{
"shinespark": {
"frames": 9,
"excessFrames": 0
}
}
],
"exitCondition": {
"leaveWithSpark": {
"position": "top"
}
},
"unlocksDoors": [
{
"types": [
"super"
],
"requires": []
},
{
"types": [
"missiles",
"powerbomb"
],
"requires": [
"never"
]
}
],
"flashSuitChecked": true
},
{
"id": 80,
"link": [
6,
5
],
"name": "G-Mode Morph into Alcatraz",
"entranceCondition": {
"comeInWithGMode": {
"mode": "any",
"morphed": true
}
},
"requires": [
"h_artificialMorphMovement"
],
"flashSuitChecked": true,
"note": [
"Use Bombs or SpringBall to navigate with artificial morph without unmorphing."
]
},
{
"id": 153,
"link": [
6,
6
],
"name": "R-Mode Entry",
"entranceCondition": {
"comeInWithRMode": {}
},
"requires": [],
"clearsObstacles": [
"R-Mode"
],
"flashSuitChecked": true,
"blueSuitChecked": true
},
{
"id": 81,
"link": [
6,
6
],
"name": "Leave with Runway",
"requires": [],
"exitCondition": {
"leaveWithRunway": {
"length": 4,
"openEnd": 1,
"steepUpTiles": 1
}
},
"flashSuitChecked": true
},
{
"id": 82,
"link": [
6,
6
],
"name": "Leave With Runway - Frozen Geemer",
"requires": [
"h_frozenEnemyRunway",
"h_ZebesIsAwake",
{
"or": [
"canBePatient",
{
"ammo": {
"type": "Super",
"count": 1
}
}
]
}
],
"exitCondition": {
"leaveWithRunway": {
"length": 5,
"openEnd": 1,
"steepUpTiles": 1
}
},
"flashSuitChecked": true,
"note": "Wait 2 minutes for a global Geemer, or use a Super to grab a closer one."
},
{
"id": 83,
"link": [
6,
6
],
"name": "G-Mode Setup - Get Hit By Geemer",
"requires": [
"h_ZebesIsAwake",
{
"or": [
"canBePatient",
{
"ammo": {
"type": "Super",
"count": 1
}
}
]
}
],
"exitCondition": {
"leaveWithGModeSetup": {}
},
"flashSuitChecked": true,
"note": [
"Wait 2 minutes for a global Geemer, or use a Super to grab a closer one."
]
},
{
"id": 84,
"link": [
6,
6
],
"name": "G-Mode Regain Mobility",
"requires": [
{
"enemyDamage": {
"enemy": "Geemer (blue)",
"type": "contact",
"hits": 1
}
},
"h_ZebesIsAwake",
{
"or": [
"canBePatient",
{
"ammo": {
"type": "Super",
"count": 1
}
}
]
}
],
"gModeRegainMobility": {},
"flashSuitChecked": true,
"note": "Wait 2 minutes for a global Geemer."
},
{
"id": 85,
"link": [
6,
7
],
"name": "Carry Shinecharge From Right to Bottom",
"entranceCondition": {
"comeInShinecharged": {}
},
"requires": [
{
"shineChargeFrames": 121
},
"canShinechargeMovementTricky"
],
"exitCondition": {
"leaveShinecharged": {}
},
"unlocksDoors": [
{
"types": [
"ammo"
],
"requires": [
"never"
]
}
],
"flashSuitChecked": true,
"note": [
"Walk off the ledge (rather than running off), aim down, and shoot.",
"Depending on your momentum coming in, if Zebes is awake you may need to shoot down twice, once to kill the Geemer and once to open the door.",
"Press forward against the floating platform to make it through the door."
]
},
{
"id": 86,
"link": [
6,
8
],
"name": "Base",
"requires": [],
"flashSuitChecked": true
},
{
"id": 87,
"link": [
7,
1
],
"name": "G-Mode through Top Left Bomb Blocks",
"entranceCondition": {
"comeInWithGMode": {
"mode": "any",
"morphed": false
},
"comesThroughToilet": "any"
},
"requires": [],
"flashSuitChecked": true,
"note": [
"There are scroll PLMs throughout the room, which will overload PLMs when going through them.",
"The bomb blocks then become air and can be passed through."
]
},
{
"id": 88,
"link": [
7,
2
],
"name": "G-Mode Morph to Middle Left Door",
"entranceCondition": {
"comeInWithGMode": {
"mode": "any",
"morphed": true
},
"comesThroughToilet": "any"
},
"requires": [
"h_artificialMorphMovement"
],
"flashSuitChecked": true,
"note": "Use Bombs or SpringBall to navigate with artificial morph without unmorphing."
},
{
"id": 89,
"link": [
7,
3
],
"name": "Carry Shinecharge",
"entranceCondition": {
"comeInShinecharged": {},
"comesThroughToilet": "any"
},
"requires": [
{
"shineChargeFrames": 125
},
"HiJump",
"canShinechargeMovementComplex"
],
"exitCondition": {
"leaveShinecharged": {}
},
"unlocksDoors": [
{
"types": [
"super"
],
"requires": []
},
{
"types": [
"missiles",
"powerbomb"
],
"requires": [
"never"
]
}
],
"flashSuitChecked": true
},
{
"id": 135,
"link": [
7,
3
],
"name": "Come In Shinecharged, Leave With Spark",
"entranceCondition": {
"comeInShinecharged": {},
"comesThroughToilet": "any"
},
"requires": [
{
"shineChargeFrames": 100
},
"HiJump",
"canShinechargeMovementComplex",
{
"shinespark": {
"frames": 8,
"excessFrames": 0
}
}
],
"exitCondition": {
"leaveWithSpark": {}
},
"unlocksDoors": [
{
"types": [
"super"
],
"requires": []
},
{
"types": [
"missiles",
"powerbomb"
],
"requires": [
"never"
]
}
],
"flashSuitChecked": true
},
{
"id": 90,
"link": [
7,
5
],
"name": "G-Mode Morph into Alcatraz",
"entranceCondition": {
"comeInWithGMode": {
"mode": "any",
"morphed": true
},
"comesThroughToilet": "any"
},
"requires": [
"h_artificialMorphMovement"
],
"flashSuitChecked": true,
"note": [
"Use Bombs or SpringBall to navigate with artificial morph without unmorphing."
]
},
{
"id": 91,
"link": [
7,
6
],
"name": "Carry Shinecharge",
"entranceCondition": {
"comeInShinecharged": {},
"comesThroughToilet": "any"
},
"requires": [
{
"shineChargeFrames": 125
},
"HiJump",
"canShinechargeMovementComplex"
],
"exitCondition": {
"leaveShinecharged": {}
},
"unlocksDoors": [
{
"types": [
"super"
],
"requires": []
},
{
"types": [
"missiles",
"powerbomb"
],
"requires": [
"never"
]
}
],
"flashSuitChecked": true
},
{
"id": 136,
"link": [
7,
6
],
"name": "Come In Shinecharged, Leave With Spark (Bottom Position)",
"entranceCondition": {
"comeInShinecharged": {},
"comesThroughToilet": "any"
},
"requires": [
{
"shineChargeFrames": 90
},
"HiJump",
"canShinechargeMovementComplex",
{
"shinespark": {
"frames": 12,
"excessFrames": 0
}
}
],
"exitCondition": {
"leaveWithSpark": {
"position": "bottom"
}
},
"unlocksDoors": [
{
"types": [
"super"
],
"requires": []
},
{
"types": [
"missiles",
"powerbomb"
],
"requires": [
"never"
]
}
],
"flashSuitChecked": true
},
{
"id": 137,
"link": [
7,
6
],
"name": "Come In Shinecharged, Leave With Spark (Top Position)",
"entranceCondition": {
"comeInShinecharged": {},
"comesThroughToilet": "any"
},
"requires": [
{
"shineChargeFrames": 115
},
"HiJump",
"canShinechargeMovementComplex",
{
"shinespark": {
"frames": 5,
"excessFrames": 0
}
}
],
"exitCondition": {
"leaveWithSpark": {
"position": "top"
}
},
"unlocksDoors": [
{
"types": [
"super"
],
"requires": []
},
{
"types": [
"missiles",
"powerbomb"
],
"requires": [
"never"
]
}
],
"flashSuitChecked": true
},
{
"id": 154,
"link": [
7,
7
],
"name": "R-Mode Entry",
"entranceCondition": {
"comeInWithRMode": {},
"comesThroughToilet": "no"
},
"requires": [],
"clearsObstacles": [
"R-Mode"
],
"flashSuitChecked": true,
"blueSuitChecked": true
},
{
"id": 93,
"link": [
7,
7
],
"name": "Shinespark",
"entranceCondition": {
"comeInWithSpark": {},
"comesThroughToilet": "any"
},
"requires": [
{
"shinespark": {
"frames": 3,
"excessFrames": 3
}
}
],
"flashSuitChecked": true,
"devNote": "This strat is not useful in-room, but can satisfy a strat in the room before with an exit shinespark."
},
{
"id": 94,
"link": [
7,
7
],
"name": "Ice Moonfall Door Lock Skip",
"requires": [
"h_ZebesIsAwake",
{
"ammo": {
"type": "Super",
"count": 1
}
},
"canEnemyStuckMoonfall",
"canFreeFallClip",
"canTrickyUseFrozenEnemies"
],
"bypassesDoorShell": true,
"flashSuitChecked": true,
"note": [
"Use a Super to bring a Geemer down to the bottom floating platform.",
"Freeze this Geemer along with a Geemer on the floor and use them to perform an enemy-stuck moonfall.",
"After gaining sufficient speed, move toward the door and clip through the door shell.",
"Falling with too much speed can cause Samus to go out of bounds."
]
},
{
"id": 95,
"link": [
7,
7
],
"name": "Ice Moonfall Door Lock Skip Without Supers",
"requires": [
{
"notable": "Ice Moonfall Door Lock Skip Without Supers"
},
"h_ZebesIsAwake",
"canEnemyStuckMoonfall",
"canTrickyUseFrozenEnemies",
"canFreeFallClip"
],
"bypassesDoorShell": true,
"flashSuitChecked": true,
"note": [
"Freeze a Geemer on the right of the overhang just below the door to Final Missile Bombway.",
"Freeze a second Geemer on the top left of its platform and setup a moonfall between them.",
"Fall off the Geemers and clip past the floating platform below, past the door shell, and into the transition.",
"This setup is highly precise; if you do not have the right speed you may land on the platform below or the door shell.",
"Falling with too much speed can also cause Samus to go out of bounds."
]
},
{
"id": 96,
"link": [
7,
7
],
"name": "Downward G-Mode Setup with Ice",
"requires": [
{
"notable": "Downward G-Mode Setup with Ice"
},
"h_ZebesIsAwake",
"canEnemyStuckMoonfall",
"canFreeFallClip",
"canTrickyUseFrozenEnemies",
"canDownwardGModeSetup"
],
"exitCondition": {
"leaveWithGModeSetup": {}
},
"flashSuitChecked": true,
"note": [
"Freeze a Geemer on the bottom of the overhang just below the door to Final Missile Bombway. Freeze a second Geemer on the top left of its platform and setup a moonfall between them.",
"Fall off the Geemers and clip into the tile left of the door. Press up to get out of crouch and lose the stored vertical speed (so that X-Ray works). Then turn-around, open the door, and go into the door transition as the third Geemer hits you.",
"Falling off the frozen Geemers requires relatively high precision: This setup is a 4 frame window, not too far left, so you can get to the door transition, not too far right such that you enter the transition when falling."
]
},
{
"id": 97,
"link": [
7,
7
],
"name": "G-Mode Regain Mobility",
"requires": [
{
"enemyDamage": {
"enemy": "Geemer (blue)",
"type": "contact",
"hits": 1
}
},
"h_ZebesIsAwake",
{
"or": [
"canBePatient",
{
"ammo": {
"type": "Super",
"count": 1
}
}
]
}
],
"gModeRegainMobility": {},
"flashSuitChecked": true,
"note": [
"Line up with the far right or left side of doorframe in the room below, to be able to not fall back through after entry, as the door remains open.",
"Be careful not to fall into the door while being hit by the Geemer."
]
},
{
"id": 98,
"link": [
7,
8
],
"name": "Base",
"requires": [],
"flashSuitChecked": true
},
{
"id": 99,
"link": [
8,
1
],
"name": "Base",
"requires": [
"h_destroyBombWalls"
],
"flashSuitChecked": true
},
{
"id": 100,
"link": [
8,
1
],
"name": "Quick Charge",
"requires": [
{
"or": [
{
"and": [
{
"getBlueSpeed": {
"usedTiles": 25,
"steepUpTiles": 3,
"steepDownTiles": 3,
"openEnd": 1
}
},
"canCarefulJump"
]
},
{
"and": [
{
"canShineCharge": {
"usedTiles": 25,
"steepUpTiles": 3,
"steepDownTiles": 3,
"openEnd": 1
}
},
"canShinechargeMovement",
{
"shinespark": {
"frames": 2
}
}
]
}
]
}
],
"flashSuitChecked": true,
"note": "Break the bomb wall while blue, or spark diagonally next to it.",
"devNote": "It is possible to come in the top right door, charge a spark, use a bounce ball, or blue space jump, but this is a bit easier anyway."
},
{
"id": 101,
"link": [
8,
1
],
"name": "Quick Charge, Leave Sparking",
"requires": [
{
"canShineCharge": {
"usedTiles": 25,
"steepUpTiles": 3,
"steepDownTiles": 3,
"openEnd": 1
}
},
{
"or": [
"canCarefulJump",
{
"and": [
"canShinechargeMovement",
{
"shinespark": {
"frames": 2
}
}
]
}
]
},
{
"shinespark": {
"frames": 28
}
}
],
"exitCondition": {
"leaveWithSpark": {}
},
"unlocksDoors": [
{
"types": [
"ammo"
],
"requires": []
}
],
"flashSuitChecked": true,
"note": "Break the bomb wall while blue, or spark diagonally next to it. Open the door then charge the spark again and spark through the wall and door.",
"devNote": "The canCarefulJump or 2 spark frames could be reduced by having the door already open, but that's probably not worth modeling."
},
{
"id": 102,
"link": [
8,
1
],
"name": "Leave with Runway, Broken Wall",
"requires": [
"h_destroyBombWalls"
],
"exitCondition": {
"leaveWithRunway": {
"length": 22,
"openEnd": 0,
"steepUpTiles": 4,
"steepDownTiles": 2
}
},
"unlocksDoors": [
{
"types": [
"ammo"
],
"requires": []
}
],
"flashSuitChecked": true
},
{
"id": 103,
"link": [
8,
1
],
"name": "Leave with Runway, Short Charge to Break the Wall",
"requires": [
"canCarefulJump",
{
"getBlueSpeed": {
"usedTiles": 25,
"steepUpTiles": 3,
"steepDownTiles": 3,
"openEnd": 1
}
}
],
"exitCondition": {
"leaveWithRunway": {
"length": 22,
"openEnd": 0,
"steepUpTiles": 4,
"steepDownTiles": 2
}
},
"unlocksDoors": [
{
"types": [
"ammo"
],
"requires": []
}
],
"flashSuitChecked": true
},
{
"id": 104,
"link": [
8,
1
],
"name": "G-Mode Setup - Power Bomb the Blocks from Below and Get Hit By Geemer",
"requires": [
"h_ZebesIsAwake",
"h_usePowerBomb"
],
"exitCondition": {
"leaveWithGModeSetup": {}
},
"unlocksDoors": [
{
"types": [
"ammo"
],
"requires": []
}
],
"flashSuitChecked": true,
"note": [
"Place the Power Bomb below the bomb blocks as the Geemer is leaving the flat part of the ceiling to break it and let the Geemer through.",
"This opens a path for the Geemer to hit Samus through the transition."
]
},
{
"id": 105,
"link": [
8,
1
],
"name": "G-Mode Setup - Speed Through the Blocks then Get Hit By Geemer",
"requires": [
"h_ZebesIsAwake",
{
"getBlueSpeed": {
"usedTiles": 25,
"steepUpTiles": 3,
"steepDownTiles": 3,
"openEnd": 1
}
}
],
"exitCondition": {
"leaveWithGModeSetup": {}
},
"unlocksDoors": [
{
"types": [
"ammo"
],
"requires": []
}
],
"flashSuitChecked": true,
"note": [
"After the Geemer is near, destroy the bomb wall using blue speed from the right.",
"This opens a path for the Geemer to hit Samus through the transition."
]
},
{
"id": 106,
"link": [
8,
2
],
"name": "Base",
"requires": [
"Morph"
],
"flashSuitChecked": true
},
{
"id": 107,
"link": [
8,
2
],
"name": "Leave With Temporary Blue",
"requires": [
{
"canShineCharge": {
"usedTiles": 25,
"steepUpTiles": 3,
"steepDownTiles": 3,
"openEnd": 1
}
},
"canLongChainTemporaryBlue",
"canXRayTurnaround",
"can4HighMidAirMorph",
"canSpringBallBounce"
],
"exitCondition": {
"leaveWithTemporaryBlue": {}
},
"unlocksDoors": [
{
"types": [
"ammo"
],
"requires": []
}
],
"flashSuitChecked": true
},
{
"id": 108,
"link": [
8,
3
],
"name": "Base",
"requires": [],
"flashSuitChecked": true
},
{
"id": 109,
"link": [
8,
3
],
"name": "Leave With Temporary Blue",
"requires": [
{
"canShineCharge": {
"usedTiles": 25,
"steepUpTiles": 3,
"steepDownTiles": 3,
"openEnd": 1
}
},
"canLongChainTemporaryBlue",
"canXRayTurnaround",
"can4HighMidAirMorph"
],
"exitCondition": {
"leaveWithTemporaryBlue": {}
},
"unlocksDoors": [
{
"types": [
"ammo"
],
"requires": []
}
],
"flashSuitChecked": true
},
{
"id": 110,
"link": [
8,
4
],
"name": "Base",
"requires": [],
"flashSuitChecked": true
},
{
"id": 111,
"link": [
8,
4
],
"name": "Leave Shinecharged, Using the Raised Platform",
"requires": [
{
"canShineCharge": {
"usedTiles": 17,
"steepUpTiles": 3,
"steepDownTiles": 3,
"openEnd": 2
}
},
{
"shineChargeFrames": 90
}
],
"exitCondition": {
"leaveShinecharged": {}
},
"unlocksDoors": [
{
"types": [
"ammo"
],
"requires": []
}
],
"flashSuitChecked": true
},
{
"id": 112,
"link": [
8,
4
],
"name": "Leave Shinecharged, Using the Left of the Raised Platform",
"requires": [
"canShinechargeMovement",
{
"canShineCharge": {
"usedTiles": 25,
"steepUpTiles": 3,
"steepDownTiles": 3,
"openEnd": 1
}
},
{
"shineChargeFrames": 150
}
],
"exitCondition": {
"leaveShinecharged": {}
},
"unlocksDoors": [
{
"types": [
"ammo"
],
"requires": []
}
],
"flashSuitChecked": true
},
{
"id": 113,
"link": [
8,
4
],
"name": "Leave With Temporary Blue",
"requires": [
{
"canShineCharge": {
"usedTiles": 25,
"steepUpTiles": 3,
"steepDownTiles": 3,
"openEnd": 1
}
},
"canLongChainTemporaryBlue"
],
"exitCondition": {
"leaveWithTemporaryBlue": {}
},
"unlocksDoors": [
{
"types": [
"ammo"
],
"requires": []
}
],
"flashSuitChecked": true
},
{
"id": 114,
"link": [
8,
5
],
"name": "Base",
"requires": [
"Morph"
],
"flashSuitChecked": true
},
{
"id": 121,
"link": [
8,
5
],
"name": "Leave With Spark (Top Position)",
"requires": [
{
"canShineCharge": {
"usedTiles": 25,
"steepUpTiles": 3,
"steepDownTiles": 3,
"openEnd": 1
}
},
"Morph",
"canResetFallSpeed",
"canShinechargeMovementTricky",
{
"shinespark": {
"frames": 12,
"excessFrames": 0
}
}
],
"exitCondition": {
"leaveWithSpark": {
"position": "top"
}
},
"unlocksDoors": [
{
"types": [
"super"
],
"requires": []
},
{
"types": [
"missiles",
"powerbomb"
],
"requires": [
"never"
]
}
],
"flashSuitChecked": true,
"note": [
"Unmorph a few tiles above the ground, and hold right to land on the platform aligning Samus with the top of the doorway.",
"If needed, shoot the door open while falling, and hold jump to buffer the shinespark activation as soon as Samus lands."
]
},
{
"id": 122,
"link": [
8,
5
],
"name": "Leave With Spark (Any Position)",
"requires": [
{
"canShineCharge": {
"usedTiles": 25,
"steepUpTiles": 3,
"steepDownTiles": 3,
"openEnd": 1
}
},
"Morph",
"canShinechargeMovementTricky",
"canInsaneJump",
{
"shinespark": {
"frames": 6,
"excessFrames": 0
}
}
],
"exitCondition": {
"leaveWithSpark": {}
},
"unlocksDoors": [
{
"types": [
"super"
],
"requires": []
},
{
"types": [
"missiles",
"powerbomb"
],
"requires": [
"never"
]
}
],
"flashSuitChecked": true,
"note": [
"Perform a soft unmorph and run toward the door (shooting it open if needed).",
"If needing to spark out the bottom of the doorway, then stop on a dime at the bottom of the runway before activating the spark;",
"this requires precise movement, as there is barely enough time to make it."
]
},
{
"id": 123,
"link": [
8,
5
],
"name": "Leave With Temporary Blue (Spring Ball Bounce, Pause Remorph)",
"requires": [
{
"canShineCharge": {
"usedTiles": 25,
"steepUpTiles": 3,
"steepDownTiles": 3,
"openEnd": 1
}
},
"canSpringBallBounce",
"canPauseRemorphTemporaryBlue"
],
"exitCondition": {
"leaveWithTemporaryBlue": {}
},
"unlocksDoors": [
{
"types": [
"ammo"
],
"requires": []
}
],
"flashSuitChecked": true
},
{
"id": 115,
"link": [
8,
6
],
"name": "Base",
"requires": [],
"flashSuitChecked": true
},
{
"id": 116,
"link": [
8,
6
],
"name": "Leave With Temporary Blue",
"requires": [
{
"canShineCharge": {
"usedTiles": 25,
"steepUpTiles": 3,
"steepDownTiles": 3,
"openEnd": 1
}
},
"canLongChainTemporaryBlue",
"canXRayTurnaround",
"can4HighMidAirMorph"
],
"exitCondition": {
"leaveWithTemporaryBlue": {}
},
"unlocksDoors": [
{
"types": [
"ammo"
],
"requires": []
}
],
"flashSuitChecked": true
},
{
"id": 117,
"link": [
8,
7
],
"name": "Base",
"requires": [],
"flashSuitChecked": true
},
{
"id": 118,
"link": [
8,
7
],
"name": "Leave With Temporary Blue",
"requires": [
{
"canShineCharge": {
"usedTiles": 25,
"steepUpTiles": 3,
"steepDownTiles": 3,
"openEnd": 1
}
},
"canLongChainTemporaryBlue",
"canXRayTurnaround",
"can4HighMidAirMorph"
],
"exitCondition": {
"leaveWithTemporaryBlue": {
"direction": "any"
}
},
"unlocksDoors": [
{
"types": [
"ammo"
],
"requires": []
}
],
"flashSuitChecked": true
},
{
"id": 155,
"link": [
8,
8
],
"name": "R-Mode Spark Interrupt",
"requires": [
"h_ZebesIsAwake",
{
"not": "f_ZebesSetAblaze"
},
{
"obstaclesCleared": [
"R-Mode"
]
},
{
"or": [
"h_CrystalFlashForReserveEnergy",
{
"and": [
"h_RModeCanRefillReserves",
{
"resourceMissingAtMost": [
{
"type": "Missile",
"count": 0
}
]
},
{
"partialRefill": {
"type": "ReserveEnergy",
"limit": 100
}
}
]
}
]
},
{
"canShineCharge": {
"usedTiles": 25,
"steepUpTiles": 3,
"steepDownTiles": 3,
"openEnd": 0
}
},
{
"autoReserveTrigger": {}
},
"canRModeSparkInterrupt"
],
"resetsObstacles": [
"R-Mode"
],
"flashSuitChecked": true,
"blueSuitChecked": true,
"note": [
"Farm Geemers and Skree for energy or else Crystal Flash.",
"The bomb wall respawns so Crystal Flash can't be used to clear it.",
"Shinecharge and get interrupted by the Ripper by the save room door, or leave a Geemer alive."
]
},
{
"id": 119,
"link": [
8,
8
],
"name": "Geemer Farm",
"requires": [
"h_ZebesIsAwake",
{
"cycleFrames": 1860
},
{
"or": [
{
"resetRoom": {
"nodes": [
3,
4,
6,
7
]
}
},
{
"and": [
{
"resetRoom": {
"nodes": [
1
]
}
},
{
"cycleFrames": 420
},
{
"or": [
"ScrewAttack",
"h_useMorphBombs",
{
"and": [
{
"getBlueSpeed": {
"usedTiles": 25,
"steepUpTiles": 3,
"steepDownTiles": 3,
"openEnd": 1
}
},
"canCarefulJump"
]
}
]
}
]
},
{
"and": [
{
"resetRoom": {
"nodes": [
2
]
}
},
{
"cycleFrames": 240
},
"Morph"
]
},
{
"and": [
"Morph",
{
"resetRoom": {
"nodes": [
5
]
}
},
{
"cycleFrames": 420
},
{
"or": [
"h_bombThings",
{
"and": [
"SpaceJump",
"canMidAirMorph",
"canCarefulJump"
]
},
{
"and": [
{
"notable": "Alcatraz Escape"
},
"canPreciseWalljump",
"canConsecutiveWalljump",
"canWallJumpInstantMorph"
]
},
{
"and": [
"canTrickySpringBallJump",
"canTrickyJump"
]
},
{
"and": [
"HiJump",
"canTrickyDashJump",
"canMidAirMorph"
]
}
]
}
]
}
]
}
],
"resetsObstacles": [
"R-Mode"
],
"farmCycleDrops": [
{
"enemy": "Geemer (blue)",
"count": 11
}
],
"flashSuitChecked": true,
"devNote": [
"A two-way farming strat could be added, e.g. if it is possible to reset the room at both the top-right and the bottom."
]
},
{
"id": 120,
"link": [
8,
8
],
"name": "Crystal Flash",
"requires": [
{
"obstaclesNotCleared": [
"R-Mode"
]
},
"h_CrystalFlash"
],
"flashSuitChecked": true
}
],
"notables": [
{
"id": 1,
"name": "Alcatraz Escape",
"note": "Wall jump up and midair morph to get out without needing to break the bomb blocks to the right."
},
{
"id": 2,
"name": "Alcatraz Escape with Grapple X-Ray Ceiling Clip",
"note": [
"Wait for a global Geemer to make the long trip along the map, or shoot a Super 20 to 30 seconds after entering the room to knock it off the ceiling and save a lot of time.",
"Freeze it just after it starts climbing the bomb blocks.",
"Spin-jump above it, which will put Samus into a forced crouch where X-Ray cannot be used.",
"Use Grapple to kill a second Geemer, restoring the ability to use X-Ray.",
"Use X-Ray to stand up, then jump up through the ceiling."
]
},
{
"id": 3,
"name": "Alcatraz Escape with HiJump Ceiling Clip",
"note": [
"Wait for a global Geemer to make the long trip along the map, or shoot a Super 20 to 30 seconds after entering the room to knock it off the ceiling and save a lot of time.",
"Hold right against the bomb blocks, take damage from the Geemer, jump, aim-down, and shoot the Geemer shortly before landing.",
"Samus should end up standing on the ground with the Geemer frozen on the wall with a 4-8 pixel gap between it and the ground (overlapping Samus' hitbox).",
"Facing the bomb blocks and pressed against them, jump while holding down (but not crouched) and then hold forward (or forward and down) 5 frames later to break the aim-down pose.",
"If successful, Samus will clip up through the ceiling.",
"This can be attempted several times before the Geemer thaws."
]
},
{
"id": 4,
"name": "Alcatraz Escape G-Mode Crystal Flash Then Forced Standup",
"note": [
"Enter with direct G-Mode artificial morph, and perform a Crystal Flash to refill reserve energy.",
"Do this all the way to the left, to prevent the Geemer from being destroyed by the lingering light orb.",
"Wait for a global Geemer to make the long trip along the map, or shoot a Super 20 to 30 seconds after entering the room to knock it off the ceiling and save a lot of time.",
"Either way, after the Geemer comes down into Alcatraz, shoot a Super to knock it off the ledge to make it bypass the light orb.",
"Damage down until one Geemer hit away from running out of energy.",
"If Samus has at least one Energy Tank, it will take longer to damage down, in which case an additional Super can be used to knock the Geemer onto the floating platform, to allow unlimited time for damaging down.",
"A final Super can be used to knock the Geemer off the floating platform.",
"Set reserves to manual, stand next to the bomb blocks, and wait for the Geemer to approach.",
"Just before taking a hit, press pause.",
"During the fade-out, hold forward to land quickly after knockback.",
"At a precise moment just before the pause hits, jump and aim down; the aim-down can be buffered before jumping, e.g. by rolling from forward to down through a diagonal input.",
"Set reserves to auto, then unpause while continuing to hold jump.",
"If successful, the forced stand-up will occur close to the ceiling and while Samus still has upward momentum, allowing Samus to clip through."
]
},
{
"id": 5,
"name": "Alcatraz Escape Double Damage Boost",
"wallJumpAvoid": true,
"note": [
"Wait 3 minutes for a global Geemer to waddle over, or shoot a Super 20 to 30 seconds after entering the room to knock it off the ceiling and save a lot of time.",
"Damage down until Samus is one Geemer hit away from running out of energy, and set reserves to manual.",
"Crouch jump at a very precise time and mid-air morph to contact the Geemer at the peak of the jump, pressing pause to be in the fade-out while getting hit and reaching 0 energy.",
"Set reserves to auto, unpause, and hold left.",
"While reserves are auto-refilling, Samus' i-frames will run out, allowing Samus to be hit by the Geemer again and be boosted high enough to reach the ledge.",
"The screen will be black, which can be fixed by pausing and unpausing again."
]
},
{
"id": 7,
"name": "Ice Moonfall Door Lock Skip Without Supers",
"note": [
"Freeze a Geemer on the right of the overhang just below the door to Final Missile Bombway.",
"Freeze a second Geemer on the top left of its platform and setup a moonfall between them.",
"Fall off the Geemers and clip past the floating platform below, past the door shell, and into the transition.",
"This setup is highly precise; if you do not have the right speed you may land on the platform below or the door shell.",
"Falling with too much speed can also cause Samus to go out of bounds."
]
},
{
"id": 8,
"name": "Downward G-Mode Setup with Ice",
"note": [
"Freeze a Geemer on the bottom of the overhang just below the door to Final Missile Bombway. Freeze a second Geemer on the top left of its platform and setup a moonfall between them.",
"Fall off the Geemers and clip into the tile left of the door. Press up to get out of crouch and lose the stored vertical speed (so that X-Ray works). Then turn-around, open the door, and go into the door transition as the third Geemer hits you.",
"Falling off the frozen Geemers requires relatively high precision: This setup is a 4 frame window, not too far left, so you can get to the door transition, not too far right such that you enter the transition when falling."
]
}
],
"nextStratId": 156,
"nextNotableId": 9
}
