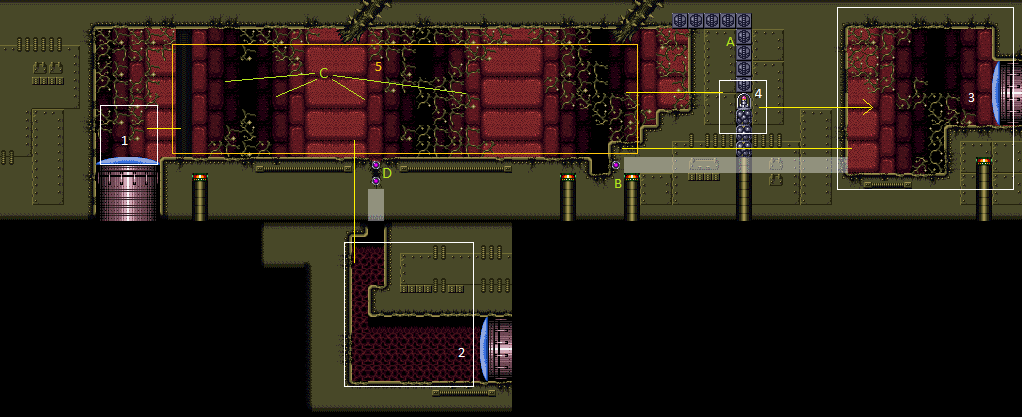
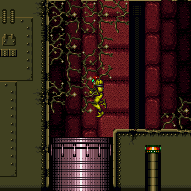
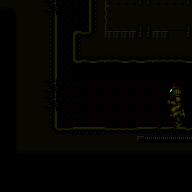
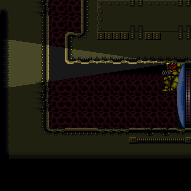
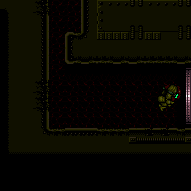
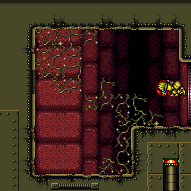
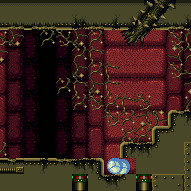
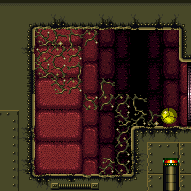
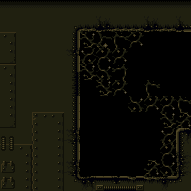
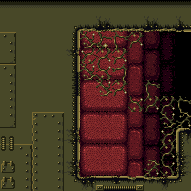
Warehouse Kihunter Room
Room ID: 81
|
Entrance condition: {
"comeInWithSpark": {},
"comesThroughToilet": "any"
}Requires: {
"shinespark": {
"frames": 5,
"excessFrames": 5
}
}Dev note: This strat is not useful in-room, but can satisfy a strat in the room before with an exit shinespark. |
From: 1
Left Vertical Door
To: 1
Left Vertical Door


Requires: {
"obstaclesCleared": [
"C"
]
}
{
"obstaclesNotCleared": [
"D"
]
}
{
"canShineCharge": {
"usedTiles": 27,
"openEnd": 2
}
}
{
"shineChargeFrames": 35
}Exit condition: {
"leaveShinecharged": {}
} |
From: 1
Left Vertical Door
To: 1
Left Vertical Door
Requires: {
"obstaclesCleared": [
"C",
"D"
]
}
{
"canShineCharge": {
"usedTiles": 13,
"openEnd": 2
}
}
{
"shineChargeFrames": 35
}Exit condition: {
"leaveShinecharged": {}
} |
From: 1
Left Vertical Door
To: 1
Left Vertical Door


Requires: {
"obstaclesCleared": [
"C"
]
}
{
"or": [
{
"and": [
{
"obstaclesNotCleared": [
"D"
]
},
{
"canShineCharge": {
"usedTiles": 27,
"openEnd": 1
}
}
]
},
{
"and": [
{
"obstaclesCleared": [
"D"
]
},
{
"canShineCharge": {
"usedTiles": 13,
"openEnd": 2
}
}
]
}
]
}Exit condition: {
"leaveWithTemporaryBlue": {
"direction": "left"
}
} |
|
Requires: {
"obstaclesCleared": [
"C"
]
}
{
"or": [
{
"canShineCharge": {
"usedTiles": 17,
"openEnd": 1
}
},
{
"and": [
{
"obstaclesNotCleared": [
"D"
]
},
{
"canShineCharge": {
"usedTiles": 31,
"openEnd": 1
}
}
]
}
]
}
"h_CrystalSpark"Dev note: FIXME: This assumes the left door is not a Power Bomb locked door. Otherwise Samus would need to shinecharge the other direction and would break the floor blocks |
From: 1
Left Vertical Door
To: 1
Left Vertical Door


Freeze two Kihunters above the door to be able to moonfall between them. After gaining enough speed, hold backward to move forward and buffer a turnaround to clip through the door. Plasma or Charge are needed in order to be able to freeze the Kihunters mid-air; otherwise they would lose their wings and fall to the ground. Requires: {
"noBlueSuit": {}
}
"canTrickyUseFrozenEnemies"
{
"or": [
"Charge",
"Plasma"
]
}
{
"enemyDamage": {
"enemy": "Kihunter (green)",
"type": "contact",
"hits": 2
}
}
"canEnemyStuckMoonfall"
"canFreeFallClip"Bypasses door shell: true Dev note: Manipulating the Kihunters is difficult. It might be possible to avoid enemy damage but this would be even more difficult. |
|
Requires: {
"resetRoom": {
"nodes": [
1
]
}
}
{
"or": [
{
"and": [
"canDash",
{
"or": [
{
"and": [
"ScrewAttack",
{
"cycleFrames": 360
}
]
},
{
"and": [
"Plasma",
{
"cycleFrames": 360
}
]
},
{
"and": [
"Wave",
{
"cycleFrames": 390
}
]
},
{
"and": [
"Spazer",
{
"cycleFrames": 390
}
]
},
{
"and": [
"Ice",
"canDodgeWhileShooting",
{
"cycleFrames": 600
}
]
},
{
"and": [
"canPseudoScrew",
"canTrickyDodgeEnemies",
{
"cycleFrames": 600
}
]
},
{
"and": [
"canTrickyDodgeEnemies",
{
"cycleFrames": 1000
}
]
}
]
}
]
},
{
"and": [
{
"haveBlueSuit": {}
},
{
"cycleFrames": 360
}
]
}
]
}Clears obstacles: C Resets obstacles: A, B, D Farm cycle drops: 4 Kihunter (green) |
|
Requires: {
"obstaclesCleared": [
"C"
]
}
"h_CrystalFlash" |
From: 1
Left Vertical Door
To: 1
Left Vertical Door
Requires: {
"enemyDamage": {
"enemy": "Kihunter (green)",
"type": "contact",
"hits": 1
}
}Dev note: It looks like the only way to remain in the room is by starting on the right side and triggering a turnaround, with or without artificial morph. |
From: 1
Left Vertical Door
To: 3
Top Right Door
Overload the PLMs by rolling through the camera scroll blocks which are just above the shot blocks. It is possible but tricky to do this damageless without a Power Bomb or blue suit. Get the first Kihunter to swoop left twice, then quickly move back and forth getting each other Kihunter to swoop without touching Samus. In immobile, the Kihunters are in a worse location, but Samus starts with i-frames, so it is a similar difficulty. Entrance condition: {
"comeInWithGMode": {
"mode": "any",
"morphed": true
},
"comesThroughToilet": "any"
}Requires: {
"or": [
"h_artificialMorphPowerBomb",
"canTrickyGMode",
{
"haveBlueSuit": {}
},
{
"enemyDamage": {
"enemy": "Kihunter (green)",
"type": "contact",
"hits": 1
}
}
]
} |
|
Requires: {
"obstaclesCleared": [
"C"
]
} |
|
Requires: {
"enemyDamage": {
"enemy": "Kihunter (green)",
"type": "contact",
"hits": 1
}
} |
|


Jump between the kihunters to avoid damage. To kill the kihunters, shoot them as they come on screen. Requires: "canTrickyJump" "canDodgeWhileShooting" Clears obstacles: C Dev note: This strat can avoid the kihunters well enough to reach further nodes or it can kill them. In both cases tricky dodging and accurate shooting is used. |
From: 1
Left Vertical Door
To: 5
Kihunter Junction
Requires: {
"enemyKill": {
"enemies": [
[
"Kihunter (green)",
"Kihunter (green)",
"Kihunter (green)",
"Kihunter (green)"
]
],
"excludedWeapons": [
"PowerBeam"
]
}
}Clears obstacles: C |
|
Requires: {
"enemyDamage": {
"enemy": "Kihunter (green)",
"type": "contact",
"hits": 1
}
}
{
"or": [
"canCarefulJump",
{
"enemyDamage": {
"enemy": "Kihunter (green)",
"type": "contact",
"hits": 1
}
}
]
}
{
"enemyKill": {
"enemies": [
[
"Kihunter (green)",
"Kihunter (green)",
"Kihunter (green)",
"Kihunter (green)"
]
],
"explicitWeapons": [
"PowerBeam"
]
}
}Clears obstacles: C |
From: 1
Left Vertical Door
To: 5
Kihunter Junction


Farm Kihunters, keeping one alive. Knock its wings off and freeze it on one end of the room, or use i-frames to run through it. Run across to shinecharge, then use the Kihunter to interrupt. Entrance condition: {
"comeInWithRMode": {},
"comesThroughToilet": "no"
}Requires: "canTrickyJump"
"canDodgeWhileShooting"
{
"or": [
"h_CrystalFlashForReserveEnergy",
{
"and": [
"h_RModeCanRefillReserves",
{
"or": [
{
"partialRefill": {
"type": "ReserveEnergy",
"limit": 5
}
},
{
"and": [
{
"partialRefill": {
"type": "ReserveEnergy",
"limit": 20
}
},
"canBeLucky"
]
}
]
}
]
}
]
}
{
"or": [
"canUseIFrames",
"canUseFrozenEnemies"
]
}
{
"canShineCharge": {
"usedTiles": 27,
"openEnd": 2
}
}
{
"autoReserveTrigger": {
"maxReserveEnergy": 95
}
}
"canRModeSparkInterrupt"Clears obstacles: C |
|
Exit condition: {
"leaveWithRunway": {
"length": 9,
"openEnd": 0
}
} |
From: 2
Bottom Right Door
To: 2
Bottom Right Door

Quickly spinjump up into the tunnel to shoot the shotblocks before the KiHunter can swoop down. Stand level with the tunnel and wait for the KiHunter to come down. Once it is in the tunnel, move to the wall to lure it down full. Don't shoot the wings off it or it will spit projectiles at Samus. Instead take a contact hit when it is at the bottom and move towards to door to lure it along. Requires: {
"enemyDamage": {
"enemy": "Kihunter (green)",
"type": "contact",
"hits": 1
}
}
{
"noBlueSuit": {}
}
"canComplexGMode"Exit condition: {
"leaveWithGModeSetup": {}
} |
|
If Samus runs into the room and quickly destroys the shot block, a Kihunter will immediately fall down. To avoid this, either spin jump into the room, or wait a moment before shooting the block. Requires: {
"resetRoom": {
"nodes": [
2
]
}
}
"canDodgeWhileShooting"
{
"or": [
"HiJump",
"canWallJump",
"h_crouchJumpDownGrab",
"SpaceJump"
]
}
{
"or": [
{
"and": [
"canDash",
{
"or": [
{
"and": [
"Plasma",
{
"cycleFrames": 480
}
]
},
{
"and": [
"ScrewAttack",
{
"cycleFrames": 570
}
]
},
{
"and": [
"Wave",
{
"cycleFrames": 660
}
]
},
{
"and": [
"Spazer",
{
"cycleFrames": 660
}
]
},
{
"and": [
"Charge",
{
"cycleFrames": 780
}
]
},
{
"and": [
"Ice",
{
"cycleFrames": 840
}
]
},
{
"and": [
"canTrickyDodgeEnemies",
{
"cycleFrames": 1200
}
]
}
]
}
]
},
{
"and": [
{
"haveBlueSuit": {}
},
{
"cycleFrames": 600
}
]
}
]
}Clears obstacles: C, D Resets obstacles: A, B Farm cycle drops: 4 Kihunter (green) |
|
Requires: "h_CrystalFlash" |
From: 2
Bottom Right Door
To: 2
Bottom Right Door
Entrance condition: {
"comeInShinecharging": {
"length": 8,
"openEnd": 0
},
"comesInHeated": "no"
}Requires: "h_CrystalSpark" |
|
The Kihunters can be killed from below but there is a chance one will drop down the hole. Watch them before breaking the shot block. Requires: {
"or": [
"HiJump",
"SpaceJump",
"canIBJ",
"canWallJump"
]
}Clears obstacles: C, D |
From: 2
Bottom Right Door
To: 5
Kihunter Junction


This crouch jump down grab is a little tighter than most. The Kihunters can be killed from below but there is a chance one will drop down the hole. Watch them before breaking the shot block. Requires: "h_crouchJumpDownGrab" Clears obstacles: C, D |
|


Use a kihunter to knock Samus out of the hole at the peak of her jump This strat may take a few attempts to get a good boost. Requires: {
"obstaclesNotCleared": [
"C"
]
}
"canNeutralDamageBoost"
{
"enemyDamage": {
"enemy": "Kihunter (green)",
"type": "contact",
"hits": 1
}
}
{
"or": [
"canTrickyDodgeEnemies",
{
"enemyDamage": {
"enemy": "Kihunter (green)",
"type": "contact",
"hits": 2
}
}
]
}Clears obstacles: C, D |
|
Climb up 1 screen Entrance condition: {
"comeInWithDoorStuckSetup": {}
}Requires: "canXRayClimb"
{
"enemyDamage": {
"enemy": "Kihunter (green)",
"type": "contact",
"hits": 1
}
}Clears obstacles: C |
From: 2
Bottom Right Door
To: 5
Kihunter Junction
Farm Kihunters from below, keeping one alive. Knock its wings off and either freeze it or take a hit and use i-frames to run through it. Run across the left side of the broken shot block, then use the Kihunter to interrupt. Entrance condition: {
"comeInWithRMode": {}
}Requires: "h_crouchJumpDownGrab"
{
"or": [
"canTrickyDodgeEnemies",
{
"enemyDamage": {
"enemy": "Kihunter (green)",
"type": "contact",
"hits": 2
}
}
]
}
{
"or": [
"h_CrystalFlashForReserveEnergy",
{
"and": [
"h_RModeCanRefillReserves",
{
"or": [
{
"partialRefill": {
"type": "ReserveEnergy",
"limit": 5
}
},
{
"and": [
{
"partialRefill": {
"type": "ReserveEnergy",
"limit": 20
}
},
"canBeLucky"
]
}
]
}
]
}
]
}
{
"or": [
"canUseIFrames",
"canUseFrozenEnemies"
]
}
{
"canShineCharge": {
"usedTiles": 13,
"openEnd": 2
}
}
{
"autoReserveTrigger": {
"maxReserveEnergy": 95
}
}
"canRModeSparkInterrupt"Clears obstacles: C, D |
|
Exit condition: {
"leaveWithRunway": {
"length": 4,
"openEnd": 1
}
} |
From: 3
Top Right Door
To: 3
Top Right Door
Gain temporary blue by running left to right. Spring ball bounce through the tunnel. Then continue chaining temporary blue through the door. Requires: {
"obstaclesCleared": [
"B",
"C"
]
}
{
"or": [
{
"and": [
{
"obstaclesCleared": [
"D"
]
},
{
"canShineCharge": {
"usedTiles": 17,
"openEnd": 1
}
}
]
},
{
"and": [
{
"obstaclesNotCleared": [
"D"
]
},
{
"canShineCharge": {
"usedTiles": 31,
"openEnd": 1
}
}
]
}
]
}
"canChainTemporaryBlue"
"canSpringBallBounce"Exit condition: {
"leaveWithTemporaryBlue": {}
} |
|
Requires: {
"resetRoom": {
"nodes": [
3
]
}
}
"Morph"
{
"or": [
"h_useMorphBombs",
{
"haveBlueSuit": {}
}
]
}
{
"or": [
{
"and": [
"canDash",
{
"or": [
{
"and": [
"Plasma",
{
"cycleFrames": 750
}
]
},
{
"and": [
"ScrewAttack",
{
"cycleFrames": 810
}
]
},
{
"and": [
"Wave",
{
"cycleFrames": 870
}
]
},
{
"and": [
"Spazer",
{
"cycleFrames": 840
}
]
},
{
"and": [
"Charge",
{
"cycleFrames": 945
}
]
},
{
"and": [
"Ice",
{
"cycleFrames": 1005
}
]
},
{
"and": [
"canDodgeWhileShooting",
{
"cycleFrames": 1125
}
]
}
]
}
]
},
{
"and": [
{
"haveBlueSuit": {}
},
{
"cycleFrames": 760
}
]
}
]
}Clears obstacles: B, C Resets obstacles: A, D Farm cycle drops: 4 Kihunter (green) |
|
Requires: "h_CrystalFlash" |
From: 3
Top Right Door
To: 3
Top Right Door
Entrance condition: {
"comeInShinecharging": {
"length": 3,
"openEnd": 0
},
"comesInHeated": "no"
}Requires: "h_CrystalSpark" |
|
The Kihunters can be killed by retreating to the morph tunnel if needed. Requires: "Morph"
{
"obstaclesCleared": [
"B"
]
}Clears obstacles: C |
|
The Kihunters can be killed by retreating to the morph tunnel if needed. Requires: "h_useMorphBombs" Clears obstacles: B, C |
|
The Kihunters can be killed by retreating to the morph tunnel if needed. Placing the Power Bomb far to the left will also destroy the shot blocks going down. Requires: "h_usePowerBomb" Clears obstacles: A, B, C |
|
Requires: {
"haveBlueSuit": {}
}
"Morph"Clears obstacles: B |
From: 3
Top Right Door
To: 5
Kihunter Junction

The Kihunters can be killed by retreating to the morph tunnel if needed. Entrance condition: {
"comeInGettingBlueSpeed": {
"length": 3,
"openEnd": 1,
"maxExtraRunSpeed": "$1.8"
}
}Requires: "canSpeedball" Clears obstacles: B, C Dev note: There is 1 unusable tile in this runway. This can also work at higher run speeds, at least up to $2.A, but this is more difficult and the usable runway would be less. |
From: 3
Top Right Door
To: 5
Kihunter Junction
The Kihunters can be killed by retreating to the morph tunnel if needed. Entrance condition: {
"comeInBlueSpinning": {
"minExtraRunSpeed": "$1.7",
"maxExtraRunSpeed": "$3.8",
"unusableTiles": 2
}
}Requires: "canSpeedball" Clears obstacles: B, C |
From: 3
Top Right Door
To: 5
Kihunter Junction
Approach the morph tunnel by chaining temporary blue; then spring ball bounce through the tunnel to break the bomb block. The Kihunters can be killed by retreating to the morph tunnel if needed. Entrance condition: {
"comeInWithTemporaryBlue": {}
}Requires: "canChainTemporaryBlue" "canTrickySpringBallBounce" Clears obstacles: B, C |
From: 3
Top Right Door
To: 5
Kihunter Junction


Spring ball bounce directly into the tunnel to break the bomb block with blue speed. The Kihunters can be killed by retreating to the morph tunnel if needed. Entrance condition: {
"comeInWithBlueSpringBallBounce": {
"movementType": "controlled",
"maxExtraRunSpeed": "$2.8"
}
}Requires: "canTrickySpringBallBounce" "canInsaneJump" Clears obstacles: B, C |
From: 3
Top Right Door
To: 5
Kihunter Junction
Bomb the block: if using a Power Bomb, place it no further left than under the item to avoid breaking the shot block. Farm Kihunters using the morph tunnel as needed, keeping one alive. Knock its wings off and freeze it on one end of the room, or use i-frames to run through it. Run across to shinecharge, then use the Kihunter to interrupt. Entrance condition: {
"comeInWithRMode": {}
}Requires: "h_bombThings"
{
"or": [
"h_CrystalFlashForReserveEnergy",
{
"and": [
"h_RModeCanRefillReserves",
{
"or": [
{
"partialRefill": {
"type": "ReserveEnergy",
"limit": 5
}
},
{
"and": [
{
"partialRefill": {
"type": "ReserveEnergy",
"limit": 20
}
},
"canBeLucky"
]
}
]
}
]
}
]
}
{
"or": [
"canUseIFrames",
"canUseFrozenEnemies"
]
}
{
"canShineCharge": {
"usedTiles": 27,
"openEnd": 2
}
}
{
"autoReserveTrigger": {
"maxReserveEnergy": 95
}
}
"canRModeSparkInterrupt"Clears obstacles: B, C |
From: 3
Top Right Door
To: 5
Kihunter Junction
Rolling on the ground will overload PLMs by moving through camera scroll blocks. Lure all of the Kihunters to the top right position, then quickly move left, exit g-mode and retreat to one of the other exits. Entrance condition: {
"comeInWithGMode": {
"mode": "any",
"morphed": true
}
} |
|
Requires: "Morph" |
|
Reaching 4 means obstacle B is open. Requires: "Morph" |
|
Requires: {
"or": [
{
"obstaclesCleared": [
"C"
]
},
{
"enemyDamage": {
"enemy": "Kihunter (green)",
"type": "contact",
"hits": 1
}
}
]
} |
From: 5
Kihunter Junction
To: 1
Left Vertical Door
Use the door for additional runway then open it once the Shinecharge is complete. Requires: {
"obstaclesCleared": [
"C"
]
}
{
"obstaclesNotCleared": [
"D"
]
}
{
"canShineCharge": {
"usedTiles": 31,
"openEnd": 1
}
}
{
"shineChargeFrames": 75
}Exit condition: {
"leaveShinecharged": {}
}Unlocks doors: {"types":["super"],"requires":[]}
{"types":["missiles","powerbomb"],"requires":["never"]}Dev note: It could be useful to have a proper way to represent that this strat requires the door not to be open. If it were a locked red or green door, you would not be able to unlock it as part of this strat unless you could reset the room. |
From: 5
Kihunter Junction
To: 1
Left Vertical Door
Use the door for additional runway then open it once the Shinecharge is complete. Requires: {
"obstaclesCleared": [
"C",
"D"
]
}
{
"canShineCharge": {
"usedTiles": 17,
"openEnd": 1
}
}
{
"shineChargeFrames": 75
}Exit condition: {
"leaveShinecharged": {}
}Unlocks doors: {"types":["super"],"requires":[]}
{"types":["missiles","powerbomb"],"requires":["never"]}Dev note: It could be useful to have a proper way to represent that this strat requires the door not to be open. If it were a locked red or green door, you would not be able to unlock it as part of this strat unless you could reset the room. |
|
Clears obstacles: D |
From: 5
Kihunter Junction
To: 2
Bottom Right Door
Charge a spark, then break the shot blocks, drop through, and spark out the bottom right door. Requires: "canShinechargeMovementComplex"
{
"obstaclesCleared": [
"C"
]
}
{
"obstaclesNotCleared": [
"D"
]
}
{
"canShineCharge": {
"usedTiles": 25,
"openEnd": 0
}
}
{
"shinespark": {
"frames": 20,
"excessFrames": 0
}
}Exit condition: {
"leaveWithSpark": {}
}Unlocks doors: {"types":["super"],"requires":[]}
{"types":["missiles","powerbomb"],"requires":["never"]} |
From: 5
Kihunter Junction
To: 2
Bottom Right Door
Break the shot block, then gain a shinecharge while sliding off the ledge, down toward the bottom right door. Requires: "canShinechargeMovementTricky"
{
"obstaclesCleared": [
"C"
]
}
{
"obstaclesNotCleared": [
"D"
]
}
{
"canShineCharge": {
"usedTiles": 17,
"openEnd": 1
}
}
{
"shineChargeFrames": 140
}Exit condition: {
"leaveShinecharged": {}
}Unlocks doors: {"types":["super"],"requires":[]}
{"types":["missiles","powerbomb"],"requires":["never"]} |
|
Requires: "Morph"
{
"or": [
"h_useMorphBombs",
{
"obstaclesCleared": [
"B"
]
}
]
}Clears obstacles: B |
|
Placing the Power Bomb against the right wall will not break the shot blocks going down. Requires: "h_usePowerBomb" Clears obstacles: A, B, C |
|
Requires: {
"haveBlueSuit": {}
}
"Morph"Clears obstacles: B |
|
A very low horizontal speed is needed to drop down and break the block without hitting the corner to the left or the block above the bomb block. Or with Temporary Blue, Samus can bounce into the bomb block. Requires: {
"notable": "Speedball"
}
"Morph"
{
"obstaclesCleared": [
"C"
]
}
{
"obstaclesNotCleared": [
"D"
]
}
{
"or": [
{
"and": [
{
"getBlueSpeed": {
"usedTiles": 17,
"openEnd": 0
}
},
"canSlowShortCharge",
"canSpeedball"
]
},
{
"and": [
{
"canShineCharge": {
"usedTiles": 30,
"openEnd": 1
}
},
"canTemporaryBlue",
"canLateralMidAirMorph"
]
}
]
}Clears obstacles: B |
From: 5
Kihunter Junction
To: 3
Top Right Door
Generate a charge on the left side and carry it through the morph tunnel and out the right door. Requires: {
"obstaclesCleared": [
"B",
"C"
]
}
{
"obstaclesNotCleared": [
"D"
]
}
{
"canShineCharge": {
"usedTiles": 31,
"openEnd": 1
}
}
"canShinechargeMovementTricky"
"Morph"
{
"shinespark": {
"frames": 13,
"excessFrames": 0
}
}Exit condition: {
"leaveWithSpark": {}
}Unlocks doors: {"types":["super"],"requires":[]}
{"types":["missiles","powerbomb"],"requires":["never"]} |
From: 5
Kihunter Junction
To: 3
Top Right Door


Generate a charge on the left side and carry it through the morph tunnel and out the right door. Requires: {
"obstaclesCleared": [
"B",
"C",
"D"
]
}
{
"canShineCharge": {
"usedTiles": 13,
"openEnd": 2
}
}
"canShinechargeMovementTricky"
"Morph"
{
"shinespark": {
"frames": 13,
"excessFrames": 0
}
}Exit condition: {
"leaveWithSpark": {}
}Unlocks doors: {"types":["super"],"requires":[]}
{"types":["missiles","powerbomb"],"requires":["never"]} |
|
Requires: {
"or": [
"canMidAirMorph",
"h_useSpringBall",
"canIBJ"
]
}
{
"obstaclesCleared": [
"A"
]
} |
|


Requires: "h_usePowerBomb"
{
"or": [
"canMidAirMorph",
"h_useSpringBall",
"canIBJ"
]
}Clears obstacles: A, B, C |
{
"$schema": "../../../schema/m3-room.schema.json",
"id": 81,
"name": "Warehouse Kihunter Room",
"area": "Brinstar",
"subarea": "Kraid",
"roomAddress": "0x7A4DA",
"roomEnvironments": [
{
"heated": false
}
],
"mapTileMask": [
[
1,
1,
1,
1
],
[
0,
1,
0,
0
]
],
"nodes": [
{
"id": 1,
"name": "Left Vertical Door",
"nodeType": "door",
"nodeSubType": "blue",
"nodeAddress": "0x001916e",
"doorOrientation": "down",
"doorEnvironments": [
{
"physics": "air"
}
],
"mapTileMask": [
[
2,
1,
1,
1
],
[
0,
1,
0,
0
]
]
},
{
"id": 2,
"name": "Bottom Right Door",
"nodeType": "door",
"nodeSubType": "blue",
"nodeAddress": "0x001917a",
"doorOrientation": "right",
"doorEnvironments": [
{
"physics": "air"
}
],
"mapTileMask": [
[
1,
1,
1,
1
],
[
0,
2,
0,
0
]
]
},
{
"id": 3,
"name": "Top Right Door",
"nodeType": "door",
"nodeSubType": "blue",
"nodeAddress": "0x0019186",
"doorOrientation": "right",
"doorEnvironments": [
{
"physics": "air"
}
],
"mapTileMask": [
[
1,
1,
1,
2
],
[
0,
1,
0,
0
]
]
},
{
"id": 4,
"name": "Hidden Item",
"nodeType": "item",
"nodeSubType": "hidden",
"nodeItem": "Missile",
"nodeAddress": "0x789EC",
"mapTileMask": [
[
1,
1,
2,
1
],
[
0,
1,
0,
0
]
],
"locks": [
{
"name": "Dummy Item Lock",
"lockType": "gameFlag",
"unlockStrats": [
{
"name": "Base (Collect Item)",
"notable": false,
"requires": [],
"flashSuitChecked": true,
"blueSuitChecked": true
}
]
}
]
},
{
"id": 5,
"name": "Kihunter Junction",
"nodeType": "junction",
"nodeSubType": "junction",
"mapTileMask": [
[
1,
2,
2,
1
],
[
0,
1,
0,
0
]
]
}
],
"obstacles": [
{
"id": "A",
"name": "Power Bomb Blocks",
"obstacleType": "inanimate"
},
{
"id": "B",
"name": "Bomb Block",
"obstacleType": "inanimate"
},
{
"id": "C",
"name": "Kihunters",
"obstacleType": "enemies"
},
{
"id": "D",
"name": "Floor Shot Blocks",
"obstacleType": "inanimate"
}
],
"enemies": [
{
"id": "e1",
"groupName": "Warehouse Kihunters",
"enemyName": "Kihunter (green)",
"quantity": 4,
"homeNodes": [
5
]
}
],
"strats": [
{
"link": [
1,
1
],
"name": "Base (Unlock Door)",
"requires": [],
"unlocksDoors": [
{
"types": [
"ammo"
],
"requires": []
}
],
"flashSuitChecked": true,
"blueSuitChecked": true
},
{
"link": [
1,
1
],
"name": "Base (Come In Normally)",
"entranceCondition": {
"comeInNormally": {}
},
"requires": [],
"flashSuitChecked": true,
"blueSuitChecked": true
},
{
"link": [
1,
1
],
"name": "Base (Come In With Grapple Jump)",
"entranceCondition": {
"comeInWithGrappleJump": {
"position": "any"
}
},
"requires": [],
"flashSuitChecked": true,
"blueSuitChecked": true
},
{
"link": [
2,
2
],
"name": "Base (Unlock Door)",
"requires": [],
"unlocksDoors": [
{
"types": [
"ammo"
],
"requires": []
}
],
"flashSuitChecked": true,
"blueSuitChecked": true
},
{
"link": [
2,
2
],
"name": "Base (Come In Normally)",
"entranceCondition": {
"comeInNormally": {}
},
"requires": [],
"flashSuitChecked": true,
"blueSuitChecked": true
},
{
"link": [
2,
2
],
"name": "Base (Come In With Mockball)",
"entranceCondition": {
"comeInWithMockball": {
"adjacentMinTiles": 0,
"remoteAndLandingMinTiles": [
[
0,
0
]
],
"speedBooster": "any"
}
},
"requires": [],
"flashSuitChecked": true,
"blueSuitChecked": true
},
{
"link": [
3,
3
],
"name": "Base (Unlock Door)",
"requires": [],
"unlocksDoors": [
{
"types": [
"ammo"
],
"requires": []
}
],
"flashSuitChecked": true,
"blueSuitChecked": true
},
{
"link": [
3,
3
],
"name": "Base (Come In Normally)",
"entranceCondition": {
"comeInNormally": {}
},
"requires": [],
"flashSuitChecked": true,
"blueSuitChecked": true
},
{
"link": [
3,
3
],
"name": "Base (Come In With Mockball)",
"entranceCondition": {
"comeInWithMockball": {
"adjacentMinTiles": 0,
"remoteAndLandingMinTiles": [
[
0,
0
]
],
"speedBooster": "any"
}
},
"requires": [],
"flashSuitChecked": true,
"blueSuitChecked": true
},
{
"name": "Base (Collect Item)",
"notable": false,
"requires": [],
"flashSuitChecked": true,
"blueSuitChecked": true,
"link": [
4,
4
],
"collectsItems": [
4
]
},
{
"id": 1,
"link": [
1,
1
],
"name": "Shinespark",
"entranceCondition": {
"comeInWithSpark": {},
"comesThroughToilet": "any"
},
"requires": [
{
  "shinespark": {
    "frames": 5,
    "excessFrames": 5
  }
}
],
"flashSuitChecked": true,
"blueSuitChecked": true,
"devNote": "This strat is not useful in-room, but can satisfy a strat in the room before with an exit shinespark."
},
{
"id": 2,
"link": [
1,
1
],
"name": "Leave Shinecharged (Open Door, Shot Block Intact)",
"requires": [
{
"obstaclesCleared": [
"C"
]
},
{
"obstaclesNotCleared": [
"D"
]
},
{
"canShineCharge": {
"usedTiles": 27,
"openEnd": 2
}
},
{
"shineChargeFrames": 35
}
],
"exitCondition": {
"leaveShinecharged": {}
},
"flashSuitChecked": true,
"blueSuitChecked": true
},
{
"id": 3,
"link": [
1,
1
],
"name": "Leave Shinecharged (Open Door, Shot Block Broken)",
"requires": [
{
"obstaclesCleared": [
"C",
"D"
]
},
{
"canShineCharge": {
"usedTiles": 13,
"openEnd": 2
}
},
{
"shineChargeFrames": 35
}
],
"exitCondition": {
"leaveShinecharged": {}
},
"flashSuitChecked": true,
"blueSuitChecked": true
},
{
"id": 5,
"link": [
1,
1
],
"name": "Leave With Temporary Blue",
"requires": [
{
"obstaclesCleared": [
"C"
]
},
{
"or": [
{
"and": [
{
"obstaclesNotCleared": [
"D"
]
},
{
"canShineCharge": {
"usedTiles": 27,
"openEnd": 1
}
}
]
},
{
"and": [
{
"obstaclesCleared": [
"D"
]
},
{
"canShineCharge": {
"usedTiles": 13,
"openEnd": 2
}
}
]
}
]
}
],
"exitCondition": {
"leaveWithTemporaryBlue": {
"direction": "left"
}
},
"flashSuitChecked": true,
"blueSuitChecked": true
},
{
"id": 55,
"link": [
1,
1
],
"name": "Crystal Spark",
"requires": [
{
"obstaclesCleared": [
"C"
]
},
{
"or": [
{
"canShineCharge": {
"usedTiles": 17,
"openEnd": 1
}
},
{
"and": [
{
"obstaclesNotCleared": [
"D"
]
},
{
"canShineCharge": {
"usedTiles": 31,
"openEnd": 1
}
}
]
}
]
},
"h_CrystalSpark"
],
"flashSuitChecked": true,
"blueSuitChecked": true,
"devNote": [
"FIXME: This assumes the left door is not a Power Bomb locked door.",
"Otherwise Samus would need to shinecharge the other direction and would break the floor blocks"
]
},
{
"id": 46,
"link": [
1,
1
],
"name": "Kihunter Ice Moonfall Door Lock Skip",
"requires": [
{
"noBlueSuit": {}
},
"canTrickyUseFrozenEnemies",
{
"or": [
"Charge",
"Plasma"
]
},
{
"enemyDamage": {
"enemy": "Kihunter (green)",
"type": "contact",
"hits": 2
}
},
"canEnemyStuckMoonfall",
"canFreeFallClip"
],
"bypassesDoorShell": "yes",
"flashSuitChecked": true,
"blueSuitChecked": true,
"note": [
"Freeze two Kihunters above the door to be able to moonfall between them.",
"After gaining enough speed, hold backward to move forward and buffer a turnaround to clip through the door."
],
"detailNote": [
"Plasma or Charge are needed in order to be able to freeze the Kihunters mid-air;",
"otherwise they would lose their wings and fall to the ground."
],
"devNote": [
"Manipulating the Kihunters is difficult.",
"It might be possible to avoid enemy damage but this would be even more difficult."
]
},
{
"id": 47,
"link": [
1,
1
],
"name": "Kihunter Farm",
"requires": [
{
"resetRoom": {
"nodes": [
1
]
}
},
{
"or": [
{
"and": [
"canDash",
{
"or": [
{
"and": [
"ScrewAttack",
{
"cycleFrames": 360
}
]
},
{
"and": [
"Plasma",
{
"cycleFrames": 360
}
]
},
{
"and": [
"Wave",
{
"cycleFrames": 390
}
]
},
{
"and": [
"Spazer",
{
"cycleFrames": 390
}
]
},
{
"and": [
"Ice",
"canDodgeWhileShooting",
{
"cycleFrames": 600
}
]
},
{
"and": [
"canPseudoScrew",
"canTrickyDodgeEnemies",
{
"cycleFrames": 600
}
]
},
{
"and": [
"canTrickyDodgeEnemies",
{
"cycleFrames": 1000
}
]
}
]
}
]
},
{
"and": [
{
"haveBlueSuit": {}
},
{
"cycleFrames": 360
}
]
}
]
}
],
"clearsObstacles": [
"C"
],
"resetsObstacles": [
"A",
"B",
"D"
],
"farmCycleDrops": [
{
"enemy": "Kihunter (green)",
"count": 4
}
],
"flashSuitChecked": true,
"blueSuitChecked": true
},
{
"id": 6,
"link": [
1,
1
],
"name": "Crystal Flash",
"requires": [
{
"obstaclesCleared": [
"C"
]
},
"h_CrystalFlash"
],
"flashSuitChecked": true,
"blueSuitChecked": true
},
{
"id": 7,
"link": [
1,
1
],
"name": "G-Mode Regain Mobility",
"requires": [
{
  "enemyDamage": {
    "enemy": "Kihunter (green)",
    "type": "contact",
    "hits": 1
  }
}
],
"gModeRegainMobility": {},
"flashSuitChecked": true,
"blueSuitChecked": true,
"devNote": "It looks like the only way to remain in the room is by starting on the right side and triggering a turnaround, with or without artificial morph."
},
{
"id": 8,
"link": [
1,
3
],
"name": "G-Mode Morph Overload PLMs",
"entranceCondition": {
"comeInWithGMode": {
"mode": "any",
"morphed": true
},
"comesThroughToilet": "any"
},
"requires": [
{
  "or": [
    "h_artificialMorphPowerBomb",
    "canTrickyGMode",
    {
      "haveBlueSuit": {}
    },
    {
      "enemyDamage": {
        "enemy": "Kihunter (green)",
        "type": "contact",
        "hits": 1
      }
    }
  ]
}
],
"flashSuitChecked": true,
"blueSuitChecked": true,
"note": [
"Overload the PLMs by rolling through the camera scroll blocks which are just above the shot blocks.",
"It is possible but tricky to do this damageless without a Power Bomb or blue suit. Get the first Kihunter to swoop left twice,",
"then quickly move back and forth getting each other Kihunter to swoop without touching Samus.",
"In immobile, the Kihunters are in a worse location, but Samus starts with i-frames, so it is a similar difficulty."
]
},
{
"id": 9,
"link": [
1,
5
],
"name": "Already Killed",
"requires": [
{
  "obstaclesCleared": [
    "C"
  ]
}
],
"flashSuitChecked": true,
"blueSuitChecked": true
},
{
"id": 10,
"link": [
1,
5
],
"name": "Take Damage",
"requires": [
{
  "enemyDamage": {
    "enemy": "Kihunter (green)",
    "type": "contact",
    "hits": 1
  }
}
],
"flashSuitChecked": true,
"blueSuitChecked": true
},
{
"id": 11,
"link": [
1,
5
],
"name": "Tricky Dodge",
"requires": [
"canTrickyJump",
"canDodgeWhileShooting"
],
"clearsObstacles": [
"C"
],
"flashSuitChecked": true,
"blueSuitChecked": true,
"note": [
"Jump between the kihunters to avoid damage.",
"To kill the kihunters, shoot them as they come on screen."
],
"devNote": [
"This strat can avoid the kihunters well enough to reach further nodes or it can kill them.",
"In both cases tricky dodging and accurate shooting is used."
]
},
{
"id": 12,
"link": [
1,
5
],
"name": "Quick Kihunter Kill",
"requires": [
{
  "enemyKill": {
    "enemies": [
      [
        "Kihunter (green)",
        "Kihunter (green)",
        "Kihunter (green)",
        "Kihunter (green)"
      ]
    ],
    "excludedWeapons": [
      "PowerBeam"
    ]
  }
}
],
"clearsObstacles": [
"C"
],
"flashSuitChecked": true,
"blueSuitChecked": true
},
{
"id": 13,
"link": [
1,
5
],
"name": "Power Beam Kill",
"requires": [
{
"enemyDamage": {
"enemy": "Kihunter (green)",
"type": "contact",
"hits": 1
}
},
{
"or": [
"canCarefulJump",
{
"enemyDamage": {
"enemy": "Kihunter (green)",
"type": "contact",
"hits": 1
}
}
]
},
{
"enemyKill": {
"enemies": [
[
"Kihunter (green)",
"Kihunter (green)",
"Kihunter (green)",
"Kihunter (green)"
]
],
"explicitWeapons": [
"PowerBeam"
]
}
}
],
"clearsObstacles": [
"C"
],
"flashSuitChecked": true,
"blueSuitChecked": true
},
{
"id": 50,
"link": [
1,
5
],
"name": "R-Mode Spark Interrupt",
"entranceCondition": {
"comeInWithRMode": {},
"comesThroughToilet": "no"
},
"requires": [
"canTrickyJump",
"canDodgeWhileShooting",
{
"or": [
"h_CrystalFlashForReserveEnergy",
{
"and": [
"h_RModeCanRefillReserves",
{
"or": [
{
"partialRefill": {
"type": "ReserveEnergy",
"limit": 5
}
},
{
"and": [
{
"partialRefill": {
"type": "ReserveEnergy",
"limit": 20
}
},
"canBeLucky"
]
}
]
}
]
}
]
},
{
"or": [
"canUseIFrames",
"canUseFrozenEnemies"
]
},
{
"canShineCharge": {
"usedTiles": 27,
"openEnd": 2
}
},
{
"autoReserveTrigger": {
"maxReserveEnergy": 95
}
},
"canRModeSparkInterrupt"
],
"clearsObstacles": [
"C"
],
"flashSuitChecked": true,
"blueSuitChecked": true,
"note": [
"Farm Kihunters, keeping one alive. Knock its wings off and freeze it on one end of the room, or use i-frames to run through it.",
"Run across to shinecharge, then use the Kihunter to interrupt."
]
},
{
"id": 14,
"link": [
2,
2
],
"name": "Leave With Runway",
"requires": [],
"exitCondition": {
"leaveWithRunway": {
"length": 9,
"openEnd": 0
}
},
"flashSuitChecked": true,
"blueSuitChecked": true
},
{
"id": 58,
"link": [
2,
2
],
"name": "G-Mode Setup - Get Hit By KiHunter",
"requires": [
{
"enemyDamage": {
"enemy": "Kihunter (green)",
"type": "contact",
"hits": 1
}
},
{
"noBlueSuit": {}
},
"canComplexGMode"
],
"exitCondition": {
"leaveWithGModeSetup": {}
},
"flashSuitChecked": true,
"blueSuitChecked": true,
"note": [
"Quickly spinjump up into the tunnel to shoot the shotblocks before the KiHunter can swoop down.",
"Stand level with the tunnel and wait for the KiHunter to come down. Once it is in the tunnel, move to the wall to lure it down full.",
"Don't shoot the wings off it or it will spit projectiles at Samus. Instead take a contact hit when it is at the bottom and move towards to door to lure it along."
]
},
{
"id": 48,
"link": [
2,
2
],
"name": "Kihunter Farm",
"requires": [
{
"resetRoom": {
"nodes": [
2
]
}
},
"canDodgeWhileShooting",
{
"or": [
"HiJump",
"canWallJump",
"h_crouchJumpDownGrab",
"SpaceJump"
]
},
{
"or": [
{
"and": [
"canDash",
{
"or": [
{
"and": [
"Plasma",
{
"cycleFrames": 480
}
]
},
{
"and": [
"ScrewAttack",
{
"cycleFrames": 570
}
]
},
{
"and": [
"Wave",
{
"cycleFrames": 660
}
]
},
{
"and": [
"Spazer",
{
"cycleFrames": 660
}
]
},
{
"and": [
"Charge",
{
"cycleFrames": 780
}
]
},
{
"and": [
"Ice",
{
"cycleFrames": 840
}
]
},
{
"and": [
"canTrickyDodgeEnemies",
{
"cycleFrames": 1200
}
]
}
]
}
]
},
{
"and": [
{
"haveBlueSuit": {}
},
{
"cycleFrames": 600
}
]
}
]
}
],
"clearsObstacles": [
"C",
"D"
],
"resetsObstacles": [
"A",
"B"
],
"farmCycleDrops": [
{
"enemy": "Kihunter (green)",
"count": 4
}
],
"flashSuitChecked": false,
"blueSuitChecked": true,
"note": [
"If Samus runs into the room and quickly destroys the shot block, a Kihunter will immediately fall down.",
"To avoid this, either spin jump into the room, or wait a moment before shooting the block."
]
},
{
"id": 15,
"link": [
2,
2
],
"name": "Crystal Flash",
"requires": [
"h_CrystalFlash"
],
"flashSuitChecked": true,
"blueSuitChecked": true
},
{
"id": 56,
"link": [
2,
2
],
"name": "Come in Shinecharging, Crystal Spark",
"entranceCondition": {
"comeInShinecharging": {
"length": 8,
"openEnd": 0
},
"comesInHeated": "no"
},
"requires": [
"h_CrystalSpark"
],
"flashSuitChecked": true,
"blueSuitChecked": true
},
{
"id": 16,
"link": [
2,
5
],
"name": "Base",
"requires": [
{
  "or": [
    "HiJump",
    "SpaceJump",
    "canIBJ",
    "canWallJump"
  ]
}
],
"clearsObstacles": [
"C",
"D"
],
"flashSuitChecked": false,
"blueSuitChecked": true,
"note": "The Kihunters can be killed from below but there is a chance one will drop down the hole. Watch them before breaking the shot block."
},
{
"id": 17,
"link": [
2,
5
],
"name": "Crouch Jump Down Grab",
"requires": [
"h_crouchJumpDownGrab"
],
"clearsObstacles": [
"C",
"D"
],
"flashSuitChecked": true,
"blueSuitChecked": true,
"note": [
"This crouch jump down grab is a little tighter than most.",
"The Kihunters can be killed from below but there is a chance one will drop down the hole. Watch them before breaking the shot block."
]
},
{
"id": 18,
"link": [
2,
5
],
"name": "Damage Boost",
"requires": [
{
"obstaclesNotCleared": [
"C"
]
},
"canNeutralDamageBoost",
{
"enemyDamage": {
"enemy": "Kihunter (green)",
"type": "contact",
"hits": 1
}
},
{
"or": [
"canTrickyDodgeEnemies",
{
"enemyDamage": {
"enemy": "Kihunter (green)",
"type": "contact",
"hits": 2
}
}
]
}
],
"clearsObstacles": [
"C",
"D"
],
"flashSuitChecked": true,
"blueSuitChecked": true,
"note": [
"Use a kihunter to knock Samus out of the hole at the peak of her jump",
"This strat may take a few attempts to get a good boost."
]
},
{
"id": 19,
"link": [
2,
5
],
"name": "X-Ray Climb",
"entranceCondition": {
"comeInWithDoorStuckSetup": {}
},
"requires": [
"canXRayClimb",
{
"enemyDamage": {
"enemy": "Kihunter (green)",
"type": "contact",
"hits": 1
}
}
],
"clearsObstacles": [
"C"
],
"flashSuitChecked": true,
"blueSuitChecked": true,
"note": "Climb up 1 screen"
},
{
"id": 51,
"link": [
2,
5
],
"name": "R-Mode Spark Interrupt",
"entranceCondition": {
"comeInWithRMode": {}
},
"requires": [
"h_crouchJumpDownGrab",
{
"or": [
"canTrickyDodgeEnemies",
{
"enemyDamage": {
"enemy": "Kihunter (green)",
"type": "contact",
"hits": 2
}
}
]
},
{
"or": [
"h_CrystalFlashForReserveEnergy",
{
"and": [
"h_RModeCanRefillReserves",
{
"or": [
{
"partialRefill": {
"type": "ReserveEnergy",
"limit": 5
}
},
{
"and": [
{
"partialRefill": {
"type": "ReserveEnergy",
"limit": 20
}
},
"canBeLucky"
]
}
]
}
]
}
]
},
{
"or": [
"canUseIFrames",
"canUseFrozenEnemies"
]
},
{
"canShineCharge": {
"usedTiles": 13,
"openEnd": 2
}
},
{
"autoReserveTrigger": {
"maxReserveEnergy": 95
}
},
"canRModeSparkInterrupt"
],
"clearsObstacles": [
"C",
"D"
],
"flashSuitChecked": true,
"blueSuitChecked": true,
"note": [
"Farm Kihunters from below, keeping one alive. Knock its wings off and either freeze it or take a hit and use i-frames to run through it.",
"Run across the left side of the broken shot block, then use the Kihunter to interrupt."
]
},
{
"id": 20,
"link": [
3,
3
],
"name": "Leave With Runway",
"requires": [],
"exitCondition": {
"leaveWithRunway": {
"length": 4,
"openEnd": 1
}
},
"flashSuitChecked": true,
"blueSuitChecked": true
},
{
"id": 21,
"link": [
3,
3
],
"name": "Leave With Temporary Blue (Spring Ball Bounce)",
"requires": [
{
"obstaclesCleared": [
"B",
"C"
]
},
{
"or": [
{
"and": [
{
"obstaclesCleared": [
"D"
]
},
{
"canShineCharge": {
"usedTiles": 17,
"openEnd": 1
}
}
]
},
{
"and": [
{
"obstaclesNotCleared": [
"D"
]
},
{
"canShineCharge": {
"usedTiles": 31,
"openEnd": 1
}
}
]
}
]
},
"canChainTemporaryBlue",
"canSpringBallBounce"
],
"exitCondition": {
"leaveWithTemporaryBlue": {}
},
"flashSuitChecked": true,
"blueSuitChecked": true,
"note": [
"Gain temporary blue by running left to right.",
"Spring ball bounce through the tunnel.",
"Then continue chaining temporary blue through the door."
]
},
{
"id": 49,
"link": [
3,
3
],
"name": "Kihunter Farm",
"requires": [
{
"resetRoom": {
"nodes": [
3
]
}
},
"Morph",
{
"or": [
"h_useMorphBombs",
{
"haveBlueSuit": {}
}
]
},
{
"or": [
{
"and": [
"canDash",
{
"or": [
{
"and": [
"Plasma",
{
"cycleFrames": 750
}
]
},
{
"and": [
"ScrewAttack",
{
"cycleFrames": 810
}
]
},
{
"and": [
"Wave",
{
"cycleFrames": 870
}
]
},
{
"and": [
"Spazer",
{
"cycleFrames": 840
}
]
},
{
"and": [
"Charge",
{
"cycleFrames": 945
}
]
},
{
"and": [
"Ice",
{
"cycleFrames": 1005
}
]
},
{
"and": [
"canDodgeWhileShooting",
{
"cycleFrames": 1125
}
]
}
]
}
]
},
{
"and": [
{
"haveBlueSuit": {}
},
{
"cycleFrames": 760
}
]
}
]
}
],
"clearsObstacles": [
"B",
"C"
],
"resetsObstacles": [
"A",
"D"
],
"farmCycleDrops": [
{
"enemy": "Kihunter (green)",
"count": 4
}
],
"flashSuitChecked": true,
"blueSuitChecked": true
},
{
"id": 22,
"link": [
3,
3
],
"name": "Crystal Flash",
"requires": [
"h_CrystalFlash"
],
"flashSuitChecked": true,
"blueSuitChecked": true
},
{
"id": 57,
"link": [
3,
3
],
"name": "Come in Shinecharging, Crystal Spark",
"entranceCondition": {
"comeInShinecharging": {
"length": 3,
"openEnd": 0
},
"comesInHeated": "no"
},
"requires": [
"h_CrystalSpark"
],
"flashSuitChecked": true,
"blueSuitChecked": true
},
{
"id": 23,
"link": [
3,
5
],
"name": "Block Already Broken",
"requires": [
"Morph",
{
"obstaclesCleared": [
"B"
]
}
],
"clearsObstacles": [
"C"
],
"flashSuitChecked": true,
"blueSuitChecked": true,
"note": "The Kihunters can be killed by retreating to the morph tunnel if needed."
},
{
"id": 24,
"link": [
3,
5
],
"name": "Bomb the Block",
"requires": [
"h_useMorphBombs"
],
"clearsObstacles": [
"B",
"C"
],
"flashSuitChecked": true,
"blueSuitChecked": true,
"note": "The Kihunters can be killed by retreating to the morph tunnel if needed."
},
{
"id": 25,
"link": [
3,
5
],
"name": "Power Bomb the Block",
"requires": [
"h_usePowerBomb"
],
"clearsObstacles": [
"A",
"B",
"C"
],
"flashSuitChecked": true,
"blueSuitChecked": true,
"note": [
"The Kihunters can be killed by retreating to the morph tunnel if needed.",
"Placing the Power Bomb far to the left will also destroy the shot blocks going down."
]
},
{
"id": 52,
"link": [
3,
5
],
"name": "Blue Suit",
"requires": [
{
"haveBlueSuit": {}
},
"Morph"
],
"clearsObstacles": [
"B"
],
"flashSuitChecked": true,
"blueSuitChecked": true
},
{
"id": 26,
"link": [
3,
5
],
"name": "Speedball (Come in Getting Blue Speed)",
"entranceCondition": {
"comeInGettingBlueSpeed": {
"length": 3,
"openEnd": 1,
"maxExtraRunSpeed": "$1.8"
}
},
"requires": [
"canSpeedball"
],
"clearsObstacles": [
"B",
"C"
],
"flashSuitChecked": true,
"blueSuitChecked": true,
"note": "The Kihunters can be killed by retreating to the morph tunnel if needed.",
"devNote": [
"There is 1 unusable tile in this runway.",
"This can also work at higher run speeds, at least up to $2.A, but this is more difficult and the usable runway would be less."
]
},
{
"id": 27,
"link": [
3,
5
],
"name": "Speedball (Come in Blue Spinning)",
"entranceCondition": {
"comeInBlueSpinning": {
"minExtraRunSpeed": "$1.7",
"maxExtraRunSpeed": "$3.8",
"unusableTiles": 2
}
},
"requires": [
"canSpeedball"
],
"clearsObstacles": [
"B",
"C"
],
"flashSuitChecked": true,
"blueSuitChecked": true,
"note": "The Kihunters can be killed by retreating to the morph tunnel if needed."
},
{
"id": 28,
"link": [
3,
5
],
"name": "Temporary Blue Spring Ball Bounce",
"entranceCondition": {
"comeInWithTemporaryBlue": {}
},
"requires": [
"canChainTemporaryBlue",
"canTrickySpringBallBounce"
],
"clearsObstacles": [
"B",
"C"
],
"flashSuitChecked": true,
"blueSuitChecked": true,
"note": [
"Approach the morph tunnel by chaining temporary blue; then spring ball bounce through the tunnel to break the bomb block.",
"The Kihunters can be killed by retreating to the morph tunnel if needed."
]
},
{
"id": 29,
"link": [
3,
5
],
"name": "Blue Spring Ball Bounce",
"entranceCondition": {
"comeInWithBlueSpringBallBounce": {
"movementType": "controlled",
"maxExtraRunSpeed": "$2.8"
}
},
"requires": [
"canTrickySpringBallBounce",
"canInsaneJump"
],
"clearsObstacles": [
"B",
"C"
],
"flashSuitChecked": true,
"blueSuitChecked": true,
"note": [
"Spring ball bounce directly into the tunnel to break the bomb block with blue speed.",
"The Kihunters can be killed by retreating to the morph tunnel if needed."
]
},
{
"id": 53,
"link": [
3,
5
],
"name": "R-Mode Spark Interrupt",
"entranceCondition": {
"comeInWithRMode": {}
},
"requires": [
"h_bombThings",
{
"or": [
"h_CrystalFlashForReserveEnergy",
{
"and": [
"h_RModeCanRefillReserves",
{
"or": [
{
"partialRefill": {
"type": "ReserveEnergy",
"limit": 5
}
},
{
"and": [
{
"partialRefill": {
"type": "ReserveEnergy",
"limit": 20
}
},
"canBeLucky"
]
}
]
}
]
}
]
},
{
"or": [
"canUseIFrames",
"canUseFrozenEnemies"
]
},
{
"canShineCharge": {
"usedTiles": 27,
"openEnd": 2
}
},
{
"autoReserveTrigger": {
"maxReserveEnergy": 95
}
},
"canRModeSparkInterrupt"
],
"clearsObstacles": [
"B",
"C"
],
"flashSuitChecked": true,
"blueSuitChecked": true,
"note": [
"Bomb the block: if using a Power Bomb, place it no further left than under the item to avoid breaking the shot block.",
"Farm Kihunters using the morph tunnel as needed, keeping one alive. Knock its wings off and freeze it on one end of the room, or use i-frames to run through it.",
"Run across to shinecharge, then use the Kihunter to interrupt."
]
},
{
"id": 30,
"link": [
3,
5
],
"name": "G-Mode Morph Overload PLMs",
"entranceCondition": {
"comeInWithGMode": {
"mode": "any",
"morphed": true
}
},
"requires": [],
"flashSuitChecked": true,
"blueSuitChecked": true,
"note": [
"Rolling on the ground will overload PLMs by moving through camera scroll blocks.",
"Lure all of the Kihunters to the top right position, then quickly move left, exit g-mode and retreat to one of the other exits."
]
},
{
"id": 31,
"link": [
4,
3
],
"name": "Base",
"requires": [
"Morph"
],
"flashSuitChecked": true,
"blueSuitChecked": true
},
{
"id": 32,
"link": [
4,
5
],
"name": "Base",
"requires": [
"Morph"
],
"flashSuitChecked": true,
"blueSuitChecked": true,
"note": "Reaching 4 means obstacle B is open."
},
{
"id": 33,
"link": [
5,
1
],
"name": "Base",
"requires": [
{
  "or": [
    {
      "obstaclesCleared": [
        "C"
      ]
    },
    {
      "enemyDamage": {
        "enemy": "Kihunter (green)",
        "type": "contact",
        "hits": 1
      }
    }
  ]
}
],
"flashSuitChecked": true,
"blueSuitChecked": true
},
{
"id": 34,
"link": [
5,
1
],
"name": "Leave Shinecharged (Closed Door, Shot Block Intact)",
"requires": [
{
"obstaclesCleared": [
"C"
]
},
{
"obstaclesNotCleared": [
"D"
]
},
{
"canShineCharge": {
"usedTiles": 31,
"openEnd": 1
}
},
{
"shineChargeFrames": 75
}
],
"exitCondition": {
"leaveShinecharged": {}
},
"unlocksDoors": [
{
"types": [
"super"
],
"requires": []
},
{
"types": [
"missiles",
"powerbomb"
],
"requires": [
"never"
]
}
],
"flashSuitChecked": true,
"blueSuitChecked": true,
"note": "Use the door for additional runway then open it once the Shinecharge is complete.",
"devNote": [
"It could be useful to have a proper way to represent that this strat requires the door not to be open.",
"If it were a locked red or green door, you would not be able to unlock it as part of this strat unless you could reset the room."
]
},
{
"id": 35,
"link": [
5,
1
],
"name": "Leave Shinecharged (Closed Door, Shot Block Broken)",
"requires": [
{
"obstaclesCleared": [
"C",
"D"
]
},
{
"canShineCharge": {
"usedTiles": 17,
"openEnd": 1
}
},
{
"shineChargeFrames": 75
}
],
"exitCondition": {
"leaveShinecharged": {}
},
"unlocksDoors": [
{
"types": [
"super"
],
"requires": []
},
{
"types": [
"missiles",
"powerbomb"
],
"requires": [
"never"
]
}
],
"flashSuitChecked": true,
"blueSuitChecked": true,
"note": "Use the door for additional runway then open it once the Shinecharge is complete.",
"devNote": [
"It could be useful to have a proper way to represent that this strat requires the door not to be open.",
"If it were a locked red or green door, you would not be able to unlock it as part of this strat unless you could reset the room."
]
},
{
"id": 36,
"link": [
5,
2
],
"name": "Base",
"requires": [],
"clearsObstacles": [
"D"
],
"flashSuitChecked": true,
"blueSuitChecked": true
},
{
"id": 37,
"link": [
5,
2
],
"name": "Leave with Spark",
"requires": [
"canShinechargeMovementComplex",
{
"obstaclesCleared": [
"C"
]
},
{
"obstaclesNotCleared": [
"D"
]
},
{
"canShineCharge": {
"usedTiles": 25,
"openEnd": 0
}
},
{
"shinespark": {
"frames": 20,
"excessFrames": 0
}
}
],
"exitCondition": {
"leaveWithSpark": {}
},
"unlocksDoors": [
{
"types": [
"super"
],
"requires": []
},
{
"types": [
"missiles",
"powerbomb"
],
"requires": [
"never"
]
}
],
"flashSuitChecked": true,
"blueSuitChecked": true,
"note": "Charge a spark, then break the shot blocks, drop through, and spark out the bottom right door."
},
{
"id": 38,
"link": [
5,
2
],
"name": "Leave Shinecharged",
"requires": [
"canShinechargeMovementTricky",
{
"obstaclesCleared": [
"C"
]
},
{
"obstaclesNotCleared": [
"D"
]
},
{
"canShineCharge": {
"usedTiles": 17,
"openEnd": 1
}
},
{
"shineChargeFrames": 140
}
],
"exitCondition": {
"leaveShinecharged": {}
},
"unlocksDoors": [
{
"types": [
"super"
],
"requires": []
},
{
"types": [
"missiles",
"powerbomb"
],
"requires": [
"never"
]
}
],
"flashSuitChecked": true,
"blueSuitChecked": true,
"note": "Break the shot block, then gain a shinecharge while sliding off the ledge, down toward the bottom right door."
},
{
"id": 39,
"link": [
5,
3
],
"name": "Base",
"requires": [
"Morph",
{
"or": [
"h_useMorphBombs",
{
"obstaclesCleared": [
"B"
]
}
]
}
],
"clearsObstacles": [
"B"
],
"flashSuitChecked": true,
"blueSuitChecked": true
},
{
"id": 40,
"link": [
5,
3
],
"name": "Power Bomb the Block",
"requires": [
"h_usePowerBomb"
],
"clearsObstacles": [
"A",
"B",
"C"
],
"flashSuitChecked": true,
"blueSuitChecked": true,
"note": "Placing the Power Bomb against the right wall will not break the shot blocks going down."
},
{
"id": 54,
"link": [
5,
3
],
"name": "Blue Suit",
"requires": [
{
"haveBlueSuit": {}
},
"Morph"
],
"clearsObstacles": [
"B"
],
"flashSuitChecked": true,
"blueSuitChecked": true
},
{
"id": 41,
"link": [
5,
3
],
"name": "Speedball",
"requires": [
{
"notable": "Speedball"
},
"Morph",
{
"obstaclesCleared": [
"C"
]
},
{
"obstaclesNotCleared": [
"D"
]
},
{
"or": [
{
"and": [
{
"getBlueSpeed": {
"usedTiles": 17,
"openEnd": 0
}
},
"canSlowShortCharge",
"canSpeedball"
]
},
{
"and": [
{
"canShineCharge": {
"usedTiles": 30,
"openEnd": 1
}
},
"canTemporaryBlue",
"canLateralMidAirMorph"
]
}
]
}
],
"clearsObstacles": [
"B"
],
"flashSuitChecked": true,
"blueSuitChecked": true,
"note": [
"A very low horizontal speed is needed to drop down and break the block without hitting the corner to the left or the block above the bomb block.",
"Or with Temporary Blue, Samus can bounce into the bomb block."
]
},
{
"id": 42,
"link": [
5,
3
],
"name": "Tunnel Shinecharge, Leave with Spark (Shot Block Intact)",
"requires": [
{
"obstaclesCleared": [
"B",
"C"
]
},
{
"obstaclesNotCleared": [
"D"
]
},
{
"canShineCharge": {
"usedTiles": 31,
"openEnd": 1
}
},
"canShinechargeMovementTricky",
"Morph",
{
"shinespark": {
"frames": 13,
"excessFrames": 0
}
}
],
"exitCondition": {
"leaveWithSpark": {}
},
"unlocksDoors": [
{
"types": [
"super"
],
"requires": []
},
{
"types": [
"missiles",
"powerbomb"
],
"requires": [
"never"
]
}
],
"flashSuitChecked": true,
"blueSuitChecked": true,
"note": "Generate a charge on the left side and carry it through the morph tunnel and out the right door."
},
{
"id": 43,
"link": [
5,
3
],
"name": "Tunnel Shinecharge, Leave with Spark (Shot Block Broken)",
"requires": [
{
"obstaclesCleared": [
"B",
"C",
"D"
]
},
{
"canShineCharge": {
"usedTiles": 13,
"openEnd": 2
}
},
"canShinechargeMovementTricky",
"Morph",
{
"shinespark": {
"frames": 13,
"excessFrames": 0
}
}
],
"exitCondition": {
"leaveWithSpark": {}
},
"unlocksDoors": [
{
"types": [
"super"
],
"requires": []
},
{
"types": [
"missiles",
"powerbomb"
],
"requires": [
"never"
]
}
],
"flashSuitChecked": true,
"blueSuitChecked": true,
"note": "Generate a charge on the left side and carry it through the morph tunnel and out the right door."
},
{
"id": 44,
"link": [
5,
4
],
"name": "Blocks Already Broken",
"requires": [
{
"or": [
"canMidAirMorph",
"h_useSpringBall",
"canIBJ"
]
},
{
"obstaclesCleared": [
"A"
]
}
],
"flashSuitChecked": true,
"blueSuitChecked": true
},
{
"id": 45,
"link": [
5,
4
],
"name": "Power Bomb",
"requires": [
"h_usePowerBomb",
{
"or": [
"canMidAirMorph",
"h_useSpringBall",
"canIBJ"
]
}
],
"clearsObstacles": [
"A",
"B",
"C"
],
"flashSuitChecked": true,
"blueSuitChecked": true
}
],
"notables": [
{
"id": 4,
"name": "Speedball",
"note": [
"A very low horizontal speed is needed to drop down and break the block without hitting the corner to the left or the block above the bomb block.",
"Or with Temporary Blue, Samus can bounce into the bomb block."
]
}
],
"nextStratId": 59,
"nextNotableId": 5,
"devNote": [
"FIXME: An ice moonfall might be possible to clip past the bottom left door shell?",
"FIXME: Leaving with temporary blue through the bottom door (node 2) is possible but seems really bad."
]
}