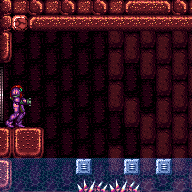
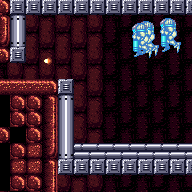
Below Spazer
Room ID: 70
From: 1
Left Door
To: 1
Left Door

Entrance condition: {
"comeInShinecharged": {}
}Requires: "Gravity"
{
"or": [
{
"and": [
{
"shineChargeFrames": 170
},
"canTrickyDodgeEnemies"
]
},
{
"and": [
{
"shineChargeFrames": 110
},
{
"ammo": {
"type": "Super",
"count": 1
}
}
]
}
]
}
{
"thornHits": 1
}
"h_spikeSuitThornHitLeniency"
"canPatientSpikeSuit"
{
"shinespark": {
"frames": 5,
"excessFrames": 5
}
} |
|

Requires: "Gravity"
{
"ammo": {
"type": "Super",
"count": 1
}
}
"h_thornXModeFramePerfectExtraLeniency"
"h_thornXModeSpikeSuit"
{
"shinespark": {
"frames": 5,
"excessFrames": 5
}
} |
|


Requires: "Gravity"
{
"ammo": {
"type": "Super",
"count": 1
}
}
"h_thornDoubleXModeFramePerfectExtraLeniency"
"h_thornDoubleXModeBlueSuit"
{
"shinespark": {
"frames": 1
}
} |
|
Exit condition: {
"leaveWithRunway": {
"length": 3,
"openEnd": 1
}
} |
|
Requires: "SpaceJump" Exit condition: {
"leaveSpinning": {
"remoteRunway": {
"length": 5,
"openEnd": 2
}
}
} |
|
Exit condition: {
"leaveWithMockball": {
"remoteRunway": {
"length": 5,
"openEnd": 2
},
"landingRunway": {
"length": 3,
"openEnd": 1
}
}
} |
|
Exit condition: {
"leaveWithSpringBallBounce": {
"remoteRunway": {
"length": 5,
"openEnd": 2
},
"landingRunway": {
"length": 3,
"openEnd": 1
},
"movementType": "uncontrolled"
}
} |
|
Exit condition: {
"leaveSpaceJumping": {
"remoteRunway": {
"length": 5,
"openEnd": 2
}
}
} |
|
While in X-mode on the thorns, Samus' will be flashing as i-frames periodically refresh; by timing the shinecharge and X-Ray release to happen soon after i-frames refresh, a second thorn hit can be avoided. Requires: "Gravity"
{
"enemyKill": {
"enemies": [
[
"Yapping Maw"
]
],
"explicitWeapons": [
"Super"
]
}
}
"h_thornXModeShinecharge"
"h_thornXModeFramePerfectExtraLeniency"
{
"shineChargeFrames": 75
}Exit condition: {
"leaveShinecharged": {}
} |
|
|
From: 1
Left Door
To: 2
Bottom Right Door


Run and jump onto the third single-tile platform, then jump over the Cacatac (or kill it). Fire a shot and activate the shinespark wind-up. Wait until the shot hits the door before sparking. Entrance condition: {
"comeInShinecharged": {}
}Requires: {
"shineChargeFrames": 140
}
"canShinechargeMovementComplex"
{
"or": [
{
"enemyDamage": {
"enemy": "Cacatac",
"type": "spike",
"hits": 1
}
},
{
"enemyKill": {
"enemies": [
[
"Cacatac"
]
],
"explicitWeapons": [
"Missile",
"Super",
"Wave",
"Spazer",
"Plasma"
]
}
}
]
}
{
"shinespark": {
"frames": 24,
"excessFrames": 0
}
}Exit condition: {
"leaveWithSpark": {}
}Unlocks doors: {"types":["super"],"requires":[]}
{"types":["missiles","powerbomb"],"requires":["never"]} |
|


Run and jump, fire a shot mid-air, and activate the shinespark wind-up. Wait until the shot is at a specific position before sparking. Sparking too late will cause the shot to despawn before reaching the door. Sparking too early will cause Samus to bonk the door as it will not yet be open. A beam shot, Missile, or Super can be used. Entrance condition: {
"comeInShinecharged": {}
}Requires: {
"shineChargeFrames": 40
}
"canShinechargeMovementTricky"
"canHeroShot"
{
"shinespark": {
"frames": 38,
"excessFrames": 0
}
}Exit condition: {
"leaveWithSpark": {}
}Unlocks doors: {"types":["super"],"requires":[]}
{"types":["missiles","powerbomb"],"requires":["never"]} |
|


It may help to disable HiJump for more controlled jumps. Entrance condition: {
"comeInWithTemporaryBlue": {}
}Requires: {
"doorUnlockedAtNode": 1
}
"HiJump"
{
"or": [
"Gravity",
{
"and": [
"canTrickySpringBallJump",
"canDodgeWhileShooting",
"canLongChainTemporaryBlue",
{
"enemyKill": {
"enemies": [
[
"Yapping Maw"
]
],
"explicitWeapons": [
"Super"
]
}
}
]
}
]
}
"canChainTemporaryBlue"
"canXRayTurnaround"Unlocks doors: {"nodeId":1,"types":["ammo"],"requires":[]} |
|
Exit the previous room with Samus in a standing pose (while grappled). After teleporting, hold left while releasing Grapple to stay standing (not being forced into a crouch). Then X-ray climb to get out of the floor. Entrance condition: {
"comeInWithGrappleTeleport": {
"blockPositions": [
[
12,
12
],
[
12,
13
]
]
}
}Requires: "canXRayClimb" Dev note: This can be done with a setup from either of the two possible Grapple blocks in Halfie Climb. The lower block can be used more easily. |
|

Exit the previous room with Samus in a standing pose (while grappled). After teleporting, hold left while releasing Grapple to stay standing (not being forced into a crouch). Then jump to clip out of the floor. Entrance condition: {
"comeInWithGrappleTeleport": {
"blockPositions": [
[
12,
12
]
]
}
}Requires: {
"notable": "Grapple Teleport Clip"
}Dev note: This requires a setup from the highest possible Grapple block in Halfie Climb, in order to end up high enough to clip out without X-Ray. |
|
Requires: {
"noBlueSuit": {}
}
{
"or": [
"HiJump",
"SpaceJump",
"canWallJump",
"canSpringBallJumpMidAir",
"canJumpIntoIBJ",
{
"and": [
"Gravity",
"canIBJ"
]
}
]
} |
|
Requires: {
"haveBlueSuit": {}
}
{
"or": [
"canConsecutiveWallJump",
"SpaceJump",
{
"and": [
"Gravity",
"canIBJ"
]
},
{
"and": [
"Gravity",
"canSpringBallJumpMidAir"
]
},
{
"and": [
{
"doorUnlockedAtNode": 1
},
{
"or": [
"HiJump",
"canSpringBallJumpMidAir",
{
"and": [
"canJumpIntoIBJ",
"can4HighMidAirMorph"
]
}
]
}
]
},
{
"and": [
"canBombJumpWaterEscape",
"canLongIBJ"
]
}
]
}Dev note: With a blue suit, the bomb blocks in front of the door cannot be used as a platform. |
|
Spark diagonally in order to make it to the top. Requires: {
"useFlashSuit": {}
}
{
"shinespark": {
"frames": 16,
"excessFrames": 3
}
}Dev note: FIXME: There should be a come in shinecharged strat that does the same thing. |
|
Requires: {
"blueSuitShinecharge": {}
}
{
"or": [
{
"shinespark": {
"frames": 24,
"excessFrames": 1
}
},
{
"and": [
"HiJump",
{
"shinespark": {
"frames": 24,
"excessFrames": 12
}
}
]
},
{
"and": [
"Gravity",
{
"shinespark": {
"frames": 20,
"excessFrames": 2
}
}
]
},
{
"and": [
"HiJump",
"Gravity",
{
"shinespark": {
"frames": 17,
"excessFrames": 13
}
}
]
}
]
} |
From: 1
Left Door
To: 4
Top Left Ledge

Entrance condition: {
"comeInShinecharged": {}
}Requires: {
"shineChargeFrames": 10
}
"canShinechargeMovement"
{
"shinespark": {
"frames": 24,
"excessFrames": 2
}
} |
From: 1
Left Door
To: 4
Top Left Ledge
Entrance condition: {
"comeInShinecharged": {}
}Requires: {
"shineChargeFrames": 40
}
"canShinechargeMovementComplex"
{
"shinespark": {
"frames": 16,
"excessFrames": 3
}
} |
|
X-Ray climb up about 1 screen, then do a turn-around spin jump to reach the top ledge. Entrance condition: {
"comeInWithDoorStuckSetup": {}
}Requires: "canXRayClimb" |
|
|
From: 2
Bottom Right Door
To: 1
Left Door
Kill the Cacatac, and reach the center of the room. Fire a shot and activate the shinespark wind-up. Wait until the shot hits the door before sparking. Entrance condition: {
"comeInShinecharging": {
"length": 3,
"openEnd": 1
}
}Requires: "canShinechargeMovementComplex"
{
"shinespark": {
"frames": 24,
"excessFrames": 0
}
}Exit condition: {
"leaveWithSpark": {}
}Unlocks doors: {"types":["super"],"requires":[]}
{"types":["missiles","powerbomb"],"requires":["never"]} |
|


Run and jump, fire a shot mid-air, and activate the shinespark wind-up. Wait until the shot is at a specific position before sparking. Sparking too late will cause the shot to despawn before reaching the door. Sparking too early will cause Samus to bonk the door as it will not yet be open. A beam shot, Missile, or Super can be used. Entrance condition: {
"comeInShinecharged": {}
}Requires: {
"shineChargeFrames": 40
}
"canShinechargeMovementTricky"
"canHeroShot"
{
"shinespark": {
"frames": 38,
"excessFrames": 0
}
}Exit condition: {
"leaveWithSpark": {}
}Unlocks doors: {"types":["super"],"requires":[]}
{"types":["missiles","powerbomb"],"requires":["never"]} |
|


Entrance condition: {
"comeInWithGrappleTeleport": {
"blockPositions": [
[
2,
19
]
]
}
}Bypasses door shell: true |
|
Entrance condition: {
"comeInWithGrappleTeleport": {
"blockPositions": [
[
2,
19
]
]
}
}Exit condition: {
"leaveWithGrappleTeleport": {
"blockPositions": [
[
2,
19
]
]
}
}Bypasses door shell: true |
From: 2
Bottom Right Door
To: 2
Bottom Right Door

Entrance condition: {
"comeInShinecharged": {}
}Requires: "Gravity"
{
"or": [
{
"and": [
{
"shineChargeFrames": 170
},
"canTrickyDodgeEnemies"
]
},
{
"and": [
{
"shineChargeFrames": 110
},
{
"ammo": {
"type": "Super",
"count": 1
}
}
]
}
]
}
{
"thornHits": 1
}
"h_spikeSuitThornHitLeniency"
"canPatientSpikeSuit"
{
"shinespark": {
"frames": 5,
"excessFrames": 5
}
} |
|
Requires: {
"or": [
{
"and": [
{
"resetRoom": {
"nodes": [
1
]
}
},
{
"cycleFrames": 300
}
]
},
{
"and": [
{
"resetRoom": {
"nodes": [
2
]
}
},
{
"cycleFrames": 240
}
]
}
]
}
{
"or": [
"canDash",
{
"cycleFrames": 80
}
]
}Farm cycle drops: 1 Cacatac |
|
Exit condition: {
"leaveWithRunway": {
"length": 4,
"openEnd": 1
}
} |
|
Requires: "SpaceJump" Exit condition: {
"leaveSpinning": {
"remoteRunway": {
"length": 5,
"openEnd": 2
}
}
} |
|
Exit condition: {
"leaveWithMockball": {
"remoteRunway": {
"length": 5,
"openEnd": 2
},
"landingRunway": {
"length": 4,
"openEnd": 1
}
}
} |
From: 2
Bottom Right Door
To: 2
Bottom Right Door
Exit condition: {
"leaveWithSpringBallBounce": {
"remoteRunway": {
"length": 5,
"openEnd": 2
},
"landingRunway": {
"length": 3,
"openEnd": 1
},
"movementType": "uncontrolled"
}
} |
|
Exit condition: {
"leaveSpaceJumping": {
"remoteRunway": {
"length": 5,
"openEnd": 2
}
}
} |
From: 2
Bottom Right Door
To: 2
Bottom Right Door
Entrance condition: {
"comeInShinecharging": {
"length": 3,
"openEnd": 0
},
"comesInHeated": "no"
}Requires: "h_CrystalSpark" Dev note: The Yapping Maw won't notice Samus if she doesn't fall off the ledge, so there should be no risk of crashing the game. |
|
While in X-mode on the thorns, Samus' will be flashing as i-frames periodically refresh; by timing the shinecharge and X-Ray release to happen soon after i-frames refresh, a second thorn hit can be avoided. Requires: "Gravity"
{
"enemyKill": {
"enemies": [
[
"Yapping Maw"
]
],
"explicitWeapons": [
"Super"
]
}
}
"h_thornXModeShinecharge"
"h_thornXModeFramePerfectExtraLeniency"
{
"shineChargeFrames": 65
}Exit condition: {
"leaveShinecharged": {}
} |
|
Requires: "h_CrystalFlash" |
|
Climb up 1 screen. Entrance condition: {
"comeInWithDoorStuckSetup": {}
}Requires: "canXRayClimb" |
|
Enter with G-mode direct, back up to between 1 and 6 pixels from the door transition, and activate X-ray to get very deep stuck in the door. Climb up 1 screen, and perform a turnaround buffered spin-jump away from the door to trigger the transition, bypassing any lock on the door. Entrance condition: {
"comeInWithGMode": {
"mode": "direct",
"morphed": false
}
}Requires: "canGModeXRayClimb" Bypasses door shell: true |
|
Entrance condition: {
"comeInWithGrappleTeleport": {
"blockPositions": [
[
7,
2
]
]
}
} |
|
Requires: "h_bombThings" |
|
Requires: {
"haveBlueSuit": {}
}
"Morph" |
|
Shoot forward with spazer to break the shot block, then jump into the morph tunnel while staying blue to break a bomb block. Entrance condition: {
"comeInGettingBlueSpeed": {
"length": 3,
"openEnd": 1,
"minExtraRunSpeed": "$1.2"
}
}Requires: "Spazer" "canSpeedball" "canCarefulJump" |
|
Run through the door and jump into a speedball to break the bomb blocks, timing a precise shot during the jump to clear the shot block. Note: Spazer can trivially break the shot block by shooting forward before jumping. Entrance condition: {
"comeInGettingBlueSpeed": {
"length": 3,
"openEnd": 1,
"minExtraRunSpeed": "$1.2"
}
}Requires: {
"notable": "Jump Shot Speedball"
}
"canSpeedball"
"canTrickyJump" |
|
Shoot the block while moving up after a Space Jump; then speedball through the morph tunnel. Entrance condition: {
"comeInBlueSpinning": {
"maxExtraRunSpeed": "$2.0",
"unusableTiles": 0
}
}Requires: {
"notable": "Jump Shot Speedball"
}
"canPreciseSpaceJump"
"canSpeedball"Dev note: This can also work at much higher speeds but would be more difficult. |
|
Jump through the door and into a speedball to break the bomb blocks, timing a shot during the jump, immediately after the transition, to clear the shot block. If Spazer or Wave are available, the timing for the shot is more lenient; otherwise, jumping with lower extra run speed (between $3.2 and $3.F) can help widen the timing window. If using a lower run speed, it often helps to aim down before bonking the ceiling, to avoid falling short of the ledge. Entrance condition: {
"comeInWithSidePlatform": {
"platforms": [
{
"minHeight": 2,
"maxHeight": 2,
"minTiles": 27.4375,
"speedBooster": "yes",
"obstructions": [
[
1,
0
]
],
"note": [
"This applies to Dust Torizo Room and Noob Bridge."
]
},
{
"minHeight": 3,
"maxHeight": 3,
"minTiles": 28.2472,
"speedBooster": "yes",
"obstructions": [
[
1,
0
]
],
"note": [
"This applies to Double Chamber."
]
},
{
"minHeight": 3,
"maxHeight": 3,
"minTiles": 39.4375,
"speedBooster": "yes",
"obstructions": [
[
3,
2
]
],
"note": [
"This applies to Metal Pirates."
]
}
]
}
}Requires: {
"notable": "Jump Shot Speedball"
}
{
"getBlueSpeed": {
"usedTiles": 20,
"openEnd": 1
}
}
{
"or": [
"canTrickyDashJump",
"Spazer",
"Wave"
]
}
"canSpeedball"Dev note: The run speed required is not overly precise, but certain ranges of speeds must be avoided (especially extra run speeds $4.0 and $4.1) to prevent Samus from getting too high of a jump and not being able to reach the ledge. |
|

In the previous room, gain low-momentum blue speed and jump, bonking the top of the doorway. After the transition, perform a CWJ off the ledge, then fire a shot and speedball through the tunnel. Entrance condition: {
"comeInBlueSpinning": {
"minExtraRunSpeed": "$1.3",
"maxExtraRunSpeed": "$1.8",
"unusableTiles": 0
}
}Requires: {
"notable": "CWJ Jump Shot Speedball"
}
"canInsaneJump"
"canCWJ"
"canSpeedball"Dev note: Higher speeds could probably also work, but depending on the geometry in the previous room it may require a precise release of jump to avoid bonking the wall above the door. |
From: 3
Top Right Door
To: 1
Left Door
Once Samus is close enough to the ledge, the shot block can be cleared by jumping, releasing angle, shooting, and aiming down before hitting the ceiling; then continue chaining temporary blue until Samus is close enough to Spring Ball bounce through the morph tunnel. Entrance condition: {
"comeInWithTemporaryBlue": {}
}Requires: "canChainTemporaryBlue" "canTrickySpringBallBounce" |
|


Entrance condition: {
"comeInWithGrappleTeleport": {
"blockPositions": [
[
2,
19
]
]
}
}Bypasses door shell: true |
|
Entrance condition: {
"comeInWithGrappleTeleport": {
"blockPositions": [
[
2,
19
]
]
}
}Exit condition: {
"leaveWithGrappleTeleport": {
"blockPositions": [
[
2,
19
]
]
}
}Bypasses door shell: true |
|
Moondance clip near the door to fall two tiles into the ground, then Moonfall again to continue clipping all the way to the area below. Entrance condition: {
"comeInWithStoredFallSpeed": {
"fallSpeedInTiles": 2
}
} |
|


Enter the room with a super sink, in order to clip down through the floor. Entrance condition: {
"comeInWithSuperSink": {}
} |
|
Exit condition: {
"leaveWithRunway": {
"length": 5,
"openEnd": 1
}
} |
|
Exit condition: {
"leaveSpinning": {
"remoteRunway": {
"length": 8,
"openEnd": 1
}
}
} |
|
Exit condition: {
"leaveWithMockball": {
"remoteRunway": {
"length": 8,
"openEnd": 1
},
"landingRunway": {
"length": 3,
"openEnd": 1
}
}
} |
|
Exit condition: {
"leaveWithSpringBallBounce": {
"remoteRunway": {
"length": 8,
"openEnd": 1
},
"landingRunway": {
"length": 1,
"openEnd": 1
},
"movementType": "uncontrolled"
}
} |
|
Exit condition: {
"leaveSpaceJumping": {
"remoteRunway": {
"length": 7,
"openEnd": 0
}
}
} |
|
Requires: "h_CrystalFlash" |
From: 3
Top Right Door
To: 3
Top Right Door
Entrance condition: {
"comeInShinecharging": {
"length": 4,
"openEnd": 0
},
"comesInHeated": "no"
}Requires: "h_CrystalSpark" |
|
|
|
If using a Power Bomb, wait for the bomb block to respawn to be able to roll over it. Requires: {
"noBlueSuit": {}
}
"h_bombThings" |
|
The blue suit would break the bomb block below Samus while rolling through the tunnel. This can be dealt with by spin jumping off the crumble block then wall jumping and morphing; or use a well timed bomb boost or Spring Ball to hop over it; alternatively, use the blue suit to break the first bomb block then discard the blue suit and continue normally. Requires: {
"haveBlueSuit": {}
}
"Morph"
{
"or": [
{
"and": [
"canCrumbleJump",
"canTrickyJump",
"canWallJump"
]
},
{
"and": [
"canTrickyJump",
"h_useSpringBall"
]
},
{
"and": [
"canTrickyJump",
"h_useMorphBombs"
]
},
{
"and": [
"canTrickyJump",
{
"ammo": {
"type": "PowerBomb",
"count": 5
}
}
]
},
{
"and": [
"canInsaneJump",
"h_usePowerBomb"
]
},
{
"noBlueSuit": {}
}
]
} |
{
"$schema": "../../../schema/m3-room.schema.json",
"id": 70,
"name": "Below Spazer",
"area": "Brinstar",
"subarea": "Red",
"roomAddress": "0x7A408",
"roomEnvironments": [
{
"heated": false
}
],
"mapTileMask": [
[
1,
1
],
[
1,
1
]
],
"nodes": [
{
"id": 1,
"name": "Left Door",
"nodeType": "door",
"nodeSubType": "blue",
"nodeAddress": "0x001910e",
"doorOrientation": "left",
"doorEnvironments": [
{
"physics": "air"
}
],
"mapTileMask": [
[
1,
1
],
[
2,
1
]
]
},
{
"id": 2,
"name": "Bottom Right Door",
"nodeType": "door",
"nodeSubType": "blue",
"nodeAddress": "0x001911a",
"doorOrientation": "right",
"doorEnvironments": [
{
"physics": "air"
}
],
"mapTileMask": [
[
1,
1
],
[
1,
2
]
]
},
{
"id": 3,
"name": "Top Right Door",
"nodeType": "door",
"nodeSubType": "green",
"nodeAddress": "0x0019126",
"doorOrientation": "right",
"doorEnvironments": [
{
"physics": "air"
}
],
"mapTileMask": [
[
1,
2
],
[
1,
1
]
]
},
{
"id": 4,
"name": "Top Left Ledge",
"nodeType": "junction",
"nodeSubType": "junction",
"mapTileMask": [
[
2,
1
],
[
1,
1
]
]
}
],
"enemies": [
{
"id": "e1",
"groupName": "Below Spazer Cacatac",
"enemyName": "Cacatac",
"quantity": 1,
"homeNodes": [
2
]
},
{
"id": "e2",
"groupName": "Below Spazer Yapping Maws",
"enemyName": "Yapping Maw",
"quantity": 2,
"homeNodes": [
2
],
"note": "Can pickup the drops without taking damage"
}
],
"strats": [
{
"link": [
1,
1
],
"name": "Base (Unlock Door)",
"requires": [],
"unlocksDoors": [
{
"types": [
"ammo"
],
"requires": []
}
],
"flashSuitChecked": true,
"blueSuitChecked": true
},
{
"link": [
1,
1
],
"name": "Base (Come In Normally)",
"entranceCondition": {
"comeInNormally": {}
},
"requires": [],
"flashSuitChecked": true,
"blueSuitChecked": true
},
{
"link": [
1,
1
],
"name": "Base (Come In With Mockball)",
"entranceCondition": {
"comeInWithMockball": {
"adjacentMinTiles": 0,
"remoteAndLandingMinTiles": [
[
0,
0
]
],
"speedBooster": "any"
}
},
"requires": [],
"flashSuitChecked": true,
"blueSuitChecked": true
},
{
"link": [
2,
2
],
"name": "Base (Unlock Door)",
"requires": [],
"unlocksDoors": [
{
"types": [
"ammo"
],
"requires": []
}
],
"flashSuitChecked": true,
"blueSuitChecked": true
},
{
"link": [
2,
2
],
"name": "Base (Come In Normally)",
"entranceCondition": {
"comeInNormally": {}
},
"requires": [],
"flashSuitChecked": true,
"blueSuitChecked": true
},
{
"link": [
2,
2
],
"name": "Base (Come In With Mockball)",
"entranceCondition": {
"comeInWithMockball": {
"adjacentMinTiles": 0,
"remoteAndLandingMinTiles": [
[
0,
0
]
],
"speedBooster": "any"
}
},
"requires": [],
"flashSuitChecked": true,
"blueSuitChecked": true
},
{
"link": [
3,
3
],
"name": "Base (Unlock Door)",
"requires": [],
"unlocksDoors": [
{
"types": [
"ammo"
],
"requires": []
}
],
"flashSuitChecked": true,
"blueSuitChecked": true
},
{
"link": [
3,
3
],
"name": "Base (Come In Normally)",
"entranceCondition": {
"comeInNormally": {}
},
"requires": [],
"flashSuitChecked": true,
"blueSuitChecked": true
},
{
"link": [
3,
3
],
"name": "Base (Come In With Mockball)",
"entranceCondition": {
"comeInWithMockball": {
"adjacentMinTiles": 0,
"remoteAndLandingMinTiles": [
[
0,
0
]
],
"speedBooster": "any"
}
},
"requires": [],
"flashSuitChecked": true,
"blueSuitChecked": true
},
{
"id": 52,
"link": [
1,
1
],
"name": "Come in Shinecharged, Gain Flash Suit (Spikesuit)",
"entranceCondition": {
"comeInShinecharged": {}
},
"requires": [
"Gravity",
{
"or": [
{
"and": [
{
"shineChargeFrames": 170
},
"canTrickyDodgeEnemies"
]
},
{
"and": [
{
"shineChargeFrames": 110
},
{
"ammo": {
"type": "Super",
"count": 1
}
}
]
}
]
},
{
"thornHits": 1
},
"h_spikeSuitThornHitLeniency",
"canPatientSpikeSuit",
{
"shinespark": {
"frames": 5,
"excessFrames": 5
}
}
],
"flashSuitChecked": true,
"blueSuitChecked": true
},
{
"id": 53,
"link": [
1,
1
],
"name": "Gain Flash Suit, (X-Mode Spikesuit)",
"requires": [
"Gravity",
{
"ammo": {
"type": "Super",
"count": 1
}
},
"h_thornXModeFramePerfectExtraLeniency",
"h_thornXModeSpikeSuit",
{
"shinespark": {
"frames": 5,
"excessFrames": 5
}
}
],
"flashSuitChecked": true,
"blueSuitChecked": true
},
{
"id": 54,
"link": [
1,
1
],
"name": "Gain Blue Suit, (Double X-Mode)",
"requires": [
"Gravity",
{
"ammo": {
"type": "Super",
"count": 1
}
},
"h_thornDoubleXModeFramePerfectExtraLeniency",
"h_thornDoubleXModeBlueSuit",
{
"shinespark": {
"frames": 1
}
}
],
"flashSuitChecked": true,
"blueSuitChecked": true
},
{
"id": 1,
"link": [
1,
1
],
"name": "Leave With Runway",
"requires": [],
"exitCondition": {
"leaveWithRunway": {
"length": 3,
"openEnd": 1
}
},
"flashSuitChecked": true,
"blueSuitChecked": true
},
{
"id": 2,
"link": [
1,
1
],
"name": "Leave Spinning (Space Jump)",
"requires": [
"SpaceJump"
],
"exitCondition": {
"leaveSpinning": {
"remoteRunway": {
"length": 5,
"openEnd": 2
}
}
},
"flashSuitChecked": true,
"blueSuitChecked": true
},
{
"id": 3,
"link": [
1,
1
],
"name": "Leave With Mockball",
"requires": [],
"exitCondition": {
"leaveWithMockball": {
"remoteRunway": {
"length": 5,
"openEnd": 2
},
"landingRunway": {
"length": 3,
"openEnd": 1
}
}
},
"flashSuitChecked": true,
"blueSuitChecked": true
},
{
"id": 4,
"link": [
1,
1
],
"name": "Leave With Spring Ball Bounce",
"requires": [],
"exitCondition": {
"leaveWithSpringBallBounce": {
"remoteRunway": {
"length": 5,
"openEnd": 2
},
"landingRunway": {
"length": 3,
"openEnd": 1
},
"movementType": "uncontrolled"
}
},
"flashSuitChecked": true,
"blueSuitChecked": true
},
{
"id": 5,
"link": [
1,
1
],
"name": "Leave Space Jumping",
"requires": [],
"exitCondition": {
"leaveSpaceJumping": {
"remoteRunway": {
"length": 5,
"openEnd": 2
}
}
},
"flashSuitChecked": true,
"blueSuitChecked": true
},
{
"id": 48,
"link": [
1,
1
],
"name": "X-Mode, Leave Shinecharged",
"requires": [
"Gravity",
{
"enemyKill": {
"enemies": [
[
"Yapping Maw"
]
],
"explicitWeapons": [
"Super"
]
}
},
"h_thornXModeShinecharge",
"h_thornXModeFramePerfectExtraLeniency",
{
"shineChargeFrames": 75
}
],
"exitCondition": {
"leaveShinecharged": {}
},
"flashSuitChecked": true,
"blueSuitChecked": true,
"note": [
"While in X-mode on the thorns, Samus' will be flashing as i-frames periodically refresh;",
"by timing the shinecharge and X-Ray release to happen soon after i-frames refresh,",
"a second thorn hit can be avoided."
]
},
{
"id": 6,
"link": [
1,
2
],
"name": "Base",
"requires": [],
"flashSuitChecked": true,
"blueSuitChecked": true
},
{
"id": 7,
"link": [
1,
2
],
"name": "Come in Shinecharged, Leave with Spark",
"entranceCondition": {
"comeInShinecharged": {}
},
"requires": [
{
"shineChargeFrames": 140
},
"canShinechargeMovementComplex",
{
"or": [
{
"enemyDamage": {
"enemy": "Cacatac",
"type": "spike",
"hits": 1
}
},
{
"enemyKill": {
"enemies": [
[
"Cacatac"
]
],
"explicitWeapons": [
"Missile",
"Super",
"Wave",
"Spazer",
"Plasma"
]
}
}
]
},
{
"shinespark": {
"frames": 24,
"excessFrames": 0
}
}
],
"exitCondition": {
"leaveWithSpark": {}
},
"unlocksDoors": [
{
"types": [
"super"
],
"requires": []
},
{
"types": [
"missiles",
"powerbomb"
],
"requires": [
"never"
]
}
],
"flashSuitChecked": true,
"blueSuitChecked": true,
"note": [
"Run and jump onto the third single-tile platform, then jump over the Cacatac (or kill it).",
"Fire a shot and activate the shinespark wind-up.",
"Wait until the shot hits the door before sparking."
]
},
{
"id": 8,
"link": [
1,
2
],
"name": "Hero Shot Spark",
"entranceCondition": {
"comeInShinecharged": {}
},
"requires": [
{
"shineChargeFrames": 40
},
"canShinechargeMovementTricky",
"canHeroShot",
{
"shinespark": {
"frames": 38,
"excessFrames": 0
}
}
],
"exitCondition": {
"leaveWithSpark": {}
},
"unlocksDoors": [
{
"types": [
"super"
],
"requires": []
},
{
"types": [
"missiles",
"powerbomb"
],
"requires": [
"never"
]
}
],
"flashSuitChecked": true,
"blueSuitChecked": true,
"note": [
"Run and jump, fire a shot mid-air, and activate the shinespark wind-up.",
"Wait until the shot is at a specific position before sparking.",
"Sparking too late will cause the shot to despawn before reaching the door.",
"Sparking too early will cause Samus to bonk the door as it will not yet be open.",
"A beam shot, Missile, or Super can be used."
]
},
{
"id": 10,
"link": [
1,
3
],
"name": "Temporary Blue Chain",
"entranceCondition": {
"comeInWithTemporaryBlue": {}
},
"requires": [
{
"doorUnlockedAtNode": 1
},
"HiJump",
{
"or": [
"Gravity",
{
"and": [
"canTrickySpringBallJump",
"canDodgeWhileShooting",
"canLongChainTemporaryBlue",
{
"enemyKill": {
"enemies": [
[
"Yapping Maw"
]
],
"explicitWeapons": [
"Super"
]
}
}
]
}
]
},
"canChainTemporaryBlue",
"canXRayTurnaround"
],
"unlocksDoors": [
{
"nodeId": 1,
"types": [
"ammo"
],
"requires": []
}
],
"flashSuitChecked": true,
"blueSuitChecked": true,
"note": "It may help to disable HiJump for more controlled jumps."
},
{
"id": 12,
"link": [
1,
3
],
"name": "Grapple Teleport X-Ray Climb",
"entranceCondition": {
"comeInWithGrappleTeleport": {
"blockPositions": [
[
12,
12
],
[
12,
13
]
]
}
},
"requires": [
"canXRayClimb"
],
"flashSuitChecked": true,
"blueSuitChecked": true,
"note": [
"Exit the previous room with Samus in a standing pose (while grappled).",
"After teleporting, hold left while releasing Grapple to stay standing (not being forced into a crouch).",
"Then X-ray climb to get out of the floor."
],
"devNote": [
"This can be done with a setup from either of the two possible Grapple blocks in Halfie Climb.",
"The lower block can be used more easily."
]
},
{
"id": 13,
"link": [
1,
3
],
"name": "Grapple Teleport Clip",
"entranceCondition": {
"comeInWithGrappleTeleport": {
"blockPositions": [
[
12,
12
]
]
}
},
"requires": [
{
  "notable": "Grapple Teleport Clip"
}
],
"flashSuitChecked": false,
"blueSuitChecked": true,
"note": [
"Exit the previous room with Samus in a standing pose (while grappled).",
"After teleporting, hold left while releasing Grapple to stay standing (not being forced into a crouch).",
"Then jump to clip out of the floor."
],
"devNote": [
"This requires a setup from the highest possible Grapple block in Halfie Climb, in order to end up high enough to clip out without X-Ray."
]
},
{
"id": 9,
"link": [
1,
4
],
"name": "Base",
"requires": [
{
"noBlueSuit": {}
},
{
"or": [
"HiJump",
"SpaceJump",
"canWallJump",
"canSpringBallJumpMidAir",
"canJumpIntoIBJ",
{
"and": [
"Gravity",
"canIBJ"
]
}
]
}
],
"flashSuitChecked": true,
"blueSuitChecked": true
},
{
"id": 61,
"link": [
1,
4
],
"name": "Carry Blue Suit",
"requires": [
{
"haveBlueSuit": {}
},
{
"or": [
"canConsecutiveWallJump",
"SpaceJump",
{
"and": [
"Gravity",
"canIBJ"
]
},
{
"and": [
"Gravity",
"canSpringBallJumpMidAir"
]
},
{
"and": [
{
"doorUnlockedAtNode": 1
},
{
"or": [
"HiJump",
"canSpringBallJumpMidAir",
{
"and": [
"canJumpIntoIBJ",
"can4HighMidAirMorph"
]
}
]
}
]
},
{
"and": [
"canBombJumpWaterEscape",
"canLongIBJ"
]
}
]
}
],
"flashSuitChecked": true,
"blueSuitChecked": true,
"devNote": "With a blue suit, the bomb blocks in front of the door cannot be used as a platform."
},
{
"id": 11,
"link": [
1,
4
],
"name": "Use Flash Suit",
"requires": [
{
"useFlashSuit": {}
},
{
"shinespark": {
"frames": 16,
"excessFrames": 3
}
}
],
"flashSuitChecked": true,
"blueSuitChecked": true,
"note": "Spark diagonally in order to make it to the top.",
"devNote": "FIXME: There should be a come in shinecharged strat that does the same thing."
},
{
"id": 60,
"link": [
1,
4
],
"name": "Blue Suit Shinespark",
"requires": [
{
"blueSuitShinecharge": {}
},
{
"or": [
{
"shinespark": {
"frames": 24,
"excessFrames": 1
}
},
{
"and": [
"HiJump",
{
"shinespark": {
"frames": 24,
"excessFrames": 12
}
}
]
},
{
"and": [
"Gravity",
{
"shinespark": {
"frames": 20,
"excessFrames": 2
}
}
]
},
{
"and": [
"HiJump",
"Gravity",
{
"shinespark": {
"frames": 17,
"excessFrames": 13
}
}
]
}
]
}
],
"flashSuitChecked": true,
"blueSuitChecked": true
},
{
"id": 44,
"link": [
1,
4
],
"name": "Come In Shinecharged, Shinespark (From Ground)",
"entranceCondition": {
"comeInShinecharged": {}
},
"requires": [
{
"shineChargeFrames": 10
},
"canShinechargeMovement",
{
"shinespark": {
"frames": 24,
"excessFrames": 2
}
}
],
"flashSuitChecked": true,
"blueSuitChecked": true
},
{
"id": 45,
"link": [
1,
4
],
"name": "Come In Shinecharged, Shinespark (Mid-Air)",
"entranceCondition": {
"comeInShinecharged": {}
},
"requires": [
{
"shineChargeFrames": 40
},
"canShinechargeMovementComplex",
{
"shinespark": {
"frames": 16,
"excessFrames": 3
}
}
],
"flashSuitChecked": true,
"blueSuitChecked": true
},
{
"id": 46,
"link": [
1,
4
],
"name": "X-Ray Climb",
"entranceCondition": {
"comeInWithDoorStuckSetup": {}
},
"requires": [
"canXRayClimb"
],
"flashSuitChecked": true,
"blueSuitChecked": true,
"note": "X-Ray climb up about 1 screen, then do a turn-around spin jump to reach the top ledge."
},
{
"id": 14,
"link": [
2,
1
],
"name": "Base",
"requires": [],
"flashSuitChecked": true,
"blueSuitChecked": true
},
{
"id": 15,
"link": [
2,
1
],
"name": "Come in Shinecharging, Leave with Spark",
"entranceCondition": {
"comeInShinecharging": {
"length": 3,
"openEnd": 1
}
},
"requires": [
"canShinechargeMovementComplex",
{
"shinespark": {
"frames": 24,
"excessFrames": 0
}
}
],
"exitCondition": {
"leaveWithSpark": {}
},
"unlocksDoors": [
{
"types": [
"super"
],
"requires": []
},
{
"types": [
"missiles",
"powerbomb"
],
"requires": [
"never"
]
}
],
"flashSuitChecked": true,
"blueSuitChecked": true,
"note": [
"Kill the Cacatac, and reach the center of the room.",
"Fire a shot and activate the shinespark wind-up.",
"Wait until the shot hits the door before sparking."
]
},
{
"id": 16,
"link": [
2,
1
],
"name": "Hero Shot Spark",
"entranceCondition": {
"comeInShinecharged": {}
},
"requires": [
{
"shineChargeFrames": 40
},
"canShinechargeMovementTricky",
"canHeroShot",
{
"shinespark": {
"frames": 38,
"excessFrames": 0
}
}
],
"exitCondition": {
"leaveWithSpark": {}
},
"unlocksDoors": [
{
"types": [
"super"
],
"requires": []
},
{
"types": [
"missiles",
"powerbomb"
],
"requires": [
"never"
]
}
],
"flashSuitChecked": true,
"blueSuitChecked": true,
"note": [
"Run and jump, fire a shot mid-air, and activate the shinespark wind-up.",
"Wait until the shot is at a specific position before sparking.",
"Sparking too late will cause the shot to despawn before reaching the door.",
"Sparking too early will cause Samus to bonk the door as it will not yet be open.",
"A beam shot, Missile, or Super can be used."
]
},
{
"id": 17,
"link": [
2,
1
],
"name": "Grapple Teleport Door Lock Skip",
"entranceCondition": {
"comeInWithGrappleTeleport": {
"blockPositions": [
[
2,
19
]
]
}
},
"requires": [],
"bypassesDoorShell": "yes",
"flashSuitChecked": true,
"blueSuitChecked": true
},
{
"id": 18,
"link": [
2,
1
],
"name": "Carry Grapple Teleport",
"entranceCondition": {
"comeInWithGrappleTeleport": {
"blockPositions": [
[
2,
19
]
]
}
},
"requires": [],
"exitCondition": {
"leaveWithGrappleTeleport": {
"blockPositions": [
[
2,
19
]
]
}
},
"bypassesDoorShell": "yes",
"flashSuitChecked": true,
"blueSuitChecked": true
},
{
"id": 55,
"link": [
2,
2
],
"name": "Come in Shinecharged, Gain Flash Suit (Spikesuit)",
"entranceCondition": {
"comeInShinecharged": {}
},
"requires": [
"Gravity",
{
"or": [
{
"and": [
{
"shineChargeFrames": 170
},
"canTrickyDodgeEnemies"
]
},
{
"and": [
{
"shineChargeFrames": 110
},
{
"ammo": {
"type": "Super",
"count": 1
}
}
]
}
]
},
{
"thornHits": 1
},
"h_spikeSuitThornHitLeniency",
"canPatientSpikeSuit",
{
"shinespark": {
"frames": 5,
"excessFrames": 5
}
}
],
"flashSuitChecked": true,
"blueSuitChecked": true
},
{
"id": 19,
"link": [
2,
2
],
"name": "Cacatac Farm",
"requires": [
{
"or": [
{
"and": [
{
"resetRoom": {
"nodes": [
1
]
}
},
{
"cycleFrames": 300
}
]
},
{
"and": [
{
"resetRoom": {
"nodes": [
2
]
}
},
{
"cycleFrames": 240
}
]
}
]
},
{
"or": [
"canDash",
{
"cycleFrames": 80
}
]
}
],
"farmCycleDrops": [
{
"enemy": "Cacatac",
"count": 1
}
],
"flashSuitChecked": true,
"blueSuitChecked": true
},
{
"id": 20,
"link": [
2,
2
],
"name": "Leave With Runway",
"requires": [],
"exitCondition": {
"leaveWithRunway": {
"length": 4,
"openEnd": 1
}
},
"flashSuitChecked": true,
"blueSuitChecked": true
},
{
"id": 21,
"link": [
2,
2
],
"name": "Leave Spinning (Space Jump)",
"requires": [
"SpaceJump"
],
"exitCondition": {
"leaveSpinning": {
"remoteRunway": {
"length": 5,
"openEnd": 2
}
}
},
"flashSuitChecked": true,
"blueSuitChecked": true
},
{
"id": 22,
"link": [
2,
2
],
"name": "Leave With Mockball",
"requires": [],
"exitCondition": {
"leaveWithMockball": {
"remoteRunway": {
"length": 5,
"openEnd": 2
},
"landingRunway": {
"length": 4,
"openEnd": 1
}
}
},
"flashSuitChecked": true,
"blueSuitChecked": true
},
{
"id": 23,
"link": [
2,
2
],
"name": "Leave With Spring Ball Bounce",
"requires": [],
"exitCondition": {
"leaveWithSpringBallBounce": {
"remoteRunway": {
"length": 5,
"openEnd": 2
},
"landingRunway": {
"length": 3,
"openEnd": 1
},
"movementType": "uncontrolled"
}
},
"flashSuitChecked": true,
"blueSuitChecked": true
},
{
"id": 24,
"link": [
2,
2
],
"name": "Leave Space Jumping",
"requires": [],
"exitCondition": {
"leaveSpaceJumping": {
"remoteRunway": {
"length": 5,
"openEnd": 2
}
}
},
"flashSuitChecked": true,
"blueSuitChecked": true
},
{
"id": 58,
"link": [
2,
2
],
"name": "Come in Shinecharging, Crystal Spark",
"entranceCondition": {
"comeInShinecharging": {
"length": 3,
"openEnd": 0
},
"comesInHeated": "no"
},
"requires": [
"h_CrystalSpark"
],
"flashSuitChecked": true,
"blueSuitChecked": true,
"devNote": "The Yapping Maw won't notice Samus if she doesn't fall off the ledge, so there should be no risk of crashing the game."
},
{
"id": 49,
"link": [
2,
2
],
"name": "X-Mode, Leave Shinecharged",
"requires": [
"Gravity",
{
"enemyKill": {
"enemies": [
[
"Yapping Maw"
]
],
"explicitWeapons": [
"Super"
]
}
},
"h_thornXModeShinecharge",
"h_thornXModeFramePerfectExtraLeniency",
{
"shineChargeFrames": 65
}
],
"exitCondition": {
"leaveShinecharged": {}
},
"flashSuitChecked": true,
"blueSuitChecked": true,
"note": [
"While in X-mode on the thorns, Samus' will be flashing as i-frames periodically refresh;",
"by timing the shinecharge and X-Ray release to happen soon after i-frames refresh,",
"a second thorn hit can be avoided."
]
},
{
"id": 25,
"link": [
2,
2
],
"name": "Crystal Flash",
"requires": [
"h_CrystalFlash"
],
"flashSuitChecked": true,
"blueSuitChecked": true
},
{
"id": 26,
"link": [
2,
3
],
"name": "X-Ray Climb",
"entranceCondition": {
"comeInWithDoorStuckSetup": {}
},
"requires": [
"canXRayClimb"
],
"flashSuitChecked": true,
"blueSuitChecked": true,
"note": "Climb up 1 screen."
},
{
"id": 27,
"link": [
2,
3
],
"name": "Very Deep Stuck X-Ray Climb",
"entranceCondition": {
"comeInWithGMode": {
"mode": "direct",
"morphed": false
}
},
"requires": [
"canGModeXRayClimb"
],
"bypassesDoorShell": "yes",
"flashSuitChecked": true,
"blueSuitChecked": true,
"note": [
"Enter with G-mode direct, back up to between 1 and 6 pixels from the door transition, and activate X-ray to get very deep stuck in the door.",
"Climb up 1 screen, and perform a turnaround buffered spin-jump away from the door to trigger the transition, bypassing any lock on the door."
]
},
{
"id": 28,
"link": [
2,
4
],
"name": "Grapple Teleport",
"entranceCondition": {
"comeInWithGrappleTeleport": {
"blockPositions": [
[
7,
2
]
]
}
},
"requires": [],
"flashSuitChecked": true,
"blueSuitChecked": true
},
{
"id": 29,
"link": [
3,
1
],
"name": "Base",
"requires": [
"h_bombThings"
],
"flashSuitChecked": true,
"blueSuitChecked": true
},
{
"id": 57,
"link": [
3,
1
],
"name": "Blue Suit",
"requires": [
{
"haveBlueSuit": {}
},
"Morph"
],
"flashSuitChecked": true,
"blueSuitChecked": true
},
{
"id": 30,
"link": [
3,
1
],
"name": "Jump and Speedball",
"entranceCondition": {
"comeInGettingBlueSpeed": {
"length": 3,
"openEnd": 1,
"minExtraRunSpeed": "$1.2"
}
},
"requires": [
"Spazer",
"canSpeedball",
"canCarefulJump"
],
"flashSuitChecked": true,
"blueSuitChecked": true,
"note": "Shoot forward with spazer to break the shot block, then jump into the morph tunnel while staying blue to break a bomb block."
},
{
"id": 31,
"link": [
3,
1
],
"name": "Jump Shot Speedball",
"entranceCondition": {
"comeInGettingBlueSpeed": {
"length": 3,
"openEnd": 1,
"minExtraRunSpeed": "$1.2"
}
},
"requires": [
{
"notable": "Jump Shot Speedball"
},
"canSpeedball",
"canTrickyJump"
],
"flashSuitChecked": true,
"blueSuitChecked": true,
"note": [
"Run through the door and jump into a speedball to break the bomb blocks,",
"timing a precise shot during the jump to clear the shot block.",
"Note: Spazer can trivially break the shot block by shooting forward before jumping."
]
},
{
"id": 32,
"link": [
3,
1
],
"name": "Blue Space Jump Speedball",
"entranceCondition": {
"comeInBlueSpinning": {
"maxExtraRunSpeed": "$2.0",
"unusableTiles": 0
}
},
"requires": [
{
"notable": "Jump Shot Speedball"
},
"canPreciseSpaceJump",
"canSpeedball"
],
"flashSuitChecked": true,
"blueSuitChecked": true,
"note": [
"Shoot the block while moving up after a Space Jump; then speedball through the morph tunnel."
],
"devNote": [
"This can also work at much higher speeds but would be more difficult."
]
},
{
"id": 47,
"link": [
3,
1
],
"name": "Side Platform Jump Speedball",
"entranceCondition": {
"comeInWithSidePlatform": {
"platforms": [
{
"minHeight": 2,
"maxHeight": 2,
"minTiles": 27.4375,
"speedBooster": "yes",
"obstructions": [
[
1,
0
]
],
"note": [
"This applies to Dust Torizo Room and Noob Bridge."
]
},
{
"minHeight": 3,
"maxHeight": 3,
"minTiles": 28.2472,
"speedBooster": "yes",
"obstructions": [
[
1,
0
]
],
"note": [
"This applies to Double Chamber."
]
},
{
"minHeight": 3,
"maxHeight": 3,
"minTiles": 39.4375,
"speedBooster": "yes",
"obstructions": [
[
3,
2
]
],
"note": [
"This applies to Metal Pirates."
]
}
]
}
},
"requires": [
{
"notable": "Jump Shot Speedball"
},
{
"getBlueSpeed": {
"usedTiles": 20,
"openEnd": 1
}
},
{
"or": [
"canTrickyDashJump",
"Spazer",
"Wave"
]
},
"canSpeedball"
],
"flashSuitChecked": true,
"blueSuitChecked": true,
"note": [
"Jump through the door and into a speedball to break the bomb blocks,",
"timing a shot during the jump, immediately after the transition, to clear the shot block."
],
"detailNote": [
"If Spazer or Wave are available, the timing for the shot is more lenient;",
"otherwise, jumping with lower extra run speed (between $3.2 and $3.F) can help widen the timing window.",
"If using a lower run speed, it often helps to aim down before bonking the ceiling, to avoid falling short of the ledge."
],
"devNote": [
"The run speed required is not overly precise,",
"but certain ranges of speeds must be avoided (especially extra run speeds $4.0 and $4.1)",
"to prevent Samus from getting too high of a jump and not being able to reach the ledge."
]
},
{
"id": 50,
"link": [
3,
1
],
"name": "CWJ Jump Shot Speedball",
"entranceCondition": {
"comeInBlueSpinning": {
"minExtraRunSpeed": "$1.3",
"maxExtraRunSpeed": "$1.8",
"unusableTiles": 0
}
},
"requires": [
{
"notable": "CWJ Jump Shot Speedball"
},
"canInsaneJump",
"canCWJ",
"canSpeedball"
],
"flashSuitChecked": true,
"blueSuitChecked": true,
"note": [
"In the previous room, gain low-momentum blue speed and jump, bonking the top of the doorway.",
"After the transition, perform a CWJ off the ledge, then fire a shot and speedball through the tunnel."
],
"devNote": [
"Higher speeds could probably also work, but depending on the geometry in the previous room",
"it may require a precise release of jump to avoid bonking the wall above the door."
]
},
{
"id": 33,
"link": [
3,
1
],
"name": "Temporary Blue Chain Spring Ball Bounce",
"entranceCondition": {
"comeInWithTemporaryBlue": {}
},
"requires": [
"canChainTemporaryBlue",
"canTrickySpringBallBounce"
],
"flashSuitChecked": true,
"blueSuitChecked": true,
"note": [
"Once Samus is close enough to the ledge, the shot block can be cleared by jumping, releasing angle, shooting, and aiming down before hitting the ceiling;",
"then continue chaining temporary blue until Samus is close enough to Spring Ball bounce through the morph tunnel."
]
},
{
"id": 35,
"link": [
3,
1
],
"name": "Grapple Teleport Door Lock Skip",
"entranceCondition": {
"comeInWithGrappleTeleport": {
"blockPositions": [
[
2,
19
]
]
}
},
"requires": [],
"bypassesDoorShell": "yes",
"flashSuitChecked": true,
"blueSuitChecked": true
},
{
"id": 36,
"link": [
3,
1
],
"name": "Carry Grapple Teleport",
"entranceCondition": {
"comeInWithGrappleTeleport": {
"blockPositions": [
[
2,
19
]
]
}
},
"requires": [],
"exitCondition": {
"leaveWithGrappleTeleport": {
"blockPositions": [
[
2,
19
]
]
}
},
"bypassesDoorShell": "yes",
"flashSuitChecked": true,
"blueSuitChecked": true
},
{
"id": 37,
"link": [
3,
2
],
"name": "Stored Moonfall Clip",
"entranceCondition": {
"comeInWithStoredFallSpeed": {
"fallSpeedInTiles": 2
}
},
"requires": [],
"flashSuitChecked": true,
"blueSuitChecked": true,
"note": "Moondance clip near the door to fall two tiles into the ground, then Moonfall again to continue clipping all the way to the area below."
},
{
"id": 51,
"link": [
3,
2
],
"name": "Super Sink",
"entranceCondition": {
"comeInWithSuperSink": {}
},
"requires": [],
"flashSuitChecked": true,
"blueSuitChecked": true,
"note": [
"Enter the room with a super sink, in order to clip down through the floor."
]
},
{
"id": 38,
"link": [
3,
3
],
"name": "Leave With Runway",
"requires": [],
"exitCondition": {
"leaveWithRunway": {
"length": 5,
"openEnd": 1
}
},
"flashSuitChecked": true,
"blueSuitChecked": true
},
{
"id": 39,
"link": [
3,
3
],
"name": "Leave Spinning",
"requires": [],
"exitCondition": {
"leaveSpinning": {
"remoteRunway": {
"length": 8,
"openEnd": 1
}
}
},
"flashSuitChecked": true,
"blueSuitChecked": true
},
{
"id": 40,
"link": [
3,
3
],
"name": "Leave With Mockball",
"requires": [],
"exitCondition": {
"leaveWithMockball": {
"remoteRunway": {
"length": 8,
"openEnd": 1
},
"landingRunway": {
"length": 3,
"openEnd": 1
}
}
},
"flashSuitChecked": true,
"blueSuitChecked": true
},
{
"id": 41,
"link": [
3,
3
],
"name": "Leave With Spring Ball Bounce",
"requires": [],
"exitCondition": {
"leaveWithSpringBallBounce": {
"remoteRunway": {
"length": 8,
"openEnd": 1
},
"landingRunway": {
"length": 1,
"openEnd": 1
},
"movementType": "uncontrolled"
}
},
"flashSuitChecked": true,
"blueSuitChecked": true
},
{
"id": 42,
"link": [
3,
3
],
"name": "Leave Space Jumping",
"requires": [],
"exitCondition": {
"leaveSpaceJumping": {
"remoteRunway": {
"length": 7,
"openEnd": 0
}
}
},
"flashSuitChecked": true,
"blueSuitChecked": true
},
{
"id": 43,
"link": [
3,
3
],
"name": "Crystal Flash",
"requires": [
"h_CrystalFlash"
],
"flashSuitChecked": true,
"blueSuitChecked": true
},
{
"id": 59,
"link": [
3,
3
],
"name": "Come in Shinecharging, Crystal Spark",
"entranceCondition": {
"comeInShinecharging": {
"length": 4,
"openEnd": 0
},
"comesInHeated": "no"
},
"requires": [
"h_CrystalSpark"
],
"flashSuitChecked": true,
"blueSuitChecked": true
},
{
"id": 62,
"link": [
4,
1
],
"name": "Base",
"requires": [],
"flashSuitChecked": true,
"blueSuitChecked": true
},
{
"id": 63,
"link": [
4,
3
],
"name": "Base",
"requires": [
{
"noBlueSuit": {}
},
"h_bombThings"
],
"flashSuitChecked": true,
"blueSuitChecked": true,
"note": "If using a Power Bomb, wait for the bomb block to respawn to be able to roll over it."
},
{
"id": 56,
"link": [
4,
3
],
"name": "Blue Suit",
"requires": [
{
"haveBlueSuit": {}
},
"Morph",
{
"or": [
{
"and": [
"canCrumbleJump",
"canTrickyJump",
"canWallJump"
]
},
{
"and": [
"canTrickyJump",
"h_useSpringBall"
]
},
{
"and": [
"canTrickyJump",
"h_useMorphBombs"
]
},
{
"and": [
"canTrickyJump",
{
"ammo": {
"type": "PowerBomb",
"count": 5
}
}
]
},
{
"and": [
"canInsaneJump",
"h_usePowerBomb"
]
},
{
"noBlueSuit": {}
}
]
}
],
"flashSuitChecked": true,
"blueSuitChecked": true,
"note": [
"The blue suit would break the bomb block below Samus while rolling through the tunnel.",
"This can be dealt with by spin jumping off the crumble block then wall jumping and morphing;",
"or use a well timed bomb boost or Spring Ball to hop over it;",
"alternatively, use the blue suit to break the first bomb block then discard the blue suit and continue normally."
]
}
],
"notables": [
{
"id": 1,
"name": "Grapple Teleport Clip",
"note": [
"Exit the previous room with Samus in a standing pose (while grappled).",
"After teleporting, hold left while releasing Grapple to stay standing (not being forced into a crouch).",
"Then jump to clip out of the floor."
]
},
{
"id": 2,
"name": "Jump Shot Speedball",
"note": [
"Jump from the top right door with speed to break the bomb blocks.",
"Time a precise shot during the jump to clear the shot block.",
"Note: Spazer can trivially break the shot block by shooting forward before jumping."
]
},
{
"id": 3,
"name": "CWJ Jump Shot Speedball",
"note": [
"In the previous room, gain low-momentum blue speed and jump, bonking the top of the doorway.",
"After the transition, perform a CWJ off the ledge, then fire a shot and speedball through the tunnel."
]
}
],
"nextStratId": 64,
"nextNotableId": 4
}