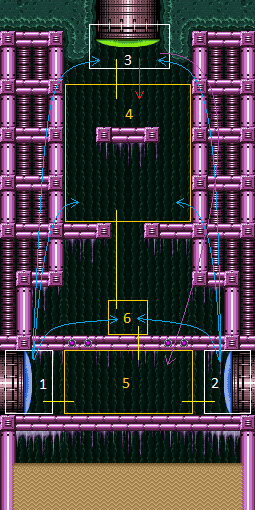
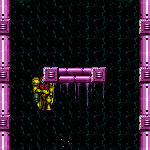
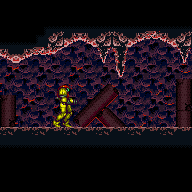
Oasis
Room ID: 198
|
Exit condition: {
"leaveWithRunway": {
"length": 13,
"openEnd": 0
}
} |
|
Requires: {
"doorUnlockedAtNode": 2
}Exit condition: {
"leaveWithRunway": {
"length": 14,
"openEnd": 0
}
}Unlocks doors: {"nodeId":2,"types":["ammo"],"requires":[]} |
|
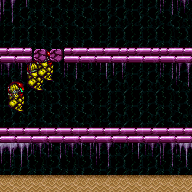
Use Screw Attack to break the bomb block by entering from a non-water room with a spin jump. It helps to enter as low as possible and with as much horizontal speed as possible and with HiJump turned off. Even if executed correctly, the trick can fail with 50% probability due to collision oscillation. Entrance condition: {
"comeInJumping": {
"speedBooster": "any",
"minTiles": 4.4375
}
}Requires: {
"notable": "Cross Room Jump with Screw Attack"
}
"canTrickyJump"
"canCrossRoomJumpIntoWater"
"ScrewAttack"Clears obstacles: A |
From: 1
Left Door
To: 1
Left Door
Use Screw Attack to break the bomb block by entering from a non-water room with a spin jump. It helps to enter as low as possible and with as much horizontal speed as possible and with HiJump turned off. Even if executed correctly, the trick can fail with 50% probability due to collision oscillation. Entrance condition: {
"comeInJumping": {
"speedBooster": "yes",
"minTiles": 3
}
}Requires: {
"notable": "Cross Room Jump with Screw Attack"
}
"canTrickyJump"
"canCrossRoomJumpIntoWater"
"ScrewAttack"Clears obstacles: A |
|

Use Screw Attack to break the bomb block by entering from a non-water room with a spin jump. It generally helps to enter as low as possible and with as much horizontal speed as possible, and with HiJump turned off except if jumping from a very low platform. Even if executed correctly, in most cases the trick can fail with 50% probability due to collision oscillation. Entrance condition: {
"comeInWithSidePlatform": {
"platforms": [
{
"minHeight": 1,
"maxHeight": 2,
"minTiles": 13.4375,
"speedBooster": "yes",
"obstructions": [
[
1,
0
]
],
"requires": [
"canTrickyDashJump"
],
"note": [
"Applies to Warehouse Entrance and Dust Torizo Room.",
"Gain extra run speed between $3.2 and $3.5, at a position where Samus just barely clears the obstruction."
],
"devNote": [
"It is technically also possible from Ridley Tank Room, using exact run speed $1.8 and subpixels in a narrow range.",
"But without a normalized setup it doesn't seem reasonable."
]
},
{
"minHeight": 3,
"maxHeight": 3,
"minTiles": 8.4375,
"speedBooster": "any",
"obstructions": [
[
1,
0
],
[
3,
2
]
],
"note": [
"Applies to Big Boy Room, Mickey Mouse Room, and Metal Pirates."
]
},
{
"minHeight": 6,
"maxHeight": 6,
"minTiles": 2.5625,
"speedBooster": "yes",
"obstructions": [
[
5,
6
]
],
"requires": [
"canTrickyDashJump"
],
"note": [
"Applies to Fast Pillars Setup Room.",
"Gain extra run speed exactly $1.1."
]
},
{
"minHeight": 8,
"maxHeight": 8,
"minTiles": 6,
"speedBooster": "no",
"obstructions": [
[
1,
0
]
],
"requires": [
"HiJump"
],
"note": [
"Applies to Screw Attack Room.",
"With extra run speed exactly $1.E, it works without collision oscillation.",
"Extra run speed $1.D also works, but with collision oscillation giving a 50% failure rate, as with most other setups."
]
}
]
}
}Requires: {
"notable": "Cross Room Jump with Screw Attack"
}
"ScrewAttack"
"canCrossRoomJumpIntoWater"
"canTrickyJump"Clears obstacles: A |
|
Use blue speed to break the bomb block by entering from a non-water room with a spin jump. It generally helps to enter as low as possible and with as much horizontal speed as possible, and with HiJump turned off. Even if executed correctly, the trick can fail with 50% probability due to collision oscillation. Shinesparking is typically an easier alternative to this strat; but using blue speed can be useful to save some energy or if carrying a flash suit. Entrance condition: {
"comeInWithSidePlatform": {
"platforms": [
{
"minHeight": 1,
"maxHeight": 1,
"minTiles": 17,
"speedBooster": "yes",
"obstructions": [
[
1,
0
]
],
"requires": [
{
"getBlueSpeed": {
"usedTiles": 15,
"openEnd": 1
}
},
"canMomentumConservingMorph"
],
"note": [
"Applies to Warehouse Entrance."
]
},
{
"minHeight": 1,
"maxHeight": 1,
"minTiles": 27.4375,
"speedBooster": "yes",
"obstructions": [
[
1,
0
]
],
"requires": [
{
"getBlueSpeed": {
"usedTiles": 24,
"openEnd": 1
}
}
],
"note": [
"Applies to Dust Torizo Room and Halfie Climb Room."
]
},
{
"minHeight": 2,
"maxHeight": 2,
"minTiles": 45,
"speedBooster": "yes",
"obstructions": [
[
2,
0
]
],
"requires": [
"h_getBlueSpeedMaxRunway",
{
"or": [
"canInsaneJump",
"canMomentumConservingMorph"
]
}
],
"note": [
"Applies to Waterway Energy Tank Room."
],
"detailNote": [
"This is easier with a momentum-conserving morph, preferably with a pause to unequip Gravity."
]
},
{
"minHeight": 2,
"maxHeight": 2,
"minTiles": 45,
"speedBooster": "yes",
"obstructions": [
[
3,
0
]
],
"requires": [
"h_getBlueSpeedMaxRunway",
"canMomentumConservingMorph"
],
"note": [
"Applies to Statues Hallway."
]
},
{
"minHeight": 3,
"maxHeight": 3,
"minTiles": 37.4375,
"speedBooster": "yes",
"obstructions": [
[
3,
0
]
],
"requires": [
"h_getBlueSpeedMaxRunway",
"canMomentumConservingMorph"
],
"note": [
"Applies to Flyway."
]
},
{
"minHeight": 3,
"maxHeight": 3,
"minTiles": 39.4375,
"speedBooster": "yes",
"obstructions": [
[
3,
2
]
],
"requires": [
"h_getBlueSpeedMaxRunway",
{
"or": [
"canMomentumConservingMorph",
"canInsaneJump"
]
}
],
"note": [
"Applies to Metal Pirates Room."
]
}
]
}
}Requires: "h_blueJump" "canCrossRoomJumpIntoWater" "canTrickyJump" Clears obstacles: A Dev note: The momentum-conserving morph variants are included for completeness, though generally if Morph is available it would be easier to speedball and do a temporary blue chain. |
|


Entrance condition: {
"comeInWithTemporaryBlue": {}
}Requires: "canChainTemporaryBlue" Clears obstacles: A Dev note: FIXME: handle the case of entering from another water room, in which case a flash suit could be carried. |
From: 1
Left Door
To: 1
Left Door


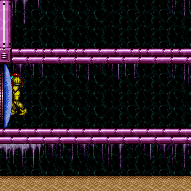
Run into the room and gain temporary blue below the bomb blocks on the far side of the room. Then jump up to break the bomb blocks. Entrance condition: {
"comeInGettingBlueSpeed": {
"length": 10,
"openEnd": 1
}
}Requires: "Gravity" "canTemporaryBlue" Clears obstacles: A Dev note: This has collision oscillation if the last half tile of runway is used. |
From: 1
Left Door
To: 1
Left Door
Run into the room and gain temporary blue below the bomb blocks on the far side of the room. Then jump up to break the bomb blocks. Entrance condition: {
"comeInGettingBlueSpeed": {
"length": 3,
"openEnd": 1
}
}Requires: "canWaterShineCharge" "canTemporaryBlue" Clears obstacles: A |
From: 1
Left Door
To: 1
Left Door
Gain blue speed running into the room, then jump, morph, and unmorph while holding angle to obtain temporary blue. This method allows retaining a flash suit. Entrance condition: {
"comeInGettingBlueSpeed": {
"length": 1,
"openEnd": 1
}
}Requires: "h_underwaterChainTemporaryBlue" Clears obstacles: A |
|
Entrance condition: {
"comeInSpeedballing": {
"runway": {
"length": 0,
"openEnd": 1
}
}
}Requires: "h_underwaterChainTemporaryBlue" Clears obstacles: A |
|
Break the bomb block on the opposite side of the room. With extra run speeds between $1.2 and $1.D, it's not possible to break the bomb block directly with a bounce; but it is always possible to break them by chaining temporary blue (even if carrying a flash suit). Entrance condition: {
"comeInWithBlueSpringBallBounce": {
"movementType": "controlled"
}
}Requires: "h_underwaterChainTemporaryBlue" Clears obstacles: A |
From: 1
Left Door
To: 1
Left Door
Gain blue speed running into the room, then jump to break the bomb block on the far side of the room. Entrance condition: {
"comeInGettingBlueSpeed": {
"length": 9,
"openEnd": 0
}
}Requires: "h_blueJump" "Gravity" "canTrickyJump" Clears obstacles: A |
From: 1
Left Door
To: 1
Left Door
Gain blue speed running into the room, then jump to break the bomb block on the far side of the room. Entrance condition: {
"comeInGettingBlueSpeed": {
"length": 2,
"openEnd": 1,
"maxExtraRunSpeed": "$1.3"
}
}Requires: "h_blueJump" "canTrickyJump" Clears obstacles: A Dev note: With extra run speeds above $1.3, Samus' jump height is shorter, in which case this method would be ineffective compared to a temporary blue chain. |
From: 1
Left Door
To: 1
Left Door
Entrance condition: {
"comeInGettingBlueSpeed": {
"length": 2,
"openEnd": 1
}
}Requires: "h_blueJump" "canTrickyJump" "HiJump" Clears obstacles: A |
|


Entrance condition: {
"comeInBlueSpaceJumping": {
"minExtraRunSpeed": "$1.B"
}
}Requires: "canPreciseSpaceJump" Clears obstacles: A |
From: 1
Left Door
To: 1
Left Door
With a runway of 5 tiles (open end) in the other room, the ideal timing for the stutter is to release forward for 5 frames, and repress forward on the last possible frame before the transition. Other timings can work, but will gain the shinecharge further from the door, leaving fewer shinecharge frames remaining. After gaining the shinecharge, continue holding forward in order to make Samus stand. Then turnaround spin jump back toward the door, and continue spin jumping to reach the transition with a shinecharge. Entrance condition: {
"comeInStutterShinecharging": {
"minTiles": 5
}
}Requires: "canPreciseStutterWaterShineCharge"
"canShinechargeMovementTricky"
"canInsaneJump"
{
"shineChargeFrames": 130
}
{
"or": [
"canBeVeryPatient",
{
"shineChargeFrames": 15
}
]
}Exit condition: {
"leaveShinecharged": {}
}Unlocks doors: {"types":["super"],"requires":[]}
{"types":["missiles","powerbomb"],"requires":["never"]} |
From: 1
Left Door
To: 1
Left Door
With only a runway of 4 tiles (open end) in the other room, the ideal timing for the stutter is to release forward for 4 frames, and repress forward on the last possible frame before the transition. It also works well to release forward for 3 frames and repress on the last possible frame. Other timings can also work, but may gain the shinecharge further from the door, leaving fewer shinecharge frames remaining. After gaining the shinecharge, continue holding forward in order to make Samus stand. Then turnaround spin jump back toward the door, and continue spin jumping to reach the transition with a shinecharge. Entrance condition: {
"comeInStutterShinecharging": {
"minTiles": 4
}
}Requires: "canPreciseStutterWaterShineCharge"
"canShinechargeMovementTricky"
"canInsaneJump"
{
"shineChargeFrames": 140
}
{
"or": [
"canBeVeryPatient",
{
"shineChargeFrames": 10
}
]
}Exit condition: {
"leaveShinecharged": {}
}Unlocks doors: {"types":["super"],"requires":[]}
{"types":["missiles","powerbomb"],"requires":["never"]} |
From: 1
Left Door
To: 1
Left Door
With only a runway of 3 tiles (open end) in the other room, the ideal timing for the stutter is to release forward for 3 or 4 frames, and repress forward on the last possible frame before the transition. Other timings can work, but will gain the shinecharge further from the door, leaving fewer shinecharge frames remaining. After gaining the shinecharge, continue holding forward in order to make Samus stand. Then turnaround spin jump back toward the door, and continue spin jumping to reach the transition with a shinecharge. Alternatively, with greater difficulty but saving some shinecharge frames, after performing the turnaround spin jump, briefly moonwalk back, then retain momentum by boomeranging forward (switching from pressing backward to pressing forward on the next frame), and arm pump to reach the door quickly. Entrance condition: {
"comeInStutterShinecharging": {
"minTiles": 3
}
}Requires: "canPreciseStutterWaterShineCharge"
"canShinechargeMovementTricky"
"canInsaneJump"
{
"shineChargeFrames": 145
}
{
"or": [
"canBeVeryPatient",
{
"shineChargeFrames": 10
}
]
}Exit condition: {
"leaveShinecharged": {}
}Unlocks doors: {"types":["super"],"requires":[]}
{"types":["missiles","powerbomb"],"requires":["never"]}Dev note: The same shinecharge frames could be achieved with a closed end runway (effective length of 2.4375), with a 3-frame stutter, but there doesn't appear to be any application. |
From: 1
Left Door
To: 1
Left Door
With only a runway of 2 tiles (open end) in the other room, the ideal timing for the stutter is to release forward for 3 frames, and repress forward on the last possible frame before the transition. Other timings can work, but will gain the shinecharge further from the door, leaving fewer shinecharge frames remaining. After gaining the shinecharge, continue holding forward in order to make Samus stand. Then turnaround spin jump back toward the door, and continue spin jumping to reach the transition with a shinecharge. Alternatively, with greater difficulty but saving some shinecharge frames, after performing the turnaround spin jump, briefly moonwalk back, then retain momentum by boomeranging forward (switching from pressing backward to pressing forward on the next frame), and arm pump to reach the door quickly. Entrance condition: {
"comeInStutterShinecharging": {
"minTiles": 2
}
}Requires: "canPreciseStutterWaterShineCharge"
"canShinechargeMovementTricky"
"canInsaneJump"
{
"shineChargeFrames": 150
}
{
"or": [
"canBeVeryPatient",
{
"shineChargeFrames": 15
}
]
}Exit condition: {
"leaveShinecharged": {}
}Unlocks doors: {"types":["super"],"requires":[]}
{"types":["missiles","powerbomb"],"requires":["never"]}Dev note: FIXME: The canBeVeryPatient requirement is for difficulty placement of the boomerang method; but the boomerang (or maybe specifically the moonwalk boomerang) should possibly be its own tech, and the same with rapid arm pumping. |
From: 1
Left Door
To: 1
Left Door
With only 1 tile of runway in the other room, Samus should ideally start on the last pixel of runway with X subpixels of $3FFF or less. Run toward the door, releasing forward for exactly 1 frame and pressing it again on the last possible frame before the transition. Starting with X subpixels of $7FFF can also work (e.g., by simply backing against the door ledge, then jumping and turning around mid-air); in this case, Samus must advance 1 or 2 pixels with an arm pump before the transition (e.g., firing a shot or pressing and/or releasing an angle button), and the shinecharge will be gained slightly further away from the door. After gaining the shinecharge, continue holding forward in order to make Samus stand. Then turnaround spin jump back toward the door, and continue spin jumping to reach the transition with a shinecharge. Alternatively, with greater difficulty but saving some shinecharge frames, after performing the turnaround spin jump, briefly moonwalk back, then retain momentum by boomeranging forward (switching from pressing backward to pressing forward on the next frame), and arm pump to reach the door quickly. Ideal subpixels ($3FFF) can be achieved using one of several methods: 1) press forward against the door ledge (or a wall aligned with it); jump, and while mid-air, tap forward for exactly 1 frame to land with subpixels $BFFF, moonwalk back for exactly 1 frame to end with subpixels $3FFF. 2) press forward against the door ledge (from a platform below, assuming one exists) turn around (while on the ground), and moonwalk back two pixels, then jump and mid-air turnaround onto the ledge; if Samus jumped from the correct pixel but does not land on the ledge, then it was needed to moonwalk back 1 more frame; in this case it is possible to retry by doing a mid-air turnaround back onto the platform, and moonwalking back for 1 frame. 3) if X-Ray is available, press against the door ledge (from a platform below, assuming one exists) turn around (while on the ground), then jump and mid-air turnaround toward the door, and use X-Ray to turnaround in place away from the door; repeat this sequence 3 more times: jump, mid-air turnaround, X-Ray turnaround; then do one more jump and mid-air turnaround, high enough to land on the door ledge, and Samus should be in the correct position with subpixels $3FFF. Entrance condition: {
"comeInStutterShinecharging": {
"minTiles": 1
}
}Requires: {
"doorUnlockedAtNode": 2
}
"canPreciseStutterWaterShineCharge"
"canInsaneJump"
"canBeVeryPatient"
"canShinechargeMovementTricky"
{
"shineChargeFrames": 160
}Exit condition: {
"leaveShinecharged": {}
}Unlocks doors: {"nodeId":2,"types":["missiles","super"],"requires":[]}
{"nodeId":2,"types":["powerbomb"],"requires":["never"]}
{"types":["super"],"requires":[]}
{"types":["missiles","powerbomb"],"requires":["never"]} |
|
Entrance condition: {
"comeInShinecharging": {
"length": 12,
"openEnd": 0
},
"comesInHeated": "no"
}Requires: "Gravity" "h_CrystalSpark" Clears obstacles: A |
|
With only a runway length of 3 tiles (closed end) in the other room, this requires a precise setup: release forward for 3 or 4 frames, then repress forward on the last possible frame before the transition; alternatively, release forward for 2 frames and repress forward on the second-to-last possible frame before the transition. If a longer runway is available (4 tiles), the timing windows are a bit more lenient: 1. Release forward for 3, 4, or 5 frames, repress forward on the last possible frame; 2. Release forward for 2 or 3 frames, repress forward on the 2nd-to-last possible frame; 3. Release forward for 1 or 2 frames, repress forward on the 3rd-to-last possible frame. Entrance condition: {
"comeInStutterShinecharging": {
"minTiles": 2.4375
},
"comesInHeated": "no"
}Requires: "canPreciseStutterWaterShineCharge" "h_underwaterCrystalSpark" Clears obstacles: A Dev note: FIXME: This is possible with a shorter runway, as low as 1 tile, but it's a lot worse. It would require more duplication and could be very tedious to set up for many attempts. |
|
Entrance condition: {
"comeInWithGMode": {
"mode": "any",
"morphed": true
}
}Requires: {
"or": [
"h_artificialMorphPowerBomb",
{
"and": [
"h_artificialMorphIBJ",
"Gravity"
]
},
{
"and": [
"h_artificialMorphSpringBall",
"h_artificialMorphBombs"
]
}
]
}Clears obstacles: A |
From: 1
Left Door
To: 2
Right Door
Entrance condition: {
"comeInShinecharged": {}
}Requires: {
"or": [
{
"and": [
"Gravity",
{
"shineChargeFrames": 5
}
]
},
{
"shineChargeFrames": 10
}
]
}
{
"shinespark": {
"frames": 23,
"excessFrames": 0
}
}Exit condition: {
"leaveWithSpark": {
"position": "bottom"
}
}Unlocks doors: {"types":["super"],"requires":[]}
{"types":["missiles","powerbomb"],"requires":["never"]} |
From: 1
Left Door
To: 2
Right Door
Entrance condition: {
"comeInShinecharged": {}
}Requires: {
"or": [
{
"and": [
"Gravity",
{
"shineChargeFrames": 10
}
]
},
{
"shineChargeFrames": 20
}
]
}
{
"shinespark": {
"frames": 21,
"excessFrames": 0
}
}Exit condition: {
"leaveWithSpark": {
"position": "top"
}
}Unlocks doors: {"types":["super"],"requires":[]}
{"types":["missiles","powerbomb"],"requires":["never"]} |
|
Entrance condition: {
"comeInShinecharged": {}
}Requires: "canShinechargeMovementComplex"
{
"or": [
{
"and": [
"Gravity",
{
"shineChargeFrames": 55
}
]
},
{
"and": [
"canSuitlessMaridia",
{
"shineChargeFrames": 150
}
]
}
]
}Exit condition: {
"leaveShinecharged": {}
}Unlocks doors: {"types":["super"],"requires":[]}
{"types":["missiles","powerbomb"],"requires":["never"]} |
|
Entrance condition: {
"comeInWithStoredFallSpeed": {
"fallSpeedInTiles": 1
}
}Exit condition: {
"leaveWithStoredFallSpeed": {
"fallSpeedInTiles": 1
}
}Unlocks doors: {"types":["missiles","super"],"requires":[]}
{"types":["powerbomb"],"requires":["never"]} |
|
Entrance condition: {
"comeInWithStoredFallSpeed": {
"fallSpeedInTiles": 2
}
}Exit condition: {
"leaveWithStoredFallSpeed": {
"fallSpeedInTiles": 2
}
}Unlocks doors: {"types":["missiles","super"],"requires":[]}
{"types":["powerbomb"],"requires":["never"]} |
From: 1
Left Door
To: 3
Top Door

Use Screw Attack to break the bomb block by entering from a non-water room with a spin jump, and make it all the way through the top door. Ideally, gain speed using between 13 and 13.5 tiles of runway (with an open end). Longer runway lengths can also work, up to 17 tiles, but will make the trick somewhat more precise. Use angle to break spin, and do a momentum conserving turnaround either on the same frame or one frame later; this first turnaround should be done early enough that the turnaround is complete by the time Samus clears the two-tile passage in the middle of the room. Do a second momentum conserving turnaround somewhat late, and by switching from holding left to holding right one frame later (a perfect 'boomerang'). Shoot open the door, and use a third momentum conserving turnaround on it as it opens. The optimal amount of extra run speed is $3.4 or $3.5, by using 13 tiles of runway or about a half tile more; this gives a 7-frame window for the first turnaround, and typically a 4-frame window for the second turnaround if the first turnaround is done early enough. Extra run speeds between $3.6 and $3.F can also work, but with shorter windows. A perfect boomerang is always required for the second turnaround, regardless of where in the window it is done. It is recommended to buffer the spin break, by holding angle (up or down), jump, and forward through the transition, then switching from forward to backward, with at most 1 frame of neutral in between, while still holding jump and angle. Entrance condition: {
"comeInJumping": {
"speedBooster": "yes",
"minTiles": 13
}
}Requires: {
"notable": "Cross Room Jump Boomerang To Top"
}
"canInsaneJump"
"canCrossRoomJumpIntoWater"
"ScrewAttack"
"canMomentumConservingTurnaround"
{
"noFlashSuit": {}
}Exit condition: {
"leaveNormally": {}
}Unlocks doors: {"types":["super"],"requires":[]}
{"types":["missiles","powerbomb"],"requires":["never"]}Dev note: This does not have collision oscillation. |
From: 1
Left Door
To: 3
Top Door
Use a 2-tap shortcharge and jump into the room with a last-frame jump, breaking the bomb block with blue speed, and making it all the way through the top door. Use angle to break spin, and do a momentum conserving turnaround either on the same frame or one frame later; this first turnaround should be done early enough that the turnaround is complete by the time Samus clears the two-tile passage in the middle of the room. Do a second momentum conserving turnaround somewhat late, and by switching from holding left to holding right one frame later (a perfect 'boomerang'). Shoot open the door, and use a third momentum conserving turnaround on it as it opens. Lower run speeds are generally better, as long as the extra run speed is at least $3.4. this gives up to a 7-frame window for the first turnaround, and typically a 4-frame window for the second turnaround if the first turnaround is done early enough. A perfect boomerang is always required for the second turnaround, regardless of where in the window it is done. It is recommended to buffer the spin break, by holding angle (up or down), jump, and forward through the transition, then switching from forward to backward, with at most 1 frame of neutral in between, while still holding jump and angle. Entrance condition: {
"comeInGettingBlueSpeed": {
"length": 0,
"openEnd": 1,
"minExtraRunSpeed": "$3.4",
"maxExtraRunSpeed": "$3.F"
}
}Requires: {
"notable": "Cross Room Jump Boomerang To Top"
}
"h_blueJump"
"canInsaneJump"
"canCrossRoomJumpIntoWater"
"canMomentumConservingTurnaround"
{
"noFlashSuit": {}
}Exit condition: {
"leaveNormally": {}
}Unlocks doors: {"types":["super"],"requires":[]}
{"types":["missiles","powerbomb"],"requires":["never"]} |
From: 1
Left Door
To: 3
Top Door


Entrance condition: {
"comeInShinecharging": {
"length": 3,
"openEnd": 0
}
}Requires: "Gravity"
"ScrewAttack"
"canShinechargeMovementTricky"
{
"or": [
{
"and": [
"HiJump",
{
"shineChargeFrames": 130
}
]
},
{
"shineChargeFrames": 145
}
]
}Exit condition: {
"leaveShinecharged": {}
}Unlocks doors: {"types":["super"],"requires":[]}
{"types":["missiles","powerbomb"],"requires":["never"]}Dev note: FIXME: It can be possible to use a longer runway, or a stutter shinecharge with Gravity re-equip, with a cost of some shinecharge frames. |
From: 1
Left Door
To: 4
Top Platform
Entrance condition: {
"comeInShinecharged": {}
}Requires: {
"shineChargeFrames": 10
}
"h_navigateUnderwater"
{
"shinespark": {
"frames": 23,
"excessFrames": 2
}
} |
|
Use Screw Attack to break the bomb block by entering from a non-water room with a last-frame spin jump, and make it to the platform below the top door. Longer runway lengths can also work, up to 17 tiles, but will make the trick somewhat more precise. Use angle to break spin, and do a momentum conserving turnaround either on the same frame or one frame later; this first turnaround should be done early enough that the turnaround is complete by the time Samus clears the two-tile passage in the middle of the room. Do a second momentum conserving turnaround somewhat late, and by switching from holding left to holding right one frame later (a perfect 'boomerang'). The optimal amount of extra run speed is between $3.2 and $3.5, by using 13 tiles of runway or about a half tile more or less; this gives a 7-frame window for the first turnaround, and typically a 4-frame window for the second turnaround if the first turnaround is done early enough. Extra run speeds between $3.6 and $3.F can also work, but with shorter windows. A perfect boomerang is always required for the second turnaround, regardless of where in the window it is done. It is recommended to buffer the spin break, by holding angle (up or down), jump, and forward through the transition, then switching from forward to backward, with at most 1 frame of neutral in between, while still holding jump and angle. Entrance condition: {
"comeInJumping": {
"speedBooster": "yes",
"minTiles": 12.4375
}
}Requires: {
"notable": "Cross Room Jump Boomerang To Top"
}
"canInsaneJump"
"canCrossRoomJumpIntoWater"
"ScrewAttack"
"canMomentumConservingTurnaround"
"h_trickyToCarryFlashSuit"Dev note: This does not have collision oscillation. |
|
Use a 2-tap shortcharge and jump into the room with a last-frame jump, breaking the bomb block with blue speed, and making it all the way through the top door. Use angle to break spin, and do a momentum conserving turnaround either on the same frame or one frame later; this first turnaround should be done early enough that the turnaround is complete by the time Samus clears the two-tile passage in the middle of the room. Do a second momentum conserving turnaround somewhat late, and by switching from holding left to holding right one frame later (a perfect 'boomerang'). Lower run speeds are generally better, as long as the extra run speed is at least $3.2. this gives up to a 7-frame window for the first turnaround, and typically a 4-frame window for the second turnaround if the first turnaround is done early enough. A perfect boomerang is always required for the second turnaround, regardless of where in the window it is done. It is recommended to buffer the spin break, by holding angle (up or down), jump, and forward through the transition, then switching from forward to backward, with at most 1 frame of neutral in between, while still holding jump and angle. Entrance condition: {
"comeInGettingBlueSpeed": {
"length": 0,
"openEnd": 1,
"minExtraRunSpeed": "$3.2",
"maxExtraRunSpeed": "$3.F"
}
}Requires: {
"notable": "Cross Room Jump Boomerang To Top"
}
"h_blueJump"
"canInsaneJump"
"canCrossRoomJumpIntoWater"
"canMomentumConservingTurnaround"
"h_trickyToCarryFlashSuit" |
|


Jump into a momentum-conserving morph with blue speed to break the bomb block and continue up to the top of the room. After pressing down to initiate the momentum-conserving morph, all inputs can be released; do not hold forward while the morph completes as it would give too much speed, causing Samus to bonk horizontally. Tapping (not holding) backward can sometimes help in dodging the platforms while ascending, by reversing Samus' horizontal momentum. Entrance condition: {
"comeInWithSidePlatform": {
"platforms": [
{
"minHeight": 1,
"maxHeight": 1,
"minTiles": 17,
"speedBooster": "yes",
"obstructions": [
[
1,
0
]
],
"requires": [
{
"getBlueSpeed": {
"usedTiles": 15,
"openEnd": 1
}
},
"h_blueJump"
],
"note": [
"Applies to Warehouse Entrance."
],
"detailNote": [
"Jump through the door with an extra run speed of at least $2.2."
]
},
{
"minHeight": 1,
"maxHeight": 1,
"minTiles": 27.4375,
"speedBooster": "yes",
"obstructions": [
[
1,
0
]
],
"requires": [
{
"getBlueSpeed": {
"usedTiles": 24,
"openEnd": 1
}
},
"h_blueJump"
],
"note": [
"Applies to Dust Torizo Room and Halfie Climb Room."
],
"detailNote": [
"Jump through the door with an extra run speed of $3.1 or less."
]
},
{
"minHeight": 2,
"maxHeight": 2,
"minTiles": 45,
"speedBooster": "yes",
"obstructions": [
[
2,
0
]
],
"requires": [
{
"getBlueSpeed": {
"usedTiles": 24,
"openEnd": 1
}
},
"h_blueJump",
"canInsaneMidAirMorph"
],
"note": [
"Applies to Waterway Energy Tank Room."
],
"detailNote": [
"Pause to unequip Gravity before the transition."
]
},
{
"minHeight": 3,
"maxHeight": 3,
"minTiles": 39.4375,
"speedBooster": "yes",
"obstructions": [
[
3,
2
]
],
"requires": [
{
"getBlueSpeed": {
"usedTiles": 24,
"openEnd": 1
}
},
"h_blueJump",
"canInsaneMidAirMorph"
],
"note": [
"Applies to Metal Pirates Room."
]
}
]
}
}Requires: "canCrossRoomJumpIntoWater" "canMomentumConservingMorph" "canInsaneJump" Clears obstacles: A |
|
|
|

This is a short climb, only a few tiles. Entrance condition: {
"comeInWithDoorStuckSetup": {}
}Requires: "canXRayClimb" |
From: 1
Left Door
To: 6
Junction Above Bomb Blocks
Spark vertically through the bomb blocks. It is still possible to break the blocks while below 30 Energy by jumping before sparking. Entrance condition: {
"comeInShinecharged": {}
}Requires: {
"shineChargeFrames": 25
}
"h_navigateUnderwater"
{
"or": [
{
"shinespark": {
"frames": 10,
"excessFrames": 8
}
},
{
"and": [
"canMidairShinespark",
{
"shinespark": {
"frames": 7,
"excessFrames": 7
}
}
]
},
{
"and": [
"canTrickyJump",
{
"shinespark": {
"frames": 1,
"excessFrames": 1
}
}
]
}
]
}Clears obstacles: A Dev note: This does not require canWaterShineCharge, as you can store the shinecharge before entering the room. Note that it is possible to spark into the ceiling to break the blocks without energy loss, but it has collision oscillation. |
|
Entrance condition: {
"comeInShinecharging": {
"length": 12,
"openEnd": 0
}
}Requires: "Gravity"
{
"shineChargeFrames": 0
} |
|
Entrance condition: {
"comeInShinecharging": {
"length": 4,
"openEnd": 0
}
}Requires: "canWaterShineCharge"
{
"shineChargeFrames": 0
} |
|
Entrance condition: {
"comeInStutterShinecharging": {
"minTiles": 2.4375
}
}Requires: "canPreciseStutterWaterShineCharge"
{
"shineChargeFrames": 0
} |
From: 1
Left Door
To: 8
Bottom Right Shinecharged
If only 2 tiles of runway are available and it is not possible to unlock the opposite door, then this requires a double frame-perfect stutter: run toward the door, release forward for exactly 3 frames, pressing forward again on the last possible frame before the transition. Entrance condition: {
"comeInStutterShinecharging": {
"minTiles": 2
}
}Requires: "canPreciseStutterWaterShineCharge"
{
"or": [
{
  "doorUnlockedAtNode": 2
},
"canInsaneJump"
]
}
{
"shineChargeFrames": 0
}Unlocks doors: {"nodeId":2,"types":["super","missiles"],"requires":[]}
{"nodeId":2,"types":["powerbomb"],"requires":["never"]}Dev note: FIXME: canInsaneJump is for difficulty placement; replace with a more appropriate tech since no jump is involved. |
From: 1
Left Door
To: 8
Bottom Right Shinecharged
With only 1 tile of runway in the other room, Samus should ideally start on the last pixel of runway with X subpixels of $3FFF or less. Run toward the door, releasing forward for exactly 1 frame and pressing it again on the last possible frame before the transition. Starting with X subpixels of $7FFF can also work (e.g., by simply backing against the door ledge, then jumping and turning around mid-air); in this case, Samus must advance 1 or 2 pixels with an arm pump before the transition (e.g., firing a shot or pressing and/or releasing an angle button), and the shinecharge will be gained slightly further away. After the transition, shoot open the opposite door while running, to extend the runway by a tile. Correct subpixels can be achieved using one of several methods: 1) press against the door ledge (or a wall aligned with it); jump, and while mid-air, tap forward for exactly 1 frame to land with subpixels $BFFF, moonwalk back for exactly 1 frame to end with subpixels $3FFF. 2) press against the door ledge (from a platform below, assuming one exists) turn around (while on the ground), and moonwalk back two pixels, then jump and mid-air turnaround onto the ledge; if Samus jumped from the correct pixel but does not land on the ledge, then it was needed to moonwalk back 1 more frame; in this case it is possible to retry by doing a mid-air turnaround back onto the platform, and moonwalking back for 1 frame. 3) if X-Ray is available, press against the door ledge (from a platform below, assuming one exists) turn around (while on the ground), then jump and mid-air turnaround toward the door, and use X-Ray to turnaround in place away from the door; repeat this sequence 3 more times: jump, mid-air turnaround, X-Ray turnaround; then do one more jump and mid-air turnaround, high enough to land on the door ledge, and Samus should be in the correct position with subpixels $3FFF. Entrance condition: {
"comeInStutterShinecharging": {
"minTiles": 1
}
}Requires: "canPreciseStutterWaterShineCharge"
"canInsaneJump"
"canBeVeryPatient"
{
"doorUnlockedAtNode": 2
}
{
"shineChargeFrames": 0
}Unlocks doors: {"nodeId":2,"types":["super","missiles"],"requires":[]}
{"nodeId":2,"types":["powerbomb"],"requires":["never"]}Dev note: The `canBeVeryPatient` is for difficulty placement; this could be improved with a more specific tech later, since it does not actually take a long time to execute. |
From: 1
Left Door
To: 9
Center Platforms
Entrance condition: {
"comeInShinecharged": {}
}Requires: {
"shineChargeFrames": 10
}
"h_navigateUnderwater"
{
"shinespark": {
"frames": 23,
"excessFrames": 10
}
} |
From: 1
Left Door
To: 9
Center Platforms

Use Screw Attack to break the bomb block by entering from a non-water room with a spin jump, and make it up to the center of the room. It helps to enter as low as possible and with as much horizontal speed as possible and with HiJump turned off. Enter with extra run speed between $3.2 and $3.F, with the lower speeds in this range being better. Entrance condition: {
"comeInJumping": {
"speedBooster": "yes",
"minTiles": 12.4375
}
}Requires: {
"notable": "Cross Room Jump with Screw Attack"
}
"canInsaneJump"
"canCrossRoomJumpIntoWater"
"ScrewAttack"
"canMomentumConservingTurnaround"Dev note: This does not have collision oscillation. |
|
Use blue speed to break the bomb block by entering from a non-water room with a spin jump, and make it up to the center of the room. It helps to enter as low as possible and with as much horizontal speed as possible and with HiJump turned off. Enter with extra run speed between $3.2 and $3.F, with the lower speeds in this range being better. Entrance condition: {
"comeInGettingBlueSpeed": {
"length": 0,
"openEnd": 1,
"minExtraRunSpeed": "$3.2",
"maxExtraRunSpeed": "$3.F"
}
}Requires: "h_blueJump" "canInsaneJump" "canCrossRoomJumpIntoWater" "canMomentumConservingTurnaround" Dev note: This does not have collision oscillation. |
From: 2
Right Door
To: 1
Left Door
Entrance condition: {
"comeInShinecharged": {}
}Requires: {
"or": [
{
"and": [
"Gravity",
{
"shineChargeFrames": 5
}
]
},
{
"shineChargeFrames": 10
}
]
}
{
"shinespark": {
"frames": 23,
"excessFrames": 0
}
}Exit condition: {
"leaveWithSpark": {
"position": "bottom"
}
}Unlocks doors: {"types":["super"],"requires":[]}
{"types":["missiles","powerbomb"],"requires":["never"]} |
From: 2
Right Door
To: 1
Left Door
Entrance condition: {
"comeInShinecharged": {}
}Requires: {
"or": [
{
"and": [
"Gravity",
{
"shineChargeFrames": 10
}
]
},
{
"shineChargeFrames": 20
}
]
}
{
"shinespark": {
"frames": 21,
"excessFrames": 0
}
}Exit condition: {
"leaveWithSpark": {
"position": "top"
}
}Unlocks doors: {"types":["super"],"requires":[]}
{"types":["missiles","powerbomb"],"requires":["never"]} |
|
Entrance condition: {
"comeInShinecharged": {}
}Requires: "canShinechargeMovementComplex"
{
"or": [
{
"and": [
"Gravity",
{
"shineChargeFrames": 55
}
]
},
{
"and": [
"canSuitlessMaridia",
{
"shineChargeFrames": 150
}
]
}
]
}Exit condition: {
"leaveShinecharged": {}
}Unlocks doors: {"types":["super"],"requires":[]}
{"types":["missiles","powerbomb"],"requires":["never"]} |
|
Entrance condition: {
"comeInWithStoredFallSpeed": {
"fallSpeedInTiles": 1
}
}Exit condition: {
"leaveWithStoredFallSpeed": {
"fallSpeedInTiles": 1
}
}Unlocks doors: {"types":["missiles","super"],"requires":[]}
{"types":["powerbomb"],"requires":["never"]} |
|
Entrance condition: {
"comeInWithStoredFallSpeed": {
"fallSpeedInTiles": 2
}
}Exit condition: {
"leaveWithStoredFallSpeed": {
"fallSpeedInTiles": 2
}
}Unlocks doors: {"types":["missiles","super"],"requires":[]}
{"types":["powerbomb"],"requires":["never"]} |
|
Exit condition: {
"leaveWithRunway": {
"length": 13,
"openEnd": 0
}
} |
|
Requires: {
"doorUnlockedAtNode": 1
}Exit condition: {
"leaveWithRunway": {
"length": 14,
"openEnd": 0
}
}Unlocks doors: {"nodeId":1,"types":["ammo"],"requires":[]} |
|
Use Screw Attack to break the bomb block by entering from a non-water room with a spin jump. It helps to enter as low as possible and with as much horizontal speed as possible and with HiJump turned off. Even if executed correctly, the trick can fail with 50% probability due to collision oscillation. Entrance condition: {
"comeInJumping": {
"speedBooster": "any",
"minTiles": 4.4375
}
}Requires: {
"notable": "Cross Room Jump with Screw Attack"
}
"canTrickyJump"
"canCrossRoomJumpIntoWater"
"ScrewAttack"Clears obstacles: A |
From: 2
Right Door
To: 2
Right Door
Use Screw Attack to break the bomb block by entering from a non-water room with a spin jump. It helps to enter as low as possible and with as much horizontal speed as possible and with HiJump turned off. Even if executed correctly, the trick can fail with 50% probability due to collision oscillation. Entrance condition: {
"comeInJumping": {
"speedBooster": "yes",
"minTiles": 3
}
}Requires: {
"notable": "Cross Room Jump with Screw Attack"
}
"canTrickyJump"
"canCrossRoomJumpIntoWater"
"ScrewAttack"Clears obstacles: A |
|
Use Screw Attack to break the bomb block by entering from a non-water room with a spin jump. It generally helps to enter as low as possible and with as much horizontal speed as possible, and with HiJump turned off. Even if executed correctly, the trick can fail with 50% probability due to collision oscillation. Entrance condition: {
"comeInWithSidePlatform": {
"platforms": [
{
"minHeight": 1,
"maxHeight": 1,
"minTiles": 13.4375,
"speedBooster": "yes",
"obstructions": [
[
1,
0
]
],
"requires": [
"canTrickyDashJump"
],
"note": [
"Applies to Lava Dive.",
"Gain extra run speed of $3.5, at a position where Samus just barely clears the obstruction:",
"Starting at a horizontal position of $110 (272) or $111 (273) works at any subpixels;",
"parts of the neighboring pixels on either side also work."
],
"devNote": [
"Run speed $3.2 works, at a pixel position of $F7 (247) with any subpixel, or on parts of the neighboring pixel on either side;",
"run speed $3.8 is possible but does not have an entire pixel that works."
]
},
{
"minHeight": 2,
"maxHeight": 2,
"minTiles": 5.4375,
"speedBooster": "yes",
"obstructions": [
[
1,
0
]
],
"note": [
"Applies to Early Super Room, Bowling Alley (Bottom), Tourian Hopper Room, Dust Torizo Room, and Noob Bridge."
]
},
{
"minHeight": 2,
"maxHeight": 2,
"minTiles": 8.4375,
"speedBooster": "any",
"obstructions": [
[
1,
0
]
],
"requires": [
"canInsaneJump"
],
"note": [
"Applies to Bowling Alley (Bottom), Tourian Hopper Room, Dust Torizo Room, and Noob Bridge.",
"Without Speed Booster, this requires specific positioning to align Samus to just barely clear the door ledge."
]
},
{
"minHeight": 3,
"maxHeight": 3,
"minTiles": 8.4375,
"speedBooster": "any",
"obstructions": [
[
1,
0
]
],
"note": [
"Applies to Bomb Torizo Room, Pink Brinstar Wave Gate Room, Phantoon's Room, Big Boy Room, Double Chamber."
]
},
{
"minHeight": 3,
"maxHeight": 3,
"minTiles": 5,
"speedBooster": "yes",
"obstructions": [
[
1,
0
],
[
3,
2
]
],
"note": [
"Applies to Bomb Torizo Room, Pink Brinstar Wave Gate Room, Phantoon's Room, Big Boy Room, Double Chamber, and Metal Pirates Room.",
"With extra run speed exactly $1.2, this works without collision oscillation.",
"Extra run speed up through $1.8 also work but with collision oscillation giving a 50% failure rate, as with most other setups."
]
},
{
"minHeight": 4,
"maxHeight": 4,
"minTiles": 4.5625,
"speedBooster": "yes",
"obstructions": [
[
5,
4
]
],
"note": [
"Applies to Tourian Escape Room 4."
]
}
]
}
}Requires: {
"notable": "Cross Room Jump with Screw Attack"
}
"ScrewAttack"
"canCrossRoomJumpIntoWater"
"canTrickyJump"Clears obstacles: A |
|
Use blue speed to break the bomb block by entering from a non-water room with a spin jump. It generally helps to enter as low as possible and with as much horizontal speed as possible, and with HiJump turned off. Even if executed correctly, the trick can fail with 50% probability due to collision oscillation. Shinesparking is typically an easier alternative to this strat; but using blue speed can be useful to save some energy or if carrying a flash suit. Entrance condition: {
"comeInWithSidePlatform": {
"platforms": [
{
"minHeight": 1,
"maxHeight": 1,
"minTiles": 16,
"speedBooster": "yes",
"obstructions": [
[
1,
0
]
],
"requires": [
{
"getBlueSpeed": {
"usedTiles": 15,
"openEnd": 0
}
},
"h_blueJump",
"canMomentumConservingMorph"
],
"note": [
"Applies to Lava Dive Room."
]
},
{
"minHeight": 2,
"maxHeight": 2,
"minTiles": 27.4375,
"speedBooster": "yes",
"obstructions": [
[
1,
0
]
],
"requires": [
{
"getBlueSpeed": {
"usedTiles": 24,
"openEnd": 1
}
},
"h_blueJump"
],
"note": [
"Applies to Dust Torizo Room and Noob Bridge."
]
},
{
"minHeight": 3,
"maxHeight": 3,
"minTiles": 28.2472,
"speedBooster": "yes",
"obstructions": [
[
1,
0
]
],
"requires": [
{
"getBlueSpeed": {
"usedTiles": 24,
"openEnd": 1
}
},
"h_blueJump"
],
"note": [
"Applies to Double Chamber."
]
},
{
"minHeight": 1,
"maxHeight": 1,
"minTiles": 36.3703,
"speedBooster": "yes",
"obstructions": [
[
3,
0
]
],
"environment": "water",
"requires": [
"h_getBlueSpeedMaxRunway",
"h_blueJump",
"canGravityJump",
"canMomentumConservingMorph"
],
"note": [
"This applies to Botwoon Energy Tank Room"
],
"detailNote": [
"Use a 1-tap to gain blue speed, and time a pause to hit just after jumping and aiming down,",
"then unequip Gravity and hold down during the unpause black screen to buffer the morph."
]
},
{
"minHeight": 2,
"maxHeight": 2,
"minTiles": 45,
"speedBooster": "yes",
"obstructions": [
[
3,
0
]
],
"requires": [
"h_getBlueSpeedMaxRunway",
"h_blueJump",
"canInsaneJump",
"canMomentumConservingMorph"
],
"note": [
"This applies to Statues Hallway and Baby Kraid Room"
],
"detailNote": [
"Use a 1-tap to gain blue speed, and time a pause to hit just after jumping and aiming down,",
"then unequip Gravity and hold down during the unpause black screen to buffer the morph."
]
},
{
"minHeight": 3,
"maxHeight": 3,
"minTiles": 21.4375,
"speedBooster": "yes",
"obstructions": [
[
3,
0
]
],
"environment": "water",
"requires": [
{
"getBlueSpeed": {
"usedTiles": 18,
"openEnd": 1
}
},
"h_blueJump",
"canInsaneJump",
"canGravityJump",
"canMomentumConservingMorph"
],
"note": [
"This applies to Draygon's Room"
],
"detailNote": [
"Use a 2-tap to gain blue speed, and time a pause to hit just after jumping and aiming down,",
"then unequip Gravity and hold down during the unpause black screen to buffer the morph."
]
},
{
"minHeight": 3,
"maxHeight": 3,
"minTiles": 30.4375,
"speedBooster": "yes",
"obstructions": [
[
3,
0
]
],
"requires": [
{
"getBlueSpeed": {
"usedTiles": 27,
"openEnd": 1
}
},
"h_blueJump",
"canMomentumConservingMorph",
"canInsaneJump"
],
"note": [
"This applies to Blue Brinstar Energy Tank Room, Bowling Alley (middle), and Basement (power on)"
]
},
{
"minHeight": 3,
"maxHeight": 3,
"minTiles": 39.4375,
"speedBooster": "yes",
"obstructions": [
[
3,
2
]
],
"requires": [
"h_getBlueSpeedMaxRunway",
"h_blueJump",
{
"or": [
"canMomentumConservingMorph",
"canInsaneJump"
]
}
],
"note": [
"Applies to Metal Pirates Room."
]
},
{
"minHeight": 3,
"maxHeight": 3,
"minTiles": 37.4375,
"speedBooster": "yes",
"obstructions": [
[
5,
2
]
],
"requires": [
"h_getBlueSpeedMaxRunway",
"h_blueJump",
"canInsaneJump",
"canMomentumConservingMorph"
],
"note": [
"Applies to Flyway."
]
}
]
}
}Requires: {
"notable": "Cross Room Jump with Screw Attack"
}
"canCrossRoomJumpIntoWater"
"canTrickyJump"Clears obstacles: A Dev note: The momentum-conserving morph variants are included for completeness, though generally if Morph is available it would be easier to speedball and do a temporary blue chain. FIXME: some of these setups can make it above the bomb blocks, so they could have a variant going to node 6. |
|


Entrance condition: {
"comeInWithTemporaryBlue": {}
}Requires: "canChainTemporaryBlue" Clears obstacles: A |
From: 2
Right Door
To: 2
Right Door


Run into the room and gain temporary blue below the bomb blocks on the far side of the room. Then jump up to break the bomb blocks. Entrance condition: {
"comeInGettingBlueSpeed": {
"length": 10,
"openEnd": 1
}
}Requires: "Gravity" "canTemporaryBlue" Clears obstacles: A Dev note: This has collision oscillation if the last half tile of runway is used. |
From: 2
Right Door
To: 2
Right Door
Run into the room and gain temporary blue below the bomb blocks on the far side of the room. Then jump up to break the bomb blocks. Entrance condition: {
"comeInGettingBlueSpeed": {
"length": 3,
"openEnd": 1
}
}Requires: "canWaterShineCharge" "canTemporaryBlue" Clears obstacles: A |
From: 2
Right Door
To: 2
Right Door
Gain blue speed running into the room, then jump, morph, and unmorph while holding angle to obtain temporary blue. This method allows retaining a flash suit. Entrance condition: {
"comeInGettingBlueSpeed": {
"length": 1,
"openEnd": 1
}
}Requires: "h_underwaterChainTemporaryBlue" Clears obstacles: A |
|
Entrance condition: {
"comeInSpeedballing": {
"runway": {
"length": 0,
"openEnd": 1
}
}
}Requires: "h_underwaterChainTemporaryBlue" Clears obstacles: A |
|
Break the bomb block on the opposite side of the room. With extra run speeds between $1.2 and $1.D, it's not possible to break the bomb block directly with a bounce; but it is always possible to break them by chaining temporary blue (even if carrying a flash suit). Entrance condition: {
"comeInWithBlueSpringBallBounce": {
"movementType": "controlled"
}
}Requires: "h_underwaterChainTemporaryBlue" Clears obstacles: A |
From: 2
Right Door
To: 2
Right Door
Gain blue speed running into the room, then jump to break the bomb block on the far side of the room. Entrance condition: {
"comeInGettingBlueSpeed": {
"length": 9,
"openEnd": 0
}
}Requires: "h_blueJump" "Gravity" "canTrickyJump" Clears obstacles: A |
From: 2
Right Door
To: 2
Right Door
Gain blue speed running into the room, then jump to break the bomb block on the far side of the room. Entrance condition: {
"comeInGettingBlueSpeed": {
"length": 2,
"openEnd": 1,
"maxExtraRunSpeed": "$1.3"
}
}Requires: "h_blueJump" "canTrickyJump" Clears obstacles: A Dev note: With extra run speeds above $1.3, Samus' jump height is shorter, in which case this method would be ineffective compared to a temporary blue chain. |
From: 2
Right Door
To: 2
Right Door
Entrance condition: {
"comeInGettingBlueSpeed": {
"length": 2,
"openEnd": 1
}
}Requires: "h_blueJump" "canTrickyJump" "HiJump" Clears obstacles: A |
|


Entrance condition: {
"comeInBlueSpaceJumping": {
"minExtraRunSpeed": "$1.B"
}
}Requires: "canPreciseSpaceJump" Clears obstacles: A |
From: 2
Right Door
To: 2
Right Door
With a runway of 5 tiles (open end) in the other room, the ideal timing for the stutter is to release forward for 5 frames, and repress forward on the last possible frame before the transition. Other timings can work, but will gain the shinecharge further from the door, leaving fewer shinecharge frames remaining. After gaining the shinecharge, continue holding forward in order to make Samus stand. Then turnaround spin jump back toward the door, and continue spin jumping to reach the transition with a shinecharge. Entrance condition: {
"comeInStutterShinecharging": {
"minTiles": 5
}
}Requires: "canPreciseStutterWaterShineCharge"
"canShinechargeMovementTricky"
"canInsaneJump"
{
"shineChargeFrames": 130
}
{
"or": [
"canBeVeryPatient",
{
"shineChargeFrames": 15
}
]
}Exit condition: {
"leaveShinecharged": {}
}Unlocks doors: {"types":["super"],"requires":[]}
{"types":["missiles","powerbomb"],"requires":["never"]} |
From: 2
Right Door
To: 2
Right Door
With only a runway of 4 tiles (open end) in the other room, the ideal timing for the stutter is to release forward for 4 frames, and repress forward on the last possible frame before the transition. It also works well to release forward for 3 frames and repress on the last possible frame. Other timings can also work, but may gain the shinecharge further from the door, leaving fewer shinecharge frames remaining. After gaining the shinecharge, continue holding forward in order to make Samus stand. Then turnaround spin jump back toward the door, and continue spin jumping to reach the transition with a shinecharge. Entrance condition: {
"comeInStutterShinecharging": {
"minTiles": 4
}
}Requires: "canPreciseStutterWaterShineCharge"
"canShinechargeMovementTricky"
"canInsaneJump"
{
"shineChargeFrames": 140
}
{
"or": [
"canBeVeryPatient",
{
"shineChargeFrames": 10
}
]
}Exit condition: {
"leaveShinecharged": {}
}Unlocks doors: {"types":["super"],"requires":[]}
{"types":["missiles","powerbomb"],"requires":["never"]} |
From: 2
Right Door
To: 2
Right Door
With only a runway of 3 tiles (open end) in the other room, the ideal timing for the stutter is to release forward for 3 or 4 frames, and repress forward on the last possible frame before the transition. Other timings can work, but will gain the shinecharge further from the door, leaving fewer shinecharge frames remaining. After gaining the shinecharge, continue holding forward in order to make Samus stand. Then turnaround spin jump back toward the door, and continue spin jumping to reach the transition with a shinecharge. Alternatively, with greater difficulty but saving some shinecharge frames, after performing the turnaround spin jump, briefly moonwalk back, then retain momentum by boomeranging forward (switching from pressing backward to pressing forward on the next frame), and arm pump to reach the door quickly. Entrance condition: {
"comeInStutterShinecharging": {
"minTiles": 3
}
}Requires: "canPreciseStutterWaterShineCharge"
"canShinechargeMovementTricky"
"canInsaneJump"
{
"shineChargeFrames": 145
}
{
"or": [
"canBeVeryPatient",
{
"shineChargeFrames": 10
}
]
}Exit condition: {
"leaveShinecharged": {}
}Unlocks doors: {"types":["super"],"requires":[]}
{"types":["missiles","powerbomb"],"requires":["never"]}Dev note: The same shinecharge frames could be achieved with a closed end runway (effective length of 2.4375), with a 3-frame stutter, but there doesn't appear to be any application. |
From: 2
Right Door
To: 2
Right Door
With only a runway of 2 tiles (open end) in the other room, the ideal timing for the stutter is to release forward for 3 frames, and repress forward on the last possible frame before the transition. Other timings can work, but will gain the shinecharge further from the door, leaving fewer shinecharge frames remaining. After gaining the shinecharge, continue holding forward in order to make Samus stand. Then turnaround spin jump back toward the door, and continue spin jumping to reach the transition with a shinecharge. Alternatively, with greater difficulty but saving some shinecharge frames, after performing the turnaround spin jump, briefly moonwalk back, then retain momentum by boomeranging forward (switching from pressing backward to pressing forward on the next frame), and arm pump to reach the door quickly. Entrance condition: {
"comeInStutterShinecharging": {
"minTiles": 2
}
}Requires: "canPreciseStutterWaterShineCharge"
"canShinechargeMovementTricky"
"canInsaneJump"
{
"shineChargeFrames": 150
}
{
"or": [
"canBeVeryPatient",
{
"shineChargeFrames": 15
}
]
}Exit condition: {
"leaveShinecharged": {}
}Unlocks doors: {"types":["super"],"requires":[]}
{"types":["missiles","powerbomb"],"requires":["never"]}Dev note: FIXME: The canBeVeryPatient requirement is for difficulty placement of the boomerang method; but the boomerang (or maybe specifically the moonwalk boomerang) should possibly be its own tech, and the same with rapid arm pumping. |
From: 2
Right Door
To: 2
Right Door
With only 1 tile of runway in the other room, Samus should ideally start on the last pixel of runway with X subpixels of $3FFF or less. Run toward the door, releasing forward for exactly 1 frame and pressing it again on the last possible frame before the transition. Starting with X subpixels of $7FFF can also work (e.g., by simply backing against the door ledge, then jumping and turning around mid-air); in this case, Samus must advance 1 or 2 pixels with an arm pump before the transition (e.g., firing a shot or pressing and/or releasing an angle button), and the shinecharge will be gained slightly further away from the door. After gaining the shinecharge, continue holding forward in order to make Samus stand. Then turnaround spin jump back toward the door, and continue spin jumping to reach the transition with a shinecharge. Alternatively, with greater difficulty but saving some shinecharge frames, after performing the turnaround spin jump, briefly moonwalk back, then retain momentum by boomeranging forward (switching from pressing backward to pressing forward on the next frame), and arm pump to reach the door quickly. Ideal subpixels ($3FFF) can be achieved using one of several methods: 1) press forward against the door ledge (or a wall aligned with it); jump, and while mid-air, tap forward for exactly 1 frame to land with subpixels $BFFF, moonwalk back for exactly 1 frame to end with subpixels $3FFF. 2) press forward against the door ledge (from a platform below, assuming one exists) turn around (while on the ground), and moonwalk back two pixels, then jump and mid-air turnaround onto the ledge; if Samus jumped from the correct pixel but does not land on the ledge, then it was needed to moonwalk back 1 more frame; in this case it is possible to retry by doing a mid-air turnaround back onto the platform, and moonwalking back for 1 frame. 3) if X-Ray is available, press against the door ledge (from a platform below, assuming one exists) turn around (while on the ground), then jump and mid-air turnaround toward the door, and use X-Ray to turnaround in place away from the door; repeat this sequence 3 more times: jump, mid-air turnaround, X-Ray turnaround; then do one more jump and mid-air turnaround, high enough to land on the door ledge, and Samus should be in the correct position with subpixels $3FFF. Entrance condition: {
"comeInStutterShinecharging": {
"minTiles": 1
}
}Requires: {
"doorUnlockedAtNode": 1
}
"canPreciseStutterWaterShineCharge"
"canInsaneJump"
"canBeVeryPatient"
"canShinechargeMovementTricky"
{
"shineChargeFrames": 160
}Exit condition: {
"leaveShinecharged": {}
}Unlocks doors: {"nodeId":1,"types":["missiles","super"],"requires":[]}
{"nodeId":1,"types":["powerbomb"],"requires":["never"]}
{"types":["super"],"requires":[]}
{"types":["missiles","powerbomb"],"requires":["never"]} |
|
Entrance condition: {
"comeInShinecharging": {
"length": 12,
"openEnd": 0
},
"comesInHeated": "no"
}Requires: "Gravity" "h_CrystalSpark" Clears obstacles: A |
From: 2
Right Door
To: 2
Right Door
With only a runway length of 3 tiles (closed end) in the other room, this requires a precise setup: release forward for 3 or 4 frames, then repress forward on the last possible frame before the transition; alternatively, release forward for 2 frames and repress forward on the second-to-last possible frame before the transition. If a longer runway is available (4 tiles), the timing windows are a bit more lenient: 1. Release forward for 3, 4, or 5 frames, repress forward on the last possible frame; 2. Release forward for 2 or 3 frames, repress forward on the 2nd-to-last possible frame; 3. Release forward for 1 or 2 frames, repress forward on the 3rd-to-last possible frame. Entrance condition: {
"comeInStutterShinecharging": {
"minTiles": 2.4375
},
"comesInHeated": "no"
}Requires: "canPreciseStutterWaterShineCharge" "h_underwaterCrystalSpark" Clears obstacles: A Dev note: FIXME: This is possible with a shorter runway, as low as 1 tile, but it's a lot worse. It would require more duplication and could be very tedious to set up for many attempts. |
|

Entrance condition: {
"comeInWithGMode": {
"mode": "any",
"morphed": true
}
}Requires: {
"or": [
"h_artificialMorphPowerBomb",
{
"and": [
"h_artificialMorphIBJ",
"Gravity"
]
},
{
"and": [
"h_artificialMorphSpringBall",
"h_artificialMorphBombs"
]
}
]
}Clears obstacles: A |
From: 2
Right Door
To: 3
Top Door

Use Screw Attack to break the bomb block by entering from a non-water room with a spin jump, and make it all the way through the top door. Ideally, gain speed using between 13 and 13.5 tiles of runway (with an open end). Longer runway lengths can also work, up to 17 tiles, but will make the trick somewhat more precise. Use angle to break spin, and do a momentum conserving turnaround either on the same frame or one frame later; this first turnaround should be done early enough that the turnaround is complete by the time Samus clears the two-tile passage in the middle of the room. The second momentum conserving turnaround must be done somewhat late, and by switching from holding forward to holding backward one frame later (a perfect 'boomerang'). Shoot open the door, and use a third momentum conserving turnaround on it as it opens. The optimal amount of extra run speed is $3.4 or $3.5, by using 13 tiles of runway or about a half tile more; this gives a 7-frame window for the first turnaround, and typically a 4-frame window for the second turnaround if the first turnaround is done early enough. Extra run speeds between $3.6 and $3.F can also work, but with shorter windows. A perfect boomerang is always required for the second turnaround, regardless of where in the window it is done. It is recommended to buffer the spin break, by holding angle (up or down), jump, and forward through the transition, then switching from forward to backward, with at most 1 frame of neutral in between, while still holding jump and angle. Entrance condition: {
"comeInJumping": {
"speedBooster": "yes",
"minTiles": 13
}
}Requires: {
"notable": "Cross Room Jump Boomerang To Top"
}
"canInsaneJump"
"canCrossRoomJumpIntoWater"
"ScrewAttack"
"canMomentumConservingTurnaround"
{
"noFlashSuit": {}
}Exit condition: {
"leaveNormally": {}
}Unlocks doors: {"types":["super"],"requires":[]}
{"types":["missiles","powerbomb"],"requires":["never"]}Dev note: This does not have collision oscillation. |
From: 2
Right Door
To: 3
Top Door
Use a 2-tap shortcharge and jump into the room with a last-frame jump, breaking the bomb block with blue speed, and making it all the way through the top door. Use angle to break spin, and do a momentum conserving turnaround either on the same frame or one frame later; this first turnaround should be done early enough that the turnaround is complete by the time Samus clears the two-tile passage in the middle of the room. The second momentum conserving turnaround must be done somewhat late, and by switching from holding forward to holding backward one frame later (a perfect 'boomerang'). Shoot open the door, and use a third momentum conserving turnaround on it as it opens. Lower run speeds are generally better, as long as the extra run speed is at least $3.4. this gives up to a 7-frame window for the first turnaround, and typically a 4-frame window for the second turnaround if the first turnaround is done early enough. A perfect boomerang is always required for the second turnaround, regardless of where in the window it is done. It is recommended to buffer the spin break, by holding angle (up or down), jump, and forward through the transition, then switching from forward to backward, with at most 1 frame of neutral in between, while still holding jump and angle. Entrance condition: {
"comeInGettingBlueSpeed": {
"length": 0,
"openEnd": 1,
"minExtraRunSpeed": "$3.4",
"maxExtraRunSpeed": "$3.F"
}
}Requires: {
"notable": "Cross Room Jump Boomerang To Top"
}
"h_blueJump"
"canInsaneJump"
"canCrossRoomJumpIntoWater"
"canMomentumConservingTurnaround"
{
"noFlashSuit": {}
}Exit condition: {
"leaveNormally": {}
}Unlocks doors: {"types":["super"],"requires":[]}
{"types":["missiles","powerbomb"],"requires":["never"]} |
From: 2
Right Door
To: 3
Top Door

Entrance condition: {
"comeInShinecharging": {
"length": 3,
"openEnd": 0
}
}Requires: "Gravity"
"ScrewAttack"
"canShinechargeMovementTricky"
{
"or": [
{
"and": [
"HiJump",
{
"shineChargeFrames": 130
}
]
},
{
"shineChargeFrames": 145
}
]
}Exit condition: {
"leaveShinecharged": {}
}Unlocks doors: {"types":["super"],"requires":[]}
{"types":["missiles","powerbomb"],"requires":["never"]}Dev note: FIXME: It can be possible to use a longer runway, or a stutter shinecharge with Gravity re-equip, with a cost of some shinecharge frames. |
From: 2
Right Door
To: 4
Top Platform
Entrance condition: {
"comeInShinecharged": {}
}Requires: {
"shineChargeFrames": 10
}
"h_navigateUnderwater"
{
"shinespark": {
"frames": 23,
"excessFrames": 2
}
} |
|
Use Screw Attack to break the bomb block by entering from a non-water room with a last-frame spin jump, and make it to the platform below the top door. Longer runway lengths can also work, up to 17 tiles, but will make the trick somewhat more precise. Use angle to break spin, and do a momentum conserving turnaround either on the same frame or one frame later; this first turnaround should be done early enough that the turnaround is complete by the time Samus clears the two-tile passage in the middle of the room. Do a second momentum conserving turnaround somewhat late, and by switching from holding forward to holding backward one frame later (a perfect 'boomerang'). The optimal amount of extra run speed is between $3.2 and $3.5, by using 13 tiles of runway or about a half tile more or less; this gives a 7-frame window for the first turnaround, and typically a 4-frame window for the second turnaround if the first turnaround is done early enough. Extra run speeds between $3.6 and $3.F can also work, but with shorter windows. A perfect boomerang is always required for the second turnaround, regardless of where in the window it is done. It is recommended to buffer the spin break, by holding angle (up or down), jump, and forward through the transition, then switching from forward to backward, with at most 1 frame of neutral in between, while still holding jump and angle. Entrance condition: {
"comeInJumping": {
"speedBooster": "yes",
"minTiles": 12.4375
}
}Requires: {
"notable": "Cross Room Jump Boomerang To Top"
}
"canInsaneJump"
"canCrossRoomJumpIntoWater"
"ScrewAttack"
"canMomentumConservingTurnaround"
"h_trickyToCarryFlashSuit"Dev note: This does not have collision oscillation. |
|
Use a 2-tap shortcharge and jump into the room with a last-frame jump, breaking the bomb block with blue speed, and making it all the way through the top door. Use angle to break spin, and do a momentum conserving turnaround either on the same frame or one frame later; this first turnaround should be done early enough that the turnaround is complete by the time Samus clears the two-tile passage in the middle of the room. Do a second momentum conserving turnaround somewhat late, and by switching from holding forward to holding backward one frame later (a perfect 'boomerang'). Lower run speeds are generally better, as long as the extra run speed is at least $3.2. this gives up to a 7-frame window for the first turnaround, and typically a 4-frame window for the second turnaround if the first turnaround is done early enough. A perfect boomerang is always required for the second turnaround, regardless of where in the window it is done. It is recommended to buffer the spin break, by holding angle (up or down), jump, and forward through the transition, then switching from forward to backward, with at most 1 frame of neutral in between, while still holding jump and angle. Entrance condition: {
"comeInGettingBlueSpeed": {
"length": 0,
"openEnd": 1,
"minExtraRunSpeed": "$3.2",
"maxExtraRunSpeed": "$3.F"
}
}Requires: {
"notable": "Cross Room Jump Boomerang To Top"
}
"h_blueJump"
"canInsaneJump"
"canCrossRoomJumpIntoWater"
"canMomentumConservingTurnaround"
"h_trickyToCarryFlashSuit" |
|
Jump into a momentum-conserving morph with blue speed to break the bomb block and continue up to the top of the room. In most cases, after pressing down to initiate the momentum-conserving morph, all inputs can be released; holding forward as the morph completes would generally give too much speed, causing Samus to bonk horizontally. Tapping (not holding) backward can sometimes help in dodging the platforms while ascending, by reversing Samus' horizontal momentum. Entrance condition: {
"comeInWithSidePlatform": {
"platforms": [
{
"minHeight": 1,
"maxHeight": 1,
"minTiles": 16,
"speedBooster": "yes",
"obstructions": [
[
1,
0
]
],
"requires": [
{
"getBlueSpeed": {
"usedTiles": 14,
"openEnd": 0
}
},
"h_blueJump",
"canInsaneMidAirMorph",
"canBeExtremelyPatient"
],
"note": [
"Applies to Lava Dive Room."
],
"detailNote": [
"This can be done with extra run speed $2.0 or $2.1 by holding forward while morphing,",
"and releasing soon afterward, after a precise amount of time.",
"Alternatively it can be done extra run speed $2.3 or higher."
]
},
{
"minHeight": 2,
"maxHeight": 2,
"minTiles": 27.4375,
"speedBooster": "yes",
"obstructions": [
[
1,
0
]
],
"requires": [
{
"getBlueSpeed": {
"usedTiles": 24,
"openEnd": 1
}
},
"h_blueJump"
],
"note": [
"Applies to Dust Torizo Room and Noob Bridge."
],
"detailNote": [
"Jump through the door with an extra run speed of $3.1 or less."
]
},
{
"minHeight": 3,
"maxHeight": 3,
"minTiles": 28.2472,
"speedBooster": "yes",
"obstructions": [
[
1,
0
]
],
"requires": [
{
"getBlueSpeed": {
"usedTiles": 24,
"openEnd": 1
}
},
"h_blueJump"
],
"note": [
"Applies to Double Chamber."
]
},
{
"minHeight": 3,
"maxHeight": 3,
"minTiles": 39.4375,
"speedBooster": "yes",
"obstructions": [
[
3,
2
]
],
"requires": [
{
"getBlueSpeed": {
"usedTiles": 24,
"openEnd": 1
}
},
"h_blueJump",
"canInsaneMidAirMorph"
],
"note": [
"Applies to Metal Pirates Room."
]
}
]
}
}Requires: "canCrossRoomJumpIntoWater" "canMomentumConservingMorph" "canInsaneJump" Clears obstacles: A |
|
Immediately after teleporting, press down to retract Grapple to avoid getting stuck inside the wall (in case the top door is blue, causing it to open with Grapple on entry). Entrance condition: {
"comeInWithGrappleTeleport": {
"blockPositions": [
[
7,
2
]
]
}
}Requires: "canOffScreenMovement" |
|
|
|

This is a short climb, only a few tiles. Entrance condition: {
"comeInWithDoorStuckSetup": {}
}Requires: "canXRayClimb" |
From: 2
Right Door
To: 6
Junction Above Bomb Blocks


Spark vertically through the bomb blocks. It is still possible to break the blocks while below 30 Energy by jumping before sparking. Entrance condition: {
"comeInShinecharged": {}
}Requires: {
"shineChargeFrames": 25
}
"h_navigateUnderwater"
{
"or": [
{
"shinespark": {
"frames": 10,
"excessFrames": 8
}
},
{
"and": [
"canMidairShinespark",
{
"shinespark": {
"frames": 7,
"excessFrames": 7
}
}
]
},
{
"and": [
"canTrickyJump",
{
"shinespark": {
"frames": 1,
"excessFrames": 1
}
}
]
}
]
}Clears obstacles: A Dev note: This does not require canWaterShineCharge, as you can store the shinecharge before entering the room. Note that it is possible to spark into the ceiling to break the blocks without energy loss, but it has collision oscillation. FIXME: Add temporary blue strats. |
|
Entrance condition: {
"comeInShinecharging": {
"length": 12,
"openEnd": 0
}
}Requires: "Gravity"
{
"shineChargeFrames": 0
} |
|
Entrance condition: {
"comeInShinecharging": {
"length": 4,
"openEnd": 0
}
}Requires: "canWaterShineCharge"
{
"shineChargeFrames": 0
} |
|
Entrance condition: {
"comeInStutterShinecharging": {
"minTiles": 2.4375
}
}Requires: "canPreciseStutterWaterShineCharge"
{
"shineChargeFrames": 0
} |
From: 2
Right Door
To: 7
Bottom Left Shinecharged
If only 2 tiles of runway are available and it is not possible to unlock the opposite door, then this requires a double frame-perfect stutter: run toward the door, release forward for exactly 3 frames, pressing forward again on the last possible frame before the transition. Entrance condition: {
"comeInStutterShinecharging": {
"minTiles": 2
}
}Requires: "canPreciseStutterWaterShineCharge"
{
"or": [
{
"doorUnlockedAtNode": 1
},
"canInsaneJump"
]
}
{
"shineChargeFrames": 0
}Unlocks doors: {"nodeId":1,"types":["super","missiles"],"requires":[]}
{"nodeId":1,"types":["powerbomb"],"requires":["never"]}Dev note: FIXME: canInsaneJump is for difficulty placement; replace with a more appropriate tech since no jump is involved. |
From: 2
Right Door
To: 7
Bottom Left Shinecharged
With only 1 tile of runway in the other room, Samus should ideally start on the last pixel of runway with X subpixels of $3FFF or less. Run toward the door, releasing forward for exactly 1 frame and pressing it again on the last possible frame before the transition. Starting with X subpixels of $7FFF can also work (e.g., by simply backing against the door ledge, then jumping and turning around mid-air); in this case, Samus must advance 1 or 2 pixels with an arm pump before the transition (e.g., firing a shot or pressing and/or releasing an angle button), and the shinecharge will be gained slightly further away. After the transition, shoot open the opposite door while running, to extend the runway by a tile. Correct subpixels can be achieved using one of several methods: 1) press against the door ledge (or a wall aligned with it); jump, and while mid-air, tap forward for exactly 1 frame to land with subpixels $4000, moonwalk back for exactly 1 frame to end with subpixels $C000. 2) press against the door ledge (from a platform below, assuming one exists) turn around (while on the ground), and moonwalk back two pixels, then jump and mid-air turnaround onto the ledge; if Samus jumped from the correct pixel but does not land on the ledge, then it was needed to moonwalk back 1 more frame; in this case it is possible to retry by doing a mid-air turnaround back onto the platform, and moonwalking back for 1 frame. 3) if X-Ray is available, press against the door ledge (from a platform below, assuming one exists) turn around (while on the ground), then jump and mid-air turnaround toward the door, and use X-Ray to turnaround in place away from the door; repeat this sequence 3 more times: jump, mid-air turnaround, X-Ray turnaround; then do one more jump and mid-air turnaround, high enough to land on the door ledge, and Samus should be in the correct position with subpixels $C000. Entrance condition: {
"comeInStutterShinecharging": {
"minTiles": 1
}
}Requires: "canPreciseStutterWaterShineCharge"
"canInsaneJump"
"canBeVeryPatient"
{
"doorUnlockedAtNode": 1
}
{
"shineChargeFrames": 0
}Unlocks doors: {"nodeId":1,"types":["super","missiles"],"requires":[]}
{"nodeId":1,"types":["powerbomb"],"requires":["never"]}Dev note: The `canBeVeryPatient` is for difficulty placement; this could be improved with a more specific tech later, since it does not actually take a long time to execute. |
From: 2
Right Door
To: 9
Center Platforms
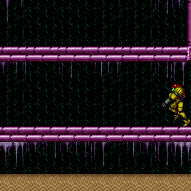
Entrance condition: {
"comeInShinecharged": {}
}Requires: {
"shineChargeFrames": 10
}
"h_navigateUnderwater"
{
"shinespark": {
"frames": 23,
"excessFrames": 10
}
} |
From: 2
Right Door
To: 9
Center Platforms
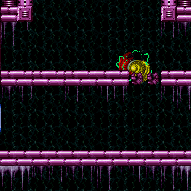
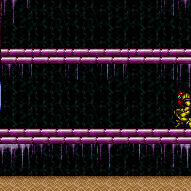
Use Screw Attack to break the bomb block by entering from a non-water room with a spin jump, and make it up to the center of the room. It helps to enter as low as possible and with as much horizontal speed as possible and with HiJump turned off. Enter with extra run speed between $3.2 and $3.F, with the lower speeds in this range being better. Entrance condition: {
"comeInJumping": {
"speedBooster": "yes",
"minTiles": 12.4375
}
}Requires: {
"notable": "Cross Room Jump with Screw Attack"
}
"canInsaneJump"
"canCrossRoomJumpIntoWater"
"ScrewAttack"
"canMomentumConservingTurnaround"Dev note: This does not have collision oscillation. |
|
Use blue speed to break the bomb block by entering from a non-water room with a spin jump, and make it up to the center of the room. It helps to enter as low as possible and with as much horizontal speed as possible and with HiJump turned off. Enter with extra run speed between $3.2 and $3.F, with the lower speeds in this range being better. Entrance condition: {
"comeInGettingBlueSpeed": {
"length": 0,
"openEnd": 1,
"minExtraRunSpeed": "$3.2",
"maxExtraRunSpeed": "$3.F"
}
}Requires: "h_blueJump" "canInsaneJump" "canCrossRoomJumpIntoWater" "canMomentumConservingTurnaround" Dev note: This does not have collision oscillation. |
|
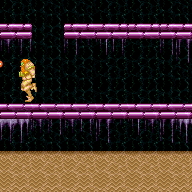
Entrance condition: {
"comeInShinecharged": {},
"comesThroughToilet": "any"
}Requires: "Gravity"
"ScrewAttack"
"canShinechargeMovementTricky"
{
"shineChargeFrames": 160
}
{
"shinespark": {
"frames": 6,
"excessFrames": 0
}
}Exit condition: {
"leaveWithSpark": {}
}Unlocks doors: {"types":["super"],"requires":[]}
{"types":["missiles","powerbomb"],"requires":["never"]} |
|
Entrance condition: {
"comeInWithGMode": {
"mode": "direct",
"morphed": false
},
"comesThroughToilet": "any"
}Requires: {
"or": [
"Gravity",
"HiJump",
"canSpringBallJumpMidAir"
]
}Exit condition: {
"leaveWithGMode": {
"morphed": false
}
} |
|
Entrance condition: {
"comeInWithGMode": {
"mode": "direct",
"morphed": true
},
"comesThroughToilet": "any"
}Requires: {
"or": [
{
"and": [
"Gravity",
"h_artificialMorphIBJ"
]
},
{
"and": [
"Gravity",
"h_artificialMorphSpringBall"
]
},
{
"and": [
"HiJump",
"h_artificialMorphSpringBall"
]
}
]
}Exit condition: {
"leaveWithGMode": {
"morphed": true
}
} |
|
Perform a double Spring Ball jump using a precisely timed bomb boost to propel Samus upward just long enough to get the mid-air Spring Ball jump. Unmorph at the top of the jump to touch the transition blocks. Entrance condition: {
"comeInWithGMode": {
"mode": "direct",
"morphed": true
},
"comesThroughToilet": "any"
}Requires: "h_artificialMorphUnderwaterBombIntoSpringBallJump" Exit condition: {
"leaveWithGMode": {
"morphed": false
}
} |
|
Entrance condition: {
"comeInNormally": {},
"comesThroughToilet": "any"
} |
|
Entrance condition: {
"comeInWithTemporaryBlue": {
"direction": "any"
},
"comesThroughToilet": "any"
}Requires: "canChainTemporaryBlue" "canXRayTurnaround" Clears obstacles: A |
From: 3
Top Door
To: 5
Bottom Junction
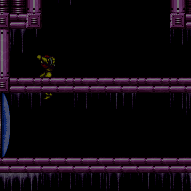
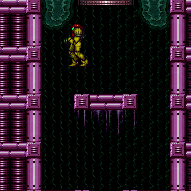
There are camera scroll blocks, which can be used to overload PLMs, just above the bomb blocks. Entrance condition: {
"comeInWithGMode": {
"mode": "any",
"morphed": false
},
"comesThroughToilet": "any"
} |
|
Entrance condition: {
"comeInWithGMode": {
"mode": "any",
"morphed": true
},
"comesThroughToilet": "any"
}Requires: "h_artificialMorphBombThings" Clears obstacles: A |
|
Requires: "Gravity" |
|
Requires: {
"or": [
"HiJump",
"canSpringBallJumpMidAir"
]
} |
|
Requires: "h_storedSpark"
{
"shinespark": {
"frames": 3,
"excessFrames": 0
}
}Exit condition: {
"leaveWithSpark": {}
}Unlocks doors: {"nodeId":3,"types":["ammo"],"requires":[]} |
|
Requires: "h_CrystalFlash" |
|
Unlocks doors: {"nodeId":3,"types":["ammo"],"requires":[]} |
|
|
|
|
|
|
|
Diagonal spark mid-air from just below the bomb blocks. Requires: "h_storedSpark"
{
"shinespark": {
"frames": 21,
"excessFrames": 2
}
}Clears obstacles: A |
|
Requires: "h_CrystalFlash" |
|
Requires: {
"or": [
"h_usePowerBomb",
{
"and": [
"Gravity",
"ScrewAttack"
]
},
{
"and": [
"Gravity",
"canIBJ"
]
},
{
"and": [
"h_useMorphBombs",
"h_useSpringBall"
]
},
{
"and": [
"h_useMorphBombs",
"canTrivialMidAirMorph",
"canDisableEquipment"
]
}
]
}Clears obstacles: A |
|
Break the bomb blocks using a blue suit. Requires: {
"haveBlueSuit": {}
}Clears obstacles: A |
|
Requires: "Gravity"
{
"or": [
{
"canShineCharge": {
"usedTiles": 12,
"openEnd": 0
}
},
{
"and": [
{
"or": [
{
"doorUnlockedAtNode": 1
},
{
"doorUnlockedAtNode": 2
}
]
},
{
"canShineCharge": {
"usedTiles": 13,
"openEnd": 0
}
}
]
},
{
"and": [
{
"doorUnlockedAtNode": 1
},
{
"doorUnlockedAtNode": 2
},
{
"canShineCharge": {
"usedTiles": 14,
"openEnd": 0
}
}
]
}
]
}
"h_CrystalSpark"Unlocks doors: {"nodeId":1,"types":["ammo"],"requires":[]}
{"nodeId":2,"types":["ammo"],"requires":[]} |
|
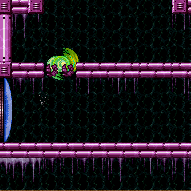
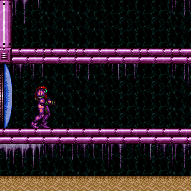
Requires: {
"obstaclesCleared": [
"A"
]
}
{
"or": [
"Gravity",
"HiJump",
"canSpringBallJumpMidAir"
]
} |
|
To save Energy, spark diagonally towards the outer sides of the room after hitting the ceiling bomb block. Requires: "h_storedSpark"
{
"shinespark": {
"frames": 6,
"excessFrames": 6
}
}Clears obstacles: A Dev note: Note that it is possible to spark into the ceiling to break the blocks without energy loss, but it has collision oscillation. With low Energy, this may not make it to 6, however the requirements to get to 6 are less than getting to the top of the room. |
|
Diagonal spark mid-air from just below the bomb blocks. Requires: "h_storedSpark"
{
"shinespark": {
"frames": 21,
"excessFrames": 10
}
}Clears obstacles: A |
|
Diagonal spark from the center platform, from a standing position hanging over the bomb blocks. A mid-air spark will fail to gain enough horizontal speed to clear the top platform. Requires: "h_storedSpark"
{
"shinespark": {
"frames": 17,
"excessFrames": 2
}
} |
|
Requires: {
"or": [
"h_bombThings",
{
"and": [
"Gravity",
"ScrewAttack"
]
},
{
"obstaclesCleared": [
"A"
]
}
]
}Clears obstacles: A |
|
Requires: {
"haveBlueSuit": {}
}Clears obstacles: A |
|
Requires: "Gravity" |
|

Requires: "canSuitlessMaridia"
{
"or": [
{
"and": [
"HiJump",
{
"or": [
"canDownGrab",
"canSpringBallJumpMidAir",
"canConsecutiveWallJump"
]
}
]
},
"h_underwaterMaxHeightSpringBallJump"
]
} |
|
Requires: "h_storedSpark"
{
"shinespark": {
"frames": 8,
"excessFrames": 5
}
} |
|
Requires: {
"shineChargeFrames": 10
}Exit condition: {
"leaveShinecharged": {}
}Unlocks doors: {"types":["missiles","super"],"requires":[]}
{"types":["powerbomb"],"requires":["never"]}Dev note: FIXME: This is a prime example for 3-room shinecharges, once the schema can model it. |
|
Requires: {
"shineChargeFrames": 0
}
"h_getBlueSpeedMaxRunway"
"canTemporaryBlue"Exit condition: {
"leaveWithTemporaryBlue": {}
}Unlocks doors: {"types":["ammo"],"requires":[]}Dev note: The `h_getBlueSpeedMaxRunway` requirement is to satisfy the tests, since we don't have a way to represent that the temporary blue originates from the startsWithShineCharge. |
|
Requires: "canShinechargeMovementComplex"
{
"shineChargeFrames": 120
}
{
"shinespark": {
"frames": 9,
"excessFrames": 0
}
}Exit condition: {
"leaveWithSpark": {}
}Unlocks doors: {"types":["super"],"requires":[]}
{"types":["missiles","powerbomb"],"requires":["never"]} |
|
Requires: {
"shineChargeFrames": 0
}
"h_getBlueSpeedMaxRunway"
"canXRayTurnaround"
"canChainTemporaryBlue"Exit condition: {
"leaveWithTemporaryBlue": {}
}Unlocks doors: {"types":["ammo"],"requires":[]}Dev note: The `h_getBlueSpeedMaxRunway` requirement is to satisfy the tests, since we don't have a way to represent that the temporary blue originates from the startsWithShineCharge. |
|
Spark diagonally through the bomb blocks. Requires: {
"shineChargeFrames": 50
}
{
"shinespark": {
"frames": 23,
"excessFrames": 2
}
}Clears obstacles: A |
From: 7
Bottom Left Shinecharged
To: 5
Bottom Junction
Requires: {
"shineChargeFrames": 0
}
"h_getBlueSpeedMaxRunway"
"canTemporaryBlue"
"canXRayTurnaround"Clears obstacles: A |
From: 7
Bottom Left Shinecharged
To: 6
Junction Above Bomb Blocks


Spark vertically through the bomb blocks. It is still possible to break the blocks while below 30 Energy by jumping before sparking. Requires: {
"shineChargeFrames": 50
}
{
"or": [
{
"shinespark": {
"frames": 10,
"excessFrames": 8
}
},
{
"and": [
"canMidairShinespark",
{
"shinespark": {
"frames": 7,
"excessFrames": 7
}
}
]
},
{
"and": [
"canTrickyJump",
"canMidairShinespark",
{
"shinespark": {
"frames": 1,
"excessFrames": 1
}
}
]
}
]
}Clears obstacles: A Dev note: It is possible to save some energy by sparking into the left wall, but it won't work with midair sparking, which saves the same amount and is easier. Note that it is possible to spark into the ceiling to break the blocks without energy loss, but it has collision oscillation. FIXME: Add temporary blue strats. |
From: 7
Bottom Left Shinecharged
To: 9
Center Platforms
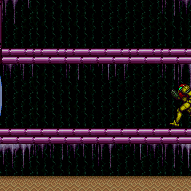
Spark diagonally through the bomb blocks. Requires: {
"shineChargeFrames": 50
}
{
"shinespark": {
"frames": 23,
"excessFrames": 10
}
}Clears obstacles: A |
|
Requires: "canShinechargeMovementComplex"
{
"shineChargeFrames": 120
}
{
"shinespark": {
"frames": 9,
"excessFrames": 0
}
}Exit condition: {
"leaveWithSpark": {}
}Unlocks doors: {"types":["super"],"requires":[]}
{"types":["missiles","powerbomb"],"requires":["never"]} |
|
Requires: {
"shineChargeFrames": 0
}
"h_getBlueSpeedMaxRunway"
"canXRayTurnaround"
"canChainTemporaryBlue"Exit condition: {
"leaveWithTemporaryBlue": {}
}Unlocks doors: {"types":["ammo"],"requires":[]}Dev note: The `h_getBlueSpeedMaxRunway` requirement is to satisfy the tests, since we don't have a way to represent that the temporary blue originates from the startsWithShineCharge. |
|
Requires: {
"shineChargeFrames": 10
}Exit condition: {
"leaveShinecharged": {}
}Unlocks doors: {"types":["missiles","super"],"requires":[]}
{"types":["powerbomb"],"requires":["never"]}Dev note: FIXME: This is a prime example for 3-room shinecharges, once the schema can model it. |
|
Requires: {
"shineChargeFrames": 0
}
"h_getBlueSpeedMaxRunway"
"canTemporaryBlue"Exit condition: {
"leaveWithTemporaryBlue": {}
}Unlocks doors: {"types":["ammo"],"requires":[]}Dev note: The `h_getBlueSpeedMaxRunway` requirement is to satisfy the tests, since we don't have a way to represent that the temporary blue originates from the startsWithShineCharge. |
|
Spark diagonally through the bomb blocks. Requires: {
"shineChargeFrames": 50
}
{
"shinespark": {
"frames": 23,
"excessFrames": 2
}
}Clears obstacles: A |
From: 8
Bottom Right Shinecharged
To: 5
Bottom Junction
Requires: {
"shineChargeFrames": 0
}
"h_getBlueSpeedMaxRunway"
"canTemporaryBlue"
"canXRayTurnaround"Clears obstacles: A |
From: 8
Bottom Right Shinecharged
To: 6
Junction Above Bomb Blocks


Spark vertically through the bomb blocks. It is still possible to break the blocks while below 30 Energy by jumping before sparking. Requires: {
"shineChargeFrames": 50
}
{
"or": [
{
"shinespark": {
"frames": 10,
"excessFrames": 8
}
},
{
"and": [
"canMidairShinespark",
{
"shinespark": {
"frames": 7,
"excessFrames": 7
}
}
]
},
{
"and": [
"canTrickyJump",
"canMidairShinespark",
{
"shinespark": {
"frames": 1,
"excessFrames": 1
}
}
]
}
]
}Clears obstacles: A Dev note: It is possible to save some energy by sparking into the left wall, but it won't work with midair sparking, which saves the same amount and is easier. Note that it is possible to spark into the ceiling to break the blocks without energy loss, but it has collision oscillation. FIXME: Add temporary blue strats. |
From: 8
Bottom Right Shinecharged
To: 9
Center Platforms

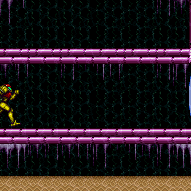
Spark diagonally through the bomb blocks. Requires: {
"shineChargeFrames": 50
}
{
"shinespark": {
"frames": 23,
"excessFrames": 10
}
}Clears obstacles: A |
|
Requires: {
"or": [
"Gravity",
{
"and": [
"canSuitlessMaridia",
{
"or": [
"HiJump",
"canSpringBallJumpMidAir"
]
}
]
}
]
} |
|
Requires: "h_storedSpark"
{
"shinespark": {
"frames": 5,
"excessFrames": 3
}
}Dev note: FIXME: It is possible to use a flash suit to get through the top door with a diagonal spark. |
|
|
|
To unlock the door with a Super or Missiles, stand on the right side, backed against or close to the wall, do a crouch jump, and fire a diagonal shot near the peak of the jump. If carrying a flash suit, it is possible to hold shot with Power Beam, then select Supers or Missiles while continuing to hold shot. Unlocks doors: {"nodeId":3,"types":["powerbomb"],"requires":[]}
{"nodeId":3,"types":["super","missiles"],"requires":["canTrickyJump","h_underwaterCrouchJump","h_midAirShootUp"]} |
{
"$schema": "../../../schema/m3-room.schema.json",
"id": 198,
"name": "Oasis",
"area": "Maridia",
"subarea": "Inner",
"subsubarea": "Green",
"roomAddress": "0x7D48E",
"roomEnvironments": [
{
"heated": false
}
],
"mapTileMask": [
[
1
],
[
1
]
],
"nodes": [
{
"id": 1,
"name": "Left Door",
"nodeType": "door",
"nodeSubType": "blue",
"nodeAddress": "0x001a660",
"doorOrientation": "left",
"doorEnvironments": [
{
"physics": "water"
}
],
"mapTileMask": [
[
1
],
[
2
]
]
},
{
"id": 2,
"name": "Right Door",
"nodeType": "door",
"nodeSubType": "blue",
"nodeAddress": "0x001a66c",
"doorOrientation": "right",
"doorEnvironments": [
{
"physics": "water"
}
],
"mapTileMask": [
[
1
],
[
2
]
]
},
{
"id": 3,
"name": "Top Door",
"nodeType": "door",
"nodeSubType": "green",
"nodeAddress": "0x001a678",
"doorOrientation": "up",
"doorEnvironments": [
{
"physics": "water"
}
],
"useImplicitComeInNormally": false,
"useImplicitCarryGModeBackThrough": false,
"useImplicitCarryGModeMorphBackThrough": false,
"mapTileMask": [
[
2
],
[
1
]
]
},
{
"id": 4,
"name": "Top Platform",
"nodeType": "junction",
"nodeSubType": "junction",
"mapTileMask": [
[
2
],
[
1
]
]
},
{
"id": 5,
"name": "Bottom Junction",
"nodeType": "junction",
"nodeSubType": "junction",
"mapTileMask": [
[
1
],
[
2
]
]
},
{
"id": 6,
"name": "Junction Above Bomb Blocks",
"nodeType": "junction",
"nodeSubType": "junction",
"mapTileMask": [
[
1
],
[
2
]
]
},
{
"id": 7,
"name": "Bottom Left Shinecharged",
"nodeType": "junction",
"nodeSubType": "junction",
"mapTileMask": [
[
1
],
[
2
]
],
"note": "This represents being at the bottom left door, facing left, having just gained a shinecharge."
},
{
"id": 8,
"name": "Bottom Right Shinecharged",
"nodeType": "junction",
"nodeSubType": "junction",
"mapTileMask": [
[
1
],
[
2
]
],
"note": "This represents being at the bottom right door, facing right, having just gained a shinecharge."
},
{
"id": 9,
"name": "Center Platforms",
"nodeType": "junction",
"nodeSubType": "junction",
"mapTileMask": [
[
2
],
[
1
]
],
"note": "This represents being on one of the second-highest platforms."
}
],
"obstacles": [
{
"id": "A",
"name": "Bomb Blocks",
"obstacleType": "inanimate"
}
],
"enemies": [],
"strats": [
{
"link": [
1,
1
],
"name": "Base (Unlock Door)",
"requires": [],
"unlocksDoors": [
{
"types": [
"ammo"
],
"requires": []
}
],
"flashSuitChecked": true,
"blueSuitChecked": true
},
{
"link": [
1,
1
],
"name": "Base (Come In Normally)",
"entranceCondition": {
"comeInNormally": {}
},
"requires": [],
"flashSuitChecked": true,
"blueSuitChecked": true
},
{
"link": [
1,
1
],
"name": "Base (Come In With Mockball)",
"entranceCondition": {
"comeInWithMockball": {
"adjacentMinTiles": 0,
"remoteAndLandingMinTiles": [
[
0,
0
]
],
"speedBooster": "any"
}
},
"requires": [],
"flashSuitChecked": true,
"blueSuitChecked": true
},
{
"link": [
2,
2
],
"name": "Base (Unlock Door)",
"requires": [],
"unlocksDoors": [
{
"types": [
"ammo"
],
"requires": []
}
],
"flashSuitChecked": true,
"blueSuitChecked": true
},
{
"link": [
2,
2
],
"name": "Base (Come In Normally)",
"entranceCondition": {
"comeInNormally": {}
},
"requires": [],
"flashSuitChecked": true,
"blueSuitChecked": true
},
{
"link": [
2,
2
],
"name": "Base (Come In With Mockball)",
"entranceCondition": {
"comeInWithMockball": {
"adjacentMinTiles": 0,
"remoteAndLandingMinTiles": [
[
0,
0
]
],
"speedBooster": "any"
}
},
"requires": [],
"flashSuitChecked": true,
"blueSuitChecked": true
},
{
"link": [
3,
3
],
"name": "Base (Unlock Door)",
"requires": [],
"unlocksDoors": [
{
"types": [
"ammo"
],
"requires": []
}
],
"flashSuitChecked": true,
"blueSuitChecked": true
},
{
"id": 1,
"link": [
1,
1
],
"name": "Leave with Runway",
"requires": [],
"exitCondition": {
"leaveWithRunway": {
"length": 13,
"openEnd": 0
}
},
"flashSuitChecked": true,
"blueSuitChecked": true
},
{
"id": 2,
"link": [
1,
1
],
"name": "Leave with Runway, Open Both Doors",
"requires": [
{
"doorUnlockedAtNode": 2
}
],
"exitCondition": {
"leaveWithRunway": {
"length": 14,
"openEnd": 0
}
},
"unlocksDoors": [
{
"nodeId": 2,
"types": [
"ammo"
],
"requires": []
}
],
"flashSuitChecked": true,
"blueSuitChecked": true
},
{
"id": 4,
"link": [
1,
1
],
"name": "Cross Room Jump with Screw Attack (From the Left)",
"entranceCondition": {
"comeInJumping": {
"speedBooster": "any",
"minTiles": 4.4375
}
},
"requires": [
{
"notable": "Cross Room Jump with Screw Attack"
},
"canTrickyJump",
"canCrossRoomJumpIntoWater",
"ScrewAttack"
],
"clearsObstacles": [
"A"
],
"flashSuitChecked": true,
"blueSuitChecked": true,
"note": [
"Use Screw Attack to break the bomb block by entering from a non-water room with a spin jump.",
"It helps to enter as low as possible and with as much horizontal speed as possible and with HiJump turned off.",
"Even if executed correctly, the trick can fail with 50% probability due to collision oscillation."
]
},
{
"id": 5,
"link": [
1,
1
],
"name": "Cross Room Jump with Screw Attack and Speed (From the Left)",
"entranceCondition": {
"comeInJumping": {
"speedBooster": "yes",
"minTiles": 3
}
},
"requires": [
{
"notable": "Cross Room Jump with Screw Attack"
},
"canTrickyJump",
"canCrossRoomJumpIntoWater",
"ScrewAttack"
],
"clearsObstacles": [
"A"
],
"flashSuitChecked": true,
"blueSuitChecked": true,
"note": [
"Use Screw Attack to break the bomb block by entering from a non-water room with a spin jump.",
"It helps to enter as low as possible and with as much horizontal speed as possible and with HiJump turned off.",
"Even if executed correctly, the trick can fail with 50% probability due to collision oscillation."
]
},
{
"id": 70,
"link": [
1,
1
],
"name": "Side Platform Cross Room Jump with Screw Attack",
"entranceCondition": {
"comeInWithSidePlatform": {
"platforms": [
{
"minHeight": 1,
"maxHeight": 2,
"minTiles": 13.4375,
"speedBooster": "yes",
"obstructions": [
[
1,
0
]
],
"requires": [
"canTrickyDashJump"
],
"note": [
"Applies to Warehouse Entrance and Dust Torizo Room.",
"Gain extra run speed between $3.2 and $3.5, at a position where Samus just barely clears the obstruction."
],
"devNote": [
"It is technically also possible from Ridley Tank Room, using exact run speed $1.8 and subpixels in a narrow range.",
"But without a normalized setup it doesn't seem reasonable."
]
},
{
"minHeight": 3,
"maxHeight": 3,
"minTiles": 8.4375,
"speedBooster": "any",
"obstructions": [
[
1,
0
],
[
3,
2
]
],
"note": [
"Applies to Big Boy Room, Mickey Mouse Room, and Metal Pirates."
]
},
{
"minHeight": 6,
"maxHeight": 6,
"minTiles": 2.5625,
"speedBooster": "yes",
"obstructions": [
[
5,
6
]
],
"requires": [
"canTrickyDashJump"
],
"note": [
"Applies to Fast Pillars Setup Room.",
"Gain extra run speed exactly $1.1."
]
},
{
"minHeight": 8,
"maxHeight": 8,
"minTiles": 6,
"speedBooster": "no",
"obstructions": [
[
1,
0
]
],
"requires": [
"HiJump"
],
"note": [
"Applies to Screw Attack Room.",
"With extra run speed exactly $1.E, it works without collision oscillation.",
"Extra run speed $1.D also works, but with collision oscillation giving a 50% failure rate, as with most other setups."
]
}
]
}
},
"requires": [
{
"notable": "Cross Room Jump with Screw Attack"
},
"ScrewAttack",
"canCrossRoomJumpIntoWater",
"canTrickyJump"
],
"clearsObstacles": [
"A"
],
"flashSuitChecked": true,
"blueSuitChecked": true,
"note": [
"Use Screw Attack to break the bomb block by entering from a non-water room with a spin jump.",
"It generally helps to enter as low as possible and with as much horizontal speed as possible,",
"and with HiJump turned off except if jumping from a very low platform.",
"Even if executed correctly, in most cases the trick can fail with 50% probability due to collision oscillation."
]
},
{
"id": 111,
"link": [
1,
1
],
"name": "Side Platform Cross Room Jump with Blue Speed",
"entranceCondition": {
"comeInWithSidePlatform": {
"platforms": [
{
"minHeight": 1,
"maxHeight": 1,
"minTiles": 17,
"speedBooster": "yes",
"obstructions": [
[
1,
0
]
],
"requires": [
{
"getBlueSpeed": {
"usedTiles": 15,
"openEnd": 1
}
},
"canMomentumConservingMorph"
],
"note": [
"Applies to Warehouse Entrance."
]
},
{
"minHeight": 1,
"maxHeight": 1,
"minTiles": 27.4375,
"speedBooster": "yes",
"obstructions": [
[
1,
0
]
],
"requires": [
{
"getBlueSpeed": {
"usedTiles": 24,
"openEnd": 1
}
}
],
"note": [
"Applies to Dust Torizo Room and Halfie Climb Room."
]
},
{
"minHeight": 2,
"maxHeight": 2,
"minTiles": 45,
"speedBooster": "yes",
"obstructions": [
[
2,
0
]
],
"requires": [
"h_getBlueSpeedMaxRunway",
{
"or": [
"canInsaneJump",
"canMomentumConservingMorph"
]
}
],
"note": [
"Applies to Waterway Energy Tank Room."
],
"detailNote": [
"This is easier with a momentum-conserving morph, preferably with a pause to unequip Gravity."
]
},
{
"minHeight": 2,
"maxHeight": 2,
"minTiles": 45,
"speedBooster": "yes",
"obstructions": [
[
3,
0
]
],
"requires": [
"h_getBlueSpeedMaxRunway",
"canMomentumConservingMorph"
],
"note": [
"Applies to Statues Hallway."
]
},
{
"minHeight": 3,
"maxHeight": 3,
"minTiles": 37.4375,
"speedBooster": "yes",
"obstructions": [
[
3,
0
]
],
"requires": [
"h_getBlueSpeedMaxRunway",
"canMomentumConservingMorph"
],
"note": [
"Applies to Flyway."
]
},
{
"minHeight": 3,
"maxHeight": 3,
"minTiles": 39.4375,
"speedBooster": "yes",
"obstructions": [
[
3,
2
]
],
"requires": [
"h_getBlueSpeedMaxRunway",
{
"or": [
"canMomentumConservingMorph",
"canInsaneJump"
]
}
],
"note": [
"Applies to Metal Pirates Room."
]
}
]
}
},
"requires": [
"h_blueJump",
"canCrossRoomJumpIntoWater",
"canTrickyJump"
],
"clearsObstacles": [
"A"
],
"flashSuitChecked": true,
"blueSuitChecked": true,
"note": [
"Use blue speed to break the bomb block by entering from a non-water room with a spin jump.",
"It generally helps to enter as low as possible and with as much horizontal speed as possible, and with HiJump turned off.",
"Even if executed correctly, the trick can fail with 50% probability due to collision oscillation."
],
"detailNote": [
"Shinesparking is typically an easier alternative to this strat;",
"but using blue speed can be useful to save some energy or if carrying a flash suit."
],
"devNote": [
"The momentum-conserving morph variants are included for completeness,",
"though generally if Morph is available it would be easier to speedball and do a temporary blue chain."
]
},
{
"id": 6,
"link": [
1,
1
],
"name": "Temporary Blue (Come In With Temporary Blue)",
"entranceCondition": {
"comeInWithTemporaryBlue": {}
},
"requires": [
"canChainTemporaryBlue"
],
"clearsObstacles": [
"A"
],
"flashSuitChecked": true,
"blueSuitChecked": true,
"devNote": [
"FIXME: handle the case of entering from another water room, in which case a flash suit could be carried."
]
},
{
"id": 112,
"link": [
1,
1
],
"name": "Temporary Blue (Come In Getting Blue Speed, Gravity)",
"entranceCondition": {
"comeInGettingBlueSpeed": {
"length": 10,
"openEnd": 1
}
},
"requires": [
"Gravity",
"canTemporaryBlue"
],
"clearsObstacles": [
"A"
],
"flashSuitChecked": true,
"blueSuitChecked": true,
"note": [
"Run into the room and gain temporary blue below the bomb blocks on the far side of the room.",
"Then jump up to break the bomb blocks."
],
"devNote": [
"This has collision oscillation if the last half tile of runway is used."
]
},
{
"id": 113,
"link": [
1,
1
],
"name": "Temporary Blue (Come In Getting Blue Speed, Water Shinecharge)",
"entranceCondition": {
"comeInGettingBlueSpeed": {
"length": 3,
"openEnd": 1
}
},
"requires": [
"canWaterShineCharge",
"canTemporaryBlue"
],
"clearsObstacles": [
"A"
],
"flashSuitChecked": true,
"blueSuitChecked": true,
"note": [
"Run into the room and gain temporary blue below the bomb blocks on the far side of the room.",
"Then jump up to break the bomb blocks."
]
},
{
"id": 114,
"link": [
1,
1
],
"name": "Temporary Blue (Come In Getting Blue Speed, Jump Into Blue Chain)",
"entranceCondition": {
"comeInGettingBlueSpeed": {
"length": 1,
"openEnd": 1
}
},
"requires": [
"h_underwaterChainTemporaryBlue"
],
"clearsObstacles": [
"A"
],
"flashSuitChecked": true,
"blueSuitChecked": true,
"note": [
"Gain blue speed running into the room, then jump, morph, and unmorph while holding angle to obtain temporary blue.",
"This method allows retaining a flash suit."
]
},
{
"id": 115,
"link": [
1,
1
],
"name": "Temporary Blue (Speedball)",
"entranceCondition": {
"comeInSpeedballing": {
"runway": {
"length": 0,
"openEnd": 1
}
}
},
"requires": [
"h_underwaterChainTemporaryBlue"
],
"clearsObstacles": [
"A"
],
"flashSuitChecked": true,
"blueSuitChecked": true
},
{
"id": 8,
"link": [
1,
1
],
"name": "Temporary Blue (Blue Spring Ball Bounce)",
"entranceCondition": {
"comeInWithBlueSpringBallBounce": {
"movementType": "controlled"
}
},
"requires": [
"h_underwaterChainTemporaryBlue"
],
"clearsObstacles": [
"A"
],
"flashSuitChecked": true,
"blueSuitChecked": true,
"note": "Break the bomb block on the opposite side of the room.",
"detailNote": [
"With extra run speeds between $1.2 and $1.D, it's not possible to break the bomb block directly with a bounce;",
"but it is always possible to break them by chaining temporary blue (even if carrying a flash suit)."
]
},
{
"id": 74,
"link": [
1,
1
],
"name": "Blue Speed (Come In Getting Blue Speed, Gravity)",
"entranceCondition": {
"comeInGettingBlueSpeed": {
"length": 9,
"openEnd": 0
}
},
"requires": [
"h_blueJump",
"Gravity",
"canTrickyJump"
],
"clearsObstacles": [
"A"
],
"flashSuitChecked": true,
"blueSuitChecked": true,
"note": [
"Gain blue speed running into the room, then jump to break the bomb block on the far side of the room."
]
},
{
"id": 7,
"link": [
1,
1
],
"name": "Blue Speed (Come In Getting Blue Speed, Low Speed)",
"entranceCondition": {
"comeInGettingBlueSpeed": {
"length": 2,
"openEnd": 1,
"maxExtraRunSpeed": "$1.3"
}
},
"requires": [
"h_blueJump",
"canTrickyJump"
],
"clearsObstacles": [
"A"
],
"flashSuitChecked": true,
"blueSuitChecked": true,
"note": [
"Gain blue speed running into the room, then jump to break the bomb block on the far side of the room."
],
"devNote": [
"With extra run speeds above $1.3, Samus' jump height is shorter,",
"in which case this method would be ineffective compared to a temporary blue chain."
]
},
{
"id": 116,
"link": [
1,
1
],
"name": "Blue Speed (Come In Getting Blue Speed, Hi-Jump)",
"entranceCondition": {
"comeInGettingBlueSpeed": {
"length": 2,
"openEnd": 1
}
},
"requires": [
"h_blueJump",
"canTrickyJump",
"HiJump"
],
"clearsObstacles": [
"A"
],
"flashSuitChecked": true,
"blueSuitChecked": true
},
{
"id": 117,
"link": [
1,
1
],
"name": "Blue Space Jump",
"entranceCondition": {
"comeInBlueSpaceJumping": {
"minExtraRunSpeed": "$1.B"
}
},
"requires": [
"canPreciseSpaceJump"
],
"clearsObstacles": [
"A"
],
"flashSuitChecked": true,
"blueSuitChecked": true
},
{
"id": 99,
"link": [
1,
1
],
"name": "Precise Stutter Shinecharge, Leave Shinecharged (5-tile runway)",
"entranceCondition": {
"comeInStutterShinecharging": {
"minTiles": 5
}
},
"requires": [
"canPreciseStutterWaterShineCharge",
"canShinechargeMovementTricky",
"canInsaneJump",
{
"shineChargeFrames": 130
},
{
"or": [
"canBeVeryPatient",
{
"shineChargeFrames": 15
}
]
}
],
"exitCondition": {
"leaveShinecharged": {}
},
"unlocksDoors": [
{
"types": [
"super"
],
"requires": []
},
{
"types": [
"missiles",
"powerbomb"
],
"requires": [
"never"
]
}
],
"flashSuitChecked": true,
"blueSuitChecked": true,
"note": [
"With a runway of 5 tiles (open end) in the other room,",
"the ideal timing for the stutter is to release forward for 5 frames, and repress forward on the last possible frame before the transition.",
"Other timings can work, but will gain the shinecharge further from the door, leaving fewer shinecharge frames remaining.",
"After gaining the shinecharge, continue holding forward in order to make Samus stand.",
"Then turnaround spin jump back toward the door, and continue spin jumping to reach the transition with a shinecharge."
]
},
{
"id": 100,
"link": [
1,
1
],
"name": "Precise Stutter Shinecharge, Leave Shinecharged (4-tile runway)",
"entranceCondition": {
"comeInStutterShinecharging": {
"minTiles": 4
}
},
"requires": [
"canPreciseStutterWaterShineCharge",
"canShinechargeMovementTricky",
"canInsaneJump",
{
"shineChargeFrames": 140
},
{
"or": [
"canBeVeryPatient",
{
"shineChargeFrames": 10
}
]
}
],
"exitCondition": {
"leaveShinecharged": {}
},
"unlocksDoors": [
{
"types": [
"super"
],
"requires": []
},
{
"types": [
"missiles",
"powerbomb"
],
"requires": [
"never"
]
}
],
"flashSuitChecked": true,
"blueSuitChecked": true,
"note": [
"With only a runway of 4 tiles (open end) in the other room,",
"the ideal timing for the stutter is to release forward for 4 frames, and repress forward on the last possible frame before the transition.",
"It also works well to release forward for 3 frames and repress on the last possible frame.",
"Other timings can also work, but may gain the shinecharge further from the door, leaving fewer shinecharge frames remaining.",
"After gaining the shinecharge, continue holding forward in order to make Samus stand.",
"Then turnaround spin jump back toward the door, and continue spin jumping to reach the transition with a shinecharge."
]
},
{
"id": 101,
"link": [
1,
1
],
"name": "Precise Stutter Shinecharge, Leave Shinecharged (3-tile runway)",
"entranceCondition": {
"comeInStutterShinecharging": {
"minTiles": 3
}
},
"requires": [
"canPreciseStutterWaterShineCharge",
"canShinechargeMovementTricky",
"canInsaneJump",
{
"shineChargeFrames": 145
},
{
"or": [
"canBeVeryPatient",
{
"shineChargeFrames": 10
}
]
}
],
"exitCondition": {
"leaveShinecharged": {}
},
"unlocksDoors": [
{
"types": [
"super"
],
"requires": []
},
{
"types": [
"missiles",
"powerbomb"
],
"requires": [
"never"
]
}
],
"flashSuitChecked": true,
"blueSuitChecked": true,
"note": [
"With only a runway of 3 tiles (open end) in the other room,",
"the ideal timing for the stutter is to release forward for 3 or 4 frames, and repress forward on the last possible frame before the transition.",
"Other timings can work, but will gain the shinecharge further from the door, leaving fewer shinecharge frames remaining.",
"After gaining the shinecharge, continue holding forward in order to make Samus stand.",
"Then turnaround spin jump back toward the door, and continue spin jumping to reach the transition with a shinecharge.",
"Alternatively, with greater difficulty but saving some shinecharge frames,",
"after performing the turnaround spin jump, briefly moonwalk back, then retain momentum by boomeranging forward",
"(switching from pressing backward to pressing forward on the next frame),",
"and arm pump to reach the door quickly."
],
"devNote": [
"The same shinecharge frames could be achieved with a closed end runway (effective length of 2.4375),",
"with a 3-frame stutter, but there doesn't appear to be any application."
]
},
{
"id": 102,
"link": [
1,
1
],
"name": "Precise Stutter Shinecharge, Leave Shinecharged (2-tile runway)",
"entranceCondition": {
"comeInStutterShinecharging": {
"minTiles": 2
}
},
"requires": [
"canPreciseStutterWaterShineCharge",
"canShinechargeMovementTricky",
"canInsaneJump",
{
"shineChargeFrames": 150
},
{
"or": [
"canBeVeryPatient",
{
"shineChargeFrames": 15
}
]
}
],
"exitCondition": {
"leaveShinecharged": {}
},
"unlocksDoors": [
{
"types": [
"super"
],
"requires": []
},
{
"types": [
"missiles",
"powerbomb"
],
"requires": [
"never"
]
}
],
"flashSuitChecked": true,
"blueSuitChecked": true,
"note": [
"With only a runway of 2 tiles (open end) in the other room,",
"the ideal timing for the stutter is to release forward for 3 frames, and repress forward on the last possible frame before the transition.",
"Other timings can work, but will gain the shinecharge further from the door, leaving fewer shinecharge frames remaining.",
"After gaining the shinecharge, continue holding forward in order to make Samus stand.",
"Then turnaround spin jump back toward the door, and continue spin jumping to reach the transition with a shinecharge.",
"Alternatively, with greater difficulty but saving some shinecharge frames,",
"after performing the turnaround spin jump, briefly moonwalk back, then retain momentum by boomeranging forward",
"(switching from pressing backward to pressing forward on the next frame),",
"and arm pump to reach the door quickly."
],
"devNote": [
"FIXME: The canBeVeryPatient requirement is for difficulty placement of the boomerang method;",
"but the boomerang (or maybe specifically the moonwalk boomerang) should possibly be its own tech,",
"and the same with rapid arm pumping."
]
},
{
"id": 103,
"link": [
1,
1
],
"name": "Precise Stutter Shinecharge, Leave Shinecharged (1-tile runway)",
"entranceCondition": {
"comeInStutterShinecharging": {
"minTiles": 1
}
},
"requires": [
{
"doorUnlockedAtNode": 2
},
"canPreciseStutterWaterShineCharge",
"canInsaneJump",
"canBeVeryPatient",
"canShinechargeMovementTricky",
{
"shineChargeFrames": 160
}
],
"exitCondition": {
"leaveShinecharged": {}
},
"unlocksDoors": [
{
"nodeId": 2,
"types": [
"missiles",
"super"
],
"requires": []
},
{
"nodeId": 2,
"types": [
"powerbomb"
],
"requires": [
"never"
]
},
{
"types": [
"super"
],
"requires": []
},
{
"types": [
"missiles",
"powerbomb"
],
"requires": [
"never"
]
}
],
"flashSuitChecked": true,
"blueSuitChecked": true,
"note": [
"With only 1 tile of runway in the other room, Samus should ideally start on the last pixel of runway with X subpixels of $3FFF or less.",
"Run toward the door, releasing forward for exactly 1 frame and pressing it again on the last possible frame before the transition.",
"Starting with X subpixels of $7FFF can also work (e.g., by simply backing against the door ledge, then jumping and turning around mid-air);",
"in this case, Samus must advance 1 or 2 pixels with an arm pump before the transition (e.g., firing a shot or pressing and/or releasing an angle button),",
"and the shinecharge will be gained slightly further away from the door.",
"After gaining the shinecharge, continue holding forward in order to make Samus stand.",
"Then turnaround spin jump back toward the door, and continue spin jumping to reach the transition with a shinecharge.",
"Alternatively, with greater difficulty but saving some shinecharge frames,",
"after performing the turnaround spin jump, briefly moonwalk back, then retain momentum by boomeranging forward",
"(switching from pressing backward to pressing forward on the next frame),",
"and arm pump to reach the door quickly."
],
"detailNote": [
"Ideal subpixels ($3FFF) can be achieved using one of several methods:",
"1) press forward against the door ledge (or a wall aligned with it);",
"jump, and while mid-air, tap forward for exactly 1 frame to land with subpixels $BFFF,",
"moonwalk back for exactly 1 frame to end with subpixels $3FFF.",
"2) press forward against the door ledge (from a platform below, assuming one exists)",
"turn around (while on the ground), and moonwalk back two pixels,",
"then jump and mid-air turnaround onto the ledge;",
"if Samus jumped from the correct pixel but does not land on the ledge, then it was needed to moonwalk back 1 more frame;",
"in this case it is possible to retry by doing a mid-air turnaround back onto the platform, and moonwalking back for 1 frame.",
"3) if X-Ray is available, press against the door ledge (from a platform below, assuming one exists)",
"turn around (while on the ground), then jump and mid-air turnaround toward the door,",
"and use X-Ray to turnaround in place away from the door;",
"repeat this sequence 3 more times: jump, mid-air turnaround, X-Ray turnaround;",
"then do one more jump and mid-air turnaround, high enough to land on the door ledge,",
"and Samus should be in the correct position with subpixels $3FFF."
]
},
{
"id": 147,
"link": [
1,
1
],
"name": "Come in Shinecharging, Crystal Spark",
"entranceCondition": {
"comeInShinecharging": {
"length": 12,
"openEnd": 0
},
"comesInHeated": "no"
},
"requires": [
"Gravity",
"h_CrystalSpark"
],
"clearsObstacles": [
"A"
],
"flashSuitChecked": true,
"blueSuitChecked": true
},
{
"id": 148,
"link": [
1,
1
],
"name": "Precise Stutter Water Shinecharge, Crystal Spark",
"entranceCondition": {
"comeInStutterShinecharging": {
"minTiles": 2.4375
},
"comesInHeated": "no"
},
"requires": [
"canPreciseStutterWaterShineCharge",
"h_underwaterCrystalSpark"
],
"clearsObstacles": [
"A"
],
"flashSuitChecked": true,
"blueSuitChecked": true,
"note": [
"With only a runway length of 3 tiles (closed end) in the other room, this requires a precise setup:",
"release forward for 3 or 4 frames, then repress forward on the last possible frame before the transition;",
"alternatively, release forward for 2 frames and repress forward on the second-to-last possible frame before the transition."
],
"detailNote": [
"If a longer runway is available (4 tiles), the timing windows are a bit more lenient:",
"1. Release forward for 3, 4, or 5 frames, repress forward on the last possible frame;",
"2. Release forward for 2 or 3 frames, repress forward on the 2nd-to-last possible frame;",
"3. Release forward for 1 or 2 frames, repress forward on the 3rd-to-last possible frame."
],
"devNote": [
"FIXME: This is possible with a shorter runway, as low as 1 tile, but it's a lot worse.",
"It would require more duplication and could be very tedious to set up for many attempts."
]
},
{
"id": 9,
"link": [
1,
1
],
"name": "G-Mode Morph Bomb Blocks",
"entranceCondition": {
"comeInWithGMode": {
"mode": "any",
"morphed": true
}
},
"requires": [
{
  "or": [
    "h_artificialMorphPowerBomb",
    {
      "and": [
        "h_artificialMorphIBJ",
        "Gravity"
      ]
    },
    {
      "and": [
        "h_artificialMorphSpringBall",
        "h_artificialMorphBombs"
      ]
    }
  ]
}
],
"clearsObstacles": [
"A"
],
"flashSuitChecked": true,
"blueSuitChecked": true
},
{
"id": 75,
"link": [
1,
2
],
"name": "Come In Shinecharged, Leave With Spark (Bottom Position)",
"entranceCondition": {
"comeInShinecharged": {}
},
"requires": [
{
"or": [
{
"and": [
"Gravity",
{
"shineChargeFrames": 5
}
]
},
{
"shineChargeFrames": 10
}
]
},
{
"shinespark": {
"frames": 23,
"excessFrames": 0
}
}
],
"exitCondition": {
"leaveWithSpark": {
"position": "bottom"
}
},
"unlocksDoors": [
{
"types": [
"super"
],
"requires": []
},
{
"types": [
"missiles",
"powerbomb"
],
"requires": [
"never"
]
}
],
"flashSuitChecked": true,
"blueSuitChecked": true
},
{
"id": 76,
"link": [
1,
2
],
"name": "Come In Shinecharged, Leave With Spark (Top Position)",
"entranceCondition": {
"comeInShinecharged": {}
},
"requires": [
{
"or": [
{
"and": [
"Gravity",
{
"shineChargeFrames": 10
}
]
},
{
"shineChargeFrames": 20
}
]
},
{
"shinespark": {
"frames": 21,
"excessFrames": 0
}
}
],
"exitCondition": {
"leaveWithSpark": {
"position": "top"
}
},
"unlocksDoors": [
{
"types": [
"super"
],
"requires": []
},
{
"types": [
"missiles",
"powerbomb"
],
"requires": [
"never"
]
}
],
"flashSuitChecked": true,
"blueSuitChecked": true
},
{
"id": 77,
"link": [
1,
2
],
"name": "Carry Shinecharge",
"entranceCondition": {
"comeInShinecharged": {}
},
"requires": [
"canShinechargeMovementComplex",
{
"or": [
{
"and": [
"Gravity",
{
"shineChargeFrames": 55
}
]
},
{
"and": [
"canSuitlessMaridia",
{
"shineChargeFrames": 150
}
]
}
]
}
],
"exitCondition": {
"leaveShinecharged": {}
},
"unlocksDoors": [
{
"types": [
"super"
],
"requires": []
},
{
"types": [
"missiles",
"powerbomb"
],
"requires": [
"never"
]
}
],
"flashSuitChecked": true,
"blueSuitChecked": true
},
{
"id": 14,
"link": [
1,
2
],
"name": "Transition with Stored Fall Speed",
"entranceCondition": {
"comeInWithStoredFallSpeed": {
"fallSpeedInTiles": 1
}
},
"requires": [],
"exitCondition": {
"leaveWithStoredFallSpeed": {
"fallSpeedInTiles": 1
}
},
"unlocksDoors": [
{
"types": [
"missiles",
"super"
],
"requires": []
},
{
"types": [
"powerbomb"
],
"requires": [
"never"
]
}
],
"flashSuitChecked": true,
"blueSuitChecked": true
},
{
"id": 15,
"link": [
1,
2
],
"name": "Transition with Stored Fall Speed (more speed)",
"entranceCondition": {
"comeInWithStoredFallSpeed": {
"fallSpeedInTiles": 2
}
},
"requires": [],
"exitCondition": {
"leaveWithStoredFallSpeed": {
"fallSpeedInTiles": 2
}
},
"unlocksDoors": [
{
"types": [
"missiles",
"super"
],
"requires": []
},
{
"types": [
"powerbomb"
],
"requires": [
"never"
]
}
],
"flashSuitChecked": true,
"blueSuitChecked": true
},
{
"id": 16,
"link": [
1,
3
],
"name": "Cross Room Jump Boomerang Through Top Door (Screw Attack)",
"entranceCondition": {
"comeInJumping": {
"speedBooster": "yes",
"minTiles": 13
}
},
"requires": [
{
"notable": "Cross Room Jump Boomerang To Top"
},
"canInsaneJump",
"canCrossRoomJumpIntoWater",
"ScrewAttack",
"canMomentumConservingTurnaround",
{
"noFlashSuit": {}
}
],
"exitCondition": {
"leaveNormally": {}
},
"unlocksDoors": [
{
"types": [
"super"
],
"requires": []
},
{
"types": [
"missiles",
"powerbomb"
],
"requires": [
"never"
]
}
],
"flashSuitChecked": true,
"blueSuitChecked": true,
"note": [
"Use Screw Attack to break the bomb block by entering from a non-water room with a spin jump, and make it all the way through the top door.",
"Ideally, gain speed using between 13 and 13.5 tiles of runway (with an open end).",
"Longer runway lengths can also work, up to 17 tiles, but will make the trick somewhat more precise.",
"Use angle to break spin, and do a momentum conserving turnaround either on the same frame or one frame later;",
"this first turnaround should be done early enough that the turnaround is complete by the time Samus clears the two-tile passage in the middle of the room.",
"Do a second momentum conserving turnaround somewhat late, and by switching from holding left to holding right one frame later (a perfect 'boomerang').",
"Shoot open the door, and use a third momentum conserving turnaround on it as it opens."
],
"detailNote": [
"The optimal amount of extra run speed is $3.4 or $3.5, by using 13 tiles of runway or about a half tile more;",
"this gives a 7-frame window for the first turnaround, and typically a 4-frame window for the second turnaround if the first turnaround is done early enough.",
"Extra run speeds between $3.6 and $3.F can also work, but with shorter windows.",
"A perfect boomerang is always required for the second turnaround, regardless of where in the window it is done.",
"It is recommended to buffer the spin break, by holding angle (up or down), jump, and forward through the transition,",
"then switching from forward to backward, with at most 1 frame of neutral in between, while still holding jump and angle."
],
"devNote": "This does not have collision oscillation."
},
{
"id": 72,
"link": [
1,
3
],
"name": "Cross Room Jump Boomerang Through Top Door (Blue Speed)",
"entranceCondition": {
"comeInGettingBlueSpeed": {
"length": 0,
"openEnd": 1,
"minExtraRunSpeed": "$3.4",
"maxExtraRunSpeed": "$3.F"
}
},
"requires": [
{
"notable": "Cross Room Jump Boomerang To Top"
},
"h_blueJump",
"canInsaneJump",
"canCrossRoomJumpIntoWater",
"canMomentumConservingTurnaround",
{
"noFlashSuit": {}
}
],
"exitCondition": {
"leaveNormally": {}
},
"unlocksDoors": [
{
"types": [
"super"
],
"requires": []
},
{
"types": [
"missiles",
"powerbomb"
],
"requires": [
"never"
]
}
],
"flashSuitChecked": true,
"blueSuitChecked": true,
"note": [
"Use a 2-tap shortcharge and jump into the room with a last-frame jump, breaking the bomb block with blue speed, and making it all the way through the top door.",
"Use angle to break spin, and do a momentum conserving turnaround either on the same frame or one frame later;",
"this first turnaround should be done early enough that the turnaround is complete by the time Samus clears the two-tile passage in the middle of the room.",
"Do a second momentum conserving turnaround somewhat late, and by switching from holding left to holding right one frame later (a perfect 'boomerang').",
"Shoot open the door, and use a third momentum conserving turnaround on it as it opens."
],
"detailNote": [
"Lower run speeds are generally better, as long as the extra run speed is at least $3.4.",
"this gives up to a 7-frame window for the first turnaround, and typically a 4-frame window for the second turnaround if the first turnaround is done early enough.",
"A perfect boomerang is always required for the second turnaround, regardless of where in the window it is done.",
"It is recommended to buffer the spin break, by holding angle (up or down), jump, and forward through the transition,",
"then switching from forward to backward, with at most 1 frame of neutral in between, while still holding jump and angle."
]
},
{
"id": 66,
"link": [
1,
3
],
"name": "Come In Shinecharging, Leave Shinecharged (Gravity, Screw Attack)",
"entranceCondition": {
"comeInShinecharging": {
"length": 3,
"openEnd": 0
}
},
"requires": [
"Gravity",
"ScrewAttack",
"canShinechargeMovementTricky",
{
"or": [
{
"and": [
"HiJump",
{
"shineChargeFrames": 130
}
]
},
{
"shineChargeFrames": 145
}
]
}
],
"exitCondition": {
"leaveShinecharged": {}
},
"unlocksDoors": [
{
"types": [
"super"
],
"requires": []
},
{
"types": [
"missiles",
"powerbomb"
],
"requires": [
"never"
]
}
],
"flashSuitChecked": true,
"blueSuitChecked": true,
"devNote": [
"FIXME: It can be possible to use a longer runway, or a stutter shinecharge with Gravity re-equip, with a cost of some shinecharge frames."
]
},
{
"id": 118,
"link": [
1,
4
],
"name": "Come In Shinecharged, Diagonal Suitless Shinespark to the Top",
"entranceCondition": {
"comeInShinecharged": {}
},
"requires": [
{
"shineChargeFrames": 10
},
"h_navigateUnderwater",
{
"shinespark": {
"frames": 23,
"excessFrames": 2
}
}
],
"flashSuitChecked": true,
"blueSuitChecked": true
},
{
"id": 119,
"link": [
1,
4
],
"name": "Cross Room Jump To Top Door (Screw Attack)",
"entranceCondition": {
"comeInJumping": {
"speedBooster": "yes",
"minTiles": 12.4375
}
},
"requires": [
{
"notable": "Cross Room Jump Boomerang To Top"
},
"canInsaneJump",
"canCrossRoomJumpIntoWater",
"ScrewAttack",
"canMomentumConservingTurnaround",
"h_trickyToCarryFlashSuit"
],
"flashSuitChecked": true,
"blueSuitChecked": true,
"note": [
"Use Screw Attack to break the bomb block by entering from a non-water room with a last-frame spin jump, and make it to the platform below the top door.",
"Longer runway lengths can also work, up to 17 tiles, but will make the trick somewhat more precise.",
"Use angle to break spin, and do a momentum conserving turnaround either on the same frame or one frame later;",
"this first turnaround should be done early enough that the turnaround is complete by the time Samus clears the two-tile passage in the middle of the room.",
"Do a second momentum conserving turnaround somewhat late, and by switching from holding left to holding right one frame later (a perfect 'boomerang')."
],
"detailNote": [
"The optimal amount of extra run speed is between $3.2 and $3.5, by using 13 tiles of runway or about a half tile more or less;",
"this gives a 7-frame window for the first turnaround, and typically a 4-frame window for the second turnaround if the first turnaround is done early enough.",
"Extra run speeds between $3.6 and $3.F can also work, but with shorter windows.",
"A perfect boomerang is always required for the second turnaround, regardless of where in the window it is done.",
"It is recommended to buffer the spin break, by holding angle (up or down), jump, and forward through the transition,",
"then switching from forward to backward, with at most 1 frame of neutral in between, while still holding jump and angle."
],
"devNote": "This does not have collision oscillation."
},
{
"id": 120,
"link": [
1,
4
],
"name": "Cross Room Jump To Top Door (Blue Speed)",
"entranceCondition": {
"comeInGettingBlueSpeed": {
"length": 0,
"openEnd": 1,
"minExtraRunSpeed": "$3.2",
"maxExtraRunSpeed": "$3.F"
}
},
"requires": [
{
"notable": "Cross Room Jump Boomerang To Top"
},
"h_blueJump",
"canInsaneJump",
"canCrossRoomJumpIntoWater",
"canMomentumConservingTurnaround",
"h_trickyToCarryFlashSuit"
],
"flashSuitChecked": true,
"blueSuitChecked": true,
"note": [
"Use a 2-tap shortcharge and jump into the room with a last-frame jump, breaking the bomb block with blue speed, and making it all the way through the top door.",
"Use angle to break spin, and do a momentum conserving turnaround either on the same frame or one frame later;",
"this first turnaround should be done early enough that the turnaround is complete by the time Samus clears the two-tile passage in the middle of the room.",
"Do a second momentum conserving turnaround somewhat late, and by switching from holding left to holding right one frame later (a perfect 'boomerang')."
],
"detailNote": [
"Lower run speeds are generally better, as long as the extra run speed is at least $3.2.",
"this gives up to a 7-frame window for the first turnaround, and typically a 4-frame window for the second turnaround if the first turnaround is done early enough.",
"A perfect boomerang is always required for the second turnaround, regardless of where in the window it is done.",
"It is recommended to buffer the spin break, by holding angle (up or down), jump, and forward through the transition,",
"then switching from forward to backward, with at most 1 frame of neutral in between, while still holding jump and angle."
]
},
{
"id": 121,
"link": [
1,
4
],
"name": "Side Platform Cross Room Jump with Blue Speed",
"entranceCondition": {
"comeInWithSidePlatform": {
"platforms": [
{
"minHeight": 1,
"maxHeight": 1,
"minTiles": 17,
"speedBooster": "yes",
"obstructions": [
[
1,
0
]
],
"requires": [
{
"getBlueSpeed": {
"usedTiles": 15,
"openEnd": 1
}
},
"h_blueJump"
],
"note": [
"Applies to Warehouse Entrance."
],
"detailNote": [
"Jump through the door with an extra run speed of at least $2.2."
]
},
{
"minHeight": 1,
"maxHeight": 1,
"minTiles": 27.4375,
"speedBooster": "yes",
"obstructions": [
[
1,
0
]
],
"requires": [
{
"getBlueSpeed": {
"usedTiles": 24,
"openEnd": 1
}
},
"h_blueJump"
],
"note": [
"Applies to Dust Torizo Room and Halfie Climb Room."
],
"detailNote": [
"Jump through the door with an extra run speed of $3.1 or less."
]
},
{
"minHeight": 2,
"maxHeight": 2,
"minTiles": 45,
"speedBooster": "yes",
"obstructions": [
[
2,
0
]
],
"requires": [
{
"getBlueSpeed": {
"usedTiles": 24,
"openEnd": 1
}
},
"h_blueJump",
"canInsaneMidAirMorph"
],
"note": [
"Applies to Waterway Energy Tank Room."
],
"detailNote": [
"Pause to unequip Gravity before the transition."
]
},
{
"minHeight": 3,
"maxHeight": 3,
"minTiles": 39.4375,
"speedBooster": "yes",
"obstructions": [
[
3,
2
]
],
"requires": [
{
"getBlueSpeed": {
"usedTiles": 24,
"openEnd": 1
}
},
"h_blueJump",
"canInsaneMidAirMorph"
],
"note": [
"Applies to Metal Pirates Room."
]
}
]
}
},
"requires": [
"canCrossRoomJumpIntoWater",
"canMomentumConservingMorph",
"canInsaneJump"
],
"clearsObstacles": [
"A"
],
"flashSuitChecked": true,
"blueSuitChecked": true,
"note": [
"Jump into a momentum-conserving morph with blue speed to break the bomb block and continue up to the top of the room.",
"After pressing down to initiate the momentum-conserving morph, all inputs can be released;",
"do not hold forward while the morph completes as it would give too much speed, causing Samus to bonk horizontally.",
"Tapping (not holding) backward can sometimes help in dodging the platforms while ascending, by reversing Samus' horizontal momentum."
]
},
{
"id": 20,
"link": [
1,
5
],
"name": "Base",
"requires": [],
"flashSuitChecked": true,
"blueSuitChecked": true
},
{
"id": 21,
"link": [
1,
6
],
"name": "X-Ray Climb",
"entranceCondition": {
"comeInWithDoorStuckSetup": {}
},
"requires": [
"canXRayClimb"
],
"flashSuitChecked": true,
"blueSuitChecked": true,
"note": "This is a short climb, only a few tiles."
},
{
"id": 22,
"link": [
1,
6
],
"name": "Come In Shinecharged, Shinespark to Break the Blocks",
"entranceCondition": {
"comeInShinecharged": {}
},
"requires": [
{
"shineChargeFrames": 25
},
"h_navigateUnderwater",
{
"or": [
{
"shinespark": {
"frames": 10,
"excessFrames": 8
}
},
{
"and": [
"canMidairShinespark",
{
"shinespark": {
"frames": 7,
"excessFrames": 7
}
}
]
},
{
"and": [
"canTrickyJump",
{
"shinespark": {
"frames": 1,
"excessFrames": 1
}
}
]
}
]
}
],
"clearsObstacles": [
"A"
],
"flashSuitChecked": true,
"blueSuitChecked": true,
"note": "Spark vertically through the bomb blocks. It is still possible to break the blocks while below 30 Energy by jumping before sparking.",
"devNote": [
"This does not require canWaterShineCharge, as you can store the shinecharge before entering the room.",
"Note that it is possible to spark into the ceiling to break the blocks without energy loss, but it has collision oscillation."
]
},
{
"id": 78,
"link": [
1,
8
],
"name": "Come In Shinecharging (Gravity)",
"entranceCondition": {
"comeInShinecharging": {
"length": 12,
"openEnd": 0
}
},
"requires": [
"Gravity",
{
"shineChargeFrames": 0
}
],
"endsWithShineCharge": true,
"flashSuitChecked": true,
"blueSuitChecked": true
},
{
"id": 79,
"link": [
1,
8
],
"name": "Water Shinecharge",
"entranceCondition": {
"comeInShinecharging": {
"length": 4,
"openEnd": 0
}
},
"requires": [
"canWaterShineCharge",
{
"shineChargeFrames": 0
}
],
"endsWithShineCharge": true,
"flashSuitChecked": true,
"blueSuitChecked": true
},
{
"id": 80,
"link": [
1,
8
],
"name": "Precise Stutter Water Shinecharge",
"entranceCondition": {
"comeInStutterShinecharging": {
"minTiles": 2.4375
}
},
"requires": [
"canPreciseStutterWaterShineCharge",
{
"shineChargeFrames": 0
}
],
"endsWithShineCharge": true,
"flashSuitChecked": true,
"blueSuitChecked": true
},
{
"id": 81,
"link": [
1,
8
],
"name": "Precise Stutter Water Shinecharge (Shorter Runway)",
"entranceCondition": {
"comeInStutterShinecharging": {
"minTiles": 2
}
},
"requires": [
"canPreciseStutterWaterShineCharge",
{
"or": [
{
"doorUnlockedAtNode": 2
},
"canInsaneJump"
]
},
{
"shineChargeFrames": 0
}
],
"unlocksDoors": [
{
"nodeId": 2,
"types": [
"super",
"missiles"
],
"requires": []
},
{
"nodeId": 2,
"types": [
"powerbomb"
],
"requires": [
"never"
]
}
],
"endsWithShineCharge": true,
"flashSuitChecked": true,
"blueSuitChecked": true,
"note": [
"If only 2 tiles of runway are available and it is not possible to unlock the opposite door, then this requires a double frame-perfect stutter:",
"run toward the door, release forward for exactly 3 frames, pressing forward again on the last possible frame before the transition."
],
"devNote": [
"FIXME: canInsaneJump is for difficulty placement; replace with a more appropriate tech since no jump is involved."
]
},
{
"id": 82,
"link": [
1,
8
],
"name": "Precise Stutter Water Shinecharge (Very Short Runway)",
"entranceCondition": {
"comeInStutterShinecharging": {
"minTiles": 1
}
},
"requires": [
"canPreciseStutterWaterShineCharge",
"canInsaneJump",
"canBeVeryPatient",
{
"doorUnlockedAtNode": 2
},
{
"shineChargeFrames": 0
}
],
"unlocksDoors": [
{
"nodeId": 2,
"types": [
"super",
"missiles"
],
"requires": []
},
{
"nodeId": 2,
"types": [
"powerbomb"
],
"requires": [
"never"
]
}
],
"endsWithShineCharge": true,
"flashSuitChecked": true,
"blueSuitChecked": true,
"note": [
"With only 1 tile of runway in the other room, Samus should ideally start on the last pixel of runway with X subpixels of $3FFF or less.",
"Run toward the door, releasing forward for exactly 1 frame and pressing it again on the last possible frame before the transition.",
"Starting with X subpixels of $7FFF can also work (e.g., by simply backing against the door ledge, then jumping and turning around mid-air);",
"in this case, Samus must advance 1 or 2 pixels with an arm pump before the transition (e.g., firing a shot or pressing and/or releasing an angle button),",
"and the shinecharge will be gained slightly further away.",
"After the transition, shoot open the opposite door while running, to extend the runway by a tile."
],
"detailNote": [
"Correct subpixels can be achieved using one of several methods:",
"1) press against the door ledge (or a wall aligned with it);",
"jump, and while mid-air, tap forward for exactly 1 frame to land with subpixels $BFFF,",
"moonwalk back for exactly 1 frame to end with subpixels $3FFF.",
"2) press against the door ledge (from a platform below, assuming one exists)",
"turn around (while on the ground), and moonwalk back two pixels,",
"then jump and mid-air turnaround onto the ledge;",
"if Samus jumped from the correct pixel but does not land on the ledge, then it was needed to moonwalk back 1 more frame;",
"in this case it is possible to retry by doing a mid-air turnaround back onto the platform, and moonwalking back for 1 frame.",
"3) if X-Ray is available, press against the door ledge (from a platform below, assuming one exists)",
"turn around (while on the ground), then jump and mid-air turnaround toward the door,",
"and use X-Ray to turnaround in place away from the door;",
"repeat this sequence 3 more times: jump, mid-air turnaround, X-Ray turnaround;",
"then do one more jump and mid-air turnaround, high enough to land on the door ledge,",
"and Samus should be in the correct position with subpixels $3FFF."
],
"devNote": [
"The `canBeVeryPatient` is for difficulty placement; this could be improved with a more specific tech later,",
"since it does not actually take a long time to execute."
]
},
{
"id": 17,
"link": [
1,
9
],
"name": "Come In Shinecharged, Diagonal Suitless Shinespark to the Center",
"entranceCondition": {
"comeInShinecharged": {}
},
"requires": [
{
"shineChargeFrames": 10
},
"h_navigateUnderwater",
{
"shinespark": {
"frames": 23,
"excessFrames": 10
}
}
],
"flashSuitChecked": true,
"blueSuitChecked": true
},
{
"id": 19,
"link": [
1,
9
],
"name": "Cross Room Jump with Screw Attack and Speed",
"entranceCondition": {
"comeInJumping": {
"speedBooster": "yes",
"minTiles": 12.4375
}
},
"requires": [
{
"notable": "Cross Room Jump with Screw Attack"
},
"canInsaneJump",
"canCrossRoomJumpIntoWater",
"ScrewAttack",
"canMomentumConservingTurnaround"
],
"flashSuitChecked": true,
"blueSuitChecked": true,
"note": [
"Use Screw Attack to break the bomb block by entering from a non-water room with a spin jump, and make it up to the center of the room.",
"It helps to enter as low as possible and with as much horizontal speed as possible and with HiJump turned off."
],
"detailNote": [
"Enter with extra run speed between $3.2 and $3.F, with the lower speeds in this range being better."
],
"devNote": [
"This does not have collision oscillation."
]
},
{
"id": 122,
"link": [
1,
9
],
"name": "Cross Room Jump with Blue Speed",
"entranceCondition": {
"comeInGettingBlueSpeed": {
"length": 0,
"openEnd": 1,
"minExtraRunSpeed": "$3.2",
"maxExtraRunSpeed": "$3.F"
}
},
"requires": [
"h_blueJump",
"canInsaneJump",
"canCrossRoomJumpIntoWater",
"canMomentumConservingTurnaround"
],
"flashSuitChecked": true,
"blueSuitChecked": true,
"note": [
"Use blue speed to break the bomb block by entering from a non-water room with a spin jump, and make it up to the center of the room.",
"It helps to enter as low as possible and with as much horizontal speed as possible and with HiJump turned off."
],
"detailNote": [
"Enter with extra run speed between $3.2 and $3.F, with the lower speeds in this range being better."
],
"devNote": [
"This does not have collision oscillation."
]
},
{
"id": 83,
"link": [
2,
1
],
"name": "Come In Shinecharged, Leave With Spark (Bottom Position)",
"entranceCondition": {
"comeInShinecharged": {}
},
"requires": [
{
"or": [
{
"and": [
"Gravity",
{
"shineChargeFrames": 5
}
]
},
{
"shineChargeFrames": 10
}
]
},
{
"shinespark": {
"frames": 23,
"excessFrames": 0
}
}
],
"exitCondition": {
"leaveWithSpark": {
"position": "bottom"
}
},
"unlocksDoors": [
{
"types": [
"super"
],
"requires": []
},
{
"types": [
"missiles",
"powerbomb"
],
"requires": [
"never"
]
}
],
"flashSuitChecked": true,
"blueSuitChecked": true
},
{
"id": 84,
"link": [
2,
1
],
"name": "Come In Shinecharged, Leave With Spark (Top Position)",
"entranceCondition": {
"comeInShinecharged": {}
},
"requires": [
{
"or": [
{
"and": [
"Gravity",
{
"shineChargeFrames": 10
}
]
},
{
"shineChargeFrames": 20
}
]
},
{
"shinespark": {
"frames": 21,
"excessFrames": 0
}
}
],
"exitCondition": {
"leaveWithSpark": {
"position": "top"
}
},
"unlocksDoors": [
{
"types": [
"super"
],
"requires": []
},
{
"types": [
"missiles",
"powerbomb"
],
"requires": [
"never"
]
}
],
"flashSuitChecked": true,
"blueSuitChecked": true
},
{
"id": 85,
"link": [
2,
1
],
"name": "Carry Shinecharge",
"entranceCondition": {
"comeInShinecharged": {}
},
"requires": [
"canShinechargeMovementComplex",
{
"or": [
{
"and": [
"Gravity",
{
"shineChargeFrames": 55
}
]
},
{
"and": [
"canSuitlessMaridia",
{
"shineChargeFrames": 150
}
]
}
]
}
],
"exitCondition": {
"leaveShinecharged": {}
},
"unlocksDoors": [
{
"types": [
"super"
],
"requires": []
},
{
"types": [
"missiles",
"powerbomb"
],
"requires": [
"never"
]
}
],
"flashSuitChecked": true,
"blueSuitChecked": true
},
{
"id": 28,
"link": [
2,
1
],
"name": "Transition with Stored Fall Speed",
"entranceCondition": {
"comeInWithStoredFallSpeed": {
"fallSpeedInTiles": 1
}
},
"requires": [],
"exitCondition": {
"leaveWithStoredFallSpeed": {
"fallSpeedInTiles": 1
}
},
"unlocksDoors": [
{
"types": [
"missiles",
"super"
],
"requires": []
},
{
"types": [
"powerbomb"
],
"requires": [
"never"
]
}
],
"flashSuitChecked": true,
"blueSuitChecked": true
},
{
"id": 29,
"link": [
2,
1
],
"name": "Transition with Stored Fall Speed (more speed)",
"entranceCondition": {
"comeInWithStoredFallSpeed": {
"fallSpeedInTiles": 2
}
},
"requires": [],
"exitCondition": {
"leaveWithStoredFallSpeed": {
"fallSpeedInTiles": 2
}
},
"unlocksDoors": [
{
"types": [
"missiles",
"super"
],
"requires": []
},
{
"types": [
"powerbomb"
],
"requires": [
"never"
]
}
],
"flashSuitChecked": true,
"blueSuitChecked": true
},
{
"id": 30,
"link": [
2,
2
],
"name": "Leave with Runway",
"requires": [],
"exitCondition": {
"leaveWithRunway": {
"length": 13,
"openEnd": 0
}
},
"flashSuitChecked": true,
"blueSuitChecked": true
},
{
"id": 31,
"link": [
2,
2
],
"name": "Leave with Runway, Open Both Doors",
"requires": [
{
  "doorUnlockedAtNode": 1
}
],
"exitCondition": {
"leaveWithRunway": {
"length": 14,
"openEnd": 0
}
},
"unlocksDoors": [
{
"nodeId": 1,
"types": [
"ammo"
],
"requires": []
}
],
"flashSuitChecked": true,
"blueSuitChecked": true
},
{
"id": 33,
"link": [
2,
2
],
"name": "Cross Room Jump with Screw Attack",
"entranceCondition": {
"comeInJumping": {
"speedBooster": "any",
"minTiles": 4.4375
}
},
"requires": [
{
"notable": "Cross Room Jump with Screw Attack"
},
"canTrickyJump",
"canCrossRoomJumpIntoWater",
"ScrewAttack"
],
"clearsObstacles": [
"A"
],
"flashSuitChecked": true,
"blueSuitChecked": true,
"note": [
"Use Screw Attack to break the bomb block by entering from a non-water room with a spin jump.",
"It helps to enter as low as possible and with as much horizontal speed as possible and with HiJump turned off.",
"Even if executed correctly, the trick can fail with 50% probability due to collision oscillation."
]
},
{
"id": 34,
"link": [
2,
2
],
"name": "Cross Room Jump with Screw Attack and Speed (From the Right)",
"entranceCondition": {
"comeInJumping": {
"speedBooster": "yes",
"minTiles": 3
}
},
"requires": [
{
"notable": "Cross Room Jump with Screw Attack"
},
"canTrickyJump",
"canCrossRoomJumpIntoWater",
"ScrewAttack"
],
"clearsObstacles": [
"A"
],
"flashSuitChecked": true,
"blueSuitChecked": true,
"note": [
"Use Screw Attack to break the bomb block by entering from a non-water room with a spin jump.",
"It helps to enter as low as possible and with as much horizontal speed as possible and with HiJump turned off.",
"Even if executed correctly, the trick can fail with 50% probability due to collision oscillation."
]
},
{
"id": 71,
"link": [
2,
2
],
"name": "Side Platform Cross Room Jump with Screw Attack",
"entranceCondition": {
"comeInWithSidePlatform": {
"platforms": [
{
"minHeight": 1,
"maxHeight": 1,
"minTiles": 13.4375,
"speedBooster": "yes",
"obstructions": [
[
1,
0
]
],
"requires": [
"canTrickyDashJump"
],
"note": [
"Applies to Lava Dive.",
"Gain extra run speed of $3.5, at a position where Samus just barely clears the obstruction:",
"Starting at a horizontal position of $110 (272) or $111 (273) works at any subpixels;",
"parts of the neighboring pixels on either side also work."
],
"devNote": [
"Run speed $3.2 works, at a pixel position of $F7 (247) with any subpixel, or on parts of the neighboring pixel on either side;",
"run speed $3.8 is possible but does not have an entire pixel that works."
]
},
{
"minHeight": 2,
"maxHeight": 2,
"minTiles": 5.4375,
"speedBooster": "yes",
"obstructions": [
[
1,
0
]
],
"note": [
"Applies to Early Super Room, Bowling Alley (Bottom), Tourian Hopper Room, Dust Torizo Room, and Noob Bridge."
]
},
{
"minHeight": 2,
"maxHeight": 2,
"minTiles": 8.4375,
"speedBooster": "any",
"obstructions": [
[
1,
0
]
],
"requires": [
"canInsaneJump"
],
"note": [
"Applies to Bowling Alley (Bottom), Tourian Hopper Room, Dust Torizo Room, and Noob Bridge.",
"Without Speed Booster, this requires specific positioning to align Samus to just barely clear the door ledge."
]
},
{
"minHeight": 3,
"maxHeight": 3,
"minTiles": 8.4375,
"speedBooster": "any",
"obstructions": [
[
1,
0
]
],
"note": [
"Applies to Bomb Torizo Room, Pink Brinstar Wave Gate Room, Phantoon's Room, Big Boy Room, Double Chamber."
]
},
{
"minHeight": 3,
"maxHeight": 3,
"minTiles": 5,
"speedBooster": "yes",
"obstructions": [
[
1,
0
],
[
3,
2
]
],
"note": [
"Applies to Bomb Torizo Room, Pink Brinstar Wave Gate Room, Phantoon's Room, Big Boy Room, Double Chamber, and Metal Pirates Room.",
"With extra run speed exactly $1.2, this works without collision oscillation.",
"Extra run speed up through $1.8 also work but with collision oscillation giving a 50% failure rate, as with most other setups."
]
},
{
"minHeight": 4,
"maxHeight": 4,
"minTiles": 4.5625,
"speedBooster": "yes",
"obstructions": [
[
5,
4
]
],
"note": [
"Applies to Tourian Escape Room 4."
]
}
]
}
},
"requires": [
{
"notable": "Cross Room Jump with Screw Attack"
},
"ScrewAttack",
"canCrossRoomJumpIntoWater",
"canTrickyJump"
],
"clearsObstacles": [
"A"
],
"flashSuitChecked": true,
"blueSuitChecked": true,
"note": [
"Use Screw Attack to break the bomb block by entering from a non-water room with a spin jump.",
"It generally helps to enter as low as possible and with as much horizontal speed as possible, and with HiJump turned off.",
"Even if executed correctly, the trick can fail with 50% probability due to collision oscillation."
]
},
{
"id": 123,
"link": [
2,
2
],
"name": "Side Platform Cross Room Jump with Blue Speed",
"entranceCondition": {
"comeInWithSidePlatform": {
"platforms": [
{
"minHeight": 1,
"maxHeight": 1,
"minTiles": 16,
"speedBooster": "yes",
"obstructions": [
[
1,
0
]
],
"requires": [
{
"getBlueSpeed": {
"usedTiles": 15,
"openEnd": 0
}
},
"h_blueJump",
"canMomentumConservingMorph"
],
"note": [
"Applies to Lava Dive Room."
]
},
{
"minHeight": 2,
"maxHeight": 2,
"minTiles": 27.4375,
"speedBooster": "yes",
"obstructions": [
[
1,
0
]
],
"requires": [
{
"getBlueSpeed": {
"usedTiles": 24,
"openEnd": 1
}
},
"h_blueJump"
],
"note": [
"Applies to Dust Torizo Room and Noob Bridge."
]
},
{
"minHeight": 3,
"maxHeight": 3,
"minTiles": 28.2472,
"speedBooster": "yes",
"obstructions": [
[
1,
0
]
],
"requires": [
{
"getBlueSpeed": {
"usedTiles": 24,
"openEnd": 1
}
},
"h_blueJump"
],
"note": [
"Applies to Double Chamber."
]
},
{
"minHeight": 1,
"maxHeight": 1,
"minTiles": 36.3703,
"speedBooster": "yes",
"obstructions": [
[
3,
0
]
],
"environment": "water",
"requires": [
"h_getBlueSpeedMaxRunway",
"h_blueJump",
"canGravityJump",
"canMomentumConservingMorph"
],
"note": [
"This applies to Botwoon Energy Tank Room"
],
"detailNote": [
"Use a 1-tap to gain blue speed, and time a pause to hit just after jumping and aiming down,",
"then unequip Gravity and hold down during the unpause black screen to buffer the morph."
]
},
{
"minHeight": 2,
"maxHeight": 2,
"minTiles": 45,
"speedBooster": "yes",
"obstructions": [
[
3,
0
]
],
"requires": [
"h_getBlueSpeedMaxRunway",
"h_blueJump",
"canInsaneJump",
"canMomentumConservingMorph"
],
"note": [
"This applies to Statues Hallway and Baby Kraid Room"
],
"detailNote": [
"Use a 1-tap to gain blue speed, and time a pause to hit just after jumping and aiming down,",
"then unequip Gravity and hold down during the unpause black screen to buffer the morph."
]
},
{
"minHeight": 3,
"maxHeight": 3,
"minTiles": 21.4375,
"speedBooster": "yes",
"obstructions": [
[
3,
0
]
],
"environment": "water",
"requires": [
{
"getBlueSpeed": {
"usedTiles": 18,
"openEnd": 1
}
},
"h_blueJump",
"canInsaneJump",
"canGravityJump",
"canMomentumConservingMorph"
],
"note": [
"This applies to Draygon's Room"
],
"detailNote": [
"Use a 2-tap to gain blue speed, and time a pause to hit just after jumping and aiming down,",
"then unequip Gravity and hold down during the unpause black screen to buffer the morph."
]
},
{
"minHeight": 3,
"maxHeight": 3,
"minTiles": 30.4375,
"speedBooster": "yes",
"obstructions": [
[
3,
0
]
],
"requires": [
{
"getBlueSpeed": {
"usedTiles": 27,
"openEnd": 1
}
},
"h_blueJump",
"canMomentumConservingMorph",
"canInsaneJump"
],
"note": [
"This applies to Blue Brinstar Energy Tank Room, Bowling Alley (middle), and Basement (power on)"
]
},
{
"minHeight": 3,
"maxHeight": 3,
"minTiles": 39.4375,
"speedBooster": "yes",
"obstructions": [
[
3,
2
]
],
"requires": [
"h_getBlueSpeedMaxRunway",
"h_blueJump",
{
"or": [
"canMomentumConservingMorph",
"canInsaneJump"
]
}
],
"note": [
"Applies to Metal Pirates Room."
]
},
{
"minHeight": 3,
"maxHeight": 3,
"minTiles": 37.4375,
"speedBooster": "yes",
"obstructions": [
[
5,
2
]
],
"requires": [
"h_getBlueSpeedMaxRunway",
"h_blueJump",
"canInsaneJump",
"canMomentumConservingMorph"
],
"note": [
"Applies to Flyway."
]
}
]
}
},
"requires": [
{
"notable": "Cross Room Jump with Screw Attack"
},
"canCrossRoomJumpIntoWater",
"canTrickyJump"
],
"clearsObstacles": [
"A"
],
"flashSuitChecked": true,
"blueSuitChecked": true,
"note": [
"Use blue speed to break the bomb block by entering from a non-water room with a spin jump.",
"It generally helps to enter as low as possible and with as much horizontal speed as possible, and with HiJump turned off.",
"Even if executed correctly, the trick can fail with 50% probability due to collision oscillation."
],
"detailNote": [
"Shinesparking is typically an easier alternative to this strat;",
"but using blue speed can be useful to save some energy or if carrying a flash suit."
],
"devNote": [
"The momentum-conserving morph variants are included for completeness,",
"though generally if Morph is available it would be easier to speedball and do a temporary blue chain.",
"FIXME: some of these setups can make it above the bomb blocks, so they could have a variant going to node 6."
]
},
{
"id": 35,
"link": [
2,
2
],
"name": "Temporary Blue (Come In With Temporary Blue)",
"entranceCondition": {
"comeInWithTemporaryBlue": {}
},
"requires": [
"canChainTemporaryBlue"
],
"clearsObstacles": [
"A"
],
"flashSuitChecked": true,
"blueSuitChecked": true
},
{
"id": 124,
"link": [
2,
2
],
"name": "Temporary Blue (Come In Getting Blue Speed, Gravity)",
"entranceCondition": {
"comeInGettingBlueSpeed": {
"length": 10,
"openEnd": 1
}
},
"requires": [
"Gravity",
"canTemporaryBlue"
],
"clearsObstacles": [
"A"
],
"flashSuitChecked": true,
"blueSuitChecked": true,
"note": [
"Run into the room and gain temporary blue below the bomb blocks on the far side of the room.",
"Then jump up to break the bomb blocks."
],
"devNote": [
"This has collision oscillation if the last half tile of runway is used."
]
},
{
"id": 125,
"link": [
2,
2
],
"name": "Temporary Blue (Come In Getting Blue Speed, Water Shinecharge)",
"entranceCondition": {
"comeInGettingBlueSpeed": {
"length": 3,
"openEnd": 1
}
},
"requires": [
"canWaterShineCharge",
"canTemporaryBlue"
],
"clearsObstacles": [
"A"
],
"flashSuitChecked": true,
"blueSuitChecked": true,
"note": [
"Run into the room and gain temporary blue below the bomb blocks on the far side of the room.",
"Then jump up to break the bomb blocks."
]
},
{
"id": 126,
"link": [
2,
2
],
"name": "Temporary Blue (Come In Getting Blue Speed, Jump Into Blue Chain)",
"entranceCondition": {
"comeInGettingBlueSpeed": {
"length": 1,
"openEnd": 1
}
},
"requires": [
"h_underwaterChainTemporaryBlue"
],
"clearsObstacles": [
"A"
],
"flashSuitChecked": true,
"blueSuitChecked": true,
"note": [
"Gain blue speed running into the room, then jump, morph, and unmorph while holding angle to obtain temporary blue.",
"This method allows retaining a flash suit."
]
},
{
"id": 127,
"link": [
2,
2
],
"name": "Temporary Blue (Speedball)",
"entranceCondition": {
"comeInSpeedballing": {
"runway": {
"length": 0,
"openEnd": 1
}
}
},
"requires": [
"h_underwaterChainTemporaryBlue"
],
"clearsObstacles": [
"A"
],
"flashSuitChecked": true,
"blueSuitChecked": true
},
{
"id": 37,
"link": [
2,
2
],
"name": "Temporary Blue (Blue Spring Ball Bounce)",
"entranceCondition": {
"comeInWithBlueSpringBallBounce": {
"movementType": "controlled"
}
},
"requires": [
"h_underwaterChainTemporaryBlue"
],
"clearsObstacles": [
"A"
],
"flashSuitChecked": true,
"blueSuitChecked": true,
"note": "Break the bomb block on the opposite side of the room.",
"detailNote": [
"With extra run speeds between $1.2 and $1.D, it's not possible to break the bomb block directly with a bounce;",
"but it is always possible to break them by chaining temporary blue (even if carrying a flash suit)."
]
},
{
"id": 86,
"link": [
2,
2
],
"name": "Blue Speed (Come In Getting Blue Speed, Gravity)",
"entranceCondition": {
"comeInGettingBlueSpeed": {
"length": 9,
"openEnd": 0
}
},
"requires": [
"h_blueJump",
"Gravity",
"canTrickyJump"
],
"clearsObstacles": [
"A"
],
"flashSuitChecked": true,
"blueSuitChecked": true,
"note": [
"Gain blue speed running into the room, then jump to break the bomb block on the far side of the room."
]
},
{
"id": 36,
"link": [
2,
2
],
"name": "Blue Speed (Come In Getting Blue Speed, Low Speed)",
"entranceCondition": {
"comeInGettingBlueSpeed": {
"length": 2,
"openEnd": 1,
"maxExtraRunSpeed": "$1.3"
}
},
"requires": [
"h_blueJump",
"canTrickyJump"
],
"clearsObstacles": [
"A"
],
"flashSuitChecked": true,
"blueSuitChecked": true,
"note": [
"Gain blue speed running into the room, then jump to break the bomb block on the far side of the room."
],
"devNote": [
"With extra run speeds above $1.3, Samus' jump height is shorter,",
"in which case this method would be ineffective compared to a temporary blue chain."
]
},
{
"id": 128,
"link": [
2,
2
],
"name": "Blue Speed (Come In Getting Blue Speed, Hi-Jump)",
"entranceCondition": {
"comeInGettingBlueSpeed": {
"length": 2,
"openEnd": 1
}
},
"requires": [
"h_blueJump",
"canTrickyJump",
"HiJump"
],
"clearsObstacles": [
"A"
],
"flashSuitChecked": true,
"blueSuitChecked": true
},
{
"id": 129,
"link": [
2,
2
],
"name": "Blue Space Jump",
"entranceCondition": {
"comeInBlueSpaceJumping": {
"minExtraRunSpeed": "$1.B"
}
},
"requires": [
"canPreciseSpaceJump"
],
"clearsObstacles": [
"A"
],
"flashSuitChecked": true,
"blueSuitChecked": true
},
{
"id": 104,
"link": [
2,
2
],
"name": "Precise Stutter Shinecharge, Leave Shinecharged (5-tile runway)",
"entranceCondition": {
"comeInStutterShinecharging": {
"minTiles": 5
}
},
"requires": [
"canPreciseStutterWaterShineCharge",
"canShinechargeMovementTricky",
"canInsaneJump",
{
"shineChargeFrames": 130
},
{
"or": [
"canBeVeryPatient",
{
"shineChargeFrames": 15
}
]
}
],
"exitCondition": {
"leaveShinecharged": {}
},
"unlocksDoors": [
{
"types": [
"super"
],
"requires": []
},
{
"types": [
"missiles",
"powerbomb"
],
"requires": [
"never"
]
}
],
"flashSuitChecked": true,
"blueSuitChecked": true,
"note": [
"With a runway of 5 tiles (open end) in the other room,",
"the ideal timing for the stutter is to release forward for 5 frames, and repress forward on the last possible frame before the transition.",
"Other timings can work, but will gain the shinecharge further from the door, leaving fewer shinecharge frames remaining.",
"After gaining the shinecharge, continue holding forward in order to make Samus stand.",
"Then turnaround spin jump back toward the door, and continue spin jumping to reach the transition with a shinecharge."
]
},
{
"id": 105,
"link": [
2,
2
],
"name": "Precise Stutter Shinecharge, Leave Shinecharged (4-tile runway)",
"entranceCondition": {
"comeInStutterShinecharging": {
"minTiles": 4
}
},
"requires": [
"canPreciseStutterWaterShineCharge",
"canShinechargeMovementTricky",
"canInsaneJump",
{
"shineChargeFrames": 140
},
{
"or": [
"canBeVeryPatient",
{
"shineChargeFrames": 10
}
]
}
],
"exitCondition": {
"leaveShinecharged": {}
},
"unlocksDoors": [
{
"types": [
"super"
],
"requires": []
},
{
"types": [
"missiles",
"powerbomb"
],
"requires": [
"never"
]
}
],
"flashSuitChecked": true,
"blueSuitChecked": true,
"note": [
"With only a runway of 4 tiles (open end) in the other room,",
"the ideal timing for the stutter is to release forward for 4 frames, and repress forward on the last possible frame before the transition.",
"It also works well to release forward for 3 frames and repress on the last possible frame.",
"Other timings can also work, but may gain the shinecharge further from the door, leaving fewer shinecharge frames remaining.",
"After gaining the shinecharge, continue holding forward in order to make Samus stand.",
"Then turnaround spin jump back toward the door, and continue spin jumping to reach the transition with a shinecharge."
]
},
{
"id": 106,
"link": [
2,
2
],
"name": "Precise Stutter Shinecharge, Leave Shinecharged (3-tile runway)",
"entranceCondition": {
"comeInStutterShinecharging": {
"minTiles": 3
}
},
"requires": [
"canPreciseStutterWaterShineCharge",
"canShinechargeMovementTricky",
"canInsaneJump",
{
"shineChargeFrames": 145
},
{
"or": [
"canBeVeryPatient",
{
"shineChargeFrames": 10
}
]
}
],
"exitCondition": {
"leaveShinecharged": {}
},
"unlocksDoors": [
{
"types": [
"super"
],
"requires": []
},
{
"types": [
"missiles",
"powerbomb"
],
"requires": [
"never"
]
}
],
"flashSuitChecked": true,
"blueSuitChecked": true,
"note": [
"With only a runway of 3 tiles (open end) in the other room,",
"the ideal timing for the stutter is to release forward for 3 or 4 frames, and repress forward on the last possible frame before the transition.",
"Other timings can work, but will gain the shinecharge further from the door, leaving fewer shinecharge frames remaining.",
"After gaining the shinecharge, continue holding forward in order to make Samus stand.",
"Then turnaround spin jump back toward the door, and continue spin jumping to reach the transition with a shinecharge.",
"Alternatively, with greater difficulty but saving some shinecharge frames,",
"after performing the turnaround spin jump, briefly moonwalk back, then retain momentum by boomeranging forward",
"(switching from pressing backward to pressing forward on the next frame),",
"and arm pump to reach the door quickly."
],
"devNote": [
"The same shinecharge frames could be achieved with a closed end runway (effective length of 2.4375),",
"with a 3-frame stutter, but there doesn't appear to be any application."
]
},
{
"id": 107,
"link": [
2,
2
],
"name": "Precise Stutter Shinecharge, Leave Shinecharged (2-tile runway)",
"entranceCondition": {
"comeInStutterShinecharging": {
"minTiles": 2
}
},
"requires": [
"canPreciseStutterWaterShineCharge",
"canShinechargeMovementTricky",
"canInsaneJump",
{
"shineChargeFrames": 150
},
{
"or": [
"canBeVeryPatient",
{
"shineChargeFrames": 15
}
]
}
],
"exitCondition": {
"leaveShinecharged": {}
},
"unlocksDoors": [
{
"types": [
"super"
],
"requires": []
},
{
"types": [
"missiles",
"powerbomb"
],
"requires": [
"never"
]
}
],
"flashSuitChecked": true,
"blueSuitChecked": true,
"note": [
"With only a runway of 2 tiles (open end) in the other room,",
"the ideal timing for the stutter is to release forward for 3 frames, and repress forward on the last possible frame before the transition.",
"Other timings can work, but will gain the shinecharge further from the door, leaving fewer shinecharge frames remaining.",
"After gaining the shinecharge, continue holding forward in order to make Samus stand.",
"Then turnaround spin jump back toward the door, and continue spin jumping to reach the transition with a shinecharge.",
"Alternatively, with greater difficulty but saving some shinecharge frames,",
"after performing the turnaround spin jump, briefly moonwalk back, then retain momentum by boomeranging forward",
"(switching from pressing backward to pressing forward on the next frame),",
"and arm pump to reach the door quickly."
],
"devNote": [
"FIXME: The canBeVeryPatient requirement is for difficulty placement of the boomerang method;",
"but the boomerang (or maybe specifically the moonwalk boomerang) should possibly be its own tech,",
"and the same with rapid arm pumping."
]
},
{
"id": 108,
"link": [
2,
2
],
"name": "Precise Stutter Shinecharge, Leave Shinecharged (1-tile runway)",
"entranceCondition": {
"comeInStutterShinecharging": {
"minTiles": 1
}
},
"requires": [
{
"doorUnlockedAtNode": 1
},
"canPreciseStutterWaterShineCharge",
"canInsaneJump",
"canBeVeryPatient",
"canShinechargeMovementTricky",
{
"shineChargeFrames": 160
}
],
"exitCondition": {
"leaveShinecharged": {}
},
"unlocksDoors": [
{
"nodeId": 1,
"types": [
"missiles",
"super"
],
"requires": []
},
{
"nodeId": 1,
"types": [
"powerbomb"
],
"requires": [
"never"
]
},
{
"types": [
"super"
],
"requires": []
},
{
"types": [
"missiles",
"powerbomb"
],
"requires": [
"never"
]
}
],
"flashSuitChecked": true,
"blueSuitChecked": true,
"note": [
"With only 1 tile of runway in the other room, Samus should ideally start on the last pixel of runway with X subpixels of $3FFF or less.",
"Run toward the door, releasing forward for exactly 1 frame and pressing it again on the last possible frame before the transition.",
"Starting with X subpixels of $7FFF can also work (e.g., by simply backing against the door ledge, then jumping and turning around mid-air);",
"in this case, Samus must advance 1 or 2 pixels with an arm pump before the transition (e.g., firing a shot or pressing and/or releasing an angle button),",
"and the shinecharge will be gained slightly further away from the door.",
"After gaining the shinecharge, continue holding forward in order to make Samus stand.",
"Then turnaround spin jump back toward the door, and continue spin jumping to reach the transition with a shinecharge.",
"Alternatively, with greater difficulty but saving some shinecharge frames,",
"after performing the turnaround spin jump, briefly moonwalk back, then retain momentum by boomeranging forward",
"(switching from pressing backward to pressing forward on the next frame),",
"and arm pump to reach the door quickly."
],
"detailNote": [
"Ideal subpixels ($3FFF) can be achieved using one of several methods:",
"1) press forward against the door ledge (or a wall aligned with it);",
"jump, and while mid-air, tap forward for exactly 1 frame to land with subpixels $BFFF,",
"moonwalk back for exactly 1 frame to end with subpixels $3FFF.",
"2) press forward against the door ledge (from a platform below, assuming one exists)",
"turn around (while on the ground), and moonwalk back two pixels,",
"then jump and mid-air turnaround onto the ledge;",
"if Samus jumped from the correct pixel but does not land on the ledge, then it was needed to moonwalk back 1 more frame;",
"in this case it is possible to retry by doing a mid-air turnaround back onto the platform, and moonwalking back for 1 frame.",
"3) if X-Ray is available, press against the door ledge (from a platform below, assuming one exists)",
"turn around (while on the ground), then jump and mid-air turnaround toward the door,",
"and use X-Ray to turnaround in place away from the door;",
"repeat this sequence 3 more times: jump, mid-air turnaround, X-Ray turnaround;",
"then do one more jump and mid-air turnaround, high enough to land on the door ledge,",
"and Samus should be in the correct position with subpixels $3FFF."
]
},
{
"id": 149,
"link": [
2,
2
],
"name": "Come in Shinecharging, Crystal Spark",
"entranceCondition": {
"comeInShinecharging": {
"length": 12,
"openEnd": 0
},
"comesInHeated": "no"
},
"requires": [
"Gravity",
"h_CrystalSpark"
],
"clearsObstacles": [
"A"
],
"flashSuitChecked": true,
"blueSuitChecked": true
},
{
"id": 150,
"link": [
2,
2
],
"name": "Precise Stutter Water Shinecharge, Crystal Spark",
"entranceCondition": {
"comeInStutterShinecharging": {
"minTiles": 2.4375
},
"comesInHeated": "no"
},
"requires": [
"canPreciseStutterWaterShineCharge",
"h_underwaterCrystalSpark"
],
"clearsObstacles": [
"A"
],
"flashSuitChecked": true,
"blueSuitChecked": true,
"note": [
"With only a runway length of 3 tiles (closed end) in the other room, this requires a precise setup:",
"release forward for 3 or 4 frames, then repress forward on the last possible frame before the transition;",
"alternatively, release forward for 2 frames and repress forward on the second-to-last possible frame before the transition."
],
"detailNote": [
"If a longer runway is available (4 tiles), the timing windows are a bit more lenient:",
"1. Release forward for 3, 4, or 5 frames, repress forward on the last possible frame;",
"2. Release forward for 2 or 3 frames, repress forward on the 2nd-to-last possible frame;",
"3. Release forward for 1 or 2 frames, repress forward on the 3rd-to-last possible frame."
],
"devNote": [
"FIXME: This is possible with a shorter runway, as low as 1 tile, but it's a lot worse.",
"It would require more duplication and could be very tedious to set up for many attempts."
]
},
{
"id": 38,
"link": [
2,
2
],
"name": "G-Mode Morph Bomb Blocks",
"entranceCondition": {
"comeInWithGMode": {
"mode": "any",
"morphed": true
}
},
"requires": [
{
  "or": [
    "h_artificialMorphPowerBomb",
    {
      "and": [
        "h_artificialMorphIBJ",
        "Gravity"
      ]
    },
    {
      "and": [
        "h_artificialMorphSpringBall",
        "h_artificialMorphBombs"
      ]
    }
  ]
}
],
"clearsObstacles": [
"A"
],
"flashSuitChecked": true,
"blueSuitChecked": true
},
{
"id": 39,
"link": [
2,
3
],
"name": "Cross Room Jump Boomerang Through Top Door (Screw Attack)",
"entranceCondition": {
"comeInJumping": {
"speedBooster": "yes",
"minTiles": 13
}
},
"requires": [
{
"notable": "Cross Room Jump Boomerang To Top"
},
"canInsaneJump",
"canCrossRoomJumpIntoWater",
"ScrewAttack",
"canMomentumConservingTurnaround",
{
"noFlashSuit": {}
}
],
"exitCondition": {
"leaveNormally": {}
},
"unlocksDoors": [
{
"types": [
"super"
],
"requires": []
},
{
"types": [
"missiles",
"powerbomb"
],
"requires": [
"never"
]
}
],
"flashSuitChecked": true,
"blueSuitChecked": true,
"note": [
"Use Screw Attack to break the bomb block by entering from a non-water room with a spin jump, and make it all the way through the top door.",
"Ideally, gain speed using between 13 and 13.5 tiles of runway (with an open end).",
"Longer runway lengths can also work, up to 17 tiles, but will make the trick somewhat more precise.",
"Use angle to break spin, and do a momentum conserving turnaround either on the same frame or one frame later;",
"this first turnaround should be done early enough that the turnaround is complete by the time Samus clears the two-tile passage in the middle of the room.",
"The second momentum conserving turnaround must be done somewhat late, and by switching from holding forward to holding backward one frame later (a perfect 'boomerang').",
"Shoot open the door, and use a third momentum conserving turnaround on it as it opens."
],
"detailNote": [
"The optimal amount of extra run speed is $3.4 or $3.5, by using 13 tiles of runway or about a half tile more;",
"this gives a 7-frame window for the first turnaround, and typically a 4-frame window for the second turnaround if the first turnaround is done early enough.",
"Extra run speeds between $3.6 and $3.F can also work, but with shorter windows.",
"A perfect boomerang is always required for the second turnaround, regardless of where in the window it is done.",
"It is recommended to buffer the spin break, by holding angle (up or down), jump, and forward through the transition,",
"then switching from forward to backward, with at most 1 frame of neutral in between, while still holding jump and angle."
],
"devNote": "This does not have collision oscillation."
},
{
"id": 73,
"link": [
2,
3
],
"name": "Cross Room Jump Boomerang Through Top Door (Blue Speed)",
"entranceCondition": {
"comeInGettingBlueSpeed": {
"length": 0,
"openEnd": 1,
"minExtraRunSpeed": "$3.4",
"maxExtraRunSpeed": "$3.F"
}
},
"requires": [
{
"notable": "Cross Room Jump Boomerang To Top"
},
"h_blueJump",
"canInsaneJump",
"canCrossRoomJumpIntoWater",
"canMomentumConservingTurnaround",
{
"noFlashSuit": {}
}
],
"exitCondition": {
"leaveNormally": {}
},
"unlocksDoors": [
{
"types": [
"super"
],
"requires": []
},
{
"types": [
"missiles",
"powerbomb"
],
"requires": [
"never"
]
}
],
"flashSuitChecked": true,
"blueSuitChecked": true,
"note": [
"Use a 2-tap shortcharge and jump into the room with a last-frame jump, breaking the bomb block with blue speed, and making it all the way through the top door.",
"Use angle to break spin, and do a momentum conserving turnaround either on the same frame or one frame later;",
"this first turnaround should be done early enough that the turnaround is complete by the time Samus clears the two-tile passage in the middle of the room.",
"The second momentum conserving turnaround must be done somewhat late, and by switching from holding forward to holding backward one frame later (a perfect 'boomerang').",
"Shoot open the door, and use a third momentum conserving turnaround on it as it opens."
],
"detailNote": [
"Lower run speeds are generally better, as long as the extra run speed is at least $3.4.",
"this gives up to a 7-frame window for the first turnaround, and typically a 4-frame window for the second turnaround if the first turnaround is done early enough.",
"A perfect boomerang is always required for the second turnaround, regardless of where in the window it is done.",
"It is recommended to buffer the spin break, by holding angle (up or down), jump, and forward through the transition,",
"then switching from forward to backward, with at most 1 frame of neutral in between, while still holding jump and angle."
]
},
{
"id": 67,
"link": [
2,
3
],
"name": "Come In Shinecharging, Leave Shinecharged (Gravity, Screw Attack)",
"entranceCondition": {
"comeInShinecharging": {
"length": 3,
"openEnd": 0
}
},
"requires": [
"Gravity",
"ScrewAttack",
"canShinechargeMovementTricky",
{
"or": [
{
"and": [
"HiJump",
{
"shineChargeFrames": 130
}
]
},
{
"shineChargeFrames": 145
}
]
}
],
"exitCondition": {
"leaveShinecharged": {}
},
"unlocksDoors": [
{
"types": [
"super"
],
"requires": []
},
{
"types": [
"missiles",
"powerbomb"
],
"requires": [
"never"
]
}
],
"flashSuitChecked": true,
"blueSuitChecked": true,
"devNote": [
"FIXME: It can be possible to use a longer runway, or a stutter shinecharge with Gravity re-equip, with a cost of some shinecharge frames."
]
},
{
"id": 130,
"link": [
2,
4
],
"name": "Come In Shinecharged, Diagonal Suitless Shinespark to the Top",
"entranceCondition": {
"comeInShinecharged": {}
},
"requires": [
{
"shineChargeFrames": 10
},
"h_navigateUnderwater",
{
"shinespark": {
"frames": 23,
"excessFrames": 2
}
}
],
"flashSuitChecked": true,
"blueSuitChecked": true
},
{
"id": 131,
"link": [
2,
4
],
"name": "Cross Room Jump To Top Door (Screw Attack)",
"entranceCondition": {
"comeInJumping": {
"speedBooster": "yes",
"minTiles": 12.4375
}
},
"requires": [
{
"notable": "Cross Room Jump Boomerang To Top"
},
"canInsaneJump",
"canCrossRoomJumpIntoWater",
"ScrewAttack",
"canMomentumConservingTurnaround",
"h_trickyToCarryFlashSuit"
],
"flashSuitChecked": true,
"blueSuitChecked": true,
"note": [
"Use Screw Attack to break the bomb block by entering from a non-water room with a last-frame spin jump, and make it to the platform below the top door.",
"Longer runway lengths can also work, up to 17 tiles, but will make the trick somewhat more precise.",
"Use angle to break spin, and do a momentum conserving turnaround either on the same frame or one frame later;",
"this first turnaround should be done early enough that the turnaround is complete by the time Samus clears the two-tile passage in the middle of the room.",
"Do a second momentum conserving turnaround somewhat late, and by switching from holding forward to holding backward one frame later (a perfect 'boomerang')."
],
"detailNote": [
"The optimal amount of extra run speed is between $3.2 and $3.5, by using 13 tiles of runway or about a half tile more or less;",
"this gives a 7-frame window for the first turnaround, and typically a 4-frame window for the second turnaround if the first turnaround is done early enough.",
"Extra run speeds between $3.6 and $3.F can also work, but with shorter windows.",
"A perfect boomerang is always required for the second turnaround, regardless of where in the window it is done.",
"It is recommended to buffer the spin break, by holding angle (up or down), jump, and forward through the transition,",
"then switching from forward to backward, with at most 1 frame of neutral in between, while still holding jump and angle."
],
"devNote": "This does not have collision oscillation."
},
{
"id": 132,
"link": [
2,
4
],
"name": "Cross Room Jump To Top Door (Blue Speed)",
"entranceCondition": {
"comeInGettingBlueSpeed": {
"length": 0,
"openEnd": 1,
"minExtraRunSpeed": "$3.2",
"maxExtraRunSpeed": "$3.F"
}
},
"requires": [
{
"notable": "Cross Room Jump Boomerang To Top"
},
"h_blueJump",
"canInsaneJump",
"canCrossRoomJumpIntoWater",
"canMomentumConservingTurnaround",
"h_trickyToCarryFlashSuit"
],
"flashSuitChecked": true,
"blueSuitChecked": true,
"note": [
"Use a 2-tap shortcharge and jump into the room with a last-frame jump, breaking the bomb block with blue speed, and making it all the way through the top door.",
"Use angle to break spin, and do a momentum conserving turnaround either on the same frame or one frame later;",
"this first turnaround should be done early enough that the turnaround is complete by the time Samus clears the two-tile passage in the middle of the room.",
"Do a second momentum conserving turnaround somewhat late, and by switching from holding forward to holding backward one frame later (a perfect 'boomerang')."
],
"detailNote": [
"Lower run speeds are generally better, as long as the extra run speed is at least $3.2.",
"this gives up to a 7-frame window for the first turnaround, and typically a 4-frame window for the second turnaround if the first turnaround is done early enough.",
"A perfect boomerang is always required for the second turnaround, regardless of where in the window it is done.",
"It is recommended to buffer the spin break, by holding angle (up or down), jump, and forward through the transition,",
"then switching from forward to backward, with at most 1 frame of neutral in between, while still holding jump and angle."
]
},
{
"id": 133,
"link": [
2,
4
],
"name": "Side Platform Cross Room Jump with Blue Speed",
"entranceCondition": {
"comeInWithSidePlatform": {
"platforms": [
{
"minHeight": 1,
"maxHeight": 1,
"minTiles": 16,
"speedBooster": "yes",
"obstructions": [
[
1,
0
]
],
"requires": [
{
"getBlueSpeed": {
"usedTiles": 14,
"openEnd": 0
}
},
"h_blueJump",
"canInsaneMidAirMorph",
"canBeExtremelyPatient"
],
"note": [
"Applies to Lava Dive Room."
],
"detailNote": [
"This can be done with extra run speed $2.0 or $2.1 by holding forward while morphing,",
"and releasing soon afterward, after a precise amount of time.",
"Alternatively it can be done extra run speed $2.3 or higher."
]
},
{
"minHeight": 2,
"maxHeight": 2,
"minTiles": 27.4375,
"speedBooster": "yes",
"obstructions": [
[
1,
0
]
],
"requires": [
{
"getBlueSpeed": {
"usedTiles": 24,
"openEnd": 1
}
},
"h_blueJump"
],
"note": [
"Applies to Dust Torizo Room and Noob Bridge."
],
"detailNote": [
"Jump through the door with an extra run speed of $3.1 or less."
]
},
{
"minHeight": 3,
"maxHeight": 3,
"minTiles": 28.2472,
"speedBooster": "yes",
"obstructions": [
[
1,
0
]
],
"requires": [
{
"getBlueSpeed": {
"usedTiles": 24,
"openEnd": 1
}
},
"h_blueJump"
],
"note": [
"Applies to Double Chamber."
]
},
{
"minHeight": 3,
"maxHeight": 3,
"minTiles": 39.4375,
"speedBooster": "yes",
"obstructions": [
[
3,
2
]
],
"requires": [
{
"getBlueSpeed": {
"usedTiles": 24,
"openEnd": 1
}
},
"h_blueJump",
"canInsaneMidAirMorph"
],
"note": [
"Applies to Metal Pirates Room."
]
}
]
}
},
"requires": [
"canCrossRoomJumpIntoWater",
"canMomentumConservingMorph",
"canInsaneJump"
],
"clearsObstacles": [
"A"
],
"flashSuitChecked": true,
"blueSuitChecked": true,
"note": [
"Jump into a momentum-conserving morph with blue speed to break the bomb block and continue up to the top of the room.",
"In most cases, after pressing down to initiate the momentum-conserving morph, all inputs can be released;",
"holding forward as the morph completes would generally give too much speed, causing Samus to bonk horizontally.",
"Tapping (not holding) backward can sometimes help in dodging the platforms while ascending, by reversing Samus' horizontal momentum."
]
},
{
"id": 43,
"link": [
2,
4
],
"name": "Grapple Teleport (from Moat)",
"entranceCondition": {
"comeInWithGrappleTeleport": {
"blockPositions": [
[
7,
2
]
]
}
},
"requires": [
"canOffScreenMovement"
],
"flashSuitChecked": true,
"blueSuitChecked": true,
"note": [
"Immediately after teleporting, press down to retract Grapple to avoid getting stuck inside the wall (in case the top door is blue, causing it to open with Grapple on entry)."
]
},
{
"id": 44,
"link": [
2,
5
],
"name": "Base",
"requires": [],
"flashSuitChecked": true,
"blueSuitChecked": true
},
{
"id": 45,
"link": [
2,
6
],
"name": "X-Ray Climb",
"entranceCondition": {
"comeInWithDoorStuckSetup": {}
},
"requires": [
"canXRayClimb"
],
"flashSuitChecked": true,
"blueSuitChecked": true,
"note": "This is a short climb, only a few tiles."
},
{
"id": 47,
"link": [
2,
6
],
"name": "Come In Shinecharged, Spark to Break the Blocks",
"entranceCondition": {
"comeInShinecharged": {}
},
"requires": [
{
"shineChargeFrames": 25
},
"h_navigateUnderwater",
{
"or": [
{
"shinespark": {
"frames": 10,
"excessFrames": 8
}
},
{
"and": [
"canMidairShinespark",
{
"shinespark": {
"frames": 7,
"excessFrames": 7
}
}
]
},
{
"and": [
"canTrickyJump",
{
"shinespark": {
"frames": 1,
"excessFrames": 1
}
}
]
}
]
}
],
"clearsObstacles": [
"A"
],
"flashSuitChecked": true,
"blueSuitChecked": true,
"note": "Spark vertically through the bomb blocks. It is still possible to break the blocks while below 30 Energy by jumping before sparking.",
"devNote": [
"This does not require canWaterShineCharge, as you can store the shinecharge before entering the room.",
"Note that it is possible to spark into the ceiling to break the blocks without energy loss, but it has collision oscillation.",
"FIXME: Add temporary blue strats."
]
},
{
"id": 87,
"link": [
2,
7
],
"name": "Come In Shinecharging (Gravity)",
"entranceCondition": {
"comeInShinecharging": {
"length": 12,
"openEnd": 0
}
},
"requires": [
"Gravity",
{
"shineChargeFrames": 0
}
],
"endsWithShineCharge": true,
"flashSuitChecked": true,
"blueSuitChecked": true
},
{
"id": 88,
"link": [
2,
7
],
"name": "Water Shinecharge",
"entranceCondition": {
"comeInShinecharging": {
"length": 4,
"openEnd": 0
}
},
"requires": [
"canWaterShineCharge",
{
"shineChargeFrames": 0
}
],
"endsWithShineCharge": true,
"flashSuitChecked": true,
"blueSuitChecked": true
},
{
"id": 89,
"link": [
2,
7
],
"name": "Precise Stutter Water Shinecharge",
"entranceCondition": {
"comeInStutterShinecharging": {
"minTiles": 2.4375
}
},
"requires": [
"canPreciseStutterWaterShineCharge",
{
"shineChargeFrames": 0
}
],
"endsWithShineCharge": true,
"flashSuitChecked": true,
"blueSuitChecked": true
},
{
"id": 90,
"link": [
2,
7
],
"name": "Precise Stutter Water Shinecharge (Shorter Runway)",
"entranceCondition": {
"comeInStutterShinecharging": {
"minTiles": 2
}
},
"requires": [
"canPreciseStutterWaterShineCharge",
{
"or": [
{
"doorUnlockedAtNode": 1
},
"canInsaneJump"
]
},
{
"shineChargeFrames": 0
}
],
"unlocksDoors": [
{
"nodeId": 1,
"types": [
"super",
"missiles"
],
"requires": []
},
{
"nodeId": 1,
"types": [
"powerbomb"
],
"requires": [
"never"
]
}
],
"endsWithShineCharge": true,
"flashSuitChecked": true,
"blueSuitChecked": true,
"note": [
"If only 2 tiles of runway are available and it is not possible to unlock the opposite door, then this requires a double frame-perfect stutter:",
"run toward the door, release forward for exactly 3 frames, pressing forward again on the last possible frame before the transition."
],
"devNote": [
"FIXME: canInsaneJump is for difficulty placement; replace with a more appropriate tech since no jump is involved."
]
},
{
"id": 91,
"link": [
2,
7
],
"name": "Precise Stutter Water Shinecharge (Very Short Runway)",
"entranceCondition": {
"comeInStutterShinecharging": {
"minTiles": 1
}
},
"requires": [
"canPreciseStutterWaterShineCharge",
"canInsaneJump",
"canBeVeryPatient",
{
"doorUnlockedAtNode": 1
},
{
"shineChargeFrames": 0
}
],
"unlocksDoors": [
{
"nodeId": 1,
"types": [
"super",
"missiles"
],
"requires": []
},
{
"nodeId": 1,
"types": [
"powerbomb"
],
"requires": [
"never"
]
}
],
"endsWithShineCharge": true,
"flashSuitChecked": true,
"blueSuitChecked": true,
"note": [
"With only 1 tile of runway in the other room, Samus should ideally start on the last pixel of runway with X subpixels of $3FFF or less.",
"Run toward the door, releasing forward for exactly 1 frame and pressing it again on the last possible frame before the transition.",
"Starting with X subpixels of $7FFF can also work (e.g., by simply backing against the door ledge, then jumping and turning around mid-air);",
"in this case, Samus must advance 1 or 2 pixels with an arm pump before the transition (e.g., firing a shot or pressing and/or releasing an angle button),",
"and the shinecharge will be gained slightly further away.",
"After the transition, shoot open the opposite door while running, to extend the runway by a tile."
],
"detailNote": [
"Correct subpixels can be achieved using one of several methods:",
"1) press against the door ledge (or a wall aligned with it);",
"jump, and while mid-air, tap forward for exactly 1 frame to land with subpixels $4000,",
"moonwalk back for exactly 1 frame to end with subpixels $C000.",
"2) press against the door ledge (from a platform below, assuming one exists)",
"turn around (while on the ground), and moonwalk back two pixels,",
"then jump and mid-air turnaround onto the ledge;",
"if Samus jumped from the correct pixel but does not land on the ledge, then it was needed to moonwalk back 1 more frame;",
"in this case it is possible to retry by doing a mid-air turnaround back onto the platform, and moonwalking back for 1 frame.",
"3) if X-Ray is available, press against the door ledge (from a platform below, assuming one exists)",
"turn around (while on the ground), then jump and mid-air turnaround toward the door,",
"and use X-Ray to turnaround in place away from the door;",
"repeat this sequence 3 more times: jump, mid-air turnaround, X-Ray turnaround;",
"then do one more jump and mid-air turnaround, high enough to land on the door ledge,",
"and Samus should be in the correct position with subpixels $C000."
],
"devNote": [
"The `canBeVeryPatient` is for difficulty placement; this could be improved with a more specific tech later,",
"since it does not actually take a long time to execute."
]
},
{
"id": 40,
"link": [
2,
9
],
"name": "Come In Shinecharged, Diagonal Suitless Shinespark to the Center",
"entranceCondition": {
"comeInShinecharged": {}
},
"requires": [
{
"shineChargeFrames": 10
},
"h_navigateUnderwater",
{
"shinespark": {
"frames": 23,
"excessFrames": 10
}
}
],
"flashSuitChecked": true,
"blueSuitChecked": true
},
{
"id": 42,
"link": [
2,
9
],
"name": "Cross Room Jump with Screw Attack and Speed",
"entranceCondition": {
"comeInJumping": {
"speedBooster": "yes",
"minTiles": 12.4375
}
},
"requires": [
{
"notable": "Cross Room Jump with Screw Attack"
},
"canInsaneJump",
"canCrossRoomJumpIntoWater",
"ScrewAttack",
"canMomentumConservingTurnaround"
],
"flashSuitChecked": true,
"blueSuitChecked": true,
"note": [
"Use Screw Attack to break the bomb block by entering from a non-water room with a spin jump, and make it up to the center of the room.",
"It helps to enter as low as possible and with as much horizontal speed as possible and with HiJump turned off."
],
"detailNote": [
"Enter with extra run speed between $3.2 and $3.F, with the lower speeds in this range being better."
],
"devNote": [
"This does not have collision oscillation."
]
},
{
"id": 134,
"link": [
2,
9
],
"name": "Cross Room Jump with Blue Speed",
"entranceCondition": {
"comeInGettingBlueSpeed": {
"length": 0,
"openEnd": 1,
"minExtraRunSpeed": "$3.2",
"maxExtraRunSpeed": "$3.F"
}
},
"requires": [
"h_blueJump",
"canInsaneJump",
"canCrossRoomJumpIntoWater",
"canMomentumConservingTurnaround"
],
"flashSuitChecked": true,
"blueSuitChecked": true,
"note": [
"Use blue speed to break the bomb block by entering from a non-water room with a spin jump, and make it up to the center of the room.",
"It helps to enter as low as possible and with as much horizontal speed as possible and with HiJump turned off."
],
"detailNote": [
"Enter with extra run speed between $3.2 and $3.F, with the lower speeds in this range being better."
],
"devNote": [
"This does not have collision oscillation."
]
},
{
"id": 68,
"link": [
3,
1
],
"name": "Come In Shinecharged, Leave With Spark",
"entranceCondition": {
"comeInShinecharged": {},
"comesThroughToilet": "any"
},
"requires": [
"Gravity",
"ScrewAttack",
"canShinechargeMovementTricky",
{
"shineChargeFrames": 160
},
{
"shinespark": {
"frames": 6,
"excessFrames": 0
}
}
],
"exitCondition": {
"leaveWithSpark": {}
},
"unlocksDoors": [
{
"types": [
"super"
],
"requires": []
},
{
"types": [
"missiles",
"powerbomb"
],
"requires": [
"never"
]
}
],
"flashSuitChecked": true,
"blueSuitChecked": true
},
{
"id": 69,
"link": [
3,
2
],
"name": "Come In Shinecharged, Leave With Spark",
"entranceCondition": {
"comeInShinecharged": {},
"comesThroughToilet": "any"
},
"requires": [
"Gravity",
"ScrewAttack",
"canShinechargeMovementTricky",
{
"shineChargeFrames": 160
},
{
"shinespark": {
"frames": 6,
"excessFrames": 0
}
}
],
"exitCondition": {
"leaveWithSpark": {}
},
"unlocksDoors": [
{
"types": [
"super"
],
"requires": []
},
{
"types": [
"missiles",
"powerbomb"
],
"requires": [
"never"
]
}
],
"flashSuitChecked": true,
"blueSuitChecked": true
},
{
"id": 48,
"link": [
3,
3
],
"name": "Carry G-Mode Back Up",
"entranceCondition": {
"comeInWithGMode": {
"mode": "direct",
"morphed": false
},
"comesThroughToilet": "any"
},
"requires": [
{
"or": [
"Gravity",
"HiJump",
"canSpringBallJumpMidAir"
]
}
],
"exitCondition": {
"leaveWithGMode": {
"morphed": false
}
},
"bypassesDoorShell": "free",
"flashSuitChecked": true,
"blueSuitChecked": true
},
{
"id": 49,
"link": [
3,
3
],
"name": "Carry G-Mode Morph Back Up",
"entranceCondition": {
"comeInWithGMode": {
"mode": "direct",
"morphed": true
},
"comesThroughToilet": "any"
},
"requires": [
{
"or": [
{
"and": [
"Gravity",
"h_artificialMorphIBJ"
]
},
{
"and": [
"Gravity",
"h_artificialMorphSpringBall"
]
},
{
"and": [
"HiJump",
"h_artificialMorphSpringBall"
]
}
]
}
],
"exitCondition": {
"leaveWithGMode": {
"morphed": true
}
},
"bypassesDoorShell": "free",
"flashSuitChecked": true,
"blueSuitChecked": true
},
{
"id": 110,
"link": [
3,
3
],
"name": "Carry G-Mode Back Up, Bomb Into Spring Ball Jump",
"entranceCondition": {
"comeInWithGMode": {
"mode": "direct",
"morphed": true
},
"comesThroughToilet": "any"
},
"requires": [
"h_artificialMorphUnderwaterBombIntoSpringBallJump"
],
"exitCondition": {
"leaveWithGMode": {
"morphed": false
}
},
"bypassesDoorShell": "free",
"flashSuitChecked": true,
"blueSuitChecked": true,
"note": [
"Perform a double Spring Ball jump using a precisely timed bomb boost",
"to propel Samus upward just long enough to get the mid-air Spring Ball jump.",
"Unmorph at the top of the jump to touch the transition blocks."
]
},
{
"id": 50,
"link": [
3,
4
],
"name": "Base",
"entranceCondition": {
"comeInNormally": {},
"comesThroughToilet": "any"
},
"requires": [],
"flashSuitChecked": true,
"blueSuitChecked": true
},
{
"id": 51,
"link": [
3,
5
],
"name": "Temporary Blue",
"entranceCondition": {
"comeInWithTemporaryBlue": {
"direction": "any"
},
"comesThroughToilet": "any"
},
"requires": [
"canChainTemporaryBlue",
"canXRayTurnaround"
],
"clearsObstacles": [
"A"
],
"flashSuitChecked": true,
"blueSuitChecked": true
},
{
"id": 109,
"link": [
3,
5
],
"name": "G-Mode Overload PLMs, Through the Bomb Blocks",
"entranceCondition": {
"comeInWithGMode": {
"mode": "any",
"morphed": false
},
"comesThroughToilet": "any"
},
"requires": [],
"flashSuitChecked": true,
"blueSuitChecked": true,
"note": "There are camera scroll blocks, which can be used to overload PLMs, just above the bomb blocks."
},
{
"id": 52,
"link": [
3,
5
],
"name": "G-Mode Morph Bomb Blocks",
"entranceCondition": {
"comeInWithGMode": {
"mode": "any",
"morphed": true
},
"comesThroughToilet": "any"
},
"requires": [
"h_artificialMorphBombThings"
],
"clearsObstacles": [
"A"
],
"flashSuitChecked": true,
"blueSuitChecked": true
},
{
"id": 53,
"link": [
4,
3
],
"name": "Base",
"requires": [
"Gravity"
],
"flashSuitChecked": true,
"blueSuitChecked": true
},
{
"id": 54,
"link": [
4,
3
],
"name": "Suitless",
"requires": [
{
"or": [
"HiJump",
"canSpringBallJumpMidAir"
]
}
],
"flashSuitChecked": true,
"blueSuitChecked": true
},
{
"id": 135,
"link": [
4,
3
],
"name": "Use Stored Spark",
"requires": [
"h_storedSpark",
{
"shinespark": {
"frames": 3,
"excessFrames": 0
}
}
],
"exitCondition": {
"leaveWithSpark": {}
},
"unlocksDoors": [
{
"nodeId": 3,
"types": [
"ammo"
],
"requires": []
}
],
"flashSuitChecked": true,
"blueSuitChecked": true
},
{
"id": 55,
"link": [
4,
4
],
"name": "Crystal Flash",
"requires": [
"h_CrystalFlash"
],
"flashSuitChecked": true,
"blueSuitChecked": true
},
{
"id": 136,
"link": [
4,
4
],
"name": "Unlock Door",
"requires": [],
"unlocksDoors": [
{
"nodeId": 3,
"types": [
"ammo"
],
"requires": []
}
],
"flashSuitChecked": true,
"blueSuitChecked": true
},
{
"id": 56,
"link": [
4,
9
],
"name": "Base",
"requires": [],
"flashSuitChecked": true,
"blueSuitChecked": true
},
{
"id": 57,
"link": [
5,
1
],
"name": "Base",
"requires": [],
"flashSuitChecked": true,
"blueSuitChecked": true
},
{
"id": 58,
"link": [
5,
2
],
"name": "Base",
"requires": [],
"flashSuitChecked": true,
"blueSuitChecked": true
},
{
"id": 137,
"link": [
5,
4
],
"name": "Use Stored Spark",
"requires": [
"h_storedSpark",
{
"shinespark": {
"frames": 21,
"excessFrames": 2
}
}
],
"clearsObstacles": [
"A"
],
"flashSuitChecked": true,
"blueSuitChecked": true,
"note": "Diagonal spark mid-air from just below the bomb blocks."
},
{
"id": 59,
"link": [
5,
5
],
"name": "Crystal Flash",
"requires": [
"h_CrystalFlash"
],
"flashSuitChecked": true,
"blueSuitChecked": true
},
{
"id": 60,
"link": [
5,
5
],
"name": "Base",
"requires": [
{
"or": [
"h_usePowerBomb",
{
"and": [
"Gravity",
"ScrewAttack"
]
},
{
"and": [
"Gravity",
"canIBJ"
]
},
{
"and": [
"h_useMorphBombs",
"h_useSpringBall"
]
},
{
"and": [
"h_useMorphBombs",
"canTrivialMidAirMorph",
"canDisableEquipment"
]
}
]
}
],
"clearsObstacles": [
"A"
],
"flashSuitChecked": true,
"blueSuitChecked": true
},
{
"id": 151,
"link": [
5,
5
],
"name": "Blue Suit",
"requires": [
{
"haveBlueSuit": {}
}
],
"clearsObstacles": [
"A"
],
"flashSuitChecked": true,
"blueSuitChecked": true,
"note": "Break the bomb blocks using a blue suit."
},
{
"id": 152,
"link": [
5,
5
],
"name": "Crystal Spark (In-Room)",
"requires": [
"Gravity",
{
"or": [
{
"canShineCharge": {
"usedTiles": 12,
"openEnd": 0
}
},
{
"and": [
{
"or": [
{
"doorUnlockedAtNode": 1
},
{
"doorUnlockedAtNode": 2
}
]
},
{
"canShineCharge": {
"usedTiles": 13,
"openEnd": 0
}
}
]
},
{
"and": [
{
"doorUnlockedAtNode": 1
},
{
"doorUnlockedAtNode": 2
},
{
"canShineCharge": {
"usedTiles": 14,
"openEnd": 0
}
}
]
}
]
},
"h_CrystalSpark"
],
"unlocksDoors": [
{
"nodeId": 1,
"types": [
"ammo"
],
"requires": []
},
{
"nodeId": 2,
"types": [
"ammo"
],
"requires": []
}
],
"flashSuitChecked": true,
"blueSuitChecked": true
},
{
"id": 61,
"link": [
5,
6
],
"name": "Base",
"requires": [
{
"obstaclesCleared": [
"A"
]
},
{
"or": [
"Gravity",
"HiJump",
"canSpringBallJumpMidAir"
]
}
],
"flashSuitChecked": true,
"blueSuitChecked": true
},
{
"id": 65,
"link": [
5,
6
],
"name": "Use Stored Spark",
"requires": [
"h_storedSpark",
{
"shinespark": {
"frames": 6,
"excessFrames": 6
}
}
],
"clearsObstacles": [
"A"
],
"flashSuitChecked": true,
"blueSuitChecked": true,
"note": "To save Energy, spark diagonally towards the outer sides of the room after hitting the ceiling bomb block.",
"devNote": [
"Note that it is possible to spark into the ceiling to break the blocks without energy loss, but it has collision oscillation.",
"With low Energy, this may not make it to 6, however the requirements to get to 6 are less than getting to the top of the room."
]
},
{
"id": 138,
"link": [
5,
9
],
"name": "Use Stored Spark",
"requires": [
"h_storedSpark",
{
"shinespark": {
"frames": 21,
"excessFrames": 10
}
}
],
"clearsObstacles": [
"A"
],
"flashSuitChecked": true,
"blueSuitChecked": true,
"note": "Diagonal spark mid-air from just below the bomb blocks."
},
{
"id": 139,
"link": [
6,
4
],
"name": "Use Stored Spark",
"requires": [
"h_storedSpark",
{
"shinespark": {
"frames": 17,
"excessFrames": 2
}
}
],
"flashSuitChecked": true,
"blueSuitChecked": true,
"note": [
"Diagonal spark from the center platform, from a standing position hanging over the bomb blocks."
],
"detailNote": [
"A mid-air spark will fail to gain enough horizontal speed to clear the top platform."
]
},
{
"id": 64,
"link": [
6,
5
],
"name": "Base",
"requires": [
{
"or": [
"h_bombThings",
{
"and": [
"Gravity",
"ScrewAttack"
]
},
{
"obstaclesCleared": [
"A"
]
}
]
}
],
"clearsObstacles": [
"A"
],
"flashSuitChecked": true,
"blueSuitChecked": true
},
{
"id": 153,
"link": [
6,
6
],
"name": "Blue Suit",
"requires": [
{
"haveBlueSuit": {}
}
],
"clearsObstacles": [
"A"
],
"flashSuitChecked": true,
"blueSuitChecked": true
},
{
"id": 62,
"link": [
6,
9
],
"name": "Base",
"requires": [
"Gravity"
],
"flashSuitChecked": true,
"blueSuitChecked": true
},
{
"id": 63,
"link": [
6,
9
],
"name": "Suitless",
"requires": [
"canSuitlessMaridia",
{
"or": [
{
"and": [
"HiJump",
{
"or": [
"canDownGrab",
"canSpringBallJumpMidAir",
"canConsecutiveWallJump"
]
}
]
},
"h_underwaterMaxHeightSpringBallJump"
]
}
],
"flashSuitChecked": true,
"blueSuitChecked": true
},
{
"id": 140,
"link": [
6,
9
],
"name": "Use Stored Spark",
"requires": [
"h_storedSpark",
{
"shinespark": {
"frames": 8,
"excessFrames": 5
}
}
],
"flashSuitChecked": true,
"blueSuitChecked": true
},
{
"id": 25,
"link": [
7,
1
],
"name": "Leave Shinecharged",
"startsWithShineCharge": true,
"requires": [
{
"shineChargeFrames": 10
}
],
"exitCondition": {
"leaveShinecharged": {}
},
"unlocksDoors": [
{
"types": [
"missiles",
"super"
],
"requires": []
},
{
"types": [
"powerbomb"
],
"requires": [
"never"
]
}
],
"flashSuitChecked": true,
"blueSuitChecked": true,
"devNote": "FIXME: This is a prime example for 3-room shinecharges, once the schema can model it."
},
{
"id": 27,
"link": [
7,
1
],
"name": "Leave With Temporary Blue",
"startsWithShineCharge": true,
"requires": [
{
"shineChargeFrames": 0
},
"h_getBlueSpeedMaxRunway",
"canTemporaryBlue"
],
"exitCondition": {
"leaveWithTemporaryBlue": {}
},
"unlocksDoors": [
{
"types": [
"ammo"
],
"requires": []
}
],
"flashSuitChecked": true,
"blueSuitChecked": true,
"devNote": [
"The `h_getBlueSpeedMaxRunway` requirement is to satisfy the tests,",
"since we don't have a way to represent that the temporary blue originates from the startsWithShineCharge."
]
},
{
"id": 32,
"link": [
7,
2
],
"name": "Leave With Spark",
"startsWithShineCharge": true,
"requires": [
"canShinechargeMovementComplex",
{
"shineChargeFrames": 120
},
{
"shinespark": {
"frames": 9,
"excessFrames": 0
}
}
],
"exitCondition": {
"leaveWithSpark": {}
},
"unlocksDoors": [
{
"types": [
"super"
],
"requires": []
},
{
"types": [
"missiles",
"powerbomb"
],
"requires": [
"never"
]
}
],
"flashSuitChecked": true,
"blueSuitChecked": true
},
{
"id": 93,
"link": [
7,
2
],
"name": "Leave With Temporary Blue",
"startsWithShineCharge": true,
"requires": [
{
"shineChargeFrames": 0
},
"h_getBlueSpeedMaxRunway",
"canXRayTurnaround",
"canChainTemporaryBlue"
],
"exitCondition": {
"leaveWithTemporaryBlue": {}
},
"unlocksDoors": [
{
"types": [
"ammo"
],
"requires": []
}
],
"flashSuitChecked": true,
"blueSuitChecked": true,
"devNote": [
"The `h_getBlueSpeedMaxRunway` requirement is to satisfy the tests,",
"since we don't have a way to represent that the temporary blue originates from the startsWithShineCharge."
]
},
{
"id": 141,
"link": [
7,
4
],
"name": "Diagonal Shinespark to the Top",
"startsWithShineCharge": true,
"requires": [
{
"shineChargeFrames": 50
},
{
"shinespark": {
"frames": 23,
"excessFrames": 2
}
}
],
"clearsObstacles": [
"A"
],
"flashSuitChecked": true,
"blueSuitChecked": true,
"note": "Spark diagonally through the bomb blocks."
},
{
"id": 94,
"link": [
7,
5
],
"name": "Temporary Blue to Break the Blocks",
"startsWithShineCharge": true,
"requires": [
{
"shineChargeFrames": 0
},
"h_getBlueSpeedMaxRunway",
"canTemporaryBlue",
"canXRayTurnaround"
],
"clearsObstacles": [
"A"
],
"flashSuitChecked": true,
"blueSuitChecked": true
},
{
"id": 46,
"link": [
7,
6
],
"name": "Shinespark to Break the Blocks",
"startsWithShineCharge": true,
"requires": [
{
"shineChargeFrames": 50
},
{
"or": [
{
"shinespark": {
"frames": 10,
"excessFrames": 8
}
},
{
"and": [
"canMidairShinespark",
{
"shinespark": {
"frames": 7,
"excessFrames": 7
}
}
]
},
{
"and": [
"canTrickyJump",
"canMidairShinespark",
{
"shinespark": {
"frames": 1,
"excessFrames": 1
}
}
]
}
]
}
],
"clearsObstacles": [
"A"
],
"flashSuitChecked": true,
"blueSuitChecked": true,
"note": "Spark vertically through the bomb blocks. It is still possible to break the blocks while below 30 Energy by jumping before sparking.",
"devNote": [
"It is possible to save some energy by sparking into the left wall, but it won't work with midair sparking, which saves the same amount and is easier.",
"Note that it is possible to spark into the ceiling to break the blocks without energy loss, but it has collision oscillation.",
"FIXME: Add temporary blue strats."
]
},
{
"id": 41,
"link": [
7,
9
],
"name": "Diagonal Shinespark to the Center",
"startsWithShineCharge": true,
"requires": [
{
"shineChargeFrames": 50
},
{
"shinespark": {
"frames": 23,
"excessFrames": 10
}
}
],
"clearsObstacles": [
"A"
],
"flashSuitChecked": true,
"blueSuitChecked": true,
"note": "Spark diagonally through the bomb blocks."
},
{
"id": 3,
"link": [
8,
1
],
"name": "Leave With Spark",
"startsWithShineCharge": true,
"requires": [
"canShinechargeMovementComplex",
{
"shineChargeFrames": 120
},
{
"shinespark": {
"frames": 9,
"excessFrames": 0
}
}
],
"exitCondition": {
"leaveWithSpark": {}
},
"unlocksDoors": [
{
"types": [
"super"
],
"requires": []
},
{
"types": [
"missiles",
"powerbomb"
],
"requires": [
"never"
]
}
],
"flashSuitChecked": true,
"blueSuitChecked": true
},
{
"id": 96,
"link": [
8,
1
],
"name": "Leave With Temporary Blue",
"startsWithShineCharge": true,
"requires": [
{
"shineChargeFrames": 0
},
"h_getBlueSpeedMaxRunway",
"canXRayTurnaround",
"canChainTemporaryBlue"
],
"exitCondition": {
"leaveWithTemporaryBlue": {}
},
"unlocksDoors": [
{
"types": [
"ammo"
],
"requires": []
}
],
"flashSuitChecked": true,
"blueSuitChecked": true,
"devNote": [
"The `h_getBlueSpeedMaxRunway` requirement is to satisfy the tests,",
"since we don't have a way to represent that the temporary blue originates from the startsWithShineCharge."
]
},
{
"id": 11,
"link": [
8,
2
],
"name": "Leave Shinecharged",
"startsWithShineCharge": true,
"requires": [
{
"shineChargeFrames": 10
}
],
"exitCondition": {
"leaveShinecharged": {}
},
"unlocksDoors": [
{
"types": [
"missiles",
"super"
],
"requires": []
},
{
"types": [
"powerbomb"
],
"requires": [
"never"
]
}
],
"flashSuitChecked": true,
"blueSuitChecked": true,
"devNote": "FIXME: This is a prime example for 3-room shinecharges, once the schema can model it."
},
{
"id": 97,
"link": [
8,
2
],
"name": "Leave With Temporary Blue",
"startsWithShineCharge": true,
"requires": [
{
"shineChargeFrames": 0
},
"h_getBlueSpeedMaxRunway",
"canTemporaryBlue"
],
"exitCondition": {
"leaveWithTemporaryBlue": {}
},
"unlocksDoors": [
{
"types": [
"ammo"
],
"requires": []
}
],
"flashSuitChecked": true,
"blueSuitChecked": true,
"devNote": [
"The `h_getBlueSpeedMaxRunway` requirement is to satisfy the tests,",
"since we don't have a way to represent that the temporary blue originates from the startsWithShineCharge."
]
},
{
"id": 142,
"link": [
8,
4
],
"name": "Diagonal Shinespark to the Top",
"startsWithShineCharge": true,
"requires": [
{
"shineChargeFrames": 50
},
{
"shinespark": {
"frames": 23,
"excessFrames": 2
}
}
],
"clearsObstacles": [
"A"
],
"flashSuitChecked": true,
"blueSuitChecked": true,
"note": "Spark diagonally through the bomb blocks."
},
{
"id": 98,
"link": [
8,
5
],
"name": "Temporary Blue to Break the Blocks",
"startsWithShineCharge": true,
"requires": [
{
"shineChargeFrames": 0
},
"h_getBlueSpeedMaxRunway",
"canTemporaryBlue",
"canXRayTurnaround"
],
"clearsObstacles": [
"A"
],
"flashSuitChecked": true,
"blueSuitChecked": true
},
{
"id": 23,
"link": [
8,
6
],
"name": "Shinespark to Break the Blocks",
"startsWithShineCharge": true,
"requires": [
{
"shineChargeFrames": 50
},
{
"or": [
{
"shinespark": {
"frames": 10,
"excessFrames": 8
}
},
{
"and": [
"canMidairShinespark",
{
"shinespark": {
"frames": 7,
"excessFrames": 7
}
}
]
},
{
"and": [
"canTrickyJump",
"canMidairShinespark",
{
"shinespark": {
"frames": 1,
"excessFrames": 1
}
}
]
}
]
}
],
"clearsObstacles": [
"A"
],
"flashSuitChecked": true,
"blueSuitChecked": true,
"note": "Spark vertically through the bomb blocks. It is still possible to break the blocks while below 30 Energy by jumping before sparking.",
"devNote": [
"It is possible to save some energy by sparking into the left wall, but it won't work with midair sparking, which saves the same amount and is easier.",
"Note that it is possible to spark into the ceiling to break the blocks without energy loss, but it has collision oscillation.",
"FIXME: Add temporary blue strats."
]
},
{
"id": 18,
"link": [
8,
9
],
"name": "Diagonal Shinespark to the Center",
"startsWithShineCharge": true,
"requires": [
{
"shineChargeFrames": 50
},
{
"shinespark": {
"frames": 23,
"excessFrames": 10
}
}
],
"clearsObstacles": [
"A"
],
"flashSuitChecked": true,
"blueSuitChecked": true,
"note": "Spark diagonally through the bomb blocks."
},
{
"id": 143,
"link": [
9,
4
],
"name": "Base",
"requires": [
{
"or": [
"Gravity",
{
"and": [
"canSuitlessMaridia",
{
"or": [
"HiJump",
"canSpringBallJumpMidAir"
]
}
]
}
]
}
],
"flashSuitChecked": true,
"blueSuitChecked": true
},
{
"id": 144,
"link": [
9,
4
],
"name": "Use Stored Spark",
"requires": [
"h_storedSpark",
{
"shinespark": {
"frames": 5,
"excessFrames": 3
}
}
],
"flashSuitChecked": true,
"blueSuitChecked": true,
"devNote": [
"FIXME: It is possible to use a flash suit to get through the top door with a diagonal spark."
]
},
{
"id": 145,
"link": [
9,
6
],
"name": "Base",
"requires": [],
"flashSuitChecked": true,
"blueSuitChecked": true
},
{
"id": 146,
"link": [
9,
9
],
"name": "Unlock Door",
"requires": [],
"unlocksDoors": [
{
"nodeId": 3,
"types": [
"powerbomb"
],
"requires": []
},
{
"nodeId": 3,
"types": [
"super",
"missiles"
],
"requires": [
"canTrickyJump",
"h_underwaterCrouchJump",
"h_midAirShootUp"
]
}
],
"flashSuitChecked": true,
"blueSuitChecked": true,
"note": [
"To unlock the door with a Super or Missiles, stand on the right side, backed against or close to the wall,",
"do a crouch jump, and fire a diagonal shot near the peak of the jump."
],
"detailNote": [
"If carrying a flash suit, it is possible to hold shot with Power Beam,",
"then select Supers or Missiles while continuing to hold shot."
]
}
],
"notables": [
{
"id": 1,
"name": "Cross Room Jump with Screw Attack",
"note": [
"Use Screw Attack to break the bomb block by entering from a non-water room with a spin jump.",
"It helps to enter as low as possible and with as much horizontal speed as possible and with HiJump turned off.",
"Depending on the setup, this may have collision oscillation, making only a 50% success when done correctly."
]
},
{
"id": 2,
"name": "Cross Room Jump Boomerang To Top",
"note": [
"Use Screw Attack or blue speed to break the bomb block by entering from a non-water room with a spin jump, and make it all the way through the top door.",
"Use angle to break spin, and do a momentum conserving turnaround either on the same frame or one frame later;",
"this first turnaround should be done early enough that the turnaround is complete by the time Samus clears the two-tile passage in the middle of the room.",
"The second momentum conserving turnaround must be done somewhat late, and by switching from holding forward to holding backward one frame later (a perfect 'boomerang').",
"Shoot open the door, and use a third momentum conserving turnaround on it as it opens."
]
}
],
"nextStratId": 154,
"nextNotableId": 3
}