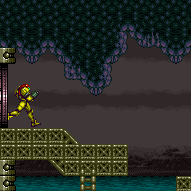
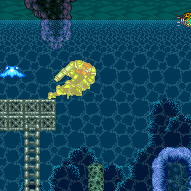
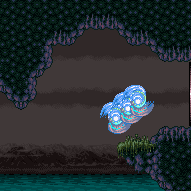
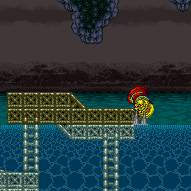
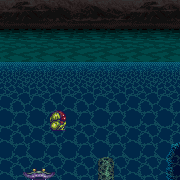
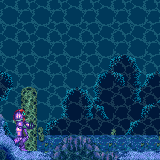
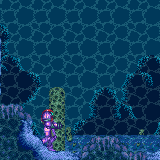
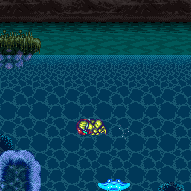
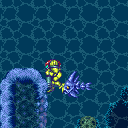
East Ocean
Room ID: 34
|


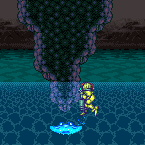
Farm the Choots for energy. Shinecharge on the left side and get interrupted by the Skultera. Entrance condition: {
"comeInWithRMode": {}
}Requires: "Gravity"
"canDodgeWhileShooting"
{
"or": [
"h_CrystalFlashForReserveEnergy",
{
"and": [
"h_RModeCanRefillReserves",
{
"resourceMissingAtMost": [
{
"type": "Missile",
"count": 0
}
]
},
{
"partialRefill": {
"type": "ReserveEnergy",
"limit": 20
}
}
]
}
]
}
{
"canShineCharge": {
"usedTiles": 20,
"steepUpTiles": 4,
"steepDownTiles": 2,
"startingSteepDownTiles": 1,
"openEnd": 0
}
}
{
"autoReserveTrigger": {
"maxReserveEnergy": 95
}
}
"canRModeSparkInterrupt" |
|
Exit condition: {
"leaveWithRunway": {
"length": 8,
"openEnd": 1,
"steepUpTiles": 1
}
} |
|
Requires: "Gravity"
{
"canShineCharge": {
"usedTiles": 20,
"steepUpTiles": 4,
"steepDownTiles": 2,
"startingSteepDownTiles": 1,
"openEnd": 0
}
}
"canShinechargeMovementTricky"
{
"shinespark": {
"frames": 18,
"excessFrames": 0
}
}Exit condition: {
"leaveWithSpark": {
"position": "bottom"
}
} |
|
Requires: "Gravity"
"HiJump"
{
"canShineCharge": {
"usedTiles": 20,
"steepUpTiles": 4,
"steepDownTiles": 2,
"startingSteepDownTiles": 1,
"openEnd": 0
}
}
"canShinechargeMovementTricky"
{
"shineChargeFrames": 150
}Exit condition: {
"leaveShinecharged": {}
} |
|

Requires: "Gravity"
"HiJump"
{
"canShineCharge": {
"usedTiles": 12,
"steepUpTiles": 3,
"steepDownTiles": 1,
"openEnd": 1
}
}
"canShinechargeMovementTricky"
{
"shineChargeFrames": 135
}Exit condition: {
"leaveShinecharged": {}
} |
|


Requires: "Gravity"
"canWallJump"
{
"canShineCharge": {
"usedTiles": 12,
"steepUpTiles": 3,
"steepDownTiles": 1,
"openEnd": 1
}
}
"canShinechargeMovementTricky"
{
"shineChargeFrames": 145
}Exit condition: {
"leaveShinecharged": {}
} |
|
Requires: "Gravity" "canPreciseSpaceJump" Exit condition: {
"leaveWithSpringBallBounce": {
"remoteRunway": {
"length": 18,
"openEnd": 1,
"steepUpTiles": 1,
"steepDownTiles": 2
},
"landingRunway": {
"length": 8,
"openEnd": 1,
"steepUpTiles": 1
},
"movementType": "controlled"
}
} |
|

Requires: "Gravity" "canPreciseSpaceJump" Exit condition: {
"leaveWithMockball": {
"remoteRunway": {
"length": 18,
"openEnd": 1,
"steepUpTiles": 1,
"steepDownTiles": 2
},
"landingRunway": {
"length": 8,
"openEnd": 1,
"steepUpTiles": 1
},
"maxExtraRunSpeed": "$2.F"
}
}Dev note: A bit higher speed can also work but would be more difficult |
|
Requires: "Gravity" "canPreciseSpaceJump" "canInsaneJump" Exit condition: {
"leaveSpinning": {
"remoteRunway": {
"length": 18,
"openEnd": 1,
"steepUpTiles": 1,
"steepDownTiles": 2
},
"minExtraRunSpeed": "$1.3",
"maxExtraRunSpeed": "$2.A"
}
} |
|


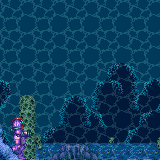
Gain temporary blue using the runway on the left side of the room, using HiJump or a Gravity jump where needed to get onto the ocean platforms. Requires: "Gravity"
{
"canShineCharge": {
"usedTiles": 20,
"steepUpTiles": 4,
"steepDownTiles": 2,
"startingSteepDownTiles": 1,
"openEnd": 0
}
}
"canLongChainTemporaryBlue"
"can4HighMidAirMorph"
{
"or": [
"HiJump",
"canGravityJump"
]
}Exit condition: {
"leaveWithTemporaryBlue": {}
}Dev note: With very precise mid-air morphs/unmorphs, it is possible to get onto the first or second ocean platform directly without HiJump or canGravityJump, by using the runway on the right side of the room. |
|
Requires: "canDodgeWhileShooting"
{
"cycleFrames": 215
}
{
"or": [
"canDash",
{
"and": [
{
"haveBlueSuit": {}
},
{
"cycleFrames": 40
}
]
}
]
}Farm cycle drops: 1 Choot |
|
Farm 3 Choots using Grapple to collect the drops, without dipping into the water. Requires: "canUseGrapple"
{
"cycleFrames": 330
}
{
"or": [
"canDash",
{
"cycleFrames": 90
}
]
}Farm cycle drops: 3 Choot |
|
Requires: "Gravity"
{
"or": [
{
"and": [
"canDash",
{
"or": [
{
"and": [
"Plasma",
{
"cycleFrames": 410
}
]
},
{
"and": [
"canUseGrapple",
{
"cycleFrames": 440
}
]
},
{
"and": [
"Wave",
{
"cycleFrames": 460
}
]
},
{
"and": [
"Spazer",
{
"cycleFrames": 540
}
]
},
{
"and": [
"canDodgeWhileShooting",
{
"cycleFrames": 730
}
]
}
]
}
]
},
{
"and": [
{
"haveBlueSuit": {}
},
{
"cycleFrames": 710
}
]
}
]
}Farm cycle drops: 4 Choot |
|
Requires: "h_CrystalFlash"
{
"obstaclesNotCleared": [
"R-Mode"
]
} |
|
Entrance condition: {
"comeInShinecharging": {
"length": 7,
"openEnd": 0,
"steepDownTiles": 1
},
"comesInHeated": "no"
}Requires: "h_CrystalSpark" |
|
Entrance condition: {
"comeInWithRMode": {}
}Clears obstacles: R-Mode |
|
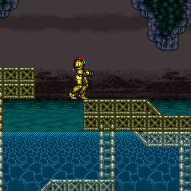
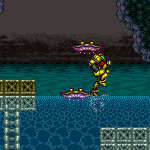
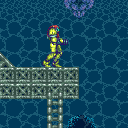
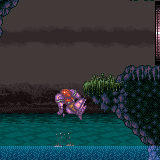
Run for 7 tiles for enough speed to Spring Ball from the submerged platform up to the platform enemy, above the water. Turning on Speed Booster midjump, after running 7+ tiles, will automatically hit the run speed requirement. It is not necessary to enter the water to clear the rightmost Choot. Requires: "canTrickyJump"
{
"or": [
{
"disableEquipment": "SpeedBooster"
},
"canTrickyDashJump"
]
}
"canSpeedyJump"
"canSpringBallBounce"
"canMockball"
"SpaceJump" |
From: 1
Left Door
To: 2
Right Door
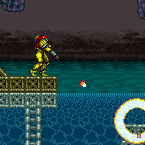
Build up run speed and then use controlled Spring Ball bounces to cross the ocean to the far right ledge, and then use Space Jump to reach the door. Mockball down the submerged ramp and begin Spring Ball bouncing under water using the platforms. Disable Spring Ball after the final jump once Samus starts falling again as a way to gain extra speed. Requires: {
"notable": "Spring Ball Bounce to the Door with SpaceJump"
}
"canTrickyJump"
"canSpaceJumpWaterBounce"
"canSpringBallBounce"
"canSpringFling"
"canMockball"
{
"or": [
"canDownGrab",
"canWallJump"
]
} |
|


Using an exact runway size of 7 tiles; use extremely precise, controlled Spring Ball bounces to cross the ocean. 7 tiles of runspeed can freely be achieved by requipping SpeedBooster after reaching the max normal run speed. Mockball down the submerged ramp and begin Spring Ball bouncing either above the water, or under water using the platforms. The final Spring Ball bounce must be on the left edge of the rightmost underwater platform. While the bounce is occuring, setup a mid-air Spring Ball Jump to escape the water and reach the door. Requires: {
"notable": "Speedy Spring Ball Bounce to the Door"
}
"canInsaneJump"
"canSpeedyJump"
"canSpringBallBounce"
"canDoubleSpringBallJumpMidAir"
"canMockball" |
|
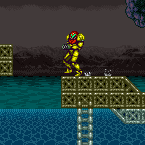
Enter the room while building a shinespark and use it on the lowest part of the ramp to cross the room and reach a raised ledge on the right side wall. From there, use SpaceJump to escape the water. Carry the shinespark to the bottom of the ramp by delaying the first Choot with two Power Beam shots, killing it, or bounceballing through it. The Choot can be shot diagonally from the middle platform, and again by running off that platform and aiming down to float above it. Entrance condition: {
"comeInShinecharging": {
"length": 6,
"openEnd": 1,
"steepDownTiles": 1
}
}Requires: "canShinechargeMovementComplex"
"canCarefulJump"
{
"or": [
{
"and": [
"canShinechargeMovementTricky",
"canTrickyDodgeEnemies"
]
},
{
"and": [
{
"enemyDamage": {
"enemy": "Choot",
"type": "contact",
"hits": 1
}
},
"canNeutralDamageBoost",
"canBounceBall"
]
},
{
"and": [
"canMockball",
{
"or": [
"canPseudoScrew",
"ScrewAttack",
"Plasma",
"Wave",
{
"ammo": {
"type": "Missile",
"count": 1
}
},
{
"ammo": {
"type": "Super",
"count": 1
}
}
]
}
]
}
]
}
{
"shinespark": {
"frames": 125,
"excessFrames": 5
}
}
"canSpaceJumpWaterBounce"
{
"or": [
{
"and": [
"canTrickyJump",
"canDownGrab"
]
},
"canWallJump"
]
}Dev note: There is 1 unusable tile in this runway. |
|
Enter the room while building a shinespark and use it on the lowest part of the ramp to diagonally spark up and out of the water. Use very low jump height space jumps to carry momentum to the far side of the submerged ramp. Both Choots must be killed. Using Screw Attack: stay a little bit high in the water so that it remains active for the second Choot. Using Plasma or ammo: kill the first Choot while running down the middle platform, and the second while gliding above it after spacejumping through the water. Then shinespark up and use SpaceJump to reach the door. Entrance condition: {
"comeInShinecharging": {
"length": 6,
"openEnd": 1,
"steepDownTiles": 1
}
}Requires: {
"notable": "Shinespark Water Escape"
}
{
"or": [
"ScrewAttack",
"canPseudoScrew",
"Plasma",
{
"ammo": {
"type": "Missile",
"count": 1
}
},
{
"ammo": {
"type": "Super",
"count": 1
}
}
]
}
{
"or": [
"ScrewAttack",
"Plasma",
{
"ammo": {
"type": "Missile",
"count": 1
}
},
{
"ammo": {
"type": "Super",
"count": 1
}
}
]
}
"canShinechargeMovementComplex"
{
"shinespark": {
"frames": 14,
"excessFrames": 5
}
}
"SpaceJump"
"canTrickyJump"Dev note: There is 1 unusable tile in this runway. |
From: 1
Left Door
To: 2
Right Door

Enter the room while building a shinespark and use it on the lowest part of the ramp to diagonally spark up and out of the water. Unmorphing with the correct timing and positioning for the Shinespark are very precise, and there are no extra frames on the Shinespark timer to work with. Carry the shinespark to the bottom of the ramp either with a bounce ball which takes damage from the Choot, or delay the first Choot with two shots and then use a late mockball. Then shinespark up and use SpaceJump to reach the door. Entrance condition: {
"comeInShinecharging": {
"length": 6,
"openEnd": 1,
"steepDownTiles": 1
}
}Requires: {
"notable": "Shinespark Water Escape With Lower Choot Alive"
}
{
"or": [
{
"and": [
{
"enemyDamage": {
"enemy": "Choot",
"type": "contact",
"hits": 1
}
},
"canNeutralDamageBoost",
"canBounceBall"
]
},
{
"and": [
"canDodgeWhileShooting",
"canMockball"
]
}
]
}
"canShinechargeMovementComplex"
{
"shinespark": {
"frames": 14,
"excessFrames": 5
}
}
"SpaceJump"
"canTrickyJump"Dev note: There is 1 unusable tile in this runway. |
From: 1
Left Door
To: 2
Right Door

Enter the room while building a shinespark and use it on the lowest part of the ramp to diagonally spark up and out of the water. Use very low jump height space jumps to carry momentum to the far side of the submerged ramp. Freeze the first Choot from the middle platform. Either SpaceJump just right so as to pass above the second Choot, or freeze it as it touches Samus to pass through without losing speed. Then shinespark up and use SpaceJump to reach the door. Entrance condition: {
"comeInShinecharging": {
"length": 6,
"openEnd": 1,
"steepDownTiles": 1
}
}Requires: {
"notable": "Shinespark Water Escape With Lower Choot Alive"
}
"Ice"
"Wave"
"Spazer"
"canDodgeWhileShooting"
"canShinechargeMovementComplex"
{
"shinespark": {
"frames": 14,
"excessFrames": 5
}
}
"canMidairShinespark"
"SpaceJump"
"canTrickyJump"Dev note: There is 1 unusable tile in this runway. |
|
Entrance condition: {
"comeInWithGMode": {
"mode": "any",
"morphed": true
}
}Requires: "Gravity"
{
"or": [
"h_artificialMorphLongIBJ",
"h_artificialMorphJumpIntoIBJ"
]
} |
|
|
From: 1
Left Door
To: 3
Junction (Left side Pit)

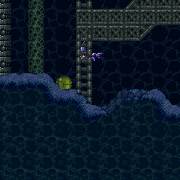
It is required to avoid double hitting the Skultera with the Power Bomb, and to position the Crystal Flash so that the Skultera can hit Samus from above so it avoids the light orb. To do this, use the bottom-left Skultera, and move it off-camera at the far left end of its cycle. Go to the far right end of it's cycle and on the Crystal Flash on the sloped tile just below where it ends. Once the Skultera gets hit by the Power Bomb explosion, it will start moving, even while off-camera. Entrance condition: {
"comeInWithGMode": {
"mode": "direct",
"morphed": true
}
}Requires: "h_artificialMorphComplexRModeCrystalFlashInterrupt"
"canCameraManip"
{
"ammo": {
"type": "Missile",
"count": 10
}
}
{
"ammo": {
"type": "Super",
"count": 10
}
}
{
"ammo": {
"type": "PowerBomb",
"count": 5
}
}
{
"or": [
"h_partialEnemyDamageReduction",
{
"resourceAtMost": [
{
"type": "RegularEnergy",
"count": 19
}
]
},
{
"and": [
{
"resourceCapacity": [
{
"type": "RegularEnergy",
"count": 199
}
]
},
{
"resourceCapacity": [
{
"type": "ReserveEnergy",
"count": 199
}
]
}
]
}
]
}Dev note: There is no reason to do this at node 4, because the movement items required to get to 4 and then do anything useful with the flash suit would also enable Samus to get the flash suit here and then take it to node 4. |
|


Farm the Choots for energy. Shinecharge on the left side and get interrupted by the Skultera. Entrance condition: {
"comeInWithRMode": {}
}Requires: "Gravity"
{
"or": [
"h_CrystalFlashForReserveEnergy",
{
"and": [
"h_RModeCanRefillReserves",
{
"resourceMissingAtMost": [
{
"type": "Missile",
"count": 0
}
]
},
{
"partialRefill": {
"type": "ReserveEnergy",
"limit": 20
}
}
]
}
]
}
{
"canShineCharge": {
"usedTiles": 20,
"steepUpTiles": 4,
"steepDownTiles": 2,
"startingSteepDownTiles": 1,
"openEnd": 0
}
}
{
"autoReserveTrigger": {
"maxReserveEnergy": 95
}
}
"canRModeSparkInterrupt" |
|


Perform a double Spring Ball jump using a precisely timed bomb boost to propel Samus upward just long enough to get the mid-air Spring Ball jump. This needs to be done multiple times to cross the room with no other items; using Spring Flings to cross from peak to peak can reduce the required number of bomb into Spring Ball jumps to two or three. Entrance condition: {
"comeInWithGMode": {
"mode": "any",
"morphed": true
}
}Requires: "h_artificialMorphUnderwaterBombIntoSpringBallJump"
{
"or": [
"h_artificialMorphSpringFling",
"canBeVeryPatient"
]
} |
|
Exit condition: {
"leaveWithRunway": {
"length": 5,
"openEnd": 1,
"steepUpTiles": 1
}
} |
|
Requires: "Gravity" "SpaceJump" Exit condition: {
"leaveSpinning": {
"remoteRunway": {
"length": 17,
"openEnd": 1,
"steepUpTiles": 3,
"steepDownTiles": 2,
"startingSteepDownTiles": 1
}
}
} |
|


Requires: "Gravity" "SpaceJump" Exit condition: {
"leaveWithMockball": {
"remoteRunway": {
"length": 17,
"openEnd": 1,
"steepUpTiles": 3,
"steepDownTiles": 2,
"startingSteepDownTiles": 1
},
"landingRunway": {
"length": 5,
"openEnd": 1,
"steepUpTiles": 1
}
}
} |
From: 2
Right Door
To: 2
Right Door
Requires: "Gravity" "SpaceJump" Exit condition: {
"leaveWithSpringBallBounce": {
"remoteRunway": {
"length": 17,
"openEnd": 1,
"steepUpTiles": 3,
"steepDownTiles": 2,
"startingSteepDownTiles": 1
},
"landingRunway": {
"length": 5,
"openEnd": 1,
"steepUpTiles": 1
},
"movementType": "uncontrolled"
}
} |
|


Requires: "Gravity"
"HiJump"
{
"or": [
{
"and": [
{
"canShineCharge": {
"usedTiles": 21,
"steepUpTiles": 3,
"steepDownTiles": 3,
"startingSteepDownTiles": 1,
"openEnd": 0
}
},
"canXRayTurnaround"
]
},
{
"canShineCharge": {
"usedTiles": 18,
"steepUpTiles": 2,
"steepDownTiles": 3,
"startingSteepDownTiles": 1,
"openEnd": 0
}
}
]
}
"canGravityJump"
"canChainTemporaryBlue"Exit condition: {
"leaveWithTemporaryBlue": {}
} |
From: 2
Right Door
To: 2
Right Door
Requires: "Gravity"
"HiJump"
{
"or": [
{
"and": [
{
"canShineCharge": {
"usedTiles": 21,
"steepUpTiles": 3,
"steepDownTiles": 3,
"startingSteepDownTiles": 1,
"openEnd": 0
}
},
"canXRayTurnaround"
]
},
{
"canShineCharge": {
"usedTiles": 15,
"steepUpTiles": 2,
"steepDownTiles": 3,
"startingSteepDownTiles": 1,
"openEnd": 0
}
}
]
}
"canSpringBallJumpMidAir"
"canChainTemporaryBlue"Exit condition: {
"leaveWithTemporaryBlue": {}
} |
|


Requires: "Gravity"
{
"getBlueSpeed": {
"usedTiles": 18,
"steepUpTiles": 2,
"steepDownTiles": 2,
"startingSteepDownTiles": 1,
"openEnd": 0
}
}
"canBlueSpaceJump"
"canChainTemporaryBlue"Exit condition: {
"leaveWithTemporaryBlue": {}
} |
|
Requires: "Gravity"
{
"cycleFrames": 270
}
{
"or": [
"canDash",
{
"cycleFrames": 90
}
]
}
{
"or": [
"HiJump",
{
"and": [
"canWallJump",
{
"cycleFrames": 45
}
]
}
]
}
{
"or": [
"Plasma",
{
"and": [
"canUseGrapple",
{
"cycleFrames": 15
}
]
},
{
"and": [
"ScrewAttack",
{
"cycleFrames": 15
}
]
},
{
"and": [
"Wave",
{
"cycleFrames": 35
}
]
},
{
"and": [
{
"haveBlueSuit": {}
},
{
"cycleFrames": 40
}
]
},
{
"and": [
"Spazer",
{
"cycleFrames": 55
}
]
},
{
"cycleFrames": 105
}
]
}Farm cycle drops: 1 Choot |
|
Requires: "h_CrystalFlash"
{
"obstaclesNotCleared": [
"R-Mode"
]
} |
|
Entrance condition: {
"comeInShinecharging": {
"length": 4,
"openEnd": 0,
"steepDownTiles": 1
},
"comesInHeated": "no"
}Requires: "h_CrystalSpark" |
|
Entrance condition: {
"comeInWithRMode": {}
}Clears obstacles: R-Mode |
|
Requires: "SpaceJump" |
|
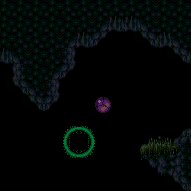
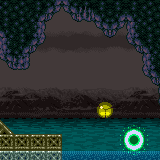
Horizontally shinespark from the grassy patch on the ledge near the door, then jump across the platforms. Entrance condition: {
"comeInShinecharged": {}
}Requires: {
"shineChargeFrames": 10
}
"canHorizontalShinespark"
{
"shinespark": {
"frames": 35
}
} |
From: 2
Right Door
To: 3
Junction (Left side Pit)
Perform a double Spring Ball jump using a precisely timed bomb boost to propel Samus upward just long enough to get the mid-air Spring Ball jump. This needs to be done multiple times to cross the room with no other items; using Spring Flings to cross from peak to peak can reduce the required number of bomb into Spring Ball jumps to just one or two. To Crystal Flash interrupt, it is required to avoid double hitting the Skultera with the Power Bomb, and to position the Crystal Flash so that the Skultera can hit Samus from above so it avoids the light orb. To do this, use the bottom-left Skultera, and move it off-camera at the far left end of its cycle. Go to the far right end of it's cycle and on the Crystal Flash on the sloped tile just below where it ends. Once the Skultera gets hit by the Power Bomb explosion, it will start moving, even while off-camera. Entrance condition: {
"comeInWithGMode": {
"mode": "direct",
"morphed": true
}
}Requires: "h_artificialMorphUnderwaterBombIntoSpringBallJump"
{
"or": [
"h_artificialMorphSpringFling",
"canBeVeryPatient"
]
}
"h_artificialMorphComplexRModeCrystalFlashInterrupt"
"canCameraManip"
{
  "ammo": {
    "type": "Missile",
    "count": 10
  }
}
{
  "ammo": {
    "type": "Super",
    "count": 10
  }
}
{
  "ammo": {
    "type": "PowerBomb",
    "count": 5
  }
}
{
  "or": [
    "h_partialEnemyDamageReduction",
    {
      "resourceAtMost": [
        {
          "type": "RegularEnergy",
          "count": 19
        }
      ]
    },
    {
      "and": [
        {
          "resourceCapacity": [
            {
              "type": "RegularEnergy",
              "count": 199
            }
          ]
        },
        {
          "resourceCapacity": [
            {
              "type": "ReserveEnergy",
              "count": 199
            }
          ]
        }
      ]
    }
  ]
}
Dev note: Methods with more flexible movement items will instead be done at node 4, after which, they can be used to get here. FIXME: Add variants that can farm enough Energy to choot damage boost without enemy damage reduction or tanks. |
|
|
From: 2
Right Door
To: 4
Junction (Right side Pit)
It is required to avoid double hitting the Skultera with the Power Bomb, and to position the Crystal Flash so that the Skultera can hit Samus from above so it avoids the light orb. To do this, use the bottom-right Skultera, and position Samus against the right pillar, or on the slope in front of the pillar. Place the Power Bomb to hit the fish as it reaches the left wall. If Samus has 75% enemy damage reduction, it is required to Crystal Flash on the sloped tile, otherwise she can use either tile. Entrance condition: {
"comeInWithGMode": {
"mode": "direct",
"morphed": true
}
}Requires: {
"or": [
{
"and": [
"Gravity",
"h_artificialMorphIBJ"
]
},
{
"and": [
"Gravity",
"h_artificialMorphSpringBall"
]
},
{
"and": [
"HiJump",
"h_artificialMorphSpringBall"
]
}
]
}
"h_artificialMorphComplexRModeCrystalFlashInterrupt"
{
"ammo": {
"type": "Missile",
"count": 10
}
}
{
"ammo": {
"type": "Super",
"count": 5
}
}
{
"or": [
"h_partialEnemyDamageReduction",
{
"resourceAtMost": [
{
"type": "RegularEnergy",
"count": 19
}
]
},
{
"and": [
{
"resourceCapacity": [
{
"type": "RegularEnergy",
"count": 199
}
]
},
{
"resourceCapacity": [
{
"type": "ReserveEnergy",
"count": 199
}
]
}
]
}
]
} |
|
Requires: "Gravity" |
|
Requires: "HiJump" |
|
Requires: "canSpaceJumpWaterBounce"
{
"or": [
"canWallJump",
{
"and": [
"canTrickyJump",
"canDownGrab"
]
}
]
} |
|
Requires: "canSuitlessMaridia" "canUseFrozenEnemies" |
|


Requires: "canSuitlessMaridia" "canTrickySpringBallJump" |
From: 3
Junction (Left side Pit)
To: 1
Left Door

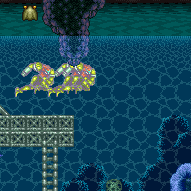
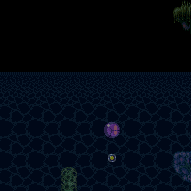
Find the Choot that is closest to the surface of the water, crouch jump under it and damage boost onto the dry platform to the left. Requires: {
"notable": "Suitless Damage Boost Water Escape"
}
"canSuitlessMaridia"
"canHorizontalDamageBoost"
"h_underwaterCrouchJump"
{
"enemyDamage": {
"enemy": "Choot",
"type": "contact",
"hits": 1
}
} |
|

Requires: "canBombJumpWaterEscape" |
|
Requires: "canSuitlessMaridia"
"h_storedSpark"
{
"shinespark": {
"frames": 6,
"excessFrames": 4
}
} |
From: 3
Junction (Left side Pit)
To: 2
Right Door
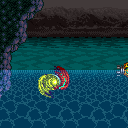
Freeze the right-most ramp Choot in a way where Samus can climb on top of it and use Space Jump to escape the water. Use a turn around to avoid knockback when making contact with the Choot to better time the use of Ice. Freeze the Choot as far to the right (on its lowest swoop), but this method is less precise than the alternatives. If Samus is inside the Choot when it is frozen, she can continuing moving freely. Jump on top either in spinjump or in Morph Ball Use XRay to standup, clipping partially into the above slope. Use a flately jump to fall out of the wall while still keeping enough height to spacejump on top of the water and escape. Requires: {
"notable": "Space Jump Water Escape with Ice and X-Ray"
}
{
"enemyDamage": {
"enemy": "Choot",
"type": "contact",
"hits": 1
}
}
"canTrickyUseFrozenEnemies"
"Morph"
"canXRayStandUp"
"canSpaceJumpWaterBounce"
"canFlatleyJump"
"canKago" |
From: 3
Junction (Left side Pit)
To: 2
Right Door
Get to the right of the Choot on the rightmost platform. Spin jump up to the right, break spin while aligned with the wall, then freeze the Choot and stand on it while it is midair to the right of the stalagmite. Jump from the Choot to the water line and space jump at the water line to the Kamer platform. Requires: {
"notable": "Space Jump Water Escape with Ice"
}
"canSpaceJumpWaterBounce"
"canTrickyUseFrozenEnemies"
"canTrickyJump" |
From: 3
Junction (Left side Pit)
To: 2
Right Door
Standing from the rightmost platform, jump to the right of the stalagmite. Perform a midair wiggle to get to the left to the stalagmite, then precisely wall jump off of it. Then perform a frame perfect space jump at the water line to bounce on the water over to the Kamer platform. Requires: {
"notable": "Precise Space Jump Water Escape"
}
"canSpaceJumpWaterBounce"
"canPreciseSpaceJump"
"canPreciseWallJump"
"canInsaneJump"
"canMidairWiggle" |
|


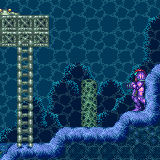
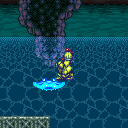
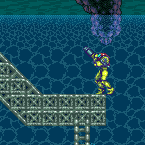
Shinespark from the scaffold to the moving Kamer platform. Then space jump to the right door. Requires: "h_storedSpark"
{
"shinespark": {
"frames": 10,
"excessFrames": 7
}
}
"SpaceJump" |
|
Requires: "h_CrystalFlash"
{
"obstaclesNotCleared": [
"R-Mode"
]
} |
From: 3
Junction (Left side Pit)
To: 3
Junction (Left side Pit)

It is required to avoid double hitting the Skultera with the Power Bomb, and to position the Crystal Flash so that the Skultera can hit Samus from above so it avoids the light orb. To do this, use the bottom-left Skultera, and move it off-camera at the far left end of its cycle. Go to the far right end of it's cycle and on the Crystal Flash on the sloped tile just below where it ends. Once the Skultera gets hit by the Power Bomb explosion, it will start moving, even while off-camera. Requires: {
"obstaclesCleared": [
"R-Mode"
]
}
"canCameraManip"
"canComplexRModeCrystalFlashInterrupt"
{
"ammo": {
"type": "Missile",
"count": 10
}
}
{
"ammo": {
"type": "Super",
"count": 10
}
}
{
"ammo": {
"type": "PowerBomb",
"count": 5
}
}
{
"or": [
"h_partialEnemyDamageReduction",
{
"resourceAtMost": [
{
"type": "RegularEnergy",
"count": 19
}
]
},
{
"and": [
{
"resourceCapacity": [
{
"type": "RegularEnergy",
"count": 199
}
]
},
{
"resourceCapacity": [
{
"type": "ReserveEnergy",
"count": 199
}
]
}
]
}
]
}Resets obstacles: R-Mode |
|
Requires: "Gravity" |
|
Requires: "HiJump" |
From: 3
Junction (Left side Pit)
To: 4
Junction (Right side Pit)
Requires: "canSuitlessMaridia" "canUseFrozenEnemies" |
From: 3
Junction (Left side Pit)
To: 4
Junction (Right side Pit)
Requires: "canSuitlessMaridia" "canSpringBallJumpMidAir" |
|


Requires: "Gravity"
{
"or": [
"canWallJump",
"HiJump",
"SpaceJump",
"canLongIBJ",
"canJumpIntoIBJ",
"canSpringBallJumpMidAir"
]
} |
|
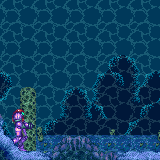
Gravity jump from the ledge to get up to the door. This requires a moderately precise gravity jump and is much easier to prevent bonking while facing towards the left. Requires: "canGravityJump" "canCarefulJump" |
|

Use one of the pillars to spin jump to the waterline then bounce on the surface, or crouch jump from a pillar and down grab onto a Kamer platform. Once on the top of the room, Space Jump to the right door. Requires: "canSuitlessMaridia"
"HiJump"
"SpaceJump"
{
"or": [
"canSpaceJumpWaterBounce",
"h_underwaterCrouchJumpDownGrab"
]
} |
|


Stand on the edge of the ledge below the door and Spring Ball jump up. This requires a quick morph and an early pause in order to fully pause before breaking the waterline and starting to fall. A crouch jump is not helpful here as it just gets Samus to the air sooner, where she will start to fall. Requires: "canSuitlessMaridia" "HiJump" "canTrickySpringBallJump" |
|


Requires: "Gravity"
{
"canShineCharge": {
"usedTiles": 22,
"steepUpTiles": 3,
"steepDownTiles": 3,
"openEnd": 0
}
}
{
"shinespark": {
"frames": 25,
"excessFrames": 5
}
} |
From: 4
Junction (Right side Pit)
To: 2
Right Door
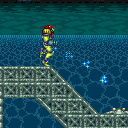
Freeze the Choot when it swings right on its jump. Quickly get on top of it by first getting onto the pillar to the left, or with a Spring Ball jump. Perform a precise spring ball jump to get to the far right ledge, while avoiding hitting the water surface. While on the ledge, stand on the raised ground to the right and jump to the surface, then space jump across the water to the left. Requires: "canTrickyUseFrozenEnemies"
"canTrickySpringBallJump"
{
"or": [
{
"and": [
"canResetFallSpeed",
"canTrickyJump"
]
},
"canStationaryLateralMidAirMorph",
"canSpringFling"
]
}
"canSpaceJumpWaterBounce"
"canWallJump" |
From: 4
Junction (Right side Pit)
To: 2
Right Door

In the center of the room, freeze the Skultera at the highest point in its cycle. Then use a max height Spring Ball jump to escape the water and land on the above platform. Use spacejump to continue to the door. Requires: "canSuitlessMaridia" "canUseFrozenEnemies" "h_underwaterMaxHeightSpringBallJump" "SpaceJump" |
From: 4
Junction (Right side Pit)
To: 2
Right Door
Requires: "canShinechargeMovementComplex"
"Gravity"
"HiJump"
{
"canShineCharge": {
"usedTiles": 22,
"steepUpTiles": 3,
"steepDownTiles": 3,
"startingSteepDownTiles": 1,
"openEnd": 0
}
}
{
"shineChargeFrames": 135
}Exit condition: {
"leaveShinecharged": {}
}Unlocks doors: {"types":["ammo"],"requires":[]} |
From: 4
Junction (Right side Pit)
To: 2
Right Door
Requires: "canShinechargeMovementComplex"
"Gravity"
"HiJump"
{
"canShineCharge": {
"usedTiles": 17,
"steepUpTiles": 2,
"steepDownTiles": 3,
"startingSteepDownTiles": 1,
"openEnd": 0
}
}
{
"shineChargeFrames": 115
}Exit condition: {
"leaveShinecharged": {}
}Unlocks doors: {"types":["ammo"],"requires":[]} |
From: 4
Junction (Right side Pit)
To: 2
Right Door
Requires: "canShinechargeMovementComplex"
"Gravity"
"SpaceJump"
{
"canShineCharge": {
"usedTiles": 17,
"steepUpTiles": 2,
"steepDownTiles": 3,
"startingSteepDownTiles": 1,
"openEnd": 0
}
}
{
"shineChargeFrames": 135
}Exit condition: {
"leaveShinecharged": {}
}Unlocks doors: {"types":["ammo"],"requires":[]} |
From: 4
Junction (Right side Pit)
To: 2
Right Door

Requires: "canShinechargeMovementComplex"
"Gravity"
"SpaceJump"
{
"canShineCharge": {
"usedTiles": 22,
"steepUpTiles": 3,
"steepDownTiles": 3,
"startingSteepDownTiles": 1,
"openEnd": 0
}
}
{
"shinespark": {
"frames": 6,
"excessFrames": 0
}
}Exit condition: {
"leaveWithSpark": {}
}Unlocks doors: {"types":["ammo"],"requires":[]} |
From: 4
Junction (Right side Pit)
To: 2
Right Door
Requires: "canShinechargeMovementComplex"
"Gravity"
"canWallJump"
{
"canShineCharge": {
"usedTiles": 22,
"steepUpTiles": 3,
"steepDownTiles": 3,
"startingSteepDownTiles": 1,
"openEnd": 0
}
}
{
"shinespark": {
"frames": 10,
"excessFrames": 0
}
}Exit condition: {
"leaveWithSpark": {}
}Unlocks doors: {"types":["ammo"],"requires":[]} |
From: 4
Junction (Right side Pit)
To: 2
Right Door
Requires: "canShinechargeMovementComplex"
"Gravity"
"canWallJump"
{
"canShineCharge": {
"usedTiles": 17,
"steepUpTiles": 2,
"steepDownTiles": 3,
"startingSteepDownTiles": 1,
"openEnd": 0
}
}
{
"shineChargeFrames": 160
}Exit condition: {
"leaveShinecharged": {}
}Unlocks doors: {"types":["ammo"],"requires":[]} |
From: 4
Junction (Right side Pit)
To: 2
Right Door
Requires: "canSuitlessMaridia"
{
"or": [
{
"and": [
"HiJump",
"canSpringBallJumpMidAir"
]
},
{
"and": [
"HiJump",
"canTrickyUseFrozenEnemies"
]
},
{
"and": [
"canTrickyUseFrozenEnemies",
"canTrickySpringBallJump",
{
"or": [
"canResetFallSpeed",
"canStationaryLateralMidAirMorph",
"canSpringFling"
]
}
]
}
]
}
"h_storedSpark"
{
"shinespark": {
"frames": 11,
"excessFrames": 5
}
} |
|


Requires: "h_storedSpark"
{
"or": [
{
"shinespark": {
"frames": 20,
"excessFrames": 5
}
},
{
"and": [
"HiJump",
{
"shinespark": {
"frames": 17,
"excessFrames": 5
}
}
]
},
{
"and": [
"canTrickyUseFrozenEnemies",
{
"shinespark": {
"frames": 14,
"excessFrames": 5
}
}
]
}
]
}Dev note: FIXME: Some energy can be saved with SpeedBooster, SprigBall, and a mockball to get up to the first Kamer, then using a flash suit to cross. |
|
Requires: "Gravity" |
|
Requires: "HiJump" |
From: 4
Junction (Right side Pit)
To: 3
Junction (Left side Pit)
Requires: "canSuitlessMaridia" "canUseFrozenEnemies" |
From: 4
Junction (Right side Pit)
To: 3
Junction (Left side Pit)
Requires: "canSuitlessMaridia" "canSpringBallJumpMidAir" |
From: 4
Junction (Right side Pit)
To: 3
Junction (Left side Pit)
Crouch jump down grab to get over the first two pillars. For the third pillar, crouch jump to time a damage boost on the Skultera. The initial jump is fairly lenient; jump approximately when the fish is over the sloped tile a few tiles away from Samus, Hold down at any time after jumping, then down grab the ledge by also pressing forward 10 to 30 frames after Samus' Energy lowers. With Morph, the jump is much tighter, with a 15 frame window, but the the forward press is no longer necessary, as the fish boosts Samus onto the ledge. Requires: {
"notable": "Suitless Damage Boost Underwater Pillar"
}
"canSuitlessMaridia"
"canTrickyJump"
"canNeutralDamageBoost"
"h_underwaterCrouchJump"
{
"or": [
{
"and": [
"canDownGrab",
{
"noBlueSuit": {}
}
]
},
"canMidAirMorph"
]
}
{
"enemyDamage": {
"enemy": "Skultera",
"type": "contact",
"hits": 1
}
} |
From: 4
Junction (Right side Pit)
To: 3
Junction (Left side Pit)
Crouch jump down grab to get onto the first pillar. This can be done by holding shoot to prevent the use of the flash suit. Jump out then diagonally spark back onto the platform just above the first pillar to use the least amount of Energy. Requires: "canSuitlessMaridia"
"h_underwaterCrouchJumpDownGrab"
"h_storedSpark"
{
"shinespark": {
"frames": 9,
"excessFrames": 4
}
} |
From: 4
Junction (Right side Pit)
To: 4
Junction (Right side Pit)
Requires: "Gravity"
{
"canShineCharge": {
"usedTiles": 22,
"steepUpTiles": 3,
"steepDownTiles": 3,
"openEnd": 0
}
}
"h_CrystalSpark" |
From: 4
Junction (Right side Pit)
To: 4
Junction (Right side Pit)
It is required to avoid double hitting the Skultera with the Power Bomb, and to position the Crystal Flash so that the Skultera can hit Samus from above so it avoids the light orb. To do this, use the bottom-right Skultera, and position Samus against the right pillar, or on the slope in front of the pillar. Place the Power Bomb to hit the fish as it reaches the left wall. If Samus has 75% enemy damage reduction, it is required to Crystal Flash on the sloped tile, otherwise she can use either tile. Requires: {
"obstaclesCleared": [
"R-Mode"
]
}
"canComplexRModeCrystalFlashInterrupt"
{
"ammo": {
"type": "Missile",
"count": 10
}
}
{
"ammo": {
"type": "Super",
"count": 5
}
}
{
"or": [
"h_partialEnemyDamageReduction",
{
"resourceAtMost": [
{
"type": "RegularEnergy",
"count": 19
}
]
},
{
"and": [
{
"resourceCapacity": [
{
"type": "RegularEnergy",
"count": 199
}
]
},
{
"resourceCapacity": [
{
"type": "ReserveEnergy",
"count": 199
}
]
}
]
}
]
}
{
"or": [
"Gravity",
"HiJump",
"canSpringBallJumpMidAir",
"canUseFrozenEnemies"
]
}Resets obstacles: R-Mode Dev note: FIXME: The movement items are to get to and from the fish spot. Other options could be added, such as using the spark to get to 2 or 3. |
{
"$schema": "../../../schema/m3-room.schema.json",
"id": 34,
"name": "East Ocean",
"area": "Crateria",
"subarea": "East",
"roomAddress": "0x794FD",
"roomEnvironments": [
{
"heated": false
}
],
"mapTileMask": [
[
0,
0,
0,
0,
0,
0,
0
],
[
0,
0,
0,
0,
0,
0,
0
],
[
0,
0,
0,
0,
0,
0,
0
],
[
0,
0,
0,
0,
0,
0,
0
],
[
1,
1,
1,
1,
1,
1,
1
],
[
1,
1,
1,
1,
1,
1,
1
]
],
"nodes": [
{
"id": 1,
"name": "Left Door",
"nodeType": "door",
"nodeSubType": "blue",
"nodeAddress": "0x0018a66",
"doorOrientation": "left",
"doorEnvironments": [
{
"physics": "air"
}
],
"mapTileMask": [
[
0,
0,
0,
0,
0,
0,
0
],
[
0,
0,
0,
0,
0,
0,
0
],
[
0,
0,
0,
0,
0,
0,
0
],
[
0,
0,
0,
0,
0,
0,
0
],
[
2,
2,
1,
1,
1,
1,
1
],
[
1,
1,
1,
1,
1,
1,
1
]
]
},
{
"id": 2,
"name": "Right Door",
"nodeType": "door",
"nodeSubType": "blue",
"nodeAddress": "0x0018a72",
"doorOrientation": "right",
"doorEnvironments": [
{
"physics": "air"
}
],
"mapTileMask": [
[
0,
0,
0,
0,
0,
0,
0
],
[
0,
0,
0,
0,
0,
0,
0
],
[
0,
0,
0,
0,
0,
0,
0
],
[
0,
0,
0,
0,
0,
0,
0
],
[
1,
1,
1,
1,
2,
2,
2
],
[
1,
1,
1,
1,
1,
1,
1
]
]
},
{
"id": 3,
"name": "Junction (Left side Pit)",
"nodeType": "junction",
"nodeSubType": "junction",
"mapTileMask": [
[
0,
0,
0,
0,
0,
0,
0
],
[
0,
0,
0,
0,
0,
0,
0
],
[
0,
0,
0,
0,
0,
0,
0
],
[
0,
0,
0,
0,
0,
0,
0
],
[
1,
1,
2,
2,
1,
1,
1
],
[
2,
2,
2,
2,
1,
1,
1
]
]
},
{
"id": 4,
"name": "Junction (Right side Pit)",
"nodeType": "junction",
"nodeSubType": "junction",
"mapTileMask": [
[
0,
0,
0,
0,
0,
0,
0
],
[
0,
0,
0,
0,
0,
0,
0
],
[
0,
0,
0,
0,
0,
0,
0
],
[
0,
0,
0,
0,
0,
0,
0
],
[
1,
1,
1,
1,
2,
2,
1
],
[
1,
1,
1,
1,
2,
2,
2
]
]
}
],
"obstacles": [
{
"id": "R-Mode",
"name": "Entered with R-Mode",
"obstacleType": "abstract"
}
],
"enemies": [
{
"id": "e1",
"groupName": "Left East Ocean Bottom Choots",
"enemyName": "Choot",
"quantity": 3,
"homeNodes": [
3
]
},
{
"id": "e2",
"groupName": "East Ocean Top Choot",
"enemyName": "Choot",
"quantity": 1,
"homeNodes": [
1,
3
]
},
{
"id": "e3",
"groupName": "Left East Ocean Skulteras",
"enemyName": "Skultera",
"quantity": 3,
"homeNodes": [
3
]
},
{
"id": "e4",
"groupName": "Right East Ocean Skulteras",
"enemyName": "Skultera",
"quantity": 2,
"homeNodes": [
4
]
},
{
"id": "e5",
"groupName": "Right East Ocean Bottom Choot",
"enemyName": "Choot",
"quantity": 1,
"homeNodes": [
4
]
}
],
"strats": [
{
"link": [
1,
1
],
"name": "Base (Unlock Door)",
"requires": [],
"unlocksDoors": [
{
"types": [
"ammo"
],
"requires": []
}
],
"flashSuitChecked": true,
"blueSuitChecked": true
},
{
"link": [
1,
1
],
"name": "Base (Come In Normally)",
"entranceCondition": {
"comeInNormally": {}
},
"requires": [],
"flashSuitChecked": true,
"blueSuitChecked": true
},
{
"link": [
1,
1
],
"name": "Base (Come In With Mockball)",
"entranceCondition": {
"comeInWithMockball": {
"adjacentMinTiles": 0,
"remoteAndLandingMinTiles": [
[
0,
0
]
],
"speedBooster": "any"
}
},
"requires": [],
"flashSuitChecked": true,
"blueSuitChecked": true
},
{
"link": [
2,
2
],
"name": "Base (Unlock Door)",
"requires": [],
"unlocksDoors": [
{
"types": [
"ammo"
],
"requires": []
}
],
"flashSuitChecked": true,
"blueSuitChecked": true
},
{
"link": [
2,
2
],
"name": "Base (Come In Normally)",
"entranceCondition": {
"comeInNormally": {}
},
"requires": [],
"flashSuitChecked": true,
"blueSuitChecked": true
},
{
"link": [
2,
2
],
"name": "Base (Come In With Mockball)",
"entranceCondition": {
"comeInWithMockball": {
"adjacentMinTiles": 0,
"remoteAndLandingMinTiles": [
[
0,
0
]
],
"speedBooster": "any"
}
},
"requires": [],
"flashSuitChecked": true,
"blueSuitChecked": true
},
{
"id": 73,
"link": [
1,
1
],
"name": "R-Mode Spark Interrupt",
"entranceCondition": {
"comeInWithRMode": {}
},
"requires": [
"Gravity",
"canDodgeWhileShooting",
{
"or": [
"h_CrystalFlashForReserveEnergy",
{
"and": [
"h_RModeCanRefillReserves",
{
"resourceMissingAtMost": [
{
"type": "Missile",
"count": 0
}
]
},
{
"partialRefill": {
"type": "ReserveEnergy",
"limit": 20
}
}
]
}
]
},
{
"canShineCharge": {
"usedTiles": 20,
"steepUpTiles": 4,
"steepDownTiles": 2,
"startingSteepDownTiles": 1,
"openEnd": 0
}
},
{
"autoReserveTrigger": {
"maxReserveEnergy": 95
}
},
"canRModeSparkInterrupt"
],
"flashSuitChecked": true,
"blueSuitChecked": true,
"note": [
"Farm the Choots for energy. Shinecharge on the left side and get interrupted by the Skultera."
]
},
{
"id": 1,
"link": [
1,
1
],
"name": "Leave with Runway",
"requires": [],
"exitCondition": {
"leaveWithRunway": {
"length": 8,
"openEnd": 1,
"steepUpTiles": 1
}
},
"flashSuitChecked": true,
"blueSuitChecked": true
},
{
"id": 2,
"link": [
1,
1
],
"name": "Leave With Spark",
"requires": [
"Gravity",
{
"canShineCharge": {
"usedTiles": 20,
"steepUpTiles": 4,
"steepDownTiles": 2,
"startingSteepDownTiles": 1,
"openEnd": 0
}
},
"canShinechargeMovementTricky",
{
"shinespark": {
"frames": 18,
"excessFrames": 0
}
}
],
"exitCondition": {
"leaveWithSpark": {
"position": "bottom"
}
},
"flashSuitChecked": true,
"blueSuitChecked": true
},
{
"id": 61,
"link": [
1,
1
],
"name": "Leave Shinecharged (HiJump, Long Runway)",
"requires": [
"Gravity",
"HiJump",
{
"canShineCharge": {
"usedTiles": 20,
"steepUpTiles": 4,
"steepDownTiles": 2,
"startingSteepDownTiles": 1,
"openEnd": 0
}
},
"canShinechargeMovementTricky",
{
"shineChargeFrames": 150
}
],
"exitCondition": {
"leaveShinecharged": {}
},
"flashSuitChecked": true,
"blueSuitChecked": true
},
{
"id": 62,
"link": [
1,
1
],
"name": "Leave Shinecharged (HiJump, Short Runway)",
"requires": [
"Gravity",
"HiJump",
{
"canShineCharge": {
"usedTiles": 12,
"steepUpTiles": 3,
"steepDownTiles": 1,
"openEnd": 1
}
},
"canShinechargeMovementTricky",
{
"shineChargeFrames": 135
}
],
"exitCondition": {
"leaveShinecharged": {}
},
"flashSuitChecked": true,
"blueSuitChecked": true
},
{
"id": 63,
"link": [
1,
1
],
"name": "Leave Shinecharged (Wall Jump, Short Runway)",
"requires": [
"Gravity",
"canWallJump",
{
"canShineCharge": {
"usedTiles": 12,
"steepUpTiles": 3,
"steepDownTiles": 1,
"openEnd": 1
}
},
"canShinechargeMovementTricky",
{
"shineChargeFrames": 145
}
],
"exitCondition": {
"leaveShinecharged": {}
},
"flashSuitChecked": true,
"blueSuitChecked": true
},
{
"id": 3,
"link": [
1,
1
],
"name": "Leave With Spring Ball Bounce (Space Jump)",
"requires": [
"Gravity",
"canPreciseSpaceJump"
],
"exitCondition": {
"leaveWithSpringBallBounce": {
"remoteRunway": {
"length": 18,
"openEnd": 1,
"steepUpTiles": 1,
"steepDownTiles": 2
},
"landingRunway": {
"length": 8,
"openEnd": 1,
"steepUpTiles": 1
},
"movementType": "controlled"
}
},
"flashSuitChecked": true,
"blueSuitChecked": true
},
{
"id": 4,
"link": [
1,
1
],
"name": "Leave With Mockball (Space Jump)",
"requires": [
"Gravity",
"canPreciseSpaceJump"
],
"exitCondition": {
"leaveWithMockball": {
"remoteRunway": {
"length": 18,
"openEnd": 1,
"steepUpTiles": 1,
"steepDownTiles": 2
},
"landingRunway": {
"length": 8,
"openEnd": 1,
"steepUpTiles": 1
},
"maxExtraRunSpeed": "$2.F"
}
},
"flashSuitChecked": true,
"blueSuitChecked": true,
"devNote": "A bit higher speed can also work but would be more difficult"
},
{
"id": 5,
"link": [
1,
1
],
"name": "Leave Spinning (Space Jump)",
"requires": [
"Gravity",
"canPreciseSpaceJump",
"canInsaneJump"
],
"exitCondition": {
"leaveSpinning": {
"remoteRunway": {
"length": 18,
"openEnd": 1,
"steepUpTiles": 1,
"steepDownTiles": 2
},
"minExtraRunSpeed": "$1.3",
"maxExtraRunSpeed": "$2.A"
}
},
"flashSuitChecked": true,
"blueSuitChecked": true
},
{
"id": 6,
"link": [
1,
1
],
"name": "Leave With Temporary Blue",
"requires": [
"Gravity",
{
"canShineCharge": {
"usedTiles": 20,
"steepUpTiles": 4,
"steepDownTiles": 2,
"startingSteepDownTiles": 1,
"openEnd": 0
}
},
"canLongChainTemporaryBlue",
"can4HighMidAirMorph",
{
"or": [
"HiJump",
"canGravityJump"
]
}
],
"exitCondition": {
"leaveWithTemporaryBlue": {}
},
"flashSuitChecked": true,
"blueSuitChecked": true,
"note": [
"Gain temporary blue using the runway on the left side of the room, using HiJump or a Gravity jump where needed to get onto the ocean platforms."
],
"devNote": [
"With very precise mid-air morphs/unmorphs, it is possible to get onto the first or second ocean platform directly without HiJump or canGravityJump, by using the runway on the right side of the room."
]
},
{
"id": 69,
"link": [
1,
1
],
"name": "Choot Farm (One Choot)",
"requires": [
"canDodgeWhileShooting",
{
"cycleFrames": 215
},
{
"or": [
"canDash",
{
"and": [
{
"haveBlueSuit": {}
},
{
"cycleFrames": 40
}
]
}
]
}
],
"farmCycleDrops": [
{
"enemy": "Choot",
"count": 1
}
],
"flashSuitChecked": true,
"blueSuitChecked": true
},
{
"id": 70,
"link": [
1,
1
],
"name": "Choot Farm (Three Choots, Grapple)",
"requires": [
"canUseGrapple",
{
"cycleFrames": 330
},
{
"or": [
"canDash",
{
"cycleFrames": 90
}
]
}
],
"farmCycleDrops": [
{
"enemy": "Choot",
"count": 3
}
],
"flashSuitChecked": true,
"blueSuitChecked": true,
"note": [
"Farm 3 Choots using Grapple to collect the drops, without dipping into the water."
]
},
{
"id": 71,
"link": [
1,
1
],
"name": "Choot Farm (Four Choots, Gravity)",
"requires": [
"Gravity",
{
"or": [
{
"and": [
"canDash",
{
"or": [
{
"and": [
"Plasma",
{
"cycleFrames": 410
}
]
},
{
"and": [
"canUseGrapple",
{
"cycleFrames": 440
}
]
},
{
"and": [
"Wave",
{
"cycleFrames": 460
}
]
},
{
"and": [
"Spazer",
{
"cycleFrames": 540
}
]
},
{
"and": [
"canDodgeWhileShooting",
{
"cycleFrames": 730
}
]
}
]
}
]
},
{
"and": [
{
"haveBlueSuit": {}
},
{
"cycleFrames": 710
}
]
}
]
}
],
"farmCycleDrops": [
{
"enemy": "Choot",
"count": 4
}
],
"flashSuitChecked": true,
"blueSuitChecked": true
},
{
"id": 7,
"link": [
1,
1
],
"name": "Crystal Flash",
"requires": [
"h_CrystalFlash",
{
"obstaclesNotCleared": [
"R-Mode"
]
}
],
"flashSuitChecked": true,
"blueSuitChecked": true
},
{
"id": 75,
"link": [
1,
1
],
"name": "Come in Shinecharging, Crystal Spark",
"entranceCondition": {
"comeInShinecharging": {
"length": 7,
"openEnd": 0,
"steepDownTiles": 1
},
"comesInHeated": "no"
},
"requires": [
"h_CrystalSpark"
],
"flashSuitChecked": true,
"blueSuitChecked": true
},
{
"id": 78,
"link": [
1,
1
],
"name": "R-Mode Entry",
"entranceCondition": {
"comeInWithRMode": {}
},
"requires": [],
"clearsObstacles": [
"R-Mode"
],
"flashSuitChecked": true,
"blueSuitChecked": true
},
{
"id": 8,
"link": [
1,
2
],
"name": "Speedy Spring Ball Bounce and Space Jump",
"requires": [
"canTrickyJump",
{
"or": [
{
"disableEquipment": "SpeedBooster"
},
"canTrickyDashJump"
]
},
"canSpeedyJump",
"canSpringBallBounce",
"canMockball",
"SpaceJump"
],
"flashSuitChecked": true,
"blueSuitChecked": true,
"note": [
"Run for 7 tiles for enough speed to Spring Ball from the submerged platform up to the platform enemy, above the water.",
"Turning on Speed Booster midjump, after running 7+ tiles, will automatically hit the run speed requirement.",
"It is not necessary to enter the water to clear the rightmost Choot."
]
},
{
"id": 9,
"link": [
1,
2
],
"name": "Spring Ball Bounce to the Door with SpaceJump",
"requires": [
{
"notable": "Spring Ball Bounce to the Door with SpaceJump"
},
"canTrickyJump",
"canSpaceJumpWaterBounce",
"canSpringBallBounce",
"canSpringFling",
"canMockball",
{
"or": [
"canDownGrab",
"canWallJump"
]
}
],
"flashSuitChecked": true,
"blueSuitChecked": true,
"note": [
"Build up run speed and then use controlled Spring Ball bounces to cross the ocean to the far right ledge, and then use Space Jump to reach the door.",
"Mockball down the submerged ramp and begin Spring Ball bouncing under water using the platforms.",
"Disable Spring Ball after the final jump once Samus starts falling again as a way to gain extra speed."
]
},
{
"id": 10,
"link": [
1,
2
],
"name": "Speedy Spring Ball Bounce to the Door",
"requires": [
{
"notable": "Speedy Spring Ball Bounce to the Door"
},
"canInsaneJump",
"canSpeedyJump",
"canSpringBallBounce",
"canDoubleSpringBallJumpMidAir",
"canMockball"
],
"flashSuitChecked": true,
"blueSuitChecked": true,
"note": [
"Using an exact runway size of 7 tiles; use extremely precise, controlled Spring Ball bounces to cross the ocean.",
"7 tiles of runspeed can freely be achieved by requipping SpeedBooster after reaching the max normal run speed.",
"Mockball down the submerged ramp and begin Spring Ball bouncing either above the water, or under water using the platforms.",
"The final Spring Ball bounce must be on the left edge of the rightmost underwater platform.",
"While the bounce is occuring, setup a mid-air Spring Ball Jump to escape the water and reach the door."
]
},
{
"id": 11,
"link": [
1,
2
],
"name": "Full Room Shinespark Plus Space Jump",
"entranceCondition": {
"comeInShinecharging": {
"length": 6,
"openEnd": 1,
"steepDownTiles": 1
}
},
"requires": [
"canShinechargeMovementComplex",
"canCarefulJump",
{
"or": [
{
"and": [
"canShinechargeMovementTricky",
"canTrickyDodgeEnemies"
]
},
{
"and": [
{
"enemyDamage": {
"enemy": "Choot",
"type": "contact",
"hits": 1
}
},
"canNeutralDamageBoost",
"canBounceBall"
]
},
{
"and": [
"canMockball",
{
"or": [
"canPseudoScrew",
"ScrewAttack",
"Plasma",
"Wave",
{
"ammo": {
"type": "Missile",
"count": 1
}
},
{
"ammo": {
"type": "Super",
"count": 1
}
}
]
}
]
}
]
},
{
"shinespark": {
"frames": 125,
"excessFrames": 5
}
},
"canSpaceJumpWaterBounce",
{
"or": [
{
"and": [
"canTrickyJump",
"canDownGrab"
]
},
"canWallJump"
]
}
],
"flashSuitChecked": true,
"blueSuitChecked": true,
"note": [
"Enter the room while building a shinespark and use it on the lowest part of the ramp to cross the room and reach a raised ledge on the right side wall.",
"From there, use SpaceJump to escape the water.",
"Carry the shinespark to the bottom of the ramp by delaying the first Choot with two Power Beam shots, killing it, or bounceballing through it.",
"The Choot can be shot diagonally from the middle platform, and again by running off that platform and aiming down to float above it."
],
"devNote": "There is 1 unusable tile in this runway."
},
{
"id": 12,
"link": [
1,
2
],
"name": "Shinespark Water Escape",
"entranceCondition": {
"comeInShinecharging": {
"length": 6,
"openEnd": 1,
"steepDownTiles": 1
}
},
"requires": [
{
"notable": "Shinespark Water Escape"
},
{
"or": [
"ScrewAttack",
"canPseudoScrew",
"Plasma",
{
"ammo": {
"type": "Missile",
"count": 1
}
},
{
"ammo": {
"type": "Super",
"count": 1
}
}
]
},
{
"or": [
"ScrewAttack",
"Plasma",
{
"ammo": {
"type": "Missile",
"count": 1
}
},
{
"ammo": {
"type": "Super",
"count": 1
}
}
]
},
"canShinechargeMovementComplex",
{
"shinespark": {
"frames": 14,
"excessFrames": 5
}
},
"SpaceJump",
"canTrickyJump"
],
"flashSuitChecked": true,
"blueSuitChecked": true,
"note": [
"Enter the room while building a shinespark and use it on the lowest part of the ramp to diagonally spark up and out of the water.",
"Use very low jump height space jumps to carry momentum to the far side of the submerged ramp.",
"Both Choots must be killed.",
"Using Screw Attack: stay a little bit high in the water so that it remains active for the second Choot.",
"Using Plasma or ammo: kill the first Choot while running down the middle platform, and the second while gliding above it after spacejumping through the water.",
"Then shinespark up and use SpaceJump to reach the door."
],
"devNote": "There is 1 unusable tile in this runway."
},
{
"id": 13,
"link": [
1,
2
],
"name": "Shinespark Water Escape With Lower Choot Alive (Morph)",
"entranceCondition": {
"comeInShinecharging": {
"length": 6,
"openEnd": 1,
"steepDownTiles": 1
}
},
"requires": [
{
"notable": "Shinespark Water Escape With Lower Choot Alive"
},
{
"or": [
{
"and": [
{
"enemyDamage": {
"enemy": "Choot",
"type": "contact",
"hits": 1
}
},
"canNeutralDamageBoost",
"canBounceBall"
]
},
{
"and": [
"canDodgeWhileShooting",
"canMockball"
]
}
]
},
"canShinechargeMovementComplex",
{
"shinespark": {
"frames": 14,
"excessFrames": 5
}
},
"SpaceJump",
"canTrickyJump"
],
"flashSuitChecked": true,
"blueSuitChecked": true,
"note": [
"Enter the room while building a shinespark and use it on the lowest part of the ramp to diagonally spark up and out of the water.",
"Unmorphing with the correct timing and positioning for the Shinespark are very precise, and there are no extra frames on the Shinespark timer to work with.",
"Carry the shinespark to the bottom of the ramp either with a bounce ball which takes damage from the Choot, or delay the first Choot with two shots and then use a late mockball.",
"Then shinespark up and use SpaceJump to reach the door."
],
"devNote": "There is 1 unusable tile in this runway."
},
{
"id": 14,
"link": [
1,
2
],
"name": "Shinespark Water Escape With Lower Choot Alive (Ice Wave Spazer)",
"entranceCondition": {
"comeInShinecharging": {
"length": 6,
"openEnd": 1,
"steepDownTiles": 1
}
},
"requires": [
{
"notable": "Shinespark Water Escape With Lower Choot Alive"
},
"Ice",
"Wave",
"Spazer",
"canDodgeWhileShooting",
"canShinechargeMovementComplex",
{
"shinespark": {
"frames": 14,
"excessFrames": 5
}
},
"canMidairShinespark",
"SpaceJump",
"canTrickyJump"
],
"flashSuitChecked": true,
"blueSuitChecked": true,
"note": [
"Enter the room while building a shinespark and use it on the lowest part of the ramp to diagonally spark up and out of the water.",
"Use very low jump height space jumps to carry momentum to the far side of the submerged ramp.",
"Freeze the first Choot from the middle platform.",
"Either SpaceJump just right so as to pass above the second Choot, or freeze it as it touches Samus to pass through without losing speed.",
"Then shinespark up and use SpaceJump to reach the door."
],
"devNote": "There is 1 unusable tile in this runway."
},
{
"id": 15,
"link": [
1,
2
],
"name": "G-mode Morph IBJ",
"entranceCondition": {
"comeInWithGMode": {
"mode": "any",
"morphed": true
}
},
"requires": [
"Gravity",
{
"or": [
"h_artificialMorphLongIBJ",
"h_artificialMorphJumpIntoIBJ"
]
}
],
"flashSuitChecked": true,
"blueSuitChecked": true
},
{
"id": 16,
"link": [
1,
3
],
"name": "Base",
"requires": [],
"flashSuitChecked": true,
"blueSuitChecked": true
},
{
"id": 79,
"link": [
1,
3
],
"name": "Direct G-mode Morph, Crystal Flash Interrupt",
"entranceCondition": {
"comeInWithGMode": {
"mode": "direct",
"morphed": true
}
},
"requires": [
"h_artificialMorphComplexRModeCrystalFlashInterrupt",
"canCameraManip",
{
"ammo": {
"type": "Missile",
"count": 10
}
},
{
"ammo": {
"type": "Super",
"count": 10
}
},
{
"ammo": {
"type": "PowerBomb",
"count": 5
}
},
{
"or": [
"h_partialEnemyDamageReduction",
{
"resourceAtMost": [
{
"type": "RegularEnergy",
"count": 19
}
]
},
{
"and": [
{
"resourceCapacity": [
{
"type": "RegularEnergy",
"count": 199
}
]
},
{
"resourceCapacity": [
{
"type": "ReserveEnergy",
"count": 199
}
]
}
]
}
]
}
],
"flashSuitChecked": true,
"blueSuitChecked": true,
"note": [
"It is required to avoid double hitting the Skultera with the Power Bomb,",
"and to position the Crystal Flash so that the Skultera can hit Samus from above so it avoids the light orb.",
"To do this, use the bottom-left Skultera, and move it off-camera at the far left end of its cycle.",
"Go to the far right end of it's cycle and on the Crystal Flash on the sloped tile just below where it ends.",
"Once the Skultera gets hit by the Power Bomb explosion, it will start moving, even while off-camera."
],
"devNote": [
"There is no reason to do this at node 4, because the movement items required to get to 4 and then do anything useful with the flash suit",
"would also enable Samus to get the flash suit here and then take it to node 4."
]
},
{
"id": 74,
"link": [
2,
1
],
"name": "R-Mode Spark Interrupt",
"entranceCondition": {
"comeInWithRMode": {}
},
"requires": [
"Gravity",
{
"or": [
"h_CrystalFlashForReserveEnergy",
{
"and": [
"h_RModeCanRefillReserves",
{
"resourceMissingAtMost": [
{
"type": "Missile",
"count": 0
}
]
},
{
"partialRefill": {
"type": "ReserveEnergy",
"limit": 20
}
}
]
}
]
},
{
"canShineCharge": {
"usedTiles": 20,
"steepUpTiles": 4,
"steepDownTiles": 2,
"startingSteepDownTiles": 1,
"openEnd": 0
}
},
{
"autoReserveTrigger": {
"maxReserveEnergy": 95
}
},
"canRModeSparkInterrupt"
],
"flashSuitChecked": true,
"blueSuitChecked": true,
"note": [
"Farm the Choots for energy. Shinecharge on the left side and get interrupted by the Skultera."
]
},
{
"id": 68,
"link": [
2,
1
],
"name": "G-Mode Morph, Bomb Into Spring Ball Jump",
"entranceCondition": {
"comeInWithGMode": {
"mode": "any",
"morphed": true
}
},
"requires": [
"h_artificialMorphUnderwaterBombIntoSpringBallJump",
{
"or": [
"h_artificialMorphSpringFling",
"canBeVeryPatient"
]
}
],
"flashSuitChecked": true,
"blueSuitChecked": true,
"note": [
"Perform a double Spring Ball jump using a precisely timed bomb boost",
"to propel Samus upward just long enough to get the mid-air Spring Ball jump.",
"This needs to be done multiple times to cross the room with no other items;",
"using Spring Flings to cross from peak to peak can reduce the required number of bomb into Spring Ball jumps to two or three."
]
},
{
"id": 17,
"link": [
2,
2
],
"name": "Leave with Runway",
"requires": [],
"exitCondition": {
"leaveWithRunway": {
"length": 5,
"openEnd": 1,
"steepUpTiles": 1
}
},
"flashSuitChecked": true,
"blueSuitChecked": true
},
{
"id": 18,
"link": [
2,
2
],
"name": "Leave Spinning (Space Jump)",
"requires": [
"Gravity",
"SpaceJump"
],
"exitCondition": {
"leaveSpinning": {
"remoteRunway": {
"length": 17,
"openEnd": 1,
"steepUpTiles": 3,
"steepDownTiles": 2,
"startingSteepDownTiles": 1
}
}
},
"flashSuitChecked": true,
"blueSuitChecked": true
},
{
"id": 19,
"link": [
2,
2
],
"name": "Leave With Mockball (Space Jump)",
"requires": [
"Gravity",
"SpaceJump"
],
"exitCondition": {
"leaveWithMockball": {
"remoteRunway": {
"length": 17,
"openEnd": 1,
"steepUpTiles": 3,
"steepDownTiles": 2,
"startingSteepDownTiles": 1
},
"landingRunway": {
"length": 5,
"openEnd": 1,
"steepUpTiles": 1
}
}
},
"flashSuitChecked": true,
"blueSuitChecked": true
},
{
"id": 20,
"link": [
2,
2
],
"name": "Leave With Spring Ball Bounce (Space Jump)",
"requires": [
"Gravity",
"SpaceJump"
],
"exitCondition": {
"leaveWithSpringBallBounce": {
"remoteRunway": {
"length": 17,
"openEnd": 1,
"steepUpTiles": 3,
"steepDownTiles": 2,
"startingSteepDownTiles": 1
},
"landingRunway": {
"length": 5,
"openEnd": 1,
"steepUpTiles": 1
},
"movementType": "uncontrolled"
}
},
"flashSuitChecked": true,
"blueSuitChecked": true
},
{
"id": 21,
"link": [
2,
2
],
"name": "Leave With Temporary Blue (Gravity Jump)",
"requires": [
"Gravity",
"HiJump",
{
"or": [
{
"and": [
{
"canShineCharge": {
"usedTiles": 21,
"steepUpTiles": 3,
"steepDownTiles": 3,
"startingSteepDownTiles": 1,
"openEnd": 0
}
},
"canXRayTurnaround"
]
},
{
"canShineCharge": {
"usedTiles": 18,
"steepUpTiles": 2,
"steepDownTiles": 3,
"startingSteepDownTiles": 1,
"openEnd": 0
}
}
]
},
"canGravityJump",
"canChainTemporaryBlue"
],
"exitCondition": {
"leaveWithTemporaryBlue": {}
},
"flashSuitChecked": true,
"blueSuitChecked": true
},
{
"id": 22,
"link": [
2,
2
],
"name": "Leave With Temporary Blue (Spring Ball Jump)",
"requires": [
"Gravity",
"HiJump",
{
"or": [
{
"and": [
{
"canShineCharge": {
"usedTiles": 21,
"steepUpTiles": 3,
"steepDownTiles": 3,
"startingSteepDownTiles": 1,
"openEnd": 0
}
},
"canXRayTurnaround"
]
},
{
"canShineCharge": {
"usedTiles": 15,
"steepUpTiles": 2,
"steepDownTiles": 3,
"startingSteepDownTiles": 1,
"openEnd": 0
}
}
]
},
"canSpringBallJumpMidAir",
"canChainTemporaryBlue"
],
"exitCondition": {
"leaveWithTemporaryBlue": {}
},
"flashSuitChecked": true,
"blueSuitChecked": true
},
{
"id": 23,
"link": [
2,
2
],
"name": "Leave With Temporary Blue (Blue Space Jump)",
"requires": [
"Gravity",
{
"getBlueSpeed": {
"usedTiles": 18,
"steepUpTiles": 2,
"steepDownTiles": 2,
"startingSteepDownTiles": 1,
"openEnd": 0
}
},
"canBlueSpaceJump",
"canChainTemporaryBlue"
],
"exitCondition": {
"leaveWithTemporaryBlue": {}
},
"flashSuitChecked": true,
"blueSuitChecked": true
},
{
"id": 72,
"link": [
2,
2
],
"name": "Choot Farm (One Choot)",
"requires": [
"Gravity",
{
"cycleFrames": 270
},
{
"or": [
"canDash",
{
"cycleFrames": 90
}
]
},
{
"or": [
"HiJump",
{
"and": [
"canWallJump",
{
"cycleFrames": 45
}
]
}
]
},
{
"or": [
"Plasma",
{
"and": [
"canUseGrapple",
{
"cycleFrames": 15
}
]
},
{
"and": [
"ScrewAttack",
{
"cycleFrames": 15
}
]
},
{
"and": [
"Wave",
{
"cycleFrames": 35
}
]
},
{
"and": [
{
"haveBlueSuit": {}
},
{
"cycleFrames": 40
}
]
},
{
"and": [
"Spazer",
{
"cycleFrames": 55
}
]
},
{
"cycleFrames": 105
}
]
}
],
"farmCycleDrops": [
{
"enemy": "Choot",
"count": 1
}
],
"flashSuitChecked": true,
"blueSuitChecked": true
},
{
"id": 24,
"link": [
2,
2
],
"name": "Crystal Flash",
"requires": [
"h_CrystalFlash",
{
"obstaclesNotCleared": [
"R-Mode"
]
}
],
"flashSuitChecked": true,
"blueSuitChecked": true
},
{
"id": 76,
"link": [
2,
2
],
"name": "Come in Shinecharging, Crystal Spark",
"entranceCondition": {
"comeInShinecharging": {
"length": 4,
"openEnd": 0,
"steepDownTiles": 1
},
"comesInHeated": "no"
},
"requires": [
"h_CrystalSpark"
],
"flashSuitChecked": true,
"blueSuitChecked": true
},
{
"id": 80,
"link": [
2,
2
],
"name": "R-Mode Entry",
"entranceCondition": {
"comeInWithRMode": {}
},
"requires": [],
"clearsObstacles": [
"R-Mode"
],
"flashSuitChecked": true,
"blueSuitChecked": true
},
{
"id": 25,
"link": [
2,
3
],
"name": "Space Jump",
"requires": [
"SpaceJump"
],
"flashSuitChecked": true,
"blueSuitChecked": true
},
{
"id": 26,
"link": [
2,
3
],
"name": "Shinespark",
"entranceCondition": {
"comeInShinecharged": {}
},
"requires": [
{
"shineChargeFrames": 10
},
"canHorizontalShinespark",
{
"shinespark": {
"frames": 35
}
}
],
"flashSuitChecked": true,
"blueSuitChecked": true,
"note": "Horizontally shinespark from the grassy patch on the ledge near the door, then jump across the platforms."
},
{
"id": 81,
"link": [
2,
3
],
"name": "Direct G-Mode Morph, Bomb Into Spring Ball Jump, Crystal Flash Interrupt",
"entranceCondition": {
"comeInWithGMode": {
"mode": "direct",
"morphed": true
}
},
"requires": [
"h_artificialMorphUnderwaterBombIntoSpringBallJump",
{
"or": [
"h_artificialMorphSpringFling",
"canBeVeryPatient"
]
},
"h_artificialMorphComplexRModeCrystalFlashInterrupt",
"canCameraManip",
{
"ammo": {
"type": "Missile",
"count": 10
}
},
{
"ammo": {
"type": "Super",
"count": 10
}
},
{
"ammo": {
"type": "PowerBomb",
"count": 5
}
},
{
"or": [
"h_partialEnemyDamageReduction",
{
"resourceAtMost": [
{
"type": "RegularEnergy",
"count": 19
}
]
},
{
"and": [
{
"resourceCapacity": [
{
"type": "RegularEnergy",
"count": 199
}
]
},
{
"resourceCapacity": [
{
"type": "ReserveEnergy",
"count": 199
}
]
}
]
}
]
}
],
"flashSuitChecked": true,
"blueSuitChecked": true,
"note": [
"Perform a double Spring Ball jump using a precisely timed bomb boost",
"to propel Samus upward just long enough to get the mid-air Spring Ball jump.",
"This needs to be done multiple times to cross the room with no other items;",
"using Spring Flings to cross from peak to peak can reduce the required number of bomb into Spring Ball jumps to just one or two.",
"To Crystal Flash interrupt, it is required to avoid double hitting the Skultera with the Power Bomb,",
"and to position the Crystal Flash so that the Skultera can hit Samus from above so it avoids the light orb.",
"To do this, use the bottom-left Skultera, and move it off-camera at the far left end of its cycle.",
"Go to the far right end of it's cycle and on the Crystal Flash on the sloped tile just below where it ends.",
"Once the Skultera gets hit by the Power Bomb explosion, it will start moving, even while off-camera."
],
"devNote": [
"Methods with more flexible movement items will instead be done at node 4, after which, they can be used to get here.",
"FIXME: Add variants that can farm enough Energy to choot damage boost without enemy damage reduction or tanks."
]
},
{
"id": 27,
"link": [
2,
4
],
"name": "Base",
"requires": [],
"flashSuitChecked": true,
"blueSuitChecked": true
},
{
"id": 82,
"link": [
2,
4
],
"name": "Direct G-Mode Morph, Crystal Flash Interrupt",
"entranceCondition": {
"comeInWithGMode": {
"mode": "direct",
"morphed": true
}
},
"requires": [
{
"or": [
{
"and": [
"Gravity",
"h_artificialMorphIBJ"
]
},
{
"and": [
"Gravity",
"h_artificialMorphSpringBall"
]
},
{
"and": [
"HiJump",
"h_artificialMorphSpringBall"
]
}
]
},
"h_artificialMorphComplexRModeCrystalFlashInterrupt",
{
"ammo": {
"type": "Missile",
"count": 10
}
},
{
"ammo": {
"type": "Super",
"count": 5
}
},
{
"or": [
"h_partialEnemyDamageReduction",
{
"resourceAtMost": [
{
"type": "RegularEnergy",
"count": 19
}
]
},
{
"and": [
{
"resourceCapacity": [
{
"type": "RegularEnergy",
"count": 199
}
]
},
{
"resourceCapacity": [
{
"type": "ReserveEnergy",
"count": 199
}
]
}
]
}
]
}
],
"flashSuitChecked": true,
"blueSuitChecked": true,
"note": [
"It is required to avoid double hitting the Skultera with the Power Bomb,",
"and to position the Crystal Flash so that the Skultera can hit Samus from above so it avoids the light orb.",
"To do this, use the bottom-right Skultera, and position Samus against the right pillar, or on the slope in front of the pillar.",
"Place the Power Bomb to hit the fish as it reaches the left wall."
],
"detailNote": "If Samus has 75% enemy damage reduction, it is required to Crystal Flash on the sloped tile, otherwise she can use either tile."
},
{
"id": 28,
"link": [
3,
1
],
"name": "Base",
"requires": [
"Gravity"
],
"flashSuitChecked": true,
"blueSuitChecked": true
},
{
"id": 29,
"link": [
3,
1
],
"name": "Base Suitless",
"requires": [
"HiJump"
],
"flashSuitChecked": true,
"blueSuitChecked": true
},
{
"id": 30,
"link": [
3,
1
],
"name": "Suitless with Space Jump",
"requires": [
"canSpaceJumpWaterBounce",
{
"or": [
"canWallJump",
{
"and": [
"canTrickyJump",
"canDownGrab"
]
}
]
}
],
"flashSuitChecked": true,
"blueSuitChecked": true
},
{
"id": 31,
"link": [
3,
1
],
"name": "Suitless with Ice Beam",
"requires": [
"canSuitlessMaridia",
"canUseFrozenEnemies"
],
"flashSuitChecked": true,
"blueSuitChecked": true
},
{
"id": 32,
"link": [
3,
1
],
"name": "Suitless with Spring Ball",
"requires": [
"canSuitlessMaridia",
"canTrickySpringBallJump"
],
"flashSuitChecked": true,
"blueSuitChecked": true
},
{
"id": 33,
"link": [
3,
1
],
"name": "Suitless Damage Boost Water Escape",
"requires": [
{
"notable": "Suitless Damage Boost Water Escape"
},
"canSuitlessMaridia",
"canHorizontalDamageBoost",
"h_underwaterCrouchJump",
{
"enemyDamage": {
"enemy": "Choot",
"type": "contact",
"hits": 1
}
}
],
"flashSuitChecked": true,
"blueSuitChecked": true,
"note": "Find the Choot that is closest to the surface of the water, crouch jump under it and damage boost onto the dry platform to the left."
},
{
"id": 34,
"link": [
3,
1
],
"name": "Bomb Jump Water Escape",
"requires": [
"canBombJumpWaterEscape"
],
"flashSuitChecked": true,
"blueSuitChecked": true
},
{
"id": 35,
"link": [
3,
1
],
"name": "Use Stored Spark",
"requires": [
"canSuitlessMaridia",
"h_storedSpark",
{
"shinespark": {
"frames": 6,
"excessFrames": 4
}
}
],
"flashSuitChecked": true,
"blueSuitChecked": true
},
{
"id": 36,
"link": [
3,
2
],
"name": "Space Jump Water Escape with Ice and X-Ray",
"requires": [
{
"notable": "Space Jump Water Escape with Ice and X-Ray"
},
{
"enemyDamage": {
"enemy": "Choot",
"type": "contact",
"hits": 1
}
},
"canTrickyUseFrozenEnemies",
"Morph",
"canXRayStandUp",
"canSpaceJumpWaterBounce",
"canFlatleyJump",
"canKago"
],
"flashSuitChecked": true,
"blueSuitChecked": true,
"note": [
"Freeze the right-most ramp Choot in a way where Samus can climb on top of it and use Space Jump to escape the water.",
"Use a turn around to avoid knockback when making contact with the Choot to better time the use of Ice.",
"Freeze the Choot as far to the right (on its lowest swoop), but this method is less precise than the alternatives.",
"If Samus is inside the Choot when it is frozen, she can continuing moving freely.",
"Jump on top either in spinjump or in Morph Ball",
"Use XRay to standup, clipping partially into the above slope.",
"Use a flately jump to fall out of the wall while still keeping enough height to spacejump on top of the water and escape."
]
},
{
"id": 37,
"link": [
3,
2
],
"name": "Space Jump Water Escape with Ice",
"requires": [
{
"notable": "Space Jump Water Escape with Ice"
},
"canSpaceJumpWaterBounce",
"canTrickyUseFrozenEnemies",
"canTrickyJump"
],
"flashSuitChecked": true,
"blueSuitChecked": true,
"note": [
"Get to the right of the Choot on the rightmost platform. Spin jump up to the right, break spin while aligned with the wall, then freeze the Choot and stand on it while it is midair to the right of the stalagmite.",
"Jump from the Choot to the water line and space jump at the water line to the Kamer platform."
]
},
{
"id": 38,
"link": [
3,
2
],
"name": "Precise Space Jump Water Escape",
"requires": [
{
"notable": "Precise Space Jump Water Escape"
},
"canSpaceJumpWaterBounce",
"canPreciseSpaceJump",
"canPreciseWallJump",
"canInsaneJump",
"canMidairWiggle"
],
"flashSuitChecked": true,
"blueSuitChecked": true,
"note": [
"Standing from the rightmost platform, jump to the right of the stalagmite. Perform a midair wiggle to get to the left to the stalagmite, then precisely wall jump off of it.",
"Then perform a frame perfect space jump at the water line to bounce on the water over to the Kamer platform."
]
},
{
"id": 39,
"link": [
3,
2
],
"name": "Use Stored Spark, Space Jump",
"requires": [
"h_storedSpark",
{
"shinespark": {
"frames": 10,
"excessFrames": 7
}
},
"SpaceJump"
],
"flashSuitChecked": true,
"blueSuitChecked": true,
"note": "Shinespark from the scaffold to the moving Kamer platform. Then space jump to the right door."
},
{
"id": 40,
"link": [
3,
3
],
"name": "Crystal Flash",
"requires": [
"h_CrystalFlash",
{
"obstaclesNotCleared": [
"R-Mode"
]
}
],
"flashSuitChecked": true,
"blueSuitChecked": true
},
{
"id": 83,
"link": [
3,
3
],
"name": "R-Mode Crystal Flash Interrupt",
"requires": [
{
"obstaclesCleared": [
"R-Mode"
]
},
"canCameraManip",
"canComplexRModeCrystalFlashInterrupt",
{
"ammo": {
"type": "Missile",
"count": 10
}
},
{
"ammo": {
"type": "Super",
"count": 10
}
},
{
"ammo": {
"type": "PowerBomb",
"count": 5
}
},
{
"or": [
"h_partialEnemyDamageReduction",
{
"resourceAtMost": [
{
"type": "RegularEnergy",
"count": 19
}
]
},
{
"and": [
{
"resourceCapacity": [
{
"type": "RegularEnergy",
"count": 199
}
]
},
{
"resourceCapacity": [
{
"type": "ReserveEnergy",
"count": 199
}
]
}
]
}
]
}
],
"resetsObstacles": [
"R-Mode"
],
"flashSuitChecked": true,
"blueSuitChecked": true,
"note": [
"It is required to avoid double hitting the Skultera with the Power Bomb,",
"and to position the Crystal Flash so that the Skultera can hit Samus from above so it avoids the light orb.",
"To do this, use the bottom-left Skultera, and move it off-camera at the far left end of its cycle.",
"Go to the far right end of it's cycle and on the Crystal Flash on the sloped tile just below where it ends.",
"Once the Skultera gets hit by the Power Bomb explosion, it will start moving, even while off-camera."
]
},
{
"id": 41,
"link": [
3,
4
],
"name": "Base",
"requires": [
"Gravity"
],
"flashSuitChecked": true,
"blueSuitChecked": true
},
{
"id": 42,
"link": [
3,
4
],
"name": "Base Suitless",
"requires": [
"HiJump"
],
"flashSuitChecked": true,
"blueSuitChecked": true
},
{
"id": 43,
"link": [
3,
4
],
"name": "Suitless with Ice Beam",
"requires": [
"canSuitlessMaridia",
"canUseFrozenEnemies"
],
"flashSuitChecked": true,
"blueSuitChecked": true
},
{
"id": 44,
"link": [
3,
4
],
"name": "Suitless with Spring Ball Jump Mid Air",
"requires": [
"canSuitlessMaridia",
"canSpringBallJumpMidAir"
],
"flashSuitChecked": true,
"blueSuitChecked": true
},
{
"id": 45,
"link": [
4,
2
],
"name": "Base",
"requires": [
"Gravity",
{
"or": [
"canWallJump",
"HiJump",
"SpaceJump",
"canLongIBJ",
"canJumpIntoIBJ",
"canSpringBallJumpMidAir"
]
}
],
"flashSuitChecked": true,
"blueSuitChecked": true
},
{
"id": 46,
"link": [
4,
2
],
"name": "Gravity Jump From Ledge",
"requires": [
"canGravityJump",
"canCarefulJump"
],
"flashSuitChecked": true,
"blueSuitChecked": true,
"note": [
"Gravity jump from the ledge to get up to the door.",
"This requires a moderately precise gravity jump and is much easier to prevent bonking while facing towards the left."
]
},
{
"id": 47,
"link": [
4,
2
],
"name": "Suitless, HiJump, Space Jump",
"requires": [
"canSuitlessMaridia",
"HiJump",
"SpaceJump",
{
"or": [
"canSpaceJumpWaterBounce",
"h_underwaterCrouchJumpDownGrab"
]
}
],
"flashSuitChecked": true,
"blueSuitChecked": true,
"note": [
"Use one of the pillars to spin jump to the waterline then bounce on the surface, or crouch jump from a pillar and down grab onto a Kamer platform.",
"Once on the top of the room, Space Jump to the right door."
]
},
{
"id": 85,
"link": [
4,
2
],
"name": "Suitless Spring Ball",
"requires": [
"canSuitlessMaridia",
"HiJump",
"canTrickySpringBallJump"
],
"flashSuitChecked": true,
"blueSuitChecked": true,
"note": [
"Stand on the edge of the ledge below the door and Spring Ball jump up.",
"This requires a quick morph and an early pause in order to fully pause before breaking the waterline and starting to fall.",
"A crouch jump is not helpful here as it just gets Samus to the air sooner, where she will start to fall."
]
},
{
"id": 48,
"link": [
4,
2
],
"name": "Shinespark",
"requires": [
"Gravity",
{
"canShineCharge": {
"usedTiles": 22,
"steepUpTiles": 3,
"steepDownTiles": 3,
"openEnd": 0
}
},
{
"shinespark": {
"frames": 25,
"excessFrames": 5
}
}
],
"flashSuitChecked": true,
"blueSuitChecked": true
},
{
"id": 49,
"link": [
4,
2
],
"name": "Suitless Frozen Choot, Spring Ball, Space Jump",
"requires": [
"canTrickyUseFrozenEnemies",
"canTrickySpringBallJump",
{
"or": [
{
"and": [
"canResetFallSpeed",
"canTrickyJump"
]
},
"canStationaryLateralMidAirMorph",
"canSpringFling"
]
},
"canSpaceJumpWaterBounce",
"canWallJump"
],
"flashSuitChecked": true,
"blueSuitChecked": true,
"note": [
"Freeze the Choot when it swings right on its jump. Quickly get on top of it by first getting onto the pillar to the left, or with a Spring Ball jump.",
"Perform a precise spring ball jump to get to the far right ledge, while avoiding hitting the water surface.",
"While on the ledge, stand on the raised ground to the right and jump to the surface, then space jump across the water to the left."
]
},
{
"id": 60,
"link": [
4,
2
],
"name": "Suitless Frozen Skultera, Spring Ball, Space Jump",
"requires": [
"canSuitlessMaridia",
"canUseFrozenEnemies",
"h_underwaterMaxHeightSpringBallJump",
"SpaceJump"
],
"flashSuitChecked": true,
"blueSuitChecked": true,
"note": [
"In the center of the room, freeze the Skultera at the highest point in its cycle.",
"Then use a max height Spring Ball jump to escape the water and land on the above platform.",
"Use spacejump to continue to the door."
]
},
{
"id": 50,
"link": [
4,
2
],
"name": "Leave Shinecharged (HiJump, Full Runway)",
"requires": [
"canShinechargeMovementComplex",
"Gravity",
"HiJump",
{
"canShineCharge": {
"usedTiles": 22,
"steepUpTiles": 3,
"steepDownTiles": 3,
"startingSteepDownTiles": 1,
"openEnd": 0
}
},
{
"shineChargeFrames": 135
}
],
"exitCondition": {
"leaveShinecharged": {}
},
"unlocksDoors": [
{
"types": [
"ammo"
],
"requires": []
}
],
"flashSuitChecked": true,
"blueSuitChecked": true
},
{
"id": 64,
"link": [
4,
2
],
"name": "Leave Shinecharged (HiJump, Short Runway)",
"requires": [
"canShinechargeMovementComplex",
"Gravity",
"HiJump",
{
"canShineCharge": {
"usedTiles": 17,
"steepUpTiles": 2,
"steepDownTiles": 3,
"startingSteepDownTiles": 1,
"openEnd": 0
}
},
{
"shineChargeFrames": 115
}
],
"exitCondition": {
"leaveShinecharged": {}
},
"unlocksDoors": [
{
"types": [
"ammo"
],
"requires": []
}
],
"flashSuitChecked": true,
"blueSuitChecked": true
},
{
"id": 65,
"link": [
4,
2
],
"name": "Leave Shinecharged (Space Jump, Short Runway)",
"requires": [
"canShinechargeMovementComplex",
"Gravity",
"SpaceJump",
{
"canShineCharge": {
"usedTiles": 17,
"steepUpTiles": 2,
"steepDownTiles": 3,
"startingSteepDownTiles": 1,
"openEnd": 0
}
},
{
"shineChargeFrames": 135
}
],
"exitCondition": {
"leaveShinecharged": {}
},
"unlocksDoors": [
{
"types": [
"ammo"
],
"requires": []
}
],
"flashSuitChecked": true,
"blueSuitChecked": true
},
{
"id": 66,
"link": [
4,
2
],
"name": "Leave With Spark (Space Jump, Full Runway)",
"requires": [
"canShinechargeMovementComplex",
"Gravity",
"SpaceJump",
{
"canShineCharge": {
"usedTiles": 22,
"steepUpTiles": 3,
"steepDownTiles": 3,
"startingSteepDownTiles": 1,
"openEnd": 0
}
},
{
"shinespark": {
"frames": 6,
"excessFrames": 0
}
}
],
"exitCondition": {
"leaveWithSpark": {}
},
"unlocksDoors": [
{
"types": [
"ammo"
],
"requires": []
}
],
"flashSuitChecked": true,
"blueSuitChecked": true
},
{
"id": 51,
"link": [
4,
2
],
"name": "Leave With Spark (Wall Jump, Full Runway)",
"requires": [
"canShinechargeMovementComplex",
"Gravity",
"canWallJump",
{
"canShineCharge": {
"usedTiles": 22,
"steepUpTiles": 3,
"steepDownTiles": 3,
"startingSteepDownTiles": 1,
"openEnd": 0
}
},
{
"shinespark": {
"frames": 10,
"excessFrames": 0
}
}
],
"exitCondition": {
"leaveWithSpark": {}
},
"unlocksDoors": [
{
"types": [
"ammo"
],
"requires": []
}
],
"flashSuitChecked": true,
"blueSuitChecked": true
},
{
"id": 67,
"link": [
4,
2
],
"name": "Leave Shinecharged (Wall Jump, Short Runway)",
"requires": [
"canShinechargeMovementComplex",
"Gravity",
"canWallJump",
{
"canShineCharge": {
"usedTiles": 17,
"steepUpTiles": 2,
"steepDownTiles": 3,
"startingSteepDownTiles": 1,
"openEnd": 0
}
},
{
"shineChargeFrames": 160
}
],
"exitCondition": {
"leaveShinecharged": {}
},
"unlocksDoors": [
{
"types": [
"ammo"
],
"requires": []
}
],
"flashSuitChecked": true,
"blueSuitChecked": true
},
{
"id": 52,
"link": [
4,
2
],
"name": "Use Stored Spark, From the Overhang",
"requires": [
"canSuitlessMaridia",
{
"or": [
{
"and": [
"HiJump",
"canSpringBallJumpMidAir"
]
},
{
"and": [
"HiJump",
"canTrickyUseFrozenEnemies"
]
},
{
"and": [
"canTrickyUseFrozenEnemies",
"canTrickySpringBallJump",
{
"or": [
"canResetFallSpeed",
"canStationaryLateralMidAirMorph",
"canSpringFling"
]
}
]
}
]
},
"h_storedSpark",
{
"shinespark": {
"frames": 11,
"excessFrames": 5
}
}
],
"flashSuitChecked": true,
"blueSuitChecked": true
},
{
"id": 53,
"link": [
4,
2
],
"name": "Use Stored Spark",
"requires": [
"h_storedSpark",
{
"or": [
{
"shinespark": {
"frames": 20,
"excessFrames": 5
}
},
{
"and": [
"HiJump",
{
"shinespark": {
"frames": 17,
"excessFrames": 5
}
}
]
},
{
"and": [
"canTrickyUseFrozenEnemies",
{
"shinespark": {
"frames": 14,
"excessFrames": 5
}
}
]
}
]
}
],
"flashSuitChecked": true,
"blueSuitChecked": true,
"devNote": "FIXME: Some energy can be saved with SpeedBooster, SprigBall, and a mockball to get up to the first Kamer, then using a flash suit to cross."
},
{
"id": 54,
"link": [
4,
3
],
"name": "Base",
"requires": [
"Gravity"
],
"flashSuitChecked": true,
"blueSuitChecked": true
},
{
"id": 55,
"link": [
4,
3
],
"name": "Base Suitless",
"requires": [
"HiJump"
],
"flashSuitChecked": true,
"blueSuitChecked": true
},
{
"id": 56,
"link": [
4,
3
],
"name": "Suitless with Ice Beam",
"requires": [
"canSuitlessMaridia",
"canUseFrozenEnemies"
],
"flashSuitChecked": true,
"blueSuitChecked": true
},
{
"id": 57,
"link": [
4,
3
],
"name": "Suitless with Spring Ball Jump Mid Air",
"requires": [
"canSuitlessMaridia",
"canSpringBallJumpMidAir"
],
"flashSuitChecked": true,
"blueSuitChecked": true
},
{
"id": 58,
"link": [
4,
3
],
"name": "Suitless Damage Boost Underwater Pillar",
"requires": [
{
"notable": "Suitless Damage Boost Underwater Pillar"
},
"canSuitlessMaridia",
"canTrickyJump",
"canNeutralDamageBoost",
"h_underwaterCrouchJump",
{
"or": [
{
"and": [
"canDownGrab",
{
"noBlueSuit": {}
}
]
},
"canMidAirMorph"
]
},
{
"enemyDamage": {
"enemy": "Skultera",
"type": "contact",
"hits": 1
}
}
],
"flashSuitChecked": true,
"blueSuitChecked": true,
"note": [
"Crouch jump down grab to get over the first two pillars.",
"For the third pillar, crouch jump to time a damage boost on the Skultera.",
"The initial jump is fairly lenient; jump approximately when the fish is over the sloped tile a few tiles away from Samus,",
"Hold down at any time after jumping, then down grab the ledge by also pressing forward 10 to 30 frames after Samus' Energy lowers.",
"With Morph, the jump is much tighter, with a 15 frame window, but the the forward press is no longer necessary, as the fish boosts Samus onto the ledge."
]
},
{
"id": 59,
"link": [
4,
3
],
"name": "Use Stored Spark",
"requires": [
"canSuitlessMaridia",
"h_underwaterCrouchJumpDownGrab",
"h_storedSpark",
{
"shinespark": {
"frames": 9,
"excessFrames": 4
}
}
],
"flashSuitChecked": true,
"blueSuitChecked": true,
"note": [
"Crouch jump down grab to get onto the first pillar. This can be done by holding shoot to prevent the use of the flash suit.",
"Jump out then diagonally spark back onto the platform just above the first pillar to use the least amount of Energy."
]
},
{
"id": 77,
"link": [
4,
4
],
"name": "In-Room Crystal Spark",
"requires": [
"Gravity",
{
"canShineCharge": {
"usedTiles": 22,
"steepUpTiles": 3,
"steepDownTiles": 3,
"openEnd": 0
}
},
"h_CrystalSpark"
],
"flashSuitChecked": true,
"blueSuitChecked": true
},
{
"id": 84,
"link": [
4,
4
],
"name": "R-Mode Crystal Flash Interrupt",
"requires": [
{
"obstaclesCleared": [
"R-Mode"
]
},
"canComplexRModeCrystalFlashInterrupt",
{
"ammo": {
"type": "Missile",
"count": 10
}
},
{
"ammo": {
"type": "Super",
"count": 5
}
},
{
"or": [
"h_partialEnemyDamageReduction",
{
"resourceAtMost": [
{
"type": "RegularEnergy",
"count": 19
}
]
},
{
"and": [
{
"resourceCapacity": [
{
"type": "RegularEnergy",
"count": 199
}
]
},
{
"resourceCapacity": [
{
"type": "ReserveEnergy",
"count": 199
}
]
}
]
}
]
},
{
"or": [
"Gravity",
"HiJump",
"canSpringBallJumpMidAir",
"canUseFrozenEnemies"
]
}
],
"resetsObstacles": [
"R-Mode"
],
"flashSuitChecked": true,
"blueSuitChecked": true,
"note": [
"It is required to avoid double hitting the Skultera with the Power Bomb,",
"and to position the Crystal Flash so that the Skultera can hit Samus from above so it avoids the light orb.",
"To do this, use the bottom-right Skultera, and position Samus against the right pillar, or on the slope in front of the pillar.",
"Place the Power Bomb to hit the fish as it reaches the left wall."
],
"detailNote": "If Samus has 75% enemy damage reduction, it is required to Crystal Flash on the sloped tile, otherwise she can use either tile.",
"devNote": "FIXME: The movement items are to get to and from the fish spot. Other options could be added, such as using the spark to get to 2 or 3."
}
],
"notables": [
{
"id": 1,
"name": "Shinespark Water Escape With Lower Choot Alive",
"note": [
"Enter the room while building a shinespark and use it on the lowest part of the ramp to diagonally spark up and out of the water.",
"The timing and positioning for the Shinespark are very precise, and there are no extra frames on the Shinespark timer to work with.",
"Carry the shinespark to the bottom of the ramp either with a bounce ball which takes damage from the Choot, with a late mockball that does not have time to decellerate, or with very precise spacejumps.",
"Then shinespark up and use SpaceJump to reach the door."
]
},
{
"id": 2,
"name": "Spring Ball Bounce to the Door with SpaceJump",
"note": [
"Build up run speed and then use controlled SpringbBall bounces to cross the ocean to the far right ledge, and then use SpaceJump to reach the door.",
"Mockball down the submerged ramp and begin Spring Ball bouncing under water using the platforms.",
"Disable Spring Ball after the final jump once Samus starts falling again as a way to gain extra speed."
]
},
{
"id": 3,
"name": "Speedy Spring Ball Bounce to the Door",
"note": [
"Using an exact runway size of 7 tiles; use extremely precise, controlled Spring Ball bounces to cross the ocean.",
"7 tiles of runspeed can freely be achieved by requipping SpeedBooster after reaching the max normal run speed.",
"Mockball down the submerged ramp and begin Spring Ball bouncing either above the water, or under water using the platforms.",
"The final Spring Ball bounce must be on the left edge of the rightmost underwater platform.",
"While the bounce is occuring, setup a mid-air Spring Ball Jump to escape the water and reach the door."
]
},
{
"id": 4,
"name": "Shinespark Water Escape",
"note": [
"Enter the room while building a shinespark and use it on the lowest part of the ramp to diagonally spark up and out of the water.",
"Use very low jump height space jumps to carry momentum to the far side of the submerged ramp.",
"Both Choots must be killed.",
"Using Screw Attack: stay a little bit high in the water so that it remains active for the second Choot.",
"Using Plasma or ammo: kill the first Choot while running down the middle platform, and the second while gliding above it after spacejumping through the water.",
"Then shinespark up and use SpaceJump to reach the door."
]
},
{
"id": 5,
"name": "Suitless Damage Boost Water Escape",
"note": "Find the Choot that is closest to the surface of the water, crouch jump under it and damage boost onto the dry platform to the left."
},
{
"id": 6,
"name": "Space Jump Water Escape with Ice and X-Ray",
"note": [
"Freeze the right-most ramp Choot in a way where Samus can climb on top of it and use Space Jump to escape the water.",
"Use a turn around to avoid knockback when making contact with the Choot to better time the use of Ice.",
"Freeze the Choot as far to the right (on its lowest swoop), but this method is less precise than the alternatives.",
"If Samus is inside the Choot when it is frozen, she can continuing moving freely.",
"Jump on top either in spinjump or in Morph Ball",
"Use XRay to standup, clipping partially into the above slope.",
"Use a flately jump to fall out of the wall while still keeping enough height to spacejump on top of the water and escape."
]
},
{
"id": 7,
"name": "Space Jump Water Escape with Ice",
"note": [
"Get to the right of the Choot on the rightmost platform. Spin jump up to the right, break spin while aligned with the wall, then freeze the Choot and stand on it while it is midair to the right of the stalagmite.",
"Jump from the Choot to the water line and space jump at the water line to the Kamer platform."
]
},
{
"id": 8,
"name": "Precise Space Jump Water Escape",
"note": [
"Standing from the rightmost platform, jump to the right of the stalagmite. Perform a midair wiggle to get to the left to the stalagmite, then precisely wall jump off of it.",
"Then perform a frame perfect space jump at the water line to bounce on the water over to the Kamer platform."
]
},
{
"id": 9,
"name": "Suitless Damage Boost Underwater Pillar",
"note": [
"Crouch jump down grab to get over the first two pillars.",
"For the third pillar, crouch jump to time a damage boost on the Skultera.",
"The initial jump is fairly lenient; jump approximately when the fish is over the sloped tile a few tiles away from Samus,",
"Hold down at any time after jumping, then down grab the ledge by also pressing forward 10 to 30 frames after Samus' Energy lowers.",
"With Morph, the jump is much tighter, with a 15 frame window, but the the forward press is no longer necessary, as the fish boosts Samus onto the ledge."
]
}
],
"nextStratId": 86,
"nextNotableId": 10
}