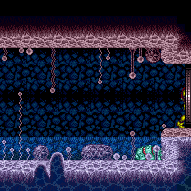
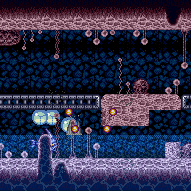
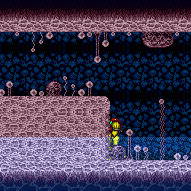
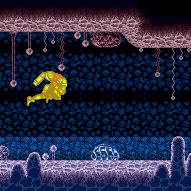
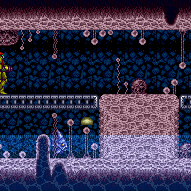
Waterway Energy Tank Room
Room ID: 65

|


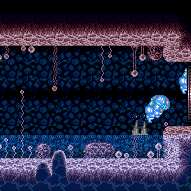
Gravity Suit can use the main runway, while suitless must use the shelf. The entire setup can be done with just the Zeros if you are patient enough (and/or have Gravity). Gravity (only) can also run through just the first thick portion of the speedway to use the the Skulltera and Puyos. Entrance condition: {
"comeInWithRMode": {}
}Requires: {
"or": [
"h_CrystalFlashForReserveEnergy",
{
"and": [
"h_RModeCanRefillReserves",
{
"resourceMissingAtMost": [
{
"type": "PowerBomb",
"count": 0
}
]
},
{
"partialRefill": {
"type": "ReserveEnergy",
"limit": 5
}
}
]
}
]
}
{
"or": [
{
"and": [
"Gravity",
"h_shinechargeMaxRunway"
]
},
{
"and": [
{
"or": [
"SpaceJump",
{
"and": [
"canSuitlessMaridia",
{
"or": [
"canPreciseWallJump",
"canBombJumpWaterEscape",
{
"and": [
"h_useSpringBall",
"canJumpIntoIBJ"
]
},
{
"and": [
"canBePatient",
"canTrickyUseFrozenEnemies",
{
"ammo": {
"type": "Super",
"count": 1
}
}
]
}
]
}
]
}
]
},
{
"canShineCharge": {
"usedTiles": 32,
"openEnd": 1
}
}
]
}
]
}
{
"autoReserveTrigger": {
"maxReserveEnergy": 95
}
}
"canRModeSparkInterrupt"
{
"partialRefill": {
"type": "Energy",
"limit": 25
}
}Clears obstacles: A |
|
Exit condition: {
"leaveWithRunway": {
"length": 2,
"openEnd": 1
}
} |
From: 1
Right Door
To: 1
Right Door


Requires: "h_frozenEnemyRunway" Exit condition: {
"leaveWithRunway": {
"length": 3,
"openEnd": 1
}
} |
|

If using the full runway, back into the corner against the Speed blocks, then perform 4 arm pumps to advance 8 pixels while running. Requires: "Gravity" "canTrickyJump" Exit condition: {
"leaveWithSidePlatform": {
"height": 2,
"runway": {
"length": 45,
"openEnd": 1
},
"obstruction": [
2,
0
]
}
}Dev note: Max extra run speed $7.0. |
|


Requires: "Gravity"
"h_shinechargeMaxRunway"
"canShinechargeMovement"
{
"shineChargeFrames": 35
}Exit condition: {
"leaveShinecharged": {}
} |
|


Requires: {
"resetRoom": {
"nodes": [
1
]
}
}
{
"or": [
{
"and": [
"Gravity",
"canDash",
{
"or": [
{
"and": [
{
"or": [
"Wave",
"Spazer",
"Plasma"
]
},
{
"cycleFrames": 340
}
]
},
{
"and": [
"ScrewAttack",
{
"cycleFrames": 360
}
]
},
{
"and": [
"Grapple",
{
"cycleFrames": 360
}
]
},
{
"cycleFrames": 420
}
]
}
]
},
{
"and": [
"Gravity",
{
"haveBlueSuit": {}
},
{
"cycleFrames": 540
}
]
},
{
"and": [
{
"or": [
"Charge",
"Wave",
"Spazer",
"Plasma",
{
"haveBlueSuit": {}
}
]
},
{
"cycleFrames": 690
}
]
},
{
"cycleFrames": 780
}
]
}Resets obstacles: A Farm cycle drops: 2 Zero |
|
Requires: {
"resetRoom": {
"nodes": [
1
]
}
}
"Gravity"
"h_getBlueSpeedMaxRunway"
{
"or": [
{
"and": [
{
"or": [
"Plasma",
"Wave",
"Spazer"
]
},
{
"cycleFrames": 440
}
]
},
{
"cycleFrames": 510
}
]
}Resets obstacles: A Farm cycle drops: 2 Zero, 3 Puyo, 2 Skultera |
From: 1
Right Door
To: 1
Right Door
Requires: {
"resetRoom": {
"nodes": [
1
]
}
}
{
  "haveBlueSuit": {}
}
{
"or": [
{
"and": [
"Gravity",
{
"cycleFrames": 1140
}
]
},
{
"cycleFrames": 1400
}
]
}Resets obstacles: A Farm cycle drops: 2 Zero, 3 Puyo, 2 Skultera |
|
Requires: "Gravity" Exit condition: {
"leaveSpinning": {
"remoteRunway": {
"length": 45,
"openEnd": 1
}
}
} |
|


Requires: "Gravity" Exit condition: {
"leaveWithMockball": {
"remoteRunway": {
"length": 45,
"openEnd": 1
},
"landingRunway": {
"length": 2,
"openEnd": 1
}
}
} |
From: 1
Right Door
To: 1
Right Door
Requires: "Gravity" Exit condition: {
"leaveWithSpringBallBounce": {
"remoteRunway": {
"length": 45,
"openEnd": 1
},
"landingRunway": {
"length": 2,
"openEnd": 1
},
"movementType": "uncontrolled"
}
} |
|
Requires: "Gravity" Exit condition: {
"leaveSpaceJumping": {
"remoteRunway": {
"length": 45,
"openEnd": 1
}
}
} |
From: 1
Right Door
To: 1
Right Door
Requires: "Gravity" "h_getBlueSpeedMaxRunway" "canChainTemporaryBlue" Exit condition: {
"leaveWithTemporaryBlue": {}
} |
|
Requires: "h_CrystalFlash" |
|
Requires: "Gravity"
"h_shinechargeMaxRunway"
{
"or": [
{
"and": [
"h_enemyDrops",
"h_CrystalSparkWithoutLenience"
]
},
"h_CrystalSpark"
]
}Dev note: No lenience, because Power Bombs can be farmed from the Zeros. |
From: 1
Right Door
To: 1
Right Door
The timing to get hit by these guys is a bit tighter, since they are so slow. Buffering their movement with x-ray can help. Exit condition: {
"leaveWithGModeSetup": {}
} |
|
Requires: "Gravity" "h_getBlueSpeedMaxRunway" Clears obstacles: A |
|
Requires: {
"haveBlueSuit": {}
}Clears obstacles: A |
|

If coming from a water environment, this assumes entering with a small spin jump. Entrance condition: {
"comeInShinecharged": {}
}Requires: {
"shineChargeFrames": 20
}
"canHorizontalShinespark"
{
"shinespark": {
"frames": 152,
"excessFrames": 10
}
}Clears obstacles: A |
From: 1
Right Door
To: 2
Item

Roll through the whole room, breaking the speedblocks. The fish enemies will die but some puyos will remain. Entrance condition: {
"comeInGettingBlueSpeed": {
"length": 0,
"openEnd": 1
}
}Requires: "canSpeedball" Clears obstacles: A |
From: 1
Right Door
To: 2
Item

Entrance condition: {
"comeInBlueSpinning": {
"unusableTiles": 0
}
}Requires: "canSpeedball" Clears obstacles: A |
From: 1
Right Door
To: 2
Item
Entrance condition: {
"comeInWithBlueSpringBallBounce": {
"movementType": "controlled",
"maxExtraRunSpeed": "$3.F",
"minLandingTiles": 1
}
}Clears obstacles: A Dev note: Higher run speeds can also work but may require more landing tiles if the speedball occurs just before the transition. |
|


Requires: {
"useFlashSuit": {}
}
{
"or": [
{
"shinespark": {
"frames": 72,
"excessFrames": 13
}
},
{
"and": [
"Gravity",
{
"shinespark": {
"frames": 59,
"excessFrames": 10
}
}
]
}
]
}Clears obstacles: A |
|
Entrance condition: {
"comeInWithGrappleTeleport": {
"blockPositions": [
[
5,
3
],
[
7,
2
]
]
}
}Dev note: This strat has limited usefulness since you will be stuck behind the speed blocks. It could be useful if you could use a flash suit to get out; for example, the item could be an Energy Tank and you could need its refill in order to spark out (rather than sparking in). It also could be useful if the game were modified to allow retaining items after resetting. |
|
Enter the room in a pose that allows Samus to stand. After teleporting, retract Grapple by pressing up. Then hold right to release Grapple while standing. Samus should get pushed up onto the floor. Entrance condition: {
"comeInWithGrappleTeleport": {
"blockPositions": [
[
3,
12
],
[
3,
13
]
]
}
}Dev note: This doesn't require `canGrappleTeleportWallEscape` tech, because the lower floor height makes it easier. This strat has limited usefulness since you will be stuck behind the speed blocks. Potentially it could be useful if you could use a flash suit to get out (though this is not yet logic); for example, the item could be an Energy Tank and you could need its refill in order to spark out (rather than sparking in). It also could be useful if the game were modified to allow retaining items after resetting. |
|


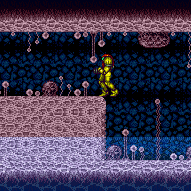
Space Jump across the room, starting from the door, to reach the dry platform. Requires: "SpaceJump" |
|

Requires: "canSuitlessMaridia" "canPreciseWallJump" |
|
Requires: "canSuitlessMaridia"
{
"or": [
"canBombJumpWaterEscape",
{
"and": [
"h_useSpringBall",
"canIBJ",
{
"tech": "canJumpIntoIBJ"
}
]
}
]
} |
|
Press pause slightly before jumping into morph, in order ensure Samus still has upward momentum when the pause fade-out finishes. Requires: "canSuitlessMaridia" "canTrickySpringBallJump" |
From: 1
Right Door
To: 3
Dry Platform Junction

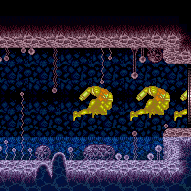
Watch a Zero (Caterpillar) climb along the ceiling before knocking it down near the speed blocks. Freeze it and jump on top. Escape the water with a spinjump or crouch jump. Requires: "canSuitlessMaridia"
"canBePatient"
"canTrickyUseFrozenEnemies"
{
"ammo": {
"type": "Super",
"count": 1
}
} |
From: 1
Right Door
To: 3
Dry Platform Junction


Requires a precise shinespark end or Gravity to destroy the speedblocks without killing the Skultera Entrance condition: {
"comeInWithRMode": {}
}Requires: "h_RModeCanRefillReserves"
{
"resourceMissingAtMost": [
{
"type": "PowerBomb",
"count": 0
}
]
}
{
"or": [
"Gravity",
{
"and": [
{
"or": [
"canPreciseWallJump",
"SpaceJump",
{
"and": [
"Ice",
{
"ammo": {
"type": "Super",
"count": 1
}
}
]
}
]
},
"canControlShinesparkEnd",
{
"canShineCharge": {
"usedTiles": 31,
"openEnd": 1
}
},
{
"shinespark": {
"frames": 30
}
}
]
}
]
}
{
"canShineCharge": {
"usedTiles": 31,
"openEnd": 1
}
}
"h_RModeKnockbackSpark" |
|
Requires: {
"obstaclesCleared": [
"A"
]
} |
|
Requires: {
"haveBlueSuit": {}
}Clears obstacles: A |
|
Requires: {
"useFlashSuit": {}
}
{
"or": [
{
"shinespark": {
"frames": 145,
"excessFrames": 86
}
},
{
"and": [
"Gravity",
{
"shinespark": {
"frames": 114,
"excessFrames": 65
}
}
]
}
]
}Clears obstacles: A Dev note: This is likely only useful after grapple teleporting into the room. The likelihood that you could spark out but not in is unlikely, unless you were to collect an E-Tank to refill. FIXME: It would be possible to do with less Energy, by ice clipping out, but there is a (terrible) farm on the right side of the room, so it's still somewhat unlikely to be useful. |
|
|
|
Charge a spark on the dry platform, and jump into a mid-air spark across the room and through the door. Requires: {
"canShineCharge": {
"usedTiles": 32,
"openEnd": 1
}
}
{
"shinespark": {
"frames": 75,
"excessFrames": 0
}
}Exit condition: {
"leaveWithSpark": {
"grounded": false
}
}Unlocks doors: {"types":["ammo"],"requires":[]} |
From: 3
Dry Platform Junction
To: 1
Right Door
Charge a spark going left, then build speed and jump far to the right into a mid-air spark across the room and through the door. Requires: {
"canShineCharge": {
"usedTiles": 32,
"openEnd": 1
}
}
"canCarefulJump"
"h_speedJump"
{
"shinespark": {
"frames": 62,
"excessFrames": 0
}
}Exit condition: {
"leaveWithSpark": {
"grounded": false
}
}Unlocks doors: {"types":["ammo"],"requires":[]} |
From: 3
Dry Platform Junction
To: 1
Right Door


Requires: "SpaceJump" "canTrickyJump" Exit condition: {
"leaveSpinning": {
"remoteRunway": {
"length": 32,
"openEnd": 1
}
}
}Unlocks doors: {"types":["ammo"],"requires":[]} |
From: 3
Dry Platform Junction
To: 1
Right Door
Requires: "canTrickyJump" Exit condition: {
"leaveWithSpringBallBounce": {
"remoteRunway": {
"length": 32,
"openEnd": 1
},
"landingRunway": {
"length": 2,
"openEnd": 1
},
"movementType": "controlled"
}
}Unlocks doors: {"types":["ammo"],"requires":[]} |
From: 3
Dry Platform Junction
To: 1
Right Door
Requires: "canPreciseSpaceJump" Exit condition: {
"leaveSpaceJumping": {
"remoteRunway": {
"length": 32,
"openEnd": 1
}
}
}Unlocks doors: {"types":["ammo"],"requires":[]} |
From: 3
Dry Platform Junction
To: 1
Right Door
Perform a speedball into a temporary blue chain to reach the door. If HiJump and Spring Ball are unavailable, then getting out of the water requires a very precise jump: delay aiming down for the mid-air morph until after Samus is above the water line. Requires: {
"getBlueSpeed": {
"usedTiles": 32,
"openEnd": 1
}
}
"canChainTemporaryBlue"
"canSpeedball"
{
"or": [
"canInsaneJump",
"HiJump",
"canSpringBallBounce"
]
}Exit condition: {
"leaveWithTemporaryBlue": {}
}Unlocks doors: {"types":["ammo"],"requires":[]}Dev note: FIXME: Other methods of getting to 3 should be added, such as using a flash suit. |
From: 3
Dry Platform Junction
To: 1
Right Door

Gain blue speed, then Space Jump across the room, ending in temporary blue chain to reach the door. Requires: {
"getBlueSpeed": {
"usedTiles": 32,
"openEnd": 1
}
}
"SpaceJump"
"canChainTemporaryBlue"Exit condition: {
"leaveWithTemporaryBlue": {}
}Unlocks doors: {"types":["ammo"],"requires":[]} |
|
Run from left to right on the dry platform to gain a shinecharge. Then fall off and spark to the left to break the speed blocks. Requires: {
"canShineCharge": {
"usedTiles": 32,
"openEnd": 1
}
}
"canShinechargeMovement"
"canHorizontalShinespark"
{
"shinespark": {
"frames": 72,
"excessFrames": 10
}
}Clears obstacles: A Dev note: Doable without a short charge, since there are 32 tiles (plus one open end) to charge it. |
|

This is a long temporary blue chain to make it through all the speed blocks. If possible, destroy the enemies beforehand using Wave or a Power Bomb; otherwise, carefully kill them individually with temporary blue. Requires: {
"canShineCharge": {
"usedTiles": 32,
"openEnd": 1
}
}
"canLongChainTemporaryBlue"
"canXRayTurnaround"
{
"or": [
"Wave",
{
"ammo": {
"type": "PowerBomb",
"count": 1
}
},
"canDodgeWhileShooting"
]
}Clears obstacles: A |
From: 3
Dry Platform Junction
To: 3
Dry Platform Junction
Requires: {
"canShineCharge": {
"usedTiles": 32,
"openEnd": 1
}
}
"h_CrystalSpark" |
From: 3
Dry Platform Junction
To: 3
Dry Platform Junction
Requires: {
"or": [
"SpaceJump",
"canPreciseWallJump",
"canTrickySpringBallJump",
{
"and": [
"h_useSpringBall",
"canIBJ",
{
"tech": "canJumpIntoIBJ"
}
]
}
]
}
{
"canShineCharge": {
"usedTiles": 32,
"openEnd": 1
}
}
{
"or": [
{
"and": [
"h_enemyDrops",
"h_CrystalSparkWithoutLenience"
]
},
"h_CrystalSpark"
]
}Dev note: No lenience, because Power Bombs can be farmed from the Zeros. Only Includes methods to get to 3 quickly. FIXME: With a heated room and the vanilla 5 Energy from small drops, farming would not be possible without Varia, Gravity, or energy free shinesparks. |
{
"$schema": "../../../schema/m3-room.schema.json",
"id": 65,
"name": "Waterway Energy Tank Room",
"area": "Brinstar",
"subarea": "Pink",
"roomAddress": "0x7A0D2",
"roomEnvironments": [
{
"heated": false
}
],
"mapTileMask": [
[
1,
1,
1,
1,
1,
1,
1
]
],
"nodes": [
{
"id": 1,
"name": "Right Door",
"nodeType": "door",
"nodeSubType": "blue",
"nodeAddress": "0x0018f8e",
"doorOrientation": "right",
"doorEnvironments": [
{
"physics": "air"
}
],
"mapTileMask": [
[
1,
1,
1,
2,
2,
2,
2
]
]
},
{
"id": 2,
"name": "Item",
"nodeType": "item",
"nodeSubType": "visible",
"nodeItem": "ETank",
"nodeAddress": "0x787FA",
"mapTileMask": [
[
2,
2,
2,
1,
1,
1,
1
]
],
"locks": [
{
"name": "Dummy Item Lock",
"lockType": "gameFlag",
"unlockStrats": [
{
"name": "Base (Collect Item)",
"notable": false,
"requires": [],
"flashSuitChecked": true,
"blueSuitChecked": true
}
]
}
]
},
{
"id": 3,
"name": "Dry Platform Junction",
"nodeType": "junction",
"nodeSubType": "junction",
"mapTileMask": [
[
1,
2,
2,
1,
1,
1,
1
]
]
}
],
"obstacles": [
{
"id": "A",
"name": "Speed blocks",
"obstacleType": "inanimate"
}
],
"enemies": [
{
"id": "e1",
"groupName": "Waterway Zeros",
"enemyName": "Zero",
"quantity": 2,
"homeNodes": [
1
]
},
{
"id": "e2",
"groupName": "Waterway Puyos",
"enemyName": "Puyo",
"quantity": 3,
"betweenNodes": [
1,
2
]
},
{
"id": "e3",
"groupName": "Waterway Skulteras",
"enemyName": "Skultera",
"quantity": 2,
"betweenNodes": [
1,
2
]
}
],
"strats": [
{
"link": [
1,
1
],
"name": "Base (Unlock Door)",
"requires": [],
"unlocksDoors": [
{
"types": [
"ammo"
],
"requires": []
}
],
"flashSuitChecked": true,
"blueSuitChecked": true
},
{
"link": [
1,
1
],
"name": "Base (Come In Normally)",
"entranceCondition": {
"comeInNormally": {}
},
"requires": [],
"flashSuitChecked": true,
"blueSuitChecked": true
},
{
"link": [
1,
1
],
"name": "Base (Come In With Mockball)",
"entranceCondition": {
"comeInWithMockball": {
"adjacentMinTiles": 0,
"remoteAndLandingMinTiles": [
[
0,
0
]
],
"speedBooster": "any"
}
},
"requires": [],
"flashSuitChecked": true,
"blueSuitChecked": true
},
{
"name": "Base (Collect Item)",
"notable": false,
"requires": [],
"flashSuitChecked": true,
"blueSuitChecked": true,
"link": [
2,
2
],
"collectsItems": [
2
]
},
{
"id": 39,
"link": [
1,
1
],
"name": "R-Mode Spark Interrupt",
"entranceCondition": {
"comeInWithRMode": {}
},
"requires": [
{
"or": [
"h_CrystalFlashForReserveEnergy",
{
"and": [
"h_RModeCanRefillReserves",
{
"resourceMissingAtMost": [
{
"type": "PowerBomb",
"count": 0
}
]
},
{
"partialRefill": {
"type": "ReserveEnergy",
"limit": 5
}
}
]
}
]
},
{
"or": [
{
"and": [
"Gravity",
"h_shinechargeMaxRunway"
]
},
{
"and": [
{
"or": [
"SpaceJump",
{
"and": [
"canSuitlessMaridia",
{
"or": [
"canPreciseWallJump",
"canBombJumpWaterEscape",
{
"and": [
"h_useSpringBall",
"canJumpIntoIBJ"
]
},
{
"and": [
"canBePatient",
"canTrickyUseFrozenEnemies",
{
"ammo": {
"type": "Super",
"count": 1
}
}
]
}
]
}
]
}
]
},
{
"canShineCharge": {
"usedTiles": 32,
"openEnd": 1
}
}
]
}
]
},
{
"autoReserveTrigger": {
"maxReserveEnergy": 95
}
},
"canRModeSparkInterrupt",
{
"partialRefill": {
"type": "Energy",
"limit": 25
}
}
],
"clearsObstacles": [
"A"
],
"flashSuitChecked": true,
"blueSuitChecked": true,
"note": [
"Gravity Suit can use the main runway, while suitless must use the shelf. The entire setup can be done with just the Zeros if you",
"are patient enough (and/or have Gravity). Gravity (only) can also run through just the first thick portion of the speedway to use the",
"the Skulltera and Puyos."
]
},
{
"id": 1,
"link": [
1,
1
],
"name": "Leave With Runway",
"requires": [],
"exitCondition": {
"leaveWithRunway": {
"length": 2,
"openEnd": 1
}
},
"flashSuitChecked": true,
"blueSuitChecked": true
},
{
"id": 2,
"link": [
1,
1
],
"name": "Leave With Runway - Frozen Caterpillar",
"requires": [
"h_frozenEnemyRunway"
],
"exitCondition": {
"leaveWithRunway": {
"length": 3,
"openEnd": 1
}
},
"flashSuitChecked": true,
"blueSuitChecked": true
},
{
"id": 36,
"link": [
1,
1
],
"name": "Leave With Side Platform",
"requires": [
"Gravity",
"canTrickyJump"
],
"exitCondition": {
"leaveWithSidePlatform": {
"height": 2,
"runway": {
"length": 45,
"openEnd": 1
},
"obstruction": [
2,
0
]
}
},
"flashSuitChecked": true,
"blueSuitChecked": true,
"note": [
"If using the full runway, back into the corner against the Speed blocks,",
"then perform 4 arm pumps to advance 8 pixels while running."
],
"devNote": "Max extra run speed $7.0."
},
{
"id": 3,
"link": [
1,
1
],
"name": "Leave Shinecharged (Gravity)",
"requires": [
"Gravity",
"h_shinechargeMaxRunway",
"canShinechargeMovement",
{
"shineChargeFrames": 35
}
],
"exitCondition": {
"leaveShinecharged": {}
},
"flashSuitChecked": true,
"blueSuitChecked": true
},
{
"id": 4,
"link": [
1,
1
],
"name": "Zero Farm",
"requires": [
{
"resetRoom": {
"nodes": [
1
]
}
},
{
"or": [
{
"and": [
"Gravity",
"canDash",
{
"or": [
{
"and": [
{
"or": [
"Wave",
"Spazer",
"Plasma"
]
},
{
"cycleFrames": 340
}
]
},
{
"and": [
"ScrewAttack",
{
"cycleFrames": 360
}
]
},
{
"and": [
"Grapple",
{
"cycleFrames": 360
}
]
},
{
"cycleFrames": 420
}
]
}
]
},
{
"and": [
"Gravity",
{
"haveBlueSuit": {}
},
{
"cycleFrames": 540
}
]
},
{
"and": [
{
"or": [
"Charge",
"Wave",
"Spazer",
"Plasma",
{
"haveBlueSuit": {}
}
]
},
{
"cycleFrames": 690
}
]
},
{
"cycleFrames": 780
}
]
}
],
"resetsObstacles": [
"A"
],
"farmCycleDrops": [
{
"enemy": "Zero",
"count": 2
}
],
"flashSuitChecked": true,
"blueSuitChecked": true
},
{
"id": 37,
"link": [
1,
1
],
"name": "Zero, Puyo, and Skultera Farm",
"requires": [
{
"resetRoom": {
"nodes": [
1
]
}
},
"Gravity",
"h_getBlueSpeedMaxRunway",
{
"or": [
{
"and": [
{
"or": [
"Plasma",
"Wave",
"Spazer"
]
},
{
"cycleFrames": 440
}
]
},
{
"cycleFrames": 510
}
]
}
],
"resetsObstacles": [
"A"
],
"farmCycleDrops": [
{
"enemy": "Zero",
"count": 2
},
{
"enemy": "Puyo",
"count": 3
},
{
"enemy": "Skultera",
"count": 2
}
],
"flashSuitChecked": true,
"blueSuitChecked": true
},
{
"id": 46,
"link": [
1,
1
],
"name": "Zero, Puyo, and Skultera Farm (Blue Suit)",
"requires": [
{
"resetRoom": {
"nodes": [
1
]
}
},
{
"haveBlueSuit": {}
},
{
"or": [
{
"and": [
"Gravity",
{
"cycleFrames": 1140
}
]
},
{
"cycleFrames": 1400
}
]
}
],
"resetsObstacles": [
"A"
],
"farmCycleDrops": [
{
"enemy": "Zero",
"count": 2
},
{
"enemy": "Puyo",
"count": 3
},
{
"enemy": "Skultera",
"count": 2
}
],
"flashSuitChecked": true,
"blueSuitChecked": true
},
{
"id": 5,
"link": [
1,
1
],
"name": "Leave Spinning (Gravity)",
"requires": [
"Gravity"
],
"exitCondition": {
"leaveSpinning": {
"remoteRunway": {
"length": 45,
"openEnd": 1
}
}
},
"flashSuitChecked": true,
"blueSuitChecked": true
},
{
"id": 6,
"link": [
1,
1
],
"name": "Leave With Mockball (Gravity)",
"requires": [
"Gravity"
],
"exitCondition": {
"leaveWithMockball": {
"remoteRunway": {
"length": 45,
"openEnd": 1
},
"landingRunway": {
"length": 2,
"openEnd": 1
}
}
},
"flashSuitChecked": true,
"blueSuitChecked": true
},
{
"id": 7,
"link": [
1,
1
],
"name": "Leave With Spring Ball Bounce (Gravity)",
"requires": [
"Gravity"
],
"exitCondition": {
"leaveWithSpringBallBounce": {
"remoteRunway": {
"length": 45,
"openEnd": 1
},
"landingRunway": {
"length": 2,
"openEnd": 1
},
"movementType": "uncontrolled"
}
},
"flashSuitChecked": true,
"blueSuitChecked": true
},
{
"id": 8,
"link": [
1,
1
],
"name": "Leave Space Jumping (Gravity)",
"requires": [
"Gravity"
],
"exitCondition": {
"leaveSpaceJumping": {
"remoteRunway": {
"length": 45,
"openEnd": 1
}
}
},
"flashSuitChecked": true,
"blueSuitChecked": true
},
{
"id": 9,
"link": [
1,
1
],
"name": "Leave With Temporary Blue (Gravity)",
"requires": [
"Gravity",
"h_getBlueSpeedMaxRunway",
"canChainTemporaryBlue"
],
"exitCondition": {
"leaveWithTemporaryBlue": {}
},
"flashSuitChecked": true,
"blueSuitChecked": true
},
{
"id": 10,
"link": [
1,
1
],
"name": "Crystal Flash",
"requires": [
"h_CrystalFlash"
],
"flashSuitChecked": true,
"blueSuitChecked": true
},
{
"id": 42,
"link": [
1,
1
],
"name": "Crystal Spark",
"requires": [
"Gravity",
"h_shinechargeMaxRunway",
{
"or": [
{
"and": [
"h_enemyDrops",
"h_CrystalSparkWithoutLenience"
]
},
"h_CrystalSpark"
]
}
],
"flashSuitChecked": true,
"blueSuitChecked": true,
"devNote": [
"No lenience, because Power Bombs can be farmed from the Zeros."
]
},
{
"id": 11,
"link": [
1,
1
],
"name": "G-Mode Setup - Get Hit By Zero",
"requires": [],
"exitCondition": {
"leaveWithGModeSetup": {}
},
"flashSuitChecked": true,
"blueSuitChecked": true,
"note": [
"The timing to get hit by these guys is a bit tighter, since they are so slow. Buffering their movement with x-ray can help."
]
},
{
"id": 12,
"link": [
1,
2
],
"name": "Base",
"requires": [
"Gravity",
"h_getBlueSpeedMaxRunway"
],
"clearsObstacles": [
"A"
],
"flashSuitChecked": true,
"blueSuitChecked": true
},
{
"id": 41,
"link": [
1,
2
],
"name": "Blue Suit",
"requires": [
{
"haveBlueSuit": {}
}
],
"clearsObstacles": [
"A"
],
"flashSuitChecked": true,
"blueSuitChecked": true
},
{
"id": 13,
"link": [
1,
2
],
"name": "Shinespark (Come in Shinecharged)",
"entranceCondition": {
"comeInShinecharged": {}
},
"requires": [
{
"shineChargeFrames": 20
},
"canHorizontalShinespark",
{
"shinespark": {
"frames": 152,
"excessFrames": 10
}
}
],
"clearsObstacles": [
"A"
],
"flashSuitChecked": true,
"blueSuitChecked": true,
"note": [
"If coming from a water environment, this assumes entering with a small spin jump."
]
},
{
"id": 14,
"link": [
1,
2
],
"name": "Speedball (Come in With Blue Speed)",
"entranceCondition": {
"comeInGettingBlueSpeed": {
"length": 0,
"openEnd": 1
}
},
"requires": [
"canSpeedball"
],
"clearsObstacles": [
"A"
],
"flashSuitChecked": true,
"blueSuitChecked": true,
"note": [
"Roll through the whole room, breaking the speedblocks.",
"The fish enemies will die but some puyos will remain."
]
},
{
"id": 15,
"link": [
1,
2
],
"name": "Come in Blue Spinning, Speedball",
"entranceCondition": {
"comeInBlueSpinning": {
"unusableTiles": 0
}
},
"requires": [
"canSpeedball"
],
"clearsObstacles": [
"A"
],
"flashSuitChecked": true,
"blueSuitChecked": true
},
{
"id": 16,
"link": [
1,
2
],
"name": "Come In With Blue Spring Ball Bounce",
"entranceCondition": {
"comeInWithBlueSpringBallBounce": {
"movementType": "controlled",
"maxExtraRunSpeed": "$3.F",
"minLandingTiles": 1
}
},
"requires": [],
"clearsObstacles": [
"A"
],
"flashSuitChecked": true,
"blueSuitChecked": true,
"devNote": "Higher run speeds can also work but may require more landing tiles if the speedball occurs just before the transition."
},
{
"id": 17,
"link": [
1,
2
],
"name": "Use Flash Suit",
"requires": [
{
"useFlashSuit": {}
},
{
"or": [
{
"shinespark": {
"frames": 72,
"excessFrames": 13
}
},
{
"and": [
"Gravity",
{
"shinespark": {
"frames": 59,
"excessFrames": 10
}
}
]
}
]
}
],
"clearsObstacles": [
"A"
],
"flashSuitChecked": true,
"blueSuitChecked": true
},
{
"id": 18,
"link": [
1,
2
],
"name": "Grapple Teleport",
"entranceCondition": {
"comeInWithGrappleTeleport": {
"blockPositions": [
[
5,
3
],
[
7,
2
]
]
}
},
"requires": [],
"flashSuitChecked": true,
"blueSuitChecked": true,
"devNote": [
"This strat has limited usefulness since you will be stuck behind the speed blocks.",
"It could be useful if you could use a flash suit to get out;",
"for example, the item could be an Energy Tank and you could need its refill in order to spark out (rather than sparking in).",
"It also could be useful if the game were modified to allow retaining items after resetting."
]
},
{
"id": 19,
"link": [
1,
2
],
"name": "Grapple Teleport Inside Wall",
"entranceCondition": {
"comeInWithGrappleTeleport": {
"blockPositions": [
[
3,
12
],
[
3,
13
]
]
}
},
"requires": [],
"flashSuitChecked": true,
"blueSuitChecked": true,
"note": [
"Enter the room in a pose that allows Samus to stand.",
"After teleporting, retract Grapple by pressing up.",
"Then hold right to release Grapple while standing.",
"Samus should get pushed up onto the floor."
],
"devNote": [
"This doesn't require `canGrappleTeleportWallEscape` tech, because the lower floor height makes it easier.",
"This strat has limited usefulness since you will be stuck behind the speed blocks.",
"Potentially it could be useful if you could use a flash suit to get out (though this is not yet logic);",
"for example, the item could be an Energy Tank and you could need its refill in order to spark out (rather than sparking in).",
"It also could be useful if the game were modified to allow retaining items after resetting."
]
},
{
"id": 20,
"link": [
1,
3
],
"name": "Space Jump",
"requires": [
"SpaceJump"
],
"flashSuitChecked": true,
"blueSuitChecked": true,
"note": "Space Jump across the room, starting from the door, to reach the dry platform."
},
{
"id": 21,
"link": [
1,
3
],
"name": "Precise Wall Jump",
"requires": [
"canSuitlessMaridia",
"canPreciseWallJump"
],
"flashSuitChecked": true,
"blueSuitChecked": true
},
{
"id": 22,
"link": [
1,
3
],
"name": "Bomb Jump",
"requires": [
"canSuitlessMaridia",
{
"or": [
"canBombJumpWaterEscape",
{
"and": [
"h_useSpringBall",
"canIBJ",
{
"tech": "canJumpIntoIBJ"
}
]
}
]
}
],
"flashSuitChecked": true,
"blueSuitChecked": true
},
{
"id": 23,
"link": [
1,
3
],
"name": "Spring Ball Jump",
"requires": [
"canSuitlessMaridia",
"canTrickySpringBallJump"
],
"flashSuitChecked": true,
"blueSuitChecked": true,
"note": "Press pause slightly before jumping into morph, in order ensure Samus still has upward momentum when the pause fade-out finishes."
},
{
"id": 24,
"link": [
1,
3
],
"name": "Frozen Caterpillar",
"requires": [
"canSuitlessMaridia",
"canBePatient",
"canTrickyUseFrozenEnemies",
{
"ammo": {
"type": "Super",
"count": 1
}
}
],
"flashSuitChecked": true,
"blueSuitChecked": true,
"note": [
"Watch a Zero (Caterpillar) climb along the ceiling before knocking it down near the speed blocks.",
"Freeze it and jump on top. Escape the water with a spinjump or crouch jump."
]
},
{
"id": 40,
"link": [
1,
3
],
"name": "Gain Flash Suit (Skultera R-Mode Knockback Spark)",
"entranceCondition": {
"comeInWithRMode": {}
},
"requires": [
"h_RModeCanRefillReserves",
{
"resourceMissingAtMost": [
{
"type": "PowerBomb",
"count": 0
}
]
},
{
"or": [
"Gravity",
{
"and": [
{
"or": [
"canPreciseWallJump",
"SpaceJump",
{
"and": [
"Ice",
{
"ammo": {
"type": "Super",
"count": 1
}
}
]
}
]
},
"canControlShinesparkEnd",
{
"canShineCharge": {
"usedTiles": 31,
"openEnd": 1
}
},
{
"shinespark": {
"frames": 30
}
}
]
}
]
},
{
"canShineCharge": {
"usedTiles": 31,
"openEnd": 1
}
},
"h_RModeKnockbackSpark"
],
"flashSuitChecked": true,
"blueSuitChecked": true,
"note": [
"Requires a precise shinespark end or Gravity to destroy the speedblocks without killing the Skultera"
]
},
{
"id": 25,
"link": [
2,
1
],
"name": "Base",
"requires": [
{
  "obstaclesCleared": [
    "A"
  ]
}
],
"flashSuitChecked": true,
"blueSuitChecked": true
},
{
"id": 43,
"link": [
2,
1
],
"name": "Blue Suit",
"requires": [
{
  "haveBlueSuit": {}
}
],
"clearsObstacles": [
"A"
],
"flashSuitChecked": true,
"blueSuitChecked": true
},
{
"id": 38,
"link": [
2,
1
],
"name": "Use Flash Suit",
"requires": [
{
"useFlashSuit": {}
},
{
"or": [
{
"shinespark": {
"frames": 145,
"excessFrames": 86
}
},
{
"and": [
"Gravity",
{
"shinespark": {
"frames": 114,
"excessFrames": 65
}
}
]
}
]
}
],
"clearsObstacles": [
"A"
],
"flashSuitChecked": true,
"blueSuitChecked": true,
"devNote": [
"This is likely only useful after grapple teleporting into the room.",
"The likelihood that you could spark out but not in is unlikely, unless you were to collect an E-Tank to refill.",
"FIXME: It would be possible to do with less Energy, by ice clipping out, but there is a (terrible) farm on the right side of the room, so it's still somewhat unlikely to be useful."
]
},
{
"id": 26,
"link": [
3,
1
],
"name": "Base",
"requires": [],
"flashSuitChecked": true,
"blueSuitChecked": true
},
{
"id": 27,
"link": [
3,
1
],
"name": "Leave With Spark",
"requires": [
{
"canShineCharge": {
"usedTiles": 32,
"openEnd": 1
}
},
{
"shinespark": {
"frames": 75,
"excessFrames": 0
}
}
],
"exitCondition": {
"leaveWithSpark": {
"grounded": false
}
},
"unlocksDoors": [
{
"types": [
"ammo"
],
"requires": []
}
],
"flashSuitChecked": true,
"blueSuitChecked": true,
"note": "Charge a spark on the dry platform, and jump into a mid-air spark across the room and through the door."
},
{
"id": 28,
"link": [
3,
1
],
"name": "Leave With Spark (Big Jump)",
"requires": [
{
"canShineCharge": {
"usedTiles": 32,
"openEnd": 1
}
},
"canCarefulJump",
"h_speedJump",
{
"shinespark": {
"frames": 62,
"excessFrames": 0
}
}
],
"exitCondition": {
"leaveWithSpark": {
"grounded": false
}
},
"unlocksDoors": [
{
"types": [
"ammo"
],
"requires": []
}
],
"flashSuitChecked": true,
"blueSuitChecked": true,
"note": "Charge a spark going left, then build speed and jump far to the right into a mid-air spark across the room and through the door."
},
{
"id": 29,
"link": [
3,
1
],
"name": "Leave Spinning (Space Jump)",
"requires": [
"SpaceJump",
"canTrickyJump"
],
"exitCondition": {
"leaveSpinning": {
"remoteRunway": {
"length": 32,
"openEnd": 1
}
}
},
"unlocksDoors": [
{
"types": [
"ammo"
],
"requires": []
}
],
"flashSuitChecked": true,
"blueSuitChecked": true
},
{
"id": 30,
"link": [
3,
1
],
"name": "Leave With Controlled Spring Ball Bounce",
"requires": [
"canTrickyJump"
],
"exitCondition": {
"leaveWithSpringBallBounce": {
"remoteRunway": {
"length": 32,
"openEnd": 1
},
"landingRunway": {
"length": 2,
"openEnd": 1
},
"movementType": "controlled"
}
},
"unlocksDoors": [
{
"types": [
"ammo"
],
"requires": []
}
],
"flashSuitChecked": true,
"blueSuitChecked": true
},
{
"id": 31,
"link": [
3,
1
],
"name": "Leave Space Jumping",
"requires": [
"canPreciseSpaceJump"
],
"exitCondition": {
"leaveSpaceJumping": {
"remoteRunway": {
"length": 32,
"openEnd": 1
}
}
},
"unlocksDoors": [
{
"types": [
"ammo"
],
"requires": []
}
],
"flashSuitChecked": true,
"blueSuitChecked": true
},
{
"id": 32,
"link": [
3,
1
],
"name": "Leave With Temporary Blue (Speedball)",
"requires": [
{
"getBlueSpeed": {
"usedTiles": 32,
"openEnd": 1
}
},
"canChainTemporaryBlue",
"canSpeedball",
{
"or": [
"canInsaneJump",
"HiJump",
"canSpringBallBounce"
]
}
],
"exitCondition": {
"leaveWithTemporaryBlue": {}
},
"unlocksDoors": [
{
"types": [
"ammo"
],
"requires": []
}
],
"flashSuitChecked": true,
"blueSuitChecked": true,
"note": [
"Perform a speedball into a temporary blue chain to reach the door.",
"If HiJump and Spring Ball are unavailable, then getting out of the water requires a very precise jump:",
"delay aiming down for the mid-air morph until after Samus is above the water line."
],
"devNote": "FIXME: Other methods of getting to 3 should be added, such as using a flash suit."
},
{
"id": 33,
"link": [
3,
1
],
"name": "Leave With Temporary Blue (Space Jump)",
"requires": [
{
"getBlueSpeed": {
"usedTiles": 32,
"openEnd": 1
}
},
"SpaceJump",
"canChainTemporaryBlue"
],
"exitCondition": {
"leaveWithTemporaryBlue": {}
},
"unlocksDoors": [
{
"types": [
"ammo"
],
"requires": []
}
],
"flashSuitChecked": true,
"blueSuitChecked": true,
"note": [
"Gain blue speed, then Space Jump across the room, ending in temporary blue chain to reach the door."
]
},
{
"id": 34,
"link": [
3,
2
],
"name": "Suitless Spark",
"requires": [
{
"canShineCharge": {
"usedTiles": 32,
"openEnd": 1
}
},
"canShinechargeMovement",
"canHorizontalShinespark",
{
"shinespark": {
"frames": 72,
"excessFrames": 10
}
}
],
"clearsObstacles": [
"A"
],
"flashSuitChecked": true,
"blueSuitChecked": true,
"note": [
"Run from left to right on the dry platform to gain a shinecharge.",
"Then fall off and spark to the left to break the speed blocks."
],
"devNote": "Doable without a short charge, since there are 32 tiles (plus one open end) to charge it."
},
{
"id": 35,
"link": [
3,
2
],
"name": "Temporary Blue Chain",
"requires": [
{
"canShineCharge": {
"usedTiles": 32,
"openEnd": 1
}
},
"canLongChainTemporaryBlue",
"canXRayTurnaround",
{
"or": [
"Wave",
{
"ammo": {
"type": "PowerBomb",
"count": 1
}
},
"canDodgeWhileShooting"
]
}
],
"clearsObstacles": [
"A"
],
"flashSuitChecked": true,
"blueSuitChecked": true,
"note": [
"This is a long temporary blue chain to make it through all the speed blocks.",
"If possible, destroy the enemies beforehand using Wave or a Power Bomb;",
"otherwise, carefully kill them individually with temporary blue."
]
},
{
"id": 44,
"link": [
3,
3
],
"name": "Crystal Spark",
"requires": [
{
"canShineCharge": {
"usedTiles": 32,
"openEnd": 1
}
},
"h_CrystalSpark"
],
"flashSuitChecked": true,
"blueSuitChecked": true
},
{
"id": 45,
"link": [
3,
3
],
"name": "Crystal Spark (With Zero Farming)",
"requires": [
{
"or": [
"SpaceJump",
"canPreciseWallJump",
"canTrickySpringBallJump",
{
"and": [
"h_useSpringBall",
"canIBJ",
{
"tech": "canJumpIntoIBJ"
}
]
}
]
},
{
"canShineCharge": {
"usedTiles": 32,
"openEnd": 1
}
},
{
"or": [
{
"and": [
"h_enemyDrops",
"h_CrystalSparkWithoutLenience"
]
},
"h_CrystalSpark"
]
}
],
"flashSuitChecked": true,
"blueSuitChecked": true,
"devNote": [
"No lenience, because Power Bombs can be farmed from the Zeros.",
"Only Includes methods to get to 3 quickly.",
"FIXME: With a heated room and the vanilla 5 Energy from small drops, farming would not be possible without Varia, Gravity, or energy free shinesparks."
]
}
],
"notables": [],
"nextStratId": 47,
"nextNotableId": 2
}