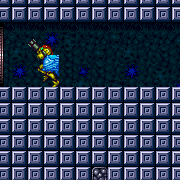
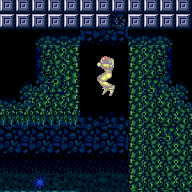
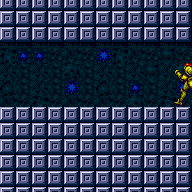
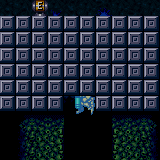
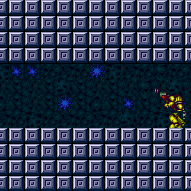
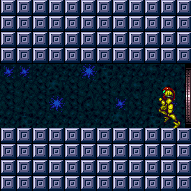
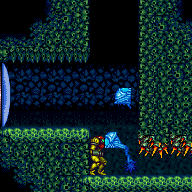
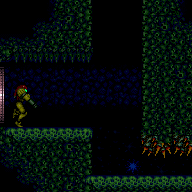
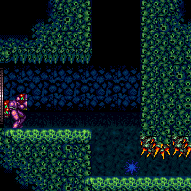
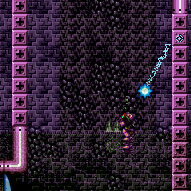
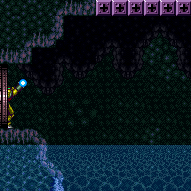
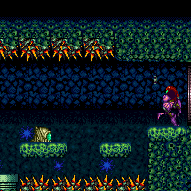
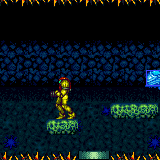
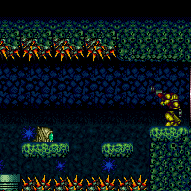
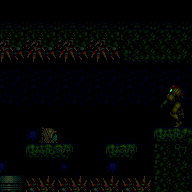
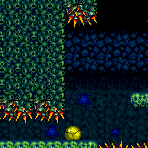
Etecoon Energy Tank Room
Room ID: 51

|
Exit condition: {
"leaveWithRunway": {
"length": 6,
"openEnd": 1
}
}Collects items: 5 Dev note: Using the full length of this runway requires collecting the item. |
From: 1
Top Left Door
To: 1
Top Left Door
Exit condition: {
"leaveWithRunway": {
"length": 4,
"openEnd": 0
}
} |
From: 1
Top Left Door
To: 1
Top Left Door

Assumes taking some time to build run speed for jumping over the gap. Requires: {
"canShineCharge": {
"usedTiles": 20,
"openEnd": 0
}
}
"canShinechargeMovement"
{
"shineChargeFrames": 120
}Exit condition: {
"leaveShinecharged": {}
}Collects items: 5 Dev note: Assumes a closed end on the left, so we aren't requiring running to the point of hanging over the dangerous edge. |
From: 1
Top Left Door
To: 1
Top Left Door

Assumes stopping two tiles before the gap, to have enough space run and gain enough speed to jump over the gap without needing to turn around first. Requires: {
"canShineCharge": {
"usedTiles": 18,
"openEnd": 1
}
}
"canShinechargeMovement"
{
"shineChargeFrames": 85
}Exit condition: {
"leaveShinecharged": {}
}Collects items: 5 |
|
Requires: "SpaceJump" "canTrickyJump" Exit condition: {
"leaveSpinning": {
"remoteRunway": {
"length": 18,
"openEnd": 1
}
}
}Collects items: 5 Dev note: The item could possibly be avoided depending on the run speed. |
|

Requires: "canTrickyJump" Exit condition: {
"leaveWithMockball": {
"remoteRunway": {
"length": 20,
"openEnd": 1
},
"landingRunway": {
"length": 5,
"openEnd": 1
}
}
}Collects items: 5 Dev note: The item could be avoided by using a shorter landing runway and enough speed |
|
Requires: "canTrickyJump" Exit condition: {
"leaveSpaceJumping": {
"remoteRunway": {
"length": 19,
"openEnd": 0
}
}
}Collects items: 5 |
From: 1
Top Left Door
To: 1
Top Left Door


Requires: {
"getBlueSpeed": {
"usedTiles": 20,
"openEnd": 1
}
}
"canTrickyJump"
"canChainTemporaryBlue"Exit condition: {
"leaveWithTemporaryBlue": {}
} |
|

Freeze a Beetom at head height where Samus can Spinjump into it and begin Moondancing. Requires: {
"obstaclesCleared": [
"C"
]
}
"canMoondance"
"canCount"
"canTrickyUseFrozenEnemies"
{
"enemyDamage": {
"enemy": "Beetom",
"type": "contact",
"hits": 2
}
}Exit condition: {
"leaveWithStoredFallSpeed": {
"fallSpeedInTiles": 1
}
} |
From: 1
Top Left Door
To: 1
Top Left Door

Freeze a Beetom at head height where Samus can Spinjump into it and begin Moondancing. After 175 moonfalls, reposition the Beetom to chest height, then continue dancing. Requires: {
"obstaclesCleared": [
"C"
]
}
"canExtendedMoondance"
"canTrickyUseFrozenEnemies"
{
"enemyDamage": {
"enemy": "Beetom",
"type": "contact",
"hits": 2
}
}
"h_extendedMoondanceBeetomLeniency"Exit condition: {
"leaveWithStoredFallSpeed": {
"fallSpeedInTiles": 2
}
} |
From: 1
Top Left Door
To: 1
Top Left Door
Entrance condition: {
"comeInShinecharging": {
"length": 5,
"openEnd": 0
},
"comesInHeated": "no"
}Requires: "h_CrystalSpark" Collects items: 5 |
|
Entrance condition: {
"comeInWithRMode": {}
}Clears obstacles: R-Mode |
From: 1
Top Left Door
To: 1
Top Left Door
Requires: "canComplexGMode"
{
"obstaclesCleared": [
"C"
]
}Exit condition: {
"leaveWithGModeSetup": {
"knockback": false
}
} |
|
|
From: 1
Top Left Door
To: 7
Junction (Zebbo Farms)
Fall into the pit while being careful to only touch one of the crumble blocks. Bounce up through the camera scroll blocks to overload PLMs with Spring Ball, Bombs, or Power Bombs. This can be done with as few as 2 Power Bombs by placing the bomb, moving slightly, then as it boosts Samus horizontally, hold backwards to avoid landing on another crumble block. Otherwise it takes 6 Power Bombs. Move horizontally to fall through the crumble blocks that haven't been touched. Carefully fall to not touch the spikes on the right, then roll through the spikeway. After the camera stops scrolling, move another 2-3 tiles then exit G-Mode. Make small jumps to reset the camera then quickly kill the Beetom as it jumps at Samus, or precisely jump underneath it. Entrance condition: {
"comeInWithGMode": {
"mode": "any",
"morphed": true
}
}Requires: "canOffScreenMovement"
{
"or": [
"h_artificialMorphBombs",
"h_artificialMorphSpringBall",
{
"ammo": {
"type": "PowerBomb",
"count": 2
}
}
]
}
{
"or": [
"h_artificialMorphPowerBomb",
"ScrewAttack",
"canTrickyGMode",
{
"and": [
"canComplexGMode",
{
"or": [
"Ice",
{
"ammo": {
"type": "Missile",
"count": 1
}
},
{
"ammo": {
"type": "Super",
"count": 1
}
}
]
}
]
},
{
"enemyDamage": {
"enemy": "Beetom",
"type": "contact",
"hits": 3
}
}
]
}Clears obstacles: B Dev note: FIXME: With only 2 Power Bombs, this would force the item pickup in direct G-mode. |
From: 1
Top Left Door
To: 7
Junction (Zebbo Farms)
Roll through the item to mostly overload PLMs before falling into the pit and fully overloading them with the camera scroll blocks. Fully overloading the PLMs before touching the camera scroll blocks will prevent the camera from following Samus after exiting G-mode. While falling, carefully avoid touching the thorns on the right, then roll through the spikeway. After the camera stops scrolling, move another 2-3 tiles then exit G-Mode. Make small jumps to reset the camera then quickly kill the Beetom as it jumps at Samus, or precisely jump underneath it. Entrance condition: {
"comeInWithGMode": {
"mode": "direct",
"morphed": true
}
}Requires: {
"itemNotCollectedAtNode": 5
}
"canRiskPermanentLossOfAccess"
"canOffScreenMovement"
"canComplexGMode"
{
"or": [
"canTrickyGMode",
"h_artificialMorphPowerBomb",
"ScrewAttack",
"Ice",
{
"ammo": {
"type": "Missile",
"count": 1
}
},
{
"ammo": {
"type": "Super",
"count": 1
}
},
{
"enemyDamage": {
"enemy": "Beetom",
"type": "contact",
"hits": 3
}
}
]
}Clears obstacles: B Collects items: 5 |
From: 2
Top Right Door
To: 1
Top Left Door
Entrance condition: {
"comeInWithGrappleTeleport": {
"blockPositions": [
[
3,
12
],
[
3,
13
]
]
}
}Requires: {
"or": [
"canGrappleTeleportWallEscape",
{
"doorUnlockedAtNode": 1
}
]
}Unlocks doors: {"types":["ammo"],"requires":[]} |
From: 2
Top Right Door
To: 1
Top Left Door


Entrance condition: {
"comeInWithGrappleTeleport": {
"blockPositions": [
[
3,
12
],
[
3,
13
]
]
}
}Bypasses door shell: true |
From: 2
Top Right Door
To: 1
Top Left Door
Entrance condition: {
"comeInWithGrappleTeleport": {
"blockPositions": [
[
3,
12
]
]
}
}Exit condition: {
"leaveWithGrappleTeleport": {
"blockPositions": [
[
3,
12
]
]
}
}Bypasses door shell: true |
From: 2
Top Right Door
To: 1
Top Left Door
Entrance condition: {
"comeInWithGrappleTeleport": {
"blockPositions": [
[
3,
13
]
]
}
}Exit condition: {
"leaveWithGrappleTeleport": {
"blockPositions": [
[
3,
13
]
]
}
}Bypasses door shell: true |
From: 2
Top Right Door
To: 1
Top Left Door
Exit the previous room with Samus in a standing pose (while grappled) with a horizontal position of 21 (as far right as possible). After teleporting, press right to release Grapple while staying standing (not being forced into a crouch). Then X-ray climb to get up to the door transition, without needing to open the door. At the beginning of the climb, avoid pressing left without X-Ray being held, to prevent triggering the transition of the bottom door. Entrance condition: {
"comeInWithGrappleTeleport": {
"blockPositions": [
[
2,
18
],
[
2,
19
],
[
2,
28
],
[
2,
29
]
]
}
}Requires: "canXRayClimb" Bypasses door shell: true |
|
Entrance condition: {
"comeInWithRMode": {}
}Clears obstacles: R-Mode |
|
Exit condition: {
"leaveWithRunway": {
"length": 21,
"openEnd": 1
}
} |
|

Freeze a Beetom at head height where Samus can Spinjump into it and begin Moondancing. Requires: {
"obstaclesCleared": [
"C"
]
}
"canMoondance"
"canCount"
"canTrickyUseFrozenEnemies"
{
"enemyDamage": {
"enemy": "Beetom",
"type": "contact",
"hits": 2
}
}Exit condition: {
"leaveWithStoredFallSpeed": {
"fallSpeedInTiles": 1
}
} |
From: 2
Top Right Door
To: 2
Top Right Door

Freeze a Beetom at head height where Samus can Spinjump into it and begin Moondancing. After 175 moonfalls, reposition the Beetom to chest height, then continue dancing. Requires: {
"obstaclesCleared": [
"C"
]
}
"canExtendedMoondance"
"canTrickyUseFrozenEnemies"
{
"enemyDamage": {
"enemy": "Beetom",
"type": "contact",
"hits": 2
}
}
"h_extendedMoondanceBeetomLeniency"Exit condition: {
"leaveWithStoredFallSpeed": {
"fallSpeedInTiles": 2
}
} |
|
Requires: {
"obstaclesNotCleared": [
"R-Mode"
]
}
"h_CrystalFlash" |
|
Requires: {
"canShineCharge": {
"usedTiles": 20,
"openEnd": 1
}
}
"h_CrystalSpark" |
From: 2
Top Right Door
To: 2
Top Right Door
Entrance condition: {
"comeInShinecharging": {
"length": 20,
"openEnd": 0
},
"comesInHeated": "no"
}Requires: "h_CrystalSpark" |
From: 2
Top Right Door
To: 2
Top Right Door

Requires: "canComplexGMode"
{
"obstaclesCleared": [
"C"
]
}Exit condition: {
"leaveWithGModeSetup": {
"knockback": false
}
} |
|
|
From: 2
Top Right Door
To: 3
Bottom Left Door
Requires: {
"canShineCharge": {
"usedTiles": 20,
"openEnd": 1
}
}
{
"shineChargeFrames": 135
}Exit condition: {
"leaveShinecharged": {}
}Unlocks doors: {"types":["missiles"],"requires":["never"]}
{"types":["super"],"requires":[]}
{
"types": [
"powerbomb"
],
"requires": [
{
"or": [
"h_useSpringBall",
{
"and": [
"canTrickyJump",
{
"or": [
"canCrumbleJump",
"canWallJumpInstantMorph"
]
}
]
}
]
}
]
}Dev note: FIXME: An extra tile could be used if the top-right door is unlocked |
From: 2
Top Right Door
To: 3
Bottom Left Door
Quick dropping through the crumbles allows reaching the door with more shinecharge time remaining. Requires: {
"canShineCharge": {
"usedTiles": 20,
"openEnd": 1
}
}
"canShinechargeMovement"
"canQuickDrop"
{
"shineChargeFrames": 115
}Exit condition: {
"leaveShinecharged": {}
}Unlocks doors: {"types":["missiles"],"requires":["never"]}
{"types":["super"],"requires":[]}
{
"types": [
"powerbomb"
],
"requires": [
{
"or": [
"h_useSpringBall",
{
"and": [
"canTrickyJump",
{
"or": [
"canCrumbleJump",
"canWallJumpInstantMorph"
]
}
]
}
]
}
]
}Dev note: Should there be a tech for crumble quick drop? |
From: 2
Top Right Door
To: 3
Bottom Left Door

Land on the crumble blocks while unmorphing, to retain temporary blue. Then aim down and use a pause buffer to remorph and chain temporary blue. Requires: {
"canShineCharge": {
"usedTiles": 20,
"openEnd": 0
}
}
"canPauseRemorphTemporaryBlue"Exit condition: {
"leaveWithTemporaryBlue": {}
}Unlocks doors: {"types":["ammo"],"requires":[]} |
From: 2
Top Right Door
To: 3
Bottom Left Door
Entrance condition: {
"comeInWithGrappleTeleport": {
"blockPositions": [
[
2,
18
],
[
2,
19
],
[
2,
28
],
[
2,
29
]
]
}
}Bypasses door shell: true |
From: 2
Top Right Door
To: 3
Bottom Left Door
Entrance condition: {
"comeInWithGrappleTeleport": {
"blockPositions": [
[
2,
18
]
]
}
}Exit condition: {
"leaveWithGrappleTeleport": {
"blockPositions": [
[
2,
18
]
]
}
}Bypasses door shell: true |
From: 2
Top Right Door
To: 3
Bottom Left Door
Entrance condition: {
"comeInWithGrappleTeleport": {
"blockPositions": [
[
2,
19
]
]
}
}Exit condition: {
"leaveWithGrappleTeleport": {
"blockPositions": [
[
2,
19
]
]
}
}Bypasses door shell: true |
From: 2
Top Right Door
To: 3
Bottom Left Door
Entrance condition: {
"comeInWithGrappleTeleport": {
"blockPositions": [
[
2,
28
]
]
}
}Exit condition: {
"leaveWithGrappleTeleport": {
"blockPositions": [
[
2,
28
]
]
}
}Bypasses door shell: true |
From: 2
Top Right Door
To: 3
Bottom Left Door
Entrance condition: {
"comeInWithGrappleTeleport": {
"blockPositions": [
[
2,
29
]
]
}
}Exit condition: {
"leaveWithGrappleTeleport": {
"blockPositions": [
[
2,
29
]
]
}
}Bypasses door shell: true |
From: 2
Top Right Door
To: 3
Bottom Left Door
Requires: {
"canShineCharge": {
"usedTiles": 20,
"openEnd": 1
}
}
"canShinechargeMovementTricky"
{
"thornHits": 1
}
"canRiskySpikeSuit"
{
"shinespark": {
"frames": 12,
"excessFrames": 12
}
} |
|


|
From: 2
Top Right Door
To: 7
Junction (Zebbo Farms)
Fall into the pit while being careful to only touch one of the crumble blocks. Bounce up through the camera scroll blocks to overload PLMs with Spring Ball, Bombs, or Power Bombs. This can be done with as few as 2 Power Bombs by placing the bomb, moving slightly, then as it boosts Samus horizontally, hold backwards to avoid landing on another crumble block. Otherwise it takes 6 Power Bombs. Move horizontally to fall through the crumble blocks that haven't been touched. Carefully fall to not touch the spikes on the right, then roll through the spikeway. After the camera stops scrolling, move another 2-3 tiles then exit G-Mode. Make small jumps to reset the camera then quickly kill the Beetom as it jumps at Samus, or precisely jump underneath it. Entrance condition: {
"comeInWithGMode": {
"mode": "any",
"morphed": true
}
}Requires: "canOffScreenMovement"
{
"or": [
"h_artificialMorphBombs",
"h_artificialMorphSpringBall",
{
"ammo": {
"type": "PowerBomb",
"count": 2
}
}
]
}
{
"or": [
"h_artificialMorphPowerBomb",
"ScrewAttack",
"canTrickyGMode",
{
"and": [
"canComplexGMode",
{
"or": [
"Ice",
{
"ammo": {
"type": "Missile",
"count": 1
}
},
{
"ammo": {
"type": "Super",
"count": 1
}
}
]
}
]
},
{
"enemyDamage": {
"enemy": "Beetom",
"type": "contact",
"hits": 3
}
}
]
}Clears obstacles: B |
From: 2
Top Right Door
To: 7
Junction (Zebbo Farms)
Carefully Bomb boost across the pit and roll through the item to mostly overload PLMs before falling into the pit and fully overloading them with the camera scroll blocks. Fully overloading the PLMs before touching the camera scroll blocks will prevent the camera from following Samus after exiting G-mode. While falling, carefully avoid touching the thorns on the right, then roll through the spikeway. After the camera stops scrolling, move another 2-3 tiles then exit G-Mode. Make small jumps to reset the camera then quickly kill the Beetom as it jumps at Samus, or precisely jump underneath it. Entrance condition: {
"comeInWithGMode": {
"mode": "direct",
"morphed": true
}
}Requires: {
"itemNotCollectedAtNode": 5
}
"canRiskPermanentLossOfAccess"
"canOffScreenMovement"
"h_artificialMorphPowerBomb"
"canComplexGMode"
{
"or": [
"canTrickyGMode",
"h_artificialMorphPowerBomb",
"ScrewAttack",
"Ice",
{
"ammo": {
"type": "Missile",
"count": 1
}
},
{
"ammo": {
"type": "Super",
"count": 1
}
},
{
"enemyDamage": {
"enemy": "Beetom",
"type": "contact",
"hits": 3
}
}
]
}Clears obstacles: B Collects items: 5 Dev note: With more movement items, Samus can use the camera scroll blocks above the crumble blocks to overload PLMs. |
|

Climb up 1 screen. Entrance condition: {
"comeInWithDoorStuckSetup": {}
}Requires: "canXRayClimb" |
From: 3
Bottom Left Door
To: 1
Top Left Door
Enter with G-mode direct, back up to between 1 and 6 pixels from the door transition, and activate X-ray to get very deep stuck in the door. Climb up 1 screen, and perform a turnaround buffered spin-jump away from the door to trigger the transition, bypassing any lock on the door. Entrance condition: {
"comeInWithGMode": {
"mode": "direct",
"morphed": false
}
}Requires: "canGModeXRayClimb" Bypasses door shell: true |
|


Jump and freeze the Beetom at a precise location in order to jump through the crumble blocks. The pixel window is larger and higher with Morph and an X-Ray Stand Up. Two Beetom hits are assumed, but with failed attempts it could take more, possibly requiring leaving the Beetom and going back to the right to farm. Requires: {
"notable": "Beetom Clip"
}
{
"noBlueSuit": {}
}
{
"or": [
"h_XRayMorphIceClip",
"h_preciseIceClip"
]
}
"Morph"
{
"enemyDamage": {
"enemy": "Beetom",
"type": "contact",
"hits": 2
}
}
{
"or": [
"h_preciseIceClip",
"canWallJump",
"HiJump",
"SpaceJump",
{
"enemyDamage": {
"enemy": "Beetom",
"type": "contact",
"hits": 2
}
}
]
}
{
"or": [
"canCrumbleJump",
"canWallJump",
"HiJump",
"SpaceJump"
]
}Dev note: Morph is required to lure a Beetom. Morphless tunnel crawl should not be required. |
From: 3
Bottom Left Door
To: 2
Top Right Door

Bring two Beetoms through the morph tunnel, damage can be limited by carefully manipulating the Beetoms. Freeze both and allow one to unfreeze and refreeze it in position to clip. Allow the second Beetom to unfreeze and latch onto Samus. Perform the crumble block clip with the Beetom attached to bring it up to the top two doors. Requires: {
"obstaclesNotCleared": [
"A"
]
}
{
"notable": "Beetom Clip"
}
{
"noBlueSuit": {}
}
{
"or": [
"h_XRayMorphIceClip",
"h_preciseIceClip"
]
}
"Morph"
{
"enemyDamage": {
"enemy": "Beetom",
"type": "contact",
"hits": 3
}
}
{
"or": [
"h_preciseIceClip",
"canWallJump",
"HiJump",
"SpaceJump",
{
"enemyDamage": {
"enemy": "Beetom",
"type": "contact",
"hits": 2
}
}
]
}
{
"or": [
"canCrumbleJump",
"canWallJump",
"HiJump",
"SpaceJump"
]
}Clears obstacles: C Dev note: This strat is for bringing a Beetom above the crumble blocks in order to be used for a Moondance or G-Mode setup from either of the top two doors. |
From: 3
Bottom Left Door
To: 2
Top Right Door
Jump and freeze the Beetom at a pixel perfect location in order to jump through the crumble blocks. The pixel is nearly the highest possible position with HiJump disabled, from the left ledge. After positioning the Beetom, get on top of it with a tight down grab, while refreezing it if necessary. Jump through the crumble blocks then down grab again to get to the top area. Two Beetom hits are assumed, but with failed attempts it could take more, possibly requiring leaving the Beetom and going back to the right to farm. Requires: {
"notable": "Beetom Clip (High Pixel, Preserve Flash Suit)"
}
{
"noBlueSuit": {}
}
"h_highPixelIceClip"
"Morph"
{
"enemyDamage": {
"enemy": "Beetom",
"type": "contact",
"hits": 2
}
}
{
"or": [
"canWallJump",
"HiJump",
"SpaceJump",
{
"enemyDamage": {
"enemy": "Beetom",
"type": "contact",
"hits": 2
}
}
]
}Dev note: Morph is required to lure a Beetom. Morphless tunnel crawl should not be required. |
From: 3
Bottom Left Door
To: 2
Top Right Door

By bouncing far enough left, it is possible to get a 2-frame window for the X-mode. Entrance condition: {
"comeInShinecharged": {}
}Requires: {
"shineChargeFrames": 135
}
{
"thornHits": 1
}
{
"or": [
{
"thornHits": "n_thornXModeLenience"
},
"canTrickyDodgeEnemies",
{
"enemyKill": {
"enemies": [
[
"Beetom",
"Beetom"
]
],
"excludedWeapons": [
"Bombs"
]
}
}
]
}
"canSuperjump"
{
"shinespark": {
"frames": 4,
"excessFrames": 0
}
}Dev note: FIXME: add a comeInShinecharging variant. |
From: 3
Bottom Left Door
To: 2
Top Right Door


By bouncing far enough left, it is possible to get a 2-frame window for the X-mode. Requires: {
"or": [
"h_thornDoubleXModeBlueSuit",
{
"and": [
"h_thornDoubleXModeBlueSuitWithoutLenience",
{
"or": [
{
"obstaclesCleared": [
"A"
]
},
"canTrickyDodgeEnemies",
{
"enemyKill": {
"enemies": [
[
"Beetom",
"Beetom"
]
],
"excludedWeapons": [
"Bombs"
]
}
}
]
}
]
}
]
}
"canSuperjump"
{
"shinespark": {
"frames": 4,
"excessFrames": 0
}
} |
|
Entrance condition: {
"comeInWithGrappleTeleport": {
"blockPositions": [
[
12,
12
],
[
12,
13
]
]
}
} |
From: 3
Bottom Left Door
To: 3
Bottom Left Door
Entrance condition: {
"comeInShinecharging": {
"length": 5,
"openEnd": 0
},
"comesInHeated": "no"
}Requires: "h_CrystalSpark" |
|
Entrance condition: {
"comeInWithRMode": {}
}Clears obstacles: R-Mode |
|
Exit condition: {
"leaveWithRunway": {
"length": 6,
"openEnd": 1
}
} |
From: 3
Bottom Left Door
To: 3
Bottom Left Door


Bring a Beetom from the right of the spiky tunnel to the bottom left door. Jump and freeze it at the right height while leaving a half-tile gap between the Beetom and the runway to extend the runway as much as possible. If needing to leave with a multi-stutter short charge, the Beetom will need to be positioned more precisely, which can be done as above, but only on the descent of a jump. Alternatively, bring two Beetoms and stand on one while freezing the other at chest height. Freezing the lower one may be made easier or damageless by scrolling the camera when the Beetom is in the correct position and freezing it with a hero shot from the right. Requires: {
"noBlueSuit": {}
}
"Morph"
"h_frozenEnemyRunway"
{
"enemyDamage": {
"enemy": "Beetom",
"type": "contact",
"hits": 2
}
}Exit condition: {
"leaveWithRunway": {
"length": 8,
"openEnd": 0
}
} |
From: 3
Bottom Left Door
To: 3
Bottom Left Door

An easy setup for this runway is to freeze one Beetom on the ground and then stand on it to freeze two other Beetoms at chest height. It is possible to leave the Beetoms and refill using the Zebbos. Requires: {
"noBlueSuit": {}
}
"Morph"
"h_trickyFrozenEnemyRunway"
{
"enemyDamage": {
"enemy": "Beetom",
"type": "contact",
"hits": 3
}
}Exit condition: {
"leaveWithRunway": {
"length": 9,
"openEnd": 0
}
} |
From: 3
Bottom Left Door
To: 3
Bottom Left Door

Entrance condition: {
"comeInShinecharged": {}
}Requires: {
"shineChargeFrames": 80
}
{
"thornHits": 1
}
{
"or": [
{
"thornHits": "n_spikeSuitLenience"
},
"canTrickyDodgeEnemies",
{
"enemyKill": {
"enemies": [
[
"Beetom",
"Beetom"
]
],
"excludedWeapons": [
"Bombs"
]
}
}
]
}
"canPatientSpikeSuit"
{
"shinespark": {
"frames": 1,
"excessFrames": 1
}
} |
From: 3
Bottom Left Door
To: 3
Bottom Left Door
Entrance condition: {
"comeInShinecharging": {
"length": 5,
"openEnd": 1
}
}Requires: {
"thornHits": 1
}
{
"or": [
{
"thornHits": "n_spikeSuitLenience"
},
"canTrickyDodgeEnemies",
{
"enemyKill": {
"enemies": [
[
"Beetom",
"Beetom"
]
],
"excludedWeapons": [
"Bombs"
]
}
}
]
}
"canPatientSpikeSuit"
{
"shinespark": {
"frames": 1,
"excessFrames": 1
}
} |
From: 3
Bottom Left Door
To: 3
Bottom Left Door
By bouncing far enough left, it is possible to get a 2-frame window for the X-mode. Requires: {
"or": [
"h_thornXModeSpikeSuit",
{
"and": [
"h_thornXModeSpikeSuitWithoutLenience",
{
"or": [
{
"obstaclesCleared": [
"A"
]
},
"canTrickyDodgeEnemies",
{
"enemyKill": {
"enemies": [
[
"Beetom",
"Beetom"
]
],
"excludedWeapons": [
"Bombs"
]
}
}
]
}
]
}
]
}
{
"shinespark": {
"frames": 12,
"excessFrames": 12
}
} |
From: 3
Bottom Left Door
To: 3
Bottom Left Door
By bouncing far enough left, it is possible to get a 2-frame window for the X-mode. Entrance condition: {
"comeInShinecharged": {}
}Requires: {
"shineChargeFrames": 135
}
{
"or": [
"h_thornXModeBlueSuit",
{
"and": [
"h_thornXModeBlueSuitWithoutLenience",
{
"or": [
"canTrickyDodgeEnemies",
{
"enemyKill": {
"enemies": [
[
"Beetom",
"Beetom"
]
],
"excludedWeapons": [
"Bombs"
]
}
}
]
}
]
}
]
}
{
"shinespark": {
"frames": 0,
"excessFrames": 0
}
} |
From: 3
Bottom Left Door
To: 3
Bottom Left Door


By bouncing far enough left, it is possible to get a 2-frame window for the X-mode. Requires: {
"or": [
"h_thornDoubleXModeBlueSuit",
{
"and": [
"h_thornDoubleXModeBlueSuitWithoutLenience",
{
"or": [
{
"obstaclesCleared": [
"A"
]
},
"canTrickyDodgeEnemies",
{
"enemyKill": {
"enemies": [
[
"Beetom",
"Beetom"
]
],
"excludedWeapons": [
"Bombs"
]
}
}
]
}
]
}
]
}
{
"shinespark": {
"frames": 0,
"excessFrames": 0
}
} |
From: 3
Bottom Left Door
To: 3
Bottom Left Door
With some dash speed, bounce into the opening of the spikeway, and enter X-mode. The spike knockback will push Samus back out of the spikeway. By bouncing far enough left, it is possible to get a 2-frame window for the X-mode. By holding an angle button, it is possible turn around in X-mode without losing dash speed. Arm pumps can be used to get close to the ledge before shinecharging, to leave with more frames remaining. Requires: "h_XModeShinecharge"
{
"thornHits": 1
}
{
"or": [
{
"thornHits": "n_thornXModeLenience"
},
{
"obstaclesCleared": [
"A"
]
},
"canTrickyDodgeEnemies",
{
"enemyKill": {
"enemies": [
[
"Beetom",
"Beetom"
]
],
"excludedWeapons": [
"Bombs"
]
}
}
]
}
{
"shineChargeFrames": 60
}
{
"or": [
"canXModeMovement",
{
"shineChargeFrames": 15
}
]
}Exit condition: {
"leaveShinecharged": {}
} |
From: 3
Bottom Left Door
To: 3
Bottom Left Door

With some dash speed, bounce into the opening of the spikeway, and enter X-mode. The spike knockback will push Samus back out of the spikeway. By bouncing far enough left, it is possible to get a 2-frame window for the X-mode. By holding an angle button, it is possible turn around in X-mode without losing dash speed. Crouch to charge a shinespark, release dash to cancel X-Ray and exit out of X-Mode and hold angle until temporary blue. Requires: "canXMode"
"h_shinechargeMaxRunway"
"canChainTemporaryBlue"
{
"thornHits": 1
}
{
"or": [
{
"thornHits": "n_thornXModeLenience"
},
{
"obstaclesCleared": [
"A"
]
},
"canTrickyDodgeEnemies",
{
"enemyKill": {
"enemies": [
[
"Beetom",
"Beetom"
]
],
"excludedWeapons": [
"Bombs"
]
}
}
]
}Exit condition: {
"leaveWithTemporaryBlue": {}
} |
From: 3
Bottom Left Door
To: 3
Bottom Left Door
Carefully lure the Beetom below the platform, then lure a Zebbo to the left door. Be careful not to let the Zebbo go off camera, or it will despawn. Requires: "Morph"
{
"or": [
"canTrickyJump",
"Ice"
]
}Exit condition: {
"leaveWithGModeSetup": {}
}Unlocks doors: {"types":["ammo"],"requires":[]}Dev note: It is possible to do this with a Beetom, avoiding the tricky jump, but we will ignore that here. |
Direct G-Mode Morph, Power Bomb the Item, Collect Item and Return
(Extreme)
Etecoon Energy Tank Room
From: 3
Bottom Left Door
To: 3
Bottom Left Door
Place two precisely positioned Power Bombs to overload PLMs. This is at the same height as the tile above the door. This ends up being the max height Samus can jump and place it while at the very bottom of the room, with a midair morph or artificially morphed Spring Ball jump. Because PLMs are overloaded, Samus needs to exit G-mode at the item to collect it before returning through the crumble blocks. Entrance condition: {
"comeInWithGMode": {
"mode": "direct",
"morphed": true
}
}Requires: "canPowerBombItemOverloadPLMs"
"canComplexGMode"
{
"itemNotCollectedAtNode": 5
}
{
"or": [
"Morph",
"h_artificialMorphSpringBall"
]
}
{
"ammo": {
"type": "PowerBomb",
"count": 2
}
}
{
"or": [
"canWallJump",
"SpaceJump",
{
"and": [
"HiJump",
"canSpringBallJumpMidAir"
]
},
"h_artificialMorphLongIBJ",
{
"and": [
{
"blueSuitShinecharge": {}
},
{
"or": [
{
"shinespark": {
"frames": 13,
"excessFrames": 3
}
},
{
"and": [
"HiJump",
{
"shinespark": {
"frames": 9,
"excessFrames": 3
}
}
]
}
]
}
]
}
]
}Collects items: 5 Dev note: This does not require canRiskPermanentLossOfAccess if Samus returns through the crumble blocks. |
From: 3
Bottom Left Door
To: 3
Bottom Left Door
Requires: "Morph"
{
"resetRoom": {
"nodes": [
3
]
}
}
{
"cycleFrames": 630
}
{
"or": [
{
"enemyKill": {
"enemies": [
[
"Beetom",
"Beetom"
]
],
"explicitWeapons": [
"ScrewAttack",
"Missile",
"PowerBomb"
]
}
},
{
"and": [
"h_useMorphBombs",
{
"or": [
"Ice",
"canTrickyDodgeEnemies"
]
},
{
"cycleFrames": 400
}
]
}
]
}Clears obstacles: A Resets obstacles: B, R-Mode, C Farm cycle drops: 2 Beetom, 1 Zebbo |
From: 3
Bottom Left Door
To: 4
Bottom Right Door

Enter the room with a blue speed jump to speedball through the spike tunnel. Then perform a long temporary blue chain across the room. Entrance condition: {
"comeInBlueSpinning": {
"maxExtraRunSpeed": "$1.E",
"unusableTiles": 1
}
}Requires: "canSpeedball" "canLongChainTemporaryBlue" Exit condition: {
"leaveWithTemporaryBlue": {}
}Unlocks doors: {"types":["ammo"],"requires":[]}Dev note: Somewhat higher run speeds can also work but with greater difficulty. |
From: 3
Bottom Left Door
To: 4
Bottom Right Door

Gain temporary blue, and use Spring Ball to bounce through the spike tunnel. Then perform a long temporary blue chain across the room. Entrance condition: {
"comeInShinecharging": {
"length": 5,
"openEnd": 0
}
}Requires: "canSpringBallBounce"
{
"thornHits": 4
}
"canLongChainTemporaryBlue"Exit condition: {
"leaveWithTemporaryBlue": {}
}Unlocks doors: {"types":["ammo"],"requires":[]}Dev note: FIXME: It's possible to farm some drops along the way. |
From: 3
Bottom Left Door
To: 5
Top Item
Place two precisely positioned Power Bombs to overload PLMs. This is at the same height as the tile above the door. This ends up being the max height Samus can jump and place it while at the very bottom of the room, with a midair morph or artificially morphed Spring Ball jump. Entrance condition: {
"comeInWithGMode": {
"mode": "direct",
"morphed": true
}
}Requires: "canPowerBombItemOverloadPLMs"
{
"itemNotCollectedAtNode": 5
}
"canRiskPermanentLossOfAccess"
{
"or": [
"Morph",
"h_artificialMorphSpringBall"
]
}
{
"ammo": {
"type": "PowerBomb",
"count": 2
}
}
{
"or": [
"canWallJump",
"SpaceJump",
{
"and": [
"HiJump",
"canSpringBallJumpMidAir"
]
},
"h_artificialMorphLongIBJ",
{
"and": [
{
"blueSuitShinecharge": {}
},
{
"or": [
{
"shinespark": {
"frames": 13,
"excessFrames": 3
}
},
{
"and": [
"HiJump",
{
"shinespark": {
"frames": 9,
"excessFrames": 3
}
}
]
}
]
}
]
}
]
}Dev note: This requires canRiskPermanentLossOfAccess unless Samus returns through the crumble blocks. |
|
Requires: "Morph" |
From: 3
Bottom Left Door
To: 6
Junction (Right of Tunnel)
Moving left to right is a bit more tricky to get into the tunnel. Land aiming down approximately 3 pixels inside the leftmost tile. If Samus is too far left she will fall out, too far right and a thorn pushes her out, not aiming down puts her stuck in crouch. Then spinjump right to take a thorn hit and get wedged in the ceiling. Then start the crawl while taking constant thorn damage. Perform one jump per thorn hit. Note that if Samus is hit by the thorn before landing, aiming down is not necessary. Note that a moonfall may be helpful to get into the tunnel. Without moonwalk, a downback can be used instead: fall off with low speed and start a downback right away. (This doesn't always work.) Requires: {
"notable": "Spikeway Tunnel Crawl"
}
"canTunnelCrawl"
"canTrickyJump"
{
"thornHits": 31
}
{
"or": [
{
"noBlueSuit": {}
},
{
"and": [
"h_trickyToCarryBlueSuit",
{
"thornHits": 31
}
]
}
]
} |
From: 3
Bottom Left Door
To: 6
Junction (Right of Tunnel)
Wiggle through the thorns. It is a long wiggle with a lot of thorn hits. Requires: {
"notable": "Spikeway Aim Cancel Wiggle"
}
"canTurnaroundAimCancel"
"canBeVeryPatient"
{
"thornHits": 100
}
{
"or": [
{
"noBlueSuit": {}
},
{
"thornHits": 100
}
]
} |
From: 3
Bottom Left Door
To: 6
Junction (Right of Tunnel)
Maintain i-frames by using X-Ray whenever a thorn would deal damage. Move by alternating between X-Ray turnarounds and normal turnarounds. Simply crouch again following any accidental X-Ray Standups. Requires: {
"notable": "Spikeway X-Ray Wiggle"
}
"canXRayWaitForIFrames"
"canXRayTurnaround"
{
"thornHits": 1
}
"h_trickyToCarryBlueSuit" |
From: 3
Bottom Left Door
To: 6
Junction (Right of Tunnel)

Entrance condition: {
"comeInWithGMode": {
"mode": "any",
"morphed": true
}
} |
|

Entrance condition: {
"comeInWithGrappleTeleport": {
"blockPositions": [
[
5,
3
],
[
7,
2
]
]
}
} |
From: 4
Bottom Right Door
To: 1
Top Left Door
Entrance condition: {
"comeInWithGrappleTeleport": {
"blockPositions": [
[
3,
12
],
[
3,
13
]
]
}
}Requires: {
"or": [
"canGrappleTeleportWallEscape",
{
"doorUnlockedAtNode": 1
}
]
}Unlocks doors: {"types":["ammo"],"requires":[]} |
From: 4
Bottom Right Door
To: 1
Top Left Door

Entrance condition: {
"comeInWithGrappleTeleport": {
"blockPositions": [
[
3,
12
],
[
3,
13
]
]
}
}Bypasses door shell: true |
From: 4
Bottom Right Door
To: 1
Top Left Door
Entrance condition: {
"comeInWithGrappleTeleport": {
"blockPositions": [
[
3,
12
]
]
}
}Exit condition: {
"leaveWithGrappleTeleport": {
"blockPositions": [
[
3,
12
]
]
}
}Bypasses door shell: true |
From: 4
Bottom Right Door
To: 1
Top Left Door
Entrance condition: {
"comeInWithGrappleTeleport": {
"blockPositions": [
[
3,
13
]
]
}
}Exit condition: {
"leaveWithGrappleTeleport": {
"blockPositions": [
[
3,
13
]
]
}
}Bypasses door shell: true |
From: 4
Bottom Right Door
To: 1
Top Left Door
Exit the previous room with Samus in a standing pose (while grappled) with a horizontal position of 21 (as far right as possible). After teleporting, press right to release Grapple while staying standing (not being forced into a crouch). Then X-ray climb to get up to the door transition, without needing to open the door. At the beginning of the climb, avoid pressing left without X-Ray being held, to prevent triggering the transition of the bottom door. Entrance condition: {
"comeInWithGrappleTeleport": {
"blockPositions": [
[
2,
18
],
[
2,
19
],
[
2,
28
],
[
2,
29
]
]
}
}Requires: "canXRayClimb" Bypasses door shell: true |
From: 4
Bottom Right Door
To: 2
Top Right Door

Freeze a Zebbo inside the wall above the right side of the spikeway, close to the ceiling thorns. Face right, equip X-Ray, move at least a few pixels away from the wall, and jump straight up into the ceiling thorns. If successful, Samus will be knocked back into the wall and end up standing inside it. Use X-Ray immediately to prevent additional thorn hits. If Samus is high enough to be touching the thorns, then i-frames will continue to be refreshed once per second. While X-Ray climbing, be careful to only release X-Ray soon after i-frames are refreshed. Crouch before pressing X-Ray again. Requires: {
"notable": "Wall Ice Clip X-Ray Climb"
}
"canWallIceClip"
{
"thornHits": 1
}
"canXRayClimb"
"canUseIFrames"
"canNeutralDamageBoost"Dev note: Standing at least 3 pixels away from the wall ensures that knockback pushes Samus fully up against the ceiling; there is also no problem with standing further right, even hanging off the ledge: as long as Samus is still in range to take damage from the thorns above, they will be able to knock Samus into the wall. It is possible to freeze the Zeebo lower, but if Samus is too low, it will be necessary to take 3 thorn hits. It is also possible to get stuck inside the wall by taking knockback from a floor thorn, or by using a frozen Beetom as a platform. However those methods are not any easier, more damage will be taken, and the climb will be longer. If Samus begins climbing at a level below the ceiling thorns, then as Samus approaches the thorns, X-Ray will need to only be released while turning to the right, in order to prevent the thorn hits from knocking Samus out of the wall. |
From: 4
Bottom Right Door
To: 3
Bottom Left Door

Entrance condition: {
"comeInWithGrappleTeleport": {
"blockPositions": [
[
2,
18
],
[
2,
19
],
[
2,
28
],
[
2,
29
]
]
}
}Bypasses door shell: true |
From: 4
Bottom Right Door
To: 3
Bottom Left Door
Entrance condition: {
"comeInWithGrappleTeleport": {
"blockPositions": [
[
2,
18
]
]
}
}Exit condition: {
"leaveWithGrappleTeleport": {
"blockPositions": [
[
2,
18
]
]
}
}Bypasses door shell: true |
From: 4
Bottom Right Door
To: 3
Bottom Left Door
Entrance condition: {
"comeInWithGrappleTeleport": {
"blockPositions": [
[
2,
19
]
]
}
}Exit condition: {
"leaveWithGrappleTeleport": {
"blockPositions": [
[
2,
19
]
]
}
}Bypasses door shell: true |
From: 4
Bottom Right Door
To: 3
Bottom Left Door
Entrance condition: {
"comeInWithGrappleTeleport": {
"blockPositions": [
[
2,
28
]
]
}
}Exit condition: {
"leaveWithGrappleTeleport": {
"blockPositions": [
[
2,
28
]
]
}
}Bypasses door shell: true |
From: 4
Bottom Right Door
To: 3
Bottom Left Door
Entrance condition: {
"comeInWithGrappleTeleport": {
"blockPositions": [
[
2,
29
]
]
}
}Exit condition: {
"leaveWithGrappleTeleport": {
"blockPositions": [
[
2,
29
]
]
}
}Bypasses door shell: true |
From: 4
Bottom Right Door
To: 3
Bottom Left Door
Entrance condition: {
"comeInWithGMode": {
"mode": "any",
"morphed": true
}
}Requires: {
"or": [
{
"and": [
{
"tech": "canBombHorizontally"
},
{
"ammo": {
"type": "PowerBomb",
"count": 6
}
},
{
"or": [
"canComplexGMode",
{
"ammo": {
"type": "PowerBomb",
"count": 2
}
}
]
}
]
},
{
"and": [
"h_artificialMorphSpringBall",
{
"ammo": {
"type": "PowerBomb",
"count": 3
}
},
{
"or": [
"canComplexGMode",
{
"ammo": {
"type": "PowerBomb",
"count": 1
}
}
]
}
]
},
{
"and": [
"h_artificialMorphBombs",
"canTrickyGMode"
]
}
]
}Clears obstacles: A Dev note: G-mode isnt helpful here with real Morph. |
From: 4
Bottom Right Door
To: 3
Bottom Left Door
Samus is only able to kill enemies with blue suit while moving and not falling. With bombs as the only movement option, Samus should only touch the enemies while grounded and moving horizontally. Entrance condition: {
"comeInWithGMode": {
"mode": "any",
"morphed": true
}
}Requires: "h_blueSuitGMode"
{
"or": [
"h_artificialMorphSpringBall",
{
"and": [
"h_artificialMorphBombs",
"canTrickyDodgeEnemies"
]
}
]
}Clears obstacles: A |
Direct G-Mode Morph Through Spikeway, Power Bomb the Item, Collect Item and Return
(Extreme)
Etecoon Energy Tank Room
From: 4
Bottom Right Door
To: 3
Bottom Left Door
Cross the room while killing the Beetoms, then use two precisely positioned Power Bombs to overload PLMs. Place the Power Bombs at the same height as the tile above the door. This ends up being the max height Samus can jump and place it while at the very bottom of the room, with a midair morph or artificially morphed Spring Ball jump. Because PLMs are overloaded, Samus needs to exit G-mode at the item to collect it before returning through the crumble blocks. Entrance condition: {
"comeInWithGMode": {
"mode": "direct",
"morphed": true
}
}Requires: "canPowerBombItemOverloadPLMs"
"canComplexGMode"
{
"itemNotCollectedAtNode": 5
}
{
"or": [
"Morph",
"h_artificialMorphSpringBall"
]
}
{
"or": [
{
"ammo": {
"type": "PowerBomb",
"count": 3
}
},
{
"and": [
"Morph",
{
"or": [
"ScrewAttack",
"Ice",
{
"ammo": {
"type": "Missile",
"count": 5
}
},
{
"ammo": {
"type": "Super",
"count": 5
}
}
]
}
]
}
]
}
{
"ammo": {
"type": "PowerBomb",
"count": 2
}
}
{
"or": [
"canWallJump",
"SpaceJump",
{
"and": [
"HiJump",
"canSpringBallJumpMidAir"
]
},
"h_artificialMorphLongIBJ"
]
}Clears obstacles: A Collects items: 5 Dev note: This does not require canRiskPermanentLossOfAccess if Samus returns through the crumble blocks. |
Direct G-Mode Morph with Blue Suit, Power Bomb the Item, Collect Item and Return
(Extreme)
Etecoon Energy Tank Room
From: 4
Bottom Right Door
To: 3
Bottom Left Door
Cross the room while killing the Beetoms, then use two precisely positioned Power Bombs to overload PLMs. Place the Power Bombs at the same height as the tile above the door. This ends up being the max height Samus can jump and place it while at the very bottom of the room, with a midair morph or artificially morphed Spring Ball jump. Because PLMs are overloaded, Samus needs to exit G-mode at the item to collect it before returning through the crumble blocks. Entrance condition: {
"comeInWithGMode": {
"mode": "direct",
"morphed": true
}
}Requires: "h_blueSuitGMode"
"canPowerBombItemOverloadPLMs"
"canComplexGMode"
{
"itemNotCollectedAtNode": 5
}
{
"or": [
"Morph",
"h_artificialMorphSpringBall"
]
}
{
"ammo": {
"type": "PowerBomb",
"count": 2
}
}
{
"or": [
"canWallJump",
"SpaceJump",
{
"and": [
"HiJump",
"canSpringBallJumpMidAir"
]
},
"h_artificialMorphLongIBJ",
{
"and": [
{
"blueSuitShinecharge": {}
},
{
"or": [
{
"shinespark": {
"frames": 13,
"excessFrames": 3
}
},
{
"and": [
"HiJump",
{
"shinespark": {
"frames": 9,
"excessFrames": 3
}
}
]
}
]
}
]
}
]
}Clears obstacles: A Collects items: 5 Dev note: This does not require canRiskPermanentLossOfAccess if Samus returns through the crumble blocks. FIXME: This could include a Crystal Flash before shinesparking. |
From: 4
Bottom Right Door
To: 4
Bottom Right Door

Entrance condition: {
"comeInShinecharged": {}
}Requires: {
"shineChargeFrames": 60
}
{
"thornHits": 1
}
{
"or": [
{
"thornHits": "n_spikeSuitLenience"
},
"canTrickyDodgeEnemies",
{
"enemyKill": {
"enemies": [
[
"Beetom"
]
],
"excludedWeapons": [
"Bombs"
]
}
}
]
}
"canPatientSpikeSuit"
{
"shinespark": {
"frames": 1,
"excessFrames": 1
}
} |
From: 4
Bottom Right Door
To: 4
Bottom Right Door
Entrance condition: {
"comeInShinecharging": {
"length": 2,
"openEnd": 0
}
}Requires: {
"thornHits": 1
}
{
"or": [
{
"thornHits": "n_spikeSuitLenience"
},
"canTrickyDodgeEnemies",
{
"enemyKill": {
"enemies": [
[
"Beetom"
]
],
"excludedWeapons": [
"Bombs"
]
}
}
]
}
"canPatientSpikeSuit"
{
"shinespark": {
"frames": 1,
"excessFrames": 1
}
} |
From: 4
Bottom Right Door
To: 4
Bottom Right Door
Exit condition: {
"leaveWithRunway": {
"length": 3,
"openEnd": 1
}
} |
|
Entrance condition: {
"comeInWithRMode": {}
}Clears obstacles: R-Mode |
From: 4
Bottom Right Door
To: 4
Bottom Right Door
Freeze a Beetom at head height where Samus can Spinjump into it and begin Moondancing. Requires: {
"obstaclesNotCleared": [
"A"
]
}
{
"noBlueSuit": {}
}
"canMoondance"
"canCount"
"canTrickyUseFrozenEnemies"
{
"enemyDamage": {
"enemy": "Beetom",
"type": "contact",
"hits": 2
}
}Exit condition: {
"leaveWithStoredFallSpeed": {
"fallSpeedInTiles": 1
}
} |
From: 4
Bottom Right Door
To: 4
Bottom Right Door

Freeze a Beetom at head height where Samus can Spinjump into it and begin Moondancing. After 175 moonfalls, reposition the Beetom to chest height, then continue dancing. Requires: {
"obstaclesNotCleared": [
"A"
]
}
{
"noBlueSuit": {}
}
"canExtendedMoondance"
"canTrickyUseFrozenEnemies"
{
"enemyDamage": {
"enemy": "Beetom",
"type": "contact",
"hits": 2
}
}
"h_extendedMoondanceBeetomLeniency"Exit condition: {
"leaveWithStoredFallSpeed": {
"fallSpeedInTiles": 2
}
} |
From: 4
Bottom Right Door
To: 4
Bottom Right Door
Requires: {
"resetRoom": {
"nodes": [
4
]
}
}
{
"cycleFrames": 530
}
{
"or": [
{
"enemyKill": {
"enemies": [
[
"Beetom",
"Beetom"
]
],
"explicitWeapons": [
"ScrewAttack",
"Missile",
"PowerBomb"
]
}
},
{
"and": [
{
"or": [
"Ice",
"canTrickyDodgeEnemies"
]
},
"h_useMorphBombs"
]
}
]
}Clears obstacles: A Resets obstacles: B, R-Mode, C Farm cycle drops: 2 Beetom, 2 Zebbo |
|
Requires: {
"obstaclesCleared": [
"A"
]
}
{
"simpleCycleFrames": 85
}
{
"cycleFrames": 30
}Farm cycle drops: 1 Zebbo |
From: 4
Bottom Right Door
To: 4
Bottom Right Door
Kill or get the Beetom stuck below the platform, then lure a Zebbo to the left door. Be careful not to let the Zebbo go off camera or it will despawn. Requires: {
"or": [
"canTrickyDodgeEnemies",
{
"obstaclesCleared": [
"A"
]
},
{
"enemyDamage": {
"enemy": "Beetom",
"type": "contact",
"hits": 2
}
}
]
}Exit condition: {
"leaveWithGModeSetup": {}
}Unlocks doors: {"types":["ammo"],"requires":[]}Dev note: It is possible to do this with a Beetom, avoiding the canTrickyDodgeEnemies, but we will ignore that here. |
From: 4
Bottom Right Door
To: 4
Bottom Right Door

Requires: {
"or": [
"h_thornXModeShinecharge",
{
"and": [
"h_thornXModeShinechargeWithoutLenience",
{
"or": [
{
"obstaclesCleared": [
"A"
]
},
"canTrickyDodgeEnemies",
{
"enemyKill": {
"enemies": [
[
"Beetom"
]
],
"excludedWeapons": [
"Bombs"
]
}
}
]
}
]
}
]
}
{
"shinespark": {
"frames": 62,
"excessFrames": 0
}
}Exit condition: {
"leaveWithSpark": {}
} |
From: 4
Bottom Right Door
To: 4
Bottom Right Door
Entrance condition: {
"comeInShinecharged": {}
}Requires: {
"shineChargeFrames": 125
}
{
"or": [
"h_thornXModeBlueSuit",
{
"and": [
"h_thornXModeBlueSuitWithoutLenience",
{
"or": [
"canTrickyDodgeEnemies",
{
"enemyKill": {
"enemies": [
[
"Beetom"
]
],
"excludedWeapons": [
"Bombs"
]
}
}
]
}
]
}
]
}
{
"shinespark": {
"frames": 0,
"excessFrames": 0
}
} |
From: 4
Bottom Right Door
To: 5
Top Item
Cross the room while killing the Beetoms, then bomb the bottom of the crumble blocks to overload PLMs and go through. Entrance condition: {
"comeInWithGMode": {
"mode": "any",
"morphed": true
}
}Requires: "h_artificialMorphLongIBJ"
{
"or": [
"canTrickyGMode",
{
"and": [
{
"ammo": {
"type": "PowerBomb",
"count": 3
}
},
{
"or": [
"canComplexGMode",
{
"ammo": {
"type": "PowerBomb",
"count": 1
}
}
]
}
]
},
{
"and": [
"Morph",
{
"or": [
"ScrewAttack",
"Ice",
{
"ammo": {
"type": "Missile",
"count": 5
}
},
{
"ammo": {
"type": "Super",
"count": 5
}
}
]
}
]
}
]
}
{
"or": [
"canBeVeryPatient",
"h_artificialMorphCeilingBombJump",
{
"and": [
"canBePatient",
"h_artificialMorphSpringBall",
"HiJump"
]
},
{
"and": [
"canBePatient",
"Morph",
{
"or": [
"HiJump",
"canWallJump"
]
}
]
}
]
}Clears obstacles: A |
From: 4
Bottom Right Door
To: 5
Top Item

Samus is only able to kill enemies with blue suit while moving and not falling. With bombs as the only movement option, Samus should only touch the enemies while grounded and moving horizontally. After crossing the spikeway, bomb the bottom of the crumble blocks to overload PLMs and go through. Entrance condition: {
"comeInWithGMode": {
"mode": "any",
"morphed": true
}
}Requires: "h_blueSuitGMode"
"h_artificialMorphLongIBJ"
{
"or": [
"canBeVeryPatient",
"h_artificialMorphCeilingBombJump",
{
"and": [
"canBePatient",
"h_artificialMorphSpringBall",
"HiJump"
]
},
{
"and": [
"canBePatient",
"Morph",
{
"or": [
"HiJump",
"canWallJump"
]
}
]
}
]
}Clears obstacles: A |
From: 4
Bottom Right Door
To: 5
Top Item


Cross the room while killing the Beetoms, then use two precisely positioned Power Bombs to overload PLMs. Place the Power Bombs at the same height as the tile above the door. This ends up being the max height Samus can jump and place it while at the very bottom of the room, with a midair morph or artificially morphed Spring Ball jump. Entrance condition: {
"comeInWithGMode": {
"mode": "direct",
"morphed": true
}
}Requires: "canPowerBombItemOverloadPLMs"
{
"itemNotCollectedAtNode": 5
}
"canRiskPermanentLossOfAccess"
"h_artificialMorphMovement"
{
"or": [
{
"and": [
{
"ammo": {
"type": "PowerBomb",
"count": 3
}
},
{
"or": [
"canComplexGMode",
{
"ammo": {
"type": "PowerBomb",
"count": 1
}
}
]
}
]
},
{
"and": [
"Morph",
{
"or": [
"ScrewAttack",
"Ice",
{
"ammo": {
"type": "Missile",
"count": 5
}
},
{
"ammo": {
"type": "Super",
"count": 5
}
}
]
}
]
}
]
}
{
"ammo": {
"type": "PowerBomb",
"count": 2
}
}
{
"or": [
"canWallJump",
"SpaceJump",
{
"and": [
"HiJump",
"canSpringBallJumpMidAir"
]
},
"h_artificialMorphLongIBJ"
]
}Clears obstacles: A Dev note: This requires canRiskPermanentLossOfAccess unless Samus returns through the crumble blocks. |
From: 4
Bottom Right Door
To: 5
Top Item

Samus is only able to kill enemies with blue suit while moving and not falling. With bombs as the only movement option, Samus should only touch the enemies while grounded and moving horizontally. After crossing the spikeway, use two precisely positioned Power Bombs to overload PLMs. Place the Power Bombs at the same height as the tile above the door. This ends up being the max height Samus can jump and place it while at the very bottom of the room, with a midair morph or artificially morphed Spring Ball jump. Entrance condition: {
"comeInWithGMode": {
"mode": "direct",
"morphed": true
}
}Requires: "h_blueSuitGMode"
"canPowerBombItemOverloadPLMs"
{
"itemNotCollectedAtNode": 5
}
"canRiskPermanentLossOfAccess"
{
"or": [
"Morph",
"h_artificialMorphSpringBall",
"h_artificialMorphIBJ"
]
}
{
"ammo": {
"type": "PowerBomb",
"count": 2
}
}
{
"or": [
"canWallJump",
"SpaceJump",
{
"and": [
"HiJump",
"canSpringBallJumpMidAir"
]
},
"h_artificialMorphLongIBJ",
{
"and": [
{
"blueSuitShinecharge": {}
},
{
"or": [
{
"shinespark": {
"frames": 13,
"excessFrames": 3
}
},
{
"and": [
"HiJump",
{
"shinespark": {
"frames": 9,
"excessFrames": 3
}
}
]
}
]
}
]
}
]
}Clears obstacles: A Dev note: This requires canRiskPermanentLossOfAccess unless Samus returns through the crumble blocks. FIXME: This could include a Crystal Flash before shinesparking. |
From: 4
Bottom Right Door
To: 7
Junction (Zebbo Farms)
Killing one Beetom is all that is needed to get to the farm. Requires: {
"enemyKill": {
"enemies": [
[
"Beetom"
]
],
"excludedWeapons": [
"Bombs"
]
}
}Clears obstacles: A |
From: 4
Bottom Right Door
To: 7
Junction (Zebbo Farms)
You typically need to place two bombs to kill them. Place the second shortly after the first and it will kill the Beetom on your way down. Killing one Beetom is all that is needed to get to the farm. Requires: {
"enemyKill": {
"enemies": [
[
"Beetom"
]
],
"explicitWeapons": [
"Bombs"
]
}
}
{
"enemyDamage": {
"enemy": "Beetom",
"type": "contact",
"hits": 2
}
}Clears obstacles: A |
From: 4
Bottom Right Door
To: 7
Junction (Zebbo Farms)
Requires: "Ice" Clears obstacles: A Dev note: Although this won't kill the Beetoms, it will remove them as an obstacle. |
From: 4
Bottom Right Door
To: 7
Junction (Zebbo Farms)
The damage included here is to get all the way to the left door. Requires: {
"enemyDamage": {
"enemy": "Beetom",
"type": "contact",
"hits": 25
}
} |
From: 4
Bottom Right Door
To: 7
Junction (Zebbo Farms)
Keep high Energy and avoid falling into the thorns, as it can be tricky to get out without taking several hits. Requires: {
"haveBlueSuit": {}
}Clears obstacles: A |
From: 4
Bottom Right Door
To: 7
Junction (Zebbo Farms)

When entering the room, it is recommended to open the door to be used as a quick escape if a Beetom attaches to Samus. Wait for the first Beetom to get stuck under one of the platforms. It may be necessary to lure it to the right. At this point, the farm can be used to gain energy. Jump into the thorns to get invulnerability frames, then run through, luring the Beetoms under the platforms while clearing and using the farms. Note that it is possible to shake a Beetom off of Samus by rapidly turning left and right, or angling up and down, etc. Samus will take 2-4 hits. Requires: {
"notable": "Beetom Tricky Dodge"
}
"canTrickyDodgeEnemies"Clears obstacles: A Dev note: Although this won't kill the Beetoms, it will remove them as an obstacle. |
|
|
|


|
|
Requires: "Morph" |
From: 6
Junction (Right of Tunnel)
To: 3
Bottom Left Door

Moving right to left is a bit easier to get into the tunnel. Land aiming down approximately 3 pixels inside the rightmost tile. If Samus is too far right she will fall out, too far left and a thorn pushes her out, not aiming down puts her stuck in crouch. Then spinjump left to take a thorn hit and get wedged in the ceiling. Then start the crawl while taking constant thorn damage. Perform one jump per thorn hit. Note that if Samus is hit by the thorn before landing, aiming down is not necessary. Note that a downback may be helpful to get into the tunnel: stand fully on the left side of the nearby ledge and run off then start and hold a downback to land in position. Requires: {
"notable": "Spikeway Tunnel Crawl"
}
"canTunnelCrawl"
"canTrickyJump"
{
"thornHits": 31
}
{
"or": [
{
"noBlueSuit": {}
},
{
"and": [
"h_trickyToCarryBlueSuit",
{
"thornHits": 31
}
]
}
]
}
{
"obstaclesCleared": [
"A"
]
}Dev note: This is not feasible to do with beetoms on Samus. Fortunately avoiding the Beetoms also requires canTrickyJump. |
From: 6
Junction (Right of Tunnel)
To: 3
Bottom Left Door
Maintain i-frames by using X-Ray whenever a thorn would deal damage. Move by alternating between X-Ray turnarounds and normal turnarounds. Simply crouch again following any accidental X-Ray Standups. Requires: {
"notable": "Spikeway X-Ray Wiggle"
}
"canXRayWaitForIFrames"
"canXRayTurnaround"
{
"thornHits": 1
}
"h_trickyToCarryBlueSuit" |
From: 6
Junction (Right of Tunnel)
To: 3
Bottom Left Door

Freeze a Beetom at head height where Samus can Spinjump into it and begin Moondancing. The Beetom can be left at the door if farming for health is needed. Requires: {
"obstaclesNotCleared": [
"A"
]
}
{
"noBlueSuit": {}
}
"Morph"
"canMoondance"
"canCount"
"canTrickyUseFrozenEnemies"
{
"enemyDamage": {
"enemy": "Beetom",
"type": "contact",
"hits": 2
}
}Exit condition: {
"leaveWithStoredFallSpeed": {
"fallSpeedInTiles": 1
}
}Unlocks doors: {"types":["ammo"],"requires":[]} |
From: 6
Junction (Right of Tunnel)
To: 3
Bottom Left Door
Freeze a Beetom at head height where Samus can Spinjump into it and begin Moondancing. After 175 moonfalls, reposition the Beetom to chest height, then continue dancing. The Beetom can be left at the door if farming for health is needed. Requires: {
"obstaclesNotCleared": [
"A"
]
}
{
"noBlueSuit": {}
}
"Morph"
"canExtendedMoondance"
"canTrickyUseFrozenEnemies"
{
"enemyDamage": {
"enemy": "Beetom",
"type": "contact",
"hits": 2
}
}
"h_extendedMoondanceBeetomLeniency"Exit condition: {
"leaveWithStoredFallSpeed": {
"fallSpeedInTiles": 2
}
}Unlocks doors: {"types":["ammo"],"requires":[]} |
From: 6
Junction (Right of Tunnel)
To: 7
Junction (Zebbo Farms)
Killing one Beetom is all that is needed to get to the farm. Requires: {
"obstaclesCleared": [
"A"
]
} |
From: 6
Junction (Right of Tunnel)
To: 7
Junction (Zebbo Farms)
Killing one Beetom is all that is needed to get to the farm. Requires: {
"enemyKill": {
"enemies": [
[
"Beetom"
]
],
"excludedWeapons": [
"Bombs"
]
}
}Clears obstacles: A |
From: 6
Junction (Right of Tunnel)
To: 7
Junction (Zebbo Farms)
You typically need to place two bombs to kill them. Place the second shortly after the first and it will kill the Beetom on your way down. Killing one Beetom is all that is needed to get to the farm. Requires: {
"enemyKill": {
"enemies": [
[
"Beetom"
]
],
"explicitWeapons": [
"Bombs"
]
}
}
{
"enemyDamage": {
"enemy": "Beetom",
"type": "contact",
"hits": 2
}
}Clears obstacles: A |
From: 6
Junction (Right of Tunnel)
To: 7
Junction (Zebbo Farms)
Requires: "Ice" Clears obstacles: A Dev note: Although this won't kill the Beetoms, it will remove them as an obstacle. |
From: 6
Junction (Right of Tunnel)
To: 7
Junction (Zebbo Farms)
The damage included here is to get all the way to the right door. Requires: {
"enemyDamage": {
"enemy": "Beetom",
"type": "contact",
"hits": 15
}
} |
From: 6
Junction (Right of Tunnel)
To: 7
Junction (Zebbo Farms)
Keep high Energy and avoid falling into the thorns, as it can be tricky to get out without taking several hits. Requires: {
"haveBlueSuit": {}
}Clears obstacles: A |
From: 6
Junction (Right of Tunnel)
To: 7
Junction (Zebbo Farms)

Wait for the first Beetom to get stuck under the first platform, then get to the first farm. If the second Beetom is making this farm difficult to use, it may be easier to use the next farm. Jump into the thorns to get invulnerability frames, then run through, luring the Beetoms under the platforms while clearing and using the farms. Note that it is possible to shake a Beetom off of Samus by rapidly turning left and right, or angling up and down, etc. Samus will take 2-4 hits. Requires: {
"notable": "Beetom Tricky Dodge"
}
"canTrickyDodgeEnemies"
{
"obstaclesNotCleared": [
"B"
]
}Clears obstacles: A Dev note: Although this won't kill the Beetoms, it will remove them as an obstacle. This strat is not possible when coming blindly from above, as the Beetom will instantly grab Samus. |
|
|
From: 7
Junction (Zebbo Farms)
To: 6
Junction (Right of Tunnel)
|
From: 7
Junction (Zebbo Farms)
To: 7
Junction (Zebbo Farms)
Crystal Flashing on one of the Zebbo spawners will usually not deal enough damage to Samus to trigger reserves. One way to make this fairly reliable is to take a Zebbo hit and then place the Power Bomb such that it explodes and kills a Zebbo shortly after it spawns. Samus will then pick up the drop and start Crystal Flashing where her refill is in a good rhythm for the Zebbo to be able to trigger reserves. This can only be done suitless and with no E-Tanks. Requires: {
"obstaclesCleared": [
"R-Mode"
]
}
"canComplexRModeCrystalFlashInterrupt"
{
"ammo": {
"type": "Missile",
"count": 10
}
}
{
"ammo": {
"type": "Super",
"count": 10
}
}Resets obstacles: R-Mode Dev note: This will not work in G-mode because the Power Bomb will kill the Zebbos and they will not respawn. |
From: 7
Junction (Zebbo Farms)
To: 7
Junction (Zebbo Farms)
The flash suit must be gained in-room due to R-Mode. Refer to the 'Gain Flash Suit (Spikesuit)' strat for how to do this. Set up energy as needed using the Zebbo farm. When ready, use the stored shinecharge and convert it into a blue suit. Requires: {
"obstaclesCleared": [
"R-Mode"
]
}
{
"or": [
{
"obstaclesCleared": [
"A"
]
},
{
"enemyKill": {
"enemies": [
[
"Beetom"
]
],
"excludedWeapons": [
"Bombs"
]
}
},
"canTrickyDodgeEnemies"
]
}
{
"refill": [
"Energy"
]
}
{
"useFlashSuit": {}
}
{
"autoReserveTrigger": {
"maxReserveEnergy": 95
}
}
"canRModeSparkInterrupt"Resets obstacles: R-Mode |
From: 7
Junction (Zebbo Farms)
To: 7
Junction (Zebbo Farms)
After entering with R-Mode, clear or trap the Beetom(s) and use any Zebbo pipe to setup Energy. Bounce into the thorns with dash speed and enter X-Mode to gain shinecharge. Timing the shinecharge and X-Ray release to happen soon after i-frames refresh avoids a second thorn hit. Then get back to the Zebbo pipe and get the blue suit. Requires: {
"obstaclesCleared": [
"R-Mode"
]
}
{
"or": [
{
"obstaclesCleared": [
"A"
]
},
{
"enemyKill": {
"enemies": [
[
"Beetom"
]
],
"excludedWeapons": [
"Bombs"
]
}
},
"canTrickyDodgeEnemies"
]
}
{
"refill": [
"Energy"
]
}
"h_thornXModeShinechargeWithoutLenience"
{
"autoReserveTrigger": {
"maxReserveEnergy": 95
}
}
"canRModeSparkInterrupt"Resets obstacles: R-Mode |
{
"$schema": "../../../schema/m3-room.schema.json",
"id": 51,
"name": "Etecoon Energy Tank Room",
"area": "Brinstar",
"subarea": "Green",
"roomAddress": "0x7A011",
"roomEnvironments": [
{
"heated": false
}
],
"mapTileMask": [
[
1,
1,
0,
0,
0
],
[
1,
1,
1,
1,
1
]
],
"nodes": [
{
"id": 1,
"name": "Top Left Door",
"nodeType": "door",
"nodeSubType": "green",
"nodeAddress": "0x0018f3a",
"doorOrientation": "left",
"doorEnvironments": [
{
"physics": "air"
}
],
"mapTileMask": [
[
2,
1,
0,
0,
0
],
[
1,
1,
1,
1,
1
]
]
},
{
"id": 2,
"name": "Top Right Door",
"nodeType": "door",
"nodeSubType": "blue",
"nodeAddress": "0x0018f2e",
"doorOrientation": "right",
"doorEnvironments": [
{
"physics": "air"
}
],
"mapTileMask": [
[
1,
2,
0,
0,
0
],
[
1,
1,
1,
1,
1
]
]
},
{
"id": 3,
"name": "Bottom Left Door",
"nodeType": "door",
"nodeSubType": "blue",
"nodeAddress": "0x0018f52",
"doorOrientation": "left",
"doorEnvironments": [
{
"physics": "air"
}
],
"mapTileMask": [
[
1,
1,
0,
0,
0
],
[
2,
1,
1,
1,
1
]
]
},
{
"id": 4,
"name": "Bottom Right Door",
"nodeType": "door",
"nodeSubType": "blue",
"nodeAddress": "0x0018f46",
"doorOrientation": "right",
"doorEnvironments": [
{
"physics": "air"
}
],
"mapTileMask": [
[
1,
1,
0,
0,
0
],
[
1,
1,
1,
1,
2
]
]
},
{
"id": 5,
"name": "Top Item",
"nodeType": "item",
"nodeSubType": "visible",
"nodeItem": "ETank",
"nodeAddress": "0x787C2",
"mapTileMask": [
[
2,
1,
0,
0,
0
],
[
1,
1,
1,
1,
1
]
],
"locks": [
{
"name": "Dummy Item Lock",
"lockType": "gameFlag",
"unlockStrats": [
{
"name": "Base (Collect Item)",
"notable": false,
"requires": [],
"flashSuitChecked": true,
"blueSuitChecked": true
}
]
}
]
},
{
"id": 6,
"name": "Junction (Right of Tunnel)",
"nodeType": "junction",
"nodeSubType": "junction",
"mapTileMask": [
[
1,
1,
0,
0,
0
],
[
1,
2,
1,
1,
1
]
],
"note": "This is to the right of the thorny morph tunnel."
},
{
"id": 7,
"name": "Junction (Zebbo Farms)",
"nodeType": "junction",
"nodeSubType": "junction",
"mapTileMask": [
[
1,
1,
0,
0,
0
],
[
1,
1,
2,
2,
1
]
],
"note": [
"This includes the three Zebbo farms, but not the rightmost or leftmost Beetom.",
"The Beetom kills or tanking their damage is taken care of by getting to this node.",
"To use the farm points, a Beetom near the Zebbo spawner must have been removed as an obstacle in some way."
]
}
],
"obstacles": [
{
"id": "A",
"name": "Beetoms",
"obstacleType": "enemies"
},
{
"id": "B",
"name": "Artificial Morph from Above",
"obstacleType": "abstract"
},
{
"id": "R-Mode",
"name": "Entered with R-Mode",
"obstacleType": "abstract"
},
{
"id": "C",
"name": "Beetom above the crumbles",
"obstacleType": "abstract"
}
],
"enemies": [
{
"id": "e1",
"groupName": "Etecoon E-Tank Middle Beetoms",
"enemyName": "Beetom",
"quantity": 3,
"homeNodes": [
7
]
},
{
"id": "e2",
"groupName": "Etecoon E-Tank Left Zebbo",
"enemyName": "Zebbo",
"quantity": 1,
"homeNodes": [
7
]
},
{
"id": "e3",
"groupName": "Etecoon E-Tank Middle Zebbo",
"enemyName": "Zebbo",
"quantity": 1,
"homeNodes": [
7
]
},
{
"id": "e4",
"groupName": "Etecoon E-Tank Right Zebbo",
"enemyName": "Zebbo",
"quantity": 1,
"homeNodes": [
7
]
},
{
"id": "e5",
"groupName": "Etecoon E-Tank Left Beetom",
"enemyName": "Beetom",
"quantity": 1,
"betweenNodes": [
6,
7
]
},
{
"id": "e6",
"groupName": "Etecoon E-Tank Right Beetom",
"enemyName": "Beetom",
"quantity": 1,
"betweenNodes": [
4,
7
]
}
],
"strats": [
{
"link": [
1,
1
],
"name": "Base (Unlock Door)",
"requires": [],
"unlocksDoors": [
{
"types": [
"ammo"
],
"requires": []
}
],
"flashSuitChecked": true,
"blueSuitChecked": true
},
{
"link": [
1,
1
],
"name": "Base (Come In Normally)",
"entranceCondition": {
"comeInNormally": {}
},
"requires": [],
"flashSuitChecked": true,
"blueSuitChecked": true
},
{
"link": [
1,
1
],
"name": "Base (Come In With Mockball)",
"entranceCondition": {
"comeInWithMockball": {
"adjacentMinTiles": 0,
"remoteAndLandingMinTiles": [
[
0,
0
]
],
"speedBooster": "any"
}
},
"requires": [],
"flashSuitChecked": true,
"blueSuitChecked": true
},
{
"link": [
2,
2
],
"name": "Base (Unlock Door)",
"requires": [],
"unlocksDoors": [
{
"types": [
"ammo"
],
"requires": []
}
],
"flashSuitChecked": true,
"blueSuitChecked": true
},
{
"link": [
2,
2
],
"name": "Base (Come In Normally)",
"entranceCondition": {
"comeInNormally": {}
},
"requires": [],
"flashSuitChecked": true,
"blueSuitChecked": true
},
{
"link": [
2,
2
],
"name": "Base (Come In With Mockball)",
"entranceCondition": {
"comeInWithMockball": {
"adjacentMinTiles": 0,
"remoteAndLandingMinTiles": [
[
0,
0
]
],
"speedBooster": "any"
}
},
"requires": [],
"flashSuitChecked": true,
"blueSuitChecked": true
},
{
"link": [
3,
3
],
"name": "Base (Unlock Door)",
"requires": [],
"unlocksDoors": [
{
"types": [
"ammo"
],
"requires": []
}
],
"flashSuitChecked": true,
"blueSuitChecked": true
},
{
"link": [
3,
3
],
"name": "Base (Come In Normally)",
"entranceCondition": {
"comeInNormally": {}
},
"requires": [],
"flashSuitChecked": true,
"blueSuitChecked": true
},
{
"link": [
3,
3
],
"name": "Base (Come In With Mockball)",
"entranceCondition": {
"comeInWithMockball": {
"adjacentMinTiles": 0,
"remoteAndLandingMinTiles": [
[
0,
0
]
],
"speedBooster": "any"
}
},
"requires": [],
"flashSuitChecked": true,
"blueSuitChecked": true
},
{
"link": [
4,
4
],
"name": "Base (Unlock Door)",
"requires": [],
"unlocksDoors": [
{
"types": [
"ammo"
],
"requires": []
}
],
"flashSuitChecked": true,
"blueSuitChecked": true
},
{
"link": [
4,
4
],
"name": "Base (Come In Normally)",
"entranceCondition": {
"comeInNormally": {}
},
"requires": [],
"flashSuitChecked": true,
"blueSuitChecked": true
},
{
"link": [
4,
4
],
"name": "Base (Come In With Mockball)",
"entranceCondition": {
"comeInWithMockball": {
"adjacentMinTiles": 0,
"remoteAndLandingMinTiles": [
[
0,
0
]
],
"speedBooster": "any"
}
},
"requires": [],
"flashSuitChecked": true,
"blueSuitChecked": true
},
{
"name": "Base (Collect Item)",
"notable": false,
"requires": [],
"flashSuitChecked": true,
"blueSuitChecked": true,
"link": [
5,
5
],
"collectsItems": [
5
]
},
{
"id": 1,
"link": [
1,
1
],
"name": "Leave With Runway",
"requires": [],
"exitCondition": {
"leaveWithRunway": {
"length": 6,
"openEnd": 1
}
},
"collectsItems": [
5
],
"flashSuitChecked": true,
"blueSuitChecked": true,
"devNote": "Using the full length of this runway requires collecting the item."
},
{
"id": 77,
"link": [
1,
1
],
"name": "Leave with Runway, Avoid Item",
"requires": [],
"exitCondition": {
"leaveWithRunway": {
"length": 4,
"openEnd": 0
}
},
"flashSuitChecked": true,
"blueSuitChecked": true
},
{
"id": 2,
"link": [
1,
1
],
"name": "Leave Shinecharged (Full Runway)",
"requires": [
{
"canShineCharge": {
"usedTiles": 20,
"openEnd": 0
}
},
"canShinechargeMovement",
{
"shineChargeFrames": 120
}
],
"exitCondition": {
"leaveShinecharged": {}
},
"collectsItems": [
5
],
"flashSuitChecked": true,
"blueSuitChecked": true,
"note": "Assumes taking some time to build run speed for jumping over the gap.",
"devNote": "Assumes a closed end on the left, so we aren't requiring running to the point of hanging over the dangerous edge."
},
{
"id": 3,
"link": [
1,
1
],
"name": "Leave Shinecharged (Partial Runway)",
"requires": [
{
"canShineCharge": {
"usedTiles": 18,
"openEnd": 1
}
},
"canShinechargeMovement",
{
"shineChargeFrames": 85
}
],
"exitCondition": {
"leaveShinecharged": {}
},
"collectsItems": [
5
],
"flashSuitChecked": true,
"blueSuitChecked": true,
"note": "Assumes stopping two tiles before the gap, to have enough space run and gain enough speed to jump over the gap without needing to turn around first."
},
{
"id": 4,
"link": [
1,
1
],
"name": "Leave Spinning",
"requires": [
"SpaceJump",
"canTrickyJump"
],
"exitCondition": {
"leaveSpinning": {
"remoteRunway": {
"length": 18,
"openEnd": 1
}
}
},
"collectsItems": [
5
],
"flashSuitChecked": true,
"blueSuitChecked": true,
"devNote": "The item could possibly be avoided depending on the run speed."
},
{
"id": 5,
"link": [
1,
1
],
"name": "Leave With Mockball",
"requires": [
"canTrickyJump"
],
"exitCondition": {
"leaveWithMockball": {
"remoteRunway": {
"length": 20,
"openEnd": 1
},
"landingRunway": {
"length": 5,
"openEnd": 1
}
}
},
"collectsItems": [
5
],
"flashSuitChecked": true,
"blueSuitChecked": true,
"devNote": "The item could be avoided by using a shorter landing runway and enough speed"
},
{
"id": 6,
"link": [
1,
1
],
"name": "Leave Space Jumping",
"requires": [
"canTrickyJump"
],
"exitCondition": {
"leaveSpaceJumping": {
"remoteRunway": {
"length": 19,
"openEnd": 0
}
}
},
"collectsItems": [
5
],
"flashSuitChecked": true,
"blueSuitChecked": true
},
{
"id": 7,
"link": [
1,
1
],
"name": "Leave With Temporary Blue",
"requires": [
{
"getBlueSpeed": {
"usedTiles": 20,
"openEnd": 1
}
},
"canTrickyJump",
"canChainTemporaryBlue"
],
"exitCondition": {
"leaveWithTemporaryBlue": {}
},
"flashSuitChecked": true,
"blueSuitChecked": true
},
{
"id": 123,
"link": [
1,
1
],
"name": "Leave with Moondance",
"requires": [
{
"obstaclesCleared": [
"C"
]
},
"canMoondance",
"canCount",
"canTrickyUseFrozenEnemies",
{
"enemyDamage": {
"enemy": "Beetom",
"type": "contact",
"hits": 2
}
}
],
"exitCondition": {
"leaveWithStoredFallSpeed": {
"fallSpeedInTiles": 1
}
},
"flashSuitChecked": true,
"blueSuitChecked": true,
"note": "Freeze a Beetom at head height where Samus can Spinjump into it and begin Moondancing."
},
{
"id": 124,
"link": [
1,
1
],
"name": "Leave with Extended Moondance",
"requires": [
{
"obstaclesCleared": [
"C"
]
},
"canExtendedMoondance",
"canTrickyUseFrozenEnemies",
{
"enemyDamage": {
"enemy": "Beetom",
"type": "contact",
"hits": 2
}
},
"h_extendedMoondanceBeetomLeniency"
],
"exitCondition": {
"leaveWithStoredFallSpeed": {
"fallSpeedInTiles": 2
}
},
"flashSuitChecked": true,
"blueSuitChecked": true,
"note": [
"Freeze a Beetom at head height where Samus can Spinjump into it and begin Moondancing.",
"After 175 moonfalls, reposition the Beetom to chest height, then continue dancing."
]
},
{
"id": 118,
"link": [
1,
1
],
"name": "Come in Shinecharging, Crystal Spark",
"entranceCondition": {
"comeInShinecharging": {
"length": 5,
"openEnd": 0
},
"comesInHeated": "no"
},
"requires": [
"h_CrystalSpark"
],
"collectsItems": [
5
],
"flashSuitChecked": true,
"blueSuitChecked": true
},
{
"id": 95,
"link": [
1,
1
],
"name": "R-Mode Entry",
"entranceCondition": {
"comeInWithRMode": {}
},
"requires": [],
"clearsObstacles": [
"R-Mode"
],
"flashSuitChecked": true,
"blueSuitChecked": true
},
{
"id": 125,
"link": [
1,
1
],
"name": "G-Mode Setup - Get Hit By Beetom",
"requires": [
"canComplexGMode",
{
"obstaclesCleared": [
"C"
]
}
],
"exitCondition": {
"leaveWithGModeSetup": {
"knockback": false
}
},
"flashSuitChecked": true,
"blueSuitChecked": true
},
{
"id": 8,
"link": [
1,
5
],
"name": "Base",
"requires": [],
"flashSuitChecked": true,
"blueSuitChecked": true
},
{
"id": 9,
"link": [
1,
7
],
"name": "G-Mode Morph Blind Movement Through Crumbles and Spikeway",
"entranceCondition": {
"comeInWithGMode": {
"mode": "any",
"morphed": true
}
},
"requires": [
"canOffScreenMovement",
{
"or": [
"h_artificialMorphBombs",
"h_artificialMorphSpringBall",
{
"ammo": {
"type": "PowerBomb",
"count": 2
}
}
]
},
{
"or": [
"h_artificialMorphPowerBomb",
"ScrewAttack",
"canTrickyGMode",
{
"and": [
"canComplexGMode",
{
"or": [
"Ice",
{
"ammo": {
"type": "Missile",
"count": 1
}
},
{
"ammo": {
"type": "Super",
"count": 1
}
}
]
}
]
},
{
"enemyDamage": {
"enemy": "Beetom",
"type": "contact",
"hits": 3
}
}
]
}
],
"clearsObstacles": [
"B"
],
"flashSuitChecked": true,
"blueSuitChecked": true,
"note": [
"Fall into the pit while being careful to only touch one of the crumble blocks.",
"Bounce up through the camera scroll blocks to overload PLMs with Spring Ball, Bombs, or Power Bombs.",
"This can be done with as few as 2 Power Bombs by placing the bomb, moving slightly, then as it boosts Samus horizontally,",
"hold backwards to avoid landing on another crumble block. Otherwise it takes 6 Power Bombs.",
"Move horizontally to fall through the crumble blocks that haven't been touched.",
"Carefully fall to not touch the spikes on the right, then roll through the spikeway.",
"After the camera stops scrolling, move another 2-3 tiles then exit G-Mode.",
"Make small jumps to reset the camera then quickly kill the Beetom as it jumps at Samus, or precisely jump underneath it."
],
"devNote": "FIXME: With only 2 Power Bombs, this would force the item pickup in direct G-mode."
},
{
"id": 82,
"link": [
1,
7
],
"name": "Direct G-Mode Morph Blind Movement, Overload PLMs with Item",
"entranceCondition": {
"comeInWithGMode": {
"mode": "direct",
"morphed": true
}
},
"requires": [
{
"itemNotCollectedAtNode": 5
},
"canRiskPermanentLossOfAccess",
"canOffScreenMovement",
"canComplexGMode",
{
"or": [
"canTrickyGMode",
"h_artificialMorphPowerBomb",
"ScrewAttack",
"Ice",
{
"ammo": {
"type": "Missile",
"count": 1
}
},
{
"ammo": {
"type": "Super",
"count": 1
}
},
{
"enemyDamage": {
"enemy": "Beetom",
"type": "contact",
"hits": 3
}
}
]
}
],
"clearsObstacles": [
"B"
],
"collectsItems": [
5
],
"flashSuitChecked": true,
"blueSuitChecked": true,
"note": [
"Roll through the item to mostly overload PLMs before falling into the pit and fully overloading them with the camera scroll blocks.",
"Fully overloading the PLMs before touching the camera scroll blocks will prevent the camera from following Samus after exiting G-mode.",
"While falling, carefully avoid touching the thorns on the right, then roll through the spikeway.",
"After the camera stops scrolling, move another 2-3 tiles then exit G-Mode.",
"Make small jumps to reset the camera then quickly kill the Beetom as it jumps at Samus, or precisely jump underneath it."
]
},
{
"id": 93,
"link": [
2,
1
],
"name": "Grapple Teleport Door Escape",
"entranceCondition": {
"comeInWithGrappleTeleport": {
"blockPositions": [
[
3,
12
],
[
3,
13
]
]
}
},
"requires": [
{
  "or": [
    "canGrappleTeleportWallEscape",
    {
      "doorUnlockedAtNode": 1
    }
  ]
}
],
"unlocksDoors": [
{
"types": [
"ammo"
],
"requires": []
}
],
"flashSuitChecked": true,
"blueSuitChecked": true
},
{
"id": 10,
"link": [
2,
1
],
"name": "Grapple Teleport Door Lock Skip",
"entranceCondition": {
"comeInWithGrappleTeleport": {
"blockPositions": [
[
3,
12
],
[
3,
13
]
]
}
},
"requires": [],
"bypassesDoorShell": "yes",
"flashSuitChecked": true,
"blueSuitChecked": true
},
{
"id": 11,
"link": [
2,
1
],
"name": "Carry Grapple Teleport (Top Position)",
"entranceCondition": {
"comeInWithGrappleTeleport": {
"blockPositions": [
[
3,
12
]
]
}
},
"requires": [],
"exitCondition": {
"leaveWithGrappleTeleport": {
"blockPositions": [
[
3,
12
]
]
}
},
"bypassesDoorShell": "yes",
"flashSuitChecked": true,
"blueSuitChecked": true
},
{
"id": 12,
"link": [
2,
1
],
"name": "Carry Grapple Teleport (Bottom Position)",
"entranceCondition": {
"comeInWithGrappleTeleport": {
"blockPositions": [
[
3,
13
]
]
}
},
"requires": [],
"exitCondition": {
"leaveWithGrappleTeleport": {
"blockPositions": [
[
3,
13
]
]
}
},
"bypassesDoorShell": "yes",
"flashSuitChecked": true,
"blueSuitChecked": true
},
{
"id": 13,
"link": [
2,
1
],
"name": "Grapple Teleport X-Ray Climb",
"entranceCondition": {
"comeInWithGrappleTeleport": {
"blockPositions": [
[
2,
18
],
[
2,
19
],
[
2,
28
],
[
2,
29
]
]
}
},
"requires": [
"canXRayClimb"
],
"bypassesDoorShell": "yes",
"flashSuitChecked": true,
"blueSuitChecked": true,
"note": [
"Exit the previous room with Samus in a standing pose (while grappled) with a horizontal position of 21 (as far right as possible).",
"After teleporting, press right to release Grapple while staying standing (not being forced into a crouch).",
"Then X-ray climb to get up to the door transition, without needing to open the door.",
"At the beginning of the climb, avoid pressing left without X-Ray being held, to prevent triggering the transition of the bottom door."
]
},
{
"id": 96,
"link": [
2,
2
],
"name": "R-Mode Entry",
"entranceCondition": {
"comeInWithRMode": {}
},
"requires": [],
"clearsObstacles": [
"R-Mode"
],
"flashSuitChecked": true,
"blueSuitChecked": true
},
{
"id": 14,
"link": [
2,
2
],
"name": "Leave With Runway",
"requires": [],
"exitCondition": {
"leaveWithRunway": {
"length": 21,
"openEnd": 1
}
},
"flashSuitChecked": true,
"blueSuitChecked": true
},
{
"id": 126,
"link": [
2,
2
],
"name": "Leave with Moondance",
"requires": [
{
"obstaclesCleared": [
"C"
]
},
"canMoondance",
"canCount",
"canTrickyUseFrozenEnemies",
{
"enemyDamage": {
"enemy": "Beetom",
"type": "contact",
"hits": 2
}
}
],
"exitCondition": {
"leaveWithStoredFallSpeed": {
"fallSpeedInTiles": 1
}
},
"flashSuitChecked": true,
"blueSuitChecked": true,
"note": "Freeze a Beetom at head height where Samus can Spinjump into it and begin Moondancing."
},
{
"id": 127,
"link": [
2,
2
],
"name": "Leave with Extended Moondance",
"requires": [
{
"obstaclesCleared": [
"C"
]
},
"canExtendedMoondance",
"canTrickyUseFrozenEnemies",
{
"enemyDamage": {
"enemy": "Beetom",
"type": "contact",
"hits": 2
}
},
"h_extendedMoondanceBeetomLeniency"
],
"exitCondition": {
"leaveWithStoredFallSpeed": {
"fallSpeedInTiles": 2
}
},
"flashSuitChecked": true,
"blueSuitChecked": true,
"note": [
"Freeze a Beetom at head height where Samus can Spinjump into it and begin Moondancing.",
"After 175 moonfalls, reposition the Beetom to chest height, then continue dancing."
]
},
{
"id": 15,
"link": [
2,
2
],
"name": "Crystal Flash",
"requires": [
{
"obstaclesNotCleared": [
"R-Mode"
]
},
"h_CrystalFlash"
],
"flashSuitChecked": true,
"blueSuitChecked": true
},
{
"id": 119,
"link": [
2,
2
],
"name": "Crystal Spark",
"requires": [
{
"canShineCharge": {
"usedTiles": 20,
"openEnd": 1
}
},
"h_CrystalSpark"
],
"flashSuitChecked": true,
"blueSuitChecked": true
},
{
"id": 120,
"link": [
2,
2
],
"name": "Come in Shinecharging, Crystal Spark",
"entranceCondition": {
"comeInShinecharging": {
"length": 20,
"openEnd": 0
},
"comesInHeated": "no"
},
"requires": [
"h_CrystalSpark"
],
"flashSuitChecked": true,
"blueSuitChecked": true
},
{
"id": 128,
"link": [
2,
2
],
"name": "G-Mode Setup - Get Hit By Beetom",
"requires": [
"canComplexGMode",
{
"obstaclesCleared": [
"C"
]
}
],
"exitCondition": {
"leaveWithGModeSetup": {
"knockback": false
}
},
"flashSuitChecked": true,
"blueSuitChecked": true
},
{
"id": 16,
"link": [
2,
3
],
"name": "Base",
"requires": [],
"flashSuitChecked": true,
"blueSuitChecked": true
},
{
"id": 17,
"link": [
2,
3
],
"name": "Leave Shinecharged (Fall Through Crumbles)",
"requires": [
{
"canShineCharge": {
"usedTiles": 20,
"openEnd": 1
}
},
{
"shineChargeFrames": 135
}
],
"exitCondition": {
"leaveShinecharged": {}
},
"unlocksDoors": [
{
"types": [
"missiles"
],
"requires": [
"never"
]
},
{
"types": [
"super"
],
"requires": []
},
{
"types": [
"powerbomb"
],
"requires": [
{
"or": [
"h_useSpringBall",
{
"and": [
"canTrickyJump",
{
"or": [
"canCrumbleJump",
"canWallJumpInstantMorph"
]
}
]
}
]
}
]
}
],
"flashSuitChecked": true,
"blueSuitChecked": true,
"devNote": "FIXME: An extra tile could be used if the top-right door is unlocked"
},
{
"id": 18,
"link": [
2,
3
],
"name": "Leave Shinecharged (Quick-Drop Through Crumbles)",
"requires": [
{
"canShineCharge": {
"usedTiles": 20,
"openEnd": 1
}
},
"canShinechargeMovement",
"canQuickDrop",
{
"shineChargeFrames": 115
}
],
"exitCondition": {
"leaveShinecharged": {}
},
"unlocksDoors": [
{
"types": [
"missiles"
],
"requires": [
"never"
]
},
{
"types": [
"super"
],
"requires": []
},
{
"types": [
"powerbomb"
],
"requires": [
{
"or": [
"h_useSpringBall",
{
"and": [
"canTrickyJump",
{
"or": [
"canCrumbleJump",
"canWallJumpInstantMorph"
]
}
]
}
]
}
]
}
],
"flashSuitChecked": true,
"blueSuitChecked": true,
"note": "Quick dropping through the crumbles allows reaching the door with more shinecharge time remaining.",
"devNote": "Should there be a tech for crumble quick drop?"
},
{
"id": 74,
"link": [
2,
3
],
"name": "Leave With Temporary Blue (Pause Remorph)",
"requires": [
{
"canShineCharge": {
"usedTiles": 20,
"openEnd": 0
}
},
"canPauseRemorphTemporaryBlue"
],
"exitCondition": {
"leaveWithTemporaryBlue": {}
},
"unlocksDoors": [
{
"types": [
"ammo"
],
"requires": []
}
],
"flashSuitChecked": true,
"blueSuitChecked": true,
"note": [
"Land on the crumble blocks while unmorphing, to retain temporary blue.",
"Then aim down and use a pause buffer to remorph and chain temporary blue."
]
},
{
"id": 19,
"link": [
2,
3
],
"name": "Grapple Teleport Door Lock Skip",
"entranceCondition": {
"comeInWithGrappleTeleport": {
"blockPositions": [
[
2,
18
],
[
2,
19
],
[
2,
28
],
[
2,
29
]
]
}
},
"requires": [],
"bypassesDoorShell": "yes",
"flashSuitChecked": true,
"blueSuitChecked": true
},
{
"id": 20,
"link": [
2,
3
],
"name": "Carry Grapple Teleport (Top Position)",
"entranceCondition": {
"comeInWithGrappleTeleport": {
"blockPositions": [
[
2,
18
]
]
}
},
"requires": [],
"exitCondition": {
"leaveWithGrappleTeleport": {
"blockPositions": [
[
2,
18
]
]
}
},
"bypassesDoorShell": "yes",
"flashSuitChecked": true,
"blueSuitChecked": true
},
{
"id": 21,
"link": [
2,
3
],
"name": "Carry Grapple Teleport (Upper Middle Position)",
"entranceCondition": {
"comeInWithGrappleTeleport": {
"blockPositions": [
[
2,
19
]
]
}
},
"requires": [],
"exitCondition": {
"leaveWithGrappleTeleport": {
"blockPositions": [
[
2,
19
]
]
}
},
"bypassesDoorShell": "yes",
"flashSuitChecked": true,
"blueSuitChecked": true
},
{
"id": 22,
"link": [
2,
3
],
"name": "Carry Grapple Teleport (Lower Middle Position)",
"entranceCondition": {
"comeInWithGrappleTeleport": {
"blockPositions": [
[
2,
28
]
]
}
},
"requires": [],
"exitCondition": {
"leaveWithGrappleTeleport": {
"blockPositions": [
[
2,
28
]
]
}
},
"bypassesDoorShell": "yes",
"flashSuitChecked": true,
"blueSuitChecked": true
},
{
"id": 23,
"link": [
2,
3
],
"name": "Carry Grapple Teleport (Bottom Position)",
"entranceCondition": {
"comeInWithGrappleTeleport": {
"blockPositions": [
[
2,
29
]
]
}
},
"requires": [],
"exitCondition": {
"leaveWithGrappleTeleport": {
"blockPositions": [
[
2,
29
]
]
}
},
"bypassesDoorShell": "yes",
"flashSuitChecked": true,
"blueSuitChecked": true
},
{
"id": 81,
"link": [
2,
3
],
"name": "Gain Flash Suit (Spikesuit)",
"requires": [
{
"canShineCharge": {
"usedTiles": 20,
"openEnd": 1
}
},
"canShinechargeMovementTricky",
{
"thornHits": 1
},
"canRiskySpikeSuit",
{
"shinespark": {
"frames": 12,
"excessFrames": 12
}
}
],
"flashSuitChecked": true,
"blueSuitChecked": true
},
{
"id": 24,
"link": [
2,
5
],
"name": "Base",
"requires": [],
"flashSuitChecked": true,
"blueSuitChecked": true
},
{
"id": 25,
"link": [
2,
7
],
"name": "G-Mode Morph Blind Movement Through Crumbles and Spikeway",
"entranceCondition": {
"comeInWithGMode": {
"mode": "any",
"morphed": true
}
},
"requires": [
"canOffScreenMovement",
{
"or": [
"h_artificialMorphBombs",
"h_artificialMorphSpringBall",
{
"ammo": {
"type": "PowerBomb",
"count": 2
}
}
]
},
{
"or": [
"h_artificialMorphPowerBomb",
"ScrewAttack",
"canTrickyGMode",
{
"and": [
"canComplexGMode",
{
"or": [
"Ice",
{
"ammo": {
"type": "Missile",
"count": 1
}
},
{
"ammo": {
"type": "Super",
"count": 1
}
}
]
}
]
},
{
"enemyDamage": {
"enemy": "Beetom",
"type": "contact",
"hits": 3
}
}
]
}
],
"clearsObstacles": [
"B"
],
"flashSuitChecked": true,
"blueSuitChecked": true,
"note": [
"Fall into the pit while being careful to only touch one of the crumble blocks.",
"Bounce up through the camera scroll blocks to overload PLMs with Spring Ball, Bombs, or Power Bombs.",
"This can be done with as few as 2 Power Bombs by placing the bomb, moving slightly, then as it boosts Samus horizontally,",
"hold backwards to avoid landing on another crumble block. Otherwise it takes 6 Power Bombs.",
"Move horizontally to fall through the crumble blocks that haven't been touched.",
"Carefully fall to not touch the spikes on the right, then roll through the spikeway.",
"After the camera stops scrolling, move another 2-3 tiles then exit G-Mode.",
"Make small jumps to reset the camera then quickly kill the Beetom as it jumps at Samus, or precisely jump underneath it."
]
},
{
"id": 83,
"link": [
2,
7
],
"name": "Direct G-Mode Morph Blind Movement, Overload PLMs with Item",
"entranceCondition": {
"comeInWithGMode": {
"mode": "direct",
"morphed": true
}
},
"requires": [
{
"itemNotCollectedAtNode": 5
},
"canRiskPermanentLossOfAccess",
"canOffScreenMovement",
"h_artificialMorphPowerBomb",
"canComplexGMode",
{
"or": [
"canTrickyGMode",
"h_artificialMorphPowerBomb",
"ScrewAttack",
"Ice",
{
"ammo": {
"type": "Missile",
"count": 1
}
},
{
"ammo": {
"type": "Super",
"count": 1
}
},
{
"enemyDamage": {
"enemy": "Beetom",
"type": "contact",
"hits": 3
}
}
]
}
],
"clearsObstacles": [
"B"
],
"collectsItems": [
5
],
"flashSuitChecked": true,
"blueSuitChecked": true,
"note": [
"Carefully Bomb boost across the pit and roll through the item to mostly overload PLMs before falling into the pit and fully overloading them with the camera scroll blocks.",
"Fully overloading the PLMs before touching the camera scroll blocks will prevent the camera from following Samus after exiting G-mode.",
"While falling, carefully avoid touching the thorns on the right, then roll through the spikeway.",
"After the camera stops scrolling, move another 2-3 tiles then exit G-Mode.",
"Make small jumps to reset the camera then quickly kill the Beetom as it jumps at Samus, or precisely jump underneath it."
],
"devNote": "With more movement items, Samus can use the camera scroll blocks above the crumble blocks to overload PLMs."
},
{
"id": 26,
"link": [
3,
1
],
"name": "X-Ray Climb",
"entranceCondition": {
"comeInWithDoorStuckSetup": {}
},
"requires": [
"canXRayClimb"
],
"flashSuitChecked": true,
"blueSuitChecked": true,
"note": "Climb up 1 screen."
},
{
"id": 27,
"link": [
3,
1
],
"name": "Very Deep Stuck X-Ray Climb",
"entranceCondition": {
"comeInWithGMode": {
"mode": "direct",
"morphed": false
}
},
"requires": [
"canGModeXRayClimb"
],
"bypassesDoorShell": "yes",
"flashSuitChecked": true,
"blueSuitChecked": true,
"note": [
"Enter with G-mode direct, back up to between 1 and 6 pixels from the door transition, and activate X-ray to get very deep stuck in the door.",
"Climb up 1 screen, and perform a turnaround buffered spin-jump away from the door to trigger the transition, bypassing any lock on the door."
]
},
{
"id": 28,
"link": [
3,
2
],
"name": "Beetom Clip",
"requires": [
{
"notable": "Beetom Clip"
},
{
"noBlueSuit": {}
},
{
"or": [
"h_XRayMorphIceClip",
"h_preciseIceClip"
]
},
"Morph",
{
"enemyDamage": {
"enemy": "Beetom",
"type": "contact",
"hits": 2
}
},
{
"or": [
"h_preciseIceClip",
"canWallJump",
"HiJump",
"SpaceJump",
{
"enemyDamage": {
"enemy": "Beetom",
"type": "contact",
"hits": 2
}
}
]
},
{
"or": [
"canCrumbleJump",
"canWallJump",
"HiJump",
"SpaceJump"
]
}
],
"flashSuitChecked": true,
"blueSuitChecked": true,
"note": [
"Jump and freeze the Beetom at a precise location in order to jump through the crumble blocks.",
"The pixel window is larger and higher with Morph and an X-Ray Stand Up.",
"Two Beetom hits are assumed, but with failed attempts it could take more, possibly requiring leaving the Beetom and going back to the right to farm."
],
"devNote": [
"Morph is required to lure a Beetom. Morphless tunnel crawl should not be required."
]
},
{
"id": 129,
"link": [
3,
2
],
"name": "Bring a Beetom Through the Crumble Blocks",
"requires": [
{
"obstaclesNotCleared": [
"A"
]
},
{
"notable": "Beetom Clip"
},
{
"noBlueSuit": {}
},
{
"or": [
"h_XRayMorphIceClip",
"h_preciseIceClip"
]
},
"Morph",
{
"enemyDamage": {
"enemy": "Beetom",
"type": "contact",
"hits": 3
}
},
{
"or": [
"h_preciseIceClip",
"canWallJump",
"HiJump",
"SpaceJump",
{
"enemyDamage": {
"enemy": "Beetom",
"type": "contact",
"hits": 2
}
}
]
},
{
"or": [
"canCrumbleJump",
"canWallJump",
"HiJump",
"SpaceJump"
]
}
],
"clearsObstacles": [
"C"
],
"flashSuitChecked": true,
"blueSuitChecked": true,
"note": [
"Bring two Beetoms through the morph tunnel, damage can be limited by carefully manipulating the Beetoms.",
"Freeze both and allow one to unfreeze and refreeze it in position to clip. Allow the second Beetom to unfreeze and latch onto Samus.",
"Perform the crumble block clip with the Beetom attached to bring it up to the top two doors."
],
"devNote": "This strat is for bringing a Beetom above the crumble blocks in order to be used for a Moondance or G-Mode setup from either of the top two doors."
},
{
"id": 29,
"link": [
3,
2
],
"name": "Beetom Clip (High Pixel, Preserve Flash Suit)",
"requires": [
{
"notable": "Beetom Clip (High Pixel, Preserve Flash Suit)"
},
{
"noBlueSuit": {}
},
"h_highPixelIceClip",
"Morph",
{
"enemyDamage": {
"enemy": "Beetom",
"type": "contact",
"hits": 2
}
},
{
"or": [
"canWallJump",
"HiJump",
"SpaceJump",
{
"enemyDamage": {
"enemy": "Beetom",
"type": "contact",
"hits": 2
}
}
]
}
],
"flashSuitChecked": true,
"blueSuitChecked": true,
"note": [
"Jump and freeze the Beetom at a pixel perfect location in order to jump through the crumble blocks.",
"The pixel is nearly the highest possible position with HiJump disabled, from the left ledge.",
"After positioning the Beetom, get on top of it with a tight down grab, while refreezing it if necessary.",
"Jump through the crumble blocks then down grab again to get to the top area.",
"Two Beetom hits are assumed, but with failed attempts it could take more, possibly requiring leaving the Beetom and going back to the right to farm."
],
"devNote": "Morph is required to lure a Beetom. Morphless tunnel crawl should not be required."
},
{
"id": 101,
"link": [
3,
2
],
"name": "Come in Shinecharged - Gain Blue Suit (X-Mode Superjump)",
"entranceCondition": {
"comeInShinecharged": {}
},
"requires": [
{
"shineChargeFrames": 135
},
{
"thornHits": 1
},
{
"or": [
{
"thornHits": "n_thornXModeLenience"
},
"canTrickyDodgeEnemies",
{
"enemyKill": {
"enemies": [
[
"Beetom",
"Beetom"
]
],
"excludedWeapons": [
"Bombs"
]
}
}
]
},
"canSuperjump",
{
"shinespark": {
"frames": 4,
"excessFrames": 0
}
}
],
"flashSuitChecked": true,
"blueSuitChecked": true,
"note": [
"By bouncing far enough left, it is possible to get a 2-frame window for the X-mode."
],
"devNote": [
"FIXME: add a comeInShinecharging variant."
]
},
{
"id": 102,
"link": [
3,
2
],
"name": "Gain Blue Suit (Double X-Mode Superjump)",
"requires": [
{
"or": [
"h_thornDoubleXModeBlueSuit",
{
"and": [
"h_thornDoubleXModeBlueSuitWithoutLenience",
{
"or": [
{
"obstaclesCleared": [
"A"
]
},
"canTrickyDodgeEnemies",
{
"enemyKill": {
"enemies": [
[
"Beetom",
"Beetom"
]
],
"excludedWeapons": [
"Bombs"
]
}
}
]
}
]
}
]
},
"canSuperjump",
{
"shinespark": {
"frames": 4,
"excessFrames": 0
}
}
],
"flashSuitChecked": true,
"blueSuitChecked": true,
"note": [
"By bouncing far enough left, it is possible to get a 2-frame window for the X-mode."
]
},
{
"id": 30,
"link": [
3,
2
],
"name": "Grapple Teleport",
"entranceCondition": {
"comeInWithGrappleTeleport": {
"blockPositions": [
[
12,
12
],
[
12,
13
]
]
}
},
"requires": [],
"flashSuitChecked": true,
"blueSuitChecked": true
},
{
"id": 121,
"link": [
3,
3
],
"name": "Come in Shinecharging, Crystal Spark",
"entranceCondition": {
"comeInShinecharging": {
"length": 5,
"openEnd": 0
},
"comesInHeated": "no"
},
"requires": [
"h_CrystalSpark"
],
"flashSuitChecked": true,
"blueSuitChecked": true
},
{
"id": 97,
"link": [
3,
3
],
"name": "R-Mode Entry",
"entranceCondition": {
"comeInWithRMode": {}
},
"requires": [],
"clearsObstacles": [
"R-Mode"
],
"flashSuitChecked": true,
"blueSuitChecked": true
},
{
"id": 31,
"link": [
3,
3
],
"name": "Leave With Runway",
"requires": [],
"exitCondition": {
"leaveWithRunway": {
"length": 6,
"openEnd": 1
}
},
"flashSuitChecked": true,
"blueSuitChecked": true
},
{
"id": 32,
"link": [
3,
3
],
"name": "Leave With Runway - Frozen Beetom",
"requires": [
{
"noBlueSuit": {}
},
"Morph",
"h_frozenEnemyRunway",
{
"enemyDamage": {
"enemy": "Beetom",
"type": "contact",
"hits": 2
}
}
],
"exitCondition": {
"leaveWithRunway": {
"length": 8,
"openEnd": 0
}
},
"flashSuitChecked": true,
"blueSuitChecked": true,
"note": [
"Bring a Beetom from the right of the spiky tunnel to the bottom left door.",
"Jump and freeze it at the right height while leaving a half-tile gap between the Beetom and the runway to extend the runway as much as possible.",
"If needing to leave with a multi-stutter short charge, the Beetom will need to be positioned more precisely, which can be done as above, but only on the descent of a jump.",
"Alternatively, bring two Beetoms and stand on one while freezing the other at chest height.",
"Freezing the lower one may be made easier or damageless by scrolling the camera when the Beetom is in the correct position and freezing it with a hero shot from the right."
]
},
{
"id": 130,
"link": [
3,
3
],
"name": "Leave With Runway - Two Frozen Beetoms",
"requires": [
{
"noBlueSuit": {}
},
"Morph",
"h_trickyFrozenEnemyRunway",
{
"enemyDamage": {
"enemy": "Beetom",
"type": "contact",
"hits": 3
}
}
],
"exitCondition": {
"leaveWithRunway": {
"length": 9,
"openEnd": 0
}
},
"flashSuitChecked": true,
"blueSuitChecked": true,
"note": [
"An easy setup for this runway is to freeze one Beetom on the ground and then stand on it to freeze two other Beetoms at chest height.",
"It is possible to leave the Beetoms and refill using the Zebbos."
]
},
{
"id": 107,
"link": [
3,
3
],
"name": "Come in Shinecharged, Gain Flash Suit (Spikesuit)",
"entranceCondition": {
"comeInShinecharged": {}
},
"requires": [
{
"shineChargeFrames": 80
},
{
"thornHits": 1
},
{
"or": [
{
"thornHits": "n_spikeSuitLenience"
},
"canTrickyDodgeEnemies",
{
"enemyKill": {
"enemies": [
[
"Beetom",
"Beetom"
]
],
"excludedWeapons": [
"Bombs"
]
}
}
]
},
"canPatientSpikeSuit",
{
"shinespark": {
"frames": 1,
"excessFrames": 1
}
}
],
"flashSuitChecked": true,
"blueSuitChecked": true
},
{
"id": 108,
"link": [
3,
3
],
"name": "Come in Shinecharging, Gain Flash Suit (Spikesuit)",
"entranceCondition": {
"comeInShinecharging": {
"length": 5,
"openEnd": 1
}
},
"requires": [
{
"thornHits": 1
},
{
"or": [
{
"thornHits": "n_spikeSuitLenience"
},
"canTrickyDodgeEnemies",
{
"enemyKill": {
"enemies": [
[
"Beetom",
"Beetom"
]
],
"excludedWeapons": [
"Bombs"
]
}
}
]
},
"canPatientSpikeSuit",
{
"shinespark": {
"frames": 1,
"excessFrames": 1
}
}
],
"flashSuitChecked": true,
"blueSuitChecked": true
},
{
"id": 103,
"link": [
3,
3
],
"name": "Gain Flash Suit (X-Mode Spikesuit)",
"requires": [
{
"or": [
"h_thornXModeSpikeSuit",
{
"and": [
"h_thornXModeSpikeSuitWithoutLenience",
{
"or": [
{
"obstaclesCleared": [
"A"
]
},
"canTrickyDodgeEnemies",
{
"enemyKill": {
"enemies": [
[
"Beetom",
"Beetom"
]
],
"excludedWeapons": [
"Bombs"
]
}
}
]
}
]
}
]
},
{
"shinespark": {
"frames": 12,
"excessFrames": 12
}
}
],
"flashSuitChecked": true,
"blueSuitChecked": true,
"note": [
"By bouncing far enough left, it is possible to get a 2-frame window for the X-mode."
]
},
{
"id": 104,
"link": [
3,
3
],
"name": "Come in Shinecharged - Gain Blue Suit (X-Mode)",
"entranceCondition": {
"comeInShinecharged": {}
},
"requires": [
{
"shineChargeFrames": 135
},
{
"or": [
"h_thornXModeBlueSuit",
{
"and": [
"h_thornXModeBlueSuitWithoutLenience",
{
"or": [
"canTrickyDodgeEnemies",
{
"enemyKill": {
"enemies": [
[
"Beetom",
"Beetom"
]
],
"excludedWeapons": [
"Bombs"
]
}
}
]
}
]
}
]
},
{
"shinespark": {
"frames": 0,
"excessFrames": 0
}
}
],
"flashSuitChecked": true,
"blueSuitChecked": true,
"note": [
"By bouncing far enough left, it is possible to get a 2-frame window for the X-mode."
]
},
{
"id": 105,
"link": [
3,
3
],
"name": "Gain Blue Suit (Double X-Mode)",
"requires": [
{
"or": [
"h_thornDoubleXModeBlueSuit",
{
"and": [
"h_thornDoubleXModeBlueSuitWithoutLenience",
{
"or": [
{
"obstaclesCleared": [
"A"
]
},
"canTrickyDodgeEnemies",
{
"enemyKill": {
"enemies": [
[
"Beetom",
"Beetom"
]
],
"excludedWeapons": [
"Bombs"
]
}
}
]
}
]
}
]
},
{
"shinespark": {
"frames": 0,
"excessFrames": 0
}
}
],
"flashSuitChecked": true,
"blueSuitChecked": true,
"note": [
"By bouncing far enough left, it is possible to get a 2-frame window for the X-mode."
]
},
{
"id": 90,
"link": [
3,
3
],
"name": "X-Mode, Leave Shinecharged",
"requires": [
"h_XModeShinecharge",
{
"thornHits": 1
},
{
"or": [
{
"thornHits": "n_thornXModeLenience"
},
{
"obstaclesCleared": [
"A"
]
},
"canTrickyDodgeEnemies",
{
"enemyKill": {
"enemies": [
[
"Beetom",
"Beetom"
]
],
"excludedWeapons": [
"Bombs"
]
}
}
]
},
{
"shineChargeFrames": 60
},
{
"or": [
"canXModeMovement",
{
"shineChargeFrames": 15
}
]
}
],
"exitCondition": {
"leaveShinecharged": {}
},
"flashSuitChecked": true,
"blueSuitChecked": true,
"note": [
"With some dash speed, bounce into the opening of the spikeway, and enter X-mode.",
"The spike knockback will push Samus back out of the spikeway.",
"By bouncing far enough left, it is possible to get a 2-frame window for the X-mode."
],
"detailNote": [
"By holding an angle button, it is possible turn around in X-mode without losing dash speed.",
"Arm pumps can be used to get close to the ledge before shinecharging, to leave with more frames remaining."
]
},
{
"id": 122,
"link": [
3,
3
],
"name": "Leave With Temporary Blue (X-Mode Shinecharge)",
"requires": [
"canXMode",
"h_shinechargeMaxRunway",
"canChainTemporaryBlue",
{
"thornHits": 1
},
{
"or": [
{
"thornHits": "n_thornXModeLenience"
},
{
"obstaclesCleared": [
"A"
]
},
"canTrickyDodgeEnemies",
{
"enemyKill": {
"enemies": [
[
"Beetom",
"Beetom"
]
],
"excludedWeapons": [
"Bombs"
]
}
}
]
}
],
"exitCondition": {
"leaveWithTemporaryBlue": {}
},
"flashSuitChecked": true,
"blueSuitChecked": true,
"note": [
"With some dash speed, bounce into the opening of the spikeway, and enter X-mode.",
"The spike knockback will push Samus back out of the spikeway.",
"By bouncing far enough left, it is possible to get a 2-frame window for the X-mode."
],
"detailNote": [
"By holding an angle button, it is possible turn around in X-mode without losing dash speed.",
"Crouch to charge a shinespark, release dash to cancel X-Ray and exit out of X-Mode and hold angle until temporary blue."
]
},
{
"id": 79,
"link": [
3,
3
],
"name": "G-Mode Setup - Get Hit By Zebbo",
"requires": [
"Morph",
{
"or": [
"canTrickyJump",
"Ice"
]
}
],
"exitCondition": {
"leaveWithGModeSetup": {}
},
"unlocksDoors": [
{
"types": [
"ammo"
],
"requires": []
}
],
"flashSuitChecked": true,
"blueSuitChecked": true,
"note": "Carefully lure the Beetom below the platform, then lure a Zebbo to the left door. Be careful not to let the Zebbo go off camera, or it will despawn.",
"devNote": "It is possible to do this with a Beetom, avoiding the tricky jump, but we will ignore that here."
},
{
"id": 84,
"link": [
3,
3
],
"name": "Direct G-Mode Morph, Power Bomb the Item, Collect Item and Return",
"entranceCondition": {
"comeInWithGMode": {
"mode": "direct",
"morphed": true
}
},
"requires": [
"canPowerBombItemOverloadPLMs",
"canComplexGMode",
{
"itemNotCollectedAtNode": 5
},
{
"or": [
"Morph",
"h_artificialMorphSpringBall"
]
},
{
"ammo": {
"type": "PowerBomb",
"count": 2
}
},
{
"or": [
"canWallJump",
"SpaceJump",
{
"and": [
"HiJump",
"canSpringBallJumpMidAir"
]
},
"h_artificialMorphLongIBJ",
{
"and": [
{
"blueSuitShinecharge": {}
},
{
"or": [
{
"shinespark": {
"frames": 13,
"excessFrames": 3
}
},
{
"and": [
"HiJump",
{
"shinespark": {
"frames": 9,
"excessFrames": 3
}
}
]
}
]
}
]
}
]
}
],
"collectsItems": [
5
],
"flashSuitChecked": true,
"blueSuitChecked": true,
"note": [
"Place two precisely positioned Power Bombs to overload PLMs. This is at the same height as the tile above the door.",
"This ends up being the max height Samus can jump and place it while at the very bottom of the room, with a midair morph or artificially morphed Spring Ball jump.",
"Because PLMs are overloaded, Samus needs to exit G-mode at the item to collect it before returning through the crumble blocks."
],
"devNote": "This does not require canRiskPermanentLossOfAccess if Samus returns through the crumble blocks."
},
{
"id": 91,
"link": [
3,
3
],
"name": "Zebbo and Beetom Farm",
"requires": [
"Morph",
{
"resetRoom": {
"nodes": [
3
]
}
},
{
"cycleFrames": 630
},
{
"or": [
{
"enemyKill": {
"enemies": [
[
"Beetom",
"Beetom"
]
],
"explicitWeapons": [
"ScrewAttack",
"Missile",
"PowerBomb"
]
}
},
{
"and": [
"h_useMorphBombs",
{
"or": [
"Ice",
"canTrickyDodgeEnemies"
]
},
{
"cycleFrames": 400
}
]
}
]
}
],
"clearsObstacles": [
"A"
],
"resetsObstacles": [
"B",
"R-Mode",
"C"
],
"farmCycleDrops": [
{
"enemy": "Beetom",
"count": 2
},
{
"enemy": "Zebbo",
"count": 1
}
],
"flashSuitChecked": true,
"blueSuitChecked": true
},
{
"id": 75,
"link": [
3,
4
],
"name": "Speedball, Long Temporary Blue Chain",
"entranceCondition": {
"comeInBlueSpinning": {
"maxExtraRunSpeed": "$1.E",
"unusableTiles": 1
}
},
"requires": [
"canSpeedball",
"canLongChainTemporaryBlue"
],
"exitCondition": {
"leaveWithTemporaryBlue": {}
},
"unlocksDoors": [
{
"types": [
"ammo"
],
"requires": []
}
],
"flashSuitChecked": true,
"blueSuitChecked": true,
"note": [
"Enter the room with a blue speed jump to speedball through the spike tunnel.",
"Then perform a long temporary blue chain across the room."
],
"devNote": [
"Somewhat higher run speeds can also work but with greater difficulty."
]
},
{
"id": 76,
"link": [
3,
4
],
"name": "Spring Ball Bounce, Long Temporary Blue Chain",
"entranceCondition": {
"comeInShinecharging": {
"length": 5,
"openEnd": 0
}
},
"requires": [
"canSpringBallBounce",
{
"thornHits": 4
},
"canLongChainTemporaryBlue"
],
"exitCondition": {
"leaveWithTemporaryBlue": {}
},
"unlocksDoors": [
{
"types": [
"ammo"
],
"requires": []
}
],
"flashSuitChecked": true,
"blueSuitChecked": true,
"note": [
"Gain temporary blue, and use Spring Ball to bounce through the spike tunnel.",
"Then perform a long temporary blue chain across the room."
],
"devNote": [
"FIXME: It's possible to farm some drops along the way."
]
},
{
"id": 85,
"link": [
3,
5
],
"name": "Direct G-Mode Morph, Power Bomb the Item",
"entranceCondition": {
"comeInWithGMode": {
"mode": "direct",
"morphed": true
}
},
"requires": [
"canPowerBombItemOverloadPLMs",
{
"itemNotCollectedAtNode": 5
},
"canRiskPermanentLossOfAccess",
{
"or": [
"Morph",
"h_artificialMorphSpringBall"
]
},
{
"ammo": {
"type": "PowerBomb",
"count": 2
}
},
{
"or": [
"canWallJump",
"SpaceJump",
{
"and": [
"HiJump",
"canSpringBallJumpMidAir"
]
},
"h_artificialMorphLongIBJ",
{
"and": [
{
"blueSuitShinecharge": {}
},
{
"or": [
{
"shinespark": {
"frames": 13,
"excessFrames": 3
}
},
{
"and": [
"HiJump",
{
"shinespark": {
"frames": 9,
"excessFrames": 3
}
}
]
}
]
}
]
}
]
}
],
"flashSuitChecked": true,
"blueSuitChecked": true,
"note": [
"Place two precisely positioned Power Bombs to overload PLMs. This is at the same height as the tile above the door.",
"This ends up being the max height Samus can jump and place it while at the very bottom of the room, with a midair morph or artificially morphed Spring Ball jump."
],
"devNote": "This requires canRiskPermanentLossOfAccess unless Samus returns through the crumble blocks."
},
{
"id": 33,
"link": [
3,
6
],
"name": "Base",
"requires": [
"Morph"
],
"flashSuitChecked": true,
"blueSuitChecked": true
},
{
"id": 34,
"link": [
3,
6
],
"name": "Spikeway Tunnel Crawl (Left to Right)",
"requires": [
{
"notable": "Spikeway Tunnel Crawl"
},
"canTunnelCrawl",
"canTrickyJump",
{
"thornHits": 31
},
{
"or": [
{
"noBlueSuit": {}
},
{
"and": [
"h_trickyToCarryBlueSuit",
{
"thornHits": 31
}
]
}
]
}
],
"flashSuitChecked": true,
"blueSuitChecked": true,
"note": [
"Moving left to right is a bit more tricky to get into the tunnel.",
"Land aiming down approximately 3 pixels inside the leftmost tile.",
"If Samus is too far left she will fall out, too far right and a thorn pushes her out, not aiming down puts her stuck in crouch.",
"Then spinjump right to take a thorn hit and get wedged in the ceiling.",
"Then start the crawl while taking constant thorn damage. Perform one jump per thorn hit.",
"Note that if Samus is hit by the thorn before landing, aiming down is not necessary.",
"Note that a moonfall may be helpful to get into the tunnel.",
"Without moonwalk, a downback can be used instead: fall off with low speed and start a downback right away. (This doesn't always work.)"
]
},
{
"id": 35,
"link": [
3,
6
],
"name": "Spikeway Aim Cancel Wiggle",
"requires": [
{
"notable": "Spikeway Aim Cancel Wiggle"
},
"canTurnaroundAimCancel",
"canBeVeryPatient",
{
"thornHits": 100
},
{
"or": [
{
"noBlueSuit": {}
},
{
"thornHits": 100
}
]
}
],
"flashSuitChecked": true,
"blueSuitChecked": true,
"note": "Wiggle through the thorns. It is a long wiggle with a lot of thorn hits."
},
{
"id": 36,
"link": [
3,
6
],
"name": "Spikeway X-Ray Wiggle (Left to Right)",
"requires": [
{
"notable": "Spikeway X-Ray Wiggle"
},
"canXRayWaitForIFrames",
"canXRayTurnaround",
{
"thornHits": 1
},
"h_trickyToCarryBlueSuit"
],
"flashSuitChecked": true,
"blueSuitChecked": true,
"note": [
"Maintain i-frames by using X-Ray whenever a thorn would deal damage.",
"Move by alternating between X-Ray turnarounds and normal turnarounds.",
"Simply crouch again following any accidental X-Ray Standups."
]
},
{
"id": 37,
"link": [
3,
6
],
"name": "G-Mode Morph Through Spikeway",
"entranceCondition": {
"comeInWithGMode": {
"mode": "any",
"morphed": true
}
},
"requires": [],
"flashSuitChecked": true,
"blueSuitChecked": true
},
{
"id": 38,
"link": [
4,
1
],
"name": "Grapple Teleport",
"entranceCondition": {
"comeInWithGrappleTeleport": {
"blockPositions": [
[
5,
3
],
[
7,
2
]
]
}
},
"requires": [],
"flashSuitChecked": true,
"blueSuitChecked": true
},
{
"id": 94,
"link": [
4,
1
],
"name": "Grapple Teleport Door Escape",
"entranceCondition": {
"comeInWithGrappleTeleport": {
"blockPositions": [
[
3,
12
],
[
3,
13
]
]
}
},
"requires": [
{
  "or": [
    "canGrappleTeleportWallEscape",
    {
      "doorUnlockedAtNode": 1
    }
  ]
}
],
"unlocksDoors": [
{
"types": [
"ammo"
],
"requires": []
}
],
"flashSuitChecked": true,
"blueSuitChecked": true
},
{
"id": 39,
"link": [
4,
1
],
"name": "Grapple Teleport Door Lock Skip",
"entranceCondition": {
"comeInWithGrappleTeleport": {
"blockPositions": [
[
3,
12
],
[
3,
13
]
]
}
},
"requires": [],
"bypassesDoorShell": "yes",
"flashSuitChecked": true,
"blueSuitChecked": true
},
{
"id": 40,
"link": [
4,
1
],
"name": "Carry Grapple Teleport (Top Position)",
"entranceCondition": {
"comeInWithGrappleTeleport": {
"blockPositions": [
[
3,
12
]
]
}
},
"requires": [],
"exitCondition": {
"leaveWithGrappleTeleport": {
"blockPositions": [
[
3,
12
]
]
}
},
"bypassesDoorShell": "yes",
"flashSuitChecked": true,
"blueSuitChecked": true
},
{
"id": 41,
"link": [
4,
1
],
"name": "Carry Grapple Teleport (Bottom Position)",
"entranceCondition": {
"comeInWithGrappleTeleport": {
"blockPositions": [
[
3,
13
]
]
}
},
"requires": [],
"exitCondition": {
"leaveWithGrappleTeleport": {
"blockPositions": [
[
3,
13
]
]
}
},
"bypassesDoorShell": "yes",
"flashSuitChecked": true,
"blueSuitChecked": true
},
{
"id": 42,
"link": [
4,
1
],
"name": "Grapple Teleport X-Ray Climb",
"entranceCondition": {
"comeInWithGrappleTeleport": {
"blockPositions": [
[
2,
18
],
[
2,
19
],
[
2,
28
],
[
2,
29
]
]
}
},
"requires": [
"canXRayClimb"
],
"bypassesDoorShell": "yes",
"flashSuitChecked": true,
"blueSuitChecked": true,
"note": [
"Exit the previous room with Samus in a standing pose (while grappled) with a horizontal position of 21 (as far right as possible).",
"After teleporting, press right to release Grapple while staying standing (not being forced into a crouch).",
"Then X-ray climb to get up to the door transition, without needing to open the door.",
"At the beginning of the climb, avoid pressing left without X-Ray being held, to prevent triggering the transition of the bottom door."
]
},
{
"id": 78,
"link": [
4,
2
],
"name": "Wall Ice Clip X-Ray Climb",
"requires": [
{
"notable": "Wall Ice Clip X-Ray Climb"
},
"canWallIceClip",
{
"thornHits": 1
},
"canXRayClimb",
"canUseIFrames",
"canNeutralDamageBoost"
],
"flashSuitChecked": true,
"blueSuitChecked": false,
"note": [
"Freeze a Zebbo inside the wall above the right side of the spikeway, close to the ceiling thorns.",
"Face right, equip X-Ray, move at least a few pixels away from the wall, and jump straight up into the ceiling thorns.",
"If successful, Samus will be knocked back into the wall and end up standing inside it.",
"Use X-Ray immediately to prevent additional thorn hits.",
"If Samus is high enough to be touching the thorns, then i-frames will continue to be refreshed once per second.",
"While X-Ray climbing, be careful to only release X-Ray soon after i-frames are refreshed.",
"Crouch before pressing X-Ray again."
],
"devNote": [
"Standing at least 3 pixels away from the wall ensures that knockback pushes Samus fully up against the ceiling;",
"there is also no problem with standing further right, even hanging off the ledge:",
"as long as Samus is still in range to take damage from the thorns above, they will be able to knock Samus into the wall.",
"It is possible to freeze the Zeebo lower, but if Samus is too low, it will be necessary to take 3 thorn hits.",
"It is also possible to get stuck inside the wall by taking knockback from a floor thorn, or by using a frozen Beetom as a platform.",
"However those methods are not any easier, more damage will be taken, and the climb will be longer.",
"If Samus begins climbing at a level below the ceiling thorns,",
"then as Samus approaches the thorns, X-Ray will need to only be released while turning to the right,",
"in order to prevent the thorn hits from knocking Samus out of the wall."
]
},
{
"id": 43,
"link": [
4,
3
],
"name": "Grapple Teleport Door Lock Skip",
"entranceCondition": {
"comeInWithGrappleTeleport": {
"blockPositions": [
[
2,
18
],
[
2,
19
],
[
2,
28
],
[
2,
29
]
]
}
},
"requires": [],
"bypassesDoorShell": "yes",
"flashSuitChecked": true,
"blueSuitChecked": true
},
{
"id": 44,
"link": [
4,
3
],
"name": "Carry Grapple Teleport (Top Position)",
"entranceCondition": {
"comeInWithGrappleTeleport": {
"blockPositions": [
[
2,
18
]
]
}
},
"requires": [],
"exitCondition": {
"leaveWithGrappleTeleport": {
"blockPositions": [
[
2,
18
]
]
}
},
"bypassesDoorShell": "yes",
"flashSuitChecked": true,
"blueSuitChecked": true
},
{
"id": 45,
"link": [
4,
3
],
"name": "Carry Grapple Teleport (Upper Middle Position)",
"entranceCondition": {
"comeInWithGrappleTeleport": {
"blockPositions": [
[
2,
19
]
]
}
},
"requires": [],
"exitCondition": {
"leaveWithGrappleTeleport": {
"blockPositions": [
[
2,
19
]
]
}
},
"bypassesDoorShell": "yes",
"flashSuitChecked": true,
"blueSuitChecked": true
},
{
"id": 46,
"link": [
4,
3
],
"name": "Carry Grapple Teleport (Lower Middle Position)",
"entranceCondition": {
"comeInWithGrappleTeleport": {
"blockPositions": [
[
2,
28
]
]
}
},
"requires": [],
"exitCondition": {
"leaveWithGrappleTeleport": {
"blockPositions": [
[
2,
28
]
]
}
},
"bypassesDoorShell": "yes",
"flashSuitChecked": true,
"blueSuitChecked": true
},
{
"id": 47,
"link": [
4,
3
],
"name": "Carry Grapple Teleport (Bottom Position)",
"entranceCondition": {
"comeInWithGrappleTeleport": {
"blockPositions": [
[
2,
29
]
]
}
},
"requires": [],
"exitCondition": {
"leaveWithGrappleTeleport": {
"blockPositions": [
[
2,
29
]
]
}
},
"bypassesDoorShell": "yes",
"flashSuitChecked": true,
"blueSuitChecked": true
},
{
"id": 86,
"link": [
4,
3
],
"name": "G-Mode Morph Through Spikeway",
"entranceCondition": {
"comeInWithGMode": {
"mode": "any",
"morphed": true
}
},
"requires": [
{
  "or": [
    {
      "and": [
        {
          "tech": "canBombHorizontally"
        },
        {
          "ammo": {
            "type": "PowerBomb",
            "count": 6
          }
        },
        {
          "or": [
            "canComplexGMode",
            {
              "ammo": {
                "type": "PowerBomb",
                "count": 2
              }
            }
          ]
        }
      ]
    },
    {
      "and": [
        "h_artificialMorphSpringBall",
        {
          "ammo": {
            "type": "PowerBomb",
            "count": 3
          }
        },
        {
          "or": [
            "canComplexGMode",
            {
              "ammo": {
                "type": "PowerBomb",
                "count": 1
              }
            }
          ]
        }
      ]
    },
    {
      "and": [
        "h_artificialMorphBombs",
        "canTrickyGMode"
      ]
    }
  ]
}
],
"clearsObstacles": [
"A"
],
"flashSuitChecked": true,
"blueSuitChecked": true,
"devNote": "G-mode isnt helpful here with real Morph."
},
{
"id": 114,
"link": [
4,
3
],
"name": "G-Mode Morph with Blue Suit",
"entranceCondition": {
"comeInWithGMode": {
"mode": "any",
"morphed": true
}
},
"requires": [
"h_blueSuitGMode",
{
"or": [
"h_artificialMorphSpringBall",
{
"and": [
"h_artificialMorphBombs",
"canTrickyDodgeEnemies"
]
}
]
}
],
"clearsObstacles": [
"A"
],
"flashSuitChecked": true,
"blueSuitChecked": true,
"note": [
"Samus is only able to kill enemies with blue suit while moving and not falling.",
"With bombs as the only movement option, Samus should only touch the enemies while grounded and moving horizontally."
]
},
{
"id": 87,
"link": [
4,
3
],
"name": "Direct G-Mode Morph Through Spikeway, Power Bomb the Item, Collect Item and Return",
"entranceCondition": {
"comeInWithGMode": {
"mode": "direct",
"morphed": true
}
},
"requires": [
"canPowerBombItemOverloadPLMs",
"canComplexGMode",
{
"itemNotCollectedAtNode": 5
},
{
"or": [
"Morph",
"h_artificialMorphSpringBall"
]
},
{
"or": [
{
"ammo": {
"type": "PowerBomb",
"count": 3
}
},
{
"and": [
"Morph",
{
"or": [
"ScrewAttack",
"Ice",
{
"ammo": {
"type": "Missile",
"count": 5
}
},
{
"ammo": {
"type": "Super",
"count": 5
}
}
]
}
]
}
]
},
{
"ammo": {
"type": "PowerBomb",
"count": 2
}
},
{
"or": [
"canWallJump",
"SpaceJump",
{
"and": [
"HiJump",
"canSpringBallJumpMidAir"
]
},
"h_artificialMorphLongIBJ"
]
}
],
"clearsObstacles": [
"A"
],
"collectsItems": [
5
],
"flashSuitChecked": true,
"blueSuitChecked": true,
"note": [
"Cross the room while killing the Beetoms, then use two precisely positioned Power Bombs to overload PLMs.",
"Place the Power Bombs at the same height as the tile above the door.",
"This ends up being the max height Samus can jump and place it while at the very bottom of the room, with a midair morph or artificially morphed Spring Ball jump.",
"Because PLMs are overloaded, Samus needs to exit G-mode at the item to collect it before returning through the crumble blocks."
],
"devNote": "This does not require canRiskPermanentLossOfAccess if Samus returns through the crumble blocks."
},
{
"id": 115,
"link": [
4,
3
],
"name": "Direct G-Mode Morph with Blue Suit, Power Bomb the Item, Collect Item and Return",
"entranceCondition": {
"comeInWithGMode": {
"mode": "direct",
"morphed": true
}
},
"requires": [
"h_blueSuitGMode",
"canPowerBombItemOverloadPLMs",
"canComplexGMode",
{
"itemNotCollectedAtNode": 5
},
{
"or": [
"Morph",
"h_artificialMorphSpringBall"
]
},
{
"ammo": {
"type": "PowerBomb",
"count": 2
}
},
{
"or": [
"canWallJump",
"SpaceJump",
{
"and": [
"HiJump",
"canSpringBallJumpMidAir"
]
},
"h_artificialMorphLongIBJ",
{
"and": [
{
"blueSuitShinecharge": {}
},
{
"or": [
{
"shinespark": {
"frames": 13,
"excessFrames": 3
}
},
{
"and": [
"HiJump",
{
"shinespark": {
"frames": 9,
"excessFrames": 3
}
}
]
}
]
}
]
}
]
}
],
"clearsObstacles": [
"A"
],
"collectsItems": [
5
],
"flashSuitChecked": true,
"blueSuitChecked": true,
"note": [
"Cross the room while killing the Beetoms, then use two precisely positioned Power Bombs to overload PLMs.",
"Place the Power Bombs at the same height as the tile above the door.",
"This ends up being the max height Samus can jump and place it while at the very bottom of the room, with a midair morph or artificially morphed Spring Ball jump.",
"Because PLMs are overloaded, Samus needs to exit G-mode at the item to collect it before returning through the crumble blocks."
],
"devNote": [
"This does not require canRiskPermanentLossOfAccess if Samus returns through the crumble blocks.",
"FIXME: This could include a Crystal Flash before shinesparking."
]
},
{
"id": 109,
"link": [
4,
4
],
"name": "Come in Shinecharged, Gain Flash Suit (Spikesuit)",
"entranceCondition": {
"comeInShinecharged": {}
},
"requires": [
{
"shineChargeFrames": 60
},
{
"thornHits": 1
},
{
"or": [
{
"thornHits": "n_spikeSuitLenience"
},
"canTrickyDodgeEnemies",
{
"enemyKill": {
"enemies": [
[
"Beetom"
]
],
"excludedWeapons": [
"Bombs"
]
}
}
]
},
"canPatientSpikeSuit",
{
"shinespark": {
"frames": 1,
"excessFrames": 1
}
}
],
"flashSuitChecked": true,
"blueSuitChecked": true
},
{
"id": 110,
"link": [
4,
4
],
"name": "Come in Shinecharging, Gain Flash Suit (Spikesuit)",
"entranceCondition": {
"comeInShinecharging": {
"length": 2,
"openEnd": 0
}
},
"requires": [
{
"thornHits": 1
},
{
"or": [
{
"thornHits": "n_spikeSuitLenience"
},
"canTrickyDodgeEnemies",
{
"enemyKill": {
"enemies": [
[
"Beetom"
]
],
"excludedWeapons": [
"Bombs"
]
}
}
]
},
"canPatientSpikeSuit",
{
"shinespark": {
"frames": 1,
"excessFrames": 1
}
}
],
"flashSuitChecked": true,
"blueSuitChecked": true
},
{
"id": 48,
"link": [
4,
4
],
"name": "Leave With Runway",
"requires": [],
"exitCondition": {
"leaveWithRunway": {
"length": 3,
"openEnd": 1
}
},
"flashSuitChecked": true,
"blueSuitChecked": true
},
{
"id": 98,
"link": [
4,
4
],
"name": "R-Mode Entry",
"entranceCondition": {
"comeInWithRMode": {}
},
"requires": [],
"clearsObstacles": [
"R-Mode"
],
"flashSuitChecked": true,
"blueSuitChecked": true
},
{
"id": 49,
"link": [
4,
4
],
"name": "Leave with Moondance",
"requires": [
{
"obstaclesNotCleared": [
"A"
]
},
{
"noBlueSuit": {}
},
"canMoondance",
"canCount",
"canTrickyUseFrozenEnemies",
{
"enemyDamage": {
"enemy": "Beetom",
"type": "contact",
"hits": 2
}
}
],
"exitCondition": {
"leaveWithStoredFallSpeed": {
"fallSpeedInTiles": 1
}
},
"flashSuitChecked": true,
"blueSuitChecked": true,
"note": "Freeze a Beetom at head height where Samus can Spinjump into it and begin Moondancing."
},
{
"id": 50,
"link": [
4,
4
],
"name": "Leave with Extended Moondance",
"requires": [
{
"obstaclesNotCleared": [
"A"
]
},
{
"noBlueSuit": {}
},
"canExtendedMoondance",
"canTrickyUseFrozenEnemies",
{
"enemyDamage": {
"enemy": "Beetom",
"type": "contact",
"hits": 2
}
},
"h_extendedMoondanceBeetomLeniency"
],
"exitCondition": {
"leaveWithStoredFallSpeed": {
"fallSpeedInTiles": 2
}
},
"flashSuitChecked": true,
"blueSuitChecked": true,
"note": [
"Freeze a Beetom at head height where Samus can Spinjump into it and begin Moondancing.",
"After 175 moonfalls, reposition the Beetom to chest height, then continue dancing."
]
},
{
"id": 51,
"link": [
4,
4
],
"name": "Zebbo and Beetom Farm",
"requires": [
{
"resetRoom": {
"nodes": [
4
]
}
},
{
"cycleFrames": 530
},
{
"or": [
{
"enemyKill": {
"enemies": [
[
"Beetom",
"Beetom"
]
],
"explicitWeapons": [
"ScrewAttack",
"Missile",
"PowerBomb"
]
}
},
{
"and": [
{
"or": [
"Ice",
"canTrickyDodgeEnemies"
]
},
"h_useMorphBombs"
]
}
]
}
],
"clearsObstacles": [
"A"
],
"resetsObstacles": [
"B",
"R-Mode",
"C"
],
"farmCycleDrops": [
{
"enemy": "Beetom",
"count": 2
},
{
"enemy": "Zebbo",
"count": 2
}
],
"flashSuitChecked": true,
"blueSuitChecked": true
},
{
"id": 52,
"link": [
4,
4
],
"name": "Zebbo Farm",
"requires": [
{
"obstaclesCleared": [
"A"
]
},
{
"simpleCycleFrames": 85
},
{
"cycleFrames": 30
}
],
"farmCycleDrops": [
{
"enemy": "Zebbo",
"count": 1
}
],
"flashSuitChecked": true,
"blueSuitChecked": true
},
{
"id": 80,
"link": [
4,
4
],
"name": "G-Mode Setup - Get Hit By Zebbo",
"requires": [
{
  "or": [
    "canTrickyDodgeEnemies",
    {
      "obstaclesCleared": [
        "A"
      ]
    },
    {
      "enemyDamage": {
        "enemy": "Beetom",
        "type": "contact",
        "hits": 2
      }
    }
  ]
}
],
"exitCondition": {
"leaveWithGModeSetup": {}
},
"unlocksDoors": [
{
"types": [
"ammo"
],
"requires": []
}
],
"flashSuitChecked": true,
"blueSuitChecked": true,
"note": "Kill or get the Beetom stuck below the platform, then lure a Zebbo to the left door. Be careful not to let the Zebbo go off camera or it will despawn.",
"devNote": "It is possible to do this with a Beetom, avoiding the canTrickyDodgeEnemies, but we will ignore that here."
},
{
"id": 92,
"link": [
4,
4
],
"name": "X-Mode, Leave With Spark",
"requires": [
{
"or": [
"h_thornXModeShinecharge",
{
"and": [
"h_thornXModeShinechargeWithoutLenience",
{
"or": [
{
"obstaclesCleared": [
"A"
]
},
"canTrickyDodgeEnemies",
{
  "enemyKill": {
    "enemies": [
      [
        "Beetom"
      ]
    ],
    "excludedWeapons": [
      "Bombs"
    ]
  }
}
]
}
]
}
]
},
{
"shinespark": {
"frames": 62,
"excessFrames": 0
}
}
],
"exitCondition": {
"leaveWithSpark": {}
},
"flashSuitChecked": true,
"blueSuitChecked": true
},
{
"id": 106,
"link": [
4,
4
],
"name": "Come in Shinecharged - Gain Blue Suit (X-Mode)",
"entranceCondition": {
"comeInShinecharged": {}
},
"requires": [
{
"shineChargeFrames": 125
},
{
"or": [
"h_thornXModeBlueSuit",
{
"and": [
"h_thornXModeBlueSuitWithoutLenience",
{
"or": [
"canTrickyDodgeEnemies",
{
"enemyKill": {
"enemies": [
[
"Beetom"
]
],
"excludedWeapons": [
"Bombs"
]
}
}
]
}
]
}
]
},
{
"shinespark": {
"frames": 0,
"excessFrames": 0
}
}
],
"flashSuitChecked": true,
"blueSuitChecked": true
},
{
"id": 88,
"link": [
4,
5
],
"name": "G-Mode Morph Through Spikeway, Bomb the Crumble Blocks",
"entranceCondition": {
"comeInWithGMode": {
"mode": "any",
"morphed": true
}
},
"requires": [
"h_artificialMorphLongIBJ",
{
"or": [
"canTrickyGMode",
{
"and": [
{
"ammo": {
"type": "PowerBomb",
"count": 3
}
},
{
"or": [
"canComplexGMode",
{
"ammo": {
"type": "PowerBomb",
"count": 1
}
}
]
}
]
},
{
"and": [
"Morph",
{
"or": [
"ScrewAttack",
"Ice",
{
"ammo": {
"type": "Missile",
"count": 5
}
},
{
"ammo": {
"type": "Super",
"count": 5
}
}
]
}
]
}
]
},
{
"or": [
"canBeVeryPatient",
"h_artificialMorphCeilingBombJump",
{
"and": [
"canBePatient",
"h_artificialMorphSpringBall",
"HiJump"
]
},
{
"and": [
"canBePatient",
"Morph",
{
"or": [
"HiJump",
"canWallJump"
]
}
]
}
]
}
],
"clearsObstacles": [
"A"
],
"flashSuitChecked": true,
"blueSuitChecked": true,
"note": "Cross the room while killing the Beetoms, then bomb the bottom of the crumble blocks to overload PLMs and go through."
},
{
"id": 116,
"link": [
4,
5
],
"name": "G-Mode Morph with Blue Suit, Bomb the Crumble Blocks",
"entranceCondition": {
"comeInWithGMode": {
"mode": "any",
"morphed": true
}
},
"requires": [
"h_blueSuitGMode",
"h_artificialMorphLongIBJ",
{
"or": [
"canBeVeryPatient",
"h_artificialMorphCeilingBombJump",
{
"and": [
"canBePatient",
"h_artificialMorphSpringBall",
"HiJump"
]
},
{
"and": [
"canBePatient",
"Morph",
{
"or": [
"HiJump",
"canWallJump"
]
}
]
}
]
}
],
"clearsObstacles": [
"A"
],
"flashSuitChecked": true,
"blueSuitChecked": true,
"note": [
"Samus is only able to kill enemies with blue suit while moving and not falling.",
"With bombs as the only movement option, Samus should only touch the enemies while grounded and moving horizontally.",
"After crossing the spikeway, bomb the bottom of the crumble blocks to overload PLMs and go through."
]
},
{
"id": 89,
"link": [
4,
5
],
"name": "Direct G-Mode Morph Through Spikeway, Power Bomb the Item",
"entranceCondition": {
"comeInWithGMode": {
"mode": "direct",
"morphed": true
}
},
"requires": [
"canPowerBombItemOverloadPLMs",
{
"itemNotCollectedAtNode": 5
},
"canRiskPermanentLossOfAccess",
"h_artificialMorphMovement",
{
"or": [
{
"and": [
{
"ammo": {
"type": "PowerBomb",
"count": 3
}
},
{
"or": [
"canComplexGMode",
{
"ammo": {
"type": "PowerBomb",
"count": 1
}
}
]
}
]
},
{
"and": [
"Morph",
{
"or": [
"ScrewAttack",
"Ice",
{
"ammo": {
"type": "Missile",
"count": 5
}
},
{
"ammo": {
"type": "Super",
"count": 5
}
}
]
}
]
}
]
},
{
"ammo": {
"type": "PowerBomb",
"count": 2
}
},
{
"or": [
"canWallJump",
"SpaceJump",
{
"and": [
"HiJump",
"canSpringBallJumpMidAir"
]
},
"h_artificialMorphLongIBJ"
]
}
],
"clearsObstacles": [
"A"
],
"flashSuitChecked": true,
"blueSuitChecked": true,
"note": [
"Cross the room while killing the Beetoms, then use two precisely positioned Power Bombs to overload PLMs.",
"Place the Power Bombs at the same height as the tile above the door.",
"This ends up being the max height Samus can jump and place it while at the very bottom of the room, with a midair morph or artificially morphed Spring Ball jump."
],
"devNote": "This requires canRiskPermanentLossOfAccess unless Samus returns through the crumble blocks."
},
{
"id": 117,
"link": [
4,
5
],
"name": "Direct G-Mode Morph with Blue Suit, Power Bomb the Item",
"entranceCondition": {
"comeInWithGMode": {
"mode": "direct",
"morphed": true
}
},
"requires": [
"h_blueSuitGMode",
"canPowerBombItemOverloadPLMs",
{
"itemNotCollectedAtNode": 5
},
"canRiskPermanentLossOfAccess",
{
"or": [
"Morph",
"h_artificialMorphSpringBall",
"h_artificialMorphIBJ"
]
},
{
"ammo": {
"type": "PowerBomb",
"count": 2
}
},
{
"or": [
"canWallJump",
"SpaceJump",
{
"and": [
"HiJump",
"canSpringBallJumpMidAir"
]
},
"h_artificialMorphLongIBJ",
{
"and": [
{
"blueSuitShinecharge": {}
},
{
"or": [
{
"shinespark": {
"frames": 13,
"excessFrames": 3
}
},
{
"and": [
"HiJump",
{
"shinespark": {
"frames": 9,
"excessFrames": 3
}
}
]
}
]
}
]
}
]
}
],
"clearsObstacles": [
"A"
],
"flashSuitChecked": true,
"blueSuitChecked": true,
"note": [
"Samus is only able to kill enemies with blue suit while moving and not falling.",
"With bombs as the only movement option, Samus should only touch the enemies while grounded and moving horizontally.",
"After crossing the spikeway, use two precisely positioned Power Bombs to overload PLMs.",
"Place the Power Bombs at the same height as the tile above the door.",
"This ends up being the max height Samus can jump and place it while at the very bottom of the room, with a midair morph or artificially morphed Spring Ball jump."
],
"devNote": [
"This requires canRiskPermanentLossOfAccess unless Samus returns through the crumble blocks.",
"FIXME: This could include a Crystal Flash before shinesparking."
]
},
{
"id": 53,
"link": [
4,
7
],
"name": "Kill the Beetoms",
"requires": [
{
"enemyKill": {
"enemies": [
[
"Beetom"
]
],
"excludedWeapons": [
"Bombs"
]
}
}
],
"clearsObstacles": [
"A"
],
"flashSuitChecked": true,
"blueSuitChecked": true,
"note": "Killing one Beetom is all that is needed to get to the farm."
},
{
"id": 54,
"link": [
4,
7
],
"name": "Bomb the Beetoms",
"requires": [
{
"enemyKill": {
"enemies": [
[
"Beetom"
]
],
"explicitWeapons": [
"Bombs"
]
}
},
{
"enemyDamage": {
"enemy": "Beetom",
"type": "contact",
"hits": 2
}
}
],
"clearsObstacles": [
"A"
],
"flashSuitChecked": true,
"blueSuitChecked": true,
"note": [
"You typically need to place two bombs to kill them. Place the second shortly after the first and it will kill the Beetom on your way down.",
"Killing one Beetom is all that is needed to get to the farm."
]
},
{
"id": 55,
"link": [
4,
7
],
"name": "Freeze the Beetoms",
"requires": [
"Ice"
],
"clearsObstacles": [
"A"
],
"flashSuitChecked": true,
"blueSuitChecked": true,
"devNote": "Although this won't kill the Beetoms, it will remove them as an obstacle."
},
{
"id": 56,
"link": [
4,
7
],
"name": "Tank the Damage",
"requires": [
{
  "enemyDamage": {
    "enemy": "Beetom",
    "type": "contact",
    "hits": 25
  }
}
],
"flashSuitChecked": true,
"blueSuitChecked": true,
"note": "The damage included here is to get all the way to the left door."
},
{
"id": 112,
"link": [
4,
7
],
"name": "Blue Suit Beetom Kill",
"requires": [
{
  "haveBlueSuit": {}
}
],
"clearsObstacles": [
"A"
],
"flashSuitChecked": true,
"blueSuitChecked": true,
"note": "Keep high Energy and avoid falling into the thorns, as it can be tricky to get out without taking several hits."
},
{
"id": 57,
"link": [
4,
7
],
"name": "Beetom Tricky Dodge (Right to Left)",
"requires": [
{
"notable": "Beetom Tricky Dodge"
},
"canTrickyDodgeEnemies"
],
"clearsObstacles": [
"A"
],
"flashSuitChecked": true,
"blueSuitChecked": true,
"note": [
"When entering the room, it is recommended to open the door to be used as a quick escape if a Beetom attaches to Samus.",
"Wait for the first Beetom to get stuck under one of the platforms. It may be necessary to lure it to the right.",
"At this point, the farm can be used to gain energy.",
"Jump into the thorns to get invulnerability frames, then run through, luring the Beetoms under the platforms while clearing and using the farms.",
"Note that it is possible to shake a Beetom off of Samus by rapidly turning left and right, or angling up and down, etc. Samus will take 2-4 hits."
],
"devNote": "Although this won't kill the Beetoms, it will remove them as an obstacle."
},
{
"id": 58,
"link": [
5,
1
],
"name": "Base",
"requires": [],
"flashSuitChecked": true,
"blueSuitChecked": true
},
{
"id": 59,
"link": [
5,
2
],
"name": "Base",
"requires": [],
"flashSuitChecked": true,
"blueSuitChecked": true
},
{
"id": 60,
"link": [
6,
3
],
"name": "Base",
"requires": [
"Morph"
],
"flashSuitChecked": true,
"blueSuitChecked": true
},
{
"id": 61,
"link": [
6,
3
],
"name": "Spikeway Tunnel Crawl (Right to Left)",
"requires": [
{
"notable": "Spikeway Tunnel Crawl"
},
"canTunnelCrawl",
"canTrickyJump",
{
"thornHits": 31
},
{
"or": [
{
"noBlueSuit": {}
},
{
"and": [
"h_trickyToCarryBlueSuit",
{
"thornHits": 31
}
]
}
]
},
{
  "obstaclesCleared": [
    "A"
  ]
}
],
"flashSuitChecked": true,
"blueSuitChecked": true,
"note": [
"Moving right to left is a bit easier to get into the tunnel.",
"Land aiming down approximately 3 pixels inside the rightmost tile.",
"If Samus is too far right she will fall out, too far left and a thorn pushes her out, not aiming down puts her stuck in crouch.",
"Then spinjump left to take a thorn hit and get wedged in the ceiling.",
"Then start the crawl while taking constant thorn damage. Perform one jump per thorn hit.",
"Note that if Samus is hit by the thorn before landing, aiming down is not necessary.",
"Note that a downback may be helpful to get into the tunnel: stand fully on the left side of the nearby ledge and run off then start and hold a downback to land in position."
],
"devNote": "This is not feasible to do with beetoms on Samus. Fortunately avoiding the Beetoms also requires canTrickyJump."
},
{
"id": 62,
"link": [
6,
3
],
"name": "Spikeway X-Ray Wiggle (Right to Left)",
"requires": [
{
"notable": "Spikeway X-Ray Wiggle"
},
"canXRayWaitForIFrames",
"canXRayTurnaround",
{
"thornHits": 1
},
"h_trickyToCarryBlueSuit"
],
"flashSuitChecked": true,
"blueSuitChecked": true,
"note": [
"Maintain i-frames by using X-Ray whenever a thorn would deal damage.",
"Move by alternating between X-Ray turnarounds and normal turnarounds.",
"Simply crouch again following any accidental X-Ray Standups."
]
},
{
"id": 63,
"link": [
6,
3
],
"name": "Leave with Moondance",
"requires": [
{
"obstaclesNotCleared": [
"A"
]
},
{
"noBlueSuit": {}
},
"Morph",
"canMoondance",
"canCount",
"canTrickyUseFrozenEnemies",
{
"enemyDamage": {
"enemy": "Beetom",
"type": "contact",
"hits": 2
}
}
],
"exitCondition": {
"leaveWithStoredFallSpeed": {
"fallSpeedInTiles": 1
}
},
"unlocksDoors": [
{
"types": [
"ammo"
],
"requires": []
}
],
"flashSuitChecked": true,
"blueSuitChecked": true,
"note": [
"Freeze a Beetom at head height where Samus can Spinjump into it and begin Moondancing.",
"The Beetom can be left at the door if farming for health is needed."
]
},
{
"id": 64,
"link": [
6,
3
],
"name": "Leave with Extended Moondance",
"requires": [
{
"obstaclesNotCleared": [
"A"
]
},
{
"noBlueSuit": {}
},
"Morph",
"canExtendedMoondance",
"canTrickyUseFrozenEnemies",
{
"enemyDamage": {
"enemy": "Beetom",
"type": "contact",
"hits": 2
}
},
"h_extendedMoondanceBeetomLeniency"
],
"exitCondition": {
"leaveWithStoredFallSpeed": {
"fallSpeedInTiles": 2
}
},
"unlocksDoors": [
{
"types": [
"ammo"
],
"requires": []
}
],
"flashSuitChecked": true,
"blueSuitChecked": true,
"note": [
"Freeze a Beetom at head height where Samus can Spinjump into it and begin Moondancing.",
"After 175 moonfalls, reposition the Beetom to chest height, then continue dancing.",
"The Beetom can be left at the door if farming for health is needed."
]
},
{
"id": 65,
"link": [
6,
7
],
"name": "Back to the Farm",
"requires": [
{
"obstaclesCleared": [
"A"
]
}
],
"flashSuitChecked": true,
"blueSuitChecked": true,
"note": "Killing one Beetom is all that is needed to get to the farm."
},
{
"id": 66,
"link": [
6,
7
],
"name": "Kill the Beetoms",
"requires": [
{
  "enemyKill": {
    "enemies": [
      [
        "Beetom"
      ]
    ],
    "excludedWeapons": [
      "Bombs"
    ]
  }
}
],
"clearsObstacles": [
"A"
],
"flashSuitChecked": true,
"blueSuitChecked": true,
"note": "Killing one Beetom is all that is needed to get to the farm."
},
{
"id": 67,
"link": [
6,
7
],
"name": "Bomb the Beetoms",
"requires": [
{
"enemyKill": {
"enemies": [
[
"Beetom"
]
],
"explicitWeapons": [
"Bombs"
]
}
},
{
"enemyDamage": {
"enemy": "Beetom",
"type": "contact",
"hits": 2
}
}
],
"clearsObstacles": [
"A"
],
"flashSuitChecked": true,
"blueSuitChecked": true,
"note": [
"You typically need to place two bombs to kill them. Place the second shortly after the first and it will kill the Beetom on your way down.",
"Killing one Beetom is all that is needed to get to the farm."
]
},
{
"id": 68,
"link": [
6,
7
],
"name": "Freeze the Beetoms",
"requires": [
"Ice"
],
"clearsObstacles": [
"A"
],
"flashSuitChecked": true,
"blueSuitChecked": true,
"devNote": "Although this won't kill the Beetoms, it will remove them as an obstacle."
},
{
"id": 69,
"link": [
6,
7
],
"name": "Tank the Damage",
"requires": [
{
  "enemyDamage": {
    "enemy": "Beetom",
    "type": "contact",
    "hits": 15
  }
}
],
"flashSuitChecked": true,
"blueSuitChecked": true,
"note": "The damage included here is to get all the way to the right door."
},
{
"id": 113,
"link": [
6,
7
],
"name": "Blue Suit Beetom Kill",
"requires": [
{
  "haveBlueSuit": {}
}
],
"clearsObstacles": [
"A"
],
"flashSuitChecked": true,
"blueSuitChecked": true,
"note": "Keep high Energy and avoid falling into the thorns, as it can be tricky to get out without taking several hits."
},
{
"id": 70,
"link": [
6,
7
],
"name": "Beetom Tricky Dodge (Left to Right)",
"requires": [
{
"notable": "Beetom Tricky Dodge"
},
"canTrickyDodgeEnemies",
{
"obstaclesNotCleared": [
"B"
]
}
],
"clearsObstacles": [
"A"
],
"flashSuitChecked": true,
"blueSuitChecked": true,
"note": [
"Wait for the first Beetom to get stuck under the first platform, then get to the first farm.",
"If the second Beetom is making this farm difficult to use, it may be easier to use the next farm.",
"Jump into the thorns to get invulnerability frames, then run through, luring the Beetoms under the platforms while clearing and using the farms.",
"Note that it is possible to shake a Beetom off of Samus by rapidly turning left and right, or angling up and down, etc. Samus will take 2-4 hits."
],
"devNote": [
"Although this won't kill the Beetoms, it will remove them as an obstacle.",
"This strat is not possible when coming blindly from above, as the Beetom will instantly grab Samus."
]
},
{
"id": 71,
"link": [
7,
4
],
"name": "Base",
"requires": [],
"flashSuitChecked": true,
"blueSuitChecked": true
},
{
"id": 72,
"link": [
7,
6
],
"name": "Base",
"requires": [],
"flashSuitChecked": true,
"blueSuitChecked": true
},
{
"id": 111,
"link": [
7,
7
],
"name": "R-Mode Crystal Flash Interrupt",
"requires": [
{
"obstaclesCleared": [
"R-Mode"
]
},
"canComplexRModeCrystalFlashInterrupt",
{
"ammo": {
"type": "Missile",
"count": 10
}
},
{
"ammo": {
"type": "Super",
"count": 10
}
}
],
"resetsObstacles": [
"R-Mode"
],
"flashSuitChecked": true,
"blueSuitChecked": true,
"note": [
"Crystal Flashing on one of the Zebbo spawners will usually not deal enough damage to Samus to trigger reserves.",
"One way to make this fairly reliable is to take a Zebbo hit and then place the Power Bomb such that it explodes and kills a Zebbo shortly after it spawns.",
"Samus will then pick up the drop and start Crystal Flashing where her refill is in a good rhythm for the Zebbo to be able to trigger reserves."
],
"detailNote": "This can only be done suitless and with no E-Tanks.",
"devNote": [
"This will not work in G-mode because the Power Bomb will kill the Zebbos and they will not respawn."
]
},
{
"id": 99,
"link": [
7,
7
],
"name": "Use Flash Suit, R-Mode Spark Interrupt",
"requires": [
{
"obstaclesCleared": [
"R-Mode"
]
},
{
"or": [
{
"obstaclesCleared": [
"A"
]
},
{
"enemyKill": {
"enemies": [
[
"Beetom"
]
],
"excludedWeapons": [
"Bombs"
]
}
},
"canTrickyDodgeEnemies"
]
},
{
"refill": [
"Energy"
]
},
{
"useFlashSuit": {}
},
{
"autoReserveTrigger": {
"maxReserveEnergy": 95
}
},
"canRModeSparkInterrupt"
],
"resetsObstacles": [
"R-Mode"
],
"flashSuitChecked": true,
"blueSuitChecked": true,
"note": [
"The flash suit must be gained in-room due to R-Mode. Refer to the 'Gain Flash Suit (Spikesuit)' strat for how to do this.",
"Set up energy as needed using the Zebbo farm. When ready, use the stored shinecharge and convert it into a blue suit."
]
},
{
"id": 100,
"link": [
7,
7
],
"name": "X-Mode Shinecharge, R-Mode Spark Interrupt",
"requires": [
{
"obstaclesCleared": [
"R-Mode"
]
},
{
"or": [
{
"obstaclesCleared": [
"A"
]
},
{
"enemyKill": {
"enemies": [
[
"Beetom"
]
],
"excludedWeapons": [
"Bombs"
]
}
},
"canTrickyDodgeEnemies"
]
},
{
"refill": [
"Energy"
]
},
"h_thornXModeShinechargeWithoutLenience",
{
"autoReserveTrigger": {
"maxReserveEnergy": 95
}
},
"canRModeSparkInterrupt"
],
"resetsObstacles": [
"R-Mode"
],
"flashSuitChecked": true,
"blueSuitChecked": true,
"note": [
"After entering with R-Mode, clear or trap the Beetom(s) and use any Zebbo pipe to setup Energy.",
"Bounce into the thorns with dash speed and enter X-Mode to gain shinecharge.",
"Timing the shinecharge and X-Ray release to happen soon after i-frames refresh avoids a second thorn hit.",
"Then get back to the Zebbo pipe and get the blue suit."
]
}
],
"notables": [
{
"id": 1,
"name": "Beetom Tricky Dodge",
"note": [
"Patiently and carefully lure the Beetoms to get them stuck under the platforms. Afterwards, a farm can be used to gain energy.",
"Then jump into the thorns to get invulnerability frames and run through, while luring the Beetoms under the platforms to use the farms."
]
},
{
"id": 2,
"name": "Spikeway Tunnel Crawl",
"note": [
"Perform a tunnel crawl through the Etecoon morph tunnel thorns. Perform one jump per thorn hit.",
"Note that because of the thorn damage, getting into the tunnel is a bit more tricky."
]
},
{
"id": 3,
"name": "Spikeway X-Ray Wiggle",
"note": [
"Slowly move through the thorns by alternating between X-Ray turnarounds and normal turnarounds.",
"Maintain i-frames by using X-Ray whenever a thorn would deal damage."
]
},
{
"id": 4,
"name": "Beetom Clip",
"note": [
"Jump and freeze the Beetom at a precise location in order to jump through the crumble blocks.",
"The pixel window is larger and higher with Morph and an X-Ray Stand Up.",
"Two Beetom hits are assumed, but with failed attempts it could take more, possibly requiring leaving the Beetom and going back to the right to farm."
]
},
{
"id": 5,
"name": "Beetom Clip (High Pixel, Preserve Flash Suit)",
"note": [
"Jump and freeze the Beetom at a pixel perfect location in order to jump through the crumble blocks.",
"The pixel is nearly the highest possible position with HiJump disabled, from the left ledge.",
"After positioning the Beetom, get on top of it with a tight down grab, while refreezing it if necessary.",
"Jump through the crumble blocks then down grab again to get to the top area.",
"Two Beetom hits are assumed, but with failed attempts it could take more, possibly requiring leaving the Beetom and going back to the right to farm."
]
},
{
"id": 6,
"name": "Spikeway Aim Cancel Wiggle",
"note": "Wiggle through the thorns. It is a long wiggle with a lot of thorn hits."
},
{
"id": 7,
"name": "Wall Ice Clip X-Ray Climb",
"note": [
"Freeze a Zebbo inside the wall above the right side of the spikeway,",
"and use it to get stuck inside the wall to X-Ray climb up to the top section of the room."
]
}
],
"nextStratId": 131,
"nextNotableId": 8,
"devNote": [
"FIXME: add a strat to take temporary blue from the top to the bottom-right."
]
}