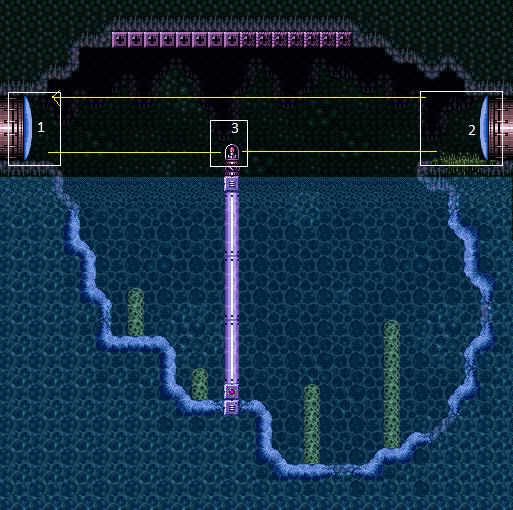
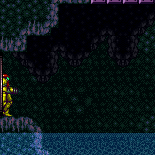
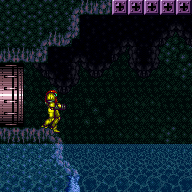
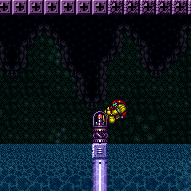
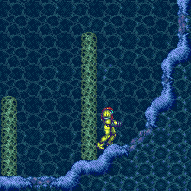
The Moat
Room ID: 7
|

Exit condition: {
"leaveWithRunway": {
"length": 3,
"openEnd": 1,
"steepUpTiles": 1
}
} |
|

Requires: "h_CrystalFlash" |
|

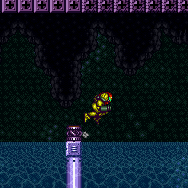
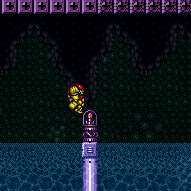
Back against the diagonal stair just higher than the flat area; crouch jump to grab the item. It is also possible to grab the item without a crouch jump by breaking spin just before reaching the pillar. Requires: "HiJump" "canTrickyJump" Collects items: 3 Dev note: This is only useful if Samus can't dash, such as with a blue suit. |
|


Exit condition: {
"leaveWithGrappleSwing": {
"blocks": [
{
"position": [
7,
2
],
"note": "Closest Grapple block to left door"
}
]
}
} |
|
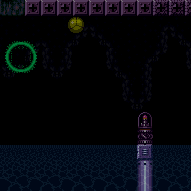
Hold angle-up, jump, bonk the ceiling, and use Grapple just before landing. Moonwalk into the transition on the same frame that the Grapple Beam reaches the Grapple block. Continue holding Grapple through the door transition to initiate a teleport in the next room. Requires: {
"notable": "Leave With Grapple Teleport"
}
"canMoonwalk"
"canInsaneJump"
{
"or": [
{
"noFlashSuit": {}
},
{
"and": [
"h_useSpringBall",
"canComplexCarryFlashSuit"
]
}
]
}Exit condition: {
"leaveWithGrappleTeleport": {
"blockPositions": [
[
7,
2
]
]
}
} |
|
Requires: {
"or": [
"SpaceJump",
{
"and": [
"Grapple",
{
"or": [
{
"noFlashSuit": {}
},
"h_midAirShootUp",
"canInsaneJump"
]
}
]
}
]
}Dev note: This avoids collecting the item. |
|
Entrance condition: {
"comeInWithSpark": {
"position": "top"
}
}Requires: {
"shinespark": {
"frames": 42,
"excessFrames": 9
}
}Dev note: Sparking in top position means the item will be avoided. |
|


Entrance condition: {
"comeInRunning": {
"speedBooster": "yes",
"minTiles": 26
}
}Requires: "h_speedJump" "canTrickyJump" |
|

Entrance condition: {
"comeInRunning": {
"speedBooster": "yes",
"minTiles": 21
}
}Requires: "h_speedJump" "canInsaneJump" |
|


Entrance condition: {
"comeInRunning": {
"speedBooster": "yes",
"minTiles": 18
}
}Requires: "h_speedJump" "canTrickyJump" "canLateralMidAirMorph" |
|
Entrance condition: {
"comeInRunning": {
"speedBooster": "yes",
"minTiles": 11
}
}Requires: "h_speedJump" "canInsaneJump" "canLateralMidAirMorph" "canMomentumConservingMorph" |
|
Entrance condition: {
"comeInWithSidePlatform": {
"platforms": [
{
"minHeight": 2,
"maxHeight": 2,
"minTiles": 27.4375,
"speedBooster": "yes",
"obstructions": [
[
1,
0
]
],
"requires": [
"canMomentumConservingMorph"
],
"note": [
"This applies to Dust Torizo Room and Halfie Climb Room."
]
},
{
"minHeight": 2,
"maxHeight": 3,
"minTiles": 29.4375,
"speedBooster": "yes",
"obstructions": [
[
2,
0
]
],
"requires": [
"canMomentumConservingMorph"
],
"note": [
"This applies to Waterway Energy Tank Room."
],
"devNote": [
"With good positioning this can be done with a lateral mid-air morph not touching the ceiling.",
"This has little use since with Gravity a Gravity jump would also be possible."
]
},
{
"minHeight": 2,
"maxHeight": 2,
"minTiles": 45,
"speedBooster": "yes",
"obstructions": [
[
3,
0
]
],
"requires": [
"canMomentumConservingMorph",
"canInsaneJump"
],
"note": [
"This applies to Statues Hallway."
]
},
{
"minHeight": 3,
"maxHeight": 3,
"minTiles": 45,
"speedBooster": "yes",
"obstructions": [
[
3,
0
]
],
"requires": [
"canMomentumConservingMorph",
"canInsaneJump"
],
"note": [
"This applies to Flyway."
]
},
{
"minHeight": 2,
"maxHeight": 2,
"minTiles": 45,
"speedBooster": "yes",
"obstructions": [
[
4,
0
]
],
"requires": [
"canMomentumConservingMorph",
"canInsaneJump",
"canInsaneMidAirMorph"
],
"note": [
"This applies to Baby Kraid Room."
]
},
{
"minHeight": 2,
"maxHeight": 2,
"minTiles": 39.4375,
"speedBooster": "yes",
"obstructions": [
[
3,
2
]
],
"note": [
"This applies to Metal Pirates Room."
],
"detailNote": [
"This has a 3-frame window for the jump."
]
}
]
}
}Requires: "canTrickyJump" Dev note: This isn't marked as a wall-jump avoid, since it may have some advantage over the CWJ by reducing the soft-lock risk. |
|


Run, jump, lateral midair morph on the way down, then bounce off the pedestal to get to the other side. Entrance condition: {
"comeInRunning": {
"speedBooster": "any",
"minTiles": 1
}
}Requires: "canSpringBallBounce"
"canDisableEquipment"
{
"or": [
"canTrickyJump",
"h_useMorphBombs"
]
}Collects items: 3 |
|
Open the door and step as close to the transition as possible. Run, jump, lateral midair morph on the way down, then bounce off the pedestal to get to the other side. Requires: "canSpringBallBounce"
"canDisableEquipment"
{
"doorUnlockedAtNode": 1
}
{
"or": [
"canTrickyJump",
"h_useMorphBombs"
]
}Collects items: 3 |
|
Align against the closed door shell on the other side of the transition. Run towards the water and jump on the last possible frame. Perform the CWJ off of the item pedestal to cross to the other side. This requires running and jumping on the last possible frame before Samus would run off into the water. If the setup is done correctly, there will then be a 2-frame window for the wall jump. Entrance condition: {
"comeInRunning": {
"speedBooster": "no",
"minTiles": 1.4
}
}Requires: {
"or": [
{
"notable": "First-Try CWJ"
},
{
"and": [
"h_bombThings",
"h_additionalBomb",
"h_additionalBomb"
]
}
]
}
"canCWJ"
{
"disableEquipment": "HiJump"
}
{
"disableEquipment": "SpeedBooster"
}Collects items: 3 |
|
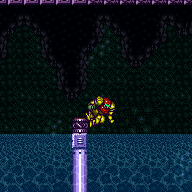
Stand on the farthest pixel into the door possible using moonwalk, X-Ray, or morphball turn around. Run towards the water and jump on the last possible frame. Perform the CWJ off of the item pedestal to cross to the other side. This requires running and jumping on the last possible frame before Samus would run off into the water. There is either a 1-frame or 2-frame window for the wall jump, depending on Samus' X subpixel position. To get a 2-frame window, Samus must start in the leftmost 75% of the pixel next to the transition. One method to guarantee that Samus gets a good subpixel is to jump and press against the overhang to align with it, then land, turn around, and moonwalk back into position. Requires: {
"or": [
{
"notable": "First-Try CWJ"
},
{
"and": [
"h_bombThings",
"h_additionalBomb",
"h_additionalBomb"
]
}
]
}
"canCWJ"
{
"disableEquipment": "HiJump"
}
{
"disableEquipment": "SpeedBooster"
}
{
"doorUnlockedAtNode": 1
}
"h_backIntoCorner"Collects items: 3 |
|
Entrance condition: {
"comeInWithGMode": {
"mode": "any",
"morphed": true
}
}Requires: "Gravity"
{
"or": [
"h_artificialMorphLongIBJ",
{
"and": [
"HiJump",
"h_artificialMorphJumpIntoIBJ"
]
}
]
} |
|
Entrance condition: {
"comeInWithGMode": {
"mode": "direct",
"morphed": true
}
}Requires: "Gravity"
{
"or": [
"h_artificialMorphLongIBJ",
{
"and": [
"HiJump",
"h_artificialMorphJumpIntoIBJ"
]
}
]
}Collects items: 3 |
|
Entrance condition: {
"comeInWithGMode": {
"mode": "any",
"morphed": true
}
}Requires: "h_artificialMorphCeilingBombJump" |
|
Entrance condition: {
"comeInWithGMode": {
"mode": "indirect",
"morphed": true
}
}Requires: "h_artificialMorphHBJ" |
From: 1
Left Door
To: 2
Right Door
Entrance condition: {
"comeInWithGMode": {
"mode": "direct",
"morphed": true
}
}Requires: {
"or": [
"h_artificialMorphCeilingBombJump",
"h_artificialMorphHBJ"
]
}Collects items: 3 |
|

With Spring Ball, pause then press right and jump just before the pause fully triggers. Disable Spring Ball in order to get a large horizontal boost. Pause again as soon as possible and re-enable Spring to reset fall speed. Entrance condition: {
"comeInWithGMode": {
"mode": "indirect",
"morphed": true
}
}Requires: "h_artificialMorphSpringFling"
"canInsaneJump"
{
"disableEquipment": "HiJump"
} |
|
With Spring Ball, pause then press right and jump just before the pause fully triggers. Disable Spring Ball in order to get a large horizontal boost. Pause again as soon as possible and re-enable Spring to reset fall speed. Entrance condition: {
"comeInWithGMode": {
"mode": "direct",
"morphed": true
}
}Requires: "h_artificialMorphSpringFling"
"canInsaneJump"
{
"disableEquipment": "HiJump"
}Collects items: 3 |
|

Run and jump, fire a shot mid-air, and activate the shinespark wind-up. Wait until the shot is at a specific position before sparking. Sparking too late will cause the shot to despawn before reaching the door. Sparking too early will cause Samus to bonk the door as it will not yet be open. A beam shot, Missile, or Super can be used. Entrance condition: {
"comeInShinecharged": {}
}Requires: {
"shineChargeFrames": 40
}
"canShinechargeMovementTricky"
"canHeroShot"
{
"shinespark": {
"frames": 38,
"excessFrames": 0
}
}Exit condition: {
"leaveWithSpark": {
"position": "top"
}
}Unlocks doors: {"types":["super"],"requires":[]}
{"types":["missiles","powerbomb"],"requires":["never"]}Dev note: Sparking in top position means the item will be avoided. |
From: 1
Left Door
To: 2
Right Door

Entrance condition: {
"comeInShinecharging": {
"length": 2,
"openEnd": 0,
"steepDownTiles": 1
}
}Requires: "canChainTemporaryBlue"
{
"or": [
"canBlueSpaceJump",
{
"and": [
"canGravityJump",
"canLongChainTemporaryBlue"
]
}
]
}Exit condition: {
"leaveWithTemporaryBlue": {}
}Unlocks doors: {"types":["ammo"],"requires":[]} |
From: 1
Left Door
To: 2
Right Door

Enter with enough speed to jump over all the water, morphing mid-air and then unmorphing into temporary blue. Entrance condition: {
"comeInGettingBlueSpeed": {
"length": 2,
"openEnd": 0,
"steepDownTiles": 1,
"minExtraRunSpeed": "$4.0"
}
}Requires: "canTrickyJump" "canLateralMidAirMorph" "canChainTemporaryBlue" Exit condition: {
"leaveWithTemporaryBlue": {}
}Unlocks doors: {"types":["ammo"],"requires":[]} |
From: 1
Left Door
To: 2
Right Door

Enter with enough speed to jump over all the water, morphing mid-air and then unmorphing into temporary blue. Morph just before hitting the ceiling, in order to extend the jump horizontally. Entrance condition: {
"comeInGettingBlueSpeed": {
"length": 2,
"openEnd": 0,
"steepDownTiles": 1,
"minExtraRunSpeed": "$3.2"
}
}Requires: "canInsaneJump" "canMomentumConservingMorph" "canChainTemporaryBlue" Exit condition: {
"leaveWithTemporaryBlue": {}
}Unlocks doors: {"types":["ammo"],"requires":[]} |
From: 1
Left Door
To: 2
Right Door


Enter with blue speed and bounce on the item pedestal to make it across, then unmorph into temporary blue. If entering at high speed, morph on the left side of the pedestal so that there is enough space to use a controlled Spring Ball bounce. If entering with very low speed, a spring fling can help make it across. Entrance condition: {
"comeInGettingBlueSpeed": {
"length": 2,
"openEnd": 0,
"steepDownTiles": 1,
"minExtraRunSpeed": "$0.8"
}
}Requires: "canTrickySpringBallBounce" "canChainTemporaryBlue" "canSpeedball" Exit condition: {
"leaveWithTemporaryBlue": {}
}Collects items: 3 Unlocks doors: {"types":["ammo"],"requires":[]} |
|
This jump is much easier without HiJump or Speed Booster equipped. Requires: "canDash" "canDisableEquipment" Collects items: 3 |
|


Requires: {
"or": [
"Grapple",
"SpaceJump",
{
"and": [
"Gravity",
"canDash"
]
},
{
"and": [
"Gravity",
"canWallJump"
]
},
{
"and": [
"Gravity",
"HiJump"
]
},
"canGravityJump"
]
}Collects items: 3 |
|


Entrance condition: {
"comeInRunning": {
"speedBooster": "any",
"minTiles": 3
}
}Collects items: 3 |
|
Requires: "canHBJ" Collects items: 3 |
|
Requires: "canSpringFling" Collects items: 3 |
|
Requires: "canSuitlessMaridia" "h_doubleSpringBallJumpWithHiJump" Collects items: 3 |
|
Jump and Morph very quickly to place a bomb to boost Samus to the right. The bomb should be as far right as possible, and just above door height. Requires: "h_bombThings"
{
"or": [
"canBeLucky",
"Bombs",
{
"ammo": {
"type": "PowerBomb",
"count": 4
}
}
]
}
{
"tech": "canUnmorphBombBoost"
}
"canResetFallSpeed"
"can4HighMidAirMorph"Collects items: 3 Dev note: canBeLucky added for difficulty placement. |
|
Entrance condition: {
"comeInShinecharged": {}
}Requires: {
"shineChargeFrames": 85
}
"canShinechargeMovementComplex"Collects items: 3 |
|
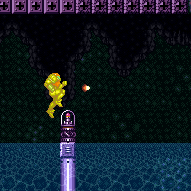
Run and jump, fire a shot mid-air, and activate the shinespark wind-up. Wait until the shot is at a specific position before sparking. Sparking too late will cause the shot to despawn before reaching the door. Sparking too early will cause Samus to bonk the door as it will not yet be open. A beam shot, Missile, or Super can be used. Entrance condition: {
"comeInShinecharged": {}
}Requires: {
"shineChargeFrames": 40
}
"canShinechargeMovementTricky"
"canHeroShot"
{
"shinespark": {
"frames": 38,
"excessFrames": 0
}
}Clears obstacles: B, C Collects items: 3 Dev note: Sparking in bottom position means the item will be collected along the way. |
|
Entrance condition: {
"comeInWithGMode": {
"mode": "any",
"morphed": true
}
}Requires: "Gravity" "h_artificialMorphLongIBJ" Collects items: 3 |
|
Entrance condition: {
"comeInWithGMode": {
"mode": "any",
"morphed": true
}
}Requires: {
"or": [
"h_artificialMorphCeilingBombJump",
"h_artificialMorphHBJ"
]
}Collects items: 3 |
|
With Spring Ball, pause then press right and jump just before the pause fully triggers. Disable Spring Ball in order to get a large horizontal boost. Pause again as soon as possible and re-enable Spring to reset fall speed. Entrance condition: {
"comeInWithGMode": {
"mode": "any",
"morphed": true
}
}Requires: "h_artificialMorphSpringFling"
{
"disableEquipment": "HiJump"
}Collects items: 3 |
|
This avoids collecting the item. Requires: {
"or": [
"Grapple",
"SpaceJump"
]
}Dev note: Several other strats would also be possible for avoiding the item. |
|


Requires: "h_bombThings" |
|
Requires: {
"haveBlueSuit": {}
}
"Morph" |
|


Requires: "Gravity"
{
"or": [
"canWallJump",
"canGravityJump",
{
"and": [
"canSpringBallJumpMidAir",
"HiJump"
]
}
]
} |
From: 2
Right Door
To: 1
Left Door
Enter with enough speed to jump onto or over the item pedestal, morphing mid-air and then unmorphing into temporary blue. Entrance condition: {
"comeInGettingBlueSpeed": {
"length": 4,
"openEnd": 0,
"minExtraRunSpeed": "$1.2"
}
}Requires: "canLongChainTemporaryBlue" Exit condition: {
"leaveWithTemporaryBlue": {}
}Collects items: 3 Unlocks doors: {"types":["ammo"],"requires":[]} |
|
Entrance condition: {
"comeInWithGrappleTeleport": {
"blockPositions": [
[
3,
12
],
[
3,
13
]
]
}
}Bypasses door shell: true |
|
Entrance condition: {
"comeInWithGrappleTeleport": {
"blockPositions": [
[
3,
12
]
]
}
}Exit condition: {
"leaveWithGrappleTeleport": {
"blockPositions": [
[
3,
12
]
]
}
}Bypasses door shell: true |
|
Entrance condition: {
"comeInWithGrappleTeleport": {
"blockPositions": [
[
3,
13
]
]
}
}Exit condition: {
"leaveWithGrappleTeleport": {
"blockPositions": [
[
3,
13
]
]
}
}Bypasses door shell: true |
|
Exit the previous room with Samus in a standing pose (while grappled). After teleporting, press right to release Grapple while staying standing (not being forced into a crouch). Then X-ray climb 1 screen to get up to the door transition, without needing to open the door. Samus will not be visible during the climb. Entrance condition: {
"comeInWithGrappleTeleport": {
"blockPositions": [
[
2,
18
],
[
2,
19
],
[
2,
28
],
[
2,
29
]
]
}
}Requires: "canXRayClimb" Bypasses door shell: true |
From: 2
Right Door
To: 1
Left Door
Requires: "h_storedSpark"
{
"shinespark": {
"frames": 3,
"excessFrames": 1
}
} |
|
Entrance condition: {
"comeInWithGMode": {
"mode": "any",
"morphed": true
}
}Requires: {
"haveBlueSuit": {}
}
{
"or": [
{
"disableEquipment": "Gravity"
},
"h_artificialMorphBombHorizontally",
"h_artificialMorphSpringBall"
]
} |
|
Exit condition: {
"leaveWithRunway": {
"length": 5,
"openEnd": 1
}
} |
|


Exit condition: {
"leaveWithGrappleSwing": {
"blocks": [
{
"position": [
5,
2
],
"note": "Closest Grapple block to right door"
}
]
}
} |
|
Requires: "h_CrystalFlash" |
|
Entrance condition: {
"comeInShinecharging": {
"length": 4,
"openEnd": 0
},
"comesInHeated": "no"
}Requires: "h_CrystalSpark" |
From: 2
Right Door
To: 2
Right Door
With Spring Ball, pause then press forward and jump just before the pause fully triggers. Disable Spring Ball in order to get a large horizontal boost. Pause again as soon as possible and re-enable Spring to reset fall speed. Entrance condition: {
"comeInWithGMode": {
"mode": "direct",
"morphed": true
}
}Requires: "canRemoteAcquire"
"h_artificialMorphSpringFling"
"canInsaneJump"
{
"disableEquipment": "HiJump"
}Collects items: 3 |
|
Entrance condition: {
"comeInWithGMode": {
"mode": "direct",
"morphed": true
}
}Requires: "canRemoteAcquire" "h_artificialMorphHBJ" Collects items: 3 |
|
Requires: {
"or": [
"Grapple",
"SpaceJump",
{
"and": [
"Gravity",
"canWallJump"
]
}
]
}Collects items: 3 |
|
Execution of this strat is non-trivial, and failing will lead to falling into the pit. Depending on item loadout, that could be a softlock. Requires: "canDash"
"canDisableEquipment"
"canCarefulJump"
{
"or": [
{
"doorUnlockedAtNode": 2
},
"canTrickyJump",
"canLateralMidAirMorph",
"h_speedJump"
]
}Collects items: 3 Dev note: Could use a failure definition? |
|
Requires: "canGravityJump" Collects items: 3 |
|


Execution of this strat is non-trivial, and failing will lead to falling into the pit. Depending on item loadout, that could be a softlock. Entrance condition: {
"comeInRunning": {
"speedBooster": "any",
"minTiles": 2
}
}Requires: "canDisableEquipment" "canCarefulJump" Collects items: 3 |
|
Requires: "canHBJ" Collects items: 3 |
|
Requires: "canSpringFling" Collects items: 3 |
|
Requires: "canSuitlessMaridia" "h_doubleSpringBallJumpWithHiJump" Collects items: 3 |
|


Entrance condition: {
"comeInWithSpark": {
"position": "bottom"
}
}Requires: {
"shinespark": {
"frames": 23,
"excessFrames": 1
}
}Clears obstacles: A Collects items: 3 Dev note: This will grab the item and continue the spark to the left door. If this is an E-Tank, Samus will not maintain full Energy after the next strat. |
|
After gaining a shinecharge, run back to the door to make space for a running jump to the left. Entrance condition: {
"comeInShinecharging": {
"length": 4,
"openEnd": 0
}
}Requires: "canShinechargeMovementComplex"
{
"shineChargeFrames": 130
}Collects items: 3 |
|
Entrance condition: {
"comeInShinecharged": {}
}Requires: {
"shineChargeFrames": 85
}
"canShinechargeMovementComplex"Collects items: 3 |
|


Run, jump, fire a shot mid-air, and activate a mid-air shinespark to the left. Sparking too late will cause the shot to despawn before reaching the door. Sparking too early will cause Samus to bonk the door as it will not yet be open. A beam shot, Missile, or Super can be used. Entrance condition: {
"comeInShinecharged": {}
}Requires: {
"shineChargeFrames": 25
}
"canShinechargeMovementTricky"
"canHeroShot"
{
"shinespark": {
"frames": 17,
"excessFrames": 0
}
}Clears obstacles: A, C Collects items: 3 |
|
Entrance condition: {
"comeInWithGMode": {
"mode": "any",
"morphed": true
}
}Requires: "Gravity"
{
"or": [
"h_artificialMorphLongIBJ",
{
"and": [
"HiJump",
"h_artificialMorphJumpIntoIBJ"
]
}
]
}Collects items: 3 |
|
Entrance condition: {
"comeInWithGMode": {
"mode": "any",
"morphed": true
}
}Requires: {
"or": [
"h_artificialMorphCeilingBombJump",
"h_artificialMorphHBJ"
]
}Collects items: 3 |
|
With Spring Ball, pause then press right and jump just before the pause fully triggers. Disable Spring Ball in order to get a large horizontal boost. Pause again as soon as possible and re-enable Spring to reset fall speed. Entrance condition: {
"comeInWithGMode": {
"mode": "any",
"morphed": true
}
}Requires: "h_artificialMorphSpringFling"
{
"disableEquipment": "HiJump"
}Collects items: 3 |
|
Requires: {
"obstaclesNotCleared": [
"A",
"B",
"C"
]
} |
|
Requires: {
"obstaclesCleared": [
"A"
]
}
{
"obstaclesNotCleared": [
"B",
"C"
]
}
"h_shinechargeMaxRunway"
{
"shinespark": {
"frames": 19,
"excessFrames": 19
}
}Resets obstacles: A Dev note: This will continue the Shinespark from the right door. This is needed in case the item is an E-Tank, Samus will not maintain full Energy after the Spark. FIXME: The h_shinechargeMaxRunway is to satisfy tests for now; we should add a proper way to represent that the shinespark carries over from the previous strat. |
|
Requires: {
"obstaclesCleared": [
"A",
"C"
]
}
{
"obstaclesNotCleared": [
"B"
]
}
"h_shinechargeMaxRunway"
{
"shinespark": {
"frames": 21,
"excessFrames": 0
}
}Exit condition: {
"leaveWithSpark": {
"position": "bottom"
}
}Unlocks doors: {"types":["super"],"requires":[]}
{"types":["missiles","powerbomb"],"requires":["never"]}Dev note: This will continue the Shinespark from the right door. This is needed in case the item is an E-Tank, Samus will not maintain full Energy after the Spark. FIXME: The h_shinechargeMaxRunway is to satisfy tests for now; we should add a proper way to represent that the shinespark carries over from the previous strat. |
|
From the pedestal, fire a shot to the left to open the door. If needed, jump slightly to the left to follow the shot, then activate the shinespark wind-up. Wait until the shot hits the door before sparking. Requires: {
"obstaclesNotCleared": [
"A",
"B",
"C"
]
}
"canShinechargeMovementComplex"
"canHeroShot"
{
"shineChargeFrames": 15
}
{
"shinespark": {
"frames": 21,
"excessFrames": 0
}
}Exit condition: {
"leaveWithSpark": {}
}Unlocks doors: {"types":["super"],"requires":[]}
{"types":["missiles","powerbomb"],"requires":["never"]}Dev note: If approaching from the right, the camera will be scrolled further, making it unnecessary to jump and follow the shot. |
|
Requires: "Grapple"
{
"obstaclesNotCleared": [
"A",
"B",
"C"
]
} |
|
Requires: "SpaceJump"
{
"obstaclesNotCleared": [
"A",
"B",
"C"
]
} |
|

Requires: "Gravity"
{
"or": [
{
"and": [
"canTrickySpringBallJump",
{
"or": [
"canLateralMidAirMorph",
"canTrickyJump"
]
}
]
},
{
"and": [
"HiJump",
"canWallJump",
{
"or": [
"canDash",
"canTrickyJump"
]
}
]
},
{
"and": [
"HiJump",
"canSpringBallJumpMidAir"
]
},
{
"and": [
"HiJump",
"canSpeedyJump"
]
}
]
}
{
"obstaclesNotCleared": [
"A",
"B",
"C"
]
} |
|


Requires: "Gravity"
{
"or": [
"canLongIBJ",
{
"and": [
"HiJump",
"canJumpIntoIBJ"
]
}
]
}
{
"obstaclesNotCleared": [
"A",
"B",
"C"
]
} |
|
Requires: "canGravityJump"
{
"obstaclesNotCleared": [
"A",
"B",
"C"
]
} |
|
Requires: "canHBJ"
{
"obstaclesNotCleared": [
"A",
"B",
"C"
]
} |
|
Requires: "canSuitlessMaridia"
"h_doubleSpringBallJumpWithHiJump"
{
"obstaclesNotCleared": [
"A",
"B",
"C"
]
} |
|

With Spring Ball, pause then press right and jump just before the pause fully triggers. Disable Spring Ball in order to get a large horizontal boost. Pause again as soon as possible and re-enable Spring to reset fall speed. Requires: "canSpringFling"
"canInsaneJump"
{
"disableEquipment": "HiJump"
}
{
"obstaclesNotCleared": [
"A",
"B",
"C"
]
}Collects items: 3 |
|
Perform a wall jump off the item pedestal while avoiding the water. Lay a Power Bomb (or Bomb) and use it to boost to the right, with a well-timed unmorph to reset fall speed. The placement of the bomb is more lenient with a CWJ. It is ideal to gain 3 frames of dash speed, the maximum possible, but lower amounts can work. It is even possible to do a regular wall jump instead of a CWJ, but the CWJ makes it significantly more lenient. It is best for the wall jump to be performed as high as possible. If Speed Booster is available, equipping it will generally be helpful, as it will increase the height of Samus' wall jump based on the amount of dash speed. Requires: {
"notable": "Walljump Bomb Boost"
}
{
"or": [
"canCWJ",
"canBePatient"
]
}
"canWallJumpBombBoost"
"canResetFallSpeed"
{
"obstaclesNotCleared": [
"A",
"B",
"C"
]
} |
|
Requires: "canCeilingBombJump"
{
"obstaclesNotCleared": [
"A",
"B",
"C"
]
} |
|
Requires: {
"obstaclesCleared": [
"B"
]
}
{
"obstaclesNotCleared": [
"A",
"C"
]
}
"h_shinechargeMaxRunway"
{
"shinespark": {
"frames": 23,
"excessFrames": 7
}
}Resets obstacles: B Dev note: FIXME: The h_shinechargeMaxRunway is to satisfy tests for now; we should add a proper way to represent that the shinespark carries over from the previous strat. |
|
Requires: {
"obstaclesCleared": [
"B",
"C"
]
}
{
"obstaclesNotCleared": [
"A"
]
}
"h_shinechargeMaxRunway"
{
"shinespark": {
"frames": 23,
"excessFrames": 7
}
}Exit condition: {
"leaveWithSpark": {
"position": "bottom"
}
}Unlocks doors: {"types":["super"],"requires":[]}
{"types":["missiles","powerbomb"],"requires":["never"]}Dev note: FIXME: The h_shinechargeMaxRunway is to satisfy tests for now; we should add a proper way to represent that the shinespark carries over from the previous strat. |
|
Jump from the pedestal to the right, and shinespark diagonally to make it past the water. Requires: {
"obstaclesNotCleared": [
"A",
"B",
"C"
]
}
"canShinechargeMovementComplex"
{
"shineChargeFrames": 45
}
{
"shinespark": {
"frames": 7
}
} |
|
From the pedestal, jump to the right to bring the door on-camera. Fire a shot mid-air, and activate the shinespark wind-up. Wait until the shot hits the door before sparking. Requires: {
"obstaclesNotCleared": [
"A",
"B",
"C"
]
}
"canShinechargeMovementComplex"
"canHeroShot"
{
"shineChargeFrames": 45
}
{
"shinespark": {
"frames": 22,
"excessFrames": 0
}
}Exit condition: {
"leaveWithSpark": {}
}Unlocks doors: {"types":["super"],"requires":[]}
{"types":["missiles","powerbomb"],"requires":["never"]}Dev note: If approaching from the right, the camera will be scrolled further, requiring a larger jump to prevent the shot from despawning. |
|
Requires: "h_storedSpark"
{
"shinespark": {
"frames": 4,
"excessFrames": 2
}
} |
|
Requires: "h_storedSpark"
"canHorizontalMidairShinespark"
{
"shinespark": {
"frames": 16,
"excessFrames": 0
}
}Exit condition: {
"leaveWithSpark": {}
}Unlocks doors: {"types":["super"],"requires":[]}
{"types":["missiles","powerbomb"],"requires":["never"]} |
{
"$schema": "../../../schema/m3-room.schema.json",
"id": 7,
"name": "The Moat",
"area": "Crateria",
"subarea": "East",
"roomAddress": "0x795FF",
"roomEnvironments": [
{
"heated": false
}
],
"mapTileMask": [
[
1,
1
],
[
1,
1
]
],
"nodes": [
{
"id": 1,
"name": "Left Door",
"nodeType": "door",
"nodeSubType": "blue",
"nodeAddress": "0x0018ade",
"doorOrientation": "left",
"doorEnvironments": [
{
"physics": "air"
}
],
"mapTileMask": [
[
2,
1
],
[
2,
1
]
]
},
{
"id": 2,
"name": "Right Door",
"nodeType": "door",
"nodeSubType": "blue",
"nodeAddress": "0x0018aea",
"doorOrientation": "right",
"doorEnvironments": [
{
"physics": "air"
}
],
"mapTileMask": [
[
1,
2
],
[
1,
2
]
]
},
{
"id": 3,
"name": "Item",
"nodeType": "item",
"nodeSubType": "visible",
"nodeItem": "Missile",
"nodeAddress": "0x78248",
"mapTileMask": [
[
2,
1
],
[
1,
1
]
],
"locks": [
{
"name": "Dummy Item Lock",
"lockType": "gameFlag",
"unlockStrats": [
{
"name": "Base (Collect Item)",
"notable": false,
"requires": [],
"flashSuitChecked": true,
"blueSuitChecked": true
}
]
}
]
}
],
"obstacles": [
{
"id": "A",
"name": "Shinesparking Left Through Item",
"obstacleType": "abstract"
},
{
"id": "B",
"name": "Shinesparking Right Through Item",
"obstacleType": "abstract"
},
{
"id": "C",
"name": "Hero Shot to Open Door",
"obstacleType": "abstract"
}
],
"enemies": [],
"strats": [
{
"link": [
1,
1
],
"name": "Base (Unlock Door)",
"requires": [],
"unlocksDoors": [
{
"types": [
"ammo"
],
"requires": []
}
],
"flashSuitChecked": true,
"blueSuitChecked": true
},
{
"link": [
1,
1
],
"name": "Base (Come In Normally)",
"entranceCondition": {
"comeInNormally": {}
},
"requires": [],
"flashSuitChecked": true,
"blueSuitChecked": true
},
{
"link": [
1,
1
],
"name": "Base (Come In With Mockball)",
"entranceCondition": {
"comeInWithMockball": {
"adjacentMinTiles": 0,
"remoteAndLandingMinTiles": [
[
0,
0
]
],
"speedBooster": "any"
}
},
"requires": [],
"flashSuitChecked": true,
"blueSuitChecked": true
},
{
"link": [
2,
2
],
"name": "Base (Unlock Door)",
"requires": [],
"unlocksDoors": [
{
"types": [
"ammo"
],
"requires": []
}
],
"flashSuitChecked": true,
"blueSuitChecked": true
},
{
"link": [
2,
2
],
"name": "Base (Come In Normally)",
"entranceCondition": {
"comeInNormally": {}
},
"requires": [],
"flashSuitChecked": true,
"blueSuitChecked": true
},
{
"link": [
2,
2
],
"name": "Base (Come In With Mockball)",
"entranceCondition": {
"comeInWithMockball": {
"adjacentMinTiles": 0,
"remoteAndLandingMinTiles": [
[
0,
0
]
],
"speedBooster": "any"
}
},
"requires": [],
"flashSuitChecked": true,
"blueSuitChecked": true
},
{
"name": "Base (Collect Item)",
"notable": false,
"requires": [],
"flashSuitChecked": true,
"blueSuitChecked": true,
"link": [
3,
3
],
"collectsItems": [
3
]
},
{
"id": 1,
"link": [
1,
1
],
"name": "Leave with Runway",
"requires": [],
"exitCondition": {
"leaveWithRunway": {
"length": 3,
"openEnd": 1,
"steepUpTiles": 1
}
},
"flashSuitChecked": true,
"blueSuitChecked": true
},
{
"id": 2,
"link": [
1,
1
],
"name": "Crystal Flash",
"requires": [
"h_CrystalFlash"
],
"flashSuitChecked": true,
"blueSuitChecked": true
},
{
"id": 69,
"link": [
1,
1
],
"name": "Dashless HiJump",
"requires": [
"HiJump",
"canTrickyJump"
],
"collectsItems": [
3
],
"flashSuitChecked": true,
"blueSuitChecked": true,
"note": [
"Back against the diagonal stair just higher than the flat area; crouch jump to grab the item.",
"It is also possible to grab the item without a crouch jump by breaking spin just before reaching the pillar."
],
"devNote": "This is only useful if Samus can't dash, such as with a blue suit."
},
{
"id": 61,
"link": [
1,
1
],
"name": "Leave With Grapple Swing",
"requires": [],
"exitCondition": {
"leaveWithGrappleSwing": {
"blocks": [
{
"position": [
7,
2
],
"note": "Closest Grapple block to left door"
}
]
}
},
"flashSuitChecked": true,
"blueSuitChecked": true
},
{
"id": 3,
"link": [
1,
1
],
"name": "Leave With Grapple Teleport",
"requires": [
{
"notable": "Leave With Grapple Teleport"
},
"canMoonwalk",
"canInsaneJump",
{
"or": [
{
"noFlashSuit": {}
},
{
"and": [
"h_useSpringBall",
"canComplexCarryFlashSuit"
]
}
]
}
],
"exitCondition": {
"leaveWithGrappleTeleport": {
"blockPositions": [
[
7,
2
]
]
}
},
"flashSuitChecked": true,
"blueSuitChecked": true,
"note": [
"Hold angle-up, jump, bonk the ceiling, and use Grapple just before landing.",
"Moonwalk into the transition on the same frame that the Grapple Beam reaches the Grapple block.",
"Continue holding Grapple through the door transition to initiate a teleport in the next room."
]
},
{
"id": 4,
"link": [
1,
2
],
"name": "Base",
"requires": [
{
  "or": [
    "SpaceJump",
    {
      "and": [
        "Grapple",
        {
          "or": [
            {
              "noFlashSuit": {}
            },
            "h_midAirShootUp",
            "canInsaneJump"
          ]
        }
      ]
    }
  ]
}
],
"flashSuitChecked": true,
"blueSuitChecked": true,
"devNote": "This avoids collecting the item."
},
{
"id": 5,
"link": [
1,
2
],
"name": "Shinespark Above Item",
"entranceCondition": {
"comeInWithSpark": {
"position": "top"
}
},
"requires": [
{
  "shinespark": {
    "frames": 42,
    "excessFrames": 9
  }
}
],
"flashSuitChecked": true,
"blueSuitChecked": true,
"devNote": "Sparking in top position means the item will be avoided."
},
{
"id": 6,
"link": [
1,
2
],
"name": "Speed Jump",
"entranceCondition": {
"comeInRunning": {
"speedBooster": "yes",
"minTiles": 26
}
},
"requires": [
"h_speedJump",
"canTrickyJump"
],
"flashSuitChecked": true,
"blueSuitChecked": true
},
{
"id": 7,
"link": [
1,
2
],
"name": "Insane Speed Jump",
"entranceCondition": {
"comeInRunning": {
"speedBooster": "yes",
"minTiles": 21
}
},
"requires": [
"h_speedJump",
"canInsaneJump"
],
"flashSuitChecked": true,
"blueSuitChecked": true
},
{
"id": 8,
"link": [
1,
2
],
"name": "Speedy Airball",
"entranceCondition": {
"comeInRunning": {
"speedBooster": "yes",
"minTiles": 18
}
},
"requires": [
"h_speedJump",
"canTrickyJump",
"canLateralMidAirMorph"
],
"flashSuitChecked": true,
"blueSuitChecked": true
},
{
"id": 9,
"link": [
1,
2
],
"name": "Insane Speedy Airball",
"entranceCondition": {
"comeInRunning": {
"speedBooster": "yes",
"minTiles": 11
}
},
"requires": [
"h_speedJump",
"canInsaneJump",
"canLateralMidAirMorph",
"canMomentumConservingMorph"
],
"flashSuitChecked": true,
"blueSuitChecked": true
},
{
"id": 63,
"link": [
1,
2
],
"name": "Side Platform Cross Room Jump",
"entranceCondition": {
"comeInWithSidePlatform": {
"platforms": [
{
"minHeight": 2,
"maxHeight": 2,
"minTiles": 27.4375,
"speedBooster": "yes",
"obstructions": [
[
1,
0
]
],
"requires": [
"canMomentumConservingMorph"
],
"note": [
"This applies to Dust Torizo Room and Halfie Climb Room."
]
},
{
"minHeight": 2,
"maxHeight": 3,
"minTiles": 29.4375,
"speedBooster": "yes",
"obstructions": [
[
2,
0
]
],
"requires": [
"canMomentumConservingMorph"
],
"note": [
"This applies to Waterway Energy Tank Room."
],
"devNote": [
"With good positioning this can be done with a lateral mid-air morph not touching the ceiling.",
"This has little use since with Gravity a Gravity jump would also be possible."
]
},
{
"minHeight": 2,
"maxHeight": 2,
"minTiles": 45,
"speedBooster": "yes",
"obstructions": [
[
3,
0
]
],
"requires": [
"canMomentumConservingMorph",
"canInsaneJump"
],
"note": [
"This applies to Statues Hallway."
]
},
{
"minHeight": 3,
"maxHeight": 3,
"minTiles": 45,
"speedBooster": "yes",
"obstructions": [
[
3,
0
]
],
"requires": [
"canMomentumConservingMorph",
"canInsaneJump"
],
"note": [
"This applies to Flyway."
]
},
{
"minHeight": 2,
"maxHeight": 2,
"minTiles": 45,
"speedBooster": "yes",
"obstructions": [
[
4,
0
]
],
"requires": [
"canMomentumConservingMorph",
"canInsaneJump",
"canInsaneMidAirMorph"
],
"note": [
"This applies to Baby Kraid Room."
]
},
{
"minHeight": 2,
"maxHeight": 2,
"minTiles": 39.4375,
"speedBooster": "yes",
"obstructions": [
[
3,
2
]
],
"note": [
"This applies to Metal Pirates Room."
],
"detailNote": [
"This has a 3-frame window for the jump."
]
}
]
}
},
"requires": [
"canTrickyJump"
],
"flashSuitChecked": true,
"blueSuitChecked": true,
"devNote": [
"This isn't marked as a wall-jump avoid, since it may have some advantage over the CWJ",
"by reducing the soft-lock risk."
]
},
{
"id": 10,
"link": [
1,
2
],
"name": "Spring Ball Bounce, Run Through the Door",
"entranceCondition": {
"comeInRunning": {
"speedBooster": "any",
"minTiles": 1
}
},
"requires": [
"canSpringBallBounce",
"canDisableEquipment",
{
"or": [
"canTrickyJump",
"h_useMorphBombs"
]
}
],
"collectsItems": [
3
],
"flashSuitChecked": true,
"blueSuitChecked": true,
"note": "Run, jump, lateral midair morph on the way down, then bounce off the pedestal to get to the other side."
},
{
"id": 11,
"link": [
1,
2
],
"name": "Spring Ball Bounce, Open Doorway",
"requires": [
"canSpringBallBounce",
"canDisableEquipment",
{
"doorUnlockedAtNode": 1
},
{
"or": [
"canTrickyJump",
"h_useMorphBombs"
]
}
],
"collectsItems": [
3
],
"flashSuitChecked": true,
"blueSuitChecked": true,
"note": "Open the door and step as close to the transition as possible. Run, jump, lateral midair morph on the way down, then bounce off the pedestal to get to the other side."
},
{
"id": 12,
"link": [
1,
2
],
"name": "Continuous Walljump, Run Through the Door",
"entranceCondition": {
"comeInRunning": {
"speedBooster": "no",
"minTiles": 1.4
}
},
"requires": [
{
"or": [
{
"notable": "First-Try CWJ"
},
{
"and": [
"h_bombThings",
"h_additionalBomb",
"h_additionalBomb"
]
}
]
},
"canCWJ",
{
"disableEquipment": "HiJump"
},
{
"disableEquipment": "SpeedBooster"
}
],
"collectsItems": [
3
],
"flashSuitChecked": true,
"blueSuitChecked": true,
"note": [
"Align against the closed door shell on the other side of the transition.",
"Run towards the water and jump on the last possible frame.",
"Perform the CWJ off of the item pedestal to cross to the other side."
],
"detailNote": [
"This requires running and jumping on the last possible frame before Samus would run off into the water.",
"If the setup is done correctly, there will then be a 2-frame window for the wall jump."
]
},
{
"id": 13,
"link": [
1,
2
],
"name": "Continuous Walljump, Open Doorway",
"requires": [
{
"or": [
{
"notable": "First-Try CWJ"
},
{
"and": [
"h_bombThings",
"h_additionalBomb",
"h_additionalBomb"
]
}
]
},
"canCWJ",
{
"disableEquipment": "HiJump"
},
{
"disableEquipment": "SpeedBooster"
},
{
"doorUnlockedAtNode": 1
},
"h_backIntoCorner"
],
"collectsItems": [
3
],
"flashSuitChecked": true,
"blueSuitChecked": true,
"note": [
"Stand on the farthest pixel into the door possible using moonwalk, X-Ray, or morphball turn around.",
"Run towards the water and jump on the last possible frame.",
"Perform the CWJ off of the item pedestal to cross to the other side."
],
"detailNote": [
"This requires running and jumping on the last possible frame before Samus would run off into the water.",
"There is either a 1-frame or 2-frame window for the wall jump, depending on Samus' X subpixel position.",
"To get a 2-frame window, Samus must start in the leftmost 75% of the pixel next to the transition.",
"One method to guarantee that Samus gets a good subpixel is to jump and press against the overhang to align with it,",
"then land, turn around, and moonwalk back into position."
]
},
{
"id": 14,
"link": [
1,
2
],
"name": "G-mode Morph IBJ",
"entranceCondition": {
"comeInWithGMode": {
"mode": "any",
"morphed": true
}
},
"requires": [
"Gravity",
{
"or": [
"h_artificialMorphLongIBJ",
{
"and": [
"HiJump",
"h_artificialMorphJumpIntoIBJ"
]
}
]
}
],
"flashSuitChecked": true,
"blueSuitChecked": true
},
{
"id": 73,
"link": [
1,
2
],
"name": "G-mode Morph IBJ, Remote Acquire",
"entranceCondition": {
"comeInWithGMode": {
"mode": "direct",
"morphed": true
}
},
"requires": [
"Gravity",
{
"or": [
"h_artificialMorphLongIBJ",
{
"and": [
"HiJump",
"h_artificialMorphJumpIntoIBJ"
]
}
]
}
],
"collectsItems": [
3
],
"flashSuitChecked": true,
"blueSuitChecked": true
},
{
"id": 15,
"link": [
1,
2
],
"name": "G-Mode Morph Ceiling Bomb Jump",
"entranceCondition": {
"comeInWithGMode": {
"mode": "any",
"morphed": true
}
},
"requires": [
"h_artificialMorphCeilingBombJump"
],
"flashSuitChecked": true,
"blueSuitChecked": true
},
{
"id": 74,
"link": [
1,
2
],
"name": "G-Mode Morph HBJ",
"entranceCondition": {
"comeInWithGMode": {
"mode": "indirect",
"morphed": true
}
},
"requires": [
"h_artificialMorphHBJ"
],
"flashSuitChecked": true,
"blueSuitChecked": true
},
{
"id": 75,
"link": [
1,
2
],
"name": "G-Mode Morph HBJ or Ceiling Bomb Jump, Remote Acquire",
"entranceCondition": {
"comeInWithGMode": {
"mode": "direct",
"morphed": true
}
},
"requires": [
{
  "or": [
    "h_artificialMorphCeilingBombJump",
    "h_artificialMorphHBJ"
  ]
}
],
"collectsItems": [
3
],
"flashSuitChecked": true,
"blueSuitChecked": true
},
{
"id": 70,
"link": [
1,
2
],
"name": "G-Mode Morph Spring Fling",
"entranceCondition": {
"comeInWithGMode": {
"mode": "indirect",
"morphed": true
}
},
"requires": [
"h_artificialMorphSpringFling",
"canInsaneJump",
{
"disableEquipment": "HiJump"
}
],
"flashSuitChecked": true,
"blueSuitChecked": true,
"note": [
"With Spring Ball, pause then press right and jump just before the pause fully triggers.",
"Disable Spring Ball in order to get a large horizontal boost.",
"Pause again as soon as possible and re-enable Spring to reset fall speed."
]
},
{
"id": 76,
"link": [
1,
2
],
"name": "G-Mode Morph Spring Fling, Remote Acquire",
"entranceCondition": {
"comeInWithGMode": {
"mode": "direct",
"morphed": true
}
},
"requires": [
"h_artificialMorphSpringFling",
"canInsaneJump",
{
"disableEquipment": "HiJump"
}
],
"collectsItems": [
3
],
"flashSuitChecked": true,
"blueSuitChecked": true,
"note": [
"With Spring Ball, pause then press right and jump just before the pause fully triggers.",
"Disable Spring Ball in order to get a large horizontal boost.",
"Pause again as soon as possible and re-enable Spring to reset fall speed."
]
},
{
"id": 16,
"link": [
1,
2
],
"name": "Hero Shot Spark Above Item",
"entranceCondition": {
"comeInShinecharged": {}
},
"requires": [
{
"shineChargeFrames": 40
},
"canShinechargeMovementTricky",
"canHeroShot",
{
"shinespark": {
"frames": 38,
"excessFrames": 0
}
}
],
"exitCondition": {
"leaveWithSpark": {
"position": "top"
}
},
"unlocksDoors": [
{
"types": [
"super"
],
"requires": []
},
{
"types": [
"missiles",
"powerbomb"
],
"requires": [
"never"
]
}
],
"flashSuitChecked": true,
"blueSuitChecked": true,
"note": [
"Run and jump, fire a shot mid-air, and activate the shinespark wind-up.",
"Wait until the shot is at a specific position before sparking.",
"Sparking too late will cause the shot to despawn before reaching the door.",
"Sparking too early will cause Samus to bonk the door as it will not yet be open.",
"A beam shot, Missile, or Super can be used."
],
"devNote": "Sparking in top position means the item will be avoided."
},
{
"id": 17,
"link": [
1,
2
],
"name": "Come in Shinecharging, Leave With Temporary Blue",
"entranceCondition": {
"comeInShinecharging": {
"length": 2,
"openEnd": 0,
"steepDownTiles": 1
}
},
"requires": [
"canChainTemporaryBlue",
{
"or": [
"canBlueSpaceJump",
{
"and": [
"canGravityJump",
"canLongChainTemporaryBlue"
]
}
]
}
],
"exitCondition": {
"leaveWithTemporaryBlue": {}
},
"unlocksDoors": [
{
"types": [
"ammo"
],
"requires": []
}
],
"flashSuitChecked": true,
"blueSuitChecked": true
},
{
"id": 18,
"link": [
1,
2
],
"name": "Come in Getting Blue Speed, Leave With Temporary Blue (Speed Jump)",
"entranceCondition": {
"comeInGettingBlueSpeed": {
"length": 2,
"openEnd": 0,
"steepDownTiles": 1,
"minExtraRunSpeed": "$4.0"
}
},
"requires": [
"canTrickyJump",
"canLateralMidAirMorph",
"canChainTemporaryBlue"
],
"exitCondition": {
"leaveWithTemporaryBlue": {}
},
"unlocksDoors": [
{
"types": [
"ammo"
],
"requires": []
}
],
"flashSuitChecked": true,
"blueSuitChecked": true,
"note": [
"Enter with enough speed to jump over all the water, morphing mid-air and then unmorphing into temporary blue."
]
},
{
"id": 19,
"link": [
1,
2
],
"name": "Come in Getting Blue Speed, Leave With Temporary Blue (Insane Speed Jump)",
"entranceCondition": {
"comeInGettingBlueSpeed": {
"length": 2,
"openEnd": 0,
"steepDownTiles": 1,
"minExtraRunSpeed": "$3.2"
}
},
"requires": [
"canInsaneJump",
"canMomentumConservingMorph",
"canChainTemporaryBlue"
],
"exitCondition": {
"leaveWithTemporaryBlue": {}
},
"unlocksDoors": [
{
"types": [
"ammo"
],
"requires": []
}
],
"flashSuitChecked": true,
"blueSuitChecked": true,
"note": [
"Enter with enough speed to jump over all the water, morphing mid-air and then unmorphing into temporary blue.",
"Morph just before hitting the ceiling, in order to extend the jump horizontally."
]
},
{
"id": 65,
"link": [
1,
2
],
"name": "Come in Getting Blue Speed, Leave With Temporary Blue (Spring Ball Bounce)",
"entranceCondition": {
"comeInGettingBlueSpeed": {
"length": 2,
"openEnd": 0,
"steepDownTiles": 1,
"minExtraRunSpeed": "$0.8"
}
},
"requires": [
"canTrickySpringBallBounce",
"canChainTemporaryBlue",
"canSpeedball"
],
"exitCondition": {
"leaveWithTemporaryBlue": {}
},
"unlocksDoors": [
{
"types": [
"ammo"
],
"requires": []
}
],
"collectsItems": [
3
],
"flashSuitChecked": true,
"blueSuitChecked": true,
"note": [
"Enter with blue speed and bounce on the item pedestal to make it across, then unmorph into temporary blue.",
"If entering at high speed, morph on the left side of the pedestal so that there is enough space to use a controlled Spring Ball bounce."
],
"detailNote": [
"If entering with very low speed, a spring fling can help make it across."
]
},
{
"id": 20,
"link": [
1,
3
],
"name": "Base",
"requires": [
"canDash",
"canDisableEquipment"
],
"collectsItems": [
3
],
"flashSuitChecked": true,
"blueSuitChecked": true,
"note": "This jump is much easier without HiJump or Speed Booster equipped."
},
{
"id": 21,
"link": [
1,
3
],
"name": "Movement Assist",
"requires": [
{
  "or": [
    "Grapple",
    "SpaceJump",
    {
      "and": [
        "Gravity",
        "canDash"
      ]
    },
    {
      "and": [
        "Gravity",
        "canWallJump"
      ]
    },
    {
      "and": [
        "Gravity",
        "HiJump"
      ]
    },
    "canGravityJump"
  ]
}
],
"collectsItems": [
3
],
"flashSuitChecked": true,
"blueSuitChecked": true
},
{
"id": 22,
"link": [
1,
3
],
"name": "Run Through Door",
"entranceCondition": {
"comeInRunning": {
"speedBooster": "any",
"minTiles": 3
}
},
"requires": [],
"collectsItems": [
3
],
"flashSuitChecked": true,
"blueSuitChecked": true
},
{
"id": 77,
"link": [
1,
3
],
"name": "Horizontal Bomb Jump",
"requires": [
"canHBJ"
],
"collectsItems": [
3
],
"flashSuitChecked": true,
"blueSuitChecked": true
},
{
"id": 78,
"link": [
1,
3
],
"name": "Spring Fling",
"requires": [
"canSpringFling"
],
"collectsItems": [
3
],
"flashSuitChecked": true,
"blueSuitChecked": true
},
{
"id": 79,
"link": [
1,
3
],
"name": "Double Spring Ball Jump",
"requires": [
"canSuitlessMaridia",
"h_doubleSpringBallJumpWithHiJump"
],
"collectsItems": [
3
],
"flashSuitChecked": true,
"blueSuitChecked": true
},
{
"id": 80,
"link": [
1,
3
],
"name": "Midair Bomb Boost",
"requires": [
"h_bombThings",
{
"or": [
"canBeLucky",
"Bombs",
{
"ammo": {
"type": "PowerBomb",
"count": 4
}
}
]
},
{
"tech": "canUnmorphBombBoost"
},
"canResetFallSpeed",
"can4HighMidAirMorph"
],
"collectsItems": [
3
],
"flashSuitChecked": true,
"blueSuitChecked": true,
"note": [
"Jump and Morph very quickly to place a bomb to boost Samus to the right.",
"The bomb should be as far right as possible, and just above door height."
],
"devNote": "canBeLucky added for difficulty placement."
},
{
"id": 23,
"link": [
1,
3
],
"name": "Come In Shinecharged, End Shinecharged",
"entranceCondition": {
"comeInShinecharged": {}
},
"requires": [
{
"shineChargeFrames": 85
},
"canShinechargeMovementComplex"
],
"collectsItems": [
3
],
"endsWithShineCharge": true,
"flashSuitChecked": true,
"blueSuitChecked": true
},
{
"id": 24,
"link": [
1,
3
],
"name": "Hero Shot Spark Through Item",
"entranceCondition": {
"comeInShinecharged": {}
},
"requires": [
{
"shineChargeFrames": 40
},
"canShinechargeMovementTricky",
"canHeroShot",
{
"shinespark": {
"frames": 38,
"excessFrames": 0
}
}
],
"clearsObstacles": [
"B",
"C"
],
"collectsItems": [
3
],
"flashSuitChecked": true,
"blueSuitChecked": true,
"note": [
"Run and jump, fire a shot mid-air, and activate the shinespark wind-up.",
"Wait until the shot is at a specific position before sparking.",
"Sparking too late will cause the shot to despawn before reaching the door.",
"Sparking too early will cause Samus to bonk the door as it will not yet be open.",
"A beam shot, Missile, or Super can be used."
],
"devNote": "Sparking in bottom position means the item will be collected along the way."
},
{
"id": 81,
"link": [
1,
3
],
"name": "G-mode Morph IBJ",
"entranceCondition": {
"comeInWithGMode": {
"mode": "any",
"morphed": true
}
},
"requires": [
"Gravity",
"h_artificialMorphLongIBJ"
],
"collectsItems": [
3
],
"flashSuitChecked": true,
"blueSuitChecked": true
},
{
"id": 82,
"link": [
1,
3
],
"name": "G-Mode Morph HBJ or Ceiling Bomb Jump",
"entranceCondition": {
"comeInWithGMode": {
"mode": "any",
"morphed": true
}
},
"requires": [
{
  "or": [
    "h_artificialMorphCeilingBombJump",
    "h_artificialMorphHBJ"
  ]
}
],
"collectsItems": [
3
],
"flashSuitChecked": true,
"blueSuitChecked": true
},
{
"id": 83,
"link": [
1,
3
],
"name": "G-Mode Morph Spring Fling",
"entranceCondition": {
"comeInWithGMode": {
"mode": "any",
"morphed": true
}
},
"requires": [
"h_artificialMorphSpringFling",
{
"disableEquipment": "HiJump"
}
],
"collectsItems": [
3
],
"flashSuitChecked": true,
"blueSuitChecked": true,
"note": [
"With Spring Ball, pause then press right and jump just before the pause fully triggers.",
"Disable Spring Ball in order to get a large horizontal boost.",
"Pause again as soon as possible and re-enable Spring to reset fall speed."
]
},
{
"id": 25,
"link": [
2,
1
],
"name": "Base",
"requires": [
{
  "or": [
    "Grapple",
    "SpaceJump"
  ]
}
],
"flashSuitChecked": true,
"blueSuitChecked": true,
"note": "This avoids collecting the item.",
"devNote": "Several other strats would also be possible for avoiding the item."
},
{
"id": 26,
"link": [
2,
1
],
"name": "Pass Below",
"requires": [
"h_bombThings"
],
"flashSuitChecked": true,
"blueSuitChecked": true
},
{
"id": 67,
"link": [
2,
1
],
"name": "Blue Suit",
"requires": [
{
"haveBlueSuit": {}
},
"Morph"
],
"flashSuitChecked": true,
"blueSuitChecked": true
},
{
"id": 27,
"link": [
2,
1
],
"name": "Gravity",
"requires": [
"Gravity",
{
"or": [
"canWallJump",
"canGravityJump",
{
"and": [
"canSpringBallJumpMidAir",
"HiJump"
]
}
]
}
],
"flashSuitChecked": true,
"blueSuitChecked": true
},
{
"id": 28,
"link": [
2,
1
],
"name": "Come in Getting Blue Speed, Leave With Temporary Blue (Speed Jump)",
"entranceCondition": {
"comeInGettingBlueSpeed": {
"length": 4,
"openEnd": 0,
"minExtraRunSpeed": "$1.2"
}
},
"requires": [
"canLongChainTemporaryBlue"
],
"exitCondition": {
"leaveWithTemporaryBlue": {}
},
"unlocksDoors": [
{
"types": [
"ammo"
],
"requires": []
}
],
"collectsItems": [
3
],
"flashSuitChecked": true,
"blueSuitChecked": true,
"note": [
"Enter with enough speed to jump onto or over the item pedestal, morphing mid-air and then unmorphing into temporary blue."
]
},
{
"id": 29,
"link": [
2,
1
],
"name": "Grapple Teleport Door Lock Skip",
"entranceCondition": {
"comeInWithGrappleTeleport": {
"blockPositions": [
[
3,
12
],
[
3,
13
]
]
}
},
"requires": [],
"bypassesDoorShell": "yes",
"flashSuitChecked": true,
"blueSuitChecked": true
},
{
"id": 30,
"link": [
2,
1
],
"name": "Carry Grapple Teleport (Top Position)",
"entranceCondition": {
"comeInWithGrappleTeleport": {
"blockPositions": [
[
3,
12
]
]
}
},
"requires": [],
"exitCondition": {
"leaveWithGrappleTeleport": {
"blockPositions": [
[
3,
12
]
]
}
},
"bypassesDoorShell": "yes",
"flashSuitChecked": true,
"blueSuitChecked": true
},
{
"id": 31,
"link": [
2,
1
],
"name": "Carry Grapple Teleport (Bottom Position)",
"entranceCondition": {
"comeInWithGrappleTeleport": {
"blockPositions": [
[
3,
13
]
]
}
},
"requires": [],
"exitCondition": {
"leaveWithGrappleTeleport": {
"blockPositions": [
[
3,
13
]
]
}
},
"bypassesDoorShell": "yes",
"flashSuitChecked": true,
"blueSuitChecked": true
},
{
"id": 32,
"link": [
2,
1
],
"name": "Grapple Teleport X-Ray Climb",
"entranceCondition": {
"comeInWithGrappleTeleport": {
"blockPositions": [
[
2,
18
],
[
2,
19
],
[
2,
28
],
[
2,
29
]
]
}
},
"requires": [
"canXRayClimb"
],
"bypassesDoorShell": "yes",
"flashSuitChecked": true,
"blueSuitChecked": true,
"note": [
"Exit the previous room with Samus in a standing pose (while grappled).",
"After teleporting, press right to release Grapple while staying standing (not being forced into a crouch).",
"Then X-ray climb 1 screen to get up to the door transition, without needing to open the door.",
"Samus will not be visible during the climb."
]
},
{
"id": 33,
"link": [
2,
1
],
"name": "Use Stored Spark, Diagonal Spark Avoid the Item",
"requires": [
"h_storedSpark",
{
"shinespark": {
"frames": 3,
"excessFrames": 1
}
}
],
"flashSuitChecked": true,
"blueSuitChecked": true
},
{
"id": 84,
"link": [
2,
1
],
"name": "G-Mode Morph, Blue Suit",
"entranceCondition": {
"comeInWithGMode": {
"mode": "any",
"morphed": true
}
},
"requires": [
{
"haveBlueSuit": {}
},
{
"or": [
{
"disableEquipment": "Gravity"
},
"h_artificialMorphBombHorizontally",
"h_artificialMorphSpringBall"
]
}
],
"flashSuitChecked": true,
"blueSuitChecked": true
},
{
"id": 34,
"link": [
2,
2
],
"name": "Leave with Runway",
"requires": [],
"exitCondition": {
"leaveWithRunway": {
"length": 5,
"openEnd": 1
}
},
"flashSuitChecked": true,
"blueSuitChecked": true
},
{
"id": 62,
"link": [
2,
2
],
"name": "Leave With Grapple Swing",
"requires": [],
"exitCondition": {
"leaveWithGrappleSwing": {
"blocks": [
{
"position": [
5,
2
],
"note": "Closest Grapple block to right door"
}
]
}
},
"flashSuitChecked": true,
"blueSuitChecked": true
},
{
"id": 35,
"link": [
2,
2
],
"name": "Crystal Flash",
"requires": [
"h_CrystalFlash"
],
"flashSuitChecked": true,
"blueSuitChecked": true
},
{
"id": 68,
"link": [
2,
2
],
"name": "Come in Shinecharging, Crystal Spark",
"entranceCondition": {
"comeInShinecharging": {
"length": 4,
"openEnd": 0
},
"comesInHeated": "no"
},
"requires": [
"h_CrystalSpark"
],
"flashSuitChecked": true,
"blueSuitChecked": true
},
{
"id": 71,
"link": [
2,
2
],
"name": "Direct G-Mode Morph Spring Fling, Remote Acquire Item",
"entranceCondition": {
"comeInWithGMode": {
"mode": "direct",
"morphed": true
}
},
"requires": [
"canRemoteAcquire",
"h_artificialMorphSpringFling",
"canInsaneJump",
{
"disableEquipment": "HiJump"
}
],
"collectsItems": [
3
],
"flashSuitChecked": true,
"blueSuitChecked": true,
"note": [
"With Spring Ball, pause then press forward and jump just before the pause fully triggers.",
"Disable Spring Ball in order to get a large horizontal boost.",
"Pause again as soon as possible and re-enable Spring to reset fall speed."
]
},
{
"id": 85,
"link": [
2,
2
],
"name": "Direct G-Mode Morph HBJ, Remote Acquire Item",
"entranceCondition": {
"comeInWithGMode": {
"mode": "direct",
"morphed": true
}
},
"requires": [
"canRemoteAcquire",
"h_artificialMorphHBJ"
],
"collectsItems": [
3
],
"flashSuitChecked": true,
"blueSuitChecked": true
},
{
"id": 36,
"link": [
2,
3
],
"name": "Base",
"requires": [
{
  "or": [
    "Grapple",
    "SpaceJump",
    {
      "and": [
        "Gravity",
        "canWallJump"
      ]
    }
  ]
}
],
"collectsItems": [
3
],
"flashSuitChecked": true,
"blueSuitChecked": true
},
{
"id": 37,
"link": [
2,
3
],
"name": "Right to Left Jump",
"requires": [
"canDash",
"canDisableEquipment",
"canCarefulJump",
{
"or": [
{
"doorUnlockedAtNode": 2
},
"canTrickyJump",
"canLateralMidAirMorph",
"h_speedJump"
]
}
],
"collectsItems": [
3
],
"flashSuitChecked": true,
"blueSuitChecked": true,
"note": [
"Execution of this strat is non-trivial, and failing will lead to falling into the pit.",
"Depending on item loadout, that could be a softlock."
],
"devNote": "Could use a failure definition?"
},
{
"id": 86,
"link": [
2,
3
],
"name": "Gravity Jump",
"requires": [
"canGravityJump"
],
"collectsItems": [
3
],
"flashSuitChecked": true,
"blueSuitChecked": true
},
{
"id": 38,
"link": [
2,
3
],
"name": "Right to Left Jump, Run Through Door",
"entranceCondition": {
"comeInRunning": {
"speedBooster": "any",
"minTiles": 2
}
},
"requires": [
"canDisableEquipment",
"canCarefulJump"
],
"collectsItems": [
3
],
"flashSuitChecked": true,
"blueSuitChecked": true,
"note": [
"Execution of this strat is non-trivial, and failing will lead to falling into the pit.",
"Depending on item loadout, that could be a softlock."
]
},
{
"id": 87,
"link": [
2,
3
],
"name": "Horizontal Bomb Jump",
"requires": [
"canHBJ"
],
"collectsItems": [
3
],
"flashSuitChecked": true,
"blueSuitChecked": true
},
{
"id": 88,
"link": [
2,
3
],
"name": "Spring Fling",
"requires": [
"canSpringFling"
],
"collectsItems": [
3
],
"flashSuitChecked": true,
"blueSuitChecked": true
},
{
"id": 89,
"link": [
2,
3
],
"name": "Double Spring Ball Jump",
"requires": [
"canSuitlessMaridia",
"h_doubleSpringBallJumpWithHiJump"
],
"collectsItems": [
3
],
"flashSuitChecked": true,
"blueSuitChecked": true
},
{
"id": 39,
"link": [
2,
3
],
"name": "Shinespark Through Item",
"entranceCondition": {
"comeInWithSpark": {
"position": "bottom"
}
},
"requires": [
{
  "shinespark": {
    "frames": 23,
    "excessFrames": 1
  }
}
],
"clearsObstacles": [
"A"
],
"collectsItems": [
3
],
"flashSuitChecked": true,
"blueSuitChecked": true,
"devNote": "This will grab the item and continue the spark to the left door. If this is an E-Tank, Samus will not maintain full Energy after the next strat."
},
{
"id": 40,
"link": [
2,
3
],
"name": "Come In Shinecharging, End Shinecharged",
"entranceCondition": {
"comeInShinecharging": {
"length": 4,
"openEnd": 0
}
},
"requires": [
"canShinechargeMovementComplex",
{
"shineChargeFrames": 130
}
],
"collectsItems": [
3
],
"endsWithShineCharge": true,
"flashSuitChecked": true,
"blueSuitChecked": true,
"note": [
"After gaining a shinecharge, run back to the door to make space for a running jump to the left."
]
},
{
"id": 41,
"link": [
2,
3
],
"name": "Come in Shinecharged, End Shinecharged",
"entranceCondition": {
"comeInShinecharged": {}
},
"requires": [
{
"shineChargeFrames": 85
},
"canShinechargeMovementComplex"
],
"collectsItems": [
3
],
"endsWithShineCharge": true,
"flashSuitChecked": true,
"blueSuitChecked": true
},
{
"id": 42,
"link": [
2,
3
],
"name": "Hero Shot Spark Through Item",
"entranceCondition": {
"comeInShinecharged": {}
},
"requires": [
{
"shineChargeFrames": 25
},
"canShinechargeMovementTricky",
"canHeroShot",
{
"shinespark": {
"frames": 17,
"excessFrames": 0
}
}
],
"clearsObstacles": [
"A",
"C"
],
"collectsItems": [
3
],
"flashSuitChecked": true,
"blueSuitChecked": true,
"note": [
"Run, jump, fire a shot mid-air, and activate a mid-air shinespark to the left.",
"Sparking too late will cause the shot to despawn before reaching the door.",
"Sparking too early will cause Samus to bonk the door as it will not yet be open.",
"A beam shot, Missile, or Super can be used."
]
},
{
"id": 90,
"link": [
2,
3
],
"name": "G-mode Morph IBJ",
"entranceCondition": {
"comeInWithGMode": {
"mode": "any",
"morphed": true
}
},
"requires": [
"Gravity",
{
"or": [
"h_artificialMorphLongIBJ",
{
"and": [
"HiJump",
"h_artificialMorphJumpIntoIBJ"
]
}
]
}
],
"collectsItems": [
3
],
"flashSuitChecked": true,
"blueSuitChecked": true
},
{
"id": 91,
"link": [
2,
3
],
"name": "G-Mode Morph HBJ or Ceiling Bomb Jump",
"entranceCondition": {
"comeInWithGMode": {
"mode": "any",
"morphed": true
}
},
"requires": [
{
  "or": [
    "h_artificialMorphCeilingBombJump",
    "h_artificialMorphHBJ"
  ]
}
],
"collectsItems": [
3
],
"flashSuitChecked": true,
"blueSuitChecked": true
},
{
"id": 92,
"link": [
2,
3
],
"name": "G-Mode Morph Spring Fling",
"entranceCondition": {
"comeInWithGMode": {
"mode": "any",
"morphed": true
}
},
"requires": [
"h_artificialMorphSpringFling",
{
"disableEquipment": "HiJump"
}
],
"collectsItems": [
3
],
"flashSuitChecked": true,
"blueSuitChecked": true,
"note": [
"With Spring Ball, pause then press right and jump just before the pause fully triggers.",
"Disable Spring Ball in order to get a large horizontal boost.",
"Pause again as soon as possible and re-enable Spring to reset fall speed."
]
},
{
"id": 43,
"link": [
3,
1
],
"name": "Base",
"requires": [
{
  "obstaclesNotCleared": [
    "A",
    "B",
    "C"
  ]
}
],
"flashSuitChecked": true,
"blueSuitChecked": true
},
{
"id": 44,
"link": [
3,
1
],
"name": "Continue Shinespark Left",
"requires": [
{
"obstaclesCleared": [
"A"
]
},
{
"obstaclesNotCleared": [
"B",
"C"
]
},
"h_shinechargeMaxRunway",
{
"shinespark": {
"frames": 19,
"excessFrames": 19
}
}
],
"resetsObstacles": [
"A"
],
"flashSuitChecked": true,
"blueSuitChecked": true,
"devNote": [
"This will continue the Shinespark from the right door. This is needed in case the item is an E-Tank, Samus will not maintain full Energy after the Spark.",
"FIXME: The h_shinechargeMaxRunway is to satisfy tests for now;",
"we should add a proper way to represent that the shinespark carries over from the previous strat."
]
},
{
"id": 45,
"link": [
3,
1
],
"name": "Continue Hero Shot Shinespark Left",
"requires": [
{
"obstaclesCleared": [
"A",
"C"
]
},
{
"obstaclesNotCleared": [
"B"
]
},
"h_shinechargeMaxRunway",
{
"shinespark": {
"frames": 21,
"excessFrames": 0
}
}
],
"exitCondition": {
"leaveWithSpark": {
"position": "bottom"
}
},
"unlocksDoors": [
{
"types": [
"super"
],
"requires": []
},
{
"types": [
"missiles",
"powerbomb"
],
"requires": [
"never"
]
}
],
"flashSuitChecked": true,
"blueSuitChecked": true,
"devNote": [
"This will continue the Shinespark from the right door. This is needed in case the item is an E-Tank, Samus will not maintain full Energy after the Spark.",
"FIXME: The h_shinechargeMaxRunway is to satisfy tests for now;",
"we should add a proper way to represent that the shinespark carries over from the previous strat."
]
},
{
"id": 46,
"link": [
3,
1
],
"name": "Continue Shinecharge, Leave With Spark",
"startsWithShineCharge": true,
"requires": [
{
"obstaclesNotCleared": [
"A",
"B",
"C"
]
},
"canShinechargeMovementComplex",
"canHeroShot",
{
"shineChargeFrames": 15
},
{
"shinespark": {
"frames": 21,
"excessFrames": 0
}
}
],
"exitCondition": {
"leaveWithSpark": {}
},
"unlocksDoors": [
{
"types": [
"super"
],
"requires": []
},
{
"types": [
"missiles",
"powerbomb"
],
"requires": [
"never"
]
}
],
"flashSuitChecked": true,
"blueSuitChecked": true,
"note": [
"From the pedestal, fire a shot to the left to open the door.",
"If needed, jump slightly to the left to follow the shot, then activate the shinespark wind-up.",
"Wait until the shot hits the door before sparking."
],
"devNote": "If approaching from the right, the camera will be scrolled further, making it unnecessary to jump and follow the shot."
},
{
"id": 47,
"link": [
3,
2
],
"name": "Grapple",
"requires": [
"Grapple",
{
"obstaclesNotCleared": [
"A",
"B",
"C"
]
}
],
"flashSuitChecked": true,
"blueSuitChecked": true
},
{
"id": 48,
"link": [
3,
2
],
"name": "Space Jump",
"requires": [
"SpaceJump",
{
"obstaclesNotCleared": [
"A",
"B",
"C"
]
}
],
"flashSuitChecked": true,
"blueSuitChecked": true
},
{
"id": 49,
"link": [
3,
2
],
"name": "Gravity with Jump Assist",
"requires": [
"Gravity",
{
"or": [
{
"and": [
"canTrickySpringBallJump",
{
"or": [
"canLateralMidAirMorph",
"canTrickyJump"
]
}
]
},
{
"and": [
"HiJump",
"canWallJump",
{
"or": [
"canDash",
"canTrickyJump"
]
}
]
},
{
"and": [
"HiJump",
"canSpringBallJumpMidAir"
]
},
{
"and": [
"HiJump",
"canSpeedyJump"
]
}
]
},
{
"obstaclesNotCleared": [
"A",
"B",
"C"
]
}
],
"flashSuitChecked": true,
"blueSuitChecked": true
},
{
"id": 50,
"link": [
3,
2
],
"name": "IBJ",
"requires": [
"Gravity",
{
"or": [
"canLongIBJ",
{
"and": [
"HiJump",
"canJumpIntoIBJ"
]
}
]
},
{
"obstaclesNotCleared": [
"A",
"B",
"C"
]
}
],
"flashSuitChecked": true,
"blueSuitChecked": true
},
{
"id": 51,
"link": [
3,
2
],
"name": "Gravity Jump",
"requires": [
"canGravityJump",
{
"obstaclesNotCleared": [
"A",
"B",
"C"
]
}
],
"flashSuitChecked": true,
"blueSuitChecked": true
},
{
"id": 52,
"link": [
3,
2
],
"name": "Horizontal Bomb Jump",
"requires": [
"canHBJ",
{
"obstaclesNotCleared": [
"A",
"B",
"C"
]
}
],
"flashSuitChecked": true,
"blueSuitChecked": true
},
{
"id": 53,
"link": [
3,
2
],
"name": "Double Spring Ball Jump",
"requires": [
"canSuitlessMaridia",
"h_doubleSpringBallJumpWithHiJump",
{
"obstaclesNotCleared": [
"A",
"B",
"C"
]
}
],
"flashSuitChecked": true,
"blueSuitChecked": true
},
{
"id": 72,
"link": [
3,
2
],
"name": "Spring Fling",
"requires": [
"canSpringFling",
"canInsaneJump",
{
"disableEquipment": "HiJump"
},
{
"obstaclesNotCleared": [
"A",
"B",
"C"
]
}
],
"collectsItems": [
3
],
"flashSuitChecked": true,
"blueSuitChecked": true,
"note": [
"With Spring Ball, pause then press right and jump just before the pause fully triggers.",
"Disable Spring Ball in order to get a large horizontal boost.",
"Pause again as soon as possible and re-enable Spring to reset fall speed."
]
},
{
"id": 64,
"link": [
3,
2
],
"name": "Walljump Bomb Boost",
"requires": [
{
"notable": "Walljump Bomb Boost"
},
{
"or": [
"canCWJ",
"canBePatient"
]
},
"canWallJumpBombBoost",
"canResetFallSpeed",
{
"obstaclesNotCleared": [
"A",
"B",
"C"
]
}
],
"flashSuitChecked": true,
"blueSuitChecked": true,
"note": [
"Perform a wall jump off the item pedestal while avoiding the water.",
"Lay a Power Bomb (or Bomb) and use it to boost to the right, with a well-timed unmorph to reset fall speed.",
"The placement of the bomb is more lenient with a CWJ."
],
"detailNote": [
"It is ideal to gain 3 frames of dash speed, the maximum possible, but lower amounts can work.",
"It is even possible to do a regular wall jump instead of a CWJ, but the CWJ makes it significantly more lenient.",
"It is best for the wall jump to be performed as high as possible.",
"If Speed Booster is available, equipping it will generally be helpful,",
"as it will increase the height of Samus' wall jump based on the amount of dash speed."
]
},
{
"id": 54,
"link": [
3,
2
],
"name": "Ceiling Bomb Jump",
"requires": [
"canCeilingBombJump",
{
"obstaclesNotCleared": [
"A",
"B",
"C"
]
}
],
"flashSuitChecked": true,
"blueSuitChecked": true
},
{
"id": 55,
"link": [
3,
2
],
"name": "Continue Shinespark Right",
"requires": [
{
"obstaclesCleared": [
"B"
]
},
{
"obstaclesNotCleared": [
"A",
"C"
]
},
"h_shinechargeMaxRunway",
{
"shinespark": {
"frames": 23,
"excessFrames": 7
}
}
],
"resetsObstacles": [
"B"
],
"flashSuitChecked": true,
"blueSuitChecked": true,
"devNote": [
"FIXME: The h_shinechargeMaxRunway is to satisfy tests for now;",
"we should add a proper way to represent that the shinespark carries over from the previous strat."
]
},
{
"id": 56,
"link": [
3,
2
],
"name": "Continue Hero Shot Shinespark Right",
"requires": [
{
"obstaclesCleared": [
"B",
"C"
]
},
{
"obstaclesNotCleared": [
"A"
]
},
"h_shinechargeMaxRunway",
{
"shinespark": {
"frames": 23,
"excessFrames": 7
}
}
],
"exitCondition": {
"leaveWithSpark": {
"position": "bottom"
}
},
"unlocksDoors": [
{
"types": [
"super"
],
"requires": []
},
{
"types": [
"missiles",
"powerbomb"
],
"requires": [
"never"
]
}
],
"flashSuitChecked": true,
"blueSuitChecked": true,
"devNote": [
"FIXME: The h_shinechargeMaxRunway is to satisfy tests for now;",
"we should add a proper way to represent that the shinespark carries over from the previous strat."
]
},
{
"id": 57,
"link": [
3,
2
],
"name": "Continue Shinecharge into Diagonal Spark",
"startsWithShineCharge": true,
"requires": [
{
"obstaclesNotCleared": [
"A",
"B",
"C"
]
},
"canShinechargeMovementComplex",
{
"shineChargeFrames": 45
},
{
"shinespark": {
"frames": 7
}
}
],
"flashSuitChecked": true,
"blueSuitChecked": true,
"note": [
"Jump from the pedestal to the right, and shinespark diagonally to make it past the water."
]
},
{
"id": 58,
"link": [
3,
2
],
"name": "Continue Shinecharge, Leave With Spark",
"startsWithShineCharge": true,
"requires": [
{
"obstaclesNotCleared": [
"A",
"B",
"C"
]
},
"canShinechargeMovementComplex",
"canHeroShot",
{
"shineChargeFrames": 45
},
{
"shinespark": {
"frames": 22,
"excessFrames": 0
}
}
],
"exitCondition": {
"leaveWithSpark": {}
},
"unlocksDoors": [
{
"types": [
"super"
],
"requires": []
},
{
"types": [
"missiles",
"powerbomb"
],
"requires": [
"never"
]
}
],
"flashSuitChecked": true,
"blueSuitChecked": true,
"note": [
"From the pedestal, jump to the right to bring the door on-camera.",
"Fire a shot mid-air, and activate the shinespark wind-up.",
"Wait until the shot hits the door before sparking."
],
"devNote": "If approaching from the right, the camera will be scrolled further, requiring a larger jump to prevent the shot from despawning."
},
{
"id": 59,
"link": [
3,
2
],
"name": "Use Stored Spark",
"requires": [
"h_storedSpark",
{
"shinespark": {
"frames": 4,
"excessFrames": 2
}
}
],
"flashSuitChecked": true,
"blueSuitChecked": true
},
{
"id": 60,
"link": [
3,
2
],
"name": "Use Stored Spark, Hero Shot Through Right Door",
"requires": [
"h_storedSpark",
"canHorizontalMidairShinespark",
{
"shinespark": {
"frames": 16,
"excessFrames": 0
}
}
],
"exitCondition": {
"leaveWithSpark": {}
},
"unlocksDoors": [
{
"types": [
"super"
],
"requires": []
},
{
"types": [
"missiles",
"powerbomb"
],
"requires": [
"never"
]
}
],
"flashSuitChecked": true,
"blueSuitChecked": true
}
],
"notables": [
{
"id": 2,
"name": "Leave With Grapple Teleport",
"note": [
"Hold angle-up, jump, bonk the ceiling, and use Grapple just before landing.",
"Moonwalk into the transition on the same frame that the Grapple Beam reaches the Grapple block.",
"Continue holding Grapple through the door transition to initiate a teleport in the next room."
]
},
{
"id": 3,
"name": "Walljump Bomb Boost",
"note": [
"Perform a wall jump off the item pedestal while avoiding the water.",
"Lay a Power Bomb (or Bomb) and use it to boost to the right, with a well-timed unmorph to reset fall speed.",
"The placement of the bomb is more lenient with a CWJ."
]
},
{
"id": 4,
"name": "First-Try CWJ",
"note": [
"Perform a CWJ across the Moat on the first try, where failure may result in a softlock.",
"Run towards the water and jump on the last possible frame.",
"Perform the CWJ off of the item pedestal to cross to the other side."
]
}
],
"nextStratId": 93,
"nextNotableId": 5
}