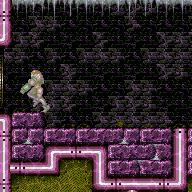
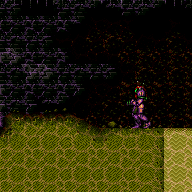
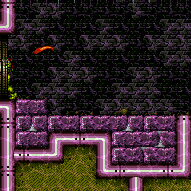
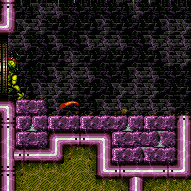
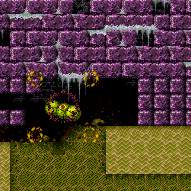
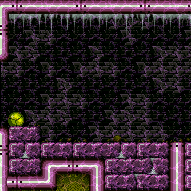
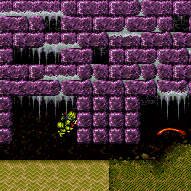
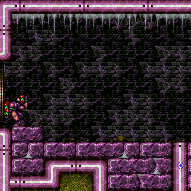
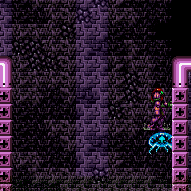
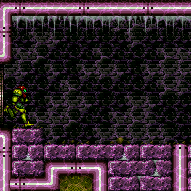
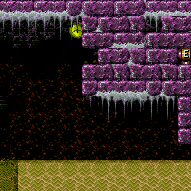
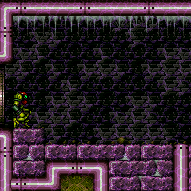
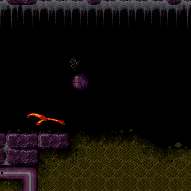
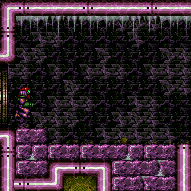
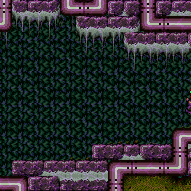
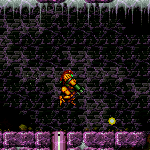
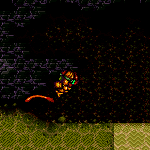
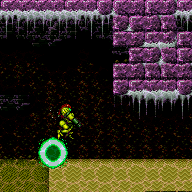
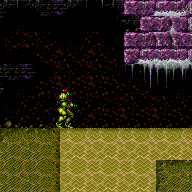
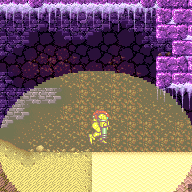
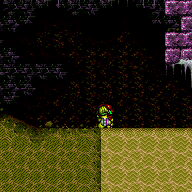
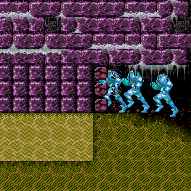
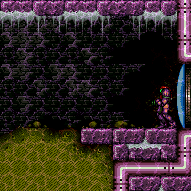
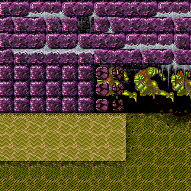
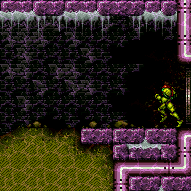
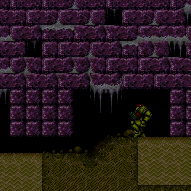
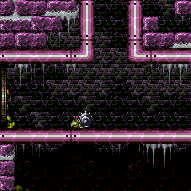
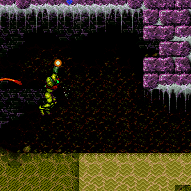
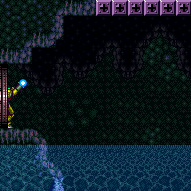
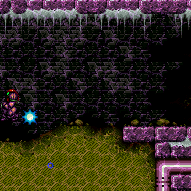
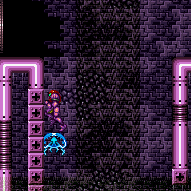
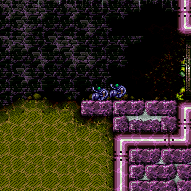
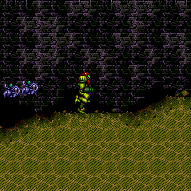
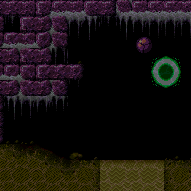
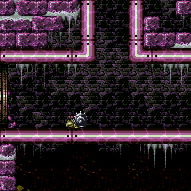
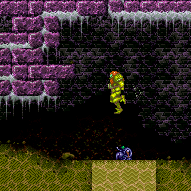
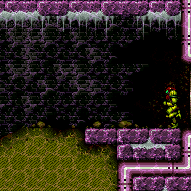
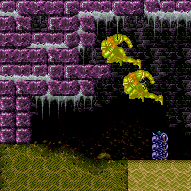
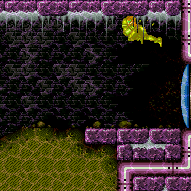
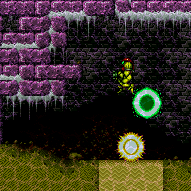
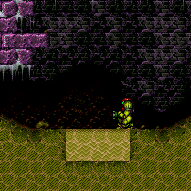
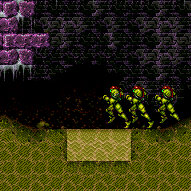
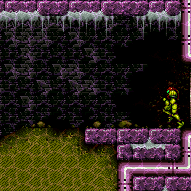
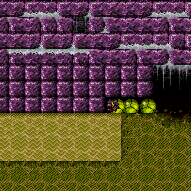
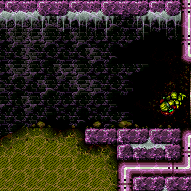
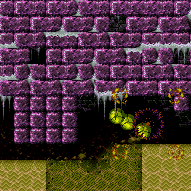
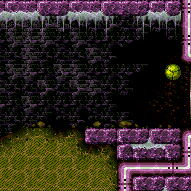
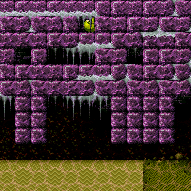
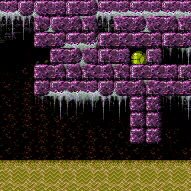
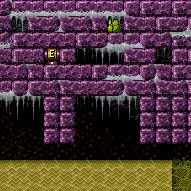
Botwoon Energy Tank Room
Room ID: 186

From: 1
Left Door
To: 1
Left Door
Entrance condition: {
"comeInWithRMode": {}
}Requires: "Gravity"
{
"or": [
{
"disableEquipment": "ETank"
},
"canBePatient"
]
}
{
"canShineCharge": {
"usedTiles": 32,
"gentleUpTiles": 1,
"steepUpTiles": 1,
"openEnd": 1
}
}
"h_RModeKnockbackSpark" |
|
Exit condition: {
"leaveWithRunway": {
"length": 3,
"openEnd": 1
}
} |
|
Requires: {
"obstaclesCleared": [
"A"
]
}
"Gravity"
"h_speedJump"
"canInsaneJump"
{
"or": [
{
"and": [
"canMomentumConservingMorph",
"canInsaneMidAirMorph"
]
},
"canMomentumConservingTurnaround"
]
}Exit condition: {
"leaveWithSidePlatform": {
"height": 1,
"runway": {
"length": 36,
"openEnd": 1,
"gentleUpTiles": 2
},
"obstruction": [
3,
0
]
}
}Dev note: Max extra run speed $6.3. |
|
Requires: {
"resetRoom": {
"nodes": [
1
]
}
}
{
"or": [
{
"and": [
"Gravity",
"canDash"
]
},
{
"and": [
"Gravity",
{
"cycleFrames": 100
}
]
},
{
"cycleFrames": 250
}
]
}
{
"or": [
{
"and": [
"Plasma",
{
"cycleFrames": 360
}
]
},
{
"and": [
"Gravity",
"ScrewAttack",
{
"cycleFrames": 375
}
]
},
{
"and": [
{
"haveBlueSuit": {}
},
{
"cycleFrames": 335
}
]
},
{
"and": [
"Wave",
{
"cycleFrames": 390
}
]
},
{
"and": [
"Grapple",
{
"cycleFrames": 400
}
]
},
{
"and": [
"Spazer",
{
"cycleFrames": 415
}
]
},
{
"and": [
"Gravity",
"canPseudoScrew",
{
"cycleFrames": 540
}
]
},
{
"and": [
"Ice",
{
"cycleFrames": 580
}
]
},
{
"and": [
"canDodgeWhileShooting",
{
"cycleFrames": 810
}
]
}
]
}Resets obstacles: A, B Farm cycle drops: 4 Puyo |
|
Requires: "Gravity"
{
"canShineCharge": {
"usedTiles": 35,
"gentleUpTiles": 2,
"openEnd": 1
}
}
{
"shineChargeFrames": 35
}Exit condition: {
"leaveShinecharged": {}
} |
|
Requires: "Gravity" Exit condition: {
"leaveSpinning": {
"remoteRunway": {
"length": 35,
"openEnd": 1
},
"minExtraRunSpeed": "$1.2"
}
} |
|
Use Speed Booster to break the Speed blocks, and run from the right side of the room, using blue speed to run on top of the sand. Requires: "Gravity"
{
"getBlueSpeed": {
"usedTiles": 22,
"openEnd": 1
}
}Exit condition: {
"leaveSpinning": {
"remoteRunway": {
"length": 45,
"openEnd": 1
},
"blue": "yes"
}
} |
|
Requires: "Gravity" Exit condition: {
"leaveWithMockball": {
"remoteRunway": {
"length": 34,
"openEnd": 1
},
"landingRunway": {
"length": 3,
"openEnd": 1
}
}
} |
|
Use Speed Booster to break the Speed blocks, and run from the right side of the room, using blue speed to run on top of the sand. Requires: "Gravity"
{
"getBlueSpeed": {
"usedTiles": 22,
"openEnd": 1
}
}Exit condition: {
"leaveWithMockball": {
"remoteRunway": {
"length": 45,
"openEnd": 1
},
"landingRunway": {
"length": 3,
"openEnd": 1
},
"blue": "yes"
}
} |
From: 1
Left Door
To: 1
Left Door
Requires: "Gravity" Exit condition: {
"leaveWithSpringBallBounce": {
"remoteRunway": {
"length": 27,
"openEnd": 0
},
"landingRunway": {
"length": 3,
"openEnd": 1
},
"movementType": "uncontrolled"
}
} |
From: 1
Left Door
To: 1
Left Door
Use Speed Booster to break the Speed blocks, and run from the right side of the room, using blue speed to run on top of the sand. Requires: "Gravity"
{
"getBlueSpeed": {
"usedTiles": 22,
"openEnd": 1
}
}
"h_speedJump"Exit condition: {
"leaveWithSpringBallBounce": {
"remoteRunway": {
"length": 45,
"openEnd": 1
},
"landingRunway": {
"length": 3,
"openEnd": 1
},
"movementType": "uncontrolled"
}
} |
|
Requires: "Gravity" Exit condition: {
"leaveSpaceJumping": {
"remoteRunway": {
"length": 35,
"openEnd": 1
}
}
} |
|
Use Speed Booster to break the Speed blocks, and run from the right side of the room, using blue speed to run on top of the sand. Requires: "Gravity"
{
"getBlueSpeed": {
"usedTiles": 22,
"openEnd": 1
}
}
"h_speedJump"Exit condition: {
"leaveSpaceJumping": {
"remoteRunway": {
"length": 45,
"openEnd": 1
}
}
} |
|
Requires: "Gravity"
{
"canShineCharge": {
"usedTiles": 35,
"gentleUpTiles": 2,
"openEnd": 1
}
}
"canChainTemporaryBlue"Exit condition: {
"leaveWithTemporaryBlue": {}
} |
|
Requires: "Gravity"
{
"canShineCharge": {
"usedTiles": 35,
"gentleUpTiles": 2,
"openEnd": 1
}
}
"h_CrystalSpark" |
|
Exit condition: {
"leaveWithGModeSetup": {}
} |
|
Requires: {
"or": [
"h_navigateUnderwater",
{
"enemyDamage": {
"enemy": "Puyo",
"type": "contact",
"hits": 2
}
},
{
"enemyKill": {
"enemies": [
[
"Puyo"
],
[
"Puyo",
"Puyo"
],
[
"Puyo"
]
],
"explicitWeapons": [
"Missile",
"Super",
"PowerBomb",
"Wave",
"Spazer",
"Plasma"
]
}
},
"canUseGrapple"
]
} |
|
Entrance condition: {
"comeInWithGMode": {
"mode": "any",
"morphed": false
}
}Exit condition: {
"leaveWithGMode": {
"morphed": false
}
} |
|
Entrance condition: {
"comeInWithGMode": {
"mode": "any",
"morphed": true
}
}Requires: {
"or": [
"h_artificialMorphBombs",
{
"haveBlueSuit": {}
},
{
"and": [
"h_artificialMorphPowerBomb",
"h_additionalBomb",
{
"or": [
"canTrickyJump",
"h_artificialMorphSpringBall",
"Gravity",
"h_additionalBomb"
]
}
]
},
{
"and": [
"Gravity",
{
"enemyDamage": {
"enemy": "Puyo",
"type": "contact",
"hits": 1
}
}
]
},
{
"and": [
"h_artificialMorphSpringBall",
{
"enemyDamage": {
"enemy": "Puyo",
"type": "contact",
"hits": 3
}
}
]
},
{
"and": [
"Gravity",
"h_artificialMorphSpringBall",
"canTrickyDodgeEnemies"
]
},
{
"enemyDamage": {
"enemy": "Puyo",
"type": "contact",
"hits": 7
}
}
]
}Exit condition: {
"leaveWithGMode": {
"morphed": true
}
} |
From: 1
Left Door
To: 2
Left Sand Pit
Reach the sand while luring a Puyo just off camera to where moonwalking on the partially submerged platform can lure the Puyo. Crouch in the sand and press forward when near the transition to stand up and touch the transition on the first frame of standing. Requires: "h_navigateUnderwater"
{
"noBlueSuit": {}
}
"canPlayInSand"
"canMoonwalk"
"canCameraManip"
"canDownwardGModeSetup"
"canOffScreenMovement"
"canTrickyGMode"Exit condition: {
"leaveWithGModeSetup": {}
} |
|
Requires: "h_navigateUnderwater" |
|
Entrance condition: {
"comeInWithGMode": {
"mode": "any",
"morphed": false
}
}Exit condition: {
"leaveWithGMode": {
"morphed": false
}
} |
|
Entrance condition: {
"comeInWithGMode": {
"mode": "any",
"morphed": true
}
}Requires: {
"or": [
"h_artificialMorphSpringBall",
{
"and": [
"Gravity",
"h_artificialMorphBombHorizontally"
]
},
{
"haveBlueSuit": {}
}
]
}
{
"or": [
{
"and": [
"h_artificialMorphBombThings",
"h_additionalBomb"
]
},
{
"haveBlueSuit": {}
},
{
"and": [
"Gravity",
"h_artificialMorphSpringBall",
{
"or": [
"canTrickyDodgeEnemies",
{
"enemyDamage": {
"enemy": "Puyo",
"type": "contact",
"hits": 1
}
}
]
}
]
},
{
"and": [
"h_artificialMorphSpringBall",
{
"enemyDamage": {
"enemy": "Puyo",
"type": "contact",
"hits": 2
}
}
]
},
{
"and": [
"Gravity",
"h_artificialMorphPowerBomb",
{
"enemyDamage": {
"enemy": "Puyo",
"type": "contact",
"hits": 2
}
}
]
}
]
}Exit condition: {
"leaveWithGMode": {
"morphed": true
}
} |
From: 1
Left Door
To: 3
Right Sand Pit
Reach the sand while luring a Puyo just off camera to where moonwalking on the partially submerged platform can lure the Puyo. Quickly move to the right section before the Puyo hits Samus. Crouch in the sand and press forward when near the transition to stand up and touch the transition on the first frame of standing. Requires: "h_navigateUnderwater"
{
"noBlueSuit": {}
}
"canPlayInSand"
"canMoonwalk"
"canCameraManip"
"canDownwardGModeSetup"
"canOffScreenMovement"
"canTrickyGMode"Exit condition: {
"leaveWithGModeSetup": {}
} |
|
To keep a blue suit, simply walk across the sand, without jumping on it or sinking into it. Requires: {
"haveBlueSuit": {}
}Clears obstacles: A |
From: 1
Left Door
To: 4
Right Door
Run across, then fill up with the Zoas. Shinecharge near the Zoa pit - or jump back across the sand and use the full-length runway there, then get interrupted by a Zoa. Entrance condition: {
"comeInWithRMode": {}
}Requires: "Gravity"
"h_shinechargeMaxRunway"
{
"refill": [
"Energy"
]
}
{
"autoReserveTrigger": {}
}
"canRModeSparkInterrupt"Clears obstacles: A |
From: 1
Left Door
To: 4
Right Door
Requires: "Gravity"
"h_getBlueSpeedMaxRunway"
{
"or": [
{
"getBlueSpeed": {
"usedTiles": 22,
"gentleDownTiles": 4,
"openEnd": 1
}
},
"h_useSpringBall",
"SpaceJump",
"h_useMorphBombs",
"canPlayInSand",
{
"obstaclesCleared": [
"A"
]
}
]
}Exit condition: {
"leaveWithRunway": {
"length": 45,
"openEnd": 1
}
}Unlocks doors: {"types":["ammo"],"requires":[]} |
From: 1
Left Door
To: 4
Right Door
Requires: "canSuitlessMaridia"
"HiJump"
{
"or": [
"h_useSpringBall",
"canPlayInSand"
]
}
{
"obstaclesCleared": [
"A"
]
}Dev note: Gravity can run across the sand with speed again. FIXME: This is possible without HiJump by breaking spin before landing, then quickly jumping again. Useful in other places as well, like Aqueduct. |
|
Requires: "Gravity" "h_getBlueSpeedMaxRunway" Clears obstacles: A |
|
Entrance condition: {
"comeInShinecharged": {}
}Requires: {
"shineChargeFrames": 60
}
"canSuitlessMaridia"
"canHorizontalShinespark"
"canShinechargeMovement"
{
"shinespark": {
"frames": 159,
"excessFrames": 43
}
}Clears obstacles: A |
From: 1
Left Door
To: 4
Right Door
Entrance condition: {
"comeInGettingBlueSpeed": {
"length": 0,
"openEnd": 1
}
}Requires: "h_waterGetBlueSpeed" "canSpeedball" "canTrickyJump" |
From: 1
Left Door
To: 4
Right Door
Entrance condition: {
"comeInBlueSpinning": {
"unusableTiles": 0
}
}Requires: "canSpeedball" |
From: 1
Left Door
To: 4
Right Door
Enter the room with blue speed, and jump into a speedball. Then chain temporary blue into the next room. Entrance condition: {
"comeInGettingBlueSpeed": {
"length": 0,
"openEnd": 1
}
}Requires: "h_waterGetBlueSpeed" "canSpeedball" "canTrickyJump" "canChainTemporaryBlue" Exit condition: {
"leaveWithTemporaryBlue": {}
}Unlocks doors: {"types":["ammo"],"requires":[]} |
From: 1
Left Door
To: 4
Right Door
Enter the room in a spin jump with blue speed, and enter a speedball. Then chain temporary blue into the next room. Entrance condition: {
"comeInBlueSpinning": {
"unusableTiles": 0
}
}Requires: "canSpeedball" "canChainTemporaryBlue" Exit condition: {
"leaveWithTemporaryBlue": {}
}Unlocks doors: {"types":["ammo"],"requires":[]} |
|
Entrance condition: {
"comeInWithBlueSpringBallBounce": {
"movementType": "controlled"
}
}Dev note: With a mid-air spring ball jump it would be possible to go through the morph tunnel. This strat exists mainly as a way to avoid collecting the item. |
From: 1
Left Door
To: 4
Right Door
Entrance condition: {
"comeInWithBlueSpringBallBounce": {
"movementType": "controlled"
}
}Requires: "canChainTemporaryBlue" Exit condition: {
"leaveWithTemporaryBlue": {}
}Unlocks doors: {"types":["ammo"],"requires":[]} |
|
Overload PLMs by touching the sand, then move through the speed blocks. Avoiding the sand pits is easier without Gravity or HiJump. Entrance condition: {
"comeInWithGMode": {
"mode": "any",
"morphed": false
}
}Requires: "canSuitlessMaridia" |
|
Entrance condition: {
"comeInWithGrappleTeleport": {
"blockPositions": [
[
108,
12
],
[
108,
13
]
]
}
}Requires: {
"or": [
"canGrappleTeleportWallEscape",
{
"doorUnlockedAtNode": 4
}
]
}Unlocks doors: {"types":["ammo"],"requires":[]} |
From: 1
Left Door
To: 4
Right Door
Entrance condition: {
"comeInWithGrappleTeleport": {
"blockPositions": [
[
108,
12
],
[
108,
13
]
]
}
}Bypasses door shell: true |
From: 1
Left Door
To: 4
Right Door
Entrance condition: {
"comeInWithGrappleTeleport": {
"blockPositions": [
[
108,
12
]
]
}
}Exit condition: {
"leaveWithGrappleTeleport": {
"blockPositions": [
[
108,
12
]
]
}
}Bypasses door shell: true |
From: 1
Left Door
To: 4
Right Door
Entrance condition: {
"comeInWithGrappleTeleport": {
"blockPositions": [
[
108,
13
]
]
}
}Exit condition: {
"leaveWithGrappleTeleport": {
"blockPositions": [
[
108,
13
]
]
}
}Bypasses door shell: true |
|
With low Energy it is recommended to spark high in order to not get hit by the Zoas in case Samus ends above their spawn. Requires: {
"useFlashSuit": {}
}
{
"or": [
{
"and": [
"canPlayInSand",
{
"shinespark": {
"frames": 101,
"excessFrames": 52
}
}
]
},
{
"and": [
"Gravity",
{
"shinespark": {
"frames": 80,
"excessFrames": 41
}
}
]
}
]
}Clears obstacles: A |
|
Requires: "Gravity"
{
"or": [
"canMidAirMorph",
"h_useSpringBall",
{
"and": [
"canIBJ",
"canBombHorizontally"
]
}
]
}Collects items: 5 |
|
Requires: "canSuitlessMaridia"
{
"or": [
{
"and": [
"canTrickySpringBallJump",
{
"or": [
"h_underwaterCrouchJump",
"canLateralMidAirMorph"
]
}
]
},
{
"and": [
"HiJump",
"h_useSpringBall"
]
},
{
"and": [
"HiJump",
"canMidAirMorph"
]
}
]
}Collects items: 5 |
|
Requires: "canSuitlessMaridia" "Morph" "canTrickyUseFrozenEnemies" Collects items: 5 |
|
Entrance condition: {
"comeInShinechargedJumping": {}
}Requires: {
"shineChargeFrames": 25
}
"canMidAirMorph"
"canCrossRoomJumpIntoWater"
"canHorizontalMidairShinespark"
{
"shinespark": {
"frames": 55,
"excessFrames": 0
}
}Collects items: 5 |
|
Needs near max horizontal speed coming from about 40 runway tiles in the adjacent room. Jump after the transition. Running longer on the short runway is more difficult at maximum speed, but will increase the success of the jump. A crisp momentum conserving morph can also make up for a jump that is buffered through the door. Entrance condition: {
"comeInRunning": {
"speedBooster": "yes",
"minTiles": 40
}
}Requires: "h_speedJump" "canInsaneJump" "canLateralMidAirMorph" "canCrossRoomJumpIntoWater" "canMomentumConservingMorph" Collects items: 5 |
From: 1
Left Door
To: 5
Item
Needs a runway of 7 tiles with no open end in the adjacent room, to get enough height. This is a peak of height with speed booster, no hjb, while underwater. Jump before the transition with SpeedBooster off and then SpeedBooster back on after reaching the ceiling and Morphing. Entrance condition: {
"comeInJumping": {
"speedBooster": "yes",
"minTiles": 6.4375
}
}Requires: "canLateralMidAirMorph"
{
"disableEquipment": "SpeedBooster"
}
"canCrossRoomJumpIntoWater"
"canSpringBallBounce"
{
"or": [
{
"enemyDamage": {
"enemy": "Puyo",
"type": "contact",
"hits": 1
}
},
"canInsaneJump",
{
"and": [
"Plasma",
"canTrickyJump"
]
},
"h_pauseAbuseMinimalReserveRefill"
]
}Collects items: 5 |
|
Requires: "Morph"
"h_storedSpark"
{
"shinespark": {
"frames": 5,
"excessFrames": 2
}
}Collects items: 5 |
|
Entrance condition: {
"comeInWithGMode": {
"mode": "direct",
"morphed": true
}
}Requires: {
"or": [
{
"and": [
"Gravity",
"h_artificialMorphIBJ",
"canDodgeWhileShooting"
]
},
{
"and": [
"h_artificialMorphSpringBall",
{
"or": [
"Gravity",
"HiJump"
]
},
{
"or": [
"canInsaneJump",
{
"and": [
"Gravity",
"canTrickyDodgeEnemies"
]
},
"h_artificialMorphBombThings",
{
"haveBlueSuit": {}
},
{
"enemyDamage": {
"enemy": "Puyo",
"type": "contact",
"hits": 1
}
}
]
}
]
}
]
}Clears obstacles: B Collects items: 5 |
|
Entrance condition: {
"comeInWithGMode": {
"mode": "any",
"morphed": true
}
}Requires: {
"or": [
{
"and": [
"Gravity",
"h_artificialMorphIBJ"
]
},
{
"and": [
"h_artificialMorphSpringBall",
{
"or": [
"Gravity",
"HiJump"
]
},
{
"or": [
"canInsaneJump",
{
"and": [
"Gravity",
"canTrickyDodgeEnemies"
]
},
"h_artificialMorphBombThings",
{
"haveBlueSuit": {}
},
{
"enemyDamage": {
"enemy": "Puyo",
"type": "contact",
"hits": 1
}
}
]
}
]
}
]
}Collects items: 5 |
From: 1
Left Door
To: 5
Item
Use Bombs to kill the Puyos. Then gain speed by rolling from left to right. Press pause and use Spring Ball to jump before the down slope, on the last possible frame before the pause hits. Unequip Spring Ball, hold right until Samus is about halfway to the morph tunnel, lay a Bomb, then pause again, and perform a mid-air Spring Ball jump into the tunnel. The frame-perfect jump allows Samus to maintain much higher horizontal speed, without which it is not possible to reach the morph tunnel. Entrance condition: {
"comeInWithGMode": {
"mode": "direct",
"morphed": true
}
}Requires: "h_artificialMorphUnderwaterBombIntoSpringBallJump" "canTrickyGMode" Clears obstacles: B Collects items: 5 |
From: 1
Left Door
To: 5
Item
Use Bombs to kill the Puyos. Then gain speed by rolling from left to right. Press pause and use Spring Ball to jump before the down slope, on the last possible frame before the pause hits. Unequip Spring Ball, hold right until Samus is about halfway to the morph tunnel, lay a Bomb, then pause again, and perform a mid-air Spring Ball jump into the tunnel. The frame-perfect jump allows Samus to maintain much higher horizontal speed, without which it is not possible to reach the morph tunnel. Entrance condition: {
"comeInWithGMode": {
"mode": "any",
"morphed": true
}
}Requires: "h_artificialMorphUnderwaterBombIntoSpringBallJump" "canTrickyGMode" Collects items: 5 |
|
Lure a Puyo close to the sand and use it to Bomb-Grapple-Jump up to the Morph Ball maze. It helps to predict the jump pattern of the enemy. Requires: {
"notable": "Puyo Bomb-Grapple-Jump"
}
"canSuitlessMaridia"
"canBombGrappleJump"
"h_underwaterCrouchJump"Collects items: 5 |
|
Lure a Puyo close to the sand to use for a Sand Grapple Boost. As it is close to entering the sand, land on the sand and crouch. Very quickly after crouching shoot the grapple and jump. As soon as the Puyo is killed aim down to escape the sand. If the timings don't work out just right, too much height is lost to the sand. Crouching in sand is also a high softlock risk. Requires: {
"notable": "Sand Grapple Boost (Left to Right)"
}
"h_underwaterCrouchJumpDownGrab"
"canSandGrappleBoost"
"canInsaneJump"
"canMidAirMorph"Collects items: 5 |
|
Stand on the edge of the sand and place a Bomb; unmorph (leaving Samus crouched), then press forward to enter the sand when the bomb flashes yellow for the second time. Once the Bomb puts Samus into a jumping pose where Samus is suspended mid-air slightly above the sand, press jump; then aim down precisely when the bomb begins to propel Samus upward. Move right to press against the wall before mid-air morphing (alternatively, a stationary lateral morph can work). There is a 2-frame window for when to enter the sand: if Samus enters the sand too early, she will sink slightly too far, resulting in not quite enough height to reach the tunnel; if Samus enters the sand too late, she will not get properly boosted by the Bomb explosion and will end up stuck in the sand. There is an 8-frame window for when to press jump, as it can be buffered during the period that the bomb begins interacting with Samus: if Samus jumps too early or late, she will get stuck in the sand. The timing for the aim-down press is frame-perfect: it must be pressed on the first frame that Samus begins being propelled upward by the bomb. if Samus aims down too early, she will get stuck in the sand; if Samus aims down too late, she will not get enough height to reach the tunnel. The timing for the jump is between 6 frames before or 1 frame after the down press. The amount of time that Samus holds forward after entering the sand is unimportant, as long as it is released before the aim-down. Requires: {
"notable": "Sand Bomb Boost (Left to Right)"
}
"canSandBombBoost"
"canInsaneJump"
{
"or": [
"can4HighMidAirMorph",
"canStationaryLateralMidAirMorph"
]
}Collects items: 5 Dev note: The timing window for when to press jump and when to aim-down is relative to the bomb explosion, independent of each other and independent of when Samus enters the sand. The timing for pressing forward (from a crouch) is 38 or 39 frames after laying the Bomb. The timing for the jump is between 51 and 58 frames after laying the Bomb. The timing for the aim-down press is 57 frames after laying the Bomb. It is also possible to stand by pressing up before entering the sand (in which case forward would be pressed 37 or 38 frames after laying the Bomb); this does not affect the size of the timing windows but introduces some more possibility for error, e.g. by the up input being eaten if Samus is still in the unmorphing animation, or by the forward input being not immediately processed if Samus is still in the standing animation. |
|
Stand on the edge of the sand and place a Power Bomb; unmorph (leaving Samus crouched), then wait a moment before pressing forward to enter the sand. On the exact frame when the Power Bomb begins to propel Samus upward, press down, and press jump on the same frame or one frame later. Move right to press against the wall before mid-air morphing (alternatively, a stationary lateral morph can work). There is a 13-frame window for when to enter the sand: if Samus enters the sand too early, she will sink slightly too far, resulting in not quite enough height to reach the tunnel; if Samus enters the sand too late, she will not get properly boosted by the Power Bomb explosion and will end up stuck in the sand. The timing for the aim-down press is frame-perfect: it must be pressed on the first frame that Samus begins being propelled upward by the Power Bomb. if Samus aims down too early, she will get stuck in the sand; if Samus aims down too late, she will not get enough height to reach the tunnel. if Samus jumps too early or late, she will get stuck in the sand. The amount of time that Samus holds forward when entering the sand should be between 2 and 11 frames. Requires: {
"notable": "Sand Bomb Boost (Left to Right)"
}
{
"tech": "canSandBombBoost"
}
"h_usePowerBomb"
"canInsaneJump"
{
"or": [
"can4HighMidAirMorph",
"canStationaryLateralMidAirMorph"
]
}Collects items: 5 Dev note: The timing window for when to press jump and when to aim-down is relative to the Power Bomb explosion, independent of each other and independent of when Samus enters the sand. The timing for pressing forward (from a crouch) is between 27 and 39 frames after laying the Power Bomb. The timing for the jump is between 56 and 57 frames after laying the Power Bomb. The timing for the aim-down press is 56 frames after laying the Power Bomb. It is also possible to stand by pressing up before entering the sand (in which case forward would be pressed 28 or 40 frames after laying the Power Bomb); this does not affect the size of the timing windows but introduces some more possibility for error, e.g. by the up input being eaten if Samus is still in the unmorphing animation, or by the forward input being not immediately processed if Samus is still in the standing animation. |
From: 1
Left Door
To: 6
Junction Right of Morph Passage
Overload PLMs by touching the sand, then move through the speed blocks. Avoiding the sand pits is easier without Gravity or HiJump. Exit G-mode while inside the speed blocks then X-Ray climb up. Entrance condition: {
"comeInWithGMode": {
"mode": "any",
"morphed": false
}
}Requires: "canComplexGMode"
"canSuitlessMaridia"
{
"noBlueSuit": {}
}
"canGModeXRayClimb"
"Morph"Dev note: This requires canInsaneJump even though it is not difficult, because it is not very intuitive. |
From: 4
Right Door
To: 1
Left Door
Requires: "Gravity"
{
"or": [
"canPlayInSand",
"SpaceJump",
"h_useSpringBall"
]
}
{
"obstaclesCleared": [
"A"
]
} |
From: 4
Right Door
To: 1
Left Door
Requires: "canSuitlessMaridia"
"HiJump"
{
"or": [
"h_useSpringBall",
"canPlayInSand"
]
}
{
"obstaclesCleared": [
"A"
]
} |
|
To keep a blue suit, simply walk across the sand, without jumping on it or sinking into it. Requires: {
"haveBlueSuit": {}
}Clears obstacles: A |
|
Requires: "Gravity"
{
"or": [
{
"getBlueSpeed": {
"usedTiles": 22,
"gentleDownTiles": 4,
"openEnd": 0
}
},
{
"and": [
{
"getBlueSpeed": {
"usedTiles": 23,
"gentleDownTiles": 4,
"openEnd": 0
}
},
{
"doorUnlockedAtNode": 4
}
]
}
]
}Clears obstacles: A Unlocks doors: {"nodeId":4,"types":["ammo"],"requires":[]} |
|
Entrance condition: {
"comeInGettingBlueSpeed": {
"length": 22,
"openEnd": 1,
"gentleDownTiles": 4
}
}Requires: "Gravity" Clears obstacles: A |
|
Entrance condition: {
"comeInShinecharged": {}
}Requires: {
"shineChargeFrames": 55
}
"Gravity"
"canHorizontalShinespark"
{
"shinespark": {
"frames": 115,
"excessFrames": 12
}
}Clears obstacles: A |
|
Coming in with zero momentum, all it takes is one non-HiJump full height jump forward, then activate. Entrance condition: {
"comeInShinecharged": {}
}Requires: {
"shineChargeFrames": 135
}
"canSuitlessMaridia"
"canHorizontalShinespark"
"canShinechargeMovement"
{
"shinespark": {
"frames": 148,
"excessFrames": 15
}
}Clears obstacles: A |
From: 4
Right Door
To: 1
Left Door
Entrance condition: {
"comeInShinecharging": {
"length": 6,
"openEnd": 1
}
}Requires: "canWaterShineCharge"
{
"shineChargeFrames": 55
}Exit condition: {
"leaveShinecharged": {}
}Unlocks doors: {"types":["super"],"requires":[]}
{"types":["missiles","powerbomb"],"requires":["never"]}Dev note: This is just a rough estimate of the minimum number of tiles that this runway can represent. It is designed for a skill level that won't be able to use canStutterWaterShineCharge. |
From: 4
Right Door
To: 1
Left Door
Entrance condition: {
"comeInStutterShinecharging": {
"minTiles": 2
}
}Requires: {
"shineChargeFrames": 55
}Exit condition: {
"leaveShinecharged": {}
}Unlocks doors: {"types":["super"],"requires":[]}
{"types":["missiles","powerbomb"],"requires":["never"]} |
From: 4
Right Door
To: 1
Left Door
With only 1 tile of runway, this requires releasing forward for 1 or 2 frames and repressing forward on the last possible frame. Entrance condition: {
"comeInStutterShinecharging": {
"minTiles": 1
}
}Requires: "canPreciseStutterWaterShineCharge"
{
"shineChargeFrames": 55
}Exit condition: {
"leaveShinecharged": {}
}Unlocks doors: {"types":["super"],"requires":[]}
{"types":["missiles","powerbomb"],"requires":["never"]} |
|
Overload PLMs by touching the sand, then move through the speed blocks. Shoot the Puyo while crouching to increase accuracy. Avoiding the right pit is much easier without Gravity or HiJump. Standing on the edge and spin jumping to the left is much easier than a running jump. While on the left side of this platform, the Puyo to the left will start moving; carefully kill it. Entrance condition: {
"comeInWithGMode": {
"mode": "any",
"morphed": true
}
}Requires: {
"or": [
"canTrickyJump",
{
"and": [
"Gravity",
"SpaceJump"
]
}
]
} |
|
Entrance condition: {
"comeInWithGrappleTeleport": {
"blockPositions": [
[
7,
2
]
]
}
} |
|
Entrance condition: {
"comeInWithGrappleTeleport": {
"blockPositions": [
[
3,
12
],
[
3,
13
]
]
}
}Requires: {
"or": [
"canGrappleTeleportWallEscape",
{
"doorUnlockedAtNode": 1
}
]
}Unlocks doors: {"types":["ammo"],"requires":[]} |
From: 4
Right Door
To: 1
Left Door
Entrance condition: {
"comeInWithGrappleTeleport": {
"blockPositions": [
[
3,
12
],
[
3,
13
]
]
}
}Bypasses door shell: true |
From: 4
Right Door
To: 1
Left Door
Entrance condition: {
"comeInWithGrappleTeleport": {
"blockPositions": [
[
3,
12
]
]
}
}Exit condition: {
"leaveWithGrappleTeleport": {
"blockPositions": [
[
3,
12
]
]
}
}Bypasses door shell: true |
From: 4
Right Door
To: 1
Left Door
Entrance condition: {
"comeInWithGrappleTeleport": {
"blockPositions": [
[
3,
13
]
]
}
}Exit condition: {
"leaveWithGrappleTeleport": {
"blockPositions": [
[
3,
13
]
]
}
}Bypasses door shell: true |
|
It is important not to crouch before sparking, as the ceiling blocks are weird and will prevent the spark. Requires: {
"useFlashSuit": {}
}
{
"or": [
{
"shinespark": {
"frames": 120,
"excessFrames": 20
}
},
{
"and": [
"Gravity",
{
"shinespark": {
"frames": 94,
"excessFrames": 15
}
}
]
},
{
"and": [
"Gravity",
{
"shinespark": {
"frames": 94,
"excessFrames": 53
}
},
{
"or": [
{
"enemyDamage": {
"enemy": "Puyo",
"type": "contact",
"hits": 1
}
},
"h_pauseAbuseMinimalReserveRefill"
]
}
]
}
]
}Clears obstacles: A Dev note: Suitless with a reserve could use pause abuse, however, Samus can just refill, spark across, and then go back and refill. There are many ranges of Energy that could be used to spark through without a Puyo hit, but that is not considered, as Samus can just go back and refill. |
From: 4
Right Door
To: 1
Left Door
Shinespark to the left with less than full Energy in order to prevent getting killed by a Puyo at the end of the spark. Sparking while next to the speed blocks requires Samus to be suitless with between 78 and 93 Energy. (With Gravity, she can tank a hit and return to the farm.) It is important not to crouch before sparking, as the ceiling blocks are weird and will prevent the spark. Alternatively, with 99 Energy spark near the quicksand. Requires: {
"useFlashSuit": {}
}
"canControlShinesparkEnd"
{
"shinespark": {
"frames": 120,
"excessFrames": 71
}
}
"canPlayInSand"Clears obstacles: A |
|
Overload PLMs by touching the sand, then move through the speed blocks. Shoot the Puyo while crouching to increase accuracy. Avoiding the right pit is much easier without Gravity or HiJump. Standing on the edge and spin jumping to the left is much easier than a running jump. While on the left side of this platform, the Puyo to the left will start moving; carefully kill or dodge it. Entrance condition: {
"comeInWithGMode": {
"mode": "any",
"morphed": false
}
}Requires: {
"or": [
"canTrickyJump",
{
"and": [
"Gravity",
"SpaceJump"
]
}
]
}Exit condition: {
"leaveWithGMode": {
"morphed": false
}
} |
|
With Gravity, or Spring Ball and HiJump, it is easiest to go through the Morph maze at the top of the room and fall into the the sand. Otherwise, the overload PLMs by touching the sand, or by bombing the speed blocks, to be able to go through to the left. Killing the Zoas with Bombs or Power Bombs will prevent them from respawning, although it is possible but tricky to dodge them with just Spring Ball. Entrance condition: {
"comeInWithGMode": {
"mode": "any",
"morphed": true
}
}Requires: {
"or": [
{
"and": [
"h_artificialMorphSpringBall",
{
"or": [
"Gravity",
"HiJump"
]
}
]
},
{
"and": [
"Gravity",
"h_artificialMorphIBJ"
]
},
{
"and": [
"h_artificialMorphSpringBall",
{
"or": [
"canTrickyJump",
"h_artificialMorphBombThings"
]
}
]
}
]
}Exit condition: {
"leaveWithGMode": {
"morphed": true
}
} |
|
Overload PLMs by touching the sand, then move through the speed blocks. Shoot the Puyo while crouching to increase accuracy. Entrance condition: {
"comeInWithGMode": {
"mode": "any",
"morphed": false
}
}Exit condition: {
"leaveWithGMode": {
"morphed": false
}
} |
|
With Gravity, or Spring Ball and HiJump, it is easiest to go through the Morph maze at the top of the room and fall into the the sand. Otherwise, the overload PLMs by touching the sand, or by bombing the speed blocks, to be able to go through to the left. Killing the Zoas with Bombs or Power Bombs will prevent them from respawning, although it is possible but tricky to dodge them with just Spring Ball. Entrance condition: {
"comeInWithGMode": {
"mode": "any",
"morphed": true
}
}Requires: {
"or": [
{
"and": [
"h_artificialMorphSpringBall",
{
"or": [
"Gravity",
"HiJump"
]
}
]
},
{
"and": [
"Gravity",
"h_artificialMorphIBJ"
]
},
{
"and": [
"h_artificialMorphSpringBall",
{
"or": [
"canTrickyJump",
"h_artificialMorphBombThings"
]
}
]
}
]
}Exit condition: {
"leaveWithGMode": {
"morphed": true
}
} |
From: 4
Right Door
To: 4
Right Door
Entrance condition: {
"comeInWithRMode": {}
}Requires: "Gravity"
{
"or": [
{
"disableEquipment": "ETank"
},
"canBePatient"
]
}
{
"canShineCharge": {
"usedTiles": 23,
"gentleUpTiles": 4,
"openEnd": 1
}
}
"h_RModeKnockbackSpark" |
From: 4
Right Door
To: 4
Right Door
Fill up with the Zoas. Shinecharge near the Zoa pit - or cross the Morph tunnel and use the full-length runway there, then get interrupted by a Zoa. Entrance condition: {
"comeInWithRMode": {}
}Requires: "Gravity"
{
"refill": [
"Energy"
]
}
{
"or": [
{
"and": [
"canSuitlessMaridia",
"canMidAirMorph",
{
"disableEquipment": "Gravity"
}
]
},
{
"canShineCharge": {
"usedTiles": 23,
"gentleUpTiles": 4,
"openEnd": 1
}
}
]
}
"h_shinechargeMaxRunway"
{
"autoReserveTrigger": {}
}
"canRModeSparkInterrupt"Clears obstacles: A |
|
Exit condition: {
"leaveWithRunway": {
"length": 23,
"openEnd": 1,
"gentleUpTiles": 4
}
} |
From: 4
Right Door
To: 4
Right Door
Entrance condition: {
"comeInStutterShinecharging": {
"minTiles": 2
}
}Requires: "canStutterWaterShineCharge"
"canShinechargeMovementComplex"
{
"or": [
{
"shinespark": {
"frames": 12,
"excessFrames": 0
}
},
{
"and": [
"canShinechargeMovementTricky",
{
"shinespark": {
"frames": 3,
"excessFrames": 0
}
}
]
}
]
}Exit condition: {
"leaveWithSpark": {}
}Unlocks doors: {"types":["missiles","super"],"requires":[]}
{"types":["powerbomb"],"requires":["never"]} |
From: 4
Right Door
To: 4
Right Door
Entrance condition: {
"comeInStutterShinecharging": {
"minTiles": 1
}
}Requires: "canPreciseStutterWaterShineCharge"
"canShinechargeMovementTricky"
{
"shinespark": {
"frames": 15,
"excessFrames": 0
}
}Exit condition: {
"leaveWithSpark": {}
}Unlocks doors: {"types":["missiles","super"],"requires":[]}
{"types":["powerbomb"],"requires":["never"]} |
From: 4
Right Door
To: 4
Right Door
With a runway of 5 tiles (open end) in the other room, the ideal timing for the stutter is to release forward for 5 frames, and repress forward on the last possible frame before the transition. Other timings can work, but will gain the shinecharge further from the door, leaving fewer shinecharge frames remaining. After gaining the shinecharge, continue holding forward in order to make Samus stand. Then turnaround spin jump back toward the door, and continue spin jumping to reach the transition with a shinecharge. Entrance condition: {
"comeInStutterShinecharging": {
"minTiles": 5
}
}Requires: "canPreciseStutterWaterShineCharge"
"canShinechargeMovementTricky"
"canInsaneJump"
{
"shineChargeFrames": 130
}
{
"or": [
"canBeVeryPatient",
{
"shineChargeFrames": 15
}
]
}Exit condition: {
"leaveShinecharged": {}
}Unlocks doors: {"types":["super"],"requires":[]}
{"types":["missiles","powerbomb"],"requires":["never"]} |
From: 4
Right Door
To: 4
Right Door
With only a runway of 4 tiles (open end) in the other room, the ideal timing for the stutter is to release forward for 4 frames, and repress forward on the last possible frame before the transition. It also works well to release forward for 3 frames and repress on the last possible frame. Other timings can also work, but may gain the shinecharge further from the door, leaving fewer shinecharge frames remaining. After gaining the shinecharge, continue holding forward in order to make Samus stand. Then turnaround spin jump back toward the door, and continue spin jumping to reach the transition with a shinecharge. Entrance condition: {
"comeInStutterShinecharging": {
"minTiles": 4
}
}Requires: "canPreciseStutterWaterShineCharge"
"canShinechargeMovementTricky"
"canInsaneJump"
{
"shineChargeFrames": 140
}
{
"or": [
"canBeVeryPatient",
{
"shineChargeFrames": 10
}
]
}Exit condition: {
"leaveShinecharged": {}
}Unlocks doors: {"types":["super"],"requires":[]}
{"types":["missiles","powerbomb"],"requires":["never"]} |
From: 4
Right Door
To: 4
Right Door
With only a runway of 3 tiles (open end) in the other room, the ideal timing for the stutter is to release forward for 3 or 4 frames, and repress forward on the last possible frame before the transition. Other timings can work, but will gain the shinecharge further from the door, leaving fewer shinecharge frames remaining. After gaining the shinecharge, continue holding forward in order to make Samus stand. Then turnaround spin jump back toward the door, and continue spin jumping to reach the transition with a shinecharge. Alternatively, with greater difficulty but saving some shinecharge frames, after performing the turnaround spin jump, briefly moonwalk back, then retain momentum by boomeranging forward (switching from pressing backward to pressing forward on the next frame), and arm pump to reach the door quickly. Entrance condition: {
"comeInStutterShinecharging": {
"minTiles": 3
}
}Requires: "canPreciseStutterWaterShineCharge"
"canShinechargeMovementTricky"
"canInsaneJump"
{
"shineChargeFrames": 145
}
{
"or": [
"canBeVeryPatient",
{
"shineChargeFrames": 10
}
]
}Exit condition: {
"leaveShinecharged": {}
}Unlocks doors: {"types":["super"],"requires":[]}
{"types":["missiles","powerbomb"],"requires":["never"]}Dev note: The same shinecharge frames could be achieved with a closed end runway (effective length of 2.4375), with a 3-frame stutter, but there doesn't appear to be any application. |
From: 4
Right Door
To: 4
Right Door
With only a runway of 2 tiles (open end) in the other room, the ideal timing for the stutter is to release forward for 3 frames, and repress forward on the last possible frame before the transition. Other timings can work, but will gain the shinecharge further from the door, leaving fewer shinecharge frames remaining. After gaining the shinecharge, continue holding forward in order to make Samus stand. Then turnaround spin jump back toward the door, and continue spin jumping to reach the transition with a shinecharge. Alternatively, with greater difficulty but saving some shinecharge frames, after performing the turnaround spin jump, briefly moonwalk back, then retain momentum by boomeranging forward (switching from pressing backward to pressing forward on the next frame), and arm pump to reach the door quickly. Entrance condition: {
"comeInStutterShinecharging": {
"minTiles": 2
}
}Requires: "canPreciseStutterWaterShineCharge"
"canShinechargeMovementTricky"
"canInsaneJump"
{
"shineChargeFrames": 150
}
{
"or": [
"canBeVeryPatient",
{
"shineChargeFrames": 15
}
]
}Exit condition: {
"leaveShinecharged": {}
}Unlocks doors: {"types":["super"],"requires":[]}
{"types":["missiles","powerbomb"],"requires":["never"]}Dev note: FIXME: The canBeVeryPatient requirement is for difficulty placement of the boomerang method; but the boomerang (or maybe specifically the moonwalk boomerang) should possibly be its own tech, and the same with rapid arm pumping. |
From: 4
Right Door
To: 4
Right Door
With only 1 tile of runway in the other room, Samus should ideally start on the last pixel of runway with X subpixels of $3FFF or less. Run toward the door, releasing forward for exactly 1 frame and pressing it again on the last possible frame before the transition. Starting with X subpixels of $7FFF can also work (e.g., by simply backing against the door ledge, then jumping and turning around mid-air); in this case, Samus must advance 1 or 2 pixels with an arm pump before the transition (e.g., firing a shot or pressing and/or releasing an angle button), and the shinecharge will be gained slightly further away from the door. After gaining the shinecharge, continue holding forward in order to make Samus stand. Then turnaround spin jump back toward the door, and continue spin jumping to reach the transition with a shinecharge. Alternatively, with greater difficulty but saving some shinecharge frames, after performing the turnaround spin jump, briefly moonwalk back, then retain momentum by boomeranging forward (switching from pressing backward to pressing forward on the next frame), and arm pump to reach the door quickly. Ideal subpixels ($3FFF) can be achieved using one of several methods: 1) press forward against the door ledge (or a wall aligned with it); jump, and while mid-air, tap forward for exactly 1 frame to land with subpixels $BFFF, moonwalk back for exactly 1 frame to end with subpixels $3FFF. 2) press forward against the door ledge (from a platform below, assuming one exists) turn around (while on the ground), and moonwalk back two pixels, then jump and mid-air turnaround onto the ledge; if Samus jumped from the correct pixel but does not land on the ledge, then it was needed to moonwalk back 1 more frame; in this case it is possible to retry by doing a mid-air turnaround back onto the platform, and moonwalking back for 1 frame. 3) if X-Ray is available, press against the door ledge (from a platform below, assuming one exists) turn around (while on the ground), then jump and mid-air turnaround toward the door, and use X-Ray to turnaround in place away from the door; repeat this sequence 3 more times: jump, mid-air turnaround, X-Ray turnaround; then do one more jump and mid-air turnaround, high enough to land on the door ledge, and Samus should be in the correct position with subpixels $3FFF. Entrance condition: {
"comeInStutterShinecharging": {
"minTiles": 1
}
}Requires: "canPreciseStutterWaterShineCharge"
"canInsaneJump"
"canBeVeryPatient"
"canShinechargeMovementTricky"
{
"shineChargeFrames": 160
}Exit condition: {
"leaveShinecharged": {}
}Unlocks doors: {"types":["super"],"requires":[]}
{"types":["missiles","powerbomb"],"requires":["never"]} |
|
Requires: {
"or": [
{
"and": [
"Gravity",
{
"or": [
{
"and": [
"Grapple",
{
"simpleCycleFrames": 105
},
{
"cycleFrames": 20
}
]
},
{
"and": [
{
"or": [
"Plasma",
"Wave",
"Spazer"
]
},
{
"simpleCycleFrames": 115
},
{
"cycleFrames": 20
}
]
},
{
"and": [
{
"simpleCycleFrames": 115
},
{
"cycleFrames": 30
}
]
}
]
}
]
},
{
"and": [
"Grapple",
{
"simpleCycleFrames": 115
},
{
"cycleFrames": 20
}
]
},
{
"and": [
{
"or": [
"Plasma",
"Wave",
"Spazer"
]
},
{
"cycleFrames": 235
}
]
},
{
"cycleFrames": 275
}
]
}Farm cycle drops: 5 Zoa |
From: 4
Right Door
To: 4
Right Door
With only 1 tile of runway, this requires releasing forward for 1 or 2 frames and repressing forward on the last possible frame. Entrance condition: {
"comeInStutterShinecharging": {
"minTiles": 1
},
"comesInHeated": "no"
}Requires: "canPreciseStutterWaterShineCharge" "h_underwaterCrystalSpark" |
From: 4
Right Door
To: 4
Right Door
Lure the Zoas. Jump so that they start moving horizontally while higher, use spin jumps to move horizontally faster while keeping them on screen. Exit condition: {
"leaveWithGModeSetup": {}
} |
|
Be careful not to touch or bomb the sand in order to grab the item before PLMs are overloaded. With bombs, kill the Zoas and they will stop spawning. Entrance condition: {
"comeInWithGMode": {
"mode": "direct",
"morphed": true
}
}Requires: {
"or": [
{
"and": [
"Gravity",
"h_artificialMorphIBJ"
]
},
{
"and": [
"h_artificialMorphSpringBall",
{
"or": [
"Gravity",
"HiJump"
]
}
]
}
]
}Clears obstacles: B Collects items: 5 |
|
Entrance condition: {
"comeInWithGMode": {
"mode": "any",
"morphed": true
}
}Requires: {
"or": [
{
"and": [
"Gravity",
"h_artificialMorphIBJ"
]
},
{
"and": [
"h_artificialMorphSpringBall",
{
"or": [
"Gravity",
"HiJump"
]
}
]
}
]
}Collects items: 5 |
From: 4
Right Door
To: 5
Item
Use Bombs to kill the Zoas. Then gain speed by rolling from right to left. Press pause and use Spring Ball to jump near the start of the down slope. Unequip Spring Ball, hold left until Samus is about halfway to the morph tunnel, lay a Bomb, then pause again, and perform a mid-air Spring Ball jump into the tunnel. Entrance condition: {
"comeInWithGMode": {
"mode": "direct",
"morphed": true
}
}Requires: "h_artificialMorphUnderwaterBombIntoSpringBallJump" "canInsaneJump" Clears obstacles: B Collects items: 5 |
From: 4
Right Door
To: 5
Item
Use Bombs to kill the Zoas. Then gain speed by rolling from right to left. Press pause and use Spring Ball to jump near the start of the down slope. Unequip Spring Ball, hold left until Samus is about halfway to the morph tunnel, lay a Bomb, then pause again, and perform a mid-air Spring Ball jump into the tunnel. Entrance condition: {
"comeInWithGMode": {
"mode": "any",
"morphed": true
}
}Requires: "h_artificialMorphUnderwaterBombIntoSpringBallJump" "canInsaneJump" Collects items: 5 |
|
Requires: "Gravity" |
From: 4
Right Door
To: 6
Junction Right of Morph Passage
Requires: "canSuitlessMaridia"
{
"or": [
"canSpringBallJumpMidAir",
"HiJump"
]
} |
From: 4
Right Door
To: 6
Junction Right of Morph Passage
Requires: "canSuitlessMaridia" "canUseFrozenEnemies" |
From: 4
Right Door
To: 6
Junction Right of Morph Passage
Shinespark diagonally over the zoa pit or run through the speed blocks and shinespark after turning around. Entrance condition: {
"comeInShinecharging": {
"length": 6,
"openEnd": 1
}
}Requires: "Morph"
"canWaterShineCharge"
{
"or": [
{
"shinespark": {
"frames": 8,
"excessFrames": 2
}
},
{
"and": [
"canMidairShinespark",
{
"shinespark": {
"frames": 5,
"excessFrames": 2
}
}
]
}
]
}Dev note: This is just a rough estimate of the minimum number of tiles that this runway can represent. It is designed for a skill level that won't be able to use canStutterWaterShineCharge. |
From: 4
Right Door
To: 6
Junction Right of Morph Passage
Shinespark diagonally over the zoa pit or run through the speed blocks and shinespark after turning around. Entrance condition: {
"comeInStutterShinecharging": {
"minTiles": 2
}
}Requires: "Morph"
"canStutterWaterShineCharge"
{
"or": [
{
"shinespark": {
"frames": 8,
"excessFrames": 2
}
},
{
"and": [
"canMidairShinespark",
{
"shinespark": {
"frames": 5,
"excessFrames": 2
}
}
]
}
]
} |
From: 4
Right Door
To: 6
Junction Right of Morph Passage
Shinespark diagonally over the zoa pit or run through the speed blocks and shinespark after turning around. Entrance condition: {
"comeInStutterShinecharging": {
"minTiles": 1
}
}Requires: "Morph"
"canPreciseStutterWaterShineCharge"
{
"or": [
{
"shinespark": {
"frames": 8,
"excessFrames": 2
}
},
{
"and": [
"canMidairShinespark",
{
"shinespark": {
"frames": 5,
"excessFrames": 2
}
}
]
}
]
} |
From: 4
Right Door
To: 6
Junction Right of Morph Passage
Entrance condition: {
"comeInShinechargedJumping": {}
}Requires: {
"shineChargeFrames": 20
}
"Morph"
"canCrossRoomJumpIntoWater"
"canHorizontalMidairShinespark"
{
"shinespark": {
"frames": 46,
"excessFrames": 3
}
} |
From: 4
Right Door
To: 6
Junction Right of Morph Passage
If using at least 8 tiles of runway, jump before going down the first slope. If using 7 tiles of runway, Samus will get a higher jump; in this case, jump later, after going down the first slope Entrance condition: {
"comeInRunning": {
"speedBooster": "yes",
"minTiles": 6.4375
}
}Requires: "canSpeedyJump" "canCrossRoomJumpIntoWater" Dev note: We don't require 'canTrickyDashJump' here, since any speed of at least $2.0 works; a different jump timing is needed for run speed between $2.0 and $2.3 compared to higher speeds, but there is a very large window in both cases, making it not difficult for the player to find a timing that works. |
From: 4
Right Door
To: 6
Junction Right of Morph Passage
Entrance condition: {
"comeInSpaceJumping": {
"speedBooster": "yes",
"minTiles": 22
}
}Requires: "canMomentumConservingMorph" Dev note: With high enough speed this could be done without morphing, but it would be more difficult, and Morph is needed to get through the maze anyway. |
From: 4
Right Door
To: 6
Junction Right of Morph Passage
Requires: "canSuitlessMaridia" "h_underwaterCrouchJumpDownGrab" "canBombGrappleJump" |
From: 4
Right Door
To: 6
Junction Right of Morph Passage
Use the respawning Zoas as a grapple target to get a sand boost in order to reach the ledge above. Shoot Grapple just after landing on the sand. Jump as soon as the Zoa is hit, and aim down to escape the sand. Avoid getting hit by killing the extra Zoas since falling into the sand is a softlock. If carrying a flash suit, hold angle-down while shooting the Zoa and jumping. Requires: "h_underwaterCrouchJumpDownGrab" "canSandGrappleBoost" |
From: 4
Right Door
To: 6
Junction Right of Morph Passage
Kill all of the enemies and leave drops uncollected so that the Zoas will not be in the way. Stand on the edge of the sand and place a Bomb or Power Bomb and wait briefly before entering the sand. Let the explosion push Samus up for a few frames before simultaneously jumping and aiming down. Then move left to down-grab onto the morph tunnel ledge. Jumping too early can lead to a softlock but jumping too late usually exits the sand safely. If carrying a flash suit, hold angle-down while jumping. Requires: {
"tech": "canSandBombBoost"
}
"h_bombThings"
"canInsaneJump"
"canDownGrab" |
From: 4
Right Door
To: 6
Junction Right of Morph Passage
Requires: "h_storedSpark"
{
"shinespark": {
"frames": 5,
"excessFrames": 2
}
} |
From: 4
Right Door
To: 6
Junction Right of Morph Passage
Overload PLMs by touching the sand, then move through the speed blocks. Avoiding the sand pits is easier without Gravity or HiJump. Exit G-mode while inside the speed blocks then X-Ray climb up. Entrance condition: {
"comeInWithGMode": {
"mode": "any",
"morphed": false
}
}Requires: "canComplexGMode"
"canSuitlessMaridia"
{
"noBlueSuit": {}
}
"canGModeXRayClimb"
"Morph"Dev note: This requires canInsaneJump even though it is not difficult, because it is not very intuitive. |
From: 4
Right Door
To: 7
Right of Sand with Blue Speed
Entrance condition: {
"comeInGettingBlueSpeed": {
"length": 6,
"openEnd": 1
}
}Requires: "h_waterGetBlueSpeed" Dev note: This is just a rough estimate of the minimum number of tiles that this runway can represent. It is designed for a skill level that won't be able to use canStutterWaterShineCharge. |
From: 4
Right Door
To: 7
Right of Sand with Blue Speed
Entrance condition: {
"comeInStutterGettingBlueSpeed": {
"minTiles": 2
}
} |
From: 4
Right Door
To: 7
Right of Sand with Blue Speed
With only 1 tile of runway, this requires releasing forward for 1 or 2 frames and repressing forward on the last possible frame. Entrance condition: {
"comeInStutterGettingBlueSpeed": {
"minTiles": 1
}
}Requires: {
"tech": "canPreciseStutterWaterShineCharge"
} |
From: 4
Right Door
To: 7
Right of Sand with Blue Speed
Entrance condition: {
"comeInSpeedballing": {
"runway": {
"length": 6,
"openEnd": 1
}
}
}Requires: "canSpeedball" |
From: 4
Right Door
To: 7
Right of Sand with Blue Speed
Entrance condition: {
"comeInWithBlueSpringBallBounce": {
"movementType": "controlled"
}
}Dev note: With a mid-air spring ball jump it would be possible to go through the morph tunnel. This strat exists mainly as a way to avoid collecting the item, by passing through the Speed blocks. |
|
If the Puyos are alive, lure the first to the right, then roll out of the hole, unmorph and fight them. Crouching while shooting may increase accuracy. Requires: "Morph" Dev note: FIXME This probably shouldnt be free if the Puyos are still alive. |
From: 5
Item
To: 1
Left Door
If the Puyos are alive, lure the first to the right, then roll out of the hole, unmorph and fight them. Crouching while shooting may increase accuracy. Requires: "canRemoteAcquire"
{
"obstaclesCleared": [
"B"
]
}Dev note: FIXME This probably shouldnt be free if the Puyos are still alive. |
From: 5
Item
To: 4
Right Door
Requires: "canRemoteAcquire"
{
"obstaclesCleared": [
"B"
]
} |
|
Requires: {
"or": [
"h_useSpringBall",
{
"and": [
"Gravity",
"h_bombThings",
"h_additionalBomb",
"h_additionalBomb"
]
}
]
} |
From: 5
Item
To: 6
Junction Right of Morph Passage
Requires: "canSuitlessMaridia" "canMidAirMorph" "canDisableEquipment" "h_complexToCarryFlashSuit" |
|
|
|
Requires: {
"or": [
"h_useSpringBall",
{
"and": [
"Gravity",
"h_bombThings",
"h_additionalBomb",
"h_additionalBomb"
]
}
]
}Collects items: 5 |
From: 6
Junction Right of Morph Passage
To: 5
Item
Requires: "canSuitlessMaridia"
"canMidAirMorph"
{
"disableEquipment": "Gravity"
}
{
"disableEquipment": "HiJump"
}
"h_complexToCarryFlashSuit"Collects items: 5 |
From: 6
Junction Right of Morph Passage
To: 6
Junction Right of Morph Passage
Requires: {
"or": [
{
"and": [
"Grapple",
{
"cycleFrames": 285
}
]
},
{
"and": [
"canDodgeWhileShooting",
{
"or": [
"Wave",
"Spazer",
"canMidairWiggle"
]
},
{
"cycleFrames": 525
}
]
}
]
}Farm cycle drops: 5 Zoa |
|
Use blue speed to pass through the speed blocks. Clears obstacles: A |
From: 7
Right of Sand with Blue Speed
To: 1
Left Door
Use blue speed to pass through the speed blocks, then chain temporary blue through the door. Requires: "h_getBlueSpeedMaxRunway" "canChainTemporaryBlue" Exit condition: {
"leaveWithTemporaryBlue": {}
}Unlocks doors: {"types":["ammo"],"requires":[]}Dev note: The `h_getBlueSpeedMaxRunway` requirement is to satisfy the tests, since we don't yet have a way to represent that being at node 7 implies already having blue speed. |
From: 7
Right of Sand with Blue Speed
To: 4
Right Door
Use X-Ray to turn around, then chain temporary blue back through the door. Requires: "h_getBlueSpeedMaxRunway" "canXRayTurnaround" "canChainTemporaryBlue" Exit condition: {
"leaveWithTemporaryBlue": {}
}Unlocks doors: {"types":["ammo"],"requires":[]}Dev note: The `h_getBlueSpeedMaxRunway` requirement is to satisfy the tests, since we don't yet have a way to represent that being at node 7 implies already having blue speed. |
{
"$schema": "../../../schema/m3-room.schema.json",
"id": 186,
"name": "Botwoon Energy Tank Room",
"area": "Maridia",
"subarea": "Inner",
"subsubarea": "Pink",
"roomAddress": "0x7D7E4",
"roomEnvironments": [
{
"heated": false
}
],
"mapTileMask": [
[
1,
1,
1,
1,
1,
1,
1
]
],
"nodes": [
{
"id": 1,
"name": "Left Door",
"nodeType": "door",
"nodeSubType": "blue",
"nodeAddress": "0x001a84c",
"doorOrientation": "left",
"doorEnvironments": [
{
"physics": "water"
}
],
"mapTileMask": [
[
2,
2,
2,
1,
1,
1,
1
]
]
},
{
"id": 2,
"name": "Left Sand Pit",
"nodeType": "exit",
"nodeSubType": "sandpit",
"nodeAddress": "0x001a864",
"doorOrientation": "down",
"mapTileMask": [
[
1,
1,
2,
1,
1,
1,
1
]
]
},
{
"id": 3,
"name": "Right Sand Pit",
"nodeType": "exit",
"nodeSubType": "sandpit",
"nodeAddress": "0x001a858",
"doorOrientation": "down",
"mapTileMask": [
[
1,
1,
1,
2,
1,
1,
1
]
]
},
{
"id": 4,
"name": "Right Door",
"nodeType": "door",
"nodeSubType": "blue",
"nodeAddress": "0x001a870",
"doorOrientation": "right",
"doorEnvironments": [
{
"physics": "water"
}
],
"mapTileMask": [
[
1,
1,
1,
1,
2,
2,
2
]
]
},
{
"id": 5,
"name": "Item",
"nodeType": "item",
"nodeSubType": "visible",
"nodeItem": "ETank",
"nodeAddress": "0x7C755",
"mapTileMask": [
[
1,
1,
1,
2,
1,
1,
1
]
],
"locks": [
{
"name": "Dummy Item Lock",
"lockType": "gameFlag",
"unlockStrats": [
{
"name": "Base (Collect Item)",
"notable": false,
"requires": [],
"flashSuitChecked": true,
"blueSuitChecked": true
}
]
}
]
},
{
"id": 6,
"name": "Junction Right of Morph Passage",
"nodeType": "junction",
"nodeSubType": "junction",
"mapTileMask": [
[
1,
1,
1,
1,
2,
1,
1
]
]
},
{
"id": 7,
"name": "Right of Sand with Blue Speed",
"nodeType": "junction",
"nodeSubType": "junction",
"mapTileMask": [
[
1,
1,
1,
1,
1,
2,
1
]
],
"devNote": [
"This represents having gained blue speed while moving right-to-left,",
"including running, speedballing, or blue spring ball bouncing."
]
}
],
"obstacles": [
{
"id": "A",
"name": "Speed Blocks",
"obstacleType": "inanimate"
},
{
"id": "B",
"name": "G-Mode Grab Item and Leave Before Exiting G-Mode",
"obstacleType": "abstract"
}
],
"enemies": [
{
"id": "e1",
"groupName": "Botwoon E-Tank Left Puyos",
"enemyName": "Puyo",
"quantity": 4,
"homeNodes": [
1
]
},
{
"id": "e2",
"groupName": "Botwoon E-Tank Right Puyo",
"enemyName": "Puyo",
"quantity": 1,
"homeNodes": [
3
]
},
{
"id": "e3",
"groupName": "Botwoon E-Tank Zoas",
"enemyName": "Zoa",
"quantity": 5,
"homeNodes": [
4
]
}
],
"strats": [
{
"link": [
1,
1
],
"name": "Base (Unlock Door)",
"requires": [],
"unlocksDoors": [
{
"types": [
"ammo"
],
"requires": []
}
],
"flashSuitChecked": true,
"blueSuitChecked": true
},
{
"link": [
1,
1
],
"name": "Base (Come In Normally)",
"entranceCondition": {
"comeInNormally": {}
},
"requires": [],
"flashSuitChecked": true,
"blueSuitChecked": true
},
{
"link": [
1,
1
],
"name": "Base (Come In With Mockball)",
"entranceCondition": {
"comeInWithMockball": {
"adjacentMinTiles": 0,
"remoteAndLandingMinTiles": [
[
0,
0
]
],
"speedBooster": "any"
}
},
"requires": [],
"flashSuitChecked": true,
"blueSuitChecked": true
},
{
"link": [
2,
2
],
"name": "Base (Unlock Door)",
"requires": [],
"unlocksDoors": [
{
"types": [
"ammo"
],
"requires": []
}
],
"flashSuitChecked": true,
"blueSuitChecked": true
},
{
"link": [
3,
3
],
"name": "Base (Unlock Door)",
"requires": [],
"unlocksDoors": [
{
"types": [
"ammo"
],
"requires": []
}
],
"flashSuitChecked": true,
"blueSuitChecked": true
},
{
"link": [
4,
4
],
"name": "Base (Unlock Door)",
"requires": [],
"unlocksDoors": [
{
"types": [
"ammo"
],
"requires": []
}
],
"flashSuitChecked": true,
"blueSuitChecked": true
},
{
"link": [
4,
4
],
"name": "Base (Come In Normally)",
"entranceCondition": {
"comeInNormally": {}
},
"requires": [],
"flashSuitChecked": true,
"blueSuitChecked": true
},
{
"link": [
4,
4
],
"name": "Base (Come In With Mockball)",
"entranceCondition": {
"comeInWithMockball": {
"adjacentMinTiles": 0,
"remoteAndLandingMinTiles": [
[
0,
0
]
],
"speedBooster": "any"
}
},
"requires": [],
"flashSuitChecked": true,
"blueSuitChecked": true
},
{
"name": "Base (Collect Item)",
"notable": false,
"requires": [],
"flashSuitChecked": true,
"blueSuitChecked": true,
"link": [
5,
5
],
"collectsItems": [
5
]
},
{
"id": 127,
"link": [
1,
1
],
"name": "Gain Flash Suit (Puyo R-Mode Knockback Spark)",
"entranceCondition": {
"comeInWithRMode": {}
},
"requires": [
"Gravity",
{
"or": [
{
"disableEquipment": "ETank"
},
"canBePatient"
]
},
{
"canShineCharge": {
"usedTiles": 32,
"gentleUpTiles": 1,
"steepUpTiles": 1,
"openEnd": 1
}
},
"h_RModeKnockbackSpark"
],
"flashSuitChecked": true,
"blueSuitChecked": true
},
{
"id": 1,
"link": [
1,
1
],
"name": "Leave with Runway",
"requires": [],
"exitCondition": {
"leaveWithRunway": {
"length": 3,
"openEnd": 1
}
},
"flashSuitChecked": true,
"blueSuitChecked": true
},
{
"id": 101,
"link": [
1,
1
],
"name": "Leave With Side Platform",
"requires": [
{
"obstaclesCleared": [
"A"
]
},
"Gravity",
"h_speedJump",
"canInsaneJump",
{
"or": [
{
"and": [
"canMomentumConservingMorph",
"canInsaneMidAirMorph"
]
},
"canMomentumConservingTurnaround"
]
}
],
"exitCondition": {
"leaveWithSidePlatform": {
"height": 1,
"runway": {
"length": 36,
"openEnd": 1,
"gentleUpTiles": 2
},
"obstruction": [
3,
0
]
}
},
"flashSuitChecked": true,
"blueSuitChecked": true,
"devNote": [
"Max extra run speed $6.3."
]
},
{
"id": 2,
"link": [
1,
1
],
"name": "Puyo Farm",
"requires": [
{
"resetRoom": {
"nodes": [
1
]
}
},
{
"or": [
{
"and": [
"Gravity",
"canDash"
]
},
{
"and": [
"Gravity",
{
"cycleFrames": 100
}
]
},
{
"cycleFrames": 250
}
]
},
{
"or": [
{
"and": [
"Plasma",
{
"cycleFrames": 360
}
]
},
{
"and": [
"Gravity",
"ScrewAttack",
{
"cycleFrames": 375
}
]
},
{
"and": [
{
"haveBlueSuit": {}
},
{
"cycleFrames": 335
}
]
},
{
"and": [
"Wave",
{
"cycleFrames": 390
}
]
},
{
"and": [
"Grapple",
{
"cycleFrames": 400
}
]
},
{
"and": [
"Spazer",
{
"cycleFrames": 415
}
]
},
{
"and": [
"Gravity",
"canPseudoScrew",
{
"cycleFrames": 540
}
]
},
{
"and": [
"Ice",
{
"cycleFrames": 580
}
]
},
{
"and": [
"canDodgeWhileShooting",
{
"cycleFrames": 810
}
]
}
]
}
],
"resetsObstacles": [
"A",
"B"
],
"farmCycleDrops": [
{
"enemy": "Puyo",
"count": 4
}
],
"flashSuitChecked": true,
"blueSuitChecked": true
},
{
"id": 3,
"link": [
1,
1
],
"name": "Leave Shinecharged",
"requires": [
"Gravity",
{
"canShineCharge": {
"usedTiles": 35,
"gentleUpTiles": 2,
"openEnd": 1
}
},
{
"shineChargeFrames": 35
}
],
"exitCondition": {
"leaveShinecharged": {}
},
"flashSuitChecked": true,
"blueSuitChecked": true
},
{
"id": 4,
"link": [
1,
1
],
"name": "Leave Spinning",
"requires": [
"Gravity"
],
"exitCondition": {
"leaveSpinning": {
"remoteRunway": {
"length": 35,
"openEnd": 1
},
"minExtraRunSpeed": "$1.2"
}
},
"flashSuitChecked": true,
"blueSuitChecked": true
},
{
"id": 5,
"link": [
1,
1
],
"name": "Leave Spinning (Across Room)",
"requires": [
"Gravity",
{
"getBlueSpeed": {
"usedTiles": 22,
"openEnd": 1
}
}
],
"exitCondition": {
"leaveSpinning": {
"remoteRunway": {
"length": 45,
"openEnd": 1
},
"blue": "yes"
}
},
"flashSuitChecked": true,
"blueSuitChecked": true,
"note": "Use Speed Booster to break the Speed blocks, and run from the right side of the room, using blue speed to run on top of the sand."
},
{
"id": 6,
"link": [
1,
1
],
"name": "Leave With Mockball",
"requires": [
"Gravity"
],
"exitCondition": {
"leaveWithMockball": {
"remoteRunway": {
"length": 34,
"openEnd": 1
},
"landingRunway": {
"length": 3,
"openEnd": 1
}
}
},
"flashSuitChecked": true,
"blueSuitChecked": true
},
{
"id": 7,
"link": [
1,
1
],
"name": "Leave With Mockball (Across Room)",
"requires": [
"Gravity",
{
"getBlueSpeed": {
"usedTiles": 22,
"openEnd": 1
}
}
],
"exitCondition": {
"leaveWithMockball": {
"remoteRunway": {
"length": 45,
"openEnd": 1
},
"landingRunway": {
"length": 3,
"openEnd": 1
},
"blue": "yes"
}
},
"flashSuitChecked": true,
"blueSuitChecked": true,
"note": "Use Speed Booster to break the Speed blocks, and run from the right side of the room, using blue speed to run on top of the sand."
},
{
"id": 8,
"link": [
1,
1
],
"name": "Leave With Spring Ball Bounce",
"requires": [
"Gravity"
],
"exitCondition": {
"leaveWithSpringBallBounce": {
"remoteRunway": {
"length": 27,
"openEnd": 0
},
"landingRunway": {
"length": 3,
"openEnd": 1
},
"movementType": "uncontrolled"
}
},
"flashSuitChecked": true,
"blueSuitChecked": true
},
{
"id": 9,
"link": [
1,
1
],
"name": "Leave With Spring Ball Bounce (Across Room)",
"requires": [
"Gravity",
{
"getBlueSpeed": {
"usedTiles": 22,
"openEnd": 1
}
},
"h_speedJump"
],
"exitCondition": {
"leaveWithSpringBallBounce": {
"remoteRunway": {
"length": 45,
"openEnd": 1
},
"landingRunway": {
"length": 3,
"openEnd": 1
},
"movementType": "uncontrolled"
}
},
"flashSuitChecked": true,
"blueSuitChecked": true,
"note": "Use Speed Booster to break the Speed blocks, and run from the right side of the room, using blue speed to run on top of the sand."
},
{
"id": 10,
"link": [
1,
1
],
"name": "Leave Space Jumping",
"requires": [
"Gravity"
],
"exitCondition": {
"leaveSpaceJumping": {
"remoteRunway": {
"length": 35,
"openEnd": 1
}
}
},
"flashSuitChecked": true,
"blueSuitChecked": true
},
{
"id": 11,
"link": [
1,
1
],
"name": "Leave Space Jumping (Across Room)",
"requires": [
"Gravity",
{
"getBlueSpeed": {
"usedTiles": 22,
"openEnd": 1
}
},
"h_speedJump"
],
"exitCondition": {
"leaveSpaceJumping": {
"remoteRunway": {
"length": 45,
"openEnd": 1
}
}
},
"flashSuitChecked": true,
"blueSuitChecked": true,
"note": "Use Speed Booster to break the Speed blocks, and run from the right side of the room, using blue speed to run on top of the sand."
},
{
"id": 12,
"link": [
1,
1
],
"name": "Leave With Temporary Blue",
"requires": [
"Gravity",
{
"canShineCharge": {
"usedTiles": 35,
"gentleUpTiles": 2,
"openEnd": 1
}
},
"canChainTemporaryBlue"
],
"exitCondition": {
"leaveWithTemporaryBlue": {}
},
"flashSuitChecked": true,
"blueSuitChecked": true
},
{
"id": 131,
"link": [
1,
1
],
"name": "In-Room Crystal Spark",
"requires": [
"Gravity",
{
"canShineCharge": {
"usedTiles": 35,
"gentleUpTiles": 2,
"openEnd": 1
}
},
"h_CrystalSpark"
],
"flashSuitChecked": true,
"blueSuitChecked": true
},
{
"id": 13,
"link": [
1,
1
],
"name": "G-Mode Setup - Get Hit By Puyo",
"requires": [],
"exitCondition": {
"leaveWithGModeSetup": {}
},
"flashSuitChecked": true,
"blueSuitChecked": true
},
{
"id": 14,
"link": [
1,
2
],
"name": "Base",
"requires": [
{
  "or": [
    "h_navigateUnderwater",
    {
      "enemyDamage": {
        "enemy": "Puyo",
        "type": "contact",
        "hits": 2
      }
    },
    {
      "enemyKill": {
        "enemies": [
          [
            "Puyo"
          ],
          [
            "Puyo",
            "Puyo"
          ],
          [
            "Puyo"
          ]
        ],
        "explicitWeapons": [
          "Missile",
          "Super",
          "PowerBomb",
          "Wave",
          "Spazer",
          "Plasma"
        ]
      }
    },
    "canUseGrapple"
  ]
}
],
"flashSuitChecked": true,
"blueSuitChecked": true
},
{
"id": 15,
"link": [
1,
2
],
"name": "G-Mode",
"entranceCondition": {
"comeInWithGMode": {
"mode": "any",
"morphed": false
}
},
"requires": [],
"exitCondition": {
"leaveWithGMode": {
"morphed": false
}
},
"flashSuitChecked": true,
"blueSuitChecked": true
},
{
"id": 16,
"link": [
1,
2
],
"name": "G-Mode Morph",
"entranceCondition": {
"comeInWithGMode": {
"mode": "any",
"morphed": true
}
},
"requires": [
{
  "or": [
    "h_artificialMorphBombs",
    {
      "haveBlueSuit": {}
    },
    {
      "and": [
        "h_artificialMorphPowerBomb",
        "h_additionalBomb",
        {
          "or": [
            "canTrickyJump",
            "h_artificialMorphSpringBall",
            "Gravity",
            "h_additionalBomb"
          ]
        }
      ]
    },
    {
      "and": [
        "Gravity",
        {
          "enemyDamage": {
            "enemy": "Puyo",
            "type": "contact",
            "hits": 1
          }
        }
      ]
    },
    {
      "and": [
        "h_artificialMorphSpringBall",
        {
          "enemyDamage": {
            "enemy": "Puyo",
            "type": "contact",
            "hits": 3
          }
        }
      ]
    },
    {
      "and": [
        "Gravity",
        "h_artificialMorphSpringBall",
        "canTrickyDodgeEnemies"
      ]
    },
    {
      "enemyDamage": {
        "enemy": "Puyo",
        "type": "contact",
        "hits": 7
      }
    }
  ]
}
],
"exitCondition": {
"leaveWithGMode": {
"morphed": true
}
},
"flashSuitChecked": true,
"blueSuitChecked": true
},
{
"id": 112,
"link": [
1,
2
],
"name": "G-Mode Setup - Get Hit by Puyo",
"requires": [
"h_navigateUnderwater",
{
"noBlueSuit": {}
},
"canPlayInSand",
"canMoonwalk",
"canCameraManip",
"canDownwardGModeSetup",
"canOffScreenMovement",
"canTrickyGMode"
],
"exitCondition": {
"leaveWithGModeSetup": {}
},
"flashSuitChecked": true,
"blueSuitChecked": true,
"note": [
"Reach the sand while luring a Puyo just off camera to where moonwalking on the partially submerged platform can lure the Puyo.",
"Crouch in the sand and press forward when near the transition to stand up and touch the transition on the first frame of standing."
]
},
{
"id": 17,
"link": [
1,
3
],
"name": "Base",
"requires": [
"h_navigateUnderwater"
],
"flashSuitChecked": true,
"blueSuitChecked": true
},
{
"id": 18,
"link": [
1,
3
],
"name": "G-Mode",
"entranceCondition": {
"comeInWithGMode": {
"mode": "any",
"morphed": false
}
},
"requires": [],
"exitCondition": {
"leaveWithGMode": {
"morphed": false
}
},
"flashSuitChecked": true,
"blueSuitChecked": true
},
{
"id": 19,
"link": [
1,
3
],
"name": "G-Mode Morph",
"entranceCondition": {
"comeInWithGMode": {
"mode": "any",
"morphed": true
}
},
"requires": [
{
"or": [
"h_artificialMorphSpringBall",
{
"and": [
"Gravity",
"h_artificialMorphBombHorizontally"
]
},
{
  "haveBlueSuit": {}
}
]
},
{
"or": [
{
"and": [
"h_artificialMorphBombThings",
"h_additionalBomb"
]
},
{
"haveBlueSuit": {}
},
{
"and": [
"Gravity",
"h_artificialMorphSpringBall",
{
"or": [
"canTrickyDodgeEnemies",
{
"enemyDamage": {
"enemy": "Puyo",
"type": "contact",
"hits": 1
}
}
]
}
]
},
{
"and": [
"h_artificialMorphSpringBall",
{
"enemyDamage": {
"enemy": "Puyo",
"type": "contact",
"hits": 2
}
}
]
},
{
"and": [
"Gravity",
"h_artificialMorphPowerBomb",
{
"enemyDamage": {
"enemy": "Puyo",
"type": "contact",
"hits": 2
}
}
]
}
]
}
],
"exitCondition": {
"leaveWithGMode": {
"morphed": true
}
},
"flashSuitChecked": true,
"blueSuitChecked": true
},
{
"id": 113,
"link": [
1,
3
],
"name": "G-Mode Setup - Get Hit by Puyo",
"requires": [
"h_navigateUnderwater",
{
"noBlueSuit": {}
},
"canPlayInSand",
"canMoonwalk",
"canCameraManip",
"canDownwardGModeSetup",
"canOffScreenMovement",
"canTrickyGMode"
],
"exitCondition": {
"leaveWithGModeSetup": {}
},
"flashSuitChecked": true,
"blueSuitChecked": true,
"note": [
"Reach the sand while luring a Puyo just off camera to where moonwalking on the partially submerged platform can lure the Puyo.",
"Quickly move to the right section before the Puyo hits Samus.",
"Crouch in the sand and press forward when near the transition to stand up and touch the transition on the first frame of standing."
]
},
{
"id": 129,
"link": [
1,
4
],
"name": "Blue Suit",
"requires": [
{
"haveBlueSuit": {}
}
],
"clearsObstacles": [
"A"
],
"flashSuitChecked": true,
"blueSuitChecked": true,
"note": "To keep a blue suit, simply walk across the sand, without jumping on it or sinking into it."
},
{
"id": 121,
"link": [
1,
4
],
"name": "R-Mode Spark Interrupt (Gain Blue Suit)",
"entranceCondition": {
"comeInWithRMode": {}
},
"requires": [
"Gravity",
"h_shinechargeMaxRunway",
{
"refill": [
"Energy"
]
},
{
"autoReserveTrigger": {}
},
"canRModeSparkInterrupt"
],
"clearsObstacles": [
"A"
],
"flashSuitChecked": true,
"blueSuitChecked": true,
"note": [
"Run across, then fill up with the Zoas. Shinecharge near the Zoa pit - or jump back across the sand and",
"use the full-length runway there, then get interrupted by a Zoa."
]
},
{
"id": 20,
"link": [
1,
4
],
"name": "Leave with Runway Through the Speed Blocks",
"requires": [
"Gravity",
"h_getBlueSpeedMaxRunway",
{
"or": [
{
"getBlueSpeed": {
"usedTiles": 22,
"gentleDownTiles": 4,
"openEnd": 1
}
},
"h_useSpringBall",
"SpaceJump",
"h_useMorphBombs",
"canPlayInSand",
{
"obstaclesCleared": [
"A"
]
}
]
}
],
"exitCondition": {
"leaveWithRunway": {
"length": 45,
"openEnd": 1
}
},
"unlocksDoors": [
{
"types": [
"ammo"
],
"requires": []
}
],
"flashSuitChecked": true,
"blueSuitChecked": true
},
{
"id": 21,
"link": [
1,
4
],
"name": "Speed Blocks Already Broken Suitless",
"requires": [
"canSuitlessMaridia",
"HiJump",
{
"or": [
"h_useSpringBall",
"canPlayInSand"
]
},
{
"obstaclesCleared": [
"A"
]
}
],
"flashSuitChecked": true,
"blueSuitChecked": true,
"devNote": [
"Gravity can run across the sand with speed again.",
"FIXME: This is possible without HiJump by breaking spin before landing, then quickly jumping again. Useful in other places as well, like Aqueduct."
]
},
{
"id": 22,
"link": [
1,
4
],
"name": "Base",
"requires": [
"Gravity",
"h_getBlueSpeedMaxRunway"
],
"clearsObstacles": [
"A"
],
"flashSuitChecked": true,
"blueSuitChecked": true
},
{
"id": 23,
"link": [
1,
4
],
"name": "Suitless Shinespark",
"entranceCondition": {
"comeInShinecharged": {}
},
"requires": [
{
"shineChargeFrames": 60
},
"canSuitlessMaridia",
"canHorizontalShinespark",
"canShinechargeMovement",
{
"shinespark": {
"frames": 159,
"excessFrames": 43
}
}
],
"clearsObstacles": [
"A"
],
"flashSuitChecked": true,
"blueSuitChecked": true
},
{
"id": 24,
"link": [
1,
4
],
"name": "Speedball (Come in Getting Blue Speed)",
"entranceCondition": {
"comeInGettingBlueSpeed": {
"length": 0,
"openEnd": 1
}
},
"requires": [
"h_waterGetBlueSpeed",
"canSpeedball",
"canTrickyJump"
],
"flashSuitChecked": true,
"blueSuitChecked": true,
"note": [
"Enter the room with blue speed, and jump into a speedball."
]
},
{
"id": 25,
"link": [
1,
4
],
"name": "Speedball (Come in Blue Spinning)",
"entranceCondition": {
"comeInBlueSpinning": {
"unusableTiles": 0
}
},
"requires": [
"canSpeedball"
],
"flashSuitChecked": true,
"blueSuitChecked": true,
"note": [
"Enter the room in a spin jump with blue speed, and enter a speedball."
]
},
{
"id": 26,
"link": [
1,
4
],
"name": "Speedball, Leave With Temporary Blue (Come in Getting Blue Speed)",
"entranceCondition": {
"comeInGettingBlueSpeed": {
"length": 0,
"openEnd": 1
}
},
"requires": [
"h_waterGetBlueSpeed",
"canSpeedball",
"canTrickyJump",
"canChainTemporaryBlue"
],
"exitCondition": {
"leaveWithTemporaryBlue": {}
},
"unlocksDoors": [
{
"types": [
"ammo"
],
"requires": []
}
],
"flashSuitChecked": true,
"blueSuitChecked": true,
"note": [
"Enter the room with blue speed, and jump into a speedball.",
"Then chain temporary blue into the next room."
]
},
{
"id": 27,
"link": [
1,
4
],
"name": "Speedball, Leave With Temporary Blue (Come in Blue Spinning)",
"entranceCondition": {
"comeInBlueSpinning": {
"unusableTiles": 0
}
},
"requires": [
"canSpeedball",
"canChainTemporaryBlue"
],
"exitCondition": {
"leaveWithTemporaryBlue": {}
},
"unlocksDoors": [
{
"types": [
"ammo"
],
"requires": []
}
],
"flashSuitChecked": true,
"blueSuitChecked": true,
"note": [
"Enter the room in a spin jump with blue speed, and enter a speedball.",
"Then chain temporary blue into the next room."
]
},
{
"id": 28,
"link": [
1,
4
],
"name": "Blue Spring Ball Bounce",
"entranceCondition": {
"comeInWithBlueSpringBallBounce": {
"movementType": "controlled"
}
},
"requires": [],
"flashSuitChecked": true,
"blueSuitChecked": true,
"note": [
"Bounce through the Speed blocks."
],
"devNote": [
"With a mid-air spring ball jump it would be possible to go through the morph tunnel.",
"This strat exists mainly as a way to avoid collecting the item."
]
},
{
"id": 29,
"link": [
1,
4
],
"name": "Blue Spring Ball Bounce, Leave With Temporary Blue",
"entranceCondition": {
"comeInWithBlueSpringBallBounce": {
"movementType": "controlled"
}
},
"requires": [
"canChainTemporaryBlue"
],
"exitCondition": {
"leaveWithTemporaryBlue": {}
},
"unlocksDoors": [
{
"types": [
"ammo"
],
"requires": []
}
],
"flashSuitChecked": true,
"blueSuitChecked": true,
"note": [
"Bounce through the Speed blocks.",
"Then unmorph and chain temporary blue into the next room."
]
},
{
"id": 30,
"link": [
1,
4
],
"name": "G-Mode Overload PLMs",
"entranceCondition": {
"comeInWithGMode": {
"mode": "any",
"morphed": false
}
},
"requires": [
"canSuitlessMaridia"
],
"flashSuitChecked": true,
"blueSuitChecked": true,
"note": "Overload PLMs by touching the sand, then move through the speed blocks. Avoiding the sand pits is easier without Gravity or HiJump."
},
{
"id": 119,
"link": [
1,
4
],
"name": "Grapple Teleport Door Escape",
"entranceCondition": {
"comeInWithGrappleTeleport": {
"blockPositions": [
[
108,
12
],
[
108,
13
]
]
}
},
"requires": [
{
  "or": [
    "canGrappleTeleportWallEscape",
    {
      "doorUnlockedAtNode": 4
    }
  ]
}
],
"unlocksDoors": [
{
"types": [
"ammo"
],
"requires": []
}
],
"flashSuitChecked": true,
"blueSuitChecked": true
},
{
"id": 31,
"link": [
1,
4
],
"name": "Grapple Teleport Door Lock Skip",
"entranceCondition": {
"comeInWithGrappleTeleport": {
"blockPositions": [
[
108,
12
],
[
108,
13
]
]
}
},
"requires": [],
"bypassesDoorShell": "yes",
"flashSuitChecked": true,
"blueSuitChecked": true
},
{
"id": 32,
"link": [
1,
4
],
"name": "Carry Grapple Teleport (Top Position)",
"entranceCondition": {
"comeInWithGrappleTeleport": {
"blockPositions": [
[
108,
12
]
]
}
},
"requires": [],
"exitCondition": {
"leaveWithGrappleTeleport": {
"blockPositions": [
[
108,
12
]
]
}
},
"bypassesDoorShell": "yes",
"flashSuitChecked": true,
"blueSuitChecked": true
},
{
"id": 33,
"link": [
1,
4
],
"name": "Carry Grapple Teleport (Bottom Position)",
"entranceCondition": {
"comeInWithGrappleTeleport": {
"blockPositions": [
[
108,
13
]
]
}
},
"requires": [],
"exitCondition": {
"leaveWithGrappleTeleport": {
"blockPositions": [
[
108,
13
]
]
}
},
"bypassesDoorShell": "yes",
"flashSuitChecked": true,
"blueSuitChecked": true
},
{
"id": 95,
"link": [
1,
4
],
"name": "Use Flash Suit",
"requires": [
{
"useFlashSuit": {}
},
{
"or": [
{
"and": [
"canPlayInSand",
{
"shinespark": {
"frames": 101,
"excessFrames": 52
}
}
]
},
{
"and": [
"Gravity",
{
"shinespark": {
"frames": 80,
"excessFrames": 41
}
}
]
}
]
}
],
"clearsObstacles": [
"A"
],
"flashSuitChecked": true,
"blueSuitChecked": true,
"note": "With low Energy it is recommended to spark high in order to not get hit by the Zoas in case Samus ends above their spawn."
},
{
"id": 34,
"link": [
1,
5
],
"name": "Base",
"requires": [
"Gravity",
{
"or": [
"canMidAirMorph",
"h_useSpringBall",
{
"and": [
"canIBJ",
"canBombHorizontally"
]
}
]
}
],
"collectsItems": [
5
],
"flashSuitChecked": true,
"blueSuitChecked": true
},
{
"id": 35,
"link": [
1,
5
],
"name": "Suitless Jump Assist",
"requires": [
"canSuitlessMaridia",
{
"or": [
{
"and": [
"canTrickySpringBallJump",
{
"or": [
"h_underwaterCrouchJump",
"canLateralMidAirMorph"
]
}
]
},
{
"and": [
"HiJump",
"h_useSpringBall"
]
},
{
"and": [
"HiJump",
"canMidAirMorph"
]
}
]
}
],
"collectsItems": [
5
],
"flashSuitChecked": true,
"blueSuitChecked": true
},
{
"id": 36,
"link": [
1,
5
],
"name": "Suitless Frozen Puyo",
"requires": [
"canSuitlessMaridia",
"Morph",
"canTrickyUseFrozenEnemies"
],
"collectsItems": [
5
],
"flashSuitChecked": true,
"blueSuitChecked": true
},
{
"id": 37,
"link": [
1,
5
],
"name": "Cross Room Jump Shinespark",
"entranceCondition": {
"comeInShinechargedJumping": {}
},
"requires": [
{
"shineChargeFrames": 25
},
"canMidAirMorph",
"canCrossRoomJumpIntoWater",
"canHorizontalMidairShinespark",
{
"shinespark": {
"frames": 55,
"excessFrames": 0
}
}
],
"collectsItems": [
5
],
"flashSuitChecked": true,
"blueSuitChecked": true
},
{
"id": 38,
"link": [
1,
5
],
"name": "Cross Room Jump with Speedbooster",
"entranceCondition": {
"comeInRunning": {
"speedBooster": "yes",
"minTiles": 40
}
},
"requires": [
"h_speedJump",
"canInsaneJump",
"canLateralMidAirMorph",
"canCrossRoomJumpIntoWater",
"canMomentumConservingMorph"
],
"collectsItems": [
5
],
"flashSuitChecked": true,
"blueSuitChecked": true,
"note": [
"Needs near max horizontal speed coming from about 40 runway tiles in the adjacent room.",
"Jump after the transition.",
"Running longer on the short runway is more difficult at maximum speed, but will increase the success of the jump.",
"A crisp momentum conserving morph can also make up for a jump that is buffered through the door."
]
},
{
"id": 39,
"link": [
1,
5
],
"name": "Cross Room Jump with Speedbooster, Spring Ball",
"entranceCondition": {
"comeInJumping": {
"speedBooster": "yes",
"minTiles": 6.4375
}
},
"requires": [
"canLateralMidAirMorph",
{
"disableEquipment": "SpeedBooster"
},
"canCrossRoomJumpIntoWater",
"canSpringBallBounce",
{
"or": [
{
"enemyDamage": {
"enemy": "Puyo",
"type": "contact",
"hits": 1
}
},
"canInsaneJump",
{
"and": [
"Plasma",
"canTrickyJump"
]
},
"h_pauseAbuseMinimalReserveRefill"
]
}
],
"collectsItems": [
5
],
"flashSuitChecked": true,
"blueSuitChecked": true,
"note": [
"Needs a runway of 7 tiles with no open end in the adjacent room, to get enough height. This is a peak of height with speed booster, no hjb, while underwater.",
"Jump before the transition with SpeedBooster off and then SpeedBooster back on after reaching the ceiling and Morphing."
]
},
{
"id": 96,
"link": [
1,
5
],
"name": "Use Stored Spark",
"requires": [
"Morph",
"h_storedSpark",
{
"shinespark": {
"frames": 5,
"excessFrames": 2
}
}
],
"collectsItems": [
5
],
"flashSuitChecked": true,
"blueSuitChecked": true
},
{
"id": 40,
"link": [
1,
5
],
"name": "G-Mode Morph Direct",
"entranceCondition": {
"comeInWithGMode": {
"mode": "direct",
"morphed": true
}
},
"requires": [
{
  "or": [
    {
      "and": [
        "Gravity",
        "h_artificialMorphIBJ",
        "canDodgeWhileShooting"
      ]
    },
    {
      "and": [
        "h_artificialMorphSpringBall",
        {
          "or": [
            "Gravity",
            "HiJump"
          ]
        },
        {
          "or": [
            "canInsaneJump",
            {
              "and": [
                "Gravity",
                "canTrickyDodgeEnemies"
              ]
            },
            "h_artificialMorphBombThings",
            {
              "haveBlueSuit": {}
            },
            {
              "enemyDamage": {
                "enemy": "Puyo",
                "type": "contact",
                "hits": 1
              }
            }
          ]
        }
      ]
    }
  ]
}
],
"clearsObstacles": [
"B"
],
"collectsItems": [
5
],
"flashSuitChecked": true,
"blueSuitChecked": true,
"note": "Be careful not to touch or bomb the sand in order to grab the item before PLMs are overloaded."
},
{
"id": 41,
"link": [
1,
5
],
"name": "G-Mode Morph",
"entranceCondition": {
"comeInWithGMode": {
"mode": "any",
"morphed": true
}
},
"requires": [
{
  "or": [
    {
      "and": [
        "Gravity",
        "h_artificialMorphIBJ"
      ]
    },
    {
      "and": [
        "h_artificialMorphSpringBall",
        {
          "or": [
            "Gravity",
            "HiJump"
          ]
        },
        {
          "or": [
            "canInsaneJump",
            {
              "and": [
                "Gravity",
                "canTrickyDodgeEnemies"
              ]
            },
            "h_artificialMorphBombThings",
            {
              "haveBlueSuit": {}
            },
            {
              "enemyDamage": {
                "enemy": "Puyo",
                "type": "contact",
                "hits": 1
              }
            }
          ]
        }
      ]
    }
  ]
}
],
"collectsItems": [
5
],
"flashSuitChecked": true,
"blueSuitChecked": true
},
{
"id": 122,
"link": [
1,
5
],
"name": "G-Mode Morph Direct Bomb into Spring Ball Jump",
"entranceCondition": {
"comeInWithGMode": {
"mode": "direct",
"morphed": true
}
},
"requires": [
"h_artificialMorphUnderwaterBombIntoSpringBallJump",
"canTrickyGMode"
],
"clearsObstacles": [
"B"
],
"collectsItems": [
5
],
"flashSuitChecked": true,
"blueSuitChecked": true,
"note": [
"Use Bombs to kill the Puyos. Then gain speed by rolling from left to right.",
"Press pause and use Spring Ball to jump before the down slope,",
"on the last possible frame before the pause hits.",
"Unequip Spring Ball, hold right until Samus is about halfway to the morph tunnel,",
"lay a Bomb, then pause again, and perform a mid-air Spring Ball jump into the tunnel."
],
"detailNote": [
"The frame-perfect jump allows Samus to maintain much higher horizontal speed,",
"without which it is not possible to reach the morph tunnel."
]
},
{
"id": 123,
"link": [
1,
5
],
"name": "G-Mode Morph Bomb into Spring Ball Jump",
"entranceCondition": {
"comeInWithGMode": {
"mode": "any",
"morphed": true
}
},
"requires": [
"h_artificialMorphUnderwaterBombIntoSpringBallJump",
"canTrickyGMode"
],
"collectsItems": [
5
],
"flashSuitChecked": true,
"blueSuitChecked": true,
"note": [
"Use Bombs to kill the Puyos. Then gain speed by rolling from left to right.",
"Press pause and use Spring Ball to jump before the down slope,",
"on the last possible frame before the pause hits.",
"Unequip Spring Ball, hold right until Samus is about halfway to the morph tunnel,",
"lay a Bomb, then pause again, and perform a mid-air Spring Ball jump into the tunnel."
],
"detailNote": [
"The frame-perfect jump allows Samus to maintain much higher horizontal speed,",
"without which it is not possible to reach the morph tunnel."
]
},
{
"id": 42,
"link": [
1,
5
],
"name": "Puyo Bomb-Grapple-Jump",
"requires": [
{
"notable": "Puyo Bomb-Grapple-Jump"
},
"canSuitlessMaridia",
"canBombGrappleJump",
"h_underwaterCrouchJump"
],
"collectsItems": [
5
],
"flashSuitChecked": false,
"blueSuitChecked": true,
"note": [
"Lure a Puyo close to the sand and use it to Bomb-Grapple-Jump up to the Morph Ball maze.",
"It helps to predict the jump pattern of the enemy."
]
},
{
"id": 43,
"link": [
1,
5
],
"name": "Sand Grapple Boost",
"requires": [
{
"notable": "Sand Grapple Boost (Left to Right)"
},
"h_underwaterCrouchJumpDownGrab",
"canSandGrappleBoost",
"canInsaneJump",
"canMidAirMorph"
],
"collectsItems": [
5
],
"flashSuitChecked": true,
"blueSuitChecked": true,
"note": [
"Lure a Puyo close to the sand to use for a Sand Grapple Boost.",
"As it is close to entering the sand, land on the sand and crouch.",
"Very quickly after crouching shoot the grapple and jump.",
"As soon as the Puyo is killed aim down to escape the sand.",
"If the timings don't work out just right, too much height is lost to the sand.",
"Crouching in sand is also a high softlock risk."
]
},
{
"id": 44,
"link": [
1,
5
],
"name": "Sand Bomb Boost (Bomb)",
"requires": [
{
"notable": "Sand Bomb Boost (Left to Right)"
},
"canSandBombBoost",
"canInsaneJump",
{
"or": [
"can4HighMidAirMorph",
"canStationaryLateralMidAirMorph"
]
}
],
"collectsItems": [
5
],
"flashSuitChecked": true,
"blueSuitChecked": true,
"note": [
"Stand on the edge of the sand and place a Bomb;",
"unmorph (leaving Samus crouched), then press forward to enter the sand when the bomb flashes yellow for the second time.",
"Once the Bomb puts Samus into a jumping pose where Samus is suspended mid-air slightly above the sand, press jump;",
"then aim down precisely when the bomb begins to propel Samus upward.",
"Move right to press against the wall before mid-air morphing (alternatively, a stationary lateral morph can work).",
"There is a 2-frame window for when to enter the sand:",
"if Samus enters the sand too early, she will sink slightly too far, resulting in not quite enough height to reach the tunnel;",
"if Samus enters the sand too late, she will not get properly boosted by the Bomb explosion and will end up stuck in the sand.",
"There is an 8-frame window for when to press jump, as it can be buffered during the period that the bomb begins interacting with Samus:",
"if Samus jumps too early or late, she will get stuck in the sand.",
"The timing for the aim-down press is frame-perfect: it must be pressed on the first frame that Samus begins being propelled upward by the bomb.",
"if Samus aims down too early, she will get stuck in the sand;",
"if Samus aims down too late, she will not get enough height to reach the tunnel.",
"The timing for the jump is between 6 frames before or 1 frame after the down press.",
"The amount of time that Samus holds forward after entering the sand is unimportant, as long as it is released before the aim-down."
],
"devNote": [
"The timing window for when to press jump and when to aim-down is relative to the bomb explosion,",
"independent of each other and independent of when Samus enters the sand.",
"The timing for pressing forward (from a crouch) is 38 or 39 frames after laying the Bomb.",
"The timing for the jump is between 51 and 58 frames after laying the Bomb.",
"The timing for the aim-down press is 57 frames after laying the Bomb.",
"It is also possible to stand by pressing up before entering the sand (in which case forward would be pressed 37 or 38 frames after laying the Bomb);",
"this does not affect the size of the timing windows but introduces some more possibility for error,",
"e.g. by the up input being eaten if Samus is still in the unmorphing animation,",
"or by the forward input being not immediately processed if Samus is still in the standing animation."
]
},
{
"id": 100,
"link": [
1,
5
],
"name": "Sand Bomb Boost (Power Bomb)",
"requires": [
{
"notable": "Sand Bomb Boost (Left to Right)"
},
{
"tech": "canSandBombBoost"
},
"h_usePowerBomb",
"canInsaneJump",
{
"or": [
"can4HighMidAirMorph",
"canStationaryLateralMidAirMorph"
]
}
],
"collectsItems": [
5
],
"flashSuitChecked": false,
"blueSuitChecked": true,
"note": [
"Stand on the edge of the sand and place a Power Bomb;",
"unmorph (leaving Samus crouched), then wait a moment before pressing forward to enter the sand.",
"On the exact frame when the Power Bomb begins to propel Samus upward, press down, and press jump on the same frame or one frame later.",
"Move right to press against the wall before mid-air morphing (alternatively, a stationary lateral morph can work).",
"There is a 13-frame window for when to enter the sand:",
"if Samus enters the sand too early, she will sink slightly too far, resulting in not quite enough height to reach the tunnel;",
"if Samus enters the sand too late, she will not get properly boosted by the Power Bomb explosion and will end up stuck in the sand.",
"The timing for the aim-down press is frame-perfect: it must be pressed on the first frame that Samus begins being propelled upward by the Power Bomb.",
"if Samus aims down too early, she will get stuck in the sand;",
"if Samus aims down too late, she will not get enough height to reach the tunnel.",
"if Samus jumps too early or late, she will get stuck in the sand.",
"The amount of time that Samus holds forward when entering the sand should be between 2 and 11 frames."
],
"devNote": [
"The timing window for when to press jump and when to aim-down is relative to the Power Bomb explosion,",
"independent of each other and independent of when Samus enters the sand.",
"The timing for pressing forward (from a crouch) is between 27 and 39 frames after laying the Power Bomb.",
"The timing for the jump is between 56 and 57 frames after laying the Power Bomb.",
"The timing for the aim-down press is 56 frames after laying the Power Bomb.",
"It is also possible to stand by pressing up before entering the sand (in which case forward would be pressed 28 or 40 frames after laying the Power Bomb);",
"this does not affect the size of the timing windows but introduces some more possibility for error,",
"e.g. by the up input being eaten if Samus is still in the unmorphing animation,",
"or by the forward input being not immediately processed if Samus is still in the standing animation."
]
},
{
"id": 114,
"link": [
1,
6
],
"name": "G-Mode Overload PLMs, Speed Block X-Ray Climb",
"entranceCondition": {
"comeInWithGMode": {
"mode": "any",
"morphed": false
}
},
"requires": [
"canComplexGMode",
"canSuitlessMaridia",
{
"noBlueSuit": {}
},
"canGModeXRayClimb",
"Morph"
],
"flashSuitChecked": true,
"blueSuitChecked": true,
"note": [
"Overload PLMs by touching the sand, then move through the speed blocks. Avoiding the sand pits is easier without Gravity or HiJump.",
"Exit G-mode while inside the speed blocks then X-Ray climb up."
],
"devNote": "This requires canInsaneJump even though it is not difficult, because it is not very intuitive."
},
{
"id": 47,
"link": [
4,
1
],
"name": "Speed Blocks Already Broken With Gravity",
"requires": [
"Gravity",
{
"or": [
"canPlayInSand",
"SpaceJump",
"h_useSpringBall"
]
},
{
"obstaclesCleared": [
"A"
]
}
],
"flashSuitChecked": true,
"blueSuitChecked": true
},
{
"id": 48,
"link": [
4,
1
],
"name": "Speed Blocks Already Broken Suitless",
"requires": [
"canSuitlessMaridia",
"HiJump",
{
"or": [
"h_useSpringBall",
"canPlayInSand"
]
},
{
"obstaclesCleared": [
"A"
]
}
],
"flashSuitChecked": true,
"blueSuitChecked": true
},
{
"id": 130,
"link": [
4,
1
],
"name": "Blue Suit",
"requires": [
{
  "haveBlueSuit": {}
}
],
"clearsObstacles": [
"A"
],
"flashSuitChecked": true,
"blueSuitChecked": true,
"note": "To keep a blue suit, simply walk across the sand, without jumping on it or sinking into it."
},
{
"id": 49,
"link": [
4,
1
],
"name": "Blue Speed",
"requires": [
"Gravity",
{
"or": [
{
"getBlueSpeed": {
"usedTiles": 22,
"gentleDownTiles": 4,
"openEnd": 0
}
},
{
"and": [
{
"getBlueSpeed": {
"usedTiles": 23,
"gentleDownTiles": 4,
"openEnd": 0
}
},
{
"doorUnlockedAtNode": 4
}
]
}
]
}
],
"unlocksDoors": [
{
"nodeId": 4,
"types": [
"ammo"
],
"requires": []
}
],
"clearsObstacles": [
"A"
],
"flashSuitChecked": true,
"blueSuitChecked": true
},
{
"id": 50,
"link": [
4,
1
],
"name": "Run Through",
"entranceCondition": {
"comeInGettingBlueSpeed": {
"length": 22,
"openEnd": 1,
"gentleDownTiles": 4
}
},
"requires": [
"Gravity"
],
"clearsObstacles": [
"A"
],
"flashSuitChecked": true,
"blueSuitChecked": true
},
{
"id": 51,
"link": [
4,
1
],
"name": "Shinespark",
"entranceCondition": {
"comeInShinecharged": {}
},
"requires": [
{
  "shineChargeFrames": 55
},
"Gravity",
"canHorizontalShinespark",
{
"shinespark": {
"frames": 115,
"excessFrames": 12
}
}
],
"clearsObstacles": [
"A"
],
"flashSuitChecked": true,
"blueSuitChecked": true
},
{
"id": 52,
"link": [
4,
1
],
"name": "Suitless Shinespark",
"entranceCondition": {
"comeInShinecharged": {}
},
"requires": [
{
"shineChargeFrames": 135
},
"canSuitlessMaridia",
"canHorizontalShinespark",
"canShinechargeMovement",
{
"shinespark": {
"frames": 148,
"excessFrames": 15
}
}
],
"clearsObstacles": [
"A"
],
"flashSuitChecked": true,
"blueSuitChecked": true,
"note": "Coming in with zero momentum, all it takes is one non-HiJump full height jump forward, then activate."
},
{
"id": 116,
"link": [
4,
1
],
"name": "Suitless Water Shinecharge, Leave Shinecharged",
"entranceCondition": {
"comeInShinecharging": {
"length": 6,
"openEnd": 1
}
},
"requires": [
"canWaterShineCharge",
{
"shineChargeFrames": 55
}
],
"exitCondition": {
"leaveShinecharged": {}
},
"unlocksDoors": [
{
"types": [
"super"
],
"requires": []
},
{
"types": [
"missiles",
"powerbomb"
],
"requires": [
"never"
]
}
],
"flashSuitChecked": true,
"blueSuitChecked": true,
"devNote": [
"This is just a rough estimate of the minimum number of tiles that this runway can represent.",
"It is designed for a skill level that won't be able to use canStutterWaterShineCharge."
]
},
{
"id": 117,
"link": [
4,
1
],
"name": "Suitless Stutter Water Shinecharge, Leave Shinecharged",
"entranceCondition": {
"comeInStutterShinecharging": {
"minTiles": 2
}
},
"requires": [
{
"shineChargeFrames": 55
}
],
"exitCondition": {
"leaveShinecharged": {}
},
"unlocksDoors": [
{
"types": [
"super"
],
"requires": []
},
{
"types": [
"missiles",
"powerbomb"
],
"requires": [
"never"
]
}
],
"flashSuitChecked": true,
"blueSuitChecked": true
},
{
"id": 118,
"link": [
4,
1
],
"name": "Precise Suitless Stutter Water Shinecharge, Leave Shinecharged",
"entranceCondition": {
"comeInStutterShinecharging": {
"minTiles": 1
}
},
"requires": [
"canPreciseStutterWaterShineCharge",
{
"shineChargeFrames": 55
}
],
"exitCondition": {
"leaveShinecharged": {}
},
"unlocksDoors": [
{
"types": [
"super"
],
"requires": []
},
{
"types": [
"missiles",
"powerbomb"
],
"requires": [
"never"
]
}
],
"flashSuitChecked": true,
"blueSuitChecked": true,
"note": [
"With only 1 tile of runway, this requires releasing forward for 1 or 2 frames",
"and repressing forward on the last possible frame."
]
},
{
"id": 60,
"link": [
4,
1
],
"name": "G-Mode Overload PLMs",
"entranceCondition": {
"comeInWithGMode": {
"mode": "any",
"morphed": true
}
},
"requires": [
{
  "or": [
    "canTrickyJump",
    {
      "and": [
        "Gravity",
        "SpaceJump"
      ]
    }
  ]
}
],
"flashSuitChecked": true,
"blueSuitChecked": true,
"note": [
"Overload PLMs by touching the sand, then move through the speed blocks.",
"Shoot the Puyo while crouching to increase accuracy.",
"Avoiding the right pit is much easier without Gravity or HiJump.",
"Standing on the edge and spin jumping to the left is much easier than a running jump.",
"While on the left side of this platform, the Puyo to the left will start moving; carefully kill it."
]
},
{
"id": 61,
"link": [
4,
1
],
"name": "Grapple Teleport",
"entranceCondition": {
"comeInWithGrappleTeleport": {
"blockPositions": [
[
7,
2
]
]
}
},
"requires": [],
"flashSuitChecked": true,
"blueSuitChecked": true
},
{
"id": 120,
"link": [
4,
1
],
"name": "Grapple Teleport Door Escape",
"entranceCondition": {
"comeInWithGrappleTeleport": {
"blockPositions": [
[
3,
12
],
[
3,
13
]
]
}
},
"requires": [
{
  "or": [
    "canGrappleTeleportWallEscape",
    {
      "doorUnlockedAtNode": 1
    }
  ]
}
],
"unlocksDoors": [
{
"types": [
"ammo"
],
"requires": []
}
],
"flashSuitChecked": true,
"blueSuitChecked": true
},
{
"id": 62,
"link": [
4,
1
],
"name": "Grapple Teleport Door Lock Skip",
"entranceCondition": {
"comeInWithGrappleTeleport": {
"blockPositions": [
[
3,
12
],
[
3,
13
]
]
}
},
"requires": [],
"bypassesDoorShell": "yes",
"flashSuitChecked": true,
"blueSuitChecked": true
},
{
"id": 63,
"link": [
4,
1
],
"name": "Carry Grapple Teleport (Top Position)",
"entranceCondition": {
"comeInWithGrappleTeleport": {
"blockPositions": [
[
3,
12
]
]
}
},
"requires": [],
"exitCondition": {
"leaveWithGrappleTeleport": {
"blockPositions": [
[
3,
12
]
]
}
},
"bypassesDoorShell": "yes",
"flashSuitChecked": true,
"blueSuitChecked": true
},
{
"id": 64,
"link": [
4,
1
],
"name": "Carry Grapple Teleport (Bottom Position)",
"entranceCondition": {
"comeInWithGrappleTeleport": {
"blockPositions": [
[
3,
13
]
]
}
},
"requires": [],
"exitCondition": {
"leaveWithGrappleTeleport": {
"blockPositions": [
[
3,
13
]
]
}
},
"bypassesDoorShell": "yes",
"flashSuitChecked": true,
"blueSuitChecked": true
},
{
"id": 97,
"link": [
4,
1
],
"name": "Use Flash Suit",
"requires": [
{
"useFlashSuit": {}
},
{
"or": [
{
"shinespark": {
"frames": 120,
"excessFrames": 20
}
},
{
"and": [
"Gravity",
{
"shinespark": {
"frames": 94,
"excessFrames": 15
}
}
]
},
{
"and": [
"Gravity",
{
"shinespark": {
"frames": 94,
"excessFrames": 53
}
},
{
"or": [
{
"enemyDamage": {
"enemy": "Puyo",
"type": "contact",
"hits": 1
}
},
"h_pauseAbuseMinimalReserveRefill"
]
}
]
}
]
}
],
"clearsObstacles": [
"A"
],
"flashSuitChecked": true,
"blueSuitChecked": true,
"note": "It is important not to crouch before sparking, as the ceiling blocks are weird and will prevent the spark.",
"devNote": [
"Suitless with a reserve could use pause abuse, however, Samus can just refill, spark across, and then go back and refill.",
"There are many ranges of Energy that could be used to spark through without a Puyo hit, but that is not considered, as Samus can just go back and refill."
]
},
{
"id": 99,
"link": [
4,
1
],
"name": "Use Flash Suit, Low Energy or Tankless",
"requires": [
{
"useFlashSuit": {}
},
"canControlShinesparkEnd",
{
"shinespark": {
"frames": 120,
"excessFrames": 71
}
},
"canPlayInSand"
],
"clearsObstacles": [
"A"
],
"flashSuitChecked": true,
"blueSuitChecked": true,
"note": [
"Shinespark to the left with less than full Energy in order to prevent getting killed by a Puyo at the end of the spark.",
"Sparking while next to the speed blocks requires Samus to be suitless with between 78 and 93 Energy. (With Gravity, she can tank a hit and return to the farm.)",
"It is important not to crouch before sparking, as the ceiling blocks are weird and will prevent the spark.",
"Alternatively, with 99 Energy spark near the quicksand."
]
},
{
"id": 65,
"link": [
4,
2
],
"name": "G-Mode",
"entranceCondition": {
"comeInWithGMode": {
"mode": "any",
"morphed": false
}
},
"requires": [
{
  "or": [
    "canTrickyJump",
    {
      "and": [
        "Gravity",
        "SpaceJump"
      ]
    }
  ]
}
],
"exitCondition": {
"leaveWithGMode": {
"morphed": false
}
},
"flashSuitChecked": true,
"blueSuitChecked": true,
"note": [
"Overload PLMs by touching the sand, then move through the speed blocks.",
"Shoot the Puyo while crouching to increase accuracy.",
"Avoiding the right pit is much easier without Gravity or HiJump.",
"Standing on the edge and spin jumping to the left is much easier than a running jump.",
"While on the left side of this platform, the Puyo to the left will start moving; carefully kill or dodge it."
]
},
{
"id": 66,
"link": [
4,
2
],
"name": "G-Mode Morph",
"entranceCondition": {
"comeInWithGMode": {
"mode": "any",
"morphed": true
}
},
"requires": [
{
  "or": [
    {
      "and": [
        "h_artificialMorphSpringBall",
        {
          "or": [
            "Gravity",
            "HiJump"
          ]
        }
      ]
    },
    {
      "and": [
        "Gravity",
        "h_artificialMorphIBJ"
      ]
    },
    {
      "and": [
        "h_artificialMorphSpringBall",
        {
          "or": [
            "canTrickyJump",
            "h_artificialMorphBombThings"
          ]
        }
      ]
    }
  ]
}
],
"exitCondition": {
"leaveWithGMode": {
"morphed": true
}
},
"flashSuitChecked": true,
"blueSuitChecked": true,
"note": [
"With Gravity, or Spring Ball and HiJump, it is easiest to go through the Morph maze at the top of the room and fall into the the sand.",
"Otherwise, the overload PLMs by touching the sand, or by bombing the speed blocks, to be able to go through to the left.",
"Killing the Zoas with Bombs or Power Bombs will prevent them from respawning, although it is possible but tricky to dodge them with just Spring Ball."
]
},
{
"id": 67,
"link": [
4,
3
],
"name": "G-Mode",
"entranceCondition": {
"comeInWithGMode": {
"mode": "any",
"morphed": false
}
},
"requires": [],
"exitCondition": {
"leaveWithGMode": {
"morphed": false
}
},
"flashSuitChecked": true,
"blueSuitChecked": true,
"note": [
"Overload PLMs by touching the sand, then move through the speed blocks.",
"Shoot the Puyo while crouching to increase accuracy."
]
},
{
"id": 68,
"link": [
4,
3
],
"name": "G-Mode Morph",
"entranceCondition": {
"comeInWithGMode": {
"mode": "any",
"morphed": true
}
},
"requires": [
{
  "or": [
    {
      "and": [
        "h_artificialMorphSpringBall",
        {
          "or": [
            "Gravity",
            "HiJump"
          ]
        }
      ]
    },
    {
      "and": [
        "Gravity",
        "h_artificialMorphIBJ"
      ]
    },
    {
      "and": [
        "h_artificialMorphSpringBall",
        {
          "or": [
            "canTrickyJump",
            "h_artificialMorphBombThings"
          ]
        }
      ]
    }
  ]
}
],
"exitCondition": {
"leaveWithGMode": {
"morphed": true
}
},
"flashSuitChecked": true,
"blueSuitChecked": true,
"note": [
"With Gravity, or Spring Ball and HiJump, it is easiest to go through the Morph maze at the top of the room and fall into the the sand.",
"Otherwise, the overload PLMs by touching the sand, or by bombing the speed blocks, to be able to go through to the left.",
"Killing the Zoas with Bombs or Power Bombs will prevent them from respawning, although it is possible but tricky to dodge them with just Spring Ball."
]
},
{
"id": 128,
"link": [
4,
4
],
"name": "Gain Flash Suit (Zoa R-Mode Knockback Spark)",
"entranceCondition": {
"comeInWithRMode": {}
},
"requires": [
"Gravity",
{
"or": [
{
"disableEquipment": "ETank"
},
"canBePatient"
]
},
{
"canShineCharge": {
"usedTiles": 23,
"gentleUpTiles": 4,
"openEnd": 1
}
},
"h_RModeKnockbackSpark"
],
"flashSuitChecked": true,
"blueSuitChecked": true
},
{
"id": 124,
"link": [
4,
4
],
"name": "R-Mode Spark Interrupt (Gain Blue Suit)",
"entranceCondition": {
"comeInWithRMode": {}
},
"requires": [
"Gravity",
{
"refill": [
"Energy"
]
},
{
"or": [
{
"and": [
"canSuitlessMaridia",
"canMidAirMorph",
{
"disableEquipment": "Gravity"
}
]
},
{
"canShineCharge": {
"usedTiles": 23,
"gentleUpTiles": 4,
"openEnd": 1
}
}
]
},
"h_shinechargeMaxRunway",
{
"autoReserveTrigger": {}
},
"canRModeSparkInterrupt"
],
"clearsObstacles": [
"A"
],
"flashSuitChecked": true,
"blueSuitChecked": true,
"note": [
"Fill up with the Zoas. Shinecharge near the Zoa pit - or cross the Morph tunnel and",
"use the full-length runway there, then get interrupted by a Zoa."
]
},
{
"id": 69,
"link": [
4,
4
],
"name": "Leave with Runway",
"requires": [],
"exitCondition": {
"leaveWithRunway": {
"length": 23,
"openEnd": 1,
"gentleUpTiles": 4
}
},
"flashSuitChecked": true,
"blueSuitChecked": true
},
{
"id": 70,
"link": [
4,
4
],
"name": "Stutter Water Shinecharge, Leave With Spark",
"entranceCondition": {
"comeInStutterShinecharging": {
"minTiles": 2
}
},
"requires": [
"canStutterWaterShineCharge",
"canShinechargeMovementComplex",
{
"or": [
{
"shinespark": {
"frames": 12,
"excessFrames": 0
}
},
{
"and": [
"canShinechargeMovementTricky",
{
"shinespark": {
"frames": 3,
"excessFrames": 0
}
}
]
}
]
}
],
"exitCondition": {
"leaveWithSpark": {}
},
"unlocksDoors": [
{
"types": [
"missiles",
"super"
],
"requires": []
},
{
"types": [
"powerbomb"
],
"requires": [
"never"
]
}
],
"flashSuitChecked": true,
"blueSuitChecked": true
},
{
"id": 102,
"link": [
4,
4
],
"name": "Precise Stutter Water Shinecharge, Leave With Spark",
"entranceCondition": {
"comeInStutterShinecharging": {
"minTiles": 1
}
},
"requires": [
"canPreciseStutterWaterShineCharge",
"canShinechargeMovementTricky",
{
"shinespark": {
"frames": 15,
"excessFrames": 0
}
}
],
"exitCondition": {
"leaveWithSpark": {}
},
"unlocksDoors": [
{
"types": [
"missiles",
"super"
],
"requires": []
},
{
"types": [
"powerbomb"
],
"requires": [
"never"
]
}
],
"flashSuitChecked": true,
"blueSuitChecked": true
},
{
"id": 103,
"link": [
4,
4
],
"name": "Precise Stutter Shinecharge, Leave Shinecharged (5-tile runway)",
"entranceCondition": {
"comeInStutterShinecharging": {
"minTiles": 5
}
},
"requires": [
"canPreciseStutterWaterShineCharge",
"canShinechargeMovementTricky",
"canInsaneJump",
{
"shineChargeFrames": 130
},
{
"or": [
"canBeVeryPatient",
{
"shineChargeFrames": 15
}
]
}
],
"exitCondition": {
"leaveShinecharged": {}
},
"unlocksDoors": [
{
"types": [
"super"
],
"requires": []
},
{
"types": [
"missiles",
"powerbomb"
],
"requires": [
"never"
]
}
],
"flashSuitChecked": true,
"blueSuitChecked": true,
"note": [
"With a runway of 5 tiles (open end) in the other room,",
"the ideal timing for the stutter is to release forward for 5 frames, and repress forward on the last possible frame before the transition.",
"Other timings can work, but will gain the shinecharge further from the door, leaving fewer shinecharge frames remaining.",
"After gaining the shinecharge, continue holding forward in order to make Samus stand.",
"Then turnaround spin jump back toward the door, and continue spin jumping to reach the transition with a shinecharge."
]
},
{
"id": 104,
"link": [
4,
4
],
"name": "Precise Stutter Shinecharge, Leave Shinecharged (4-tile runway)",
"entranceCondition": {
"comeInStutterShinecharging": {
"minTiles": 4
}
},
"requires": [
"canPreciseStutterWaterShineCharge",
"canShinechargeMovementTricky",
"canInsaneJump",
{
"shineChargeFrames": 140
},
{
"or": [
"canBeVeryPatient",
{
"shineChargeFrames": 10
}
]
}
],
"exitCondition": {
"leaveShinecharged": {}
},
"unlocksDoors": [
{
"types": [
"super"
],
"requires": []
},
{
"types": [
"missiles",
"powerbomb"
],
"requires": [
"never"
]
}
],
"flashSuitChecked": true,
"blueSuitChecked": true,
"note": [
"With only a runway of 4 tiles (open end) in the other room,",
"the ideal timing for the stutter is to release forward for 4 frames, and repress forward on the last possible frame before the transition.",
"It also works well to release forward for 3 frames and repress on the last possible frame.",
"Other timings can also work, but may gain the shinecharge further from the door, leaving fewer shinecharge frames remaining.",
"After gaining the shinecharge, continue holding forward in order to make Samus stand.",
"Then turnaround spin jump back toward the door, and continue spin jumping to reach the transition with a shinecharge."
]
},
{
"id": 105,
"link": [
4,
4
],
"name": "Precise Stutter Shinecharge, Leave Shinecharged (3-tile runway)",
"entranceCondition": {
"comeInStutterShinecharging": {
"minTiles": 3
}
},
"requires": [
"canPreciseStutterWaterShineCharge",
"canShinechargeMovementTricky",
"canInsaneJump",
{
"shineChargeFrames": 145
},
{
"or": [
"canBeVeryPatient",
{
"shineChargeFrames": 10
}
]
}
],
"exitCondition": {
"leaveShinecharged": {}
},
"unlocksDoors": [
{
"types": [
"super"
],
"requires": []
},
{
"types": [
"missiles",
"powerbomb"
],
"requires": [
"never"
]
}
],
"flashSuitChecked": true,
"blueSuitChecked": true,
"note": [
"With only a runway of 3 tiles (open end) in the other room,",
"the ideal timing for the stutter is to release forward for 3 or 4 frames, and repress forward on the last possible frame before the transition.",
"Other timings can work, but will gain the shinecharge further from the door, leaving fewer shinecharge frames remaining.",
"After gaining the shinecharge, continue holding forward in order to make Samus stand.",
"Then turnaround spin jump back toward the door, and continue spin jumping to reach the transition with a shinecharge.",
"Alternatively, with greater difficulty but saving some shinecharge frames,",
"after performing the turnaround spin jump, briefly moonwalk back, then retain momentum by boomeranging forward",
"(switching from pressing backward to pressing forward on the next frame),",
"and arm pump to reach the door quickly."
],
"devNote": [
"The same shinecharge frames could be achieved with a closed end runway (effective length of 2.4375),",
"with a 3-frame stutter, but there doesn't appear to be any application."
]
},
{
"id": 106,
"link": [
4,
4
],
"name": "Precise Stutter Shinecharge, Leave Shinecharged (2-tile runway)",
"entranceCondition": {
"comeInStutterShinecharging": {
"minTiles": 2
}
},
"requires": [
"canPreciseStutterWaterShineCharge",
"canShinechargeMovementTricky",
"canInsaneJump",
{
"shineChargeFrames": 150
},
{
"or": [
"canBeVeryPatient",
{
"shineChargeFrames": 15
}
]
}
],
"exitCondition": {
"leaveShinecharged": {}
},
"unlocksDoors": [
{
"types": [
"super"
],
"requires": []
},
{
"types": [
"missiles",
"powerbomb"
],
"requires": [
"never"
]
}
],
"flashSuitChecked": true,
"blueSuitChecked": true,
"note": [
"With only a runway of 2 tiles (open end) in the other room,",
"the ideal timing for the stutter is to release forward for 3 frames, and repress forward on the last possible frame before the transition.",
"Other timings can work, but will gain the shinecharge further from the door, leaving fewer shinecharge frames remaining.",
"After gaining the shinecharge, continue holding forward in order to make Samus stand.",
"Then turnaround spin jump back toward the door, and continue spin jumping to reach the transition with a shinecharge.",
"Alternatively, with greater difficulty but saving some shinecharge frames,",
"after performing the turnaround spin jump, briefly moonwalk back, then retain momentum by boomeranging forward",
"(switching from pressing backward to pressing forward on the next frame),",
"and arm pump to reach the door quickly."
],
"devNote": [
"FIXME: The canBeVeryPatient requirement is for difficulty placement of the boomerang method;",
"but the boomerang (or maybe specifically the moonwalk boomerang) should possibly be its own tech,",
"and the same with rapid arm pumping."
]
},
{
"id": 107,
"link": [
4,
4
],
"name": "Precise Stutter Shinecharge, Leave Shinecharged (1-tile runway)",
"entranceCondition": {
"comeInStutterShinecharging": {
"minTiles": 1
}
},
"requires": [
"canPreciseStutterWaterShineCharge",
"canInsaneJump",
"canBeVeryPatient",
"canShinechargeMovementTricky",
{
"shineChargeFrames": 160
}
],
"exitCondition": {
"leaveShinecharged": {}
},
"unlocksDoors": [
{
"types": [
"super"
],
"requires": []
},
{
"types": [
"missiles",
"powerbomb"
],
"requires": [
"never"
]
}
],
"flashSuitChecked": true,
"blueSuitChecked": true,
"note": [
"With only 1 tile of runway in the other room, Samus should ideally start on the last pixel of runway with X subpixels of $3FFF or less.",
"Run toward the door, releasing forward for exactly 1 frame and pressing it again on the last possible frame before the transition.",
"Starting with X subpixels of $7FFF can also work (e.g., by simply backing against the door ledge, then jumping and turning around mid-air);",
"in this case, Samus must advance 1 or 2 pixels with an arm pump before the transition (e.g., firing a shot or pressing and/or releasing an angle button),",
"and the shinecharge will be gained slightly further away from the door.",
"After gaining the shinecharge, continue holding forward in order to make Samus stand.",
"Then turnaround spin jump back toward the door, and continue spin jumping to reach the transition with a shinecharge.",
"Alternatively, with greater difficulty but saving some shinecharge frames,",
"after performing the turnaround spin jump, briefly moonwalk back, then retain momentum by boomeranging forward",
"(switching from pressing backward to pressing forward on the next frame),",
"and arm pump to reach the door quickly."
],
"detailNote": [
"Ideal subpixels ($3FFF) can be achieved using one of several methods:",
"1) press forward against the door ledge (or a wall aligned with it);",
"jump, and while mid-air, tap forward for exactly 1 frame to land with subpixels $BFFF,",
"moonwalk back for exactly 1 frame to end with subpixels $3FFF.",
"2) press forward against the door ledge (from a platform below, assuming one exists)",
"turn around (while on the ground), and moonwalk back two pixels,",
"then jump and mid-air turnaround onto the ledge;",
"if Samus jumped from the correct pixel but does not land on the ledge, then it was needed to moonwalk back 1 more frame;",
"in this case it is possible to retry by doing a mid-air turnaround back onto the platform, and moonwalking back for 1 frame.",
"3) if X-Ray is available, press against the door ledge (from a platform below, assuming one exists)",
"turn around (while on the ground), then jump and mid-air turnaround toward the door,",
"and use X-Ray to turnaround in place away from the door;",
"repeat this sequence 3 more times: jump, mid-air turnaround, X-Ray turnaround;",
"then do one more jump and mid-air turnaround, high enough to land on the door ledge,",
"and Samus should be in the correct position with subpixels $3FFF."
]
},
{
"id": 71,
"link": [
4,
4
],
"name": "Zoa Farm",
"requires": [
{
  "or": [
    {
      "and": [
        "Gravity",
        {
          "or": [
            {
              "and": [
                "Grapple",
                {
                  "simpleCycleFrames": 105
                },
                {
                  "cycleFrames": 20
                }
              ]
            },
            {
              "and": [
                {
                  "or": [
                    "Plasma",
                    "Wave",
                    "Spazer"
                  ]
                },
                {
                  "simpleCycleFrames": 115
                },
                {
                  "cycleFrames": 20
                }
              ]
            },
            {
              "and": [
                {
                  "simpleCycleFrames": 115
                },
                {
                  "cycleFrames": 30
                }
              ]
            }
          ]
        }
      ]
    },
    {
      "and": [
        "Grapple",
        {
          "simpleCycleFrames": 115
        },
        {
          "cycleFrames": 20
        }
      ]
    },
    {
      "and": [
        {
          "or": [
            "Plasma",
            "Wave",
            "Spazer"
          ]
        },
        {
          "cycleFrames": 235
        }
      ]
    },
    {
      "cycleFrames": 275
    }
  ]
}
],
"farmCycleDrops": [
{
"enemy": "Zoa",
"count": 5
}
],
"flashSuitChecked": true,
"blueSuitChecked": true
},
{
"id": 132,
"link": [
4,
4
],
"name": "Precise Stutter Water Shinecharge, Crystal Spark",
"entranceCondition": {
"comeInStutterShinecharging": {
"minTiles": 1
},
"comesInHeated": "no"
},
"requires": [
"canPreciseStutterWaterShineCharge",
"h_underwaterCrystalSpark"
],
"flashSuitChecked": true,
"blueSuitChecked": true,
"note": [
"With only 1 tile of runway, this requires releasing forward for 1 or 2 frames",
"and repressing forward on the last possible frame."
]
},
{
"id": 72,
"link": [
4,
4
],
"name": "G-Mode Setup - Get Hit By Zoa",
"requires": [],
"exitCondition": {
"leaveWithGModeSetup": {}
},
"flashSuitChecked": true,
"blueSuitChecked": true,
"note": [
"Lure the Zoas. Jump so that they start moving horizontally while higher, use spin jumps to move horizontally faster while keeping them on screen."
]
},
{
"id": 73,
"link": [
4,
5
],
"name": "G-Mode Morph Direct",
"entranceCondition": {
"comeInWithGMode": {
"mode": "direct",
"morphed": true
}
},
"requires": [
{
  "or": [
    {
      "and": [
        "Gravity",
        "h_artificialMorphIBJ"
      ]
    },
    {
      "and": [
        "h_artificialMorphSpringBall",
        {
          "or": [
            "Gravity",
            "HiJump"
          ]
        }
      ]
    }
  ]
}
],
"clearsObstacles": [
"B"
],
"collectsItems": [
5
],
"flashSuitChecked": true,
"blueSuitChecked": true,
"note": [
"Be careful not to touch or bomb the sand in order to grab the item before PLMs are overloaded.",
"With bombs, kill the Zoas and they will stop spawning."
]
},
{
"id": 74,
"link": [
4,
5
],
"name": "G-Mode Morph",
"entranceCondition": {
"comeInWithGMode": {
"mode": "any",
"morphed": true
}
},
"requires": [
{
  "or": [
    {
      "and": [
        "Gravity",
        "h_artificialMorphIBJ"
      ]
    },
    {
      "and": [
        "h_artificialMorphSpringBall",
        {
          "or": [
            "Gravity",
            "HiJump"
          ]
        }
      ]
    }
  ]
}
],
"collectsItems": [
5
],
"flashSuitChecked": true,
"blueSuitChecked": true,
"note": "With bombs, kill the Zoas and they will stop spawning."
},
{
"id": 125,
"link": [
4,
5
],
"name": "G-Mode Morph Direct Bomb into Spring Ball Jump",
"entranceCondition": {
"comeInWithGMode": {
"mode": "direct",
"morphed": true
}
},
"requires": [
"h_artificialMorphUnderwaterBombIntoSpringBallJump",
"canInsaneJump"
],
"clearsObstacles": [
"B"
],
"collectsItems": [
5
],
"flashSuitChecked": true,
"blueSuitChecked": true,
"note": [
"Use Bombs to kill the Zoas. Then gain speed by rolling from right to left.",
"Press pause and use Spring Ball to jump near the start of the down slope.",
"Unequip Spring Ball, hold left until Samus is about halfway to the morph tunnel,",
"lay a Bomb, then pause again, and perform a mid-air Spring Ball jump into the tunnel."
]
},
{
"id": 126,
"link": [
4,
5
],
"name": "G-Mode Morph Bomb into Spring Ball Jump",
"entranceCondition": {
"comeInWithGMode": {
"mode": "any",
"morphed": true
}
},
"requires": [
"h_artificialMorphUnderwaterBombIntoSpringBallJump",
"canInsaneJump"
],
"collectsItems": [
5
],
"flashSuitChecked": true,
"blueSuitChecked": true,
"note": [
"Use Bombs to kill the Zoas. Then gain speed by rolling from right to left.",
"Press pause and use Spring Ball to jump near the start of the down slope.",
"Unequip Spring Ball, hold left until Samus is about halfway to the morph tunnel,",
"lay a Bomb, then pause again, and perform a mid-air Spring Ball jump into the tunnel."
]
},
{
"id": 75,
"link": [
4,
6
],
"name": "Base",
"requires": [
"Gravity"
],
"flashSuitChecked": true,
"blueSuitChecked": true
},
{
"id": 76,
"link": [
4,
6
],
"name": "Suitless Jump Assist",
"requires": [
"canSuitlessMaridia",
{
"or": [
"canSpringBallJumpMidAir",
"HiJump"
]
}
],
"flashSuitChecked": true,
"blueSuitChecked": true
},
{
"id": 77,
"link": [
4,
6
],
"name": "Suitless Frozen Zoa",
"requires": [
"canSuitlessMaridia",
"canUseFrozenEnemies"
],
"flashSuitChecked": true,
"blueSuitChecked": true
},
{
"id": 78,
"link": [
4,
6
],
"name": "Suitless Water Shinecharge",
"entranceCondition": {
"comeInShinecharging": {
"length": 6,
"openEnd": 1
}
},
"requires": [
"Morph",
"canWaterShineCharge",
{
"or": [
{
"shinespark": {
"frames": 8,
"excessFrames": 2
}
},
{
"and": [
"canMidairShinespark",
{
"shinespark": {
"frames": 5,
"excessFrames": 2
}
}
]
}
]
}
],
"flashSuitChecked": true,
"blueSuitChecked": true,
"note": "Shinespark diagonally over the zoa pit or run through the speed blocks and shinespark after turning around.",
"devNote": [
"This is just a rough estimate of the minimum number of tiles that this runway can represent.",
"It is designed for a skill level that won't be able to use canStutterWaterShineCharge."
]
},
{
"id": 79,
"link": [
4,
6
],
"name": "Stutter Water Shinecharge",
"entranceCondition": {
"comeInStutterShinecharging": {
"minTiles": 2
}
},
"requires": [
"Morph",
"canStutterWaterShineCharge",
{
"or": [
{
"shinespark": {
"frames": 8,
"excessFrames": 2
}
},
{
"and": [
"canMidairShinespark",
{
"shinespark": {
"frames": 5,
"excessFrames": 2
}
}
]
}
]
}
],
"flashSuitChecked": true,
"blueSuitChecked": true,
"note": "Shinespark diagonally over the zoa pit or run through the speed blocks and shinespark after turning around."
},
{
"id": 108,
"link": [
4,
6
],
"name": "Precise Stutter Water Shinecharge",
"entranceCondition": {
"comeInStutterShinecharging": {
"minTiles": 1
}
},
"requires": [
"Morph",
"canPreciseStutterWaterShineCharge",
{
"or": [
{
"shinespark": {
"frames": 8,
"excessFrames": 2
}
},
{
"and": [
"canMidairShinespark",
{
"shinespark": {
"frames": 5,
"excessFrames": 2
}
}
]
}
]
}
],
"flashSuitChecked": true,
"blueSuitChecked": true,
"note": "Shinespark diagonally over the zoa pit or run through the speed blocks and shinespark after turning around."
},
{
"id": 80,
"link": [
4,
6
],
"name": "Cross Room Jump Shinespark",
"entranceCondition": {
"comeInShinechargedJumping": {}
},
"requires": [
{
"shineChargeFrames": 20
},
"Morph",
"canCrossRoomJumpIntoWater",
"canHorizontalMidairShinespark",
{
"shinespark": {
"frames": 46,
"excessFrames": 3
}
}
],
"flashSuitChecked": true,
"blueSuitChecked": true
},
{
"id": 81,
"link": [
4,
6
],
"name": "Speedy Jump",
"entranceCondition": {
"comeInRunning": {
"speedBooster": "yes",
"minTiles": 6.4375
}
},
"requires": [
"canSpeedyJump",
"canCrossRoomJumpIntoWater"
],
"flashSuitChecked": true,
"blueSuitChecked": true,
"note": [
"If using at least 8 tiles of runway, jump before going down the first slope.",
"If using 7 tiles of runway, Samus will get a higher jump; in this case, jump later, after going down the first slope"
],
"devNote": [
"We don't require 'canTrickyDashJump' here, since any speed of at least $2.0 works;",
"a different jump timing is needed for run speed between $2.0 and $2.3 compared to higher speeds,",
"but there is a very large window in both cases, making it not difficult for the player to find a timing that works."
]
},
{
"id": 82,
"link": [
4,
6
],
"name": "Cross Room Space Jump Airball",
"entranceCondition": {
"comeInSpaceJumping": {
"speedBooster": "yes",
"minTiles": 22
}
},
"requires": [
"canMomentumConservingMorph"
],
"flashSuitChecked": true,
"blueSuitChecked": true,
"devNote": [
"With high enough speed this could be done without morphing, but it would be more difficult, and Morph is needed to get through the maze anyway."
]
},
{
"id": 83,
"link": [
4,
6
],
"name": "Bomb Grapple Jump",
"requires": [
"canSuitlessMaridia",
"h_underwaterCrouchJumpDownGrab",
"canBombGrappleJump"
],
"flashSuitChecked": false,
"blueSuitChecked": true,
"note": "Use the respawning Zoas to double jump up to the Morph Ball maze."
},
{
"id": 84,
"link": [
4,
6
],
"name": "Sand Grapple Boost",
"requires": [
"h_underwaterCrouchJumpDownGrab",
"canSandGrappleBoost"
],
"flashSuitChecked": true,
"blueSuitChecked": true,
"note": [
"Use the respawning Zoas as a grapple target to get a sand boost in order to reach the ledge above.",
"Shoot Grapple just after landing on the sand.",
"Jump as soon as the Zoa is hit, and aim down to escape the sand.",
"Avoid getting hit by killing the extra Zoas since falling into the sand is a softlock."
],
"detailNote": [
"If carrying a flash suit, hold angle-down while shooting the Zoa and jumping."
]
},
{
"id": 85,
"link": [
4,
6
],
"name": "Sand Bomb Boost",
"requires": [
{
"tech": "canSandBombBoost"
},
"h_bombThings",
"canInsaneJump",
"canDownGrab"
],
"flashSuitChecked": true,
"blueSuitChecked": true,
"note": [
"Kill all of the enemies and leave drops uncollected so that the Zoas will not be in the way.",
"Stand on the edge of the sand and place a Bomb or Power Bomb and wait briefly before entering the sand.",
"Let the explosion push Samus up for a few frames before simultaneously jumping and aiming down.",
"Then move left to down-grab onto the morph tunnel ledge.",
"Jumping too early can lead to a softlock but jumping too late usually exits the sand safely."
],
"detailNote": [
"If carrying a flash suit, hold angle-down while jumping."
]
},
{
"id": 98,
"link": [
4,
6
],
"name": "Use Stored Spark",
"requires": [
"h_storedSpark",
{
"shinespark": {
"frames": 5,
"excessFrames": 2
}
}
],
"flashSuitChecked": true,
"blueSuitChecked": true
},
{
"id": 115,
"link": [
4,
6
],
"name": "G-Mode Overload PLMs, Speed Block X-Ray Climb",
"entranceCondition": {
"comeInWithGMode": {
"mode": "any",
"morphed": false
}
},
"requires": [
"canComplexGMode",
"canSuitlessMaridia",
{
"noBlueSuit": {}
},
"canGModeXRayClimb",
"Morph"
],
"flashSuitChecked": true,
"blueSuitChecked": true,
"note": [
"Overload PLMs by touching the sand, then move through the speed blocks. Avoiding the sand pits is easier without Gravity or HiJump.",
"Exit G-mode while inside the speed blocks then X-Ray climb up."
],
"devNote": "This requires canInsaneJump even though it is not difficult, because it is not very intuitive."
},
{
"id": 53,
"link": [
4,
7
],
"name": "Suitless Water Blue Speed Run",
"entranceCondition": {
"comeInGettingBlueSpeed": {
"length": 6,
"openEnd": 1
}
},
"requires": [
"h_waterGetBlueSpeed"
],
"flashSuitChecked": true,
"blueSuitChecked": true,
"devNote": [
"This is just a rough estimate of the minimum number of tiles that this runway can represent.",
"It is designed for a skill level that won't be able to use canStutterWaterShineCharge."
]
},
{
"id": 54,
"link": [
4,
7
],
"name": "Suitless Stutter Water Get Blue Speed",
"entranceCondition": {
"comeInStutterGettingBlueSpeed": {
"minTiles": 2
}
},
"requires": [],
"flashSuitChecked": true,
"blueSuitChecked": true
},
{
"id": 109,
"link": [
4,
7
],
"name": "Precise Suitless Stutter Water Blue Speed",
"entranceCondition": {
"comeInStutterGettingBlueSpeed": {
"minTiles": 1
}
},
"requires": [
{
"tech": "canPreciseStutterWaterShineCharge"
}
],
"flashSuitChecked": true,
"blueSuitChecked": true,
"note": [
"With only 1 tile of runway, this requires releasing forward for 1 or 2 frames",
"and repressing forward on the last possible frame."
]
},
{
"id": 56,
"link": [
4,
7
],
"name": "Speedball",
"entranceCondition": {
"comeInSpeedballing": {
"runway": {
"length": 6,
"openEnd": 1
}
}
},
"requires": [
"canSpeedball"
],
"flashSuitChecked": true,
"blueSuitChecked": true,
"note": [
"This is just a rough estimate of the minimum number of tiles that this runway can represent."
]
},
{
"id": 58,
"link": [
4,
7
],
"name": "Blue Spring Ball Bounce",
"entranceCondition": {
"comeInWithBlueSpringBallBounce": {
"movementType": "controlled"
}
},
"requires": [],
"flashSuitChecked": true,
"blueSuitChecked": true,
"devNote": [
"With a mid-air spring ball jump it would be possible to go through the morph tunnel.",
"This strat exists mainly as a way to avoid collecting the item, by passing through the Speed blocks."
]
},
{
"id": 86,
"link": [
5,
1
],
"name": "Base",
"requires": [
"Morph"
],
"flashSuitChecked": true,
"blueSuitChecked": true,
"note": "If the Puyos are alive, lure the first to the right, then roll out of the hole, unmorph and fight them. Crouching while shooting may increase accuracy.",
"devNote": "FIXME This probably shouldnt be free if the Puyos are still alive."
},
{
"id": 87,
"link": [
5,
1
],
"name": "G-Mode Morph Exit Tunnel Before Leaving G-Mode",
"requires": [
"canRemoteAcquire",
{
"obstaclesCleared": [
"B"
]
}
],
"flashSuitChecked": true,
"blueSuitChecked": true,
"note": "If the Puyos are alive, lure the first to the right, then roll out of the hole, unmorph and fight them. Crouching while shooting may increase accuracy.",
"devNote": "FIXME This probably shouldnt be free if the Puyos are still alive."
},
{
"id": 88,
"link": [
5,
4
],
"name": "G-Mode Morph Exit Tunnel Before Leaving G-Mode",
"requires": [
"canRemoteAcquire",
{
"obstaclesCleared": [
"B"
]
}
],
"flashSuitChecked": true,
"blueSuitChecked": true
},
{
"id": 89,
"link": [
5,
6
],
"name": "Base",
"requires": [
{
"or": [
"h_useSpringBall",
{
"and": [
"Gravity",
"h_bombThings",
"h_additionalBomb",
"h_additionalBomb"
]
}
]
}
],
"flashSuitChecked": true,
"blueSuitChecked": true
},
{
"id": 90,
"link": [
5,
6
],
"name": "Suitless Bootless Mid-Air Morph",
"requires": [
"canSuitlessMaridia",
"canMidAirMorph",
"canDisableEquipment",
"h_complexToCarryFlashSuit"
],
"flashSuitChecked": true,
"blueSuitChecked": true,
"note": "Jump and mid-air morph. This is much easier with Gravity and HiJump turned off."
},
{
"id": 91,
"link": [
6,
4
],
"name": "Base",
"requires": [],
"flashSuitChecked": true,
"blueSuitChecked": true
},
{
"id": 92,
"link": [
6,
5
],
"name": "Base",
"requires": [
{
"or": [
"h_useSpringBall",
{
"and": [
"Gravity",
"h_bombThings",
"h_additionalBomb",
"h_additionalBomb"
]
}
]
}
],
"collectsItems": [
5
],
"flashSuitChecked": true,
"blueSuitChecked": true
},
{
"id": 93,
"link": [
6,
5
],
"name": "Suitless Bootless Mid-Air Morph",
"requires": [
"canSuitlessMaridia",
"canMidAirMorph",
{
"disableEquipment": "Gravity"
},
{
"disableEquipment": "HiJump"
},
"h_complexToCarryFlashSuit"
],
"collectsItems": [
5
],
"flashSuitChecked": true,
"blueSuitChecked": true,
"note": "Jump and mid-air morph. This is much easier with Gravity and HiJump turned off."
},
{
"id": 94,
"link": [
6,
6
],
"name": "Zoa Farm",
"requires": [
{
"or": [
{
"and": [
"Grapple",
{
"cycleFrames": 285
}
]
},
{
"and": [
"canDodgeWhileShooting",
{
"or": [
"Wave",
"Spazer",
"canMidairWiggle"
]
},
{
"cycleFrames": 525
}
]
}
]
}
],
"farmCycleDrops": [
{
"enemy": "Zoa",
"count": 5
}
],
"flashSuitChecked": true,
"blueSuitChecked": true
},
{
"id": 110,
"link": [
7,
1
],
"name": "Base",
"requires": [],
"clearsObstacles": [
"A"
],
"flashSuitChecked": true,
"blueSuitChecked": true,
"note": [
"Use blue speed to pass through the speed blocks."
]
},
{
"id": 55,
"link": [
7,
1
],
"name": "Leave With Temporary Blue",
"requires": [
"h_getBlueSpeedMaxRunway",
"canChainTemporaryBlue"
],
"exitCondition": {
"leaveWithTemporaryBlue": {}
},
"unlocksDoors": [
{
"types": [
"ammo"
],
"requires": []
}
],
"flashSuitChecked": true,
"blueSuitChecked": true,
"note": [
"Use blue speed to pass through the speed blocks, then chain temporary blue through the door."
],
"devNote": [
"The `h_getBlueSpeedMaxRunway` requirement is to satisfy the tests,",
"since we don't yet have a way to represent that being at node 7 implies already having blue speed."
]
},
{
"id": 111,
"link": [
7,
4
],
"name": "Leave With Temporary Blue",
"requires": [
"h_getBlueSpeedMaxRunway",
"canXRayTurnaround",
"canChainTemporaryBlue"
],
"exitCondition": {
"leaveWithTemporaryBlue": {}
},
"unlocksDoors": [
{
"types": [
"ammo"
],
"requires": []
}
],
"flashSuitChecked": true,
"blueSuitChecked": true,
"note": [
"Use X-Ray to turn around, then chain temporary blue back through the door."
],
"devNote": [
"The `h_getBlueSpeedMaxRunway` requirement is to satisfy the tests,",
"since we don't yet have a way to represent that being at node 7 implies already having blue speed."
]
}
],
"notables": [
{
"id": 1,
"name": "Puyo Bomb-Grapple-Jump",
"note": [
"Lure a Puyo close to the sand and use it to Bomb-Grapple-Jump up to the Morph Ball maze.",
"It helps to predict the jump pattern of the enemy."
]
},
{
"id": 2,
"name": "Sand Grapple Boost (Left to Right)",
"note": [
"Lure a Puyo close to the sand to use for a Sand Grapple Boost.",
"As it is close to entering the sand, land on the sand and crouch.",
"Very quickly after crouching shoot the grapple and jump.",
"As soon as the Puyo is killed aim down to escape the sand.",
"If the timings don't work out just right, too much height is lost to the sand.",
"Crouching in sand is also a high softlock risk."
]
},
{
"id": 3,
"name": "Sand Bomb Boost (Left to Right)",
"note": [
"Stand on the edge of the sand and place a Bomb or Power Bomb and wait briefly before entering the sand.",
"Precisely as the explosion begins to propel Samus up, simultaneously press down and jump.",
"There are differences in the timing windows depending on whether a Bomb or Power Bomb is used:",
"For a Bomb, the timing to enter the sand is very precise, only 2 frames, while the timing to jump is lenient (8 frames).",
"For a Power Bomb, the timing to enter the sand lenient (13 frames), while the timing to jump is precise (2 frames).",
"In both cases, a frame-perfect aim-down input is required, and a failure likely results in Samus falling down through the sand."
]
}
],
"nextStratId": 133,
"nextNotableId": 4
}
