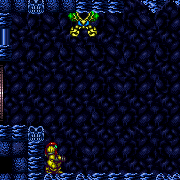
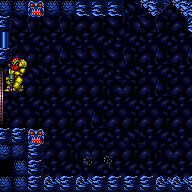
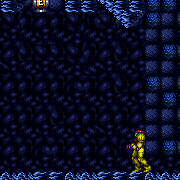
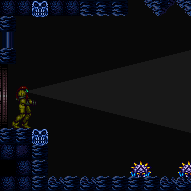
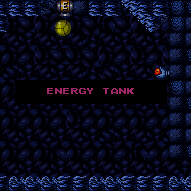
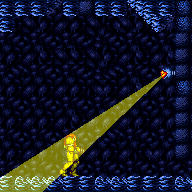
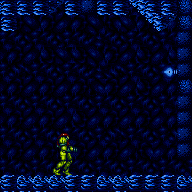
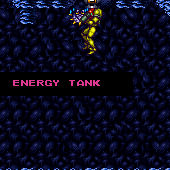
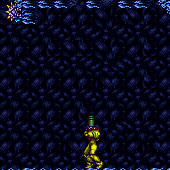
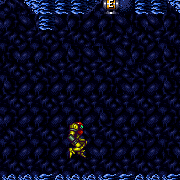
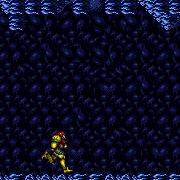
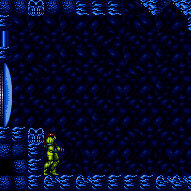
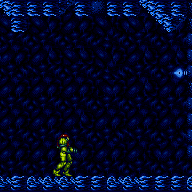
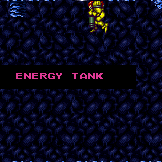
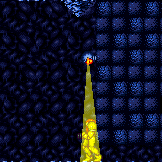
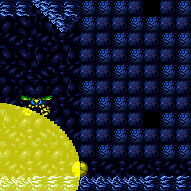
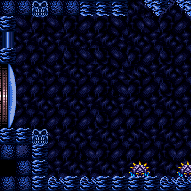
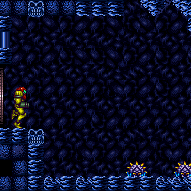
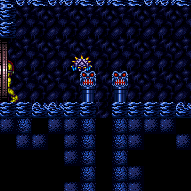
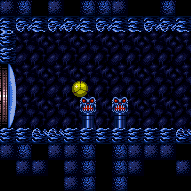
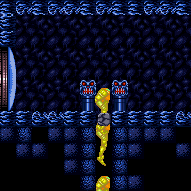
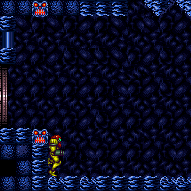
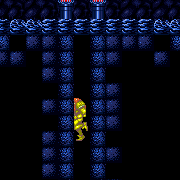
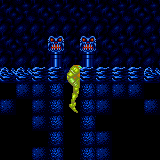
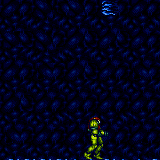
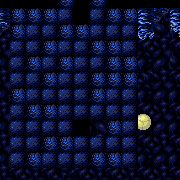
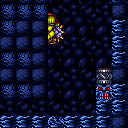
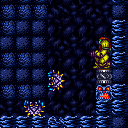
Blue Brinstar Energy Tank Room
Room ID: 41
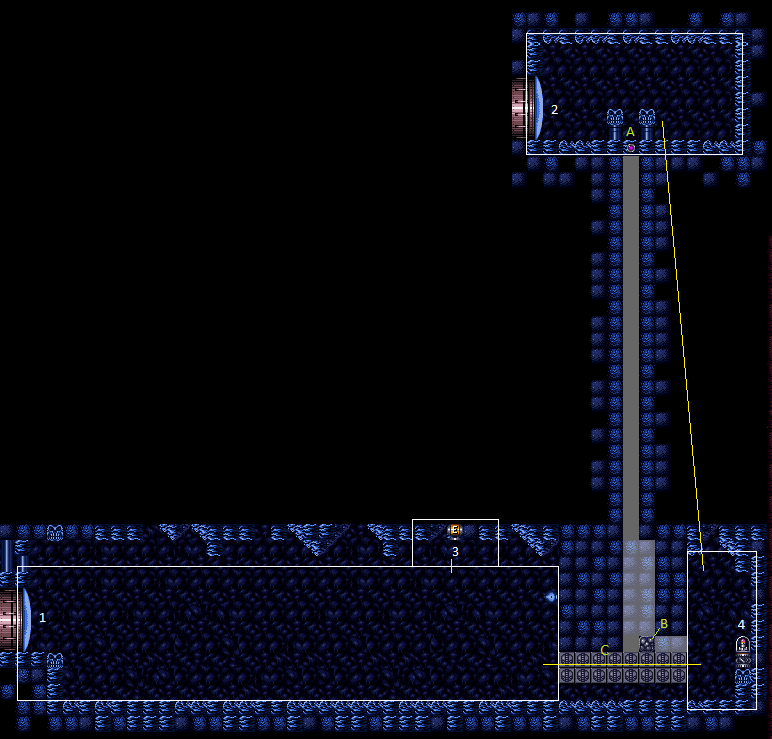
From: 1
Bottom Left Door
To: 1
Bottom Left Door
Exit condition: {
"leaveWithRunway": {
"length": 3,
"openEnd": 1
}
} |
From: 1
Bottom Left Door
To: 1
Bottom Left Door
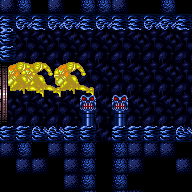
Lure the Reo from the right and freeze it in the correct position when it swoops down. Note that using a frozen Geemer may be useful and is easier to setup, particularly if shortcharging out the door. Requires: "h_ZebesIsAwake"
"h_frozenEnemyRunway"
{
"enemyDamage": {
"enemy": "Reo",
"type": "contact",
"hits": 1
}
}Exit condition: {
"leaveWithRunway": {
"length": 6,
"openEnd": 0
}
}Dev note: The Reo can be set up flush with the runway or 3 pixels higher. FIXME: Find and add a description for a normalized setup for this and possibly remove the Reo hit, especially with using the Geemer to extend the runway. |
From: 1
Bottom Left Door
To: 1
Bottom Left Door
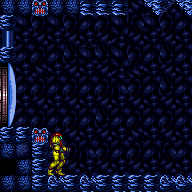
Leaving with upward momentum is possible in three ways: 1) Most easily, with a momentum-conserving morph against the ceiling through the transition, 2) With a momentum-conserving turnaround through the transition, or 3) Jumping specifically with a extra run speed between $5.2 and $5.4 and aiming down through the transition. For the first two methods, avoid backing into the corner; instead press against it and turn around, to put Samus into a better position. For the third method, use only the part of the runway in front of the Power Bomb blocks, or about a tile less. Requires: {
"obstaclesCleared": [
"C"
]
}
"h_speedJump"
{
  "or": [
    "canMomentumConservingMorph",
    "canInsaneJump"
  ]
}
Exit condition: {
"leaveWithSidePlatform": {
"height": 3,
"runway": {
"length": 42,
"openEnd": 0
},
"obstruction": [
3,
0
]
}
}Dev note: Max extra run speed $6.8. Using the full runway, the momentum-conserving morph has a 4-frame window for the jump, and between a 3-frame and 6-frame window for the morph depending on the jump timing (with later jumps giving a bigger window for the morph); The momentum-conserving turnaround has a 2-frame window for the jump, and either a 1-frame or 5-frame window for the turnaround depending on the jump (with the last-frame jump giving the larger window for the turnaround). |
From: 1
Bottom Left Door
To: 1
Bottom Left Door
Leaving with upward momentum is possible in three ways: 1) Most easily, with a momentum-conserving morph against the ceiling through the transition, 2) With a momentum-conserving turnaround through the transition, or 3) Jumping and aiming down through the transition. To maximize the lenience for the jump, back into the Power Bomb block corner, and while running perform a single-pixel arm pump (e.g. by firing a shot); this only matters in certain situations, but in all cases it won't hurt. Requires: "h_speedJump"
{
"or": [
"canMomentumConservingMorph",
"canInsaneJump"
]
}Exit condition: {
"leaveWithSidePlatform": {
"height": 3,
"runway": {
"length": 31,
"openEnd": 0
},
"obstruction": [
3,
0
]
}
}Dev note: Max extra run speed $5.4. The momentum-conserving morph has a 3-frame window for the jump, and between a 3-frame and 8-frame window for the morph depending on the jump timing (with later jumps giving a bigger window for the morph); these windows can be more narrow depending on what is required in the next room. The momentum-conserving turnaround has a 2-frame window for the jump: if jumping on the second-to-last possible frame, then there is a 4-frame window for the turnaround, while if jumping on the last frame, there is a 5-frame window for turning around before the transition or it can be buffered through the transition (or the turnaround could not be performed at all, to maintain forward and upward momentum by simply aiming down). |
From: 1
Bottom Left Door
To: 1
Bottom Left Door
Requires: {
"canShineCharge": {
"usedTiles": 30,
"openEnd": 0
}
}
"canShinechargeMovement"
{
"shineChargeFrames": 40
}Exit condition: {
"leaveShinecharged": {}
} |
From: 1
Bottom Left Door
To: 1
Bottom Left Door
Requires: {
"obstaclesCleared": [
"C"
]
}
{
"canShineCharge": {
"usedTiles": 41,
"openEnd": 0
}
}
"canShinechargeMovement"
{
"shineChargeFrames": 40
}Exit condition: {
"leaveShinecharged": {}
} |
From: 1
Bottom Left Door
To: 1
Bottom Left Door
Exit condition: {
"leaveSpinning": {
"remoteRunway": {
"length": 28,
"openEnd": 0
}
}
} |
From: 1
Bottom Left Door
To: 1
Bottom Left Door
Requires: {
"obstaclesCleared": [
"C"
]
}Exit condition: {
"leaveSpinning": {
"remoteRunway": {
"length": 38,
"openEnd": 1
}
}
} |
From: 1
Bottom Left Door
To: 1
Bottom Left Door
Exit condition: {
"leaveWithMockball": {
"remoteRunway": {
"length": 28,
"openEnd": 0
},
"landingRunway": {
"length": 3,
"openEnd": 1
}
}
} |
From: 1
Bottom Left Door
To: 1
Bottom Left Door
Requires: {
"obstaclesCleared": [
"C"
]
}Exit condition: {
"leaveWithMockball": {
"remoteRunway": {
"length": 38,
"openEnd": 1
},
"landingRunway": {
"length": 3,
"openEnd": 1
}
}
} |
From: 1
Bottom Left Door
To: 1
Bottom Left Door
Exit condition: {
"leaveWithSpringBallBounce": {
"remoteRunway": {
"length": 23,
"openEnd": 1
},
"landingRunway": {
"length": 3,
"openEnd": 1
},
"movementType": "uncontrolled"
}
} |
From: 1
Bottom Left Door
To: 1
Bottom Left Door
Requires: {
"obstaclesCleared": [
"C"
]
}Exit condition: {
"leaveWithSpringBallBounce": {
"remoteRunway": {
"length": 31,
"openEnd": 0
},
"landingRunway": {
"length": 3,
"openEnd": 1
},
"movementType": "uncontrolled"
}
} |
From: 1
Bottom Left Door
To: 1
Bottom Left Door
Exit condition: {
"leaveSpaceJumping": {
"remoteRunway": {
"length": 20,
"openEnd": 0
}
}
} |
From: 1
Bottom Left Door
To: 1
Bottom Left Door
Requires: {
"obstaclesCleared": [
"C"
]
}Exit condition: {
"leaveSpaceJumping": {
"remoteRunway": {
"length": 28,
"openEnd": 1
}
}
} |
From: 1
Bottom Left Door
To: 1
Bottom Left Door
Requires: {
"canShineCharge": {
"usedTiles": 29,
"openEnd": 0
}
}
"canChainTemporaryBlue"Exit condition: {
"leaveWithTemporaryBlue": {}
} |
From: 1
Bottom Left Door
To: 1
Bottom Left Door
Requires: "h_ZebesIsAwake"
{
"resetRoom": {
"nodes": [
1
]
}
}
{
"cycleFrames": 400
}
{
"or": [
"canDash",
{
"and": [
{
"haveBlueSuit": {}
},
{
"cycleFrames": 80
}
]
}
]
}Resets obstacles: A, B, C Farm cycle drops: 2 Geemer (blue), 2 Skree, 1 Reo |
From: 1
Bottom Left Door
To: 1
Bottom Left Door
Requires: "h_ZebesIsAwake" Exit condition: {
"leaveWithGModeSetup": {}
} |
From: 1
Bottom Left Door
To: 1
Bottom Left Door
Requires: {
"enemyDamage": {
"enemy": "Geemer (blue)",
"type": "contact",
"hits": 1
}
}
"h_ZebesIsAwake" |
From: 1
Bottom Left Door
To: 1
Bottom Left Door
Entrance condition: {
"comeInWithRMode": {}
}Requires: "h_ZebesIsAwake"
{
"or": [
"h_CrystalFlashForReserveEnergy",
{
"and": [
"h_RModeCanRefillReserves",
{
"resourceMissingAtMost": [
{
"type": "Missile",
"count": 0
}
]
},
{
"partialRefill": {
"type": "ReserveEnergy",
"limit": 20
}
}
]
}
]
}
{
"canShineCharge": {
"usedTiles": 30,
"openEnd": 0
}
}
{
"autoReserveTrigger": {
"maxReserveEnergy": 95
}
}
"canRModeSparkInterrupt"Dev note: Kill the Geemers for Reserves, or else Crystal Flash. Damage down and use the Reo to interrupt a shinespark wind-up. |
|
Requires: "h_CrystalFlash" Clears obstacles: C |
From: 1
Bottom Left Door
To: 1
Bottom Left Door
Requires: {
"or": [
{
"canShineCharge": {
"usedTiles": 31,
"openEnd": 0
}
},
{
"and": [
{
  "obstaclesCleared": [
    "C"
  ]
},
{
"canShineCharge": {
"usedTiles": 43,
"openEnd": 0
}
}
]
}
]
}
"h_CrystalSpark" |
|
Requires: {
"or": [
"HiJump",
"SpaceJump",
"canSpringBallJumpMidAir"
]
} |
From: 1
Bottom Left Door
To: 3
Hidden Ceiling Item
Requires: "h_ZebesIsAwake" "canUseFrozenEnemies" |
|
Requires: "canBombAboveIBJ" |
From: 1
Bottom Left Door
To: 3
Hidden Ceiling Item
Requires: "canPowerBombMidIBJ" Clears obstacles: C |
From: 1
Bottom Left Door
To: 3
Hidden Ceiling Item
Shoot the block, jump into an IBJ, gaining height quickly enough to make it in time. This can be done with as few as 2 bombs, in which case it is similar to the start of a double bomb jump. Requires: "canJumpIntoIBJ" "canTrickyJump" |
From: 1
Bottom Left Door
To: 3
Hidden Ceiling Item
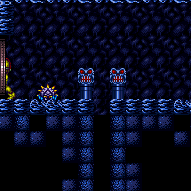
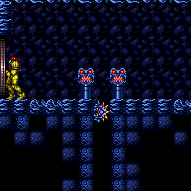
Have Samus shoot the shot block revealing the item and then quickly get hit by an enemy at the peak of her jump in order to reach the item. No directional inputs should be held while getting hit by the enemy in order to have a neutral boost and reach the item. This is traditionally done with the swooping Reo; after a few failed tries, it may help to reset the room to reposition it. The global Geemer may be easier to use, although it takes longer to get there; jump as it starts moving horizontally again while it is 3 tiles away from the item. Requires: {
"notable": "Ceiling Damage Boost"
}
"h_ZebesIsAwake"
"canNeutralDamageBoost"
{
"enemyDamage": {
"enemy": "Geemer (blue)",
"type": "contact",
"hits": 1
}
}Dev note: Although the Reo is traditionally used for the boost, the Geemer does less damage and should still put this in logic with low energy. |
From: 1
Bottom Left Door
To: 3
Hidden Ceiling Item
While carrying a blue suit, take damage from the Reo after mid-air morphing, to get a boost from it. It helps to crouch jump, using X-Ray to cancel the shinecharge if needed. A standing jump can also work, but with more precision. It is best to unmorph as soon as possible after taking damage, while Samus still has knockback. A slightly later unmorph, after knockback expires, can also work but depends on collision oscillation. Requires: {
"haveBlueSuit": {}
}
{
"notable": "Ceiling Damage Boost"
}
"h_ZebesIsAwake"
{
"tech": "canNeutralDamageBoost"
}
"canMidAirMorph"
"canTrickyDodgeEnemies"
{
"or": [
{
"and": [
"h_blueSuitXRayCancelShinecharge",
"canCrouchJump"
]
},
"canInsaneJump"
]
}
{
"enemyDamage": {
"enemy": "Reo",
"type": "contact",
"hits": 1
}
}Dev note: Technically a blue suit would not be required for this strat, so the `haveBlueSuit` requirement could be dropped, but without a blue suit there would be no reason to do it this way, and the name would be misleading. |
From: 1
Bottom Left Door
To: 3
Hidden Ceiling Item
Requires: "canSpeedyJump" "canCarefulJump" |
From: 1
Bottom Left Door
To: 3
Hidden Ceiling Item
After shinesparking against the ceiling, if the item is not immediately collected, hold the direction (left or right) toward the item to collect it while falling. Holding a direction helps because Samus clips vertically a couple pixels into the ceiling at the end of the shinespark, which allows time to press against the item to collect it while falling. This works regardless of whether Samus is facing the item (and holding forward) or away from the item (holding backward to turn around). Requires: "canShinechargeMovement"
{
"or": [
{
"canShineCharge": {
"usedTiles": 31,
"openEnd": 0
}
},
{
"and": [
{
  "obstaclesCleared": [
    "C"
  ]
},
{
"canShineCharge": {
"usedTiles": 42,
"openEnd": 0
}
}
]
}
]
}
{
"or": [
{
"shinespark": {
"frames": 10,
"excessFrames": 2
}
},
{
"and": [
"canMidairShinespark",
{
"shinespark": {
"frames": 3,
"excessFrames": 2
}
}
]
}
]
} |
From: 1
Bottom Left Door
To: 3
Hidden Ceiling Item
Reveal the item and then setup to jump into an IBJ. As Samus starts falling, unmorph to extend Samus' hitbox high enough to reach the item after bouncing on the bomb. Requires: "canCrouchJump"
"canMidAirMorph"
{
"tech": "canJumpIntoIBJ"
}
"canUnmorphBombBoost"Dev note: It is a JumpIntoIBJ that bounces on a single bomb or Power Bomb. |
From: 1
Bottom Left Door
To: 3
Hidden Ceiling Item
Requires: "h_storedSpark"
{
"shinespark": {
"frames": 3,
"excessFrames": 2
}
}Dev note: Technically you obtain the item after 1 frame, then continue for 2 more. If the item is an Energy Tank, the first frame deals damage, the next obtains the tank without dealing damage, then the next deals damage again. It is untested if this is how it works with other items, but it is likely never going to matter. |
From: 1
Bottom Left Door
To: 3
Hidden Ceiling Item
Samus must start pressed against the wall, facing left. Start by performing a dashing stationary spinjump. The initial left press needs to be exactly 3 or 4 frames. Jump needs to be pressed exactly 3 frames after the inital left press. Samus then needs to quickly walljump off the wall at a precise height. While spin jumping in the air, break spin with angle or shot and hold down to reduce the size of the hitbox. If the initial jump and subsequent walljump were performed correctly, depending on walljump height and the number of pixels away from the wall, Samus will have between 1-3 frames where it is possible to collect the tank Release down just as Samus is about to collide with the tank to collect. Even if the previous steps were performed correctly and down was released on the correct frame to collect the tank, there is a 50% chance of failure. The game will check if Samus is in contact with the wall or the item on alternating frames. If the item collection happens on a frame where the game is checking for a wall collision then the item will not be acquired. Requires: {
"notable": "Taco Tank"
}
"canCWJ"
"canInsaneWallJump"
"canStationarySpinJump" |
|
Requires: "Morph" |
From: 1
Bottom Left Door
To: 5
G-Mode Morph Junction (Bottom)
It is possible to roll off of the ledge and avoid the Geemers, but it is somewhat tight and the timing is likely earlier than expected. Entrance condition: {
"comeInWithGMode": {
"mode": "indirect",
"morphed": true
}
}Requires: {
"or": [
"h_ZebesNotAwake",
"Morph",
"h_artificialMorphSpringBall",
"h_artificialMorphBombThings",
"canTrickyDodgeEnemies",
"h_blueSuitGMode",
{
"enemyDamage": {
"enemy": "Geemer (blue)",
"type": "contact",
"hits": 1
}
}
]
}Dev note: It may be possible to come in indirect and still have enough i-frames to get through the Geemers, but Samus may be coming from a doorless room like Crateria Tube. This is not easy to model and isn't worth doing, because the player will almost certainly canTrickyDodgeEnemies enabled before enabling canArtificialMorph. |
From: 1
Bottom Left Door
To: 6
G-Mode Morph Junction Direct (Bottom)
It is possible to roll off of the ledge over the Geemers, but it is somewhat tight and the timing is likely earlier than expected.. Alternatively, it is possible to roll of the ledge go through the Geemers before Samus' i-frames expire. Entrance condition: {
"comeInWithGMode": {
"mode": "direct",
"morphed": true
}
}Requires: {
"or": [
"h_ZebesNotAwake",
"Morph",
"h_artificialMorphSpringBall",
"h_artificialMorphBombThings",
"canTrickyDodgeEnemies",
"h_blueSuitGMode",
{
"enemyDamage": {
"enemy": "Geemer (blue)",
"type": "contact",
"hits": 1
}
}
]
} |
From: 1
Bottom Left Door
To: 6
G-Mode Morph Junction Direct (Bottom)
Regain mobility with the first Geemer then roll through the second to avoid a second hit. Entrance condition: {
"comeInWithGMode": {
"mode": "direct",
"morphed": true,
"mobility": "immobile"
}
}Requires: "h_ZebesIsAwake" "canUseIFrames" |
From: 2
Top Left Door
To: 1
Bottom Left Door
Entrance condition: {
"comeInWithRMode": {}
}Requires: "h_ZebesIsAwake"
{
"or": [
"h_CrystalFlashForReserveEnergy",
{
"and": [
"Morph",
"h_destroyBombWalls",
"h_RModeCanRefillReserves",
{
"resourceMissingAtMost": [
{
"type": "Missile",
"count": 0
}
]
},
{
"partialRefill": {
"type": "ReserveEnergy",
"limit": 20
}
}
]
}
]
}
{
"canShineCharge": {
"usedTiles": 30,
"openEnd": 0
}
}
{
"autoReserveTrigger": {
"maxReserveEnergy": 95
}
}
"canRModeSparkInterrupt"Clears obstacles: A, B Dev note: Kill the Geemers for Reserves, or else Crystal Flash. Damage down and use the Reo to interrupt a shinespark wind-up. |
|
Exit condition: {
"leaveWithRunway": {
"length": 5,
"openEnd": 0
}
} |
From: 2
Top Left Door
To: 2
Top Left Door
Requires: {
"notable": "Leave With Spark (Fast Wall Climb)"
}
{
"obstaclesCleared": [
"A",
"C"
]
}
"HiJump"
{
"canShineCharge": {
"usedTiles": 35,
"openEnd": 1
}
}
"canShinechargeMovementTricky"
"canFastWallJumpClimb"
{
"shinespark": {
"frames": 8,
"excessFrames": 0
}
}Exit condition: {
"leaveWithSpark": {
"position": "top"
}
} |
From: 2
Top Left Door
To: 2
Top Left Door
Requires: "h_ZebesIsAwake"
{
"or": [
"h_destroyBombWalls",
{
"obstaclesCleared": [
"A"
]
}
]
}
{
"or": [
"canConsecutiveWallJump",
"SpaceJump",
"canLongIBJ"
]
}Exit condition: {
"leaveWithGModeSetup": {}
} |
G-Mode Setup - Get Hit By Geemer - Broken Power Bomb Blocks
(Expert+)
Blue Brinstar Energy Tank Room
From: 2
Top Left Door
To: 2
Top Left Door
Requires: "h_ZebesIsAwake"
{
"or": [
"h_destroyBombWalls",
{
"obstaclesCleared": [
"A"
]
}
]
}
"h_usePowerBomb"
{
"canShineCharge": {
"usedTiles": 42,
"openEnd": 0
}
}
{
"or": [
{
"shinespark": {
"frames": 36,
"excessFrames": 3
}
},
{
"and": [
"HiJump",
{
"shinespark": {
"frames": 32,
"excessFrames": 3
}
}
]
}
]
}Exit condition: {
"leaveWithGModeSetup": {}
} |
From: 2
Top Left Door
To: 2
Top Left Door
Falling down the shaft and breaking the crumble block does not require Morph. Requires: "h_ZebesIsAwake"
{
"obstaclesCleared": [
"A",
"B"
]
}Exit condition: {
"leaveWithGModeSetup": {}
} |
From: 2
Top Left Door
To: 2
Top Left Door
Requires: {
"notable": "Return Through Crumble Blocks"
}
"h_ZebesIsAwake"
"Morph"
{
"or": [
"ScrewAttack",
{
"and": [
"h_useMorphBombs",
{
"cycleFrames": 80
}
]
},
{
"haveBlueSuit": {}
}
]
}
{
"or": [
"canConsecutiveWallJump",
{
"and": [
"SpaceJump",
{
"cycleFrames": 250
}
]
}
]
}
{
"resetRoom": {
"nodes": [
2
]
}
}
{
"cycleFrames": 1210
}
{
"or": [
"canDash",
{
"and": [
{
"haveBlueSuit": {}
},
{
"cycleFrames": 50
}
]
}
]
}Clears obstacles: A, B Resets obstacles: C Farm cycle drops: 2 Geemer (blue), 2 Skree, 1 Reo Dev note: Returning with an IBJ or frozen Geemer would also be possible, but these are probably too slow to model in a farm strat. |
|
Requires: "h_CrystalFlash" Clears obstacles: A |
From: 2
Top Left Door
To: 2
Top Left Door
Entrance condition: {
"comeInShinecharging": {
"length": 4,
"openEnd": 0
},
"comesInHeated": "no"
}Requires: "h_CrystalSpark" |
|
Requires: "Morph"
{
"or": [
"h_destroyBombWalls",
{
"obstaclesCleared": [
"A"
]
}
]
}Clears obstacles: A, B |
|
Requires: "Morph"
{
"haveBlueSuit": {}
}Clears obstacles: A, B |
|
Entrance condition: {
"comeInShinecharging": {
"length": 3,
"openEnd": 0
}
}Requires: "Morph" "canTemporaryBlue" Clears obstacles: A, B Dev note: There is 1 unusable tile in this runway. |
From: 2
Top Left Door
To: 5
G-Mode Morph Junction (Bottom)
Use a blue suit to pass through the bomb block. Overload PLMs using the scroll PLMs in the shaft, to pass through the crumble block. Entrance condition: {
"comeInWithGMode": {
"mode": "any",
"morphed": true
}
}Requires: "h_blueSuitGMode"
{
"or": [
"h_artificialMorphSpringBall",
"h_artificialMorphBombThings"
]
}Clears obstacles: A Dev note: Power Bombs do not work as a movement option, because they make the bomb block solid. We don't track direct vs. indirect state here: since PLMs will be overloaded, remote acquiring the item would not be an option anyway. Flashing lights are not a concern because the cameras will be off without Morph, and with Morph there would be no purpose to the G-mode here. Samus can jump after exiting G-mode to fix the camera. There are no strats that require any off-screen precision that start from 5 except going back up, which is pointless. |
|
|
|
Requires: "Morph" |
From: 4
Right Item
To: 1
Bottom Left Door
Requires: {
"or": [
"h_usePowerBomb",
{
  "obstaclesCleared": [
    "C"
  ]
}
]
}Clears obstacles: C |
From: 4
Right Item
To: 2
Top Left Door
The Crumble Block does not respawn, so it's possible to grab the items and go back up without breaking the Power Bomb blocks. Requires: {
"notable": "Return Through Crumble Blocks"
}
"Morph"
{
"or": [
"canConsecutiveWallJump",
"SpaceJump",
"canLongIBJ"
]
}
{
"obstaclesCleared": [
"A",
"B"
]
} |
|
Requires: {
"or": [
"h_usePowerBomb",
{
  "obstaclesCleared": [
    "C"
  ]
}
]
}
{
"or": [
"canConsecutiveWallJump",
"SpaceJump",
"canLongIBJ"
]
}
{
"or": [
{
"and": [
"h_usePowerBomb",
"canTrivialMidAirMorph"
]
},
"ScrewAttack"
]
}Clears obstacles: A, B, C Dev note: canWallJumpInstantMorph is not needed here, as the precision is very low. |
|
Requires: {
"haveBlueSuit": {}
}
{
"or": [
"h_usePowerBomb",
{
"obstaclesCleared": [
"C"
]
}
]
}
{
"or": [
"canConsecutiveWallJump",
"SpaceJump"
]
}Clears obstacles: A, B, C |
|
Requires: {
"or": [
"h_usePowerBomb",
{
"obstaclesCleared": [
"C"
]
}
]
}
"h_useMorphBombs"
{
"or": [
{
"and": [
"SpaceJump",
"canMidAirMorph"
]
},
"canLongIBJ",
{
"and": [
"canConsecutiveWallJump",
"canWallJumpInstantMorph"
]
}
]
}Clears obstacles: A, B, C |
|
Use both Geemers to climb the tall shaft by repeatedly freezing them. Note that one moves locally when on camera and the other moves globally. Requires: "h_ZebesIsAwake"
{
"or": [
"h_usePowerBomb",
{
"and": [
{
"obstaclesCleared": [
"B"
]
},
"Morph"
]
},
{
"obstaclesCleared": [
"C"
]
}
]
}
{
"or": [
{
"obstaclesCleared": [
"A"
]
},
"ScrewAttack",
{
"haveBlueSuit": {}
},
{
"and": [
"h_useMorphBombs",
"canMidAirMorph"
]
}
]
}
"canTrickyUseFrozenEnemies"
"canTrickyJump"
"canCameraManip"Clears obstacles: A, B Dev note: FIXME: It is possible to ceiling ice clip the top block. |
From: 4
Right Item
To: 2
Top Left Door
Use both Geemers to climb the tall shaft by repeatedly freezing them. Note that one moves locally when on camera and the other moves globally. Once Samus is close to the top Bomb Block, freeze one Geemer low and jump as high as possible before placing a power bomb. Continue climbing with the Geemer that survives. Requires: "h_ZebesIsAwake"
{
"or": [
"h_usePowerBomb",
{
"and": [
{
"obstaclesCleared": [
"B"
]
},
"Morph"
]
},
{
"obstaclesCleared": [
"C"
]
}
]
}
"h_usePowerBomb"
"canTrivialMidAirMorph"
"canTrickyUseFrozenEnemies"
"canTrickyJump"
"canBePatient"
"canCameraManip"Clears obstacles: A, B |
|
Requires: {
"or": [
"h_usePowerBomb",
{
"obstaclesCleared": [
"C"
]
}
]
}
{
"canShineCharge": {
"usedTiles": 42,
"openEnd": 0
}
}
{
"or": [
{
"shinespark": {
"frames": 43,
"excessFrames": 2
}
},
{
"and": [
"canMidairShinespark",
{
"shinespark": {
"frames": 36,
"excessFrames": 3
}
}
]
},
{
"and": [
"HiJump",
"canMidairShinespark",
{
"shinespark": {
"frames": 32,
"excessFrames": 3
}
}
]
}
]
}Clears obstacles: A, B, C Dev note: FIXME: add a variant that uses a crumble jump to save some shinespark frames. |
|
Breaking the Power Bomb blocks exactly wide enough makes it easier to quickly enter the one-tile gap. Aligning the Power Bomb with the left side of the ceiling fixture that sticks down will position the explosion correctly for this. Requires: {
"or": [
"h_usePowerBomb",
{
"obstaclesCleared": [
"C"
]
}
]
}
{
"canShineCharge": {
"usedTiles": 42,
"openEnd": 0
}
}
"canShinechargeMovementComplex"
"canConsecutiveWallJump"
{
"shinespark": {
"frames": 17,
"excessFrames": 3
}
}Clears obstacles: A, B, C Dev note: The runway here is 31 tiles before breaking the Power Bomb blocks, but becomes longer after. |
From: 4
Right Item
To: 2
Top Left Door
By wall jumping fast enough and sparking close to the block, it can be broken even on low energy (29 or less). Requires: {
"notable": "Fast Wall Jump Spark"
}
{
"or": [
"h_usePowerBomb",
{
"obstaclesCleared": [
"C"
]
}
]
}
{
"canShineCharge": {
"usedTiles": 42,
"openEnd": 0
}
}
"canShinechargeMovementComplex"
"canConsecutiveWallJump"
"HiJump"
{
"shinespark": {
"frames": 9,
"excessFrames": 9
}
}Clears obstacles: A, B, C |
From: 4
Right Item
To: 2
Top Left Door
By wall jumping fast enough and sparking close to the block, it can be broken even on low energy (29 or less). Requires: {
"notable": "Fast Wall Jump Spark"
}
{
"or": [
"h_usePowerBomb",
{
"obstaclesCleared": [
"C"
]
}
]
}
{
"canShineCharge": {
"usedTiles": 42,
"openEnd": 0
}
}
"canShinechargeMovementComplex"
"canFastWallJumpClimb"
{
"shinespark": {
"frames": 9,
"excessFrames": 9
}
}Clears obstacles: A, B, C |
From: 4
Right Item
To: 2
Top Left Door
Requires: {
"obstaclesCleared": [
"B"
]
}
"Morph"
{
"canShineCharge": {
"usedTiles": 31,
"openEnd": 0
}
}
{
"shinespark": {
"frames": 40,
"excessFrames": 3
}
}
"canShinechargeMovementTricky"Clears obstacles: A |
|
Requires: {
"obstaclesCleared": [
"C"
]
}
"h_storedSpark"
{
"or": [
{
"shinespark": {
"frames": 36,
"excessFrames": 3
}
},
{
"and": [
"HiJump",
{
"shinespark": {
"frames": 32,
"excessFrames": 3
}
}
]
},
{
"and": [
{
"or": [
"canConsecutiveWallJump",
"SpaceJump"
]
},
{
"shinespark": {
"frames": 9,
"excessFrames": 9
}
}
]
}
]
}Clears obstacles: A |
From: 4
Right Item
To: 2
Top Left Door
Requires: {
"obstaclesCleared": [
"B"
]
}
"Morph"
{
"obstaclesNotCleared": [
"C"
]
}
"h_storedSpark"
{
"or": [
{
"shinespark": {
"frames": 33,
"excessFrames": 3
}
},
{
"and": [
"HiJump",
{
"shinespark": {
"frames": 29,
"excessFrames": 3
}
}
]
},
{
"and": [
{
"or": [
"canConsecutiveWallJump",
"SpaceJump"
]
},
{
"shinespark": {
"frames": 9,
"excessFrames": 9
}
}
]
}
]
}Clears obstacles: A |
From: 4
Right Item
To: 2
Top Left Door
Keep the two Geemers on screen while moving to the right side of the room. Freeze the second Geemer as it exits the Morph Tunnel, with the Crumble block. Use a Super Missile to knock the first Geemer down and freeze it at the pixel perfect height. Become stuck in the wall after using Grapple to kill the frozen Geemer as it walks through Samus, firing to the left. This re-enables XRay climbing. Requires: {
"notable": "Geemer Ice Stuck XRay Climb"
}
"h_ZebesIsAwake"
"canWallIceClip"
"canLongXRayClimb"
"Grapple"
{
"ammo": {
"type": "Super",
"count": 1
}
}
{
"enemyDamage": {
"enemy": "Geemer (blue)",
"type": "contact",
"hits": 1
}
}Dev note: FIXME: The Reo can be used to avoid spending a Super, but it's chaotic. |
From: 5
G-Mode Morph Junction (Bottom)
To: 1
Bottom Left Door
Requires: "canGMode" |
From: 5
G-Mode Morph Junction (Bottom)
To: 2
Top Left Door
Overload PLMs by repeatidly bombing the Power Bomb blocks or the side of the crumble block, then enter through the crumble block. If Samus is then going to IBJ up the shaft, and she has Morph, it is worth exiting G-mode first to allow the camera to follow her. Requires: "canGMode"
"h_artificialMorphIBJ"
{
"or": [
"canConsecutiveWallJump",
"SpaceJump",
{
"and": [
"h_artificialMorphLongIBJ",
"canOffScreenMovement"
]
},
{
"and": [
{
"blueSuitShinecharge": {}
},
{
"or": [
{
"shinespark": {
"frames": 32,
"excessFrames": 3
}
},
{
"and": [
"HiJump",
{
"shinespark": {
"frames": 29,
"excessFrames": 3
}
}
]
}
]
}
]
}
]
}
{
"or": [
"h_ZebesIsAwake",
{
"notable": "G-Mode Flashing Lights"
}
]
}Dev note: The off screen movement is just during an artificial morphed IBJ - the IBJ is long and Samus is covered for most of it. |
From: 5
G-Mode Morph Junction (Bottom)
To: 2
Top Left Door
Overload PLMs by shooting the ceiling block item many times. Because the item is in a shot block, this does not require Direct G-mode, nor does it require the item to be uncollected. Requires: "canGMode"
"Morph"
{
"or": [
"canConsecutiveWallJump",
"SpaceJump"
]
}
{
"or": [
"h_ZebesIsAwake",
{
"notable": "G-Mode Flashing Lights"
}
]
} |
From: 5
G-Mode Morph Junction (Bottom)
To: 2
Top Left Door
Overload PLMs with a single Power Bomb by hitting the ceiling block item. This can be done with a single precisely placed Power Bomb. There should be one empty tile between Samus and the right wall. Because the item is in a shot block, this does not require Direct G-mode, nor does it require the item to be uncollected. Requires: "canPowerBombItemOverloadPLMs"
"canGMode"
"h_artificialMorphPowerBomb"
"h_artificialMorphMovement"
{
"or": [
"canConsecutiveWallJump",
"SpaceJump",
{
"and": [
{
"blueSuitShinecharge": {}
},
{
"or": [
{
"shinespark": {
"frames": 32,
"excessFrames": 3
}
},
{
"and": [
"HiJump",
{
"shinespark": {
"frames": 29,
"excessFrames": 3
}
}
]
}
]
}
]
}
]
}Clears obstacles: B, C Dev note: This strat is useless if Samus has Morph, so there will be no flashing lights. |
From: 5
G-Mode Morph Junction (Bottom)
To: 4
Right Item
Requires: "canGMode" Dev note: This strat is useless if Samus has Morph, so there will be no flashing lights. |
From: 5
G-Mode Morph Junction (Bottom)
To: 4
Right Item
The blocks will not break if PLMs are already overloaded. Exiting G-Mode before the Power Bomb explodes will ensure they break. Requires: "canGMode" "h_artificialMorphPowerBomb" Clears obstacles: B, C Dev note: This strat is useless if Samus has Morph, so there will be no flashing lights. |
From: 5
G-Mode Morph Junction (Bottom)
To: 4
Right Item
Overload PLMs by shooting the ceiling block item many times. Because the item is in a shot block, this does not require Direct G-mode, nor does it require the item to be uncollected. After PLMs are overloaded, pass through the crumble block, exit G-mode, and break the crumble block. Requires: "canGMode"
"Morph"
{
"or": [
"h_ZebesIsAwake",
{
"notable": "G-Mode Flashing Lights"
}
]
}Clears obstacles: B |
From: 6
G-Mode Morph Junction Direct (Bottom)
To: 1
Bottom Left Door
Touch the item then roll back to the left before exiting G-Mode and remotely collect it. Requires: "canRemoteAcquire" "h_artificialMorphMovement" Collects items: 4 Dev note: This does not include canRiskPermanentLossOfAccess if Samus only uses this to return to the left with the item. This strat is useless if Samus has Morph, so there will be no flashing lights. |
From: 6
G-Mode Morph Junction Direct (Bottom)
To: 2
Top Left Door
Touch the item to overload PLMs then go through the crumble block and bomb block at the top of the shaft before exiting G-mode. Requires: "canGMode"
{
"itemNotCollectedAtNode": 4
}
"h_artificialMorphSpringBall"
{
"or": [
"canConsecutiveWallJump",
"SpaceJump",
{
"and": [
{
"blueSuitShinecharge": {}
},
{
"or": [
{
"shinespark": {
"frames": 32,
"excessFrames": 3
}
},
{
"and": [
"HiJump",
{
"shinespark": {
"frames": 29,
"excessFrames": 3
}
}
]
}
]
}
]
}
]
}
{
"or": [
"h_ZebesIsAwake",
{
"notable": "G-Mode Flashing Lights"
}
]
}Collects items: 4 Dev note: This will force Samus to pick up the item, so it can only be done once. itemNotCollectedAtNode implicitly includes canRiskPermanentLossOfAccess. Spring Ball is required, because Morph, Bombs, or a Power Bomb will allow other strats to be used instead. |
G-Mode Morph Touch the Item, Break the Crumble, Geemer Ice Climb
(Expert+)
Blue Brinstar Energy Tank Room
From: 6
G-Mode Morph Junction Direct (Bottom)
To: 2
Top Left Door
Touch the item to overload PLMs then go through the crumble block. Use the global Geemer to climb the tall shaft by repeatedly freezing it. Use a blue suit or Screw Attack at the top to break the block Requires: "canGMode"
"h_ZebesIsAwake"
{
"itemNotCollectedAtNode": 4
}
"h_artificialMorphSpringBall"
{
"or": [
"ScrewAttack",
{
"haveBlueSuit": {}
}
]
}
"canTrickyUseFrozenEnemies"
"canTrickyJump"
"canCameraManip"Clears obstacles: A, B Collects items: 4 Dev note: This will force Samus to pick up the item, so it can only be done once. itemNotCollectedAtNode implicitly includes canRiskPermanentLossOfAccess. Spring Ball is required, because Morph, Bombs, or a Power Bomb will allow other strats to be used instead. This strat requires Zebes to be awake, so there will be no flashing lights. FIXME: It is possible to ceiling ice clip the top block. |
From: 6
G-Mode Morph Junction Direct (Bottom)
To: 5
G-Mode Morph Junction (Bottom)
Requires: "canGMode" |
{
"$schema": "../../../schema/m3-room.schema.json",
"id": 41,
"name": "Blue Brinstar Energy Tank Room",
"area": "Brinstar",
"subarea": "Blue",
"roomAddress": "0x79F64",
"roomEnvironments": [
{
"heated": false
}
],
"mapTileMask": [
[
0,
0,
1
],
[
0,
0,
1
],
[
1,
1,
1
]
],
"nodes": [
{
"id": 1,
"name": "Bottom Left Door",
"nodeType": "door",
"nodeSubType": "blue",
"nodeAddress": "0x0018ee6",
"doorOrientation": "left",
"doorEnvironments": [
{
"physics": "air"
}
],
"viewableNodes": [
{
"id": 3,
"strats": [
{
"name": "Base",
"requires": [],
"flashSuitChecked": true,
"blueSuitChecked": true
}
]
}
],
"mapTileMask": [
[
0,
0,
1
],
[
0,
0,
1
],
[
2,
2,
1
]
]
},
{
"id": 2,
"name": "Top Left Door",
"nodeType": "door",
"nodeSubType": "blue",
"nodeAddress": "0x0018ef2",
"doorOrientation": "left",
"doorEnvironments": [
{
"physics": "air"
}
],
"mapTileMask": [
[
0,
0,
2
],
[
0,
0,
1
],
[
1,
1,
1
]
]
},
{
"id": 3,
"name": "Hidden Ceiling Item",
"nodeType": "item",
"nodeSubType": "hidden",
"nodeItem": "ETank",
"nodeAddress": "0x7879E",
"mapTileMask": [
[
0,
0,
1
],
[
0,
0,
1
],
[
1,
2,
1
]
],
"locks": [
{
"name": "Dummy Item Lock",
"lockType": "gameFlag",
"unlockStrats": [
{
"name": "Base (Collect Item)",
"notable": false,
"requires": [],
"flashSuitChecked": true,
"blueSuitChecked": true
}
]
}
]
},
{
"id": 4,
"name": "Right Item",
"nodeType": "item",
"nodeSubType": "visible",
"nodeItem": "Missile",
"nodeAddress": "0x78798",
"mapTileMask": [
[
0,
0,
1
],
[
0,
0,
2
],
[
1,
1,
2
]
],
"locks": [
{
"name": "Dummy Item Lock",
"lockType": "gameFlag",
"unlockStrats": [
{
"name": "Base (Collect Item)",
"notable": false,
"requires": [],
"flashSuitChecked": true,
"blueSuitChecked": true
}
]
}
]
},
{
"id": 5,
"name": "G-Mode Morph Junction (Bottom)",
"nodeType": "junction",
"nodeSubType": "g-mode",
"mapTileMask": [
[
0,
0,
1
],
[
0,
0,
1
],
[
2,
2,
2
]
],
"note": [
"Represents being in the room with G-Mode, to the right of the two Geemers, with morph or artificial morph.",
"All strats coming from this node should ensure that Samus has the flashing lights notable, has no Morph, or Zebes is asleep."
]
},
{
"id": 6,
"name": "G-Mode Morph Junction Direct (Bottom)",
"nodeType": "junction",
"nodeSubType": "g-mode",
"mapTileMask": [
[
0,
0,
1
],
[
0,
0,
1
],
[
2,
2,
2
]
],
"note": [
"Represents being in the room with G-Mode, to the right of the two Geemers, with morph or artificial morph, in direct G-Mode, with PLMs not overloaded.",
"All strats coming from this node should ensure that Samus has the flashing lights notable, has no Morph, or Zebes is asleep."
]
}
],
"obstacles": [
{
"id": "A",
"name": "Top Bomb Block",
"obstacleType": "inanimate"
},
{
"id": "B",
"name": "Crumble Block",
"obstacleType": "inanimate"
},
{
"id": "C",
"name": "Power Bomb Blocks",
"obstacleType": "inanimate"
}
],
"enemies": [
{
"id": "e1",
"groupName": "Ceiling E-Tank Geemers",
"enemyName": "Geemer (blue)",
"quantity": 2,
"homeNodes": [
1
],
"spawn": [
"f_ZebesAwake"
]
},
{
"id": "e2",
"groupName": "Ceiling E-Tank Skrees",
"enemyName": "Skree",
"quantity": 2,
"homeNodes": [
1
],
"spawn": [
"f_ZebesAwake"
]
},
{
"id": "e3",
"groupName": "Ceiling E-Tank Reo",
"enemyName": "Reo",
"quantity": 1,
"homeNodes": [
1
],
"spawn": [
"f_ZebesAwake"
]
}
],
"strats": [
{
"link": [
1,
1
],
"name": "Base (Unlock Door)",
"requires": [],
"unlocksDoors": [
{
"types": [
"ammo"
],
"requires": []
}
],
"flashSuitChecked": true,
"blueSuitChecked": true
},
{
"link": [
1,
1
],
"name": "Base (Come In Normally)",
"entranceCondition": {
"comeInNormally": {}
},
"requires": [],
"flashSuitChecked": true,
"blueSuitChecked": true
},
{
"link": [
1,
1
],
"name": "Base (Come In With Mockball)",
"entranceCondition": {
"comeInWithMockball": {
"adjacentMinTiles": 0,
"remoteAndLandingMinTiles": [
[
0,
0
]
],
"speedBooster": "any"
}
},
"requires": [],
"flashSuitChecked": true,
"blueSuitChecked": true
},
{
"link": [
2,
2
],
"name": "Base (Unlock Door)",
"requires": [],
"unlocksDoors": [
{
"types": [
"ammo"
],
"requires": []
}
],
"flashSuitChecked": true,
"blueSuitChecked": true
},
{
"link": [
2,
2
],
"name": "Base (Come In Normally)",
"entranceCondition": {
"comeInNormally": {}
},
"requires": [],
"flashSuitChecked": true,
"blueSuitChecked": true
},
{
"link": [
2,
2
],
"name": "Base (Come In With Mockball)",
"entranceCondition": {
"comeInWithMockball": {
"adjacentMinTiles": 0,
"remoteAndLandingMinTiles": [
[
0,
0
]
],
"speedBooster": "any"
}
},
"requires": [],
"flashSuitChecked": true,
"blueSuitChecked": true
},
{
"name": "Base (Collect Item)",
"notable": false,
"requires": [],
"flashSuitChecked": true,
"blueSuitChecked": true,
"link": [
3,
3
],
"collectsItems": [
3
]
},
{
"name": "Base (Collect Item)",
"notable": false,
"requires": [],
"flashSuitChecked": true,
"blueSuitChecked": true,
"link": [
4,
4
],
"collectsItems": [
4
]
},
{
"id": 1,
"link": [
1,
1
],
"name": "Leave With Runway",
"requires": [],
"exitCondition": {
"leaveWithRunway": {
"length": 3,
"openEnd": 1
}
},
"flashSuitChecked": true,
"blueSuitChecked": true
},
{
"id": 2,
"link": [
1,
1
],
"name": "Leave With Runway - Frozen Reo",
"requires": [
"h_ZebesIsAwake",
"h_frozenEnemyRunway",
{
"enemyDamage": {
"enemy": "Reo",
"type": "contact",
"hits": 1
}
}
],
"exitCondition": {
"leaveWithRunway": {
"length": 6,
"openEnd": 0
}
},
"flashSuitChecked": true,
"blueSuitChecked": true,
"note": [
"Lure the Reo from the right and freeze it in the correct position when it swoops down.",
"Note that using a frozen Geemer may be useful and is easier to setup, particularly if shortcharging out the door."
],
"devNote": [
"The Reo can be set up flush with the runway or 3 pixels higher.",
"FIXME: Find and add a description for a normalized setup for this and possibly remove the Reo hit, especially with using the Geemer to extend the runway."
]
},
{
"id": 66,
"link": [
1,
1
],
"name": "Leave With Side Platform (Power Bomb Blocks Broken)",
"requires": [
{
"obstaclesCleared": [
"C"
]
},
"h_speedJump",
{
"or": [
"canMomentumConservingMorph",
"canInsaneJump"
]
}
],
"exitCondition": {
"leaveWithSidePlatform": {
"height": 3,
"runway": {
"length": 42,
"openEnd": 0
},
"obstruction": [
3,
0
]
}
},
"flashSuitChecked": true,
"blueSuitChecked": true,
"note": [
"Leaving with upward momentum is possible in three ways:",
"1) Most easily, with a momentum-conserving morph against the ceiling through the transition,",
"2) With a momentum-conserving turnaround through the transition, or",
"3) Jumping specifically with a extra run speed between $5.2 and $5.4 and aiming down through the transition.",
"For the first two methods, avoid backing into the corner;",
"instead press against it and turn around, to put Samus into a better position.",
"For the third method, use only the part of the runway in front of the Power Bomb blocks, or about a tile less."
],
"devNote": [
"Max extra run speed $6.8.",
"Using the full runway, the momentum-conserving morph has a 4-frame window for the jump,",
"and between a 3-frame and 6-frame window for the morph depending on the jump timing (with later jumps giving a bigger window for the morph);",
"The momentum-conserving turnaround has a 2-frame window for the jump,",
"and either a 1-frame or 5-frame window for the turnaround depending on the jump (with the last-frame jump giving the larger window for the turnaround)."
]
},
{
"id": 67,
"link": [
1,
1
],
"name": "Leave With Side Platform (Power Bomb Blocks Intact)",
"requires": [
"h_speedJump",
{
"or": [
"canMomentumConservingMorph",
"canInsaneJump"
]
}
],
"exitCondition": {
"leaveWithSidePlatform": {
"height": 3,
"runway": {
"length": 31,
"openEnd": 0
},
"obstruction": [
3,
0
]
}
},
"flashSuitChecked": true,
"blueSuitChecked": true,
"note": [
"Leaving with upward momentum is possible in three ways:",
"1) Most easily, with a momentum-conserving morph against the ceiling through the transition,",
"2) With a momentum-conserving turnaround through the transition, or",
"3) Jumping and aiming down through the transition.",
"To maximize the lenience for the jump, back into the Power Bomb block corner,",
"and while running perform a single-pixel arm pump (e.g. by firing a shot);",
"this only matters in certain situations, but in all cases it won't hurt."
],
"devNote": [
"Max extra run speed $5.4.",
"The momentum-conserving morph has a 3-frame window for the jump,",
"and between a 3-frame and 8-frame window for the morph depending on the jump timing (with later jumps giving a bigger window for the morph);",
"these windows can be more narrow depending on what is required in the next room.",
"The momentum-conserving turnaround has a 2-frame window for the jump:",
"if jumping on the second-to-last possible frame, then there is a 4-frame window for the turnaround,",
"while if jumping on the last frame, there is a 5-frame window for turning around before the transition",
"or it can be buffered through the transition",
"(or the turnaround could not be performed at all, to maintain forward and upward momentum by simply aiming down)."
]
},
{
"id": 3,
"link": [
1,
1
],
"name": "Leave Shinecharged",
"requires": [
{
"canShineCharge": {
"usedTiles": 30,
"openEnd": 0
}
},
"canShinechargeMovement",
{
"shineChargeFrames": 40
}
],
"exitCondition": {
"leaveShinecharged": {}
},
"flashSuitChecked": true,
"blueSuitChecked": true
},
{
"id": 4,
"link": [
1,
1
],
"name": "Leave Shinecharged - Power Bomb Blocks Broken",
"requires": [
{
"obstaclesCleared": [
"C"
]
},
{
"canShineCharge": {
"usedTiles": 41,
"openEnd": 0
}
},
"canShinechargeMovement",
{
"shineChargeFrames": 40
}
],
"exitCondition": {
"leaveShinecharged": {}
},
"flashSuitChecked": true,
"blueSuitChecked": true
},
{
"id": 5,
"link": [
1,
1
],
"name": "Leave Spinning",
"requires": [],
"exitCondition": {
"leaveSpinning": {
"remoteRunway": {
"length": 28,
"openEnd": 0
}
}
},
"flashSuitChecked": true,
"blueSuitChecked": true
},
{
"id": 6,
"link": [
1,
1
],
"name": "Leave Spinning - Power Bomb Blocks Broken",
"requires": [
{
"obstaclesCleared": [
"C"
]
}
],
"exitCondition": {
"leaveSpinning": {
"remoteRunway": {
"length": 38,
"openEnd": 1
}
}
},
"flashSuitChecked": true,
"blueSuitChecked": true
},
{
"id": 7,
"link": [
1,
1
],
"name": "Leave With Mockball",
"requires": [],
"exitCondition": {
"leaveWithMockball": {
"remoteRunway": {
"length": 28,
"openEnd": 0
},
"landingRunway": {
"length": 3,
"openEnd": 1
}
}
},
"flashSuitChecked": true,
"blueSuitChecked": true
},
{
"id": 8,
"link": [
1,
1
],
"name": "Leave With Mockball - Power Bomb Blocks Broken",
"requires": [
{
"obstaclesCleared": [
"C"
]
}
],
"exitCondition": {
"leaveWithMockball": {
"remoteRunway": {
"length": 38,
"openEnd": 1
},
"landingRunway": {
"length": 3,
"openEnd": 1
}
}
},
"flashSuitChecked": true,
"blueSuitChecked": true
},
{
"id": 9,
"link": [
1,
1
],
"name": "Leave With Spring Ball Bounce",
"requires": [],
"exitCondition": {
"leaveWithSpringBallBounce": {
"remoteRunway": {
"length": 23,
"openEnd": 1
},
"landingRunway": {
"length": 3,
"openEnd": 1
},
"movementType": "uncontrolled"
}
},
"flashSuitChecked": true,
"blueSuitChecked": true
},
{
"id": 10,
"link": [
1,
1
],
"name": "Leave With Spring Ball Bounce - Power Bomb Blocks Broken",
"requires": [
{
"obstaclesCleared": [
"C"
]
}
],
"exitCondition": {
"leaveWithSpringBallBounce": {
"remoteRunway": {
"length": 31,
"openEnd": 0
},
"landingRunway": {
"length": 3,
"openEnd": 1
},
"movementType": "uncontrolled"
}
},
"flashSuitChecked": true,
"blueSuitChecked": true
},
{
"id": 11,
"link": [
1,
1
],
"name": "Leave Space Jumping",
"requires": [],
"exitCondition": {
"leaveSpaceJumping": {
"remoteRunway": {
"length": 20,
"openEnd": 0
}
}
},
"flashSuitChecked": true,
"blueSuitChecked": true
},
{
"id": 12,
"link": [
1,
1
],
"name": "Leave Space Jumping - Power Bomb Blocks Broken",
"requires": [
{
"obstaclesCleared": [
"C"
]
}
],
"exitCondition": {
"leaveSpaceJumping": {
"remoteRunway": {
"length": 28,
"openEnd": 1
}
}
},
"flashSuitChecked": true,
"blueSuitChecked": true
},
{
"id": 13,
"link": [
1,
1
],
"name": "Leave With Temporary Blue",
"requires": [
{
"canShineCharge": {
"usedTiles": 29,
"openEnd": 0
}
},
"canChainTemporaryBlue"
],
"exitCondition": {
"leaveWithTemporaryBlue": {}
},
"flashSuitChecked": true,
"blueSuitChecked": true
},
{
"id": 14,
"link": [
1,
1
],
"name": "Geemer, Skree, and Reo Farm",
"requires": [
"h_ZebesIsAwake",
{
"resetRoom": {
"nodes": [
1
]
}
},
{
"cycleFrames": 400
},
{
"or": [
"canDash",
{
"and": [
{
"haveBlueSuit": {}
},
{
"cycleFrames": 80
}
]
}
]
}
],
"resetsObstacles": [
"A",
"B",
"C"
],
"farmCycleDrops": [
{
"enemy": "Geemer (blue)",
"count": 2
},
{
"enemy": "Skree",
"count": 2
},
{
"enemy": "Reo",
"count": 1
}
],
"flashSuitChecked": true,
"blueSuitChecked": true
},
{
"id": 15,
"link": [
1,
1
],
"name": "G-Mode Setup - Get Hit By Geemer",
"requires": [
"h_ZebesIsAwake"
],
"exitCondition": {
"leaveWithGModeSetup": {}
},
"flashSuitChecked": true,
"blueSuitChecked": true
},
{
"id": 16,
"link": [
1,
1
],
"name": "G-Mode Regain Mobility",
"requires": [
{
"enemyDamage": {
"enemy": "Geemer (blue)",
"type": "contact",
"hits": 1
}
},
"h_ZebesIsAwake"
],
"gModeRegainMobility": {},
"flashSuitChecked": true,
"blueSuitChecked": true
},
{
"id": 72,
"link": [
1,
1
],
"name": "R-Mode Spark Interrupt",
"entranceCondition": {
"comeInWithRMode": {}
},
"requires": [
"h_ZebesIsAwake",
{
"or": [
"h_CrystalFlashForReserveEnergy",
{
"and": [
"h_RModeCanRefillReserves",
{
"resourceMissingAtMost": [
{
"type": "Missile",
"count": 0
}
]
},
{
"partialRefill": {
"type": "ReserveEnergy",
"limit": 20
}
}
]
}
]
},
{
"canShineCharge": {
"usedTiles": 30,
"openEnd": 0
}
},
{
"autoReserveTrigger": {
"maxReserveEnergy": 95
}
},
"canRModeSparkInterrupt"
],
"flashSuitChecked": true,
"blueSuitChecked": true,
"devNote": [
"Kill the Geemers for Reserves, or else Crystal Flash. Damage down and use the Reo to interrupt a shinespark wind-up."
]
},
{
"id": 17,
"link": [
1,
1
],
"name": "Crystal Flash",
"requires": [
"h_CrystalFlash"
],
"clearsObstacles": [
"C"
],
"flashSuitChecked": true,
"blueSuitChecked": true
},
{
"id": 74,
"link": [
1,
1
],
"name": "Crystal Spark",
"requires": [
{
"or": [
{
"canShineCharge": {
"usedTiles": 31,
"openEnd": 0
}
},
{
"and": [
{
"obstaclesCleared": [
"C"
]
},
{
"canShineCharge": {
"usedTiles": 43,
"openEnd": 0
}
}
]
}
]
},
"h_CrystalSpark"
],
"flashSuitChecked": true,
"blueSuitChecked": true
},
{
"id": 18,
"link": [
1,
3
],
"name": "Base",
"requires": [
{
  "or": [
    "HiJump",
    "SpaceJump",
    "canSpringBallJumpMidAir"
  ]
}
],
"flashSuitChecked": true,
"blueSuitChecked": true
},
{
"id": 19,
"link": [
1,
3
],
"name": "Use Frozen Enemy",
"requires": [
"h_ZebesIsAwake",
"canUseFrozenEnemies"
],
"flashSuitChecked": true,
"blueSuitChecked": true
},
{
"id": 20,
"link": [
1,
3
],
"name": "IBJ",
"requires": [
"canBombAboveIBJ"
],
"flashSuitChecked": true,
"blueSuitChecked": true
},
{
"id": 21,
"link": [
1,
3
],
"name": "IBJ with Power Bomb",
"requires": [
"canPowerBombMidIBJ"
],
"clearsObstacles": [
"C"
],
"flashSuitChecked": true,
"blueSuitChecked": true,
"note": "Use a Power Bomb while performing an IBJ to break the shot block while part way up."
},
{
"id": 22,
"link": [
1,
3
],
"name": "Ceiling Item Jump Into IBJ",
"requires": [
"canJumpIntoIBJ",
"canTrickyJump"
],
"flashSuitChecked": true,
"blueSuitChecked": true,
"note": [
"Shoot the block, jump into an IBJ, gaining height quickly enough to make it in time.",
"This can be done with as few as 2 bombs,",
"in which case it is similar to the start of a double bomb jump."
]
},
{
"id": 23,
"link": [
1,
3
],
"name": "Ceiling Damage Boost",
"requires": [
{
"notable": "Ceiling Damage Boost"
},
"h_ZebesIsAwake",
"canNeutralDamageBoost",
{
"enemyDamage": {
"enemy": "Geemer (blue)",
"type": "contact",
"hits": 1
}
}
],
"flashSuitChecked": true,
"blueSuitChecked": true,
"note": [
"Have Samus shoot the shot block revealing the item and then quickly get hit by an enemy at the peak of her jump in order to reach the item.",
"No directional inputs should be held while getting hit by the enemy in order to have a neutral boost and reach the item.",
"This is traditionally done with the swooping Reo; after a few failed tries, it may help to reset the room to reposition it.",
"The global Geemer may be easier to use, although it takes longer to get there; jump as it starts moving horizontally again while it is 3 tiles away from the item."
],
"devNote": "Although the Reo is traditionally used for the boost, the Geemer does less damage and should still put this in logic with low energy."
},
{
"id": 75,
"link": [
1,
3
],
"name": "Ceiling Damage Boost with Blue Suit",
"requires": [
{
"haveBlueSuit": {}
},
{
"notable": "Ceiling Damage Boost"
},
"h_ZebesIsAwake",
{
"tech": "canNeutralDamageBoost"
},
"canMidAirMorph",
"canTrickyDodgeEnemies",
{
"or": [
{
"and": [
"h_blueSuitXRayCancelShinecharge",
"canCrouchJump"
]
},
"canInsaneJump"
]
},
{
"enemyDamage": {
"enemy": "Reo",
"type": "contact",
"hits": 1
}
}
],
"flashSuitChecked": true,
"blueSuitChecked": true,
"note": [
"While carrying a blue suit, take damage from the Reo after mid-air morphing, to get a boost from it.",
"It helps to crouch jump, using X-Ray to cancel the shinecharge if needed.",
"A standing jump can also work, but with more precision.",
"It is best to unmorph as soon as possible after taking damage, while Samus still has knockback."
],
"detailNote": [
"A slightly later unmorph, after knockback expires, can also work but depends on collision oscillation."
],
"devNote": [
"Technically a blue suit would not be required for this strat, so the `haveBlueSuit` requirement could be dropped,",
"but without a blue suit there would be no reason to do it this way, and the name would be misleading."
]
},
{
"id": 24,
"link": [
1,
3
],
"name": "Ceiling Item Speed Jump",
"requires": [
"canSpeedyJump",
"canCarefulJump"
],
"flashSuitChecked": true,
"blueSuitChecked": true,
"note": "Does not require a shinespark. You can shoot the block, then just run and jump."
},
{
"id": 84,
"link": [
1,
3
],
"name": "Ceiling Item Shinespark",
"requires": [
"canShinechargeMovement",
{
"or": [
{
"canShineCharge": {
"usedTiles": 31,
"openEnd": 0
}
},
{
"and": [
{
"obstaclesCleared": [
"C"
]
},
{
"canShineCharge": {
"usedTiles": 42,
"openEnd": 0
}
}
]
}
]
},
{
"or": [
{
"shinespark": {
"frames": 10,
"excessFrames": 2
}
},
{
"and": [
"canMidairShinespark",
{
"shinespark": {
"frames": 3,
"excessFrames": 2
}
}
]
}
]
}
],
"flashSuitChecked": true,
"blueSuitChecked": true,
"note": [
"After shinesparking against the ceiling, if the item is not immediately collected,",
"hold the direction (left or right) toward the item to collect it while falling."
],
"detailNote": [
"Holding a direction helps because Samus clips vertically a couple pixels into the ceiling at the end of the shinespark,",
"which allows time to press against the item to collect it while falling.",
"This works regardless of whether Samus is facing the item (and holding forward)",
"or away from the item (holding backward to turn around)."
]
},
{
"id": 25,
"link": [
1,
3
],
"name": "Ceiling Item Unmorph Bomb Boost",
"requires": [
"canCrouchJump",
"canMidAirMorph",
{
"tech": "canJumpIntoIBJ"
},
"canUnmorphBombBoost"
],
"flashSuitChecked": true,
"blueSuitChecked": true,
"note": [
"Reveal the item and then setup to jump into an IBJ.",
"As Samus starts falling, unmorph to extend Samus' hitbox high enough to reach the item after bouncing on the bomb."
],
"devNote": "It is a JumpIntoIBJ that bounces on a single bomb or Power Bomb."
},
{
"id": 26,
"link": [
1,
3
],
"name": "Use Stored Spark",
"requires": [
"h_storedSpark",
{
"shinespark": {
"frames": 3,
"excessFrames": 2
}
}
],
"flashSuitChecked": true,
"blueSuitChecked": true,
"devNote": [
"Technically you obtain the item after 1 frame, then continue for 2 more.",
"If the item is an Energy Tank, the first frame deals damage, the next obtains the tank without dealing damage, then the next deals damage again.",
"It is untested if this is how it works with other items, but it is likely never going to matter."
]
},
{
"id": 27,
"link": [
1,
3
],
"name": "Taco Tank",
"requires": [
{
"notable": "Taco Tank"
},
"canCWJ",
"canInsaneWallJump",
"canStationarySpinJump"
],
"flashSuitChecked": false,
"blueSuitChecked": true,
"note": [
"Samus must start pressed against the wall, facing left. Start by performing a dashing stationary spinjump. The initial left press needs to be exactly 3 or 4 frames.",
"Jump needs to be pressed exactly 3 frames after the inital left press. Samus then needs to quickly walljump off the wall at a precise height.",
"While spin jumping in the air, break spin with angle or shot and hold down to reduce the size of the hitbox.",
"If the initial jump and subsequent walljump were performed correctly, depending on walljump height and the number of pixels away from the wall, Samus will have between 1-3 frames where it is possible to collect the tank",
"Release down just as Samus is about to collide with the tank to collect. Even if the previous steps were performed correctly and down was released on the correct frame to collect the tank, there is a 50% chance of failure.",
"The game will check if Samus is in contact with the wall or the item on alternating frames. If the item collection happens on a frame where the game is checking for a wall collision then the item will not be acquired."
]
},
{
"id": 28,
"link": [
1,
4
],
"name": "Base",
"requires": [
"Morph"
],
"flashSuitChecked": true,
"blueSuitChecked": true
},
{
"id": 29,
"link": [
1,
5
],
"name": "G-Mode Morph",
"entranceCondition": {
"comeInWithGMode": {
"mode": "indirect",
"morphed": true
}
},
"requires": [
{
  "or": [
    "h_ZebesNotAwake",
    "Morph",
    "h_artificialMorphSpringBall",
    "h_artificialMorphBombThings",
    "canTrickyDodgeEnemies",
    "h_blueSuitGMode",
    {
      "enemyDamage": {
        "enemy": "Geemer (blue)",
        "type": "contact",
        "hits": 1
      }
    }
  ]
}
],
"flashSuitChecked": true,
"blueSuitChecked": true,
"note": "It is possible to roll off of the ledge and avoid the Geemers, but it is somewhat tight and the timing is likely earlier than expected.",
"devNote": [
"It may be possible to come in indirect and still have enough i-frames to get through the Geemers, but Samus may be coming from a doorless room like Crateria Tube.",
"This is not easy to model and isn't worth doing, because the player will almost certainly canTrickyDodgeEnemies enabled before enabling canArtificialMorph."
]
},
{
"id": 31,
"link": [
1,
6
],
"name": "Direct G-Mode Morph",
"entranceCondition": {
"comeInWithGMode": {
"mode": "direct",
"morphed": true
}
},
"requires": [
{
  "or": [
    "h_ZebesNotAwake",
    "Morph",
    "h_artificialMorphSpringBall",
    "h_artificialMorphBombThings",
    "canTrickyDodgeEnemies",
    "h_blueSuitGMode",
    {
      "enemyDamage": {
        "enemy": "Geemer (blue)",
        "type": "contact",
        "hits": 1
      }
    }
  ]
}
],
"flashSuitChecked": true,
"blueSuitChecked": true,
"note": [
"It is possible to roll off of the ledge over the Geemers, but it is somewhat tight and the timing is likely earlier than expected..",
"Alternatively, it is possible to roll of the ledge go through the Geemers before Samus' i-frames expire."
]
},
{
"id": 68,
"link": [
1,
6
],
"name": "Direct G-Mode Morph, Immobile",
"entranceCondition": {
"comeInWithGMode": {
"mode": "direct",
"morphed": true,
"mobility": "immobile"
}
},
"requires": [
"h_ZebesIsAwake",
"canUseIFrames"
],
"flashSuitChecked": true,
"blueSuitChecked": true,
"note": "Regain mobility with the first Geemer then roll through the second to avoid a second hit."
},
{
"id": 73,
"link": [
2,
1
],
"name": "R-Mode Spark Interrupt",
"entranceCondition": {
"comeInWithRMode": {}
},
"requires": [
"h_ZebesIsAwake",
{
"or": [
"h_CrystalFlashForReserveEnergy",
{
"and": [
"Morph",
"h_destroyBombWalls",
"h_RModeCanRefillReserves",
{
"resourceMissingAtMost": [
{
"type": "Missile",
"count": 0
}
]
},
{
"partialRefill": {
"type": "ReserveEnergy",
"limit": 20
}
}
]
}
]
},
{
"canShineCharge": {
"usedTiles": 30,
"openEnd": 0
}
},
{
"autoReserveTrigger": {
"maxReserveEnergy": 95
}
},
"canRModeSparkInterrupt"
],
"clearsObstacles": [
"A",
"B"
],
"flashSuitChecked": true,
"blueSuitChecked": true,
"devNote": [
"Kill the Geemers for Reserves, or else Crystal Flash. Damage down and use the Reo to interrupt a shinespark wind-up."
]
},
{
"id": 34,
"link": [
2,
2
],
"name": "Leave with Runway",
"requires": [],
"exitCondition": {
"leaveWithRunway": {
"length": 5,
"openEnd": 0
}
},
"flashSuitChecked": true,
"blueSuitChecked": true
},
{
"id": 63,
"link": [
2,
2
],
"name": "Leave With Spark (Fast Wall Climb)",
"requires": [
{
"notable": "Leave With Spark (Fast Wall Climb)"
},
{
"obstaclesCleared": [
"A",
"C"
]
},
"HiJump",
{
"canShineCharge": {
"usedTiles": 35,
"openEnd": 1
}
},
"canShinechargeMovementTricky",
"canFastWallJumpClimb",
{
"shinespark": {
"frames": 8,
"excessFrames": 0
}
}
],
"exitCondition": {
"leaveWithSpark": {
"position": "top"
}
},
"flashSuitChecked": true,
"blueSuitChecked": true
},
{
"id": 35,
"link": [
2,
2
],
"name": "G-Mode Setup - Get Hit By Geemer - Broken Crumble Blocks",
"requires": [
"h_ZebesIsAwake",
{
"or": [
"h_destroyBombWalls",
{
"obstaclesCleared": [
"A"
]
}
]
},
{
"or": [
"canConsecutiveWallJump",
"SpaceJump",
"canLongIBJ"
]
}
],
"exitCondition": {
"leaveWithGModeSetup": {}
},
"flashSuitChecked": true,
"blueSuitChecked": true,
"note": "Falling down the shaft and breaking the crumble block does not require Morph."
},
{
"id": 36,
"link": [
2,
2
],
"name": "G-Mode Setup - Get Hit By Geemer - Broken Power Bomb Blocks",
"requires": [
"h_ZebesIsAwake",
{
"or": [
"h_destroyBombWalls",
{
"obstaclesCleared": [
"A"
]
}
]
},
"h_usePowerBomb",
{
"canShineCharge": {
"usedTiles": 42,
"openEnd": 0
}
},
{
"or": [
{
"shinespark": {
"frames": 36,
"excessFrames": 3
}
},
{
"and": [
"HiJump",
{
"shinespark": {
"frames": 32,
"excessFrames": 3
}
}
]
}
]
}
],
"exitCondition": {
"leaveWithGModeSetup": {}
},
"flashSuitChecked": true,
"blueSuitChecked": true,
"note": "Falling down the shaft and breaking the crumble block does not require Morph."
},
{
"id": 37,
"link": [
2,
2
],
"name": "G-Mode Setup - Get Hit By Geemer - Blocks Already Broken",
"requires": [
"h_ZebesIsAwake",
{
"obstaclesCleared": [
"A",
"B"
]
}
],
"exitCondition": {
"leaveWithGModeSetup": {}
},
"flashSuitChecked": true,
"blueSuitChecked": true,
"note": "Falling down the shaft and breaking the crumble block does not require Morph."
},
{
"id": 69,
"link": [
2,
2
],
"name": "Geemer, Skree, and Reo Farm",
"requires": [
{
"notable": "Return Through Crumble Blocks"
},
"h_ZebesIsAwake",
"Morph",
{
"or": [
"ScrewAttack",
{
"and": [
"h_useMorphBombs",
{
"cycleFrames": 80
}
]
},
{
"haveBlueSuit": {}
}
]
},
{
"or": [
"canConsecutiveWallJump",
{
"and": [
"SpaceJump",
{
"cycleFrames": 250
}
]
}
]
},
{
"resetRoom": {
"nodes": [
2
]
}
},
{
"cycleFrames": 1210
},
{
"or": [
"canDash",
{
"and": [
{
"haveBlueSuit": {}
},
{
"cycleFrames": 50
}
]
}
]
}
],
"clearsObstacles": [
"A",
"B"
],
"resetsObstacles": [
"C"
],
"farmCycleDrops": [
{
"enemy": "Geemer (blue)",
"count": 2
},
{
"enemy": "Skree",
"count": 2
},
{
"enemy": "Reo",
"count": 1
}
],
"flashSuitChecked": true,
"blueSuitChecked": true,
"devNote": [
"Returning with an IBJ or frozen Geemer would also be possible,",
"but these are probably too slow to model in a farm strat."
]
},
{
"id": 38,
"link": [
2,
2
],
"name": "Crystal Flash",
"requires": [
"h_CrystalFlash"
],
"clearsObstacles": [
"A"
],
"flashSuitChecked": true,
"blueSuitChecked": true
},
{
"id": 83,
"link": [
2,
2
],
"name": "Come in Shinecharging, Crystal Spark",
"entranceCondition": {
"comeInShinecharging": {
"length": 4,
"openEnd": 0
},
"comesInHeated": "no"
},
"requires": [
"h_CrystalSpark"
],
"flashSuitChecked": true,
"blueSuitChecked": true
},
{
"id": 39,
"link": [
2,
4
],
"name": "Base",
"requires": [
"Morph",
{
"or": [
"h_destroyBombWalls",
{
"obstaclesCleared": [
"A"
]
}
]
}
],
"clearsObstacles": [
"A",
"B"
],
"flashSuitChecked": true,
"blueSuitChecked": true
},
{
"id": 76,
"link": [
2,
4
],
"name": "Blue Suit",
"requires": [
"Morph",
{
"haveBlueSuit": {}
}
],
"clearsObstacles": [
"A",
"B"
],
"flashSuitChecked": true,
"blueSuitChecked": true
},
{
"id": 40,
"link": [
2,
4
],
"name": "Temporary Blue",
"entranceCondition": {
"comeInShinecharging": {
"length": 3,
"openEnd": 0
}
},
"requires": [
"Morph",
"canTemporaryBlue"
],
"clearsObstacles": [
"A",
"B"
],
"flashSuitChecked": true,
"blueSuitChecked": true,
"devNote": "There is 1 unusable tile in this runway."
},
{
"id": 77,
"link": [
2,
5
],
"name": "G-Mode Morph with Blue Suit",
"entranceCondition": {
"comeInWithGMode": {
"mode": "any",
"morphed": true
}
},
"requires": [
"h_blueSuitGMode",
{
"or": [
"h_artificialMorphSpringBall",
"h_artificialMorphBombThings"
]
}
],
"clearsObstacles": [
"A"
],
"flashSuitChecked": true,
"blueSuitChecked": true,
"note": [
"Use a blue suit to pass through the bomb block.",
"Overload PLMs using the scroll PLMs in the shaft, to pass through the crumble block."
],
"devNote": [
"Power Bombs do not work as a movement option, because they make the bomb block solid.",
"We don't track direct vs. indirect state here:",
"since PLMs will be overloaded, remote acquiring the item would not be an option anyway.",
"Flashing lights are not a concern because the cameras will be off without Morph,",
"and with Morph there would be no purpose to the G-mode here.",
"Samus can jump after exiting G-mode to fix the camera.",
"There are no strats that require any off-screen precision that start from 5 except going back up, which is pointless."
]
},
{
"id": 41,
"link": [
3,
1
],
"name": "Base",
"requires": [],
"flashSuitChecked": true,
"blueSuitChecked": true
},
{
"id": 42,
"link": [
4,
1
],
"name": "Base",
"requires": [
"Morph"
],
"flashSuitChecked": true,
"blueSuitChecked": true
},
{
"id": 43,
"link": [
4,
1
],
"name": "Broken Power Bomb Blocks",
"requires": [
{
  "or": [
    "h_usePowerBomb",
    {
      "obstaclesCleared": [
        "C"
      ]
    }
  ]
}
],
"clearsObstacles": [
"C"
],
"flashSuitChecked": true,
"blueSuitChecked": true
},
{
"id": 45,
"link": [
4,
2
],
"name": "Return Through Crumble Blocks",
"requires": [
{
"notable": "Return Through Crumble Blocks"
},
"Morph",
{
"or": [
"canConsecutiveWallJump",
"SpaceJump",
"canLongIBJ"
]
},
{
"obstaclesCleared": [
"A",
"B"
]
}
],
"flashSuitChecked": true,
"blueSuitChecked": true,
"note": "The Crumble Block does not respawn, so it's possible to grab the items and go back up without breaking the Power Bomb blocks."
},
{
"id": 46,
"link": [
4,
2
],
"name": "Base",
"requires": [
{
"or": [
"h_usePowerBomb",
{
"obstaclesCleared": [
"C"
]
}
]
},
{
"or": [
"canConsecutiveWallJump",
"SpaceJump",
"canLongIBJ"
]
},
{
"or": [
{
"and": [
"h_usePowerBomb",
"canTrivialMidAirMorph"
]
},
"ScrewAttack"
]
}
],
"clearsObstacles": [
"A",
"B",
"C"
],
"flashSuitChecked": true,
"blueSuitChecked": true,
"note": "Base strat when entering the room from below.",
"devNote": "canWallJumpInstantMorph is not needed here, as the precision is very low."
},
{
"id": 78,
"link": [
4,
2
],
"name": "Blue Suit",
"requires": [
{
"haveBlueSuit": {}
},
{
"or": [
"h_usePowerBomb",
{
"obstaclesCleared": [
"C"
]
}
]
},
{
"or": [
"canConsecutiveWallJump",
"SpaceJump"
]
}
],
"clearsObstacles": [
"A",
"B",
"C"
],
"flashSuitChecked": true,
"blueSuitChecked": true
},
{
"id": 47,
"link": [
4,
2
],
"name": "Power Bomb and Bombs",
"requires": [
{
"or": [
"h_usePowerBomb",
{
"obstaclesCleared": [
"C"
]
}
]
},
"h_useMorphBombs",
{
"or": [
{
"and": [
"SpaceJump",
"canMidAirMorph"
]
},
"canLongIBJ",
{
"and": [
"canConsecutiveWallJump",
"canWallJumpInstantMorph"
]
}
]
}
],
"clearsObstacles": [
"A",
"B",
"C"
],
"flashSuitChecked": true,
"blueSuitChecked": true,
"note": "Placing the bomb against the bomb block at the top of the shaft can be somewhat tricky."
},
{
"id": 48,
"link": [
4,
2
],
"name": "Geemer Ice Climb",
"requires": [
"h_ZebesIsAwake",
{
"or": [
"h_usePowerBomb",
{
"and": [
{
"obstaclesCleared": [
"B"
]
},
"Morph"
]
},
{
"obstaclesCleared": [
"C"
]
}
]
},
{
"or": [
{
"obstaclesCleared": [
"A"
]
},
"ScrewAttack",
{
"haveBlueSuit": {}
},
{
"and": [
"h_useMorphBombs",
"canMidAirMorph"
]
}
]
},
"canTrickyUseFrozenEnemies",
"canTrickyJump",
"canCameraManip"
],
"clearsObstacles": [
"A",
"B"
],
"flashSuitChecked": true,
"blueSuitChecked": true,
"note": [
"Use both Geemers to climb the tall shaft by repeatedly freezing them.",
"Note that one moves locally when on camera and the other moves globally."
],
"devNote": "FIXME: It is possible to ceiling ice clip the top block."
},
{
"id": 49,
"link": [
4,
2
],
"name": "Geemer Ice Climb with PowerBombs",
"requires": [
"h_ZebesIsAwake",
{
"or": [
"h_usePowerBomb",
{
"and": [
{
"obstaclesCleared": [
"B"
]
},
"Morph"
]
},
{
"obstaclesCleared": [
"C"
]
}
]
},
"h_usePowerBomb",
"canTrivialMidAirMorph",
"canTrickyUseFrozenEnemies",
"canTrickyJump",
"canBePatient",
"canCameraManip"
],
"clearsObstacles": [
"A",
"B"
],
"flashSuitChecked": true,
"blueSuitChecked": true,
"note": [
"Use both Geemers to climb the tall shaft by repeatedly freezing them.",
"Note that one moves locally when on camera and the other moves globally.",
"Once Samus is close to the top Bomb Block, freeze one Geemer low and jump as high as possible before placing a power bomb.",
"Continue climbing with the Geemer that survives."
]
},
{
"id": 50,
"link": [
4,
2
],
"name": "Shinespark",
"requires": [
{
"or": [
"h_usePowerBomb",
{
"obstaclesCleared": [
"C"
]
}
]
},
{
"canShineCharge": {
"usedTiles": 42,
"openEnd": 0
}
},
{
"or": [
{
"shinespark": {
"frames": 43,
"excessFrames": 2
}
},
{
"and": [
"canMidairShinespark",
{
"shinespark": {
"frames": 36,
"excessFrames": 3
}
}
]
},
{
"and": [
"HiJump",
"canMidairShinespark",
{
"shinespark": {
"frames": 32,
"excessFrames": 3
}
}
]
}
]
}
],
"clearsObstacles": [
"A",
"B",
"C"
],
"flashSuitChecked": true,
"blueSuitChecked": true,
"devNote": [
"FIXME: add a variant that uses a crumble jump to save some shinespark frames."
]
},
{
"id": 51,
"link": [
4,
2
],
"name": "Wall Jump Spark",
"requires": [
{
"or": [
"h_usePowerBomb",
{
"obstaclesCleared": [
"C"
]
}
]
},
{
"canShineCharge": {
"usedTiles": 42,
"openEnd": 0
}
},
"canShinechargeMovementComplex",
"canConsecutiveWallJump",
{
"shinespark": {
"frames": 17,
"excessFrames": 3
}
}
],
"clearsObstacles": [
"A",
"B",
"C"
],
"flashSuitChecked": true,
"blueSuitChecked": true,
"note": [
"Breaking the Power Bomb blocks exactly wide enough makes it easier to quickly enter the one-tile gap.",
"Aligning the Power Bomb with the left side of the ceiling fixture that sticks down will position the explosion correctly for this."
],
"devNote": "The runway here is 31 tiles before breaking the Power Bomb blocks, but becomes longer after."
},
{
"id": 64,
"link": [
4,
2
],
"name": "Fast Wall Jump Spark (With HiJump)",
"requires": [
{
"notable": "Fast Wall Jump Spark"
},
{
"or": [
"h_usePowerBomb",
{
"obstaclesCleared": [
"C"
]
}
]
},
{
"canShineCharge": {
"usedTiles": 42,
"openEnd": 0
}
},
"canShinechargeMovementComplex",
"canConsecutiveWallJump",
"HiJump",
{
"shinespark": {
"frames": 9,
"excessFrames": 9
}
}
],
"clearsObstacles": [
"A",
"B",
"C"
],
"flashSuitChecked": true,
"blueSuitChecked": true,
"note": [
"By wall jumping fast enough and sparking close to the block, it can be broken even on low energy (29 or less)."
]
},
{
"id": 65,
"link": [
4,
2
],
"name": "Fast Wall Jump Spark (Bootless)",
"requires": [
{
"notable": "Fast Wall Jump Spark"
},
{
"or": [
"h_usePowerBomb",
{
"obstaclesCleared": [
"C"
]
}
]
},
{
"canShineCharge": {
"usedTiles": 42,
"openEnd": 0
}
},
"canShinechargeMovementComplex",
"canFastWallJumpClimb",
{
"shinespark": {
"frames": 9,
"excessFrames": 9
}
}
],
"clearsObstacles": [
"A",
"B",
"C"
],
"flashSuitChecked": true,
"blueSuitChecked": true,
"note": [
"By wall jumping fast enough and sparking close to the block, it can be broken even on low energy (29 or less)."
]
},
{
"id": 52,
"link": [
4,
2
],
"name": "Shinespark (Return Through Crumble Blocks)",
"requires": [
{
"obstaclesCleared": [
"B"
]
},
"Morph",
{
"canShineCharge": {
"usedTiles": 31,
"openEnd": 0
}
},
{
"shinespark": {
"frames": 40,
"excessFrames": 3
}
},
"canShinechargeMovementTricky"
],
"clearsObstacles": [
"A"
],
"flashSuitChecked": true,
"blueSuitChecked": true
},
{
"id": 53,
"link": [
4,
2
],
"name": "Use Stored Spark",
"requires": [
{
"obstaclesCleared": [
"C"
]
},
"h_storedSpark",
{
"or": [
{
"shinespark": {
"frames": 36,
"excessFrames": 3
}
},
{
"and": [
"HiJump",
{
"shinespark": {
"frames": 32,
"excessFrames": 3
}
}
]
},
{
"and": [
{
"or": [
"canConsecutiveWallJump",
"SpaceJump"
]
},
{
"shinespark": {
"frames": 9,
"excessFrames": 9
}
}
]
}
]
}
],
"clearsObstacles": [
"A"
],
"flashSuitChecked": true,
"blueSuitChecked": true
},
{
"id": 54,
"link": [
4,
2
],
"name": "Use Stored Spark (Return Through Crumble Blocks)",
"requires": [
{
"obstaclesCleared": [
"B"
]
},
"Morph",
{
"obstaclesNotCleared": [
"C"
]
},
"h_storedSpark",
{
"or": [
{
"shinespark": {
"frames": 33,
"excessFrames": 3
}
},
{
"and": [
"HiJump",
{
"shinespark": {
"frames": 29,
"excessFrames": 3
}
}
]
},
{
"and": [
{
"or": [
"canConsecutiveWallJump",
"SpaceJump"
]
},
{
"shinespark": {
"frames": 9,
"excessFrames": 9
}
}
]
}
]
}
],
"clearsObstacles": [
"A"
],
"flashSuitChecked": true,
"blueSuitChecked": true
},
{
"id": 55,
"link": [
4,
2
],
"name": "Geemer Ice Stuck XRay Climb",
"requires": [
{
"notable": "Geemer Ice Stuck XRay Climb"
},
"h_ZebesIsAwake",
"canWallIceClip",
"canLongXRayClimb",
"Grapple",
{
"ammo": {
"type": "Super",
"count": 1
}
},
{
"enemyDamage": {
"enemy": "Geemer (blue)",
"type": "contact",
"hits": 1
}
}
],
"flashSuitChecked": true,
"blueSuitChecked": true,
"note": [
"Keep the two Geemers on screen while moving to the right side of the room.",
"Freeze the second Geemer as it exits the Morph Tunnel, with the Crumble block.",
"Use a Super Missile to knock the first Geemer down and freeze it at the pixel perfect height.",
"Become stuck in the wall after using Grapple to kill the frozen Geemer as it walks through Samus, firing to the left.",
"This re-enables XRay climbing."
],
"devNote": "FIXME: The Reo can be used to avoid spending a Super, but it's chaotic."
},
{
"id": 79,
"link": [
5,
1
],
"name": "Exit G-Mode",
"requires": [
"canGMode"
],
"flashSuitChecked": true,
"blueSuitChecked": true
},
{
"id": 57,
"link": [
5,
2
],
"name": "G-Mode Morph Bomb the Crumble Block",
"requires": [
"canGMode",
"h_artificialMorphIBJ",
{
"or": [
"canConsecutiveWallJump",
"SpaceJump",
{
"and": [
"h_artificialMorphLongIBJ",
"canOffScreenMovement"
]
},
{
"and": [
{
"blueSuitShinecharge": {}
},
{
"or": [
{
"shinespark": {
"frames": 32,
"excessFrames": 3
}
},
{
"and": [
"HiJump",
{
"shinespark": {
"frames": 29,
"excessFrames": 3
}
}
]
}
]
}
]
}
]
},
{
"or": [
"h_ZebesIsAwake",
{
"notable": "G-Mode Flashing Lights"
}
]
}
],
"flashSuitChecked": true,
"blueSuitChecked": true,
"note": [
"Overload PLMs by repeatidly bombing the Power Bomb blocks or the side of the crumble block, then enter through the crumble block.",
"If Samus is then going to IBJ up the shaft, and she has Morph, it is worth exiting G-mode first to allow the camera to follow her."
],
"devNote": "The off screen movement is just during an artificial morphed IBJ - the IBJ is long and Samus is covered for most of it."
},
{
"id": 70,
"link": [
5,
2
],
"name": "G-Mode Shoot the Ceiling Block Item",
"requires": [
"canGMode",
"Morph",
{
"or": [
"canConsecutiveWallJump",
"SpaceJump"
]
},
{
"or": [
"h_ZebesIsAwake",
{
"notable": "G-Mode Flashing Lights"
}
]
}
],
"flashSuitChecked": true,
"blueSuitChecked": true,
"note": [
"Overload PLMs by shooting the ceiling block item many times.",
"Because the item is in a shot block, this does not require Direct G-mode, nor does it require the item to be uncollected."
]
},
{
"id": 71,
"link": [
5,
2
],
"name": "G-Mode Morph Power Bomb the Ceiling Block Item",
"requires": [
"canPowerBombItemOverloadPLMs",
"canGMode",
"h_artificialMorphPowerBomb",
"h_artificialMorphMovement",
{
"or": [
"canConsecutiveWallJump",
"SpaceJump",
{
"and": [
{
"blueSuitShinecharge": {}
},
{
"or": [
{
"shinespark": {
"frames": 32,
"excessFrames": 3
}
},
{
"and": [
"HiJump",
{
"shinespark": {
"frames": 29,
"excessFrames": 3
}
}
]
}
]
}
]
}
]
}
],
"clearsObstacles": [
"B",
"C"
],
"flashSuitChecked": true,
"blueSuitChecked": true,
"note": [
"Overload PLMs with a single Power Bomb by hitting the ceiling block item.",
"This can be done with a single precisely placed Power Bomb. There should be one empty tile between Samus and the right wall.",
"Because the item is in a shot block, this does not require Direct G-mode, nor does it require the item to be uncollected."
],
"devNote": "This strat is useless if Samus has Morph, so there will be no flashing lights."
},
{
"id": 58,
"link": [
5,
4
],
"name": "G-Mode Morph",
"requires": [
"canGMode"
],
"flashSuitChecked": true,
"blueSuitChecked": true,
"devNote": "This strat is useless if Samus has Morph, so there will be no flashing lights."
},
{
"id": 59,
"link": [
5,
4
],
"name": "G-Mode Morph with Power Bomb",
"requires": [
"canGMode",
"h_artificialMorphPowerBomb"
],
"clearsObstacles": [
"B",
"C"
],
"flashSuitChecked": true,
"blueSuitChecked": true,
"note": "The blocks will not break if PLMs are already overloaded. Exiting G-Mode before the Power Bomb explodes will ensure they break.",
"devNote": "This strat is useless if Samus has Morph, so there will be no flashing lights."
},
{
"id": 80,
"link": [
5,
4
],
"name": "G-Mode Shoot the Ceiling Block Item",
"requires": [
"canGMode",
"Morph",
{
"or": [
"h_ZebesIsAwake",
{
"notable": "G-Mode Flashing Lights"
}
]
}
],
"clearsObstacles": [
"B"
],
"flashSuitChecked": true,
"blueSuitChecked": true,
"note": [
"Overload PLMs by shooting the ceiling block item many times.",
"Because the item is in a shot block, this does not require Direct G-mode, nor does it require the item to be uncollected.",
"After PLMs are overloaded, pass through the crumble block, exit G-mode, and break the crumble block."
]
},
{
"id": 81,
"link": [
6,
1
],
"name": "G-Mode Morph, Remote Acquire",
"requires": [
"canRemoteAcquire",
"h_artificialMorphMovement"
],
"collectsItems": [
4
],
"flashSuitChecked": true,
"blueSuitChecked": true,
"note": "Touch the item then roll back to the left before exiting G-Mode and remotely collect it.",
"devNote": [
"This does not include canRiskPermanentLossOfAccess if Samus only uses this to return to the left with the item.",
"This strat is useless if Samus has Morph, so there will be no flashing lights."
]
},
{
"id": 56,
"link": [
6,
2
],
"name": "G-Mode Morph Touch the Item to Overload PLMs",
"requires": [
"canGMode",
{
"itemNotCollectedAtNode": 4
},
"h_artificialMorphSpringBall",
{
"or": [
"canConsecutiveWallJump",
"SpaceJump",
{
"and": [
{
"blueSuitShinecharge": {}
},
{
"or": [
{
"shinespark": {
"frames": 32,
"excessFrames": 3
}
},
{
"and": [
"HiJump",
{
"shinespark": {
"frames": 29,
"excessFrames": 3
}
}
]
}
]
}
]
}
]
},
{
"or": [
"h_ZebesIsAwake",
{
"notable": "G-Mode Flashing Lights"
}
]
}
],
"collectsItems": [
4
],
"flashSuitChecked": true,
"blueSuitChecked": true,
"note": [
"Touch the item to overload PLMs then go through the crumble block and bomb block at the top of the shaft before exiting G-mode."
],
"devNote": [
"This will force Samus to pick up the item, so it can only be done once.",
"itemNotCollectedAtNode implicitly includes canRiskPermanentLossOfAccess.",
"Spring Ball is required, because Morph, Bombs, or a Power Bomb will allow other strats to be used instead."
]
},
{
"id": 82,
"link": [
6,
2
],
"name": "G-Mode Morph Touch the Item, Break the Crumble, Geemer Ice Climb",
"requires": [
"canGMode",
"h_ZebesIsAwake",
{
"itemNotCollectedAtNode": 4
},
"h_artificialMorphSpringBall",
{
"or": [
"ScrewAttack",
{
"haveBlueSuit": {}
}
]
},
"canTrickyUseFrozenEnemies",
"canTrickyJump",
"canCameraManip"
],
"clearsObstacles": [
"A",
"B"
],
"collectsItems": [
4
],
"flashSuitChecked": true,
"blueSuitChecked": true,
"note": [
"Touch the item to overload PLMs then go through the crumble block.",
"Use the global Geemer to climb the tall shaft by repeatedly freezing it.",
"Use a blue suit or Screw Attack at the top to break the block"
],
"devNote": [
"This will force Samus to pick up the item, so it can only be done once.",
"itemNotCollectedAtNode implicitly includes canRiskPermanentLossOfAccess.",
"Spring Ball is required, because Morph, Bombs, or a Power Bomb will allow other strats to be used instead.",
"This strat requires Zebes to be awake, so there will be no flashing lights.",
"FIXME: It is possible to ceiling ice clip the top block."
]
},
{
"id": 62,
"link": [
6,
5
],
"name": "Base",
"requires": [
"canGMode"
],
"flashSuitChecked": true,
"blueSuitChecked": true
}
],
"notables": [
{
"id": 1,
"name": "G-Mode Flashing Lights",
"note": [
"The eye scanners are particularly annoying while in G-mode. They scan Samus with bright flashing lights which remain for a further distance.",
"This is notable so a player can disable having to enter these flashing lights.",
"If disabled, Samus will only require being in G-mode in this room if Zebes is awake or if Samus does not have Morph."
]
},
{
"id": 2,
"name": "Ceiling Damage Boost",
"note": [
"Have Samus shoot the shot block revealing the item and then quickly get hit by an enemy at the peak of her jump in order to reach the item.",
"No directional inputs should be held while getting hit by the enemy in order to have a neutral boost and reach the item.",
"This is traditionally done with the swooping Reo; after a few failed tries, it may help to reset the room to reposition it.",
"The global Geemer may be easier to use, although it takes longer to get there; jump as it starts moving horizontally again while it is 3 tiles away from the item."
]
},
{
"id": 3,
"name": "Taco Tank",
"note": [
"Samus must start pressed against the wall, facing left. Start by performing a dashing stationary spinjump. The initial left press needs to be exactly 3 or 4 frames.",
"Jump needs to be pressed exactly 3 frames after the inital left press. Samus then needs to quickly walljump off the wall at a precise height.",
"While spin jumping in the air, break spin with angle or shot and hold down to reduce the size of the hitbox.",
"If the initial jump and subsequent walljump were performed correctly, depending on walljump height and the number of pixels away from the wall, Samus will have between 1-3 frames where it is possible to collect the tank",
"Release down just as Samus is about to collide with the tank to collect. Even if the previous steps were performed correctly and down was released on the correct frame to collect the tank, there is a 50% chance of failure.",
"The game will check if Samus is in contact with the wall or the item on alternating frames. If the item collection happens on a frame where the game is checking for a wall collision then the item will not be acquired."
]
},
{
"id": 4,
"name": "Return Through Crumble Blocks",
"note": "The Crumble Block does not respawn, so it's possible to grab the items and go back up without breaking the Power Bomb blocks."
},
{
"id": 5,
"name": "Geemer Ice Stuck XRay Climb",
"note": [
"Keep the two Geemers on screen while moving to the right side of the room.",
"Freeze the second Geemer as it exits the Morph Tunnel, with the Crumble block.",
"Use a Super Missile to knock the first Geemer down and freeze it at the pixel perfect height.",
"Become stuck in the wall after using Grapple to kill the frozen Geemer as it walks through Samus, firing to the left.",
"This re-enables XRay climbing."
]
},
{
"id": 6,
"name": "Leave With Spark (Fast Wall Climb)",
"note": [
"Gain a shinecharge using the runway at the bottom of the room.",
"Perform a series of fast walljumps to reach the top of the room and spark out."
]
},
{
"id": 7,
"name": "Fast Wall Jump Spark",
"note": [
"By wall jumping fast enough and sparking close to the block, it can be broken even on low energy (29 or less)."
]
}
],
"nextStratId": 85,
"nextNotableId": 8
}

