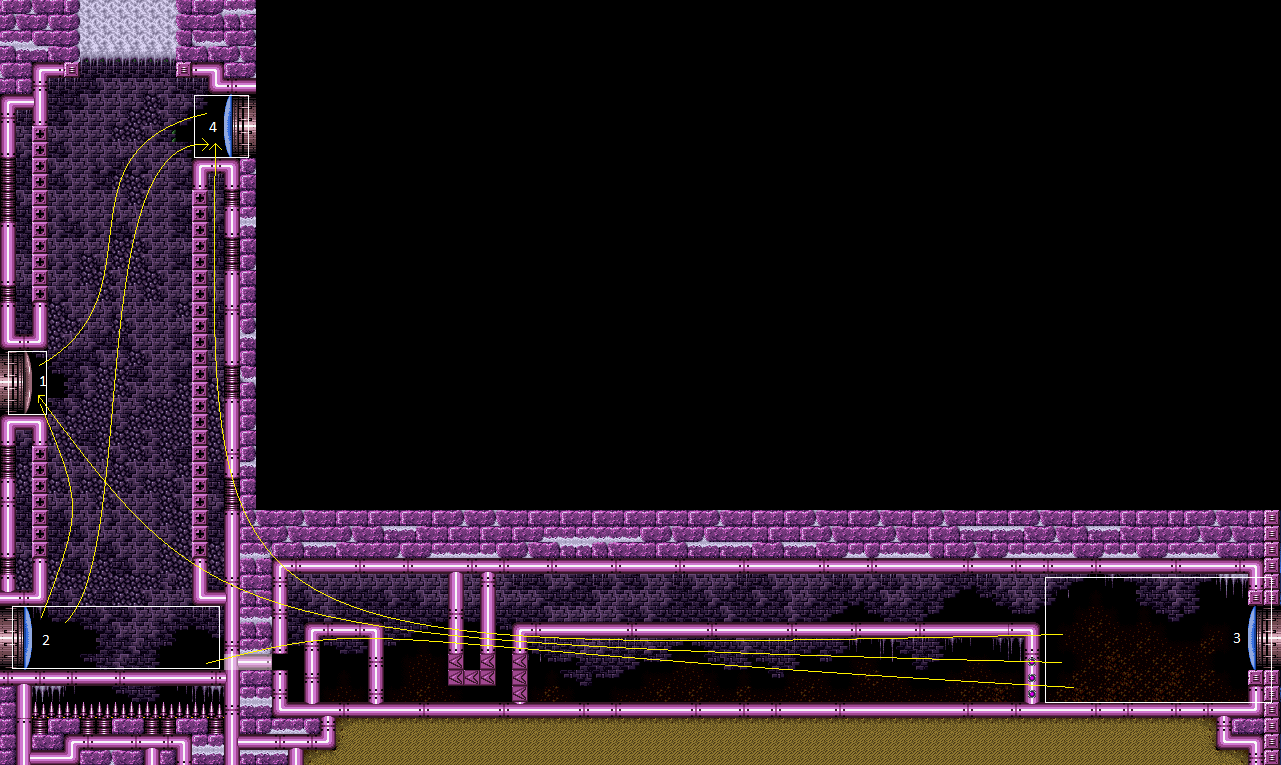
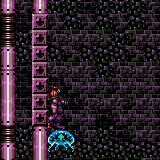
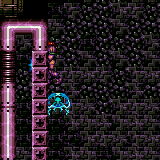
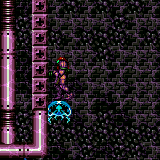
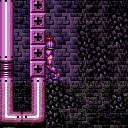
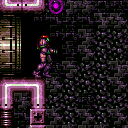
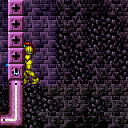
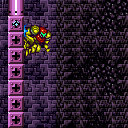
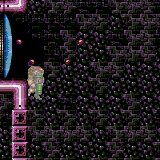
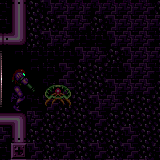
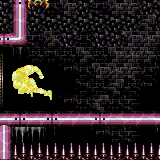
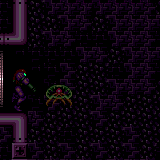
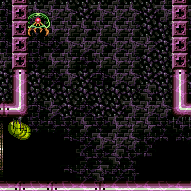
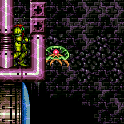
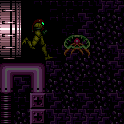
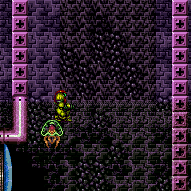
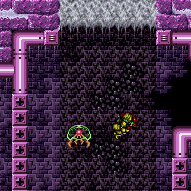
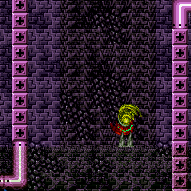
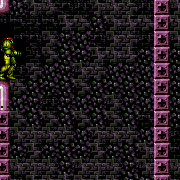
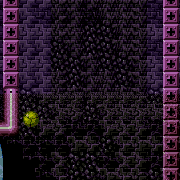
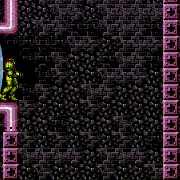
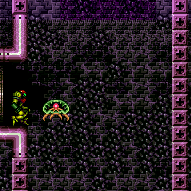
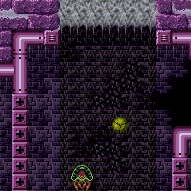
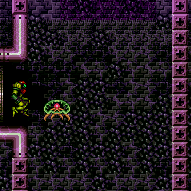
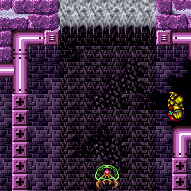
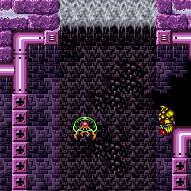
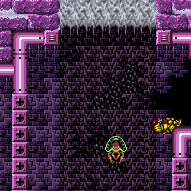
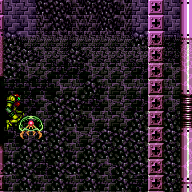
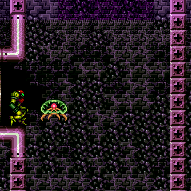
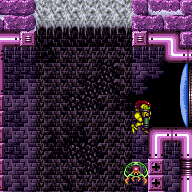
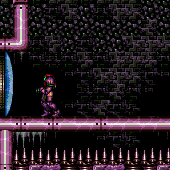
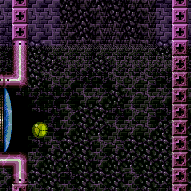
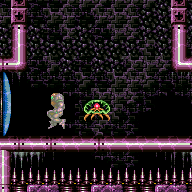
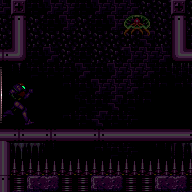
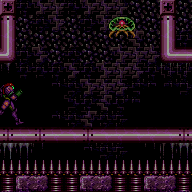
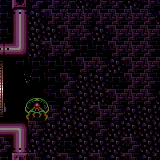
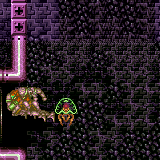
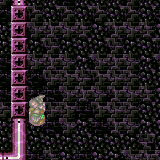
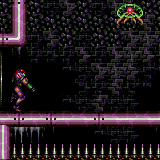
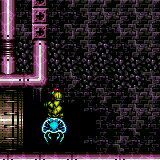
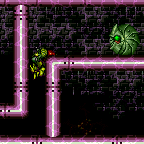
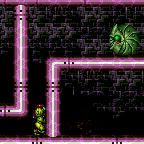
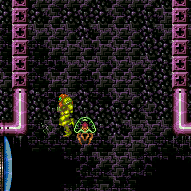
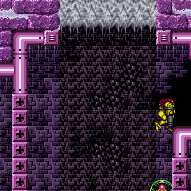
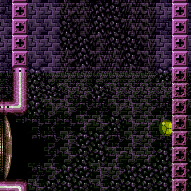
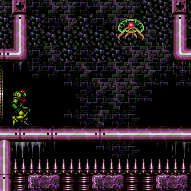
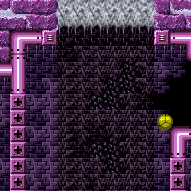
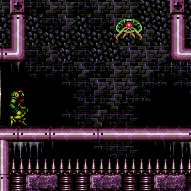
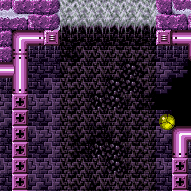
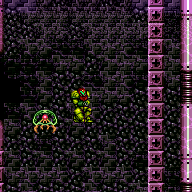
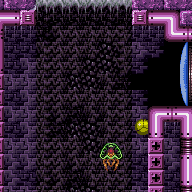
Halfie Climb Room
Room ID: 187
|
Exit condition: {
"leaveWithRunway": {
"length": 2,
"openEnd": 1
}
} |
From: 1
Top Left Door
To: 1
Top Left Door


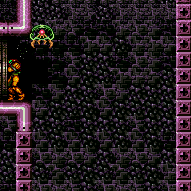
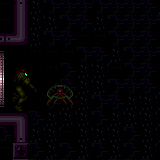
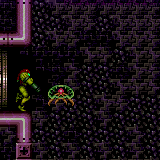
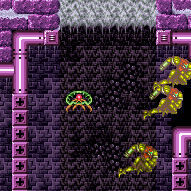
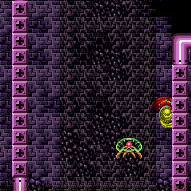
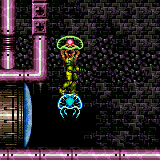
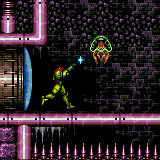
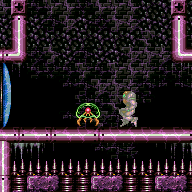
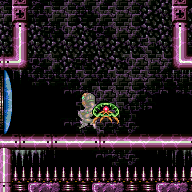
Use a frozen Mochtroid to extend the length of the runway. Positioning the Mochtroid can be done by dropping down below then climbing back up with the frozen Mochtroid as a platform. Alternatively, freeze the Mochtroid with an angle-down shot while falling below then quickly climb back up. Requires: "h_navigateUnderwater"
"h_frozenEnemyRunway"
{
"or": [
"canMochtroidIceClimb",
{
"and": [
"Gravity",
{
"or": [
"SpaceJump",
"canWallJump"
]
}
]
}
]
}
{
"enemyDamage": {
"enemy": "Mochtroid",
"type": "contact",
"hits": 2
}
}Exit condition: {
"leaveWithRunway": {
"length": 3,
"openEnd": 1
}
}Dev note: There are many other ways to get into position, but they would require manipulating the Mochtroid as much as canMochtroidIceClimb expects. |
|
Requires: {
"resetRoom": {
"nodes": [
1
]
}
}
{
"or": [
{
"and": [
"Grapple",
{
"cycleFrames": 75
}
]
},
{
"and": [
"Plasma",
{
"cycleFrames": 75
}
]
},
{
"and": [
"Gravity",
"ScrewAttack",
{
"cycleFrames": 75
}
]
},
{
"and": [
{
"haveBlueSuit": {}
},
{
"cycleFrames": 75
}
]
},
{
"and": [
"Wave",
{
"cycleFrames": 85
}
]
},
{
"and": [
"Spazer",
{
"cycleFrames": 90
}
]
},
{
"and": [
"canDodgeWhileShooting",
{
"cycleFrames": 135
}
]
}
]
}Resets obstacles: R-Mode Farm cycle drops: 1 Mochtroid |
|
Requires: "h_CrystalFlash"
{
"obstaclesNotCleared": [
"R-Mode"
]
} |
From: 1
Top Left Door
To: 1
Top Left Door
In case Samus has a blue suit, it is still possible to inch forward a pixel or two at a time using X-Ray without destroying the Mochtroid. Exit condition: {
"leaveWithGModeSetup": {
"knockback": false
}
} |
|
Entrance condition: {
"comeInWithRMode": {}
}Clears obstacles: R-Mode |
From: 1
Top Left Door
To: 1
Top Left Door
Get a boost from a Bomb or Power Bomb while grappled to the first Grapple block above the door. Samus will enter a 'glitched grapple hanging' state where Samus' graphics will appear corrupted while swinging with Grapple. Swing down, and hold left while approaching the door to trigger the transition. Continue holding Grapple through the door transition to initiate a teleport in the next room. If needing to stand up in the next room (e.g. for an X-Ray climb), then enter the transition while swinging slowly, e.g. after coming to a stop directly below the block. If needing to transition at horiziontal position $15 (as far right as possible), then additionally roll from pressing left to pressing diagonally up-left just before the transition. The game may lag heavily if Samus enters a retracted position; if this happens, hold down to extend Grapple again. Requires: {
"or": [
"HiJump",
"Gravity"
]
}
"canGrappleBombHang"
"h_bombThings"Exit condition: {
"leaveWithGrappleTeleport": {
"blockPositions": [
[
2,
18
]
]
}
} |
From: 1
Top Left Door
To: 1
Top Left Door
Get a boost from a Bomb or Power Bomb while grappled to the second Grapple block below the door. Samus will enter a 'glitched grapple hanging' state where Samus' graphics will appear corrupted while swinging with Grapple. Press jump to get a good bounce off the wall at the bottom of the swing, making it possible to swing up to the door. To avoid heavy lag, hold left while near the top of the swing, and hold angle down for the middle of the swing. Continue holding Grapple through the transition to initiate a teleport in the next room. If needing to stand up in the next room (e.g. for an X-Ray climb), then press up while approaching the door to retract Grapple and come to a stop; then roll from pressing left to diagonally down-left to trigger the transition. This method will also transition at horizontal position $15 (as far right as possible). If it is needed to transition further left (e.g. position $13 or $14), it can be done by instead rolling from pressing left to pressing down (with a brief diagonal input in between) and then left again if necessary. Requires: "Gravity" "canGrappleBombHang" "h_bombThings" Exit condition: {
"leaveWithGrappleTeleport": {
"blockPositions": [
[
2,
29
]
]
}
} |
From: 1
Top Left Door
To: 1
Top Left Door
Get a boost from a Bomb or Power Bomb while grappled to the top Grapple block below the door. Samus will enter a 'glitched grapple hanging' state where Samus' graphics will appear corrupted while swinging with Grapple. Press jump to get a good bounce off the wall at the bottom of the swing, making it possible to swing up to the door. To avoid heavy lag, hold left while near the top of the swing, and hold angle down for the middle of the swing. Press up while approaching the door to retract Grapple to avoid bonking the ceiling. After Samus comes to a stop (at horiziontal position $19), roll from pressing left to diagonally down-left to trigger the transition. This method will allow Samus to stand up in the next room (e.g. for an X-Ray climb) and will also transition at horizontal position $15 (as far right as possible). If it is needed to transition further left (at position $14) while still being able to stand, it can be done with by rolling from pressing left to briefly pressing down (with a brief diagonal input in between), which should bring Samus to a stop at position $14; then press left to trigger the transition. Requires: "Gravity" "canGrappleBombHang" "h_bombThings" Exit condition: {
"leaveWithGrappleTeleport": {
"blockPositions": [
[
2,
28
]
]
}
} |
From: 1
Top Left Door
To: 1
Top Left Door

Freeze a Mochtroid near the bottom of the Grapple wall, stand on it, and fire Grapple horizontally while walking toward the wall. If successful, Samus should clip slightly into the wall. Crouch, and fire Grapple while angling up. Samus will enter a 'glitched grapple hanging' state where Samus' graphics will appear corrupted while swinging with Grapple. Swing down, and hold left while approaching the door to trigger the transition. Continue holding Grapple through the door transition to initiate a teleport in the next room. If needing to stand up in the next room (e.g. for an X-Ray climb), then enter the transition while swinging slowly, e.g. after coming to a stop directly below the block (or without Gravity equipped). If needing to transition at horiziontal position $15 (as far right as possible), then additionally roll from pressing left to pressing diagonally up-left just before the transition. The game may lag heavily if Samus enters a retracted position; if this happens, hold down to extend Grapple again. Requires: "canFrozenEnemyGrappleHang" Exit condition: {
"leaveWithGrappleTeleport": {
"blockPositions": [
[
2,
18
]
]
}
} |
From: 1
Top Left Door
To: 1
Top Left Door

Freeze a Mochtroid at a specific position, where its top is about at the midpoint of the fourth Grapple block below the door. Stand on the frozen Mochtroid, and fire Grapple horizontally while walking toward the wall. If successful, Samus should clip slightly into the wall. Crouch, and fire Grapple while angling up. Samus will enter a 'glitched grapple hanging' state where Samus' graphics will appear corrupted while swinging with Grapple. Press jump to get a good bounce off the wall at the bottom of the swing, making it possible to swing up to the door. To avoid heavy lag, hold down during the bottom part of the swing, and hold angle up during the top part. Continue holding Grapple through the transition to initiate a teleport in the next room. If needing to stand up in the next room (e.g. for an X-Ray climb), then press up while approaching the door to retract Grapple and come to a stop; then roll from pressing left to diagonally down-left to trigger the transition. This method will also transition at horizontal position $15 (as far right as possible). If it is needed to transition further left (e.g. position $13 or $14), it can be done by instead rolling from pressing left to pressing down (with a brief diagonal input in between) and then left again if necessary. Requires: "Gravity" "canFrozenEnemyGrappleHang" Exit condition: {
"leaveWithGrappleTeleport": {
"blockPositions": [
[
2,
29
]
]
}
} |
From: 1
Top Left Door
To: 1
Top Left Door
Freeze a Mochtroid at a specific position, where its top is about at the midpoint of the third Grapple block below the door. Stand on the frozen Mochtroid, and fire Grapple horizontally while walking toward the wall. If successful, Samus should clip slightly into the wall. Crouch, and fire Grapple while angling up. Samus will enter a 'glitched grapple hanging' state where Samus' graphics will appear corrupted while swinging with Grapple. Press jump to get a good bounce off the wall at the bottom of the swing, making it possible to swing up to the door. To avoid heavy lag, hold down during the bottom part of the swing, and hold angle up during the top part. Press up while approaching the door to retract Grapple to avoid bonking the ceiling. After Samus comes to a stop (at horiziontal position $19), roll from pressing left to diagonally down-left to trigger the transition. This method will allow Samus to stand up in the next room (e.g. for an X-Ray climb) and will also transition at horizontal position $15 (as far right as possible). If it is needed to transition further left (at position $14) while still being able to stand, it can be done with by rolling from pressing left to briefly pressing down (with a brief diagonal input in between), which should bring Samus to a stop at position $14; then press left to trigger the transition. Requires: "Gravity" "canFrozenEnemyGrappleHang" Exit condition: {
"leaveWithGrappleTeleport": {
"blockPositions": [
[
2,
28
]
]
}
} |
From: 1
Top Left Door
To: 1
Top Left Door
Position near the edge of the ledge, crouch jump out into a mid-air morph, and press left against the wall. Unmorph while approaching the peak of the jump (an 8-frame window), then use Grapple immediately (a 2-frame window) to get stuck standing a pixel or two inside the first Grapple block above the door. Then jump (to force crouch), angle down, and grapple. Samus will enter a 'glitched grapple hanging' state where Samus' graphics will appear corrupted while swinging with Grapple. Swing down, and hold left while approaching the door to trigger the transition. To avoid heavy lag, hold down through the entire swing. Continue holding Grapple through the door transition to initiate a teleport in the next room. If needing to stand up in the next room (e.g. for an X-Ray climb), then enter the transition while swinging slowly, e.g. after coming to a stop directly below the block. If needing to transition at horiziontal position $15 (as far right as possible), then additionally roll from pressing left to pressing diagonally up-left just before the transition. The game may lag heavily if Samus enters a retracted position; if this happens, hold down to extend Grapple again. Requires: "Gravity" "canCrouchJump" "canUnmorphGrappleHang" Exit condition: {
"leaveWithGrappleTeleport": {
"blockPositions": [
[
2,
18
]
]
}
}Dev note: The canCrouchJump is not a h_underwaterCrouchJump, because Gravity is required. |
From: 1
Top Left Door
To: 1
Top Left Door


Grapple to the second Grapple block from the bottom of the room, jump off from it, morph, and press against the Grapple wall to the left. Unmorph slightly before the peak of the jump (an 8-frame window), then immediately use grapple (a 2-frame window) to get stuck standing a pixel or two inside the second Grapple block below the door. Then jump (to force crouch), angle down, and grapple. Samus will enter a 'glitched grapple hanging' state where Samus' graphics will appear corrupted while swinging with Grapple. Press jump to get a good bounce off the wall at the bottom of the swing, making it possible to swing up to the door. To avoid heavy lag, hold down during the bottom part of the swing, and hold angle up during the top part. Continue holding Grapple through the transition to initiate a teleport in the next room. If needing to stand up in the next room (e.g. for an X-Ray climb), then press up while approaching the door to retract Grapple and come to a stop; then roll from pressing left to diagonally down-left to trigger the transition. This method will also transition at horizontal position $15 (as far right as possible). If it is needed to transition further left (e.g. position $13 or $14), it can be done by instead rolling from pressing left to pressing down (with a brief diagonal input in between) and then left again if necessary. Requires: "Gravity" "canUnmorphGrappleHang" Exit condition: {
"leaveWithGrappleTeleport": {
"blockPositions": [
[
2,
29
]
]
}
} |
From: 1
Top Left Door
To: 1
Top Left Door
Grapple to the second Grapple block from the bottom of the room, jump off from it, morph, and press against the Grapple wall to the left. Unmorph slightly before the peak of the jump (an 8-frame window), then immediately use grapple (a 2-frame window) to get stuck standing a pixel or two inside the second Grapple block below the door. Then jump (to force crouch), angle up, and grapple. Samus will enter a 'glitched grapple hanging' state where Samus' graphics will appear corrupted while swinging with Grapple. Press jump to get a good bounce off the wall at the bottom of the swing, making it possible to swing up to the door. To avoid heavy lag, hold down during the bottom part of the swing, and hold angle up during the top part. Press up while approaching the door to retract Grapple to avoid bonking the ceiling. After Samus comes to a stop (at horiziontal position $19), roll from pressing left to diagonally down-left to trigger the transition. This method will allow Samus to stand up in the next room (e.g. for an X-Ray climb) and will also transition at horizontal position $15 (as far right as possible). If it is needed to transition further left (at position $14) while still being able to stand, it can be done with by rolling from pressing left to briefly pressing down (with a brief diagonal input in between), which should bring Samus to a stop at position $14; then press left to trigger the transition. Requires: "Gravity" "canUnmorphGrappleHang" Exit condition: {
"leaveWithGrappleTeleport": {
"blockPositions": [
[
2,
28
]
]
}
} |
From: 1
Top Left Door
To: 1
Top Left Door
Grapple to the top Grapple in the top-left corner of the room. Hold left while waiting for the grapple wall jump check to expire, then quickly morph. While falling, unmorph to reset fall speed and then quickly morph again. unmorph at a precise time (typically a 2-frame window) then use Grapple immediately (another 2-frame window) to get stuck standing a pixel or two inside the first Grapple block above the door. Then jump (to force crouch), angle down, and grapple. Samus will enter a 'glitched grapple hanging' state where Samus' graphics will appear corrupted while swinging with Grapple. Swing down, and hold left while approaching the door to trigger the transition. To avoid heavy lag, hold down through the entire swing. Continue holding Grapple through the door transition to initiate a teleport in the next room. If needing to stand up in the next room (e.g. for an X-Ray climb), then enter the transition while swinging slowly, e.g. after coming to a stop directly below the block. If needing to transition at horiziontal position $15 (as far right as possible), then additionally roll from pressing left to pressing diagonally up-left just before the transition. The game may lag heavily if Samus enters a retracted position; if this happens, hold down to extend Grapple again. Requires: {
"notable": "Top Left Suitless Unmorph Leave With Grapple Teleport"
}
"canUnmorphGrappleHang"Exit condition: {
"leaveWithGrappleTeleport": {
"blockPositions": [
[
2,
18
]
]
}
} |
|
|
From: 1
Top Left Door
To: 2
Bottom Left Door

Entrance condition: {
"comeInShinecharging": {
"length": 1,
"openEnd": 1
}
}Requires: "Gravity"
"canShinechargeMovementComplex"
{
"shineChargeFrames": 100
}Exit condition: {
"leaveShinecharged": {}
}Unlocks doors: {"types":["super"],"requires":[]}
{"types":["missiles","powerbomb"],"requires":["never"]} |
From: 1
Top Left Door
To: 2
Bottom Left Door
Entrance condition: {
"comeInShinecharging": {
"length": 0,
"openEnd": 1
}
}Requires: "canWaterShineCharge"
"canShinechargeMovementComplex"
{
"shineChargeFrames": 160
}Exit condition: {
"leaveShinecharged": {}
}Unlocks doors: {"types":["super"],"requires":[]}
{"types":["missiles","powerbomb"],"requires":["never"]} |
From: 1
Top Left Door
To: 2
Bottom Left Door

Entrance condition: {
"comeInShinecharged": {}
}Requires: {
"shineChargeFrames": 105
}
"canShinechargeMovementComplex"Exit condition: {
"leaveShinecharged": {}
}Unlocks doors: {"types":["super"],"requires":[]}
{"types":["missiles","powerbomb"],"requires":["never"]} |
From: 1
Top Left Door
To: 2
Bottom Left Door
Entrance condition: {
"comeInShinecharged": {}
}Requires: {
"shineChargeFrames": 130
}
"canShinechargeMovementComplex"
{
"shinespark": {
"frames": 4,
"excessFrames": 0
}
}Exit condition: {
"leaveWithSpark": {
"position": "top"
}
}Unlocks doors: {"types":["super"],"requires":[]}
{"types":["missiles","powerbomb"],"requires":["never"]} |
From: 1
Top Left Door
To: 2
Bottom Left Door
Entrance condition: {
"comeInShinecharged": {}
}Requires: {
"shineChargeFrames": 135
}
"canShinechargeMovementComplex"
{
"shinespark": {
"frames": 3,
"excessFrames": 0
}
}Exit condition: {
"leaveWithSpark": {
"position": "bottom"
}
}Unlocks doors: {"types":["super"],"requires":[]}
{"types":["missiles","powerbomb"],"requires":["never"]} |
From: 1
Top Left Door
To: 2
Bottom Left Door
Entrance condition: {
"comeInShinecharged": {}
}Requires: {
"shineChargeFrames": 70
}
"Gravity"
"canShinechargeMovementComplex"
{
"shinespark": {
"frames": 4,
"excessFrames": 0
}
}Exit condition: {
"leaveWithSpark": {
"position": "top"
}
}Unlocks doors: {"types":["super"],"requires":[]}
{"types":["missiles","powerbomb"],"requires":["never"]} |
From: 1
Top Left Door
To: 2
Bottom Left Door
Entrance condition: {
"comeInShinecharged": {}
}Requires: {
"shineChargeFrames": 75
}
"Gravity"
"canShinechargeMovementComplex"
{
"shinespark": {
"frames": 4,
"excessFrames": 0
}
}Exit condition: {
"leaveWithSpark": {
"position": "bottom"
}
}Unlocks doors: {"types":["super"],"requires":[]}
{"types":["missiles","powerbomb"],"requires":["never"]} |
From: 1
Top Left Door
To: 2
Bottom Left Door

Entrance condition: {
"comeInShinecharging": {
"length": 0,
"openEnd": 1
}
}Requires: "canSuitlessMaridia" "canChainTemporaryBlue" "canXRayTurnaround" Exit condition: {
"leaveWithTemporaryBlue": {}
}Unlocks doors: {"types":["ammo"],"requires":[]} |
From: 1
Top Left Door
To: 2
Bottom Left Door
Perform a moonfall with stored fall speed to clip into the air space below the door at node 1. Land, then grapple the nearest block and release. Samus will fall into the door transition, bypassing any lock that may be on the door. Entrance condition: {
"comeInWithStoredFallSpeed": {
"fallSpeedInTiles": 1
}
}Requires: {
"notable": "Stored Moonfall Grapple Door Lock Skip"
}
{
"doorUnlockedAtNode": 1
}
"canGrappleClip"Bypasses door shell: true Unlocks doors: {"nodeId":1,"types":["missiles","super"],"requires":[]}
{"nodeId":1,"types":["powerbomb"],"requires":["never"]} |
|
Enter and farm all three Mochtroids, or Crystal Flash. Run right to left underneath the Ohms, then lead them to roll off the right side. Shinecharge and use the Ohm lick attack to interrupt. Requires: {
"obstaclesCleared": [
"R-Mode"
]
}
"Gravity"
"Morph"
"h_RModeCanRefillReserves"
{
"or": [
{
"resourceMissingAtMost": [
{
"type": "Missile",
"count": 2
}
]
},
{
"resourceMissingAtMost": [
{
"type": "Super",
"count": 1
}
]
}
]
}
{
"partialRefill": {
"type": "ReserveEnergy",
"limit": 20
}
}
"h_shinechargeMaxRunway"
{
"autoReserveTrigger": {
"maxReserveEnergy": 95
}
}
"canRModeSparkInterrupt"Resets obstacles: R-Mode |
|
Requires: "Gravity"
{
"or": [
"SpaceJump",
{
"and": [
"HiJump",
{
"or": [
"canSpringBallJumpMidAir",
"canWallJump"
]
}
]
},
"canConsecutiveWallJump"
]
} |
|
Entrance condition: {
"comeInShinecharged": {}
}Requires: {
"shineChargeFrames": 10
}
"Gravity"
{
"shinespark": {
"frames": 20,
"excessFrames": 3
}
} |
|
Entrance condition: {
"comeInShinecharged": {}
}Requires: {
"shineChargeFrames": 10
}
{
"shinespark": {
"frames": 22,
"excessFrames": 5
}
} |
|


Requires: "h_navigateUnderwater" "Grapple" "h_complexToCarryFlashSuit" |
|

Requires: "h_navigateUnderwater" "canMochtroidIceClimb" "h_complexToCarryFlashSuit" "h_complexToCarryBlueSuit" |
|

Requires: "canGravityJump" "HiJump" "canSpeedyJump" "canCarefulJump" |
|

Requires: "HiJump"
{
"or": [
{
"and": [
"canSpaceJumpWaterBounce",
"canWallJump"
]
},
"canSpaceJumpWaterEscape"
]
} |
From: 1
Top Left Door
To: 4
Top Right Door

Requires: "canUnderwaterWallJumpBreakFree" |
|
Stationary lateral midair morph into a SpringBall jump just as Samus exits the water to reach the distant ledge. This can either be done from a crouch jump from the last pixel, giving an 8-frame window to jump while out of the water, or from a spin jump, which gives a 2-frame window to jump while out of the water. Samus could also start from a standing position, requiring the last pixel and only giving a 2-frame window. Requires: "canSuitlessMaridia"
"HiJump"
"canTrickyJump"
"canTrickySpringBallJump"
"canStationaryLateralMidAirMorph"
{
"or": [
"h_underwaterCrouchJump",
"canInsaneJump"
]
} |
|
Requires a runway of 1 tile in the adjacent room. Use Space Jump or a wall jump after getting out of the water. Entrance condition: {
"comeInJumping": {
"speedBooster": "any",
"minTiles": 1
}
}Requires: "canCrossRoomJumpIntoWater"
"canTrickyJump"
{
"or": [
"canWallJump",
"SpaceJump"
]
} |
From: 1
Top Left Door
To: 4
Top Right Door

Requires a runway of 1 tile in the adjacent room. Use a Spring Ball jump after getting out of the water. Entrance condition: {
"comeInJumping": {
"speedBooster": "any",
"minTiles": 1
}
}Requires: "canCrossRoomJumpIntoWater" "canTrickyJump" "canTrickySpringBallJump" |
|

Assumes a runway of at least 4 tiles in the adjacent room. Use Space Jump or a wall jump after getting out of the water. Entrance condition: {
"comeInJumping": {
"speedBooster": "any",
"minTiles": 4
}
}Requires: "canCrossRoomJumpIntoWater"
{
"or": [
"canWallJump",
"SpaceJump"
]
} |
|

Requires a runway of 3 tiles in the adjacent room. Entrance condition: {
"comeInJumping": {
"speedBooster": "yes",
"minTiles": 3
}
}Requires: "canCrossRoomJumpIntoWater" "canTrickyJump" "HiJump" |
From: 1
Top Left Door
To: 4
Top Right Door

Assumes a runway of 7 tiles in the adjacent room. Entrance condition: {
"comeInJumping": {
"speedBooster": "yes",
"minTiles": 7
}
}Requires: "canCrossRoomJumpIntoWater" "HiJump" |
|
Requires a runway of approximately 21 tile in the adjacent room. Entrance condition: {
"comeInJumping": {
"speedBooster": "yes",
"minTiles": 21
}
}Requires: "canCrossRoomJumpIntoWater" |
|

Requires a gaining a precise amount of run speed using 19 tiles before jumping in the adjacent room (with extra run speed $4.0 or $4.1). Entrance condition: {
"comeInJumping": {
"speedBooster": "yes",
"minTiles": 18.4375
}
}Requires: "canTrickyDashJump" "canCrossRoomJumpIntoWater" |
|

Only requires a runway of approximately 1 tile in the adjacent room. Take two Mochtroid hits or kill it using a Power Bomb or 5 Bombs. Entrance condition: {
"comeInJumping": {
"speedBooster": "any",
"minTiles": 1
}
}Requires: "canJumpIntoIBJ"
{
"or": [
{
"ammo": {
"type": "PowerBomb",
"count": 1
}
},
{
"and": [
"canCeilingBombJump",
{
"enemyDamage": {
"enemy": "Mochtroid",
"type": "contact",
"hits": 1
}
}
]
},
{
"and": [
"canDoubleBombJump",
{
"enemyDamage": {
"enemy": "Mochtroid",
"type": "contact",
"hits": 2
}
}
]
},
{
"enemyDamage": {
"enemy": "Mochtroid",
"type": "contact",
"hits": 3
}
}
]
}
"canCrossRoomJumpIntoWater"
"canBufferedMomentumConservingTurnaround"
"canTrickyJump"Dev note: The rhythm for placing 4 Bombs quickly is the main component of ceiling bomb jumps. canTrickyJump for the IBJ more than the through-door jump. |
From: 1
Top Left Door
To: 4
Top Right Door

Entrance condition: {
"comeInWithSidePlatform": {
"platforms": [
{
"minHeight": 1,
"maxHeight": 1,
"minTiles": 13,
"speedBooster": "yes",
"obstructions": [
[
1,
0
]
],
"requires": [
"HiJump",
"canMomentumConservingTurnaround"
],
"note": [
"This applies to Warehouse Entrance.",
"With Hi-Jump equipped, gain extra run speed of at least $3.1, jump, and aim-down before the transition.",
"Then hold down and backward through the transition."
]
},
{
"minHeight": 2,
"maxHeight": 2,
"minTiles": 27.4375,
"speedBooster": "yes",
"obstructions": [
[
1,
0
]
],
"requires": [
"canDownGrab",
"canTrickyJump"
],
"note": [
"This applies to Dust Torizo Room and Halfie Climb Room.",
"Use the full runway, with a last-frame jump (extra run speed $5.0), and a down-grab."
],
"devNote": [
"The jump could also be done with a shorter runway, with a tricky dash jump using run speed $4.0 or $4.1."
]
},
{
"minHeight": 2,
"maxHeight": 2,
"minTiles": 45,
"speedBooster": "yes",
"obstructions": [
[
2,
0
]
],
"requires": [
"canInsaneJump"
],
"note": [
"This applies to Waterway Energy Tank Room."
]
},
{
"minHeight": 3,
"maxHeight": 3,
"minTiles": 39.4375,
"speedBooster": "yes",
"obstructions": [
[
3,
2
]
],
"note": [
"This applies to Metal Pirates Room.",
"Use the full runway, though there is no need to back into the corner;",
"jump on one of the last three possible frames (extra run speed between $6.6 and $6.8)"
]
},
{
"minHeight": 2,
"maxHeight": 2,
"minTiles": 45,
"speedBooster": "yes",
"obstructions": [
[
3,
0
]
],
"requires": [
"canInsaneJump",
{
"or": [
"canMomentumConservingMorph",
{
"and": [
"canMomentumConservingTurnaround",
"canBeVeryPatient"
]
}
]
}
],
"note": [
"This applies to Statues Hallway."
],
"devNote": [
"Using the full runway and single-pixel arm pump, with a momentum-conserving morph",
"this has a 4-frame window for the jump, and a 2-frame to 4-frame window for the morph (with later jumps giving a larger window for the morph).",
"With a momentum-conserving turnaround, it requires a last-frame jump and last-frame turnaround.",
"The arm pump doesn't really help with the turnaround.",
"There are 2 frames for the turnaround that allow Samus to make it past the overhang in the next room,",
"but only the last frame provides the horizontal momentum needed to reach the ledge."
]
},
{
"minHeight": 3,
"maxHeight": 3,
"minTiles": 37.4375,
"speedBooster": "yes",
"obstructions": [
[
3,
0
]
],
"requires": [
"canMomentumConservingMorph",
"canInsaneJump"
],
"note": [
"This applies to Flyway.",
"Avoid backing into the corner of runway (instead press into it and turn around).",
"Using the full runway, this has a 2-frame window for the jump,",
"and either a 1-frame window or 2-frame window for the morph, depending on the jump timing (last-frame jump being better)."
],
"devNote": [
"This involves getting extra dash speed $6.0 or $6.1."
]
},
{
"minHeight": 2,
"maxHeight": 2,
"minTiles": 45,
"speedBooster": "yes",
"obstructions": [
[
4,
0
]
],
"requires": [
"canMomentumConservingMorph",
"canInsaneJump",
"canInsaneMidAirMorph"
],
"note": [
"This applies to Baby Kraid Room.",
"Using the full runway, this is double frame perfect:",
"it requires jumping on the last possible frame before Samus would bonk on the doorway ledge,",
"and morphing on the last possible frame before Samus would bonk the ceiling."
]
}
]
}
}Requires: "canCrossRoomJumpIntoWater" |
From: 1
Top Left Door
To: 4
Top Right Door
Entrance condition: {
"comeInShinecharged": {}
}Requires: {
"shineChargeFrames": 125
}
"Gravity"
"HiJump"
"canWallJump"
"canShinechargeMovementComplex"Exit condition: {
"leaveShinecharged": {}
}Unlocks doors: {"types":["super"],"requires":[]}
{"types":["missiles","powerbomb"],"requires":["never"]} |
Come in Shinecharged, Leave With Spark (Gravity, HiJump, Right Wall Climb)
(Very Hard)
Halfie Climb Room
From: 1
Top Left Door
To: 4
Top Right Door

Entrance condition: {
"comeInShinecharged": {}
}Requires: {
"or": [
{
"shineChargeFrames": 115
},
{
"and": [
"canSpeedyJump",
{
"shineChargeFrames": 100
}
]
}
]
}
"Gravity"
"HiJump"
"canWallJump"
"canShinechargeMovementComplex"
{
"shinespark": {
"frames": 7,
"excessFrames": 0
}
}Exit condition: {
"leaveWithSpark": {}
}Unlocks doors: {"types":["super"],"requires":[]}
{"types":["missiles","powerbomb"],"requires":["never"]} |
Come in Shinecharged, Leave With Spark (Gravity, HiJump, Left Wall Climb)
(Very Hard)
Halfie Climb Room
From: 1
Top Left Door
To: 4
Top Right Door
Entrance condition: {
"comeInShinecharged": {}
}Requires: {
"or": [
{
"shineChargeFrames": 80
},
{
"and": [
"canSpeedyJump",
{
"shineChargeFrames": 75
}
]
}
]
}
"Gravity"
"HiJump"
"canWallJump"
"canShinechargeMovementComplex"
{
"shinespark": {
"frames": 18,
"excessFrames": 0
}
}Exit condition: {
"leaveWithSpark": {}
}Unlocks doors: {"types":["super"],"requires":[]}
{"types":["missiles","powerbomb"],"requires":["never"]} |
From: 1
Top Left Door
To: 4
Top Right Door

Entrance condition: {
"comeInShinecharged": {}
}Requires: {
"shineChargeFrames": 95
}
"Gravity"
"canConsecutiveWallJump"
"canShinechargeMovementComplex"
{
"shinespark": {
"frames": 19,
"excessFrames": 0
}
}Exit condition: {
"leaveWithSpark": {}
}Unlocks doors: {"types":["super"],"requires":[]}
{"types":["missiles","powerbomb"],"requires":["never"]} |
From: 1
Top Left Door
To: 4
Top Right Door
Entrance condition: {
"comeInShinecharging": {
"length": 1,
"openEnd": 0
}
}Requires: "Gravity" "HiJump" "canTrickySpringBallJump" "canChainTemporaryBlue" Exit condition: {
"leaveWithTemporaryBlue": {}
}Unlocks doors: {"types":["ammo"],"requires":[]} |
|
Requires: "h_storedSpark"
{
"or": [
{
"shinespark": {
"frames": 17,
"excessFrames": 3
}
},
{
"and": [
"HiJump",
{
"shinespark": {
"frames": 14,
"excessFrames": 3
}
}
]
},
{
"and": [
"Gravity",
{
"shinespark": {
"frames": 13,
"excessFrames": 3
}
}
]
},
{
"and": [
"Gravity",
"HiJump",
{
"shinespark": {
"frames": 9,
"excessFrames": 3
}
}
]
},
{
"and": [
"Gravity",
"HiJump",
"canSpeedyJump",
{
"shinespark": {
"frames": 7,
"excessFrames": 3
}
}
]
}
]
} |
|
To avoid the Mochtroids, it is possible to place bombs near them while in the Morph Tunnel below to the right. Entrance condition: {
"comeInWithGMode": {
"mode": "any",
"morphed": true
}
}Requires: "Gravity" "h_artificialMorphLongIBJ" Dev note: This strat is not starting from 5, because that would require canOffScreenMovement. |
From: 1
Top Left Door
To: 4
Top Right Door
Entrance condition: {
"comeInWithGrappleTeleport": {
"blockPositions": [
[
12,
12
],
[
12,
13
]
]
}
}Bypasses door shell: true |
From: 1
Top Left Door
To: 4
Top Right Door
Entrance condition: {
"comeInWithGrappleTeleport": {
"blockPositions": [
[
12,
12
]
]
}
}Exit condition: {
"leaveWithGrappleTeleport": {
"blockPositions": [
[
12,
12
]
]
}
}Bypasses door shell: true |
From: 1
Top Left Door
To: 4
Top Right Door
Entrance condition: {
"comeInWithGrappleTeleport": {
"blockPositions": [
[
12,
13
]
]
}
}Exit condition: {
"leaveWithGrappleTeleport": {
"blockPositions": [
[
12,
13
]
]
}
}Bypasses door shell: true |
From: 1
Top Left Door
To: 5
G-Mode Morph, In Morph Tunnel
After morphing, kill the Mochtroid with a Power Bomb, or roll off the edge. Stay to the left to avoid luring the second Mochtroid below. Entrance condition: {
"comeInWithGMode": {
"mode": "direct",
"morphed": true
}
}Requires: {
"or": [
"Gravity",
{
"haveBlueSuit": {}
},
"canInsaneJump",
"h_artificialMorphPowerBomb",
{
"enemyDamage": {
"enemy": "Mochtroid",
"type": "contact",
"hits": 1
}
}
]
} |
From: 1
Top Left Door
To: 5
G-Mode Morph, In Morph Tunnel

Enter morphed and kill the Mochtroid with Bombs or a Power Bomb, or roll off the edge with Gravity to drop fast enough not to lure the Mochtroid. It is also possible to Spring Fling by jumping from the ground immediately before the pause fully triggers to move right fast enough to avoid a hit. Entrance condition: {
"comeInWithGMode": {
"mode": "indirect",
"morphed": true
}
}Requires: {
"or": [
"Gravity",
{
"haveBlueSuit": {}
},
{
"and": [
"h_artificialMorphBombs",
"canInsaneJump"
]
},
"h_artificialMorphPowerBomb",
{
"and": [
"h_artificialMorphSpringFling",
"canTrickyGMode"
]
},
{
"enemyDamage": {
"enemy": "Mochtroid",
"type": "contact",
"hits": 1
}
}
]
} |
|

Requires: "Gravity"
{
"or": [
"SpaceJump",
"canLongIBJ",
"canJumpIntoIBJ",
"canWallJump",
"canGravityJump",
{
"and": [
"HiJump",
{
"or": [
"canSpringBallJumpMidAir",
"canSpeedyJump"
]
}
]
}
]
} |
From: 2
Bottom Left Door
To: 1
Top Left Door

Requires: "canSuitlessMaridia" "h_doubleSpringBallJumpWithHiJump" |
From: 2
Bottom Left Door
To: 1
Top Left Door
Entrance condition: {
"comeInShinecharged": {}
}Requires: {
"shineChargeFrames": 30
}
{
"shinespark": {
"frames": 20,
"excessFrames": 3
}
} |
|


Requires: "h_navigateUnderwater" "Grapple" "h_complexToCarryFlashSuit" |
|
Requires: "h_navigateUnderwater"
"canMochtroidIceClimb"
{
"or": [
"Gravity",
"canDodgeWhileShooting",
{
"enemyDamage": {
"enemy": "Mochtroid",
"type": "contact",
"hits": 2
}
},
"Wave",
"Spazer",
"Plasma",
{
"and": [
"canPrepareForNextRoom",
"Charge"
]
}
]
}
"h_complexToCarryFlashSuit"
"h_complexToCarryBlueSuit" |
|

Climb up 1 screen. Entrance condition: {
"comeInWithDoorStuckSetup": {}
}Requires: "canXRayClimb" |
|

Only requires a runway of 1 tile in the adjacent room. Entrance condition: {
"comeInJumping": {
"speedBooster": "any",
"minTiles": 1
}
}Requires: "canCrossRoomJumpIntoWater" Dev note: This can be done with a shorter runway (closed end) and canMomentumConservingTurnaround, but that type of connection doesn't exist. |
|
Requires: "h_storedSpark"
{
"or": [
{
"shinespark": {
"frames": 17,
"excessFrames": 3
}
},
{
"and": [
"HiJump",
{
"shinespark": {
"frames": 13,
"excessFrames": 3
}
}
]
},
{
"and": [
"Gravity",
{
"shinespark": {
"frames": 13,
"excessFrames": 3
}
}
]
},
{
"and": [
"Gravity",
"HiJump",
{
"shinespark": {
"frames": 9,
"excessFrames": 3
}
}
]
}
]
} |
From: 2
Bottom Left Door
To: 1
Top Left Door

This underwater walljump is very long. Requires: "canLongUnderwaterWallJump" |
|

Enter with G-mode direct, back up to exactly 8 pixels away from the door transition, and activate X-ray to get very deep stuck in the door. Climb up a little less than 1 screen, and perform a turnaround buffered spin-jump away from the door to trigger the transition, bypassing any lock on the door. Perform the spin-jump when Samus' feet are between about 0.5 and 2 tiles below the bottom of the door. Entrance condition: {
"comeInWithGMode": {
"mode": "direct",
"morphed": false
}
}Requires: "canComplexGMode"
"canGModeXRayClimb"
{
"notable": "Very Deep Stuck X-Ray Climb"
}
"canXRayClimb"Bypasses door shell: true Dev note: Standing any closer to the door will cause Samus to no longer be stuck in the wall when reaching the air pocket above. Standing any further from the door will make it impossible to get a wall-jump check from the transition tiles. |
From: 2
Bottom Left Door
To: 1
Top Left Door


Perform an X-Ray Climb until you are just above the door into Cacatac Alley. Walk left into the gap between pipes, behind the grapple blocks. Walk to the left wall, turn around, crouch, grapple the block and release. Samus will fall into the door transition. The camera does not follow Samus but the pipes are still visually in the same position. And the camera does not break after the transition. Entrance condition: {
"comeInWithDoorStuckSetup": {}
}Requires: "canXRayClimb" "canGrappleClip" Bypasses door shell: true |
Come in Shinecharging, Leave Shinecharged (Full Runway, HiJump, Walljump)
(Very Hard)
Halfie Climb Room
From: 2
Bottom Left Door
To: 1
Top Left Door
Entrance condition: {
"comeInShinecharging": {
"length": 12,
"openEnd": 0
}
}Requires: "Gravity"
"HiJump"
"canWallJump"
"canShinechargeMovementComplex"
{
"shineChargeFrames": 120
}Exit condition: {
"leaveShinecharged": {}
}Unlocks doors: {"types":["super"],"requires":[]}
{"types":["missiles","powerbomb"],"requires":["never"]} |
Come in Shinecharging, Leave Shinecharged (Full Runway, Bootless, Walljump)
(Expert)
Halfie Climb Room
From: 2
Bottom Left Door
To: 1
Top Left Door
Entrance condition: {
"comeInShinecharging": {
"length": 12,
"openEnd": 0
}
}Requires: "Gravity"
"canWallJump"
"canFastWallJumpClimb"
"canShinechargeMovementComplex"
{
"shineChargeFrames": 145
}Exit condition: {
"leaveShinecharged": {}
}Unlocks doors: {"types":["super"],"requires":[]}
{"types":["missiles","powerbomb"],"requires":["never"]} |
Come in Shinecharging, Leave Shinecharged (Full Runway, HiJump, Tricky Jump)
(Very Hard)
Halfie Climb Room
From: 2
Bottom Left Door
To: 1
Top Left Door
Entrance condition: {
"comeInShinecharging": {
"length": 12,
"openEnd": 0
}
}Requires: "Gravity"
"HiJump"
"canTrickyJump"
"canShinechargeMovementComplex"
{
"shineChargeFrames": 130
}Exit condition: {
"leaveShinecharged": {}
}Unlocks doors: {"types":["super"],"requires":[]}
{"types":["missiles","powerbomb"],"requires":["never"]} |
From: 2
Bottom Left Door
To: 1
Top Left Door
Entrance condition: {
"comeInShinecharging": {
"length": 12,
"openEnd": 0
}
}Requires: "canGravityJump"
"canShinechargeMovementTricky"
{
"shineChargeFrames": 125
}Exit condition: {
"leaveShinecharged": {}
}Unlocks doors: {"types":["super"],"requires":[]}
{"types":["missiles","powerbomb"],"requires":["never"]} |
From: 2
Bottom Left Door
To: 1
Top Left Door

Entrance condition: {
"comeInShinecharged": {}
}Requires: {
"shineChargeFrames": 120
}
"Gravity"
"canFastWallJumpClimb"
"canShinechargeMovementComplex"Exit condition: {
"leaveShinecharged": {}
}Unlocks doors: {"types":["super"],"requires":[]}
{"types":["missiles","powerbomb"],"requires":["never"]} |
From: 2
Bottom Left Door
To: 1
Top Left Door

Entrance condition: {
"comeInShinecharged": {}
}Requires: {
"shineChargeFrames": 100
}
"Gravity"
"canFastWallJumpClimb"
"canShinechargeMovementComplex"
{
"shinespark": {
"frames": 4,
"excessFrames": 0
}
}Exit condition: {
"leaveWithSpark": {}
}Unlocks doors: {"types":["super"],"requires":[]}
{"types":["missiles","powerbomb"],"requires":["never"]} |
From: 2
Bottom Left Door
To: 1
Top Left Door
Entrance condition: {
"comeInShinecharged": {}
}Requires: {
"shineChargeFrames": 90
}
"Gravity"
"HiJump"
"canWallJump"
"canShinechargeMovementComplex"Exit condition: {
"leaveShinecharged": {}
}Unlocks doors: {"types":["super"],"requires":[]}
{"types":["missiles","powerbomb"],"requires":["never"]} |
From: 2
Bottom Left Door
To: 1
Top Left Door

Entrance condition: {
"comeInShinecharged": {}
}Requires: {
"or": [
{
"shineChargeFrames": 80
},
{
"and": [
"canSpeedyJump",
{
"shineChargeFrames": 75
}
]
}
]
}
"Gravity"
"HiJump"
"canWallJump"
"canShinechargeMovementComplex"
{
"shinespark": {
"frames": 2,
"excessFrames": 0
}
}Exit condition: {
"leaveWithSpark": {}
}Unlocks doors: {"types":["super"],"requires":[]}
{"types":["missiles","powerbomb"],"requires":["never"]} |
|
Exit condition: {
"leaveWithRunway": {
"length": 13,
"openEnd": 0
}
} |
From: 2
Bottom Left Door
To: 2
Bottom Left Door
Requires: {
"resetRoom": {
"nodes": [
2
]
}
}
{
"or": [
{
"and": [
"Grapple",
{
"cycleFrames": 80
}
]
},
{
"and": [
"Plasma",
{
"cycleFrames": 80
}
]
},
{
"and": [
"Gravity",
"ScrewAttack",
{
"cycleFrames": 80
}
]
},
{
"and": [
{
"haveBlueSuit": {}
},
{
"cycleFrames": 80
}
]
},
{
"and": [
"Wave",
{
"cycleFrames": 85
}
]
},
{
"and": [
"Spazer",
{
"cycleFrames": 90
}
]
},
{
"and": [
"canDodgeWhileShooting",
{
"cycleFrames": 135
}
]
}
]
}Resets obstacles: R-Mode Farm cycle drops: 1 Mochtroid |
From: 2
Bottom Left Door
To: 2
Bottom Left Door
Requires: "Gravity"
{
"cycleFrames": 330
}
{
"or": [
{
"resetRoom": {
"nodes": [
2
]
}
},
{
"and": [
{
"resetRoom": {
"nodes": [
4
]
}
},
{
"cycleFrames": 70
}
]
},
{
"and": [
{
"resetRoom": {
"nodes": [
1
]
}
},
{
"cycleFrames": 90
}
]
},
{
"and": [
{
"resetRoom": {
"nodes": [
3
]
}
},
"Morph",
{
"cycleFrames": 1210
}
]
}
]
}
{
"or": [
"canConsecutiveWallJump",
{
"and": [
"SpaceJump",
{
"cycleFrames": 40
}
]
},
{
"and": [
"Grapple",
{
"cycleFrames": 150
}
]
},
{
"and": [
"canGravityJump",
{
"cycleFrames": 120
},
"h_doubleEquipmentScreenCycleFrames"
]
}
]
}
{
"or": [
"ScrewAttack",
{
"haveBlueSuit": {}
},
{
"and": [
"Grapple",
{
"cycleFrames": 40
}
]
},
{
"and": [
"Plasma",
{
"cycleFrames": 20
}
]
},
{
"and": [
"Wave",
{
"cycleFrames": 160
}
]
},
{
"and": [
"Spazer",
{
"cycleFrames": 180
}
]
},
{
"and": [
"canDodgeWhileShooting",
{
"cycleFrames": 315
}
]
}
]
}Resets obstacles: R-Mode Farm cycle drops: 3 Mochtroid Dev note: FIXME: other options for this are possible (e.g. suitless) |
|
Requires: "h_CrystalFlash"
{
"obstaclesNotCleared": [
"R-Mode"
]
} |
From: 2
Bottom Left Door
To: 2
Bottom Left Door
With a runway of 5 tiles (open end) in the other room, the ideal timing for the stutter is to release forward for 5 frames, and repress forward on the last possible frame before the transition. Other timings can work, but will gain the shinecharge further from the door, leaving fewer shinecharge frames remaining. After gaining the shinecharge, continue holding forward in order to make Samus stand. Then turnaround spin jump back toward the door, and continue spin jumping to reach the transition with a shinecharge. Entrance condition: {
"comeInStutterShinecharging": {
"minTiles": 5
}
}Requires: "canPreciseStutterWaterShineCharge"
"canShinechargeMovementTricky"
"canInsaneJump"
"canTrickyDodgeEnemies"
{
"shineChargeFrames": 130
}
{
"or": [
"canBeVeryPatient",
{
"shineChargeFrames": 15
}
]
}Exit condition: {
"leaveShinecharged": {}
}Unlocks doors: {"types":["super"],"requires":[]}
{"types":["missiles","powerbomb"],"requires":["never"]} |
From: 2
Bottom Left Door
To: 2
Bottom Left Door
With only a runway of 4 tiles (open end) in the other room, the ideal timing for the stutter is to release forward for 4 frames, and repress forward on the last possible frame before the transition. It also works well to release forward for 3 frames and repress on the last possible frame. Other timings can also work, but may gain the shinecharge further from the door, leaving fewer shinecharge frames remaining. After gaining the shinecharge, continue holding forward in order to make Samus stand. Then turnaround spin jump back toward the door, and continue spin jumping to reach the transition with a shinecharge. Entrance condition: {
"comeInStutterShinecharging": {
"minTiles": 4
}
}Requires: "canPreciseStutterWaterShineCharge"
"canShinechargeMovementTricky"
"canInsaneJump"
"canTrickyDodgeEnemies"
{
"shineChargeFrames": 140
}
{
"or": [
"canBeVeryPatient",
{
"shineChargeFrames": 10
}
]
}Exit condition: {
"leaveShinecharged": {}
}Unlocks doors: {"types":["super"],"requires":[]}
{"types":["missiles","powerbomb"],"requires":["never"]} |
From: 2
Bottom Left Door
To: 2
Bottom Left Door
With only a runway of 3 tiles (open end) in the other room, the ideal timing for the stutter is to release forward for 3 or 4 frames, and repress forward on the last possible frame before the transition. Other timings can work, but will gain the shinecharge further from the door, leaving fewer shinecharge frames remaining. After gaining the shinecharge, continue holding forward in order to make Samus stand. Then turnaround spin jump back toward the door, and continue spin jumping to reach the transition with a shinecharge. Alternatively, with greater difficulty but saving some shinecharge frames, after performing the turnaround spin jump, briefly moonwalk back, then retain momentum by boomeranging forward (switching from pressing backward to pressing forward on the next frame), and arm pump to reach the door quickly. Entrance condition: {
"comeInStutterShinecharging": {
"minTiles": 3
}
}Requires: "canPreciseStutterWaterShineCharge"
"canShinechargeMovementTricky"
"canInsaneJump"
"canTrickyDodgeEnemies"
{
"shineChargeFrames": 145
}
{
"or": [
"canBeVeryPatient",
{
"shineChargeFrames": 10
}
]
}Exit condition: {
"leaveShinecharged": {}
}Unlocks doors: {"types":["super"],"requires":[]}
{"types":["missiles","powerbomb"],"requires":["never"]}Dev note: The same shinecharge frames could be achieved with a closed end runway (effective length of 2.4375), with a 3-frame stutter, but there doesn't appear to be any application. |
From: 2
Bottom Left Door
To: 2
Bottom Left Door
With only a runway of 2 tiles (open end) in the other room, the ideal timing for the stutter is to release forward for 3 frames, and repress forward on the last possible frame before the transition. Other timings can work, but will gain the shinecharge further from the door, leaving fewer shinecharge frames remaining. After gaining the shinecharge, continue holding forward in order to make Samus stand. Then turnaround spin jump back toward the door, and continue spin jumping to reach the transition with a shinecharge. Alternatively, with greater difficulty but saving some shinecharge frames, after performing the turnaround spin jump, briefly moonwalk back, then retain momentum by boomeranging forward (switching from pressing backward to pressing forward on the next frame), and arm pump to reach the door quickly. Entrance condition: {
"comeInStutterShinecharging": {
"minTiles": 2
}
}Requires: "canPreciseStutterWaterShineCharge"
"canShinechargeMovementTricky"
"canInsaneJump"
"canTrickyDodgeEnemies"
{
"shineChargeFrames": 150
}
{
"or": [
"canBeVeryPatient",
{
"shineChargeFrames": 15
}
]
}Exit condition: {
"leaveShinecharged": {}
}Unlocks doors: {"types":["super"],"requires":[]}
{"types":["missiles","powerbomb"],"requires":["never"]}Dev note: FIXME: The canBeVeryPatient requirement is for difficulty placement of the boomerang method; but the boomerang (or maybe specifically the moonwalk boomerang) should possibly be its own tech, and the same with rapid arm pumping. |
From: 2
Bottom Left Door
To: 2
Bottom Left Door
Entrance condition: {
"comeInShinecharging": {
"length": 12,
"openEnd": 0
},
"comesInHeated": "no"
}Requires: "Gravity" "h_CrystalSpark" |
From: 2
Bottom Left Door
To: 2
Bottom Left Door
With only a runway length of 3 tiles (closed end) in the other room, this requires a precise setup: release forward for 3 or 4 frames, then repress forward on the last possible frame before the transition; alternatively, release forward for 2 frames and repress forward on the second-to-last possible frame before the transition. If a longer runway is available (4 tiles), the timing windows are a bit more lenient: 1. Release forward for 3, 4, or 5 frames, repress forward on the last possible frame; 2. Release forward for 2 or 3 frames, repress forward on the 2nd-to-last possible frame; 3. Release forward for 1 or 2 frames, repress forward on the 3rd-to-last possible frame. Entrance condition: {
"comeInStutterShinecharging": {
"minTiles": 2.4375
},
"comesInHeated": "no"
}Requires: "canPreciseStutterWaterShineCharge" "h_underwaterCrystalSpark" Dev note: FIXME: This is possible with a 2-tile runway, but it's a lot worse. It would require more duplication and could be very tedious to set up for many attempts. |
From: 2
Bottom Left Door
To: 2
Bottom Left Door

In the case of carrying a blue suit, it is possible to inch forward a pixel or two at a time using X-Ray without destroying the Mochtroid. Exit condition: {
"leaveWithGModeSetup": {
"knockback": false
}
} |
|
Entrance condition: {
"comeInWithRMode": {}
}Clears obstacles: R-Mode |
From: 2
Bottom Left Door
To: 2
Bottom Left Door

Get a boost from a Bomb or Power Bomb while grappled to the first Grapple block above the door. Even without Gravity or HiJump, this can be done by standing about 5 tiles away from the door, jumping up into a mid-air morph, laying a bomb or Power Bomb, unmorphing, then grappling diagonally; hold down immediately after the grapple attachment to prevent Grapple from retracting. Samus will enter a 'glitched grapple hanging' state where Samus' graphics will appear corrupted while swinging with Grapple. Swing down, and hold left while approaching the door to trigger the transition. Continue holding Grapple through the door transition to initiate a teleport in the next room. If needing to stand up in the next room (e.g. for an X-Ray climb), then enter the transition while swinging slowly, e.g. after coming to a stop directly below the block (or without Gravity equipped). If needing to transition at horiziontal position $15 (as far right as possible), then additionally roll from pressing left to pressing diagonally up-left just before the transition. The game may lag heavily if Samus enters a retracted position; if this happens, hold down to extend Grapple again. Requires: "canGrappleBombHang" "h_bombThings" Exit condition: {
"leaveWithGrappleTeleport": {
"blockPositions": [
[
2,
34
]
]
}
} |
From: 2
Bottom Left Door
To: 2
Bottom Left Door
Align against the wall, then crouch jump into a mid-air morph. Unmorph while approaching the peak of the jump (an 8-frame window), then use Grapple immediately (a 2-frame window) to get stuck standing a pixel or two inside the first Grapple block above the door. Then jump (to force crouch), angle down, and grapple. Samus will enter a 'glitched grapple hanging' state where Samus' graphics will appear corrupted while swinging with Grapple. Swing down, and hold left while approaching the door to trigger the transition. To avoid heavy lag, hold down through the entire swing. Continue holding Grapple through the door transition to initiate a teleport in the next room. If needing to stand up in the next room (e.g. for an X-Ray climb), then enter the transition while swinging slowly, e.g. after coming to a stop directly below the block. If needing to transition at horiziontal position $15 (as far right as possible), then additionally roll from pressing left to pressing diagonally up-left just before the transition. The game may lag heavily if Samus enters a retracted position; if this happens, hold down to extend Grapple again. Requires: "Gravity" "canCrouchJump" "canUnmorphGrappleHang" Exit condition: {
"leaveWithGrappleTeleport": {
"blockPositions": [
[
2,
34
]
]
}
}Dev note: The canCrouchJump is not a h_underwaterCrouchJump, because Gravity is required. |
From: 2
Bottom Left Door
To: 2
Bottom Left Door
Freeze a Mochtroid near the bottom of the Grapple wall. Stand on it, and fire Grapple horizontally while walking toward the wall. If successful, Samus should clip slightly into the wall. Crouch, and fire Grapple while angling up. Samus will enter a 'glitched grapple hanging' state where Samus' graphics will appear corrupted while swinging with Grapple. Swing down, and hold left while approaching the door to trigger the transition. Continue holding Grapple through the door transition to initiate a teleport in the next room. If needing to stand up in the next room (e.g. for an X-Ray climb), then enter the transition while swinging slowly, e.g. after coming to a stop directly below the block (or without Gravity equipped). If needing to transition at horiziontal position $15 (as far right as possible), then additionally roll from pressing left to pressing diagonally up-left just before the transition. The game may lag heavily if Samus enters a retracted position; if this happens, hold down to extend Grapple again. Requires: "canFrozenEnemyGrappleHang" Exit condition: {
"leaveWithGrappleTeleport": {
"blockPositions": [
[
2,
34
]
]
}
} |
From: 2
Bottom Left Door
To: 2
Bottom Left Door
Grapple to the sixth Grapple block above the door (the second below the ledge above). Hold left while waiting for the grapple wall jump check to expire, then quickly morph. unmorph at a precise time (a 3-frame window) then use Grapple immediately (a 2-frame window) to get stuck standing a pixel or two inside the first Grapple block above the door. Then jump (to force crouch), angle down, and grapple. Samus will enter a 'glitched grapple hanging' state where Samus' graphics will appear corrupted while swinging with Grapple. Swing down, and hold left while approaching the door to trigger the transition. To avoid heavy lag, hold down through the entire swing. Continue holding Grapple through the door transition to initiate a teleport in the next room. If needing to stand up in the next room (e.g. for an X-Ray climb), then enter the transition while swinging slowly, e.g. after coming to a stop directly below the block. If needing to transition at horiziontal position $15 (as far right as possible), then additionally roll from pressing left to pressing diagonally up-left just before the transition. The game may lag heavily if Samus enters a retracted position; if this happens, hold down to extend Grapple again. Requires: "canUnmorphGrappleHang" Exit condition: {
"leaveWithGrappleTeleport": {
"blockPositions": [
[
2,
34
]
]
}
} |
|
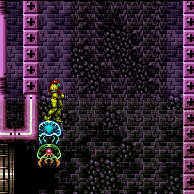
Touch the Oum to get it to start moving then retreat down to the left; they will roll into the wall and then move to the right, clearing the path forward. Alternatively, it is possible to clip through them by jumping and quickly aiming down before hitting the ceiling, while the Oum is rolling into Samus. It is much easier to clip through them with Gravity disabled, otherwise it requires a very quick down input after jumping. Requires: "Morph" "Gravity" |
|
Touch the Oum to get it to start moving then retreat down to the left; they will roll into the wall and then move to the right, clearing the path forward. Alternatively, it is possible to clip through them by jumping and quickly aiming down before hitting the ceiling, while the Oum is rolling into Samus. It is much easier to clip through them with Gravity disabled, otherwise it requires a very quick down input after jumping. Requires: "Morph"
"canSuitlessMaridia"
{
"or": [
"canSpringBallJumpMidAir",
"HiJump",
"canSunkenTileWideWallClimb"
]
} |
From: 2
Bottom Left Door
To: 3
Bottom Right Door
Jump using Spring Ball with the right timing leaving the Morph tunnel to avoid falling. Requires: {
"haveBlueSuit": {}
}
"canInsaneJump"
"h_useSpringBall"Dev note: This strat is an alternative to a mid-air Spring Ball jump, avoiding the need to pause. |
|


Enter and farm all three Mochtroids, or Crystal Flash. Run right to left underneath the Ohms, then lead them to roll off the right side. Shinecharge and use the Ohm lick attack to interrupt. Requires: {
"obstaclesCleared": [
"R-Mode"
]
}
"Gravity"
"Morph"
{
"or": [
"h_CrystalFlashForReserveEnergy",
{
"and": [
"h_RModeCanRefillReserves",
{
"resourceMissingAtMost": [
{
"type": "Missile",
"count": 0
}
]
},
{
"resourceMissingAtMost": [
{
"type": "Super",
"count": 0
}
]
},
{
"partialRefill": {
"type": "ReserveEnergy",
"limit": 20
}
}
]
}
]
}
"h_shinechargeMaxRunway"
{
"autoReserveTrigger": {
"maxReserveEnergy": 95
}
}
"canRModeSparkInterrupt"Resets obstacles: R-Mode |
From: 2
Bottom Left Door
To: 4
Top Right Door
Entrance condition: {
"comeInShinecharged": {}
}Requires: {
"shineChargeFrames": 10
}
{
"shinespark": {
"frames": 38,
"excessFrames": 3
}
} |
From: 2
Bottom Left Door
To: 4
Top Right Door
Gravity jump, then quickly pause and turn on Spring Ball for a Spring Ball jump. Requires: "canGravityJump" "HiJump" "canTrickySpringBallJump" |
From: 2
Bottom Left Door
To: 4
Top Right Door

Assumes a runway of 9 tiles in the adjacent room. Entrance condition: {
"comeInJumping": {
"speedBooster": "yes",
"minTiles": 9
}
}Requires: "HiJump" "canCrossRoomJumpIntoWater" |
From: 2
Bottom Left Door
To: 4
Top Right Door

Requires a runway of 8 tiles in the adjacent room (extra run speed at least $2.5). Entrance condition: {
"comeInJumping": {
"speedBooster": "yes",
"minTiles": 8
}
}Requires: "HiJump" "canDownGrab" "canTrickyJump" "canCrossRoomJumpIntoWater" |
|

Requires a runway of at least 38 tiles in the adjacent room. Entrance condition: {
"comeInJumping": {
"speedBooster": "yes",
"minTiles": 38
}
}Requires: "canTrickyJump" "canCrossRoomJumpIntoWater" |
From: 2
Bottom Left Door
To: 4
Top Right Door
Requires running a precise distance of 34 tiles (extra run speed $6.0 or $6.1). Entrance condition: {
"comeInJumping": {
"speedBooster": "yes",
"minTiles": 34
}
}Requires: "canTrickyDashJump" "canCrossRoomJumpIntoWater" |
From: 2
Bottom Left Door
To: 4
Top Right Door
Entrance condition: {
"comeInJumping": {
"speedBooster": "yes",
"minTiles": 16
}
}Requires: "canTrickySpringBallJump" "canCrossRoomJumpIntoWater" |
From: 2
Bottom Left Door
To: 4
Top Right Door
This requires gaining speed by running a precise distance of 7 tiles (extra run speed of $2.0 or $2.1). Entrance condition: {
"comeInJumping": {
"speedBooster": "yes",
"minTiles": 6.4375
}
}Requires: "canTrickyDashJump" "canTrickySpringBallJump" "canCrossRoomJumpIntoWater" |
From: 2
Bottom Left Door
To: 4
Top Right Door
Entrance condition: {
"comeInJumping": {
"speedBooster": "yes",
"minTiles": 10
}
}Requires: "SpaceJump" "canCrossRoomJumpIntoWater" |
From: 2
Bottom Left Door
To: 4
Top Right Door
This requires gaining speed by running a precise distance of 7 tiles (extra run speed of $2.0 or $2.1). Entrance condition: {
"comeInJumping": {
"speedBooster": "yes",
"minTiles": 6.4375
}
}Requires: "canTrickyDashJump" "SpaceJump" "canCrossRoomJumpIntoWater" |
From: 2
Bottom Left Door
To: 4
Top Right Door
Requires a runway of 1 tile in the adjacent room. Entrance condition: {
"comeInJumping": {
"speedBooster": "any",
"minTiles": 1
}
}Requires: "HiJump" "canBufferedMomentumConservingTurnaround" "canTrickySpringBallJump" "canCrossRoomJumpIntoWater" |
From: 2
Bottom Left Door
To: 4
Top Right Door
Requires a runway of 1 tile in the adjacent room. Use a spring ball jump after breaking the water, then ibj. Take two Mochtroid hits or use a double bomb jump. Entrance condition: {
"comeInJumping": {
"speedBooster": "no",
"minTiles": 1
}
}Requires: "canTrickySpringBallJump"
"canJumpIntoIBJ"
"canTrickyJump"
{
"or": [
"canDoubleBombJump",
{
"enemyDamage": {
"enemy": "Mochtroid",
"type": "contact",
"hits": 2
}
}
]
}
"canCrossRoomJumpIntoWater" |
From: 2
Bottom Left Door
To: 4
Top Right Door

Requires a runway of 1 tile in the adjacent room. There is just enough room to wall jump after breaking the water. Entrance condition: {
"comeInJumping": {
"speedBooster": "no",
"minTiles": 1
}
}Requires: "canPreciseWallJump" "canTrickyJump" "canCrossRoomJumpIntoWater" |
From: 2
Bottom Left Door
To: 4
Top Right Door

Entrance condition: {
"comeInWithSpringBallBounce": {
"speedBooster": "yes",
"movementType": "any",
"remoteAndLandingMinTiles": [
[
39,
1
]
]
}
}Requires: "canCrossRoomJumpIntoWater" |
From: 2
Bottom Left Door
To: 4
Top Right Door
This requires gaining speed by running a precise distance of 34 tiles (extra run speed of $6.0 or $6.1). Entrance condition: {
"comeInWithSpringBallBounce": {
"speedBooster": "yes",
"movementType": "any",
"remoteAndLandingMinTiles": [
[
34,
1
]
]
}
}Requires: "canTrickyDashJump" "canCrossRoomJumpIntoWater" |
From: 2
Bottom Left Door
To: 4
Top Right Door

This requires gaining speed by running a precise distance of 7 tiles (extra run speed of $2.0 or $2.1). Immediately pause after the transition to unequip Spring Ball. Then equip Spring Ball again and perform a mid-air spring ball jump. Entrance condition: {
"comeInWithSpringBallBounce": {
"speedBooster": "yes",
"movementType": "any",
"remoteAndLandingMinTiles": [
[
6.4375,
1
]
]
}
}Requires: "canTrickyDashJump" "canDoubleSpringBallJumpMidAir" "canCrossRoomJumpIntoWater" |
Tricky Cross Room Spring Ball Bounce into Spring Ball Jump, Leave With Temporary Blue
(Extreme+)
Halfie Climb Room
From: 2
Bottom Left Door
To: 4
Top Right Door

Gaining blue speed with a precise amount of run speed (extra run speed of $2.0 or $2.1), and bounce through the transition. After the transition, press pause, unmorph, aim down, and unequip Spring Ball. Buffer a morph out of the pause. Pause again to equip Spring Ball and perform a mid-air spring ball jump, chaining temporary blue to the top of the room. Entrance condition: {
"comeInWithBlueSpringBallBounce": {
"movementType": "any",
"minExtraRunSpeed": "$2.0",
"maxExtraRunSpeed": "$2.1"
}
}Requires: "canTrickyDashJump" "canCrossRoomJumpIntoWater" "canPauseRemorphTemporaryBlue" "canDoubleSpringBallJumpMidAir" Exit condition: {
"leaveWithTemporaryBlue": {}
}Unlocks doors: {"types":["ammo"],"requires":[]} |
|

Entrance condition: {
"comeInSpaceJumping": {
"speedBooster": "yes",
"minTiles": 10
}
}Requires: "canCrossRoomJumpIntoWater" |
From: 2
Bottom Left Door
To: 4
Top Right Door

This requires gaining speed by running a precise distance of 7 tiles (extra run speed of $2.0 or $2.1). Entrance condition: {
"comeInSpaceJumping": {
"speedBooster": "yes",
"minTiles": 6.4375
}
}Requires: "canTrickyDashJump" "canCrossRoomJumpIntoWater" |
From: 2
Bottom Left Door
To: 4
Top Right Door
Gain run speed using a platform below the door in the other room. Jump through the door, carrying upward momentum into this room; if necessary, use a momentum-conserving morph or momentum-conserving turnaround through the transition. Entrance condition: {
"comeInWithSidePlatform": {
"platforms": [
{
"minHeight": 2,
"maxHeight": 2,
"minTiles": 27.4375,
"speedBooster": "yes",
"obstructions": [
[
1,
0
]
],
"requires": [],
"note": [
"This applies to Dust Torizo Room and Halfie Climb Room."
]
},
{
"minHeight": 3,
"maxHeight": 3,
"minTiles": 39.4375,
"speedBooster": "yes",
"obstructions": [
[
3,
2
]
],
"requires": [
"canTrickyDashJump",
"canMomentumConservingTurnaround"
],
"note": [
"This applies to Metal Pirates Room."
],
"devNote": [
"FIXME: canTrickyDashJump is for difficulty placement; it doesn't really have anything to do with the non-linearity of Speed Booster jump height."
]
},
{
"minHeight": 2,
"maxHeight": 2,
"minTiles": 45,
"speedBooster": "yes",
"obstructions": [
[
3,
0
]
],
"requires": [
"canMomentumConservingMorph",
"canInsaneJump"
],
"note": [
"This applies to Statues Hallway.",
"Using the full runway (backing into the corner, with or without a single-pixel arm jump),",
"this has a 3-frame window for the jump, and a 3-frame window for the morph."
]
},
{
"minHeight": 3,
"maxHeight": 3,
"minTiles": 37.4375,
"speedBooster": "yes",
"obstructions": [
[
3,
0
]
],
"requires": [
"canMomentumConservingMorph",
"canInsaneJump"
],
"note": [
"This applies to Flyway.",
"Using the full runway, this has a 2-frame window for the jump,",
"and either a 1-frame window or 2-frame window for the morph, depending on the jump timing (last-frame jump being better)."
]
}
]
}
}Requires: "HiJump" "canCrossRoomJumpIntoWater" |
From: 2
Bottom Left Door
To: 4
Top Right Door
Entrance condition: {
"comeInWithSidePlatform": {
"platforms": [
{
"minHeight": 2,
"maxHeight": 2,
"minTiles": 27.4375,
"speedBooster": "yes",
"obstructions": [
[
1,
0
]
],
"requires": [],
"note": [
"This applies to Dust Torizo Room and Halfie Climb Room."
]
},
{
"minHeight": 2,
"maxHeight": 2,
"minTiles": 45,
"speedBooster": "yes",
"obstructions": [
[
2,
0
]
],
"requires": [
"canInsaneJump",
"canMomentumConservingMorph"
],
"note": [
"This applies to Waterway Energy Tank Room."
],
"detailNote": [
"Gain run speed, and time a pause to unequip Gravity after Samus jumps and aims down;",
"when the unpause black screen hits, press and hold down (and jump) to buffer a morph."
]
},
{
"minHeight": 3,
"maxHeight": 3,
"minTiles": 39.4375,
"speedBooster": "yes",
"obstructions": [
[
3,
2
]
],
"note": [
"This applies to Metal Pirates Room."
]
},
{
"minHeight": 2,
"maxHeight": 2,
"minTiles": 45,
"speedBooster": "yes",
"obstructions": [
[
3,
0
]
],
"requires": [
"canMomentumConservingMorph",
"canInsaneJump"
],
"note": [
"This applies to Statues Hallway.",
"Using the full runway with a single-pixel arm pump, this has a 4-frame window for the jump,",
"and between a 2-frame and 4-frame window for the morph (with later jumps giving a larger window)."
]
},
{
"minHeight": 3,
"maxHeight": 3,
"minTiles": 37.4375,
"speedBooster": "yes",
"obstructions": [
[
3,
0
]
],
"requires": [
"canMomentumConservingMorph",
"canInsaneJump"
],
"note": [
"This applies to Flyway.",
"Using the full runway, this has a 2-frame window for the jump,",
"and either a 1-frame window and 2-frame window for the morph, depending on the jump timing (last-frame jump being better)."
]
},
{
"minHeight": 2,
"maxHeight": 2,
"minTiles": 45,
"speedBooster": "yes",
"obstructions": [
[
4,
0
]
],
"requires": [
"canMomentumConservingMorph",
"canInsaneJump",
"canInsaneMidAirMorph"
],
"note": [
"This applies to Baby Kraid Room.",
"Using the full runway, this is double frame perfect:",
"it requires jumping on the last possible frame before Samus would bonk on the doorway ledge,",
"and morphing on the last possible frame before Samus would bonk the ceiling."
]
}
]
}
}Requires: "canSpringBallJumpMidAir" "canCrossRoomJumpIntoWater" |
|
Requires: "h_storedSpark"
{
"or": [
{
"shinespark": {
"frames": 35,
"excessFrames": 3
}
},
{
"and": [
"HiJump",
{
"shinespark": {
"frames": 31,
"excessFrames": 3
}
}
]
},
{
"and": [
"Gravity",
{
"shinespark": {
"frames": 32,
"excessFrames": 4
}
}
]
},
{
"and": [
"Gravity",
"HiJump",
{
"shinespark": {
"frames": 27,
"excessFrames": 3
}
}
]
}
]
} |
|
To avoid the Mochtroids, it is possible to place bombs near them while in the Morph Tunnel below to the right. Entrance condition: {
"comeInWithGMode": {
"mode": "any",
"morphed": true
}
}Requires: "Gravity" "h_artificialMorphLongIBJ" Dev note: This strat is not starting from 5, because that would require canOffScreenMovement. |
From: 2
Bottom Left Door
To: 4
Top Right Door

Entrance condition: {
"comeInShinecharging": {
"length": 8,
"openEnd": 1
}
}Requires: "Gravity"
"HiJump"
"canShinechargeMovementTricky"
"canFastWallJumpClimb"
{
"shineChargeFrames": 165
}Exit condition: {
"leaveShinecharged": {}
}Unlocks doors: {"types":["super"],"requires":[]}
{"types":["missiles","powerbomb"],"requires":["never"]} |
From: 2
Bottom Left Door
To: 4
Top Right Door

Entrance condition: {
"comeInShinecharging": {
"length": 8,
"openEnd": 1
}
}Requires: "Gravity"
"canShinechargeMovementTricky"
"canFastWallJumpClimb"
{
"shineChargeFrames": 150
}
{
"or": [
"HiJump",
{
"shineChargeFrames": 27
}
]
}
{
"shinespark": {
"frames": 5,
"excessFrames": 0
}
}Exit condition: {
"leaveWithSpark": {}
}Unlocks doors: {"types":["super"],"requires":[]}
{"types":["missiles","powerbomb"],"requires":["never"]} |
From: 2
Bottom Left Door
To: 4
Top Right Door

Entrance condition: {
"comeInShinecharging": {
"length": 3,
"openEnd": 1
}
}Requires: "HiJump"
{
"or": [
{
"and": [
"canGravityJump",
"canTrickySpringBallJump",
"canChainTemporaryBlue"
]
},
{
"and": [
"canTrickyUseFrozenEnemies",
"canLongChainTemporaryBlue"
]
}
]
}Exit condition: {
"leaveWithTemporaryBlue": {}
}Unlocks doors: {"types":["ammo"],"requires":[]}Dev note: FIXME: Probably more of the runway could be used, but with increasing difficulty. |
From: 2
Bottom Left Door
To: 4
Top Right Door
Entrance condition: {
"comeInWithGrappleTeleport": {
"blockPositions": [
[
12,
12
],
[
12,
13
]
]
}
}Bypasses door shell: true |
From: 2
Bottom Left Door
To: 4
Top Right Door
Entrance condition: {
"comeInWithGrappleTeleport": {
"blockPositions": [
[
12,
12
]
]
}
}Exit condition: {
"leaveWithGrappleTeleport": {
"blockPositions": [
[
12,
12
]
]
}
}Bypasses door shell: true |
From: 2
Bottom Left Door
To: 4
Top Right Door
Entrance condition: {
"comeInWithGrappleTeleport": {
"blockPositions": [
[
12,
13
]
]
}
}Exit condition: {
"leaveWithGrappleTeleport": {
"blockPositions": [
[
12,
13
]
]
}
}Bypasses door shell: true |
From: 2
Bottom Left Door
To: 5
G-Mode Morph, In Morph Tunnel
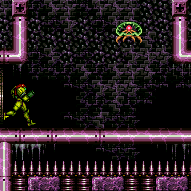
Entrance condition: {
"comeInWithGMode": {
"mode": "any",
"morphed": true
}
} |
From: 2
Bottom Left Door
To: 6
Bottom Shinecharged
Entrance condition: {
"comeInShinecharging": {
"length": 12,
"openEnd": 0
}
}Requires: "Gravity"
{
"shineChargeFrames": 0
} |
From: 2
Bottom Left Door
To: 6
Bottom Shinecharged
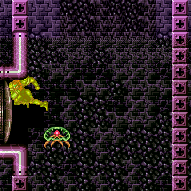
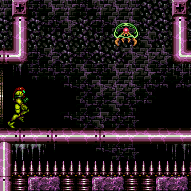
Entrance condition: {
"comeInShinecharging": {
"length": 4,
"openEnd": 0
}
}Requires: "canWaterShineCharge"
{
"shineChargeFrames": 0
} |
From: 2
Bottom Left Door
To: 6
Bottom Shinecharged
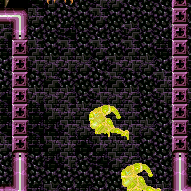
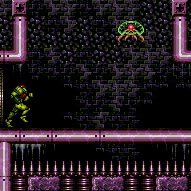
With only a runway length of 3 tiles (closed end) in the other room, this requires a precise setup: release forward for 3 or 4 frames, then repress forward on the last possible frame before the transition; alternatively, release forward for 2 frames and repress forward on the second-to-last possible frame before the transition. It is possible to clear the Mochtroid with Power Beam without taking damage, by first firing angle up shots and then switching to angle down shots once the Mochtroid is on top of Samus. If a longer runway is available (4 tiles), the timing windows are a bit more lenient: 1. Release forward for 3, 4, or 5 frames, repress forward on the last possible frame; 2. Release forward for 2 or 3 frames, repress forward on the 2nd-to-last possible frame; 3. Release forward for 1 or 2 frames, repress forward on the 3rd-to-last possible frame. Entrance condition: {
"comeInStutterShinecharging": {
"minTiles": 2.4375
}
}Requires: "canPreciseStutterWaterShineCharge"
{
"or": [
{
"enemyDamage": {
"enemy": "Mochtroid",
"type": "contact",
"hits": 2
}
},
{
"and": [
"canDodgeWhileShooting",
{
"or": [
"Wave",
"Spazer",
"Plasma",
{
"ammo": {
"type": "Missile",
"count": 1
}
},
{
"ammo": {
"type": "Super",
"count": 1
}
},
"canTrickyDodgeEnemies"
]
}
]
}
]
}
{
"shineChargeFrames": 0
} |
From: 2
Bottom Left Door
To: 6
Bottom Shinecharged
With only a runway of 2 tiles (open end) in the other room, this requires a double-frame-perfect setup: release forward for exactly 3 frames, and repress forward on the last possible frame before the transition. It is possible to clear the Mochtroid with Power Beam without taking damage, by first firing angle up shots and then switching to angle down shots once the Mochtroid is on top of Samus. Entrance condition: {
"comeInStutterShinecharging": {
"minTiles": 2
}
}Requires: "canPreciseStutterWaterShineCharge"
"canInsaneJump"
{
"or": [
{
"enemyDamage": {
"enemy": "Mochtroid",
"type": "contact",
"hits": 2
}
},
{
"and": [
"canDodgeWhileShooting",
{
"or": [
"Wave",
"Spazer",
"Plasma",
{
"ammo": {
"type": "Missile",
"count": 1
}
},
{
"ammo": {
"type": "Super",
"count": 1
}
},
"canTrickyDodgeEnemies"
]
}
]
}
]
}
{
"shineChargeFrames": 0
}Dev note: FIXME: canInsaneJump is for difficulty placement; replace with a more appropriate tech since no jump is involved. |
From: 3
Bottom Right Door
To: 1
Top Left Door
Charge a shinespark below the Oums, near the bottom right door, quickly move through the morph tunnel and spark up left to the middle door. This is an alternative to wall jumping. Requires: "Morph"
"Gravity"
"canShinechargeMovementComplex"
"h_shinechargeMaxRunway"
{
"shinespark": {
"frames": 15,
"excessFrames": 3
}
}Dev note: Jumping into a diagonal spark saves a little energy from both the jump and hitting the slightly lower ceiling by the door. |
|
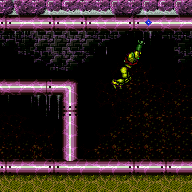

After teleporting, allow Samus to swing right before releasing Grapple. Entrance condition: {
"comeInWithGrappleTeleport": {
"blockPositions": [
[
5,
3
],
[
7,
2
]
]
}
} |
From: 3
Bottom Right Door
To: 1
Top Left Door
Entrance condition: {
"comeInWithGrappleTeleport": {
"blockPositions": [
[
2,
18
],
[
2,
19
],
[
2,
28
],
[
2,
29
]
]
}
}Bypasses door shell: true |
From: 3
Bottom Right Door
To: 1
Top Left Door

After teleporting, release Grapple and turn around repeatedly to wiggle out to the left and fall into the air space behind the Grapple blocks. Press right against the wall, angle up, use Grapple, and release to clip into the door transition. Entrance condition: {
"comeInWithGrappleTeleport": {
"blockPositions": [
[
7,
2
]
]
}
}Requires: "canGrappleClip" Bypasses door shell: true |
From: 3
Bottom Right Door
To: 1
Top Left Door
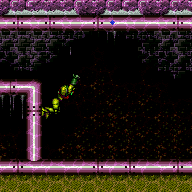
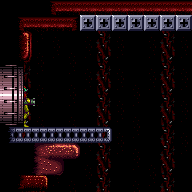
After teleporting, quickly press and hold down to extend Grapple to push Samus to the left. Release Grapple, and turn around repeatedly to wiggle out to the left and fall into the air space behind the Grapple blocks. Press right against the wall, angle up, use Grapple, and release to clip into the door transition. Entrance condition: {
"comeInWithGrappleTeleport": {
"blockPositions": [
[
5,
3
]
]
}
}Requires: "canInsaneJump" "canGrappleClip" Bypasses door shell: true |
From: 3
Bottom Right Door
To: 1
Top Left Door
Entrance condition: {
"comeInWithGrappleTeleport": {
"blockPositions": [
[
2,
18
]
]
}
}Exit condition: {
"leaveWithGrappleTeleport": {
"blockPositions": [
[
2,
18
]
]
}
}Bypasses door shell: true |
From: 3
Bottom Right Door
To: 1
Top Left Door
Entrance condition: {
"comeInWithGrappleTeleport": {
"blockPositions": [
[
2,
19
]
]
}
}Exit condition: {
"leaveWithGrappleTeleport": {
"blockPositions": [
[
2,
19
]
]
}
}Bypasses door shell: true |
From: 3
Bottom Right Door
To: 1
Top Left Door
Entrance condition: {
"comeInWithGrappleTeleport": {
"blockPositions": [
[
2,
28
]
]
}
}Exit condition: {
"leaveWithGrappleTeleport": {
"blockPositions": [
[
2,
28
]
]
}
}Bypasses door shell: true |
From: 3
Bottom Right Door
To: 1
Top Left Door
Entrance condition: {
"comeInWithGrappleTeleport": {
"blockPositions": [
[
2,
29
]
]
}
}Exit condition: {
"leaveWithGrappleTeleport": {
"blockPositions": [
[
2,
29
]
]
}
}Bypasses door shell: true |
|
Run under the Oums to get them to all move to the right and clear the path. Alternatively, it is possible to clip through them by touching them then jumping and quickly aiming down before hitting the ceiling, while the Oum is rolling into Samus. It is much easier to clip through them with Gravity disabled, otherwise it requires a very quick down input after jumping. Requires: "Morph" "Gravity" |
From: 3
Bottom Right Door
To: 2
Bottom Left Door


Run under the Oums to get them to all move to the right and clear the path. Alternatively, it is possible to clip through them by touching them then jumping and quickly aiming down before hitting the ceiling, while the Oum is rolling into Samus. It is much easier to clip through them with Gravity disabled, otherwise it requires a very quick down input after jumping. Requires: "Morph"
"canSuitlessMaridia"
{
"or": [
"canSpringBallJumpMidAir",
"HiJump"
]
} |
From: 3
Bottom Right Door
To: 2
Bottom Left Door
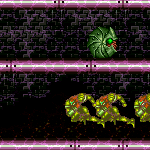
Quickly shoot out the 3 shot blocks then horizontal spark breaking the speed blocks. Wait for the Oums to roll on their own to a place where they can be climbed. Do not stand on the Oums when they begin to attack. Entrance condition: {
"comeInShinecharged": {}
}Requires: {
"shineChargeFrames": 100
}
{
"notable": "Come in Shinecharged, Shinespark from the Bottom Right"
}
"Morph"
"canSuitlessMaridia"
"canUseEnemies"
"canHorizontalShinespark"
{
"shinespark": {
"frames": 91,
"excessFrames": 4
}
} |
Come in Shinecharged, Shinespark from the Bottom Right (Conserve Energy)
(Very Hard)
Halfie Climb Room
From: 3
Bottom Right Door
To: 2
Bottom Left Door
Quickly shoot out the 3 shot blocks then horizontal spark breaking the speed blocks. Jump forward to save some health before Shinesparking Wait for the Oums to roll on their own to a place where they can be climbed. Do not stand on the Oums when they begin to attack. Entrance condition: {
"comeInShinecharged": {}
}Requires: {
"shineChargeFrames": 125
}
{
"notable": "Come in Shinecharged, Shinespark from the Bottom Right"
}
"Morph"
"canSuitlessMaridia"
"canUseEnemies"
"canShinechargeMovementComplex"
{
"shinespark": {
"frames": 70,
"excessFrames": 4
}
} |
From: 3
Bottom Right Door
To: 2
Bottom Left Door
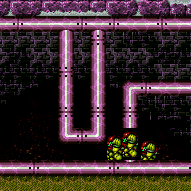
Use temporary blue to break the speed blocks. Use stationary lateral mid-air morphs to move quickly while chaining temporary blue, in order to reach the last speed blocks before the Oums. Climb on the Oums to reach the left side of the room. Do not stand on the Oums when they begin to attack. Entrance condition: {
"comeInBlueSpinning": {
"maxExtraRunSpeed": "$3.0",
"unusableTiles": 0
}
}Requires: "canLongChainTemporaryBlue" "canStationaryLateralMidAirMorph" "can4HighMidAirMorph" "canUseEnemies" Dev note: FIXME: This strat name is not accurate since it doesn't involve a shinespark; it's only this way because it shares the reusable notable. FIXME: Carrying a flash suit can be possible while chaining temporary blue underwater here; a speedball could also be possible to avoid the need for such a long chain. |
From: 3
Bottom Right Door
To: 2
Bottom Left Door


Use temporary blue to break the speed blocks. Use stationary lateral mid-air morphs to move quickly while chaining temporary blue, in order to reach the last speed blocks before the Oums. Climb on the Oums to reach the left side of the room. Do not stand on the Oums when they begin to attack. Entrance condition: {
"comeInWithTemporaryBlue": {}
}Requires: "canLongChainTemporaryBlue" "canStationaryLateralMidAirMorph" "can4HighMidAirMorph" "canUseEnemies" |
|


Go under the Oums to lure one and use it to get to the left. Shinespark to get up the next ledge. Requires: "Morph"
"canUseEnemies"
"h_storedSpark"
{
"shinespark": {
"frames": 4,
"excessFrames": 2
}
} |
|
Gain a shinecharge using the long runway on the right side of the room, carry it through the morph tunnel, and spark out the door. Requires: "Gravity"
"Morph"
"h_shinechargeMaxRunway"
"canShinechargeMovementTricky"
{
"shinespark": {
"frames": 10,
"excessFrames": 0
}
}Exit condition: {
"leaveWithSpark": {}
}Unlocks doors: {"types":["ammo"],"requires":[]} |
From: 3
Bottom Right Door
To: 2
Bottom Left Door
Entrance condition: {
"comeInWithGrappleTeleport": {
"blockPositions": [
[
2,
34
]
]
}
}Bypasses door shell: true |
|
Entrance condition: {
"comeInWithGrappleTeleport": {
"blockPositions": [
[
2,
34
]
]
}
}Exit condition: {
"leaveWithGrappleTeleport": {
"blockPositions": [
[
2,
34
]
]
}
}Bypasses door shell: true |
|
Exit condition: {
"leaveWithRunway": {
"length": 1,
"openEnd": 1
}
} |
From: 3
Bottom Right Door
To: 3
Bottom Right Door
Requires: "Gravity" Exit condition: {
"leaveWithSidePlatform": {
"height": 2,
"runway": {
"length": 45,
"openEnd": 1
},
"obstruction": [
1,
0
]
}
}Dev note: Max extra run speed $2.D with spin, or $2.E with a quick aim-down. |
|
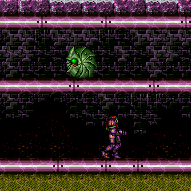
Requires: "Gravity"
"canShinechargeMovement"
"h_shinechargeMaxRunway"
{
"shineChargeFrames": 30
}Exit condition: {
"leaveShinecharged": {}
} |
|
If needing high speed, try to prevent the Oums from falling to the floor, to prevent them from blocking the runway. Requires: "Gravity" Exit condition: {
"leaveSpinning": {
"remoteRunway": {
"length": 45,
"openEnd": 1
}
}
} |
|
If needing high speed, try to prevent the Oums from falling to the floor, to prevent them from blocking the runway. Requires: "Gravity" Exit condition: {
"leaveWithMockball": {
"remoteRunway": {
"length": 45,
"openEnd": 1
},
"landingRunway": {
"length": 1,
"openEnd": 1
}
}
} |
From: 3
Bottom Right Door
To: 3
Bottom Right Door
If needing high speed, try to prevent the Oums from falling to the floor, to prevent them from blocking the runway. Requires: "Gravity" Exit condition: {
"leaveWithSpringBallBounce": {
"remoteRunway": {
"length": 45,
"openEnd": 1
},
"landingRunway": {
"length": 1,
"openEnd": 1
},
"movementType": "uncontrolled"
}
} |
|
If needing high speed, try to prevent the Oums from falling to the floor, to prevent them from blocking the runway. Requires: "Gravity" Exit condition: {
"leaveSpaceJumping": {
"remoteRunway": {
"length": 45,
"openEnd": 1
}
}
} |
From: 3
Bottom Right Door
To: 3
Bottom Right Door
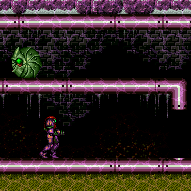
Requires: "Gravity" "h_shinechargeMaxRunway" "canChainTemporaryBlue" Exit condition: {
"leaveWithTemporaryBlue": {}
} |
|
Requires: "h_CrystalFlash"
{
"obstaclesNotCleared": [
"R-Mode"
]
} |
|
Requires: "Gravity" "h_shinechargeMaxRunway" "h_CrystalSpark" |
|
Entrance condition: {
"comeInWithRMode": {}
}Clears obstacles: R-Mode |
From: 3
Bottom Right Door
To: 3
Bottom Right Door

Time the Crystal Flash so that the Oum can hit Samus. This is fairly lenient, but one method is to Crystal Flash near the shot block pillar while the Oum is to the right of Samus, near the door. Requires: {
"obstaclesCleared": [
"R-Mode"
]
}
"canRModeCrystalFlashInterrupt"
{
"ammo": {
"type": "Missile",
"count": 10
}
}
{
"or": [
{
"tech": "canComplexRModeCrystalFlashInterrupt"
},
{
"ammo": {
"type": "Super",
"count": 10
}
}
]
}
{
"or": [
"h_fullEnemyDamageReduction",
{
"and": [
"h_partialEnemyDamageReduction",
{
"resourceAtMost": [
{
"type": "RegularEnergy",
"count": 49
}
]
}
]
},
{
"and": [
{
"resourceCapacity": [
{
"type": "RegularEnergy",
"count": 199
}
]
},
{
"resourceCapacity": [
{
"type": "ReserveEnergy",
"count": 199
}
]
}
]
}
]
}Resets obstacles: R-Mode |
From: 3
Bottom Right Door
To: 3
Bottom Right Door

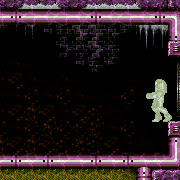
Climb up and lure and Oum to the right pit, then time the Crystal Flash so that the Oum can hit Samus. This is fairly lenient, but one method is to Crystal Flash near the shot block pillar while the Oum is to the right of Samus moving right. With some testing, it seemed like the Oum was more likely to hit Samus when it is moving to the left. This is possible with a Bomb into Spring Ball jump using a precisely timed bomb boost to propel Samus upward just long enough to get the mid-air Spring Ball jump. Entrance condition: {
"comeInWithGMode": {
"mode": "direct",
"morphed": true
}
}Requires: {
"or": [
{
"and": [
"HiJump",
"h_artificialMorphSpringBall"
]
},
{
"and": [
"Gravity",
"h_artificialMorphIBJ"
]
},
"h_artificialMorphUnderwaterBombIntoSpringBallJump"
]
}
"h_artificialMorphRModeCrystalFlashInterrupt"
{
"ammo": {
"type": "Missile",
"count": 10
}
}
{
"or": [
{
"tech": "canComplexRModeCrystalFlashInterrupt"
},
{
"ammo": {
"type": "Super",
"count": 10
}
}
]
}
{
"or": [
"h_fullEnemyDamageReduction",
{
"and": [
"h_partialEnemyDamageReduction",
{
"resourceAtMost": [
{
"type": "RegularEnergy",
"count": 49
}
]
}
]
},
{
"and": [
{
"resourceCapacity": [
{
"type": "RegularEnergy",
"count": 199
}
]
},
{
"resourceCapacity": [
{
"type": "ReserveEnergy",
"count": 199
}
]
}
]
}
]
}Dev note: It is possible to enter with G-mode for the left side of the room and do this off-camera, but it is unreasonably difficult. |
From: 3
Bottom Right Door
To: 4
Top Right Door
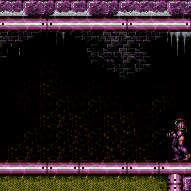
Charge a shinespark below the Oums, near the bottom right door, quickly move through the morph tunnel and spark up to the top door. This is an alternative to wall jumping. Requires: "Morph"
"Gravity"
"canShinechargeMovementComplex"
"h_shinechargeMaxRunway"
{
"shinespark": {
"frames": 33,
"excessFrames": 3
}
}Dev note: Jumping into a diagonal spark saves a little energy from both the jump and hitting the slightly lower ceiling by the door. |
|
Entrance condition: {
"comeInWithGrappleTeleport": {
"blockPositions": [
[
5,
3
],
[
7,
2
]
]
}
} |
From: 3
Bottom Right Door
To: 5
G-Mode Morph, In Morph Tunnel
Entrance condition: {
"comeInWithGMode": {
"mode": "any",
"morphed": true
}
}Requires: {
"or": [
{
"and": [
"Gravity",
"h_artificialMorphIBJ"
]
},
{
"and": [
"h_artificialMorphSpringBall",
{
"or": [
"Gravity",
"HiJump"
]
}
]
}
]
} |
From: 3
Bottom Right Door
To: 5
G-Mode Morph, In Morph Tunnel
Perform a double Spring Ball jump using a precisely timed bomb boost to propel Samus upward just long enough to get the mid-air Spring Ball jump. This needs to be done twice to cross the room and get through the morph tunnel. Entrance condition: {
"comeInWithGMode": {
"mode": "any",
"morphed": true
}
}Requires: "h_artificialMorphUnderwaterBombIntoSpringBallJump" |
|
|
From: 4
Top Right Door
To: 1
Top Left Door
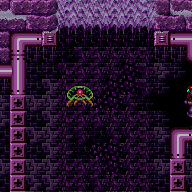
Entrance condition: {
"comeInShinecharged": {}
}Requires: {
"shineChargeFrames": 110
}
"Gravity"
"canShinechargeMovementComplex"Exit condition: {
"leaveShinecharged": {}
}Unlocks doors: {"types":["super"],"requires":[]}
{"types":["missiles","powerbomb"],"requires":["never"]} |
From: 4
Top Right Door
To: 1
Top Left Door


Entrance condition: {
"comeInShinecharged": {}
}Requires: {
"shineChargeFrames": 115
}
"canShinechargeMovementComplex"Exit condition: {
"leaveShinecharged": {}
}Unlocks doors: {"types":["super"],"requires":[]}
{"types":["missiles","powerbomb"],"requires":["never"]} |
From: 4
Top Right Door
To: 1
Top Left Door
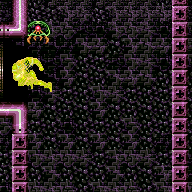
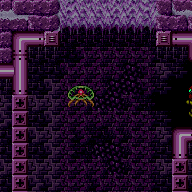
Run off the ledge, fire a shot horizontally to open the door, and spark after landing. Entrance condition: {
"comeInShinecharged": {}
}Requires: {
"shineChargeFrames": 95
}
"canShinechargeMovementComplex"
{
"shinespark": {
"frames": 4,
"excessFrames": 0
}
}Exit condition: {
"leaveWithSpark": {
"position": "bottom"
}
}Unlocks doors: {"types":["super"],"requires":[]}
{"types":["missiles","powerbomb"],"requires":["never"]} |
Come in Shinecharged, Leave With Spark (Bottom Position, Distant Spark)
(Very Hard)
Halfie Climb Room
From: 4
Top Right Door
To: 1
Top Left Door

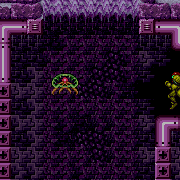
Spin jump, fire a shot diagonally down to open the door, and spark mid-air. Entrance condition: {
"comeInShinecharged": {}
}Requires: {
"shineChargeFrames": 85
}
"canShinechargeMovementComplex"
{
"shinespark": {
"frames": 10,
"excessFrames": 0
}
}Exit condition: {
"leaveWithSpark": {
"position": "bottom"
}
}Unlocks doors: {"types":["super"],"requires":[]}
{"types":["missiles","powerbomb"],"requires":["never"]} |
From: 4
Top Right Door
To: 1
Top Left Door


Entrance condition: {
"comeInShinecharged": {}
}Requires: {
"shineChargeFrames": 85
}
"canShinechargeMovementComplex"
{
"shinespark": {
"frames": 4,
"excessFrames": 0
}
}Exit condition: {
"leaveWithSpark": {
"position": "top"
}
}Unlocks doors: {"types":["super"],"requires":[]}
{"types":["missiles","powerbomb"],"requires":["never"]} |
From: 4
Top Right Door
To: 1
Top Left Door
Entrance condition: {
"comeInShinecharged": {}
}Requires: {
"shineChargeFrames": 75
}
"canShinechargeMovementComplex"
{
"shinespark": {
"frames": 10,
"excessFrames": 0
}
}Exit condition: {
"leaveWithSpark": {
"position": "top"
}
}Unlocks doors: {"types":["super"],"requires":[]}
{"types":["missiles","powerbomb"],"requires":["never"]} |
From: 4
Top Right Door
To: 1
Top Left Door

Entrance condition: {
"comeInShinecharging": {
"length": 0,
"openEnd": 1
}
}Requires: "canSuitlessMaridia" "canChainTemporaryBlue" "canSpringFling" Exit condition: {
"leaveWithTemporaryBlue": {}
}Unlocks doors: {"types":["ammo"],"requires":[]} |
From: 4
Top Right Door
To: 1
Top Left Door
Entrance condition: {
"comeInBlueSpinning": {
"maxExtraRunSpeed": "$1.8",
"unusableTiles": 1
}
}Requires: "canSuitlessMaridia" "canInsaneJump" "canChainTemporaryBlue" Exit condition: {
"leaveWithTemporaryBlue": {}
}Unlocks doors: {"types":["ammo"],"requires":[]} |
From: 4
Top Right Door
To: 1
Top Left Door
Entrance condition: {
"comeInWithGrappleTeleport": {
"blockPositions": [
[
2,
18
],
[
2,
19
],
[
2,
28
],
[
2,
29
]
]
}
}Bypasses door shell: true |
From: 4
Top Right Door
To: 1
Top Left Door
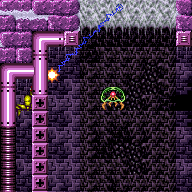
After teleporting, release Grapple and turn around repeatedly to wiggle out to the left and fall into the air space behind the Grapple blocks. Press right against the wall, angle up, use Grapple, and release to clip into the door transition. Entrance condition: {
"comeInWithGrappleTeleport": {
"blockPositions": [
[
7,
2
]
]
}
}Requires: "canGrappleClip" Bypasses door shell: true |
From: 4
Top Right Door
To: 1
Top Left Door


After teleporting, quickly press and hold down to extend Grapple to push Samus to the left. Release Grapple, and turn around repeatedly to wiggle out to the left and fall into the air space behind the Grapple blocks. Press right against the wall, angle up, use Grapple, and release to clip into the door transition. Entrance condition: {
"comeInWithGrappleTeleport": {
"blockPositions": [
[
5,
3
]
]
}
}Requires: "canInsaneJump" "canGrappleClip" Bypasses door shell: true |
From: 4
Top Right Door
To: 1
Top Left Door
Entrance condition: {
"comeInWithGrappleTeleport": {
"blockPositions": [
[
2,
18
]
]
}
}Exit condition: {
"leaveWithGrappleTeleport": {
"blockPositions": [
[
2,
18
]
]
}
}Bypasses door shell: true |
From: 4
Top Right Door
To: 1
Top Left Door
Entrance condition: {
"comeInWithGrappleTeleport": {
"blockPositions": [
[
2,
19
]
]
}
}Exit condition: {
"leaveWithGrappleTeleport": {
"blockPositions": [
[
2,
19
]
]
}
}Bypasses door shell: true |
From: 4
Top Right Door
To: 1
Top Left Door
Entrance condition: {
"comeInWithGrappleTeleport": {
"blockPositions": [
[
2,
28
]
]
}
}Exit condition: {
"leaveWithGrappleTeleport": {
"blockPositions": [
[
2,
28
]
]
}
}Bypasses door shell: true |
From: 4
Top Right Door
To: 1
Top Left Door
Entrance condition: {
"comeInWithGrappleTeleport": {
"blockPositions": [
[
2,
29
]
]
}
}Exit condition: {
"leaveWithGrappleTeleport": {
"blockPositions": [
[
2,
29
]
]
}
}Bypasses door shell: true |
From: 4
Top Right Door
To: 2
Bottom Left Door
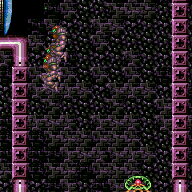

Entrance condition: {
"comeInShinecharging": {
"length": 2,
"openEnd": 1
}
}Requires: "Gravity"
"canShinechargeMovementComplex"
{
"shineChargeFrames": 150
}Exit condition: {
"leaveShinecharged": {}
}Unlocks doors: {"types":["super"],"requires":[]}
{"types":["missiles","powerbomb"],"requires":["never"]} |
From: 4
Top Right Door
To: 2
Bottom Left Door

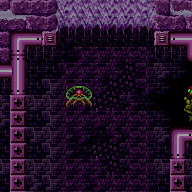
Entrance condition: {
"comeInShinecharging": {
"length": 1,
"openEnd": 0
}
}Requires: "canShinechargeMovementComplex"
{
"shineChargeFrames": 155
}Exit condition: {
"leaveShinecharged": {}
}Unlocks doors: {"types":["super"],"requires":[]}
{"types":["missiles","powerbomb"],"requires":["never"]} |
From: 4
Top Right Door
To: 2
Bottom Left Door
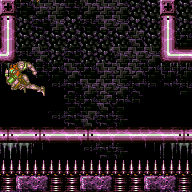
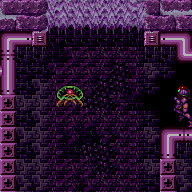
Entrance condition: {
"comeInShinecharged": {}
}Requires: {
"shineChargeFrames": 130
}
"canShinechargeMovementComplex"
{
"shinespark": {
"frames": 4,
"excessFrames": 0
}
}Exit condition: {
"leaveWithSpark": {
"position": "top"
}
}Unlocks doors: {"types":["super"],"requires":[]}
{"types":["missiles","powerbomb"],"requires":["never"]} |
From: 4
Top Right Door
To: 2
Bottom Left Door
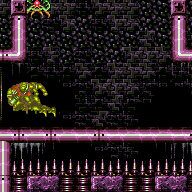
Entrance condition: {
"comeInShinecharged": {}
}Requires: {
"shineChargeFrames": 145
}
"canShinechargeMovementComplex"
{
"shinespark": {
"frames": 4,
"excessFrames": 0
}
}Exit condition: {
"leaveWithSpark": {
"position": "top"
}
}Unlocks doors: {"types":["super"],"requires":[]}
{"types":["missiles","powerbomb"],"requires":["never"]} |
From: 4
Top Right Door
To: 2
Bottom Left Door
Entrance condition: {
"comeInShinecharging": {
"length": 0,
"openEnd": 1
}
}Requires: "canSuitlessMaridia" "canChainTemporaryBlue" Exit condition: {
"leaveWithTemporaryBlue": {}
}Unlocks doors: {"types":["ammo"],"requires":[]} |
From: 4
Top Right Door
To: 2
Bottom Left Door
Entrance condition: {
"comeInWithGrappleTeleport": {
"blockPositions": [
[
2,
34
]
]
}
}Bypasses door shell: true |
|
Entrance condition: {
"comeInWithGrappleTeleport": {
"blockPositions": [
[
2,
34
]
]
}
}Exit condition: {
"leaveWithGrappleTeleport": {
"blockPositions": [
[
2,
34
]
]
}
}Bypasses door shell: true |
|
Exit condition: {
"leaveWithRunway": {
"length": 3,
"openEnd": 1
}
} |
From: 4
Top Right Door
To: 4
Top Right Door


Use a frozen Mochtroid to extend the length of the runway. Positioning the Mochtroid can be done by dropping down below then climbing back up with the frozen Mochtroid as a platform. Alternatively, freeze the Mochtroid with an angle-down shot while falling below then quickly climb back up. Requires: "h_navigateUnderwater"
"h_frozenEnemyRunway"
{
"or": [
"canMochtroidIceClimb",
{
"and": [
"Gravity",
{
"or": [
"SpaceJump",
"canWallJump"
]
}
]
}
]
}
{
"enemyDamage": {
"enemy": "Mochtroid",
"type": "contact",
"hits": 2
}
}Exit condition: {
"leaveWithRunway": {
"length": 4,
"openEnd": 1
}
}Dev note: There are many other ways to get into position, but they would require manipulating the Mochtroid as much as canMochtroidIceClimb expects. |
|
Requires: {
"resetRoom": {
"nodes": [
4
]
}
}
{
"or": [
{
"and": [
"Grapple",
{
"cycleFrames": 80
}
]
},
{
"and": [
"Plasma",
{
"cycleFrames": 80
}
]
},
{
"and": [
"ScrewAttack",
{
"cycleFrames": 80
}
]
},
{
"and": [
{
"haveBlueSuit": {}
},
{
"cycleFrames": 80
}
]
},
{
"and": [
"Wave",
{
"cycleFrames": 85
}
]
},
{
"and": [
"Spazer",
{
"cycleFrames": 90
}
]
},
{
"and": [
"canDodgeWhileShooting",
{
"cycleFrames": 120
}
]
}
]
}Resets obstacles: R-Mode Farm cycle drops: 1 Mochtroid |
|
Requires: "h_CrystalFlash"
{
"obstaclesNotCleared": [
"R-Mode"
]
} |
From: 4
Top Right Door
To: 4
Top Right Door

In the case of carrying a blue suit, it is possible to inch forward a pixel or two at a time using X-Ray without destroying the Mochtroid. Exit condition: {
"leaveWithGModeSetup": {
"knockback": false
}
} |
From: 4
Top Right Door
To: 4
Top Right Door
Entrance condition: {
"comeInWithGMode": {
"mode": "direct",
"morphed": false
}
}Requires: "h_doorImmediatelyClosedFix" Exit condition: {
"leaveWithGMode": {
"morphed": false
}
} |
From: 4
Top Right Door
To: 4
Top Right Door
Entrance condition: {
"comeInWithGMode": {
"mode": "direct",
"morphed": true
}
}Requires: "h_doorImmediatelyClosedFix" Exit condition: {
"leaveWithGMode": {
"morphed": true
}
} |
|
Entrance condition: {
"comeInWithRMode": {}
}Clears obstacles: R-Mode |
From: 4
Top Right Door
To: 4
Top Right Door

Get a boost from a Bomb or Power Bomb while grappled to the second Grapple block below the door; Samus will enter a 'glitched grapple hanging' state where Samus' graphics will appear corrupted while swinging with Grapple. Press jump to get a good bounce off the wall at the bottom of the swing, making it possible to swing up to the door. Heavy lag can typically be avoided by holding right during the bottom half of the swing. Pressing right while inside the transition tiles will trigger the transition. Continue holding Grapple through the transition to initiate a teleport in the next room. If it is needed to trigger the transition further to the right (at position $EE), then wait to come to a stop before pressing right. If it is needed to trigger the transition further to the left (positions $EB or $ED), then hold right while approaching the door. Either way, Samus should automatically be able to stand in the next room (e.g. for an X-Ray climb). Requires: "Gravity" "canGrappleBombHang" "h_bombThings" Exit condition: {
"leaveWithGrappleTeleport": {
"blockPositions": [
[
12,
13
]
]
}
} |
From: 4
Top Right Door
To: 4
Top Right Door
Get a boost from a Bomb or Power Bomb while grappled to the top Grapple block below the door; alternatively, do a grapple wall jump instant morph from the third Grapple block, frame-perfect unmorph and grapple to clip a pixel inside the second Grapple block (at vertical position $CF), then crouch and grapple to the second block. Samus will enter a 'glitched grapple hanging' state where Samus' graphics will appear corrupted while swinging with Grapple. Press jump to get a good bounce off the wall at the bottom of the swing, making it possible to swing up to the door. Heavy lag can typically be avoided by holding right during the bottom half of the swing. While swinging up, tap up to retract Grapple to avoid the ceiling (or tap up after after coming to rest against the ceiling if this happens). Samus should usually come to a stop one tile in front of the door (at horizontal position $D7). Roll from pressing right to pressing diagonally down-right to enter the transition. If it is needed for Samus to be able to stand in the next room, then only briefly press diagonally down-right and then press up, bringing Samus to a stop at position $E1 or $E3; then roll from right to down-right to enter the transition (at horizontal positon $EB). Requires: "Gravity" "canGrappleBombHang" "h_bombThings" Exit condition: {
"leaveWithGrappleTeleport": {
"blockPositions": [
[
12,
12
]
]
}
} |
From: 4
Top Right Door
To: 4
Top Right Door

Grapple to the sixth Grapple block below the door (the second one fully above the water line), jump off from it, morph, and press against the wal to the right. Unmorph slightly before the peak of the jump (a 3-frame window), then immediately use grapple (a 2-frame window) to get stuck standing a pixel inside the second Grapple block. Then jump (to force crouch), angle down, and grapple. Samus will enter a 'glitched grapple hanging' state where Samus' graphics will appear corrupted while swinging with Grapple. Press jump to get a good bounce off the wall at the bottom of the swing, making it possible to swing up to the door. To minimize lag, when grapple is extended horizontally release all inputs other than shot/grapple; there will still be a bit of unavoidable lag while Grapple is initially extending. Try to get a good first bounce; otherwise heavy lag may be difficult to avoid, and it may be better to retry from the beginning. Pressing right while inside the transition tiles will trigger the transition. Continue holding Grapple through the transition to initiate a teleport in the next room. If it is needed to trigger the transition further to the right (at position $EE), then wait to come to a stop before pressing right. If it is needed to trigger the transition further to the left (positions $EB or $ED), then hold right while approaching the door. Either way, Samus should automatically be able to stand in the next room (e.g. for an X-Ray climb). Requires: "Gravity" "canUnmorphGrappleHang" Exit condition: {
"leaveWithGrappleTeleport": {
"blockPositions": [
[
12,
13
]
]
}
} |
From: 4
Top Right Door
To: 4
Top Right Door
Grapple to the fifth Grapple block below the door (the third one fully above the water line), jump off from it, and morph. Unmorph slightly before the peak of the jump (a 3-frame window), then immediately use grapple (a 2-frame window) to get stuck standing a pixel inside the second Grapple block. Then jump (to force crouch), angle down, and grapple. Samus will enter a 'glitched grapple hanging' state where Samus' graphics will appear corrupted while swinging with Grapple. Press jump to get a good bounce off the wall at the bottom of the swing, making it possible to swing up to the door. To minimize lag, when grapple is extended horizontally release all inputs other than shot/grapple; there will still be a bit of unavoidable lag while Grapple is initially extending. Try to get a good first bounce; otherwise heavy lag may be difficult to avoid, and it may be better to retry from the beginning. While swinging up, tap up to retract Grapple to avoid the ceiling (or tap up after after coming to rest against the ceiling if this happens). Samus should usually come to a stop one tile in front of the door (at horizontal position $D7). Roll from pressing right to pressing diagonally down-right to enter the transition. If it is needed for Samus to be able to stand in the next room, then only briefly press diagonally down-right and then press up, bringing Samus to a stop at position $E1 or $E3; then roll from right to down-right to enter the transition (at horizontal positon $EB). Requires: "Gravity" "canUnmorphGrappleHang" Exit condition: {
"leaveWithGrappleTeleport": {
"blockPositions": [
[
12,
12
]
]
}
} |
From: 4
Top Right Door
To: 4
Top Right Door
Freeze a Mochtroid at a specific position, aiming for its top to be slightly above the midpoint of the fourth Grapple block below the door. Stand on the frozen Mochtroid, and fire Grapple horizontally while walking toward the wall. If successful, Samus should clip slightly into the wall. Crouch, and fire Grapple while angling up. Samus will enter a 'glitched grapple hanging' state where Samus' graphics will appear corrupted while swinging with Grapple. Press jump to get a good bounce off the wall at the bottom of the swing, making it possible to swing up to the door. To minimize lag, when grapple is extended horizontally release all inputs other than shot/grapple; there will still be a bit of unavoidable lag while Grapple is initially extending. Try to get a good first bounce; otherwise heavy lag may be difficult to avoid, and it may be better to retry from the beginning. Pressing right while inside the transition tiles will trigger the transition. Continue holding Grapple through the transition to initiate a teleport in the next room. If it is needed to trigger the transition further to the right (at position $EE), then wait to come to a stop before pressing right. If it is needed to trigger the transition further to the left (positions $EB or $ED), then hold right while approaching the door. Either way, Samus should automatically be able to stand in the next room (e.g. for an X-Ray climb). Requires: "Gravity" "canFrozenEnemyGrappleHang" Exit condition: {
"leaveWithGrappleTeleport": {
"blockPositions": [
[
12,
13
]
]
}
} |
From: 4
Top Right Door
To: 4
Top Right Door
Freeze a Mochtroid at a specific position, aiming for its top to be slightly above the midpoint of the third Grapple block below the door. Stand on the frozen Mochtroid, and fire Grapple horizontally while walking toward the wall. If successful, Samus should clip slightly into the wall. Crouch, and fire Grapple while angling up. Samus will enter a 'glitched grapple hanging' state where Samus' graphics will appear corrupted while swinging with Grapple. Press jump to get a good bounce off the wall at the bottom of the swing, making it possible to swing up to the door. To minimize lag, when grapple is extended horizontally release all inputs other than shot/grapple; there will still be a bit of unavoidable lag while Grapple is initially extending. Try to get a good first bounce; otherwise heavy lag may be difficult to avoid, and it may be better to retry from the beginning. While swinging up, tap up to retract Grapple to avoid the ceiling (or tap up after after coming to rest against the ceiling if this happens). Samus should usually come to a stop one tile in front of the door (at horizontal position $D7). Roll from pressing right to pressing diagonally down-right to enter the transition. If it is needed for Samus to be able to stand in the next room, then only briefly press diagonally down-right and then press up, bringing Samus to a stop at position $E1 or $E3; then roll from right to down-right to enter the transition (at horizontal positon $EB). Requires: "Gravity" "canFrozenEnemyGrappleHang" Exit condition: {
"leaveWithGrappleTeleport": {
"blockPositions": [
[
12,
12
]
]
}
} |
|

Kill the bottom Mochtroid with Bombs or a Power Bomb, roll into the tunnel with Gravity, or avoid it with nothing. With no items, move left and cross about half way across the room before switching back to the right. This will make the Mochtroid move left and give Samus enough time to get to the morph tunnel without taking a hit. Entrance condition: {
"comeInWithGMode": {
"mode": "any",
"morphed": true
}
}Requires: {
"or": [
"canTrickyDodgeEnemies",
"Gravity",
{
"enemyDamage": {
"enemy": "Mochtroid",
"type": "contact",
"hits": 1
}
}
]
} |
From: 5
G-Mode Morph, In Morph Tunnel
To: 3
Bottom Right Door

Roll through the camera scroll blocks in the morph tunnel to overload PLMs then the speed blocks can be walked through. Note that the Oums are still active and dangerous off screen. The right shot block wall can be broken with a wide beam, otherwise it is important to crouch to shoot the bottom block. Requires: "canGMode"
"canOffScreenMovement"
{
"or": [
"Gravity",
"HiJump",
"canSunkenTileWideWallClimb"
]
} |
From: 5
G-Mode Morph, In Morph Tunnel
To: 3
Bottom Right Door

Roll through the camera scroll blocks in the morph tunnel to overload PLMs then the speed blocks can be walked through. Perform a blind foosball - use the screen movement to be able to tell when Samus is in the morph tunnel and when she makes the jump. Note that the Oums are still active and dangerous off screen. The right shot block wall can be broken with a wide beam, otherwise it is important to crouch to shoot the bottom block. Requires: "canGMode" "canOffScreenMovement" "canInsaneJump" "h_artificialMorphSpringBall" |
From: 5
G-Mode Morph, In Morph Tunnel
To: 4
Top Right Door
Requires: "canGMode" "Gravity" "h_artificialMorphLongIBJ" "canOffScreenMovement" |
From: 5
G-Mode Morph, In Morph Tunnel
To: 4
Top Right Door
Climb the room with a Gravity jump + Spring Ball jump. Turn off Spring Ball and Gravity at the same time, then repause after a short delay and turn Spring back on. If coming from the right, Samus will be off camera. Requires: "canComplexGMode"
"canGravityJump"
"HiJump"
{
"tech": "canSpringBallJumpMidAir"
}
"h_artificialMorphSpringBall" |
|
Requires: {
"shineChargeFrames": 70
}
{
"or": [
{
"shinespark": {
"frames": 20,
"excessFrames": 3
}
},
{
"and": [
"canMidairShinespark",
{
"shinespark": {
"frames": 17,
"excessFrames": 3
}
}
]
},
{
"and": [
"HiJump",
"canMidairShinespark",
{
"shinespark": {
"frames": 13,
"excessFrames": 3
}
}
]
}
]
} |
From: 6
Bottom Shinecharged
To: 1
Top Left Door
Requires: "h_shinechargeMaxRunway"
{
"shineChargeFrames": 0
}
"canXRayTurnaround"
"canChainTemporaryBlue"
{
"or": [
"canGravityJump",
{
"and": [
"HiJump",
"canTrickyUseFrozenEnemies",
"canLongChainTemporaryBlue"
]
}
]
}Exit condition: {
"leaveWithTemporaryBlue": {}
}Unlocks doors: {"types":["ammo"],"requires":[]} |
|
Requires: {
"shineChargeFrames": 50
}
"canShinechargeMovementComplex"
{
"or": [
{
"shinespark": {
"frames": 12,
"excessFrames": 0
}
},
{
"and": [
"canShinechargeMovementTricky",
{
"shinespark": {
"frames": 3,
"excessFrames": 0
}
}
]
}
]
}Exit condition: {
"leaveWithSpark": {}
}Unlocks doors: {"types":["super"],"requires":[]}
{"types":["missiles","powerbomb"],"requires":["never"]} |
From: 6
Bottom Shinecharged
To: 2
Bottom Left Door

Requires: "h_shinechargeMaxRunway"
{
"shineChargeFrames": 0
}
"canXRayTurnaround"
"canChainTemporaryBlue"Exit condition: {
"leaveWithTemporaryBlue": {}
}Unlocks doors: {"types":["ammo"],"requires":[]} |
|

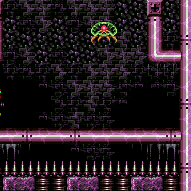
Requires: {
"shineChargeFrames": 60
}
{
"or": [
{
"shinespark": {
"frames": 38,
"excessFrames": 3
}
},
{
"and": [
"canMidairShinespark",
{
"shinespark": {
"frames": 35,
"excessFrames": 3
}
}
]
},
{
"and": [
"HiJump",
"canMidairShinespark",
{
"shinespark": {
"frames": 31,
"excessFrames": 3
}
}
]
}
]
} |
From: 6
Bottom Shinecharged
To: 4
Top Right Door
Requires: "h_shinechargeMaxRunway"
{
"shineChargeFrames": 0
}
"canXRayTurnaround"
"HiJump"
{
"or": [
{
"and": [
"canGravityJump",
"canTrickySpringBallJump",
"canChainTemporaryBlue"
]
},
{
"and": [
"canTrickyUseFrozenEnemies",
"canLongChainTemporaryBlue"
]
}
]
}Exit condition: {
"leaveWithTemporaryBlue": {}
}Unlocks doors: {"types":["ammo"],"requires":[]} |
{
"$schema": "../../../schema/m3-room.schema.json",
"id": 187,
"name": "Halfie Climb Room",
"area": "Maridia",
"subarea": "Inner",
"subsubarea": "Pink",
"roomAddress": "0x7D913",
"roomEnvironments": [
{
"heated": false
}
],
"mapTileMask": [
[
1,
0,
0,
0,
0
],
[
1,
0,
0,
0,
0
],
[
1,
1,
1,
1,
1
]
],
"nodes": [
{
"id": 1,
"name": "Top Left Door",
"nodeType": "door",
"nodeSubType": "gray",
"nodeAddress": "0x001a900",
"doorOrientation": "left",
"doorEnvironments": [
{
"physics": "water"
}
],
"locks": [
{
"name": "Halfie Climb Gray Lock (to East Cactus Alley)",
"lockType": "gameFlag",
"unlockStrats": [
{
"name": "Base",
"requires": [
"f_DefeatedDraygon"
],
"flashSuitChecked": true,
"blueSuitChecked": true
}
]
}
],
"mapTileMask": [
[
1,
0,
0,
0,
0
],
[
2,
0,
0,
0,
0
],
[
1,
1,
1,
1,
1
]
]
},
{
"id": 2,
"name": "Bottom Left Door",
"nodeType": "door",
"nodeSubType": "blue",
"nodeAddress": "0x001a8dc",
"doorOrientation": "left",
"doorEnvironments": [
{
"physics": "water"
}
],
"mapTileMask": [
[
1,
0,
0,
0,
0
],
[
1,
0,
0,
0,
0
],
[
2,
2,
1,
1,
1
]
]
},
{
"id": 3,
"name": "Bottom Right Door",
"nodeType": "door",
"nodeSubType": "blue",
"nodeAddress": "0x001a8f4",
"doorOrientation": "right",
"doorEnvironments": [
{
"physics": "water"
}
],
"mapTileMask": [
[
1,
0,
0,
0,
0
],
[
1,
0,
0,
0,
0
],
[
1,
1,
2,
2,
2
]
]
},
{
"id": 4,
"name": "Top Right Door",
"nodeType": "door",
"nodeSubType": "blue",
"nodeAddress": "0x001a8e8",
"doorOrientation": "right",
"doorEnvironments": [
{
"physics": "air"
}
],
"isDoorImmediatelyClosed": true,
"mapTileMask": [
[
2,
0,
0,
0,
0
],
[
1,
0,
0,
0,
0
],
[
1,
1,
1,
1,
1
]
]
},
{
"id": 5,
"name": "G-Mode Morph, In Morph Tunnel",
"nodeType": "junction",
"nodeSubType": "g-mode",
"mapTileMask": [
[
1,
0,
0,
0,
0
],
[
1,
0,
0,
0,
0
],
[
1,
2,
1,
1,
1
]
],
"note": "Represents being in the Morph tunnel with Artificial Morph, likely moving off camera towards the opposite side of the room."
},
{
"id": 6,
"name": "Bottom Shinecharged",
"nodeType": "junction",
"nodeSubType": "junction",
"mapTileMask": [
[
1,
0,
0,
0,
0
],
[
1,
0,
0,
0,
0
],
[
2,
1,
1,
1,
1
]
],
"devNote": [
"This represents being shinecharged at the end of the runway opposite the bottom-left door."
]
}
],
"obstacles": [
{
"id": "R-Mode",
"name": "Entered with R-Mode",
"obstacleType": "abstract"
}
],
"enemies": [
{
"id": "e1",
"groupName": "Halfie Climb Mochtroids",
"enemyName": "Mochtroid",
"quantity": 3,
"homeNodes": [
1,
2
]
},
{
"id": "e2",
"groupName": "Halfie Climb Oums",
"enemyName": "Oum",
"quantity": 3,
"homeNodes": [
3
]
}
],
"strats": [
{
"link": [
1,
1
],
"name": "Base (Unlock Door)",
"requires": [],
"unlocksDoors": [
{
"types": [
"ammo"
],
"requires": []
}
],
"flashSuitChecked": true,
"blueSuitChecked": true
},
{
"link": [
1,
1
],
"name": "Base (Come In Normally)",
"entranceCondition": {
"comeInNormally": {}
},
"requires": [],
"flashSuitChecked": true,
"blueSuitChecked": true
},
{
"link": [
1,
1
],
"name": "Base (Come In With Mockball)",
"entranceCondition": {
"comeInWithMockball": {
"adjacentMinTiles": 0,
"remoteAndLandingMinTiles": [
[
0,
0
]
],
"speedBooster": "any"
}
},
"requires": [],
"flashSuitChecked": true,
"blueSuitChecked": true
},
{
"link": [
2,
2
],
"name": "Base (Unlock Door)",
"requires": [],
"unlocksDoors": [
{
"types": [
"ammo"
],
"requires": []
}
],
"flashSuitChecked": true,
"blueSuitChecked": true
},
{
"link": [
2,
2
],
"name": "Base (Come In Normally)",
"entranceCondition": {
"comeInNormally": {}
},
"requires": [],
"flashSuitChecked": true,
"blueSuitChecked": true
},
{
"link": [
2,
2
],
"name": "Base (Come In With Mockball)",
"entranceCondition": {
"comeInWithMockball": {
"adjacentMinTiles": 0,
"remoteAndLandingMinTiles": [
[
0,
0
]
],
"speedBooster": "any"
}
},
"requires": [],
"flashSuitChecked": true,
"blueSuitChecked": true
},
{
"link": [
3,
3
],
"name": "Base (Unlock Door)",
"requires": [],
"unlocksDoors": [
{
"types": [
"ammo"
],
"requires": []
}
],
"flashSuitChecked": true,
"blueSuitChecked": true
},
{
"link": [
3,
3
],
"name": "Base (Come In Normally)",
"entranceCondition": {
"comeInNormally": {}
},
"requires": [],
"flashSuitChecked": true,
"blueSuitChecked": true
},
{
"link": [
3,
3
],
"name": "Base (Come In With Mockball)",
"entranceCondition": {
"comeInWithMockball": {
"adjacentMinTiles": 0,
"remoteAndLandingMinTiles": [
[
0,
0
]
],
"speedBooster": "any"
}
},
"requires": [],
"flashSuitChecked": true,
"blueSuitChecked": true
},
{
"link": [
4,
4
],
"name": "Base (Unlock Door)",
"requires": [],
"unlocksDoors": [
{
"types": [
"ammo"
],
"requires": []
}
],
"flashSuitChecked": true,
"blueSuitChecked": true
},
{
"link": [
4,
4
],
"name": "Base (Come In Normally)",
"entranceCondition": {
"comeInNormally": {}
},
"requires": [],
"flashSuitChecked": true,
"blueSuitChecked": true
},
{
"link": [
4,
4
],
"name": "Base (Come In With Mockball)",
"entranceCondition": {
"comeInWithMockball": {
"adjacentMinTiles": 0,
"remoteAndLandingMinTiles": [
[
0,
0
]
],
"speedBooster": "any"
}
},
"requires": [],
"flashSuitChecked": true,
"blueSuitChecked": true
},
{
"id": 1,
"link": [
1,
1
],
"name": "Leave with Runway",
"requires": [],
"exitCondition": {
"leaveWithRunway": {
"length": 2,
"openEnd": 1
}
},
"flashSuitChecked": true,
"blueSuitChecked": true
},
{
"id": 2,
"link": [
1,
1
],
"name": "Leave With Runway - Frozen Mochtroid",
"requires": [
"h_navigateUnderwater",
"h_frozenEnemyRunway",
{
"or": [
"canMochtroidIceClimb",
{
"and": [
"Gravity",
{
"or": [
"SpaceJump",
"canWallJump"
]
}
]
}
]
},
{
"enemyDamage": {
"enemy": "Mochtroid",
"type": "contact",
"hits": 2
}
}
],
"exitCondition": {
"leaveWithRunway": {
"length": 3,
"openEnd": 1
}
},
"flashSuitChecked": true,
"blueSuitChecked": true,
"note": [
"Use a frozen Mochtroid to extend the length of the runway.",
"Positioning the Mochtroid can be done by dropping down below then climbing back up with the frozen Mochtroid as a platform.",
"Alternatively, freeze the Mochtroid with an angle-down shot while falling below then quickly climb back up."
],
"devNote": "There are many other ways to get into position, but they would require manipulating the Mochtroid as much as canMochtroidIceClimb expects."
},
{
"id": 205,
"link": [
1,
1
],
"name": "Mochtroid Farm (1 Mochtroid)",
"requires": [
{
"resetRoom": {
"nodes": [
1
]
}
},
{
"or": [
{
"and": [
"Grapple",
{
"cycleFrames": 75
}
]
},
{
"and": [
"Plasma",
{
"cycleFrames": 75
}
]
},
{
"and": [
"Gravity",
"ScrewAttack",
{
"cycleFrames": 75
}
]
},
{
"and": [
{
"haveBlueSuit": {}
},
{
"cycleFrames": 75
}
]
},
{
"and": [
"Wave",
{
"cycleFrames": 85
}
]
},
{
"and": [
"Spazer",
{
"cycleFrames": 90
}
]
},
{
"and": [
"canDodgeWhileShooting",
{
"cycleFrames": 135
}
]
}
]
}
],
"resetsObstacles": [
"R-Mode"
],
"farmCycleDrops": [
{
"enemy": "Mochtroid",
"count": 1
}
],
"flashSuitChecked": true,
"blueSuitChecked": true
},
{
"id": 3,
"link": [
1,
1
],
"name": "Crystal Flash",
"requires": [
"h_CrystalFlash",
{
"obstaclesNotCleared": [
"R-Mode"
]
}
],
"flashSuitChecked": true,
"blueSuitChecked": true
},
{
"id": 4,
"link": [
1,
1
],
"name": "G-Mode Setup - Get Hit By Mochtroid",
"requires": [],
"exitCondition": {
"leaveWithGModeSetup": {
"knockback": false
}
},
"flashSuitChecked": true,
"blueSuitChecked": true,
"note": "In case Samus has a blue suit, it is still possible to inch forward a pixel or two at a time using X-Ray without destroying the Mochtroid."
},
{
"id": 209,
"link": [
1,
1
],
"name": "R-Mode Entry",
"entranceCondition": {
"comeInWithRMode": {}
},
"requires": [],
"clearsObstacles": [
"R-Mode"
],
"flashSuitChecked": true,
"blueSuitChecked": true
},
{
"id": 5,
"link": [
1,
1
],
"name": "Leave With Grapple Teleport (Top Position)",
"requires": [
{
"or": [
"HiJump",
"Gravity"
]
},
"canGrappleBombHang",
"h_bombThings"
],
"exitCondition": {
"leaveWithGrappleTeleport": {
"blockPositions": [
[
2,
18
]
]
}
},
"flashSuitChecked": true,
"blueSuitChecked": true,
"note": [
"Get a boost from a Bomb or Power Bomb while grappled to the first Grapple block above the door.",
"Samus will enter a 'glitched grapple hanging' state where Samus' graphics will appear corrupted while swinging with Grapple.",
"Swing down, and hold left while approaching the door to trigger the transition.",
"Continue holding Grapple through the door transition to initiate a teleport in the next room.",
"If needing to stand up in the next room (e.g. for an X-Ray climb), then enter the transition while swinging slowly, e.g. after coming to a stop directly below the block.",
"If needing to transition at horiziontal position $15 (as far right as possible), then additionally roll from pressing left to pressing diagonally up-left just before the transition.",
"The game may lag heavily if Samus enters a retracted position; if this happens, hold down to extend Grapple again."
]
},
{
"id": 6,
"link": [
1,
1
],
"name": "Leave With Grapple Teleport (Bottom Position)",
"requires": [
"Gravity",
"canGrappleBombHang",
"h_bombThings"
],
"exitCondition": {
"leaveWithGrappleTeleport": {
"blockPositions": [
[
2,
29
]
]
}
},
"flashSuitChecked": true,
"blueSuitChecked": true,
"note": [
"Get a boost from a Bomb or Power Bomb while grappled to the second Grapple block below the door.",
"Samus will enter a 'glitched grapple hanging' state where Samus' graphics will appear corrupted while swinging with Grapple.",
"Press jump to get a good bounce off the wall at the bottom of the swing, making it possible to swing up to the door.",
"To avoid heavy lag, hold left while near the top of the swing, and hold angle down for the middle of the swing.",
"Continue holding Grapple through the transition to initiate a teleport in the next room.",
"If needing to stand up in the next room (e.g. for an X-Ray climb), then press up while approaching the door to retract Grapple and come to a stop; then roll from pressing left to diagonally down-left to trigger the transition.",
"This method will also transition at horizontal position $15 (as far right as possible).",
"If it is needed to transition further left (e.g. position $13 or $14), it can be done by instead rolling from pressing left to pressing down (with a brief diagonal input in between) and then left again if necessary."
]
},
{
"id": 7,
"link": [
1,
1
],
"name": "Leave With Grapple Teleport (Middle Position)",
"requires": [
"Gravity",
"canGrappleBombHang",
"h_bombThings"
],
"exitCondition": {
"leaveWithGrappleTeleport": {
"blockPositions": [
[
2,
28
]
]
}
},
"flashSuitChecked": true,
"blueSuitChecked": true,
"note": [
"Get a boost from a Bomb or Power Bomb while grappled to the top Grapple block below the door.",
"Samus will enter a 'glitched grapple hanging' state where Samus' graphics will appear corrupted while swinging with Grapple.",
"Press jump to get a good bounce off the wall at the bottom of the swing, making it possible to swing up to the door.",
"To avoid heavy lag, hold left while near the top of the swing, and hold angle down for the middle of the swing.",
"Press up while approaching the door to retract Grapple to avoid bonking the ceiling.",
"After Samus comes to a stop (at horiziontal position $19), roll from pressing left to diagonally down-left to trigger the transition.",
"This method will allow Samus to stand up in the next room (e.g. for an X-Ray climb) and will also transition at horizontal position $15 (as far right as possible).",
"If it is needed to transition further left (at position $14) while still being able to stand, it can be done with by rolling from pressing left to briefly pressing down (with a brief diagonal input in between), which should bring Samus to a stop at position $14; then press left to trigger the transition."
]
},
{
"id": 176,
"link": [
1,
1
],
"name": "Leave With Grapple Teleport (Frozen Mochtroid, Top Position)",
"requires": [
"canFrozenEnemyGrappleHang"
],
"exitCondition": {
"leaveWithGrappleTeleport": {
"blockPositions": [
[
2,
18
]
]
}
},
"flashSuitChecked": true,
"blueSuitChecked": true,
"note": [
"Freeze a Mochtroid near the bottom of the Grapple wall, stand on it, and fire Grapple horizontally while walking toward the wall.",
"If successful, Samus should clip slightly into the wall.",
"Crouch, and fire Grapple while angling up.",
"Samus will enter a 'glitched grapple hanging' state where Samus' graphics will appear corrupted while swinging with Grapple.",
"Swing down, and hold left while approaching the door to trigger the transition.",
"Continue holding Grapple through the door transition to initiate a teleport in the next room.",
"If needing to stand up in the next room (e.g. for an X-Ray climb), then enter the transition while swinging slowly, e.g. after coming to a stop directly below the block (or without Gravity equipped).",
"If needing to transition at horiziontal position $15 (as far right as possible), then additionally roll from pressing left to pressing diagonally up-left just before the transition.",
"The game may lag heavily if Samus enters a retracted position; if this happens, hold down to extend Grapple again."
]
},
{
"id": 177,
"link": [
1,
1
],
"name": "Leave With Grapple Teleport (Frozen Mochtroid, Bottom Position)",
"requires": [
"Gravity",
"canFrozenEnemyGrappleHang"
],
"exitCondition": {
"leaveWithGrappleTeleport": {
"blockPositions": [
[
2,
29
]
]
}
},
"flashSuitChecked": true,
"blueSuitChecked": true,
"note": [
"Freeze a Mochtroid at a specific position, where its top is about at the midpoint of the fourth Grapple block below the door.",
"Stand on the frozen Mochtroid, and fire Grapple horizontally while walking toward the wall.",
"If successful, Samus should clip slightly into the wall.",
"Crouch, and fire Grapple while angling up.",
"Samus will enter a 'glitched grapple hanging' state where Samus' graphics will appear corrupted while swinging with Grapple.",
"Press jump to get a good bounce off the wall at the bottom of the swing, making it possible to swing up to the door.",
"To avoid heavy lag, hold down during the bottom part of the swing, and hold angle up during the top part.",
"Continue holding Grapple through the transition to initiate a teleport in the next room.",
"If needing to stand up in the next room (e.g. for an X-Ray climb), then press up while approaching the door to retract Grapple and come to a stop; then roll from pressing left to diagonally down-left to trigger the transition.",
"This method will also transition at horizontal position $15 (as far right as possible).",
"If it is needed to transition further left (e.g. position $13 or $14), it can be done by instead rolling from pressing left to pressing down (with a brief diagonal input in between) and then left again if necessary."
]
},
{
"id": 178,
"link": [
1,
1
],
"name": "Leave With Grapple Teleport (Frozen Mochtroid, Middle Position)",
"requires": [
"Gravity",
"canFrozenEnemyGrappleHang"
],
"exitCondition": {
"leaveWithGrappleTeleport": {
"blockPositions": [
[
2,
28
]
]
}
},
"flashSuitChecked": true,
"blueSuitChecked": true,
"note": [
"Freeze a Mochtroid at a specific position, where its top is about at the midpoint of the third Grapple block below the door.",
"Stand on the frozen Mochtroid, and fire Grapple horizontally while walking toward the wall.",
"If successful, Samus should clip slightly into the wall.",
"Crouch, and fire Grapple while angling up.",
"Samus will enter a 'glitched grapple hanging' state where Samus' graphics will appear corrupted while swinging with Grapple.",
"Press jump to get a good bounce off the wall at the bottom of the swing, making it possible to swing up to the door.",
"To avoid heavy lag, hold down during the bottom part of the swing, and hold angle up during the top part.",
"Press up while approaching the door to retract Grapple to avoid bonking the ceiling.",
"After Samus comes to a stop (at horiziontal position $19), roll from pressing left to diagonally down-left to trigger the transition.",
"This method will allow Samus to stand up in the next room (e.g. for an X-Ray climb) and will also transition at horizontal position $15 (as far right as possible).",
"If it is needed to transition further left (at position $14) while still being able to stand, it can be done with by rolling from pressing left to briefly pressing down (with a brief diagonal input in between), which should bring Samus to a stop at position $14; then press left to trigger the transition."
]
},
{
"id": 8,
"link": [
1,
1
],
"name": "Leave With Grapple Teleport (Unmorph, Top Position)",
"requires": [
"Gravity",
"canCrouchJump",
"canUnmorphGrappleHang"
],
"exitCondition": {
"leaveWithGrappleTeleport": {
"blockPositions": [
[
2,
18
]
]
}
},
"flashSuitChecked": true,
"blueSuitChecked": true,
"note": [
"Position near the edge of the ledge, crouch jump out into a mid-air morph, and press left against the wall.",
"Unmorph while approaching the peak of the jump (an 8-frame window), then use Grapple immediately (a 2-frame window) to get stuck standing a pixel or two inside the first Grapple block above the door.",
"Then jump (to force crouch), angle down, and grapple.",
"Samus will enter a 'glitched grapple hanging' state where Samus' graphics will appear corrupted while swinging with Grapple.",
"Swing down, and hold left while approaching the door to trigger the transition.",
"To avoid heavy lag, hold down through the entire swing.",
"Continue holding Grapple through the door transition to initiate a teleport in the next room.",
"If needing to stand up in the next room (e.g. for an X-Ray climb), then enter the transition while swinging slowly, e.g. after coming to a stop directly below the block.",
"If needing to transition at horiziontal position $15 (as far right as possible), then additionally roll from pressing left to pressing diagonally up-left just before the transition.",
"The game may lag heavily if Samus enters a retracted position; if this happens, hold down to extend Grapple again."
],
"devNote": "The canCrouchJump is not a h_underwaterCrouchJump, because Gravity is required."
},
{
"id": 9,
"link": [
1,
1
],
"name": "Leave With Grapple Teleport (Unmorph, Bottom Position)",
"requires": [
"Gravity",
"canUnmorphGrappleHang"
],
"exitCondition": {
"leaveWithGrappleTeleport": {
"blockPositions": [
[
2,
29
]
]
}
},
"flashSuitChecked": true,
"blueSuitChecked": true,
"note": [
"Grapple to the second Grapple block from the bottom of the room, jump off from it, morph, and press against the Grapple wall to the left.",
"Unmorph slightly before the peak of the jump (an 8-frame window), then immediately use grapple (a 2-frame window) to get stuck standing a pixel or two inside the second Grapple block below the door.",
"Then jump (to force crouch), angle down, and grapple.",
"Samus will enter a 'glitched grapple hanging' state where Samus' graphics will appear corrupted while swinging with Grapple.",
"Press jump to get a good bounce off the wall at the bottom of the swing, making it possible to swing up to the door.",
"To avoid heavy lag, hold down during the bottom part of the swing, and hold angle up during the top part.",
"Continue holding Grapple through the transition to initiate a teleport in the next room.",
"If needing to stand up in the next room (e.g. for an X-Ray climb), then press up while approaching the door to retract Grapple and come to a stop; then roll from pressing left to diagonally down-left to trigger the transition.",
"This method will also transition at horizontal position $15 (as far right as possible).",
"If it is needed to transition further left (e.g. position $13 or $14), it can be done by instead rolling from pressing left to pressing down (with a brief diagonal input in between) and then left again if necessary."
]
},
{
"id": 10,
"link": [
1,
1
],
"name": "Leave With Grapple Teleport (Unmorph, Middle Position)",
"requires": [
"Gravity",
"canUnmorphGrappleHang"
],
"exitCondition": {
"leaveWithGrappleTeleport": {
"blockPositions": [
[
2,
28
]
]
}
},
"flashSuitChecked": true,
"blueSuitChecked": true,
"note": [
"Grapple to the second Grapple block from the bottom of the room, jump off from it, morph, and press against the Grapple wall to the left.",
"Unmorph slightly before the peak of the jump (an 8-frame window), then immediately use grapple (a 2-frame window) to get stuck standing a pixel or two inside the second Grapple block below the door.",
"Then jump (to force crouch), angle up, and grapple.",
"Samus will enter a 'glitched grapple hanging' state where Samus' graphics will appear corrupted while swinging with Grapple.",
"Press jump to get a good bounce off the wall at the bottom of the swing, making it possible to swing up to the door.",
"To avoid heavy lag, hold down during the bottom part of the swing, and hold angle up during the top part.",
"Press up while approaching the door to retract Grapple to avoid bonking the ceiling.",
"After Samus comes to a stop (at horiziontal position $19), roll from pressing left to diagonally down-left to trigger the transition.",
"This method will allow Samus to stand up in the next room (e.g. for an X-Ray climb) and will also transition at horizontal position $15 (as far right as possible).",
"If it is needed to transition further left (at position $14) while still being able to stand, it can be done with by rolling from pressing left to briefly pressing down (with a brief diagonal input in between), which should bring Samus to a stop at position $14; then press left to trigger the transition."
]
},
{
"id": 11,
"link": [
1,
1
],
"name": "Top Left Suitless Unmorph Leave With Grapple Teleport",
"requires": [
{
"notable": "Top Left Suitless Unmorph Leave With Grapple Teleport"
},
"canUnmorphGrappleHang"
],
"exitCondition": {
"leaveWithGrappleTeleport": {
"blockPositions": [
[
2,
18
]
]
}
},
"flashSuitChecked": true,
"blueSuitChecked": true,
"note": [
"Grapple to the top Grapple in the top-left corner of the room.",
"Hold left while waiting for the grapple wall jump check to expire, then quickly morph.",
"While falling, unmorph to reset fall speed and then quickly morph again.",
"unmorph at a precise time (typically a 2-frame window) then use Grapple immediately (another 2-frame window) to get stuck standing a pixel or two inside the first Grapple block above the door.",
"Then jump (to force crouch), angle down, and grapple.",
"Samus will enter a 'glitched grapple hanging' state where Samus' graphics will appear corrupted while swinging with Grapple.",
"Swing down, and hold left while approaching the door to trigger the transition.",
"To avoid heavy lag, hold down through the entire swing.",
"Continue holding Grapple through the door transition to initiate a teleport in the next room.",
"If needing to stand up in the next room (e.g. for an X-Ray climb), then enter the transition while swinging slowly, e.g. after coming to a stop directly below the block.",
"If needing to transition at horiziontal position $15 (as far right as possible), then additionally roll from pressing left to pressing diagonally up-left just before the transition.",
"The game may lag heavily if Samus enters a retracted position; if this happens, hold down to extend Grapple again."
]
},
{
"id": 12,
"link": [
1,
2
],
"name": "Base",
"requires": [],
"flashSuitChecked": true,
"blueSuitChecked": true
},
{
"id": 138,
"link": [
1,
2
],
"name": "Come in Shinecharging, Leave Shinecharged (Gravity)",
"entranceCondition": {
"comeInShinecharging": {
"length": 1,
"openEnd": 1
}
},
"requires": [
"Gravity",
"canShinechargeMovementComplex",
{
"shineChargeFrames": 100
}
],
"exitCondition": {
"leaveShinecharged": {}
},
"unlocksDoors": [
{
"types": [
"super"
],
"requires": []
},
{
"types": [
"missiles",
"powerbomb"
],
"requires": [
"never"
]
}
],
"flashSuitChecked": true,
"blueSuitChecked": true
},
{
"id": 139,
"link": [
1,
2
],
"name": "Come in Shinecharging, Leave Shinecharged (Suitless)",
"entranceCondition": {
"comeInShinecharging": {
"length": 0,
"openEnd": 1
}
},
"requires": [
"canWaterShineCharge",
"canShinechargeMovementComplex",
{
"shineChargeFrames": 160
}
],
"exitCondition": {
"leaveShinecharged": {}
},
"unlocksDoors": [
{
"types": [
"super"
],
"requires": []
},
{
"types": [
"missiles",
"powerbomb"
],
"requires": [
"never"
]
}
],
"flashSuitChecked": true,
"blueSuitChecked": true
},
{
"id": 140,
"link": [
1,
2
],
"name": "Carry Shinecharge (Gravity)",
"entranceCondition": {
"comeInShinecharged": {}
},
"requires": [
{
"shineChargeFrames": 105
},
"canShinechargeMovementComplex"
],
"exitCondition": {
"leaveShinecharged": {}
},
"unlocksDoors": [
{
"types": [
"super"
],
"requires": []
},
{
"types": [
"missiles",
"powerbomb"
],
"requires": [
"never"
]
}
],
"flashSuitChecked": true,
"blueSuitChecked": true
},
{
"id": 141,
"link": [
1,
2
],
"name": "Come in Shinecharged, Leave With Spark (Suitless, Top Position)",
"entranceCondition": {
"comeInShinecharged": {}
},
"requires": [
{
"shineChargeFrames": 130
},
"canShinechargeMovementComplex",
{
"shinespark": {
"frames": 4,
"excessFrames": 0
}
}
],
"exitCondition": {
"leaveWithSpark": {
"position": "top"
}
},
"unlocksDoors": [
{
"types": [
"super"
],
"requires": []
},
{
"types": [
"missiles",
"powerbomb"
],
"requires": [
"never"
]
}
],
"flashSuitChecked": true,
"blueSuitChecked": true
},
{
"id": 142,
"link": [
1,
2
],
"name": "Come in Shinecharged, Leave With Spark (Suitless, Bottom Position)",
"entranceCondition": {
"comeInShinecharged": {}
},
"requires": [
{
"shineChargeFrames": 135
},
"canShinechargeMovementComplex",
{
"shinespark": {
"frames": 3,
"excessFrames": 0
}
}
],
"exitCondition": {
"leaveWithSpark": {
"position": "bottom"
}
},
"unlocksDoors": [
{
"types": [
"super"
],
"requires": []
},
{
"types": [
"missiles",
"powerbomb"
],
"requires": [
"never"
]
}
],
"flashSuitChecked": true,
"blueSuitChecked": true
},
{
"id": 143,
"link": [
1,
2
],
"name": "Come in Shinecharged, Leave With Spark (Gravity, Top Position)",
"entranceCondition": {
"comeInShinecharged": {}
},
"requires": [
{
"shineChargeFrames": 70
},
"Gravity",
"canShinechargeMovementComplex",
{
"shinespark": {
"frames": 4,
"excessFrames": 0
}
}
],
"exitCondition": {
"leaveWithSpark": {
"position": "top"
}
},
"unlocksDoors": [
{
"types": [
"super"
],
"requires": []
},
{
"types": [
"missiles",
"powerbomb"
],
"requires": [
"never"
]
}
],
"flashSuitChecked": true,
"blueSuitChecked": true
},
{
"id": 144,
"link": [
1,
2
],
"name": "Come in Shinecharged, Leave With Spark (Gravity, Bottom Position)",
"entranceCondition": {
"comeInShinecharged": {}
},
"requires": [
{
"shineChargeFrames": 75
},
"Gravity",
"canShinechargeMovementComplex",
{
"shinespark": {
"frames": 4,
"excessFrames": 0
}
}
],
"exitCondition": {
"leaveWithSpark": {
"position": "bottom"
}
},
"unlocksDoors": [
{
"types": [
"super"
],
"requires": []
},
{
"types": [
"missiles",
"powerbomb"
],
"requires": [
"never"
]
}
],
"flashSuitChecked": true,
"blueSuitChecked": true
},
{
"id": 13,
"link": [
1,
2
],
"name": "Come in Shinecharging, Leave With Temporary Blue",
"entranceCondition": {
"comeInShinecharging": {
"length": 0,
"openEnd": 1
}
},
"requires": [
"canSuitlessMaridia",
"canChainTemporaryBlue",
"canXRayTurnaround"
],
"exitCondition": {
"leaveWithTemporaryBlue": {}
},
"unlocksDoors": [
{
"types": [
"ammo"
],
"requires": []
}
],
"flashSuitChecked": true,
"blueSuitChecked": true
},
{
"id": 14,
"link": [
1,
2
],
"name": "Stored Moonfall Grapple Door Lock Skip",
"entranceCondition": {
"comeInWithStoredFallSpeed": {
"fallSpeedInTiles": 1
}
},
"requires": [
{
"notable": "Stored Moonfall Grapple Door Lock Skip"
},
{
"doorUnlockedAtNode": 1
},
"canGrappleClip"
],
"bypassesDoorShell": "yes",
"unlocksDoors": [
{
"nodeId": 1,
"types": [
"missiles",
"super"
],
"requires": []
},
{
"nodeId": 1,
"types": [
"powerbomb"
],
"requires": [
"never"
]
}
],
"flashSuitChecked": true,
"blueSuitChecked": true,
"note": [
"Perform a moonfall with stored fall speed to clip into the air space below the door at node 1.",
"Land, then grapple the nearest block and release.",
"Samus will fall into the door transition, bypassing any lock that may be on the door."
]
},
{
"id": 215,
"link": [
1,
3
],
"name": "R-Mode Spark Interrupt",
"requires": [
{
"obstaclesCleared": [
"R-Mode"
]
},
"Gravity",
"Morph",
"h_RModeCanRefillReserves",
{
"or": [
{
"resourceMissingAtMost": [
{
"type": "Missile",
"count": 2
}
]
},
{
"resourceMissingAtMost": [
{
"type": "Super",
"count": 1
}
]
}
]
},
{
"partialRefill": {
"type": "ReserveEnergy",
"limit": 20
}
},
"h_shinechargeMaxRunway",
{
"autoReserveTrigger": {
"maxReserveEnergy": 95
}
},
"canRModeSparkInterrupt"
],
"resetsObstacles": [
"R-Mode"
],
"flashSuitChecked": true,
"blueSuitChecked": true,
"note": [
"Enter and farm all three Mochtroids, or Crystal Flash.",
"Run right to left underneath the Ohms, then lead them to roll off the right side.",
"Shinecharge and use the Ohm lick attack to interrupt."
]
},
{
"id": 16,
"link": [
1,
4
],
"name": "Base",
"requires": [
"Gravity",
{
"or": [
"SpaceJump",
{
"and": [
"HiJump",
{
"or": [
"canSpringBallJumpMidAir",
"canWallJump"
]
}
]
},
"canConsecutiveWallJump"
]
}
],
"flashSuitChecked": true,
"blueSuitChecked": true
},
{
"id": 17,
"link": [
1,
4
],
"name": "Shinespark",
"entranceCondition": {
"comeInShinecharged": {}
},
"requires": [
{
"shineChargeFrames": 10
},
"Gravity",
{
"shinespark": {
"frames": 20,
"excessFrames": 3
}
}
],
"flashSuitChecked": true,
"blueSuitChecked": true
},
{
"id": 18,
"link": [
1,
4
],
"name": "Suitless Shinespark",
"entranceCondition": {
"comeInShinecharged": {}
},
"requires": [
{
"shineChargeFrames": 10
},
{
"shinespark": {
"frames": 22,
"excessFrames": 5
}
}
],
"flashSuitChecked": true,
"blueSuitChecked": true
},
{
"id": 19,
"link": [
1,
4
],
"name": "Grapple",
"requires": [
"h_navigateUnderwater",
"Grapple",
"h_complexToCarryFlashSuit"
],
"flashSuitChecked": true,
"blueSuitChecked": true
},
{
"id": 20,
"link": [
1,
4
],
"name": "Mochtroid Climb",
"requires": [
"h_navigateUnderwater",
"canMochtroidIceClimb",
"h_complexToCarryFlashSuit",
"h_complexToCarryBlueSuit"
],
"flashSuitChecked": true,
"blueSuitChecked": true
},
{
"id": 21,
"link": [
1,
4
],
"name": "Gravity Jump",
"requires": [
"canGravityJump",
"HiJump",
"canSpeedyJump",
"canCarefulJump"
],
"flashSuitChecked": true,
"blueSuitChecked": true
},
{
"id": 22,
"link": [
1,
4
],
"name": "Break Free",
"requires": [
"HiJump",
{
"or": [
{
"and": [
"canSpaceJumpWaterBounce",
"canWallJump"
]
},
"canSpaceJumpWaterEscape"
]
}
],
"flashSuitChecked": true,
"blueSuitChecked": true
},
{
"id": 133,
"link": [
1,
4
],
"name": "Underwater Wall Jump Break Free",
"requires": [
"canUnderwaterWallJumpBreakFree"
],
"flashSuitChecked": true,
"blueSuitChecked": true
},
{
"id": 23,
"link": [
1,
4
],
"name": "Suitless Spring Ball Jump",
"requires": [
"canSuitlessMaridia",
"HiJump",
"canTrickyJump",
"canTrickySpringBallJump",
"canStationaryLateralMidAirMorph",
{
"or": [
"h_underwaterCrouchJump",
"canInsaneJump"
]
}
],
"flashSuitChecked": true,
"blueSuitChecked": true,
"note": [
"Stationary lateral midair morph into a SpringBall jump just as Samus exits the water to reach the distant ledge.",
"This can either be done from a crouch jump from the last pixel, giving an 8-frame window to jump while out of the water,",
"or from a spin jump, which gives a 2-frame window to jump while out of the water."
],
"detailNote": "Samus could also start from a standing position, requiring the last pixel and only giving a 2-frame window."
},
{
"id": 24,
"link": [
1,
4
],
"name": "Cross Room Jump",
"entranceCondition": {
"comeInJumping": {
"speedBooster": "any",
"minTiles": 1
}
},
"requires": [
"canCrossRoomJumpIntoWater",
"canTrickyJump",
{
"or": [
"canWallJump",
"SpaceJump"
]
}
],
"flashSuitChecked": true,
"blueSuitChecked": true,
"note": "Requires a runway of 1 tile in the adjacent room. Use Space Jump or a wall jump after getting out of the water."
},
{
"id": 25,
"link": [
1,
4
],
"name": "Cross Room Spring Ball Jump",
"entranceCondition": {
"comeInJumping": {
"speedBooster": "any",
"minTiles": 1
}
},
"requires": [
"canCrossRoomJumpIntoWater",
"canTrickyJump",
"canTrickySpringBallJump"
],
"flashSuitChecked": true,
"blueSuitChecked": true,
"note": "Requires a runway of 1 tile in the adjacent room. Use a Spring Ball jump after getting out of the water."
},
{
"id": 26,
"link": [
1,
4
],
"name": "Cross Room Jump (Lenient)",
"entranceCondition": {
"comeInJumping": {
"speedBooster": "any",
"minTiles": 4
}
},
"requires": [
"canCrossRoomJumpIntoWater",
{
"or": [
"canWallJump",
"SpaceJump"
]
}
],
"flashSuitChecked": true,
"blueSuitChecked": true,
"note": "Assumes a runway of at least 4 tiles in the adjacent room. Use Space Jump or a wall jump after getting out of the water."
},
{
"id": 27,
"link": [
1,
4
],
"name": "Cross Room Speedy HiJump",
"entranceCondition": {
"comeInJumping": {
"speedBooster": "yes",
"minTiles": 3
}
},
"requires": [
"canCrossRoomJumpIntoWater",
"canTrickyJump",
"HiJump"
],
"flashSuitChecked": true,
"blueSuitChecked": true,
"note": "Requires a runway of 3 tiles in the adjacent room."
},
{
"id": 28,
"link": [
1,
4
],
"name": "Cross Room Speedy HiJump (Lenient)",
"entranceCondition": {
"comeInJumping": {
"speedBooster": "yes",
"minTiles": 7
}
},
"requires": [
"canCrossRoomJumpIntoWater",
"HiJump"
],
"flashSuitChecked": true,
"blueSuitChecked": true,
"note": "Assumes a runway of 7 tiles in the adjacent room."
},
{
"id": 29,
"link": [
1,
4
],
"name": "Cross Room Speedy Jump",
"entranceCondition": {
"comeInJumping": {
"speedBooster": "yes",
"minTiles": 21
}
},
"requires": [
"canCrossRoomJumpIntoWater"
],
"flashSuitChecked": true,
"blueSuitChecked": true,
"note": "Requires a runway of approximately 21 tile in the adjacent room."
},
{
"id": 30,
"link": [
1,
4
],
"name": "Tricky Cross Room Speedy Jump",
"entranceCondition": {
"comeInJumping": {
"speedBooster": "yes",
"minTiles": 18.4375
}
},
"requires": [
"canTrickyDashJump",
"canCrossRoomJumpIntoWater"
],
"flashSuitChecked": true,
"blueSuitChecked": true,
"note": "Requires a gaining a precise amount of run speed using 19 tiles before jumping in the adjacent room (with extra run speed $4.0 or $4.1)."
},
{
"id": 31,
"link": [
1,
4
],
"name": "Cross Room Jump with IBJ",
"entranceCondition": {
"comeInJumping": {
"speedBooster": "any",
"minTiles": 1
}
},
"requires": [
"canJumpIntoIBJ",
{
"or": [
{
"ammo": {
"type": "PowerBomb",
"count": 1
}
},
{
"and": [
"canCeilingBombJump",
{
"enemyDamage": {
"enemy": "Mochtroid",
"type": "contact",
"hits": 1
}
}
]
},
{
"and": [
"canDoubleBombJump",
{
"enemyDamage": {
"enemy": "Mochtroid",
"type": "contact",
"hits": 2
}
}
]
},
{
"enemyDamage": {
"enemy": "Mochtroid",
"type": "contact",
"hits": 3
}
}
]
},
"canCrossRoomJumpIntoWater",
"canBufferedMomentumConservingTurnaround",
"canTrickyJump"
],
"flashSuitChecked": true,
"blueSuitChecked": true,
"note": [
"Only requires a runway of approximately 1 tile in the adjacent room.",
"Take two Mochtroid hits or kill it using a Power Bomb or 5 Bombs."
],
"devNote": [
"The rhythm for placing 4 Bombs quickly is the main component of ceiling bomb jumps.",
"canTrickyJump for the IBJ more than the through-door jump."
]
},
{
"id": 190,
"link": [
1,
4
],
"name": "Side Platform Cross Room Jump",
"entranceCondition": {
"comeInWithSidePlatform": {
"platforms": [
{
"minHeight": 1,
"maxHeight": 1,
"minTiles": 13,
"speedBooster": "yes",
"obstructions": [
[
1,
0
]
],
"requires": [
"HiJump",
"canMomentumConservingTurnaround"
],
"note": [
"This applies to Warehouse Entrance.",
"With Hi-Jump equipped, gain extra run speed of at least $3.1, jump, and aim-down before the transition.",
"Then hold down and backward through the transition."
]
},
{
"minHeight": 2,
"maxHeight": 2,
"minTiles": 27.4375,
"speedBooster": "yes",
"obstructions": [
[
1,
0
]
],
"requires": [
"canDownGrab",
"canTrickyJump"
],
"note": [
"This applies to Dust Torizo Room and Halfie Climb Room.",
"Use the full runway, with a last-frame jump (extra run speed $5.0), and a down-grab."
],
"devNote": [
"The jump could also be done with a shorter runway, with a tricky dash jump using run speed $4.0 or $4.1."
]
},
{
"minHeight": 2,
"maxHeight": 2,
"minTiles": 45,
"speedBooster": "yes",
"obstructions": [
[
2,
0
]
],
"requires": [
"canInsaneJump"
],
"note": [
"This applies to Waterway Energy Tank Room."
]
},
{
"minHeight": 3,
"maxHeight": 3,
"minTiles": 39.4375,
"speedBooster": "yes",
"obstructions": [
[
3,
2
]
],
"note": [
"This applies to Metal Pirates Room.",
"Use the full runway, though there is no need to back into the corner;",
"jump on one of the last three possible frames (extra run speed between $6.6 and $6.8)"
]
},
{
"minHeight": 2,
"maxHeight": 2,
"minTiles": 45,
"speedBooster": "yes",
"obstructions": [
[
3,
0
]
],
"requires": [
"canInsaneJump",
{
"or": [
"canMomentumConservingMorph",
{
"and": [
"canMomentumConservingTurnaround",
"canBeVeryPatient"
]
}
]
}
],
"note": [
"This applies to Statues Hallway."
],
"devNote": [
"Using the full runway and single-pixel arm pump, with a momentum-conserving morph",
"this has a 4-frame window for the jump, and a 2-frame to 4-frame window for the morph (with later jumps giving a larger window for the morph).",
"With a momentum-conserving turnaround, it requires a last-frame jump and last-frame turnaround.",
"The arm pump doesn't really help with the turnaround.",
"There are 2 frames for the turnaround that allow Samus to make it past the overhang in the next room,",
"but only the last frame provides the horizontal momentum needed to reach the ledge."
]
},
{
"minHeight": 3,
"maxHeight": 3,
"minTiles": 37.4375,
"speedBooster": "yes",
"obstructions": [
[
3,
0
]
],
"requires": [
"canMomentumConservingMorph",
"canInsaneJump"
],
"note": [
"This applies to Flyway.",
"Avoid backing into the corner of runway (instead press into it and turn around).",
"Using the full runway, this has a 2-frame window for the jump,",
"and either a 1-frame window or 2-frame window for the morph, depending on the jump timing (last-frame jump being better)."
],
"devNote": [
"This involves getting extra dash speed $6.0 or $6.1."
]
},
{
"minHeight": 2,
"maxHeight": 2,
"minTiles": 45,
"speedBooster": "yes",
"obstructions": [
[
4,
0
]
],
"requires": [
"canMomentumConservingMorph",
"canInsaneJump",
"canInsaneMidAirMorph"
],
"note": [
"This applies to Baby Kraid Room.",
"Using the full runway, this is double frame perfect:",
"it requires jumping on the last possible frame before Samus would bonk on the doorway ledge,",
"and morphing on the last possible frame before Samus would bonk the ceiling."
]
}
]
}
},
"requires": [
"canCrossRoomJumpIntoWater"
],
"flashSuitChecked": true,
"blueSuitChecked": true
},
{
"id": 145,
"link": [
1,
4
],
"name": "Carry Shinecharge (Gravity, HiJump, Walljump)",
"entranceCondition": {
"comeInShinecharged": {}
},
"requires": [
{
"shineChargeFrames": 125
},
"Gravity",
"HiJump",
"canWallJump",
"canShinechargeMovementComplex"
],
"exitCondition": {
"leaveShinecharged": {}
},
"unlocksDoors": [
{
"types": [
"super"
],
"requires": []
},
{
"types": [
"missiles",
"powerbomb"
],
"requires": [
"never"
]
}
],
"flashSuitChecked": true,
"blueSuitChecked": true
},
{
"id": 146,
"link": [
1,
4
],
"name": "Come in Shinecharged, Leave With Spark (Gravity, HiJump, Right Wall Climb)",
"entranceCondition": {
"comeInShinecharged": {}
},
"requires": [
{
"or": [
{
"shineChargeFrames": 115
},
{
"and": [
"canSpeedyJump",
{
"shineChargeFrames": 100
}
]
}
]
},
"Gravity",
"HiJump",
"canWallJump",
"canShinechargeMovementComplex",
{
"shinespark": {
"frames": 7,
"excessFrames": 0
}
}
],
"exitCondition": {
"leaveWithSpark": {}
},
"unlocksDoors": [
{
"types": [
"super"
],
"requires": []
},
{
"types": [
"missiles",
"powerbomb"
],
"requires": [
"never"
]
}
],
"flashSuitChecked": true,
"blueSuitChecked": true
},
{
"id": 147,
"link": [
1,
4
],
"name": "Come in Shinecharged, Leave With Spark (Gravity, HiJump, Left Wall Climb)",
"entranceCondition": {
"comeInShinecharged": {}
},
"requires": [
{
"or": [
{
"shineChargeFrames": 80
},
{
"and": [
"canSpeedyJump",
{
"shineChargeFrames": 75
}
]
}
]
},
"Gravity",
"HiJump",
"canWallJump",
"canShinechargeMovementComplex",
{
"shinespark": {
"frames": 18,
"excessFrames": 0
}
}
],
"exitCondition": {
"leaveWithSpark": {}
},
"unlocksDoors": [
{
"types": [
"super"
],
"requires": []
},
{
"types": [
"missiles",
"powerbomb"
],
"requires": [
"never"
]
}
],
"flashSuitChecked": true,
"blueSuitChecked": true
},
{
"id": 148,
"link": [
1,
4
],
"name": "Come in Shinecharged, Leave With Spark (Gravity, Bootless, Walljump)",
"entranceCondition": {
"comeInShinecharged": {}
},
"requires": [
{
"shineChargeFrames": 95
},
"Gravity",
"canConsecutiveWallJump",
"canShinechargeMovementComplex",
{
"shinespark": {
"frames": 19,
"excessFrames": 0
}
}
],
"exitCondition": {
"leaveWithSpark": {}
},
"unlocksDoors": [
{
"types": [
"super"
],
"requires": []
},
{
"types": [
"missiles",
"powerbomb"
],
"requires": [
"never"
]
}
],
"flashSuitChecked": true,
"blueSuitChecked": true
},
{
"id": 32,
"link": [
1,
4
],
"name": "Come in Shinecharging, Leave With Temporary Blue",
"entranceCondition": {
"comeInShinecharging": {
"length": 1,
"openEnd": 0
}
},
"requires": [
"Gravity",
"HiJump",
"canTrickySpringBallJump",
"canChainTemporaryBlue"
],
"exitCondition": {
"leaveWithTemporaryBlue": {}
},
"unlocksDoors": [
{
"types": [
"ammo"
],
"requires": []
}
],
"flashSuitChecked": true,
"blueSuitChecked": true
},
{
"id": 134,
"link": [
1,
4
],
"name": "Use Stored Spark",
"requires": [
"h_storedSpark",
{
"or": [
{
"shinespark": {
"frames": 17,
"excessFrames": 3
}
},
{
"and": [
"HiJump",
{
"shinespark": {
"frames": 14,
"excessFrames": 3
}
}
]
},
{
"and": [
"Gravity",
{
"shinespark": {
"frames": 13,
"excessFrames": 3
}
}
]
},
{
"and": [
"Gravity",
"HiJump",
{
"shinespark": {
"frames": 9,
"excessFrames": 3
}
}
]
},
{
"and": [
"Gravity",
"HiJump",
"canSpeedyJump",
{
"shinespark": {
"frames": 7,
"excessFrames": 3
}
}
]
}
]
}
],
"flashSuitChecked": true,
"blueSuitChecked": true
},
{
"id": 33,
"link": [
1,
4
],
"name": "G-Mode Morph",
"entranceCondition": {
"comeInWithGMode": {
"mode": "any",
"morphed": true
}
},
"requires": [
"Gravity",
"h_artificialMorphLongIBJ"
],
"flashSuitChecked": true,
"blueSuitChecked": true,
"note": "To avoid the Mochtroids, it is possible to place bombs near them while in the Morph Tunnel below to the right.",
"devNote": "This strat is not starting from 5, because that would require canOffScreenMovement."
},
{
"id": 34,
"link": [
1,
4
],
"name": "Grapple Teleport Door Lock Skip",
"entranceCondition": {
"comeInWithGrappleTeleport": {
"blockPositions": [
[
12,
12
],
[
12,
13
]
]
}
},
"requires": [],
"bypassesDoorShell": "yes",
"flashSuitChecked": true,
"blueSuitChecked": true
},
{
"id": 35,
"link": [
1,
4
],
"name": "Carry Grapple Teleport (Top Position)",
"entranceCondition": {
"comeInWithGrappleTeleport": {
"blockPositions": [
[
12,
12
]
]
}
},
"requires": [],
"exitCondition": {
"leaveWithGrappleTeleport": {
"blockPositions": [
[
12,
12
]
]
}
},
"bypassesDoorShell": "yes",
"flashSuitChecked": true,
"blueSuitChecked": true
},
{
"id": 36,
"link": [
1,
4
],
"name": "Carry Grapple Teleport (Bottom Position)",
"entranceCondition": {
"comeInWithGrappleTeleport": {
"blockPositions": [
[
12,
13
]
]
}
},
"requires": [],
"exitCondition": {
"leaveWithGrappleTeleport": {
"blockPositions": [
[
12,
13
]
]
}
},
"bypassesDoorShell": "yes",
"flashSuitChecked": true,
"blueSuitChecked": true
},
{
"id": 182,
"link": [
1,
5
],
"name": "Direct G-Mode Morph",
"entranceCondition": {
"comeInWithGMode": {
"mode": "direct",
"morphed": true
}
},
"requires": [
{
  "or": [
    "Gravity",
    {
      "haveBlueSuit": {}
    },
    "canInsaneJump",
    "h_artificialMorphPowerBomb",
    {
      "enemyDamage": {
        "enemy": "Mochtroid",
        "type": "contact",
        "hits": 1
      }
    }
  ]
}
],
"flashSuitChecked": true,
"blueSuitChecked": true,
"note": "After morphing, kill the Mochtroid with a Power Bomb, or roll off the edge. Stay to the left to avoid luring the second Mochtroid below."
},
{
"id": 15,
"link": [
1,
5
],
"name": "Indirect G-Mode Morph",
"entranceCondition": {
"comeInWithGMode": {
"mode": "indirect",
"morphed": true
}
},
"requires": [
{
  "or": [
    "Gravity",
    {
      "haveBlueSuit": {}
    },
    {
      "and": [
        "h_artificialMorphBombs",
        "canInsaneJump"
      ]
    },
    "h_artificialMorphPowerBomb",
    {
      "and": [
        "h_artificialMorphSpringFling",
        "canTrickyGMode"
      ]
    },
    {
      "enemyDamage": {
        "enemy": "Mochtroid",
        "type": "contact",
        "hits": 1
      }
    }
  ]
}
],
"flashSuitChecked": true,
"blueSuitChecked": true,
"note": [
"Enter morphed and kill the Mochtroid with Bombs or a Power Bomb, or roll off the edge with Gravity to drop fast enough not to lure the Mochtroid.",
"It is also possible to Spring Fling by jumping from the ground immediately before the pause fully triggers to move right fast enough to avoid a hit."
]
},
{
"id": 37,
"link": [
2,
1
],
"name": "Base",
"requires": [
"Gravity",
{
"or": [
"SpaceJump",
"canLongIBJ",
"canJumpIntoIBJ",
"canWallJump",
"canGravityJump",
{
"and": [
"HiJump",
{
"or": [
"canSpringBallJumpMidAir",
"canSpeedyJump"
]
}
]
}
]
}
],
"flashSuitChecked": true,
"blueSuitChecked": true
},
{
"id": 38,
"link": [
2,
1
],
"name": "Suitless Double Spring Ball Jump",
"requires": [
"canSuitlessMaridia",
"h_doubleSpringBallJumpWithHiJump"
],
"flashSuitChecked": true,
"blueSuitChecked": true
},
{
"id": 39,
"link": [
2,
1
],
"name": "Come in Shinecharged, Shinespark",
"entranceCondition": {
"comeInShinecharged": {}
},
"requires": [
{
"shineChargeFrames": 30
},
{
"shinespark": {
"frames": 20,
"excessFrames": 3
}
}
],
"flashSuitChecked": true,
"blueSuitChecked": true
},
{
"id": 40,
"link": [
2,
1
],
"name": "Grapple",
"requires": [
"h_navigateUnderwater",
"Grapple",
"h_complexToCarryFlashSuit"
],
"flashSuitChecked": true,
"blueSuitChecked": true
},
{
"id": 41,
"link": [
2,
1
],
"name": "Mochtroid Climb",
"requires": [
"h_navigateUnderwater",
"canMochtroidIceClimb",
{
"or": [
"Gravity",
"canDodgeWhileShooting",
{
"enemyDamage": {
"enemy": "Mochtroid",
"type": "contact",
"hits": 2
}
},
"Wave",
"Spazer",
"Plasma",
{
"and": [
"canPrepareForNextRoom",
"Charge"
]
}
]
},
"h_complexToCarryFlashSuit",
"h_complexToCarryBlueSuit"
],
"flashSuitChecked": true,
"blueSuitChecked": true
},
{
"id": 42,
"link": [
2,
1
],
"name": "X-Ray Climb",
"entranceCondition": {
"comeInWithDoorStuckSetup": {}
},
"requires": [
"canXRayClimb"
],
"flashSuitChecked": true,
"blueSuitChecked": true,
"note": "Climb up 1 screen."
},
{
"id": 43,
"link": [
2,
1
],
"name": "Cross Room Jump",
"entranceCondition": {
"comeInJumping": {
"speedBooster": "any",
"minTiles": 1
}
},
"requires": [
"canCrossRoomJumpIntoWater"
],
"flashSuitChecked": true,
"blueSuitChecked": true,
"note": "Only requires a runway of 1 tile in the adjacent room.",
"devNote": "This can be done with a shorter runway (closed end) and canMomentumConservingTurnaround, but that type of connection doesn't exist."
},
{
"id": 135,
"link": [
2,
1
],
"name": "Use Stored Spark",
"requires": [
"h_storedSpark",
{
"or": [
{
"shinespark": {
"frames": 17,
"excessFrames": 3
}
},
{
"and": [
"HiJump",
{
"shinespark": {
"frames": 13,
"excessFrames": 3
}
}
]
},
{
"and": [
"Gravity",
{
"shinespark": {
"frames": 13,
"excessFrames": 3
}
}
]
},
{
"and": [
"Gravity",
"HiJump",
{
"shinespark": {
"frames": 9,
"excessFrames": 3
}
}
]
}
]
}
],
"flashSuitChecked": true,
"blueSuitChecked": true
},
{
"id": 48,
"link": [
2,
1
],
"name": "Very Long Underwater Walljump Climb",
"requires": [
"canLongUnderwaterWallJump"
],
"flashSuitChecked": true,
"blueSuitChecked": true,
"note": "This underwater walljump is very long."
},
{
"id": 49,
"link": [
2,
1
],
"name": "Very Deep Stuck X-Ray Climb",
"entranceCondition": {
"comeInWithGMode": {
"mode": "direct",
"morphed": false
}
},
"requires": [
"canComplexGMode",
"canGModeXRayClimb",
{
"notable": "Very Deep Stuck X-Ray Climb"
},
"canXRayClimb"
],
"bypassesDoorShell": "yes",
"flashSuitChecked": true,
"blueSuitChecked": true,
"note": [
"Enter with G-mode direct, back up to exactly 8 pixels away from the door transition, and activate X-ray to get very deep stuck in the door.",
"Climb up a little less than 1 screen, and perform a turnaround buffered spin-jump away from the door to trigger the transition, bypassing any lock on the door.",
"Perform the spin-jump when Samus' feet are between about 0.5 and 2 tiles below the bottom of the door."
],
"devNote": [
"Standing any closer to the door will cause Samus to no longer be stuck in the wall when reaching the air pocket above.",
"Standing any further from the door will make it impossible to get a wall-jump check from the transition tiles."
]
},
{
"id": 50,
"link": [
2,
1
],
"name": "X-Ray Climb Grapple Door Lock Skip",
"entranceCondition": {
"comeInWithDoorStuckSetup": {}
},
"requires": [
"canXRayClimb",
"canGrappleClip"
],
"bypassesDoorShell": "yes",
"flashSuitChecked": true,
"blueSuitChecked": true,
"note": [
"Perform an X-Ray Climb until you are just above the door into Cacatac Alley.",
"Walk left into the gap between pipes, behind the grapple blocks.",
"Walk to the left wall, turn around, crouch, grapple the block and release.",
"Samus will fall into the door transition.",
"The camera does not follow Samus but the pipes are still visually in the same position. And the camera does not break after the transition."
]
},
{
"id": 149,
"link": [
2,
1
],
"name": "Come in Shinecharging, Leave Shinecharged (Full Runway, HiJump, Walljump)",
"entranceCondition": {
"comeInShinecharging": {
"length": 12,
"openEnd": 0
}
},
"requires": [
"Gravity",
"HiJump",
"canWallJump",
"canShinechargeMovementComplex",
{
"shineChargeFrames": 120
}
],
"exitCondition": {
"leaveShinecharged": {}
},
"unlocksDoors": [
{
"types": [
"super"
],
"requires": []
},
{
"types": [
"missiles",
"powerbomb"
],
"requires": [
"never"
]
}
],
"flashSuitChecked": true,
"blueSuitChecked": true
},
{
"id": 150,
"link": [
2,
1
],
"name": "Come in Shinecharging, Leave Shinecharged (Full Runway, Bootless, Walljump)",
"entranceCondition": {
"comeInShinecharging": {
"length": 12,
"openEnd": 0
}
},
"requires": [
"Gravity",
"canWallJump",
"canFastWallJumpClimb",
"canShinechargeMovementComplex",
{
"shineChargeFrames": 145
}
],
"exitCondition": {
"leaveShinecharged": {}
},
"unlocksDoors": [
{
"types": [
"super"
],
"requires": []
},
{
"types": [
"missiles",
"powerbomb"
],
"requires": [
"never"
]
}
],
"flashSuitChecked": true,
"blueSuitChecked": true
},
{
"id": 151,
"link": [
2,
1
],
"name": "Come in Shinecharging, Leave Shinecharged (Full Runway, HiJump, Tricky Jump)",
"entranceCondition": {
"comeInShinecharging": {
"length": 12,
"openEnd": 0
}
},
"requires": [
"Gravity",
"HiJump",
"canTrickyJump",
"canShinechargeMovementComplex",
{
"shineChargeFrames": 130
}
],
"exitCondition": {
"leaveShinecharged": {}
},
"unlocksDoors": [
{
"types": [
"super"
],
"requires": []
},
{
"types": [
"missiles",
"powerbomb"
],
"requires": [
"never"
]
}
],
"flashSuitChecked": true,
"blueSuitChecked": true
},
{
"id": 152,
"link": [
2,
1
],
"name": "Come in Shinecharging, Leave Shinecharged (Full Runway, Gravity Jump)",
"entranceCondition": {
"comeInShinecharging": {
"length": 12,
"openEnd": 0
}
},
"requires": [
"canGravityJump",
"canShinechargeMovementTricky",
{
"shineChargeFrames": 125
}
],
"exitCondition": {
"leaveShinecharged": {}
},
"unlocksDoors": [
{
"types": [
"super"
],
"requires": []
},
{
"types": [
"missiles",
"powerbomb"
],
"requires": [
"never"
]
}
],
"flashSuitChecked": true,
"blueSuitChecked": true
},
{
"id": 153,
"link": [
2,
1
],
"name": "Carry Shinecharge (Bootless)",
"entranceCondition": {
"comeInShinecharged": {}
},
"requires": [
{
"shineChargeFrames": 120
},
"Gravity",
"canFastWallJumpClimb",
"canShinechargeMovementComplex"
],
"exitCondition": {
"leaveShinecharged": {}
},
"unlocksDoors": [
{
"types": [
"super"
],
"requires": []
},
{
"types": [
"missiles",
"powerbomb"
],
"requires": [
"never"
]
}
],
"flashSuitChecked": true,
"blueSuitChecked": true
},
{
"id": 154,
"link": [
2,
1
],
"name": "Come in Shinecharged, Leave With Spark (Bootless)",
"entranceCondition": {
"comeInShinecharged": {}
},
"requires": [
{
"shineChargeFrames": 100
},
"Gravity",
"canFastWallJumpClimb",
"canShinechargeMovementComplex",
{
"shinespark": {
"frames": 4,
"excessFrames": 0
}
}
],
"exitCondition": {
"leaveWithSpark": {}
},
"unlocksDoors": [
{
"types": [
"super"
],
"requires": []
},
{
"types": [
"missiles",
"powerbomb"
],
"requires": [
"never"
]
}
],
"flashSuitChecked": true,
"blueSuitChecked": true
},
{
"id": 155,
"link": [
2,
1
],
"name": "Carry Shinecharge (HiJump)",
"entranceCondition": {
"comeInShinecharged": {}
},
"requires": [
{
"shineChargeFrames": 90
},
"Gravity",
"HiJump",
"canWallJump",
"canShinechargeMovementComplex"
],
"exitCondition": {
"leaveShinecharged": {}
},
"unlocksDoors": [
{
"types": [
"super"
],
"requires": []
},
{
"types": [
"missiles",
"powerbomb"
],
"requires": [
"never"
]
}
],
"flashSuitChecked": true,
"blueSuitChecked": true
},
{
"id": 156,
"link": [
2,
1
],
"name": "Come in Shinecharged, Leave With Spark (HiJump)",
"entranceCondition": {
"comeInShinecharged": {}
},
"requires": [
{
"or": [
{
"shineChargeFrames": 80
},
{
"and": [
"canSpeedyJump",
{
"shineChargeFrames": 75
}
]
}
]
},
"Gravity",
"HiJump",
"canWallJump",
"canShinechargeMovementComplex",
{
"shinespark": {
"frames": 2,
"excessFrames": 0
}
}
],
"exitCondition": {
"leaveWithSpark": {}
},
"unlocksDoors": [
{
"types": [
"super"
],
"requires": []
},
{
"types": [
"missiles",
"powerbomb"
],
"requires": [
"never"
]
}
],
"flashSuitChecked": true,
"blueSuitChecked": true
},
{
"id": 51,
"link": [
2,
2
],
"name": "Leave with Runway",
"requires": [],
"exitCondition": {
"leaveWithRunway": {
"length": 13,
"openEnd": 0
}
},
"flashSuitChecked": true,
"blueSuitChecked": true
},
{
"id": 206,
"link": [
2,
2
],
"name": "Mochtroid Farm (1 Mochtroid)",
"requires": [
{
"resetRoom": {
"nodes": [
2
]
}
},
{
"or": [
{
"and": [
"Grapple",
{
"cycleFrames": 80
}
]
},
{
"and": [
"Plasma",
{
"cycleFrames": 80
}
]
},
{
"and": [
"Gravity",
"ScrewAttack",
{
"cycleFrames": 80
}
]
},
{
"and": [
{
"haveBlueSuit": {}
},
{
"cycleFrames": 80
}
]
},
{
"and": [
"Wave",
{
"cycleFrames": 85
}
]
},
{
"and": [
"Spazer",
{
"cycleFrames": 90
}
]
},
{
"and": [
"canDodgeWhileShooting",
{
"cycleFrames": 135
}
]
}
]
}
],
"resetsObstacles": [
"R-Mode"
],
"farmCycleDrops": [
{
"enemy": "Mochtroid",
"count": 1
}
],
"flashSuitChecked": true,
"blueSuitChecked": true
},
{
"id": 53,
"link": [
2,
2
],
"name": "Mochtroid Farm (3 Mochtroids)",
"requires": [
"Gravity",
{
"cycleFrames": 330
},
{
"or": [
{
"resetRoom": {
"nodes": [
2
]
}
},
{
"and": [
{
"resetRoom": {
"nodes": [
4
]
}
},
{
"cycleFrames": 70
}
]
},
{
"and": [
{
"resetRoom": {
"nodes": [
1
]
}
},
{
"cycleFrames": 90
}
]
},
{
"and": [
{
"resetRoom": {
"nodes": [
3
]
}
},
"Morph",
{
"cycleFrames": 1210
}
]
}
]
},
{
"or": [
"canConsecutiveWallJump",
{
"and": [
"SpaceJump",
{
"cycleFrames": 40
}
]
},
{
"and": [
"Grapple",
{
"cycleFrames": 150
}
]
},
{
"and": [
"canGravityJump",
{
"cycleFrames": 120
},
"h_doubleEquipmentScreenCycleFrames"
]
}
]
},
{
"or": [
"ScrewAttack",
{
"haveBlueSuit": {}
},
{
"and": [
"Grapple",
{
"cycleFrames": 40
}
]
},
{
"and": [
"Plasma",
{
"cycleFrames": 20
}
]
},
{
"and": [
"Wave",
{
"cycleFrames": 160
}
]
},
{
"and": [
"Spazer",
{
"cycleFrames": 180
}
]
},
{
"and": [
"canDodgeWhileShooting",
{
"cycleFrames": 315
}
]
}
]
}
],
"resetsObstacles": [
"R-Mode"
],
"farmCycleDrops": [
{
"enemy": "Mochtroid",
"count": 3
}
],
"flashSuitChecked": true,
"blueSuitChecked": true,
"devNote": [
"FIXME: other options for this are possible (e.g. suitless)"
]
},
{
"id": 54,
"link": [
2,
2
],
"name": "Crystal Flash",
"requires": [
"h_CrystalFlash",
{
"obstaclesNotCleared": [
"R-Mode"
]
}
],
"flashSuitChecked": true,
"blueSuitChecked": true
},
{
"id": 193,
"link": [
2,
2
],
"name": "Precise Stutter Shinecharge, Leave Shinecharged (5-tile runway)",
"entranceCondition": {
"comeInStutterShinecharging": {
"minTiles": 5
}
},
"requires": [
"canPreciseStutterWaterShineCharge",
"canShinechargeMovementTricky",
"canInsaneJump",
"canTrickyDodgeEnemies",
{
"shineChargeFrames": 130
},
{
"or": [
"canBeVeryPatient",
{
"shineChargeFrames": 15
}
]
}
],
"exitCondition": {
"leaveShinecharged": {}
},
"unlocksDoors": [
{
"types": [
"super"
],
"requires": []
},
{
"types": [
"missiles",
"powerbomb"
],
"requires": [
"never"
]
}
],
"flashSuitChecked": true,
"blueSuitChecked": true,
"note": [
"With a runway of 5 tiles (open end) in the other room,",
"the ideal timing for the stutter is to release forward for 5 frames, and repress forward on the last possible frame before the transition.",
"Other timings can work, but will gain the shinecharge further from the door, leaving fewer shinecharge frames remaining.",
"After gaining the shinecharge, continue holding forward in order to make Samus stand.",
"Then turnaround spin jump back toward the door, and continue spin jumping to reach the transition with a shinecharge."
]
},
{
"id": 194,
"link": [
2,
2
],
"name": "Precise Stutter Shinecharge, Leave Shinecharged (4-tile runway)",
"entranceCondition": {
"comeInStutterShinecharging": {
"minTiles": 4
}
},
"requires": [
"canPreciseStutterWaterShineCharge",
"canShinechargeMovementTricky",
"canInsaneJump",
"canTrickyDodgeEnemies",
{
"shineChargeFrames": 140
},
{
"or": [
"canBeVeryPatient",
{
"shineChargeFrames": 10
}
]
}
],
"exitCondition": {
"leaveShinecharged": {}
},
"unlocksDoors": [
{
"types": [
"super"
],
"requires": []
},
{
"types": [
"missiles",
"powerbomb"
],
"requires": [
"never"
]
}
],
"flashSuitChecked": true,
"blueSuitChecked": true,
"note": [
"With only a runway of 4 tiles (open end) in the other room,",
"the ideal timing for the stutter is to release forward for 4 frames, and repress forward on the last possible frame before the transition.",
"It also works well to release forward for 3 frames and repress on the last possible frame.",
"Other timings can also work, but may gain the shinecharge further from the door, leaving fewer shinecharge frames remaining.",
"After gaining the shinecharge, continue holding forward in order to make Samus stand.",
"Then turnaround spin jump back toward the door, and continue spin jumping to reach the transition with a shinecharge."
]
},
{
"id": 195,
"link": [
2,
2
],
"name": "Precise Stutter Shinecharge, Leave Shinecharged (3-tile runway)",
"entranceCondition": {
"comeInStutterShinecharging": {
"minTiles": 3
}
},
"requires": [
"canPreciseStutterWaterShineCharge",
"canShinechargeMovementTricky",
"canInsaneJump",
"canTrickyDodgeEnemies",
{
"shineChargeFrames": 145
},
{
"or": [
"canBeVeryPatient",
{
"shineChargeFrames": 10
}
]
}
],
"exitCondition": {
"leaveShinecharged": {}
},
"unlocksDoors": [
{
"types": [
"super"
],
"requires": []
},
{
"types": [
"missiles",
"powerbomb"
],
"requires": [
"never"
]
}
],
"flashSuitChecked": true,
"blueSuitChecked": true,
"note": [
"With only a runway of 3 tiles (open end) in the other room,",
"the ideal timing for the stutter is to release forward for 3 or 4 frames, and repress forward on the last possible frame before the transition.",
"Other timings can work, but will gain the shinecharge further from the door, leaving fewer shinecharge frames remaining.",
"After gaining the shinecharge, continue holding forward in order to make Samus stand.",
"Then turnaround spin jump back toward the door, and continue spin jumping to reach the transition with a shinecharge.",
"Alternatively, with greater difficulty but saving some shinecharge frames,",
"after performing the turnaround spin jump, briefly moonwalk back, then retain momentum by boomeranging forward",
"(switching from pressing backward to pressing forward on the next frame),",
"and arm pump to reach the door quickly."
],
"devNote": [
"The same shinecharge frames could be achieved with a closed end runway (effective length of 2.4375),",
"with a 3-frame stutter, but there doesn't appear to be any application."
]
},
{
"id": 196,
"link": [
2,
2
],
"name": "Precise Stutter Shinecharge, Leave Shinecharged (2-tile runway)",
"entranceCondition": {
"comeInStutterShinecharging": {
"minTiles": 2
}
},
"requires": [
"canPreciseStutterWaterShineCharge",
"canShinechargeMovementTricky",
"canInsaneJump",
"canTrickyDodgeEnemies",
{
"shineChargeFrames": 150
},
{
"or": [
"canBeVeryPatient",
{
"shineChargeFrames": 15
}
]
}
],
"exitCondition": {
"leaveShinecharged": {}
},
"unlocksDoors": [
{
"types": [
"super"
],
"requires": []
},
{
"types": [
"missiles",
"powerbomb"
],
"requires": [
"never"
]
}
],
"flashSuitChecked": true,
"blueSuitChecked": true,
"note": [
"With only a runway of 2 tiles (open end) in the other room,",
"the ideal timing for the stutter is to release forward for 3 frames, and repress forward on the last possible frame before the transition.",
"Other timings can work, but will gain the shinecharge further from the door, leaving fewer shinecharge frames remaining.",
"After gaining the shinecharge, continue holding forward in order to make Samus stand.",
"Then turnaround spin jump back toward the door, and continue spin jumping to reach the transition with a shinecharge.",
"Alternatively, with greater difficulty but saving some shinecharge frames,",
"after performing the turnaround spin jump, briefly moonwalk back, then retain momentum by boomeranging forward",
"(switching from pressing backward to pressing forward on the next frame),",
"and arm pump to reach the door quickly."
],
"devNote": [
"FIXME: The canBeVeryPatient requirement is for difficulty placement of the boomerang method;",
"but the boomerang (or maybe specifically the moonwalk boomerang) should possibly be its own tech,",
"and the same with rapid arm pumping."
]
},
{
"id": 218,
"link": [
2,
2
],
"name": "Come in Shinecharging, Crystal Spark",
"entranceCondition": {
"comeInShinecharging": {
"length": 12,
"openEnd": 0
},
"comesInHeated": "no"
},
"requires": [
"Gravity",
"h_CrystalSpark"
],
"flashSuitChecked": true,
"blueSuitChecked": true
},
{
"id": 219,
"link": [
2,
2
],
"name": "Precise Stutter Water Shinecharge, Crystal Spark",
"entranceCondition": {
"comeInStutterShinecharging": {
"minTiles": 2.4375
},
"comesInHeated": "no"
},
"requires": [
"canPreciseStutterWaterShineCharge",
"h_underwaterCrystalSpark"
],
"flashSuitChecked": true,
"blueSuitChecked": true,
"note": [
"With only a runway length of 3 tiles (closed end) in the other room, this requires a precise setup:",
"release forward for 3 or 4 frames, then repress forward on the last possible frame before the transition;",
"alternatively, release forward for 2 frames and repress forward on the second-to-last possible frame before the transition."
],
"detailNote": [
"If a longer runway is available (4 tiles), the timing windows are a bit more lenient:",
"1. Release forward for 3, 4, or 5 frames, repress forward on the last possible frame;",
"2. Release forward for 2 or 3 frames, repress forward on the 2nd-to-last possible frame;",
"3. Release forward for 1 or 2 frames, repress forward on the 3rd-to-last possible frame."
],
"devNote": [
"FIXME: This is possible with a 2-tile runway, but it's a lot worse.",
"It would require more duplication and could be very tedious to set up for many attempts."
]
},
{
"id": 55,
"link": [
2,
2
],
"name": "G-Mode Setup - Get Hit By Mochtroid",
"requires": [],
"exitCondition": {
"leaveWithGModeSetup": {
"knockback": false
}
},
"flashSuitChecked": true,
"blueSuitChecked": true,
"note": "In the case of carrying a blue suit, it is possible to inch forward a pixel or two at a time using X-Ray without destroying the Mochtroid."
},
{
"id": 210,
"link": [
2,
2
],
"name": "R-Mode Entry",
"entranceCondition": {
"comeInWithRMode": {}
},
"requires": [],
"clearsObstacles": [
"R-Mode"
],
"flashSuitChecked": true,
"blueSuitChecked": true
},
{
"id": 56,
"link": [
2,
2
],
"name": "Leave With Grapple Teleport (Bomb Hang)",
"requires": [
"canGrappleBombHang",
"h_bombThings"
],
"exitCondition": {
"leaveWithGrappleTeleport": {
"blockPositions": [
[
2,
34
]
]
}
},
"flashSuitChecked": true,
"blueSuitChecked": true,
"note": [
"Get a boost from a Bomb or Power Bomb while grappled to the first Grapple block above the door.",
"Even without Gravity or HiJump, this can be done by standing about 5 tiles away from the door, jumping up into a mid-air morph, laying a bomb or Power Bomb, unmorphing, then grappling diagonally;",
"hold down immediately after the grapple attachment to prevent Grapple from retracting.",
"Samus will enter a 'glitched grapple hanging' state where Samus' graphics will appear corrupted while swinging with Grapple.",
"Swing down, and hold left while approaching the door to trigger the transition.",
"Continue holding Grapple through the door transition to initiate a teleport in the next room.",
"If needing to stand up in the next room (e.g. for an X-Ray climb), then enter the transition while swinging slowly, e.g. after coming to a stop directly below the block (or without Gravity equipped).",
"If needing to transition at horiziontal position $15 (as far right as possible), then additionally roll from pressing left to pressing diagonally up-left just before the transition.",
"The game may lag heavily if Samus enters a retracted position; if this happens, hold down to extend Grapple again."
]
},
{
"id": 57,
"link": [
2,
2
],
"name": "Leave With Grapple Teleport (Unmorph)",
"requires": [
"Gravity",
"canCrouchJump",
"canUnmorphGrappleHang"
],
"exitCondition": {
"leaveWithGrappleTeleport": {
"blockPositions": [
[
2,
34
]
]
}
},
"flashSuitChecked": true,
"blueSuitChecked": true,
"note": [
"Align against the wall, then crouch jump into a mid-air morph.",
"Unmorph while approaching the peak of the jump (an 8-frame window), then use Grapple immediately (a 2-frame window) to get stuck standing a pixel or two inside the first Grapple block above the door.",
"Then jump (to force crouch), angle down, and grapple.",
"Samus will enter a 'glitched grapple hanging' state where Samus' graphics will appear corrupted while swinging with Grapple.",
"Swing down, and hold left while approaching the door to trigger the transition.",
"To avoid heavy lag, hold down through the entire swing.",
"Continue holding Grapple through the door transition to initiate a teleport in the next room.",
"If needing to stand up in the next room (e.g. for an X-Ray climb), then enter the transition while swinging slowly, e.g. after coming to a stop directly below the block.",
"If needing to transition at horiziontal position $15 (as far right as possible), then additionally roll from pressing left to pressing diagonally up-left just before the transition.",
"The game may lag heavily if Samus enters a retracted position; if this happens, hold down to extend Grapple again."
],
"devNote": "The canCrouchJump is not a h_underwaterCrouchJump, because Gravity is required."
},
{
"id": 179,
"link": [
2,
2
],
"name": "Leave With Grapple Teleport (Frozen Mochtroid)",
"requires": [
"canFrozenEnemyGrappleHang"
],
"exitCondition": {
"leaveWithGrappleTeleport": {
"blockPositions": [
[
2,
34
]
]
}
},
"flashSuitChecked": true,
"blueSuitChecked": true,
"note": [
"Freeze a Mochtroid near the bottom of the Grapple wall.",
"Stand on it, and fire Grapple horizontally while walking toward the wall.",
"If successful, Samus should clip slightly into the wall.",
"Crouch, and fire Grapple while angling up.",
"Samus will enter a 'glitched grapple hanging' state where Samus' graphics will appear corrupted while swinging with Grapple.",
"Swing down, and hold left while approaching the door to trigger the transition.",
"Continue holding Grapple through the door transition to initiate a teleport in the next room.",
"If needing to stand up in the next room (e.g. for an X-Ray climb), then enter the transition while swinging slowly, e.g. after coming to a stop directly below the block (or without Gravity equipped).",
"If needing to transition at horiziontal position $15 (as far right as possible), then additionally roll from pressing left to pressing diagonally up-left just before the transition.",
"The game may lag heavily if Samus enters a retracted position; if this happens, hold down to extend Grapple again."
]
},
{
"id": 58,
"link": [
2,
2
],
"name": "Leave With Grapple Teleport (Suitless, Unmorph)",
"requires": [
"canUnmorphGrappleHang"
],
"exitCondition": {
"leaveWithGrappleTeleport": {
"blockPositions": [
[
2,
34
]
]
}
},
"flashSuitChecked": true,
"blueSuitChecked": true,
"note": [
"Grapple to the sixth Grapple block above the door (the second below the ledge above).",
"Hold left while waiting for the grapple wall jump check to expire, then quickly morph.",
"unmorph at a precise time (a 3-frame window) then use Grapple immediately (a 2-frame window) to get stuck standing a pixel or two inside the first Grapple block above the door.",
"Then jump (to force crouch), angle down, and grapple.",
"Samus will enter a 'glitched grapple hanging' state where Samus' graphics will appear corrupted while swinging with Grapple.",
"Swing down, and hold left while approaching the door to trigger the transition.",
"To avoid heavy lag, hold down through the entire swing.",
"Continue holding Grapple through the door transition to initiate a teleport in the next room.",
"If needing to stand up in the next room (e.g. for an X-Ray climb), then enter the transition while swinging slowly, e.g. after coming to a stop directly below the block.",
"If needing to transition at horiziontal position $15 (as far right as possible), then additionally roll from pressing left to pressing diagonally up-left just before the transition.",
"The game may lag heavily if Samus enters a retracted position; if this happens, hold down to extend Grapple again."
]
},
{
"id": 59,
"link": [
2,
3
],
"name": "Base",
"requires": [
"Morph",
"Gravity"
],
"flashSuitChecked": true,
"blueSuitChecked": true,
"note": [
"Touch the Oum to get it to start moving then retreat down to the left;",
"they will roll into the wall and then move to the right, clearing the path forward.",
"Alternatively, it is possible to clip through them by jumping and quickly aiming down",
"before hitting the ceiling, while the Oum is rolling into Samus.",
"It is much easier to clip through them with Gravity disabled, otherwise it requires a very quick down input after jumping."
]
},
{
"id": 60,
"link": [
2,
3
],
"name": "Suitless",
"requires": [
"Morph",
"canSuitlessMaridia",
{
"or": [
"canSpringBallJumpMidAir",
"HiJump",
"canSunkenTileWideWallClimb"
]
}
],
"flashSuitChecked": true,
"blueSuitChecked": true,
"note": [
"Touch the Oum to get it to start moving then retreat down to the left;",
"they will roll into the wall and then move to the right, clearing the path forward.",
"Alternatively, it is possible to clip through them by jumping and quickly aiming down",
"before hitting the ceiling, while the Oum is rolling into Samus.",
"It is much easier to clip through them with Gravity disabled, otherwise it requires a very quick down input after jumping."
]
},
{
"id": 217,
"link": [
2,
3
],
"name": "Blue Suit Spring Ball out of Morph Tunnel",
"requires": [
{
"haveBlueSuit": {}
},
"canInsaneJump",
"h_useSpringBall"
],
"flashSuitChecked": true,
"blueSuitChecked": true,
"note": [
"Jump using Spring Ball with the right timing leaving the Morph tunnel to avoid falling."
],
"devNote": [
"This strat is an alternative to a mid-air Spring Ball jump, avoiding the need to pause."
]
},
{
"id": 216,
"link": [
2,
3
],
"name": "R-Mode Spark Interrupt",
"requires": [
{
"obstaclesCleared": [
"R-Mode"
]
},
"Gravity",
"Morph",
{
"or": [
"h_CrystalFlashForReserveEnergy",
{
"and": [
"h_RModeCanRefillReserves",
{
"resourceMissingAtMost": [
{
"type": "Missile",
"count": 0
}
]
},
{
"resourceMissingAtMost": [
{
"type": "Super",
"count": 0
}
]
},
{
"partialRefill": {
"type": "ReserveEnergy",
"limit": 20
}
}
]
}
]
},
"h_shinechargeMaxRunway",
{
"autoReserveTrigger": {
"maxReserveEnergy": 95
}
},
"canRModeSparkInterrupt"
],
"resetsObstacles": [
"R-Mode"
],
"flashSuitChecked": true,
"blueSuitChecked": true,
"note": [
"Enter and farm all three Mochtroids, or Crystal Flash.",
"Run right to left underneath the Ohms, then lead them to roll off the right side.",
"Shinecharge and use the Ohm lick attack to interrupt."
]
},
{
"id": 62,
"link": [
2,
4
],
"name": "Come in Shinecharged, Shinespark",
"entranceCondition": {
"comeInShinecharged": {}
},
"requires": [
{
"shineChargeFrames": 10
},
{
"shinespark": {
"frames": 38,
"excessFrames": 3
}
}
],
"flashSuitChecked": true,
"blueSuitChecked": true
},
{
"id": 183,
"link": [
2,
4
],
"name": "Gravity Jump, Spring Ball Jump",
"requires": [
"canGravityJump",
"HiJump",
"canTrickySpringBallJump"
],
"flashSuitChecked": true,
"blueSuitChecked": true,
"note": "Gravity jump, then quickly pause and turn on Spring Ball for a Spring Ball jump."
},
{
"id": 63,
"link": [
2,
4
],
"name": "Cross Room Speedy HiJump (Lenient)",
"entranceCondition": {
"comeInJumping": {
"speedBooster": "yes",
"minTiles": 9
}
},
"requires": [
"HiJump",
"canCrossRoomJumpIntoWater"
],
"flashSuitChecked": true,
"blueSuitChecked": true,
"note": "Assumes a runway of 9 tiles in the adjacent room."
},
{
"id": 64,
"link": [
2,
4
],
"name": "Cross Room Speedy HiJump",
"entranceCondition": {
"comeInJumping": {
"speedBooster": "yes",
"minTiles": 8
}
},
"requires": [
"HiJump",
"canDownGrab",
"canTrickyJump",
"canCrossRoomJumpIntoWater"
],
"flashSuitChecked": true,
"blueSuitChecked": true,
"note": "Requires a runway of 8 tiles in the adjacent room (extra run speed at least $2.5)."
},
{
"id": 65,
"link": [
2,
4
],
"name": "Cross Room Speedy Jump",
"entranceCondition": {
"comeInJumping": {
"speedBooster": "yes",
"minTiles": 38
}
},
"requires": [
"canTrickyJump",
"canCrossRoomJumpIntoWater"
],
"flashSuitChecked": true,
"blueSuitChecked": true,
"note": "Requires a runway of at least 38 tiles in the adjacent room."
},
{
"id": 66,
"link": [
2,
4
],
"name": "Tricky Cross Room Speedy Jump",
"entranceCondition": {
"comeInJumping": {
"speedBooster": "yes",
"minTiles": 34
}
},
"requires": [
"canTrickyDashJump",
"canCrossRoomJumpIntoWater"
],
"flashSuitChecked": true,
"blueSuitChecked": true,
"note": "Requires running a precise distance of 34 tiles (extra run speed $6.0 or $6.1)."
},
{
"id": 67,
"link": [
2,
4
],
"name": "Cross Room Speedy Jump into Spring Ball Jump",
"entranceCondition": {
"comeInJumping": {
"speedBooster": "yes",
"minTiles": 16
}
},
"requires": [
"canTrickySpringBallJump",
"canCrossRoomJumpIntoWater"
],
"flashSuitChecked": true,
"blueSuitChecked": true
},
{
"id": 68,
"link": [
2,
4
],
"name": "Tricky Cross Room Speedy Jump into Spring Ball Jump",
"entranceCondition": {
"comeInJumping": {
"speedBooster": "yes",
"minTiles": 6.4375
}
},
"requires": [
"canTrickyDashJump",
"canTrickySpringBallJump",
"canCrossRoomJumpIntoWater"
],
"flashSuitChecked": true,
"blueSuitChecked": true,
"note": [
"This requires gaining speed by running a precise distance of 7 tiles (extra run speed of $2.0 or $2.1)."
]
},
{
"id": 69,
"link": [
2,
4
],
"name": "Cross Room Speedy Jump into Space Jump",
"entranceCondition": {
"comeInJumping": {
"speedBooster": "yes",
"minTiles": 10
}
},
"requires": [
"SpaceJump",
"canCrossRoomJumpIntoWater"
],
"flashSuitChecked": true,
"blueSuitChecked": true
},
{
"id": 70,
"link": [
2,
4
],
"name": "Tricky Cross Room Speedy Jump into Space Jump",
"entranceCondition": {
"comeInJumping": {
"speedBooster": "yes",
"minTiles": 6.4375
}
},
"requires": [
"canTrickyDashJump",
"SpaceJump",
"canCrossRoomJumpIntoWater"
],
"flashSuitChecked": true,
"blueSuitChecked": true,
"note": [
"This requires gaining speed by running a precise distance of 7 tiles (extra run speed of $2.0 or $2.1)."
]
},
{
"id": 71,
"link": [
2,
4
],
"name": "Cross Room Jump with Spring Ball, HiJump",
"entranceCondition": {
"comeInJumping": {
"speedBooster": "any",
"minTiles": 1
}
},
"requires": [
"HiJump",
"canBufferedMomentumConservingTurnaround",
"canTrickySpringBallJump",
"canCrossRoomJumpIntoWater"
],
"flashSuitChecked": true,
"blueSuitChecked": true,
"note": "Requires a runway of 1 tile in the adjacent room."
},
{
"id": 72,
"link": [
2,
4
],
"name": "Cross Room Jump with Spring Ball and IBJ",
"entranceCondition": {
"comeInJumping": {
"speedBooster": "no",
"minTiles": 1
}
},
"requires": [
"canTrickySpringBallJump",
"canJumpIntoIBJ",
"canTrickyJump",
{
"or": [
"canDoubleBombJump",
{
"enemyDamage": {
"enemy": "Mochtroid",
"type": "contact",
"hits": 2
}
}
]
},
"canCrossRoomJumpIntoWater"
],
"flashSuitChecked": true,
"blueSuitChecked": true,
"note": [
"Requires a runway of 1 tile in the adjacent room.",
"Use a spring ball jump after breaking the water, then ibj.",
"Take two Mochtroid hits or use a double bomb jump."
]
},
{
"id": 73,
"link": [
2,
4
],
"name": "Cross Room Jump with Wall Jump",
"entranceCondition": {
"comeInJumping": {
"speedBooster": "no",
"minTiles": 1
}
},
"requires": [
"canPreciseWallJump",
"canTrickyJump",
"canCrossRoomJumpIntoWater"
],
"flashSuitChecked": true,
"blueSuitChecked": true,
"note": [
"Requires a runway of 1 tile in the adjacent room.",
"There is just enough room to wall jump after breaking the water."
]
},
{
"id": 74,
"link": [
2,
4
],
"name": "Cross Room Spring Ball Bounce",
"entranceCondition": {
"comeInWithSpringBallBounce": {
"speedBooster": "yes",
"movementType": "any",
"remoteAndLandingMinTiles": [
[
39,
1
]
]
}
},
"requires": [
"canCrossRoomJumpIntoWater"
],
"flashSuitChecked": true,
"blueSuitChecked": true
},
{
"id": 75,
"link": [
2,
4
],
"name": "Tricky Cross Room Spring Ball Bounce",
"entranceCondition": {
"comeInWithSpringBallBounce": {
"speedBooster": "yes",
"movementType": "any",
"remoteAndLandingMinTiles": [
[
34,
1
]
]
}
},
"requires": [
"canTrickyDashJump",
"canCrossRoomJumpIntoWater"
],
"flashSuitChecked": true,
"blueSuitChecked": true,
"note": [
"This requires gaining speed by running a precise distance of 34 tiles (extra run speed of $6.0 or $6.1)."
]
},
{
"id": 76,
"link": [
2,
4
],
"name": "Tricky Cross Room Spring Ball Bounce into Spring Ball Jump",
"entranceCondition": {
"comeInWithSpringBallBounce": {
"speedBooster": "yes",
"movementType": "any",
"remoteAndLandingMinTiles": [
[
6.4375,
1
]
]
}
},
"requires": [
"canTrickyDashJump",
"canDoubleSpringBallJumpMidAir",
"canCrossRoomJumpIntoWater"
],
"flashSuitChecked": true,
"blueSuitChecked": true,
"note": [
"This requires gaining speed by running a precise distance of 7 tiles (extra run speed of $2.0 or $2.1).",
"Immediately pause after the transition to unequip Spring Ball.",
"Then equip Spring Ball again and perform a mid-air spring ball jump."
]
},
{
"id": 77,
"link": [
2,
4
],
"name": "Tricky Cross Room Spring Ball Bounce into Spring Ball Jump, Leave With Temporary Blue",
"entranceCondition": {
"comeInWithBlueSpringBallBounce": {
"movementType": "any",
"minExtraRunSpeed": "$2.0",
"maxExtraRunSpeed": "$2.1"
}
},
"requires": [
"canTrickyDashJump",
"canCrossRoomJumpIntoWater",
"canPauseRemorphTemporaryBlue",
"canDoubleSpringBallJumpMidAir"
],
"exitCondition": {
"leaveWithTemporaryBlue": {}
},
"unlocksDoors": [
{
"types": [
"ammo"
],
"requires": []
}
],
"flashSuitChecked": true,
"blueSuitChecked": true,
"note": [
"Gaining blue speed with a precise amount of run speed (extra run speed of $2.0 or $2.1), and bounce through the transition.",
"After the transition, press pause, unmorph, aim down, and unequip Spring Ball.",
"Buffer a morph out of the pause.",
"Pause again to equip Spring Ball and perform a mid-air spring ball jump, chaining temporary blue to the top of the room."
]
},
{
"id": 78,
"link": [
2,
4
],
"name": "Cross Room Space Jump",
"entranceCondition": {
"comeInSpaceJumping": {
"speedBooster": "yes",
"minTiles": 10
}
},
"requires": [
"canCrossRoomJumpIntoWater"
],
"flashSuitChecked": true,
"blueSuitChecked": true
},
{
"id": 79,
"link": [
2,
4
],
"name": "Tricky Cross Room Space Jump",
"entranceCondition": {
"comeInSpaceJumping": {
"speedBooster": "yes",
"minTiles": 6.4375
}
},
"requires": [
"canTrickyDashJump",
"canCrossRoomJumpIntoWater"
],
"flashSuitChecked": true,
"blueSuitChecked": true,
"note": [
"This requires gaining speed by running a precise distance of 7 tiles (extra run speed of $2.0 or $2.1)."
]
},
{
"id": 191,
"link": [
2,
4
],
"name": "Side Platform Cross Room Jump (Hi-Jump)",
"entranceCondition": {
"comeInWithSidePlatform": {
"platforms": [
{
"minHeight": 2,
"maxHeight": 2,
"minTiles": 27.4375,
"speedBooster": "yes",
"obstructions": [
[
1,
0
]
],
"requires": [],
"note": [
"This applies to Dust Torizo Room and Halfie Climb Room."
]
},
{
"minHeight": 3,
"maxHeight": 3,
"minTiles": 39.4375,
"speedBooster": "yes",
"obstructions": [
[
3,
2
]
],
"requires": [
"canTrickyDashJump",
"canMomentumConservingTurnaround"
],
"note": [
"This applies to Metal Pirates Room."
],
"devNote": [
"FIXME: canTrickyDashJump is for difficulty placement; it doesn't really have anything to do with the non-linearity of Speed Booster jump height."
]
},
{
"minHeight": 2,
"maxHeight": 2,
"minTiles": 45,
"speedBooster": "yes",
"obstructions": [
[
3,
0
]
],
"requires": [
"canMomentumConservingMorph",
"canInsaneJump"
],
"note": [
"This applies to Statues Hallway.",
"Using the full runway (backing into the corner, with or without a single-pixel arm jump),",
"this has a 3-frame window for the jump, and a 3-frame window for the morph."
]
},
{
"minHeight": 3,
"maxHeight": 3,
"minTiles": 37.4375,
"speedBooster": "yes",
"obstructions": [
[
3,
0
]
],
"requires": [
"canMomentumConservingMorph",
"canInsaneJump"
],
"note": [
"This applies to Flyway.",
"Using the full runway, this has a 2-frame window for the jump,",
"and either a 1-frame window or 2-frame window for the morph, depending on the jump timing (last-frame jump being better)."
]
}
]
}
},
"requires": [
"HiJump",
"canCrossRoomJumpIntoWater"
],
"flashSuitChecked": true,
"blueSuitChecked": true,
"note": [
"Gain run speed using a platform below the door in the other room.",
"Jump through the door, carrying upward momentum into this room;",
"if necessary, use a momentum-conserving morph or momentum-conserving turnaround through the transition."
]
},
{
"id": 192,
"link": [
2,
4
],
"name": "Side Platform Cross Room Jump (Spring Ball Jump)",
"entranceCondition": {
"comeInWithSidePlatform": {
"platforms": [
{
"minHeight": 2,
"maxHeight": 2,
"minTiles": 27.4375,
"speedBooster": "yes",
"obstructions": [
[
1,
0
]
],
"requires": [],
"note": [
"This applies to Dust Torizo Room and Halfie Climb Room."
]
},
{
"minHeight": 2,
"maxHeight": 2,
"minTiles": 45,
"speedBooster": "yes",
"obstructions": [
[
2,
0
]
],
"requires": [
"canInsaneJump",
"canMomentumConservingMorph"
],
"note": [
"This applies to Waterway Energy Tank Room."
],
"detailNote": [
"Gain run speed, and time a pause to unequip Gravity after Samus jumps and aims down;",
"when the unpause black screen hits, press and hold down (and jump) to buffer a morph."
]
},
{
"minHeight": 3,
"maxHeight": 3,
"minTiles": 39.4375,
"speedBooster": "yes",
"obstructions": [
[
3,
2
]
],
"note": [
"This applies to Metal Pirates Room."
]
},
{
"minHeight": 2,
"maxHeight": 2,
"minTiles": 45,
"speedBooster": "yes",
"obstructions": [
[
3,
0
]
],
"requires": [
"canMomentumConservingMorph",
"canInsaneJump"
],
"note": [
"This applies to Statues Hallway.",
"Using the full runway with a single-pixel arm pump, this has a 4-frame window for the jump,",
"and between a 2-frame and 4-frame window for the morph (with later jumps giving a larger window)."
]
},
{
"minHeight": 3,
"maxHeight": 3,
"minTiles": 37.4375,
"speedBooster": "yes",
"obstructions": [
[
3,
0
]
],
"requires": [
"canMomentumConservingMorph",
"canInsaneJump"
],
"note": [
"This applies to Flyway.",
"Using the full runway, this has a 2-frame window for the jump,",
"and either a 1-frame window and 2-frame window for the morph, depending on the jump timing (last-frame jump being better)."
]
},
{
"minHeight": 2,
"maxHeight": 2,
"minTiles": 45,
"speedBooster": "yes",
"obstructions": [
[
4,
0
]
],
"requires": [
"canMomentumConservingMorph",
"canInsaneJump",
"canInsaneMidAirMorph"
],
"note": [
"This applies to Baby Kraid Room.",
"Using the full runway, this is double frame perfect:",
"it requires jumping on the last possible frame before Samus would bonk on the doorway ledge,",
"and morphing on the last possible frame before Samus would bonk the ceiling."
]
}
]
}
},
"requires": [
"canSpringBallJumpMidAir",
"canCrossRoomJumpIntoWater"
],
"flashSuitChecked": true,
"blueSuitChecked": true
},
{
"id": 136,
"link": [
2,
4
],
"name": "Use Stored Spark",
"requires": [
"h_storedSpark",
{
"or": [
{
"shinespark": {
"frames": 35,
"excessFrames": 3
}
},
{
"and": [
"HiJump",
{
"shinespark": {
"frames": 31,
"excessFrames": 3
}
}
]
},
{
"and": [
"Gravity",
{
"shinespark": {
"frames": 32,
"excessFrames": 4
}
}
]
},
{
"and": [
"Gravity",
"HiJump",
{
"shinespark": {
"frames": 27,
"excessFrames": 3
}
}
]
}
]
}
],
"flashSuitChecked": true,
"blueSuitChecked": true
},
{
"id": 84,
"link": [
2,
4
],
"name": "G-Mode Morph",
"entranceCondition": {
"comeInWithGMode": {
"mode": "any",
"morphed": true
}
},
"requires": [
"Gravity",
"h_artificialMorphLongIBJ"
],
"flashSuitChecked": true,
"blueSuitChecked": true,
"note": "To avoid the Mochtroids, it is possible to place bombs near them while in the Morph Tunnel below to the right.",
"devNote": "This strat is not starting from 5, because that would require canOffScreenMovement."
},
{
"id": 157,
"link": [
2,
4
],
"name": "Come in Shinecharging, Leave Shinecharged (Full Halfie)",
"entranceCondition": {
"comeInShinecharging": {
"length": 8,
"openEnd": 1
}
},
"requires": [
"Gravity",
"HiJump",
"canShinechargeMovementTricky",
"canFastWallJumpClimb",
{
"shineChargeFrames": 165
}
],
"exitCondition": {
"leaveShinecharged": {}
},
"unlocksDoors": [
{
"types": [
"super"
],
"requires": []
},
{
"types": [
"missiles",
"powerbomb"
],
"requires": [
"never"
]
}
],
"flashSuitChecked": true,
"blueSuitChecked": true
},
{
"id": 158,
"link": [
2,
4
],
"name": "Come in Shinecharging, Leave With Spark (Halfie)",
"entranceCondition": {
"comeInShinecharging": {
"length": 8,
"openEnd": 1
}
},
"requires": [
"Gravity",
"canShinechargeMovementTricky",
"canFastWallJumpClimb",
{
"shineChargeFrames": 150
},
{
"or": [
"HiJump",
{
"shineChargeFrames": 27
}
]
},
{
"shinespark": {
"frames": 5,
"excessFrames": 0
}
}
],
"exitCondition": {
"leaveWithSpark": {}
},
"unlocksDoors": [
{
"types": [
"super"
],
"requires": []
},
{
"types": [
"missiles",
"powerbomb"
],
"requires": [
"never"
]
}
],
"flashSuitChecked": true,
"blueSuitChecked": true
},
{
"id": 203,
"link": [
2,
4
],
"name": "Come in Shinecharging, Leave With Temporary Blue",
"entranceCondition": {
"comeInShinecharging": {
"length": 3,
"openEnd": 1
}
},
"requires": [
"HiJump",
{
"or": [
{
"and": [
"canGravityJump",
"canTrickySpringBallJump",
"canChainTemporaryBlue"
]
},
{
"and": [
"canTrickyUseFrozenEnemies",
"canLongChainTemporaryBlue"
]
}
]
}
],
"exitCondition": {
"leaveWithTemporaryBlue": {}
},
"unlocksDoors": [
{
"types": [
"ammo"
],
"requires": []
}
],
"flashSuitChecked": true,
"blueSuitChecked": true,
"devNote": [
"FIXME: Probably more of the runway could be used, but with increasing difficulty."
]
},
{
"id": 85,
"link": [
2,
4
],
"name": "Grapple Teleport Door Lock Skip",
"entranceCondition": {
"comeInWithGrappleTeleport": {
"blockPositions": [
[
12,
12
],
[
12,
13
]
]
}
},
"requires": [],
"bypassesDoorShell": "yes",
"flashSuitChecked": true,
"blueSuitChecked": true
},
{
"id": 86,
"link": [
2,
4
],
"name": "Carry Grapple Teleport (Top Position)",
"entranceCondition": {
"comeInWithGrappleTeleport": {
"blockPositions": [
[
12,
12
]
]
}
},
"requires": [],
"exitCondition": {
"leaveWithGrappleTeleport": {
"blockPositions": [
[
12,
12
]
]
}
},
"bypassesDoorShell": "yes",
"flashSuitChecked": true,
"blueSuitChecked": true
},
{
"id": 87,
"link": [
2,
4
],
"name": "Carry Grapple Teleport (Bottom Position)",
"entranceCondition": {
"comeInWithGrappleTeleport": {
"blockPositions": [
[
12,
13
]
]
}
},
"requires": [],
"exitCondition": {
"leaveWithGrappleTeleport": {
"blockPositions": [
[
12,
13
]
]
}
},
"bypassesDoorShell": "yes",
"flashSuitChecked": true,
"blueSuitChecked": true
},
{
"id": 61,
"link": [
2,
5
],
"name": "G-Mode Morph",
"entranceCondition": {
"comeInWithGMode": {
"mode": "any",
"morphed": true
}
},
"requires": [],
"flashSuitChecked": true,
"blueSuitChecked": true
},
{
"id": 197,
"link": [
2,
6
],
"name": "Come In Shinecharging (Gravity)",
"entranceCondition": {
"comeInShinecharging": {
"length": 12,
"openEnd": 0
}
},
"requires": [
"Gravity",
{
"shineChargeFrames": 0
}
],
"endsWithShineCharge": true,
"flashSuitChecked": true,
"blueSuitChecked": true
},
{
"id": 44,
"link": [
2,
6
],
"name": "Suitless Water Shinecharge",
"entranceCondition": {
"comeInShinecharging": {
"length": 4,
"openEnd": 0
}
},
"requires": [
"canWaterShineCharge",
{
"shineChargeFrames": 0
}
],
"endsWithShineCharge": true,
"flashSuitChecked": true,
"blueSuitChecked": true
},
{
"id": 46,
"link": [
2,
6
],
"name": "Precise Stutter Water Shinecharge",
"entranceCondition": {
"comeInStutterShinecharging": {
"minTiles": 2.4375
}
},
"requires": [
"canPreciseStutterWaterShineCharge",
{
"or": [
{
"enemyDamage": {
"enemy": "Mochtroid",
"type": "contact",
"hits": 2
}
},
{
"and": [
"canDodgeWhileShooting",
{
"or": [
"Wave",
"Spazer",
"Plasma",
{
"ammo": {
"type": "Missile",
"count": 1
}
},
{
"ammo": {
"type": "Super",
"count": 1
}
},
"canTrickyDodgeEnemies"
]
}
]
}
]
},
{
"shineChargeFrames": 0
}
],
"endsWithShineCharge": true,
"flashSuitChecked": true,
"blueSuitChecked": true,
"note": [
"With only a runway length of 3 tiles (closed end) in the other room, this requires a precise setup:",
"release forward for 3 or 4 frames, then repress forward on the last possible frame before the transition;",
"alternatively, release forward for 2 frames and repress forward on the second-to-last possible frame before the transition.",
"It is possible to clear the Mochtroid with Power Beam without taking damage,",
"by first firing angle up shots and then switching to angle down shots once the Mochtroid is on top of Samus."
],
"detailNote": [
"If a longer runway is available (4 tiles), the timing windows are a bit more lenient:",
"1. Release forward for 3, 4, or 5 frames, repress forward on the last possible frame;",
"2. Release forward for 2 or 3 frames, repress forward on the 2nd-to-last possible frame;",
"3. Release forward for 1 or 2 frames, repress forward on the 3rd-to-last possible frame."
]
},
{
"id": 198,
"link": [
2,
6
],
"name": "Very Precise Stutter Water Shinecharge",
"entranceCondition": {
"comeInStutterShinecharging": {
"minTiles": 2
}
},
"requires": [
"canPreciseStutterWaterShineCharge",
"canInsaneJump",
{
"or": [
{
"enemyDamage": {
"enemy": "Mochtroid",
"type": "contact",
"hits": 2
}
},
{
"and": [
"canDodgeWhileShooting",
{
"or": [
"Wave",
"Spazer",
"Plasma",
{
"ammo": {
"type": "Missile",
"count": 1
}
},
{
"ammo": {
"type": "Super",
"count": 1
}
},
"canTrickyDodgeEnemies"
]
}
]
}
]
},
{
"shineChargeFrames": 0
}
],
"endsWithShineCharge": true,
"flashSuitChecked": true,
"blueSuitChecked": true,
"note": [
"With only a runway of 2 tiles (open end) in the other room, this requires a double-frame-perfect setup:",
"release forward for exactly 3 frames, and repress forward on the last possible frame before the transition.",
"It is possible to clear the Mochtroid with Power Beam without taking damage,",
"by first firing angle up shots and then switching to angle down shots once the Mochtroid is on top of Samus."
],
"devNote": [
"FIXME: canInsaneJump is for difficulty placement; replace with a more appropriate tech since no jump is involved."
]
},
{
"id": 88,
"link": [
3,
1
],
"name": "Shinecharge through Morph Tunnel",
"requires": [
"Morph",
"Gravity",
"canShinechargeMovementComplex",
"h_shinechargeMaxRunway",
{
"shinespark": {
"frames": 15,
"excessFrames": 3
}
}
],
"flashSuitChecked": true,
"blueSuitChecked": true,
"note": [
"Charge a shinespark below the Oums, near the bottom right door, quickly move through the morph tunnel and spark up left to the middle door.",
"This is an alternative to wall jumping."
],
"devNote": "Jumping into a diagonal spark saves a little energy from both the jump and hitting the slightly lower ceiling by the door."
},
{
"id": 169,
"link": [
3,
1
],
"name": "Grapple Teleport",
"entranceCondition": {
"comeInWithGrappleTeleport": {
"blockPositions": [
[
5,
3
],
[
7,
2
]
]
}
},
"requires": [],
"flashSuitChecked": true,
"blueSuitChecked": true,
"note": [
"After teleporting, allow Samus to swing right before releasing Grapple."
]
},
{
"id": 89,
"link": [
3,
1
],
"name": "Grapple Teleport Door Lock Skip",
"entranceCondition": {
"comeInWithGrappleTeleport": {
"blockPositions": [
[
2,
18
],
[
2,
19
],
[
2,
28
],
[
2,
29
]
]
}
},
"requires": [],
"bypassesDoorShell": "yes",
"flashSuitChecked": true,
"blueSuitChecked": true
},
{
"id": 170,
"link": [
3,
1
],
"name": "Grapple Teleport Into Grapple Clip (From Moat)",
"entranceCondition": {
"comeInWithGrappleTeleport": {
"blockPositions": [
[
7,
2
]
]
}
},
"requires": [
"canGrappleClip"
],
"bypassesDoorShell": "yes",
"flashSuitChecked": true,
"blueSuitChecked": true,
"note": [
"After teleporting, release Grapple and turn around repeatedly to wiggle out to the left and fall into the air space behind the Grapple blocks.",
"Press right against the wall, angle up, use Grapple, and release to clip into the door transition."
]
},
{
"id": 171,
"link": [
3,
1
],
"name": "Grapple Teleport Into Grapple Clip (From Red Brinstar Firefleas)",
"entranceCondition": {
"comeInWithGrappleTeleport": {
"blockPositions": [
[
5,
3
]
]
}
},
"requires": [
"canInsaneJump",
"canGrappleClip"
],
"bypassesDoorShell": "yes",
"flashSuitChecked": true,
"blueSuitChecked": true,
"note": [
"After teleporting, quickly press and hold down to extend Grapple to push Samus to the left.",
"Release Grapple, and turn around repeatedly to wiggle out to the left and fall into the air space behind the Grapple blocks.",
"Press right against the wall, angle up, use Grapple, and release to clip into the door transition."
]
},
{
"id": 90,
"link": [
3,
1
],
"name": "Carry Grapple Teleport (Top Position)",
"entranceCondition": {
"comeInWithGrappleTeleport": {
"blockPositions": [
[
2,
18
]
]
}
},
"requires": [],
"exitCondition": {
"leaveWithGrappleTeleport": {
"blockPositions": [
[
2,
18
]
]
}
},
"bypassesDoorShell": "yes",
"flashSuitChecked": true,
"blueSuitChecked": true
},
{
"id": 91,
"link": [
3,
1
],
"name": "Carry Grapple Teleport (Upper Middle Position)",
"entranceCondition": {
"comeInWithGrappleTeleport": {
"blockPositions": [
[
2,
19
]
]
}
},
"requires": [],
"exitCondition": {
"leaveWithGrappleTeleport": {
"blockPositions": [
[
2,
19
]
]
}
},
"bypassesDoorShell": "yes",
"flashSuitChecked": true,
"blueSuitChecked": true
},
{
"id": 92,
"link": [
3,
1
],
"name": "Carry Grapple Teleport (Lower Middle Position)",
"entranceCondition": {
"comeInWithGrappleTeleport": {
"blockPositions": [
[
2,
28
]
]
}
},
"requires": [],
"exitCondition": {
"leaveWithGrappleTeleport": {
"blockPositions": [
[
2,
28
]
]
}
},
"bypassesDoorShell": "yes",
"flashSuitChecked": true,
"blueSuitChecked": true
},
{
"id": 93,
"link": [
3,
1
],
"name": "Carry Grapple Teleport (Bottom Position)",
"entranceCondition": {
"comeInWithGrappleTeleport": {
"blockPositions": [
[
2,
29
]
]
}
},
"requires": [],
"exitCondition": {
"leaveWithGrappleTeleport": {
"blockPositions": [
[
2,
29
]
]
}
},
"bypassesDoorShell": "yes",
"flashSuitChecked": true,
"blueSuitChecked": true
},
{
"id": 94,
"link": [
3,
2
],
"name": "Base",
"requires": [
"Morph",
"Gravity"
],
"flashSuitChecked": true,
"blueSuitChecked": true,
"note": [
"Run under the Oums to get them to all move to the right and clear the path.",
"Alternatively, it is possible to clip through them by touching them then jumping and quickly aiming down",
"before hitting the ceiling, while the Oum is rolling into Samus.",
"It is much easier to clip through them with Gravity disabled, otherwise it requires a very quick down input after jumping."
]
},
{
"id": 95,
"link": [
3,
2
],
"name": "Suitless With Jump Assist",
"requires": [
"Morph",
"canSuitlessMaridia",
{
"or": [
"canSpringBallJumpMidAir",
"HiJump"
]
}
],
"flashSuitChecked": true,
"blueSuitChecked": true,
"note": [
"Run under the Oums to get them to all move to the right and clear the path.",
"Alternatively, it is possible to clip through them by touching them then jumping and quickly aiming down",
"before hitting the ceiling, while the Oum is rolling into Samus.",
"It is much easier to clip through them with Gravity disabled, otherwise it requires a very quick down input after jumping."
]
},
{
"id": 96,
"link": [
3,
2
],
"name": "Come in Shinecharged, Shinespark from the Bottom Right",
"entranceCondition": {
"comeInShinecharged": {}
},
"requires": [
{
"shineChargeFrames": 100
},
{
"notable": "Come in Shinecharged, Shinespark from the Bottom Right"
},
"Morph",
"canSuitlessMaridia",
"canUseEnemies",
"canHorizontalShinespark",
{
"shinespark": {
"frames": 91,
"excessFrames": 4
}
}
],
"flashSuitChecked": true,
"blueSuitChecked": true,
"note": [
"Quickly shoot out the 3 shot blocks then horizontal spark breaking the speed blocks.",
"Wait for the Oums to roll on their own to a place where they can be climbed.",
"Do not stand on the Oums when they begin to attack."
]
},
{
"id": 97,
"link": [
3,
2
],
"name": "Come in Shinecharged, Shinespark from the Bottom Right (Conserve Energy)",
"entranceCondition": {
"comeInShinecharged": {}
},
"requires": [
{
"shineChargeFrames": 125
},
{
"notable": "Come in Shinecharged, Shinespark from the Bottom Right"
},
"Morph",
"canSuitlessMaridia",
"canUseEnemies",
"canShinechargeMovementComplex",
{
"shinespark": {
"frames": 70,
"excessFrames": 4
}
}
],
"flashSuitChecked": true,
"blueSuitChecked": true,
"note": [
"Quickly shoot out the 3 shot blocks then horizontal spark breaking the speed blocks.",
"Jump forward to save some health before Shinesparking",
"Wait for the Oums to roll on their own to a place where they can be climbed.",
"Do not stand on the Oums when they begin to attack."
]
},
{
"id": 98,
"link": [
3,
2
],
"name": "Long Temporary Blue Chain (Come in Blue Spinning)",
"entranceCondition": {
"comeInBlueSpinning": {
"maxExtraRunSpeed": "$3.0",
"unusableTiles": 0
}
},
"requires": [
"canLongChainTemporaryBlue",
"canStationaryLateralMidAirMorph",
"can4HighMidAirMorph",
"canUseEnemies"
],
"flashSuitChecked": true,
"blueSuitChecked": true,
"note": [
"Use temporary blue to break the speed blocks.",
"Use stationary lateral mid-air morphs to move quickly while chaining temporary blue, in order to reach the last speed blocks before the Oums.",
"Climb on the Oums to reach the left side of the room.",
"Do not stand on the Oums when they begin to attack."
],
"devNote": [
"FIXME: This strat name is not accurate since it doesn't involve a shinespark;",
"it's only this way because it shares the reusable notable.",
"FIXME: Carrying a flash suit can be possible while chaining temporary blue underwater here;",
"a speedball could also be possible to avoid the need for such a long chain."
]
},
{
"id": 99,
"link": [
3,
2
],
"name": "Long Temporary Blue Chain (Come in With Temporary Blue)",
"entranceCondition": {
"comeInWithTemporaryBlue": {}
},
"requires": [
"canLongChainTemporaryBlue",
"canStationaryLateralMidAirMorph",
"can4HighMidAirMorph",
"canUseEnemies"
],
"flashSuitChecked": true,
"blueSuitChecked": true,
"note": [
"Use temporary blue to break the speed blocks.",
"Use stationary lateral mid-air morphs to move quickly while chaining temporary blue, in order to reach the last speed blocks before the Oums.",
"Climb on the Oums to reach the left side of the room.",
"Do not stand on the Oums when they begin to attack."
]
},
{
"id": 137,
"link": [
3,
2
],
"name": "Use Stored Spark",
"requires": [
"Morph",
"canUseEnemies",
"h_storedSpark",
{
"shinespark": {
"frames": 4,
"excessFrames": 2
}
}
],
"flashSuitChecked": true,
"blueSuitChecked": true,
"note": "Go under the Oums to lure one and use it to get to the left. Shinespark to get up the next ledge."
},
{
"id": 208,
"link": [
3,
2
],
"name": "Leave With Spark",
"requires": [
"Gravity",
"Morph",
"h_shinechargeMaxRunway",
"canShinechargeMovementTricky",
{
"shinespark": {
"frames": 10,
"excessFrames": 0
}
}
],
"exitCondition": {
"leaveWithSpark": {}
},
"unlocksDoors": [
{
"types": [
"ammo"
],
"requires": []
}
],
"flashSuitChecked": true,
"blueSuitChecked": true,
"note": [
"Gain a shinecharge using the long runway on the right side of the room,",
"carry it through the morph tunnel, and spark out the door."
]
},
{
"id": 101,
"link": [
3,
2
],
"name": "Grapple Teleport Door Lock Skip",
"entranceCondition": {
"comeInWithGrappleTeleport": {
"blockPositions": [
[
2,
34
]
]
}
},
"requires": [],
"bypassesDoorShell": "yes",
"flashSuitChecked": true,
"blueSuitChecked": true
},
{
"id": 102,
"link": [
3,
2
],
"name": "Carry Grapple Teleport",
"entranceCondition": {
"comeInWithGrappleTeleport": {
"blockPositions": [
[
2,
34
]
]
}
},
"requires": [],
"exitCondition": {
"leaveWithGrappleTeleport": {
"blockPositions": [
[
2,
34
]
]
}
},
"bypassesDoorShell": "yes",
"flashSuitChecked": true,
"blueSuitChecked": true
},
{
"id": 103,
"link": [
3,
3
],
"name": "Leave with Runway",
"requires": [],
"exitCondition": {
"leaveWithRunway": {
"length": 1,
"openEnd": 1
}
},
"flashSuitChecked": true,
"blueSuitChecked": true
},
{
"id": 184,
"link": [
3,
3
],
"name": "Leave With Side Platform",
"requires": [
"Gravity"
],
"exitCondition": {
"leaveWithSidePlatform": {
"height": 2,
"runway": {
"length": 45,
"openEnd": 1
},
"obstruction": [
1,
0
]
}
},
"flashSuitChecked": true,
"blueSuitChecked": true,
"devNote": "Max extra run speed $2.D with spin, or $2.E with a quick aim-down."
},
{
"id": 104,
"link": [
3,
3
],
"name": "Leave Shinecharged",
"requires": [
"Gravity",
"canShinechargeMovement",
"h_shinechargeMaxRunway",
{
"shineChargeFrames": 30
}
],
"exitCondition": {
"leaveShinecharged": {}
},
"flashSuitChecked": true,
"blueSuitChecked": true
},
{
"id": 105,
"link": [
3,
3
],
"name": "Leave Spinning",
"requires": [
"Gravity"
],
"exitCondition": {
"leaveSpinning": {
"remoteRunway": {
"length": 45,
"openEnd": 1
}
}
},
"flashSuitChecked": true,
"blueSuitChecked": true,
"note": [
"If needing high speed, try to prevent the Oums from falling to the floor, to prevent them from blocking the runway."
]
},
{
"id": 106,
"link": [
3,
3
],
"name": "Leave With Mockball",
"requires": [
"Gravity"
],
"exitCondition": {
"leaveWithMockball": {
"remoteRunway": {
"length": 45,
"openEnd": 1
},
"landingRunway": {
"length": 1,
"openEnd": 1
}
}
},
"flashSuitChecked": true,
"blueSuitChecked": true,
"note": [
"If needing high speed, try to prevent the Oums from falling to the floor, to prevent them from blocking the runway."
]
},
{
"id": 107,
"link": [
3,
3
],
"name": "Leave With Spring Ball Bounce",
"requires": [
"Gravity"
],
"exitCondition": {
"leaveWithSpringBallBounce": {
"remoteRunway": {
"length": 45,
"openEnd": 1
},
"landingRunway": {
"length": 1,
"openEnd": 1
},
"movementType": "uncontrolled"
}
},
"flashSuitChecked": true,
"blueSuitChecked": true,
"note": [
"If needing high speed, try to prevent the Oums from falling to the floor, to prevent them from blocking the runway."
]
},
{
"id": 108,
"link": [
3,
3
],
"name": "Leave Space Jumping",
"requires": [
"Gravity"
],
"exitCondition": {
"leaveSpaceJumping": {
"remoteRunway": {
"length": 45,
"openEnd": 1
}
}
},
"flashSuitChecked": true,
"blueSuitChecked": true,
"note": [
"If needing high speed, try to prevent the Oums from falling to the floor, to prevent them from blocking the runway."
]
},
{
"id": 109,
"link": [
3,
3
],
"name": "Leave With Temporary Blue",
"requires": [
"Gravity",
"h_shinechargeMaxRunway",
"canChainTemporaryBlue"
],
"exitCondition": {
"leaveWithTemporaryBlue": {}
},
"flashSuitChecked": true,
"blueSuitChecked": true
},
{
"id": 110,
"link": [
3,
3
],
"name": "Crystal Flash",
"requires": [
"h_CrystalFlash",
{
"obstaclesNotCleared": [
"R-Mode"
]
}
],
"flashSuitChecked": true,
"blueSuitChecked": true
},
{
"id": 220,
"link": [
3,
3
],
"name": "In-Room Crystal Spark",
"requires": [
"Gravity",
"h_shinechargeMaxRunway",
"h_CrystalSpark"
],
"flashSuitChecked": true,
"blueSuitChecked": true
},
{
"id": 211,
"link": [
3,
3
],
"name": "R-Mode Entry",
"entranceCondition": {
"comeInWithRMode": {}
},
"requires": [],
"clearsObstacles": [
"R-Mode"
],
"flashSuitChecked": true,
"blueSuitChecked": true
},
{
"id": 212,
"link": [
3,
3
],
"name": "R-Mode Crystal Flash Interrupt",
"requires": [
{
"obstaclesCleared": [
"R-Mode"
]
},
"canRModeCrystalFlashInterrupt",
{
"ammo": {
"type": "Missile",
"count": 10
}
},
{
"or": [
{
"tech": "canComplexRModeCrystalFlashInterrupt"
},
{
"ammo": {
"type": "Super",
"count": 10
}
}
]
},
{
"or": [
"h_fullEnemyDamageReduction",
{
"and": [
"h_partialEnemyDamageReduction",
{
"resourceAtMost": [
{
"type": "RegularEnergy",
"count": 49
}
]
}
]
},
{
"and": [
{
"resourceCapacity": [
{
"type": "RegularEnergy",
"count": 199
}
]
},
{
"resourceCapacity": [
{
"type": "ReserveEnergy",
"count": 199
}
]
}
]
}
]
}
],
"resetsObstacles": [
"R-Mode"
],
"flashSuitChecked": true,
"blueSuitChecked": true,
"note": [
"Time the Crystal Flash so that the Oum can hit Samus.",
"This is fairly lenient, but one method is to Crystal Flash near the shot block pillar while the Oum is to the right of Samus, near the door."
]
},
{
"id": 213,
"link": [
3,
3
],
"name": "Direct G-mode Morph, Crystal Flash Interrupt",
"entranceCondition": {
"comeInWithGMode": {
"mode": "direct",
"morphed": true
}
},
"requires": [
{
"or": [
{
"and": [
"HiJump",
"h_artificialMorphSpringBall"
]
},
{
"and": [
"Gravity",
"h_artificialMorphIBJ"
]
},
"h_artificialMorphUnderwaterBombIntoSpringBallJump"
]
},
"h_artificialMorphRModeCrystalFlashInterrupt",
{
"ammo": {
"type": "Missile",
"count": 10
}
},
{
"or": [
{
"tech": "canComplexRModeCrystalFlashInterrupt"
},
{
"ammo": {
"type": "Super",
"count": 10
}
}
]
},
{
"or": [
"h_fullEnemyDamageReduction",
{
"and": [
"h_partialEnemyDamageReduction",
{
"resourceAtMost": [
{
"type": "RegularEnergy",
"count": 49
}
]
}
]
},
{
"and": [
{
"resourceCapacity": [
{
"type": "RegularEnergy",
"count": 199
}
]
},
{
"resourceCapacity": [
{
"type": "ReserveEnergy",
"count": 199
}
]
}
]
}
]
}
],
"flashSuitChecked": true,
"blueSuitChecked": true,
"note": [
"Climb up and lure and Oum to the right pit, then time the Crystal Flash so that the Oum can hit Samus.",
"This is fairly lenient, but one method is to Crystal Flash near the shot block pillar while the Oum is to the right of Samus moving right.",
"With some testing, it seemed like the Oum was more likely to hit Samus when it is moving to the left."
],
"detailNote": [
"This is possible with a Bomb into Spring Ball jump using a precisely timed bomb boost",
"to propel Samus upward just long enough to get the mid-air Spring Ball jump."
],
"devNote": [
"It is possible to enter with G-mode for the left side of the room and do this off-camera, but it is unreasonably difficult."
]
},
{
"id": 111,
"link": [
3,
4
],
"name": "Shinecharge through Morph Tunnel",
"requires": [
"Morph",
"Gravity",
"canShinechargeMovementComplex",
"h_shinechargeMaxRunway",
{
"shinespark": {
"frames": 33,
"excessFrames": 3
}
}
],
"flashSuitChecked": true,
"blueSuitChecked": true,
"note": [
"Charge a shinespark below the Oums, near the bottom right door, quickly move through the morph tunnel and spark up to the top door.",
"This is an alternative to wall jumping."
],
"devNote": "Jumping into a diagonal spark saves a little energy from both the jump and hitting the slightly lower ceiling by the door."
},
{
"id": 113,
"link": [
3,
4
],
"name": "Grapple Teleport",
"entranceCondition": {
"comeInWithGrappleTeleport": {
"blockPositions": [
[
5,
3
],
[
7,
2
]
]
}
},
"requires": [],
"flashSuitChecked": true,
"blueSuitChecked": true
},
{
"id": 100,
"link": [
3,
5
],
"name": "G-Mode Morph",
"entranceCondition": {
"comeInWithGMode": {
"mode": "any",
"morphed": true
}
},
"requires": [
{
"or": [
{
"and": [
"Gravity",
"h_artificialMorphIBJ"
]
},
{
"and": [
"h_artificialMorphSpringBall",
{
"or": [
"Gravity",
"HiJump"
]
}
]
}
]
}
],
"flashSuitChecked": true,
"blueSuitChecked": true
},
{
"id": 185,
"link": [
3,
5
],
"name": "G-Mode Morph, Bomb Into Spring Ball Jump",
"entranceCondition": {
"comeInWithGMode": {
"mode": "any",
"morphed": true
}
},
"requires": [
"h_artificialMorphUnderwaterBombIntoSpringBallJump"
],
"flashSuitChecked": true,
"blueSuitChecked": true,
"note": [
"Perform a double Spring Ball jump using a precisely timed bomb boost",
"to propel Samus upward just long enough to get the mid-air Spring Ball jump.",
"This needs to be done twice to cross the room and get through the morph tunnel."
]
},
{
"id": 114,
"link": [
4,
1
],
"name": "Base",
"requires": [],
"flashSuitChecked": true,
"blueSuitChecked": true
},
{
"id": 159,
"link": [
4,
1
],
"name": "Carry Shinecharge (Gravity)",
"entranceCondition": {
"comeInShinecharged": {}
},
"requires": [
{
"shineChargeFrames": 110
},
"Gravity",
"canShinechargeMovementComplex"
],
"exitCondition": {
"leaveShinecharged": {}
},
"unlocksDoors": [
{
"types": [
"super"
],
"requires": []
},
{
"types": [
"missiles",
"powerbomb"
],
"requires": [
"never"
]
}
],
"flashSuitChecked": true,
"blueSuitChecked": true
},
{
"id": 160,
"link": [
4,
1
],
"name": "Carry Shinecharge (Suitless)",
"entranceCondition": {
"comeInShinecharged": {}
},
"requires": [
{
"shineChargeFrames": 115
},
"canShinechargeMovementComplex"
],
"exitCondition": {
"leaveShinecharged": {}
},
"unlocksDoors": [
{
"types": [
"super"
],
"requires": []
},
{
"types": [
"missiles",
"powerbomb"
],
"requires": [
"never"
]
}
],
"flashSuitChecked": true,
"blueSuitChecked": true
},
{
"id": 161,
"link": [
4,
1
],
"name": "Come in Shinecharged, Leave With Spark (Bottom Position, Close Spark)",
"entranceCondition": {
"comeInShinecharged": {}
},
"requires": [
{
"shineChargeFrames": 95
},
"canShinechargeMovementComplex",
{
"shinespark": {
"frames": 4,
"excessFrames": 0
}
}
],
"exitCondition": {
"leaveWithSpark": {
"position": "bottom"
}
},
"unlocksDoors": [
{
"types": [
"super"
],
"requires": []
},
{
"types": [
"missiles",
"powerbomb"
],
"requires": [
"never"
]
}
],
"flashSuitChecked": true,
"blueSuitChecked": true,
"note": [
"Run off the ledge, fire a shot horizontally to open the door, and spark after landing."
]
},
{
"id": 162,
"link": [
4,
1
],
"name": "Come in Shinecharged, Leave With Spark (Bottom Position, Distant Spark)",
"entranceCondition": {
"comeInShinecharged": {}
},
"requires": [
{
"shineChargeFrames": 85
},
"canShinechargeMovementComplex",
{
"shinespark": {
"frames": 10,
"excessFrames": 0
}
}
],
"exitCondition": {
"leaveWithSpark": {
"position": "bottom"
}
},
"unlocksDoors": [
{
"types": [
"super"
],
"requires": []
},
{
"types": [
"missiles",
"powerbomb"
],
"requires": [
"never"
]
}
],
"flashSuitChecked": true,
"blueSuitChecked": true,
"note": [
"Spin jump, fire a shot diagonally down to open the door, and spark mid-air."
]
},
{
"id": 163,
"link": [
4,
1
],
"name": "Come in Shinecharged, Leave With Spark (Top Position, Close Spark)",
"entranceCondition": {
"comeInShinecharged": {}
},
"requires": [
{
"shineChargeFrames": 85
},
"canShinechargeMovementComplex",
{
"shinespark": {
"frames": 4,
"excessFrames": 0
}
}
],
"exitCondition": {
"leaveWithSpark": {
"position": "top"
}
},
"unlocksDoors": [
{
"types": [
"super"
],
"requires": []
},
{
"types": [
"missiles",
"powerbomb"
],
"requires": [
"never"
]
}
],
"flashSuitChecked": true,
"blueSuitChecked": true
},
{
"id": 164,
"link": [
4,
1
],
"name": "Come in Shinecharged, Leave With Spark (Top Position, Distant Spark)",
"entranceCondition": {
"comeInShinecharged": {}
},
"requires": [
{
"shineChargeFrames": 75
},
"canShinechargeMovementComplex",
{
"shinespark": {
"frames": 10,
"excessFrames": 0
}
}
],
"exitCondition": {
"leaveWithSpark": {
"position": "top"
}
},
"unlocksDoors": [
{
"types": [
"super"
],
"requires": []
},
{
"types": [
"missiles",
"powerbomb"
],
"requires": [
"never"
]
}
],
"flashSuitChecked": true,
"blueSuitChecked": true
},
{
"id": 115,
"link": [
4,
1
],
"name": "Come in Shinecharging, Leave With Temporary Blue (Spring Fling)",
"entranceCondition": {
"comeInShinecharging": {
"length": 0,
"openEnd": 1
}
},
"requires": [
"canSuitlessMaridia",
"canChainTemporaryBlue",
"canSpringFling"
],
"exitCondition": {
"leaveWithTemporaryBlue": {}
},
"unlocksDoors": [
{
"types": [
"ammo"
],
"requires": []
}
],
"flashSuitChecked": true,
"blueSuitChecked": true
},
{
"id": 204,
"link": [
4,
1
],
"name": "Come in Blue Spinning, Leave With Temporary Blue (Low Speed)",
"entranceCondition": {
"comeInBlueSpinning": {
"maxExtraRunSpeed": "$1.8",
"unusableTiles": 1
}
},
"requires": [
"canSuitlessMaridia",
"canInsaneJump",
"canChainTemporaryBlue"
],
"exitCondition": {
"leaveWithTemporaryBlue": {}
},
"unlocksDoors": [
{
"types": [
"ammo"
],
"requires": []
}
],
"flashSuitChecked": true,
"blueSuitChecked": true
},
{
"id": 116,
"link": [
4,
1
],
"name": "Grapple Teleport Door Lock Skip",
"entranceCondition": {
"comeInWithGrappleTeleport": {
"blockPositions": [
[
2,
18
],
[
2,
19
],
[
2,
28
],
[
2,
29
]
]
}
},
"requires": [],
"bypassesDoorShell": "yes",
"flashSuitChecked": true,
"blueSuitChecked": true
},
{
"id": 172,
"link": [
4,
1
],
"name": "Grapple Teleport Into Grapple Clip (From Moat)",
"entranceCondition": {
"comeInWithGrappleTeleport": {
"blockPositions": [
[
7,
2
]
]
}
},
"requires": [
"canGrappleClip"
],
"bypassesDoorShell": "yes",
"flashSuitChecked": true,
"blueSuitChecked": true,
"note": [
"After teleporting, release Grapple and turn around repeatedly to wiggle out to the left and fall into the air space behind the Grapple blocks.",
"Press right against the wall, angle up, use Grapple, and release to clip into the door transition."
]
},
{
"id": 173,
"link": [
4,
1
],
"name": "Grapple Teleport Into Grapple Clip (From Red Brinstar Firefleas)",
"entranceCondition": {
"comeInWithGrappleTeleport": {
"blockPositions": [
[
5,
3
]
]
}
},
"requires": [
"canInsaneJump",
"canGrappleClip"
],
"bypassesDoorShell": "yes",
"flashSuitChecked": true,
"blueSuitChecked": true,
"note": [
"After teleporting, quickly press and hold down to extend Grapple to push Samus to the left.",
"Release Grapple, and turn around repeatedly to wiggle out to the left and fall into the air space behind the Grapple blocks.",
"Press right against the wall, angle up, use Grapple, and release to clip into the door transition."
]
},
{
"id": 117,
"link": [
4,
1
],
"name": "Carry Grapple Teleport (Top Position)",
"entranceCondition": {
"comeInWithGrappleTeleport": {
"blockPositions": [
[
2,
18
]
]
}
},
"requires": [],
"exitCondition": {
"leaveWithGrappleTeleport": {
"blockPositions": [
[
2,
18
]
]
}
},
"bypassesDoorShell": "yes",
"flashSuitChecked": true,
"blueSuitChecked": true
},
{
"id": 118,
"link": [
4,
1
],
"name": "Carry Grapple Teleport (Upper Middle Position)",
"entranceCondition": {
"comeInWithGrappleTeleport": {
"blockPositions": [
[
2,
19
]
]
}
},
"requires": [],
"exitCondition": {
"leaveWithGrappleTeleport": {
"blockPositions": [
[
2,
19
]
]
}
},
"bypassesDoorShell": "yes",
"flashSuitChecked": true,
"blueSuitChecked": true
},
{
"id": 119,
"link": [
4,
1
],
"name": "Carry Grapple Teleport (Lower Middle Position)",
"entranceCondition": {
"comeInWithGrappleTeleport": {
"blockPositions": [
[
2,
28
]
]
}
},
"requires": [],
"exitCondition": {
"leaveWithGrappleTeleport": {
"blockPositions": [
[
2,
28
]
]
}
},
"bypassesDoorShell": "yes",
"flashSuitChecked": true,
"blueSuitChecked": true
},
{
"id": 120,
"link": [
4,
1
],
"name": "Carry Grapple Teleport (Bottom Position)",
"entranceCondition": {
"comeInWithGrappleTeleport": {
"blockPositions": [
[
2,
29
]
]
}
},
"requires": [],
"exitCondition": {
"leaveWithGrappleTeleport": {
"blockPositions": [
[
2,
29
]
]
}
},
"bypassesDoorShell": "yes",
"flashSuitChecked": true,
"blueSuitChecked": true
},
{
"id": 165,
"link": [
4,
2
],
"name": "Come in Shinecharging, Leave Shinecharged (Gravity)",
"entranceCondition": {
"comeInShinecharging": {
"length": 2,
"openEnd": 1
}
},
"requires": [
"Gravity",
"canShinechargeMovementComplex",
{
"shineChargeFrames": 150
}
],
"exitCondition": {
"leaveShinecharged": {}
},
"unlocksDoors": [
{
"types": [
"super"
],
"requires": []
},
{
"types": [
"missiles",
"powerbomb"
],
"requires": [
"never"
]
}
],
"flashSuitChecked": true,
"blueSuitChecked": true
},
{
"id": 166,
"link": [
4,
2
],
"name": "Come in Shinecharging, Leave Shinecharged (Suitless)",
"entranceCondition": {
"comeInShinecharging": {
"length": 1,
"openEnd": 0
}
},
"requires": [
"canShinechargeMovementComplex",
{
"shineChargeFrames": 155
}
],
"exitCondition": {
"leaveShinecharged": {}
},
"unlocksDoors": [
{
"types": [
"super"
],
"requires": []
},
{
"types": [
"missiles",
"powerbomb"
],
"requires": [
"never"
]
}
],
"flashSuitChecked": true,
"blueSuitChecked": true
},
{
"id": 167,
"link": [
4,
2
],
"name": "Come in Shinecharged, Leave With Spark (Top Position)",
"entranceCondition": {
"comeInShinecharged": {}
},
"requires": [
{
"shineChargeFrames": 130
},
"canShinechargeMovementComplex",
{
"shinespark": {
"frames": 4,
"excessFrames": 0
}
}
],
"exitCondition": {
"leaveWithSpark": {
"position": "top"
}
},
"unlocksDoors": [
{
"types": [
"super"
],
"requires": []
},
{
"types": [
"missiles",
"powerbomb"
],
"requires": [
"never"
]
}
],
"flashSuitChecked": true,
"blueSuitChecked": true
},
{
"id": 168,
"link": [
4,
2
],
"name": "Come in Shinecharged, Leave With Spark (Bottom Position)",
"entranceCondition": {
"comeInShinecharged": {}
},
"requires": [
{
"shineChargeFrames": 145
},
"canShinechargeMovementComplex",
{
"shinespark": {
"frames": 4,
"excessFrames": 0
}
}
],
"exitCondition": {
"leaveWithSpark": {
"position": "top"
}
},
"unlocksDoors": [
{
"types": [
"super"
],
"requires": []
},
{
"types": [
"missiles",
"powerbomb"
],
"requires": [
"never"
]
}
],
"flashSuitChecked": true,
"blueSuitChecked": true
},
{
"id": 121,
"link": [
4,
2
],
"name": "Come in Shinecharging, Leave With Temporary Blue",
"entranceCondition": {
"comeInShinecharging": {
"length": 0,
"openEnd": 1
}
},
"requires": [
"canSuitlessMaridia",
"canChainTemporaryBlue"
],
"exitCondition": {
"leaveWithTemporaryBlue": {}
},
"unlocksDoors": [
{
"types": [
"ammo"
],
"requires": []
}
],
"flashSuitChecked": true,
"blueSuitChecked": true
},
{
"id": 122,
"link": [
4,
2
],
"name": "Grapple Teleport Door Lock Skip",
"entranceCondition": {
"comeInWithGrappleTeleport": {
"blockPositions": [
[
2,
34
]
]
}
},
"requires": [],
"bypassesDoorShell": "yes",
"flashSuitChecked": true,
"blueSuitChecked": true
},
{
"id": 123,
"link": [
4,
2
],
"name": "Carry Grapple Teleport",
"entranceCondition": {
"comeInWithGrappleTeleport": {
"blockPositions": [
[
2,
34
]
]
}
},
"requires": [],
"exitCondition": {
"leaveWithGrappleTeleport": {
"blockPositions": [
[
2,
34
]
]
}
},
"bypassesDoorShell": "yes",
"flashSuitChecked": true,
"blueSuitChecked": true
},
{
"id": 125,
"link": [
4,
4
],
"name": "Leave with Runway",
"requires": [],
"exitCondition": {
"leaveWithRunway": {
"length": 3,
"openEnd": 1
}
},
"flashSuitChecked": true,
"blueSuitChecked": true
},
{
"id": 126,
"link": [
4,
4
],
"name": "Leave With Runway - Frozen Mochtroid",
"requires": [
"h_navigateUnderwater",
"h_frozenEnemyRunway",
{
"or": [
"canMochtroidIceClimb",
{
"and": [
"Gravity",
{
"or": [
"SpaceJump",
"canWallJump"
]
}
]
}
]
},
{
"enemyDamage": {
"enemy": "Mochtroid",
"type": "contact",
"hits": 2
}
}
],
"exitCondition": {
"leaveWithRunway": {
"length": 4,
"openEnd": 1
}
},
"flashSuitChecked": true,
"blueSuitChecked": true,
"note": [
"Use a frozen Mochtroid to extend the length of the runway.",
"Positioning the Mochtroid can be done by dropping down below then climbing back up with the frozen Mochtroid as a platform.",
"Alternatively, freeze the Mochtroid with an angle-down shot while falling below then quickly climb back up."
],
"devNote": "There are many other ways to get into position, but they would require manipulating the Mochtroid as much as canMochtroidIceClimb expects."
},
{
"id": 207,
"link": [
4,
4
],
"name": "Mochtroid Farm (1 Mochtroid)",
"requires": [
{
"resetRoom": {
"nodes": [
4
]
}
},
{
"or": [
{
"and": [
"Grapple",
{
"cycleFrames": 80
}
]
},
{
"and": [
"Plasma",
{
"cycleFrames": 80
}
]
},
{
"and": [
"ScrewAttack",
{
"cycleFrames": 80
}
]
},
{
"and": [
{
"haveBlueSuit": {}
},
{
"cycleFrames": 80
}
]
},
{
"and": [
"Wave",
{
"cycleFrames": 85
}
]
},
{
"and": [
"Spazer",
{
"cycleFrames": 90
}
]
},
{
"and": [
"canDodgeWhileShooting",
{
"cycleFrames": 120
}
]
}
]
}
],
"resetsObstacles": [
"R-Mode"
],
"farmCycleDrops": [
{
"enemy": "Mochtroid",
"count": 1
}
],
"flashSuitChecked": true,
"blueSuitChecked": true
},
{
"id": 127,
"link": [
4,
4
],
"name": "Crystal Flash",
"requires": [
"h_CrystalFlash",
{
"obstaclesNotCleared": [
"R-Mode"
]
}
],
"flashSuitChecked": true,
"blueSuitChecked": true
},
{
"id": 128,
"link": [
4,
4
],
"name": "G-Mode Setup - Get Hit By Mochtroid",
"requires": [],
"exitCondition": {
"leaveWithGModeSetup": {
"knockback": false
}
},
"flashSuitChecked": true,
"blueSuitChecked": true,
"note": "In the case of carrying a blue suit, it is possible to inch forward a pixel or two at a time using X-Ray without destroying the Mochtroid."
},
{
"id": 174,
"link": [
4,
4
],
"name": "Carry G-Mode Back through the Door",
"entranceCondition": {
"comeInWithGMode": {
"mode": "direct",
"morphed": false
}
},
"requires": [
"h_doorImmediatelyClosedFix"
],
"exitCondition": {
"leaveWithGMode": {
"morphed": false
}
},
"bypassesDoorShell": "free",
"flashSuitChecked": true,
"blueSuitChecked": true
},
{
"id": 175,
"link": [
4,
4
],
"name": "Carry G-Mode Morph Back through the Door",
"entranceCondition": {
"comeInWithGMode": {
"mode": "direct",
"morphed": true
}
},
"requires": [
"h_doorImmediatelyClosedFix"
],
"exitCondition": {
"leaveWithGMode": {
"morphed": true
}
},
"bypassesDoorShell": "free",
"flashSuitChecked": true,
"blueSuitChecked": true
},
{
"id": 214,
"link": [
4,
4
],
"name": "R-Mode Entry",
"entranceCondition": {
"comeInWithRMode": {}
},
"requires": [],
"clearsObstacles": [
"R-Mode"
],
"flashSuitChecked": true,
"blueSuitChecked": true
},
{
"id": 129,
"link": [
4,
4
],
"name": "Leave With Grapple Teleport (Bottom Position)",
"requires": [
"Gravity",
"canGrappleBombHang",
"h_bombThings"
],
"exitCondition": {
"leaveWithGrappleTeleport": {
"blockPositions": [
[
12,
13
]
]
}
},
"flashSuitChecked": true,
"blueSuitChecked": true,
"note": [
"Get a boost from a Bomb or Power Bomb while grappled to the second Grapple block below the door;",
"Samus will enter a 'glitched grapple hanging' state where Samus' graphics will appear corrupted while swinging with Grapple.",
"Press jump to get a good bounce off the wall at the bottom of the swing, making it possible to swing up to the door.",
"Heavy lag can typically be avoided by holding right during the bottom half of the swing.",
"Pressing right while inside the transition tiles will trigger the transition.",
"Continue holding Grapple through the transition to initiate a teleport in the next room.",
"If it is needed to trigger the transition further to the right (at position $EE), then wait to come to a stop before pressing right.",
"If it is needed to trigger the transition further to the left (positions $EB or $ED), then hold right while approaching the door.",
"Either way, Samus should automatically be able to stand in the next room (e.g. for an X-Ray climb)."
]
},
{
"id": 130,
"link": [
4,
4
],
"name": "Leave With Grapple Teleport (Top Position)",
"requires": [
"Gravity",
"canGrappleBombHang",
"h_bombThings"
],
"exitCondition": {
"leaveWithGrappleTeleport": {
"blockPositions": [
[
12,
12
]
]
}
},
"flashSuitChecked": true,
"blueSuitChecked": true,
"note": [
"Get a boost from a Bomb or Power Bomb while grappled to the top Grapple block below the door;",
"alternatively, do a grapple wall jump instant morph from the third Grapple block, frame-perfect unmorph and grapple to clip a pixel inside the second Grapple block (at vertical position $CF), then crouch and grapple to the second block.",
"Samus will enter a 'glitched grapple hanging' state where Samus' graphics will appear corrupted while swinging with Grapple.",
"Press jump to get a good bounce off the wall at the bottom of the swing, making it possible to swing up to the door.",
"Heavy lag can typically be avoided by holding right during the bottom half of the swing.",
"While swinging up, tap up to retract Grapple to avoid the ceiling (or tap up after after coming to rest against the ceiling if this happens).",
"Samus should usually come to a stop one tile in front of the door (at horizontal position $D7).",
"Roll from pressing right to pressing diagonally down-right to enter the transition.",
"If it is needed for Samus to be able to stand in the next room, then only briefly press diagonally down-right and then press up, bringing Samus to a stop at position $E1 or $E3;",
"then roll from right to down-right to enter the transition (at horizontal positon $EB)."
]
},
{
"id": 131,
"link": [
4,
4
],
"name": "Leave With Grapple Teleport (Unmorph, Bottom Position)",
"requires": [
"Gravity",
"canUnmorphGrappleHang"
],
"exitCondition": {
"leaveWithGrappleTeleport": {
"blockPositions": [
[
12,
13
]
]
}
},
"flashSuitChecked": true,
"blueSuitChecked": true,
"note": [
"Grapple to the sixth Grapple block below the door (the second one fully above the water line), jump off from it, morph, and press against the wal to the right.",
"Unmorph slightly before the peak of the jump (a 3-frame window), then immediately use grapple (a 2-frame window) to get stuck standing a pixel inside the second Grapple block.",
"Then jump (to force crouch), angle down, and grapple.",
"Samus will enter a 'glitched grapple hanging' state where Samus' graphics will appear corrupted while swinging with Grapple.",
"Press jump to get a good bounce off the wall at the bottom of the swing, making it possible to swing up to the door.",
"To minimize lag, when grapple is extended horizontally release all inputs other than shot/grapple; there will still be a bit of unavoidable lag while Grapple is initially extending.",
"Try to get a good first bounce; otherwise heavy lag may be difficult to avoid, and it may be better to retry from the beginning.",
"Pressing right while inside the transition tiles will trigger the transition.",
"Continue holding Grapple through the transition to initiate a teleport in the next room.",
"If it is needed to trigger the transition further to the right (at position $EE), then wait to come to a stop before pressing right.",
"If it is needed to trigger the transition further to the left (positions $EB or $ED), then hold right while approaching the door.",
"Either way, Samus should automatically be able to stand in the next room (e.g. for an X-Ray climb)."
]
},
{
"id": 132,
"link": [
4,
4
],
"name": "Leave With Grapple Teleport (Unmorph, Top Position)",
"requires": [
"Gravity",
"canUnmorphGrappleHang"
],
"exitCondition": {
"leaveWithGrappleTeleport": {
"blockPositions": [
[
12,
12
]
]
}
},
"flashSuitChecked": true,
"blueSuitChecked": true,
"note": [
"Grapple to the fifth Grapple block below the door (the third one fully above the water line), jump off from it, and morph.",
"Unmorph slightly before the peak of the jump (a 3-frame window), then immediately use grapple (a 2-frame window) to get stuck standing a pixel inside the second Grapple block.",
"Then jump (to force crouch), angle down, and grapple.",
"Samus will enter a 'glitched grapple hanging' state where Samus' graphics will appear corrupted while swinging with Grapple.",
"Press jump to get a good bounce off the wall at the bottom of the swing, making it possible to swing up to the door.",
"To minimize lag, when grapple is extended horizontally release all inputs other than shot/grapple; there will still be a bit of unavoidable lag while Grapple is initially extending.",
"Try to get a good first bounce; otherwise heavy lag may be difficult to avoid, and it may be better to retry from the beginning.",
"While swinging up, tap up to retract Grapple to avoid the ceiling (or tap up after after coming to rest against the ceiling if this happens).",
"Samus should usually come to a stop one tile in front of the door (at horizontal position $D7).",
"Roll from pressing right to pressing diagonally down-right to enter the transition.",
"If it is needed for Samus to be able to stand in the next room, then only briefly press diagonally down-right and then press up, bringing Samus to a stop at position $E1 or $E3;",
"then roll from right to down-right to enter the transition (at horizontal positon $EB)."
]
},
{
"id": 180,
"link": [
4,
4
],
"name": "Leave With Grapple Teleport (Frozen Mochtroid, Bottom Position)",
"requires": [
"Gravity",
"canFrozenEnemyGrappleHang"
],
"exitCondition": {
"leaveWithGrappleTeleport": {
"blockPositions": [
[
12,
13
]
]
}
},
"flashSuitChecked": true,
"blueSuitChecked": true,
"note": [
"Freeze a Mochtroid at a specific position, aiming for its top to be slightly above the midpoint of the fourth Grapple block below the door.",
"Stand on the frozen Mochtroid, and fire Grapple horizontally while walking toward the wall.",
"If successful, Samus should clip slightly into the wall.",
"Crouch, and fire Grapple while angling up.",
"Samus will enter a 'glitched grapple hanging' state where Samus' graphics will appear corrupted while swinging with Grapple.",
"Press jump to get a good bounce off the wall at the bottom of the swing, making it possible to swing up to the door.",
"To minimize lag, when grapple is extended horizontally release all inputs other than shot/grapple; there will still be a bit of unavoidable lag while Grapple is initially extending.",
"Try to get a good first bounce; otherwise heavy lag may be difficult to avoid, and it may be better to retry from the beginning.",
"Pressing right while inside the transition tiles will trigger the transition.",
"Continue holding Grapple through the transition to initiate a teleport in the next room.",
"If it is needed to trigger the transition further to the right (at position $EE), then wait to come to a stop before pressing right.",
"If it is needed to trigger the transition further to the left (positions $EB or $ED), then hold right while approaching the door.",
"Either way, Samus should automatically be able to stand in the next room (e.g. for an X-Ray climb)."
]
},
{
"id": 181,
"link": [
4,
4
],
"name": "Leave With Grapple Teleport (Frozen Mochtroid, Top Position)",
"requires": [
"Gravity",
"canFrozenEnemyGrappleHang"
],
"exitCondition": {
"leaveWithGrappleTeleport": {
"blockPositions": [
[
12,
12
]
]
}
},
"flashSuitChecked": true,
"blueSuitChecked": true,
"note": [
"Freeze a Mochtroid at a specific position, aiming for its top to be slightly above the midpoint of the third Grapple block below the door.",
"Stand on the frozen Mochtroid, and fire Grapple horizontally while walking toward the wall.",
"If successful, Samus should clip slightly into the wall.",
"Crouch, and fire Grapple while angling up.",
"Samus will enter a 'glitched grapple hanging' state where Samus' graphics will appear corrupted while swinging with Grapple.",
"Press jump to get a good bounce off the wall at the bottom of the swing, making it possible to swing up to the door.",
"To minimize lag, when grapple is extended horizontally release all inputs other than shot/grapple; there will still be a bit of unavoidable lag while Grapple is initially extending.",
"Try to get a good first bounce; otherwise heavy lag may be difficult to avoid, and it may be better to retry from the beginning.",
"While swinging up, tap up to retract Grapple to avoid the ceiling (or tap up after after coming to rest against the ceiling if this happens).",
"Samus should usually come to a stop one tile in front of the door (at horizontal position $D7).",
"Roll from pressing right to pressing diagonally down-right to enter the transition.",
"If it is needed for Samus to be able to stand in the next room, then only briefly press diagonally down-right and then press up, bringing Samus to a stop at position $E1 or $E3;",
"then roll from right to down-right to enter the transition (at horizontal positon $EB)."
]
},
{
"id": 124,
"link": [
4,
5
],
"name": "G-Mode Morph",
"entranceCondition": {
"comeInWithGMode": {
"mode": "any",
"morphed": true
}
},
"requires": [
{
"or": [
"canTrickyDodgeEnemies",
"Gravity",
{
"enemyDamage": {
"enemy": "Mochtroid",
"type": "contact",
"hits": 1
}
}
]
}
],
"flashSuitChecked": true,
"blueSuitChecked": true,
"note": [
"Kill the bottom Mochtroid with Bombs or a Power Bomb, roll into the tunnel with Gravity, or avoid it with nothing.",
"With no items, move left and cross about half way across the room before switching back to the right.",
"This will make the Mochtroid move left and give Samus enough time to get to the morph tunnel without taking a hit."
]
},
{
"id": 186,
"link": [
5,
3
],
"name": "G-Mode Morph, Jump Assist",
"requires": [
"canGMode",
"canOffScreenMovement",
{
"or": [
"Gravity",
"HiJump",
"canSunkenTileWideWallClimb"
]
}
],
"flashSuitChecked": true,
"blueSuitChecked": true,
"note": [
"Roll through the camera scroll blocks in the morph tunnel to overload PLMs then the speed blocks can be walked through.",
"Note that the Oums are still active and dangerous off screen. The right shot block wall can be broken with a wide beam, otherwise it is important to crouch to shoot the bottom block."
]
},
{
"id": 187,
"link": [
5,
3
],
"name": "G-Mode, Blind Foosball",
"requires": [
"canGMode",
"canOffScreenMovement",
"canInsaneJump",
"h_artificialMorphSpringBall"
],
"flashSuitChecked": true,
"blueSuitChecked": true,
"note": [
"Roll through the camera scroll blocks in the morph tunnel to overload PLMs then the speed blocks can be walked through.",
"Perform a blind foosball - use the screen movement to be able to tell when Samus is in the morph tunnel and when she makes the jump.",
"Note that the Oums are still active and dangerous off screen. The right shot block wall can be broken with a wide beam, otherwise it is important to crouch to shoot the bottom block."
]
},
{
"id": 188,
"link": [
5,
4
],
"name": "G-Mode Morph, Long Blind IBJ",
"requires": [
"canGMode",
"Gravity",
"h_artificialMorphLongIBJ",
"canOffScreenMovement"
],
"flashSuitChecked": true,
"blueSuitChecked": true
},
{
"id": 189,
"link": [
5,
4
],
"name": "G-Mode Morph, Gravity Jump, Spring Ball Jump",
"requires": [
"canComplexGMode",
"canGravityJump",
"HiJump",
{
"tech": "canSpringBallJumpMidAir"
},
"h_artificialMorphSpringBall"
],
"flashSuitChecked": true,
"blueSuitChecked": true,
"note": [
"Climb the room with a Gravity jump + Spring Ball jump. Turn off Spring Ball and Gravity at the same time, then repause after a short delay and turn Spring back on.",
"If coming from the right, Samus will be off camera."
]
},
{
"id": 199,
"link": [
6,
1
],
"name": "Shinespark",
"startsWithShineCharge": true,
"requires": [
{
"shineChargeFrames": 70
},
{
"or": [
{
"shinespark": {
"frames": 20,
"excessFrames": 3
}
},
{
"and": [
"canMidairShinespark",
{
"shinespark": {
"frames": 17,
"excessFrames": 3
}
}
]
},
{
"and": [
"HiJump",
"canMidairShinespark",
{
"shinespark": {
"frames": 13,
"excessFrames": 3
}
}
]
}
]
}
],
"flashSuitChecked": true,
"blueSuitChecked": true
},
{
"id": 200,
"link": [
6,
1
],
"name": "Leave With Temporary Blue",
"startsWithShineCharge": true,
"requires": [
"h_shinechargeMaxRunway",
{
"shineChargeFrames": 0
},
"canXRayTurnaround",
"canChainTemporaryBlue",
{
"or": [
"canGravityJump",
{
"and": [
"HiJump",
"canTrickyUseFrozenEnemies",
"canLongChainTemporaryBlue"
]
}
]
}
],
"exitCondition": {
"leaveWithTemporaryBlue": {}
},
"unlocksDoors": [
{
"types": [
"ammo"
],
"requires": []
}
],
"flashSuitChecked": true,
"blueSuitChecked": true
},
{
"id": 201,
"link": [
6,
2
],
"name": "Leave With Spark",
"startsWithShineCharge": true,
"requires": [
{
"shineChargeFrames": 50
},
"canShinechargeMovementComplex",
{
"or": [
{
"shinespark": {
"frames": 12,
"excessFrames": 0
}
},
{
"and": [
"canShinechargeMovementTricky",
{
"shinespark": {
"frames": 3,
"excessFrames": 0
}
}
]
}
]
}
],
"exitCondition": {
"leaveWithSpark": {}
},
"unlocksDoors": [
{
"types": [
"super"
],
"requires": []
},
{
"types": [
"missiles",
"powerbomb"
],
"requires": [
"never"
]
}
],
"flashSuitChecked": true,
"blueSuitChecked": true
},
{
"id": 202,
"link": [
6,
2
],
"name": "Leave With Temporary Blue",
"startsWithShineCharge": true,
"requires": [
"h_shinechargeMaxRunway",
{
"shineChargeFrames": 0
},
"canXRayTurnaround",
"canChainTemporaryBlue"
],
"exitCondition": {
"leaveWithTemporaryBlue": {}
},
"unlocksDoors": [
{
"types": [
"ammo"
],
"requires": []
}
],
"flashSuitChecked": true,
"blueSuitChecked": true
},
{
"id": 80,
"link": [
6,
4
],
"name": "Shinespark",
"startsWithShineCharge": true,
"requires": [
{
"shineChargeFrames": 60
},
{
"or": [
{
"shinespark": {
"frames": 38,
"excessFrames": 3
}
},
{
"and": [
"canMidairShinespark",
{
"shinespark": {
"frames": 35,
"excessFrames": 3
}
}
]
},
{
"and": [
"HiJump",
"canMidairShinespark",
{
"shinespark": {
"frames": 31,
"excessFrames": 3
}
}
]
}
]
}
],
"flashSuitChecked": true,
"blueSuitChecked": true
},
{
"id": 81,
"link": [
6,
4
],
"name": "Leave With Temporary Blue",
"startsWithShineCharge": true,
"requires": [
"h_shinechargeMaxRunway",
{
"shineChargeFrames": 0
},
"canXRayTurnaround",
"HiJump",
{
"or": [
{
"and": [
"canGravityJump",
"canTrickySpringBallJump",
"canChainTemporaryBlue"
]
},
{
"and": [
"canTrickyUseFrozenEnemies",
"canLongChainTemporaryBlue"
]
}
]
}
],
"exitCondition": {
"leaveWithTemporaryBlue": {}
},
"unlocksDoors": [
{
"types": [
"ammo"
],
"requires": []
}
],
"flashSuitChecked": true,
"blueSuitChecked": true
}
],
"notables": [
{
"id": 1,
"name": "Come in Shinecharged, Shinespark from the Bottom Right",
"note": [
"Quickly shoot out the 3 shot blocks then horizontal spark breaking the speed blocks.",
"Wait for the Oums to roll on their own to a place where they can be climbed.",
"Do not stand on the Oums when they begin to attack."
]
},
{
"id": 2,
"name": "Top Left Suitless Unmorph Leave With Grapple Teleport",
"note": [
"Grapple to the top Grapple in the top-left corner of the room.",
"Hold left while waiting for the grapple wall jump check to expire, then quickly morph.",
"While falling, unmorph to reset fall speed and then quickly morph again.",
"unmorph at a precise time (typically a 2-frame window) then use Grapple immediately (another 2-frame window) to get stuck standing a pixel or two inside the first Grapple block above the door.",
"Then jump (to force crouch), angle down, and grapple.",
"Samus will enter a 'glitched grapple hanging' state where Samus' graphics will appear corrupted while swinging with Grapple.",
"Swing down, and hold left while approaching the door to trigger the transition.",
"To avoid heavy lag, hold down through the entire swing.",
"Continue holding Grapple through the door transition to initiate a teleport in the next room.",
"If needing to stand up in the next room (e.g. for an X-Ray climb), then enter the transition while swinging slowly, e.g. after coming to a stop directly below the block.",
"If needing to transition at horiziontal position $15 (as far right as possible), then additionally roll from pressing left to pressing diagonally up-left just before the transition.",
"The game may lag heavily if Samus enters a retracted position; if this happens, hold down to extend Grapple again."
]
},
{
"id": 3,
"name": "Stored Moonfall Grapple Door Lock Skip",
"note": [
"Perform a moonfall with stored fall speed to clip into the air space below the door at node 1.",
"Land, then grapple the nearest block and release.",
"Samus will fall into the door transition, bypassing any lock that may be on the door."
]
},
{
"id": 5,
"name": "Very Deep Stuck X-Ray Climb",
"note": [
"Enter with G-mode direct, back up to exactly 8 pixels away from the door transition, and activate X-ray to get very deep stuck in the door.",
"Climb up a little less than 1 screen, and perform a turnaround buffered spin-jump away from the door to trigger the transition, bypassing any lock on the door.",
"Perform the spin-jump when Samus' feet are between about 0.5 and 2 tiles below the bottom of the door."
]
}
],
"nextStratId": 221,
"nextNotableId": 6
}