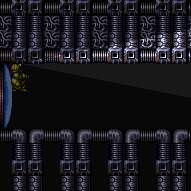
Climb Supers Room
Room ID: 29
|
Exit condition: {
"leaveWithRunway": {
"length": 6,
"openEnd": 1
}
} |
From: 1
Top Left Door
To: 1
Top Left Door
Entrance condition: {
"comeInShinecharging": {
"length": 5,
"openEnd": 0
},
"comesInHeated": "no"
}Requires: "h_CrystalSpark" |
|


Exit condition: {
"leaveWithGrappleSwing": {
"blocks": [
{
"position": [
9,
2
],
"note": "Closest Grapple block to door"
}
]
}
} |
|
Requires: "h_spikeXModeShinecharge"
{
"shineChargeFrames": 110
}Exit condition: {
"leaveShinecharged": {}
}Dev note: Two spike hits are expected per attempt (with any additional leniency hits being multiplied by this amount). |
From: 1
Top Left Door
To: 1
Top Left Door


Entrance condition: {
"comeInShinecharged": {}
}Requires: {
"shineChargeFrames": 70
}
"h_spikeSuitSpikeHitLeniency"
{
"spikeHits": 1
}
"canSpikeSuit"
{
"shinespark": {
"frames": 4,
"excessFrames": 4
}
} |
From: 1
Top Left Door
To: 1
Top Left Door


Entrance condition: {
"comeInShinecharging": {
"length": 3,
"openEnd": 1
}
}Requires: {
"spikeHits": 1
}
"h_spikeSuitSpikeHitLeniency"
"canSpikeSuit"
{
"shinespark": {
"frames": 5,
"excessFrames": 5
}
} |
From: 1
Top Left Door
To: 1
Top Left Door


Requires: "h_spikeXModeSpikeSuit"
{
"shinespark": {
"frames": 5,
"excessFrames": 5
}
} |
From: 1
Top Left Door
To: 1
Top Left Door


Entrance condition: {
"comeInRunning": {
"speedBooster": "yes",
"minTiles": 4
}
}Requires: "canSpeedKeep"
{
"canShineCharge": {
"usedTiles": 21,
"openEnd": 2
}
}
{
"spikeHits": {
"mul": [
3,
"n_speedKeepAttempts"
]
}
}
{
"spikeHits": 1
}
"h_spikeSuitSpikeHitLeniency"
"canPatientSpikeSuit"
{
"shinespark": {
"frames": 6,
"excessFrames": 2
}
}Dev note: FIXME: the lenience needs to multiply speed keep attempts and spike suit attempts. |
From: 1
Top Left Door
To: 1
Top Left Door
Requires: {
"notable": "In-Room SpeedKeep for Temporary Blue"
}
"canSpeedKeep"
{
"doorUnlockedAtNode": 1
}
{
"canShineCharge": {
"usedTiles": 13,
"openEnd": 1
}
}
{
"spikeHits": {
"mul": [
3,
"n_speedKeepAttempts"
]
}
}
{
"spikeHits": 1
}
"h_spikeSuitSpikeHitLeniency"
"canPatientSpikeSuit"
{
"shinespark": {
"frames": 6,
"excessFrames": 2
}
}Dev note: FIXME: the lenience needs to multiply speed keep attempts and spike suit attempts. |
From: 1
Top Left Door
To: 1
Top Left Door


Entrance condition: {
"comeInShinecharged": {}
}Requires: {
"shineChargeFrames": 145
}
"h_spikeXModeBlueSuit"
{
  "shinespark": {
    "frames": 1
  }
} |
From: 1
Top Left Door
To: 1
Top Left Door
Entrance condition: {
"comeInShinecharging": {
"length": 3,
"openEnd": 1
}
}Requires: "h_spikeXModeBlueSuit"
{
"shinespark": {
"frames": 1
}
} |
From: 1
Top Left Door
To: 1
Top Left Door


Requires: "h_spikeDoubleXModeBlueSuit"
{
"shinespark": {
"frames": 1
}
} |
|
Requires: "h_CrystalFlash" |
|
Entrance condition: {
"comeInWithGMode": {
"mode": "direct",
"morphed": true
}
}Requires: "h_artificialMorphLongCeilingBombJump" Clears obstacles: C |
|

It is possible to cross the spike pit with spring flings and two spike hits. Pause then jump just before the fade out ends and turn Spring Ball off in order to get more horizontal distance at the start and avoid one spike hit. Turn Spring Ball off and on again while jumping on the spikes to get across to avoid another. Entrance condition: {
"comeInWithGMode": {
"mode": "any",
"morphed": true
}
}Requires: {
"or": [
"h_artificialMorphLongCeilingBombJump",
{
"and": [
"h_artificialMorphSpringBall",
{
"spikeHits": 4
}
]
},
{
"and": [
"h_artificialMorphSpringBall",
"h_artificialMorphBombHorizontally",
{
"spikeHits": 3
}
]
},
{
"and": [
"h_artificialMorphSpringFling",
"canTrickyJump",
{
"spikeHits": 2
}
]
},
{
"and": [
"h_artificialMorphIBJ",
{
"spikeHits": 10
},
{
"or": [
"h_artificialMorphBombHorizontally",
{
"spikeHits": 2
}
]
}
]
}
]
}Dev note: This is a softlock unless the item is Morph. The IBJ strat has 2 extra spike hits added as a leniency. |
|
Requires: {
"or": [
{
"and": [
"Grapple",
"h_midAirShootUp"
]
},
"SpaceJump"
]
} |
From: 1
Top Left Door
To: 4
Top Junction (Right of Spikes)

Requires: "canDash"
{
"spikeHits": 1
}
{
"or": [
"canUseIFrames",
{
"spikeHits": 1
}
]
} |
From: 1
Top Left Door
To: 4
Top Junction (Right of Spikes)
Requires: {
"haveBlueSuit": {}
}
{
"spikeHits": 2
}
{
"or": [
{
"tech": "canHorizontalDamageBoost"
},
"h_complexToCarryFlashSuit",
{
"spikeHits": 1
}
]
} |
|
Entrance condition: {
"comeInWithSpark": {}
}Requires: {
"shinespark": {
"frames": 65,
"excessFrames": 6
}
} |
From: 1
Top Left Door
To: 4
Top Junction (Right of Spikes)

Entrance condition: {
"comeInShinecharging": {
"length": 3,
"openEnd": 1
}
}Requires: "canHorizontalShinespark"
{
"or": [
{
"shinespark": {
"frames": 56,
"excessFrames": 6
}
},
{
"and": [
"canHorizontalMidairShinespark",
{
"shinespark": {
"frames": 41,
"excessFrames": 4
}
}
]
}
]
} |
From: 1
Top Left Door
To: 4
Top Junction (Right of Spikes)

Entrance condition: {
"comeInShinecharged": {}
}Requires: {
"or": [
{
"and": [
{
"shineChargeFrames": 40
},
"canHorizontalShinespark",
{
"shinespark": {
"frames": 55,
"excessFrames": 6
}
}
]
},
{
"and": [
{
"shineChargeFrames": 75
},
"canHorizontalMidairShinespark",
{
"shinespark": {
"frames": 43,
"excessFrames": 8
}
}
]
}
]
} |
From: 1
Top Left Door
To: 4
Top Junction (Right of Spikes)
Run, jump, and spark mid-air at a specific height to be able to down-grab onto the ledge. Entrance condition: {
"comeInShinecharged": {}
}Requires: {
"shineChargeFrames": 80
}
"canShinechargeMovementTricky"
"canDownGrab"
{
"shinespark": {
"frames": 38,
"excessFrames": 0
}
} |
From: 1
Top Left Door
To: 4
Top Junction (Right of Spikes)

After gaining a shinecharge, run back to the door, then run right, jump, and spark mid-air at a specific height to be able to down-grab onto the ledge. Entrance condition: {
"comeInShinecharging": {
"length": 5,
"openEnd": 0
}
}Requires: "canShinechargeMovementTricky"
"canDownGrab"
{
"shinespark": {
"frames": 35,
"excessFrames": 0
}
} |
From: 1
Top Left Door
To: 4
Top Junction (Right of Spikes)
Requires: "canUseIFrames"
"h_pauseAbuseMinimalReserveRefill"
{
"or": [
"canDash",
{
"and": [
"h_pauseAbuseMinimalReserveRefill",
{
"or": [
{
"and": [
{
"tech": "canHorizontalDamageBoost"
},
"h_complexToCarryFlashSuit"
]
},
"h_pauseAbuseMinimalReserveRefill"
]
}
]
}
]
} |
From: 1
Top Left Door
To: 4
Top Junction (Right of Spikes)
Requires: "h_storedSpark"
"canDash"
{
"shinespark": {
"frames": 41,
"excessFrames": 6
}
} |
From: 1
Top Left Door
To: 4
Top Junction (Right of Spikes)
Requires: "canLongCeilingBombJump" |
From: 1
Top Left Door
To: 4
Top Junction (Right of Spikes)
Run and jump into an airball, pressing pause just as Samus hits the ceiling, in order to unequip Spring Ball to reset fall speed. Entrance condition: {
"comeInRunning": {
"speedBooster": "yes",
"minTiles": 28
}
}Requires: "h_speedJump" "canTrickyJump" "canLateralMidAirMorph" "canSpringFling" Dev note: This can be done with 26 tiles of other-room runway, but it would probably require a higher movement tech. |
From: 1
Top Left Door
To: 4
Top Junction (Right of Spikes)
Entrance condition: {
"comeInWithSpringBallBounce": {
"speedBooster": "yes",
"movementType": "controlled",
"remoteAndLandingMinTiles": [
[
30,
1
]
]
}
}Requires: "canTrickyJump" "canSpringFling" |
From: 1
Top Left Door
To: 5
Bottom Junction (Right of Boyons)
It is possible to cross the spike pit with spring flings and two spike hits. Pause then jump just before the fade out ends and turn Spring Ball off in order to get more horizontal distance at the start and avoid one spike hit. Turn Spring Ball off and on again while jumping on the spikes to get across to avoid another. Entrance condition: {
"comeInWithGMode": {
"mode": "any",
"morphed": true
}
}Requires: "h_artificialMorphBombs"
{
"or": [
{
"and": [
"h_artificialMorphSpringBall",
{
"spikeHits": 4
}
]
},
{
"and": [
"h_artificialMorphSpringBall",
"h_artificialMorphBombHorizontally",
{
"spikeHits": 3
}
]
},
{
"and": [
"h_artificialMorphSpringFling",
"canTrickyJump",
{
"spikeHits": 2
}
]
},
{
"and": [
"Morph",
{
"or": [
"SpaceJump",
{
"and": [
{
"spikeHits": 1
},
{
"or": [
"canUseIFrames",
{
"spikeHits": 1
}
]
}
]
}
]
}
]
},
{
"and": [
"h_artificialMorphIBJ",
{
"spikeHits": 10
},
{
"or": [
"h_artificialMorphBombHorizontally",
{
"spikeHits": 2
}
]
}
]
},
"h_artificialMorphLongCeilingBombJump"
]
}Dev note: The IBJ from spikes has 2 extra spike hits added as a leniency. |
From: 1
Top Left Door
To: 5
Bottom Junction (Right of Boyons)
Grapple part way across the room before falling into the spike pit. Alternatively, cross with Space Jump then quickly Grapple and release the Grapple blocks a few times until they stop working. Be careful not to fall into the spikes. Entrance condition: {
"comeInWithGMode": {
"mode": "any",
"morphed": false
}
}Requires: "Morph"
"Grapple"
{
"or": [
{
"and": [
"SpaceJump",
"canTrickyJump"
]
},
{
"spikeHits": 1
}
]
}Dev note: FIXME: Grapple will quickly overload PLMS. It is barely possible to cross the gap using short grapples, canResetFallSpeed, and ending with a swing. |
From: 1
Top Left Door
To: 5
Bottom Junction (Right of Boyons)
Place the PBs exactly two tiles left of the Morph tunnel. Be sure not to touch the item if this strat will be needed again in the future. It is possible to cross the spike pit with spring flings and two spike hits. Pause then jump just before the fade out ends and turn Spring Ball off in order to get more horizontal distance at the start and avoid one spike hit. Turn Spring Ball off and on again while jumping on the spikes to get across to avoid another. Entrance condition: {
"comeInWithGMode": {
"mode": "direct",
"morphed": true
}
}Requires: "canPowerBombItemOverloadPLMs"
{
"itemNotCollectedAtNode": 3
}
"canRiskPermanentLossOfAccess"
"h_artificialMorphPowerBomb"
"h_artificialMorphPowerBomb"
{
"or": [
{
"and": [
"h_artificialMorphSpringBall",
{
"spikeHits": 4
}
]
},
{
"and": [
"h_artificialMorphSpringBall",
"h_artificialMorphBombHorizontally",
{
"spikeHits": 3
}
]
},
{
"and": [
"h_artificialMorphSpringFling",
"canTrickyJump",
{
"spikeHits": 2
}
]
},
{
"and": [
"Morph",
{
"or": [
"SpaceJump",
{
"and": [
{
"spikeHits": 1
},
{
"or": [
"canUseIFrames",
{
"spikeHits": 1
}
]
}
]
}
]
}
]
}
]
} |
From: 1
Top Left Door
To: 5
Bottom Junction (Right of Boyons)
Move through the item to overload PLMs, then go down through the speed blocks and exit G-mode to collect the item. Note that if the item has already been collected, Samus can overload PLMs with Grapple. With Morph and Grapple, quickly grapple to then release grapple on the grapple blocks a few times until they stop working. Be careful not to fall into the spikes. Entrance condition: {
"comeInWithGMode": {
"mode": "direct",
"morphed": false
}
}Requires: "Morph"
"SpaceJump"
"canRemoteAcquire"
{
"or": [
"h_blueSuitGMode",
{
"and": [
{
"itemNotCollectedAtNode": 3
},
"canRiskPermanentLossOfAccess"
]
},
{
"and": [
"Grapple",
"canTrickyJump"
]
}
]
}Collects items: 3 |
From: 1
Top Left Door
To: 5
Bottom Junction (Right of Boyons)

Move through the item to overload PLMs, then go down through the speed blocks and exit G-mode to collect the item. Note that if the item has already been collected, Samus can overload PLMs with Grapple. With Morph and Grapple, quickly grapple to then release grapple on the grapple blocks a few times until they stop working. Be careful not to fall into the spikes. Entrance condition: {
"comeInWithGMode": {
"mode": "direct",
"morphed": false
}
}Requires: {
"noBlueSuit": {}
}
"h_CrystalFlash"
"canRemoteAcquire"
{
"or": [
{
"and": [
{
"itemNotCollectedAtNode": 3
},
"canRiskPermanentLossOfAccess",
{
"or": [
"SpaceJump",
{
"spikeHits": 1
}
]
}
]
},
{
"and": [
"SpaceJump",
"Grapple",
"canTrickyJump"
]
},
{
"and": [
"Grapple",
{
"spikeHits": 1
}
]
}
]
}
{
"autoReserveTrigger": {}
}
{
"enemyDamage": {
"enemy": "Boyon",
"type": "contact",
"hits": 1
}
}Collects items: 3 Dev note: Without Bombs, this can not be done with artificial morph, because there is no morphed method to cross the spikes without taking damage; with Bombs, anolther strat will be used which can overload PLMs using the speed blocks. Remote acquiring the item in G-mode with Morph is not useful with a blue suit - alternative strats will be able to cross the room to 3, which can then return or go down. FIXME: It is possible to kill the Boyon during the reserve trigger, or to use the acid instead and end with full Energy. |
From: 1
Top Left Door
To: 6
Right of Morph Tunnel with Temporary Blue
Entrance condition: {
"comeInGettingBlueSpeed": {
"length": 5,
"openEnd": 1
}
}Requires: "canSpeedball" "canBlueSpaceJump" |
From: 1
Top Left Door
To: 6
Right of Morph Tunnel with Temporary Blue

Use Springball on the spikes to cross the room with a Speedball. Then bounce into the Morph tunnel and use Springball to bounce all of the way through. It can help to unmorph before the Morph tunnel and use temporary blue to start the bounce into the tunnel. Entrance condition: {
"comeInGettingBlueSpeed": {
"length": 5,
"openEnd": 1,
"minExtraRunSpeed": "$2.0",
"maxExtraRunSpeed": "$3.F"
}
}Requires: "h_blueJump"
"canTrickySpringBallBounce"
{
"or": [
"canInsaneJump",
"canChainTemporaryBlue"
]
}
{
"spikeHits": 1
}Dev note: Higher and lower run speeds can also work but may need to jump earlier or take additional spike hits. |
From: 1
Top Left Door
To: 6
Right of Morph Tunnel with Temporary Blue
Run and jump into an airball, pressing pause just as Samus hits the ceiling, in order to unequip Spring Ball to reset fall speed. Entrance condition: {
"comeInGettingBlueSpeed": {
"length": 5,
"openEnd": 1,
"minExtraRunSpeed": "$5.8"
}
}Requires: "canTrickyJump" "canMomentumConservingMorph" "canSpringFling" "canTemporaryBlue" |
From: 1
Top Left Door
To: 6
Right of Morph Tunnel with Temporary Blue
Entrance condition: {
"comeInWithBlueSpringBallBounce": {
"movementType": "controlled",
"minExtraRunSpeed": "$5.8"
}
}Requires: "canTrickyJump" "canLateralMidAirMorph" "canSpringFling" "canTemporaryBlue" |
From: 1
Top Left Door
To: 6
Right of Morph Tunnel with Temporary Blue
Use Springball on the spikes to cross the room while retaining temporary blue. Then use Spring Ball to bounce all of the way through the Morph tunnel. Entrance condition: {
"comeInWithTemporaryBlue": {}
}Requires: "canChainTemporaryBlue"
"canSpringBallBounce"
{
"spikeHits": 3
} |
From: 1
Top Left Door
To: 6
Right of Morph Tunnel with Temporary Blue

Enter with a shinespark ready, activate XMode by bouncing into the spikes, then activate the shinespark but release XMode during the shinespark windup animation. Entrance condition: {
"comeInShinecharging": {
"length": 4,
"openEnd": 1
}
}Requires: "canSuperjump"
{
"shinespark": {
"frames": 7,
"excessFrames": 0
}
}
"h_XModeSpikeHit"
{
"or": [
{
"and": [
"h_XModeSpikeHit",
"h_XModeSpikeHit"
]
},
{
"and": [
"h_XModeSpikeHit",
"SpaceJump"
]
},
"Grapple"
]
}Dev note: There is 1 unusable tile in this runway. |
From: 1
Top Left Door
To: 6
Right of Morph Tunnel with Temporary Blue
Use X-Mode to store a spikesuit, and then convert that to a blue suit with more X-Mode. By bouncing on the ledge and arm pumping a few tiles in the first X-Mode, it is possible to reach the right with a horizontal damage boost and only a single additional spike hit after the superjump. Requires: {
"notable": "In-Room X-Mode BlueSuit"
}
"canSuperjump"
"h_XModeSpikeHit"
"h_XModeSpikeHit"
"h_XModeSpikeHit"
"h_shinechargeMaxRunway"
{
"shinespark": {
"frames": 5
}
}
"h_XModeSpikeHit"
{
"or": [
{
"and": [
"h_XModeSpikeHit",
"h_XModeSpikeHit"
]
},
{
"and": [
"SpaceJump",
"h_XModeSpikeHit"
]
},
"Grapple"
]
} |
From: 1
Top Left Door
To: 6
Right of Morph Tunnel with Temporary Blue
Bounce into the spikes and use a speedkeep to run on spikes to setup for a speedball towards the item. Bouncing on the platform near the door saves a spike hit. Entrance condition: {
"comeInWithTemporaryBlue": {}
}Requires: "canChainTemporaryBlue"
"can4HighMidAirMorph"
"canSpeedKeep"
{
"spikeHits": {
"add": [
"n_speedKeepAttempts",
"n_speedKeepLenience"
]
}
}
"canSpeedball"Dev note: The extra lenience is because of the need to either to perform a very precise jump off the spikes or to start with a bounce on the spikes, taking an extra hit. |
From: 1
Top Left Door
To: 6
Right of Morph Tunnel with Temporary Blue
Bounce into the spikes and use a speedkeep to run on spikes to setup for a speedball towards the item. Bouncing on the platform near the door saves a spike hit. Or a damage boost speedkeep could be used instead of a spike speedkeep with enough runspeed. Entrance condition: {
"comeInRunning": {
"speedBooster": "yes",
"minTiles": 12
}
}Requires: "canSpeedKeep"
"canCarefulJump"
"canSlowShortCharge"
"can4HighMidAirMorph"
{
"spikeHits": "n_speedKeepAttempts"
}
"canSpeedball" |
From: 1
Top Left Door
To: 6
Right of Morph Tunnel with Temporary Blue

Bounce into the spikes and use a speedkeep to run on spikes to setup for a speedball towards the item. A damage boost speedkeep could be used instead of a spike speedkeep with enough runspeed. Entrance condition: {
"comeInRunning": {
"speedBooster": "yes",
"minTiles": 4
}
}Requires: "canSpeedKeep"
"canCarefulJump"
{
"getBlueSpeed": {
"usedTiles": 21,
"openEnd": 2
}
}
{
"spikeHits": "n_speedKeepAttempts"
}
{
"or": [
{
"spikeHits": "n_speedKeepAttempts"
},
{
"and": [
"canChainTemporaryBlue",
{
"spikeHits": "n_speedKeepLenience"
}
]
}
]
}
"canSpeedball"Dev note: The extra lenience is because of the need to either to perform a very precise jump off the spikes, or to start with a bounce on the spikes, taking an extra hit. |
From: 1
Top Left Door
To: 6
Right of Morph Tunnel with Temporary Blue
Using only the short runway and spike pit, use one or two speedkeeps to speedball towards the item location. This requires either a very short shortcharge, or a second speedkeep in the spikes which also resets Samus' run speed with a crouch jump before spike i-frames expire. Requires: {
"notable": "In-Room SpeedKeep for Temporary Blue"
}
"canSpeedKeep"
"canSlowShortCharge"
{
"doorUnlockedAtNode": 1
}
{
"or": [
{
"and": [
"canChainTemporaryBlue",
{
"getBlueSpeed": {
"usedTiles": 13,
"openEnd": 1
}
},
{
"spikeHits": "n_speedKeepAttempts"
}
]
},
{
"and": [
{
"getBlueSpeed": {
"usedTiles": 14,
"openEnd": 1
}
},
{
"spikeHits": {
"mul": [
2,
"n_speedKeepAttempts"
]
}
}
]
},
{
"and": [
"canChainTemporaryBlue",
{
"spikeHits": {
"mul": [
{
"add": [
"n_speedKeepAttempts",
2
]
},
"n_speedKeepAttempts"
]
}
}
]
}
]
}
"canSpeedball"Dev note: 1 - Stop and bounce on left ledge. 2 - Jump from ledge and bounce in spikes. 3 - Stop and bounce on left ledge, then stop in spikes and speedkeep again. |
|
Climb up 7 screens. Entrance condition: {
"comeInWithDoorStuckSetup": {}
}Requires: "canLongXRayClimb" "canBeVeryPatient" |
|
Enter with G-mode direct, back up to between 1 and 6 pixels from the door transition, and activate X-ray to get very deep stuck in the door. Climb up 7 screens, and perform a turnaround buffered spin-jump away from the door to trigger the transition, bypassing any lock on the door. Entrance condition: {
"comeInWithGMode": {
"mode": "direct",
"morphed": false
}
}Requires: "canGModeXRayClimb" "canLongXRayClimb" "canBeVeryPatient" Bypasses door shell: true |
|

Samus will enter the room grappled to a spike block below. Release Grapple quickly after entering, then aim up and grapple onto a Grapple block on the ceiling to avoid taking spike damage. Entrance condition: {
"comeInWithGrappleTeleport": {
"blockPositions": [
[
12,
13
]
]
}
} |
|


Kill all three Boyons for energy, or Crystal Flash. If you need to freeze Boyons for extra runway, disable Ice Beam to force them to unfreeze so you can interrupt spark. If you end up killing all four Boyons, you can also dip in the acid for the spark interrupt. Entrance condition: {
"comeInWithRMode": {}
}Requires: {
"or": [
"h_CrystalFlashForReserveEnergy",
{
"and": [
"h_RModeCanRefillReserves",
{
"resourceMissingAtMost": [
{
"type": "Missile",
"count": 0
}
]
},
{
"enemyKill": {
"enemies": [
[
"Boyon",
"Boyon",
"Boyon"
]
],
"excludedWeapons": [
"PseudoScrew"
]
}
},
{
"or": [
{
"and": [
"canBeLucky",
{
"partialRefill": {
"type": "ReserveEnergy",
"limit": 5
}
}
]
},
{
"and": [
"canBeVeryLucky",
{
"partialRefill": {
"type": "ReserveEnergy",
"limit": 20
}
}
]
}
]
}
]
}
]
}
{
"or": [
{
"canShineCharge": {
"usedTiles": 25,
"openEnd": 0
}
},
{
"and": [
"canTrivialUseFrozenEnemies",
{
"canShineCharge": {
"usedTiles": 31,
"openEnd": 0
}
},
{
"disableEquipment": "Ice"
}
]
}
]
}
{
"autoReserveTrigger": {}
}
"canRModeSparkInterrupt"Clears obstacles: A |
|
Exit condition: {
"leaveWithRunway": {
"length": 35,
"openEnd": 0
}
} |
From: 2
Bottom Left Door
To: 2
Bottom Left Door
Requires: "canTrivialUseFrozenEnemies" Exit condition: {
"leaveWithRunway": {
"length": 45,
"openEnd": 1
}
} |
|
Requires: "h_CrystalFlash" |
|
Requires: {
"or": [
{
"enemyKill": {
"enemies": [
[
"Boyon",
"Boyon",
"Boyon",
"Boyon"
]
],
"excludedWeapons": [
"Bombs",
"PseudoScrew"
]
}
},
{
"and": [
"canBePatient",
"h_useMorphBombs"
]
},
{
"and": [
{
"enemyDamage": {
"enemy": "Boyon",
"type": "contact",
"hits": 16
}
},
"canCarefulJump",
"canPseudoScrew"
]
}
]
}Clears obstacles: A |
|
Requires: "h_shinechargeMaxRunway" "h_CrystalSpark" |
From: 2
Bottom Left Door
To: 2
Bottom Left Door


Crystal Flash then Shinespark up to the item, touch it, and return through the speed block that is now air. Use the Boyons and acid to reserve trigger to exit G-mode below to collect the item. Entrance condition: {
"comeInWithGMode": {
"mode": "direct",
"morphed": true
}
}Requires: "canComplexGMode"
"canRemoteAcquire"
"h_artificialMorphCrystalFlash"
{
"or": [
{
"and": [
"canTrivialUseFrozenEnemies",
"h_shinechargeMaxRunway",
"canMidairShinespark",
{
"shinespark": {
"frames": 118,
"excessFrames": 6
}
}
]
},
{
"and": [
"canShinechargeMovementComplex",
{
"canShineCharge": {
"usedTiles": 34,
"openEnd": 0
}
},
{
"shinespark": {
"frames": 128,
"excessFrames": 6
}
}
]
},
{
"and": [
{
"blueSuitShinecharge": {}
},
{
"shinespark": {
"frames": 121,
"excessFrames": 5
}
}
]
}
]
}
{
"autoReserveTrigger": {
"minReserveEnergy": 1
}
}Collects items: 3 Dev note: These shinespark frames could be reduced with more items or tech, but in direct G-mode, Samus will need to Crystal Flash and reserve trigger to collect the item. |
|


Requires: "canTrivialUseFrozenEnemies"
"h_shinechargeMaxRunway"
{
"shinespark": {
"frames": 128,
"excessFrames": 6
}
} |
|


Requires: "canTrivialUseFrozenEnemies"
"h_shinechargeMaxRunway"
"canMidairShinespark"
{
"or": [
{
"shinespark": {
"frames": 118,
"excessFrames": 6
}
},
{
"and": [
"HiJump",
{
"shinespark": {
"frames": 113,
"excessFrames": 6
}
}
]
}
]
} |
From: 2
Bottom Left Door
To: 3
Item


Requires: "canTrivialUseFrozenEnemies"
"h_shinechargeMaxRunway"
"canSpeedyJump"
"canShinechargeMovementComplex"
{
"or": [
{
"shinespark": {
"frames": 111,
"excessFrames": 6
}
},
{
"and": [
"HiJump",
{
"shinespark": {
"frames": 103,
"excessFrames": 6
}
}
]
}
]
} |
|
Quickly Walljump to conserve health on the shinespark. Requires: "canTrivialUseFrozenEnemies"
"canShinechargeMovementComplex"
"canFastWallJumpClimb"
"h_shinechargeMaxRunway"
{
"or": [
{
"shinespark": {
"frames": 93,
"excessFrames": 6
}
},
{
"and": [
"HiJump",
{
"shinespark": {
"frames": 83,
"excessFrames": 6
}
}
]
}
]
} |
|
Starting from the door, use a 1-tap shortcharge to gain a shinecharge running to the right. Use the remaining runway to gain speed to clear the pits with a single jump. Then spark vertically or diagonally. Requires: "canShinechargeMovement"
{
"canShineCharge": {
"usedTiles": 25,
"openEnd": 2
}
}
{
"shinespark": {
"frames": 128,
"excessFrames": 6
}
}
{
"obstaclesCleared": [
"A"
]
}Clears obstacles: A Dev note: This is doable without a short charge, but it's essentially harder than the bluesuit jump. With a quick charge, it can serve as a less scary strat. |
From: 2
Bottom Left Door
To: 3
Item


Starting from the door, use a 1-tap shortcharge to gain a shinecharge running to the right. Use the remaining runway to gain speed to clear the pits with a single jump. Spark mid-air to conserve energy. Requires: {
"obstaclesCleared": [
"A"
]
}
"canShinechargeMovementComplex"
{
"canShineCharge": {
"usedTiles": 25,
"openEnd": 2
}
}
{
"or": [
{
"shinespark": {
"frames": 121,
"excessFrames": 6
}
},
{
"and": [
"canSpeedyJump",
{
"shinespark": {
"frames": 118,
"excessFrames": 6
}
}
]
},
{
"and": [
"HiJump",
{
"shinespark": {
"frames": 117,
"excessFrames": 6
}
}
]
},
{
"and": [
"HiJump",
"canSpeedyJump",
{
"shinespark": {
"frames": 113,
"excessFrames": 6
}
}
]
}
]
} |
|
Starting from the door, use a 1-tap shortcharge to gain a shinecharge running to the right. Use the remaining runway to gain speed to clear the pits with a single jump, using Screw Attack to avoid Boyon damage. Then spark vertically or diagonally. Requires: "canShinechargeMovement"
"canCarefulJump"
{
"canShineCharge": {
"usedTiles": 23,
"openEnd": 2
}
}
"ScrewAttack"
{
"shinespark": {
"frames": 128,
"excessFrames": 6
}
}Dev note: There could be another tile if the door is open, but it shouldn't matter at this runway length with canCarefulJump. |
|

Starting from the door, use a 1-tap shortcharge to gain a shinecharge running to the right. Use the remaining runway to gain speed to clear the pits with a single jump, using Screw Attack to avoid Boyon damage. Then spark vertically or diagonally. Requires: "canShinechargeMovementComplex"
"canCarefulJump"
{
"canShineCharge": {
"usedTiles": 23,
"openEnd": 2
}
}
"ScrewAttack"
{
"or": [
{
"shinespark": {
"frames": 121,
"excessFrames": 6
}
},
{
"and": [
"canSpeedyJump",
{
"shinespark": {
"frames": 118,
"excessFrames": 6
}
}
]
},
{
"and": [
"HiJump",
{
"shinespark": {
"frames": 117,
"excessFrames": 6
}
}
]
},
{
"and": [
"HiJump",
"canSpeedyJump",
{
"shinespark": {
"frames": 113,
"excessFrames": 6
}
}
]
}
]
}Dev note: There could be another tile if the door is open, but it shouldn't matter at this runway length with canCarefulJump. |
|

Charge a Shinespark running left, then get blue speed by running back to the right to jump through the Boyons. Requires: "canCarefulJump"
"canShinechargeMovementComplex"
{
"getBlueSpeed": {
"usedTiles": 34,
"openEnd": 0
}
}
"h_blueJump"
{
"canShineCharge": {
"usedTiles": 34,
"openEnd": 0
}
}
{
"shinespark": {
"frames": 128,
"excessFrames": 6
}
}Dev note: The out-of-order requirements are to work around the tests' assumption that a getBlueSpeed would lose the shinecharge. |
|
Requires: {
"canShineCharge": {
"usedTiles": 23,
"openEnd": 2
}
}
"canShinechargeMovementTricky"
{
"or": [
"canHorizontalDamageBoost",
"canLateralMidAirMorph"
]
}
{
"enemyDamage": {
"enemy": "Boyon",
"type": "contact",
"hits": 1
}
}
{
"or": [
{
"shinespark": {
"frames": 121,
"excessFrames": 6
}
},
{
"and": [
"canSpeedyJump",
{
"shinespark": {
"frames": 118,
"excessFrames": 6
}
}
]
},
{
"and": [
"HiJump",
{
"shinespark": {
"frames": 117,
"excessFrames": 6
}
}
]
},
{
"and": [
"HiJump",
"canSpeedyJump",
{
"shinespark": {
"frames": 113,
"excessFrames": 6
}
}
]
}
]
} |
|

Wall jump up 5 times, placing a Power Bomb precisely in the top right corner to overload PLMs with as few Power Bombs as possible. This only works in direct G-mode with the item still uncollected. Entrance condition: {
"comeInWithGMode": {
"mode": "direct",
"morphed": false
}
}Requires: "canPowerBombItemOverloadPLMs"
{
"notable": "G-Mode Up with Power Bombs"
}
{
"itemNotCollectedAtNode": 3
}
"canConsecutiveWallJump"
"Morph"
{
"or": [
"canRiskPermanentLossOfAccess",
{
"and": [
"canComplexGMode",
"canLongXRayClimb",
"canBeVeryPatient"
]
}
]
}
{
"ammo": {
"type": "PowerBomb",
"count": 5
}
}
"canBePatient"
{
"or": [
"Ice",
"canTrickyDodgeEnemies",
"ScrewAttack",
{
"and": [
"h_getBlueSpeedMaxRunway",
"h_blueJump"
]
},
{
"enemyKill": {
"enemies": [
[
"Boyon",
"Boyon",
"Boyon",
"Boyon"
]
],
"excludedWeapons": [
"Bombs"
]
}
},
{
"enemyDamage": {
"enemy": "Boyon",
"type": "contact",
"hits": 1
}
},
{
"and": [
"canBeVeryPatient",
"h_useMorphBombs"
]
}
]
}Dev note: Using this strat doesn't have canRiskPermanentLossOfAccess if the player could x-ray climb instead: this requires direct G-mode and Samus can freely doorstuck here, and there is no benefit to going to the item instead of the top left door, unless the item is there. FIXME: Placing the Power Bombs lower, on the magic tile, could overload PLMs with fewer, likely with as low as 2 Power Bombs. |
|

Ascend with a long IBJ, then go through the speed blocks to the item. The Boyons can be killed with bombs or 3 Power Bombs, or Samus can jump through them with Spring Ball, which is easy as long as she doesn't stop jumping. Note that Samus can not bomb boost through the Boyons while blue. Entrance condition: {
"comeInWithGMode": {
"mode": "any",
"morphed": true
}
}Requires: "h_blueSuitGMode"
"h_artificialMorphLongIBJ"
"canBePatient"
{
"or": [
"canBeVeryPatient",
{
"and": [
{
"ammo": {
"type": "PowerBomb",
"count": 3
}
},
"canDoubleBombJump"
]
},
{
"and": [
"h_artificialMorphSpringBall",
"canDoubleBombJump"
]
}
]
} |
|
Ascend with a long IBJ, then ceiling bomb jump against the speed blocks to overload the PLMs. Falling is very unforgiving. Note that the Boyons can be killed with bombs. Entrance condition: {
"comeInWithGMode": {
"mode": "any",
"morphed": true
}
}Requires: {
"notable": "G-Mode Morph Long Ceiling Bomb Jump"
}
"h_artificialMorphLongIBJ"
"h_artificialMorphCeilingBombJump"
"canBeVeryPatient"Dev note: This is technically doable without canBeVeryPatient, but would require double bomb jump, Morph, a way to bypass Boyons, and never falling. |
From: 2
Bottom Left Door
To: 4
Top Junction (Right of Spikes)
Ascend with a long IBJ, then go through the speed blocks and through the morph tunnel. The Boyons can be killed with bombs or 3 Power Bombs, or Samus can jump through them with Spring Ball, which is easy as long as she doesn't stop jumping. Note that Samus can not bomb boost through the Boyons while blue. Entrance condition: {
"comeInWithGMode": {
"mode": "any",
"morphed": true
}
}Requires: "h_blueSuitGMode"
"h_artificialMorphLongIBJ"
"canBePatient"
{
"or": [
"canBeVeryPatient",
{
"and": [
{
"ammo": {
"type": "PowerBomb",
"count": 3
}
},
"canDoubleBombJump"
]
},
{
"and": [
"h_artificialMorphSpringBall",
"canDoubleBombJump"
]
}
]
}Dev note: There is not a ceiling bomb jump strat from here, because it would be easier to just have X-Ray climbed the room. |
From: 2
Bottom Left Door
To: 4
Top Junction (Right of Spikes)
Ascend with a long IBJ, then go through the speed blocks to the item. The Boyons can be killed with bombs or 3 Power Bombs, or Samus can jump through them with Spring Ball, which is easy as long as she doesn't stop jumping. Note that Samus can not bomb boost through the Boyons while blue. Entrance condition: {
"comeInWithGMode": {
"mode": "any",
"morphed": true
}
}Requires: "h_blueSuitGMode"
"h_artificialMorphLongIBJ"
"canBePatient"
"canComplexGMode"
"canRemoteAcquire"
{
"or": [
"canBeVeryPatient",
{
"and": [
{
"ammo": {
"type": "PowerBomb",
"count": 3
}
},
"canDoubleBombJump"
]
},
{
"and": [
"h_artificialMorphSpringBall",
"canDoubleBombJump"
]
}
]
}Collects items: 3 Dev note: FIXME: It would be possible to remote acquire to the left after using spring into ceiling bomb jump, but it would require restructuring the room, a long CIBJ, and canBeExtremelyPatient. |
From: 2
Bottom Left Door
To: 5
Bottom Junction (Right of Boyons)
Requires: {
"obstaclesCleared": [
"A"
]
} |
|
Requires: "Ice" |
From: 2
Bottom Left Door
To: 5
Bottom Junction (Right of Boyons)
Intentionally take damage before attempting to jump through to avoid falling in the acid. Requires: {
"or": [
{
"and": [
{
"enemyDamage": {
"enemy": "Boyon",
"type": "contact",
"hits": 3
}
},
"Gravity",
{
"acidFrames": 30
}
]
},
{
"and": [
{
"enemyDamage": {
"enemy": "Boyon",
"type": "contact",
"hits": 2
}
},
"canCarefulJump"
]
},
{
"and": [
{
"enemyDamage": {
"enemy": "Boyon",
"type": "contact",
"hits": 1
}
},
"canTrickyJump"
]
}
]
} |
From: 2
Bottom Left Door
To: 5
Bottom Junction (Right of Boyons)
Jump at the last tile to make it through all of the Boyons. Requires: "canDash"
"ScrewAttack"
{
"or": [
"canCarefulJump",
"SpaceJump",
"h_speedJump"
]
} |
From: 2
Bottom Left Door
To: 5
Bottom Junction (Right of Boyons)
Requires: {
"or": [
{
"enemyKill": {
"enemies": [
[
"Boyon",
"Boyon",
"Boyon",
"Boyon"
]
],
"excludedWeapons": [
"Bombs",
"PseudoScrew"
]
}
},
{
"and": [
"canBePatient",
"h_useMorphBombs"
]
}
]
}Clears obstacles: A |
From: 2
Bottom Left Door
To: 5
Bottom Junction (Right of Boyons)
Requires: {
"haveBlueSuit": {}
} |
From: 2
Bottom Left Door
To: 5
Bottom Junction (Right of Boyons)
Requires: "canInsaneJump" Dev note: It's not really insane jump difficult, but that is where you think about needing to avoid the damage. And failing the jump is still very punishing due to falling into the acid. |
From: 2
Bottom Left Door
To: 5
Bottom Junction (Right of Boyons)
Shinespark up to the item, touch it, and return through the speed block that is now air. Exit G-mode below to collect the item. Entrance condition: {
"comeInWithGMode": {
"mode": "direct",
"morphed": false
}
}Requires: "canComplexGMode"
"canRemoteAcquire"
{
"or": [
{
"and": [
"canTrivialUseFrozenEnemies",
"h_shinechargeMaxRunway"
]
},
{
"and": [
"canShinechargeMovementComplex",
{
"getBlueSpeed": {
"usedTiles": 34,
"openEnd": 0
}
},
"h_blueJump",
{
"canShineCharge": {
"usedTiles": 34,
"openEnd": 0
}
}
]
},
{
"and": [
{
"canShineCharge": {
"usedTiles": 25,
"openEnd": 2
}
},
{
"enemyKill": {
"enemies": [
[
"Boyon",
"Boyon",
"Boyon",
"Boyon"
]
],
"excludedWeapons": [
"Bombs"
]
}
}
]
},
{
"blueSuitShinecharge": {}
},
{
"and": [
"canInsaneJump",
{
"canShineCharge": {
"usedTiles": 14,
"openEnd": 0
}
}
]
},
{
"and": [
"canInsaneJump",
{
"canShineCharge": {
"usedTiles": 14,
"openEnd": 1
}
},
{
"enemyKill": {
"enemies": [
[
"Boyon"
]
]
}
}
]
}
]
}
{
"shinespark": {
"frames": 121,
"excessFrames": 5
}
}Collects items: 3 Dev note: The shinespark frames could be reduced with more items or tech, but in direct G-mode, Samus will be at low Energy and need an energy free shinespark. The out-of-order requirements in the blue jump case are to work around the tests' assumption that a getBlueSpeed would lose the shinecharge. |
|
Requires: "Morph" |
|
Requires: "canRemoteAcquire"
{
"obstaclesCleared": [
"C"
]
}Dev note: FIXME: It would be possible to remote acquire to the left after using spring into ceiling bomb jump, but it would require restructuring the room and an extremely long CIBJ. |
|
Requires: {
"obstaclesCleared": [
"B"
]
}Dev note: The strat specific requirements are included when clearing the abstract obstacle. |
|
Requires: {
"haveBlueSuit": {}
} |
From: 3
Item
To: 5
Bottom Junction (Right of Boyons)
Walk through the item or use Bombs to overload PLMs, fall through the speed blocks, then exit G-Mode to remote acquire the item. Requires: "canRemoteAcquire"
{
"obstaclesCleared": [
"C"
]
} |
|
Requires: {
"or": [
{
"and": [
"Grapple",
"h_midAirShootUp"
]
},
"SpaceJump"
]
} |
From: 4
Top Junction (Right of Spikes)
To: 1
Top Left Door
Requires: "canDash"
{
"spikeHits": 1
}
{
"or": [
"canUseIFrames",
{
"spikeHits": 1
}
]
} |
From: 4
Top Junction (Right of Spikes)
To: 1
Top Left Door
Requires: {
"spikeHits": 2
}
{
"or": [
{
"and": [
{
"tech": "canHorizontalDamageBoost"
},
"h_complexToCarryBlueSuit"
]
},
{
"spikeHits": 1
}
]
} |
From: 4
Top Junction (Right of Spikes)
To: 1
Top Left Door


Requires: "canUseIFrames"
"h_pauseAbuseMinimalReserveRefill"
{
"or": [
"canDash",
{
"and": [
"h_pauseAbuseMinimalReserveRefill",
{
"or": [
{
"and": [
{
"tech": "canHorizontalDamageBoost"
},
"h_complexToCarryBlueSuit"
]
},
"h_pauseAbuseMinimalReserveRefill"
]
}
]
}
]
} |
From: 4
Top Junction (Right of Spikes)
To: 1
Top Left Door
Requires: "h_storedSpark"
"canDash"
{
"or": [
{
"shinespark": {
"frames": 44,
"excessFrames": 7
}
},
{
"and": [
"canShinechargeMovementTricky",
{
"shinespark": {
"frames": 38,
"excessFrames": 0
}
}
]
},
{
"and": [
"canShinechargeMovementTricky",
"canSpeedyJump",
{
"shinespark": {
"frames": 35,
"excessFrames": 0
}
}
]
}
]
} |
From: 4
Top Junction (Right of Spikes)
To: 1
Top Left Door
Requires: "canLongCeilingBombJump"
"canJumpIntoIBJ"
{
"or": [
{
"and": [
"h_useSpringBall",
{
"noBlueSuit": {}
}
]
},
{
"and": [
"canPreciseWallJump",
"canWallJumpInstantMorph"
]
}
]
} |
|
Requires: "Morph" |
From: 4
Top Junction (Right of Spikes)
To: 4
Top Junction (Right of Spikes)


Requires: "h_spikeDoubleXModeBlueSuit"
{
"shinespark": {
"frames": 2
}
} |
From: 4
Top Junction (Right of Spikes)
To: 4
Top Junction (Right of Spikes)
Requires: "h_CrystalFlash" |
From: 5
Bottom Junction (Right of Boyons)
To: 2
Bottom Left Door
Requires: {
"obstaclesCleared": [
"A"
]
} |
|
Requires: "Ice" |
From: 5
Bottom Junction (Right of Boyons)
To: 2
Bottom Left Door


Intentionally take damage before attempting to jump through to avoid falling in the acid. Requires: {
"or": [
{
"and": [
{
"enemyDamage": {
"enemy": "Boyon",
"type": "contact",
"hits": 3
}
},
"Gravity",
{
"acidFrames": 30
}
]
},
{
"and": [
{
"enemyDamage": {
"enemy": "Boyon",
"type": "contact",
"hits": 2
}
},
"canCarefulJump"
]
},
{
"and": [
{
"enemyDamage": {
"enemy": "Boyon",
"type": "contact",
"hits": 1
}
},
"canTrickyJump"
]
}
]
} |
From: 5
Bottom Junction (Right of Boyons)
To: 2
Bottom Left Door
Jump at the last tile to make it through all of the Boyons. Requires: "canDash"
"ScrewAttack"
{
"or": [
"canCarefulJump",
"SpaceJump",
"h_speedJump"
]
} |
From: 5
Bottom Junction (Right of Boyons)
To: 2
Bottom Left Door
Requires: {
"or": [
{
"enemyKill": {
"enemies": [
[
"Boyon",
"Boyon",
"Boyon",
"Boyon"
]
],
"excludedWeapons": [
"Bombs",
"PseudoScrew"
]
}
},
{
"and": [
"canBePatient",
"h_useMorphBombs"
]
}
]
}Clears obstacles: A |
From: 5
Bottom Junction (Right of Boyons)
To: 2
Bottom Left Door
Requires: {
"haveBlueSuit": {}
} |
From: 5
Bottom Junction (Right of Boyons)
To: 2
Bottom Left Door


Requires: "canInsaneJump" Dev note: It's not really insane jump difficult, but that is where you think about needing to avoid the damage. And failing the jump is still very punishing due to falling into the acid. |
From: 5
Bottom Junction (Right of Boyons)
To: 3
Item
Requires: {
"haveBlueSuit": {}
}
{
"or": [
"canConsecutiveWallJump",
"SpaceJump",
{
"and": [
"canLongIBJ",
"canBePatient"
]
}
]
} |
From: 5
Bottom Junction (Right of Boyons)
To: 3
Item


Requires: {
"useFlashSuit": {}
}
{
"shinespark": {
"frames": 9,
"excessFrames": 7
}
}
{
"or": [
"canConsecutiveWallJump",
"SpaceJump",
{
"and": [
"canLongIBJ",
"canUnmorphBombBoost",
"canBePatient"
]
}
]
} |
From: 5
Bottom Junction (Right of Boyons)
To: 3
Item
Requires: "h_storedSpark"
{
"or": [
{
"shinespark": {
"frames": 121,
"excessFrames": 6
}
},
{
"and": [
{
"shinespark": {
"frames": 117,
"excessFrames": 6
}
},
"HiJump"
]
},
{
"and": [
{
"shinespark": {
"frames": 112,
"excessFrames": 6
}
},
"HiJump",
"canSpeedyJump"
]
}
]
}Dev note: There is no point in using a blue suit to spark or sparking at the bottom if Samus can wall jump. |
|
Use the runway to the right of the Boyons to gain a shinecharge. If the rightmost Boyon is cleared, an extra half tile of runway is available. Requires: {
"or": [
{
"canShineCharge": {
"usedTiles": 14,
"openEnd": 0
}
},
{
"and": [
{
"or": [
{
"enemyKill": {
"enemies": [
[
"Boyon"
]
]
}
},
{
"obstaclesCleared": [
"A"
]
}
]
},
{
"canShineCharge": {
"usedTiles": 14,
"openEnd": 1
}
}
]
}
]
}
"canMidairShinespark"
{
"or": [
{
"shinespark": {
"frames": 121,
"excessFrames": 6
}
},
{
"and": [
{
"shinespark": {
"frames": 117,
"excessFrames": 6
}
},
"HiJump"
]
},
{
"and": [
{
"shinespark": {
"frames": 112,
"excessFrames": 6
}
},
"HiJump",
"canSpeedyJump"
]
},
{
"and": [
"canFastWallJumpClimb",
{
"shinespark": {
"frames": 93,
"excessFrames": 6
}
}
]
},
{
"and": [
"HiJump",
"canFastWallJumpClimb",
{
"shinespark": {
"frames": 83,
"excessFrames": 6
}
}
]
}
]
} |
From: 6
Right of Morph Tunnel with Temporary Blue
To: 3
Item
Unmorph on the leftmost edge of the Speed blocks and jump across. Landing on the right side Speedblock, and the solid tile, gives enough time to run to the item and fall before the block respawns. Or jump fully over the Speed blocks and turn around using X-Ray after collecting the item. Requires: "h_getBlueSpeedMaxRunway"
"canChainTemporaryBlue"
{
"or": [
"canTrickyJump",
"canXRayTurnaround"
]
}Clears obstacles: B Dev note: FIXME: The h_getBlueSpeedMaxRunway is to satisfy tests for now. We should add a proper way to represent that the blue state carries over from the previous strat. FIXME: With Spring Ball it is possible to preserve a flash suit while both collecting the item and going down. |
From: 6
Right of Morph Tunnel with Temporary Blue
To: 5
Bottom Junction (Right of Boyons)
Dev note: Samus is in a Speedball or Blue Suit state. |
{
"$schema": "../../../schema/m3-room.schema.json",
"id": 29,
"name": "Climb Supers Room",
"area": "Crateria",
"subarea": "Central",
"roomAddress": "0x799F9",
"roomEnvironments": [
{
"heated": false
}
],
"mapTileMask": [
[
1,
1,
1,
1
],
[
0,
0,
0,
1
],
[
0,
0,
0,
1
],
[
0,
0,
0,
1
],
[
0,
0,
0,
1
],
[
0,
0,
0,
1
],
[
0,
0,
0,
1
],
[
1,
1,
1,
1
]
],
"nodes": [
{
"id": 1,
"name": "Top Left Door",
"nodeType": "door",
"nodeSubType": "blue",
"nodeAddress": "0x0018c6a",
"doorOrientation": "left",
"doorEnvironments": [
{
"physics": "air"
}
],
"mapTileMask": [
[
2,
1,
1,
1
],
[
0,
0,
0,
1
],
[
0,
0,
0,
1
],
[
0,
0,
0,
1
],
[
0,
0,
0,
1
],
[
0,
0,
0,
1
],
[
0,
0,
0,
1
],
[
1,
1,
1,
1
]
]
},
{
"id": 2,
"name": "Bottom Left Door",
"nodeType": "door",
"nodeSubType": "blue",
"nodeAddress": "0x0018c76",
"doorOrientation": "left",
"doorEnvironments": [
{
"physics": "air"
}
],
"mapTileMask": [
[
1,
1,
1,
1
],
[
0,
0,
0,
1
],
[
0,
0,
0,
1
],
[
0,
0,
0,
1
],
[
0,
0,
0,
1
],
[
0,
0,
0,
1
],
[
0,
0,
0,
1
],
[
2,
2,
2,
1
]
]
},
{
"id": 3,
"name": "Item",
"nodeType": "item",
"nodeSubType": "visible",
"nodeItem": "Super",
"nodeAddress": "0x78478",
"mapTileMask": [
[
1,
1,
1,
2
],
[
0,
0,
0,
1
],
[
0,
0,
0,
1
],
[
0,
0,
0,
1
],
[
0,
0,
0,
1
],
[
0,
0,
0,
1
],
[
0,
0,
0,
1
],
[
1,
1,
1,
1
]
],
"locks": [
{
"name": "Dummy Item Lock",
"lockType": "gameFlag",
"unlockStrats": [
{
"name": "Base (Collect Item)",
"notable": false,
"requires": [],
"flashSuitChecked": true,
"blueSuitChecked": true
}
]
}
]
},
{
"id": 4,
"name": "Top Junction (Right of Spikes)",
"nodeType": "junction",
"nodeSubType": "junction",
"mapTileMask": [
[
1,
2,
2,
1
],
[
0,
0,
0,
1
],
[
0,
0,
0,
1
],
[
0,
0,
0,
1
],
[
0,
0,
0,
1
],
[
0,
0,
0,
1
],
[
0,
0,
0,
1
],
[
1,
1,
1,
1
]
]
},
{
"id": 5,
"name": "Bottom Junction (Right of Boyons)",
"nodeType": "junction",
"nodeSubType": "junction",
"viewableNodes": [
{
"id": 3,
"strats": [
{
"name": "Wall Jump",
"requires": [
"canConsecutiveWallJump"
],
"flashSuitChecked": true,
"blueSuitChecked": true
},
{
"name": "Space Jump",
"requires": [
"SpaceJump"
],
"flashSuitChecked": true,
"blueSuitChecked": true
},
{
"name": "IBJ",
"requires": [
"canLongIBJ",
"canBePatient"
],
"flashSuitChecked": true,
"blueSuitChecked": true
}
]
}
],
"mapTileMask": [
[
1,
1,
1,
1
],
[
0,
0,
0,
2
],
[
0,
0,
0,
2
],
[
0,
0,
0,
2
],
[
0,
0,
0,
2
],
[
0,
0,
0,
2
],
[
0,
0,
0,
2
],
[
1,
1,
1,
2
]
]
},
{
"id": 6,
"name": "Right of Morph Tunnel with Temporary Blue",
"nodeType": "junction",
"nodeSubType": "junction",
"mapTileMask": [
[
1,
1,
1,
2
],
[
0,
0,
0,
1
],
[
0,
0,
0,
1
],
[
0,
0,
0,
1
],
[
0,
0,
0,
1
],
[
0,
0,
0,
1
],
[
0,
0,
0,
1
],
[
1,
1,
1,
1
]
]
}
],
"obstacles": [
{
"id": "A",
"name": "Boyons",
"obstacleType": "enemies"
},
{
"id": "B",
"name": "Above SpeedBlocks with Temp Blue",
"obstacleType": "abstract"
},
{
"id": "C",
"name": "At Item in Direct G-Mode Morph with Bombs",
"obstacleType": "abstract"
}
],
"enemies": [
{
"id": "e1",
"groupName": "Climb Supers Boyons",
"enemyName": "Boyon",
"quantity": 4,
"homeNodes": [
2
]
}
],
"strats": [
{
"link": [
1,
1
],
"name": "Base (Unlock Door)",
"requires": [],
"unlocksDoors": [
{
"types": [
"ammo"
],
"requires": []
}
],
"flashSuitChecked": true,
"blueSuitChecked": true
},
{
"link": [
1,
1
],
"name": "Base (Come In Normally)",
"entranceCondition": {
"comeInNormally": {}
},
"requires": [],
"flashSuitChecked": true,
"blueSuitChecked": true
},
{
"link": [
1,
1
],
"name": "Base (Come In With Mockball)",
"entranceCondition": {
"comeInWithMockball": {
"adjacentMinTiles": 0,
"remoteAndLandingMinTiles": [
[
0,
0
]
],
"speedBooster": "any"
}
},
"requires": [],
"flashSuitChecked": true,
"blueSuitChecked": true
},
{
"link": [
2,
2
],
"name": "Base (Unlock Door)",
"requires": [],
"unlocksDoors": [
{
"types": [
"ammo"
],
"requires": []
}
],
"flashSuitChecked": true,
"blueSuitChecked": true
},
{
"link": [
2,
2
],
"name": "Base (Come In Normally)",
"entranceCondition": {
"comeInNormally": {}
},
"requires": [],
"flashSuitChecked": true,
"blueSuitChecked": true
},
{
"link": [
2,
2
],
"name": "Base (Come In With Mockball)",
"entranceCondition": {
"comeInWithMockball": {
"adjacentMinTiles": 0,
"remoteAndLandingMinTiles": [
[
0,
0
]
],
"speedBooster": "any"
}
},
"requires": [],
"flashSuitChecked": true,
"blueSuitChecked": true
},
{
"name": "Base (Collect Item)",
"notable": false,
"requires": [],
"flashSuitChecked": true,
"blueSuitChecked": true,
"link": [
3,
3
],
"collectsItems": [
3
]
},
{
"id": 1,
"link": [
1,
1
],
"name": "Leave with Runway",
"requires": [],
"exitCondition": {
"leaveWithRunway": {
"length": 6,
"openEnd": 1
}
},
"flashSuitChecked": true,
"blueSuitChecked": true
},
{
"id": 92,
"link": [
1,
1
],
"name": "Come in Shinecharging, Crystal Spark",
"entranceCondition": {
"comeInShinecharging": {
"length": 5,
"openEnd": 0
},
"comesInHeated": "no"
},
"requires": [
"h_CrystalSpark"
],
"flashSuitChecked": true,
"blueSuitChecked": true
},
{
"id": 75,
"link": [
1,
1
],
"name": "Leave With Grapple Swing",
"requires": [],
"exitCondition": {
"leaveWithGrappleSwing": {
"blocks": [
{
"position": [
9,
2
],
"note": "Closest Grapple block to door"
}
]
}
},
"flashSuitChecked": true,
"blueSuitChecked": true
},
{
"id": 2,
"link": [
1,
1
],
"name": "X-Mode, Leave Shinecharged",
"requires": [
"h_spikeXModeShinecharge",
{
"shineChargeFrames": 110
}
],
"exitCondition": {
"leaveShinecharged": {}
},
"flashSuitChecked": true,
"blueSuitChecked": true,
"devNote": "Two spike hits are expected per attempt (with any additional leniency hits being multiplied by this amount)."
},
{
"id": 84,
"link": [
1,
1
],
"name": "Come in Shinecharged, Gain Flash Suit (Spikesuit)",
"entranceCondition": {
"comeInShinecharged": {}
},
"requires": [
{
"shineChargeFrames": 70
},
"h_spikeSuitSpikeHitLeniency",
{
"spikeHits": 1
},
"canSpikeSuit",
{
"shinespark": {
"frames": 4,
"excessFrames": 4
}
}
],
"flashSuitChecked": true,
"blueSuitChecked": true
},
{
"id": 85,
"link": [
1,
1
],
"name": "Come in Shinecharging, Gain Flash Suit (Spikesuit)",
"entranceCondition": {
"comeInShinecharging": {
"length": 3,
"openEnd": 1
}
},
"requires": [
{
"spikeHits": 1
},
"h_spikeSuitSpikeHitLeniency",
"canSpikeSuit",
{
"shinespark": {
"frames": 5,
"excessFrames": 5
}
}
],
"flashSuitChecked": true,
"blueSuitChecked": true
},
{
"id": 86,
"link": [
1,
1
],
"name": "Gain Flash Suit (X-Mode Spikesuit)",
"requires": [
"h_spikeXModeSpikeSuit",
{
"shinespark": {
"frames": 5,
"excessFrames": 5
}
}
],
"flashSuitChecked": true,
"blueSuitChecked": true
},
{
"id": 93,
"link": [
1,
1
],
"name": "SpeedKeep - Gain Flash Suit (Spikesuit)",
"entranceCondition": {
"comeInRunning": {
"speedBooster": "yes",
"minTiles": 4
}
},
"requires": [
"canSpeedKeep",
{
"canShineCharge": {
"usedTiles": 21,
"openEnd": 2
}
},
{
"spikeHits": {
"mul": [
3,
"n_speedKeepAttempts"
]
}
},
{
"spikeHits": 1
},
"h_spikeSuitSpikeHitLeniency",
"canPatientSpikeSuit",
{
"shinespark": {
"frames": 6,
"excessFrames": 2
}
}
],
"flashSuitChecked": true,
"blueSuitChecked": true,
"devNote": "FIXME: the lenience needs to multiply speed keep attempts and spike suit attempts."
},
{
"id": 94,
"link": [
1,
1
],
"name": "Inroom SpeedKeep - Gain Flash Suit (Spikesuit)",
"requires": [
{
"notable": "In-Room SpeedKeep for Temporary Blue"
},
"canSpeedKeep",
{
"doorUnlockedAtNode": 1
},
{
"canShineCharge": {
"usedTiles": 13,
"openEnd": 1
}
},
{
"spikeHits": {
"mul": [
3,
"n_speedKeepAttempts"
]
}
},
{
"spikeHits": 1
},
"h_spikeSuitSpikeHitLeniency",
"canPatientSpikeSuit",
{
"shinespark": {
"frames": 6,
"excessFrames": 2
}
}
],
"flashSuitChecked": true,
"blueSuitChecked": true,
"devNote": "FIXME: the lenience needs to multiply speed keep attempts and spike suit attempts."
},
{
"id": 81,
"link": [
1,
1
],
"name": "Come in Shinecharged - Gain Blue Suit (X-Mode)",
"entranceCondition": {
"comeInShinecharged": {}
},
"requires": [
{
"shineChargeFrames": 145
},
"h_spikeXModeBlueSuit",
{
"shinespark": {
"frames": 1
}
}
],
"flashSuitChecked": true,
"blueSuitChecked": true
},
{
"id": 87,
"link": [
1,
1
],
"name": "Come in Shinecharging, Gain Blue Suit (X-Mode)",
"entranceCondition": {
"comeInShinecharging": {
"length": 3,
"openEnd": 1
}
},
"requires": [
"h_spikeXModeBlueSuit",
{
"shinespark": {
"frames": 1
}
}
],
"flashSuitChecked": true,
"blueSuitChecked": true
},
{
"id": 82,
"link": [
1,
1
],
"name": "Gain Blue Suit (Double X-Mode)",
"requires": [
"h_spikeDoubleXModeBlueSuit",
{
"shinespark": {
"frames": 1
}
}
],
"flashSuitChecked": true,
"blueSuitChecked": true
},
{
"id": 3,
"link": [
1,
1
],
"name": "Crystal Flash",
"requires": [
"h_CrystalFlash"
],
"flashSuitChecked": true,
"blueSuitChecked": true
},
{
"id": 4,
"link": [
1,
3
],
"name": "Direct G-Mode Morph Ceiling Bomb Jump",
"entranceCondition": {
"comeInWithGMode": {
"mode": "direct",
"morphed": true
}
},
"requires": [
"h_artificialMorphLongCeilingBombJump"
],
"clearsObstacles": [
"C"
],
"flashSuitChecked": true,
"blueSuitChecked": true
},
{
"id": 5,
"link": [
1,
3
],
"name": "G-Mode Morph",
"entranceCondition": {
"comeInWithGMode": {
"mode": "any",
"morphed": true
}
},
"requires": [
{
  "or": [
    "h_artificialMorphLongCeilingBombJump",
    {
      "and": [
        "h_artificialMorphSpringBall",
        {
          "spikeHits": 4
        }
      ]
    },
    {
      "and": [
        "h_artificialMorphSpringBall",
        "h_artificialMorphBombHorizontally",
        {
          "spikeHits": 3
        }
      ]
    },
    {
      "and": [
        "h_artificialMorphSpringFling",
        "canTrickyJump",
        {
          "spikeHits": 2
        }
      ]
    },
    {
      "and": [
        "h_artificialMorphIBJ",
        {
          "spikeHits": 10
        },
        {
          "or": [
            "h_artificialMorphBombHorizontally",
            {
              "spikeHits": 2
            }
          ]
        }
      ]
    }
  ]
}
],
"flashSuitChecked": true,
"blueSuitChecked": false,
"note": [
"It is possible to cross the spike pit with spring flings and two spike hits.",
"Pause then jump just before the fade out ends and turn Spring Ball off in order to get more horizontal distance at the start and avoid one spike hit.",
"Turn Spring Ball off and on again while jumping on the spikes to get across to avoid another."
],
"devNote": [
"This is a softlock unless the item is Morph.",
"The IBJ strat has 2 extra spike hits added as a leniency."
]
},
{
"id": 6,
"link": [
1,
4
],
"name": "Base",
"requires": [
{
  "or": [
    {
      "and": [
        "Grapple",
        "h_midAirShootUp"
      ]
    },
    "SpaceJump"
  ]
}
],
"flashSuitChecked": true,
"blueSuitChecked": true
},
{
"id": 7,
"link": [
1,
4
],
"name": "Take Spike Damage",
"requires": [
"canDash",
{
"spikeHits": 1
},
{
"or": [
"canUseIFrames",
{
"spikeHits": 1
}
]
}
],
"flashSuitChecked": true,
"blueSuitChecked": true
},
{
"id": 99,
"link": [
1,
4
],
"name": "Cross with Blue Suit",
"requires": [
{
"haveBlueSuit": {}
},
{
"spikeHits": 2
},
{
"or": [
{
"tech": "canHorizontalDamageBoost"
},
"h_complexToCarryFlashSuit",
{
"spikeHits": 1
}
]
}
],
"flashSuitChecked": true,
"blueSuitChecked": true
},
{
"id": 8,
"link": [
1,
4
],
"name": "Shinespark",
"entranceCondition": {
"comeInWithSpark": {}
},
"requires": [
{
  "shinespark": {
    "frames": 65,
    "excessFrames": 6
  }
}
],
"flashSuitChecked": true,
"blueSuitChecked": true
},
{
"id": 9,
"link": [
1,
4
],
"name": "Come in Shinecharging, Shinespark",
"entranceCondition": {
"comeInShinecharging": {
"length": 3,
"openEnd": 1
}
},
"requires": [
"canHorizontalShinespark",
{
"or": [
{
"shinespark": {
"frames": 56,
"excessFrames": 6
}
},
{
"and": [
"canHorizontalMidairShinespark",
{
"shinespark": {
"frames": 41,
"excessFrames": 4
}
}
]
}
]
}
],
"flashSuitChecked": true,
"blueSuitChecked": true
},
{
"id": 104,
"link": [
1,
4
],
"name": "Come in Shinecharged, Shinespark",
"entranceCondition": {
"comeInShinecharged": {}
},
"requires": [
{
  "or": [
    {
      "and": [
        {
          "shineChargeFrames": 40
        },
        "canHorizontalShinespark",
        {
          "shinespark": {
            "frames": 55,
            "excessFrames": 6
          }
        }
      ]
    },
    {
      "and": [
        {
          "shineChargeFrames": 75
        },
        "canHorizontalMidairShinespark",
        {
          "shinespark": {
            "frames": 43,
            "excessFrames": 8
          }
        }
      ]
    }
  ]
}
],
"flashSuitChecked": true,
"blueSuitChecked": true
},
{
"id": 67,
"link": [
1,
4
],
"name": "Come in Shinecharged, Tricky Shinespark",
"entranceCondition": {
"comeInShinecharged": {}
},
"requires": [
{
"shineChargeFrames": 80
},
"canShinechargeMovementTricky",
"canDownGrab",
{
"shinespark": {
"frames": 38,
"excessFrames": 0
}
}
],
"flashSuitChecked": true,
"blueSuitChecked": true,
"note": [
"Run, jump, and spark mid-air at a specific height to be able to down-grab onto the ledge."
]
},
{
"id": 68,
"link": [
1,
4
],
"name": "Come in Shinecharging, Tricky Shinespark",
"entranceCondition": {
"comeInShinecharging": {
"length": 5,
"openEnd": 0
}
},
"requires": [
"canShinechargeMovementTricky",
"canDownGrab",
{
"shinespark": {
"frames": 35,
"excessFrames": 0
}
}
],
"flashSuitChecked": true,
"blueSuitChecked": true,
"note": [
"After gaining a shinecharge, run back to the door, then run right, jump, and spark mid-air at a specific height to be able to down-grab onto the ledge."
]
},
{
"id": 69,
"link": [
1,
4
],
"name": "Pause Abuse Spike Damage",
"requires": [
"canUseIFrames",
"h_pauseAbuseMinimalReserveRefill",
{
"or": [
"canDash",
{
"and": [
"h_pauseAbuseMinimalReserveRefill",
{
"or": [
{
"and": [
{
"tech": "canHorizontalDamageBoost"
},
"h_complexToCarryFlashSuit"
]
},
"h_pauseAbuseMinimalReserveRefill"
]
}
]
}
]
}
],
"flashSuitChecked": true,
"blueSuitChecked": true
},
{
"id": 10,
"link": [
1,
4
],
"name": "Use Stored Spark",
"requires": [
"h_storedSpark",
"canDash",
{
"shinespark": {
"frames": 41,
"excessFrames": 6
}
}
],
"flashSuitChecked": true,
"blueSuitChecked": true
},
{
"id": 11,
"link": [
1,
4
],
"name": "Ceiling Bomb Jump Over Spikes",
"requires": [
"canLongCeilingBombJump"
],
"flashSuitChecked": true,
"blueSuitChecked": true
},
{
"id": 12,
"link": [
1,
4
],
"name": "Speed Jump Spring Fling",
"entranceCondition": {
"comeInRunning": {
"speedBooster": "yes",
"minTiles": 28
}
},
"requires": [
"h_speedJump",
"canTrickyJump",
"canLateralMidAirMorph",
"canSpringFling"
],
"flashSuitChecked": true,
"blueSuitChecked": true,
"note": "Run and jump into an airball, pressing pause just as Samus hits the ceiling, in order to unequip Spring Ball to reset fall speed.",
"devNote": "This can be done with 26 tiles of other-room runway, but it would probably require a higher movement tech."
},
{
"id": 13,
"link": [
1,
4
],
"name": "Spring Ball Bounce Spring Fling",
"entranceCondition": {
"comeInWithSpringBallBounce": {
"speedBooster": "yes",
"movementType": "controlled",
"remoteAndLandingMinTiles": [
[
30,
1
]
]
}
},
"requires": [
"canTrickyJump",
"canSpringFling"
],
"flashSuitChecked": true,
"blueSuitChecked": true
},
{
"id": 14,
"link": [
1,
5
],
"name": "G-Mode Morph and Bombs to Overload Speed Blocks",
"entranceCondition": {
"comeInWithGMode": {
"mode": "any",
"morphed": true
}
},
"requires": [
"h_artificialMorphBombs",
{
"or": [
{
"and": [
"h_artificialMorphSpringBall",
{
"spikeHits": 4
}
]
},
{
"and": [
"h_artificialMorphSpringBall",
"h_artificialMorphBombHorizontally",
{
"spikeHits": 3
}
]
},
{
"and": [
"h_artificialMorphSpringFling",
"canTrickyJump",
{
"spikeHits": 2
}
]
},
{
"and": [
"Morph",
{
"or": [
"SpaceJump",
{
"and": [
{
"spikeHits": 1
},
{
"or": [
"canUseIFrames",
{
"spikeHits": 1
}
]
}
]
}
]
}
]
},
{
"and": [
"h_artificialMorphIBJ",
{
"spikeHits": 10
},
{
"or": [
"h_artificialMorphBombHorizontally",
{
"spikeHits": 2
}
]
}
]
},
"h_artificialMorphLongCeilingBombJump"
]
}
],
"flashSuitChecked": true,
"blueSuitChecked": false,
"note": [
"It is possible to cross the spike pit with spring flings and two spike hits.",
"Pause then jump just before the fade out ends and turn Spring Ball off in order to get more horizontal distance at the start and avoid one spike hit.",
"Turn Spring Ball off and on again while jumping on the spikes to get across to avoid another."
],
"devNote": "The IBJ from spikes has 2 extra spike hits added as a leniency."
},
{
"id": 15,
"link": [
1,
5
],
"name": "G-Mode and Grapple to Overload Grapple Blocks",
"entranceCondition": {
"comeInWithGMode": {
"mode": "any",
"morphed": false
}
},
"requires": [
"Morph",
"Grapple",
{
"or": [
{
"and": [
"SpaceJump",
"canTrickyJump"
]
},
{
"spikeHits": 1
}
]
}
],
"flashSuitChecked": true,
"blueSuitChecked": true,
"note": [
"Grapple part way across the room before falling into the spike pit.",
"Alternatively, cross with Space Jump then quickly Grapple and release the Grapple blocks a few times until they stop working. Be careful not to fall into the spikes."
],
"devNote": "FIXME: Grapple will quickly overload PLMS. It is barely possible to cross the gap using short grapples, canResetFallSpeed, and ending with a swing."
},
{
"id": 16,
"link": [
1,
5
],
"name": "G-Mode Morph Overload PLMs by Power Bombing Item",
"entranceCondition": {
"comeInWithGMode": {
"mode": "direct",
"morphed": true
}
},
"requires": [
"canPowerBombItemOverloadPLMs",
{
"itemNotCollectedAtNode": 3
},
"canRiskPermanentLossOfAccess",
"h_artificialMorphPowerBomb",
"h_artificialMorphPowerBomb",
{
"or": [
{
"and": [
"h_artificialMorphSpringBall",
{
"spikeHits": 4
}
]
},
{
"and": [
"h_artificialMorphSpringBall",
"h_artificialMorphBombHorizontally",
{
"spikeHits": 3
}
]
},
{
"and": [
"h_artificialMorphSpringFling",
"canTrickyJump",
{
"spikeHits": 2
}
]
},
{
"and": [
"Morph",
{
"or": [
"SpaceJump",
{
"and": [
{
"spikeHits": 1
},
{
"or": [
"canUseIFrames",
{
"spikeHits": 1
}
]
}
]
}
]
}
]
}
]
}
],
"flashSuitChecked": true,
"blueSuitChecked": false,
"note": [
"Place the PBs exactly two tiles left of the Morph tunnel. Be sure not to touch the item if this strat will be needed again in the future.",
"It is possible to cross the spike pit with spring flings and two spike hits.",
"Pause then jump just before the fade out ends and turn Spring Ball off in order to get more horizontal distance at the start and avoid one spike hit.",
"Turn Spring Ball off and on again while jumping on the spikes to get across to avoid another."
]
},
{
"id": 76,
"link": [
1,
5
],
"name": "Direct G-Mode Overload PLMs, Remote Acquire Item",
"entranceCondition": {
"comeInWithGMode": {
"mode": "direct",
"morphed": false
}
},
"requires": [
"Morph",
"SpaceJump",
"canRemoteAcquire",
{
"or": [
"h_blueSuitGMode",
{
"and": [
{
"itemNotCollectedAtNode": 3
},
"canRiskPermanentLossOfAccess"
]
},
{
"and": [
"Grapple",
"canTrickyJump"
]
}
]
}
],
"collectsItems": [
3
],
"flashSuitChecked": true,
"blueSuitChecked": true,
"note": [
"Move through the item to overload PLMs, then go down through the speed blocks and exit G-mode to collect the item.",
"Note that if the item has already been collected, Samus can overload PLMs with Grapple."
],
"detailNote": [
"With Morph and Grapple, quickly grapple to then release grapple on the grapple blocks a few times until they stop working. Be careful not to fall into the spikes."
]
},
{
"id": 105,
"link": [
1,
5
],
"name": "Direct G-Mode Crystal Flash, Overload PLMs, Remote Acquire Item",
"entranceCondition": {
"comeInWithGMode": {
"mode": "direct",
"morphed": false
}
},
"requires": [
{
"noBlueSuit": {}
},
"h_CrystalFlash",
"canRemoteAcquire",
{
"or": [
{
"and": [
{
"itemNotCollectedAtNode": 3
},
"canRiskPermanentLossOfAccess",
{
"or": [
"SpaceJump",
{
"spikeHits": 1
}
]
}
]
},
{
"and": [
"SpaceJump",
"Grapple",
"canTrickyJump"
]
},
{
"and": [
"Grapple",
{
"spikeHits": 1
}
]
}
]
},
{
"autoReserveTrigger": {}
},
{
"enemyDamage": {
"enemy": "Boyon",
"type": "contact",
"hits": 1
}
}
],
"collectsItems": [
3
],
"flashSuitChecked": true,
"blueSuitChecked": true,
"note": [
"Move through the item to overload PLMs, then go down through the speed blocks and exit G-mode to collect the item.",
"Note that if the item has already been collected, Samus can overload PLMs with Grapple."
],
"detailNote": [
"With Morph and Grapple, quickly grapple to then release grapple on the grapple blocks a few times until they stop working. Be careful not to fall into the spikes."
],
"devNote": [
"Without Bombs, this can not be done with artificial morph, because there is no morphed method to cross the spikes without taking damage;",
"with Bombs, anolther strat will be used which can overload PLMs using the speed blocks.",
"Remote acquiring the item in G-mode with Morph is not useful with a blue suit - alternative strats will be able to cross the room to 3, which can then return or go down.",
"FIXME: It is possible to kill the Boyon during the reserve trigger, or to use the acid instead and end with full Energy."
]
},
{
"id": 17,
"link": [
1,
6
],
"name": "SpaceJump Speedball",
"entranceCondition": {
"comeInGettingBlueSpeed": {
"length": 5,
"openEnd": 1
}
},
"requires": [
"canSpeedball",
"canBlueSpaceJump"
],
"flashSuitChecked": true,
"blueSuitChecked": true
},
{
"id": 18,
"link": [
1,
6
],
"name": "Blue Spring Ball Bounce (Come in Getting Blue Speed)",
"entranceCondition": {
"comeInGettingBlueSpeed": {
"length": 5,
"openEnd": 1,
"minExtraRunSpeed": "$2.0",
"maxExtraRunSpeed": "$3.F"
}
},
"requires": [
"h_blueJump",
"canTrickySpringBallBounce",
{
"or": [
"canInsaneJump",
"canChainTemporaryBlue"
]
},
{
"spikeHits": 1
}
],
"flashSuitChecked": true,
"blueSuitChecked": true,
"note": [
"Use Springball on the spikes to cross the room with a Speedball.",
"Then bounce into the Morph tunnel and use Springball to bounce all of the way through.",
"It can help to unmorph before the Morph tunnel and use temporary blue to start the bounce into the tunnel."
],
"devNote": "Higher and lower run speeds can also work but may need to jump earlier or take additional spike hits."
},
{
"id": 19,
"link": [
1,
6
],
"name": "Spring Fling Temporary Blue (Come in Getting Blue Speed)",
"entranceCondition": {
"comeInGettingBlueSpeed": {
"length": 5,
"openEnd": 1,
"minExtraRunSpeed": "$5.8"
}
},
"requires": [
"canTrickyJump",
"canMomentumConservingMorph",
"canSpringFling",
"canTemporaryBlue"
],
"flashSuitChecked": true,
"blueSuitChecked": true,
"note": "Run and jump into an airball, pressing pause just as Samus hits the ceiling, in order to unequip Spring Ball to reset fall speed."
},
{
"id": 20,
"link": [
1,
6
],
"name": "Spring Fling Temporary Blue (Come in With Blue Spring Ball Bounce)",
"entranceCondition": {
"comeInWithBlueSpringBallBounce": {
"movementType": "controlled",
"minExtraRunSpeed": "$5.8"
}
},
"requires": [
"canTrickyJump",
"canLateralMidAirMorph",
"canSpringFling",
"canTemporaryBlue"
],
"flashSuitChecked": true,
"blueSuitChecked": true
},
{
"id": 21,
"link": [
1,
6
],
"name": "Temporary Blue Springball Bounce",
"entranceCondition": {
"comeInWithTemporaryBlue": {}
},
"requires": [
"canChainTemporaryBlue",
"canSpringBallBounce",
{
"spikeHits": 3
}
],
"flashSuitChecked": true,
"blueSuitChecked": true,
"note": [
"Use Springball on the spikes to cross the room while retaining temporary blue.",
"Then use Spring Ball to bounce all of the way through the Morph tunnel."
]
},
{
"id": 22,
"link": [
1,
6
],
"name": "X-Mode BlueSuit",
"entranceCondition": {
"comeInShinecharging": {
"length": 4,
"openEnd": 1
}
},
"requires": [
"canSuperjump",
{
"shinespark": {
"frames": 7,
"excessFrames": 0
}
},
"h_XModeSpikeHit",
{
"or": [
{
"and": [
"h_XModeSpikeHit",
"h_XModeSpikeHit"
]
},
{
"and": [
"h_XModeSpikeHit",
"SpaceJump"
]
},
"Grapple"
]
}
],
"flashSuitChecked": true,
"blueSuitChecked": true,
"note": "Enter with a shinespark ready, activate XMode by bouncing into the spikes, then activate the shinespark but release XMode during the shinespark windup animation.",
"devNote": [
"There is 1 unusable tile in this runway."
]
},
{
"id": 23,
"link": [
1,
6
],
"name": "In-Room X-Mode BlueSuit",
"requires": [
{
"notable": "In-Room X-Mode BlueSuit"
},
"canSuperjump",
"h_XModeSpikeHit",
"h_XModeSpikeHit",
"h_XModeSpikeHit",
"h_shinechargeMaxRunway",
{
"shinespark": {
"frames": 5
}
},
"h_XModeSpikeHit",
{
"or": [
{
"and": [
"h_XModeSpikeHit",
"h_XModeSpikeHit"
]
},
{
"and": [
"SpaceJump",
"h_XModeSpikeHit"
]
},
"Grapple"
]
}
],
"flashSuitChecked": true,
"blueSuitChecked": true,
"note": [
"Use X-Mode to store a spikesuit, and then convert that to a blue suit with more X-Mode.",
"By bouncing on the ledge and arm pumping a few tiles in the first X-Mode,",
"it is possible to reach the right with a horizontal damage boost and only a single additional spike hit after the superjump."
]
},
{
"id": 24,
"link": [
1,
6
],
"name": "Speedkeep (Come in With Temporary Blue)",
"entranceCondition": {
"comeInWithTemporaryBlue": {}
},
"requires": [
"canChainTemporaryBlue",
"can4HighMidAirMorph",
"canSpeedKeep",
{
"spikeHits": {
"add": [
"n_speedKeepAttempts",
"n_speedKeepLenience"
]
}
},
"canSpeedball"
],
"flashSuitChecked": true,
"blueSuitChecked": true,
"note": [
"Bounce into the spikes and use a speedkeep to run on spikes to setup for a speedball towards the item.",
"Bouncing on the platform near the door saves a spike hit."
],
"devNote": [
"The extra lenience is because of the need to either to perform a very precise jump off the spikes",
"or to start with a bounce on the spikes, taking an extra hit."
]
},
{
"id": 25,
"link": [
1,
6
],
"name": "SpeedKeep for Temporary Blue, Slow Entry, Bounce on Runway",
"entranceCondition": {
"comeInRunning": {
"speedBooster": "yes",
"minTiles": 12
}
},
"requires": [
"canSpeedKeep",
"canCarefulJump",
"canSlowShortCharge",
"can4HighMidAirMorph",
{
"spikeHits": "n_speedKeepAttempts"
},
"canSpeedball"
],
"flashSuitChecked": true,
"blueSuitChecked": true,
"note": [
"Bounce into the spikes and use a speedkeep to run on spikes to setup for a speedball towards the item.",
"Bouncing on the platform near the door saves a spike hit.",
"Or a damage boost speedkeep could be used instead of a spike speedkeep with enough runspeed."
]
},
{
"id": 26,
"link": [
1,
6
],
"name": "SpeedKeep for Temporary Blue",
"entranceCondition": {
"comeInRunning": {
"speedBooster": "yes",
"minTiles": 4
}
},
"requires": [
"canSpeedKeep",
"canCarefulJump",
{
"getBlueSpeed": {
"usedTiles": 21,
"openEnd": 2
}
},
{
"spikeHits": "n_speedKeepAttempts"
},
{
"or": [
{
"spikeHits": "n_speedKeepAttempts"
},
{
"and": [
"canChainTemporaryBlue",
{
"spikeHits": "n_speedKeepLenience"
}
]
}
]
},
"canSpeedball"
],
"flashSuitChecked": true,
"blueSuitChecked": true,
"note": [
"Bounce into the spikes and use a speedkeep to run on spikes to setup for a speedball towards the item.",
"A damage boost speedkeep could be used instead of a spike speedkeep with enough runspeed."
],
"devNote": [
"The extra lenience is because of the need to either to perform a very precise jump off the spikes,",
"or to start with a bounce on the spikes, taking an extra hit."
]
},
{
"id": 27,
"link": [
1,
6
],
"name": "In-Room SpeedKeep for Temporary Blue",
"requires": [
{
"notable": "In-Room SpeedKeep for Temporary Blue"
},
"canSpeedKeep",
"canSlowShortCharge",
{
"doorUnlockedAtNode": 1
},
{
"or": [
{
"and": [
"canChainTemporaryBlue",
{
"getBlueSpeed": {
"usedTiles": 13,
"openEnd": 1
}
},
{
"spikeHits": "n_speedKeepAttempts"
}
]
},
{
"and": [
{
"getBlueSpeed": {
"usedTiles": 14,
"openEnd": 1
}
},
{
"spikeHits": {
"mul": [
2,
"n_speedKeepAttempts"
]
}
}
]
},
{
"and": [
"canChainTemporaryBlue",
{
"spikeHits": {
"mul": [
{
"add": [
"n_speedKeepAttempts",
2
]
},
"n_speedKeepAttempts"
]
}
}
]
}
]
},
"canSpeedball"
],
"flashSuitChecked": true,
"blueSuitChecked": true,
"note": [
"Using only the short runway and spike pit, use one or two speedkeeps to speedball towards the item location.",
"This requires either a very short shortcharge, or a second speedkeep in the spikes which also resets Samus' run speed with a crouch jump before spike i-frames expire."
],
"devNote": [
"1 - Stop and bounce on left ledge.",
"2 - Jump from ledge and bounce in spikes.",
"3 - Stop and bounce on left ledge, then stop in spikes and speedkeep again."
]
},
{
"id": 28,
"link": [
2,
1
],
"name": "X-Ray Climb",
"entranceCondition": {
"comeInWithDoorStuckSetup": {}
},
"requires": [
"canLongXRayClimb",
"canBeVeryPatient"
],
"flashSuitChecked": true,
"blueSuitChecked": true,
"note": "Climb up 7 screens."
},
{
"id": 29,
"link": [
2,
1
],
"name": "Very Deep Stuck X-Ray Climb",
"entranceCondition": {
"comeInWithGMode": {
"mode": "direct",
"morphed": false
}
},
"requires": [
"canGModeXRayClimb",
"canLongXRayClimb",
"canBeVeryPatient"
],
"bypassesDoorShell": "yes",
"flashSuitChecked": true,
"blueSuitChecked": true,
"note": [
"Enter with G-mode direct, back up to between 1 and 6 pixels from the door transition, and activate X-ray to get very deep stuck in the door.",
"Climb up 7 screens, and perform a turnaround buffered spin-jump away from the door to trigger the transition, bypassing any lock on the door."
]
},
{
"id": 30,
"link": [
2,
1
],
"name": "Grapple Teleport",
"entranceCondition": {
"comeInWithGrappleTeleport": {
"blockPositions": [
[
12,
13
]
]
}
},
"requires": [],
"flashSuitChecked": true,
"blueSuitChecked": true,
"note": [
"Samus will enter the room grappled to a spike block below.",
"Release Grapple quickly after entering, then aim up and grapple onto a Grapple block on the ceiling to avoid taking spike damage."
]
},
{
"id": 83,
"link": [
2,
2
],
"name": "R-Mode Spark Interrupt",
"entranceCondition": {
"comeInWithRMode": {}
},
"requires": [
{
"or": [
"h_CrystalFlashForReserveEnergy",
{
"and": [
"h_RModeCanRefillReserves",
{
"resourceMissingAtMost": [
{
"type": "Missile",
"count": 0
}
]
},
{
"enemyKill": {
"enemies": [
[
"Boyon",
"Boyon",
"Boyon"
]
],
"excludedWeapons": [
"PseudoScrew"
]
}
},
{
"or": [
{
"and": [
"canBeLucky",
{
"partialRefill": {
"type": "ReserveEnergy",
"limit": 5
}
}
]
},
{
"and": [
"canBeVeryLucky",
{
"partialRefill": {
"type": "ReserveEnergy",
"limit": 20
}
}
]
}
]
}
]
}
]
},
{
"or": [
{
"canShineCharge": {
"usedTiles": 25,
"openEnd": 0
}
},
{
"and": [
"canTrivialUseFrozenEnemies",
{
"canShineCharge": {
"usedTiles": 31,
"openEnd": 0
}
},
{
"disableEquipment": "Ice"
}
]
}
]
},
{
"autoReserveTrigger": {}
},
"canRModeSparkInterrupt"
],
"clearsObstacles": [
"A"
],
"flashSuitChecked": true,
"blueSuitChecked": true,
"note": [
"Kill all three Boyons for energy, or Crystal Flash. If you need to freeze Boyons for extra runway, disable Ice Beam",
"to force them to unfreeze so you can interrupt spark. If you end up killing all four Boyons, you can also dip in the",
"acid for the spark interrupt."
]
},
{
"id": 31,
"link": [
2,
2
],
"name": "Leave with Runway",
"requires": [],
"exitCondition": {
"leaveWithRunway": {
"length": 35,
"openEnd": 0
}
},
"flashSuitChecked": true,
"blueSuitChecked": true
},
{
"id": 32,
"link": [
2,
2
],
"name": "Leave with Runway, Frozen Boyon Bridge",
"requires": [
"canTrivialUseFrozenEnemies"
],
"exitCondition": {
"leaveWithRunway": {
"length": 45,
"openEnd": 1
}
},
"flashSuitChecked": true,
"blueSuitChecked": true
},
{
"id": 33,
"link": [
2,
2
],
"name": "Crystal Flash",
"requires": [
"h_CrystalFlash"
],
"flashSuitChecked": true,
"blueSuitChecked": true
},
{
"id": 34,
"link": [
2,
2
],
"name": "Kill The Boyons",
"requires": [
{
  "or": [
    {
      "enemyKill": {
        "enemies": [
          [
            "Boyon",
            "Boyon",
            "Boyon",
            "Boyon"
          ]
        ],
        "excludedWeapons": [
          "Bombs",
          "PseudoScrew"
        ]
      }
    },
    {
      "and": [
        "canBePatient",
        "h_useMorphBombs"
      ]
    },
    {
      "and": [
        {
          "enemyDamage": {
            "enemy": "Boyon",
            "type": "contact",
            "hits": 16
          }
        },
        "canCarefulJump",
        "canPseudoScrew"
      ]
    }
  ]
}
],
"clearsObstacles": [
"A"
],
"flashSuitChecked": true,
"blueSuitChecked": true
},
{
"id": 95,
"link": [
2,
2
],
"name": "Crystal Spark",
"requires": [
"h_shinechargeMaxRunway",
"h_CrystalSpark"
],
"flashSuitChecked": true,
"blueSuitChecked": true
},
{
"id": 77,
"link": [
2,
2
],
"name": "Direct G-Mode, Crystal Flash, Shinespark, Return",
"entranceCondition": {
"comeInWithGMode": {
"mode": "direct",
"morphed": true
}
},
"requires": [
"canComplexGMode",
"canRemoteAcquire",
"h_artificialMorphCrystalFlash",
{
"or": [
{
"and": [
"canTrivialUseFrozenEnemies",
"h_shinechargeMaxRunway",
"canMidairShinespark",
{
"shinespark": {
"frames": 118,
"excessFrames": 6
}
}
]
},
{
"and": [
"canShinechargeMovementComplex",
{
"canShineCharge": {
"usedTiles": 34,
"openEnd": 0
}
},
{
"shinespark": {
"frames": 128,
"excessFrames": 6
}
}
]
},
{
"and": [
{
"blueSuitShinecharge": {}
},
{
"shinespark": {
"frames": 121,
"excessFrames": 5
}
}
]
}
]
},
{
"autoReserveTrigger": {
"minReserveEnergy": 1
}
}
],
"collectsItems": [
3
],
"flashSuitChecked": true,
"blueSuitChecked": true,
"note": [
"Crystal Flash then Shinespark up to the item, touch it, and return through the speed block that is now air.",
"Use the Boyons and acid to reserve trigger to exit G-mode below to collect the item."
],
"devNote": "These shinespark frames could be reduced with more items or tech, but in direct G-mode, Samus will need to Crystal Flash and reserve trigger to collect the item."
},
{
"id": 35,
"link": [
2,
3
],
"name": "Frozen Boyon Runway",
"requires": [
"canTrivialUseFrozenEnemies",
"h_shinechargeMaxRunway",
{
"shinespark": {
"frames": 128,
"excessFrames": 6
}
}
],
"flashSuitChecked": true,
"blueSuitChecked": true
},
{
"id": 70,
"link": [
2,
3
],
"name": "Frozen Boyon Runway (Mid-Air Spark)",
"requires": [
"canTrivialUseFrozenEnemies",
"h_shinechargeMaxRunway",
"canMidairShinespark",
{
"or": [
{
"shinespark": {
"frames": 118,
"excessFrames": 6
}
},
{
"and": [
"HiJump",
{
"shinespark": {
"frames": 113,
"excessFrames": 6
}
}
]
}
]
}
],
"flashSuitChecked": true,
"blueSuitChecked": true
},
{
"id": 71,
"link": [
2,
3
],
"name": "Frozen Boyon Runway (Speedy Jump Spark)",
"requires": [
"canTrivialUseFrozenEnemies",
"h_shinechargeMaxRunway",
"canSpeedyJump",
"canShinechargeMovementComplex",
{
"or": [
{
"shinespark": {
"frames": 111,
"excessFrames": 6
}
},
{
"and": [
"HiJump",
{
"shinespark": {
"frames": 103,
"excessFrames": 6
}
}
]
}
]
}
],
"flashSuitChecked": true,
"blueSuitChecked": true
},
{
"id": 36,
"link": [
2,
3
],
"name": "Frozen Boyon Runway (Fast Walljumps)",
"requires": [
"canTrivialUseFrozenEnemies",
"canShinechargeMovementComplex",
"canFastWallJumpClimb",
"h_shinechargeMaxRunway",
{
"or": [
{
"shinespark": {
"frames": 93,
"excessFrames": 6
}
},
{
"and": [
"HiJump",
{
"shinespark": {
"frames": 83,
"excessFrames": 6
}
}
]
}
]
}
],
"flashSuitChecked": true,
"blueSuitChecked": true,
"note": [
"Quickly Walljump to conserve health on the shinespark."
]
},
{
"id": 38,
"link": [
2,
3
],
"name": "Dead Boyon Quick Charge",
"requires": [
"canShinechargeMovement",
{
"canShineCharge": {
"usedTiles": 25,
"openEnd": 2
}
},
{
"shinespark": {
"frames": 128,
"excessFrames": 6
}
},
{
  "obstaclesCleared": [
    "A"
  ]
}
],
"clearsObstacles": [
"A"
],
"flashSuitChecked": true,
"blueSuitChecked": true,
"note": [
"Starting from the door, use a 1-tap shortcharge to gain a shinecharge running to the right.",
"Use the remaining runway to gain speed to clear the pits with a single jump.",
"Then spark vertically or diagonally."
],
"devNote": [
"This is doable without a short charge, but it's essentially harder than the bluesuit jump.",
"With a quick charge, it can serve as a less scary strat."
]
},
{
"id": 72,
"link": [
2,
3
],
"name": "Dead Boyon Quick Charge (Mid-Air Spark)",
"requires": [
{
"obstaclesCleared": [
"A"
]
},
"canShinechargeMovementComplex",
{
"canShineCharge": {
"usedTiles": 25,
"openEnd": 2
}
},
{
"or": [
{
"shinespark": {
"frames": 121,
"excessFrames": 6
}
},
{
"and": [
"canSpeedyJump",
{
"shinespark": {
"frames": 118,
"excessFrames": 6
}
}
]
},
{
"and": [
"HiJump",
{
"shinespark": {
"frames": 117,
"excessFrames": 6
}
}
]
},
{
"and": [
"HiJump",
"canSpeedyJump",
{
"shinespark": {
"frames": 113,
"excessFrames": 6
}
}
]
}
]
}
],
"flashSuitChecked": true,
"blueSuitChecked": true,
"note": [
"Starting from the door, use a 1-tap shortcharge to gain a shinecharge running to the right.",
"Use the remaining runway to gain speed to clear the pits with a single jump.",
"Spark mid-air to conserve energy."
]
},
{
"id": 39,
"link": [
2,
3
],
"name": "Screw Attack Jump",
"requires": [
"canShinechargeMovement",
"canCarefulJump",
{
"canShineCharge": {
"usedTiles": 23,
"openEnd": 2
}
},
"ScrewAttack",
{
"shinespark": {
"frames": 128,
"excessFrames": 6
}
}
],
"flashSuitChecked": true,
"blueSuitChecked": true,
"note": [
"Starting from the door, use a 1-tap shortcharge to gain a shinecharge running to the right.",
"Use the remaining runway to gain speed to clear the pits with a single jump, using Screw Attack to avoid Boyon damage.",
"Then spark vertically or diagonally."
],
"devNote": "There could be another tile if the door is open, but it shouldn't matter at this runway length with canCarefulJump."
},
{
"id": 73,
"link": [
2,
3
],
"name": "Screw Attack Jump (Mid-Air Spark)",
"requires": [
"canShinechargeMovementComplex",
"canCarefulJump",
{
"canShineCharge": {
"usedTiles": 23,
"openEnd": 2
}
},
"ScrewAttack",
{
"or": [
{
"shinespark": {
"frames": 121,
"excessFrames": 6
}
},
{
"and": [
"canSpeedyJump",
{
"shinespark": {
"frames": 118,
"excessFrames": 6
}
}
]
},
{
"and": [
"HiJump",
{
"shinespark": {
"frames": 117,
"excessFrames": 6
}
}
]
},
{
"and": [
"HiJump",
"canSpeedyJump",
{
"shinespark": {
"frames": 113,
"excessFrames": 6
}
}
]
}
]
}
],
"flashSuitChecked": true,
"blueSuitChecked": true,
"note": [
"Starting from the door, use a 1-tap shortcharge to gain a shinecharge running to the right.",
"Use the remaining runway to gain speed to clear the pits with a single jump, using Screw Attack to avoid Boyon damage.",
"Then spark vertically or diagonally."
],
"devNote": "There could be another tile if the door is open, but it shouldn't matter at this runway length with canCarefulJump."
},
{
"id": 40,
"link": [
2,
3
],
"name": "Blue Speed Jump through Boyons",
"requires": [
"canCarefulJump",
"canShinechargeMovementComplex",
{
"getBlueSpeed": {
"usedTiles": 34,
"openEnd": 0
}
},
"h_blueJump",
{
"canShineCharge": {
"usedTiles": 34,
"openEnd": 0
}
},
{
"shinespark": {
"frames": 128,
"excessFrames": 6
}
}
],
"flashSuitChecked": true,
"blueSuitChecked": true,
"note": "Charge a Shinespark running left, then get blue speed by running back to the right to jump through the Boyons.",
"devNote": [
"The out-of-order requirements are to work around the tests' assumption that a getBlueSpeed would lose the shinecharge."
]
},
{
"id": 103,
"link": [
2,
3
],
"name": "Damage Boost Across Boyons",
"requires": [
{
"canShineCharge": {
"usedTiles": 23,
"openEnd": 2
}
},
"canShinechargeMovementTricky",
{
"or": [
"canHorizontalDamageBoost",
"canLateralMidAirMorph"
]
},
{
"enemyDamage": {
"enemy": "Boyon",
"type": "contact",
"hits": 1
}
},
{
"or": [
{
"shinespark": {
"frames": 121,
"excessFrames": 6
}
},
{
"and": [
"canSpeedyJump",
{
"shinespark": {
"frames": 118,
"excessFrames": 6
}
}
]
},
{
"and": [
"HiJump",
{
"shinespark": {
"frames": 117,
"excessFrames": 6
}
}
]
},
{
"and": [
"HiJump",
"canSpeedyJump",
{
"shinespark": {
"frames": 113,
"excessFrames": 6
}
}
]
}
]
}
],
"flashSuitChecked": true,
"blueSuitChecked": true
},
{
"id": 41,
"link": [
2,
3
],
"name": "G-Mode Up with Power Bombs",
"entranceCondition": {
"comeInWithGMode": {
"mode": "direct",
"morphed": false
}
},
"requires": [
"canPowerBombItemOverloadPLMs",
{
"notable": "G-Mode Up with Power Bombs"
},
{
"itemNotCollectedAtNode": 3
},
"canConsecutiveWallJump",
"Morph",
{
"or": [
"canRiskPermanentLossOfAccess",
{
"and": [
"canComplexGMode",
"canLongXRayClimb",
"canBeVeryPatient"
]
}
]
},
{
"ammo": {
"type": "PowerBomb",
"count": 5
}
},
"canBePatient",
{
"or": [
"Ice",
"canTrickyDodgeEnemies",
"ScrewAttack",
{
"and": [
"h_getBlueSpeedMaxRunway",
"h_blueJump"
]
},
{
"enemyKill": {
"enemies": [
[
"Boyon",
"Boyon",
"Boyon",
"Boyon"
]
],
"excludedWeapons": [
"Bombs"
]
}
},
{
"enemyDamage": {
"enemy": "Boyon",
"type": "contact",
"hits": 1
}
},
{
"and": [
"canBeVeryPatient",
"h_useMorphBombs"
]
}
]
}
],
"flashSuitChecked": true,
"blueSuitChecked": true,
"note": [
"Wall jump up 5 times, placing a Power Bomb precisely in the top right corner to overload PLMs with as few Power Bombs as possible.",
"This only works in direct G-mode with the item still uncollected."
],
"devNote": [
"Using this strat doesn't have canRiskPermanentLossOfAccess if the player could x-ray climb instead: this requires direct G-mode and Samus can freely doorstuck here,",
"and there is no benefit to going to the item instead of the top left door, unless the item is there.",
"FIXME: Placing the Power Bombs lower, on the magic tile, could overload PLMs with fewer, likely with as low as 2 Power Bombs."
]
},
{
"id": 96,
"link": [
2,
3
],
"name": "G-Mode Morph IBJ with Blue Suit",
"entranceCondition": {
"comeInWithGMode": {
"mode": "any",
"morphed": true
}
},
"requires": [
"h_blueSuitGMode",
"h_artificialMorphLongIBJ",
"canBePatient",
{
"or": [
"canBeVeryPatient",
{
"and": [
{
"ammo": {
"type": "PowerBomb",
"count": 3
}
},
"canDoubleBombJump"
]
},
{
"and": [
"h_artificialMorphSpringBall",
"canDoubleBombJump"
]
}
]
}
],
"flashSuitChecked": true,
"blueSuitChecked": true,
"note": [
"Ascend with a long IBJ, then go through the speed blocks to the item.",
"The Boyons can be killed with bombs or 3 Power Bombs, or Samus can jump through them with Spring Ball, which is easy as long as she doesn't stop jumping.",
"Note that Samus can not bomb boost through the Boyons while blue."
]
},
{
"id": 42,
"link": [
2,
3
],
"name": "G-Mode Morph Long Ceiling Bomb Jump",
"entranceCondition": {
"comeInWithGMode": {
"mode": "any",
"morphed": true
}
},
"requires": [
{
"notable": "G-Mode Morph Long Ceiling Bomb Jump"
},
"h_artificialMorphLongIBJ",
"h_artificialMorphCeilingBombJump",
"canBeVeryPatient"
],
"flashSuitChecked": true,
"blueSuitChecked": true,
"note": [
"Ascend with a long IBJ, then ceiling bomb jump against the speed blocks to overload the PLMs. Falling is very unforgiving.",
"Note that the Boyons can be killed with bombs."
],
"devNote": "This is technically doable without canBeVeryPatient, but would require double bomb jump, Morph, a way to bypass Boyons, and never falling."
},
{
"id": 97,
"link": [
2,
4
],
"name": "G-Mode Morph IBJ with Blue Suit",
"entranceCondition": {
"comeInWithGMode": {
"mode": "any",
"morphed": true
}
},
"requires": [
"h_blueSuitGMode",
"h_artificialMorphLongIBJ",
"canBePatient",
{
"or": [
"canBeVeryPatient",
{
"and": [
{
"ammo": {
"type": "PowerBomb",
"count": 3
}
},
"canDoubleBombJump"
]
},
{
"and": [
"h_artificialMorphSpringBall",
"canDoubleBombJump"
]
}
]
}
],
"flashSuitChecked": true,
"blueSuitChecked": true,
"note": [
"Ascend with a long IBJ, then go through the speed blocks and through the morph tunnel.",
"The Boyons can be killed with bombs or 3 Power Bombs, or Samus can jump through them with Spring Ball, which is easy as long as she doesn't stop jumping.",
"Note that Samus can not bomb boost through the Boyons while blue."
],
"devNote": "There is not a ceiling bomb jump strat from here, because it would be easier to just have X-Ray climbed the room."
},
{
"id": 98,
"link": [
2,
4
],
"name": "Direct G-Mode Morph IBJ with Blue Suit, Remote Acquire",
"entranceCondition": {
"comeInWithGMode": {
"mode": "any",
"morphed": true
}
},
"requires": [
"h_blueSuitGMode",
"h_artificialMorphLongIBJ",
"canBePatient",
"canComplexGMode",
"canRemoteAcquire",
{
"or": [
"canBeVeryPatient",
{
"and": [
{
"ammo": {
"type": "PowerBomb",
"count": 3
}
},
"canDoubleBombJump"
]
},
{
"and": [
"h_artificialMorphSpringBall",
"canDoubleBombJump"
]
}
]
}
],
"collectsItems": [
3
],
"flashSuitChecked": true,
"blueSuitChecked": true,
"note": [
"Ascend with a long IBJ, then go through the speed blocks to the item.",
"The Boyons can be killed with bombs or 3 Power Bombs, or Samus can jump through them with Spring Ball, which is easy as long as she doesn't stop jumping.",
"Note that Samus can not bomb boost through the Boyons while blue."
],
"devNote": [
"FIXME: It would be possible to remote acquire to the left after using spring into ceiling bomb jump, but it would require restructuring the room, a long CIBJ, and canBeExtremelyPatient."
]
},
{
"id": 43,
"link": [
2,
5
],
"name": "Boyons Cleared",
"requires": [
{
"obstaclesCleared": [
"A"
]
}
],
"flashSuitChecked": true,
"blueSuitChecked": true
},
{
"id": 44,
"link": [
2,
5
],
"name": "Ice",
"requires": [
"Ice"
],
"flashSuitChecked": true,
"blueSuitChecked": true
},
{
"id": 45,
"link": [
2,
5
],
"name": "Take Boyon Damage",
"requires": [
{
  "or": [
    {
      "and": [
        {
          "enemyDamage": {
            "enemy": "Boyon",
            "type": "contact",
            "hits": 3
          }
        },
        "Gravity",
        {
          "acidFrames": 30
        }
      ]
    },
    {
      "and": [
        {
          "enemyDamage": {
            "enemy": "Boyon",
            "type": "contact",
            "hits": 2
          }
        },
        "canCarefulJump"
      ]
    },
    {
      "and": [
        {
          "enemyDamage": {
            "enemy": "Boyon",
            "type": "contact",
            "hits": 1
          }
        },
        "canTrickyJump"
      ]
    }
  ]
}
],
"flashSuitChecked": true,
"blueSuitChecked": true,
"note": "Intentionally take damage before attempting to jump through to avoid falling in the acid."
},
{
"id": 46,
"link": [
2,
5
],
"name": "Screw Attack",
"requires": [
"canDash",
"ScrewAttack",
{
"or": [
"canCarefulJump",
"SpaceJump",
"h_speedJump"
]
}
],
"flashSuitChecked": true,
"blueSuitChecked": true,
"note": "Jump at the last tile to make it through all of the Boyons."
},
{
"id": 100,
"link": [
2,
5
],
"name": "Kill The Boyons",
"requires": [
{
  "or": [
    {
      "enemyKill": {
        "enemies": [
          [
            "Boyon",
            "Boyon",
            "Boyon",
            "Boyon"
          ]
        ],
        "excludedWeapons": [
          "Bombs",
          "PseudoScrew"
        ]
      }
    },
    {
      "and": [
        "canBePatient",
        "h_useMorphBombs"
      ]
    }
  ]
}
],
"clearsObstacles": [
"A"
],
"flashSuitChecked": true,
"blueSuitChecked": true
},
{
"id": 79,
"link": [
2,
5
],
"name": "Blue Suit",
"requires": [
{
  "haveBlueSuit": {}
}
],
"flashSuitChecked": true,
"blueSuitChecked": true
},
{
"id": 47,
"link": [
2,
5
],
"name": "Jump Under Boyons",
"requires": [
"canInsaneJump"
],
"flashSuitChecked": true,
"blueSuitChecked": true,
"devNote": "It's not really insane jump difficult, but that is where you think about needing to avoid the damage. And failing the jump is still very punishing due to falling into the acid."
},
{
"id": 78,
"link": [
2,
5
],
"name": "Direct G-Mode, Shinespark, Return",
"entranceCondition": {
"comeInWithGMode": {
"mode": "direct",
"morphed": false
}
},
"requires": [
"canComplexGMode",
"canRemoteAcquire",
{
"or": [
{
"and": [
"canTrivialUseFrozenEnemies",
"h_shinechargeMaxRunway"
]
},
{
"and": [
"canShinechargeMovementComplex",
{
"getBlueSpeed": {
"usedTiles": 34,
"openEnd": 0
}
},
"h_blueJump",
{
"canShineCharge": {
"usedTiles": 34,
"openEnd": 0
}
}
]
},
{
"and": [
{
"canShineCharge": {
"usedTiles": 25,
"openEnd": 2
}
},
{
"enemyKill": {
"enemies": [
[
"Boyon",
"Boyon",
"Boyon",
"Boyon"
]
],
"excludedWeapons": [
"Bombs"
]
}
}
]
},
{
"blueSuitShinecharge": {}
},
{
"and": [
"canInsaneJump",
{
"canShineCharge": {
"usedTiles": 14,
"openEnd": 0
}
}
]
},
{
"and": [
"canInsaneJump",
{
"canShineCharge": {
"usedTiles": 14,
"openEnd": 1
}
},
{
"enemyKill": {
"enemies": [
[
"Boyon"
]
]
}
}
]
}
]
},
{
"shinespark": {
"frames": 121,
"excessFrames": 5
}
}
],
"collectsItems": [
3
],
"flashSuitChecked": true,
"blueSuitChecked": true,
"note": "Shinespark up to the item, touch it, and return through the speed block that is now air. Exit G-mode below to collect the item.",
"devNote": [
"The shinespark frames could be reduced with more items or tech, but in direct G-mode, Samus will be at low Energy and need an energy free shinespark.",
"The out-of-order requirements in the blue jump case are to work around the tests' assumption that a getBlueSpeed would lose the shinecharge."
]
},
{
"id": 48,
"link": [
3,
4
],
"name": "Base",
"requires": [
"Morph"
],
"flashSuitChecked": true,
"blueSuitChecked": true
},
{
"id": 49,
"link": [
3,
4
],
"name": "Remote Acquire Item",
"requires": [
"canRemoteAcquire",
{
"obstaclesCleared": [
"C"
]
}
],
"flashSuitChecked": true,
"blueSuitChecked": true,
"devNote": [
"FIXME: It would be possible to remote acquire to the left after using spring into ceiling bomb jump,",
"but it would require restructuring the room and an extremely long CIBJ."
]
},
{
"id": 50,
"link": [
3,
5
],
"name": "Base",
"requires": [
{
  "obstaclesCleared": [
    "B"
  ]
}
],
"flashSuitChecked": true,
"blueSuitChecked": true,
"devNote": "The strat specific requirements are included when clearing the abstract obstacle."
},
{
"id": 89,
"link": [
3,
5
],
"name": "Blue Suit",
"requires": [
{
  "haveBlueSuit": {}
}
],
"flashSuitChecked": true,
"blueSuitChecked": true
},
{
"id": 51,
"link": [
3,
5
],
"name": "Remote Acquire Item",
"requires": [
"canRemoteAcquire",
{
"obstaclesCleared": [
"C"
]
}
],
"flashSuitChecked": true,
"blueSuitChecked": true,
"note": "Walk through the item or use Bombs to overload PLMs, fall through the speed blocks, then exit G-Mode to remote acquire the item."
},
{
"id": 52,
"link": [
4,
1
],
"name": "Base",
"requires": [
{
  "or": [
    {
      "and": [
        "Grapple",
        "h_midAirShootUp"
      ]
    },
    "SpaceJump"
  ]
}
],
"flashSuitChecked": true,
"blueSuitChecked": true
},
{
"id": 53,
"link": [
4,
1
],
"name": "Take Spike Damage",
"requires": [
"canDash",
{
"spikeHits": 1
},
{
"or": [
"canUseIFrames",
{
"spikeHits": 1
}
]
}
],
"flashSuitChecked": true,
"blueSuitChecked": true
},
{
"id": 101,
"link": [
4,
1
],
"name": "Cross with Blue Suit",
"requires": [
{
"spikeHits": 2
},
{
"or": [
{
"and": [
{
"tech": "canHorizontalDamageBoost"
},
"h_complexToCarryBlueSuit"
]
},
{
"spikeHits": 1
}
]
}
],
"flashSuitChecked": true,
"blueSuitChecked": true
},
{
"id": 74,
"link": [
4,
1
],
"name": "Pause Abuse Spike Damage",
"requires": [
"canUseIFrames",
"h_pauseAbuseMinimalReserveRefill",
{
"or": [
"canDash",
{
"and": [
"h_pauseAbuseMinimalReserveRefill",
{
"or": [
{
"and": [
{
"tech": "canHorizontalDamageBoost"
},
"h_complexToCarryBlueSuit"
]
},
"h_pauseAbuseMinimalReserveRefill"
]
}
]
}
]
}
],
"flashSuitChecked": true,
"blueSuitChecked": true
},
{
"id": 54,
"link": [
4,
1
],
"name": "Use Stored Spark",
"requires": [
"h_storedSpark",
"canDash",
{
"or": [
{
"shinespark": {
"frames": 44,
"excessFrames": 7
}
},
{
"and": [
"canShinechargeMovementTricky",
{
"shinespark": {
"frames": 38,
"excessFrames": 0
}
}
]
},
{
"and": [
"canShinechargeMovementTricky",
"canSpeedyJump",
{
"shinespark": {
"frames": 35,
"excessFrames": 0
}
}
]
}
]
}
],
"flashSuitChecked": true,
"blueSuitChecked": true
},
{
"id": 55,
"link": [
4,
1
],
"name": "Jump into Ceiling Bomb Jump Over Spikes",
"requires": [
"canLongCeilingBombJump",
"canJumpIntoIBJ",
{
"or": [
{
"and": [
"h_useSpringBall",
{
"noBlueSuit": {}
}
]
},
{
"and": [
"canPreciseWallJump",
"canWallJumpInstantMorph"
]
}
]
}
],
"flashSuitChecked": true,
"blueSuitChecked": false
},
{
"id": 56,
"link": [
4,
3
],
"name": "Base",
"requires": [
"Morph"
],
"flashSuitChecked": true,
"blueSuitChecked": true
},
{
"id": 88,
"link": [
4,
4
],
"name": "Gain Blue Suit (Double X-Mode)",
"requires": [
"h_spikeDoubleXModeBlueSuit",
{
"shinespark": {
"frames": 2
}
}
],
"flashSuitChecked": true,
"blueSuitChecked": true
},
{
"id": 57,
"link": [
4,
4
],
"name": "Crystal Flash",
"requires": [
"h_CrystalFlash"
],
"flashSuitChecked": true,
"blueSuitChecked": true
},
{
"id": 58,
"link": [
5,
2
],
"name": "Boyons Cleared",
"requires": [
{
  "obstaclesCleared": [
    "A"
  ]
}
],
"flashSuitChecked": true,
"blueSuitChecked": true
},
{
"id": 59,
"link": [
5,
2
],
"name": "Ice",
"requires": [
"Ice"
],
"flashSuitChecked": true,
"blueSuitChecked": true
},
{
"id": 60,
"link": [
5,
2
],
"name": "Take Boyon Damage",
"requires": [
{
  "or": [
    {
      "and": [
        {
          "enemyDamage": {
            "enemy": "Boyon",
            "type": "contact",
            "hits": 3
          }
        },
        "Gravity",
        {
          "acidFrames": 30
        }
      ]
    },
    {
      "and": [
        {
          "enemyDamage": {
            "enemy": "Boyon",
            "type": "contact",
            "hits": 2
          }
        },
        "canCarefulJump"
      ]
    },
    {
      "and": [
        {
          "enemyDamage": {
            "enemy": "Boyon",
            "type": "contact",
            "hits": 1
          }
        },
        "canTrickyJump"
      ]
    }
  ]
}
],
"flashSuitChecked": true,
"blueSuitChecked": true,
"note": "Intentionally take damage before attempting to jump through to avoid falling in the acid."
},
{
"id": 61,
"link": [
5,
2
],
"name": "Screw Attack",
"requires": [
"canDash",
"ScrewAttack",
{
"or": [
"canCarefulJump",
"SpaceJump",
"h_speedJump"
]
}
],
"flashSuitChecked": true,
"blueSuitChecked": true,
"note": "Jump at the last tile to make it through all of the Boyons."
},
{
"id": 62,
"link": [
5,
2
],
"name": "Kill The Boyons",
"requires": [
{
  "or": [
    {
      "enemyKill": {
        "enemies": [
          [
            "Boyon",
            "Boyon",
            "Boyon",
            "Boyon"
          ]
        ],
        "excludedWeapons": [
          "Bombs",
          "PseudoScrew"
        ]
      }
    },
    {
      "and": [
        "canBePatient",
        "h_useMorphBombs"
      ]
    }
  ]
}
],
"clearsObstacles": [
"A"
],
"flashSuitChecked": true,
"blueSuitChecked": true
},
{
"id": 80,
"link": [
5,
2
],
"name": "Blue Suit",
"requires": [
{
  "haveBlueSuit": {}
}
],
"flashSuitChecked": true,
"blueSuitChecked": true
},
{
"id": 63,
"link": [
5,
2
],
"name": "Jump Under Boyons",
"requires": [
"canInsaneJump"
],
"flashSuitChecked": true,
"blueSuitChecked": true,
"devNote": "It's not really insane jump difficult, but that is where you think about needing to avoid the damage. And failing the jump is still very punishing due to falling into the acid."
},
{
"id": 90,
"link": [
5,
3
],
"name": "Climb with Blue Suit",
"requires": [
{
"haveBlueSuit": {}
},
{
"or": [
"canConsecutiveWallJump",
"SpaceJump",
{
"and": [
"canLongIBJ",
"canBePatient"
]
}
]
}
],
"flashSuitChecked": true,
"blueSuitChecked": true
},
{
"id": 64,
"link": [
5,
3
],
"name": "Use Flash Suit at the Top",
"requires": [
{
"useFlashSuit": {}
},
{
"shinespark": {
"frames": 9,
"excessFrames": 7
}
},
{
"or": [
"canConsecutiveWallJump",
"SpaceJump",
{
"and": [
"canLongIBJ",
"canUnmorphBombBoost",
"canBePatient"
]
}
]
}
],
"flashSuitChecked": true,
"blueSuitChecked": true
},
{
"id": 91,
"link": [
5,
3
],
"name": "Use Stored Spark (No Wall Jump)",
"requires": [
"h_storedSpark",
{
"or": [
{
"shinespark": {
"frames": 121,
"excessFrames": 6
}
},
{
"and": [
{
"shinespark": {
"frames": 117,
"excessFrames": 6
}
},
"HiJump"
]
},
{
"and": [
{
"shinespark": {
"frames": 112,
"excessFrames": 6
}
},
"HiJump",
"canSpeedyJump"
]
}
]
}
],
"wallJumpAvoid": true,
"flashSuitChecked": true,
"blueSuitChecked": true,
"devNote": "There is no point in using a blue suit to spark or sparking at the bottom if Samus can wall jump."
},
{
"id": 102,
"link": [
5,
3
],
"name": "Shinespark",
"requires": [
{
"or": [
{
"canShineCharge": {
"usedTiles": 14,
"openEnd": 0
}
},
{
"and": [
{
"or": [
{
"enemyKill": {
"enemies": [
[
"Boyon"
]
]
}
},
{
"obstaclesCleared": [
"A"
]
}
]
},
{
"canShineCharge": {
"usedTiles": 14,
"openEnd": 1
}
}
]
}
]
},
"canMidairShinespark",
{
"or": [
{
"shinespark": {
"frames": 121,
"excessFrames": 6
}
},
{
"and": [
{
"shinespark": {
"frames": 117,
"excessFrames": 6
}
},
"HiJump"
]
},
{
"and": [
{
"shinespark": {
"frames": 112,
"excessFrames": 6
}
},
"HiJump",
"canSpeedyJump"
]
},
{
"and": [
"canFastWallJumpClimb",
{
"shinespark": {
"frames": 93,
"excessFrames": 6
}
}
]
},
{
"and": [
"HiJump",
"canFastWallJumpClimb",
{
"shinespark": {
"frames": 83,
"excessFrames": 6
}
}
]
}
]
}
],
"flashSuitChecked": true,
"blueSuitChecked": true,
"note": [
"Use the runway to the right of the Boyons to gain a shinecharge."
],
"detailNote": [
"If the rightmost Boyon is cleared, an extra half tile of runway is available."
]
},
{
"id": 65,
"link": [
6,
3
],
"name": "Jump Over the Speed Blocks",
"requires": [
"h_getBlueSpeedMaxRunway",
"canChainTemporaryBlue",
{
"or": [
"canTrickyJump",
"canXRayTurnaround"
]
}
],
"clearsObstacles": [
"B"
],
"flashSuitChecked": true,
"blueSuitChecked": true,
"note": [
"Unmorph on the leftmost edge of the Speed blocks and jump across.",
"Landing on the right side Speedblock, and the solid tile, gives enough time to run to the item and fall before the block respawns.",
"Or jump fully over the Speed blocks and turn around using X-Ray after collecting the item."
],
"devNote": [
"FIXME: The h_getBlueSpeedMaxRunway is to satisfy tests for now.",
"We should add a proper way to represent that the blue state carries over from the previous strat.",
"FIXME: With Spring Ball it is possible to preserve a flash suit while both collecting the item and going down."
]
},
{
"id": 66,
"link": [
6,
5
],
"name": "Base",
"requires": [],
"flashSuitChecked": true,
"blueSuitChecked": true,
"devNote": "Samus is in a Speedball or Blue Suit state."
}
],
"notables": [
{
"id": 1,
"name": "In-Room X-Mode BlueSuit",
"note": "Use X-Mode to store a spikesuit, and then convert that to a blue suit with more X-Mode."
},
{
"id": 2,
"name": "In-Room SpeedKeep for Temporary Blue",
"note": [
"Using only the short runway and spike pit, use one or more SpeedKeeps to Speedball towards the item location.",
"This requires either a very short shortcharge, or a second SpeedKeep in the spikes which also resets Samus' run speed with a crouch jump before spike i-frames expire."
]
},
{
"id": 3,
"name": "G-Mode Up with Power Bombs",
"note": "Wall jump up 9 times, placing a PB at the top. Only works in direct g-mode with the item still uncollected."
},
{
"id": 4,
"name": "G-Mode Morph Long Ceiling Bomb Jump",
"note": [
"Ascend with a long IBJ, then ceiling bomb jump against the speed blocks to overload the PLMs. Falling is very unforgiving.",
"Note that the boyons can be killed with bombs."
]
}
],
"nextStratId": 106,
"nextNotableId": 5
}